Chapter4:机器人仿真
ROS1{\rm ROS1}ROS1的基础及应用,基于古月的课,各位可以去看,基于hawkbot{\rm hawkbot}hawkbot机器人进行实际操作。
ROS{\rm ROS}ROS版本:ROS1{\rm ROS1}ROS1的Melodic{\rm Melodic}Melodic;实际机器人:Hawkbot{\rm Hawkbot}Hawkbot;
1.机器人URDF模型优化
-
URDF{\rm URDF}URDF模型进化版本–xacro{\rm xacro}xacro模型文件
- 精简模型代码
- 创建宏定义;
- 文件包含;
- 提供可编程接口
- 常量;
- 变量;
- 数学计算;
- 条件语句;
- 精简模型代码
-
常量定义
# 常量定义 <xacro:property name="M_PI" value="3.14159" /># 常量使用 <origin xyz="0 0 0" ryp="${M_PI/2} 0 0" /> -
数学计算
# 数学计算 <origin xyz="0 ${(motor_length+wheel_length)/2} 0" rpy="0 0 0"/> -
宏定义
# 宏定义 <xacro:macro name="name" params="A B C"> ... </xacro:macro># 宏调用 <name A="A_value" B="B_value" C="C_value" /> -
文件包含
# 文件包含
<xacro:include filename="$(find mbot_description)/urdf/xacro/mbot_base.xacro" />
2.使用xacro建立模型
# 1.在urdf文件夹下建立xacro文件夹
mkdir xacro# 在xacro目录下新建mbot_base.xacro和mbot.xacro文件
# 文件内容见下个代码块,请勿直接复制粘贴
touch mbot_base.xacro mbot.xacro# 2.新建display_mbot_base_xacro.launch文件
# 文件内容见下个代码块,请勿直接复制粘贴
touch display_mbot_base_xacro.launch# 3.模型显示
# 法1:将xacro文件转换成URDF文件显示
rosrun xacro xacro.py mbot.xacro > mbot.urdf# 法2:直接调用xacro文件解析器,在.launch文件中写入
<arg name="model" default="$(find xacro)/xacro--inorder'$(find mbot_description)/urdf/xacro/mbot.xacro'" /><param name="robot_description" command="$(arg model)" /># 4.启动.launch文件
roslaunch mbot_description display_mbot_base_xacro.launch
# mbot_base.xacro文件内容
<?xml version="1.0"?>
<robot name="mbot" xmlns:xacro="http://www.ros.org/wiki/xacro"><!-- PROPERTY LIST --><xacro:property name="M_PI" value="3.1415926"/><xacro:property name="base_radius" value="0.20"/><xacro:property name="base_length" value="0.16"/><xacro:property name="wheel_radius" value="0.06"/><xacro:property name="wheel_length" value="0.025"/><xacro:property name="wheel_joint_y" value="0.19"/><xacro:property name="wheel_joint_z" value="0.05"/><xacro:property name="caster_radius" value="0.015"/> <!-- wheel_radius - ( base_length/2 - wheel_joint_z) --><xacro:property name="caster_joint_x" value="0.18"/><!-- Defining the colors used in this robot --><material name="yellow"><color rgba="1 0.4 0 1"/></material><material name="black"><color rgba="0 0 0 0.95"/></material><material name="gray"><color rgba="0.75 0.75 0.75 1"/></material><!-- Macro for robot wheel --><xacro:macro name="wheel" params="prefix reflect"><joint name="${prefix}_wheel_joint" type="continuous"><origin xyz="0 ${reflect*wheel_joint_y} ${-wheel_joint_z}" rpy="0 0 0"/><parent link="base_link"/><child link="${prefix}_wheel_link"/><axis xyz="0 1 0"/></joint><link name="${prefix}_wheel_link"><visual><origin xyz="0 0 0" rpy="${M_PI/2} 0 0" /><geometry><cylinder radius="${wheel_radius}" length = "${wheel_length}"/></geometry><material name="gray" /></visual></link></xacro:macro><!-- Macro for robot caster --><xacro:macro name="caster" params="prefix reflect"><joint name="${prefix}_caster_joint" type="continuous"><origin xyz="${reflect*caster_joint_x} 0 ${-(base_length/2 + caster_radius)}" rpy="0 0 0"/><parent link="base_link"/><child link="${prefix}_caster_link"/><axis xyz="0 1 0"/></joint><link name="${prefix}_caster_link"><visual><origin xyz="0 0 0" rpy="0 0 0"/><geometry><sphere radius="${caster_radius}" /></geometry><material name="black" /></visual></link></xacro:macro><xacro:macro name="mbot_base"><link name="base_footprint"><visual><origin xyz="0 0 0" rpy="0 0 0" /><geometry><box size="0.001 0.001 0.001" /></geometry></visual></link><joint name="base_footprint_joint" type="fixed"><origin xyz="0 0 ${base_length/2 + caster_radius*2}" rpy="0 0 0" />        <parent link="base_footprint"/><child link="base_link" /></joint><link name="base_link"><visual><origin xyz=" 0 0 0" rpy="0 0 0" /><geometry><cylinder length="${base_length}" radius="${base_radius}"/></geometry><material name="yellow" /></visual></link><wheel prefix="left" reflect="-1"/><wheel prefix="right" reflect="1"/><caster prefix="front" reflect="-1"/><caster prefix="back" reflect="1"/></xacro:macro>
</robot>
# mbot.xacro文件内容
<?xml version="1.0"?>
<robot name="arm" xmlns:xacro="http://www.ros.org/wiki/xacro"><xacro:include filename="$(find mbot_description)/urdf/xacro/mbot_base.xacro" /><mbot_base/></robot>
# display_mbot_base_xacro.launch文件内容
<launch><arg name="model" default="$(find xacro)/xacro --inorder '$(find mbot_description)/urdf/xacro/mbot.xacro'" /><arg name="gui" default="true" /><param name="robot_description" command="$(arg model)" /><!-- 设置GUI参数,显示关节控制插件 --><param name="use_gui" value="$(arg gui)"/><!-- 运行joint_state_publisher节点,发布机器人的关节状态  --><node name="joint_state_publisher" pkg="joint_state_publisher" type="joint_state_publisher" /><!-- 运行robot_state_publisher节点,发布tf  --><node name="robot_state_publisher" pkg="robot_state_publisher" type="robot_state_publisher" /><!-- 运行rviz可视化界面 --><node name="rviz" pkg="rviz" type="rviz" args="-d $(find mbot_description)/config/mbot.rviz" required="true" /></launch>
3.ArbotiX+rviz功能仿真
-
ArbotiX{\rm ArbotiX}ArbotiX简介
- 一款控制电机、舵机的硬件控制板;
- 提供了相应的ROS{\rm ROS}ROS功能包;
- 提供了一个差速控制器,通过接收速度控制指令,更新机器人的里程计状态;
-
ArbotiX{\rm ArbotiX}ArbotiX安装
# ros相关信息:Ubuntu 18.04+melodic # 1.下载ArbotiX功能包 cd willard_ws/src/ git clone -b indigo-devel https://github.com/vanadiumlabs/arbotix_ros.git# 2.工作空间下编译 cd ~/willard_ws/ catkin_make -
配置ArbotiX{\rm ArbotiX}ArbotiX控制器
# 1.创建launch文件
cd willard_ws/src/mbot_description/launch/xacro/# 文件内容见下个代码块,请勿直接复制粘贴
touch arbotix_mbot_with_camera_xacro.launch# 2.创建配置文件
cd willard_ws/src/mbot_description/config/# 文件内容见下个代码块,请勿直接复制粘贴
touch fake_mbot_arbotix.yaml# 3.启动仿真器
roslaunch mbot_description arbotix_mbot_with_camera_xacro.launch# 4.键盘控制相关
# 4.1 新建mbot_teleop功能包
catkin_create_pkg willard_teleop roscpp std_msgs rospy# 4.2 在willard_teleop下创建launch、scripts文件夹
mkdir launch scripts# 4.3 在/scripts文件夹下创建.py文件
# 文件内容见下个代码块,请勿直接复制粘贴
touch willard_teleop.py# 4.4 给.py文件添加可执行权限
chmod 777 willard_teleop.py# 4.5 新建.launch文件
# 文件内容见下个代码块,请勿直接复制粘贴
touch willard_teleop.launch # 5.启动键盘控制
roslaunch willard_teleop willard_teleop.launch
# arbotix_mbot_with_camera_xacro.launch文件内容 <launch><arg name="model" default="$(find xacro)/xacro --inorder '$(find mbot_description)/urdf/xacro/mbot_with_camera.xacro'" /><arg name="gui" default="false" /><param name="robot_description" command="$(arg model)" /><!-- 设置GUI参数,显示关节控制插件 --><param name="use_gui" value="$(arg gui)"/><node name="arbotix" pkg="arbotix_python" type="arbotix_driver" output="screen"><rosparam file="$(find mbot_description)/config/fake_mbot_arbotix.yaml" command="load" /><param name="sim" value="true"/></node><!-- 运行joint_state_publisher节点,发布机器人的关节状态 --><node name="joint_state_publisher" pkg="joint_state_publisher" type="joint_state_publisher" /><!-- 运行robot_state_publisher节点,发布tf --><node name="robot_state_publisher" pkg="robot_state_publisher" type="robot_state_publisher" /><!-- 运行rviz可视化界面 --><node name="rviz" pkg="rviz" type="rviz" args="-d $(find mbot_description)/config/mbot_arbotix.rviz" required="true" /></launch># fake_mbot_arbotix.yaml文件内容 controllers: {base_controller: {type: diff_controller, base_frame_id: base_footprint, base_width: 0.26, ticks_meter: 4100, Kp: 12, Kd: 12, Ki: 0, Ko: 50, accel_limit: 1.0 } }# willard_teleop.py文件内容 #!/usr/bin/env python # -*- coding: utf-8 -*-import rospy from geometry_msgs.msg import Twist import sys, select, termios, ttymsg = """ Control mbot! --------------------------- Moving around:u i oj k lm , .q/z : increase/decrease max speeds by 10% w/x : increase/decrease only linear speed by 10% e/c : increase/decrease only angular speed by 10% space key, k : force stop anything else : stop smoothlyCTRL-C to quit """moveBindings = {'i':(1,0),'o':(1,-1),'j':(0,1),'l':(0,-1),'u':(1,1),',':(-1,0),'.':(-1,1),'m':(-1,-1),}speedBindings={'q':(1.1,1.1),'z':(.9,.9),'w':(1.1,1),'x':(.9,1),'e':(1,1.1),'c':(1,.9),}def getKey():tty.setraw(sys.stdin.fileno())rlist, _, _ = select.select([sys.stdin], [], [], 0.1)if rlist:key = sys.stdin.read(1)else:key = ''termios.tcsetattr(sys.stdin, termios.TCSADRAIN, settings)return keyspeed = .2 turn = 1def vels(speed,turn):return "currently:\tspeed %s\tturn %s " % (speed,turn)if __name__=="__main__":settings = termios.tcgetattr(sys.stdin)rospy.init_node('mbot_teleop')pub = rospy.Publisher('/cmd_vel', Twist, queue_size=5)x = 0th = 0status = 0count = 0acc = 0.1target_speed = 0target_turn = 0control_speed = 0control_turn = 0try:print msgprint vels(speed,turn)while(1):key = getKey()# 运动控制方向键(1:正方向,-1负方向)if key in moveBindings.keys():x = moveBindings[key][0]th = moveBindings[key][1]count = 0# 速度修改键elif key in speedBindings.keys():speed = speed * speedBindings[key][0] # 线速度增加0.1倍turn = turn * speedBindings[key][1] # 角速度增加0.1倍count = 0print vels(speed,turn)if (status == 14):print msgstatus = (status + 1) % 15# 停止键elif key == ' ' or key == 'k' :x = 0th = 0control_speed = 0control_turn = 0else:count = count + 1if count > 4:x = 0th = 0if (key == '\x03'):break# 目标速度=速度值*方向值target_speed = speed * xtarget_turn = turn * th# 速度限位,防止速度增减过快if target_speed > control_speed:control_speed = min( target_speed, control_speed + 0.02 )elif target_speed < control_speed:control_speed = max( target_speed, control_speed - 0.02 )else:control_speed = target_speedif target_turn > control_turn:control_turn = min( target_turn, control_turn + 0.1 )elif target_turn < control_turn:control_turn = max( target_turn, control_turn - 0.1 )else:control_turn = target_turn# 创建并发布twist消息twist = Twist()twist.linear.x = control_speed; twist.linear.y = 0; twist.linear.z = 0twist.angular.x = 0; twist.angular.y = 0; twist.angular.z = control_turnpub.publish(twist)except:print efinally:twist = Twist()twist.linear.x = 0; twist.linear.y = 0; twist.linear.z = 0twist.angular.x = 0; twist.angular.y = 0; twist.angular.z = 0pub.publish(twist)termios.tcsetattr(sys.stdin, termios.TCSADRAIN, settings)# willard_teleop.launch <launch><node name="willard_teleop" pkg="willard_teleop" type="willard_teleop.py" output="screen"><param name="scale_linear" value="0.1" type="double"/><param name="scale_angular" value="0.4" type="double"/></node> </launch> -
仿真效果图

4.Gazebo物理仿真环境搭建
4.1 ros_control
-
ros_control{\rm ros\_control}ros_control简介
- ROS{\rm ROS}ROS为开发者提供的机器人控制中间件;
- 包含一系列控制器接口、传动装置接口、硬件接口、控制器工具等;
- 可以帮助机器人应用功能包快速落地,提高开发效率;
-
ros_control{\rm ros\_control}ros_control框架


- 控制器管理器:提供一种通用的接口来管理不同的控制器;
- 控制器:读取硬件状态,发布控制命令,完成每个joint{\rm joint}joint的控制;
- 硬件资源:为上下两层提供硬件资源的接口;
- 机器人硬件抽象:机器人硬件抽象和硬件资源直接打交道,通过write{\rm write}write和read{\rm read}read方法完成硬件操作;
- 真实机器人:执行接收到的命令;

-
控制器(controllers)({\rm controllers})(controllers)介绍

4.2 仿真步骤
- 配置机器人模型;
- 创建仿真环境;
- 开始仿真;
4.2.1 配置物理仿真模型
- STEP1{\rm STEP1}STEP1:为link{\rm link}link添加惯性参数和碰撞属性;
- STEP2{\rm STEP2}STEP2:为link{\rm link}link添加gazebo{\rm gazebo}gazebo标签;
- STEP3{\rm STEP3}STEP3:为joint{\rm joint}joint添加传动装置;
- STEP4{\rm STEP4}STEP4:添加gazebo{\rm gazebo}gazebo控制器插件;
- <robotNamespace{\rm robotNamespace}robotNamespace>:机器人的命名空间;
- <leftJoint{\rm leftJoint}leftJoint>和<rightJoint{\rm rightJoint}rightJoint>:左右轮转动的关节joint{\rm joint}joint;
- <wheelSeparation{\rm wheelSeparation}wheelSeparation>和<wheelDiameter{\rm wheelDiameter}wheelDiameter>:机器人模型的相关尺寸,在计算差速参数时需要使用;
- <commandTopic{\rm commandTopic}commandTopic>:控制器订阅的速度控制指令,生成全局命名时需要结合<robotNamespace{\rm robotNamespace}robotNamespace>中设置的命名空间;
- <odometryFrame{\rm odometryFrame}odometryFrame>:里程计数据的参考坐标系,ROS{\rm ROS}ROS中一般命名为odom{\rm odom}odom;
物理仿真模型配置实例:
# mbot_base_gazebo.xacro文件内容<?xml version="1.0"?>
<robot name="mbot" xmlns:xacro="http://www.ros.org/wiki/xacro"><!-- PROPERTY LIST --><xacro:property name="M_PI" value="3.1415926"/><xacro:property name="base_mass"   value="20" /> <xacro:property name="base_radius" value="0.20"/><xacro:property name="base_length" value="0.16"/><xacro:property name="wheel_mass"   value="2" /><xacro:property name="wheel_radius" value="0.06"/><xacro:property name="wheel_length" value="0.025"/><xacro:property name="wheel_joint_y" value="0.19"/><xacro:property name="wheel_joint_z" value="0.05"/><xacro:property name="caster_mass"    value="0.5" /> <xacro:property name="caster_radius"  value="0.015"/> <!-- wheel_radius - ( base_length/2 - wheel_joint_z) --><xacro:property name="caster_joint_x" value="0.18"/><!-- Defining the colors used in this robot --><material name="yellow"><color rgba="1 0.4 0 1"/></material><material name="black"><color rgba="0 0 0 0.95"/></material><material name="gray"><color rgba="0.75 0.75 0.75 1"/></material><!-- Macro for inertia matrix --><xacro:macro name="sphere_inertial_matrix" params="m r"><inertial><mass value="${m}" /><inertia ixx="${2*m*r*r/5}" ixy="0" ixz="0"iyy="${2*m*r*r/5}" iyz="0" izz="${2*m*r*r/5}" /></inertial></xacro:macro><xacro:macro name="cylinder_inertial_matrix" params="m r h"><inertial><mass value="${m}" /><inertia ixx="${m*(3*r*r+h*h)/12}" ixy = "0" ixz = "0"iyy="${m*(3*r*r+h*h)/12}" iyz = "0"izz="${m*r*r/2}" /> </inertial></xacro:macro><!-- Macro for robot wheel --><xacro:macro name="wheel" params="prefix reflect"><joint name="${prefix}_wheel_joint" type="continuous"><origin xyz="0 ${reflect*wheel_joint_y} ${-wheel_joint_z}" rpy="0 0 0"/><parent link="base_link"/><child link="${prefix}_wheel_link"/><axis xyz="0 1 0"/></joint><link name="${prefix}_wheel_link"><visual><origin xyz="0 0 0" rpy="${M_PI/2} 0 0" /><geometry><cylinder radius="${wheel_radius}" length = "${wheel_length}"/></geometry><material name="gray" /></visual><collision><origin xyz="0 0 0" rpy="${M_PI/2} 0 0" /><geometry><cylinder radius="${wheel_radius}" length = "${wheel_length}"/></geometry></collision><cylinder_inertial_matrix  m="${wheel_mass}" r="${wheel_radius}" h="${wheel_length}" /></link><gazebo reference="${prefix}_wheel_link"><material>Gazebo/Gray</material></gazebo><!-- Transmission is important to link the joints and the controller --><transmission name="${prefix}_wheel_joint_trans"><type>transmission_interface/SimpleTransmission</type><joint name="${prefix}_wheel_joint" ><hardwareInterface>hardware_interface/VelocityJointInterface</hardwareInterface></joint><actuator name="${prefix}_wheel_joint_motor"><hardwareInterface>hardware_interface/VelocityJointInterface</hardwareInterface><mechanicalReduction>1</mechanicalReduction></actuator></transmission></xacro:macro><!-- Macro for robot caster --><xacro:macro name="caster" params="prefix reflect"><joint name="${prefix}_caster_joint" type="continuous"><origin xyz="${reflect*caster_joint_x} 0 ${-(base_length/2 + caster_radius)}" rpy="0 0 0"/><parent link="base_link"/><child link="${prefix}_caster_link"/><axis xyz="0 1 0"/></joint><link name="${prefix}_caster_link"><visual><origin xyz="0 0 0" rpy="0 0 0"/><geometry><sphere radius="${caster_radius}" /></geometry><material name="black" /></visual><collision><origin xyz="0 0 0" rpy="0 0 0"/><geometry><sphere radius="${caster_radius}" /></geometry></collision>      <sphere_inertial_matrix  m="${caster_mass}" r="${caster_radius}" /></link><gazebo reference="${prefix}_caster_link"><material>Gazebo/Black</material></gazebo></xacro:macro><xacro:macro name="mbot_base_gazebo"><link name="base_footprint"><visual><origin xyz="0 0 0" rpy="0 0 0" /><geometry><box size="0.001 0.001 0.001" /></geometry></visual></link><gazebo reference="base_footprint"><turnGravityOff>false</turnGravityOff></gazebo><joint name="base_footprint_joint" type="fixed"><origin xyz="0 0 ${base_length/2 + caster_radius*2}" rpy="0 0 0" />        <parent link="base_footprint"/><child link="base_link" /></joint><link name="base_link"><visual><origin xyz=" 0 0 0" rpy="0 0 0" /><geometry><cylinder length="${base_length}" radius="${base_radius}"/></geometry><material name="yellow" /></visual><collision><origin xyz=" 0 0 0" rpy="0 0 0" /><geometry><cylinder length="${base_length}" radius="${base_radius}"/></geometry></collision>   <cylinder_inertial_matrix  m="${base_mass}" r="${base_radius}" h="${base_length}" /></link><gazebo reference="base_link"><material>Gazebo/Blue</material></gazebo><wheel prefix="left"  reflect="-1"/><wheel prefix="right" reflect="1"/><caster prefix="front" reflect="-1"/><caster prefix="back"  reflect="1"/><!-- controller --><gazebo><plugin name="differential_drive_controller" filename="libgazebo_ros_diff_drive.so"><rosDebugLevel>Debug</rosDebugLevel><publishWheelTF>true</publishWheelTF><robotNamespace>/</robotNamespace><publishTf>1</publishTf><publishWheelJointState>true</publishWheelJointState><alwaysOn>true</alwaysOn><updateRate>100.0</updateRate><legacyMode>true</legacyMode><leftJoint>left_wheel_joint</leftJoint><rightJoint>right_wheel_joint</rightJoint><wheelSeparation>${wheel_joint_y*2}</wheelSeparation><wheelDiameter>${2*wheel_radius}</wheelDiameter><broadcastTF>1</broadcastTF><wheelTorque>30</wheelTorque><wheelAcceleration>1.8</wheelAcceleration><commandTopic>cmd_vel</commandTopic><odometryFrame>odom</odometryFrame> <odometryTopic>odom</odometryTopic> <robotBaseFrame>base_footprint</robotBaseFrame></plugin></gazebo> </xacro:macro></robot>
4.2.2 创建仿真环境
# view_mbot_gazebo_empty_world.launch文件内容<launch><!-- 设置launch文件的参数 --><arg name="paused" default="false"/><arg name="use_sim_time" default="true"/><arg name="gui" default="true"/><arg name="headless" default="false"/><arg name="debug" default="false"/><!-- 运行gazebo仿真环境 --><include file="$(find gazebo_ros)/launch/empty_world.launch"><arg name="debug" value="$(arg debug)" /><arg name="gui" value="$(arg gui)" /><arg name="paused" value="$(arg paused)"/><arg name="use_sim_time" value="$(arg use_sim_time)"/><arg name="headless" value="$(arg headless)"/></include><!-- 加载机器人模型描述参数 --><param name="robot_description" command="$(find xacro)/xacro --inorder '$(find mbot_description)/urdf/xacro/gazebo/mbot_gazebo.xacro'" /> <!-- 运行joint_state_publisher节点,发布机器人的关节状态 --><node name="joint_state_publisher" pkg="joint_state_publisher" type="joint_state_publisher" ></node> <!-- 运行robot_state_publisher节点,发布tf --><node name="robot_state_publisher" pkg="robot_state_publisher" type="robot_state_publisher" output="screen" ><param name="publish_frequency" type="double" value="50.0" /></node><!-- 在gazebo中加载机器人模型--><node name="urdf_spawner" pkg="gazebo_ros" type="spawn_model" respawn="false" output="screen"args="-urdf -model mrobot -param robot_description"/> </launch># 1.启动空环境下的.launch文件
roslaunch mbot_gazebo view_mbot_gazebo_empty_world.launch # 2.启动键盘控制节点
roslaunch mbot_teleop mbot_teleop.launch# 3.添加环境模型
# 3.1 直接添加,把模型保存到~/.gazebo/models/下
cd ~/.gazebo/models/
git clone https://github.com/osrf/gazebo_models.git# 添加好模型后,保存为.world文件# 3.2 使用Buiding Editor,在gazebo的edit下
# 4.把仿真模型路径写入.launch文件,即可加载效果如下图:


4.3 传感器仿真
4.3.1 摄像头仿真
-
<sensor{\rm sensor}sensor>标签:描述传感器;
- type{\rm type}type:传感器类型,camera{\rm camera}camera;
- name{\rm name}name:摄像头命名,自由设置;
-
<camera{\rm camera}camera>标签:描述摄像头参数;
- 分辨率、编码格式、图像范围、噪音参数等;
-
<plugin{\rm plugin}plugin>标签:加载摄像头仿真插件libgazebo_ros_camera.so{\rm libgazebo\_ros\_camera.so}libgazebo_ros_camera.so;
- 设置插件的命名空间、发布图像的话题、参考坐标系等;
-
摄像头仿真的.xacro{\rm .xacro}.xacro文件实例
# camera_gazebo.xacro文件内容<?xml version="1.0"?>
<robot xmlns:xacro="http://www.ros.org/wiki/xacro" name="camera"><xacro:macro name="usb_camera" params="prefix:=camera"><!-- Create laser reference frame --><link name="${prefix}_link"><inertial><mass value="0.1" /><origin xyz="0 0 0" /><inertia ixx="0.01" ixy="0.0" ixz="0.0"iyy="0.01" iyz="0.0"izz="0.01" /></inertial><visual><origin xyz=" 0 0 0 " rpy="0 0 0" /><geometry><box size="0.01 0.04 0.04" /></geometry><material name="black"/></visual><collision><origin xyz="0.0 0.0 0.0" rpy="0 0 0" /><geometry><box size="0.01 0.04 0.04" /></geometry></collision></link><gazebo reference="${prefix}_link"><material>Gazebo/Black</material></gazebo><gazebo reference="${prefix}_link"><sensor type="camera" name="camera_node"><update_rate>30.0</update_rate><camera name="head"><horizontal_fov>1.3962634</horizontal_fov><image><width>1280</width><height>720</height><format>R8G8B8</format></image><clip><near>0.02</near><far>300</far></clip><noise><type>gaussian</type><mean>0.0</mean><stddev>0.007</stddev></noise></camera><plugin name="gazebo_camera" filename="libgazebo_ros_camera.so"><alwaysOn>true</alwaysOn><updateRate>0.0</updateRate><cameraName>/camera</cameraName><imageTopicName>image_raw</imageTopicName><cameraInfoTopicName>camera_info</cameraInfoTopicName><frameName>camera_link</frameName><hackBaseline>0.07</hackBaseline><distortionK1>0.0</distortionK1><distortionK2>0.0</distortionK2><distortionK3>0.0</distortionK3><distortionT1>0.0</distortionT1><distortionT2>0.0</distortionT2></plugin></sensor></gazebo></xacro:macro>
</robot>
# 1.在~/willard_ws/src/mbot_description/urdf/xacro/sensors/下新建camera_gazebo.xacro文件,内容见上一代码块
touch camera_gazebo.xacro# 2.启动仿真环境
# view_mbot_with_camera_gazebo.launch内容见下一代码块
roslaunch mbot_gazebo view_mbot_with_camera_gazebo.launch# 3.查看图像
rqt_image_view# 4.启动键盘控制机器人移动
roslaunch mbot_teleop mbot_teleop.launch
# view_mbot_with_camera_gazebo.launch文件内容<launch><!-- 设置launch文件的参数 --><arg name="world_name" value="$(find mbot_gazebo)/worlds/playground.world"/><arg name="paused" default="false"/><arg name="use_sim_time" default="true"/><arg name="gui" default="true"/><arg name="headless" default="false"/><arg name="debug" default="false"/><!-- 运行gazebo仿真环境 --><include file="$(find gazebo_ros)/launch/empty_world.launch"><arg name="world_name" value="$(arg world_name)" /><arg name="debug" value="$(arg debug)" /><arg name="gui" value="$(arg gui)" /><arg name="paused" value="$(arg paused)"/><arg name="use_sim_time" value="$(arg use_sim_time)"/><arg name="headless" value="$(arg headless)"/></include><!-- 加载机器人模型描述参数 --><param name="robot_description" command="$(find xacro)/xacro --inorder '$(find mbot_description)/urdf/xacro/gazebo/mbot_with_camera_gazebo.xacro'" /> <!-- 运行joint_state_publisher节点,发布机器人的关节状态 --><node name="joint_state_publisher" pkg="joint_state_publisher" type="joint_state_publisher" ></node> <!-- 运行robot_state_publisher节点,发布tf --><node name="robot_state_publisher" pkg="robot_state_publisher" type="robot_state_publisher" output="screen" ><param name="publish_frequency" type="double" value="50.0" /></node><!-- 在gazebo中加载机器人模型--><node name="urdf_spawner" pkg="gazebo_ros" type="spawn_model" respawn="false" output="screen"args="-urdf -model mrobot -param robot_description"/> </launch>
4.3.2 RGB-D摄像头(kinect)仿真
# 1.在~/willard_ws/src/mbot_description/urdf/xacro/sensors/下新建kinect_gazebo.xacro文件,内容见下一代码块
touch kinect_gazebo.xacro# 2.启动仿真环境
# view_mbot_with_kinect_gazebo.launch内容见下一代码块
roslaunch mbot_gazebo view_mbot_with_kinect_gazebo.launch# 3.查看图像
rosrun rviz rviz# 4.启动键盘控制机器人移动
roslaunch mbot_teleop mbot_teleop.launch
# kinect_gazebo.xacro文件内容<?xml version="1.0"?>
<robot xmlns:xacro="http://www.ros.org/wiki/xacro" name="kinect_camera"><xacro:macro name="kinect_camera" params="prefix:=camera"><!-- Create kinect reference frame --><!-- Add mesh for kinect --><link name="${prefix}_link"><origin xyz="0 0 0" rpy="0 0 0"/><visual><origin xyz="0 0 0" rpy="0 0 ${M_PI/2}"/><geometry><mesh filename="package://mbot_description/meshes/kinect.dae" /></geometry></visual><collision><geometry><box size="0.07 0.3 0.09"/></geometry></collision></link><joint name="${prefix}_optical_joint" type="fixed"><origin xyz="0 0 0" rpy="-1.5708 0 -1.5708"/><parent link="${prefix}_link"/><child link="${prefix}_frame_optical"/></joint><link name="${prefix}_frame_optical"/><gazebo reference="${prefix}_link"><sensor type="depth" name="${prefix}"><always_on>true</always_on><update_rate>20.0</update_rate><camera><horizontal_fov>${60.0*M_PI/180.0}</horizontal_fov><image><format>R8G8B8</format><width>640</width><height>480</height></image><clip><near>0.05</near><far>8.0</far></clip></camera><plugin name="kinect_${prefix}_controller" filename="libgazebo_ros_openni_kinect.so"><cameraName>${prefix}</cameraName><alwaysOn>true</alwaysOn><updateRate>10</updateRate><imageTopicName>rgb/image_raw</imageTopicName><depthImageTopicName>depth/image_raw</depthImageTopicName><pointCloudTopicName>depth/points</pointCloudTopicName><cameraInfoTopicName>rgb/camera_info</cameraInfoTopicName><depthImageCameraInfoTopicName>depth/camera_info</depthImageCameraInfoTopicName><frameName>${prefix}_frame_optical</frameName><baseline>0.1</baseline><distortion_k1>0.0</distortion_k1><distortion_k2>0.0</distortion_k2><distortion_k3>0.0</distortion_k3><distortion_t1>0.0</distortion_t1><distortion_t2>0.0</distortion_t2><pointCloudCutoff>0.4</pointCloudCutoff></plugin></sensor></gazebo></xacro:macro>
</robot># view_mbot_with_kinect_gazebo.launch文件内容<launch><!-- 设置launch文件的参数 --><arg name="world_name" value="$(find mbot_gazebo)/worlds/playground.world"/><arg name="paused" default="false"/><arg name="use_sim_time" default="true"/><arg name="gui" default="true"/><arg name="headless" default="false"/><arg name="debug" default="false"/><!-- 运行gazebo仿真环境 --><include file="$(find gazebo_ros)/launch/empty_world.launch"><arg name="world_name" value="$(arg world_name)" /><arg name="debug" value="$(arg debug)" /><arg name="gui" value="$(arg gui)" /><arg name="paused" value="$(arg paused)"/><arg name="use_sim_time" value="$(arg use_sim_time)"/><arg name="headless" value="$(arg headless)"/></include><!-- 加载机器人模型描述参数 --><param name="robot_description" command="$(find xacro)/xacro --inorder '$(find mbot_description)/urdf/xacro/gazebo/mbot_with_kinect_gazebo.xacro'" /> <!-- 运行joint_state_publisher节点,发布机器人的关节状态 --><node name="joint_state_publisher" pkg="joint_state_publisher" type="joint_state_publisher" ></node> <!-- 运行robot_state_publisher节点,发布tf --><node name="robot_state_publisher" pkg="robot_state_publisher" type="robot_state_publisher" output="screen" ><param name="publish_frequency" type="double" value="50.0" /></node><!-- 在gazebo中加载机器人模型--><node name="urdf_spawner" pkg="gazebo_ros" type="spawn_model" respawn="false" output="screen"args="-urdf -model mrobot -param robot_description"/> </launch>仿真效果图:

4.3.3 激光雷达仿真
# 1.在~/willard_ws/src/mbot_description/urdf/xacro/sensors/下新建lidar_gazebo.xacro文件,内容见下一代码块
touch lidar_gazebo.xacro# 2.启动仿真环境
# view_mbot_with_laser_gazebo.launch内容见下一代码块
roslaunch mbot_gazebo view_mbot_with_laser_gazebo.launch# 3.查看图像
rosrun rviz rviz# 4.启动键盘控制机器人移动
roslaunch mbot_teleop mbot_teleop.launch
# lidar_gazebo.xacro文件内容<?xml version="1.0"?>
<robot xmlns:xacro="http://www.ros.org/wiki/xacro" name="laser"><xacro:macro name="rplidar" params="prefix:=laser"><!-- Create laser reference frame --><link name="${prefix}_link"><inertial><mass value="0.1" /><origin xyz="0 0 0" /><inertia ixx="0.01" ixy="0.0" ixz="0.0"iyy="0.01" iyz="0.0"izz="0.01" /></inertial><visual><origin xyz=" 0 0 0 " rpy="0 0 0" /><geometry><cylinder length="0.05" radius="0.05"/></geometry><material name="black"/></visual><collision><origin xyz="0.0 0.0 0.0" rpy="0 0 0" /><geometry><cylinder length="0.06" radius="0.05"/></geometry></collision></link><gazebo reference="${prefix}_link"><material>Gazebo/Black</material></gazebo><gazebo reference="${prefix}_link"><sensor type="ray" name="rplidar"><pose>0 0 0 0 0 0</pose><visualize>false</visualize><update_rate>5.5</update_rate><ray><scan><horizontal><samples>360</samples><resolution>1</resolution><min_angle>-3</min_angle><max_angle>3</max_angle></horizontal></scan><range><min>0.10</min><max>6.0</max><resolution>0.01</resolution></range><noise><type>gaussian</type><mean>0.0</mean><stddev>0.01</stddev></noise></ray><plugin name="gazebo_rplidar" filename="libgazebo_ros_laser.so"><topicName>/scan</topicName><frameName>laser_link</frameName></plugin></sensor></gazebo></xacro:macro>
</robot>仿真效果图:

相关文章:

Chapter4:机器人仿真
ROS1{\rm ROS1}ROS1的基础及应用,基于古月的课,各位可以去看,基于hawkbot{\rm hawkbot}hawkbot机器人进行实际操作。 ROS{\rm ROS}ROS版本:ROS1{\rm ROS1}ROS1的Melodic{\rm Melodic}Melodic;实际机器人:Ha…...

python(14)--集合
前言 本篇文章学习的是 python 中集合的基础知识。 集合元素的内容是不可变的,常见的元素有整数、浮点数、字符串、元组等。至于可变内容列表、字典、集合等不可以是集合元素。虽然集合不可以是集合的元素,但是集合本身是可变的,可以去增加或…...
【Spark分布式内存计算框架——Spark Core】4. RDD函数(中)Transformation函数、Action函数
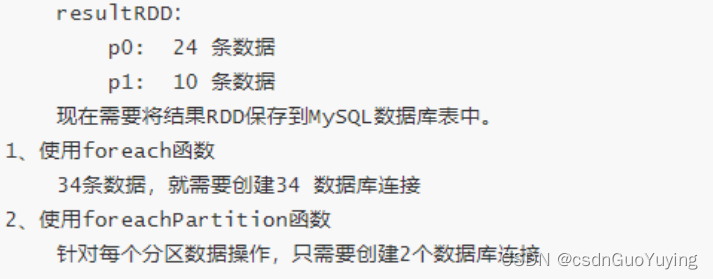
3.2 Transformation函数 在Spark中Transformation操作表示将一个RDD通过一系列操作变为另一个RDD的过程,这个操作可能是简单的加减操作,也可能是某个函数或某一系列函数。值得注意的是Transformation操作并不会触发真正的计算,只会建立RDD间…...

Mysql 数据类型
1、数值数据类型 1.1 整数类型(精确值) INTEGER, INT, SMALLINT, TINYINT, MEDIUMINT, BIGINT MySQL支持SQL标准的整数类型INTEGER (或INT)和SMALLINT。作为标准的扩展,MySQL还支持整数类型TINYINT、MEDIUMINT和BIGINT。下表显示了每种整数类型所需的存储和范围。…...

运行Whisper笔记(1)
最近chatGPT很火,就去逛了一下openai的github项目。发现了这个项目。 这个项目可以识别视频中的音频,转换出字幕。 带着一颗好奇的心就尝试自己去部署玩一玩 跟着这篇文章一步步来进行安装,并且跟着这篇文章解决途中遇到的问题。 途中还会遇…...
2023年最强大的12款数据可视化工具,值得收藏
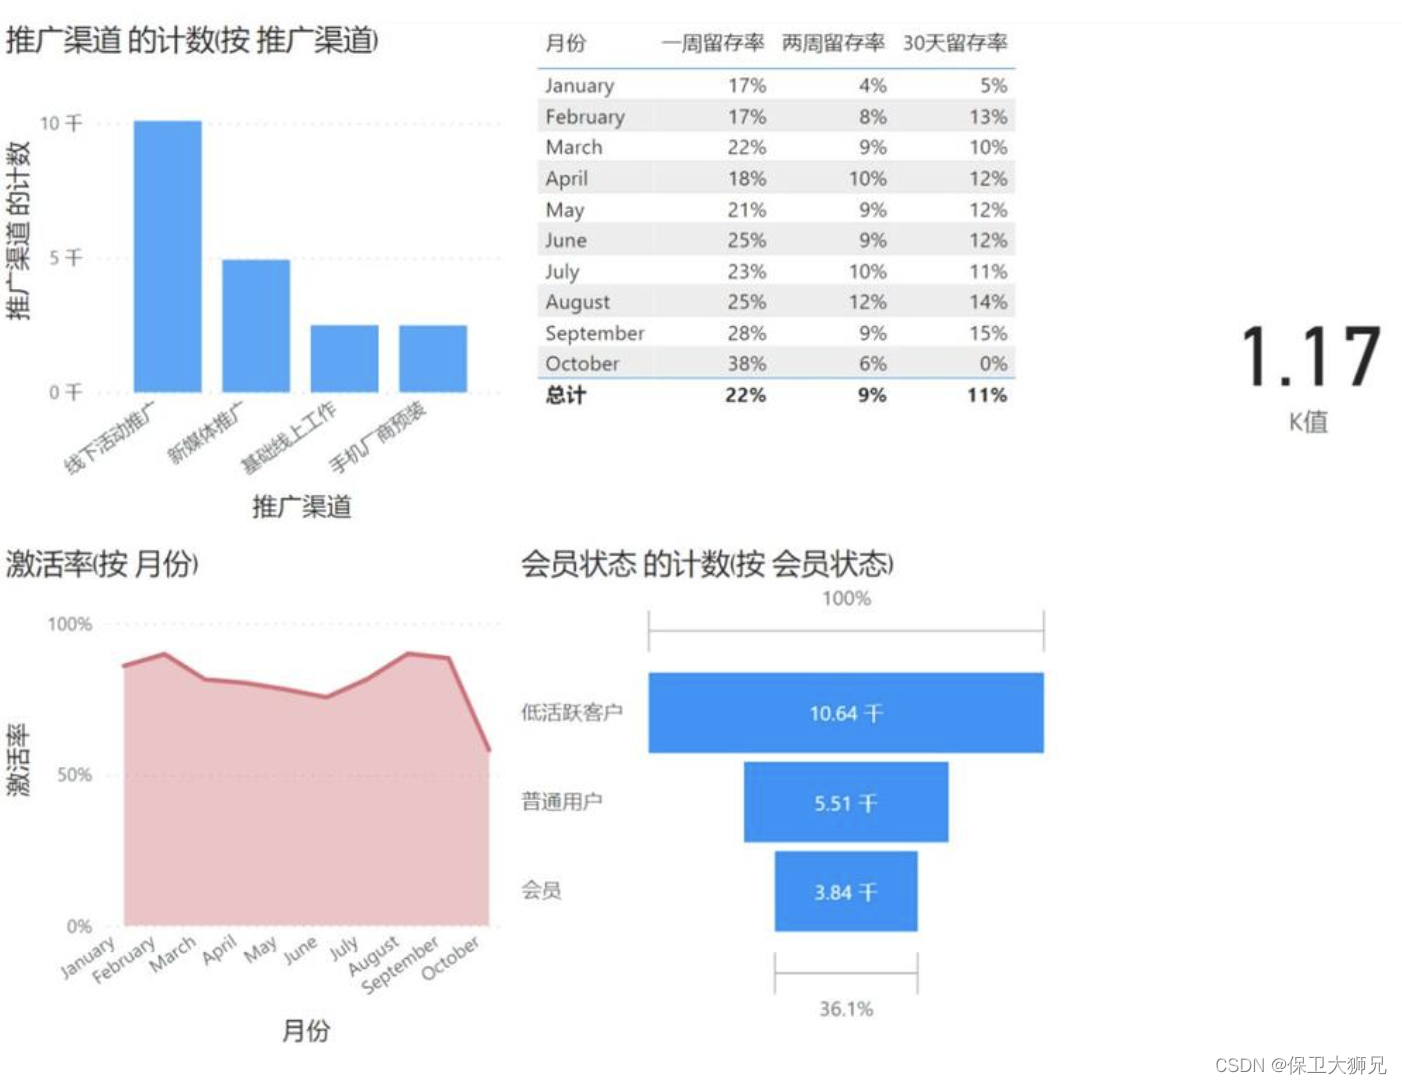
做数据分析也有年头了,好的坏的工具都用过,推荐几个觉得很好用的,避坑必看! PS:一般比较成熟的公司里,数据分析工具不只是满足业务分析和报表制作,像我现在给我们公司选型BI工具,是做…...

LeetCode刷题系列 -- 523. 连续的子数组和
给你一个整数数组 nums 和一个整数 k ,编写一个函数来判断该数组是否含有同时满足下述条件的连续子数组:子数组大小 至少为 2 ,且子数组元素总和为 k 的倍数。如果存在,返回 true ;否则,返回 false 。如果存…...

LeetCode刷题系列 -- 525. 连续数组
给定一个二进制数组 nums , 找到含有相同数量的 0 和 1 的最长连续子数组,并返回该子数组的长度。示例 1:输入: nums [0,1]输出: 2说明: [0, 1] 是具有相同数量 0 和 1 的最长连续子数组。示例 2:输入: nums [0,1,0]输出: 2说明: [0, 1] (或 [1, 0]) 是具有相同数…...
JavaEE15-Spring Boot统一功能处理
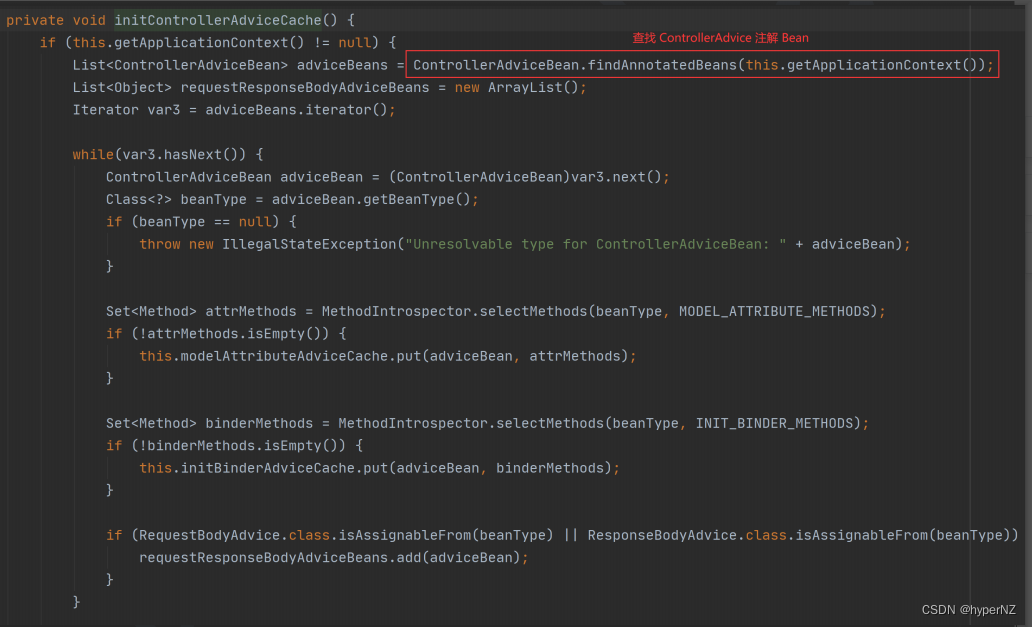
目录 1.统一用户登录权限效验 1.1.最初用户登录验证 1.2.Spring AOP用户统一登录验证的问题 1.3.Spring拦截器 1.3.1.创建自定义拦截器,实现 HandlerInterceptor 接口并重写 preHandle(执行具体方法之前的预处理)方法 1.3.2.将自定义拦…...

centos7.6 设置防火墙
1、查看系统版本 cat /etc/redhat-release2、查看防火墙运行状态 systemctl status firewalld这里可以看到当前是未运行状态(inactive)。 3、关闭开机自启动防火墙 systemctl disable firewalld.service4、启动防火墙并查看状态,系统默认 22 端口是开启的。 sy…...

在线支付系列【22】微信支付实战篇之集成服务商API
有道无术,术尚可求,有术无道,止于术。 文章目录前言1. 环境搭建2. 特约商户进件3. 统一下单总结前言 在上篇文档中,我们做好了接入前准备工作,接下来使用开源框架集成服务商相关API。 一个简单的支付系统完成支付流程…...

3.2 埃尔米特转置
定义 对于复矩阵,转置又不一样,常见的操作是共轭转置,也叫埃尔米特转置Hermitian transpose。埃尔米特转置就是对矩阵先共轭,再转置,一般来说用三种符号表示埃尔米特转置: 第一种符号是AHA^HAH,…...
Python爬虫之Scrapy框架系列(13)——实战ZH小说爬取数据入MySql数据库
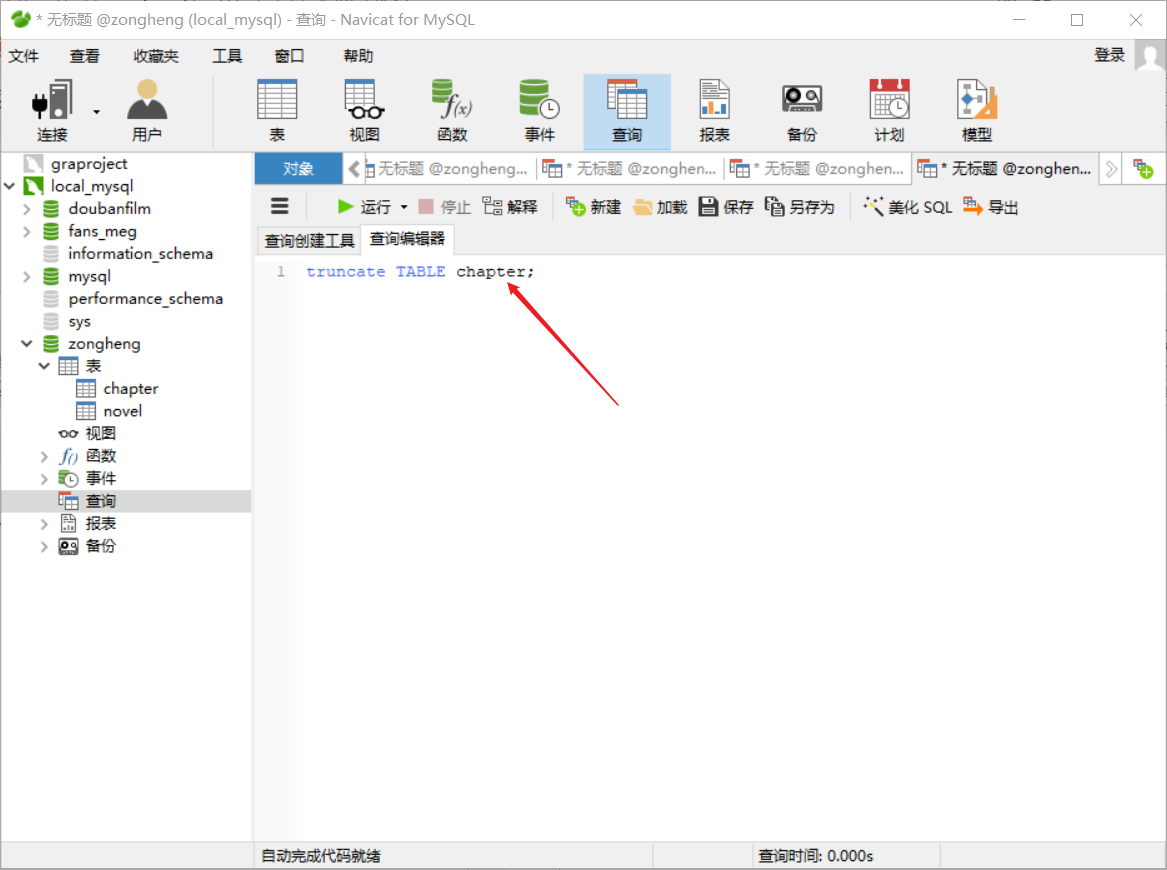
目录:1 数据持久化存储,写入Mysql数据库①定义结构化字段:②重新编写爬虫文件:③编写管道文件:④辅助配置(修改settings.py文件):⑤navicat创库建表:⑥ 效果如下…...

MySQL篇02-三大范式,多表查询
数据入库时,由于数据设计不合理,会存在数据重复、更新插入异常等情况, 故数据库中表的设计遵循的设计规范:三大范式1.第一范式(1NF)要求数据库的每一列都是不可分割的原子数据项,即原子性。强调的是列的原子性,即数据库中每一列的…...

vue-cli3创建Vue项目
文章目录前言一、使用vue-cli3创建项目1.检查当前vue的版本2.下载并安装Vue-cli33.使用命令行创建项目二、关于配置前言 本文讲解了如何使用vue-cli3创建属于自己的Vue项目,如果本文对你有所帮助请三连支持博主,你的支持是我更新的动力。 下面案例可供…...
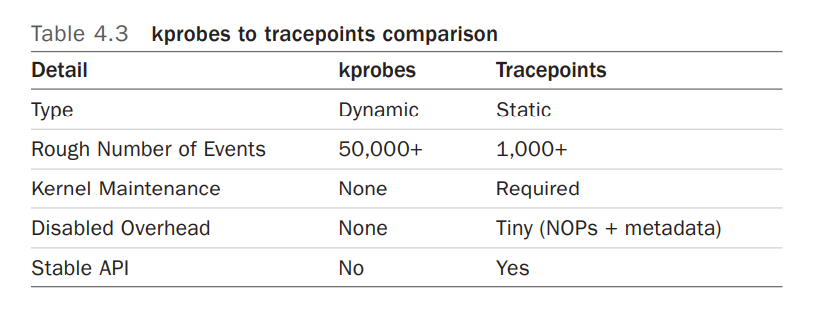
Linux perf probe 的使用(三)
文章目录前言一、Dynamic Tracing二、kprobes2.1 perf kprobe 的使用2.2 kprobe Arguments3.3 tcp_sendmsg()3.3.1 Kernel: tcp_sendmsg()3.3.2 Kernel: tcp_sendmsg() with size3.3.2 Kernel: tcp_sendmsg() line number and local variable三、uprobes的使用3.1 perf uprobe …...

python GUI编程 多窗口跳转
# 多窗口跳转例子from tkinter import *def main(): # 主窗体def goto(num):root.destroy() # 关闭主窗体if num 1:one() # 进入第1个窗体elif num 2:two() # 进入第2个窗体root Tk()root.geometry(300x150600200)root.title(登录窗口)but1 Button(root, text"进入…...
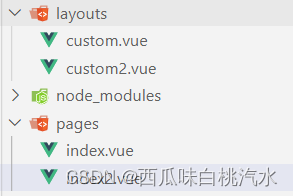
nuxt 学习笔记
这里写目录标题路由跳转NuxtLinkquery参数params参数嵌套路由tab切换效果layouts 文件夹强制约定放置所有布局文件,并以插槽的形式作用在页面中1.在app.vue里面2.component 组件使用Vue < component :is"">Vuex生命周期数据请求useFetchuseAsyncDat…...
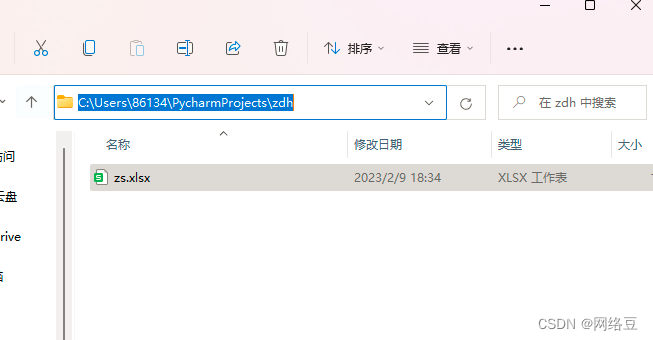
Python编程自动化办公案例(1)
作者简介:一名在校计算机学生、每天分享Python的学习经验、和学习笔记。 座右铭:低头赶路,敬事如仪 个人主页:网络豆的主页 目录 前言 一.使用库讲解 1.xlrd 2.xlwt 二.主要案例 1.批量合并 模板如下…...
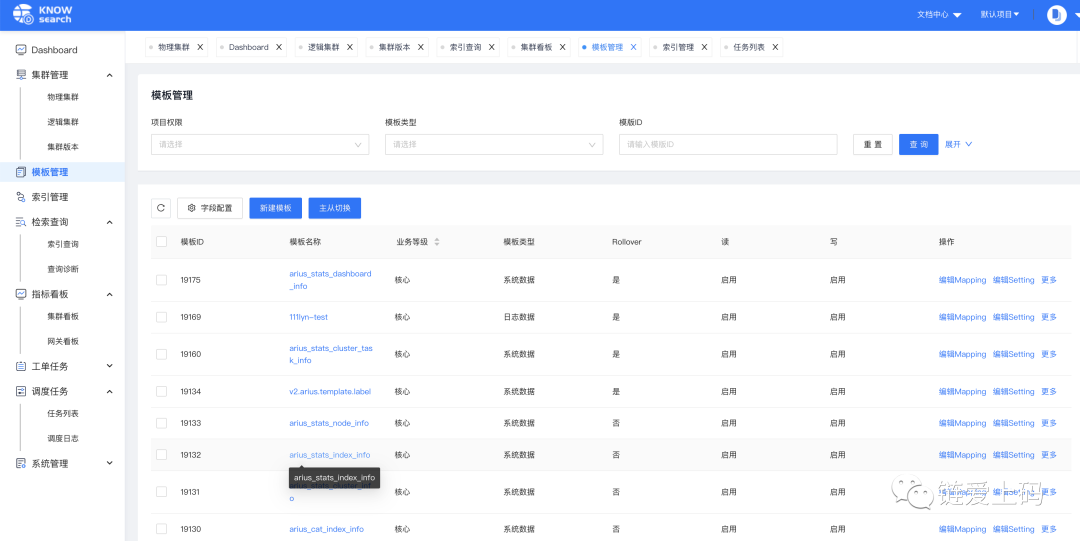
一站式 Elasticsearch 集群指标监控与运维管控平台
上篇文章写了一下消息运维管理平台,今天带来的是ES的监控和运维平台。目前初创企业,不像大型互联网公司,可以重复的造轮子。前期还是快速迭代试错阶段,方便拿到市场反馈,及时调整自己的战略和产品方向。让自己活下去&a…...
)
进程地址空间(比特课总结)
一、进程地址空间 1. 环境变量 1 )⽤户级环境变量与系统级环境变量 全局属性:环境变量具有全局属性,会被⼦进程继承。例如当bash启动⼦进程时,环 境变量会⾃动传递给⼦进程。 本地变量限制:本地变量只在当前进程(ba…...

R语言AI模型部署方案:精准离线运行详解
R语言AI模型部署方案:精准离线运行详解 一、项目概述 本文将构建一个完整的R语言AI部署解决方案,实现鸢尾花分类模型的训练、保存、离线部署和预测功能。核心特点: 100%离线运行能力自包含环境依赖生产级错误处理跨平台兼容性模型版本管理# 文件结构说明 Iris_AI_Deployme…...

DockerHub与私有镜像仓库在容器化中的应用与管理
哈喽,大家好,我是左手python! Docker Hub的应用与管理 Docker Hub的基本概念与使用方法 Docker Hub是Docker官方提供的一个公共镜像仓库,用户可以在其中找到各种操作系统、软件和应用的镜像。开发者可以通过Docker Hub轻松获取所…...
关于nvm与node.js
1 安装nvm 安装过程中手动修改 nvm的安装路径, 以及修改 通过nvm安装node后正在使用的node的存放目录【这句话可能难以理解,但接着往下看你就了然了】 2 修改nvm中settings.txt文件配置 nvm安装成功后,通常在该文件中会出现以下配置&…...

关于iview组件中使用 table , 绑定序号分页后序号从1开始的解决方案
问题描述:iview使用table 中type: "index",分页之后 ,索引还是从1开始,试过绑定后台返回数据的id, 这种方法可行,就是后台返回数据的每个页面id都不完全是按照从1开始的升序,因此百度了下,找到了…...

Spring Boot面试题精选汇总
🤟致敬读者 🟩感谢阅读🟦笑口常开🟪生日快乐⬛早点睡觉 📘博主相关 🟧博主信息🟨博客首页🟫专栏推荐🟥活动信息 文章目录 Spring Boot面试题精选汇总⚙️ **一、核心概…...

LLM基础1_语言模型如何处理文本
基于GitHub项目:https://github.com/datawhalechina/llms-from-scratch-cn 工具介绍 tiktoken:OpenAI开发的专业"分词器" torch:Facebook开发的强力计算引擎,相当于超级计算器 理解词嵌入:给词语画"…...

企业如何增强终端安全?
在数字化转型加速的今天,企业的业务运行越来越依赖于终端设备。从员工的笔记本电脑、智能手机,到工厂里的物联网设备、智能传感器,这些终端构成了企业与外部世界连接的 “神经末梢”。然而,随着远程办公的常态化和设备接入的爆炸式…...

稳定币的深度剖析与展望
一、引言 在当今数字化浪潮席卷全球的时代,加密货币作为一种新兴的金融现象,正以前所未有的速度改变着我们对传统货币和金融体系的认知。然而,加密货币市场的高度波动性却成为了其广泛应用和普及的一大障碍。在这样的背景下,稳定…...

Pinocchio 库详解及其在足式机器人上的应用
Pinocchio 库详解及其在足式机器人上的应用 Pinocchio (Pinocchio is not only a nose) 是一个开源的 C 库,专门用于快速计算机器人模型的正向运动学、逆向运动学、雅可比矩阵、动力学和动力学导数。它主要关注效率和准确性,并提供了一个通用的框架&…...
