某马程序员NodeJS速学笔记
文章目录
- 前言
- 一、什么是Node.js?
- 二、fs文件系统模块
- 三、Http模块
- 四、模块化
- 五、开发属于自己的包
- 模块加载机制
- 六、Express
- 1.初识Express
- GET/POST
- nodemon
- 2.路由模块化
- 3.中间件
- 中间件分类
- 自定义中间件
- 4. 跨域问题
- 七、Mysql模块
- 安装与配置
- 基本使用
- Web开发模式
- Session认证
- JWT
- 八、multer模块
- 九、大事件项目
- 十、总结
前言
从某🐎程序员速学NodeJS的一些笔记
一、什么是Node.js?
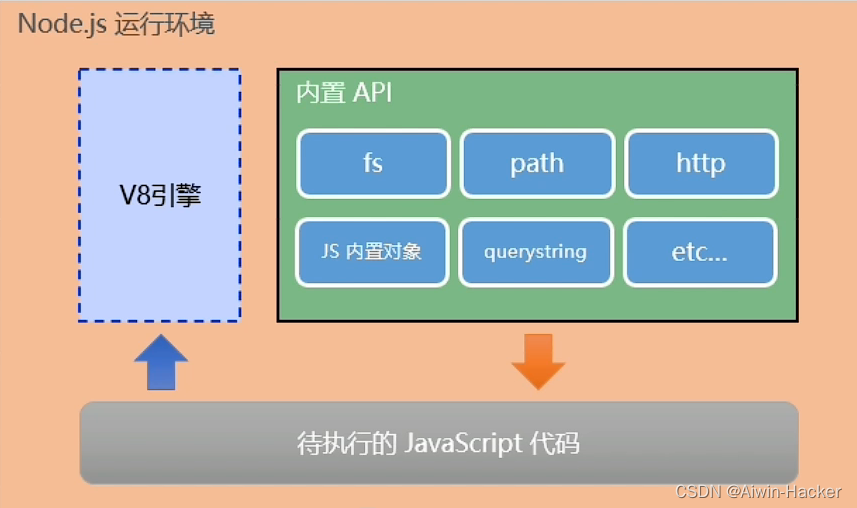
- 基于Chrome V8引擎的Javascript的运行环境,V8相对于火狐的OdinMonkey,Safri浏览器的JSCore都要快。
- Node.js是Javascript的后端运行环境,无法调用DOM和BOM等浏览器内置API,仅仅提供了基础的功能和API,这些基础使很多强大的框架出现,可以基于Express框架构建Web应用,基于restify快速构建API项目,可以读写和操作数据库等。
二、fs文件系统模块
- fs模块是Node.js官方提供的用来操作文件的模块,提供一系列的方法和属性,用来满足用户对文件的操作,有如下的一些常用命令。
| 命令 | 说明 |
|---|---|
| open(path,mode,callback) | 异步模式下打开文件 |
| stat(path,callback) | 异步模式下获取文件信息 |
| writeFile(file,data,callback) | 异步模式下写入文件 |
| read(fd,buffer,offset,length,position,callback) | 通过文件描述符读取文件 |
| close(fd,callback) | 通过文件描述符读取文件 |
| ftruncate(fd,len,callback) | 通过文件描述符读取文件 |
| fs.unlink(path, callback) | 删除文件 |
| fs.mkdir(path[, options], callback) | 创建目录 |
| fs.readdir(path, callback) | 读取目录 |
| fs.rmdir(path, callback) | 删除目录 |
| fs.exists(path, callback) | 文件是否存在 |
- 例子:
const fs=require('fs')
const buf = new Buffer.alloc(1024);
fs.mkdir('../file/',function (err) {if(err){console.log(err)}console.log("目录创建成功")
})
fs.writeFile('../file/input.txt','通过writeFile写入文件内容',function (err) {if(err){return console.log(err)}console.log('文件写入成功')
})
fs.readdir("../file/",function (err,files) {if(err){return console.error(err)}files.forEach(function (file) {console.log("目录读取开始")console.log(file)})})
fs.open('../file/input.txt','r+',function (err,fd) {if(err){return console.error(err)}console.log("开始文件读取")fs.read(fd,buf,0,buf.length,0,function (err,bytes) {if(err){console.log(err)}if(bytes>0){console.log(buf.subarray(0,bytes).toString())}console.log(bytes+"字节被读取")})fs.close(fd,function (err) {if(err){console.log(err)}console.log("文件读取关闭")})
})
fs.unlink("../file/input.txt",function (err) {if(err){return console.error(err)}console.log("文件删除成功")})
setTimeout(function() {fs.rmdir("../file/", function (err) {if (err) {return console.log(err)}console.log("目录删除成功")})
},3000)

- path路径模块
Node在读取或者写入文件,使用相对路径的时候,会以Node使用的目录为起点,直接拼接相对目录的字符串,可以使用绝对路径或者path模块解决。
| 命令 | 说明 |
|---|---|
| sep | 平台路径分割符 |
| join() | 拼接路径 |
| basename() | 最后的文件名 |
| extname() | 文件扩展名 |
| isAbsolute() | 判断是否为绝对路径 |
| relative | 转为相对路径 |
| normalize | 规范化路径 |
const path=require('path')
console.log(path.sep) //路径分割符
const pathStr=path.join("/tmp","/Node","fs","../","path")
console.log(pathStr)const pathStr1=path.join(__dirname,'../files/input.txt')
console.log(pathStr1)console.log(path.basename("../files/input.txt")) //获取最后的文件名
console.log(path.extname("../files/input.txt")) //文件扩展名
console.log(path.isAbsolute("/tmp/node/path")) //判断是否是绝对路径
console.log(path.relative("/tmp/node/path","/tmp/node/http/"))  //转换成相对路径
console.log(path.normalize('/test/test1//2slashes/1slash/tab/../')); //规范化路径

- 烟花分割案例
在index.html页面中,CSS和Javascript都写入了里面,没有分成index.css,index.js文件,使用fs和path对index.html分割成这几个文件。
原index.html:
<!doctype html>
<html>
<head>
<meta charset="utf-8">
<title>烟花动画特效</title><style>
html,body{margin:0px;width:100%;height:100%;overflow:hidden;background:#000;
}#canvas{width:100%;height:100%;
}
</style></head>
<body><canvas id="canvas"></canvas><script>
function initVars(){pi=Math.PI;ctx=canvas.getContext("2d");canvas.width=canvas.clientWidth;canvas.height=canvas.clientHeight;cx=canvas.width/2;cy=canvas.height/2;playerZ=-25;playerX=playerY=playerVX=playerVY=playerVZ=pitch=yaw=pitchV=yawV=0;scale=600;seedTimer=0;seedInterval=5,seedLife=100;gravity=.02;seeds=new Array();sparkPics=new Array();s="https://cantelope.org/NYE/";for(i=1;i<=10;++i){sparkPic=new Image();sparkPic.src=s+"spark"+i+".png";sparkPics.push(sparkPic);}sparks=new Array();pow1=new Audio(s+"pow1.ogg");pow2=new Audio(s+"pow2.ogg");pow3=new Audio(s+"pow3.ogg");pow4=new Audio(s+"pow4.ogg");frames = 0;
}function rasterizePoint(x,y,z){var p,d;x-=playerX;y-=playerY;z-=playerZ;p=Math.atan2(x,z);d=Math.sqrt(x*x+z*z);x=Math.sin(p-yaw)*d;z=Math.cos(p-yaw)*d;p=Math.atan2(y,z);d=Math.sqrt(y*y+z*z);y=Math.sin(p-pitch)*d;z=Math.cos(p-pitch)*d;var rx1=-1000,ry1=1,rx2=1000,ry2=1,rx3=0,ry3=0,rx4=x,ry4=z,uc=(ry4-ry3)*(rx2-rx1)-(rx4-rx3)*(ry2-ry1);if(!uc) return {x:0,y:0,d:-1};var ua=((rx4-rx3)*(ry1-ry3)-(ry4-ry3)*(rx1-rx3))/uc;var ub=((rx2-rx1)*(ry1-ry3)-(ry2-ry1)*(rx1-rx3))/uc;if(!z)z=.000000001;if(ua>0&&ua<1&&ub>0&&ub<1){return {x:cx+(rx1+ua*(rx2-rx1))*scale,y:cy+y/z*scale,d:Math.sqrt(x*x+y*y+z*z)};}else{return {x:cx+(rx1+ua*(rx2-rx1))*scale,y:cy+y/z*scale,d:-1};}
}function spawnSeed(){seed=new Object();seed.x=-50+Math.random()*100;seed.y=25;seed.z=-50+Math.random()*100;seed.vx=.1-Math.random()*.2;seed.vy=-1.5;//*(1+Math.random()/2);seed.vz=.1-Math.random()*.2;seed.born=frames;seeds.push(seed);
}function splode(x,y,z){t=5+parseInt(Math.random()*150);sparkV=1+Math.random()*2.5;type=parseInt(Math.random()*3);switch(type){case 0:pic1=parseInt(Math.random()*10);break;case 1:pic1=parseInt(Math.random()*10);do{ pic2=parseInt(Math.random()*10); }while(pic2==pic1);break;case 2:pic1=parseInt(Math.random()*10);do{ pic2=parseInt(Math.random()*10); }while(pic2==pic1);do{ pic3=parseInt(Math.random()*10); }while(pic3==pic1 || pic3==pic2);break;}for(m=1;m<t;++m){spark=new Object();spark.x=x; spark.y=y; spark.z=z;p1=pi*2*Math.random();p2=pi*Math.random();v=sparkV*(1+Math.random()/6)spark.vx=Math.sin(p1)*Math.sin(p2)*v;spark.vz=Math.cos(p1)*Math.sin(p2)*v;spark.vy=Math.cos(p2)*v;switch(type){case 0: spark.img=sparkPics[pic1]; break;case 1:spark.img=sparkPics[parseInt(Math.random()*2)?pic1:pic2];break;case 2:switch(parseInt(Math.random()*3)){case 0: spark.img=sparkPics[pic1]; break;case 1: spark.img=sparkPics[pic2]; break;case 2: spark.img=sparkPics[pic3]; break;}break;}spark.radius=25+Math.random()*50;spark.alpha=1;spark.trail=new Array();sparks.push(spark);}switch(parseInt(Math.random()*4)){case 0:	pow=new Audio(s+"pow1.ogg"); break;case 1:	pow=new Audio(s+"pow2.ogg"); break;case 2:	pow=new Audio(s+"pow3.ogg"); break;case 3:	pow=new Audio(s+"pow4.ogg"); break;}d=Math.sqrt((x-playerX)*(x-playerX)+(y-playerY)*(y-playerY)+(z-playerZ)*(z-playerZ));pow.volume=1.5/(1+d/10);pow.play();
}function doLogic(){if(seedTimer<frames){seedTimer=frames+seedInterval*Math.random()*10;spawnSeed();}for(i=0;i<seeds.length;++i){seeds[i].vy+=gravity;seeds[i].x+=seeds[i].vx;seeds[i].y+=seeds[i].vy;seeds[i].z+=seeds[i].vz;if(frames-seeds[i].born>seedLife){splode(seeds[i].x,seeds[i].y,seeds[i].z);seeds.splice(i,1);}}for(i=0;i<sparks.length;++i){if(sparks[i].alpha>0 && sparks[i].radius>5){sparks[i].alpha-=.01;sparks[i].radius/=1.02;sparks[i].vy+=gravity;point=new Object();point.x=sparks[i].x;point.y=sparks[i].y;point.z=sparks[i].z;if(sparks[i].trail.length){x=sparks[i].trail[sparks[i].trail.length-1].x;y=sparks[i].trail[sparks[i].trail.length-1].y;z=sparks[i].trail[sparks[i].trail.length-1].z;d=((point.x-x)*(point.x-x)+(point.y-y)*(point.y-y)+(point.z-z)*(point.z-z));if(d>9){sparks[i].trail.push(point);}}else{sparks[i].trail.push(point);}if(sparks[i].trail.length>5)sparks[i].trail.splice(0,1);				sparks[i].x+=sparks[i].vx;sparks[i].y+=sparks[i].vy;sparks[i].z+=sparks[i].vz;sparks[i].vx/=1.075;sparks[i].vy/=1.075;sparks[i].vz/=1.075;}else{sparks.splice(i,1);}}p=Math.atan2(playerX,playerZ);d=Math.sqrt(playerX*playerX+playerZ*playerZ);d+=Math.sin(frames/80)/1.25;t=Math.sin(frames/200)/40;playerX=Math.sin(p+t)*d;playerZ=Math.cos(p+t)*d;yaw=pi+p+t;
}function rgb(col){var r = parseInt((.5+Math.sin(col)*.5)*16);var g = parseInt((.5+Math.cos(col)*.5)*16);var b = parseInt((.5-Math.sin(col)*.5)*16);return "#"+r.toString(16)+g.toString(16)+b.toString(16);
}function draw(){ctx.clearRect(0,0,cx*2,cy*2);ctx.fillStyle="#ff8";for(i=-100;i<100;i+=3){for(j=-100;j<100;j+=4){x=i;z=j;y=25;point=rasterizePoint(x,y,z);if(point.d!=-1){size=250/(1+point.d);d = Math.sqrt(x * x + z * z);a = 0.75 - Math.pow(d / 100, 6) * 0.75;if(a>0){ctx.globalAlpha = a;ctx.fillRect(point.x-size/2,point.y-size/2,size,size);				}}}}ctx.globalAlpha=1;for(i=0;i<seeds.length;++i){point=rasterizePoint(seeds[i].x,seeds[i].y,seeds[i].z);if(point.d!=-1){size=200/(1+point.d);ctx.fillRect(point.x-size/2,point.y-size/2,size,size);}}point1=new Object();for(i=0;i<sparks.length;++i){point=rasterizePoint(sparks[i].x,sparks[i].y,sparks[i].z);if(point.d!=-1){size=sparks[i].radius*200/(1+point.d);if(sparks[i].alpha<0)sparks[i].alpha=0;if(sparks[i].trail.length){point1.x=point.x;point1.y=point.y;switch(sparks[i].img){case sparkPics[0]:ctx.strokeStyle="#f84";break;case sparkPics[1]:ctx.strokeStyle="#84f";break;case sparkPics[2]:ctx.strokeStyle="#8ff";break;case sparkPics[3]:ctx.strokeStyle="#fff";break;case sparkPics[4]:ctx.strokeStyle="#4f8";break;case sparkPics[5]:ctx.strokeStyle="#f44";break;case sparkPics[6]:ctx.strokeStyle="#f84";break;case sparkPics[7]:ctx.strokeStyle="#84f";break;case sparkPics[8]:ctx.strokeStyle="#fff";break;case sparkPics[9]:ctx.strokeStyle="#44f";break;}for(j=sparks[i].trail.length-1;j>=0;--j){point2=rasterizePoint(sparks[i].trail[j].x,sparks[i].trail[j].y,sparks[i].trail[j].z);if(point2.d!=-1){ctx.globalAlpha=j/sparks[i].trail.length*sparks[i].alpha/2;ctx.beginPath();ctx.moveTo(point1.x,point1.y);ctx.lineWidth=1+sparks[i].radius*10/(sparks[i].trail.length-j)/(1+point2.d);ctx.lineTo(point2.x,point2.y);ctx.stroke();point1.x=point2.x;point1.y=point2.y;}}}ctx.globalAlpha=sparks[i].alpha;ctx.drawImage(sparks[i].img,point.x-size/2,point.y-size/2,size,size);}}
}function frame(){if(frames>100000){seedTimer=0;frames=0;}frames++;draw();doLogic();requestAnimationFrame(frame);
}window.addEventListener("resize",()=>{canvas.width=canvas.clientWidth;canvas.height=canvas.clientHeight;cx=canvas.width/2;cy=canvas.height/2;
});initVars();
frame();
</script></body>
</html>
const fs=require('fs')
const path=require('path')const regStyle=/<style>[\s\S]*<\/style>/
const regJs=/<script>[\s\S]*<\/script>/fs.readFile(path.join(__dirname,"static/index.html"),function (err,data) {if(err){return console.log("文件读取失败")}resolveCSS(data)resoleJs(data)resoleHtml(data)
})
function resolveCSS(htmlStr) {const r=regStyle.exec(htmlStr)const newCss=r[0].replace("<style>","").replace("</style>","")fs.writeFile(path.join(__dirname,"static/style.css"),newCss,function (err) {if(err) {return console.log("CSS文件写入失败"+err.message)}})
}
function resoleJs(htmlStr){const r=regJs.exec(htmlStr)const newJs=r[0].replace("<script>","").replace("</script>","")fs.writeFile(path.join(__dirname,"static/index.js"),newJs,function (err) {if(err) {return console.log("JS文件写入失败"+err.message)}})
}function resoleHtml(htmlStr) {const r=regStyle.exec(htmlStr)const r1=regJs.exec(htmlStr)const pathStyle="./style.css"const pathStyle1="./index.js"const newHtml=htmlStr.toString().replace(r[0],'<link rel="stylesheet" href="'+pathStyle+'"/>').replace(r1[0],'<script src="'+pathStyle1+'"></script>')fs.writeFile(path.join(__dirname,"static/index.html"),newHtml,function (err) {if(err){return console.log("文件写入失败"+err.message)}})
}

三、Http模块
-
http模块是Node.js官方提供的,用来创建web服务器的模块,通过http模块提供的createServer()方法,将电脑变成Web服务器,对外提供Web资源服务。
-
烟花案例
const http=require('http')
const fs=require('fs')
const url = require("url")
const path=require('path')server=http.createServer()server.on('request' ,function (req,res) {const url = req.urllet pathname=''if(url==='/' || url==='/index.html'){pathname=path.join(__dirname,'./static/index.html')}else{pathname=path.join(__dirname,'./static',url)}fs.readFile(pathname,'utf-8',function (err,data) {if(err){res.write("出现未知错误"+err.message)}res.end(data)})
})server.listen(8080,function () {console.log("服务器运行在http://127.0.0.1:8080")
})- Get请求
const http = require('http');
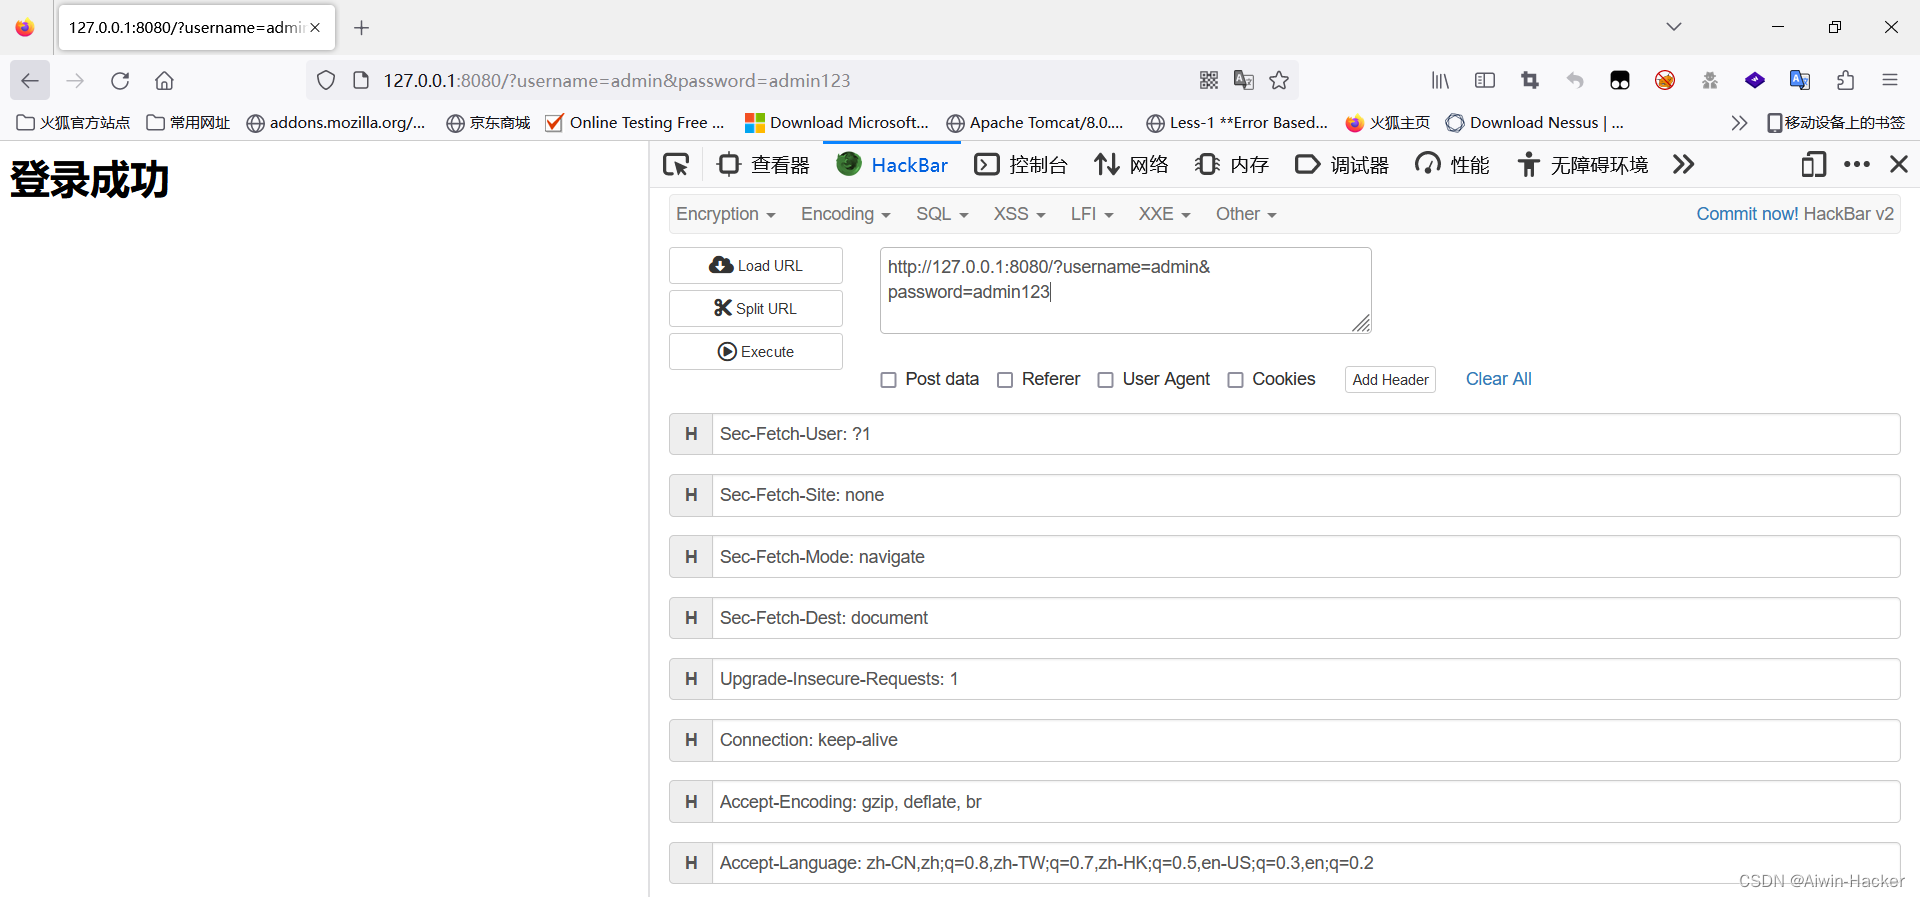
const url = require('url');http.createServer(function(req, res){res.writeHead(200, {'Content-Type': 'text/html;charset=utf-8'});const params = url.parse(req.url, true).query;if(params.username==="admin"&¶ms.password==="admin123"){res.write("<h1>登录成功</h1>")}res.end();}).listen(8080);
- post请求
const http=require("http")
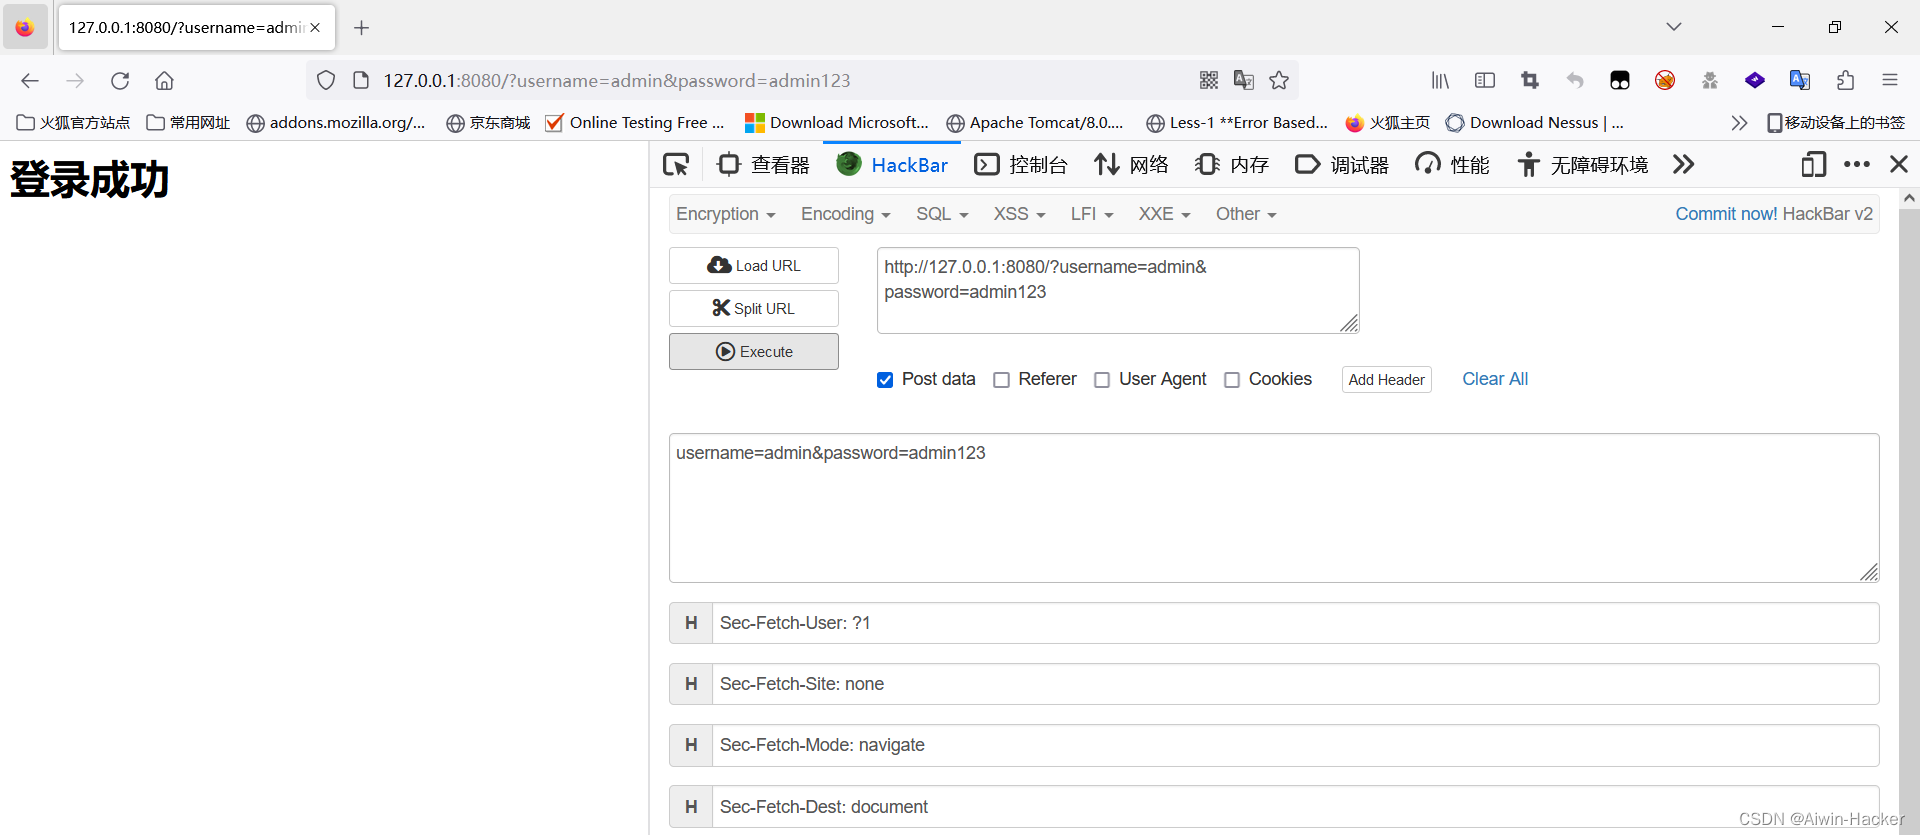
const querystring=require("querystring")let postHTML='<html><head><meta charset="utf-8"><title>Node.js 例子</title></head>' +'<body>' +'<form method="post">' +'用户名: <input name="username"><br>' +'密码: <input name="password"><br>' +'<input type="submit">' +'</form>' +'</body></html>';server=http.createServer(function (req,res) {let body="";req.on('data',function (chunk) {body+=chunk})req.on('end',function () {body=querystring.parse(body)res.writeHead(200, {'Content-Type': 'text/html; charset=utf8'});if(body.username==="admin"&&body.password==="admin123"){res.write("<h1>登录成功</h1>")}else{res.write(postHTML)}res.end()})
}).listen(8080)
四、模块化
- 模块化在编程中指的是遵守固定规则,把一个大文件拆成相互依赖的多个小模块,从而提高代码的复用性,可维护性,按需加载等。
- 模块化规范:对代码进行模块化拆分和组合时,要遵守的规则,从而方便了各大模块之间的相互调用。
- Node.js的模块分类:内置模块(官方提供),自定义模块(用户自己创建),第三方模块(第三方开发,使用前下载)
- 模块作用域:为了防止全局变量污染,自定义模块中定义的变量和方法等成员,只能在当前模块被访问。
- 向外共享模块作用域成员:每个.js自定义模块中都有module对象,存储了和当前模块的有关信息,使得模块内成员可以通过export被模块外访问到。

- 向外共享成员例子:
//向module.exports对象上挂载username属性或方法
module.exports.username='Aiwin'
module.exports.say=function () {console.log("您好,exports向外共享")
}function NoInvoke() {console.log("这里不能暴露出去")
}
const m=require("./test")
console.log(m)

使用require()方法导入模块时,导入的结果永远以module.exports指向的新对象为准,即exports对象可以被重覆盖。
//向module.exports对象上挂载username属性或方法
module.exports.username='Aiwin'
module.exports.say=function () {console.log("您好,exports向外共享")
}//require指向永远以新的对象为准
module.exports={name:'Aiwin',say(){console.log("Hello")}
}
function NoInvoke() {console.log("这里不能暴露出去")
}

-
为了简化向外共享成员的代码,Node提供了exports对象,默认情况下,module.exports和exports指向同一对象,最终共享的结果以module.exports指向对象为准。
-
npm和包:NodeJs中的包就是由第三方个人或团队开发出来的模块,免费供所有人使用,包基于内置模块封装出来,提供了更高级,更方便的API,极大的提高了开发效率。 全球最大的包共享平台
-
npm初体验
传统初始化时间
function dataFormat(timeStr){const data=new Date(timeStr)const y=data.getFullYear()const m=padZero(data.getMonth())const d=padZero(data.getDate())const hh=padZero(data.getHours())const mm=padZero(data.getMinutes())const ss=padZero(data.getSeconds())return `${y}-${m}-${d} ${hh}:${mm}:${ss}`
}function padZero(n) {return n>9?n:'0'+n
}
module.exports={dataFormat
}
const time=require("./dataFormat")const t=new Date()
console.log(t)
console.log(time.dataFormat(t))
npm的一些使用:
| 命令 | 说明 |
|---|---|
| npm install 包完整名称@版本号 | 安装npm包 |
| npm i 包名称@版本号 | 安装npm包 |
| npm init -y | 创建package.json文件 |
| npm config get registry | 查看镜像源 |
| npm config set registry=https://registry.npm.taobao.org/ | 安装淘宝镜像源 |
| npm i nrm -g | 下载nrm |
| npm uninstall 包名 -g | 卸载全局安装的包 |
| nrm ls | 查看可下载镜像源 |
| nrm use 名称 | 更换镜像源 |
| npm uninstall | 卸载包 |
| npm i 包名 -D | 将包记录到devDependencies节点 |
| npm i / npm install | 自动从dependencies中识别包下载 |
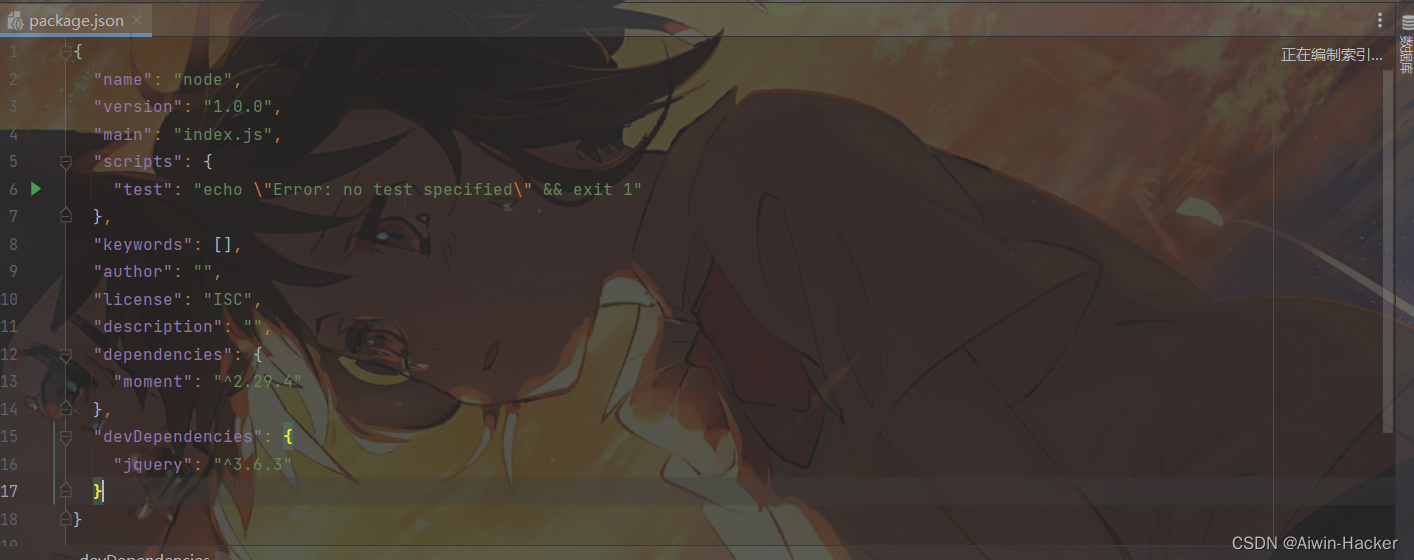
devDependencies中的包是指项目只在开发阶段用到的包,项目上线后遇不到,dependencies中有项目安装的npm包。
使用npm
const moment=require('moment')const time=moment().format('YYYY-MM-DD HH:mm:ss')
console.log(time)
- 规范的包结构,应包含以下3点要求:
(1)包必须以单独的目录存在。
(2)包的顶级目录必须包含package.json管理配置文件。
(3)package.json必须包含name、version、main这三个属性,代表包名、版本、入口。
五、开发属于自己的包
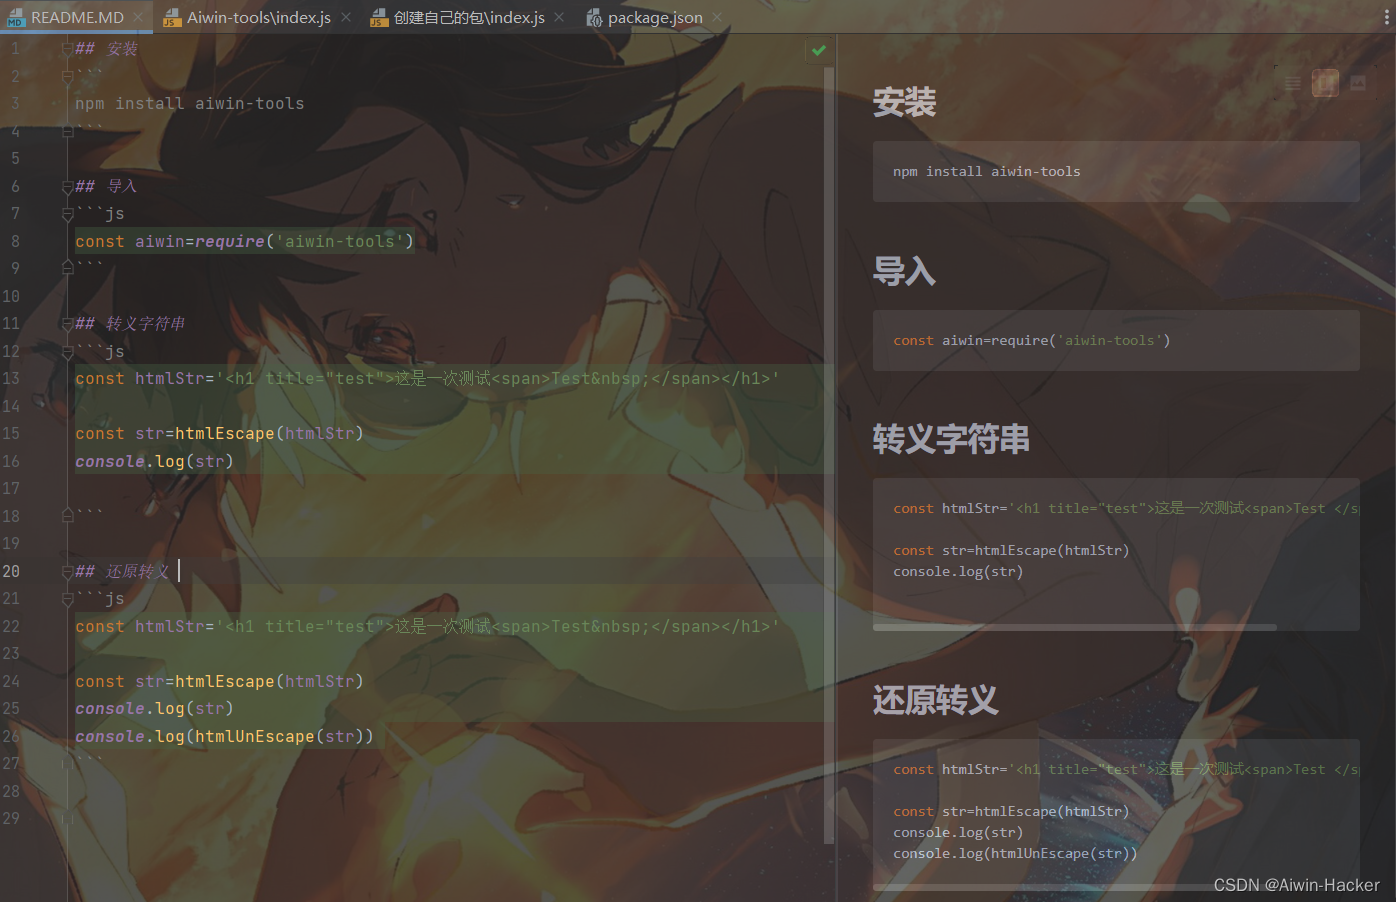
功能要求:1.转义HTML中的特殊字符
2.还原转义字符
步骤如下:1. 创建新目录作为包的根目录
2.在根目录下创建入口js,package.json,README.MD
3.编写package.json和代码
注意包名必须唯一,创建包名前须查看是否存在相同包名
- 创建package.json
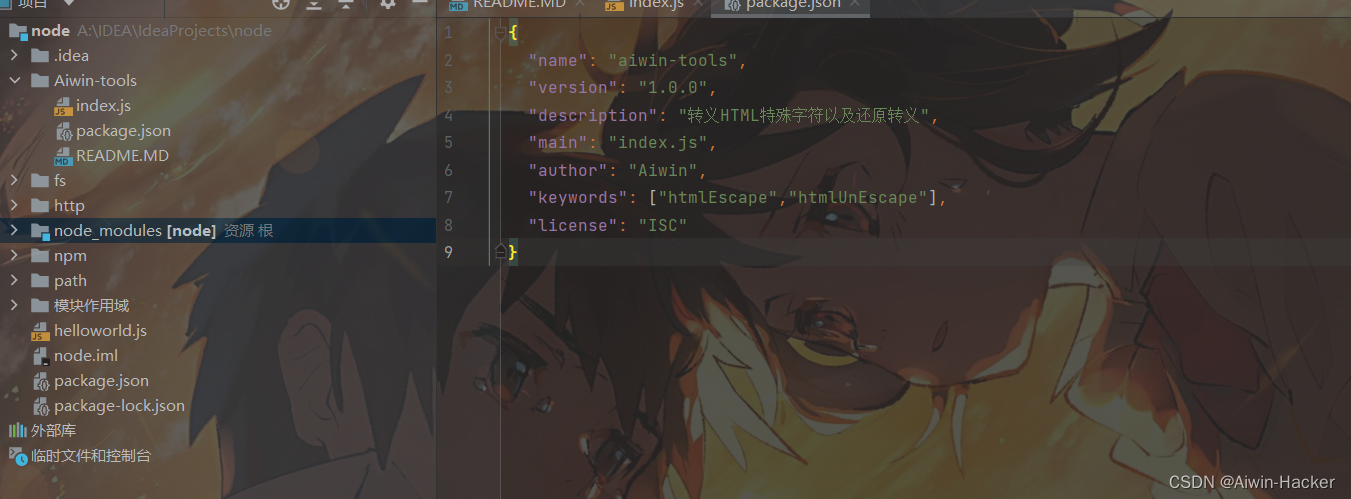
package.json的一些基本信息,包名,版本号,入口,关键词,协议
- 编写index.js代码
function htmlEscape(html) {return html.replace(/<|>|"|&/g,match=>{switch (match) {case "<":return "<"case ">":return ">"case '"':return """case "&":return "&"}})
}
function htmlUnEscape(html) {return html.replace(/<|>|"|&/g,match=>{switch (match) {case "<":return "<"case ">":return ">"case '"':return '"'case "&":return "&"}})
}
module.exports={htmlEscape,htmlUnEscape
}
- 测试:
const {htmlEscape, htmlUnEscape} = require("../Aiwin-tools");const htmlStr='<h1 title="test">这是一次测试<span>Test </span></h1>'const str=htmlEscape(htmlStr)
console.log(str)
console.log(htmlUnEscape(str))

- 编写README.MD文档
将包用法说清楚即可,没有特别的规范
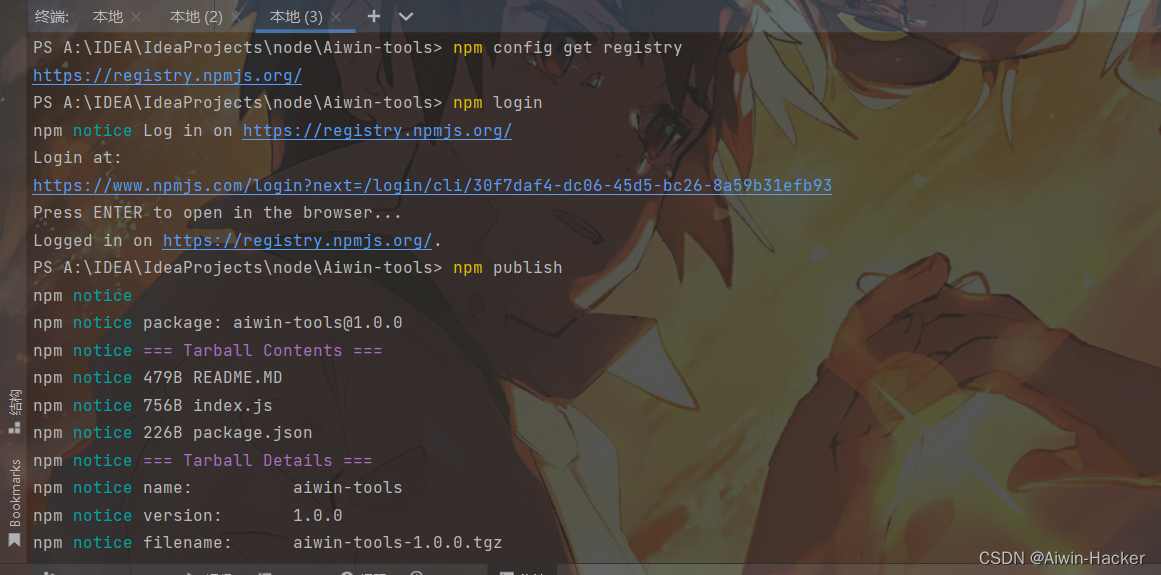
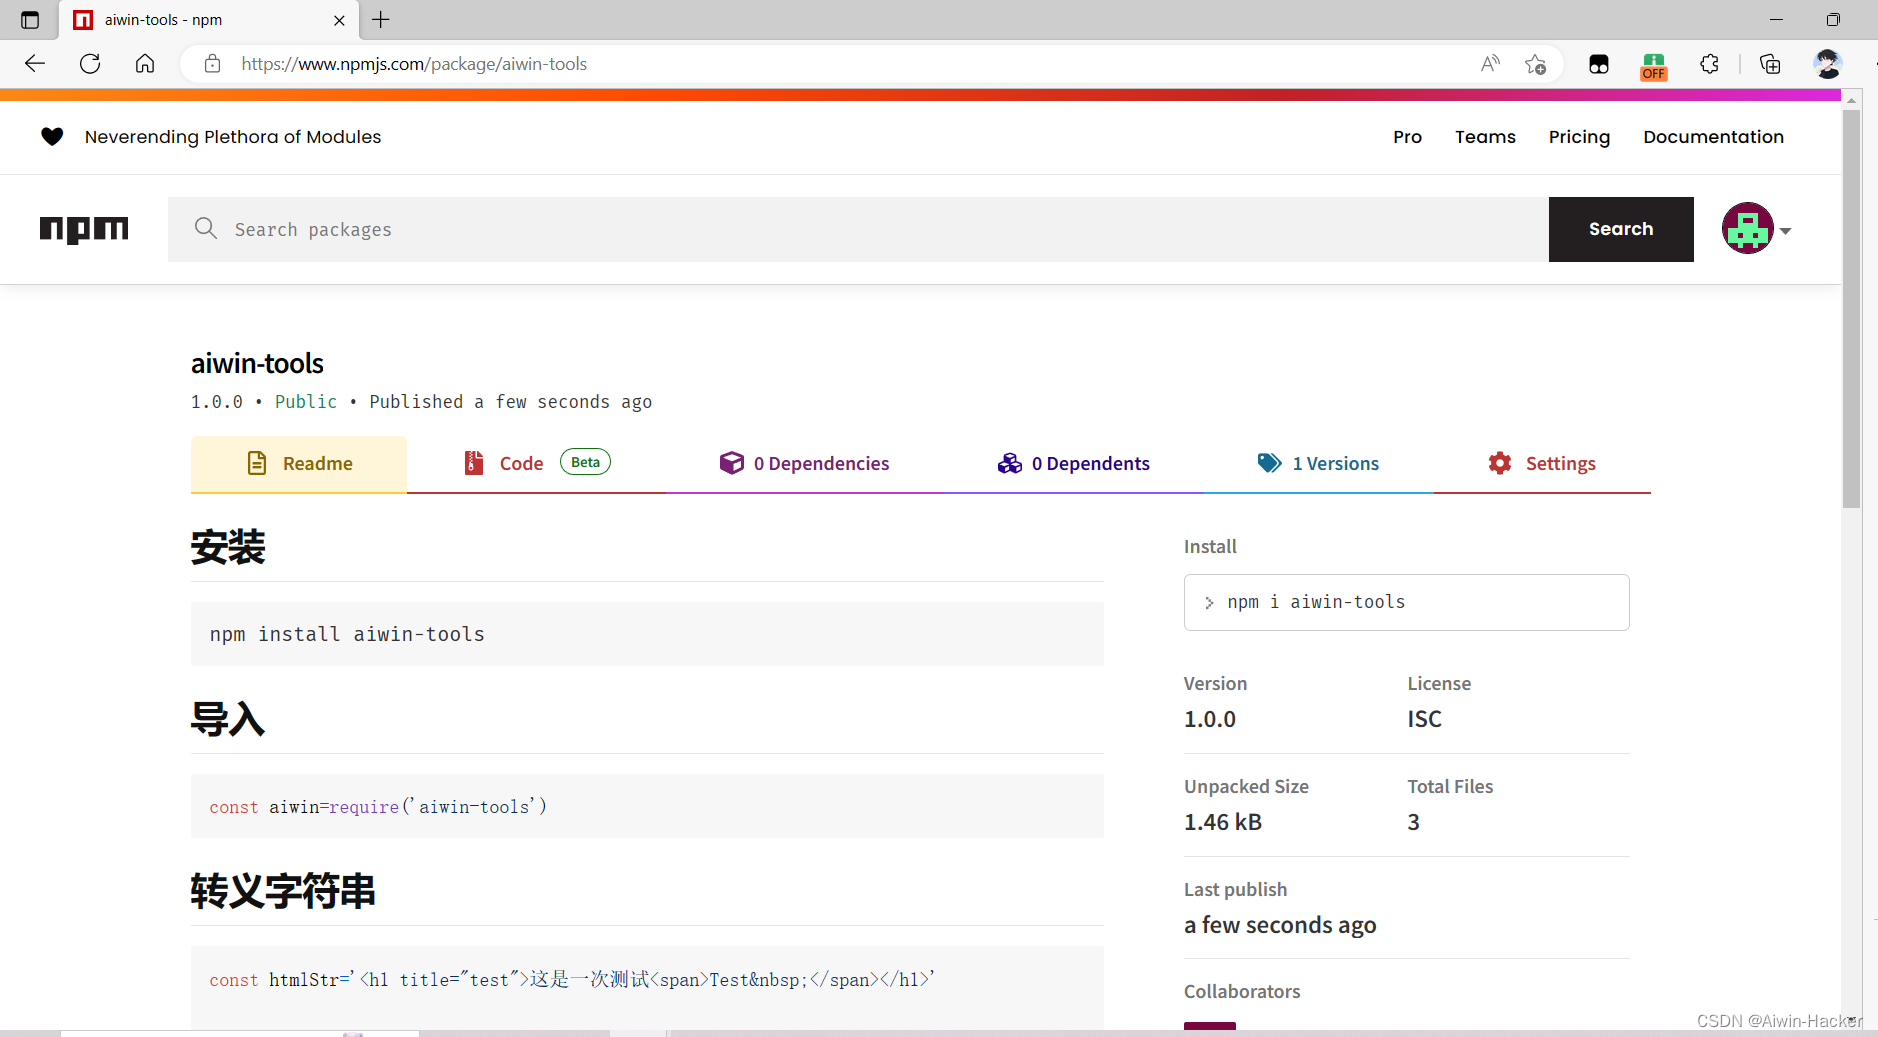
- 将包发布到npm
- 前往npm官网注册一个账号
- npm login登录npm账号,注意登录服务器必须为官网的服务器
- npm publish 发布包
- npm unpublish 包名 --force 删除发布72小时内发布的包

模块加载机制
- 模块加载机制,优先从缓存中加载,即多次调用require()不会导致模块代码被执行多次。
- 内置模块加载机制,内置模块的加载优先级最高,如require(‘fs’)始终返回内置的fs模块,即可node_modules目录下有相同的包叫fs。
- 自定义模块加载机制,使用require()加载自定义模块,必须指定./或…/开头的路径标识符,如果省略文件名,则会按照顺序为确切文件名,补.js,.json,.node扩展名加载。
- 第三方模块加载机制,如果传递给require()的模块标识符不是内置模块,也没有./或者…/开头,则会从当前目录向上寻找node_modules文件夹加载第三方模块。
- 目录作为模块标识符,会在被加载目录下寻找package.json文件,寻找main属性作为加载入口,若没有,则加载目录下index.js文件,若两者都没有,则报错。
六、Express
1.初识Express
- Express基于Node.js平台,快读、开放、极简的Web开发框架,通俗的说就是http模块的加强版,是基于http模块进一步封装出来,极大提高开发效率,专门用于创建Web服务器。
- 安装express安装到项目中,直接npm install下载即可。
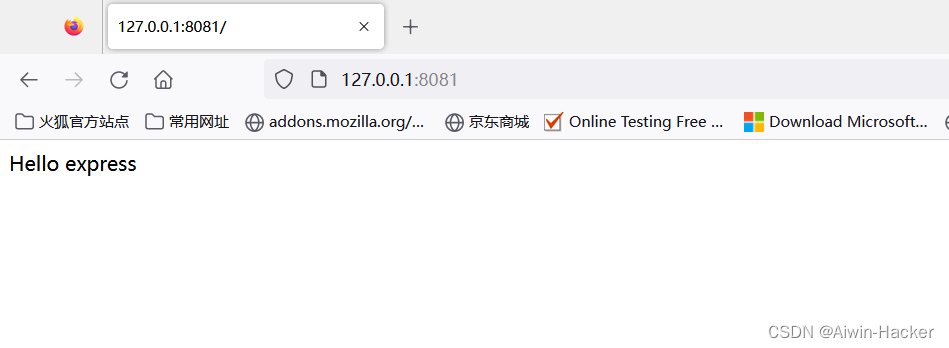
- 创建基本Web服务器
const express = require('express');
const app = express();app.get('/', function (req, res) {res.send('Hello express');
})const server = app.listen(8081, function () {const host = server.address().address;const port = server.address().port;console.log("express server running at https://%s:%s", host, port)});
GET/POST
const express = require('express');
const bodyParser = require('body-parser');
const app = express();
app.use(bodyParser.urlencoded({ extends: false }))
app.use('./public',express.static('public'))
app.get('/', function (req, res) {res.sendFile( __dirname + "/public/" + "index.html" );
})app.post('/post',function (req,res) {let response={"username":req.body.username,"password":req.body.password}res.end(JSON.stringify(response))
})//动态参数
app.get('/user/:username/:password',function (req,res) {res.send(req.params)
})
const server = app.listen(8081, function () {const {address,port} = server.address();console.log("express server running at https://%s:%s", address, port)});
<!doctype html>
<html>
<head><meta charset="utf-8"><title>Express</title>
</head>
<body>
<form action="http://127.0.0.1:8081/post" method="POST">Username: <input type="text" name="username">  <br>Password: <input type="text" name="password"><input type="submit" value="Submit">
</form>
</body>
</html>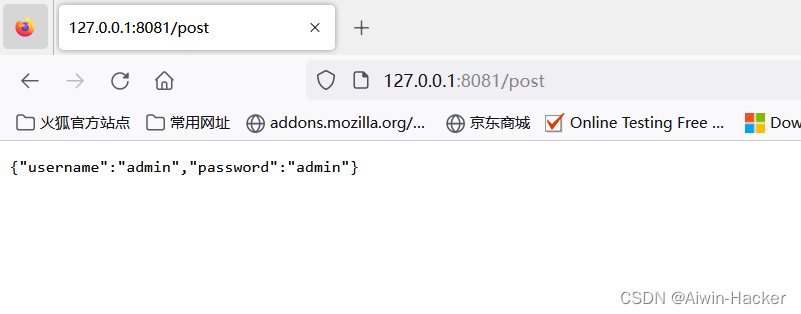
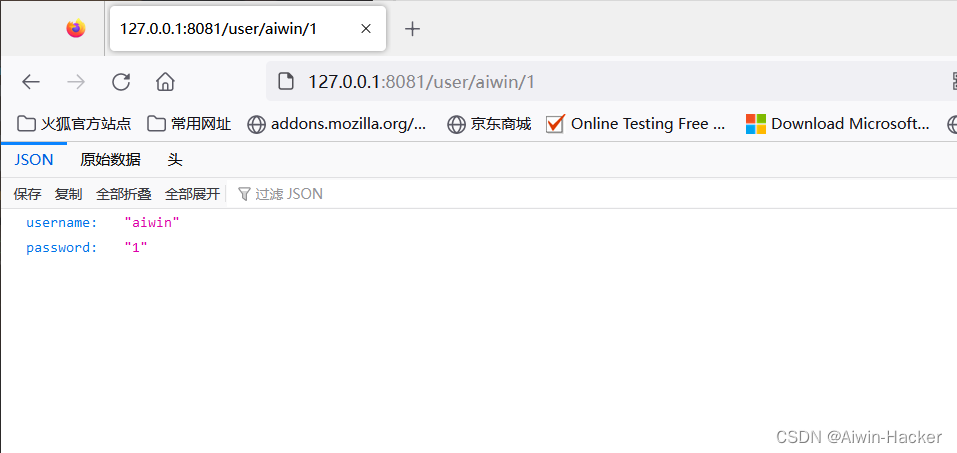
express.static()创建静态资源服务器,如果有多个静态资源目录,会按添加顺序查找所需文件,注意post请求中的body要解析才能提取参数。
nodemon
-
用于在编写调试Node.js项目时,修改了项目代码,工具会自动监听项目文件变动,当代码被修改后,自动重启项目,方便开发和调试,类似于springboot的devtools。
-
安装,npm install -g nodemon
-
使用nodeman,将启动项目的node命令替换为nodeman命令即可。
2.路由模块化
为了方便路由进行模块化管理,Express不建议将路由直接挂载到app,推荐将路由抽离为单独模块,步骤如下:
- 创建路由模块对应的js文件
- 调用express.Router()函数创建路由对象
- 向路由对象上挂载具体路由
- 使用module.exports向外共享路由对象
- 使用app.use()函数注册路由模块
router.js:
const express=require('express')const router=express.Router()router.get('/get',function (req,res) {res.send('这是Get请求')
})router.post('/post',function (req,res) {res.send('这是post请求')
})
module.exports=router
express.js:
const router=require('./router')
const express=require('express')
const app=express()app.use(router)const server = app.listen(8081, function () {const {address,port} = server.address();console.log("express server running at https://%s:%s", address, port)});
3.中间件
- 当一个请求到达Express的服务器之后,可以连续调用多个中间件,从而对这次请求进行预处理。
- Express中间件,本质上就是一个function处理函数,格式如下function(req,res,next),必须包含next参数,next表示把流转关系转交给下一个中间件或路由。
- 全局中间件:到达服务器后,都会触发的中间件。
例子:登录拦截器
const express=require('express')
const app=express()
const bodyParser = require('body-parser');
const cookieParser = require("cookie-parser");app.use(bodyParser.urlencoded({ extends: false }))
app.use(express.static('public'))
app.use(cookieParser())
const middleware=function (req,res,next) {let url=req.urlconst cookie=req.cookiesif(url!=='/login'&&cookie.name!=='Aiwin'){res.location('/')res.setHeader('Location','/')res.send(301)}next()
}
app.use(middleware)app.get('/',function (req,res) {res.sendFile(__dirname+"index.html")
})
app.post('/login',function(req,res){const username=req.body.usernameconst password=req.body.passwordif(username==='admin'&&password==='admin'){res.cookie("name","Aiwin",{maxAge:3600})res.setHeader('Location','/admin')res.location('/admin')res.send(301)}})
app.get('/admin',function (req,res) {res.sendFile(__dirname+"/public/admin.html")
})
const server = app.listen(8082, function () {const {address,port} = server.address();console.log("express server running at https://%s:%s", address, port)});
admin.html:
<!doctype html>
<html>
<head><meta charset="utf-8"><title>Express</title>
</head>
<body>
<form action="http://127.0.0.1:8082/login" method="POST">Username: <input type="text" name="username">  <br>Password: <input type="text" name="password"><input type="submit" value="Submit">
</form>
</body>
</html>
admin.html:
<!DOCTYPE html>
<html lang="en">
<head><meta charset="UTF-8"><title>Admin</title>
</head>
<body>
<h1>这是登录后的页面</h1>
</body>
</html>
所有的请求都会经过中间件,在没有登录成功,获取cookie的时候,无法访问/admin页面
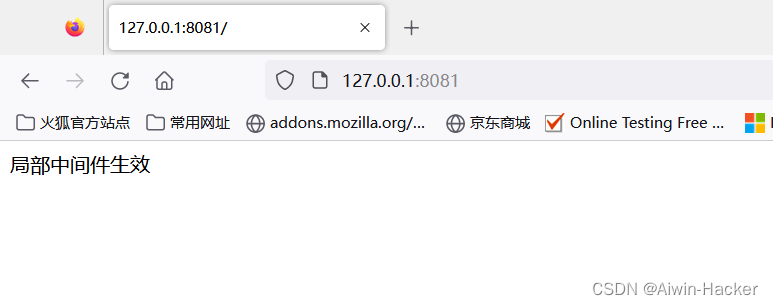
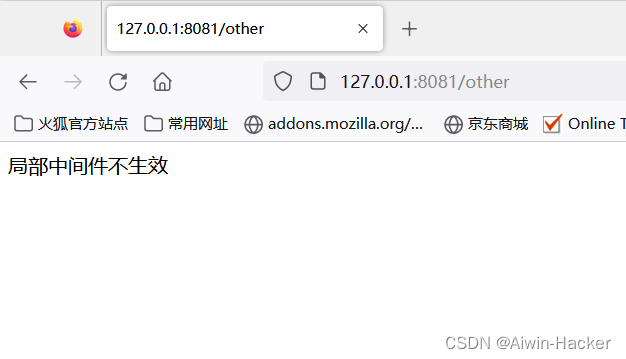
- 局部中间件,不使用app.use()定义中间件,使用app.METHOD(PATH,中间件,function)定义局部中间件,只对该路由生效。
const express=require('express')const app=express()
const mw=function (req,res,next) {req.a='局部中间件生效'next()
}
app.get('/',mw,function (req,res) {res.send(req.a)
})
app.get('/other',function (req,res) {res.send('局部中间件不生效')
})const server = app.listen(8081, function () {const {address,port} = server.address();console.log("express server running at https://%s:%s", address, port)});
6. 中间件注意事项
- 在路由之前注册中间件(错误级别除外)。
- 中间件一定要执行next()函数。
- 连续调用多个中间件,多个中间件共享req,res对象。
中间件分类
- 应用级别中间件,通过app实例上的中间件。
- 路由级别中间件,绑定到Router()上的中间件。
- 错误级别中间件,捕获整个项目发生的异常作物,防止项目崩溃。
const express = require('express')
const app = express()// 注意:除了错误级别的中间件,其他的中间件,必须在路由之前进行配置
// 通过 express.json() 这个中间件,解析表单中的 JSON 格式的数据
app.use(express.json())
app.use(express.urlencoded({extended:false}))
app.post('/', (req, res) => {// 在服务器,可以使用 req.body 这个属性,来接收客户端发送过来的请求体数据// 默认情况下,如果不配置解析表单数据中间件,则 req.body 默认等于 undefinedconsole.log(req.body)res.send('OK')
})
app.post('/url',function (req,res) {console.log(req.body)res.send('OK')
})
app.listen(8081)
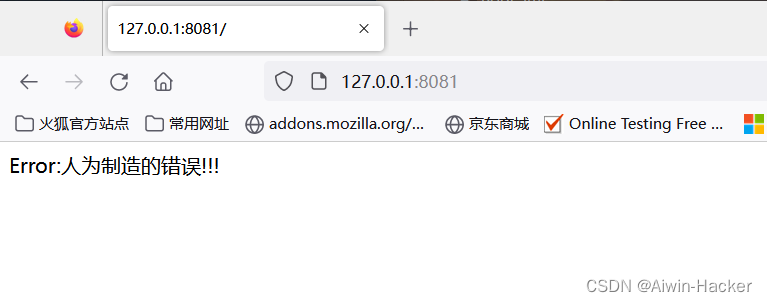
错误级别中间件注册到路由之后,res.send()没有执行,因为错误中间件中断掉了后面的执行。
- 内置中间件
| 中间件 | 作用 |
|---|---|
| express.static | 托管静态资源中间件 |
| express.json | 解析JSON格式请求体数据 |
| express.urlencoded | 解析URL-encoded格式请求体数据 |
const express = require('express')
const app = express()// 注意:除了错误级别的中间件,其他的中间件,必须在路由之前进行配置
// 通过 express.json() 这个中间件,解析表单中的 JSON 格式的数据
app.use(express.json())app.post('/', (req, res) => {// 在服务器,可以使用 req.body 这个属性,来接收客户端发送过来的请求体数据// 默认情况下,如果不配置解析表单数据中间件,则 req.body 默认等于 undefinedconsole.log(req.body)res.send('OK')
})app.listen(8081)
- 第三方中间件,非官方内置,由别人开发,可以进行下载使用的,跟第三方模块差不多。
自定义中间件
手动模拟express.urlencoded中间件,解析POST提交到服务器的表单数据。
- 编写代码
- 封装为模块
自定义中间件.js
const querystring = require("querystring");
const mw=function (req,res,next) {let body=''//监听data事件,把数据切割,避免数据太大,无法接受req.on('data',(chunk)=>{body+=chunk})req.on('end',()=>{req.body=querystring.parse(body)next()})
}module.exports=mw
express.js
const express=require('express')
const mw=require('./自定义中间件')const app=express()
app.use(express.static('public'))
app.get('/',(req,res)=>{console.log(1)res.sendFile(__dirname+"index.html")
})
app.post('/login',mw,(req,res)=>{let response={"name":req.body.name,"gender":req.body.gender}res.send(response)
})app.listen(3000)

4. 跨域问题
CORS相关响应头:
| 名称 | 作用 |
|---|---|
| Access-Control-Allow-Origin | 只允许访问该资源的外域URL |
| Access-Control-Allow-Headers | 仅支持服务端发送9个请求头,设置此参数额外增加 |
| Access-Control-Allow-Methods | 允许客户端请求服务器的方法 |
CORS跨域请求资源分类:
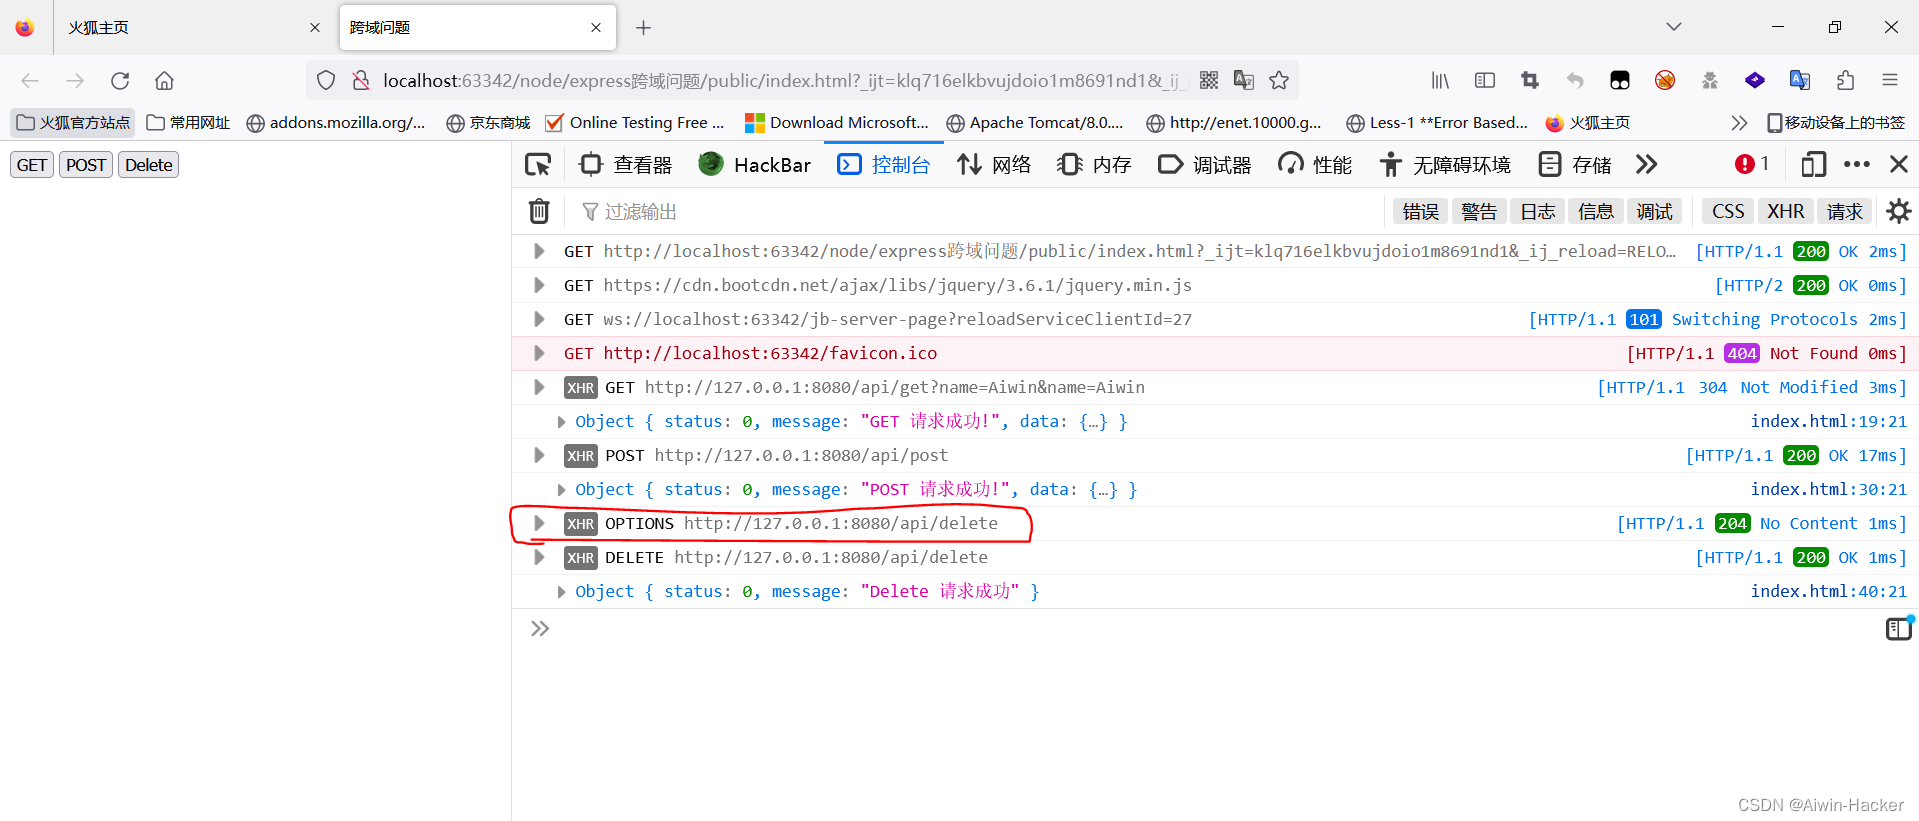
- 简单请求,只允许get,post,head,且请求头不超过合规的9个字段,无自定义头部。(一次)
- 预检请求,请求方式为get,post,head外的请求,请求头包含自定义头部,向服务器发送application/json格式数据。
- 浏览器会发送OPTION请求进行预检,以获知服务器是否允许该实际请求,服务器响应预检请求后,才会发送真正的请求。(两次)
解决方案:1. CORS中间件,JSONP(有缺陷,只支持POST请求)
npm install cors直接使用
router.js:
const express=require('express')
const router=express.Router()router.get('/get',function (req,res) {const query=req.queryres.send({status:0,message:'GET 请求成功!',data:query})
})
router.post('/post',function (req,res) {const query=req.bodyres.send({status:0,message:'POST 请求成功!',data:query})
})
router.delete('/delete',function (req,res) {res.send({status:0,message:'Delete 请求成功'})
})
module.exports=router
express.js:
const express=require('express')
const app=express()
const router=require('./router')
const cors=require('cors')
app.use(cors())
app.use(express.urlencoded({extended:false}))
app.use('/api',router)
app.listen(8080)
index.html:
<!DOCTYPE html>
<html lang="en">
<head><meta charset="UTF-8"><title>跨域问题</title><script src="https://cdn.bootcdn.net/ajax/libs/jquery/3.6.1/jquery.min.js"></script>
</head>
<body>
<button id="btnGet">GET</button>
<button id="btnPost">POST</button>
<button id="btnDelete">Delete</button>
<script>
$('#btnGet').on('click',function () {$.ajax({type:'GET',url:'http://127.0.0.1:8080/api/get?name=Aiwin',data:{name:'Aiwin'},success:function (res) {console.log(res)}})
})
$('#btnPost').on('click',function () {$.ajax({type:'POST',url:'http://127.0.0.1:8080/api/post',data:{name:'Aiwin'},success:function (res) {console.log(res)}})
})
$('#btnDelete').on('click',function () {$.ajax({type:'DELETE',url:'http://127.0.0.1:8080/api/delete',success:function (res) {console.log(res)}})
})
</script>
</body>
</html>
七、Mysql模块
安装与配置
- 安装操作Mysql数据库的第三方模块
- 通过mysql模块连接到Mysql数据库
- 通过mysql模块执行SQL语句
const mysql=require('mysql')const database=mysql.createPool({host:'127.0.0.1',   //数据库的IP地址user:'root',        //登录用户名password:'root',    //登录密码database:'node'     //要操作的数据库
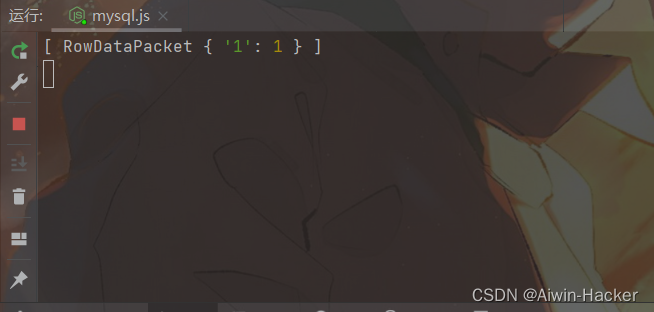
})//测试mysql是否连接成功
database.query('SELECT 1',(err,results)=>{if(err){return console.log(err.message)}console.log(results)
})
基本使用
mysql模块进行mysql的操作,其实就是通过数据库语句对数据库进行查询,只不过mysql模块负责与数据库交互。
const connect=require('mysql')const database=connect.createPool({host:'127.0.0.1',   //数据库的IP地址user:'root',        //登录用户名password:'root',    //登录密码database:'node'     //要操作的数据库
})//SELECT查询
database.query('select *from users',(err,results)=>{if(err){return console.log(err.message)}console.log(results)
})//INSERT插入数据
const user={username:'Tom',password:'IamTom'}
const sqlStr=`INSERT INTO users (username,password) VALUES (?,?)`
//const sqlStr=`INSERT INTO users SET?`   插入数据字段对应的时候
//database.query(sqlStr,user,function)
database.query(sqlStr,[user.username,user.password],(err,results)=>{if(err){return console.log(err.message)}if(results.affectedRows===1){ //results是一个对象,内置了fieldCount、affectedRows、InsertId、serverStatus、 warningCount、 message、 protocol41、changedRows属性console.log('数据插入成功')}
})//更新数据库对象
const UpdateUser={id:2,username:'Jerry',password:'IamJerry'}
const updateStr=`UPDATE users SET username=?,password=? where id=?`
// const updateStr=`UPDATE users SET ? where id=?`
database.query(updateStr,[UpdateUser.username,UpdateUser.password,UpdateUser.id],(err,results)=>{if(err){return console.log(err.message)}if(results.affectedRows===1){console.log('更新成功')}
})//Delete删除
const DeleteStr=`Delete FROM users where id=?`
database.query(DeleteStr,2,(err,results)=>{if(err){return console.log(err.message)}if(results.affectedRows===1){console.log('删除成功')}
})
删除推荐使用标记删除,即使用status等字段标记删除,避免误操作delete直接真删除了
Web开发模式
- 服务器渲染的Web开发:服务器发送给客户端HTML页面,是在服务器通过字符串拼接,动态生成的,不需要使用ajax额外请求数据
优点:
- 前端耗时少,服务器负责动态生成HTML内容,浏览器直接渲染页面即可。
- 利于SEO,服务器响应的是完整的HTML页面内容,爬虫更容易爬取。
缺点:
- 占用服务器资源,服务器端完成HTML页面拼接,如果请求较多,服务器压力过大。
- 不利于前后端分离,开发效率低,使用服务器渲染无法完成分工合作,对于前端复杂度高的项目,不利于开发。
- 前后端分离的Web开发:依赖于Ajax技术的应用,后端只负责提供API接口,前端使用ajax调用接口的技术。
优点:
- 开发体验好,利于分工,前端负责UI开发,后端专注于API开发,前端选择性更多
- 用户体验好,实现页面局部刷新。
- 减轻服务器端渲染压力。
缺点:
- 不利于SEO,完整的HTML页面需要在客户端动态拼接完成,爬虫无法爬取页面有效信息。
Session认证
通过session-express中间件使用session。
const express=require('express')
const app=express()
const session=require('express-session')
app.use(express.urlencoded({extended:false}))
app.use(session({secret:'Aiwin',resave:false, //是否允许并行发送多个请求saveUninitialized:true //初始化session时是否保存到存储。默认为true
}))
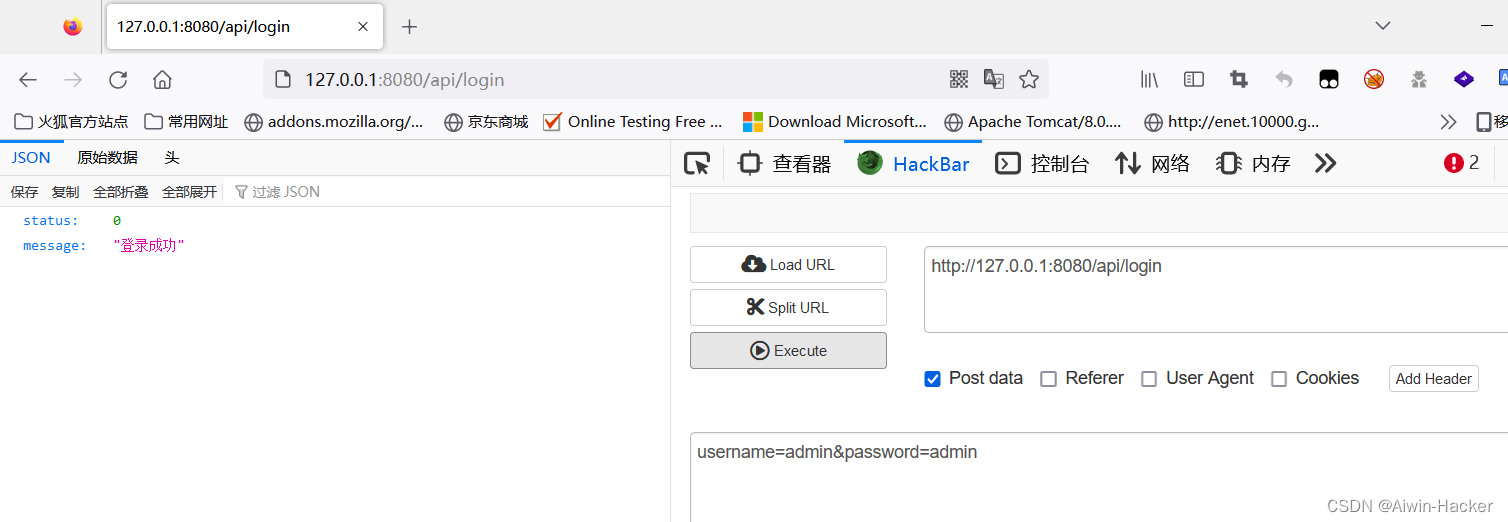
app.post('/api/login',(req,res)=>{if(req.body.username!=='admin'||req.body.password!=='admin'){return res.send({status:1,message:'登录失败'})}req.session.user=req.bodyreq.session.islogin=trueres.send({status:0,message:'登录成功'})})
app.get('/api/username',(req,res)=>{if(!req.session.islogin){return res.send({status:1,message:'fail'})}return res.send({status:0,username:req.session.user})
})
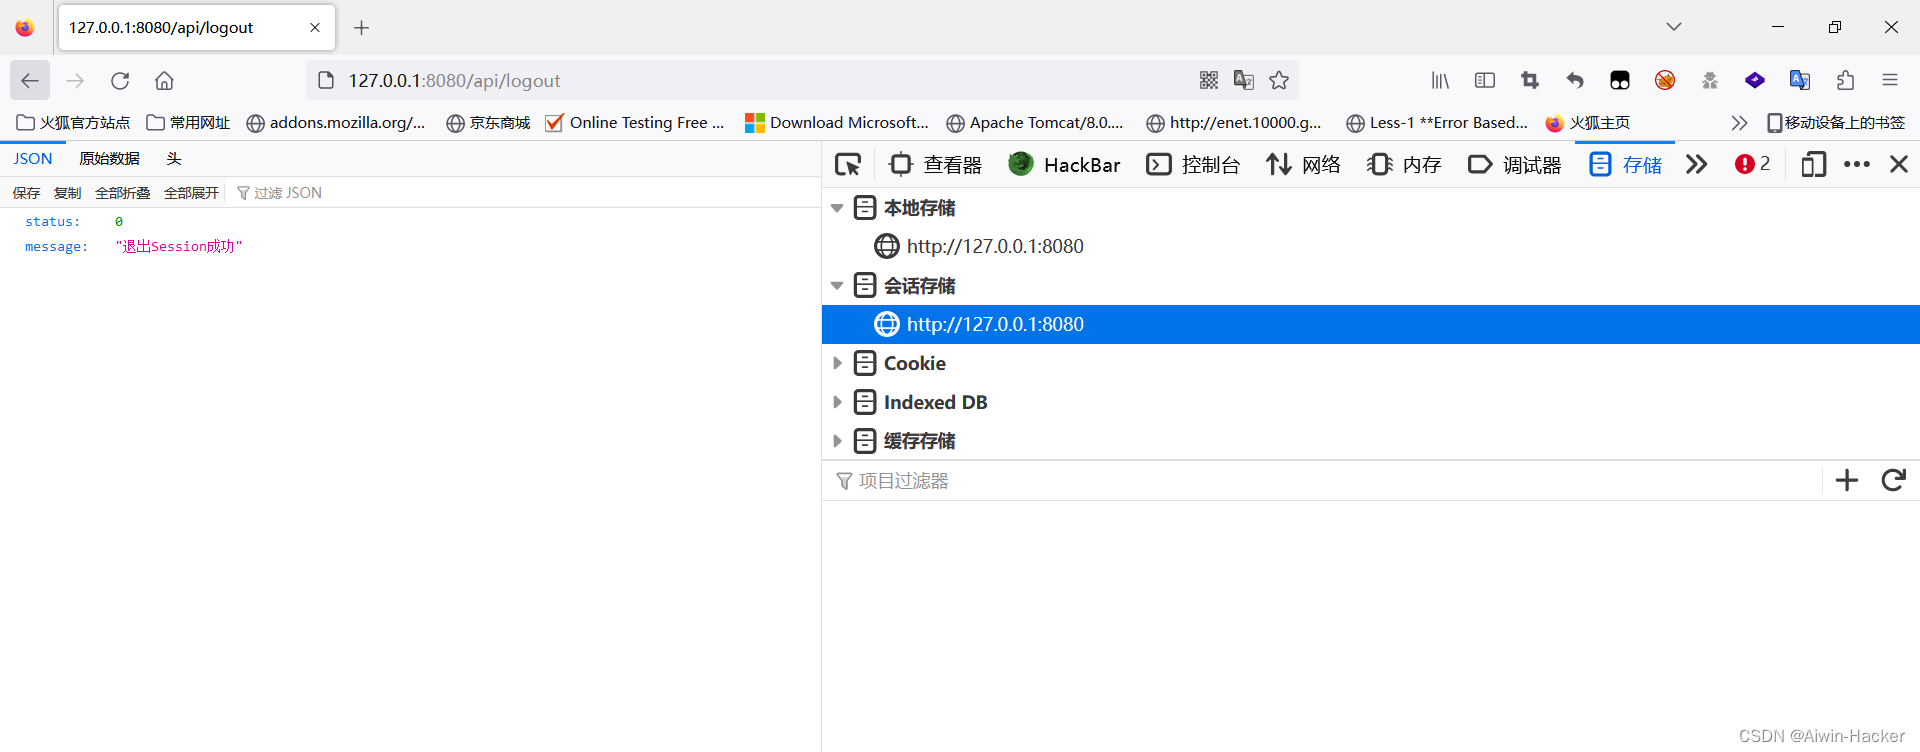
app.get('/api/logout',(req,res)=>{req.session.destroy()res.send({status:0,message:'退出Session成功'})
})
app.listen(8080)
未登录时:

登录后:

JWT
-
Session认证机制需要配合Cookie才能实现,由于Cookie不支持跨域访问,当涉及前端跨域请求后端接口时,需要使用很多额外的配置,才能实现Session认证,此时推荐使用JWT。
-
工作原理:用户的信息通过Token字符串的形式,保存在客户端浏览器,服务器通过还原token字符串的形式来认证用户身份。
-
JWT组成部分:
JWT=Header(头部).Payload(有效载荷).Signature(签名)
| 部分 | 说明 |
|---|---|
| 头部Header | JWT类型+加密算法,JWT主要加密算法又HS256 RS256 |
| 载荷Payload | 携带存放的数据和注册声明,包括签发者,接收者,签发时间,过期时间等 |
| 签名Signature | 使用头部定义的加密算法和密钥生成对数据进行加密生成 |
- 使用中间件
jsonwebtoken 生成JWT字符串
express-jwt 用于将JWT字符串解析还原成JSON对象
const express=require('express')
const jwt=require('jsonwebtoken')
const {expressjwt: expressJWT} = require("express-jwt");
const bodyParser=require('body-parser')
const app=express()
app.use(bodyParser.urlencoded({ extends: false }))
const secretKey='Aiwin'
//.unless()指定那些接口不需要访问权限
app.use(expressJWT({secret: secretKey,algorithms: ["HS256"],}).unless({path:[/^\/api\//]})
);
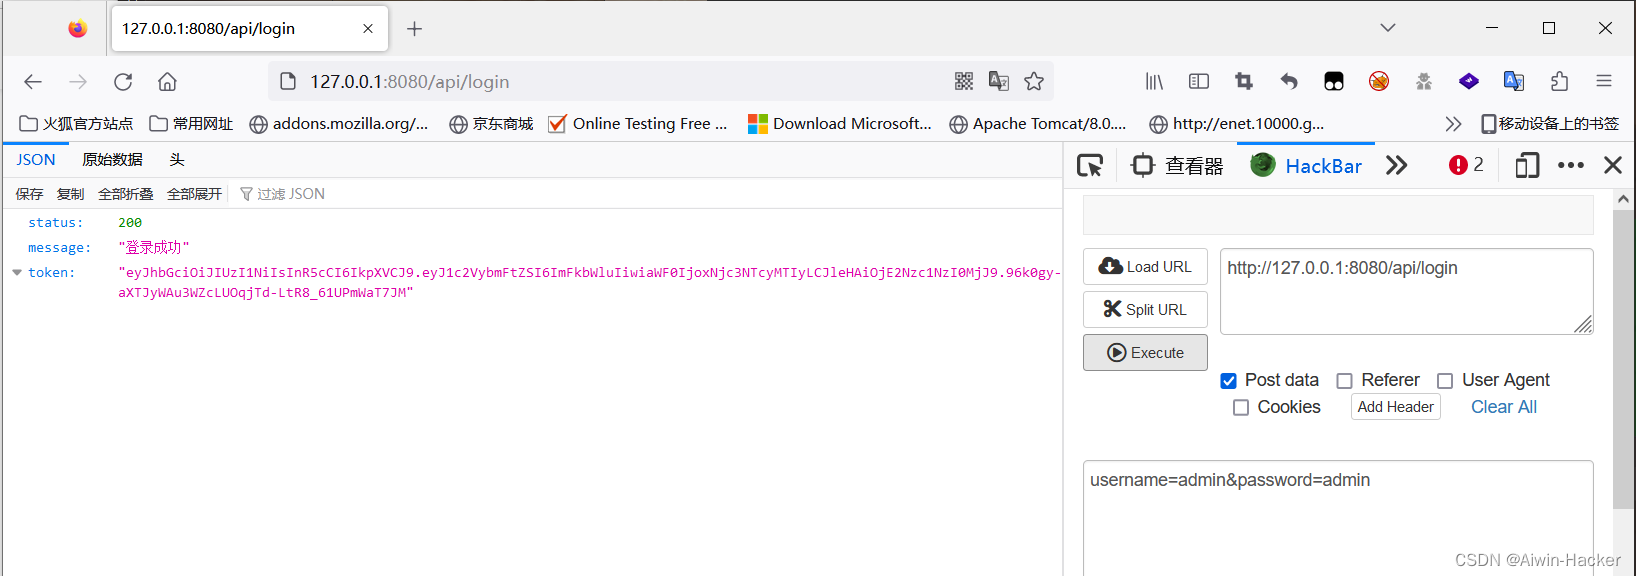
app.post('/api/login',(req,res)=>{const user=req.bodyif(user.username!=='admin'||user.password!=='admin'){return res.send({status:1,message:'登录失败'})}const token=jwt.sign({username:user.username},secretKey,{expiresIn:'300s'})res.send({status:200,message:'登录成功',token:token})})
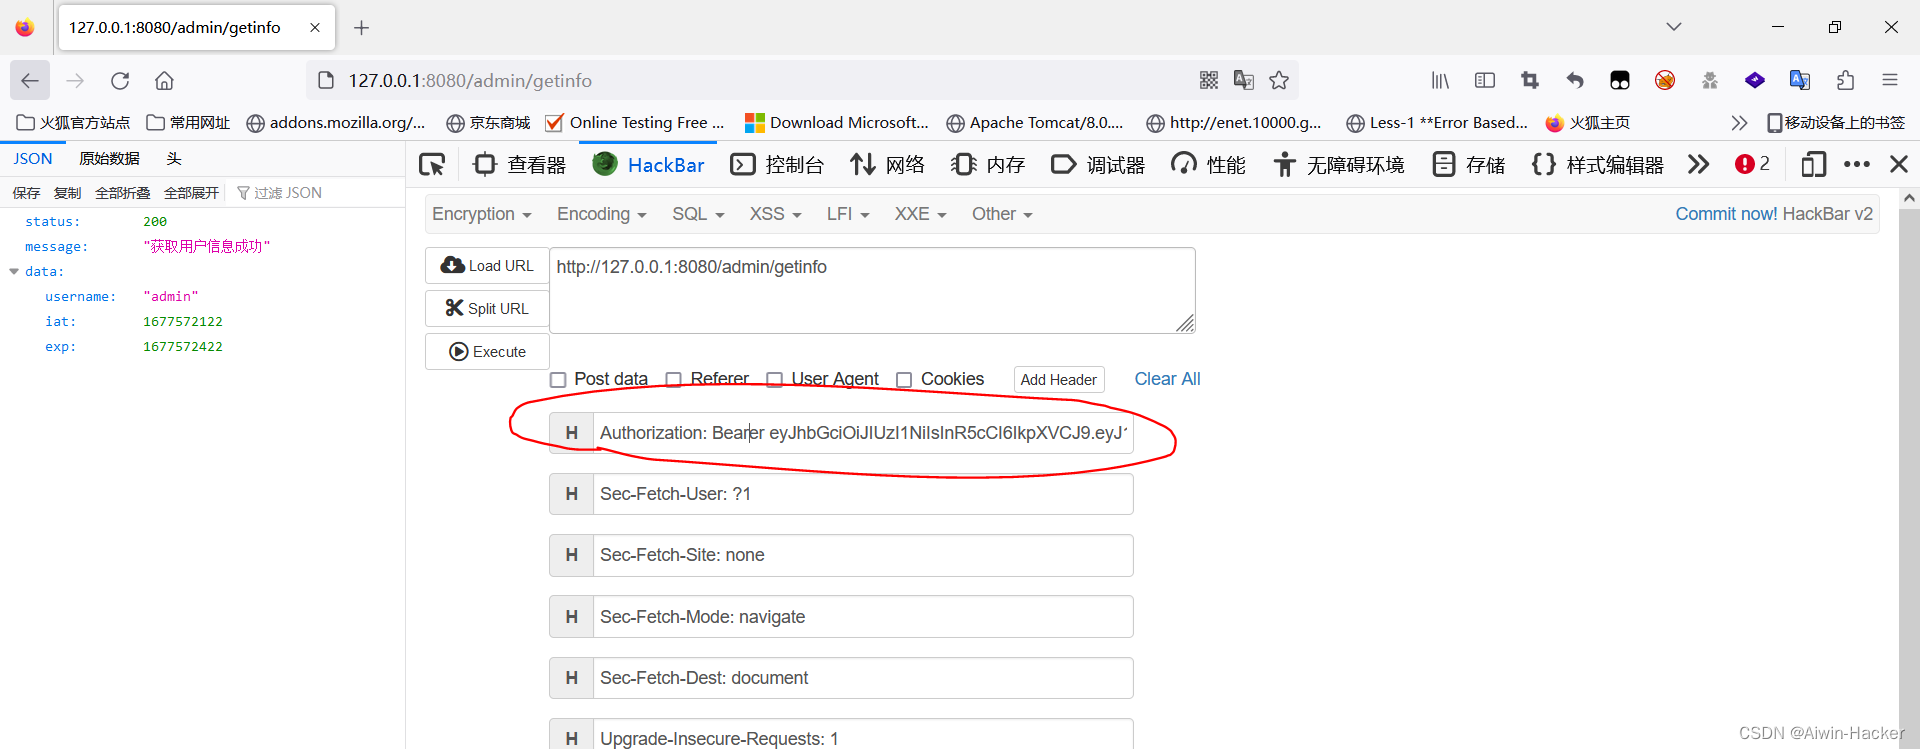
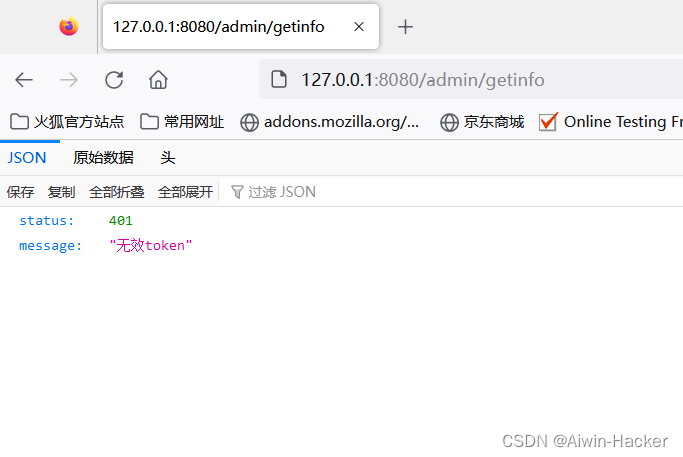
app.get('/admin/getinfo',(req,res)=> {res.send({status:200,message:'获取用户信息成功',data:req.auth})
})
//捕捉解析JWT解析失败
app.use((err,req,res,next)=>{if(err.name==='UnauthorizedError'){return res.send({status:401,message:'无效token'})}res.send({status:500,message:'未知错误'})
})
app.listen(8080)
八、multer模块
用于处理multipart/form-data类型的表单数据,它主要用于上传文件
例子:
app.js:
const express=require('express')
const app=express()
app.use('/multer',require("./multer"));app.listen(3000)
multer.js:
const router = require("express").Router();
const multer = require("multer");
const path=require('path')
path.extname('jpg')
const fs=require('fs')
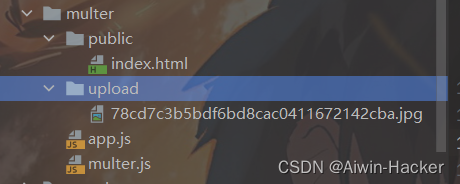
const upload = multer({dest:"./upload"//上传文件存放路径
});const singleMidle = upload.single("singleFile");//一次处理一张
//可同时处理多个上传控件的上传
//实际项目中根据自己的情况,使用以上三种用法之一即可!
router.get("/",(req,res)=>{res.sendFile(path.join(__dirname,'/public/index.html'))
})
router.post("/singup", singleMidle, function (req, res) {let oldname=req.file.pathlet newname=req.file.path+ path.extname(req.file.originalname)fs.renameSync(oldname,newname)res.send(req.file);
});module.exports = router;
index.html:
<!DOCTYPE html>
<html>
<head><meta charset="utf-8"><title>multer的使用方案</title>
</head>
<body>
<form class="" action="/multer/singup" method="post" enctype="multipart/form-data"><!--enctype="multipart/form-data"表示不会对数据本身编码,multer只处理enctype="multipart/form-data"的表单数据--><input type="file" name="singleFile" value=""><input type="submit" name="" value="上传1">
</form>
</body>
</html>

九、大事件项目
参考文档:某🐎大事件项目
完成的API接口:
链接:https://pan.baidu.com/s/1CXZvE1uq7AFo5iggCDjKFg?pwd=s483
提取码:s483
十、总结
学的东西都比较基础,上手也是非常快,最后的项目也是相当于把前面复习的都用了一遍,感觉NodeJS开发效率也是很高,有很多第三方中间件能直接引用完成很多东西,不需要再自己写,算是站在别人的肩膀上,自己学的比较粗糙,因为只要求自己能看懂基本的代码即可,真正要学好还得细学。
相关文章:

某马程序员NodeJS速学笔记
文章目录前言一、什么是Node.js?二、fs文件系统模块三、Http模块四、模块化五、开发属于自己的包模块加载机制六、Express1.初识ExpressGET/POSTnodemon2.路由模块化3.中间件中间件分类自定义中间件4. 跨域问题七、Mysql模块安装与配置基本使用Web开发模式Session认证JWT八、m…...
 完结 静态资源原理)
SpringMVC DispatcherServlet源码(6) 完结 静态资源原理
阅读源码,分析静态资源处理器相关组件: 使用SimpleUrlHandlerMapping管理url -> 处理器映射关系spring mvc使用WebMvcConfigurationSupport注入SimpleUrlHandlerMapping组件DelegatingWebMvcConfiguration可以使用WebMvcConfigurer的配置静态资源url…...

2023年全国最新会计专业技术资格精选真题及答案9
百分百题库提供会计专业技术资格考试试题、会计考试预测题、会计专业技术资格考试真题、会计证考试题库等,提供在线做题刷题,在线模拟考试,助你考试轻松过关。 四、材料题 1.某企业为增值税一般纳税人,2019年12月初“应付职工薪酬…...

Web3中文|把Web3装进口袋,Solana手机Saga有何魔力?
2月23日,Solana Web3手机Saga发布新的消息,将推出NFT铸造应用程序Minty Fresh。在Minty Fresh,用户仅需轻点并完成拍摄,就可以直接在手机中进行NFT铸造,并在几秒钟内将其转换为链上NFT,NFT还可以发布在 Ins…...
【配电网优化】基于串行和并行ADMM算法的配电网优化研究(Matlab代码实现)
💥💥💞💞欢迎来到本博客❤️❤️💥💥 🏆博主优势:🌞🌞🌞博客内容尽量做到思维缜密,逻辑清晰,为了方便读者。 ⛳️座右铭&a…...
数据结构初阶 -- 顺序表
数据结构初阶 链表的讲解 目录 一. 线性表 1.1 定义 1.2 特点 二. 顺序表 2.1 定义 2.2 代码 2.3 功能需求 2.4 静态顺序表的特点以及缺点 2.5 动态的顺序表 2.6 动态顺序表接口的实现 三. 代码 头文件 主文件 一. 线性表 1.1 定义 线性表(linear li…...
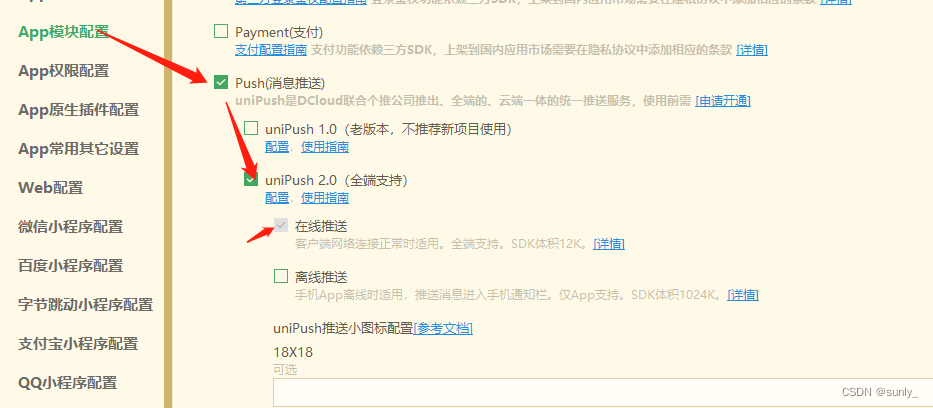
uniapp:3分钟搞定在线推送uni.createPushMessage,uni.onPushMessage
安卓端 在线推送功能演示: 1、dcloud后台申请开通uniPush dcloud后台 (1):找到我的应用 (2):点进去后,各平台信息,点击新增 (3):填…...
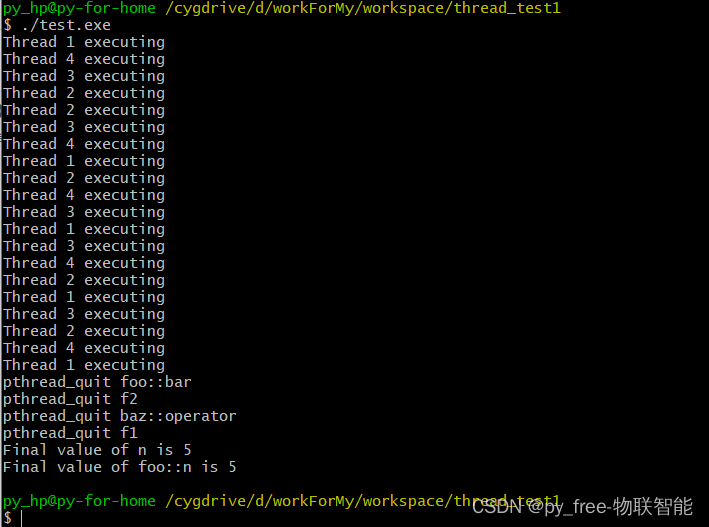
C/C++开发,无可避免的多线程(篇一).跨平台并行编程姗姗来迟
一、编译环境准备 在正式进入c/c多线程编程系列之前,先来搭建支持多线程编译的编译环境。 1.1 MinGW(win) 进入Downloads - MinGW-w64下载页面,选择MinGW-w64-builds跳转下载, 再次进行跳转: 然后进入下载页…...

如何把照片的底色修改为想要的颜色
如何给照片更换底色?其实有可以一键给照片更换底色的 APP ,但是几乎都要收费。如果想要免费的给照片更换底色的话,分享两种简单便捷的方法给你。掌握了这项技能,以后就不用店花钱处理啦!1、免费!线上快速 给…...

【高效办公】批量生成固定模板的文件夹名称
老师让你按照他的要求生成每位学生的文件夹,你是学委,让你马上完成该任务,但你又不想是手动一个一个码字,因此聪明的你就看到了本篇文章啦!!! 虽说一个人懒惰,并不是好的事情。 但这个似乎合情合理啊~ 然后,就动手想办法,一开始就真的打算码字了。。 思路 在实际开…...

redis的集群方式
1.主从复制 主从复制原理: 从服务器连接主服务器,发送SYNC命令; 主服务器接收到SYNC命名后,开始执行BGSAVE命令生成RDB文件并使用缓冲区记录此后执行的所有写命令; 主服务器BGSAVE执行完后,向所有从服务…...
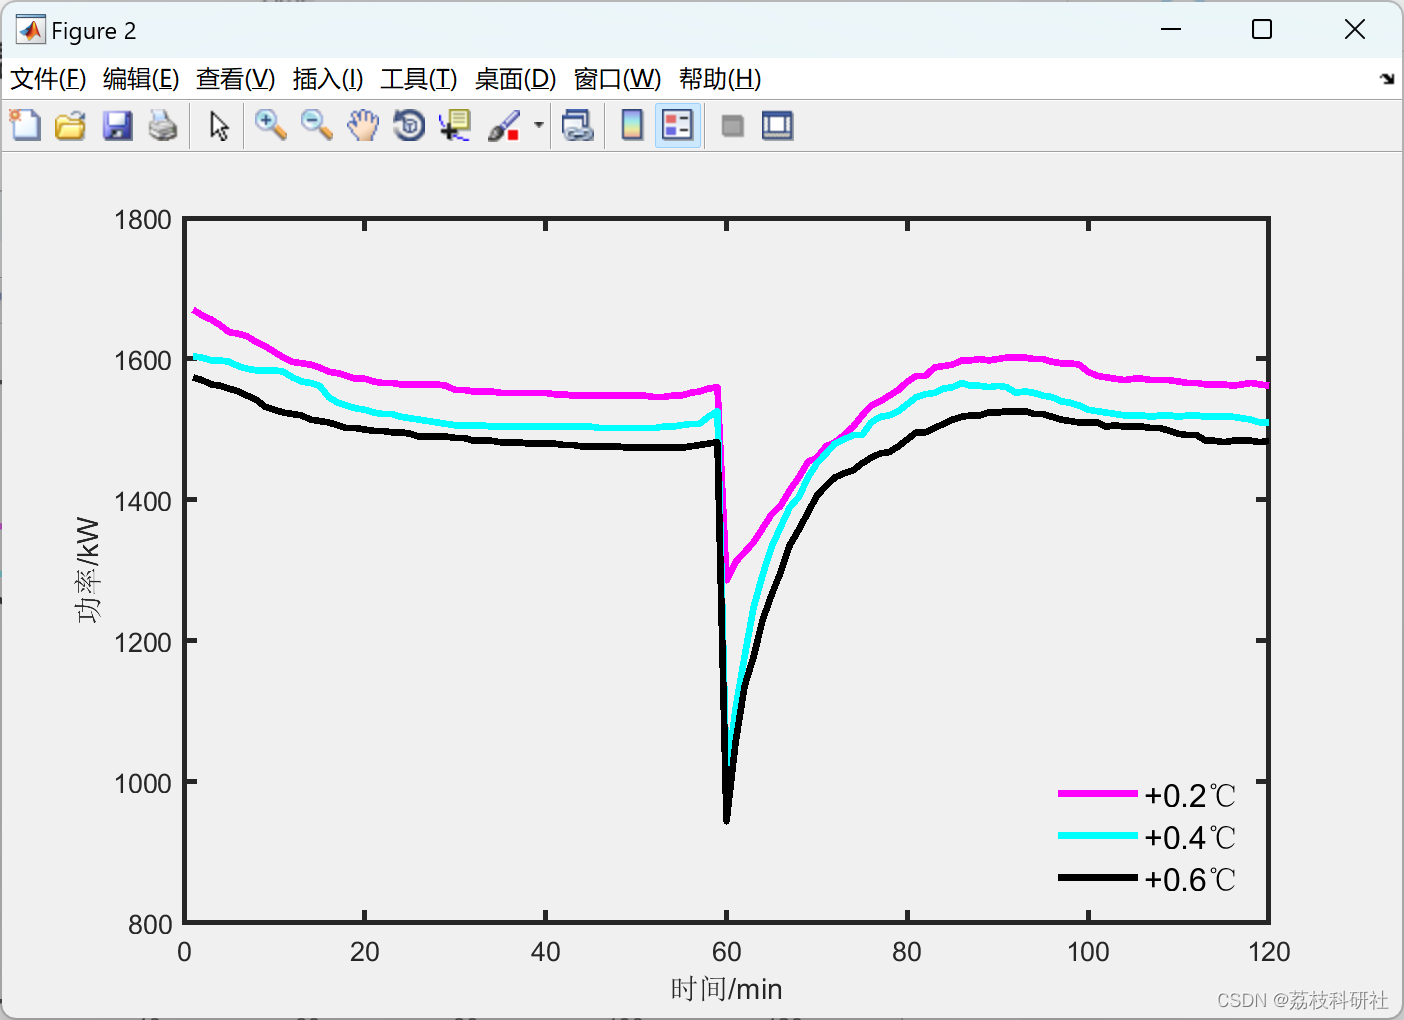
温控负荷的需求响应潜力评估及其协同优化管理研究(Matlab代码实现)
💥💥💞💞欢迎来到本博客❤️❤️💥💥 🏆博主优势:🌞🌞🌞博客内容尽量做到思维缜密,逻辑清晰,为了方便读者。 ⛳️座右铭&a…...
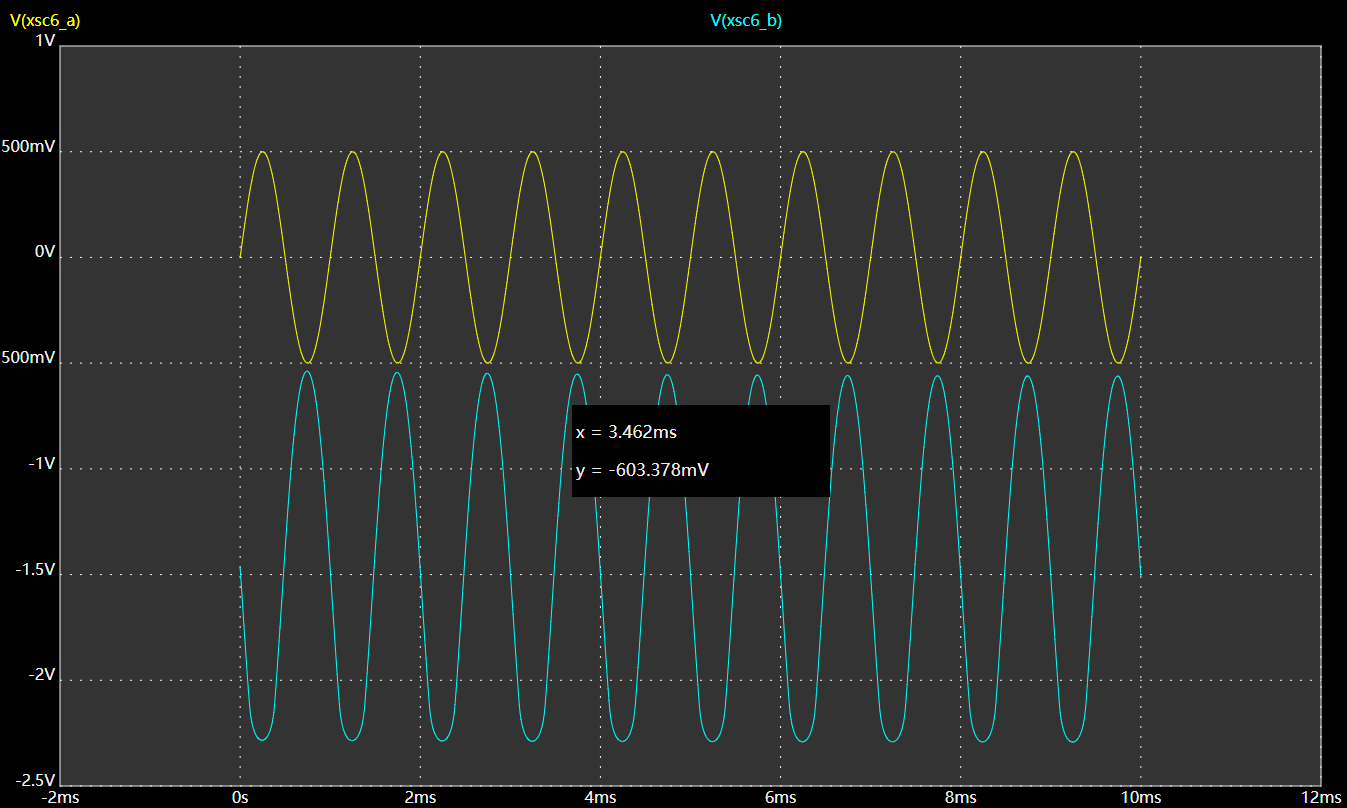
模电学习9. MOS管使用入门
模电学习9. MOS管使用入门一、mos管理简介1. 简介2. mos管理的特点3. MOS管的工作状态(1)放大功能(2)截止区(3)饱和区3. Mos管的分类(1)按照工作模式分类:(2&…...
解法)
【算法】【数组与矩阵模块】正数组中累加和为给定值的最长子数组长度,空间复杂度O(1)解法
目录前言问题介绍解决方案代码编写java语言版本c语言版本c语言版本思考感悟写在最后前言 当前所有算法都使用测试用例运行过,但是不保证100%的测试用例,如果存在问题务必联系批评指正~ 在此感谢左大神让我对算法有了新的感悟认识! 问题介绍 …...

3.1.2 创建表
文章目录1.创建表2.表创建基础3.表的主键4.使用null值5.使用AUTO_INCREMENT6.指定默认值7. 字段备注8.引擎类型9.外键1.创建表 表的创建一般有俩种方式,一种是使用交互式创建和管理表的工具,比如我们安装的MariaDB,另一种是使用MySQL 语句进…...
使用netlify实现自动化部署前端项目(无服务器版本)
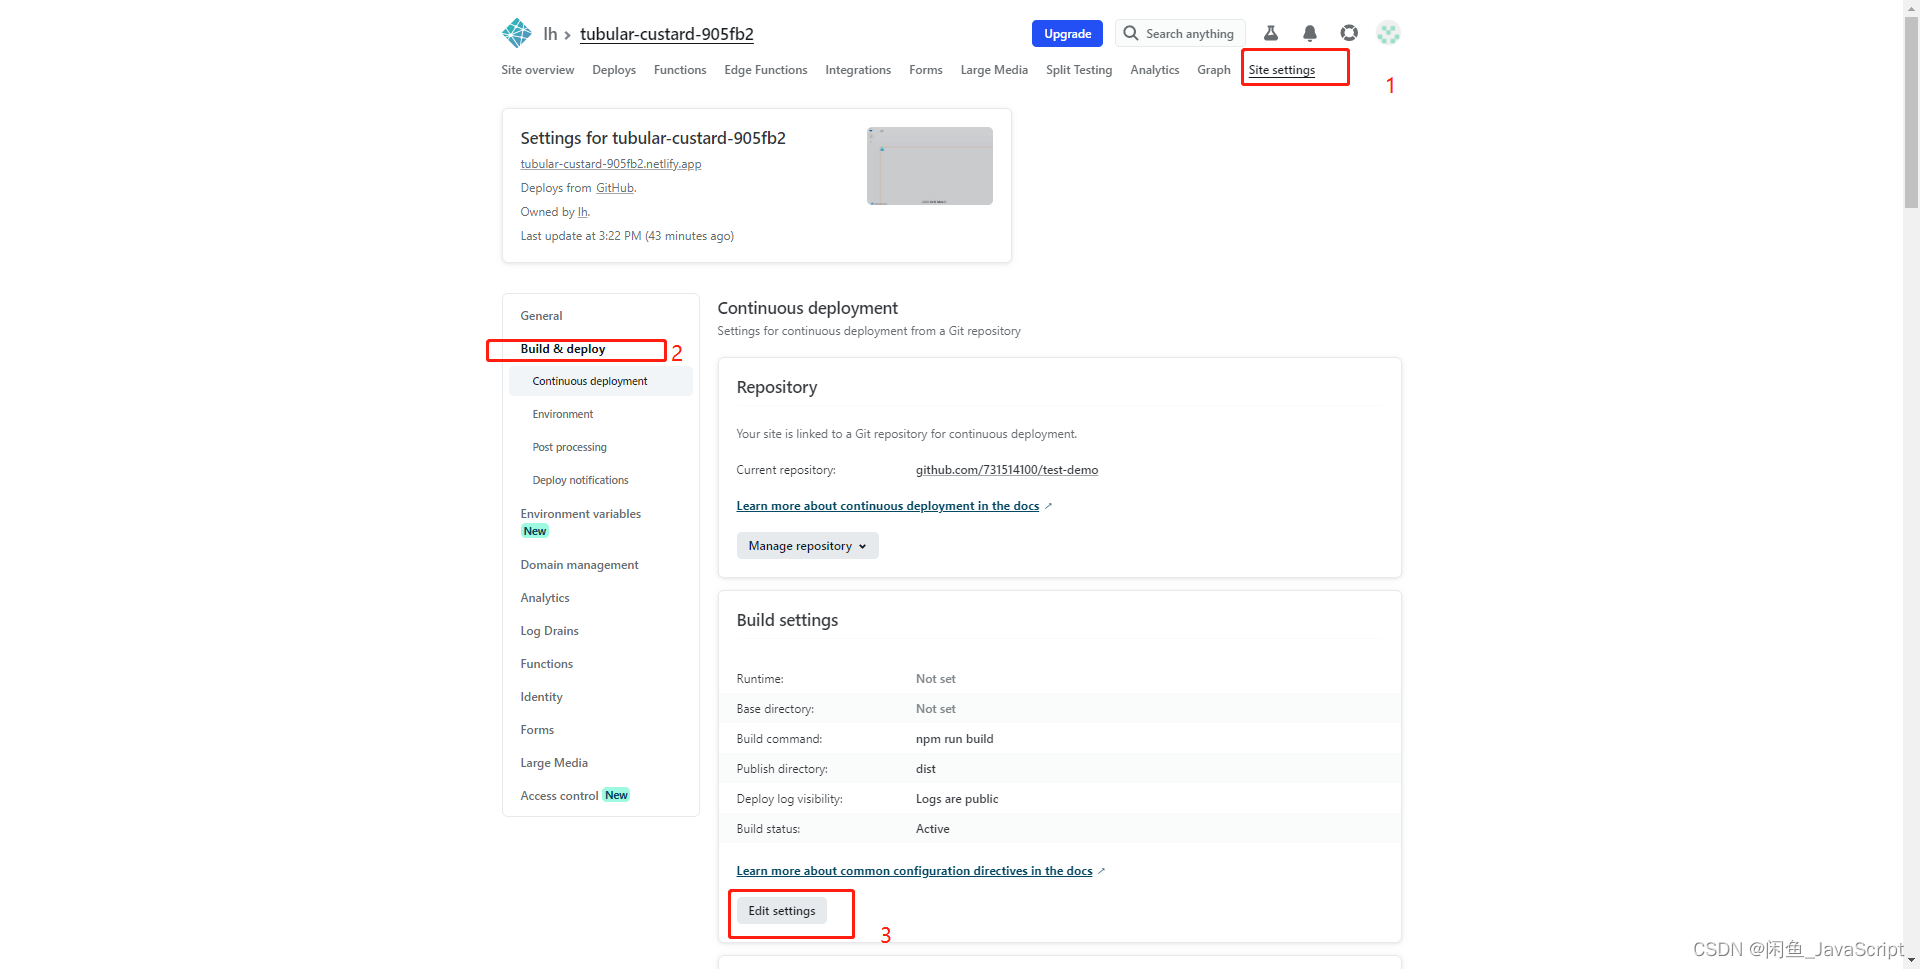
介绍 本文以 github仓库进行介绍关联netlify的无服务前端自动化部署。用途:个人网站设计、小游戏等当然这只是让你入门~具体细节等待你自己去探索 实现 打开官方网站 如果没有注册过的账户,你需要使用 github 去进行登录。注册完成后会自动给你提示填…...
:可视化点云之pcshow参数详解与快捷键操作)
MATLAB点云数据处理(二十九):可视化点云之pcshow参数详解与快捷键操作
文章目录 1 pcshow简述2 最简单的pcshow3 带参数的pcshow3.1 点大小参数----MakerSize3.2 背景色参数----Background3.3 指定竖直轴参数----VerticalAxis3.4 指定垂直轴方向参数----VerticalAxisDir3.5 投影参数----Projection3.6 指定可视化平面参数----ViewPlane3.7 颜色渲染…...
顺序表——重置版
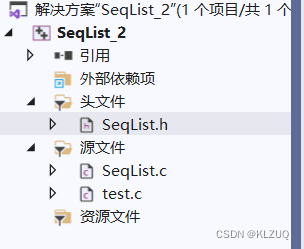
本期我们来实现数据结构的顺序表(这个之前写过一次,不过本期和之前可能会略有不同,但大体相同),大家可以看一下我们之前完成的顺序表 (6条消息) 顺序表及其多种接口的实现_顺序表类中实现接口方法_KLZUQ的博客-CSDN博客…...

PyQt5自然语言处理入门案例笔记
前言 最近想将自然语言处理的项目进行可视化,尽量还是使用回Python语言,因此打算用PyQt来实现相应的功能。 入门案例 一个简单的自然语言处理的demo,使用PyQt框架,该demo可以读取文本文件,对文件中的文本进行情感分…...

使用 CSS 替换表行颜色?
跳到主内容 我正在使用一个带有交替行颜色的表格。 tr.d0 td {background-color: #CC9999;color: black; } tr.d1 td {background-color: #9999CC;color: black; }<table><tr class"d0"><td>One</td><td>one</td></tr>&…...

华为云AI开发平台ModelArts
华为云ModelArts:重塑AI开发流程的“智能引擎”与“创新加速器”! 在人工智能浪潮席卷全球的2025年,企业拥抱AI的意愿空前高涨,但技术门槛高、流程复杂、资源投入巨大的现实,却让许多创新构想止步于实验室。数据科学家…...
多云管理“拦路虎”:深入解析网络互联、身份同步与成本可视化的技术复杂度
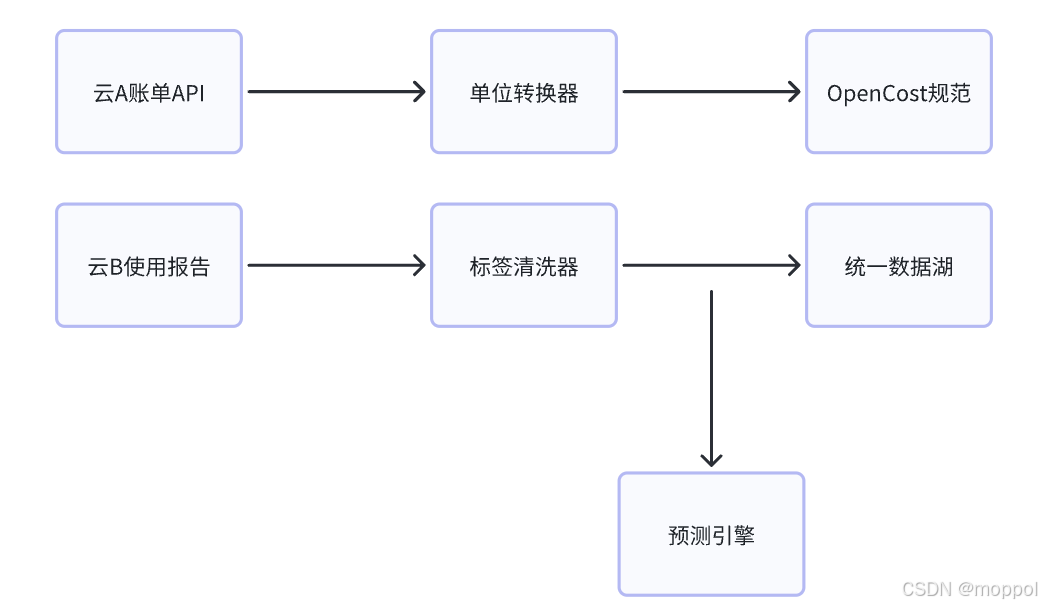
一、引言:多云环境的技术复杂性本质 企业采用多云策略已从技术选型升维至生存刚需。当业务系统分散部署在多个云平台时,基础设施的技术债呈现指数级积累。网络连接、身份认证、成本管理这三大核心挑战相互嵌套:跨云网络构建数据…...
Lombok 的 @Data 注解失效,未生成 getter/setter 方法引发的HTTP 406 错误
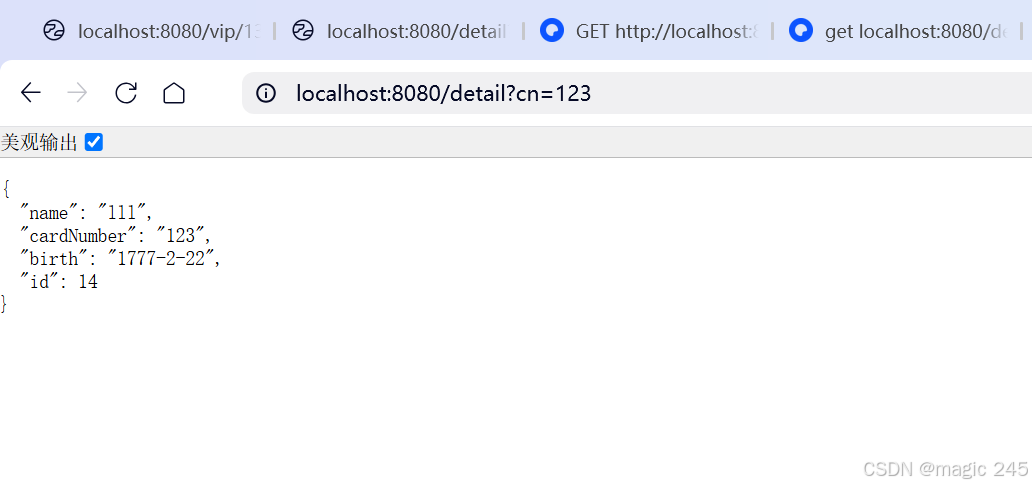
HTTP 状态码 406 (Not Acceptable) 和 500 (Internal Server Error) 是两类完全不同的错误,它们的含义、原因和解决方法都有显著区别。以下是详细对比: 1. HTTP 406 (Not Acceptable) 含义: 客户端请求的内容类型与服务器支持的内容类型不匹…...

java_网络服务相关_gateway_nacos_feign区别联系
1. spring-cloud-starter-gateway 作用:作为微服务架构的网关,统一入口,处理所有外部请求。 核心能力: 路由转发(基于路径、服务名等)过滤器(鉴权、限流、日志、Header 处理)支持负…...

基于数字孪生的水厂可视化平台建设:架构与实践
分享大纲: 1、数字孪生水厂可视化平台建设背景 2、数字孪生水厂可视化平台建设架构 3、数字孪生水厂可视化平台建设成效 近几年,数字孪生水厂的建设开展的如火如荼。作为提升水厂管理效率、优化资源的调度手段,基于数字孪生的水厂可视化平台的…...

基于Docker Compose部署Java微服务项目
一. 创建根项目 根项目(父项目)主要用于依赖管理 一些需要注意的点: 打包方式需要为 pom<modules>里需要注册子模块不要引入maven的打包插件,否则打包时会出问题 <?xml version"1.0" encoding"UTF-8…...
)
.Net Framework 4/C# 关键字(非常用,持续更新...)
一、is 关键字 is 关键字用于检查对象是否于给定类型兼容,如果兼容将返回 true,如果不兼容则返回 false,在进行类型转换前,可以先使用 is 关键字判断对象是否与指定类型兼容,如果兼容才进行转换,这样的转换是安全的。 例如有:首先创建一个字符串对象,然后将字符串对象隐…...
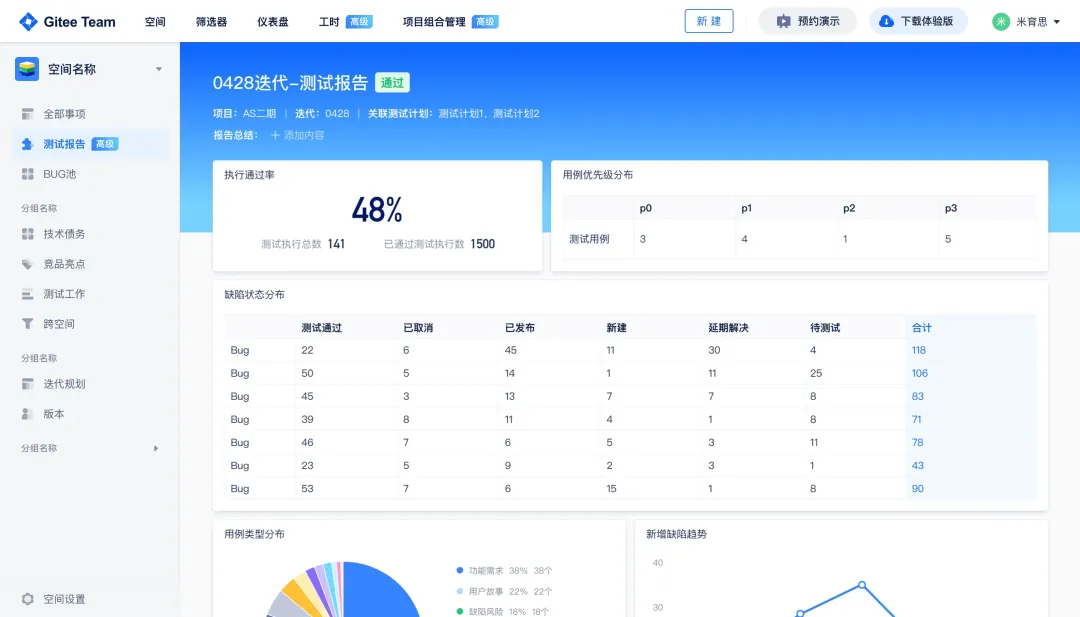
从“安全密码”到测试体系:Gitee Test 赋能关键领域软件质量保障
关键领域软件测试的"安全密码":Gitee Test如何破解行业痛点 在数字化浪潮席卷全球的今天,软件系统已成为国家关键领域的"神经中枢"。从国防军工到能源电力,从金融交易到交通管控,这些关乎国计民生的关键领域…...
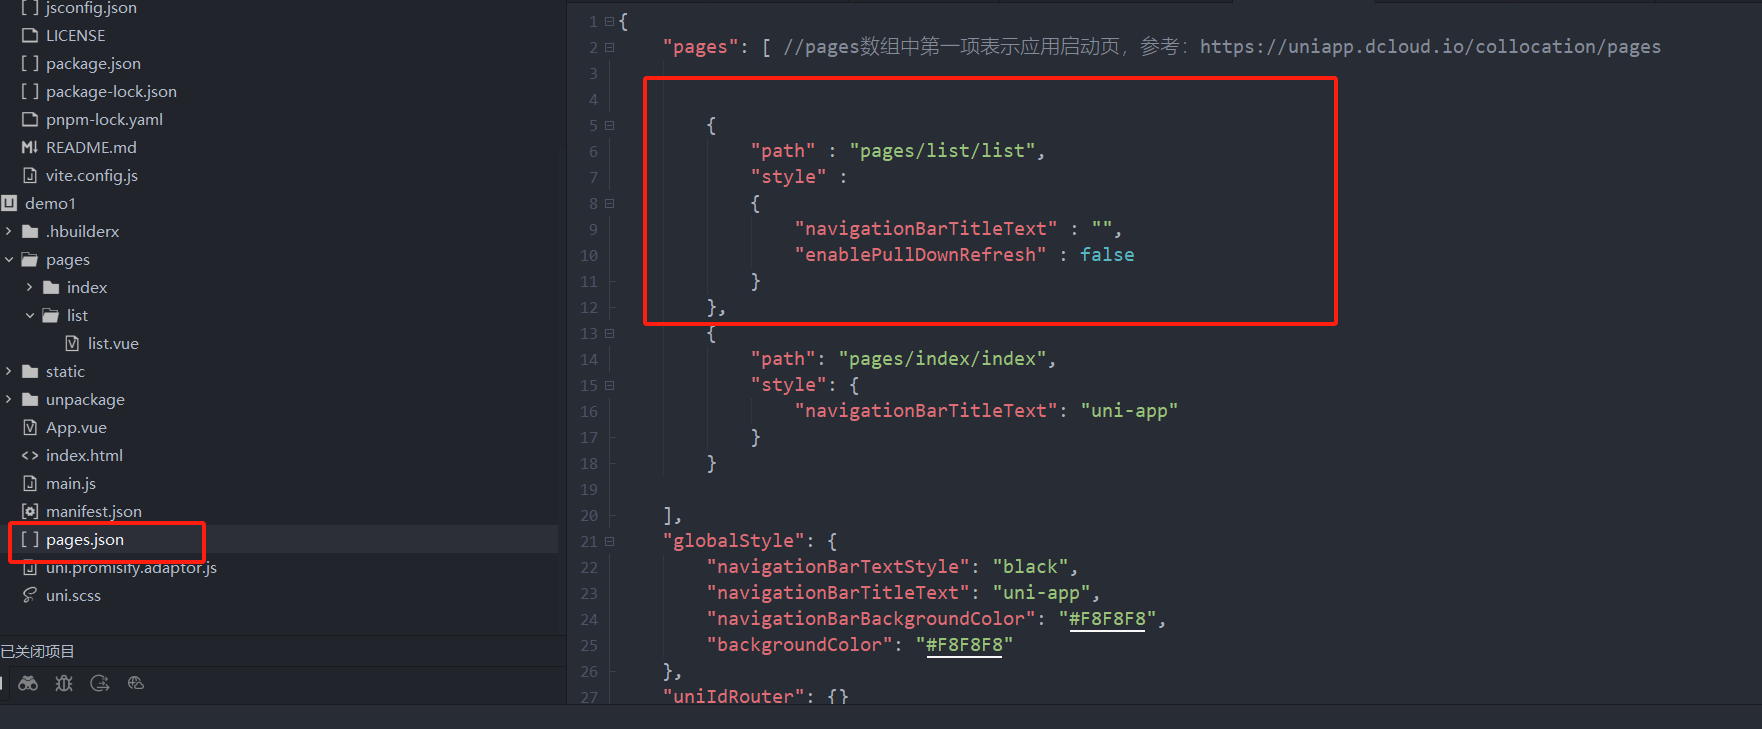
uniapp 小程序 学习(一)
利用Hbuilder 创建项目 运行到内置浏览器看效果 下载微信小程序 安装到Hbuilder 下载地址 :开发者工具默认安装 设置服务端口号 在Hbuilder中设置微信小程序 配置 找到运行设置,将微信开发者工具放入到Hbuilder中, 打开后出现 如下 bug 解…...
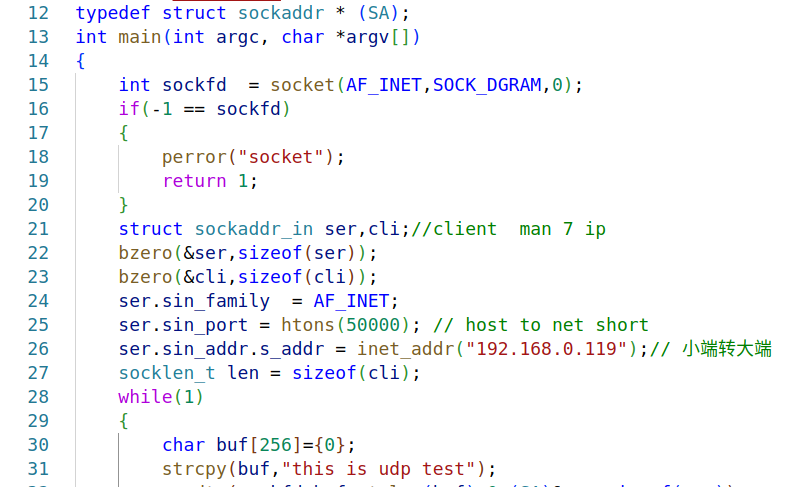
嵌入式学习之系统编程(九)OSI模型、TCP/IP模型、UDP协议网络相关编程(6.3)
目录 一、网络编程--OSI模型 二、网络编程--TCP/IP模型 三、网络接口 四、UDP网络相关编程及主要函数 编辑编辑 UDP的特征 socke函数 bind函数 recvfrom函数(接收函数) sendto函数(发送函数) 五、网络编程之 UDP 用…...

