Spring 装配Bean详解
一、简介
Spring容器负责创建应用程序中的bean并通过DI来协调这些对象之间的关系。Spring具有非常大的灵活性,它提供了三种主要的装配机制:
- 在XML中进行显示配置;
- 在Java中进行显示配置;
- 隐式的bean发现机制和自动装配。
二、在XML中进行显示配置
1. 声明一个简单的bean
1. 创建CD接口
public interface CompactDisc {void play();
}
2. 创建NowAndThen类
public class NowAndThen implements CompactDisc{private String title = "Now And Then.";private String artist = "The Beatles";@Overridepublic void play() {System.out.println("Playing " + title + " by " + artist);}}
3. 在bean.xml文件中配置
<!--  通过class属性来声明一个简单的bean,此时因为没有指定ID,bean的ID将会是com.shiftycat.soundsystem.NowAndThen#0  -->
<bean class="com.shiftycat.soundsystem.NowAndThen"/>
<!--  使用id属性可以用来指定ID  -->
<bean id="CompactDisc" class="com.shiftycat.soundsystem.NowAndThen"/>
4. 进行测试
@Test
public void compactDiscTest() {ClassPathXmlApplicationContext classPathXmlApplicationContext =new ClassPathXmlApplicationContext("bean.xml");CompactDisc compactDisc = classPathXmlApplicationContext.getBean(CompactDisc.class);compactDisc.play();
}
5. 测试结果
Playing Now And Then. by The Beatles
2. 借助构造器注入初始化bean
构造器注入有两种方案:
constructor-arg元素- 使用Spring 3.0所引入的c-命名空间
1. 创建CD接口
public interface CompactDisc {void play();
}
2. 创建NowAndThen类
public class NowAndThen implements CompactDisc{private String title = "Now And Then.";private String artist = "The Beatles";@Overridepublic void play() {System.out.println("Playing " + title + " by " + artist);}}
3. 创建MediaPlayer接口
public interface MediaPlayer {void play();
}
4. 创建CDPlayer类
public class CDPlayer implements MediaPlayer{private CompactDisc cd;// 构造器注入public CDPlayer(CompactDisc cd) {this.cd = cd;}@Overridepublic void play() {System.out.println("Loading...");cd.play();}
}
5. 在bean.xml文件中配置
<bean id="CompactDisc" class="com.shiftycat.soundsystem.NowAndThen"/>\
<!--  第一种配置方案:`constructor-arg`元素  -->
<bean id="cdPlayer" class="com.shiftycat.soundsystem.CDPlayer"><constructor-arg ref="CompactDisc"/>
</bean>
<!--  第二种配置方案:使用Spring 3.0所引入的c-命名空间  -->
<!--  c:构造器参数名-ref=“要注入的bean的ID”  -->
<bean id="cdPlayer" class="com.shiftycat.soundsystem.CDPlayer" c:cd-ref="CompactDisc"/>
<!--  或者将参数的名称替换为"_0"或者"_"  -->
<bean id="cdPlayer" class="com.shiftycat.soundsystem.CDPlayer" c:_0-ref="CompactDisc" />
<bean id="cdPlayer" class="com.shiftycat.soundsystem.CDPlayer" c:_-ref="CompactDisc" />
6. 进行测试
@Test
public void cdPlayerTest() {ClassPathXmlApplicationContext classPathXmlApplicationContext =new ClassPathXmlApplicationContext("bean.xml");CDPlayer cdPlayer = classPathXmlApplicationContext.getBean(CDPlayer.class);cdPlayer.play();}
7. 测试结果
Loading...
Playing Now And Then. by The Beatles
将字面量注入到构造器中
1. 创建BlackDisc类
public class BlackDisc implements CompactDisc{private String title;private String artist;public BlackDisc(String title, String artist) {this.title = title;this.artist = artist;}@Overridepublic void play() {System.out.println("Playing " + title + " by " + artist);}
}
2. 在bean.xml中进行配置
<bean id="blackDisc" class="com.shiftycat.soundsystem.BlackDisc"><constructor-arg value="Now And Then." /><constructor-arg value="The Beatles" />
</bean><bean id="blackDisc" class="com.shiftycat.soundsystem.BlackDisc"c:title="Now And Then."c:artist="The Beatles"
/><bean id="blackDisc" class="com.shiftycat.soundsystem.BlackDisc"c:_0="Now And Then."c:_1="The Beatles"
/>
3. 进行测试
@Test
public void blackDiscTest() {ClassPathXmlApplicationContext classPathXmlApplicationContext =new ClassPathXmlApplicationContext("bean.xml");BlackDisc blackDisc = classPathXmlApplicationContext.getBean(BlackDisc.class);blackDisc.play();
}
4. 测试结果
Playing Now And Then. by The Beatles
P.S. 装配集合
public class BlackDisc implements CompactDisc {private String title;private String artist;private List<String> tracks;public BlackDisc(String title, String artist, List<String> tracks) {this.title = title;this.artist = artist;this.tracks = tracks;}@Overridepublic void play() {System.out.println("Playing " + title + " by " + artist);for (String track : tracks) {System.out.println("-Track: " + track);}}
}
<bean id="blackDisc" class="com.shiftycat.soundsystem.BlackDisc"><constructor-arg value="Now And Then." /><constructor-arg value="The Beatles" /><constructor-arg><list><value>I know it's true</value><value>It's all because of you</value><value>And if I make it through</value><value>It's all because of you</value><value>And now and then</value></list></constructor-arg>
</bean>
Playing Now And Then. by The Beatles
-Track: I know it's true
-Track: It's all because of you
-Track: And if I make it through
-Track: It's all because of you
-Track: And now and then
3. 设置属性初始化bean
一般而言,对于强依赖使用构造器注入,对可选性的依赖使用属性注入。
1. 在CDPlayer类中设置setter方法
public class CDPlayer implements MediaPlayer{private CompactDisc cd;public void setCompactDisc(CompactDisc cd) {this.cd = cd;}@Overridepublic void play() {System.out.println("Loading...");cd.play();}
}
2. 在bean.xml文件中进行配置
<!--  可以使用property进行配置-->
<bean id="cdPlayer" class="com.shiftycat.soundsystem.CDPlayer"><property name="compactDisc" ref="compactDisc"/>
</bean>
<!--  或者使用p-命名空间性配置-->
<bean id="cdPlayer" class="com.shiftycat.soundsystem.CDPlayer"p:compactDisc-ref="compactDisc"/>
3. 进行测试
@Test
public void cdPlayerTest() {ClassPathXmlApplicationContext classPathXmlApplicationContext =new ClassPathXmlApplicationContext("bean.xml");CDPlayer cdPlayer = classPathXmlApplicationContext.getBean(CDPlayer.class);cdPlayer.play();
}
4. 测试结果
Loading...
Playing Now And Then. by The Beatles
将字面量注入到属性中
1. 在WhiteDisc类中设置setter方法
public class WhiteDisc implements CompactDisc{private String title;private String artist;private List<String> tracks;public String getTitle() {return title;}public void setTitle(String title) {this.title = title;}public String getArtist() {return artist;}public void setArtist(String artist) {this.artist = artist;}public List<String> getTracks() {return tracks;}public void setTracks(List<String> tracks) {this.tracks = tracks;}@Overridepublic void play() {System.out.println("Playing " + title + " by " + artist);for (String track : tracks) {System.out.println("-Track: " + track);}}
}
2. 在bean.xml文件中进行配置
<bean id="whileDisc" class="com.shiftycat.soundsystem.WhiteDisc"><property name="artist" value="Now And Then."/><property name="title" value="The Beatles" /><property name="tracks"><list><value>I know it's true</value><value>It's all because of you</value><value>And if I make it through</value><value>It's all because of you</value><value>And now and then</value></list></property>
</bean>
<!--或者-->
<bean id="whileDisc" class="com.shiftycat.soundsystem.WhiteDisc"p:artist="Now And Then."p:title="The Beatles"><property name="tracks"><list><value>I know it's true</value><value>It's all because of you</value><value>And if I make it through</value><value>It's all because of you</value><value>And now and then</value></list></property>
</bean>
<!--或者-->
<bean id="whileDisc" class="com.shiftycat.soundsystem.WhiteDisc"p:artist="Now And Then."p:title="The Beatles"p:tracks-ref="tracks"
>
</bean><util:list id="tracks"><value>I know it's true</value><value>It's all because of you</value><value>And if I make it through</value><value>It's all because of you</value><value>And now and then</value>
</util:list>
3. 进行测试
@Test
public void whiteDiscTest() {ClassPathXmlApplicationContext classPathXmlApplicationContext =new ClassPathXmlApplicationContext("bean.xml");WhiteDisc whiteDisc = classPathXmlApplicationContext.getBean(WhiteDisc.class);whiteDisc.play();
}
4. 测试结果
Playing The Beatles by Now And Then.
-Track: I know it's true
-Track: It's all because of you
-Track: And if I make it through
-Track: It's all because of you
-Track: And now and then
三、在Java中进行显式配置
1. 声明简单的bean
1. 创建配置类
@Configuration
public class CDPlayerConfig {}
2. 声明简单的bean
@Configuration
public class CDPlayerConfig {@Beanpublic CompactDisc nowAndThen() {return new nowAndThen();}}
2. 借助JavaConfig实现注入
@Configuration
//@ComponentScan(basePackages = "com.shiftycat.soundsystem") //在Spring中启动组件扫描,默认扫描该类所在包及这个包下的所有子包
public class CDPlayerConfig {@Beanpublic CompactDisc nowAndThen() {return new nowAndThen();}// 方法一: 最简单的方法是引用创建bean的方法@Beanpublic CDPlayer cdPlayer() {return new CDPlayer(nowAndThen());}// 方法二: 请求一个CompactDisc作为参数,将CompactDisc注入到CDPlayer的构造器中,// 而且不用明确引用CompactDisc的@Bean方法。@Beanpublic CDPlayer cdPlayer(CompactDisc compactDisc) {return new CDPlayer(compactDisc);}// 方法三: 通过setter方法注入CompactDisc@Beanpublic CDPlayer cdPlayer(CompactDisc compactDisc) {CDPlayer  cdPlayer = new CDPlayer();cdPlayer.setCd(compactDisc);return cdPlayer;}
}
四、隐式的bean发现机制和自动装配
1. 自动化装配bean
Spring通过两个方面实现自动化装配:
- 组件扫描(component scanning):Spring会自动发现应用上下文所创建的bean。
- 自动装配(autowiring):Spring自动满足bean之间的依赖。
2. 步骤
1. 创建可被发现的bean
public interface CompactDisc {void play();
}public class nowAndThen implements CompactDisc{private String title = "Now And Then.";private String artist = "The Beatles";@Overridepublic void play() {System.out.println("Playing " + title + " by " + artist);}
}public interface MediaPlayer {void play();
}
2. 开启组件扫描
@Configuration
@ComponentScan(basePackages = "com.shiftycat.soundsystem") //在Spring中启动组件扫描,默认扫描该类所在包及这个包下的所有子包
public class CDPlayerConfig {}
<?xml version="1.0" encoding="UTF-8"?>
<beans xmlns="http://www.springframework.org/schema/beans"xmlns:xsi="http://www.w3.org/2001/XMLSchema-instance"xmlns:context="http://www.springframework.org/schema/context"xsi:schemaLocation="http://www.springframework.org/schema/beanshttp://www.springframework.org/schema/beans/spring-beans.xsd><context:component-scan base-package="com.shiftycat.soundsystem" />
</beans>
@Autowired
private CompactDisc compactDisc;@Test
public void compactDiscTest() {compactDisc.play();
}
Playing Now And Then. by The Beatles
3. 通过为bean添加注解实现自动装配
不管是构造器、Setter方法还是其他的方法,Spring都会尝试满足方法参数上所声明的依赖。假如有且只有一个bean匹配以来需求的话,那么这个bean将会被装配进来。
@Component
public class CDPlayer implements MediaPlayer{private CompactDisc cd;@Autowiredpublic CDPlayer(CompactDisc cd) {this.cd = cd;}@Autowiredpublic void setCd(CompactDisc cd) {this.cd = cd;}@Overridepublic void play() {System.out.println("Loading...");cd.play();}
}
@Autowired
private CDPlayer cdPlayer;
@Test
public void cdPlayerTest() {cdPlayer.play();
}
Loading...
Playing Now And Then. by The Beatles
五、导入和混合配置
1. 在JavaConfig中引用XML配置
假如现存由两个config文件和一个XML文件,如何实现在一个JavaConfig文件中引用两个config文件并且在其中引入XML配置文件。
1. 配置文件1
public interface CompactDisc {void play();
}@Component
public class NowAndThen implements CompactDisc {private String title = "Now And Then.";private String artist = "The Beatles";@Overridepublic void play() {System.out.println("Playing " + title + " by " + artist);}
}@Configuration
public class CDConfig {@Beanpublic CompactDisc compactDisc() {return new NowAndThen();}
}
2. 配置文件2
public interface MediaPlayer {void play();
}@Component
public class CDPlayer implements MediaPlayer {private CompactDisc cd;public CDPlayer(CompactDisc cd) {this.cd = cd;}@Overridepublic void play() {System.out.println("Loading...");cd.play();}
}@Configuration
//@Import(CDConfig.class)
public class CDPlayerConfig {@Beanpublic CDPlayer cdPlayer(CompactDisc compactDisc) {return new CDPlayer(compactDisc);}
}
3. 配置文件3
public class BlackDisc implements CompactDisc {private String title;private String artist;private List<String> tracks;public String getTitle() {return title;}public void setTitle(String title) {this.title = title;}public String getArtist() {return artist;}public void setArtist(String artist) {this.artist = artist;}public List<String> getTracks() {return tracks;}public void setTracks(List<String> tracks) {this.tracks = tracks;}@Overridepublic void play() {System.out.println("Playing " + title + " by " + artist);for (String track : tracks) {System.out.println("-Track: " + track);}}
}
<?xml version="1.0" encoding="UTF-8"?>
<beans xmlns="http://www.springframework.org/schema/beans"xmlns:c="http://www.springframework.org/schema/c"xmlns:p="http://www.springframework.org/schema/p"xmlns:util="http://www.springframework.org/schema/util"xmlns:xsi="http://www.w3.org/2001/XMLSchema-instance"xsi:schemaLocation="http://www.springframework.org/schema/beanshttp://www.springframework.org/schema/beans/spring-beans.xsdhttp://www.springframework.org/schema/utilhttp://www.springframework.org/schema/util/spring-util.xsd"><bean id="blackDisc" class="com.shiftycat.importAndBlend.BlackDisc"p:artist="Now And Then."p:title="The Beatles"p:tracks-ref="tracks"></bean><util:list id="tracks"><value>I know it's true</value><value>It's all because of you</value><value>And if I make it through</value><value>It's all because of you</value><value>And now and then</value></util:list></beans>
4. 主要的Config文件
@Configuration
@Import({CDConfig.class, CDPlayerConfig.class})
@ImportResource("classpath:cd-config.xml")
public class SoundSystemConfig {}
5. 进行测试
@Test
public void JavaConfigTest() {AnnotationConfigApplicationContext context = new AnnotationConfigApplicationContext();context.register(SoundSystemConfig.class);context.refresh();System.out.println("BlackDisc: ");CompactDisc blackDisc = context.getBean(BlackDisc.class);blackDisc.play();System.out.println("\nnowAndThen: ");CompactDisc nowAndThen = context.getBean(NowAndThen.class);nowAndThen.play();System.out.println("\nCDPlayer: ");CDPlayer player = context.getBean(CDPlayer.class);player.play();
}
6. 测试结果
BlackDisc:
Playing The Beatles by Now And Then.
-Track: I know it's true
-Track: It's all because of you
-Track: And if I make it through
-Track: It's all because of you
-Track: And now and thennowAndThen:
Playing Now And Then. by The BeatlesCDPlayer:
Loading...
Playing Now And Then. by The Beatles
2. 在XML配置中引用JavaConfig
与在JavaConfig中引用XML配置一样,我们可以使用更高层次的配置文件,这个文件不声明任何的bean,只是负责将两个或更多的配置组合起来。
<?xml version="1.0" encoding="UTF-8"?>
<beans xmlns="http://www.springframework.org/schema/beans"xmlns:xsi="http://www.w3.org/2001/XMLSchema-instance"xsi:schemaLocation="http://www.springframework.org/schema/beanshttp://www.springframework.org/schema/beans/spring-beans.xsd"><!--  用来导入JavaConfig类配置到Xml文件中  --><bean class="com.shiftycat.importAndBlend.CDConfig" /><!--  用来导入xml文件配置  --><import resource="cd-config.xml"/></beans>
《Spring实战(第4版)》
相关文章:

Spring 装配Bean详解
一、简介 Spring容器负责创建应用程序中的bean并通过DI来协调这些对象之间的关系。Spring具有非常大的灵活性,它提供了三种主要的装配机制: 在XML中进行显示配置;在Java中进行显示配置;隐式的bean发现机制和自动装配。 二、…...
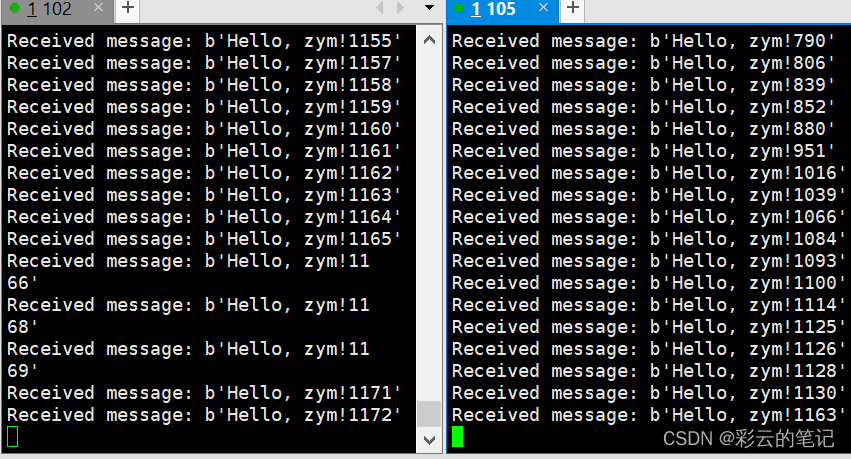
udp多播组播
import socket ,struct,time# 组播地址和端口号 MCAST_GRP 239.0.0.1 MCAST_PORT 8888 # 创建UDP socket对象 sock socket.socket(socket.AF_INET, socket.SOCK_DGRAM, socket.IPPROTO_UDP) # 绑定socket对象到本地端口号 # sock.bind((MCAST_GRP, MCAST_PORT)) …...

逆向修改Unity的安卓包资源并重新打包
在上一篇文章中,我已经讲过如何逆向获取unity打包出来的源代码和资源了,那么这一节我将介绍如何将解密出来的源代码进行修改并重新压缩到apk中。 其实在很多时候,我们不仅仅想要看Unity的源码,我们还要对他们的客户端源码进行修改和调整,比如替换资源,替换服务器连接地址…...
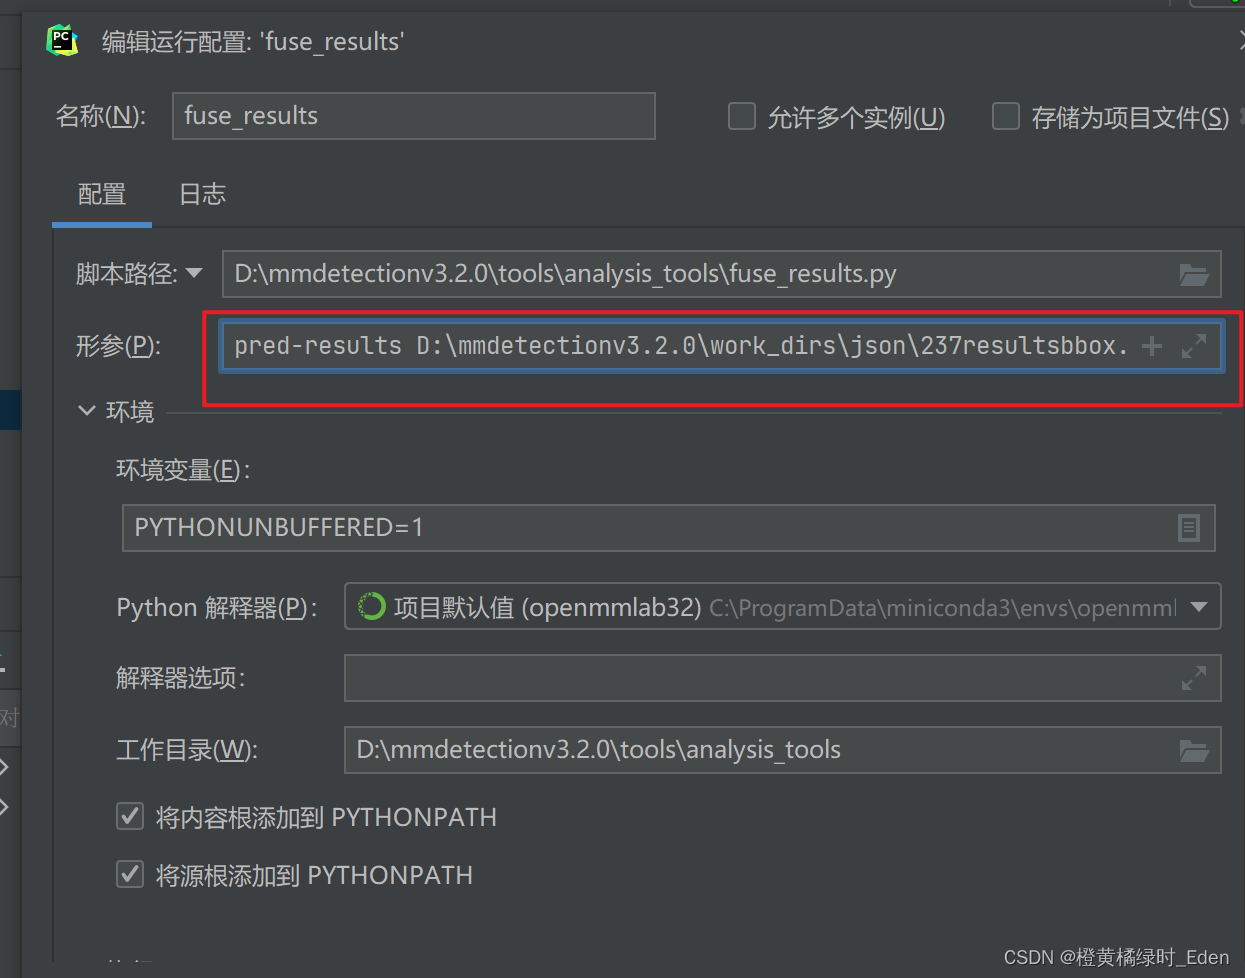
pycharm中py文件设置参数
在py文件中右键 直接对应复制进去即可...
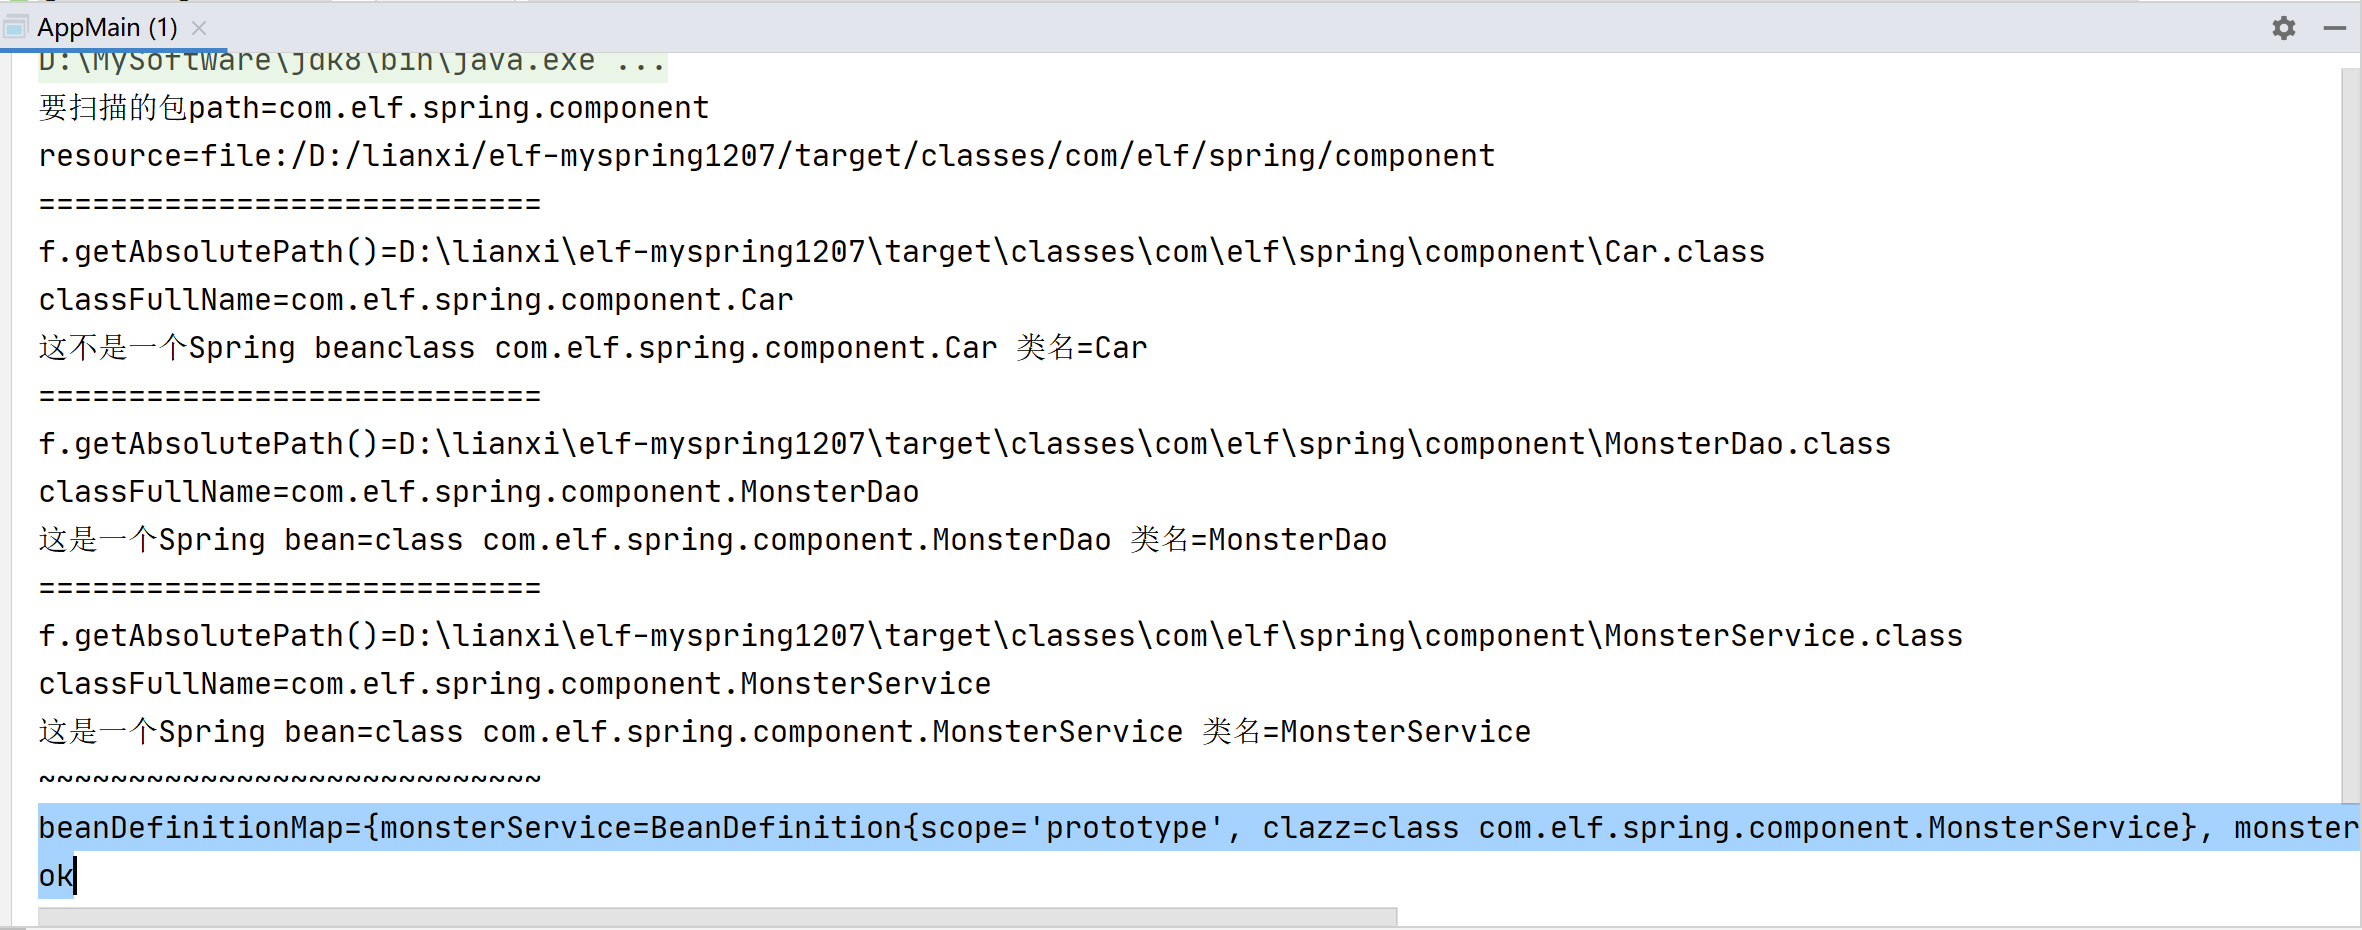
简单实现Spring容器(二) 封装BeanDefinition对象放入Map
阶段2: // 1.编写自己的Spring容器,实现扫描包,得到bean的class对象.2.扫描将 bean 信息封装到 BeanDefinition对象,并放入到Map.思路: 1.将 bean 信息封装到 BeanDefinition对象中,再将其放入到BeanDefinitionMap集合中,集合的结构大概是 key[beanName]–value[beanDefintion…...

信创运维产业的发展与趋势:IT管理的新视角
随着数字化时代的来临,信息技术应用的各个方面都在发生变革。在这个过程中,信创运维产业的发展尤为引人注目。它不仅是数字化转型的关键驱动力,也是国家经济发展的重要支柱。本文将探讨信创运维产业的发展与趋势,以及国家如何管理…...

算法通关村第十七关 | 黄金挑战 | 跳跃游戏
1.跳跃游戏 原题:力扣55. 逐步判断下一步的覆盖范围,根据范围去推断是否能到达终点,不用计较每一步走到哪里。 public boolean canJump(int[] nums) {// 题目规定 nums 长度大于等于1if (nums.length 1) {return true;}int cover 0;// f…...
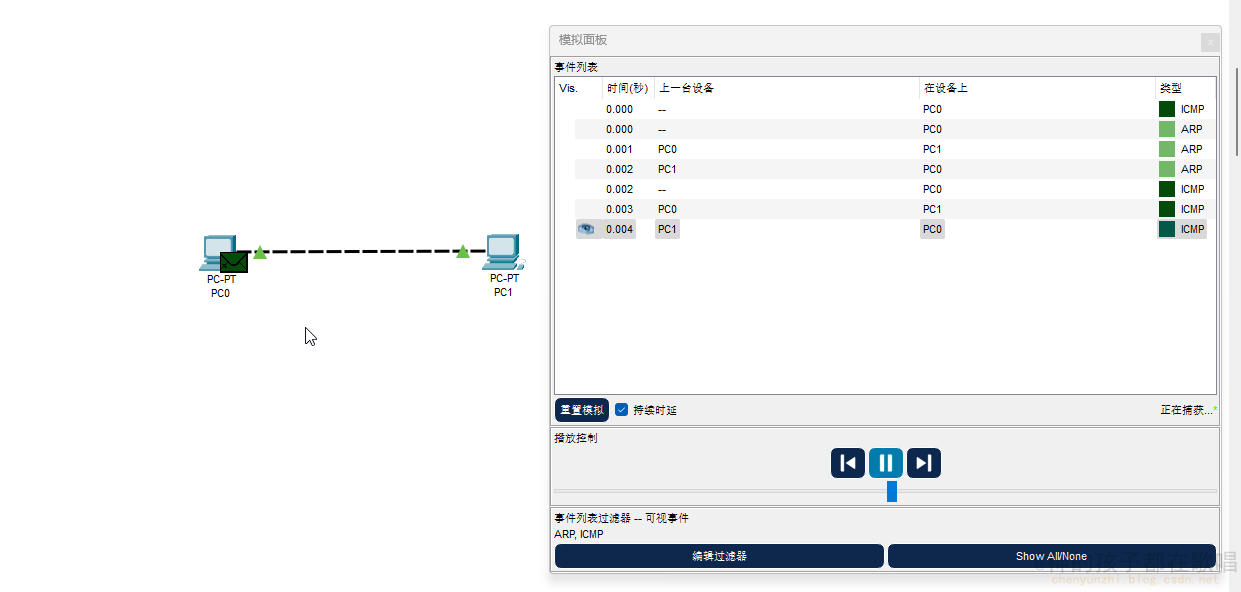
思科最新版Cisco Packet Tracer 8.2.1安装
思科最新版Cisco Packet Tracer 8.2.1安装 一. 注册并登录CISCO账号二. 下载 Cisco Packet Tracer 8.2.1三. 安装四. 汉化五. cisco packet tracer教学文档六. 正常使用图 前言 这是我在这个网站整理的笔记,有错误的地方请指出,关注我,接下来还会持续更新…...

【LeetCode热题100】【滑动窗口】找到字符串中所有字母异位词
给定两个字符串 s 和 p,找到 s 中所有 p 的 异位词 的子串,返回这些子串的起始索引。不考虑答案输出的顺序。 异位词 指由相同字母重排列形成的字符串(包括相同的字符串)。 示例 1: 输入: s "cbaebabacd", p "…...
logback的使用
1 logback概述 SLF4J的日志实现组件关系图如下所示。 SLF4J,即Java中的简单日志门面(Simple Logging Facade for Java),它为各种日志框架提供简单的抽象接口。 SLF4J最常用的日志实现框架是:log4j、logback。一般有s…...

IntelliJ IDEA无公网远程连接Windows本地Mysql数据库提高开发效率
🔥博客主页: 小羊失眠啦. 🎥系列专栏:《C语言》 《数据结构》 《Linux》《Cpolar》 ❤️感谢大家点赞👍收藏⭐评论✍️ 前些天发现了一个巨牛的人工智能学习网站,通俗易懂,风趣幽默,…...

VS Code使用教程
链接远程服务器 https://blog.csdn.net/zhaxun/article/details/120568402 免密登陆服务器 1生成客户机(个人PC)密令 ssh-keygen -t rsa生成的文件在主目录的.ssh文件当中。 查看密令并复制到linux系统当中 cat id_rsa.pub 2复制到服务器中 echo …...

StarRocks数据模型之主键模型(当前版本v3.1)
StarRocks表设计数据模型,有四种:分别是明细模型(Dumplicate Key table),聚合模型(Aggregate table),更新模型(Unique Key table),主键模型&#…...

正确使用React组件缓存
简介 正常来讲的话当我们点击组件的时候,该组件以及该组件的子组件都会重新渲染,但是如何避免子组件重新渲染呢,我们经常用memo来解决 React.memo配合useCallback缓存组件 父组件没有传props const Index ()> {console.log(子组件刷新…...

AMEYA360:大唐恩智浦荣获 2023芯向亦庄 “汽车芯片50强”
2023年11月28日,由北京市科学技术委员会和北京市经济和信息化局指导、北京经济技术开发区管理委员会主办、盖世汽车协办的“芯向亦庄”汽车芯片大赛在北京亦庄成功闭幕。 在本次大赛中 大唐恩智浦的 电池管理芯片DNB1168 (应用于新能源汽车BMS系统) 凭卓越的性能及高…...

在Arch Linux上安装yay
有点麻烦。 准备 # pacman -Syu # pacman -S --needed base-devel git 变身为普通用户 不能使用root下载代码。所以要变身为普通用户: # sueradd tsit # su tsit 下载代码 $ git clone https://aur.archlinux.org/yay.git 编译安装 $ cd yay $ makepkg -si…...

PHP案例:探究MySQL应用开发喜好的网络调查
文章目录 一、知识准备(一)数据库与表的创建(二)录入调查选项(三)创建问卷页面(四)处理投票数据(五)显示调查结果二、实现步骤(一)创建数据库与表(二)录入若干调查选项(三)创建问卷页面(四)创建调查结果页面(五)体验运行结果(六)查看最终生成的HTML代码很…...

力扣第374场周赛题解
这一场周赛的题目是比较难的一次,写了1个多小时就写了两个题目。 首先第一题: 纯水题,遍历然后进行一下判断就可以解决了。这边就不放代码了。 第二题: 这个题目,我觉得难度非常大,其实代码量也不大都是很…...
Linux Docker 安装Nginx
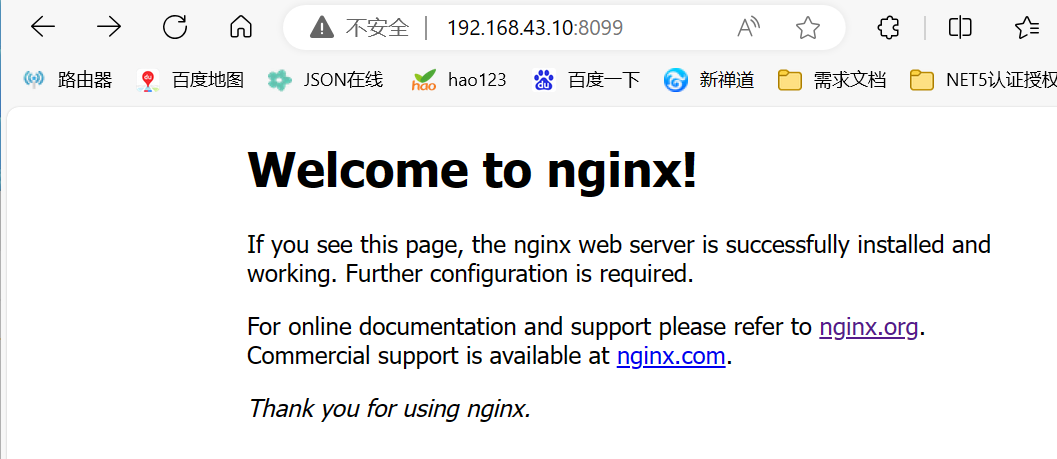
1.21、查看可用的Nginx版本 访问Nginx镜像库地址:https://hub.docker.com/_/nginx 2、拉取指定版本的Nginx镜像 docker pull nginx:latest #安装最新版 docker pull nginx:1.25.3 #安装指定版本的Nginx 3、查看本地镜像 docker images 4、根据镜像创建并运行…...
鸿蒙应用开发(二)环境搭建
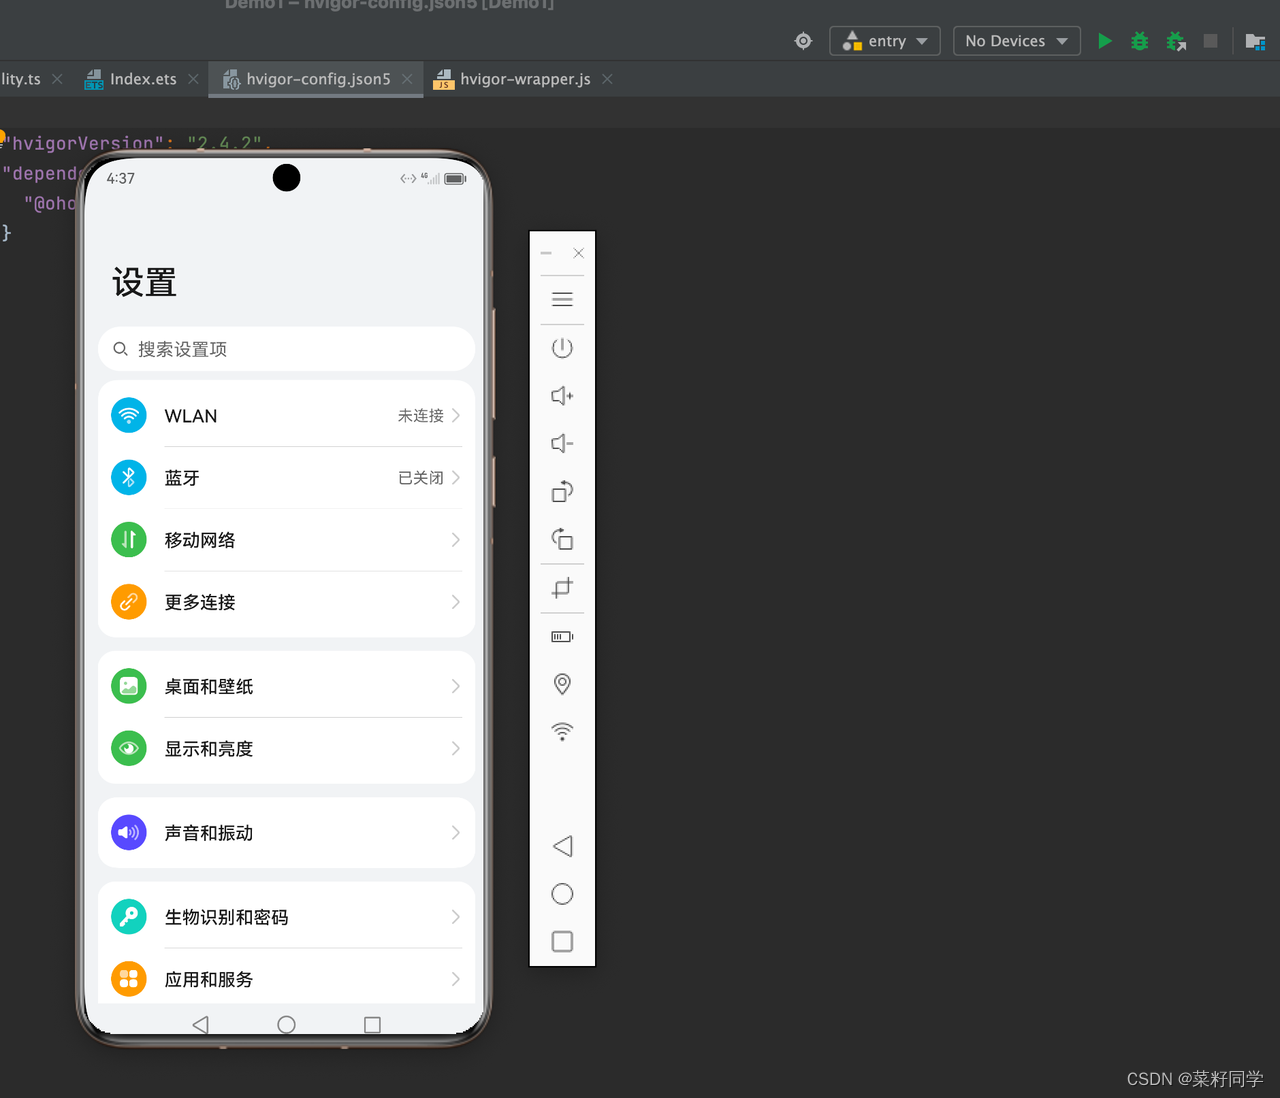
开发流程 IDE下载 首先下载HUAWEI DevEco Studio,介绍首次启动DevEco Studio的配置向导: 运行已安装的DevEco Studio,首次使用,请选择Do not import settings,单击OK。安装Node.js与ohpm。node.js 是基于 V8 引擎构…...

7个高效技巧:用Ice彻底改造你的macOS菜单栏体验
7个高效技巧:用Ice彻底改造你的macOS菜单栏体验 【免费下载链接】Ice Powerful menu bar manager for macOS 项目地址: https://gitcode.com/GitHub_Trending/ice/Ice 你是否曾因macOS菜单栏图标过多而感到困扰?当十几个应用图标挤在屏幕顶部时&a…...

UE5行为树避坑指南:从‘选择器’与‘序列’的逻辑陷阱,到‘简单并行’节点的正确用法
UE5行为树避坑指南:从‘选择器’与‘序列’的逻辑陷阱,到‘简单并行’节点的正确用法 当你在UE5中构建一个看似完美的AI行为树,却发现NPC总在关键时刻做出匪夷所思的决策——这可能不是代码的错,而是行为树节点的逻辑陷阱在作祟。…...
)
Firefly RK3588Q开发板Buildroot固件烧写与启动避坑全记录(附离线编译思路)
Firefly RK3588Q开发板Buildroot固件深度定制指南:从烧写到离线编译的完整实践 第一次拿到Firefly RK3588Q开发板时,我本以为像大多数嵌入式开发板一样,按照官方文档按部就班就能顺利完成系统切换。但当我试图将默认的Ubuntu系统替换为更轻量…...

ESP32开发环境配置翻车实录:从‘requirements not satisfied’到成功编译的完整修复日志
ESP32开发环境配置实战:从报错到成功编译的完整指南 引言 作为一名从Arduino平台转向ESP-IDF的开发者,我本以为配置ESP32开发环境会是个简单的过程。然而现实却给了我当头一棒——各种Python依赖报错、环境变量冲突、工具链问题接踵而至。这篇文章记录…...

别再只会用`uvm_info了!UVM打印系统实战:从日志分级到文件输出,让你的Debug效率翻倍
UVM调试艺术:从日志分级到智能断点的工程实践 在芯片验证领域,UVM打印系统远不止是简单的信息输出工具——它是一个完整的调试生态系统。当验证工程师面对数百万行代码的复杂验证环境时,如何精准控制信息洪流、快速定位问题根源,直…...

OpenProject项目管理终极指南:从零开始掌握开源协作神器
OpenProject项目管理终极指南:从零开始掌握开源协作神器 【免费下载链接】openproject OpenProject is the leading open source project management software. 项目地址: https://gitcode.com/GitHub_Trending/op/openproject 还在为团队协作效率低下而烦恼…...

FreeCAD - “增料放样“基础使用
创建第一个草图创建第二个草图偏置其中一个草图点击“增料放样”,选择其中一个草图附件,点击“OK”轮廓对象为上一步选择的附件,点击添加截面,选择另一草图中的轮廓点击 OK 完成操作...

轻松搞定多显示器DPI缩放:SetDPI实战应用全解析
轻松搞定多显示器DPI缩放:SetDPI实战应用全解析 【免费下载链接】SetDPI 项目地址: https://gitcode.com/gh_mirrors/se/SetDPI 你是否遇到过这样的烦恼:连接多个显示器工作时,Windows系统自动的DPI缩放让界面变得模糊不清࿰…...

ArcGIS 10.5保姆级安装指南:从下载到激活,一次搞定所有报错
ArcGIS 10.5实战安装手册:避坑指南与深度优化 第一次安装ArcGIS 10.5的经历,往往像一场没有地图的探险——你永远不知道下一个报错对话框会在哪个转角等着你。作为GIS领域的行业标准工具,ArcGIS的安装过程远比普通软件复杂,特别是…...
手游:官网下载评测 - 正版玩法深度解析)
热江点卡服(怀旧版)手游:官网下载评测 - 正版玩法深度解析
点卡收费自由交易,重温端游时代的纯粹江湖“有人就有恩怨,有恩怨就有江湖”——这句话放在今天的游戏圈,依然让人心潮澎湃。还记得当年在网吧通宵刷怪、组队打BOSS、为了一个极品装备跟兄弟抢破头的日子吗?作为经典端游《热血江湖…...