音视频开发17 FFmpeg 音频解码- 将 aac 解码成 pcm
这一节,接 音视频开发12 FFmpeg 解复用详情分析,前面我们已经对一个 MP4文件,或者 FLV文件,或者TS文件进行了 解复用,解出来的 视频是H264,音频是AAC,那么接下来就要对H264和AAC进行处理,这一节 主要是对 AAC进行处理。
⾳频解码过程

FFmpeg流程解码过程

关键函数说明
1.找到想要的编解码器
const AVCodec *avcodec_find_decoder(enum AVCodecID id);
根据AVCodecID 查找对应的AVCodec
根据AVCodecID 查找对应的AVCodec
/*** Find a registered decoder with a matching codec ID.** @param id AVCodecID of the requested decoder* @return A decoder if one was found, NULL otherwise.*/
const AVCodec *avcodec_find_decoder(enum AVCodecID id);这个 AVCodecID 代表的是 解码器 或者 编码器 的 IDenum AVCodecID {AV_CODEC_ID_NONE,......//video codecsAV_CODEC_ID_H264,......//audio codecsAV_CODEC_ID_MP3,AV_CODEC_ID_AAC,......//pcm codecsAV_CODEC_ID_PCM_U16LE//subtitle codecsAV_CODEC_ID_DVD_SUBTITLE}但是这里有一个问题,就是我们一般在解析一个文件的时候,并不知道这个文件的音频和视频用的什么编码,也就不知道用什么解码器解码比较好,合理的写法有两种,如下:
第一种,在前面解封装的时候,通过 avformat_find_stream_info 方法我们得到过文件的详细信息:然后通过 avformatcontext 得到 每一个AVStream,通过AVStream就可以得到codecid,然后就可以得到AVCodec。
但是这里无法分清楚那个是音频,哪个是视频,还需要进一步的判断:
for (i = 0; i < ifmt_ctx->nb_streams; i++) {AVStream *stream = avformatcontext->streams[i];const AVCodec *dec = avcodec_find_decoder(stream->codecpar->codec_id);。。。。。。}另一种方式:使用 av_find_best_stream 函数 获得指定的 avformatcontext中的最佳的stream。这时候通过传递进去一个 AVCodec,方法完成后就能得到对应的AVCodec
注意你要得到的 解码器 avcodec,是通过指针的形式传递进去的。
int av_find_best_stream(AVFormatContext *avformatcontext,enum AVMediaType type,int wanted_stream_nb,int related_stream,const struct AVCodec **decoder_ret,int flags);参数说明
ic:AVFormatContext指针,表示输入的媒体文件上下文。
type:要查找的媒体流类型,可以是音频流、视频流或字幕流等。
wanted_stream_nb:期望的媒体流索引号,可以是特定的索引号,也可以是AV_NOPTS_VALUE(-1)表示任意流。
related_stream:前一个相关流的索引号,如果没有前一个相关流,则传入-1。
decoder_ret:返回解码器指针。
flags:查找最佳流的标志位,默认为0。
返回值:
找到的最佳匹配媒体流的索引号,如果找不到则返回AVERROR_STREAM_NOT_FOUND。* @return  the non-negative stream number in case of success,*          AVERROR_STREAM_NOT_FOUND if no stream with the requested type*          could be found,*          AVERROR_DECODER_NOT_FOUND if streams were found but no decoder** @note  If av_find_best_stream returns successfully and decoder_ret is not*        NULL, then *decoder_ret is guaranteed to be set to a valid AVCodec.
•avcodec_find_decoder_by_name():根据解码器名字 找到解码器,这里有一个问题,这个name从哪里得到呢?
在windows cmd 下,输入 ffmpeg -h,就可以看到
Print help / information / capabilities:
-L                  show license
-h <topic>          show help
-version            show version
-muxers             show available muxers
-demuxers           show available demuxers
-devices            show available devices
-decoders           show available decoders
-encoders           show available encoders
-filters            show available filters
-pix_fmts           show available pixel formats
-layouts            show standard channel layouts
-sample_fmts        show available audio sample formats
我们是要找解码器的,因此 ffmpeg -decoders 就可以将所有的解码器列出来,为了方便查找,还可以将存储到 一个txt 中
ffmpeg -decoders > a.txt
在a.txt中看当前ffmpeg 支持的 decoder 的name有哪些,对应的如下的012v,4xm就是video的解码器名字,也可以当前查找关键字,例如aac,h264 就更快一些。
Decoders:V..... = VideoA..... = AudioS..... = Subtitle.F.... = Frame-level multithreading..S... = Slice-level multithreading...X.. = Codec is experimental....B. = Supports draw_horiz_band.....D = Supports direct rendering method 1------V....D 012v                 Uncompressed 4:2:2 10-bitV....D 4xm                  4X MovieV....D 8bps                 QuickTime 8BPS video
...................A....D aac                  AAC (Advanced Audio Coding)A....D aac_fixed            AAC (Advanced Audio Coding) (codec aac)A....D libfdk_aac           Fraunhofer FDK AAC (codec aac)A....D aac_latm             AAC LATM (Advanced Audio Coding LATM syntax)
.................V....D h261                 H.261V...BD h263                 H.263 / H.263-1996, H.263+ / H.263-1998 / H.263 version 2V...BD h263i                Intel H.263V...BD h263p                H.263 / H.263-1996, H.263+ / H.263-1998 / H.263 version 2VFS..D h264                 H.264 / AVC / MPEG-4 AVC / MPEG-4 part 10VFS..D hap                  Vidvox HapVF...D hdr                  HDR (Radiance RGBE format) image
/*** Find a registered decoder with the specified name.** @param name name of the requested decoder* @return A decoder if one was found, NULL otherwise.*/
const AVCodec *avcodec_find_decoder_by_name(const char *name);到这里,我们就有了解码器了(AVCodec),有了解码器还不行,还需要有解码器上下文,这里谈一下为什么有了解码器 还需要有 解码器上下文。
假设有一个视频文件,里面有3路视频,3路音频,有两路视频都是H264的,如果数据都保存到解码器里面,多路解码的时候,数据会有冲突,因此要多设计一个AVCodecContext.
也就是说,在ffmpeg 中,AVCodec 中一般存储的是方法,AVCodecContext 中则存储了该AVCodec中的具体数据。实际上 ffmpeg 中一直就延续这种风格,xxxcontext中存储的都是对应的xxx的数据,而 xxx中则是对应的方法之类的。
我们具体的来看:struct AVCodec
我们观察AVCodec, 看到AVCodec 中的内容,都是
该 AVCodec支持的supported_framerates 数组。
该 AVCodec支持的 enum AVPixelFormat *pix_fmt 数组。
该 AVCodec支持的 supported_samplerates 数组。
该 AVCodec支持的 AVSampleFormat 数组。
typedef struct AVCodec {/*** Name of the codec implementation.* The name is globally unique among encoders and among decoders (but an* encoder and a decoder can share the same name).* This is the primary way to find a codec from the user perspective.*/const char *name;/*** Descriptive name for the codec, meant to be more human readable than name.* You should use the NULL_IF_CONFIG_SMALL() macro to define it.*/const char *long_name;enum AVMediaType type;enum AVCodecID id;/*** Codec capabilities.* see AV_CODEC_CAP_**/int capabilities;uint8_t max_lowres;                     ///< maximum value for lowres supported by the decoderconst AVRational *supported_framerates; ///< array of supported framerates, or NULL if any, array is terminated by {0,0}const enum AVPixelFormat *pix_fmts;     ///< array of supported pixel formats, or NULL if unknown, array is terminated by -1const int *supported_samplerates;       ///< array of supported audio samplerates, or NULL if unknown, array is terminated by 0const enum AVSampleFormat *sample_fmts; ///< array of supported sample formats, or NULL if unknown, array is terminated by -1const AVClass *priv_class;              ///< AVClass for the private contextconst AVProfile *profiles;              ///< array of recognized profiles, or NULL if unknown, array is terminated by {AV_PROFILE_UNKNOWN}/*** Group name of the codec implementation.* This is a short symbolic name of the wrapper backing this codec. A* wrapper uses some kind of external implementation for the codec, such* as an external library, or a codec implementation provided by the OS or* the hardware.* If this field is NULL, this is a builtin, libavcodec native codec.* If non-NULL, this will be the suffix in AVCodec.name in most cases* (usually AVCodec.name will be of the form "<codec_name>_<wrapper_name>").*/const char *wrapper_name;/*** Array of supported channel layouts, terminated with a zeroed layout.*/const AVChannelLayout *ch_layouts;
} AVCodec;
再来看一下 AVCodecContext 的内容。里面存储了当前的avcodec的具体的数据,我们的这个
AVCodecContext 内容太多了。 这里如果要看,直接看源码比较好
2. 给解码器 分配 解码器上下文,并初始化一些default value,注意这时候 解码器上下文还是没有值
我们在这里debug 一下,看这时候 AVCodecContext 里面的内容是啥?
AVCodecContext *avcodec_alloc_context3(const AVCodec *codec);
/*** Allocate an AVCodecContext and set its fields to default values. The* resulting struct should be freed with avcodec_free_context().** @param codec if non-NULL, allocate private data and initialize defaults*              for the given codec. It is illegal to then call avcodec_open2()*              with a different codec.*              If NULL, then the codec-specific defaults won't be initialized,*              which may result in suboptimal default settings (this is*              important mainly for encoders, e.g. libx264).** @return An AVCodecContext filled with default values or NULL on failure.*/
AVCodecContext *avcodec_alloc_context3(const AVCodec *codec);
3. 打开 解码器上下文 avcodec_open2
int avcodec_open2(AVCodecContext *avctx, const AVCodec *codec, AVDictionary **options);
/*** Initialize the AVCodecContext to use the given AVCodec. Prior to using this* function the context has to be allocated with avcodec_alloc_context3().** The functions avcodec_find_decoder_by_name(), avcodec_find_encoder_by_name(),* avcodec_find_decoder() and avcodec_find_encoder() provide an easy way for* retrieving a codec.** Depending on the codec, you might need to set options in the codec context* also for decoding (e.g. width, height, or the pixel or audio sample format in* the case the information is not available in the bitstream, as when decoding* raw audio or video).** Options in the codec context can be set either by setting them in the options* AVDictionary, or by setting the values in the context itself, directly or by* using the av_opt_set() API before calling this function.** Example:* @code* av_dict_set(&opts, "b", "2.5M", 0);* codec = avcodec_find_decoder(AV_CODEC_ID_H264);* if (!codec)*     exit(1);** context = avcodec_alloc_context3(codec);** if (avcodec_open2(context, codec, opts) < 0)*     exit(1);* @endcode** In the case AVCodecParameters are available (e.g. when demuxing a stream* using libavformat, and accessing the AVStream contained in the demuxer), the* codec parameters can be copied to the codec context using* avcodec_parameters_to_context(), as in the following example:** @code* AVStream *stream = ...;* context = avcodec_alloc_context3(codec);* if (avcodec_parameters_to_context(context, stream->codecpar) < 0)*     exit(1);* if (avcodec_open2(context, codec, NULL) < 0)*     exit(1);* @endcode** @note Always call this function before using decoding routines (such as* @ref avcodec_receive_frame()).** @param avctx The context to initialize.* @param codec The codec to open this context for. If a non-NULL codec has been*              previously passed to avcodec_alloc_context3() or*              for this context, then this parameter MUST be either NULL or*              equal to the previously passed codec.* @param options A dictionary filled with AVCodecContext and codec-private*                options, which are set on top of the options already set in*                avctx, can be NULL. On return this object will be filled with*                options that were not found in the avctx codec context.** @return zero on success, a negative value on error* @see avcodec_alloc_context3(), avcodec_find_decoder(), avcodec_find_encoder(),*      av_dict_set(), av_opt_set(), av_opt_find(), avcodec_parameters_to_context()*/
int avcodec_open2(AVCodecContext *avctx, const AVCodec *codec, AVDictionary **options);
4. 获取裸流的解析器上下文 AVCodecParserContext(数据) + AVCodecParser(方法)
AVCodecParserContext *av_parser_init(int codec_id);
parser = av_parser_init(codec->id);
5.打开输入文件
infile = fopen(filename, "rb");
if (!infile) {
fprintf(stderr, "Could not open %s\n", filename);
exit(1);
}
6.打开输出文件
outfile = fopen(outfilename, "wb");
if (!outfile) {
av_free(codec_ctx);
exit(1);
}
7. 从 输入文件中读取数据,注意技巧
由于我们读取的数据 是流,因此一个一个字节的读取,会比较安全,
data = inbuf;
data_size = fread(inbuf, 1, AUDIO_INBUF_SIZE, infile);
从infile 中读取,读取的数据存储到 inbuf 中,i并让data指向inbuf的头部指针。读取的大小为 AUDIO_INBUF_SIZE 20480//注意的是 我们给的 inbuf 的大小为 uint8_t inbuf[AUDIO_INBUF_SIZE + AV_INPUT_BUFFER_PADDING_SIZE];实际上为 20480 + 64,为什么要多一个64呢?//这个在 AV_INPUT_BUFFER_PADDING_SIZE 的说明中可以看到,大致意思是有些编解码器有优化,会用32或者64做为一整组数据,如果数据是该文件的末尾,那么就需要有一个buffer,那么64就比较合理//也就是说,我们这时候读取的aac 文件的前20480字节 在 inbuf中,
    在标头 <stdio.h> 定义size_t fread( void *restrict buffer, size_t size, size_t count,FILE *restrict stream );从给定输入流 stream 读取至多 count 个对象到数组 buffer 中,如同以对每个对象调用 size 次 fgetc ,并按顺序存储结果到转译为 unsigned char 数组的 buffer 中的相继位置。流的文件位置指示器前进读取的字符数。若出现错误,则流的文件位置指示器的结果值不确定。若读入部分的元素,则元素值不确定。参数buffer - 指向要读取的数组中首个对象的指针
size - 每个对象的字节大小
count - 要读取的对象数
stream - 读取来源的输入文件流 返回值成功读取的对象数,若出现错误或文件尾条件,则可能小于 count 。若 size 或 count 为零,则 fread 返回零且不进行其他动作。
8. 通过av_parser_parse2函数将读取的数据 转化成 ffmpeg可以操作的 AVPacket
这时候数据已经到了inbuf 中了,也就是data指针的指向,我们要经过AVCodecParserContext和AVCodecContext将 data指向的数据转换成 ffmpeg 中可以操作的avpacket
ret = av_parser_parse2(parser, codec_ctx, &pkt->data, &pkt->size,data, data_size,AV_NOPTS_VALUE, AV_NOPTS_VALUE, 0); // av_parser_parse2 函数说明,将 要转化的数据(第五个参数) 和 要转化的数据的大小(第六个参数),//经过解析器和加码器 转化成 传出dada数据(第三个参数) 和 传出data数据大小(第四个参数)//参数1:解析器上下文//参数2:解码器上下文//参数3:传出data数据,从参数5中读取到的数据经过 解析器 和 解码器 处理后,存放到这里//参数4:传出data数据大小,从参数5中读取到的数据经过 解析器 和 解码器 处理后的大小,存放到这里//参数5:要转化的数据地址//参数6:要转化的数据大小//参数7: 是否pts数据//参数7: *@param pts输入演示时间戳。在这里输入AV_NOPTS_VALUE//参数8: *@param dts输入解码时间戳。在这里输入AV_NOPTS_VALUE//参数9: *@param pos输入流中的字节位置。在这里输入 0// 从第5个参数buf中,拿数据,最多拿 buf_size个数据,实际上要拿很多次。//返回值:为每次读取的数据大小。//转化后传出的数据是 AVPacket格式,因此前面会通过 av_packet_alloc 分配// int av_parser_parse2(AVCodecParserContext *s,// AVCodecContext *avctx,// uint8_t **poutbuf,// int *poutbuf_size,// const uint8_t *buf,// int buf_size,// int64_t pts,// int64_t dts,// int64_t pos);9.数据已经到AVPacket 了,那么就要将AVpacket 数据变成 AVframe数据了。
到这里需要学习和理解一下AVPacket 的知识点,链接为:
//这里的 我们通过 自己定义的decode 函数 将这一串串工作 包起来,核心工作是 通过 avcodec_send_packet 和 avcodec_receive_frame 完成的
自己包装起来的方法:
static void decode(AVCodecContext *dec_ctx, AVPacket *pkt, AVFrame *frame,
FILE *outfile)
核心实现是:
ret = avcodec_send_packet(dec_ctx, pkt);
ret = avcodec_receive_frame(dec_ctx, frame);
10.这时候数据已经转换成avframe了, 需要将avframe数据写入本地文件,并且测试
//到这里理论上 avframe 中 就有了pcm的数据了,那么这个pcm的数据是什么格式的呢?是几声道的呢?一个avframe中存储了多少数据呢?
//为什么要知道格式呢?因为不同的格式存储是不一样的,例如AV_SAMPLE_FMT_S16 和 AV_SAMPLE_FMT_S16P 就不一样
//一个是非平面的,一个是平面的。平面和非平面的存储方式是不一样的,这决定了我们如果如何将pcm数据存储起来。这里可以参考PCM的存储方式问题
//当然有几个声道也是必须知道的,因为平面存储和声道有关系的。
//当然不同的加码器 解码 AAC 后的 pcm 格式也不一样,ffmpeg默认带的是 aac是 对应 AV_SAMPLE_FMT_S32P 格式的,fdk-aac则是 对应的AV_SAMPLE_FMT_S16
//我们这里之所以关心 pcm 的格式是啥,主要的原因是我们要把pcm存储到本地,然后播放测试,但是pcm能播放的格式是 非planar的,因此如果是planar的,则存储的时候要重新排列。
//也就是说:我们这里有两个问题:非planar(交错模式)的pcm,我们要怎么存储呢? planar 的pcm 如何转换成非planar(交错模式),然后存储呢?
//需要注意的一点是planar仅仅是FFmpeg内部使用的储存模式,我们实际中所使用的音频都是packed模式的,也就是说我们使用FFmpeg解码出音频PCM数据后,如果需要写入到输出文件,应该将其转为packed模式的输出。
//为了弄清楚这个问题,我们需要翻看一下前面关于pcm的相关资料,然后从avframe中找到对应的 成员。
// 在avframe中, uint8_t *data[AV_NUM_DATA_POINTERS];代表了存储数据的真正位置,音频和视频都是这么存储的。AV_NUM_DATA_POINTERS的值是8
// 我们可以理解为 avframe 将音频分为8个声道,如果是planar模式,则每个声道存储在 data[i]中。如果是交错模式,则都存储在data[0] 中
//
//如果是交错模式,就是这样了:LRLRLRLRLRLR...... 每一个LR 就是一样音频帧,所有的数据都是存储在 avframe的第一个平面。
// 存储的位置已经有了,那么存储的大小是多少呢? 这就就要看 avframe 中的这个值了:int linesize[AV_NUM_DATA_POINTERS];
//我们既然已经得到了avformat,就可以通过avformat得到想到的值了。
// 通过 int av_sample_fmt_is_planar(enum AVSampleFormat sample_fmt); 知道是不是planar
主要用到的方法以及说明:
1.得到AVSampleFormat-采样格式
对于音频,先得到用的是那个 AVSampleFormat;对于视频 ,先得到用的是那个 AVPixelFormat
/**
* format of the frame, -1 if unknown or unset
* Values correspond to enum AVPixelFormat for video frames,
* enum AVSampleFormat for audio)
*/
enum AVSampleFormat avsampleformat = (enum AVSampleFormat)frame->format;
2.如果是音频,得到有多少声道
int nbchannels = frame->ch_layout.nb_channels;
3.每个声道有多少音频样本
int nb_samples = frame->nb_samples;
4.每个音频样本占多少位?
int data_size = av_get_bytes_per_sample(avsampleformat);
5.那么上述三者相乘 就可以得到这个 AVFrame 占了多少字节了,
nbchannels * nb_samples * data_size
6.还需要判断我们当前avframe 中的数据是 交错模式 还是 planar 模式。
int isplanar = av_sample_fmt_is_planar(avsampleformat);
1表示是planar 模式,0表示是交错模式。
是planar 模式 还是交错模式,是和我们用的解码器相关的。
对于aac 来说,如果用的默认的ffmpeg 自带的 aac,那么是planar模式;
如果使用的是 libfdk_aac, 则是交错模式;
在测试代码中我们两种都用了。
有了这些数据,怎么使用呢?
这就需要对于 AVFrame 这个类有一些认识了,参考链接:
P表示Planar(平面),其数据格式排列方式为 :
LLLLLLRRRRRRLLLLLLRRRRRRLLLLLLRRRRRRL...(每个LLLLLLRRRRRR为一个音频帧)
而不带P的数据格式(即交错排列)排列方式为:
LRLRLRLRLRLRLRLRLRLRLRLRLRLRLRLRLRLRL...(每个LR为一个音频样本)
播放范例: ffplay -ar 48000 -ac 2 -f f32le believe.pcm
7.以交错模式存储pcm数据
为啥要用交错模式存储pcm数据呢?用planar模式不行吗?
--不行,原因是 :planar仅仅是FFmpeg内部使用的储存模式,我们实际中所使用的音频都是packed模式的,也就是说我们使用FFmpeg解码出音频PCM数据后,如果需要写入到输出文件,应该将其转为packed模式的输出。
那么这个 planar模式有啥用呢?实际上再 传输的过程中,planar模式很重要,后面才会用到,这里先知道这玩意有用就行了。
7.1 以交错模式存储
注意,我们在存储交错模式的时候,存储的地方是 frame->data[0],那么要存储多少呢?
如下是两种写法,
一种是直接使用avframe 提供的 frame->linesize[0]
一种是 声道数 * 每个声道有多少个音频样本 * 每个样本占用多少个字节
用这两种方式生成了两个不同的pcm,
believejiaocuolinesize0.pcm 和 believejiaocuochannel_persameple.pcm。
对比,发现大小不一样
于是使用ffmpeg 6.0的命令 生成一个 48000_2_s16le.pcm,
发现 其大小和 believejiaocuochannel_persameple.pcm 相同
结论: 就用 nbchannels * frame->nb_samples * data_size 这种方法。
另外,打log,将每次 nbchannels * frame->nb_samples * data_size 的大小 和 frame->linesize[0]对比,发现,frame->linesize[0]在不满4096的时候,其实就是第一次log 和最后一次log,frame->linesize[0]都比nbchannels * frame->nb_samples * data_size 大 64,这说明在 AVFrame的内部实现机制上,也会有一个64的buffer
这里记住这个结论,使用的时候注意下,万一有问题,才回头看源码,目前这个阶段 源码有些地方还看不明白,暂时忽略
另外:这两个pcm播放起来是没有问题的。
还有一点,在使用ffmpeg 7.0 中的ffplay 播放的pcm的时候,ffplay -ar 48000 -ac 2 -f s16le believejiaocuolinesize0.pcm
总是提示 -ac 后面的值是2有问题,查看了ffmpeg 的官网,也没有说这个参数会变化呀,在源码中查找了一下,也没有看到 有啥变化,此处原因不明,
不管是自己build ffmpeg 7.0 添加了libfdk-aac的源码,还是ffmpeg7.0提供的full build 好的源码,ffplay -ac 的参数都不行
测试播放时使用 ffmpeg 6.1.1 中的ffplay
7.2 将 planar 模式转换成交错模式,然后存储
目的是将planar 模式的pcm转换成 交错模式然后 存储
//将 LLLLRRRR 变成LRLRLR的过程,对于planar 模式,frame->data[0]存储的是LLLLLL,frame->data[1]存储的是 RRRRRR,
//fwrite 函数的说明是,size_t fwrite( const void *restrict buffer, size_t size, size_t count, FILE *restrict stream );
//写 count 个来自给定数组 buffer 的对象到输出流stream。如同转译每个对象为 unsigned char 数组,并对每个对象调用 size 次 fputc 以将那些 unsigned char 按顺序写入 stream 一般写入。文件位置指示器前进写入的字节数。for (i = 0; i < frame->nb_samples; i++)
{for (ch = 0; ch < dec_ctx->ch_layout.nb_channels; ch++)  // 交错的方式写入, 大部分float的格式输出
}
8.测试播放
我们播放pcm 数据需要知道:采样率,声道数,采样格式
采样率:
int sample_rate = frame->sample_rate;
声道数:
int nbchannels = frame->ch_layout.nb_channels;
采样格式:
enum AVSampleFormat avsampleformat = (enum AVSampleFormat)frame->format;
如果使用的默认ffmpeg 的aac,这个值是8,对应 AV_SAMPLE_FMT_FLTP,是planar模式;
如果使用的libfdk_aac,,这个值是1,对应 AV_SAMPLE_FMT_S16,是交错模式。
当我们使用的交错模式的时候,那么播放使用命令为:
ffplay -ar 48000 -ac 2 -f s16le believe.pcm
如果我们是从 AV_SAMPLE_FMT_FLTP的planar 模式转换成 交错模式,那么播放使用命令为:
ffplay -ar 48000 -ac 2 -f f32le believe.pcm
这里-ar 48000 是log中看出来的,我们在转换的时候没有进行处理。
-ac 2 也是从log 中看出来的,我们在转换的时候也没有进行处理。
那么从 AV_SAMPLE_FMT_FLTP 转成 交错模式后,为什么-f 是 f32le呢?
这就要看ffmpeg 给我提供的 ffmpeg -sample_fmts 命令中的说明了,我们看到fltp 对应的是32,而我们是在windows上播放的,windows上用的是le,也就是小端模式,因此 -f后面的参数是f32le。
name   depth
u8        8
s16      16
s32      32
flt      32
dbl      64
u8p       8
s16p     16
s32p     32
fltp     32
dblp     64
s64      64
s64p     64
9.额外说明:
在代码中,实际上还有一些技巧。
1.关于指针跳动和减去已经使用的size;
2.当读入的数据过小时,马上开始读取的一些优化操作,看代码时需要认真研读。
11. avcodec_send_packet、avcodec_receive_frame说明
avcodec_send_packet、avcodec_receive_frame的API是FFmpeg3版本加⼊的。为了正确
的使⽤它们,有必要阅读FFmpeg的⽂档说明(请点击链接)。
以下内容摘译⾃⽂档说明
FFmpeg提供了两组函数,分别⽤于编码和解码:
解码:avcodec_send_packet()、avcodec_receive_frame()。
解码:avcodec_send_frame()、avcodec_receive_packet()。
API的设计与编解码的流程⾮常贴切建议的使⽤流程如下:
1. 像以前⼀样设置并打开AVCodecContext。
2. 输⼊有效的数据:
解码:调⽤avcodec_send_packet()给解码器传⼊包含原始的压缩数据的AVPacket对
象。
编码:调⽤ avcodec_send_frame()给编码器传⼊包含解压数据的AVFrame对象。
两种情况下推荐AVPacket和AVFrame都使⽤refcounted(引⽤计数)的模式,否则
libavcodec可能不得不对输⼊的数据进⾏拷⻉。
3. 在⼀个循环体内去接收codec的输出,即周期性地调⽤avcodec_receive_*()来接收codec
输出的数据:
解码:调⽤avcodec_receive_frame(),如果成功会返回⼀个包含未压缩数据的
AVFrame。
编码:调⽤avcodec_receive_packet(),如果成功会返回⼀个包含压缩数据的
AVPacket。
反复地调⽤avcodec_receive_packet()直到返回 AVERROR(EAGAIN)或其他错误。返回
AVERROR(EAGAIN)错误表示codec需要新的输⼊来输出更多的数据。对于每个输⼊的
packet或frame,codec⼀般会输出⼀个frame或packet,但是也有可能输出0个或者多
于1个。
4. 流处理结束的时候需要flush(冲刷) codec。因为codec可能在内部缓冲多个frame或
packet,出于性能或其他必要的情况(如考虑B帧的情况)。 处理流程如下:
调⽤avcodec_send_*()传⼊的AVFrame或AVPacket指针设置为NULL。 这将进⼊
draining mode(排⽔模式)。
反复地调⽤avcodec_receive_*()直到返回AVERROR_EOF,该⽅法在draining mode
时不会返回AVERROR(EAGAIN)的错误,除⾮你没有进⼊draining mode。
当重新开启codec时,需要先调⽤ avcodec_flush_buffers()来重置codec。
说明:
1. 编码或者解码刚开始的时候,codec可能接收了多个输⼊的frame或packet后还没有输出
数据,直到内部的buffer被填充满。上⾯的使⽤流程可以处理这种情况。
2. 理论上,只有在输出数据没有被完全接收的情况调⽤avcodec_send_*()的时候才可能会发
⽣AVERROR(EAGAIN)的错误。你可以依赖这个机制来实现区别于上⾯建议流程的处理⽅
式,⽐如每次循环都调⽤avcodec_send_*(),在出现AVERROR(EAGAIN)错误的时候再
去调⽤avcodec_receive_*()。
3. 并不是所有的codec都遵循⼀个严格、可预测的数据处理流程,唯⼀可以保证的是 “调⽤
avcodec_send_*()/avcodec_receive_*()返回AVERROR(EAGAIN)的时候去
avcodec_receive_*()/avcodec_send_*()会成功,否则不应该返回AVERROR(EAGAIN)
的错误。”⼀般来说,任何codec都不允许⽆限制地缓存输⼊或者输出。
4. 在同⼀个AVCodecContext上混合使⽤新旧API是不允许的,这将导致未定义的⾏为。avcodec_send_packet
函数:int avcodec_send_packet(AVCodecContext *avctx, const AVPacket *avpkt);
作⽤:⽀持将裸流数据包送给解码器
警告:
输⼊的avpkt-data缓冲区必须⼤于AV_INPUT_PADDING_SIZE,因为优化的字节流读取
器必须⼀次读取32或者64⽐特的数据
不能跟之前的API(例如avcodec_decode_video2)混⽤,否则会返回不可预知的错误
备注:
在将包发送给解码器的时候,AVCodecContext必须已经通过avcodec_open2打开
参数:
avctx:解码上下⽂
avpkt:输⼊AVPakcet.通常情况下,输⼊数据是⼀个单⼀的视频帧或者⼏个完整的⾳频
帧。调⽤者保留包的原有属性,解码器不会修改包的内容。解码器可能创建对包的引⽤。
如果包没有引⽤计数将拷⻉⼀份。跟以往的API不⼀样,输⼊的包的数据将被完全地消耗,
如果包含有多个帧,要求多次调⽤avcodec_recvive_frame,直到
avcodec_recvive_frame返回VERROR(EAGAIN)或AVERROR_EOF。输⼊参数可以为
NULL,或者AVPacket的data域设置为NULL或者size域设置为0,表示将刷新所有的包,
意味着数据流已经结束了。第⼀次发送刷新会总会成功,第⼆次发送刷新包是没有必要
的,并且返回AVERROR_EOF,如果×××缓存了⼀些帧,返回⼀个刷新包,将会返回所有的
解码包
返回值:
0: 表示成功
AVERROR(EAGAIN):当前状态不接受输⼊,⽤户必须先使⽤avcodec_receive_frame() 读
取数据帧;
AVERROR_EOF:解码器已刷新,不能再向其发送新包;
AVERROR(EINVAL):没有打开解码器,或者这是⼀个编码器,或者要求刷新;
AVERRO(ENOMEN):⽆法将数据包添加到内部队列。
avcodec_receive_frame函数:int avcodec_receive_frame ( AVCodecContext * avctx, AVFrame * frame )
作⽤:从解码器返回已解码的输出数据。
参数:
avctx: 编解码器上下⽂
frame: 获取使⽤reference-counted机制的audio或者video帧(取决于解码器类型)。请
注意,在执⾏其他操作之前,函数内部将始终先调⽤av_frame_unref(frame)。
返回值:
0: 成功,返回⼀个帧
AVERROR(EAGAIN): 该状态下没有帧输出,需要使⽤avcodec_send_packet发送新的
packet到解码器
AVERROR_EOF: 解码器已经被完全刷新,不再有输出帧
AVERROR(EINVAL): 编解码器没打开
其他<0的值: 具体查看对应的错误码
12. 刷新解码器,
/* 冲刷解码器 */pkt->data = NULL; // 让其进入drain modepkt->size = 0;decode(codec_ctx, pkt, decoded_frame, outfile);源码demo:
/**
* @projectName   07-05-decode_audio
* @brief         解码音频,主要的测试格式aac和mp3
* @author        Liao Qingfu
* @date          2020-01-16
*/
#include <stdio.h>
#include <stdlib.h>
#include <string.h>#include <libavutil/frame.h>
#include <libavutil/mem.h>#include <libavcodec/avcodec.h>
#include <libavutil/samplefmt.h>
#include <libavformat/avformat.h>#define AUDIO_INBUF_SIZE 20480
#define AUDIO_REFILL_THRESH 4096static char err_buf[128] = {0};
static char* av_get_err(int errnum)
{av_strerror(errnum, err_buf, 128);return err_buf;
}static void print_sample_format(const AVFrame *frame)
{printf("ar-samplerate: %uHz\n", frame->sample_rate);printf("ac-channel: %u\n", frame->ch_layout.nb_channels);printf("f-format: %u\n", frame->format);// 格式需要注意,实际存储到本地文件时已经改成交错模式
}//这里的 pkt 中存储的是从 infile 读取到的数据,通过 avcodec_send_packet 将avpacket的数据发送到 AVCodecContext,
//AVCodecContext内部会处理,将avpacket 转化成 avframe
static void decode(AVCodecContext *dec_ctx, AVPacket *pkt, AVFrame *frame,FILE *outfile)
{int i, ch;int ret, data_size;/* send the packet with the compressed data to the decoder *///返回值为0,表示发送成功,如果为EAGAIN 表示要重新读,如果是其他error,说明该方法调用有问题ret = avcodec_send_packet(dec_ctx, pkt);if(ret == AVERROR(EAGAIN)){fprintf(stderr, "Receive_frame and send_packet both returned EAGAIN, which is an API violation.\n");}else if (ret < 0){fprintf(stderr, "Error submitting the packet to the decoder, err:%s, pkt_size:%d\n",av_get_err(ret), pkt->size);
//        exit(1);return;}/* read all the output frames (infile general there may be any number of them */while (ret >= 0){// 对于frame, avcodec_receive_frame内部每次都先调用ret = avcodec_receive_frame(dec_ctx, frame);if (ret == AVERROR(EAGAIN) || ret == AVERROR_EOF)return;else if (ret < 0){fprintf(stderr, "Error during decoding\n");exit(1);}//到这里理论上 frame 中 就有了pcm的数据了,那么这个pcm的数据是什么格式的呢?是几声道的呢?一个音频帧有多少个字节呢?//为什么要知道格式呢?因为不同的格式存储是不一样的,例如AV_SAMPLE_FMT_S16 和 AV_SAMPLE_FMT_S16P 就不一样//一个是非平面的,一个是平面的。平面和非平面的存储方式是不一样的,这决定了我们如果如何将pcm数据存储起来。这里可以参考PCM的存储方式问题//当然有几个声道也是必须知道的,因为平面存储和声道有关系的。//当然不同的加码器 解码 AAC 后的 pcm 格式也不一样,ffmpeg默认带的是 aac是 对应 AV_SAMPLE_FMT_S32P 格式的,fdk-aac则是 对应的AV_SAMPLE_FMT_S16//我们这里之所以关心 pcm 的格式是啥,主要的原因是我们要把pcm存储到本地,然后播放测试,但是pcm能播放的格式是 非planar的,因此如果是planar的,则存储的时候要重新排列。//也就是说:我们这里有两个问题:非planar(交错模式)的pcm,我们要怎么存储呢? planar 的pcm 如何转换成非planar(交错模式),然后存储呢?
//需要注意的一点是planar仅仅是FFmpeg内部使用的储存模式,我们实际中所使用的音频都是packed模式的,也就是说我们使用FFmpeg解码出音频PCM数据后,如果需要写入到输出文件,应该将其转为packed模式的输出。//为了弄清楚这个问题,我们需要翻看一下前面关于pcm的相关资料,然后从avframe中找到对应的 成员。
//        在avframe中,    uint8_t *data[AV_NUM_DATA_POINTERS];代表了存储数据的真正位置,音频和视频都是这么存储的。AV_NUM_DATA_POINTERS的值是8
//        我们可以理解为 avframe 将音频分为8个声道,如果是planar模式,则每个声道存储在 data[i]中。如果是交错模式,则都存储在data[0] 中////如果是交错模式,就是这样了:LRLRLRLRLRLR...... 每一个LR 就是一样音频帧,所有的数据都是存储在 avframe的第一个平面。// 存储的位置已经有了,那么存储的大小是多少呢? 这就就要看 avframe 中的这个值了:int linesize[AV_NUM_DATA_POINTERS];//我们既然已经得到了avformat,就可以通过avformat得到想到的值了。// 通过 int av_sample_fmt_is_planar(enum AVSampleFormat sample_fmt); 知道是不是planarenum AVSampleFormat avsampleformat = (enum AVSampleFormat)frame->format;printf("avsampleformat = %d\n",avsampleformat);int linesize0 = frame->linesize[0];
//        printf("linesize0 = %d\n",linesize0);int nbchannels = frame->ch_layout.nb_channels;
//        printf("nbchannels = %d\n",nbchannels);int sample_rate = frame->sample_rate;printf("sample_rate = %d\n",sample_rate); // 48000int nb_samples = frame->nb_samples;printf("nb_samples = %d\n",nb_samples); //1024 实际上就是一个aac 的avframe,应该有1024个样本int isplanar = av_sample_fmt_is_planar(avsampleformat);
//        printf("isplanar = %d\n",isplanar);data_size = av_get_bytes_per_sample(dec_ctx->sample_fmt);
//                printf("111 dec_ctx->sample_fmt = %d\n",dec_ctx->sample_fmt);
//                        printf("data_size = %d\n",data_size);if (data_size < 0){/* This should not occur, checking just for paranoia */fprintf(stderr, "Failed to calculate data size\n");exit(1);}static int s_print_format = 0;//根据自己在该方法前面加的log打印,就会明白,这里为什么要有一个 static int s_print_format,因为这个方法会不停的走进来,打印的太多了if(s_print_format == 0){s_print_format = 1;print_sample_format(frame);}/**P表示Planar(平面),其数据格式排列方式为 :LLLLLLRRRRRRLLLLLLRRRRRRLLLLLLRRRRRRL...(每个LLLLLLRRRRRR为一个音频帧)而不带P的数据格式(即交错排列)排列方式为:LRLRLRLRLRLRLRLRLRLRLRLRLRLRLRLRLRLRL...(每个LR为一个音频样本)播放范例:   ffplay -ar 48000 -ac 2 -f f32le believe.pcm*/if(isplanar){static int s_print_format111 = 0;//根据自己在该方法前面加的log打印,就会明白,这里为什么要有一个 static int s_print_format,因为这个方法会不停的走进来,打印的太多了if(s_print_format111 == 0){s_print_format111 = 1;printf("isplanner insert data ... \n");}//将 LLLLRRRR 变成LRLRLR的过程,对于planar 模式,frame->data[0]存储的是LLLLLL,frame->data[1]存储的是 RRRRRR,//fwrite 函数的说明是,size_t fwrite( const void *restrict buffer, size_t size, size_t count, FILE *restrict stream );//写 count 个来自给定数组 buffer 的对象到输出流stream。如同转译每个对象为 unsigned char 数组,并对每个对象调用 size 次 fputc 以将那些 unsigned char 按顺序写入 stream 一般写入。文件位置指示器前进写入的字节数。for (i = 0; i < frame->nb_samples; i++){for (ch = 0; ch < dec_ctx->ch_layout.nb_channels; ch++)  // 交错的方式写入, 大部分float的格式输出fwrite(frame->data[ch] + data_size*i, 1, data_size, outfile);}} else {static int s_print_format222 = 0;//根据自己在该方法前面加的log打印,就会明白,这里为什么要有一个 static int s_print_format,因为这个方法会不停的走进来,打印的太多了if(s_print_format222 == 0){s_print_format222 = 1;printf("not isplanner insert data ... \n");}//注意,我们在存储交错模式的时候,存储的地方是 frame->data[0],那么要存储多少呢?//如下是两种写法,一种是直接使用avframe 提供的 frame->linesize[0]//一种是 声道数 * 每个声道有多少个音频样本 * 每个样本占用多少个字节//用这两种方式生成了两个不同的pcm,believejiaocuolinesize0.pcm 和 believejiaocuochannel_persameple.pcm 对比,发现大小不一样//于是使用ffmpeg 6.0的命令 生成一个 48000_2_s16le.pcm,发现 其大小和 believejiaocuochannel_persameple.pcm 相同//结论: 就用 nbchannels * frame->nb_samples * data_size 这种方法。//另外,打log,将每次 nbchannels * frame->nb_samples * data_size 的大小 和 frame->linesize[0]对比,发现,frame->linesize[0]在不满4096的时候,其实就是第一次log 和最后一次log,frame->linesize[0]都比nbchannels * frame->nb_samples * data_size 大 64,这说明在 AVFrame的内部实现机制上,也会有一个64的buffer//这里记住这个结论,使用的时候注意下,万一有问题,才回头看源码,目前这个阶段 源码有些地方还看不明白,暂时忽略//这两个pcm播放起来是没有问题的。//还有一点,在使用ffmpeg 7.0 中的ffplay 播放的pcm的时候,ffplay -ar 48000 -ac 2 -f s16le believejiaocuolinesize0.pcm
//            总是提示 -ac 后面的值是2有问题,查看了ffmpeg 的官网,也没有说这个参数会变化呀,在源码中查找了一下,也没有看到 有啥变化,此处原因不明,//不管是自己build ffmpeg 7.0 添加了libfdk-aac的源码,还是ffmpeg7.0提供的full build 好的源码,ffplay -ac 的参数都不行//测试播放时使用 ffmpeg 6.1.1 中的ffplay//fwrite(frame->data[0], 1, frame->linesize[0], outfile);fwrite(frame->data[0], 1, nbchannels * frame->nb_samples * data_size, outfile);static int s_print_format333 = 0;//根据自己在该方法前面加的log打印,就会明白,这里为什么要有一个 static int s_print_format,因为这个方法会不停的走进来,打印的太多了
//            if(s_print_format333 == 0)
//            {s_print_format333 = 1;printf("not isplanner insert data nbchannels * frame->nb_samples * data_size = %d ... \n",nbchannels * frame->nb_samples * data_size);printf("frame->line[0] = %d\n",frame->linesize[0]);
//            }}}
}
// 播放范例:   ffplay -ar 48000 -ac 2 -f f32le believe.pcm
int main(int argc, char **argv)
{//输出文件的名字const char *outfilename;//输入文件的名字const char *filename;//1.解码器const AVCodec *codec;//2.解码器上下文AVCodecContext *codec_ctx= NULL;//3.解析器上下文,解码的时候要用到这个。AVCodecParserContext *parser = NULL;int len = 0;int ret = 0;FILE *infile = NULL;FILE *outfile = NULL;uint8_t inbuf[AUDIO_INBUF_SIZE + AV_INPUT_BUFFER_PADDING_SIZE];uint8_t *data = NULL;size_t   data_size = 0;AVPacket *pkt = NULL;AVFrame *decoded_frame = NULL;//我们这里直接指定文件,不使用参数传递的形式
//    if (argc <= 2)
//    {
//        fprintf(stderr, "Usage: %s <input file> <output file>\n", argv[0]);
//        exit(0);
//    }
//    filename    = argv[1];
//    outfilename = argv[2];filename    = "D:/AllInformation/qtworkspacenew/07-05-decode_audio/believe.aac";// outfilename = "D:/AllInformation/qtworkspacenew/07-05-decode_audio/believejiaocuolinesize0.pcm";outfilename = "D:/AllInformation/qtworkspacenew/07-05-decode_audio/believejiaocuochannel_persameple.pcm";pkt = av_packet_alloc();enum AVCodecID audio_codec_id = AV_CODEC_ID_AAC;if(strstr(filename, "aac") != NULL){audio_codec_id = AV_CODEC_ID_AAC;}else if(strstr(filename, "mp3") != NULL){audio_codec_id = AV_CODEC_ID_MP3;}else{printf("default codec id:%d\n", audio_codec_id);}// 1.查找解码器 AVCodec
//    codec = avcodec_find_decoder(audio_codec_id);  // AV_CODEC_ID_AACcodec = avcodec_find_decoder_by_name("libfdk_aac");if (!codec) {fprintf(stderr, "Codec not found\n");exit(1);}printf("编解码器id :codec->id = %d\n",codec->id);//86018  AV_CODEC_ID_AAC,printf("编解码器的name :codec->name = %s\n",codec->name);//aacprintf("编解码器的long name :codec->long_name = %s\n",codec->long_name);//AAC (Advanced Audio Coding)printf("编解码器的类型 :codec->type = %d\n",codec->type);//1,对应的是AVMediaType 是 AVMEDIA_TYPE_AUDIOprintf("解码支持的低分辨率的最大值 : codec->max_lowres = %d\n",codec->max_lowres); //由于当前测试的aac,是声音,因此这个值是0printf("编解码器功能:codec->capabilities = %d\n",codec->capabilities);//0100 0000 0010 对应如下两个 | 起来, #define AV_CODEC_CAP_CHANNEL_CONF (1 << 10)     #define AV_CODEC_CAP_DR1 (1 <<  1)//const AVRational *supported_framerates; ///< array of supported framerates, or NULL if any, array is terminated by {0,0}//AVRational 是一个分子分母的结构,对于音频来说,就是采样率,每秒中采集的样本数量; 对于视频来说,就是每秒中播放多少帧。if (codec->supported_framerates==NULL) {printf("编解码器支持的帧速率阵列 codec->supported_framerates = null\n"); //结果为:codec->supported_framerates = null} else {int i =0;while(1){if(codec->supported_framerates[i].den == 0 && codec->supported_framerates[i].num == 0){break;}else {printf("编解码器支持的帧速率阵列 codec->supported_framerates[%d].den = %d,codec->supported_framerates[%d].num = %d\n",i,codec->supported_framerates[i].den,i,codec->supported_framerates[i].num);i++;}}}//const enum AVPixelFormat *pix_fmts;     ///< array of supported pixel formats, or NULL if unknown, array is terminated by -1//AVPixelFormat,AV_PIX_FMT_YUV420P,对应的是视频的格式,是YUVP的,还是RGB888的if (codec->pix_fmts==NULL) {printf("codec->pix_fmts = null\n"); //结果为:codec->pix_fmts = null} else {int i =0;while(1){if(codec->pix_fmts[i] == -1){break;}else{printf("codec->pix_fmts[%d] = %d\n",i,codec->pix_fmts[i]);i++;}}}//const enum AVSampleFormat *sample_fmts; ///< array of supported sample formats, or NULL if unknown, array is terminated by -1// AVSampleFormat  AV_SAMPLE_FMT_S16, 对应的是音频的 采样格式if (codec->sample_fmts==NULL) {printf("codec->sample_fmts = null\n");} else {int i =0;while(1){if(codec->sample_fmts[i] == -1){break;}else{printf("codec->sample_fmts[%d] = %d\n",i,codec->sample_fmts[i]);//结果为:codec->sample_fmts[0] = 8,8对应的是AV_SAMPLE_FMT_FLTP ///< float, planari++;}}}//const int *supported_samplerates;       ///< array of supported audio samplerates, or NULL if unknown, array is terminated by 0//支持的音频采样率阵列if (codec->supported_samplerates==NULL) {printf("codec->supported_samplerates = null\n"); //结果为:codec->supported_samplerates = null} else {int i =0;while(1){if(codec->supported_samplerates[i] == 0){break;}else{printf("codec->supported_samplerates[%d] = %d\n",i,codec->supported_samplerates[i]);i++;}}}//const AVClass *priv_class;              ///< AVClass for the private context//这个 AVClass 暂时不知道在哪里用到。因此暂时不打印log//const AVProfile *profiles;              ///< array of recognized profiles, or NULL if unknown, array is terminated by {AV_PROFILE_UNKNOWN}
//已识别的配置文件阵列,这里理解为 当前编解码器应该有多种编解码方式,比如,AAC 有 LC模式,MAIN模式,等,if (codec->profiles==NULL) {printf("codec->profiles = null\n"); //这时候还是null} else {int i =0;while(1){if(codec->profiles[i].profile == AV_PROFILE_UNKNOWN){break;}else{printf("codec->profiles[%d].name = %s\n",i,codec->profiles[i].name);printf("codec->profiles[%d].profile = %d\n",i,codec->profiles[i].profile);i++;}}}//const char *wrapper_name;if (codec->wrapper_name==NULL) {printf("codec->wrapper_name = null\n"); //这时候还是null} else {printf("codec->wrapper_name = %s\n",codec->wrapper_name);}//    /**
//     * Array of supported channel layouts, terminated with a zeroed layout.
//     */
//    const AVChannelLayout *ch_layouts;//当前编解码器支持的 声道数量if (codec->ch_layouts==NULL) {printf("codec->ch_layouts = null\n");} else {int i =0;while(1){if(codec->ch_layouts[i].nb_channels==0){break;}else{printf("codec->ch_layouts[i].nb_channels = %d\n",i,codec->ch_layouts[i].nb_channels);i++;}}}printf("1111111\n");// 2.分配codec上下文 AVCodecContextcodec_ctx = avcodec_alloc_context3(codec);if (!codec_ctx) {fprintf(stderr, "Could not allocate audio codec context\n");exit(1);}printf("2222\n");// 3.将解码器和解码器上下文进行关联if (avcodec_open2(codec_ctx, codec, NULL) < 0) {fprintf(stderr, "Could not open codec\n");exit(1);}printf("33333333\n");// 4.获取裸流的解析器 AVCodecParserContext(数据)  +  AVCodecParser(方法)parser = av_parser_init(codec->id);if (!parser) {fprintf(stderr, "Parser not found\n");exit(1);}printf("44444444\n");// 5.打开输入文件infile = fopen(filename, "rb");if (!infile) {fprintf(stderr, "Could not open %s\n", filename);exit(1);}// 6.打开输出文件outfile = fopen(outfilename, "wb");if (!outfile) {av_free(codec_ctx);exit(1);}// 7.读取文件进行解码,从infile 中读取,读取的数据存储到 inbuf 中,i并让data指向inbuf的头部指针。读取的大小为 AUDIO_INBUF_SIZE 20480//注意的是 我们给的 inbuf 的大小为 uint8_t inbuf[AUDIO_INBUF_SIZE + AV_INPUT_BUFFER_PADDING_SIZE];实际上为 20480 + 64,为什么要多一个64呢?//这个在 AV_INPUT_BUFFER_PADDING_SIZE 的说明中可以看到,大致意思是有些编解码器有优化,会用32或者64做为一整组数据,如果数据是该文件的末尾,那么就需要有一个buffer,那么64就比较合理//也就是说,我们这时候读取的aac 文件的前20480字节 在 inbuf中,data      = inbuf;data_size = fread(inbuf, 1, AUDIO_INBUF_SIZE, infile);while (data_size > 0){if (!decoded_frame){if (!(decoded_frame = av_frame_alloc())){fprintf(stderr, "Could not allocate audio frame\n");exit(1);}}// av_parser_parse2 函数说明,将 要转化的数据(第五个参数) 和 要转化的数据的大小(第六个参数),//经过解析器和加码器 转化成 传出dada数据(第三个参数) 和 传出data数据大小(第四个参数)//参数1:解析器上下文//参数2:解码器上下文//参数3:传出data数据,从参数5中读取到的数据经过 解析器 和 解码器 处理后,存放到这里//参数4:传出data数据大小,从参数5中读取到的数据经过 解析器 和 解码器 处理后的大小,存放到这里//参数5:要转化的数据地址//参数6:要转化的数据大小//参数7: 是否pts数据//参数7: *@param pts输入演示时间戳。在这里输入AV_NOPTS_VALUE//参数8: *@param dts输入解码时间戳。在这里输入AV_NOPTS_VALUE//参数9: *@param pos输入流中的字节位置。在这里输入 0// 从第5个参数buf中,拿数据,最多拿 buf_size个数据,实际上要拿很多次。//返回值:为每次读取的数据大小。//转化后传出的数据是 AVPacket格式,因此前面会通过 av_packet_alloc 分配//        int av_parser_parse2(AVCodecParserContext *s,//                             AVCodecContext *avctx,//                             uint8_t **poutbuf,//                             int *poutbuf_size,//                             const uint8_t *buf,//                             int buf_size,//                             int64_t pts,//                             int64_t dts,//                             int64_t pos);ret = av_parser_parse2(parser, codec_ctx, &pkt->data, &pkt->size,data, data_size,AV_NOPTS_VALUE, AV_NOPTS_VALUE, 0);if (ret < 0){fprintf(stderr, "Error while parsing\n");exit(1);}data      += ret;   // 跳过已经解析的数据data_size -= ret;   // 对应的缓存大小也做相应减小//经过av_parser_parse2后,真正的数据,这时候已经在pkt 中了,因此要将pkt中的数据处理成 pcm数据。通过自己写的decode方法完成,解码后的数据就是 原始数据了,在ffmpeg中通过 AVFrame存储,因此这里要存储到 AVFrame中if (pkt->size)decode(codec_ctx, pkt, decoded_frame, outfile);if (data_size < AUDIO_REFILL_THRESH)    // 如果数据少了则再次读取{memmove(inbuf, data, data_size);    // 把之前剩的数据拷贝到buffer的起始位置data = inbuf;// 读取数据 长度: AUDIO_INBUF_SIZE - data_sizelen = fread(data + data_size, 1, AUDIO_INBUF_SIZE - data_size, infile);if (len > 0)data_size += len;}}/* 冲刷解码器 */pkt->data = NULL;   // 让其进入drain modepkt->size = 0;decode(codec_ctx, pkt, decoded_frame, outfile);fclose(outfile);fclose(infile);avcodec_free_context(&codec_ctx);av_parser_close(parser);av_frame_free(&decoded_frame);av_packet_free(&pkt);printf("main finish, please enter Enter and exit\n");return 0;
}
相关文章:
音视频开发17 FFmpeg 音频解码- 将 aac 解码成 pcm
这一节,接 音视频开发12 FFmpeg 解复用详情分析,前面我们已经对一个 MP4文件,或者 FLV文件,或者TS文件进行了 解复用,解出来的 视频是H264,音频是AAC,那么接下来就要对H264和AAC进行处理,这一节…...
)
vue2中封装图片上传获取方法类(针对后端返回的数据不是图片链接,只是图片编号)
在Vue 2中实现商品列表中带有图片编号,并将返回的图片插入到商品列表中,可以通过以下步骤完成: 在Vue组件的data函数中定义商品列表和图片URL数组。 创建一个方法来获取每个商品的图片URL。 使用v-for指令在模板中遍历商品列表,并…...
this指针和静态成员)
【C++面向对象编程】(二)this指针和静态成员
文章目录 this指针和静态成员this指针静态成员 this指针和静态成员 this指针 C中类的成员变量和成员函数的存储方式有所不同: 成员变量:对象的成员变量直接作为对象的一部分存储在内存中。成员函数:成员函数(非静态成员函数&am…...

最大矩形问题
柱状图中最大的矩形 题目 分析 矩形的面积等于宽乘以高,因此只要能确定每个矩形的宽和高,就能计算它的面积。如果直方图中一个矩形从下标为 i 的柱子开始,到下标为 j 的柱子结束,那么这两根柱子之间的矩形(含两端的柱…...

LeetCode62不同路径
题目描述 一个机器人位于一个 m x n 网格的左上角 (起始点在下图中标记为 “Start” )。机器人每次只能向下或者向右移动一步。机器人试图达到网格的右下角(在下图中标记为 “Finish” )。问总共有多少条不同的路径? …...
GNU Radio实现OFDM Radar
文章目录 前言一、GNU Radio Radar Toolbox编译及安装二、ofdm radar 原理讲解三、GNU Radio 实现 OFDM Radar1、官方提供的 grc①、grc 图②、运行结果 2、修改后的便于后续可实现探测和通信的 grc①、grc 图②、运行结果 四、资源自取 前言 本文使用 GNU Radio 搭建 OFDM Ra…...

东方博宜1760 - 整理抽屉
题目描述 期末考试即将来临,小T由于同时肩负了学习、竞赛、班团活动等多方面的任务,一直没有时间好好整理他的课桌抽屉,为了更好地复习,小T首先要把课桌抽屉里的书分类整理好。 小T的抽屉里堆着 N 本书,每本书的封面上…...
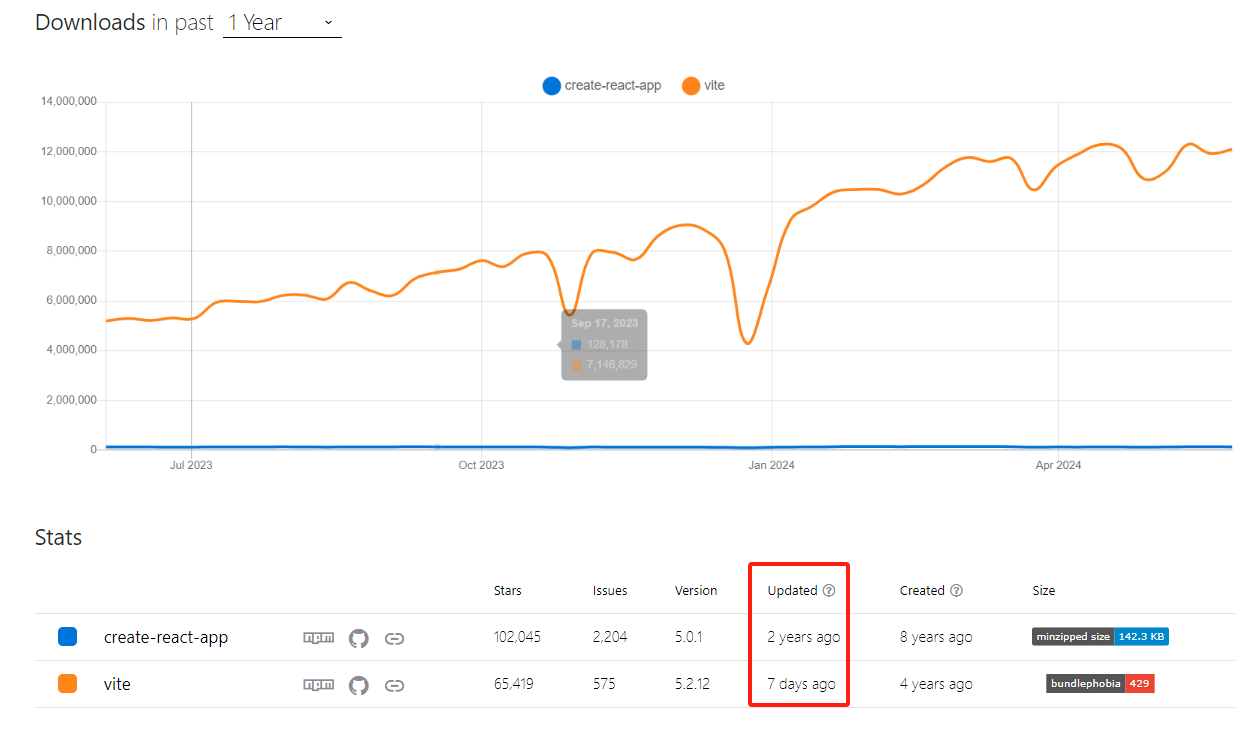
react快速开始(四)-之Vite 还是 (Create React App) CRA? 用Vite创建项目
文章目录 react快速开始(四)-之Vite 还是 (Create React App) CRA? 用Vite创建项目背景Vite 和 (Create React App) CRAVite?Vite 是否支持 TypeScript? 用Vite创建react项目参考 react快速开始(四)-之Vite 还是 (Create React App) CRA? 用Vite创建项…...
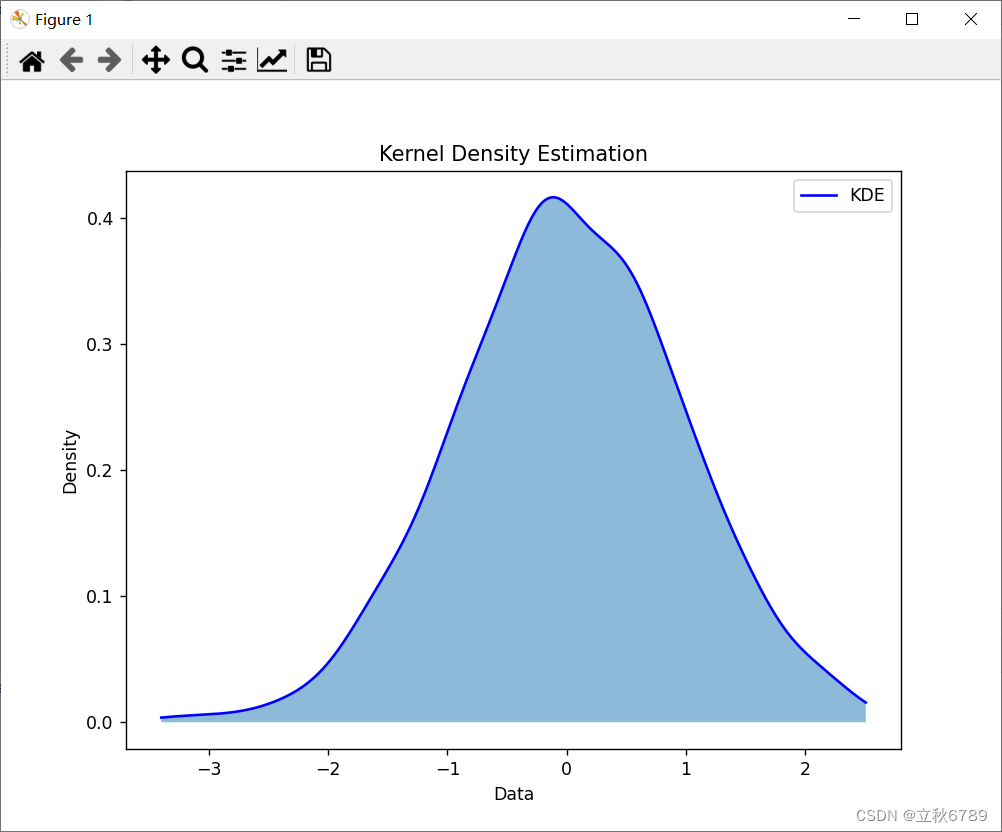
使用python绘制核密度估计图
使用python绘制核密度估计图 核密度估计图介绍效果代码 核密度估计图介绍 核密度估计(Kernel Density Estimation,KDE)是一种用于估计数据概率密度函数的非参数方法。与直方图不同,KDE 可以生成平滑的密度曲线,更好地…...
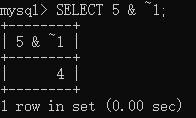
5. MySQL 运算符和函数
文章目录 【 1. 算术运算符 】【 2. 逻辑运算符 】2.1 逻辑非 (NOT 或者 !)2.2 逻辑与运算符 (AND 或者 &&)2.3 逻辑或 (OR 或者 ||)2.4 异或运算 (XOR) 【 3. 比较运算符 】3.1 等于 3.2 安全等于运算符 <>3.3 不等于运算符 (<> 或者 !)3.4 小于等于运算符…...

Linux学习之vi文本编辑器的使用
天行健,君子以自强不息;地势坤,君子以厚德载物。 每个人都有惰性,但不断学习是好好生活的根本,共勉! 文章均为学习整理笔记,分享记录为主,如有错误请指正,共同学习进步。…...

【数据结构】链表与顺序表的比较
不同点: 顺序表和链表是两种常见的数据结构,他们的不同点在于存储方式和插入、删除操作、随机访问、cpu缓存利用率等方面。 一、存储方式不同: 顺序表: 顺序表的存储方式是顺序存储,在内存中申请一块连续的空间,通…...

dart 基本语法
//入口方法 main() 或 void main() //数据类型 原生数据类型 String int double bool null 注意:String 包函 ‘’ “” ‘’’ ‘’’ 三种形式复杂数据类型 list Set Map自定义数据类型 class inheritance动态数据类型 var 注:dart 是静态类型语言&a…...
)
【经验分享】嵌入式入坑经历(选段)
文章目录 你现在的工作中所用到的专业知识有哪些呢?为什么想转行了?后来为什么从事了嵌入式行业呢?你对嵌入式的兴趣是何时培养起来的?你是怎么平衡兴趣爱好和工作的关系的?平时做的事情对你现在的工作有哪些帮助?对于有志学习嵌入式开发的在校大学生…...

Docker面试整理-Docker与虚拟机的区别是什么?
Docker 容器和传统的虚拟机(VM)都是提供隔离的运行环境以部署和运行应用程序的技术,但它们在架构和性能上存在显著的不同。了解这些差异可以帮助你选择最适合特定需求的解决方案: 基础架构:虚拟机:每个虚拟机都包括完整的操作系统、应用程序、必需的库和二进制文件,运行在…...

Java:JDK8 GC中ParNew和CMS的问题说明
JDK8中常用如下的垃圾收集器,它们分别运用在年轻代和老年代: ParNew : 年轻代垃圾收集器,多线程,采用标记—复制算法。 CMS:老年代的收集器,全称(Concurrent Mark and Sweep)&#…...
学单片机前先学什么?
先学c语言和数字电路 这里默认你说的单片机是51单片机,通过你的问题,我猜你的单片机应该还没有入门,如果是入门的话,一般都是从51单片机开始的。刚好我有一些资料,是我根据网友给的问题精心整理了一份「单片机的资料从…...

数据可视化:Matplotlib 与 Seaborn
数据可视化是数据分析中至关重要的一部分,它能帮助我们直观地理解数据的分布、趋势和关系。Python 中,Matplotlib 和 Seaborn 是两个最常用的可视化库。本文将详细介绍如何使用 Matplotlib 和 Seaborn 进行数据可视化,包括基本图形、图形定制…...

【linux】自定义快捷命令/脚本
linux自定义快捷命令 场景自定义命令自定义脚本 场景 深度学习经常要切换到自己环境,conda activate mmagic,但是又不想每次重复打这么多字,想使用快捷命令直接切换。 自定义命令 使用别名(alias)或自定义脚本来创建…...
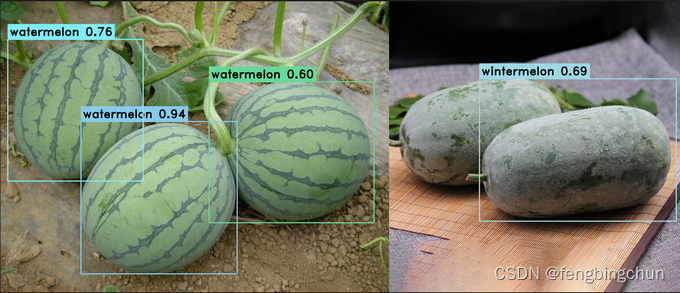
使用onnxruntime加载YOLOv8生成的onnx文件进行目标检测
在网上下载了60多幅包含西瓜和冬瓜的图像组成melon数据集,使用 LabelMe 工具进行标注,然后使用 labelme2yolov8 脚本将json文件转换成YOLOv8支持的.txt文件,并自动生成YOLOv8支持的目录结构,包括melon.yaml文件,其内容…...
)
云计算——弹性云计算器(ECS)
弹性云服务器:ECS 概述 云计算重构了ICT系统,云计算平台厂商推出使得厂家能够主要关注应用管理而非平台管理的云平台,包含如下主要概念。 ECS(Elastic Cloud Server):即弹性云服务器,是云计算…...

Redis相关知识总结(缓存雪崩,缓存穿透,缓存击穿,Redis实现分布式锁,如何保持数据库和缓存一致)
文章目录 1.什么是Redis?2.为什么要使用redis作为mysql的缓存?3.什么是缓存雪崩、缓存穿透、缓存击穿?3.1缓存雪崩3.1.1 大量缓存同时过期3.1.2 Redis宕机 3.2 缓存击穿3.3 缓存穿透3.4 总结 4. 数据库和缓存如何保持一致性5. Redis实现分布式…...

Cesium1.95中高性能加载1500个点
一、基本方式: 图标使用.png比.svg性能要好 <template><div id"cesiumContainer"></div><div class"toolbar"><button id"resetButton">重新生成点</button><span id"countDisplay&qu…...

Cilium动手实验室: 精通之旅---20.Isovalent Enterprise for Cilium: Zero Trust Visibility
Cilium动手实验室: 精通之旅---20.Isovalent Enterprise for Cilium: Zero Trust Visibility 1. 实验室环境1.1 实验室环境1.2 小测试 2. The Endor System2.1 部署应用2.2 检查现有策略 3. Cilium 策略实体3.1 创建 allow-all 网络策略3.2 在 Hubble CLI 中验证网络策略源3.3 …...

论文浅尝 | 基于判别指令微调生成式大语言模型的知识图谱补全方法(ISWC2024)
笔记整理:刘治强,浙江大学硕士生,研究方向为知识图谱表示学习,大语言模型 论文链接:http://arxiv.org/abs/2407.16127 发表会议:ISWC 2024 1. 动机 传统的知识图谱补全(KGC)模型通过…...
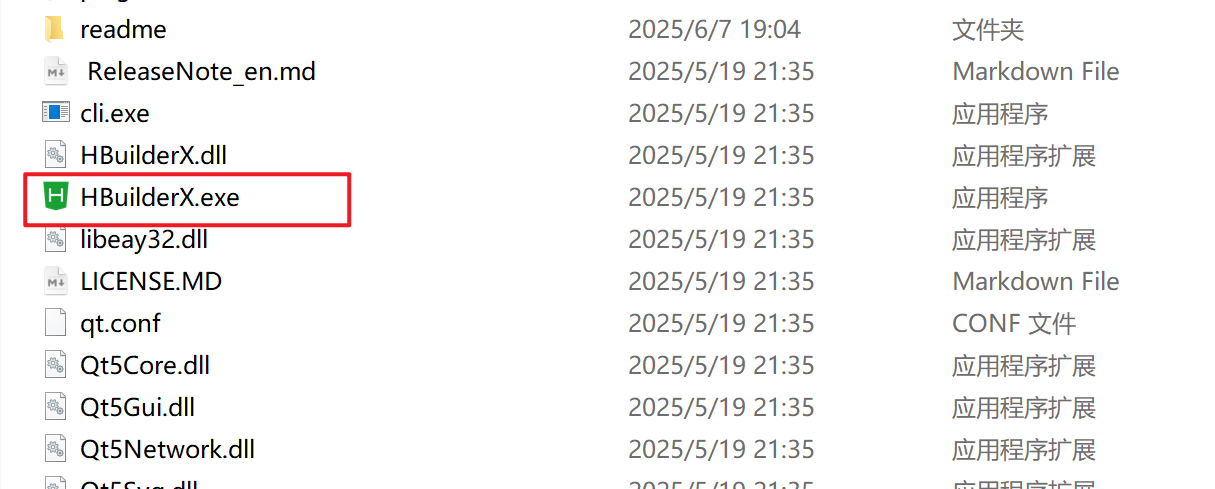
HBuilderX安装(uni-app和小程序开发)
下载HBuilderX 访问官方网站:https://www.dcloud.io/hbuilderx.html 根据您的操作系统选择合适版本: Windows版(推荐下载标准版) Windows系统安装步骤 运行安装程序: 双击下载的.exe安装文件 如果出现安全提示&…...

Android15默认授权浮窗权限
我们经常有那种需求,客户需要定制的apk集成在ROM中,并且默认授予其【显示在其他应用的上层】权限,也就是我们常说的浮窗权限,那么我们就可以通过以下方法在wms、ams等系统服务的systemReady()方法中调用即可实现预置应用默认授权浮…...

React---day11
14.4 react-redux第三方库 提供connect、thunk之类的函数 以获取一个banner数据为例子 store: 我们在使用异步的时候理应是要使用中间件的,但是configureStore 已经自动集成了 redux-thunk,注意action里面要返回函数 import { configureS…...

A2A JS SDK 完整教程:快速入门指南
目录 什么是 A2A JS SDK?A2A JS 安装与设置A2A JS 核心概念创建你的第一个 A2A JS 代理A2A JS 服务端开发A2A JS 客户端使用A2A JS 高级特性A2A JS 最佳实践A2A JS 故障排除 什么是 A2A JS SDK? A2A JS SDK 是一个专为 JavaScript/TypeScript 开发者设计的强大库ÿ…...

并发编程 - go版
1.并发编程基础概念 进程和线程 A. 进程是程序在操作系统中的一次执行过程,系统进行资源分配和调度的一个独立单位。B. 线程是进程的一个执行实体,是CPU调度和分派的基本单位,它是比进程更小的能独立运行的基本单位。C.一个进程可以创建和撤销多个线程;同一个进程中…...