SpringBoot学习06-[SpringBoot与AOP、SpringBoot自定义starter]
SpringBoot自定义starter
- SpringBoot与AOP
- SpringBoot集成Mybatis-整合druid
- 在不使用启动器的情况下,手动写配置类进行整合
- 使用启动器的情况下,进行整合
- SpringBoot启动原理
- 源码解析
- 创建SpringApplication
- 初始化SpringApplication总结
- 启动
- SpringBoot自定义Starter
- 定义父maven项目
- starter模块
- autoconfigure模块
- 定义properties文件用于属性绑定
- 定义controller用于进行功能展示
- 定义配置类
- 新建spring.factories文件
- 打包
- 在其他工程进行使用
SpringBoot与AOP
使用AOP实现用户接口访问日志功能
- 添加AOP场景启动器
<!--添加AOP场景启动器--><dependency><groupId>org.springframework.boot</groupId><artifactId>spring-boot-starter-aop</artifactId></dependency>
- 定义切面类
@Aspect
@Component
public class LogAspect {Logger log= LoggerFactory.getLogger(LogAspect.class);@Around("execution(* com.springboot.controller.*.*(..))&&" +"@annotation(apiOperation)")public Object around(ProceedingJoinPoint joinPoint, ApiOperation apiOperation) throws Throwable {StringBuilder loginfo=new StringBuilder();Class<?> controller = joinPoint.getThis().getClass();Api annotation = controller.getAnnotation(Api.class);if (annotation != null) {loginfo.append(annotation.value());}String value = apiOperation.value();loginfo.append(value);log.info("请求接口相关信息:{}",loginfo.toString());return joinPoint.proceed();}
}
- 测试
通过swaager进行测试
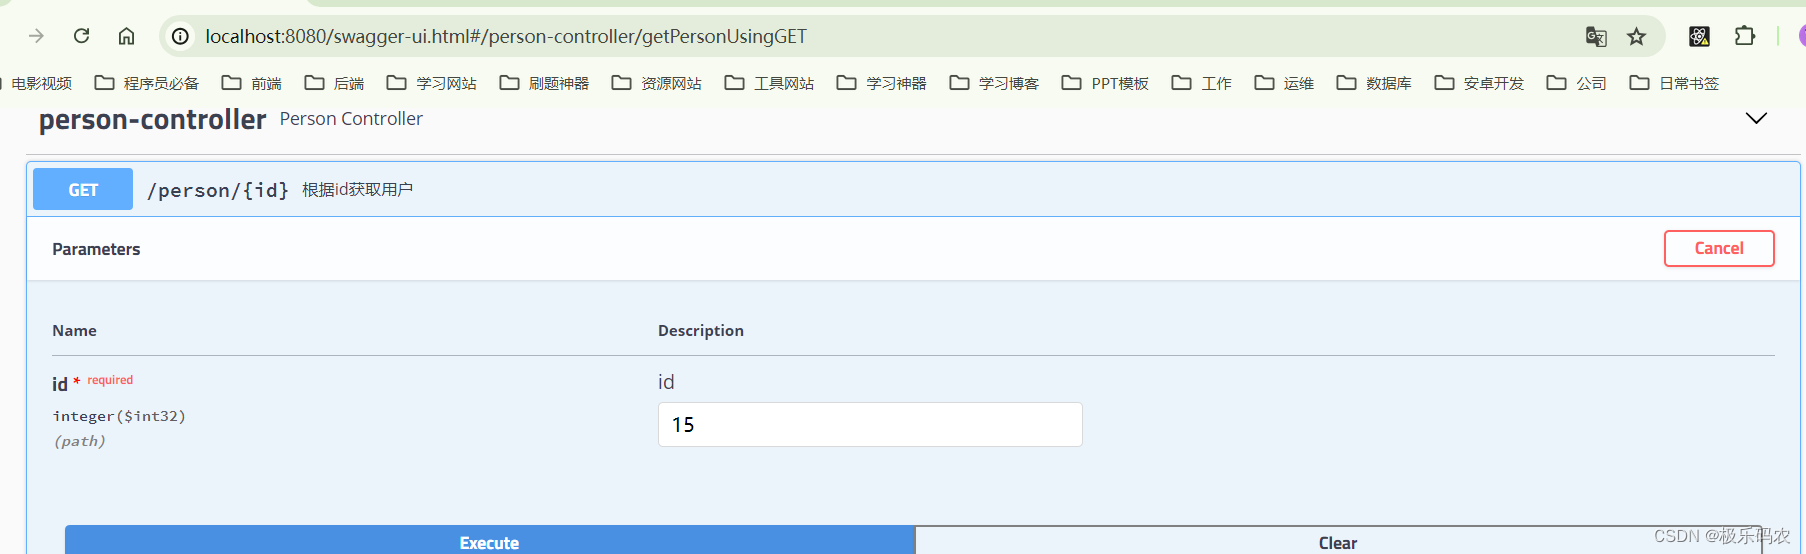
可以看到日志信息已经被打印

SpringBoot集成Mybatis-整合druid
整合druid的目的是为了引入数据控制台
在不使用启动器的情况下,手动写配置类进行整合
- 整合druid配置datasouce
- 引入druid依赖
<!--sprinboot版本2.6.6--><parent><groupId>org.springframework.boot</groupId><artifactId>spring-boot-starter-parent</artifactId><version>2.6.6</version></parent><!--sprinboot整合druid--><!--jdbc--><dependency><groupId>org.springframework.boot</groupId><artifactId>spring-boot-starter-jdbc</artifactId></dependency><!--mysql驱动--><dependency><groupId>mysql</groupId><artifactId>mysql-connector-java</artifactId></dependency><!--连接池--><dependency><groupId>com.alibaba</groupId><artifactId>druid</artifactId><version>1.2.3</version></dependency>
- 配置文件
spring:datasource:username: rootpassword: 123456driver-class-name: com.mysql.cj.jdbc.Driverurl: jdbc:mysql://localhost:3306/personaltesttype: com.alibaba.druid.pool.DruidDataSource#初始化时运行sql脚本schema: classpath:sql/test.sqlinitialization-mode: always
- 配置类
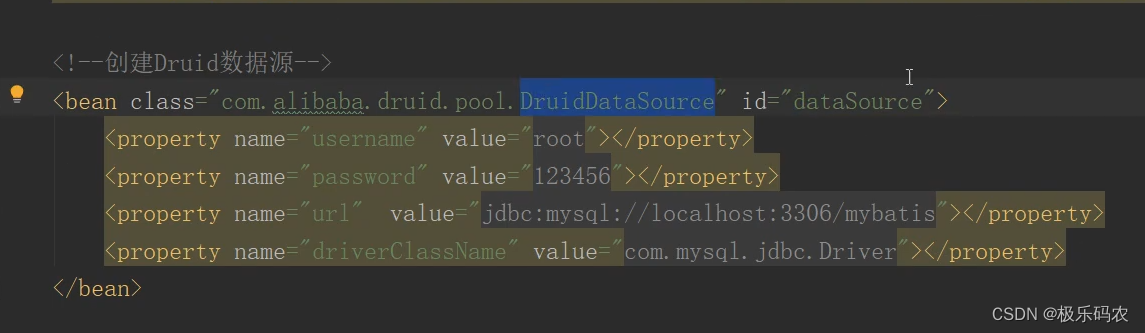
在没有启动器的情况下我们需要手动配置配置类,配置DruidDataSource的bean
@ConditionalOnProperty(“spring.datasource.type”):配置文件配置spring.datasource.type属性,配置类才会生效
@ConfigurationProperties(“spring.datasource”)可以放在方法上对bean进行属性注入
@Configuration
@ConditionalOnProperty("spring.datasource")
public class CustomDataSourceConfig {@Bean@ConfigurationProperties("spring.datasource") //会绑定application.yml中所有以spring.datasource开头的配置,绑定到datasourcepublic DataSource dataSource(){return new DruidDataSource();}
}
- 测试
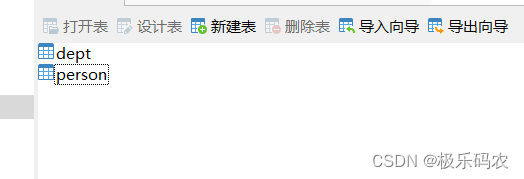
看启动的时候,sql脚本是否执行正确执行
成功执行了脚本插入了两个表
- 整合druid配置监控台
- 配置类添加监控台sevlet和监控台服务过滤器
@Configuration
@ConditionalOnProperty("spring.datasource.bean")
public class CustomDataSourceConfig {@Bean@ConfigurationProperties("spring.datasource") //会绑定application.yml中所有以spring.datasource开头的配置,绑定到datasourcepublic DataSource dataSource() {return new DruidDataSource();}/*** 监控台servlet*/@Beanpublic ServletRegistrationBean<StatViewServlet> statViewServlet() {ServletRegistrationBean<StatViewServlet> bean = new ServletRegistrationBean<>();bean.setServlet(new StatViewServlet());bean.addUrlMappings("/druid/*");//添加白名单bean.addInitParameter("allow", "127.0.0.1");//添加黑名单,当白名单和黑名单重复时,黑名单优先级更高bean.addInitParameter("deny","127.0.0.1");//添加控制台管理用户bean.addInitParameter("loginUsername", "admin");bean.addInitParameter("loginPassword", "123456");//是否能够重复数据bean.addInitParameter("resetEnable", "false");return bean;}/*** 监控台filter:服务过滤器*/@Beanpublic FilterRegistrationBean<WebStatFilter> webStatFilter() {FilterRegistrationBean<WebStatFilter> filter = new FilterRegistrationBean<>();filter.setFilter(new WebStatFilter());//添加过滤规则filter.addUrlPatterns("/*");// 忽略过滤格式(这些访问都不会被监控到,会被忽略掉)filter.addInitParameter("exclusions", "*.js,*.gif,*.jpg,*.png,*.css,*.ico,/druid/*,");return filter;}@Beanpublic StatFilter statFilter() {StatFilter statFilter = new StatFilter();//慢sql记录statFilter.setLogSlowSql(true);statFilter.setMergeSql(true);//超过多少时间为慢sqlstatFilter.setSlowSqlMillis(3000);return statFilter;}
}
此时访问:http://localhost:8080/druid/可以进入控制台(正常情况下可以,但是这儿不行始终404,考虑是springboot和druid版本不匹配问题)
这儿就用配置的方式了解一下整合数据控制台需要什么,需要一个StatViewServlet的bean和WebStatFilter的bean帮助理解,druid自动配置类整合的时候如何整合。

使用启动器的情况下,进行整合
在使用启动器的情况下只需要添加启动依赖就可以了,配置文件不变,配置文件也是上面的不变
- 引入依赖
<!--连接池--><dependency><groupId>com.alibaba</groupId><artifactId>druid-spring-boot-starter</artifactId><version>1.2.3</version></dependency>
再次访问还是404,由上述手动配置可知需要两个bean,我们看druid的自动配置类

它导入了DruidStatViewServletConfiguration和DruidWebStatFilterConfiguration两个配置类分别对应手动配置的两个bean,这两个配置类会分别配置两个bean。我们在看DruidStatViewServletConfiguration配置类
``

里面加了@ConditionalOnProperty( name = {"spring.datasource.druid.stat-view-servlet.enabled"}, havingValue = "true" )注解,要让这个配置生效,配置文件必须有spring.datasource.druid.stat-view-servlet.enabled属性,并且值必须为true
- 配置文件配置
druid:stat-view-servlet:enabled: true
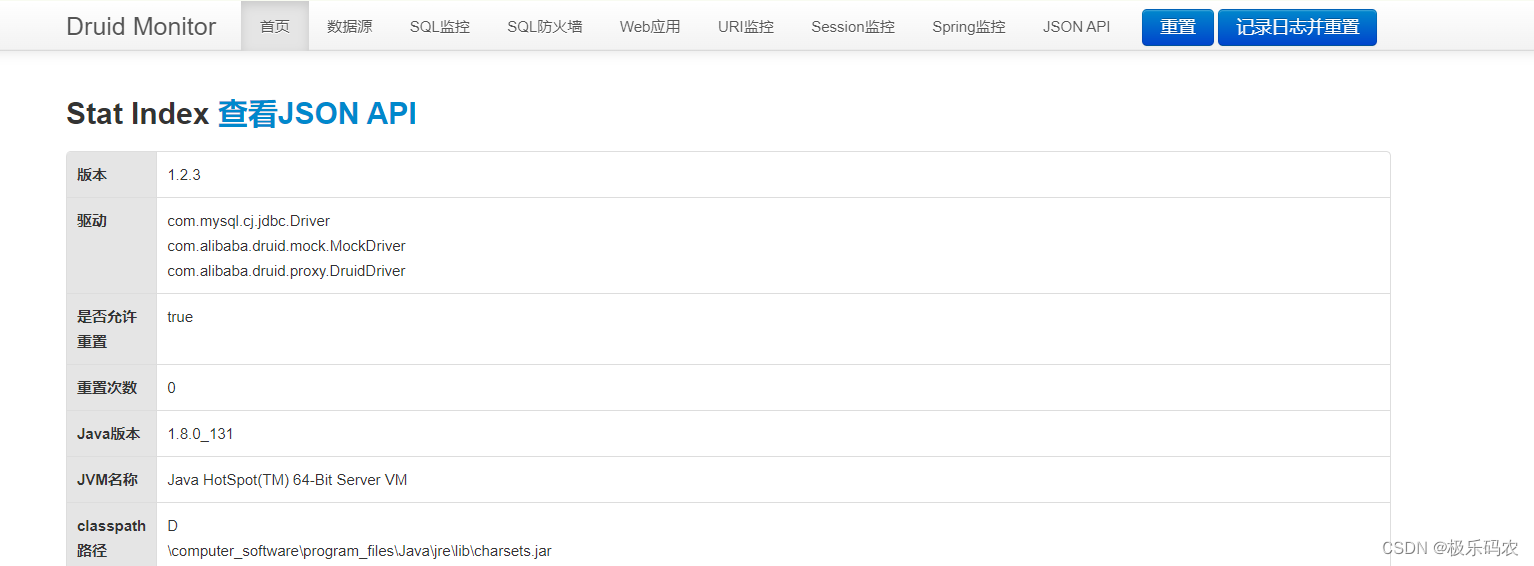
再次访问:http://localhost:8080/druid/index.html
成功进入监控台
SpringBoot启动原理
SpingBoot在启动的时候使用了ServletWebServerApplicationContext
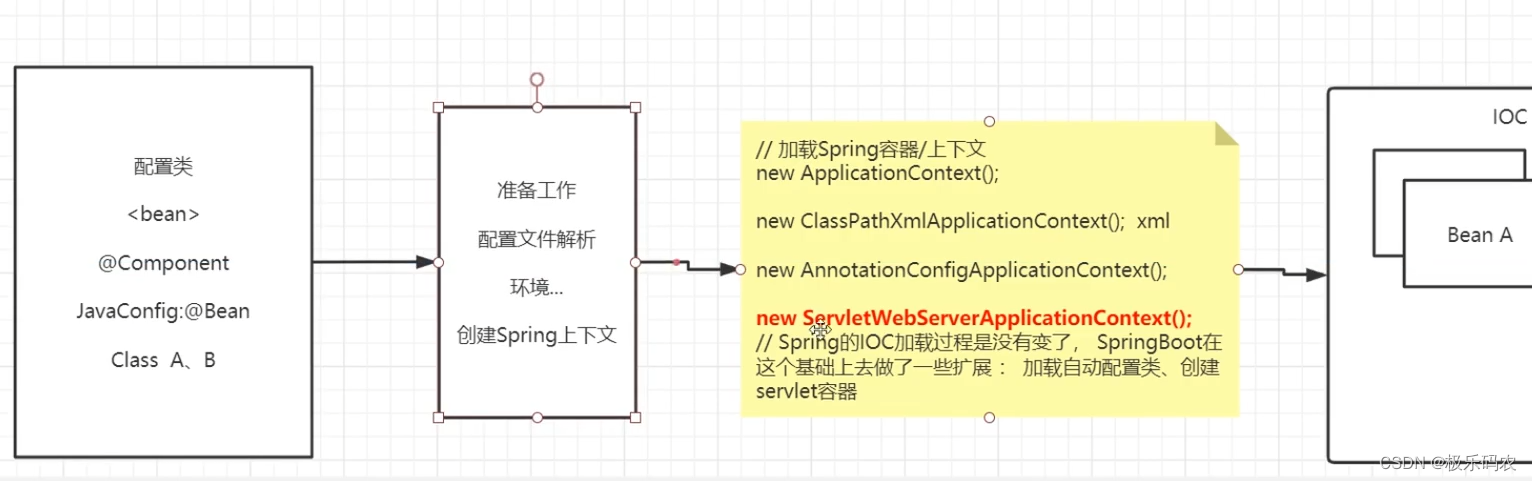
接下来源码分析:主要看准备准备工作阶段
源码解析
1、调用SpringApplication.run启动SpringBoot
SpringApplication.run(MyApplication.class,args);
2、使用自定义SpringApplication进行启动
public static ConfigurableApplicationContext run(Class<?>[] primarySources, String[] args) {return (new SpringApplication(primarySources)).run(args);}
启动的时候有两步:
- 创建SpringApplication
- 启动
创建SpringApplication
调用构造方法
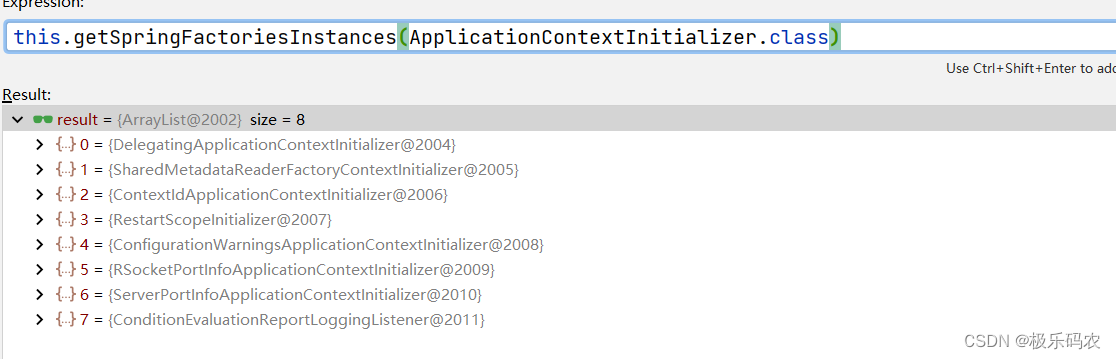
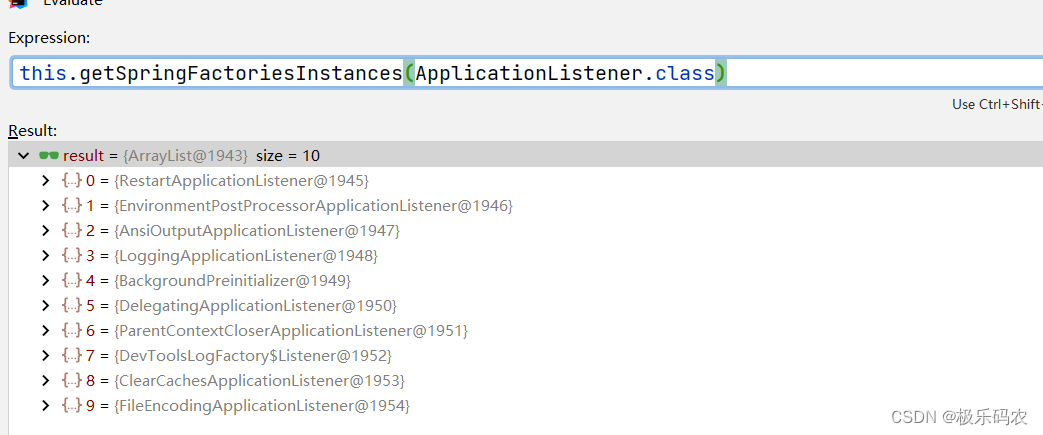
public SpringApplication(ResourceLoader resourceLoader, Class<?>... primarySources) {this.sources = new LinkedHashSet();this.bannerMode = Banner.Mode.CONSOLE;this.logStartupInfo = true;this.addCommandLineProperties = true;this.addConversionService = true;this.headless = true;this.registerShutdownHook = true;this.additionalProfiles = Collections.emptySet();this.isCustomEnvironment = false;this.lazyInitialization = false;this.applicationContextFactory = ApplicationContextFactory.DEFAULT;this.applicationStartup = ApplicationStartup.DEFAULT;this.resourceLoader = resourceLoader;Assert.notNull(primarySources, "PrimarySources must not be null");//将启动类放入primarySourcesthis.primarySources = new LinkedHashSet(Arrays.asList(primarySources));//根据classpath下的类,推算当前web应用类型(wbflux、servlet)this.webApplicationType = WebApplicationType.deduceFromClasspath();this.bootstrapRegistryInitializers = new ArrayList(this.getSpringFactoriesInstances(BootstrapRegistryInitializer.class));//就是去spring.factories 中去获取所有key:org.springframework.context.ApplicationContextInitializer的valuethis.setInitializers(this.getSpringFactoriesInstances(ApplicationContextInitializer.class));//就是去spring.factories 中去获取所有key:org.springframework.context.ApplicationListener的valuethis.setListeners(this.getSpringFactoriesInstances(ApplicationListener.class));//根据main方法推算粗mainApplicationClassthis.mainApplicationClass = this.deduceMainApplicationClass();}
ApplicationContextInitializer
ApplicationListener
推算出的启动类

初始化SpringApplication总结
总结:
- 获取启动类
- 获取应用类型
- 读取了对外扩展的ApplicationContextInitializer和ApplicationListener(从factories文件读取)
- 根据main方法推断启动类
就是去初始化了一些信息
启动
- run
- 启动springboot最核心的逻辑
public ConfigurableApplicationContext run(String... args) {//记录应用启动时间long startTime = System.nanoTime();DefaultBootstrapContext bootstrapContext = this.createBootstrapContext();//它是任何spring上下文的接口,所以可以接收任何applicationtext实现ConfigurableApplicationContext context = null;//开启了Headless模式(了解即可)this.configureHeadlessProperty();//又去spring.factories中读取了 SpringApplicationRunListener类型的组件,就是用来进行发布事件或者说运行监听器(发布事件和运行监听器是一个意思,发布事件,监听器就会运行)SpringApplicationRunListeners listeners = this.getRunListeners(args);//开始运行监听器,发布1、ApplicationStartingEvent事件,在运行时发送listeners.starting(bootstrapContext, this.mainApplicationClass);try {//根据命令行参数 实例化一个ApplicationArgumentsApplicationArguments applicationArguments = new DefaultApplicationArguments(args);//预初始化环境,读取环境变量,读取配置文件信息(基于监听器)ConfigurableEnvironment environment = this.prepareEnvironment(listeners, bootstrapContext, applicationArguments);//忽略beaninfo的beanthis.configureIgnoreBeanInfo(environment);//打印banner横条Banner printedBanner = this.printBanner(environment);//创建spring上下文context = this.createApplicationContext();context.setApplicationStartup(this.applicationStartup);//预初始化contextthis.prepareContext(bootstrapContext, context, environment, listeners, applicationArguments, printedBanner);//加载spring ioc容器,启动servlet容器 ** 相当重要 由于是使用AnnotationConfigServletWebServerApplicationContext 启动的Spring容器,// 所以springboot对它进行了扩展:加载自动配置类:invokeBeanFactoryPostProcessors;创建servlet容器:onRefreshthis.refreshContext(context);this.afterRefresh(context, applicationArguments);Duration timeTakenToStartup = Duration.ofNanos(System.nanoTime() - startTime);if (this.logStartupInfo) {(new StartupInfoLogger(this.mainApplicationClass)).logStarted(this.getApplicationLog(), timeTakenToStartup);}//发布ApplicationStartedEvent事件listeners.started(context, timeTakenToStartup);this.callRunners(context, applicationArguments);} catch (Throwable var12) {this.handleRunFailure(context, var12, listeners);throw new IllegalStateException(var12);}try {Duration timeTakenToReady = Duration.ofNanos(System.nanoTime() - startTime);//发布了ApplicationReadyEvent事件listeners.ready(context, timeTakenToReady);return context;} catch (Throwable var11) {this.handleRunFailure(context, var11, (SpringApplicationRunListeners)null);throw new IllegalStateException(var11);}}
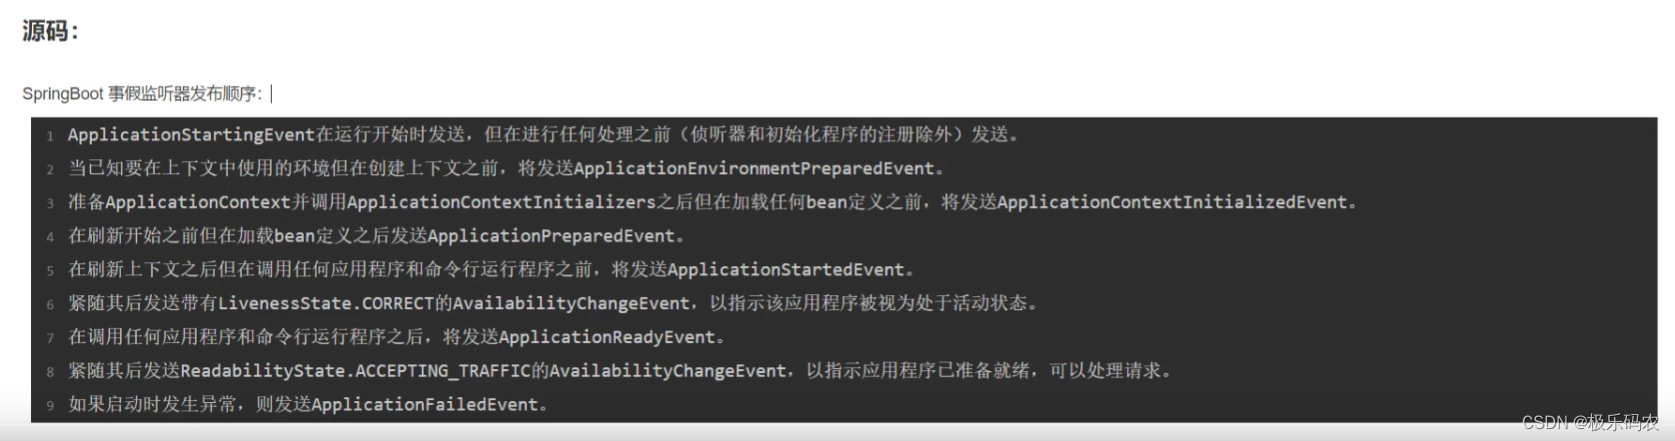
在启动第一步会发布ApplicationStartingEvent事件
public void starting(ConfigurableBootstrapContext bootstrapContext) {this.initialMulticaster.multicastEvent(new ApplicationStartingEvent(bootstrapContext, this.application, this.args));}
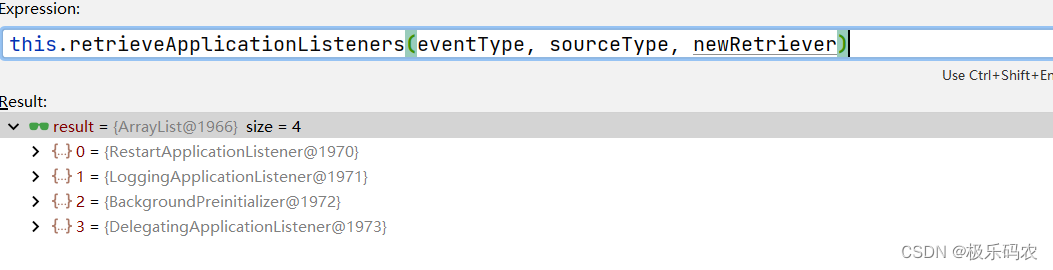
ApplicationStartingEvent事件对应的监听器,当事件发布后,监听器就会运行
环境准备prepareEnvironment
private ConfigurableEnvironment prepareEnvironment(SpringApplicationRunListeners listeners, DefaultBootstrapContext bootstrapContext, ApplicationArguments applicationArguments) {//根据webapplicationType, 创建Environment 创建就会读取 java环境变量和系统环境变量ConfigurableEnvironment environment = this.getOrCreateEnvironment();//将命令行参数读取到环境变量中,供应用使用this.configureEnvironment((ConfigurableEnvironment)environment, applicationArguments.getSourceArgs());//将@PropertySource()的配置信息,放在第一位,因为读取配置文件@PropertySource()优先级最低ConfigurationPropertySources.attach((Environment)environment);//在创建上下文之前,会发布ApplicationEnvironmentPreparedEvent事件 目的就是读取springboot全局配置文件listeners.environmentPrepared(bootstrapContext, (ConfigurableEnvironment)environment);DefaultPropertiesPropertySource.moveToEnd((ConfigurableEnvironment)environment);Assert.state(!((ConfigurableEnvironment)environment).containsProperty("spring.main.environment-prefix"), "Environment prefix cannot be set via properties.");//将所有spring.main 开头的配置信息绑定到SpringApplication类this.bindToSpringApplication((ConfigurableEnvironment)environment);if (!this.isCustomEnvironment) {environment = this.convertEnvironment((ConfigurableEnvironment)environment);}//更新PropertySourceConfigurationPropertySources.attach((Environment)environment);return (ConfigurableEnvironment)environment;}
预处理context:prepareContext方法
private void prepareContext(DefaultBootstrapContext bootstrapContext, ConfigurableApplicationContext context, ConfigurableEnvironment environment, SpringApplicationRunListeners listeners, ApplicationArguments applicationArguments, Banner printedBanner) {context.setEnvironment(environment);this.postProcessApplicationContext(context);//拿到我们之前读取到的所有ApplicationContextInitializer类型的组件,循环调用它们的initialize方法this.applyInitializers(context);//发布ApplicationContextInitializedEvent 事件listeners.contextPrepared(context);bootstrapContext.close(context);if (this.logStartupInfo) {this.logStartupInfo(context.getParent() == null);this.logStartupProfileInfo(context);}//获取当前spring上下文 beanFactory(用来创建bean)ConfigurableListableBeanFactory beanFactory = context.getBeanFactory();beanFactory.registerSingleton("springApplicationArguments", applicationArguments);if (printedBanner != null) {beanFactory.registerSingleton("springBootBanner", printedBanner);}if (beanFactory instanceof AbstractAutowireCapableBeanFactory) {((AbstractAutowireCapableBeanFactory)beanFactory).setAllowCircularReferences(this.allowCircularReferences);//在spring下 如果出现两个重名的bean,后读取到的会覆盖前面的,但是在boot中设置了不允许覆盖,如果重复会报错if (beanFactory instanceof DefaultListableBeanFactory) {((DefaultListableBeanFactory)beanFactory).setAllowBeanDefinitionOverriding(this.allowBeanDefinitionOverriding);}}//设置当前spring容器是不是要将所有的bean设置为懒加载,true为懒加载,false不懒加载if (this.lazyInitialization) {context.addBeanFactoryPostProcessor(new LazyInitializationBeanFactoryPostProcessor());}Set<Object> sources = this.getAllSources();Assert.notEmpty(sources, "Sources must not be empty");//读取主启动类(因为后续要根据配置类去解析配置的所有bean)this.load(context, sources.toArray(new Object[0]));//读取完配置类后发送ApplicationPreparedEvent事件listeners.contextLoaded(context);}重要:加载spring ioc容器:refreshContext
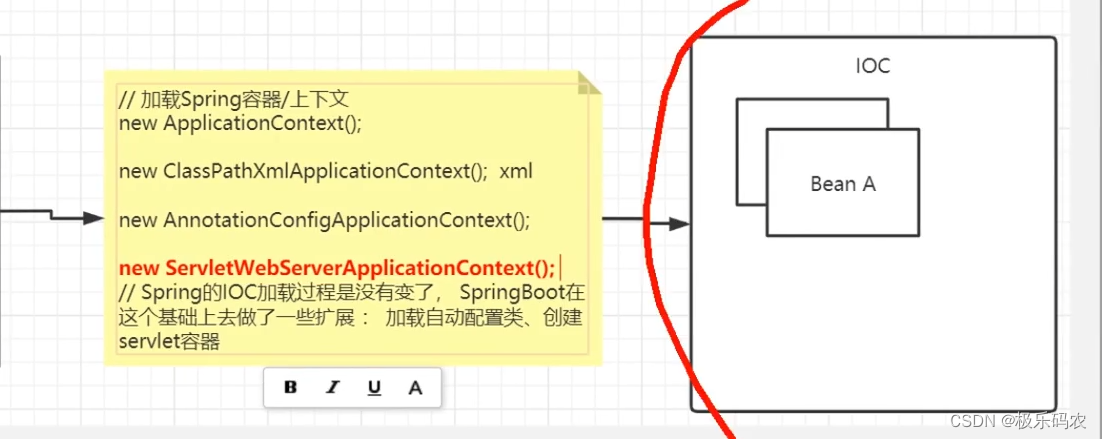
加载spring ioc容器,启动servlet容器 ** 相当重要 由于是使用AnnotationConfigServletWebServerApplicationContext 启动的Spring容器,
所以springboot对它进行了扩展:加载自动配置类:invokeBeanFactoryPostProcessors;创建servlet容器:onRefresh
public void refresh() throws BeansException, IllegalStateException {synchronized(this.startupShutdownMonitor) {StartupStep contextRefresh = this.applicationStartup.start("spring.context.refresh");this.prepareRefresh();ConfigurableListableBeanFactory beanFactory = this.obtainFreshBeanFactory();this.prepareBeanFactory(beanFactory);try {this.postProcessBeanFactory(beanFactory);StartupStep beanPostProcess = this.applicationStartup.start("spring.context.beans.post-process");//调用BeanFactoryPostProcess,扫描class为beanDefinitiointhis.invokeBeanFactoryPostProcessors(beanFactory);this.registerBeanPostProcessors(beanFactory);beanPostProcess.end();this.initMessageSource();this.initApplicationEventMulticaster();//创建servlet容器,启动servlet容器this.onRefresh();this.registerListeners();this.finishBeanFactoryInitialization(beanFactory);this.finishRefresh();} catch (BeansException var10) {if (this.logger.isWarnEnabled()) {this.logger.warn("Exception encountered during context initialization - cancelling refresh attempt: " + var10);}this.destroyBeans();this.cancelRefresh(var10);throw var10;} finally {this.resetCommonCaches();contextRefresh.end();}}}
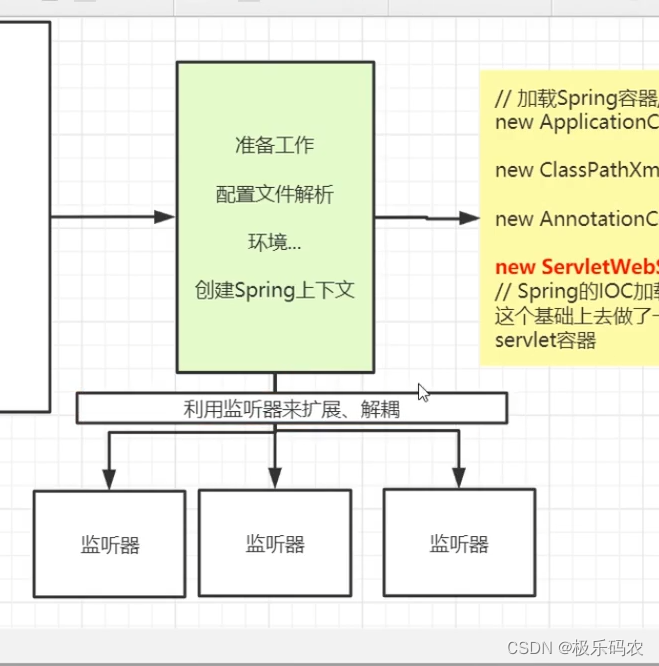
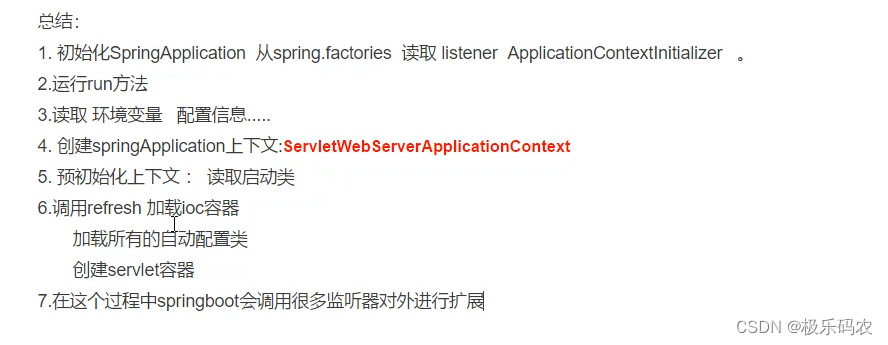
总结:SpringBoot启动的时候会解析配置文件、解析环境变量,创建spring上下文context,执行refresh方法,加载ioc容器,启动servlet容器,在refresh中做了一些扩展,加载自动配置类、创建servlet容器。在启动过程中还会发布一些事件,启动相应的监听器来进行扩展和解耦。
SpringBoot自定义Starter
自定义一个Starter给web应用添加首页
Sringbootstarter分三个部分:父工程、starter模块、auconfiration模块
定义父maven项目
springboot_custome_starter
<project xmlns="http://maven.apache.org/POM/4.0.0" xmlns:xsi="http://www.w3.org/2001/XMLSchema-instance"xsi:schemaLocation="http://maven.apache.org/POM/4.0.0 http://maven.apache.org/xsd/maven-4.0.0.xsd"><modelVersion>4.0.0</modelVersion><groupId>org.example</groupId><artifactId>springboot_custome_starter</artifactId><version>1.0-SNAPSHOT</version><modules><module>tulingxueyuan-spring-boot-starter</module><module>tulingxueyuan-spring-boot-autoconfigure</module></modules><packaging>pom</packaging><name>springboot_custome_starter</name><url>http://maven.apache.org</url><description>SpringBoot自定义Starter</description><properties><project.build.sourceEncoding>UTF-8</project.build.sourceEncoding></properties><dependencyManagement><dependencies><dependency><groupId>org.springframework.boot</groupId><artifactId>spring-boot-starter-parent</artifactId><version>2.6.6</version><type>pom</type><scope>import</scope></dependency></dependencies></dependencyManagement><dependencies><dependency><groupId>org.springframework.boot</groupId><artifactId>spring-boot-devtools</artifactId></dependency><dependency><groupId>org.springframework.boot</groupId><artifactId>spring-boot-starter</artifactId></dependency></dependencies><!--打包好
帮我们把所有依赖的jar 统统放到jar文件里面的BOOT-INF\lib中
--><build><plugins><plugin><groupId>org.springframework.boot</groupId><artifactId>spring-boot-maven-plugin</artifactId></plugin></plugins></build>
</project>
starter模块
定义tulingxueyuan-spring-boot-starter
只需要引入autoconfiratioin即可,其他项目引用的时候,只需要引入starter即可
<project xmlns="http://maven.apache.org/POM/4.0.0" xmlns:xsi="http://www.w3.org/2001/XMLSchema-instance"xsi:schemaLocation="http://maven.apache.org/POM/4.0.0 http://maven.apache.org/xsd/maven-4.0.0.xsd"><parent><artifactId>springboot_custome_starter</artifactId><groupId>org.example</groupId><version>1.0-SNAPSHOT</version></parent><modelVersion>4.0.0</modelVersion><artifactId>tulingxueyuan-spring-boot-starter</artifactId><packaging>jar</packaging><description>启动器(starter)是一个空的jar文件,仅仅提供辅助性依赖管理,这些依赖需要自动装配或其他类库。</description><name>tulingxueyuan-spring-boot-starter</name><url>http://maven.apache.org</url><properties><project.build.sourceEncoding>UTF-8</project.build.sourceEncoding></properties><dependencies><!--引入autoconfigure--><dependency><groupId>org.example</groupId><artifactId>tulingxueyuan-spring-boot-autoconfigure</artifactId><version>1.0-SNAPSHOT</version></dependency><!--如果当前starter还需要其他类库 就在这里进行引用--></dependencies>
</project>
autoconfigure模块
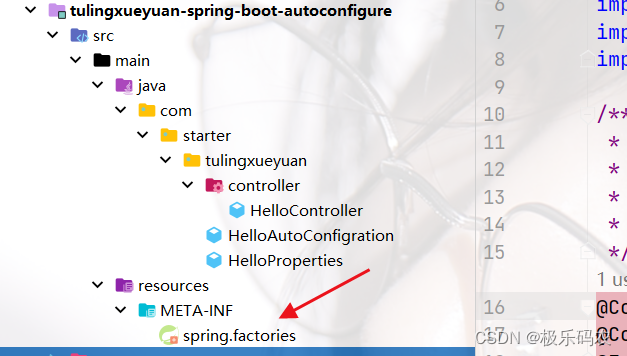
定义tulingxueyuan-spring-boot-autoconfigure模块
<project xmlns="http://maven.apache.org/POM/4.0.0" xmlns:xsi="http://www.w3.org/2001/XMLSchema-instance"xsi:schemaLocation="http://maven.apache.org/POM/4.0.0 http://maven.apache.org/xsd/maven-4.0.0.xsd"><parent><artifactId>springboot_custome_starter</artifactId><groupId>org.example</groupId><version>1.0-SNAPSHOT</version></parent><modelVersion>4.0.0</modelVersion><artifactId>tulingxueyuan-spring-boot-autoconfigure</artifactId><packaging>jar</packaging><name>tulingxueyuan-spring-boot-autoconfigure</name><url>http://maven.apache.org</url><properties><project.build.sourceEncoding>UTF-8</project.build.sourceEncoding></properties><dependencies><dependency><groupId>org.springframework.boot</groupId><artifactId>spring-boot-starter-web</artifactId></dependency><dependency><groupId>org.springframework.boot</groupId><artifactId>spring-boot-configuration-processor</artifactId></dependency></dependencies>
</project>
定义properties文件用于属性绑定
@ConfigurationProperties(prefix = "tuling.hello")
public class HelloProperties {private String name;public String getName() {return name;}public void setName(String name) {this.name = name;}
}
定义controller用于进行功能展示
@RestController
public class HelloController {private HelloProperties properties;public HelloController(HelloProperties properties) {this.properties = properties;}@RequestMapping("/")public String index(){return properties.getName()+"欢迎你";}
}
定义配置类
@Configuration
@ConditionalOnProperty("tuling.hello.name") //配置文件必须有tuling.hello.name属性配置类才会生效
@EnableConfigurationProperties(HelloProperties.class) //开启配置属性类,让属性类可以和配置文件进行属性绑定,并且将属性类注入到spring容器
public class HelloAutoConfigration {@Autowiredprivate HelloProperties properties;@Beanpublic HelloController helloController(){return new HelloController(properties);}
}
新建spring.factories文件
在classpath/META-INF下新建spring.factories文件,让springboot可以扫描到我们的配置类
key:org.springframework.boot.autoconfigure.EnableAutoConfiguration
org.springframework.boot.autoconfigure.EnableAutoConfiguration=\com.starter.tulingxueyuan.HelloAutoConfigration
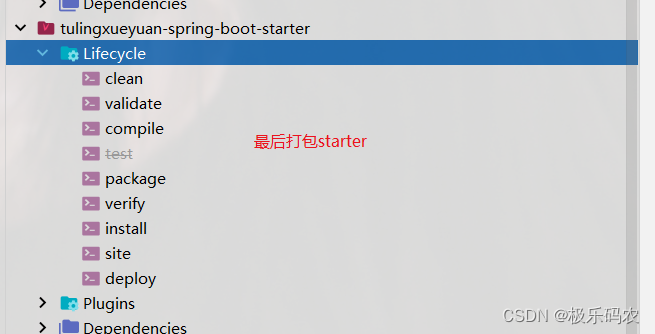
打包
打包的时候注意:先打包父工厂,在打包configration,最后打包stater,不然会打包失败,因为autoconfigration和starter依赖父工程,starter又依赖autuconfigration

- 打包后的机构
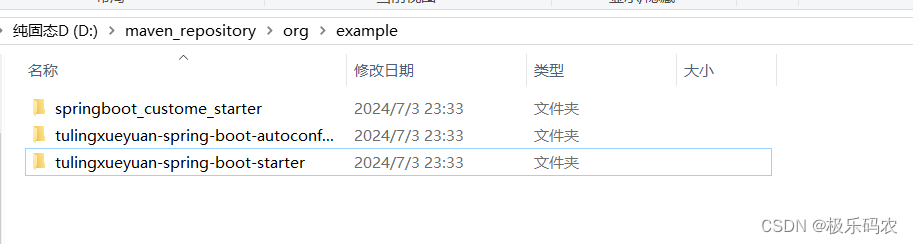
在其他工程进行使用
只需要引入starter模块就可以了
<!--引入自定义starter--><dependency><groupId>org.example</groupId><artifactId>tulingxueyuan-spring-boot-starter</artifactId><version>1.0-SNAPSHOT</version></dependency>
- 配置文件配置,让配置类生效
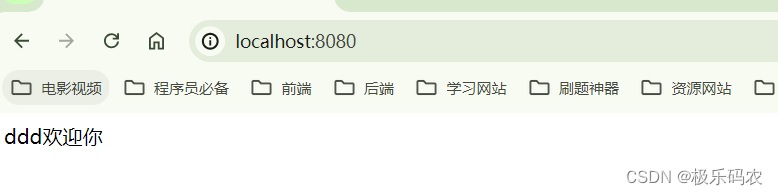
tuling:hello:name: ddd
- 测试
直接启动项目就可以了
相关文章:
SpringBoot学习06-[SpringBoot与AOP、SpringBoot自定义starter]
SpringBoot自定义starter SpringBoot与AOPSpringBoot集成Mybatis-整合druid在不使用启动器的情况下,手动写配置类进行整合使用启动器的情况下,进行整合 SpringBoot启动原理源码解析创建SpringApplication初始化SpringApplication总结 启动 SpringBoot自定义Starter定…...

Maven - 在没有网络的情况下强制使用本地jar包
文章目录 问题解决思路解决办法删除 _remote.repositories 文件代码手动操作步骤验证 问题 非互联网环境,无法从中央仓库or镜像里拉取jar包。 服务器上搭建了一套Nexus私服。 Nexus私服故障,无法连接。 工程里新增了一个Jar的依赖, 本地仓…...
JAVA--JSON转换工具类
JSON转换工具类 import com.alibaba.fastjson.JSONObject; import com.fasterxml.jackson.annotation.JsonInclude; import com.fasterxml.jackson.core.JsonProcessingException; import com.fasterxml.jackson.databind.DeserializationFeature; import com.fasterxml.jackso…...

每日复盘-20240705
今日关注: 20240705 六日涨幅最大: ------1--------300391--------- 长药控股 五日涨幅最大: ------1--------300391--------- 长药控股 四日涨幅最大: ------1--------300391--------- 长药控股 三日涨幅最大: ------1--------300391--------- 长药控股 二日涨幅最…...

MySQL 一些用来做比较的函数
目录 IF:根据不同条件返回不同的值 CASE:多条件判断,类似于Switch函数 IFNULL:用于检查一个值是否为NULL,如果是,则用指定值代替 NULLIF:比较两个值,如果相等则返回NULLÿ…...

一个使用率超高的大数据实验室是如何练成的?
厦门大学嘉庚学院“大数据应用实训中心”(以下简称“实训中心”)自2022年建成以来,已经成为支撑“大数据专业”复合型人才培养的重要支撑,目前实训中心在专业课程实验教学、项目实训、数据分析类双创比赛、毕业设计等方面都有深入…...

Chiasmodon:一款针对域名安全的公开资源情报OSINT工具
关于Chiasmodon Chiasmodon是一款针对域名安全的公开资源情报OSINT工具,该工具可以帮助广大研究人员从各种来源收集目标域名的相关信息,并根据域名、Google Play应用程序、电子邮件地址、IP地址、组织和URL等信息进行有针对性的数据收集。 该工具可以提…...

如何在Java中实现PDF生成
如何在Java中实现PDF生成 大家好,我是免费搭建查券返利机器人省钱赚佣金就用微赚淘客系统3.0的小编,也是冬天不穿秋裤,天冷也要风度的程序猿! 在软件开发和企业应用中,生成PDF文档是一项常见的需求。Java作为一种强大…...

Redis 的缓存淘汰策略
Redis 作为一个高性能的内存数据库,提供了多种缓存淘汰策略(也称为过期策略或驱逐策略),用于管理内存使用。当 Redis 达到其内存限制时,系统会根据配置的策略删除一些数据,以释放内存空间。以下是 Redis 支…...

音乐播放器
目录 一、设计目标二、实现流程1. 数据库操作2. 后端功能实现3. 前端UI界面实现4. 程序入口 三、项目收获 一、设计目标 1. 模拟网易云音乐,实现本地音乐盒。 2. 功能分析: 登录功能窗口显示加载本地音乐建立播放列表播放音乐删除播放列表音乐 3.设计思…...

三星组件新的HBM开发团队加速HBM研发
为应对人工智能(AI)市场扩张带来的对高性能存储解决方案需求的增长,三星电子在其设备解决方案(DS)部门内部成立了全新的“HBM开发团队”,旨在提升其在高带宽存储器(HBM)领域的竞争力。根据Business Korea的最新报告,该团队将专注于推进HBM3、…...

图书馆数据仓库
目录 1.数据仓库的数据来源为业务数据库(mysql) 初始化脚本 init_book_result.sql 2.通过sqoop将mysql中的业务数据导入到大数据平台(hive) 导入mysql数据到hive中 3.通过hive进行数据计算和数据分析 形成数据报表 4.再通过sq…...

基于uniapp(vue3)H5附件上传组件,可限制文件大小
代码: <template><view class"upload-file"><text>最多上传5份附件,需小于50M</text><view class"" click"selectFile">上传</view></view><view class"list" v…...

Phoenix Omid Timestamp Oracle 组件实现原理
Omid Timestamp Oracle 组件实现原理 作用 生成全局单调递增的时间戳,支持获取操作和崩溃恢复。 功能 1.生成全局单调递增的时间戳(支持崩溃恢复)apinext返回下一个时间戳getLast返回最后一个分配的时间戳(当前时间戳)实现方式TimestampOracleImpl单调递增的时间…...

Lex Fridman Podcast with Andrej Karpathy
我不太喜欢Lex Fridman的声音,总觉得那让人昏昏欲睡, 但无奈他采访的人都太大牌了,只能去听。但是听着听着,就会觉得有深度的采访这些人,似乎也只有他这种由研究员背景的人能干, 另,他提的问题确…...

力扣1895.最大的幻方
力扣1895.最大的幻方 求前缀和暴力枚举幻方边长 求行列前缀和 class Solution {public:int largestMagicSquare(vector<vector<int>>& grid) {int n grid.size() , m grid[0].size();vector<vector<int>> rowsum(n,vector<int>(m));for…...

【C++】 解决 C++ 语言报错:Segmentation Fault
文章目录 引言 段错误(Segmentation Fault)是 C 编程中常见且令人头疼的错误之一。段错误通常发生在程序试图访问未被允许的内存区域时,导致程序崩溃。本文将深入探讨段错误的产生原因、检测方法及其预防和解决方案,帮助开发者在…...

【linuxC语言】手撕Http协议之程序框架
文章目录 前言提示基本框架主函数一个小问题代码概况多线程版本单线程版本总结前言 在现代网络编程中,HTTP协议无疑是最常用的协议之一。它是互联网上应用最为广泛的一种网络协议。理解HTTP协议并能够手动实现它,对于深入理解网络编程和提高编程技能都有着重要的意义。本文将…...

溶解氧(DO)理论指南(1)
转载自梅特勒官网资料,仅用于学习交流,侵权则删! 溶解氧理论指南 1 溶解氧(DO)原理1.1 溶解氧和分压1.2 氧气在水中的溶解度1.3 溶解氧对生物的重要性1.4 溶解氧对工业的重要性 1 溶解氧(DO)原理 氧是宇宙中第三大常见元素,也是…...

Mysql中常用函数的使用示例
场景 基础知识回顾:mysql中常用函数的使用示例。 注: 博客:霸道流氓气质-CSDN博客 实现 数学函数 -- ABS(x)返回x的绝对值 SELECT ABS(-1),ABS(2); -- PI()返回圆周率 SELECT PI(); -- SQRT(x)返回非负数x的二次方根 SELECT SQRT(4); -…...

HTML 语义化
目录 HTML 语义化HTML5 新特性HTML 语义化的好处语义化标签的使用场景最佳实践 HTML 语义化 HTML5 新特性 标准答案: 语义化标签: <header>:页头<nav>:导航<main>:主要内容<article>&#x…...

.Net框架,除了EF还有很多很多......
文章目录 1. 引言2. Dapper2.1 概述与设计原理2.2 核心功能与代码示例基本查询多映射查询存储过程调用 2.3 性能优化原理2.4 适用场景 3. NHibernate3.1 概述与架构设计3.2 映射配置示例Fluent映射XML映射 3.3 查询示例HQL查询Criteria APILINQ提供程序 3.4 高级特性3.5 适用场…...

电脑插入多块移动硬盘后经常出现卡顿和蓝屏
当电脑在插入多块移动硬盘后频繁出现卡顿和蓝屏问题时,可能涉及硬件资源冲突、驱动兼容性、供电不足或系统设置等多方面原因。以下是逐步排查和解决方案: 1. 检查电源供电问题 问题原因:多块移动硬盘同时运行可能导致USB接口供电不足&#x…...
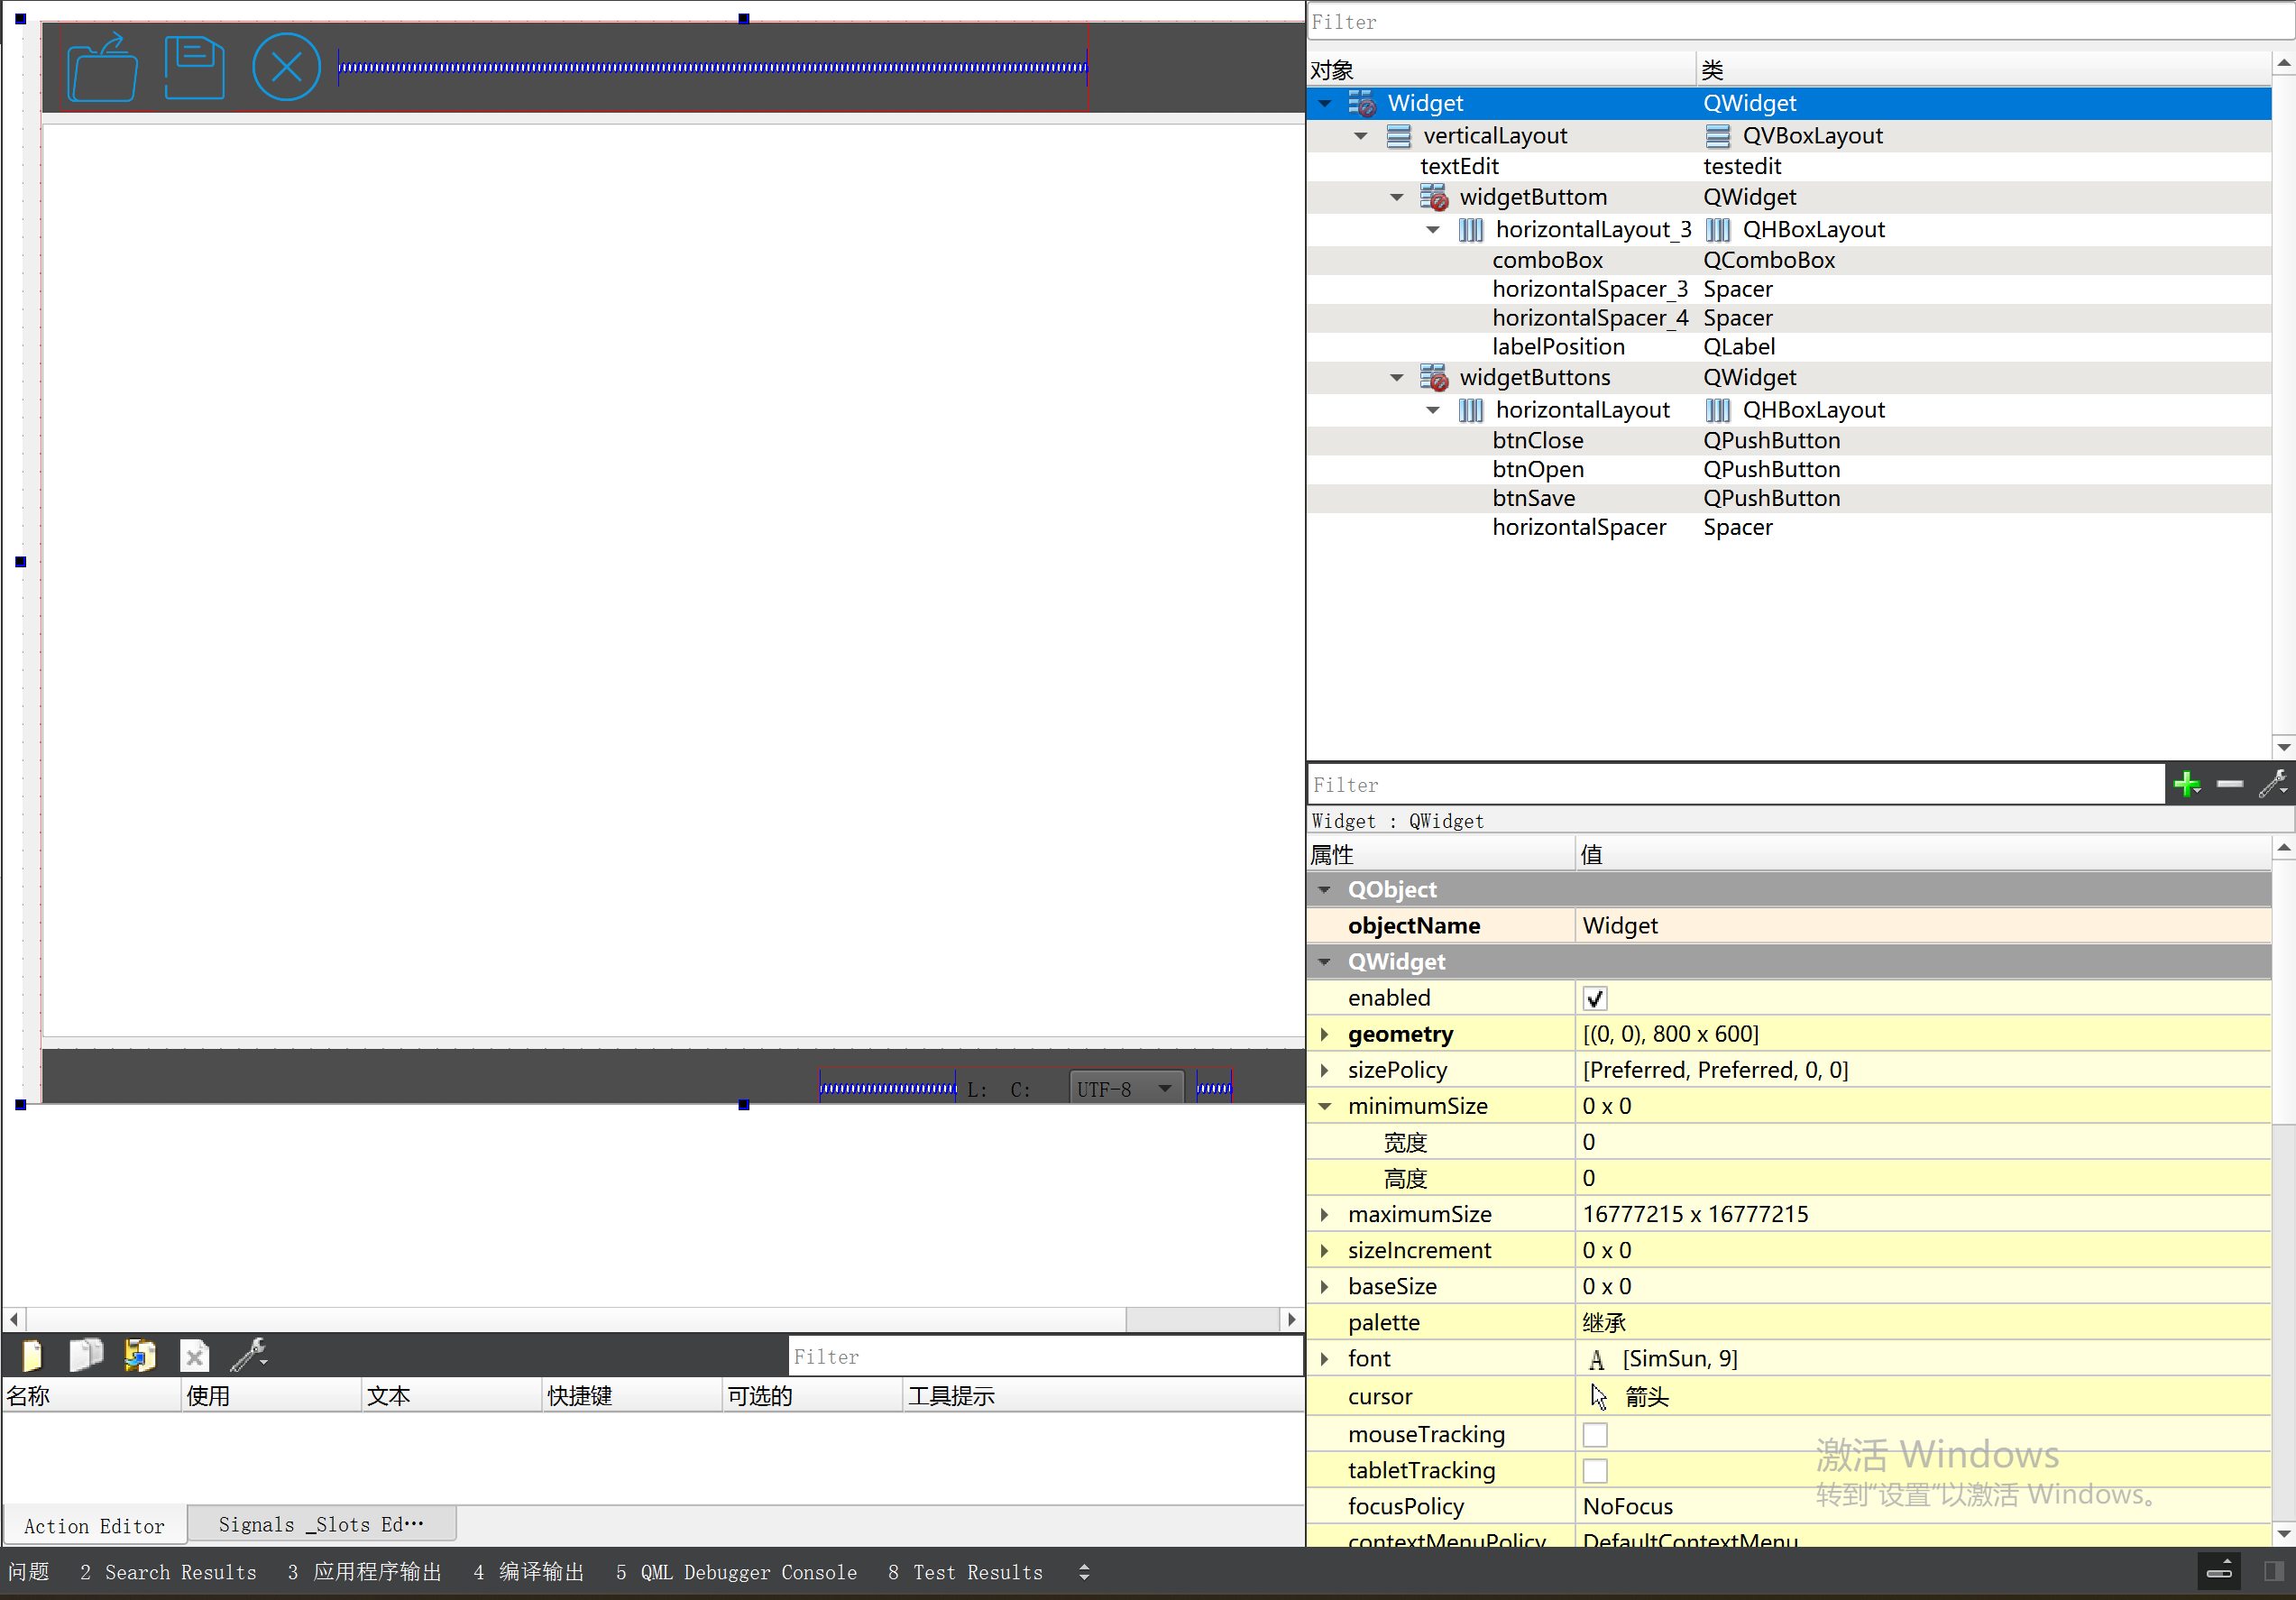
P3 QT项目----记事本(3.8)
3.8 记事本项目总结 项目源码 1.main.cpp #include "widget.h" #include <QApplication> int main(int argc, char *argv[]) {QApplication a(argc, argv);Widget w;w.show();return a.exec(); } 2.widget.cpp #include "widget.h" #include &q…...
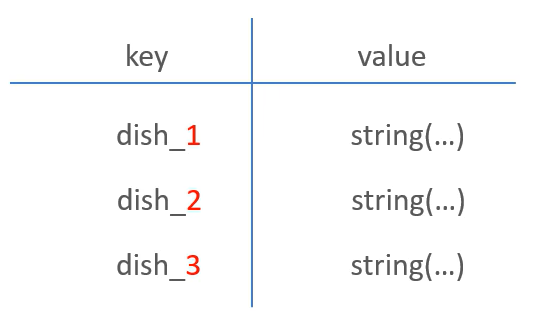
苍穹外卖--缓存菜品
1.问题说明 用户端小程序展示的菜品数据都是通过查询数据库获得,如果用户端访问量比较大,数据库访问压力随之增大 2.实现思路 通过Redis来缓存菜品数据,减少数据库查询操作。 缓存逻辑分析: ①每个分类下的菜品保持一份缓存数据…...

sqlserver 根据指定字符 解析拼接字符串
DECLARE LotNo NVARCHAR(50)A,B,C DECLARE xml XML ( SELECT <x> REPLACE(LotNo, ,, </x><x>) </x> ) DECLARE ErrorCode NVARCHAR(50) -- 提取 XML 中的值 SELECT value x.value(., VARCHAR(MAX))…...

vue3 定时器-定义全局方法 vue+ts
1.创建ts文件 路径:src/utils/timer.ts 完整代码: import { onUnmounted } from vuetype TimerCallback (...args: any[]) > voidexport function useGlobalTimer() {const timers: Map<number, NodeJS.Timeout> new Map()// 创建定时器con…...
MySQL 8.0 OCP 英文题库解析(十三)
Oracle 为庆祝 MySQL 30 周年,截止到 2025.07.31 之前。所有人均可以免费考取原价245美元的MySQL OCP 认证。 从今天开始,将英文题库免费公布出来,并进行解析,帮助大家在一个月之内轻松通过OCP认证。 本期公布试题111~120 试题1…...
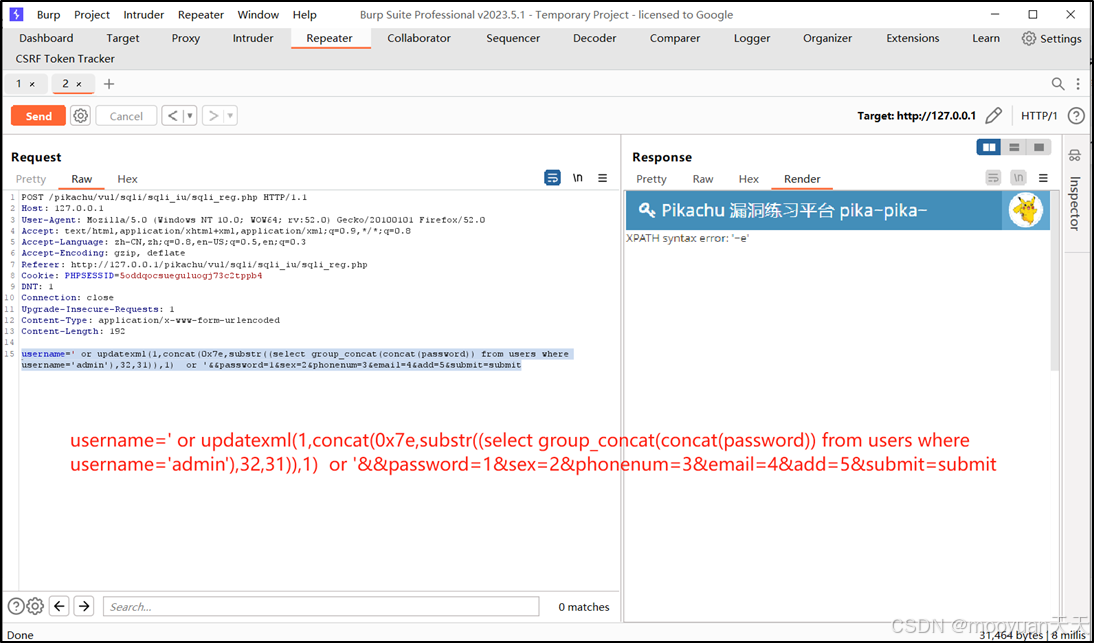
pikachu靶场通关笔记22-1 SQL注入05-1-insert注入(报错法)
目录 一、SQL注入 二、insert注入 三、报错型注入 四、updatexml函数 五、源码审计 六、insert渗透实战 1、渗透准备 2、获取数据库名database 3、获取表名table 4、获取列名column 5、获取字段 本系列为通过《pikachu靶场通关笔记》的SQL注入关卡(共10关࿰…...

Spring是如何解决Bean的循环依赖:三级缓存机制
1、什么是 Bean 的循环依赖 在 Spring框架中,Bean 的循环依赖是指多个 Bean 之间互相持有对方引用,形成闭环依赖关系的现象。 多个 Bean 的依赖关系构成环形链路,例如: 双向依赖:Bean A 依赖 Bean B,同时 Bean B 也依赖 Bean A(A↔B)。链条循环: Bean A → Bean…...