【SpringBoot3】双向实时通讯 websocket
文章目录
- 一、Websocket使用步骤
- 二、示例1:继承抽象类 `AbstractWebSocketHandler`
- 后端代码
- 前端代码
- 三、示例2:使用注解`@ServerEndpoint`
- 后端代码
- 前端代码
- 四、前端代码封装
一、Websocket使用步骤
在Spring Boot中使用WebSocket是一个常见的需求,因为WebSocket提供了一种在客户端和服务器之间进行全双工通信的方式。Spring Boot通过Spring的WebSocket支持,使得在应用程序中集成WebSocket变得非常简单。
以下是在Spring Boot中使用WebSocket的基本步骤:
1、添加依赖:
首先,你需要在你的pom.xml(如果你使用Maven)或build.gradle(如果你使用Gradle)中添加WebSocket的依赖。对于Spring Boot项目,你通常只需要添加spring-boot-starter-websocket依赖。
<dependency><groupId>org.springframework.boot</groupId><artifactId>spring-boot-starter-websocket</artifactId>
</dependency>
2、配置WebSocket:
接下来,你需要创建一个配置类实现接口WebSocketConfigurer来启用WebSocket,并配置相关的端点和消息代理。使用@EnableWebSocket注解来启用WebSocket功能。
3、创建控制器:
一旦WebSocket被配置,你就可以创建一个控制器来处理WebSocket消息。
创建一个class类,集成抽象类AbstractWebSocketHandler,或者使用注解@ServerEndpoint来声明Websocket Endpoint
4、客户端连接:
最后,你需要在客户端连接到WebSocket服务器。这可以通过使用WebSocket API来实现。
二、示例1:继承抽象类 AbstractWebSocketHandler
后端代码
1、创建Websocket处理类Ws1Handler,继承抽象类AbstractWebSocketHandler
import org.slf4j.Logger;
import org.slf4j.LoggerFactory;
import org.springframework.web.socket.CloseStatus;
import org.springframework.web.socket.TextMessage;
import org.springframework.web.socket.WebSocketSession;
import org.springframework.web.socket.handler.AbstractWebSocketHandler;
import org.thymeleaf.util.StringUtils;import static com.hj.springboot3.ws.demo1.Ws1Pool.broadcast;/*** websocket事件处理* <p>* 链接:/ws/demo1?userId=xxxx*/
public class Ws1Handler extends AbstractWebSocketHandler {private static final Logger logger = LoggerFactory.getLogger(Ws1Handler.class);@Overridepublic void afterConnectionEstablished(WebSocketSession session) throws Exception {Ws1Pool.add(session);}@Overridepublic void afterConnectionClosed(WebSocketSession session, CloseStatus status) throws Exception {Ws1Pool.remove(session);}@Overrideprotected void handleTextMessage(WebSocketSession session, TextMessage message) throws Exception {if (StringUtils.equals("ping", message.getPayload())) {// 心跳消息session.sendMessage(new TextMessage("pong"));return;}logger.info("receive Msg :" + message.getPayload());TextMessage msg = new TextMessage(message.getPayload());// 回发信息 给 js前端session.sendMessage(msg);}}
消息对象VO
@Data
@NoArgsConstructor
@AllArgsConstructor
public class WsMsgVo {private String text;private Long userId;
}
将请求参数字符串转换成map 工具类
public class ParamUtil {/** 将请求参数字符串转换成map */public static Map<String, String> parser(String queryString) {Map<String, String> map = new HashMap<String, String>();if (StringUtils.isNotBlank(queryString)) {String[] params = queryString.split("&");for (String p : params) {String[] strs = p.split("=");if (strs.length == 2) {map.put(strs[0], strs[1]);}}}return map;}
}
2、创建websocket链接池
存储所有在线用户链接,并实现发送消息和广播消息的功能;使用异步线给前端发送消息
/*** websocket链接池*/
public class Ws1Pool {private static final Logger logger = LoggerFactory.getLogger(Ws1Pool.class);private static final Map<String, WebSocketSession> pool = new ConcurrentHashMap<>();private static final Map<Long, List<String>> userMap = new ConcurrentHashMap<>();private static final ExecutorService threadPool = Executors.newFixedThreadPool(10);public static void add(WebSocketSession inbound) {pool.put(inbound.getId(), inbound);Map<String, String> map = ParamUtil.parser(inbound.getUri().getQuery());Long userId = Long.valueOf(map.get("userId"));logger.info("add userId:{}", userId);List<String> lstInBound = userMap.computeIfAbsent(userId, k -> new ArrayList<>());lstInBound.add(inbound.getId());logger.info("add connetion {},total size {}", inbound.getId(), pool.size());}public static void remove(WebSocketSession socket) {String sessionId = socket.getId();List<String> lstInBound = null;Map<String, String> map = ParamUtil.parser(socket.getUri().getQuery());Long userId = Long.valueOf(map.get("userId"));logger.info("remove userId:{}", userId);if (StringUtils.isNotBlank(sessionId)) {lstInBound = userMap.get(userId);if (lstInBound != null) {lstInBound.remove(sessionId);if (lstInBound.isEmpty()) {userMap.remove(userId);}}}pool.remove(sessionId);logger.info("remove connetion {},total size {}", sessionId, pool.size());}/** 推送信息 */public static void broadcast(WsMsgVo vo) {Long userId = vo.getUserId();List<String> lstInBoundId;if (userId == null || userId == 0L) {// 发送给所有人lstInBoundId = userMap.values().stream().flatMap(List::stream).collect(Collectors.toList());} else {lstInBoundId = userMap.get(userId);}if (lstInBoundId == null || lstInBoundId.isEmpty()) {return;}threadPool.execute(() -> {try {for (String id : lstInBoundId) {// 发送给指定用户WebSocketSession connection = pool.get(id);if (connection != null) {synchronized (connection) {TextMessage msg = new TextMessage(vo.getText());connection.sendMessage(msg);}}}} catch (Exception e) {logger.error("broadcast error: userId:{}", userId, e);}});}}
3、创建Websocket配置类,并注册地址/ws/demo1,将地址和处理类绑定
import org.springframework.context.annotation.Bean;
import org.springframework.context.annotation.Configuration;
import org.springframework.web.socket.config.annotation.EnableWebSocket;
import org.springframework.web.socket.config.annotation.WebSocketConfigurer;
import org.springframework.web.socket.config.annotation.WebSocketHandlerRegistry;/*** Websocket配置*/
@Configuration
@EnableWebSocket
public class Ws1Config implements WebSocketConfigurer {@Overridepublic void registerWebSocketHandlers(WebSocketHandlerRegistry registry) {registry.addHandler(ws1Handler(), "/ws/demo1").setAllowedOrigins("*");}@Beanpublic Ws1Handler ws1Handler() {return new Ws1Handler();}}
前端代码
在这段代码中,我们首先创建了一个新的WebSocket对象,并传入了WebSocket服务的URL。然后,我们为这个WebSocket连接添加了四个事件监听器:
onopen:当WebSocket连接打开时触发。onmessage:当从服务器接收到消息时触发。onerror:当WebSocket发生错误时触发。onclose:当WebSocket连接关闭时触发。
你可以根据自己的需求,在这些事件监听器中添加相应的逻辑。例如,在onopen事件监听器中发送一个消息给服务器,或者在onmessage事件监听器中处理从服务器接收到的消息。
<!DOCTYPE html>
<html xmlns:th="http://www.thymeleaf.org"xmlns:layout="http://www.ultraq.net.nz/thymeleaf/layout">
<head>
<head><meta charset="UTF-8"><meta name="viewport" content="width=device-width, initial-scale=1.0"><title>websocket demo1</title>
</head>
<body>
<div><div id="content"><div>信息面板</div></div><input type="text" id="input" placeholder="请输入内容" /><button id="send" onclick="doSend()">发送</button></div>
<script type="text/javascript">// 创建一个新的WebSocket并连接到指定的URLvar socket = new WebSocket('ws://localhost:8080/ws/demo1?userId=001');// 当WebSocket连接打开时触发socket.onopen = function(event) {console.log('Connection opened');// 可以选择在这里发送一些数据到服务器socket.send('Hello, server!');};// 当从服务器接收到数据时触发socket.onmessage = function(event) {if (event.data == null || event.data == '' || "pong" == event.data) {//心跳消息console.log("Info: 心跳消息");} else {console.log('Message from server ', event.data);var div_msg = document.createElement('div');div_msg.textContent = event.data;document.getElementById('content').appendChild(div_msg)}};// 当WebSocket连接关闭时触发socket.onclose = function(event) {console.log('Connection closed');};// 当WebSocket连接发生错误时触发socket.onerror = function(error) {console.error('WebSocket Error:', error);};function doSend(){var input_dom = document.getElementById('input')var value = input_dom.value;input_dom.value=''input_dom.focus()socket.send(value);}</script></body>
</html>
三、示例2:使用注解@ServerEndpoint
后端代码
1、创建Websocket处理类Ws3Handler,并使用注解@ServerEndpoint声明
import jakarta.websocket.*;
import jakarta.websocket.server.ServerEndpoint;
import org.slf4j.Logger;
import org.slf4j.LoggerFactory;
import org.springframework.stereotype.Component;
import org.thymeleaf.util.StringUtils;import java.io.IOException;/*** websocket事件处理* <p>* 链接:/ws/demo3?userId=xxxx*/
@Component
@ServerEndpoint("/ws/demo3")
public class Ws3Handler {private static final Logger logger = LoggerFactory.getLogger(Ws3Handler.class);@OnOpenpublic void onOpen(Session session) {Ws3Pool.add(session);}@OnClosepublic void OnClose(Session session) {Ws3Pool.remove(session);}@OnMessagepublic void onMessage(Session session, String message) throws IOException {if (StringUtils.equals("ping", message)) {// 心跳消息session.getBasicRemote().sendText("pong");return;}logger.info("receive Msg :" + message);
//        session.getBasicRemote().sendText(message);Ws3Pool.broadcast(new WsMsgVo(message, 0L));}/*** 错误时调用*/@OnErrorpublic void onError(Session session, Throwable throwable) {throwable.printStackTrace();}}
2、创建websocket链接池
存储所有在线用户链接,并实现发送消息和广播消息的功能;使用异步线给前端发送消息
/*** websocket链接池*/
public class Ws3Pool {private static final Logger logger = LoggerFactory.getLogger(Ws3Pool.class);private static Map<String, Session> pool = new ConcurrentHashMap<>();private static final Map<Long, List<String>> userMap = new ConcurrentHashMap<>();private static final ExecutorService threadPool = Executors.newFixedThreadPool(10);public static void add(Session session) {pool.put(session.getId(), session);Map<String, String> map = ParamUtil.parser(session.getQueryString());Long userId = Long.valueOf(map.get("userId"));logger.info("add userId:{}", userId);List<String> lstInBound = userMap.computeIfAbsent(userId, k -> new ArrayList<>());lstInBound.add(session.getId());logger.info("add connetion {},total size {}", session.getId(), pool.size());}public static void remove(Session session) {String sessionId = session.getId();List<String> lstInBound = null;Map<String, String> map = ParamUtil.parser(session.getQueryString());Long userId = Long.valueOf(map.get("userId"));logger.info("remove userId:{}", userId);if (StringUtils.isNotBlank(sessionId)) {lstInBound = userMap.get(userId);if (lstInBound != null) {lstInBound.remove(sessionId);if (lstInBound.isEmpty()) {userMap.remove(userId);}}}pool.remove(sessionId);logger.info("remove connetion {},total size {}", sessionId, pool.size());}/** 推送信息 */public static void broadcast(WsMsgVo vo) {Long userId = vo.getUserId();List<String> lstInBoundId;if (userId == null || userId == 0L) {// 发送给所有人lstInBoundId = userMap.values().stream().flatMap(List::stream).collect(Collectors.toList());} else {lstInBoundId = userMap.get(userId);}if (lstInBoundId == null || lstInBoundId.isEmpty()) {return;}threadPool.execute(() -> {try {for (String id : lstInBoundId) {// 发送给指定用户Session session = pool.get(id);if (session != null) {synchronized (session) {session.getBasicRemote().sendText(vo.getText());}}}} catch (Exception e) {logger.error("broadcast error: userId:{}", userId, e);}});}}
3、创建Websocket配置类,并注册 ServerEndpointExporter
ServerEndpointExporter 是 Spring Boot 中的一个重要组件,用于导出 WebSocket 服务器端点配置。在 Spring 应用程序中,特别是当你使用 Spring Boot 时,ServerEndpointExporter 能够自动注册使用 @ServerEndpoint 注解声明的 WebSocket 端点。
import org.springframework.context.annotation.Bean;
import org.springframework.context.annotation.Configuration;
import org.springframework.web.socket.config.annotation.EnableWebSocket;
import org.springframework.web.socket.server.standard.ServerEndpointExporter;
@Configuration
@EnableWebSocket
public class Ws3Config {/*** ServerEndpointExporter 作用* 这个Bean会自动注册使用@ServerEndpoint注解声明的websocket endpoint*/@Beanpublic ServerEndpointExporter serverEndpointExporter() {return new ServerEndpointExporter();}
}
在这个配置类中,我们定义了一个 serverEndpointExporter 方法,它返回一个 ServerEndpointExporter 的实例。这样,Spring 容器就会管理这个 bean,并自动注册所有使用 @ServerEndpoint 注解声明的 WebSocket 端点。
前端代码
(可以和上面的例子一致)
四、前端代码封装
为了更方便的使用websocket,以及确保在后端服务器重启后,前端websocket能够自动重连,我们可以增加心跳机制
1、创建 ws.handler.js
var WsHander = {};
WsHander.socket = null;
WsHander.connect = (function (host) {WsHander.host = host;if ("WebSocket" in window) {WsHander.socket = new WebSocket(host);} else if ("MozWebSocket" in window) {WsHander.socket = new MozWebSocket(host);} else {console.log("Error: WebSocket is not supported by this browser.");return;}WsHander.socket.onopen = function () {console.log("Info: websocket已启动.");// 心跳检测重置heartCheck.reset().start(WsHander.socket);};WsHander.socket.onclose = function () {console.log("Info: websocket已关闭.");WsHander.reconnect();};WsHander.socket.onmessage = function (message) {heartCheck.reset().start(WsHander.socket);if (message.data == null || message.data === '' || "pong" === message.data) {//心跳消息console.log("Info: 心跳消息");} else {// 收到 Websocket消息,执行业务操作if (doOnWsMessage){doOnWsMessage(message.data);}}};
});
WsHander.reconnect = function (){WsHander.connect(WsHander.host);
}
WsHander.initialize = function (userId, uri) {WsHander.currUserId = userId;if (WsHander.currUserId) {if (window.location.protocol === "http:") {WsHander.connect("ws://" + window.location.host + uri+"?userId=" + WsHander.currUserId);} else {WsHander.connect("wss://" + window.location.host + uri+"?userId=" + WsHander.currUserId);}}
};
WsHander.sendMessage = (function (message) {if (message !== "") {WsHander.socket.send(message);}
});//心跳检测
var heartCheck = {timeout: 5000,// 5秒timeoutObj: null,reset: function () {clearTimeout(this.timeoutObj);return this;},start: function (ws) {var self = this;this.timeoutObj = setTimeout(function () {// 这里发送一个心跳,后端收到后,返回一个心跳消息,// onmessage拿到返回的心跳就说明连接正常ws.send("ping");}, this.timeout);}
}
2、在html页面中使用
<!DOCTYPE html>
<html xmlns:th="http://www.thymeleaf.org"xmlns:layout="http://www.ultraq.net.nz/thymeleaf/layout">
<head>
<head><meta charset="UTF-8"><meta name="viewport" content="width=device-width, initial-scale=1.0"><title>websocket demo1</title>
</head>
<body>
<div><div id="content"><div>信息面板</div></div><input type="text" id="input" placeholder="请输入内容" /><button id="send" onclick="doSend()">发送</button></div>
<script src="../static/ws.handler.js" ></script>
<script type="text/javascript">WsHander.initialize("001", "/ws/demo3")// 当从服务器接收到数据时触发function doOnWsMessage(messageData){console.log('Message from server ', messageData);var div_msg = document.createElement('div');div_msg.textContent = messageData;document.getElementById('content').appendChild(div_msg)}function doSend(){var input_dom = document.getElementById('input')var value = input_dom.value;input_dom.value=''input_dom.focus()WsHander.sendMessage(value)}</script></body>
</html>
相关文章:

【SpringBoot3】双向实时通讯 websocket
文章目录 一、Websocket使用步骤二、示例1:继承抽象类 AbstractWebSocketHandler后端代码前端代码 三、示例2:使用注解ServerEndpoint后端代码前端代码 四、前端代码封装 一、Websocket使用步骤 在Spring Boot中使用WebSocket是一个常见的需求ÿ…...

搭建内网开发环境(一)|基于docker快速部署开发环境
引言 最近因需要搭建一套简易版的纯内网的开发环境,服务器采用 centos8.0,容器化技术采用 docker 使用 docker-compose 进行容器编排。 该系列教程分为两大类: 软件安装和使用,这类是开发环境常用的软件部署和使用,涉…...

MATLAB R2023b配置Fortran编译器
MATLAB R2023b配置Fortran编译器 引言1. 安装Visual Studio 20192. 安装Intel API20243. 配置xml文件文件4. 设置环境变量5. MATLAB编译Fortran 引言 当我们需要用到MATLAB编译Fortran代码后进行调用计算时,整个配置流程较繁琐。下面以MATLAB R2023b为例࿰…...

2024新型数字政府综合解决方案(七)
新型数字政府综合解决方案通过集成人工智能、大数据、区块链和云计算技术,创建了一个高度智能化和互联互通的政府服务平台,旨在全面提升行政效率、服务质量和透明度。该平台实现了跨部门的数据整合与实时共享,利用人工智能进行智能决策支持和…...

搭建高可用k8s集群
高可用 Kubernetes V1.28.10 安装 文章目录 1. 环境介绍2. 准备工作2.1 修改主机名称2.2 修改hosts文件2.3 关闭防火墙和SLinux2.4 配置SSH免密访问2.4.1 主机名称: k8s-master-01 操作 2.5 配置yum源2.6 禁用Swarp分区2.7 同步时间2.8 配置内核转发及网桥过滤2.9 安装 IPVS 3…...
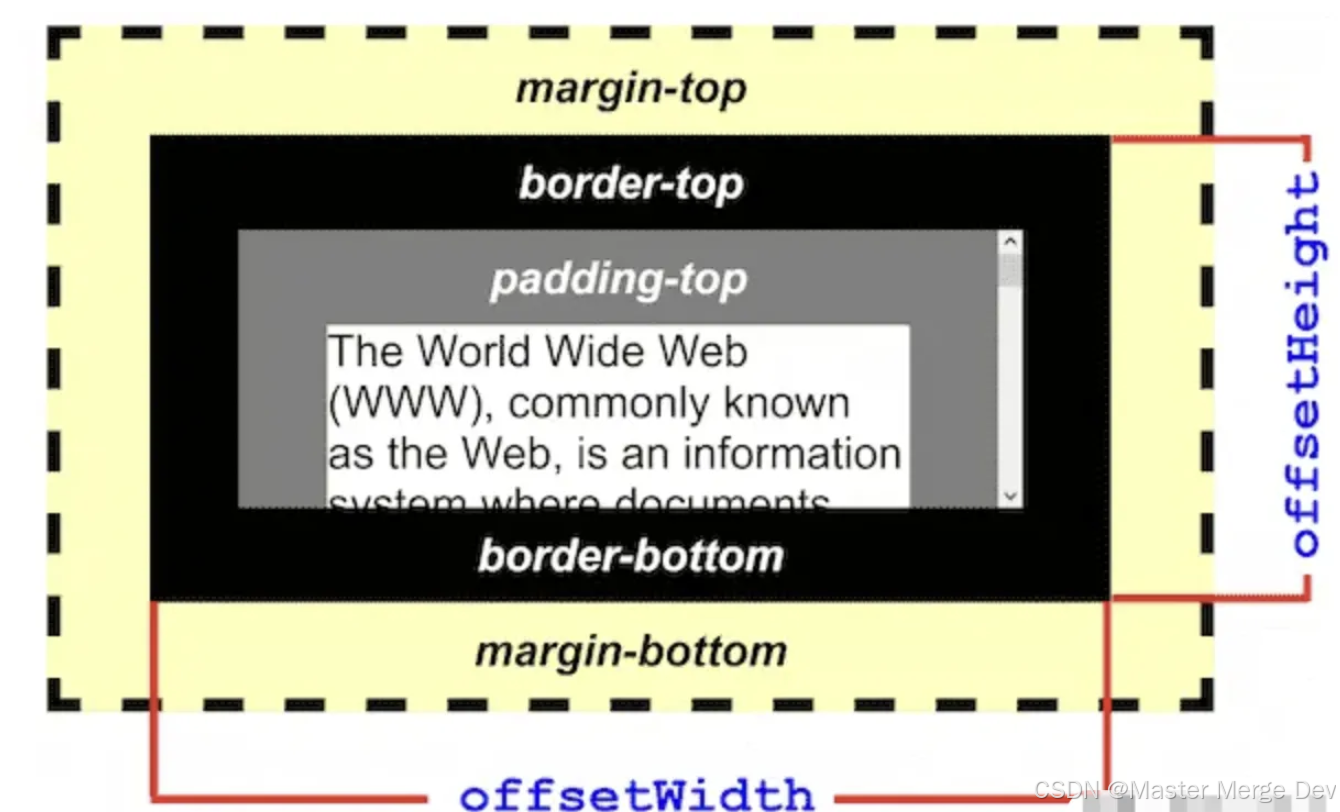
完美解决html2canvas + jsPDF导出pdf分页内容截断问题
代码地址:https://github.com/HFQ12333/export-pdf.git html2canvas jspdf方案是前端实现页面打印的一种常用方案,但是在实践过程中,遇到的最大问题就是分页截断的问题:当页面元素超过一页A4纸的时候,连续的页面就会…...

14 地址映射
14 地址映射 1、地址划分2、相关函数2.1 ioremap/iounmap2.2 mmap地址映射 3、总结 1、地址划分 明确:在linux系统中,不管是应用程序还是驱动程序,都不允许直接访问外设的物理地址,要想访问必须将物理地址映射到用户虚拟地址或者内核虚拟地址࿰…...

Java Resilience4j-RateLimiter学习
一. 介绍 Resilience4j-RateLimiter 是 Resilience4j 中的一个限流模块,我们对 Resilience4j 的 CircuitBreaker、Retry 已经有了一定的了解,现在来学习 RateLimiter 限流器; 引入依赖; <dependency><groupId>io.g…...

Nginx--地址重写Rewrite
一、什么是Rewrite Rewrite对称URL Rewrite,即URL重写,就是把传入Web的请求重定向到其他URL的过程 URL Rewrite最常见的应用是URL伪静态化,是将动态页面显示为静态页面方式的一种技术。比如http://www.123.com/news/index.php?id123 使用U…...

webflux源码解析(1)-主流程
目录 1.关键实例的创建1.1 实例创建1.2 初始化 2.处理请求的关键流程2.1 从ReactorHttpHandlerAdapter开始2.1 DispatcherHandler的初始化2.2查找mapping handler2.3 处理请求(执行handler)2.4 返回结果处理 3.webflux的配置装配参考: WebFlux是Spring 5.0框架推出的…...

ipad作为扩展屏的最简单方式
将iPad用作扩展屏幕有几种简单而有效的方法。以下是几种常见的方式: 1. Sidecar(苹果官方功能) 适用设备:iPad和Mac(macOS Catalina及以上版本)。功能:Sidecar 是苹果官方的功能,可…...

【卡码网Python基础课 17.判断集合成员】
目录 题目描述与分析一、集合二、集合的常用方法三、代码编写 题目描述与分析 题目描述: 请你编写一个程序,判断给定的整数 n 是否存在于给定的集合中。 输入描述: 有多组测试数据,第一行有一个整数 k,代表有 k 组测…...

生物研究新范式!AI语言模型在生物研究中的应用
–https://doi.org/10.1038/s41592-024-02354-y 留意更多内容,欢迎关注微信公众号:组学之心 Language models for biological research: a primer 研究团队及研究单位 James Zou–Department of Biomedical Data Science, Stanford University, Stan…...

python语言day08 属性装饰器和property函数 异常关键字 约束
属性装饰器: 三个装饰器实现对私有化属性_creat_time的get,set,del方法; 三个装饰器下的方法名都一样,通过message.creat_time的不同操作实现调用get,set,del方法。 __inti__: 创建并…...

day01JS-数据类型-01
1. 浏览器内核 通常所谓的浏览器内核也就是浏览器所采用的渲染引擎,渲染引擎决定了浏览器如何显示网页的内容以及页面的格式信息。不同的浏览器内核对网页编写语法的解释也有不同,因此同一网页在不同的内核的浏览器里的渲染(显示)…...

MATLAB 手动实现一种高度覆盖值提取建筑物点云的方法(74)
专栏往期文章,包含本章 MATLAB 手动实现一种高度覆盖值提取建筑物点云的方法(74) 一、算法介绍二、算法实现1.代码2.效果总结一、算法介绍 手动实现一种基于高度覆盖值的建筑物点云提取方法,适用于高大的城市建筑物,比只利用高度提取建筑物的方法更加稳定和具有价值,主要…...

git的下载与安装(Windows)
Git是一个开源的分布式版本控制系统(Distributed Version Control System,简称DVCS),它以其高效、灵活和强大的功能,在现代软件开发中扮演着至关重要的角色。 git官网:Git (git-scm.com) 1.进入git官网 2…...

腾讯云AI代码助手 —— 编程新体验,智能编码新纪元
阅读导航 引言一、开发环境介绍1. 支持的编程语言2. 支持的集成开发环境(IDE) 二、腾讯云AI代码助手使用实例1. 开发环境配置2. 代码补全功能使用💻自动生成单句代码💻自动生成整个代码块 3. 技术对话3. 规范/修复错误代码4. 智能…...

使用 ESP32 和 TFT 屏幕显示实时天气信息 —— 基于 OpenWeatherMap API
实时监测环境数据是一个非常常见的应用场景,例如气象站、智能家居等。这篇博客将带你使用 ESP32 微控制器和一个 TFT 屏幕,实时显示当前城市的天气信息。通过 OpenWeatherMap API,我们能够获取诸如温度、天气情况以及经纬度等详细的天气数据&…...

高阶数据结构——B树
1. 常见的搜索结构 以上结构适合用于数据量相对不是很大,能够一次性存放在内存中,进行数据查找的场景。如果数据量很大,比如有100G数据,无法一次放进内存中,那就只能放在磁盘上了,如果放在磁盘上࿰…...

利用ngx_stream_return_module构建简易 TCP/UDP 响应网关
一、模块概述 ngx_stream_return_module 提供了一个极简的指令: return <value>;在收到客户端连接后,立即将 <value> 写回并关闭连接。<value> 支持内嵌文本和内置变量(如 $time_iso8601、$remote_addr 等)&a…...
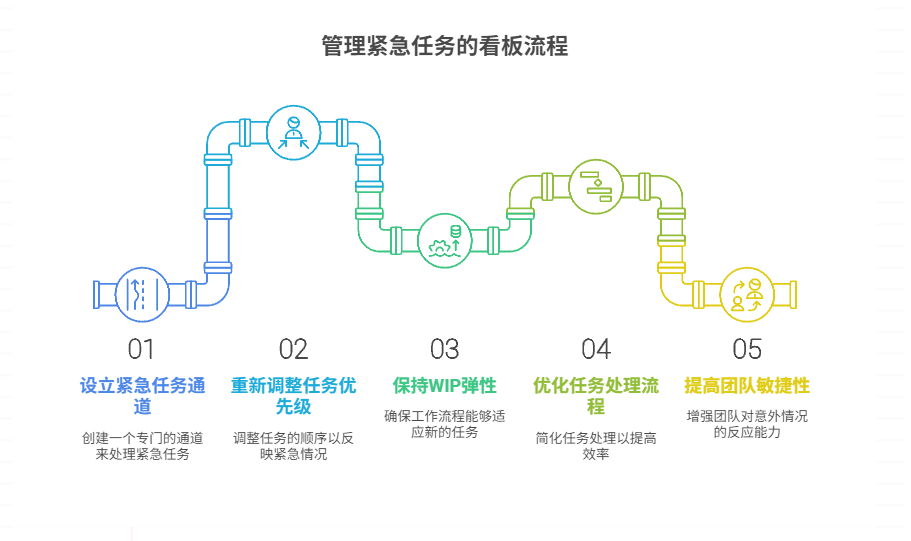
如何在看板中有效管理突发紧急任务
在看板中有效管理突发紧急任务需要:设立专门的紧急任务通道、重新调整任务优先级、保持适度的WIP(Work-in-Progress)弹性、优化任务处理流程、提高团队应对突发情况的敏捷性。其中,设立专门的紧急任务通道尤为重要,这能…...
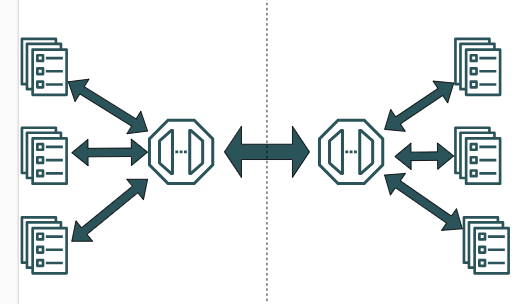
SpringCloudGateway 自定义局部过滤器
场景: 将所有请求转化为同一路径请求(方便穿网配置)在请求头内标识原来路径,然后在将请求分发给不同服务 AllToOneGatewayFilterFactory import lombok.Getter; import lombok.Setter; import lombok.extern.slf4j.Slf4j; impor…...
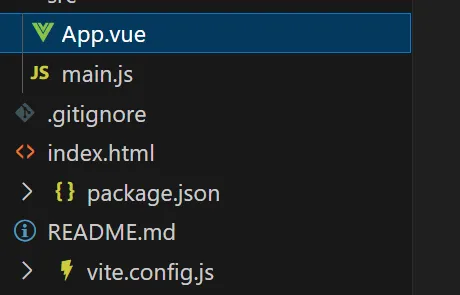
springboot整合VUE之在线教育管理系统简介
可以学习到的技能 学会常用技术栈的使用 独立开发项目 学会前端的开发流程 学会后端的开发流程 学会数据库的设计 学会前后端接口调用方式 学会多模块之间的关联 学会数据的处理 适用人群 在校学生,小白用户,想学习知识的 有点基础,想要通过项…...

Java编程之桥接模式
定义 桥接模式(Bridge Pattern)属于结构型设计模式,它的核心意图是将抽象部分与实现部分分离,使它们可以独立地变化。这种模式通过组合关系来替代继承关系,从而降低了抽象和实现这两个可变维度之间的耦合度。 用例子…...
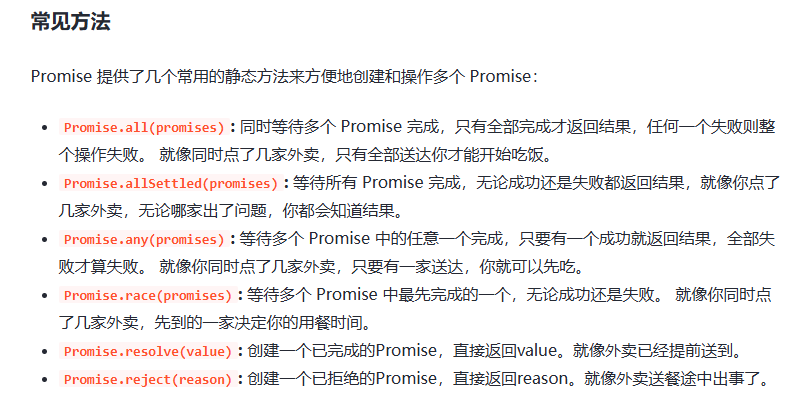
处理vxe-table 表尾数据是单独一个接口,表格tableData数据更新后,需要点击两下,表尾才是正确的
修改bug思路: 分别把 tabledata 和 表尾相关数据 console.log() 发现 更新数据先后顺序不对 settimeout延迟查询表格接口 ——测试可行 升级↑:async await 等接口返回后再开始下一个接口查询 ________________________________________________________…...
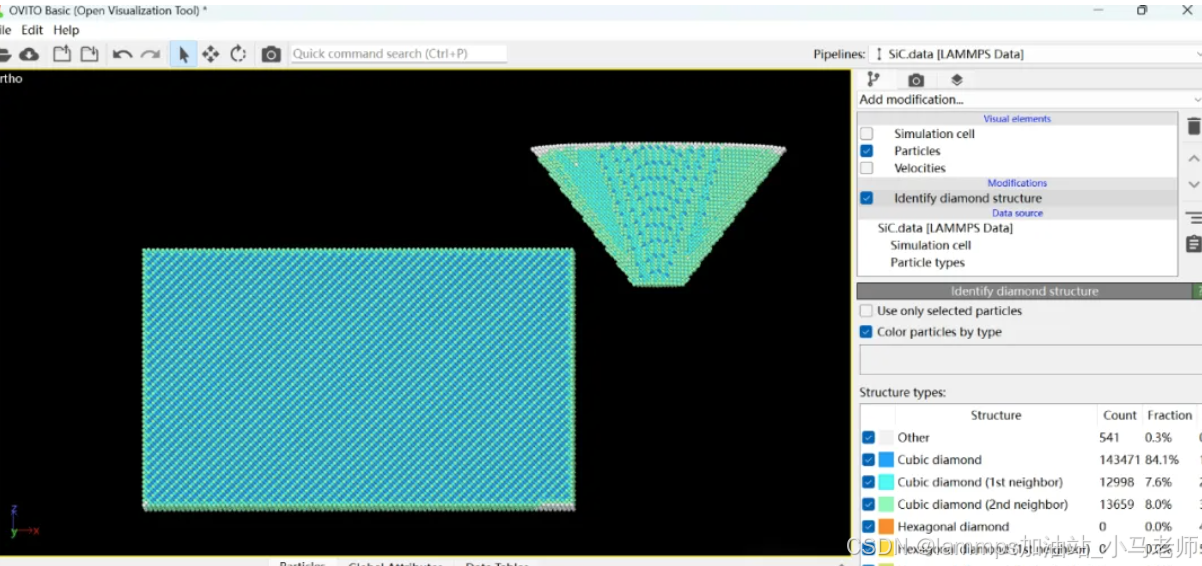
Python Ovito统计金刚石结构数量
大家好,我是小马老师。 本文介绍python ovito方法统计金刚石结构的方法。 Ovito Identify diamond structure命令可以识别和统计金刚石结构,但是无法直接输出结构的变化情况。 本文使用python调用ovito包的方法,可以持续统计各步的金刚石结构,具体代码如下: from ovito…...
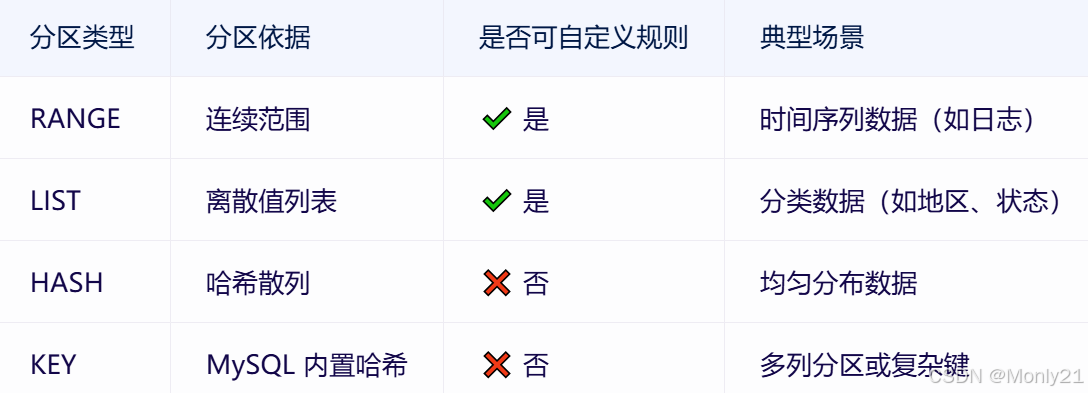
MySQL:分区的基本使用
目录 一、什么是分区二、有什么作用三、分类四、创建分区五、删除分区 一、什么是分区 MySQL 分区(Partitioning)是一种将单张表的数据逻辑上拆分成多个物理部分的技术。这些物理部分(分区)可以独立存储、管理和优化,…...

破解路内监管盲区:免布线低位视频桩重塑停车管理新标准
城市路内停车管理常因行道树遮挡、高位设备盲区等问题,导致车牌识别率低、逃费率高,传统模式在复杂路段束手无策。免布线低位视频桩凭借超低视角部署与智能算法,正成为破局关键。该设备安装于车位侧方0.5-0.7米高度,直接规避树枝遮…...
基础)
6个月Python学习计划 Day 16 - 面向对象编程(OOP)基础
第三周 Day 3 🎯 今日目标 理解类(class)和对象(object)的关系学会定义类的属性、方法和构造函数(init)掌握对象的创建与使用初识封装、继承和多态的基本概念(预告) &a…...
