Spring系列四:AOP切面编程
文章目录
- 💗AOP-官方文档
- 🍝AOP 讲解
- 🍝AOP APIs
- 💗动态代理
- 🍝初始动态代理
- 🍝动态代理深入
- 🍝AOP问题提出
- 📗使用土方法解决
- 📗 对土方法解耦-开发最简单的AOP类
- 📗 土方法缺点
- 💗Spring AOP
- 🍝基本介绍
- 🍝AOP编程 快速入门
- 🍝注意事项和细节
- 🍝课后作业
- 🐋AOP-切入表达式
- 💧注意事项和细节
- 🐋AOP-JoinPoint
- 🐋返回通知获取结果
- 🐋异常通知获取异常信息
- 🐋环绕通知
- 🐋切入点表达式重用
- 🐋切面类执行顺序
- 💧注意事项和细节
- 🐋基于XML配置AOP
- 🐋课后作业
- 💗引出对Spring底层实现再思考
- 🐋创建maven项目
- 🐋思考一: 原生Spring如何实现依赖注入和(singleton, prototype)
- 🐋思考二: 原生Spring容器如何实现BeanPostProcessor
- 🐋思考三: 原生Spring容器如何实现AOP
- 🐋补充说明
- 💗Spring整体架构分析
上文中, 我们学习到了 Spring系列一:spring的安装与使用
接下来我们学习, AOP切面编程

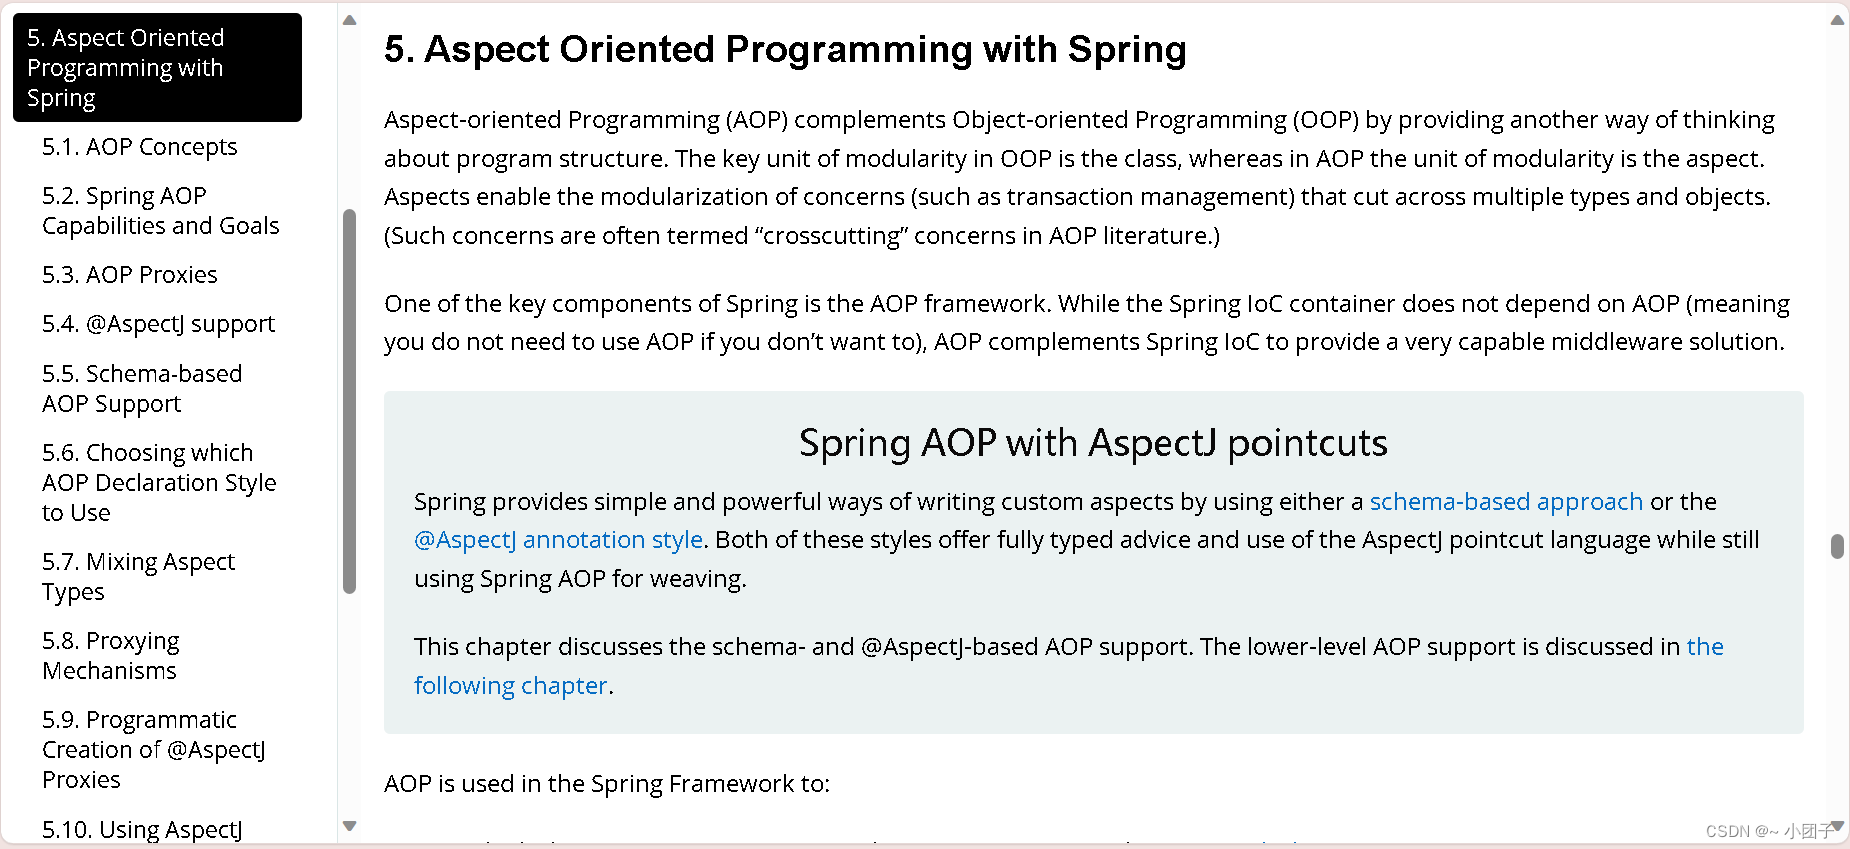
💗AOP-官方文档
🍝AOP 讲解
AOP 讲解: spring-framework-5.3.8\docs\reference\html/index.html
🍝AOP APIs
**AOP APIs:** spring-framework-5.3.8\docs\javadoc-api\index.html 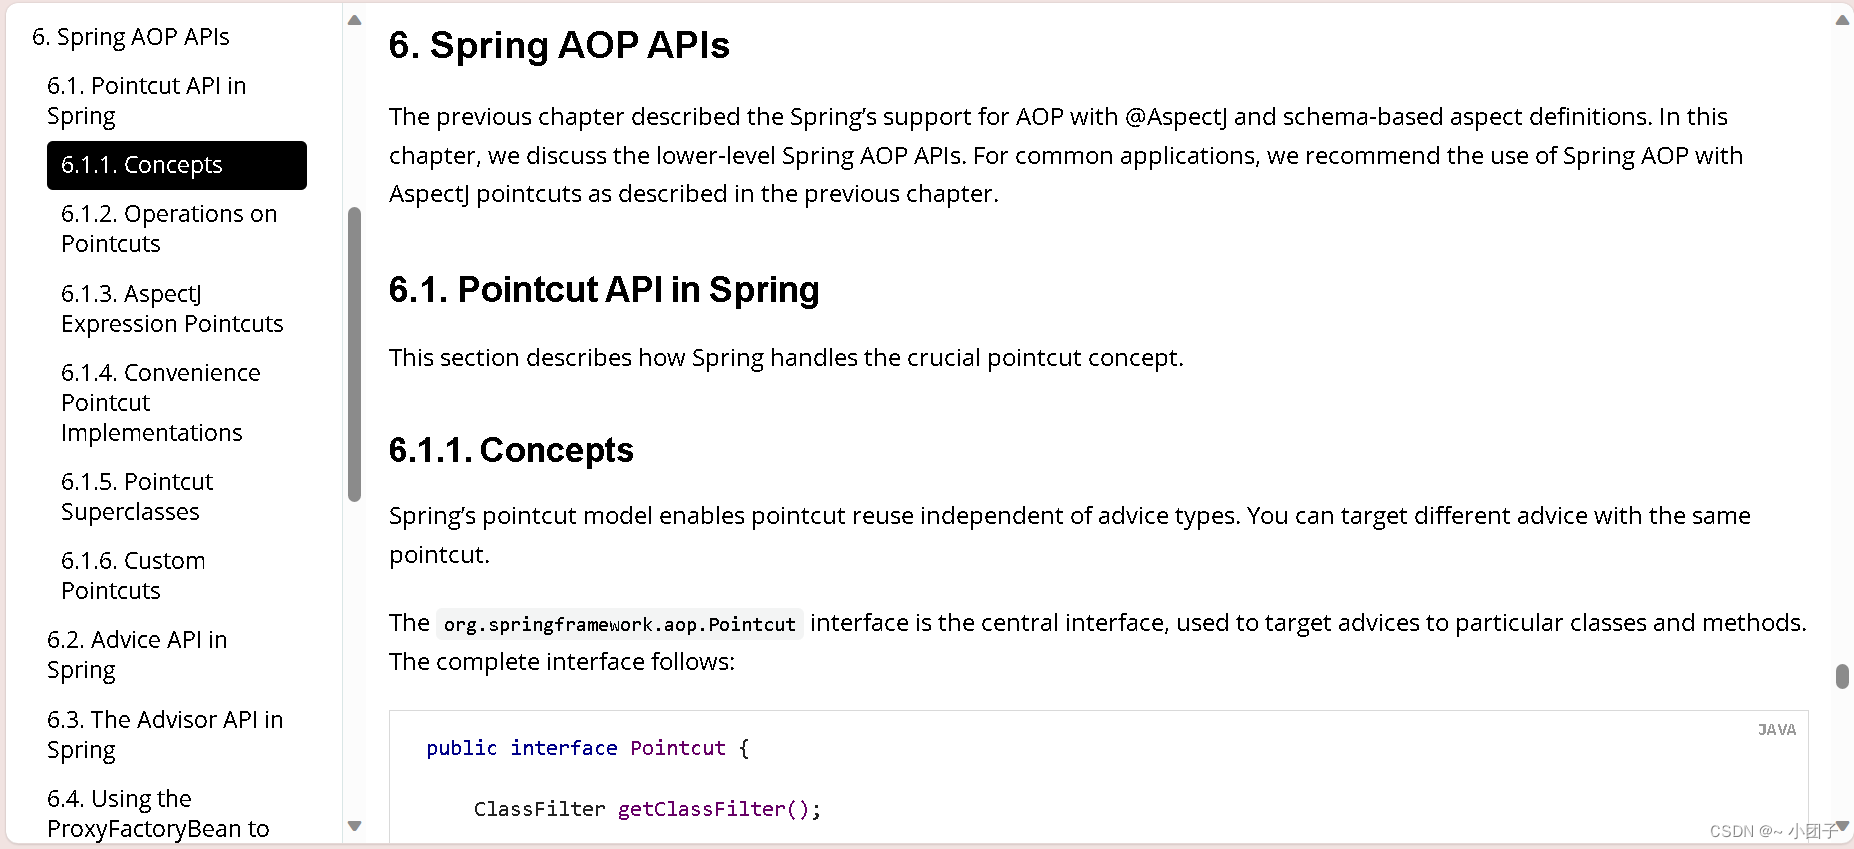 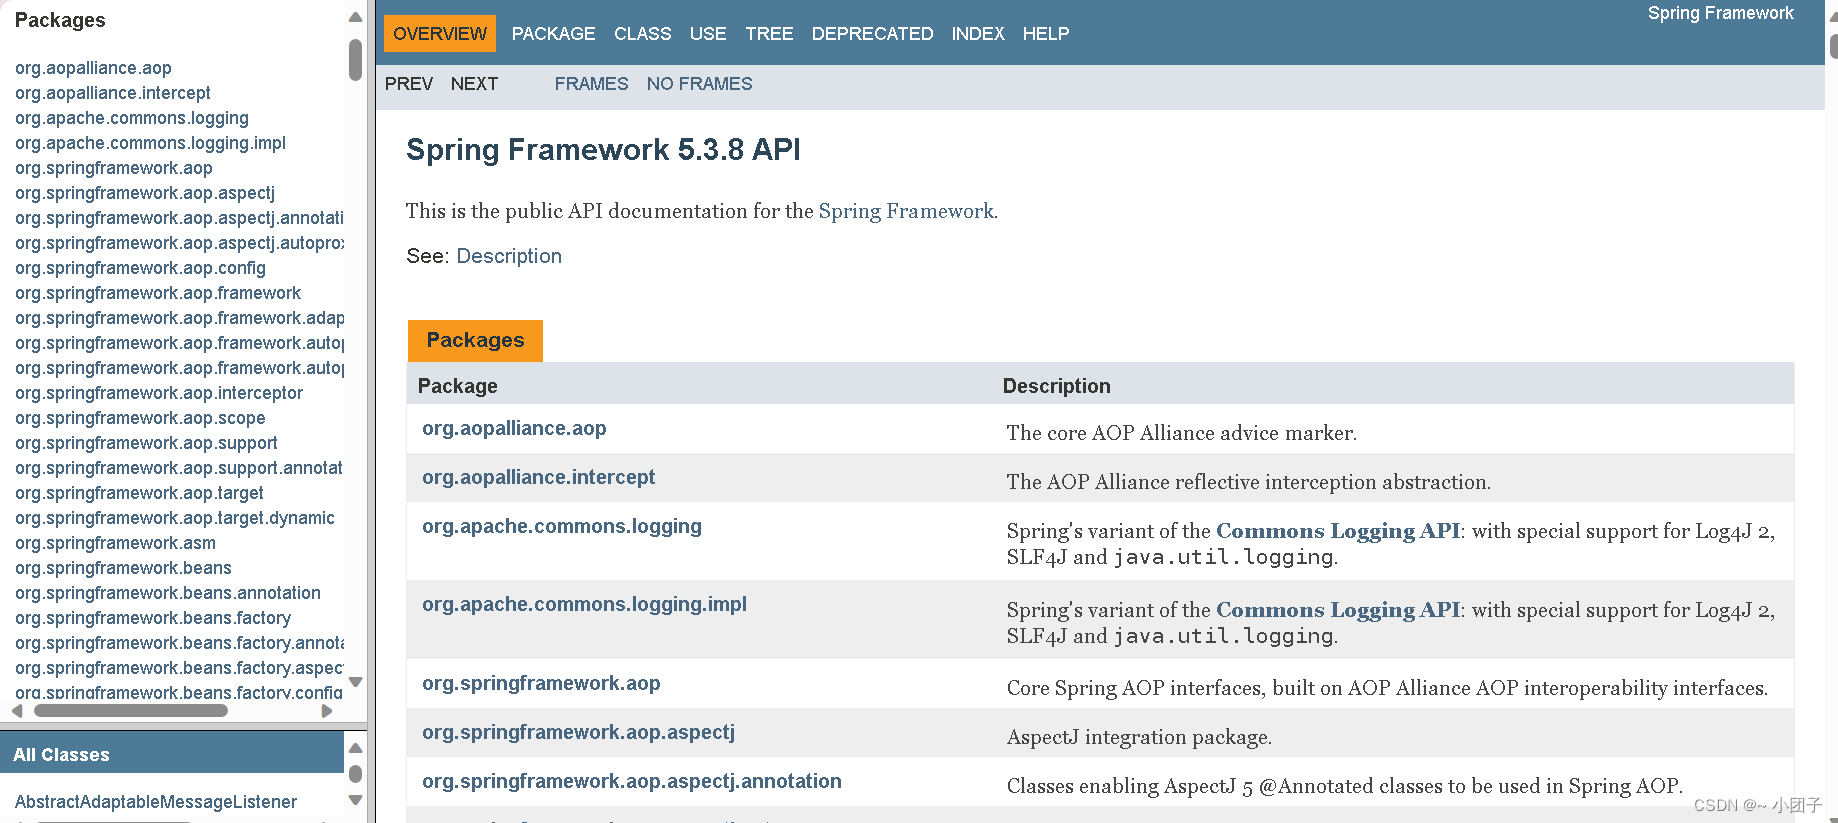
💗动态代理
🍝初始动态代理
需求说明
1.由Vehicle (交通工具接口, 有一个run方法), 下面有两个类 Car 和 Ship
2.当运行Car对象的 run 方法 和 ship对象的 run 方法时, 输入如下内容
交通工具开始运行了…
轮船在海上航行…
交通工具停止运行了…
交通工具开始运行了…
小汽车在路上跑…
交通工具停止运行了…
解决方案一: 传统方案
//接口, 该接口有run方法
public interface Vehicle {void run();
}
public class Car implements Vehicle{@Overridepublic void run() {System.out.println("交通工具开始运行了....");System.out.println("小汽车在路上 running....");System.out.println("交通工具停止运行了....");}
}
public class Ship implements Vehicle{@Overridepublic void run() {System.out.println("交通工具开始运行了....");System.out.println("大轮船在路上 running....");System.out.println("交通工具停止运行了....");}
}
public class TestVehicle {@Testpublic void run() {//OOP基础=>java基础Vehicle vehicle = new Ship();//动态绑定vehicle.run();}
}
来思考一下, 这个解决方案好吗? ====> 代码冗余, 其实就是单个对象的调用, 并没有很好的解决.
解决方案二: 动态代理方式
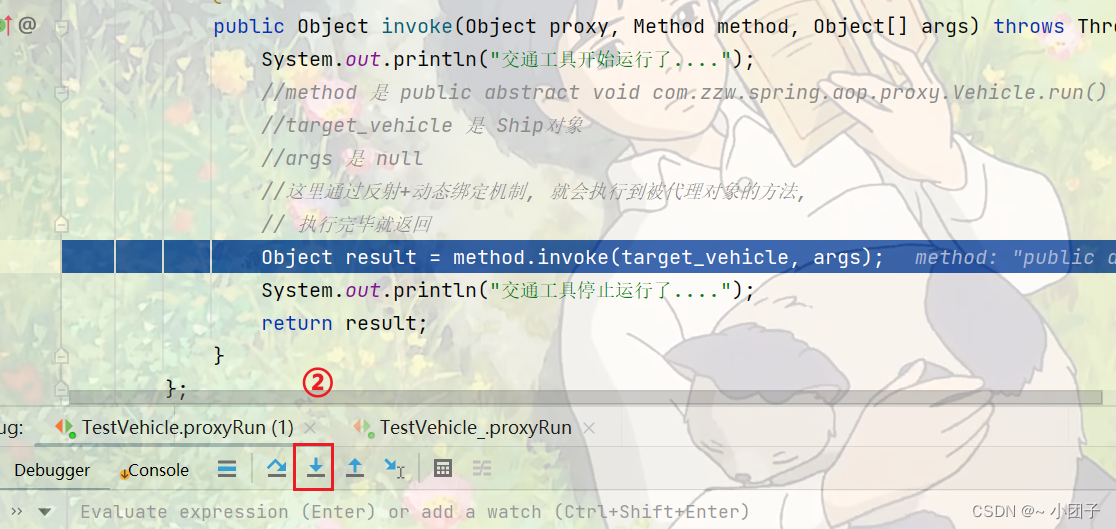
动态代理解决思路: 在调用方法时, 使用反射机制, 根据方法去决定调用哪个对象方法
public class VehicleProxyProvider {//定义一个属性//target_vehicle 表示真正要执行的对象//该对象实现了Vehicle接口private Vehicle target_vehicle;//构造器public VehicleProxyProvider(Vehicle target_vehicle) {this.target_vehicle = target_vehicle;}//编写一个方法, 可以返回一个代理对象//解读://1.这个方法非常重要, 理解有一定难度//2.public Vehicle getProxy() {//得到类加载器ClassLoader classLoader =target_vehicle.getClass().getClassLoader();//得到要代理的对象/被执行对象 的接口信息, 底层是通过接口来完成调用Class<?>[] interfaces = target_vehicle.getClass().getInterfaces();//创建InvocationHandler 对象//因为 InvocationHandler 是接口, 所以我们可以通过匿名对象的方式来创建该对象/*** public interface InvocationHandler {*     public Object invoke(Object proxy, Method method, Object[] args)*          throws Throwable;* }* invoke 方法是将来执行target_vehicle的方法时, 会调用到*/InvocationHandler invocationHandler = new InvocationHandler() {/*class VehicleProxyProvider$01 implements InvocationHandler {@Overridepublic Object invoke(Object proxy, Method method, Object[] args) throws Throwable {System.out.println("交通工具开始运行了....");//这里是我们的反射基础 => OOPObject result = method.invoke(target_vehicle, args);System.out.println("交通工具停止运行了....");return result;}}InvocationHandler invocationHandler = new VehicleProxyProvider$01();*//*** invoke 方法是将来执行我们的target_vehicle的方法时, 会调用到** @param proxy  表示代理对象* @param method 就是通过代理对象调用方法时, 的那个方法 代理对象.run()* @param args   表示调用 代理对象.run(xx) 传入的参数* @return 表示 代理对象.run(xx) 执行后的结果.* @throws Throwable*/@Overridepublic Object invoke(Object proxy, Method method, Object[] args) throws Throwable {System.out.println("交通工具开始运行了....");//这里是我们的反射基础 => OOP//method 是 public abstract void com.zzw.spring.aop.proxy.Vehicle.run()//target_vehicle 是 Ship对象//args 是 null//这里通过反射+动态绑定机制, 就会执行到被代理对象的方法//执行完毕就返回Object result = method.invoke(target_vehicle, args);System.out.println("交通工具停止运行了....");return result;}};/*public static Object newProxyInstance(ClassLoader loader,Class<?>[] interfaces,InvocationHandler h)解读1.Proxy.newProxyInstance() 可以返回一个代理对象2.ClassLoader loader: 类加载器,3.Class<?>[] interfaces 就是将来要代理的对象的接口信息4.InvocationHandler h 调用处理器/对象, 有一个非常重要的方法invoke*/Vehicle proxy =(Vehicle) Proxy.newProxyInstance(classLoader, interfaces, invocationHandler);return proxy;}
}
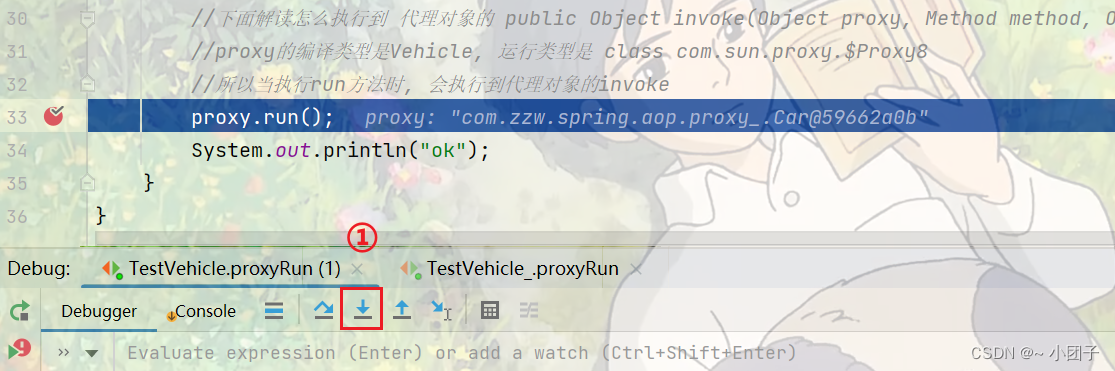
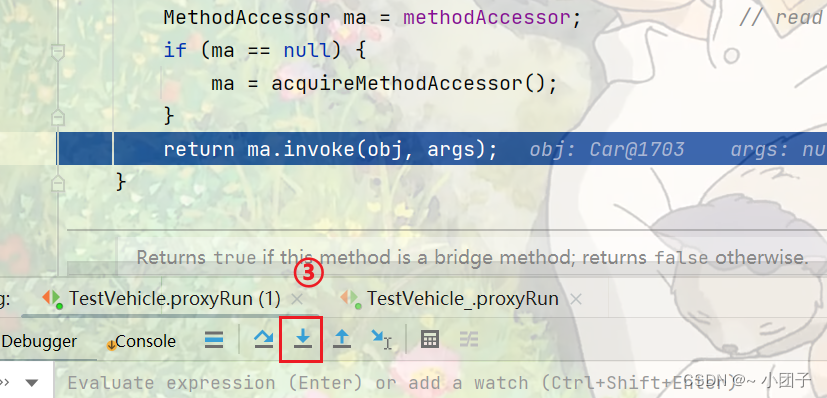
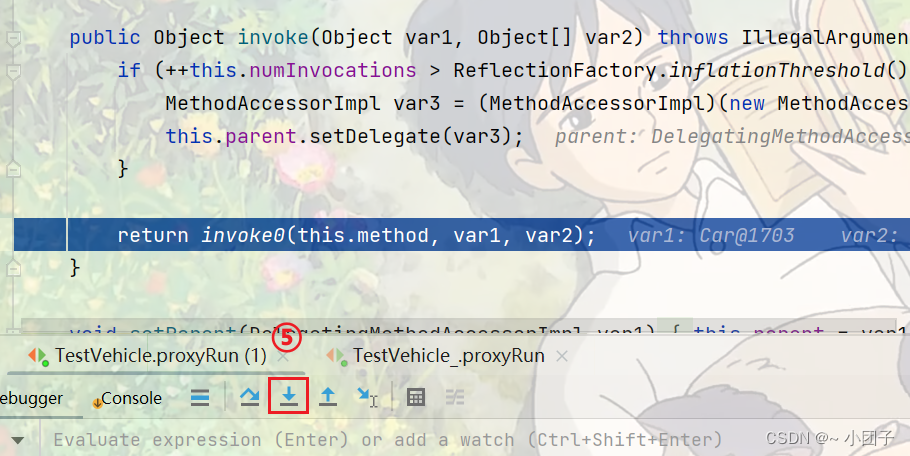
public class TestVehicle {@Testpublic void proxyRun() {//创建Ship对象Vehicle vehicle = new Ship();//创建VehicleProxyProvider对象, 并且我们传入的要代理的对象VehicleProxyProvider vehicleProxyProvider= new VehicleProxyProvider(new Car());//获取代理对象, 该对象可以代理执行方法//解读//1.proxy 编译类型Vehicle,//2.运行类型 是代理类型, 即 class com.sun.proxy.$Proxy8Vehicle proxy = vehicleProxyProvider.getProxy();System.out.println("proxy的编译类型是 Vehicle");System.out.println("proxy的运行类型是" + proxy.getClass());//下面解读/debug怎么执行到 代理对象的 public Object invoke(Object proxy, Method method, Object[] args)//梳理完毕, proxy的编译类型是Vehicle, 运行类型是Proxy class com.sun.proxy.$Proxy8//所以当执行run方法时, 会执行到 代理对象的invoke//如果体现动态 [1.被代理的对象 2.方法]//proxy.run();String result = proxy.fly(10000);System.out.println("result=" + result);System.out.println("ok");}
debug

🍝动态代理深入
需求说明
1.有一个SmartAnimal 接口, 可以完成简单的加减法, 要求在执行 getSum() 和 getSub() 时, 输出执行前, 执行过程, 执行后的日志结果. 输出内容如下:
日志-方法名-getSum-参数 1.5 4.5
方法内部打印result = 6.0
日志-方法名-getSum-结果result= 6.0
=================================
日志-方法名-getSub-参数 1.4 3.3
方法内部打印result = -1.9
日志-方法名-getSub-结果result= -1.9
解决方案一: 传统方案
public interface SmartAnimalAble {//求和float getSum(float i, float j);//求差float getSub(float i, float j);
}
public class SmartCat implements SmartAnimalAble {@Overridepublic float getSum(float i, float j) {System.out.println("日志-方法名-getSum-参数 " + i + " " + j);float result = i + j;System.out.println("方法内部打印result = " + result);System.out.println("日志-方法名-getSum-结果result= " + (i + j));return result;}@Overridepublic float getSub(float i, float j) {System.out.println("日志-方法名-getSub-参数 " + i + " " + j);float result = i - j;System.out.println("方法内部打印result = " + result);System.out.println("日志-方法名-getSub-结果result= " + (i - j));return result;}
}
public class AopTest {@Testpublic void run() {SmartAnimalAble smartAnimalAble = new SmartCat();smartAnimalAble.getSum(1.5f, 4.5f);System.out.println("=================================");smartAnimalAble.getSub(1.4f, 3.3f);}
}
解决方案二: 动态代理方式
考虑代理对象调用方法(底层是反射调用)时, 可能出现的异常- [横切关注点]
//可以返回一个动态代理对象, 可以执行SmartCat对象的方法
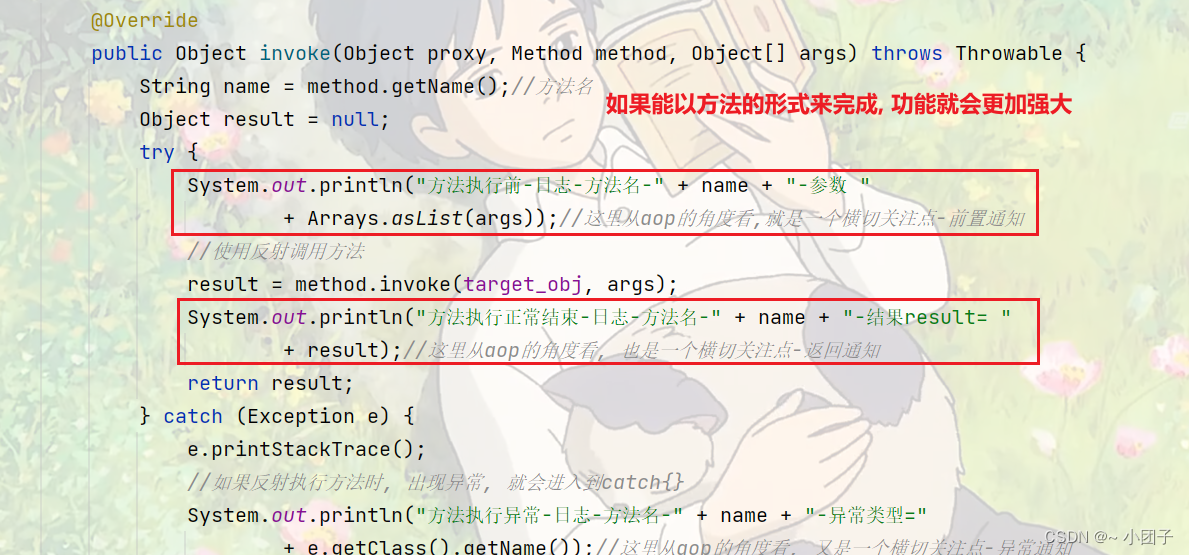
public class MyProxyProvider {//这是一个属性, 是我们要执行的目标对象//该对象实现了SmartAnimal接口private SmartAnimalAble target_obj;//构造器MyProxyProvider(SmartAnimalAble target_obj) {this.target_obj = target_obj;}//编写一个方法, 可以返回一个代理对象//该代理对象可以执行目标对象public SmartAnimalAble getProxy() {//1.得到类加载器ClassLoader classLoader =target_obj.getClass().getClassLoader();//2.得到要执行的目标对象的接口信息Class<?>[] interfaces = target_obj.getClass().getInterfaces();//3.创建InvocationHandler 对象InvocationHandler invocationHandler = new InvocationHandler() {@Overridepublic Object invoke(Object proxy, Method method, Object[] args) throws Throwable {String name = method.getName();//方法名Object result = null;try {System.out.println("方法执行前-日志-方法名-" + name + "-参数 "+ Arrays.asList(args));//这里从aop的角度看,就是一个横切关注点-前置通知//使用反射调用方法result = method.invoke(target_obj, args);System.out.println("方法执行正常结束-日志-方法名-" + name + "-结果result= "+ result);//这里从aop的角度看, 也是一个横切关注点-返回通知return result;} catch (Exception e) {e.printStackTrace();//如果反射执行方法时, 出现异常, 就会进入到catch{}System.out.println("方法执行异常-日志-方法名-" + name + "-异常类型="+ e.getClass().getName());//这里从aop的角度看, 又是一个横切关注点-异常通知} finally {//不管你是否出现了异常, 最终都会执行到 finally {}//这里从aop的角度看, 还是一个横切关注点-最终通知System.out.println("方法最终结束-日志-方法名-" + name);}return result;}};//创建代理对象SmartAnimalAble proxy =(SmartAnimalAble) Proxy.newProxyInstance(classLoader, interfaces, invocationHandler);return proxy;}
}
public class AopTest {@Testpublic void smartCatTestProxy() {//创建SmartCat对象SmartAnimalAble smartAnimalAble = new SmartCat();MyProxyProvider myProxyProvider= new MyProxyProvider(smartAnimalAble);//获取代理对象, 该对象可以代理执行方法SmartAnimalAble proxy = myProxyProvider.getProxy();System.out.println("proxy的编译类型是 SmartAnimalAble");System.out.println("proxy的运行类型是 " + proxy.getClass());//proxy的编译类型是SmartAnimal, 运行类型是 Class com.sun.proxy.$Proxy8//所以当执行getSum方法时, 会执行到 代理对象的invokeproxy.getSum(1.2f, 2.4f);System.out.println("=================================");proxy.getSub(1.3f, 4.5f);System.out.println("ok");}
}
🍝AOP问题提出
在MyProxyProvider.java中, 我们的输出语句功能比较弱, 在实际开发中, 我们希望是以一个方法的形式, 嵌入到真正执行的目标方法前.
如图分析
📗使用土方法解决
1). 需求分析
使用土方法解决前面的问题, 后面使用Spring的AOP组件完成
2). 先建一个包, 把相关文件拷贝过来, 进行修改完成.
//我们的一个方法, 在目标对象执行前执行
public void before(Method method, Object[] args) {System.out.println("before方法执行前-日志-方法名-" + method.getName() + "-参数 "+ Arrays.asList(args));//这里从aop的角度看,就是一个横切关注点-前置通知
}//我们的一个方法, 在目标对象执行后执行
public void after(Method method, Object result) {System.out.println("after方法执行正常结束-日志-方法名-" + method.getName() + "-结果result= "+ result);//这里从aop的角度看, 也是一个横切关注点-返回通知
}
@Override
public Object invoke(Object proxy, Method method, Object[] args) throws Throwable {String name = method.getName();//方法名Object result = null;before(method, args);//使用反射调用方法result = method.invoke(target_obj, args);after(method, result);return result;
}
3). 该方法问题分析: 耦合度高
📗 对土方法解耦-开发最简单的AOP类
public class ZzwAOP {//我们的一个方法, 在目标对象执行前执行public static void before(Method method, Object[] args) {System.out.println("ZzwHsp-方法执行前-日志-方法名-" + method.getName() + "-参数 "+ Arrays.asList(args));//这里从aop的角度看,就是一个横切关注点-前置通知}//我们的一个方法, 在目标对象执行后执行public static void after(Method method, Object result) {System.out.println("ZzwHsp-方法执行正常结束-日志-方法名-" + method.getName() + "-结果result= "+ result);//这里从aop的角度看, 也是一个横切关注点-返回通知}
}
@Override
public Object invoke(Object proxy, Method method, Object[] args) throws Throwable {String name = method.getName();//方法名Object result = null;try {//before(method, args);ZzwAOP.before(method, args);//使用反射调用方法result = method.invoke(target_obj, args);//after(method, result);ZzwAOP.after(method, result);return result;} catch (Exception e) {}
}
📗 土方法缺点
土方法 不够灵活;
土方法 复用性差;
土方法 是一种硬编码 (因为没有注解和反射支撑)
Spring AOP 闪亮登场 - 底层是ASPECTJ
💗Spring AOP
🍝基本介绍
- 什么是AOP
AOP的全称(aspect oriented programming), 面向切面编程.
第一张图

- AOP实现方式
1.基于动态代理的方式 [内置aop实现]
2.使用框架aspectj来实现
🍝AOP编程 快速入门
●说明
1.需要引入核心的aspect包
2.在切面类中声明通知方法
1)前置通知: @Before
2)返回通知: @AfterReturning
3)异常通知: @AfterThrowing
4)后置通知: @After 最终通知
5)环绕通知: @Around
●需求说明
我们使用aop编程的方式, 来实现手写的动态代理案例效果, 以上一个案例为例进行讲解.
1.导入AOP编程需要的包
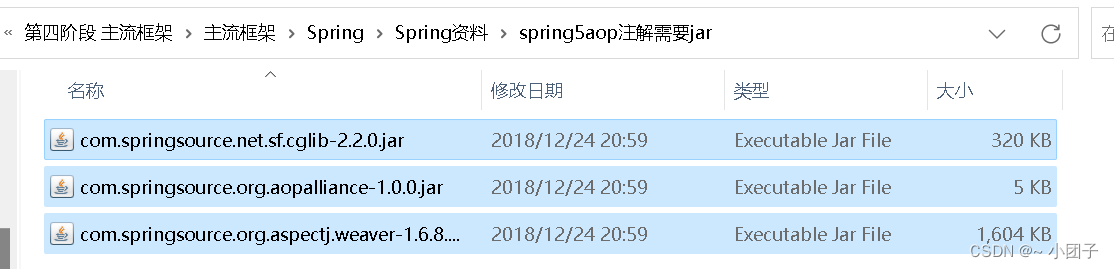
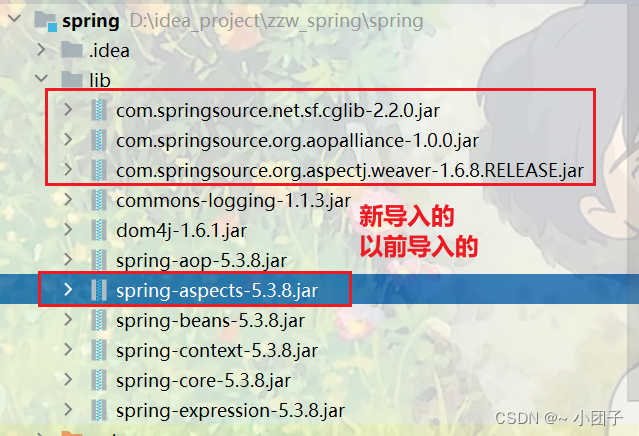
2.创建包spring/aop/aspect
package com.zzw.spring.aop.aspectj;public interface SmartAnimalAble {//求和float getSum(float i, float j);//求差float getSub(float i, float j);
}
易错点: 不要引入别的包下的SmartAnimalAble, 要引入同包下的SmartAnimalAble
@Component //使用@Component 当spring容器启动时, 将 SmartDog 注入到容器
public class SmartDog implements SmartAnimalAble {@Overridepublic float getSum(float i, float j) {float result = i + j;System.out.println("方法内部打印result = " + result);return result;}@Overridepublic float getSub(float i, float j) {float result = i - j;System.out.println("方法内部打印result = " + result);return result;}
}
切面类, 类似于我们前面自己写的MyProxyProvider, 但是功能强大很多
@Aspect //表示是一个切面类[底层切面编程的支撑(动态代理+反射+动态绑定)]
@Component //会将SmartAnimalAspect注入到容器
public class SmartAnimalAspect {//希望将showBeginLog方法切入到SmartDog-getSum前执行-前置通知/*** 解读* 1. @Before 表示是前置通知, 即在我们的目标对象执行方法前执行* 2. value = "execution(public float com.zzw.spring.aop.aspectj.SmartDog.getSum(float, float))"* 指定切入到哪个类的哪个方法 形式是: 访问修饰符 返回类型 全类名.方法名(形参列表)* 3. showBeginLog方法可以理解成就是一个切入方法, 这个方法名是可以由程序员指定的 比如:showBeginLog* 4. JoinPoint joinPoint 在底层执行时, 由AspectJ切面编程框架, 会给该切入方法传入 joinPoint对象* , 通过该方法, 程序员可以获取到 相关信息* @param joinPoint*/@Before(value = "execution(public float com.zzw.spring.aop.aspectj.SmartDog.getSum(float, float))")public void showBeginLog(JoinPoint joinPoint) {//通过连接点对象joinPoint, 可以获取方法签名Signature signature = joinPoint.getSignature();System.out.println("切面类showBeginLog()-方法执行前-日志-方法名-" + signature.getName() + "-参数 "+ Arrays.asList(joinPoint.getArgs()));}//返回通知: 即把showSuccessEndLog方法切入到目标对象方法正常执行完毕后的地方@AfterReturning(value = "execution(public float com.zzw.spring.aop.aspectj.SmartDog.getSum(float, float))")public void showSuccessEndLog(JoinPoint joinPoint, Object res) {Signature signature = joinPoint.getSignature();System.out.println("切面类showSuccessEndLog()-方法执行正常结束-日志-方法名-" + signature.getName());}//异常通知: 即把showExceptionLog方法切入到目标对象方法执行发生异常后的catch{}@AfterThrowing(value = "execution(public float com.zzw.spring.aop.aspectj.SmartDog.getSum(float, float))")public void showExceptionLog(JoinPoint joinPoint) {Signature signature = joinPoint.getSignature();System.out.println("切面类showExceptionLog()-方法执行异常-日志-方法名-" + signature.getName());}//最终通知: 即把showFinallyEndLog方法切入到目标方法执行后, 不管是否发生异常都要执行, finally{}@After(value = "execution(public float com.zzw.spring.aop.aspectj.SmartDog.getSum(float, float))")public void showFinallyEndLog(JoinPoint joinPoint) {Signature signature = joinPoint.getSignature();System.out.println("切面类showFinallyEndLog()-方法最终执行完毕-日志-方法名-" + signature.getName());}
}
新建beans08.xml
<?xml version="1.0" encoding="UTF-8"?>
<beans xmlns="http://www.springframework.org/schema/beans"xmlns:xsi="http://www.w3.org/2001/XMLSchema-instance"xmlns:context="http://www.springframework.org/schema/context"xsi:schemaLocation="http://www.springframework.org/schema/beans http://www.springframework.org/schema/beans/spring-beans.xsd http://www.springframework.org/schema/context https://www.springframework.org/schema/context/spring-context.xsd"><context:component-scan base-package="com.zzw.spring.aop.aspectj"/><!--开启基于注解的AOP功能--><aop:aspectj-autoproxy/>
</beans>
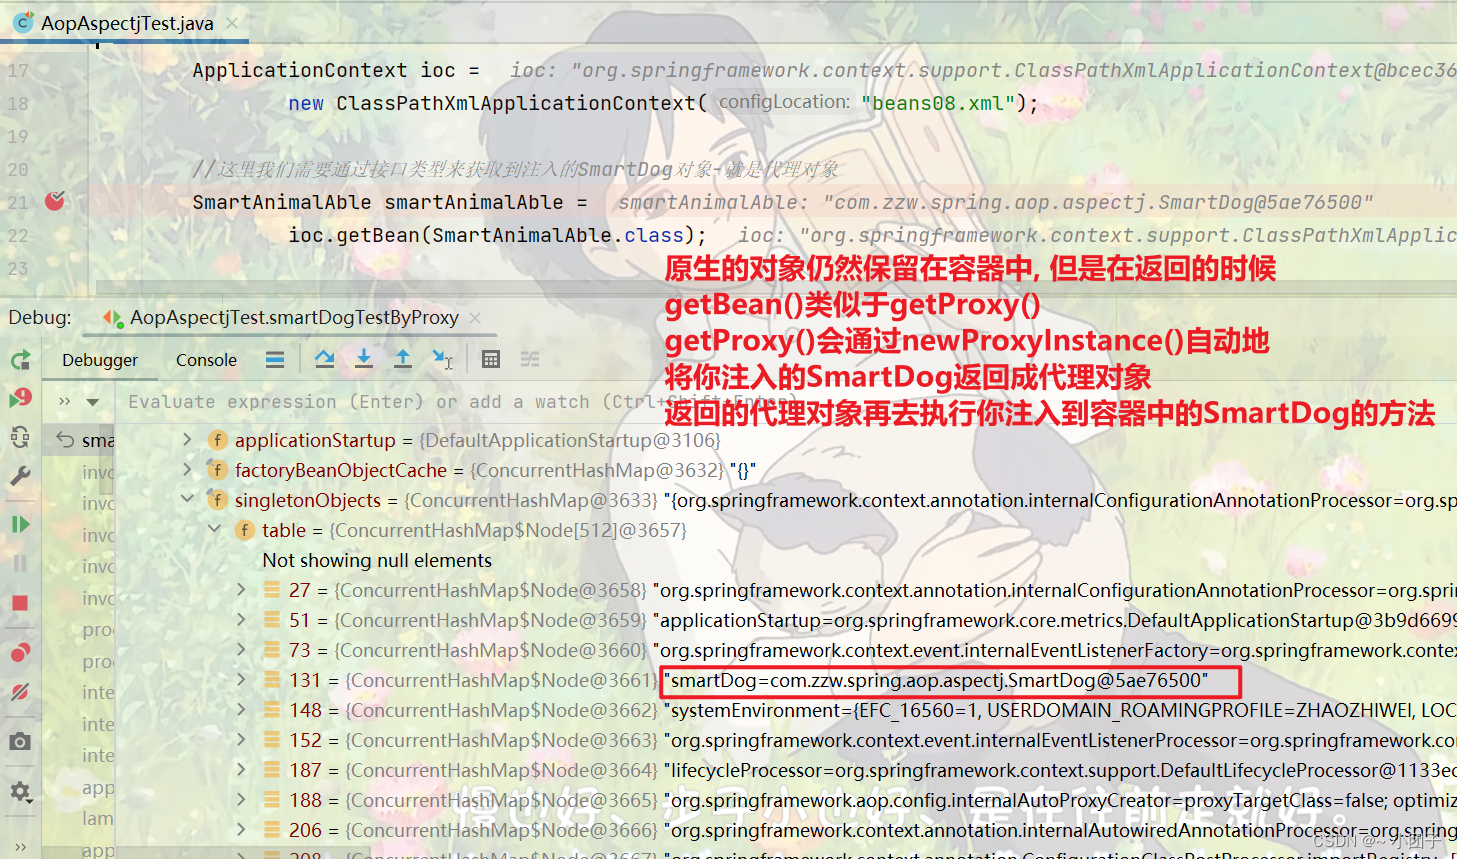
测试
public class AopAspectjTest {@Testpublic void smartDogTestByProxy() {ApplicationContext ioc =new ClassPathXmlApplicationContext("beans08.xml");//这里我们需要通过接口类型来获取到注入的SmartDog对象-就是代理对象SmartAnimalAble smartAnimalAble =ioc.getBean(SmartAnimalAble.class);smartAnimalAble.getSum(1, 2);//System.out.println("smartAnimalAble运行类型是 " + smartAnimalAble.getClass());//class com.sun.proxy.$Proxy16}
}
🍝注意事项和细节
1.关于切面类方法命名可以自己规范一下, 比如showBeginLog(), showSuccessEndLog(), showExceptionLog(), showFinallyEndLog()
2.切入表达式的更多配置, 比如使用模糊配置
@Before(value=“execution(* com.zzw.aop.proxy.SmartDog.*(…))”)
第一个\*表示: 任意修饰符和返回类型
第二个\*表示: 任意方法名
..表示: 任意形参列表
3.表示所有访问权限, 所有包下的所有类的所有方法, 都会被执行该前置通知方法
@Before(value=“execution(* *.*(…))”)
4.当spring容器开启了 基于注解的AOP功能 <aop:aspectj-autoproxy/>, 我们获取注入的对象, 需要以接口的类型来获取, 因为你注入的对象.getClass() 已经是代理类型了
5.当spring容器开启了 基于注解的AOP功能 <aop:aspectj-autoproxy/>, 我们获取注入的对象, 也可以通过id来获取, 但是也要转成接口类型.
//这里我们需要通过接口类型来获取到注入的SmartDog对象-就是代理对象
SmartAnimalAble smartAnimalAble = ioc.getBean(SmartAnimalAble.class);//SmartAnimalAble smartAnimalAble = (SmartAnimalAble) ioc.getBean("smartDog");
🍝课后作业
1.有接口 UsbInterface (方法 work)
2.实现子类 Phone 和 Camera 实现 UsbInterface
3.请在SmartAnimalAspect 切面类, 写一个方法(可输出日志信息作为前置通知, 在Phone和Camera对象执行work方法前调用
4.其它如返回通知, 异常通知, 后置通知, 也可以加入.
新建包 com.zzw.spring.aop.homework;
接口
public interface UsbInterface {void work(String name);
}
实现类
@Component //将Phone当作一个组件注入到容器中
public class Phone implements UsbInterface{@Overridepublic void work(String name) {System.out.println(name + " 手机正在工作中....");}
}
@Component //将Camera对象注入到Spring容器
public class Camera implements UsbInterface{@Overridepublic void work(String name) {System.out.println(name + " 相机正在工作中....");}
}
切面类
@Aspect
@Component
public class SmartAnimalAspect {//希望将showBeginLog切入到Phone/Camera-work() 前执行//前置通知//切入表达式也可以指向接口的方法, 这时切入表达式会对实现了接口的类/对象生效//比如下面我们是对UsbInterface切入, 那么对实现类 Phone/Camera 都生效//@Before(value = "execution(public void *.work(String))")@Before(value = "execution(public void com.zzw.spring.aop.homework.UsbInterface.work(String))")public void showBeginLog(JoinPoint joinPoint) {//通过连接点对象, 可以获取方法签名Signature signature = joinPoint.getSignature();System.out.println("切面类showBeginLog()-方法执行前-日志-方法名-" + signature.getName() + "-参数"+ Arrays.asList(joinPoint.getArgs()));}//返回通知@AfterReturning(value = "execution(public void UsbInterface.work(String))")//@AfterReturning(value = "execution(public void com.zzw.spring.aop.homework.*.work(String))")public void showSuccessEndLog(JoinPoint joinPoint) {//通过连接点对象, 可以获取方法名Signature signature = joinPoint.getSignature();System.out.println("切面类showSuccessEndLog()-方法执行正常结束-日志-方法名-" + signature.getName());}//异常通知//@AfterThrowing(value = "execution(public void *.work(String))")@AfterThrowing(value = "execution(public void UsbInterface.work(String))")public void showExceptionLog(JoinPoint joinPoint) {//通过连接点对象, 可以获取方法名Signature signature = joinPoint.getSignature();System.out.println("切面类showExceptionLog()-方法执行异常-日志-方法名-" + signature.getName());}//后置通知//@After(value = "execution(public void *.work(String))")@After(value = "execution(public void UsbInterface.work(String))")public void showFinallyEndLog(JoinPoint joinPoint) {//通过连接点对象, 可以获取方法名Signature signature = joinPoint.getSignature();System.out.println("切面类showFinallyEndLog()-方法最终执行完毕-日志-方法名-" + signature.getName());}
}
beans09.xml
<?xml version="1.0" encoding="UTF-8"?>
<beans xmlns="http://www.springframework.org/schema/beans"xmlns:xsi="http://www.w3.org/2001/XMLSchema-instance"xmlns:context="http://www.springframework.org/schema/context"xmlns:aop="http://www.springframework.org/schema/aop"xsi:schemaLocation="http://www.springframework.org/schema/beans http://www.springframework.org/schema/beans/spring-beans.xsd http://www.springframework.org/schema/context https://www.springframework.org/schema/context/spring-context.xsd http://www.springframework.org/schema/aop https://www.springframework.org/schema/aop/spring-aop.xsd"><context:component-scan base-package="com.zzw.spring.aop.homework"/><!--开启基于注解的AOP功能--><aop:aspectj-autoproxy/>
</beans>
测试类
public class AspAspectjTest {public static void main(String[] args) {ApplicationContext ioc =new ClassPathXmlApplicationContext("beans09.xml");UsbInterface phone = (UsbInterface) ioc.getBean("phone");phone.work("华为");System.out.println("===================================");UsbInterface camera = (UsbInterface) ioc.getBean("camera");camera.work("索尼");//System.out.println("phone的运行类型是" + phone.getClass());}
}
🐋AOP-切入表达式
切入点表达式
1.作用
通过表达式的方式定位一个或多个具体的连接点
2.语法细节
①切入点表达式的语法格式
execution([权限修饰符] [返回值类型] [简单类名/全类名] [方法名] (参数列表))
②举例说明
| 表达式 | execution(* com.zzw.spring.aop.aspectj.SmartDog.*(..)) |
|---|---|
| 含义 | 如果SmartAnimalAble是接口, 则表示 接口/类 中声明的所有方法. 第一个 * 代表任意修饰符及任意返回值 第二个 * 表示任意方法 .. 匹配任意数量, 任意类型的参数 (规定.的数量是2个) 若目标类, 接口与该切面类在同一个包中可以省略包名 |
| 表达式 | execution(public * SmartDog.*(..)) |
|---|---|
| 含义 | SmartDog 接口/类 中的所有公有方法 |
| 表达式 | execution(public double SmartDog.*(..)) |
|---|---|
| 含义 | SmartDog 接口/类 中返回double类型数值的方法 |
| 表达式 | execution(public double SmartDog.*(double, ..)) |
|---|---|
| 含义 | 第一个参数为double类型的方法. ..匹配任意数量, 任意类型的参数 |
| 表达式 | execution(public double SmartDog.*(double, double)) |
|---|---|
| 含义 | 参数类型为double, double类型的方法 |
| 表达式 | execution(public double SmartDog.*(double, double)) |
|---|---|
| 含义 | 参数类型为double, double类型的方法 |
③在AspectJ中, 切入点表达式可以通过&&, ||, ! 等操作符结合起来
| 表达式 | execution(* *.add(int, ..)) || execution(* *.sub(int, ..)) |
|---|---|
| 含义 | 任意类中第一个参数为int类型的add方法或sub方法 |
💧注意事项和细节
1.切入表达式也可以指向类的方法, 这时切入表达式会对该类/对象生效
2.切入表达式也可以指向接口的方法, 这时切入表达式会对实现了接口的类/对象生效
3.切入表达式也可以对没有实现接口的类, 进行切入
@Component //把Car视为一个组件[对象], 注入到Spring容器
public class Car {public void run() {System.out.println("小汽车 run...");}
}
//切面类
@Aspect //表示是一个切面类
@Component //会将SmartAnimalAspect注入到容器
public class SmartAnimalAspect {//给Car配置一个前置通知@Before(value = "execution(public void Car.run())")public void ok1(JoinPoint joinPoint) {Signature signature = joinPoint.getSignature();System.out.println("切面类的ok1()-执行的目标方法-" + signature.getName());}
}
测试
public class AopAspectjTest {@Testpublic void test3() {ApplicationContext ioc =new ClassPathXmlApplicationContext("beans08.xml");Car car = ioc.getBean(Car.class);//说明: car对象仍然是代理对象System.out.println("car的运行类型=" + car.getClass());//car的运行类型=class com.zzw.spring.aop.aspectj.Car$$EnhancerBySpringCGLIB$$5e9a8b7acar.run();}
}
4.补充: 动态代理jdk的Proxy和Spring的CGlib
🐋AOP-JoinPoint
1.通过JoinPoint可以获取到调用方法的签名
2.其他常用方法
@Aspect //表示是一个切面类
@Component //会将SmartAnimalAspect注入到容器
public class SmartAnimalAspect {//给Car配置一个最终通知@After(value = "execution(public void Car.run())")public void ok4(JoinPoint joinPoint) {//演示joinPoint常用的方法joinPoint.getSignature().getName();//获取目标方法名joinPoint.getSignature().getDeclaringType().getSimpleName();//获取目标方法所属类的简单类名joinPoint.getSignature().getDeclaringTypeName();//获取目标方法所属类的类名joinPoint.getSignature().getModifiers();//获取目标方法声明类型(public, private, protected)Object[] args = joinPoint.getArgs();//获取传入目标方法的参数, 返回一个数组joinPoint.getTarget();//获取被代理的对象joinPoint.getThis();//获取代理对象自己       }
}
🐋返回通知获取结果
切面类
@Aspect //表示是一个切面类[底层切面编程的支撑(动态代理+反射+动态绑定)]
@Component //会将SmartAnimalAspect注入到容器
public class SmartAnimalAspect {//返回通知: 即把showSuccessEndLog方法切入到目标对象方法正常执行完毕后的地方//解读//1.如果我们希望把目标方法, 执行的结果, 返回给切入方法//2.可以在 @AfterReturning 增加属性,  比如 returning = "res"//3.同时在切入方法增加 Object res//4.注意: returning = "res" 和 Object res 的 res名字一样@AfterReturning(value = "execution(public float com.zzw.spring.aop.aspectj.SmartDog.getSum(float, float))", returning = "res")public void showSuccessEndLog(JoinPoint joinPoint, Object res) {Signature signature = joinPoint.getSignature();System.out.println("切面类showSuccessEndLog()-方法执行正常结束-日志-方法名-" + signature.getName() + " 返回的结果是=" + res);}
}
🐋异常通知获取异常信息
如何在异常通知方法中获取异常信息
@Component //使用@Component 当spring容器启动时, 将 SmartDog 注入到容器
public class SmartDog implements SmartAnimalAble {@Overridepublic float getSum(float i, float j) {float result = i + j;int res = 1 / 0;//模拟一个算数异常System.out.println("方法内部打印result = " + result);return result;}
}
切面类
@Aspect //表示是一个切面类[底层切面编程的支撑(动态代理+反射+动态绑定)]
@Component //会将SmartAnimalAspect注入到容器
public class SmartAnimalAspect {//异常通知: 即把showExceptionLog方法切入到目标对象方法执行发生异常后的catch{}@AfterThrowing(value = "execution(public float com.zzw.spring.aop.aspectj.SmartDog.getSum(float, float))", throwing = "throwable")public void showExceptionLog(JoinPoint joinPoint, Throwable throwable) {Signature signature = joinPoint.getSignature();System.out.println("切面类showExceptionLog()-方法执行异常-日志-方法名-" + signature.getName() + " 异常信息=" + throwable);}
}
🐋环绕通知
需求: 如果使用环绕通知完成其它四个通知的功能.
新建SmartAnimalAspect2切面类, 并把SmartAnimalAspect切面类注解注释, 避免干扰; 去掉SmartDog的异常代码.
//切面类
@Aspect //表示是一个切面类[底层切面编程的支撑(动态代理+反射+动态绑定)]
@Component //会将SmartAnimalAspect注入到容器
public class SmartAnimalAspect2 {//演示环绕通知的使用//1. @Around 表示这是一个环绕通知[可以完成其它四个通知的功能]//2. (value = "execution(public float getSum(float, float))") 切入点表达式//3. doAround 表示要切入的方法 - 调用的基本结构 try-catch-finally@Around(value = "execution(public float com.zzw.spring.aop.aspectj.SmartDog.getSum(float, float))")public Object doAround(ProceedingJoinPoint joinPoint) {Object result = null;String methodName = joinPoint.getSignature().getName();try {//1.相当于前置通知完成的事情Object[] args = joinPoint.getArgs();List<Object> argList = Arrays.asList(args);System.out.println("AOP环绕通知[=前置通知]--" + methodName + "方法开始了--参数有: " + argList);//在环绕通知中一定要调用joinPoint.proceed()来执行目标方法result = joinPoint.proceed();//2.相当于返回通知完成的事情System.out.println("AOP环绕通知[=返回通知]--" + methodName + "方法结束了--结果是: " + result);} catch (Throwable throwable) {//3.相当于异常通知完成的事情System.out.println("AOP环绕通知[=异常通知]--" + methodName + "方法抛出异常--异常对象: " + throwable);} finally {//相当于最终通知完成的事情System.out.println("AOP环绕通知[=最终通知]--" + methodName + "方法最终结束了...");}return result;}
}
测试
public class AopAspectjTest {@Testpublic void testDoAround() {//获取Spring容器ApplicationContext ioc =new ClassPathXmlApplicationContext("beans08.xml");SmartAnimalAble smartAnimalAble = ioc.getBean(SmartAnimalAble.class);smartAnimalAble.getSum(10, 2);}
}
结果
Connected to the target VM, address: '127.0.0.1:60160', transport: 'socket'
AOP环绕通知[=前置通知]--getSum方法开始了--参数有: [10.0, 2.0]
方法内部打印result = 12.0
AOP环绕通知[=返回通知]--getSum方法结束了--结果是: 12.0
AOP环绕通知[=最终通知]--getSum方法最终结束了...
🐋切入点表达式重用
为了统一管理切入点表达式, 我们可以使用切入点表达式重用技术
对SmartAnimalAspect.java稍作修改
//切面类, 类似于我们前面自己写的MyProxyProvider, 但是功能强大很多
@Aspect //表示是一个切面类[底层切面编程的支撑(动态代理+反射+动态绑定)]
@Component //会将SmartAnimalAspect注入到容器
public class SmartAnimalAspect {//定义一个切入点, 在后面使用时可以直接引用, 提高了复用性@Pointcut(value = "execution(public float com.zzw.spring.aop.aspectj.SmartDog.getSum(float, float))")public void myPointCut() {}//@Before(value = "execution(public float com.zzw.spring.aop.aspectj.SmartDog.getSum(float, float))")//这里我们使用定义好的切入点@Before(value = "myPointCut()")public void showBeginLog(JoinPoint joinPoint) {//通过连接点对象joinPoint, 可以获取方法签名Signature signature = joinPoint.getSignature();System.out.println("切面类showBeginLog()[使用的myPointCut()]-方法执行前-日志-方法名-" + signature.getName() + "-参数 "+ Arrays.asList(joinPoint.getArgs()));}//返回通知: 即把showSuccessEndLog方法切入到目标对象方法正常执行完毕后的地方//@AfterReturning(value = "execution(public float com.zzw.spring.aop.aspectj.SmartDog.getSum(float, float))", returning = "res")//使用切入点@AfterReturning(value = "myPointCut()", returning = "res")public void showSuccessEndLog(JoinPoint joinPoint, Object res) {Signature signature = joinPoint.getSignature();System.out.println("切面类showSuccessEndLog()-方法执行正常结束-日志-方法名-" + signature.getName() + " 返回的结果是=" + res);}//异常通知: 即把showExceptionLog方法切入到目标对象方法执行发生异常后的catch{}//@AfterThrowing(value = "execution(public float com.zzw.spring.aop.aspectj.SmartDog.getSum(float, float))", throwing = "throwable")//直接使用切入点表达式@AfterThrowing(value = "myPointCut()", throwing = "throwable")public void showExceptionLog(JoinPoint joinPoint, Throwable throwable) {Signature signature = joinPoint.getSignature();System.out.println("切面类showExceptionLog()-方法执行异常-日志-方法名-" + signature.getName() + " 异常信息=" + throwable);}//最终通知: 即把showFinallyEndLog方法切入到目标方法执行后, 不管是否发生异常都要执行, finally{}//@After(value = "execution(public float com.zzw.spring.aop.aspectj.SmartDog.getSum(float, float))")//直接使用切入点表达式@After(value = "myPointCut()")public void showFinallyEndLog(JoinPoint joinPoint) {Signature signature = joinPoint.getSignature();System.out.println("切面类showFinallyEndLog()-方法最终执行完毕-日志-方法名-" + signature.getName());}
}
🐋切面类执行顺序
如果同一个方法, 有多个切面在同一个切入点切入, 那么执行的优先级如何控制
●基本语法
import org.springframework.core.annotation.Order;
通过@order(value=n) 来控制. n值越小, 优先级越高
●代码
新建SmartAnimalAspect3.java, 将SmartAnimalAspect2.java注销, 保留SmartAnimalAspect.java
1.如果这两个类不加@order注解, 那么执行结果如下
SmartAnimalAspect-切面类showBeginLog()[使用的myPointCut()]-方法执行前-日志-方法名-getSum-参数 [1.0, 2.0]
SmartAnimalAspect3-切面类showBeginLog()-方法执行前-日志-方法名-getSum-参数 [1.0, 2.0]
方法内部打印result = 3.0
SmartAnimalAspect3-切面类showSuccessEndLog()-方法执行正常结束-日志-方法名-getSum 返回的结果是=3.0
SmartAnimalAspect3-切面类showFinallyEndLog()-方法最终执行完毕-日志-方法名-getSum
SmartAnimalAspect-切面类showSuccessEndLog()-方法执行正常结束-日志-方法名-getSum 返回的结果是=3.0
SmartAnimalAspect-切面类showFinallyEndLog()-方法最终执行完毕-日志-方法名-getSum
如果两个类加了@order注解
@Order(value = 2)//表示该切面类执行的顺序, value的值越小, 优先级越高
@Aspect
@Component
public class SmartAnimalAspect {//内容省略
}
@Order(value = 1)//表示该切面类执行的顺序, value的值越小, 优先级越高
@Aspect
@Component
public class SmartAnimalAspect3 {//内容省略
}
那么执行结果如下
SmartAnimalAspect3-切面类showBeginLog()-方法执行前-日志-方法名-getSum-参数 [1.0, 2.0]
SmartAnimalAspect-切面类showBeginLog()[使用的myPointCut()]-方法执行前-日志-方法名-getSum-参数 [1.0, 2.0]
方法内部打印result = 3.0
SmartAnimalAspect-切面类showSuccessEndLog()-方法执行正常结束-日志-方法名-getSum 返回的结果是=3.0
SmartAnimalAspect-切面类showFinallyEndLog()-方法最终执行完毕-日志-方法名-getSum
SmartAnimalAspect3-切面类showSuccessEndLog()-方法执行正常结束-日志-方法名-getSum 返回的结果是=3.0
SmartAnimalAspect3-切面类showFinallyEndLog()-方法最终执行完毕-日志-方法名-getSum
💧注意事项和细节
🐧不能理解成: 优先级高的每个消息通知都先执行. 这个方法调用机制和Filter过滤器链式调用类似
🐧方法调用机制如下图所示
👇👇👇👇👇👇👇👇👇👇👇👇👇👇👇👇👇👇👇👇👇👇👇👇👇👇👇👇👇👇👇👇👇👇👇👇👇👇👇👇👇👇👇👇👇👇

🐋基于XML配置AOP
基本说明
前面我们是通过注解来配置aop的, 在spring中, 我们也可以通过xml的方式来配置AOP.
将SmartAnimalAble.java ,SmartDog.java 拷贝至 spring/aop/xml包下
注意: 不要引错包
切面类
//这是我们开发一个切面类, 但是不用注解, 而是使用xml配置
public class SmartAnimalAspect {public void showBeginLog(JoinPoint joinPoint) {//通过连接点对象joinPoint, 可以获取方法签名Signature signature = joinPoint.getSignature();System.out.println("SmartAnimalAspect[XML配置]-切面类showBeginLog()-方法执行前-日志-方法名-" + signature.getName() + "-参数 "+ Arrays.asList(joinPoint.getArgs()));}public void showSuccessEndLog(JoinPoint joinPoint, Object res) {Signature signature = joinPoint.getSignature();System.out.println("SmartAnimalAspect[XML配置]-切面类showSuccessEndLog()-方法执行正常结束-日志-方法名-" + signature.getName() + " 返回的结果是=" + res);}public void showExceptionLog(JoinPoint joinPoint, Throwable throwable) {Signature signature = joinPoint.getSignature();System.out.println("SmartAnimalAspect[XML配置]-切面类showExceptionLog()-方法执行异常-日志-方法名-" + signature.getName() + " 异常信息=" + throwable);}public void showFinallyEndLog(JoinPoint joinPoint) {Signature signature = joinPoint.getSignature();System.out.println("SmartAnimalAspect[XML配置]-切面类showFinallyEndLog()-方法最终执行完毕-日志-方法名-" + signature.getName());}
}
beans09_2.xml
<?xml version="1.0" encoding="UTF-8"?>
<beans xmlns="http://www.springframework.org/schema/beans"xmlns:xsi="http://www.w3.org/2001/XMLSchema-instance"xmlns:aop="http://www.springframework.org/schema/aop"xsi:schemaLocation="http://www.springframework.org/schema/beans http://www.springframework.org/schema/beans/spring-beans.xsd http://www.springframework.org/schema/context https://www.springframework.org/schema/context/spring-context.xsd http://www.springframework.org/schema/aop https://www.springframework.org/schema/aop/spring-aop.xsd"><!--使用XML配置, 完成AOP编程--><!--配置一个切面类对象-bean--><bean class="com.zzw.spring.aop.xml.SmartAnimalAspect" id="smartAnimalAspect"/><!--配置一个SmartDog对象-bean--><bean class="com.zzw.spring.aop.xml.SmartDog" id="smartDog"/><!--配置切面类, 细节: 一定要引入 xmlns:aop--><aop:config><!--配置切入点表达式--><aop:pointcut id="myPointCut" expression="execution(public float com.zzw.spring.aop.xml.SmartDog.getSum(float, float))"/><!--配置切面的 前置,返回,异常,最终通知--><aop:aspect ref="smartAnimalAspect" order="10"><!--配置前置通知--><aop:before method="showBeginLog" pointcut-ref="myPointCut"/><!--配置返回通知--><aop:after-returning method="showSuccessEndLog" pointcut-ref="myPointCut" returning="res"/><!--配置异常通知--><aop:after-throwing method="showExceptionLog" pointcut-ref="myPointCut" throwing="throwable"/><!--配置最终通知--><aop:after method="showFinallyEndLog" pointcut-ref="myPointCut"/><!--配置环绕通知--><!--<aop:around method=""--></aop:aspect></aop:config>
</beans>
测试
public class AopAspectjXMLTest {@Testpublic void testAspectByXML() {ApplicationContext ioc =  new ClassPathXmlApplicationContext("beans09_2.xml");SmartAnimalAble smartAnimalAble = ioc.getBean(SmartAnimalAble.class);smartAnimalAble.getSum(1, 2);}
}
🐋课后作业
1.请编写一个Cal接口
(1)方法 cal1(int n) 计算1 + 2 +...+ n
(2)方法 cal2(int n) 计算 1 * 2 *...* n
2.实现类 MyCal, 实现Cal的方法
3.请分别使用 注解方式 / XML配置方式 完成AOP编程
(1) 在执行cal1 前打印开始执行的时间, 执行完后打印结束的时间
(2) 在执行cal2 前打印开始执行的时间, 执行完后打印结束的时间
❶👉基于注解
接口
public interface Cal {//计算1+2+...+nint cal1(int n);//计算1*2*...*nint cal2(int n);
}
实现类
@Component
public class MyCal implements Cal{@Overridepublic int cal1(int n) {int sum = 0;for (int i = 1; i <= n; i++) {sum += i;}return sum;}@Overridepublic int cal2(int n) {int res = 1;for (int i = 1; i <= n; i++) {res *= n;}return res;}
}
切面类
@Aspect //CalAspect是一个切面类
@Component //CalAspect作为对象, 注入到Spring容器
public class CalAspect {//注意: 如果目标类和切面类, 在同一个包, 可以省略包名//因为cal1和cal2方法, 都要去输出开始执行时间, 因此使用 MyCal.* 通配符@Pointcut(value = "execution(public int MyCal.*(int))")public void myPointCut() {}//前置通知@Before(value = "myPointCut()")public void calStart(JoinPoint joinPoint) {Signature signature = joinPoint.getSignature();System.out.println(signature.getName() + " 执行, 开始执行时间=" + System.currentTimeMillis());}//返回通知@AfterReturning(value = "myPointCut()", returning = "res")public void calEnd(JoinPoint joinPoint, Object res) {Signature signature = joinPoint.getSignature();System.out.println(signature.getName() + " 执行结果=" + res);System.out.println(signature.getName() + " 执行, 结束时间=" + System.currentTimeMillis());}
}
beans10.xml
<?xml version="1.0" encoding="UTF-8"?>
<beans xmlns="http://www.springframework.org/schema/beans"xmlns:xsi="http://www.w3.org/2001/XMLSchema-instance"xmlns:context="http://www.springframework.org/schema/context"xmlns:aop="http://www.springframework.org/schema/aop"xsi:schemaLocation="http://www.springframework.org/schema/beans http://www.springframework.org/schema/beans/spring-beans.xsd http://www.springframework.org/schema/context https://www.springframework.org/schema/context/spring-context.xsd http://www.springframework.org/schema/aop https://www.springframework.org/schema/aop/spring-aop.xsd"><!--扫描指定的包--><context:component-scan base-package="com.zzw.spring.aop.homework02.annotation_"/><!--开启基于注解的AOP功能--><aop:aspectj-autoproxy/>
</beans>
测试
public class AopAspectjTest {@Testpublic void test() {ApplicationContext ioc =new ClassPathXmlApplicationContext("beans10.xml");Cal cal = ioc.getBean(Cal.class);cal.cal1(10);System.out.println("====================================");cal.cal2(10);}
}
结果
cal1 执行, 开始执行时间=1691395310255
cal1 执行结果=55
cal1 执行, 结束时间=1691395310256
====================================
cal2 执行, 开始执行时间=1691395310256
cal2 执行结果=1410065408
cal2 执行, 结束时间=1691395310257
❷基于XML配置方法
接口
public interface Cal {//计算1+2+...+nint cal1(int n);//计算1*2*...*nint cal2(int n);
}
实现类
public class MyCal implements Cal{@Overridepublic int cal1(int n) {int sum = 0;for (int i = 1; i <= n; i++) {sum += i;}return sum;}@Overridepublic int cal2(int n) {int res = 1;for (int i = 1; i <= n; i++) {res *= ;}return res;}
}
切面类
public class CalAspect {//前置通知public void calStart(JoinPoint joinPoint) {Signature signature = joinPoint.getSignature();System.out.println(signature.getName() + " 执行[基于XML配置], 开始执行时间=" + System.currentTimeMillis());}//返回通知public void calEnd(JoinPoint joinPoint, Object res) {Signature signature = joinPoint.getSignature();System.out.println(signature.getName() + " 执行结果=" + res);System.out.println(signature.getName() + " 执行[基于XML配置], 结束时间=" + System.currentTimeMillis());}
}
beans11.xml
<?xml version="1.0" encoding="UTF-8"?>
<beans xmlns="http://www.springframework.org/schema/beans"xmlns:xsi="http://www.w3.org/2001/XMLSchema-instance" xmlns:aop="http://www.springframework.org/schema/aop"xsi:schemaLocation="http://www.springframework.org/schema/beans http://www.springframework.org/schema/beans/spring-beans.xsd http://www.springframework.org/schema/aop https://www.springframework.org/schema/aop/spring-aop.xsd"><!--使用XML配置, 完成AOP编程--><!--配置一个切面类对象-bean--><bean class="com.zzw.spring.aop.homework02.xml.CalAspect" id="calAspect"/><!--配置一个MyCal对象-bean--><bean class="com.zzw.spring.aop.homework02.xml.MyCal" id="myCal"/><!--配置切面类, 细节: 一定要引入 xmlns:aop--><aop:config><!--配置切入点表达式--><aop:pointcut id="myPointCut" expression="execution(public int com.zzw.spring.aop.homework02.xml.MyCal.*(int))"/><!--配置切面的 前置, 返回通知--><aop:aspect ref="calAspect" order="10"><!--配置前置通知--><aop:before method="calStart" pointcut-ref="myPointCut"/><!--配置返回通知--><aop:after-returning method="calEnd" pointcut-ref="myPointCut" returning="res"/></aop:aspect></aop:config>
</beans>
测试
public class AopAspectjXMLTest {@Testpublic void testMyCalByXML() {ApplicationContext ioc =new ClassPathXmlApplicationContext("beans11.xml");Cal cal = ioc.getBean(Cal.class);cal.cal1(10);System.out.println("====================================");cal.cal2(10);}
}
结果
cal1 执行[基于XML配置], 开始执行时间=1691396329275
cal1 执行结果=55
cal1 执行[基于XML配置], 结束时间=1691396329275
====================================
cal2 执行[基于XML配置], 开始执行时间=1691396329275
cal2 执行结果=1410065408
cal2 执行[基于XML配置], 结束时间=1691396329275
💗引出对Spring底层实现再思考
🐋创建maven项目
1.创建maven项目
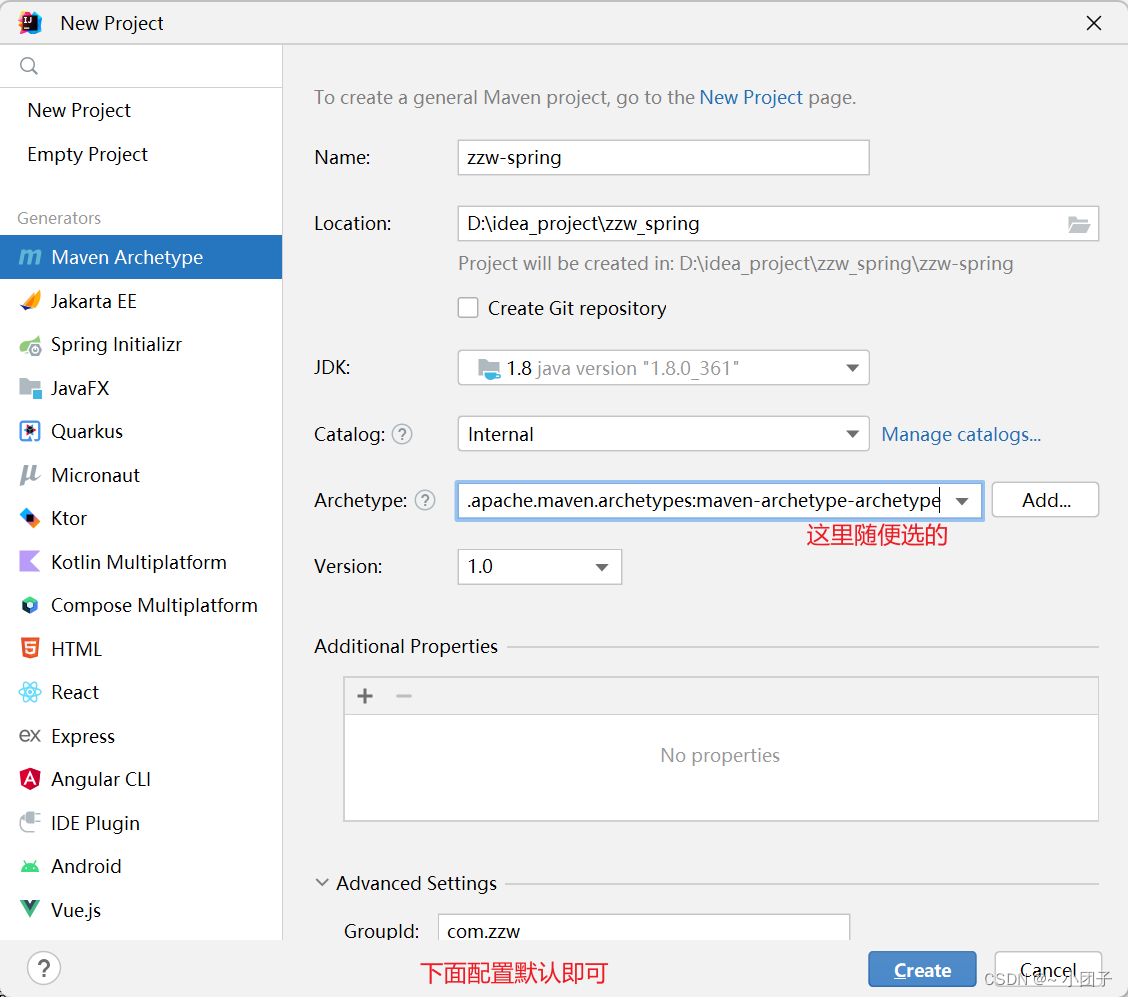
2.加入依赖
<project xmlns="http://maven.apache.org/POM/4.0.0" xmlns:xsi="http://www.w3.org/2001/XMLSchema-instance"xsi:schemaLocation="http://maven.apache.org/POM/4.0.0 http://maven.apache.org/maven-v4_0_0.xsd"><modelVersion>4.0.0</modelVersion><groupId>com.zzw</groupId><artifactId>zzw-spring</artifactId><version>1.0-SNAPSHOT</version><dependencies><!--加入spring开发的基本包--><dependency><groupId>org.springframework</groupId><artifactId>spring-context</artifactId><version>5.3.8</version></dependency><!--加入spring开发切面编程需要的包--><dependency><groupId>org.springframework</groupId><artifactId>spring-aspects</artifactId><version>5.3.8</version></dependency></dependencies>
</project>
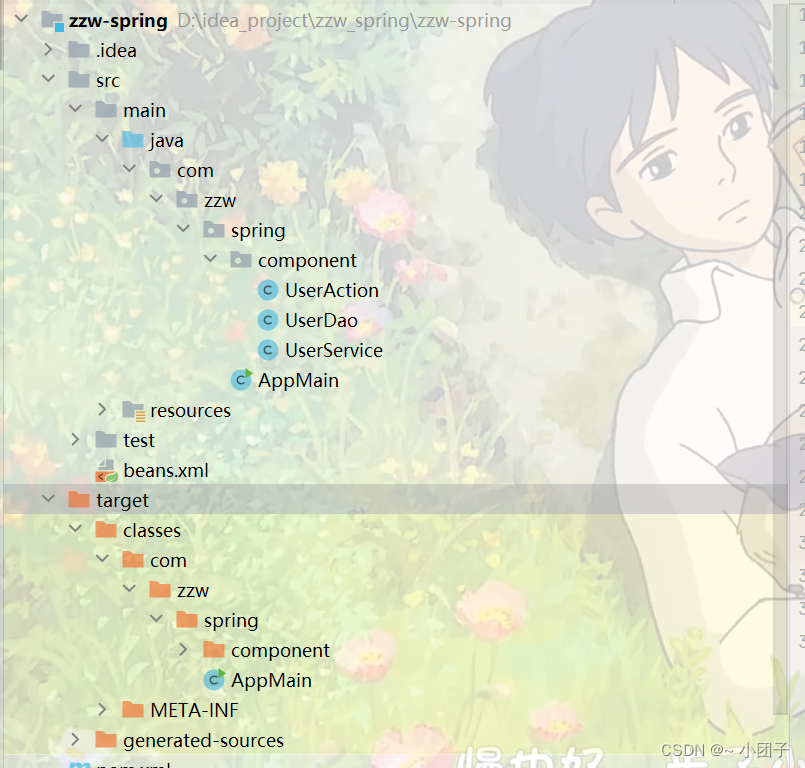
2.项目目录结构, 文件夹对应不上的可以自己 添加或删除.
//就是一个Controller
//也可以使用 @Controller
在默认情况下, 我们配置@Component,@Repository,@Controller,@Service 是单例
@Component
public class UserAction { }
//也可以使用 @Repository
@Component
public class UserDao {public void hi() {System.out.println("UserDao hi()...");}
}
//也可以使用 @Service
@Component
public class UserService {//也可以使用 @Resource@Autowiredprivate UserDao userDao;//定义一个属性public void m1() {userDao.hi();}
}
src目录下创建beans.xml
<?xml version="1.0" encoding="UTF-8"?>
<beans xmlns="http://www.springframework.org/schema/beans"xmlns:xsi="http://www.w3.org/2001/XMLSchema-instance"xmlns:context="http://www.springframework.org/schema/context"xsi:schemaLocation="http://www.springframework.org/schema/beans http://www.springframework.org/schema/beans/spring-beans.xsd http://www.springframework.org/schema/context https://www.springframework.org/schema/context/spring-context.xsd"><!--配置自动扫描的包, 同时引入对应的名称空间--><context:component-scan base-package="com.zzw.spring.component"/></beans>
测试1
public class AppMain {public static void main(String[] args) {//测试/看看是否可以得到spring容器中的bean, 同时看看依赖注入是否OKApplicationContext ioc =new ClassPathXmlApplicationContext("beans.xml");UserAction userAction = ioc.getBean("userAction", UserAction.class);UserAction userAction2 = ioc.getBean("userAction", UserAction.class);System.out.println("userAction=" + userAction);System.out.println("userAction2=" + userAction2);UserDao userDao = ioc.getBean("userDao", UserDao.class);System.out.println("userDao=" + userDao);UserService userService = ioc.getBean("userService", UserService.class);System.out.println("userService=" + userService);}
}
报错: Caused by: java.io.FileNotFoundException: class path resource [beans.xml] cannot be opened because it does not exist, 其错误原因是
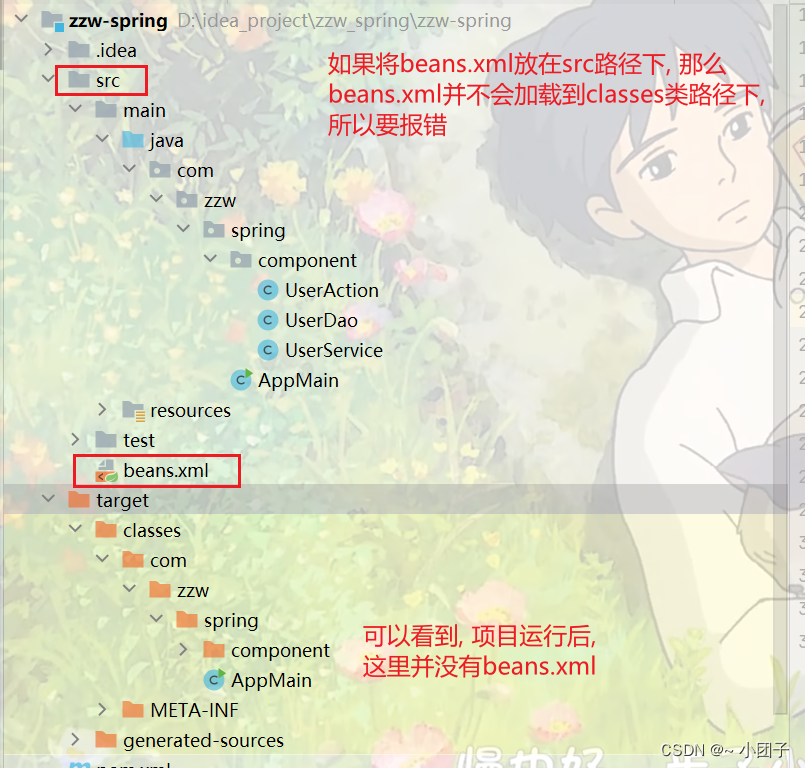
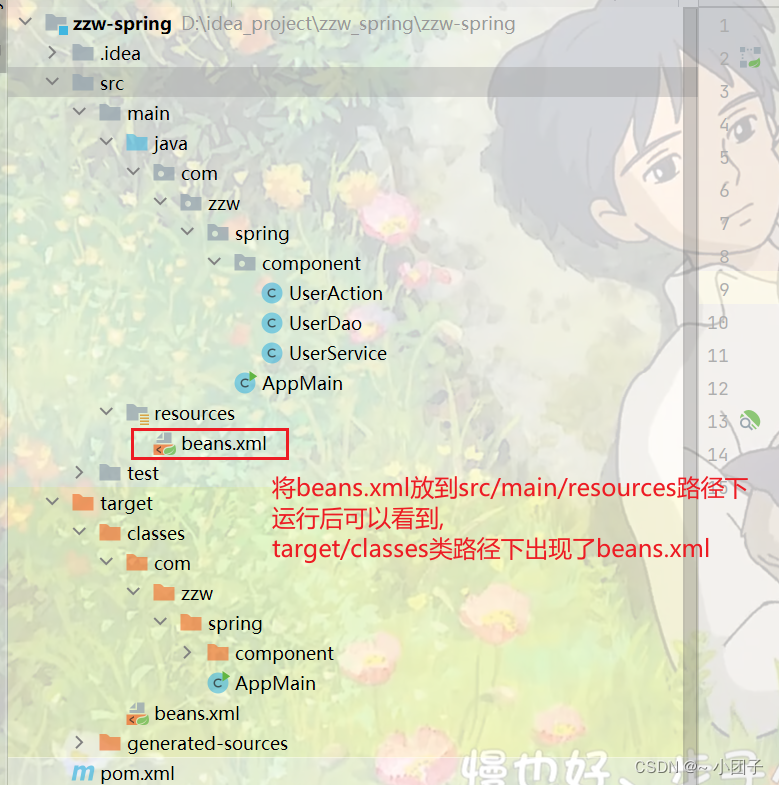
实际上 beans.xml 应该在 src/main/resources 下创建
<?xml version="1.0" encoding="UTF-8"?>
<beans xmlns="http://www.springframework.org/schema/beans"xmlns:xsi="http://www.w3.org/2001/XMLSchema-instance"xmlns:context="http://www.springframework.org/schema/context"xsi:schemaLocation="http://www.springframework.org/schema/beans http://www.springframework.org/schema/beans/spring-beans.xsd http://www.springframework.org/schema/context https://www.springframework.org/schema/context/spring-context.xsd"><!--配置自动扫描的包, 同时引入对应的名称空间--><!--说明1.如果我们是普通的java项目, beans.xml放在src目录下即可2.如果我们是java maven项目, beans.xml放在src/main/resources--><context:component-scan base-package="com.zzw.spring.component"/></beans>
此时项目结构图如下所示:
运行结果
userAction=com.zzw.spring.component.UserAction@679b62af
userAction2=com.zzw.spring.component.UserAction@679b62af
userDao=com.zzw.spring.component.UserDao@5cdd8682
userService=com.zzw.spring.component.UserService@d6da883
🐋思考一: 原生Spring如何实现依赖注入和(singleton, prototype)
1.Spring底层如何实现: IOC容器创建和初始化
2.Spring底层如何实现: 根据 singleton, prototype来返回bean对象
案例注入默认是单例注入, 标识了注解@Scope(value = "prototype")后代表多例
//在默认情况下, 我们配置@Component,@Repository,@Controller,@Service 是单例
//@Scope(value = "prototype") 表示以多例形式, 返回 UserAction bean
//多例是懒加载
//思考: Spring容器底层如何实现
@Component
@Scope(value = "prototype")
public class UserAction {}
测试2
public class AppMain {public static void main(String[] args) {//测试/看看是否可以得到spring容器中的bean, 同时看看依赖注入是否OKApplicationContext ioc =new ClassPathXmlApplicationContext("beans.xml");UserAction userAction = ioc.getBean("userAction", UserAction.class);UserAction userAction2 = ioc.getBean("userAction", UserAction.class);System.out.println("userAction=" + userAction);System.out.println("userAction2=" + userAction2);UserDao userDao = ioc.getBean("userDao", UserDao.class);System.out.println("userDao=" + userDao);UserService userService = ioc.getBean("userService", UserService.class);System.out.println("userService=" + userService);//测试一下当前的依赖注入userService.m1();}
}
运行结果
userAction=com.zzw.spring.component.UserAction@60bd273d
userAction2=com.zzw.spring.component.UserAction@121314f7
userDao=com.zzw.spring.component.UserDao@130c12b7
userService=com.zzw.spring.component.UserService@5e600dd5
UserDao hi()...
🐋思考二: 原生Spring容器如何实现BeanPostProcessor
//编写一个后置处理器
public class MyBeanProcessor implements BeanPostProcessor {/*** 在Bean的 init初始化方法前调用** @param bean* @param beanName* @return* @throws BeansException*/public Object postProcessBeforeInitialization(Object bean, String beanName) throws BeansException {System.out.println("postProcessBeforeInitialization() 被调用... " + beanName + " bean=" + bean.getClass());return bean;}/*** 在Bean的 init初始化方法后调用** @param bean* @param beanName* @return* @throws BeansException*/public Object postProcessAfterInitialization(Object bean, String beanName) throws BeansException {System.out.println("postProcessAfterInitialization() 被调用... " + beanName + " bean=" + bean.getClass());return bean;}
}
@Component
public class UserService {@Autowiredprivate UserDao userDao;public void m1() {userDao.hi();}//这里我们需要指定init() 是初始化方法@PostConstructpublic void init() {System.out.println("UserService init()...");}
}
<?xml version="1.0" encoding="UTF-8"?>
<beans xmlns="http://www.springframework.org/schema/beans"xmlns:xsi="http://www.w3.org/2001/XMLSchema-instance"xmlns:context="http://www.springframework.org/schema/context"xsi:schemaLocation="http://www.springframework.org/schema/beans http://www.springframework.org/schema/beans/spring-beans.xsd http://www.springframework.org/schema/context https://www.springframework.org/schema/context/spring-context.xsd"><!--配置自动扫描的包--><context:component-scan base-package="com.zzw.spring.component"/><!--配置后置处理器--><bean class="com.zzw.spring.process.MyBeanProcessor" id="myBeanProcessor"/>
</beans>
测试3
public class AppMain {public static void main(String[] args) {ApplicationContext ioc =new ClassPathXmlApplicationContext("beans.xml");UserAction userAction = ioc.getBean("userAction", UserAction.class);UserAction userAction2 = ioc.getBean("userAction", UserAction.class);System.out.println("userAction=" + userAction);System.out.println("userAction2=" + userAction2);UserDao userDao = ioc.getBean("userDao", UserDao.class);System.out.println("userDao=" + userDao);UserService userService = ioc.getBean("userService", UserService.class);System.out.println("userService=" + userService);//测试一下当前的依赖注入//userService.m1();}
}
运行结果
postProcessBeforeInitialization() 被调用... userDao bean=class com.zzw.spring.component.UserDao
postProcessAfterInitialization() 被调用... userDao bean=class com.zzw.spring.component.UserDao
postProcessBeforeInitialization() 被调用... userService bean=class com.zzw.spring.component.UserService
UserService init()...
postProcessAfterInitialization() 被调用... userService bean=class com.zzw.spring.component.UserService
postProcessBeforeInitialization() 被调用... userAction bean=class com.zzw.spring.component.UserAction
postProcessAfterInitialization() 被调用... userAction bean=class com.zzw.spring.component.UserAction
postProcessBeforeInitialization() 被调用... userAction bean=class com.zzw.spring.component.UserAction
postProcessAfterInitialization() 被调用... userAction bean=class com.zzw.spring.component.UserAction
userAction=com.zzw.spring.component.UserAction@1ffaf86
userAction2=com.zzw.spring.component.UserAction@6574a52c
userDao=com.zzw.spring.component.UserDao@6c1a5b54
userService=com.zzw.spring.component.UserService@1c7696c6
拿掉UserAction的@Scope(value = “prototype”)注解, 运行结果如下
postProcessBeforeInitialization() 被调用... userAction bean=class com.zzw.spring.component.UserAction
postProcessAfterInitialization() 被调用... userAction bean=class com.zzw.spring.component.UserAction
postProcessBeforeInitialization() 被调用... userDao bean=class com.zzw.spring.component.UserDao
postProcessAfterInitialization() 被调用... userDao bean=class com.zzw.spring.component.UserDao
postProcessBeforeInitialization() 被调用... userService bean=class com.zzw.spring.component.UserService
UserService init()...
postProcessAfterInitialization() 被调用... userService bean=class com.zzw.spring.component.UserService
userAction=com.zzw.spring.component.UserAction@71a794e5
userAction2=com.zzw.spring.component.UserAction@71a794e5
userDao=com.zzw.spring.component.UserDao@76329302
userService=com.zzw.spring.component.UserService@5e25a92e
知识点: 基于注解的方式配置后置处理器(别忘了扫描包)
//编写一个后置处理器
@Component
public class MyBeanProcessor implements BeanPostProcessor {/*** 在Bean的 init初始化方法前调用** @param bean* @param beanName* @return* @throws BeansException*/public Object postProcessBeforeInitialization(Object bean, String beanName) throws BeansException {System.out.println("postProcessBeforeInitialization() 被调用... " + beanName + " bean=" + bean.getClass());return bean;}/*** 在Bean的 init初始化方法后调用** @param bean* @param beanName* @return* @throws BeansException*/public Object postProcessAfterInitialization(Object bean, String beanName) throws BeansException {System.out.println("postProcessAfterInitialization() 被调用... " + beanName + " bean=" + bean.getClass());return bean;}
}
<?xml version="1.0" encoding="UTF-8"?>
<beans xmlns="http://www.springframework.org/schema/beans"xmlns:xsi="http://www.w3.org/2001/XMLSchema-instance"xmlns:context="http://www.springframework.org/schema/context"xsi:schemaLocation="http://www.springframework.org/schema/beans http://www.springframework.org/schema/beans/spring-beans.xsd http://www.springframework.org/schema/context https://www.springframework.org/schema/context/spring-context.xsd"><context:component-scan base-package="com.zzw.spring.component"/><context:component-scan base-package="com.zzw.spring.process"/>
</beans>
🐋思考三: 原生Spring容器如何实现AOP
//接口
public interface SmartAnimalAble {float getSum(float i, float j);float getSub(float i, float j);
}
@Component
public class SmartDog implements SmartAnimalAble{public float getSum(float i, float j) {float res = i + j;System.out.println("SmartDog getSum() 结果=" + res);return res;}public float getSub(float i, float j) {float res = i - j;System.out.println("SmartDog getSub() 结果=" + res);return res;}
}
//这是一个切面类
@Aspect
@Component
public class SmartAnimalAspect {//给SmartDog配置前置, 返回, 异常, 最终通知//前置通知@Before(value = "execution(public float com.zzw.spring.aop.SmartDog.getSum(float, float))")public void showBeginLog(JoinPoint joinPoint) {//通过连接点对象joinPoint, 可以获取方法签名Signature signature = joinPoint.getSignature();System.out.println("SmartAnimalAspect-切面类showBeginLog()-方法执行前-日志-方法名-" + signature.getName() + "-参数 "+ Arrays.asList(joinPoint.getArgs()));}//返回通知: 即把showSuccessEndLog方法切入到目标对象方法正常执行完毕后的地方@AfterReturning(value = "execution(public float com.zzw.spring.aop.SmartDog.getSum(float, float))", returning = "res")public void showSuccessEndLog(JoinPoint joinPoint, Object res) {Signature signature = joinPoint.getSignature();System.out.println("SmartAnimalAspect-切面类showSuccessEndLog()-方法执行正常结束-日志-方法名-" + signature.getName() + " 返回的结果是=" + res);}//异常通知: 即把showExceptionLog方法切入到目标对象方法执行发生异常后的catch{}@AfterThrowing(value = "execution(public float com.zzw.spring.aop.SmartDog.getSum(float, float))", throwing = "throwable")public void showExceptionLog(JoinPoint joinPoint, Throwable throwable) {Signature signature = joinPoint.getSignature();System.out.println("SmartAnimalAspect-切面类showExceptionLog()-方法执行异常-日志-方法名-" + signature.getName() + " 异常信息=" + throwable);}//最终通知: 即把showFinallyEndLog方法切入到目标方法执行后, 不管是否发生异常都要执行, finally{}@After(value = "execution(public float com.zzw.spring.aop.SmartDog.getSum(float, float))")public void showFinallyEndLog(JoinPoint joinPoint) {Signature signature = joinPoint.getSignature();System.out.println("SmartAnimalAspect-切面类showFinallyEndLog()-方法最终执行完毕-日志-方法名-" + signature.getName());}
}
<?xml version="1.0" encoding="UTF-8"?>
<beans xmlns="http://www.springframework.org/schema/beans"xmlns:xsi="http://www.w3.org/2001/XMLSchema-instance"xmlns:context="http://www.springframework.org/schema/context"xmlns:aop="http://www.springframework.org/schema/aop"xsi:schemaLocation="http://www.springframework.org/schema/beans http://www.springframework.org/schema/beans/spring-beans.xsd http://www.springframework.org/schema/context https://www.springframework.org/schema/context/spring-context.xsd http://www.springframework.org/schema/aop https://www.springframework.org/schema/aop/spring-aop.xsd"><!--配置自动扫描的包, 同时引入对应的名称空间--><context:component-scan base-package="com.zzw.spring.component"/><context:component-scan base-package="com.zzw.spring.aop"/><!--开启基于注解的AOP功能--><aop:aspectj-autoproxy/><!--配置后置处理器--><bean class="com.zzw.spring.process.MyBeanProcessor" id="myBeanProcessor"/>
</beans>
测试4
public class AppMain {public static void main(String[] args) {//测试/看看是否可以得到spring容器中的bean, 同时看看依赖注入是否OKApplicationContext ioc =new ClassPathXmlApplicationContext("beans.xml");UserAction userAction = ioc.getBean("userAction", UserAction.class);UserAction userAction2 = ioc.getBean("userAction", UserAction.class);System.out.println("userAction=" + userAction);System.out.println("userAction2=" + userAction2);UserDao userDao = ioc.getBean("userDao", UserDao.class);System.out.println("userDao=" + userDao);UserService userService = ioc.getBean("userService", UserService.class);System.out.println("userService=" + userService);//测试一下当前的依赖注入userService.m1();//测试一下AOPSmartAnimalAble smartDog = ioc.getBean(SmartAnimalAble.class);System.out.println(smartDog.getSum(1,2));}
}
运行结果
postProcessBeforeInitialization() 被调用... userAction bean=class com.zzw.spring.component.UserAction
postProcessAfterInitialization() 被调用... userAction bean=class com.zzw.spring.component.UserAction
postProcessBeforeInitialization() 被调用... userDao bean=class com.zzw.spring.component.UserDao
postProcessAfterInitialization() 被调用... userDao bean=class com.zzw.spring.component.UserDao
postProcessBeforeInitialization() 被调用... userService bean=class com.zzw.spring.component.UserService
UserService init()...
postProcessAfterInitialization() 被调用... userService bean=class com.zzw.spring.component.UserService
postProcessBeforeInitialization() 被调用... smartAnimalAspect bean=class com.zzw.spring.aop.SmartAnimalAspect
postProcessAfterInitialization() 被调用... smartAnimalAspect bean=class com.zzw.spring.aop.SmartAnimalAspect
postProcessBeforeInitialization() 被调用... smartDog bean=class com.zzw.spring.aop.SmartDog
postProcessAfterInitialization() 被调用... smartDog bean=class com.sun.proxy.$Proxy16
userAction=com.zzw.spring.component.UserAction@26ceffa8
userAction2=com.zzw.spring.component.UserAction@26ceffa8
userDao=com.zzw.spring.component.UserDao@600b90df
userService=com.zzw.spring.component.UserService@7c8c9a05
UserDao hi()...
SmartAnimalAspect-切面类showBeginLog()-方法执行前-日志-方法名-getSum-参数 [1.0, 2.0]
SmartDog getSum() 结果=3.0
SmartAnimalAspect-切面类showSuccessEndLog()-方法执行正常结束-日志-方法名-getSum 返回的结果是=3.0
SmartAnimalAspect-切面类showFinallyEndLog()-方法最终执行完毕-日志-方法名-getSum
3.0
简析Spring AOP 和 BeanPostProcessor关系
1.AOP实现Spring可以通过给一个类, 加入注解 @EnableAspectJAutoProxy 来指定
2.追一下@EnableAspectJAutoProxy的源码
@Target({ElementType.TYPE})
@Retention(RetentionPolicy.RUNTIME)
@Documented
@Import({AspectJAutoProxyRegistrar.class}) 👈
public @interface EnableAspectJAutoProxy {boolean proxyTargetClass() default false;boolean exposeProxy() default false;
}
public void registerBeanDefinitions(AnnotationMetadata importingClassMetadata, BeanDefinitionRegistry registry) {AopConfigUtils.registerAspectJAnnotationAutoProxyCreatorIfNecessary(registry); 👈AnnotationAttributes enableAspectJAutoProxy = AnnotationConfigUtils.attributesFor(importingClassMetadata, EnableAspectJAutoProxy.class);if (enableAspectJAutoProxy != null) {if (enableAspectJAutoProxy.getBoolean("proxyTargetClass")) {AopConfigUtils.forceAutoProxyCreatorToUseClassProxying(registry);}if (enableAspectJAutoProxy.getBoolean("exposeProxy")) {AopConfigUtils.forceAutoProxyCreatorToExposeProxy(registry);}}}
@Nullablepublic static BeanDefinition registerAspectJAnnotationAutoProxyCreatorIfNecessary(BeanDefinitionRegistry registry, @Nullable Object source) {return registerOrEscalateApcAsRequired(AnnotationAwareAspectJAutoProxyCreator.class, registry, source); 👈}
3.看一下AnnotationAwareAspectJAutoProxyCreator的类图

4.解读
1)AOP底层是基于BeanPostProcessor机制的.
2)即在Bean创建好后, 根据是否需要AOP处理, 决定返回代理对象, 还是原生Bean
3)在返回代理对象时, 就可以根据要代理的类和方法来返回
4)机制并不难, 本质就是BeanPostProcessor机制 + 动态代理技术
🐋补充说明
| 后置处理器 | SmartDog类型 |
|---|---|
| postProcessBeforeInitialization() | class com.zzw.spring.aop.SmartDog |
| postProcessAfterInitialization() | class com.sun.proxy.$Proxy16 |
为何: SmartDog 在 postProcessBeforeInitialization() 中类型是普通类型, 在postProcessAfterInitialization()中成了代理类型.
其本质原因在: SmartAnimalAspect类是一个切面类, 并且对SmartDog中的方法做了切入, 所以后置处理器处理成了代理对象.
💗Spring整体架构分析

下乘: Spring系列五:手动实现Spring底层机制, 未完待续…
相关文章:
Spring系列四:AOP切面编程
文章目录 💗AOP-官方文档🍝AOP 讲解🍝AOP APIs 💗动态代理🍝初始动态代理🍝动态代理深入🍝AOP问题提出📗使用土方法解决📗 对土方法解耦-开发最简单的AOP类📗…...

VS+Qt+C++旅游景区地图导航源码实例
程序示例精选 VSQtC旅游景区地图导航 如需安装运行环境或远程调试,见文章底部个人QQ名片,由专业技术人员远程协助! 前言 这篇博客针对<<VSQtC旅游景区地图导航>>编写代码,代码整洁,规则,易读。…...
回调函数和一般函数的区别
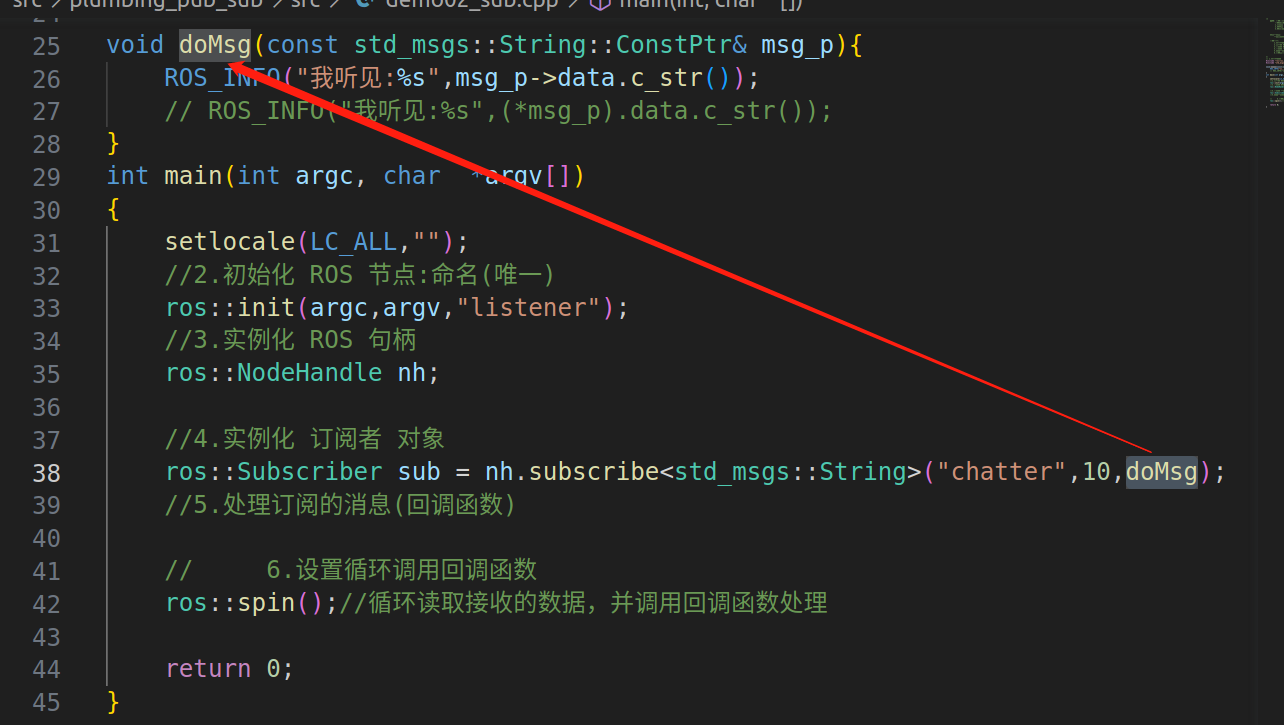
回调函数:不是我能控制的,通过外界信号触发调用,例如下面是chatter 一般函数:我能控制的,顺序调用...
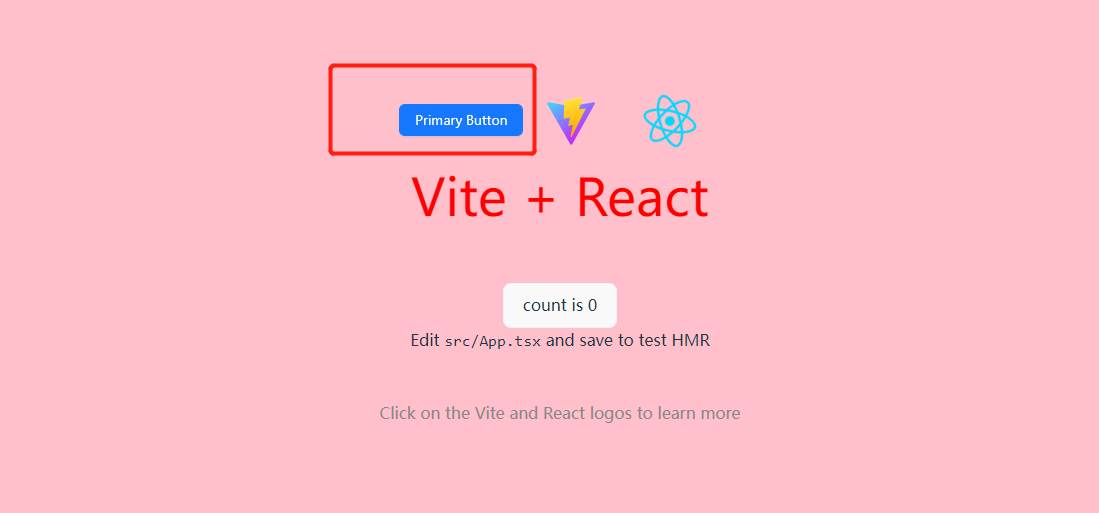
使用vite创建Vue/React前端项目,配置@别名和Sass样式,又快又方便
Vite官方网站:Vite | 下一代的前端工具链 Vite 并不是基于 Webpack 的,它有自己的开发服务器,利用浏览器中的原生 ES 模块。这种架构使得 Vite 比 Webpack 的开发服务器快了好几个数量级。Vite 采用 Rollup 进行构建,速度也更快…...
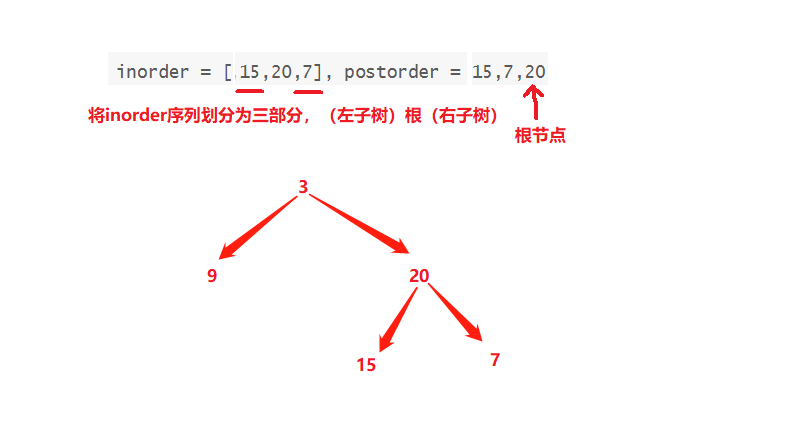
从前序与中序遍历序列构造二叉树,从中序与后序遍历序列构造二叉树
目录 从前序与中序遍历序列构造二叉树从中序与后序遍历序列构造二叉树 从前序与中序遍历序列构造二叉树 题目链接 给定两个整数数组 preorder 和 inorder ,其中 preorder 是二叉树的先序遍历, inorder 是同一棵树的中序遍历,请构造二叉树并返…...

【JS常见数据结构】
JS数据结构 前言数组JavaScript 中数组的常见操作:1. 创建数组:2. 访问数组元素:3. 插入元素:4. 删除元素:5. 查询元素: 链表单向链表双向链表循环链表 栈队列树二叉树示例 图图的定义图的分类图的表示方法…...
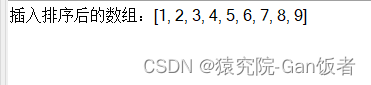
算法基础之插入排序
1、插入排序基本思想 插入排序的工作原理是通过构建有序序列,对于未排序数据,在已排序序列中从后向前扫描,找到相应位置并插入。插入排序在实现上,通常采用in-place排序(即只需用到O(1)的额外空间的排序)&a…...
InfoQ 分享
...
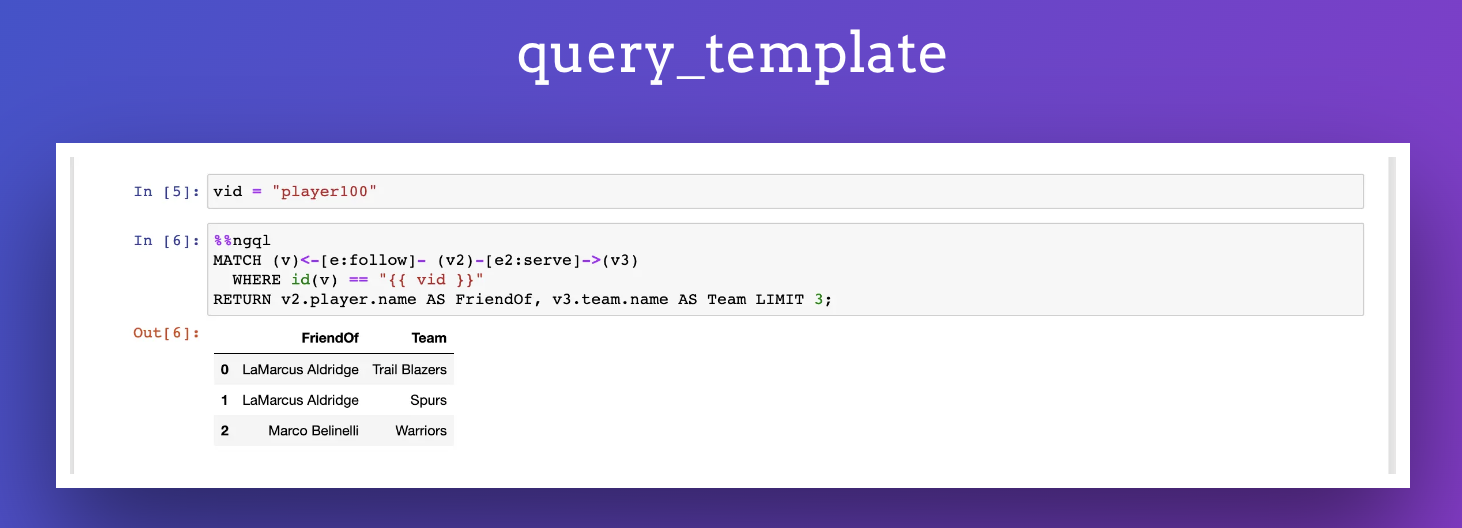
Jupyter Notebook 遇上 NebulaGraph,可视化探索图数据库
在之前的《手把手教你用 NebulaGraph AI 全家桶跑图算法》中,除了介绍了 ngai 这个小工具之外,还提到了一件事有了 Jupyter Notebook 插件: https://github.com/wey-gu/ipython-ngql,可以更便捷地操作 NebulaGraph。 本文就手把手教你咋在 J…...

人类与机器的分类不同
分类能力也是智能的重要标识之一。通过分类,我们可以将事物或概念进行归类和组织,从而更好地理解和处理信息。分类在人类认知和智能发展中起到了重要的作用,它有助于我们对世界进行认知、记忆、推理和决策。在机器智能领域,分类同…...

WEB安全-SQL注入,CSRF跨站伪造,OXX跨站脚本
SQL 注入攻击 SQL 注入是一种网络攻击手段,攻击者通过在 Web 应用程序的输入字段中插入恶意 SQL 代码,试图访问、篡改或删除数据库中的数据。这种攻击通常发生在应用程序未对用户输入进行充分验证或过滤的情况下。 举个例子,例如,…...

【HDFS】客户端读某个块时,如何对块的各个副本进行网络距离排序?
本文包含如下内容: ① 通过图解+源码分析/A1/B1/node1和 /A1/B2/node2 这两个节点的网络距离怎么算出来的 ② 客户端读文件时,副本的优先级。(怎么排序的,排序规则都有哪些?) ③ 我们集群发现的一个问题。 客户端读时,通过调用getBlockLocations RPC 获取文件的各个块。…...

【数字化处理】仿生假体控制中肌电信号的数字化处理研究(Matlab代码实现)
💥💥💞💞欢迎来到本博客❤️❤️💥💥 🏆博主优势:🌞🌞🌞博客内容尽量做到思维缜密,逻辑清晰,为了方便读者。 ⛳️座右铭&a…...
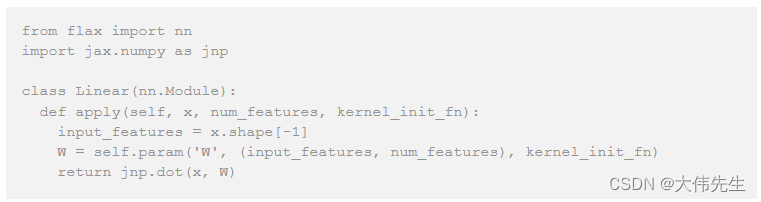
谷歌推出Flax:JAX的神经网络库
在优化理论中,损失或成本函数测量拟合或预测值与实际值之间的距离。对于大多数机器学习模型,提高性能意味着最小化损失函数。 但对于深度神经网络,执行梯度下降以最小化每个参数的损失函数可能会消耗大量资源。传统方法包括手动推导和编码&a…...

PDF换行的难度,谁能解决?
换行的时候确认不了长度: import java.awt.*;public class Test {public static void main(String[] args) {String str1 "淘淘淘淘淘淘淘淘淘淘淘淘淘淘淘淘淘淘淘淘淘淘淘淘淘淘淘淘淘淘淘淘淘淘淘淘淘";String str2 "AAAAAAAAAAAAAAAAAAAAAAAAA…...

山东布谷科技直播程序源码使用Redis进行服务器横向扩展
当今,直播程序源码平台作为新媒体时代主流,受到了世界各地人民的喜爱,这也使得直播程序源码平台用户数量的庞大,也难免会出现大量用户同时访问服务器,使服务器过载的情况,当服务器承受不住的时候࿰…...

symfony3.4中根据角色不同跳转不同页面
在Symfony 3.4中,可以使用安全组件来实现控制不同角色跳转到不同页面的功能。 首先,确保你已经安装了Symfony的安全组件,并配置了安全相关的配置文件。这些文件通常是 security.yml 和 security.yml。 在配置文件中,你可以定义不…...
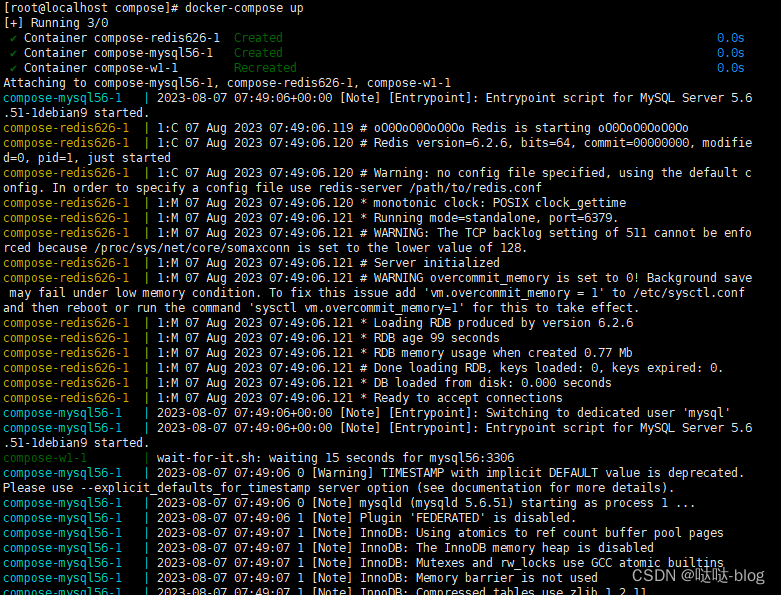
Dockerfile部署golang,docker-compose
使用go镜像打包,运行在容器内 redis和mysql用外部的 项目目录结构 w1go项目: Dockerfile # 这种方式是docker项目加上 本地的mysql和redis环境 # go打包的容器 FROM golang:alpine AS builder# 为我们镜像设置一些必要的环境变量 ENV GO111MODULEon …...
什么是Linux,如何在Windows操作系统下搭建Linux环境,远程连接Linux系统
文章目录 什么是LinuxLinux的诞生及发展为什么要学习LinuxLinux内核Linux发行版什么是虚拟机如何在VMware虚拟机中搭建Linux系统环境远程连接 Linux 系统Linux 帮助网站 什么是Linux Linux是一套免费使用和自由传播的类Unix操作系统,是一个基于POSIX和UNIX的多用户…...

Ubuntu下RabbitMQ安装与简单使用
一:RabbitMQ基本安装 1.更新依赖包(提前更新依赖包避免出现报错) sudo apt-get update 2.由于rabbitMq使用erlang语言开发,在安装rabbitMq之前需要安装erlang sudo apt-get install erlang 3.查看erlang是否安装成功 sudo erl 安装成功会出现下面的提示…...
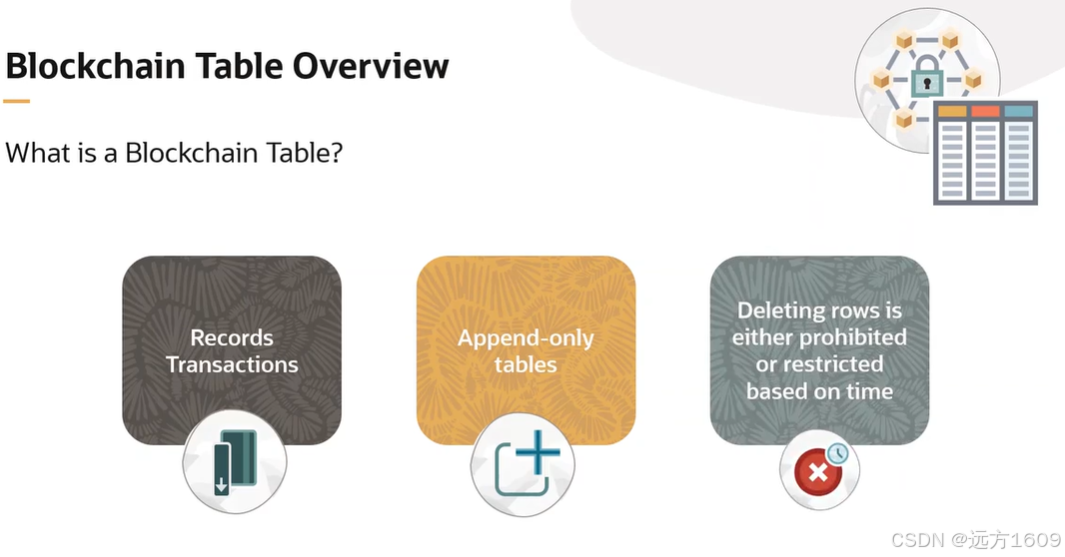
23-Oracle 23 ai 区块链表(Blockchain Table)
小伙伴有没有在金融强合规的领域中遇见,必须要保持数据不可变,管理员都无法修改和留痕的要求。比如医疗的电子病历中,影像检查检验结果不可篡改行的,药品追溯过程中数据只可插入无法删除的特性需求;登录日志、修改日志…...
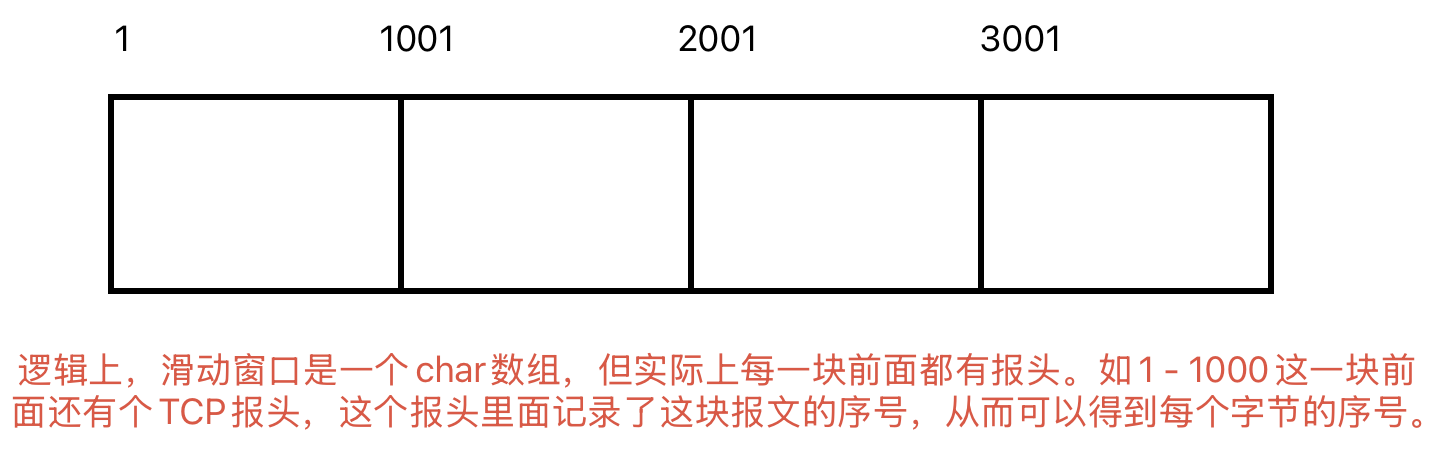
Linux相关概念和易错知识点(42)(TCP的连接管理、可靠性、面临复杂网络的处理)
目录 1.TCP的连接管理机制(1)三次握手①握手过程②对握手过程的理解 (2)四次挥手(3)握手和挥手的触发(4)状态切换①挥手过程中状态的切换②握手过程中状态的切换 2.TCP的可靠性&…...
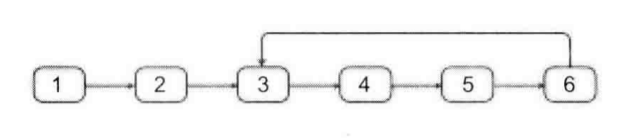
剑指offer20_链表中环的入口节点
链表中环的入口节点 给定一个链表,若其中包含环,则输出环的入口节点。 若其中不包含环,则输出null。 数据范围 节点 val 值取值范围 [ 1 , 1000 ] [1,1000] [1,1000]。 节点 val 值各不相同。 链表长度 [ 0 , 500 ] [0,500] [0,500]。 …...

浅谈不同二分算法的查找情况
二分算法原理比较简单,但是实际的算法模板却有很多,这一切都源于二分查找问题中的复杂情况和二分算法的边界处理,以下是博主对一些二分算法查找的情况分析。 需要说明的是,以下二分算法都是基于有序序列为升序有序的情况…...

selenium学习实战【Python爬虫】
selenium学习实战【Python爬虫】 文章目录 selenium学习实战【Python爬虫】一、声明二、学习目标三、安装依赖3.1 安装selenium库3.2 安装浏览器驱动3.2.1 查看Edge版本3.2.2 驱动安装 四、代码讲解4.1 配置浏览器4.2 加载更多4.3 寻找内容4.4 完整代码 五、报告文件爬取5.1 提…...

深入理解Optional:处理空指针异常
1. 使用Optional处理可能为空的集合 在Java开发中,集合判空是一个常见但容易出错的场景。传统方式虽然可行,但存在一些潜在问题: // 传统判空方式 if (!CollectionUtils.isEmpty(userInfoList)) {for (UserInfo userInfo : userInfoList) {…...

【Elasticsearch】Elasticsearch 在大数据生态圈的地位 实践经验
Elasticsearch 在大数据生态圈的地位 & 实践经验 1.Elasticsearch 的优势1.1 Elasticsearch 解决的核心问题1.1.1 传统方案的短板1.1.2 Elasticsearch 的解决方案 1.2 与大数据组件的对比优势1.3 关键优势技术支撑1.4 Elasticsearch 的竞品1.4.1 全文搜索领域1.4.2 日志分析…...

【Ftrace 专栏】Ftrace 参考博文
ftrace、perf、bcc、bpftrace、ply、simple_perf的使用Ftrace 基本用法Linux 利用 ftrace 分析内核调用如何利用ftrace精确跟踪特定进程调度信息使用 ftrace 进行追踪延迟Linux-培训笔记-ftracehttps://www.kernel.org/doc/html/v4.18/trace/events.htmlhttps://blog.csdn.net/…...

CSS 工具对比:UnoCSS vs Tailwind CSS,谁是你的菜?
在现代前端开发中,Utility-First (功能优先) CSS 框架已经成为主流。其中,Tailwind CSS 无疑是市场的领导者和标杆。然而,一个名为 UnoCSS 的新星正以其惊人的性能和极致的灵活性迅速崛起。 这篇文章将深入探讨这两款工具的核心理念、技术差…...

CVE-2023-25194源码分析与漏洞复现(Kafka JNDI注入)
漏洞概述 漏洞名称:Apache Kafka Connect JNDI注入导致的远程代码执行漏洞 CVE编号:CVE-2023-25194 CVSS评分:8.8 影响版本:Apache Kafka 2.3.0 - 3.3.2 修复版本:≥ 3.4.0 漏洞类型:反序列化导致的远程代…...