Linux_11_系统启动和内核管理
目录
- 1 C entOS 6 的启动管理
- 1.1 Linux 组成
- 1.2 内核设计流派
- 1.3 CentOS 6启动流程
- 1.3.1 CentOs 6 启动流程
- 1.3.1 硬件启动POST
- 1.3.2 bootloader 启动/引导加载器
- 1.3.2.1 grub 功能和组成
- 1.3.2.2 CentOS 6 grub 安装
- 1.3.2.3 grub legacy 管理
- 1.3.3 加载 kernel
- 1.3.4 init 初始化
- 1.3.4.1 运行级别
- 1.3.4.2 初始化脚本 sysinit
- 1.3.4.3 服务管理
- 1.3.4.4 非独立服务
- 1.3.4.5 开机启动文件 rc.local
- 1.3.5 Centos 启动过程总结
- 1.4 自制linux系统
- 1.4.0为当前Linux系统增加硬盘
- 1.4.1 分区并创建文件系统
- 1.4.2 挂载boot
- 1.4.3 安装grub
- 1.4.4 准备内核和initramfs文件
- 1.4.5 手动建立grub.conf
- 1.4.6 准备根下面相关程序和库
- 1.4.7 准备新的虚拟机
- 1.5 启动过程的故障排错
- 1.5.1 实战案例
- 1.5.2 实战案例
- 2 /proc 目录和内核参数管理
- 3 /sys 目录
- 4 内核模块管理和编译
- 4.1 内核版本
- 4.2 内核模块命令
- 4.3 编译内核
- 4.3.1 编译准备
- 4.3.1.1.目标主机硬件设备相关信息
- 4.3.1.2 开发环境相关包
- 4.3.1.3 内核编译安装实现
- 4.3.1.4 编译安装内核实战案例
- 4.3.1.4 内核编译说明
- 4.3.1.5 卸载内核
- 5 Busybox
- 5.1 Busybox介绍
- 5.2 Busybox使用
- 5.3 busybox编译安装
- 6 systemd
- 6.1 systemd 特性
- 6.2 systemctl管理系统服务service unit
- 6.3 service unit文件格式
- 6.4 运行级别
- 6.5 Centos 7之后版本引导顺序
- 6.6 设置内核参数
- 6.7 破解 CentOS 7和8的 root 密码
- 6.8 实现GRUB2安全
- 6.9 修复GRUB2
- 6.10 故障排错实战案例
- 6.10.1 实战案例1: centos 7,8 破坏MBR后进行恢复
- 6.10.2 实战案例2: entos 7,8删除/boot/grub2/*所有内容进行恢复
- 6.10.3 实战案例3: Centos 7,8 删除/boot/下所有文件后进行恢复
1 C entOS 6 的启动管理
1.1 Linux 组成
-
kernel 实现进程管理、内存管理、网络管理、驱动程序、文件系统、安全功能等功能
-
rootfs 包括程序和 glibc 库
程序:二进制执行文件
库: 函数集合,function, 调用接口 (头文件负责描述)
1.2 内核设计流派
-
宏内核(monolithic kernel): 又称单内核和强内核,Unix,Linux
把所有系统服务都放到内核里,所有功能集成于同一个程序,分层实现不同功能,系统庞大复杂Linux其实在单内核内核实现了模块化,也就相当于吸收了微内核的优点
-
微内核(micro kernel): Windows,Solaris,HarmonyOS
简化内核功能,在内核之外的用户态尽可能多地实现系统服务,同时加入相互之间的安全保护,每种功能使用一个单独子系统实现,将内核功能移到用户空间,性能差
1.3 CentOS 6启动流程
1.3.1 CentOs 6 启动流程
![[外链图片转存失败,源站可能有防盗链机制,建议将图片保存下来直接上传(img-dOSQIoTw-1692688111216)(C:\Users\HUIO\AppData\Roaming\Typora\typora-user-images\image-20230817112929369.png)]](https://img-blog.csdnimg.cn/04f5532051814e0cb0f6f20c4453d90e.png)
- 加载BIOS的硬件信息,获取第一个启动设备
- 读取第一个启动设备MBR的引导加载程序(grub)的启动信息
- 加载核心操作系统的核心信息,核心开始解压缩,并尝试驱动所有的硬件设备
- 核心执行init程序,并获取默认的运行信息
- init程序执行/etc/rc.d/rc.sysinit文件,重新挂载根文件系统
- 启动核心的外挂模块
- init执行运行的各个批处理文件(scripts)
- init执行/etc/rc.d/rc.local
- 执行/bin/login程序,等待用户登录
- 登录之后开始以shell控制主机
1.3.1 硬件启动POST
POST:Power-On-Self-Test,加电自检,是BIOS功能的一个主要部分。负责完成对CPU、主板、内存、硬盘子系统、显示子系统、串并行接口、键盘等硬件情况的检测
主板的ROM:BIOS,Basic lnput and Output System 基本输入输出系统,保存着有关计算机系统最重要的基本输入输出程序,系统信息设置、开机加电自检程序和系统启动自举程序等
主板的RAM:CMOS 互补金属氧化物半导体,保存各项参数的设定,按次序查找引导设备,第一个有引导程序的设备为本次启动设备
1.3.2 bootloader 启动/引导加载器
1.3.2.1 grub 功能和组成
bootloader:引导加载器,引导程序
- windows:ntloader,仅是启动OS
- Linux:功能丰富,提供菜单,允许用户选择要启动系统或不同的内核版本,把用户选定的内核装载到内存中的特定空间中,解压、展开,并把系统控制权移交给内核
Linux的bootloader
- LILO:LInux LOader,早期的bootloader,功能单一,已淘汰
- GRUB:GRand Unified Bootloader,C5/6 使用GRUB 0.97: GRUB Legacy,C7 以后使用GRUB 2.02
GRUB 启动阶段
- primary boot loader:
- 1st stage:MBR的前446个字节)
- 1.5 stage:mbr 之后的扇区,让stage1中的bootloader能识别stage2所在的分区上的文件
- secondary boot loader:2nd stage,分区文件/boot/grub/
例:
[root@CentOS8 ~]#rpm -qa grub*
grub2-tools-minimal-2.02-106.el8.x86_64
grub2-common-2.02-106.el8.noarch
grub2-tools-2.02-106.el8.x86_64
grub2-pc-2.02-106.el8.x86_64
grub2-pc-modules-2.02-106.el8.noarch
grub2-tools-extra-2.02-106.el8.x86_64
grubby-8.40-42.el8.x86_64[root@CentOS8 ~]#rpm -qi grub2-pc
Name        : grub2-pc
Epoch       : 1
Version     : 2.02
Release     : 106.el8
Architecture: x86_64
Install Date: Tue 30 May 2023 11:33:23 PM CST
Group       : System Environment/Base
Size        : 0
1.3.2.2 CentOS 6 grub 安装
安装grub:
(1)grub-install 安装grub stage1和stage1_5到/dev/DISK磁盘上,并复制GRUB相关文件到 DIR/boot
目录下
grub-install --root-directory=DIR /dev/DISK
(2) grub
grub> root (hd#,#)@第#个硬盘第#个分区
grub> setup (hd#)
例1:破坏C6系统的启动文件的第一阶段的446字节,然后使用救援模式修复
[root@CentOS6 ~]#hexdump -C -n 512 /dev/sda
00000000  eb 48 90 10 8e d0 bc 00  b0 b8 00 00 8e d8 8e c0  |.H..............|
00000010  fb be 00 7c bf 00 06 b9  00 02 f3 a4 ea 21 06 00  |...|.........!..|
00000020  00 be be 07 38 04 75 0b  83 c6 10 81 fe fe 07 75  |....8.u........u|
00000030  f3 eb 16 b4 02 b0 01 bb  00 7c b2 80 8a 74 03 02  |.........|...t..|
00000040  80 00 00 80 a0 0c 05 00  00 08 fa 90 90 f6 c2 80  |................|
00000050  75 02 b2 80 ea 59 7c 00  00 31 c0 8e d8 8e d0 bc  |u....Y|..1......|
00000060  00 20 fb a0 40 7c 3c ff  74 02 88 c2 52 f6 c2 80  |. ..@|<.t...R...|
00000070  74 54 b4 41 bb aa 55 cd  13 5a 52 72 49 81 fb 55  |tT.A..U..ZRrI..U|
00000080  aa 75 43 a0 41 7c 84 c0  75 05 83 e1 01 74 37 66  |.uC.A|..u....t7f|
00000090  8b 4c 10 be 05 7c c6 44  ff 01 66 8b 1e 44 7c c7  |.L...|.D..f..D|.|
000000a0  04 10 00 c7 44 02 01 00  66 89 5c 08 c7 44 06 00  |....D...f.\..D..|
000000b0  70 66 31 c0 89 44 04 66  89 44 0c b4 42 cd 13 72  |pf1..D.f.D..B..r|
000000c0  05 bb 00 70 eb 7d b4 08  cd 13 73 0a f6 c2 80 0f  |...p.}....s.....|
000000d0  84 f0 00 e9 8d 00 be 05  7c c6 44 ff 00 66 31 c0  |........|.D..f1.|
000000e0  88 f0 40 66 89 44 04 31  d2 88 ca c1 e2 02 88 e8  |..@f.D.1........|
000000f0  88 f4 40 89 44 08 31 c0  88 d0 c0 e8 02 66 89 04  |..@.D.1......f..|
00000100  66 a1 44 7c 66 31 d2 66  f7 34 88 54 0a 66 31 d2  |f.D|f1.f.4.T.f1.|
00000110  66 f7 74 04 88 54 0b 89  44 0c 3b 44 08 7d 3c 8a  |f.t..T..D.;D.}<.|
00000120  54 0d c0 e2 06 8a 4c 0a  fe c1 08 d1 8a 6c 0c 5a  |T.....L......l.Z|
00000130  8a 74 0b bb 00 70 8e c3  31 db b8 01 02 cd 13 72  |.t...p..1......r|
00000140  2a 8c c3 8e 06 48 7c 60  1e b9 00 01 8e db 31 f6  |*....H|`......1.|
00000150  31 ff fc f3 a5 1f 61 ff  26 42 7c be 7f 7d e8 40  |1.....a.&B|..}.@|
00000160  00 eb 0e be 84 7d e8 38  00 eb 06 be 8e 7d e8 30  |.....}.8.....}.0|
00000170  00 be 93 7d e8 2a 00 eb  fe 47 52 55 42 20 00 47  |...}.*...GRUB .G|
00000180  65 6f 6d 00 48 61 72 64  20 44 69 73 6b 00 52 65  |eom.Hard Disk.Re|
00000190  61 64 00 20 45 72 72 6f  72 00 bb 01 00 b4 0e cd  |ad. Error.......|
000001a0  10 ac 3c 00 75 f4 c3 00  00 00 00 00 00 00 00 00  |..<.u...........|
000001b0  00 00 00 00 00 00 00 00  05 7f 0d 00 00 00 80 20  |............... |
000001c0  21 00 83 aa 28 82 00 08  00 00 00 00 20 00 00 aa  |!...(....... ...|
000001d0  29 82 83 fe ff ff 00 08  20 00 00 00 80 0c 00 fe  |)....... .......|
000001e0  ff ff 83 fe ff ff 00 08  a0 0c 00 80 1a 06 00 fe  |................|
000001f0  ff ff 05 fe ff ff 00 88  ba 12 00 78 45 06 55 aa  |...........xE.U.|
00000200
[root@CentOS6 ~]#dd if=/dev/zero of=/dev/sda bs=1 count=446		#将前446字节写为0
446+0 records in
446+0 records out
446 bytes (446 B) copied, 0.000366533 s, 1.2 MB/s
[root@CentOS6 ~]#hexdump -C -n 512 /dev/sda -v
00000000  00 00 00 00 00 00 00 00  00 00 00 00 00 00 00 00  |................|
00000010  00 00 00 00 00 00 00 00  00 00 00 00 00 00 00 00  |................|
00000020  00 00 00 00 00 00 00 00  00 00 00 00 00 00 00 00  |................|
00000030  00 00 00 00 00 00 00 00  00 00 00 00 00 00 00 00  |................|
00000040  00 00 00 00 00 00 00 00  00 00 00 00 00 00 00 00  |................|
00000050  00 00 00 00 00 00 00 00  00 00 00 00 00 00 00 00  |................|
00000060  00 00 00 00 00 00 00 00  00 00 00 00 00 00 00 00  |................|
00000070  00 00 00 00 00 00 00 00  00 00 00 00 00 00 00 00  |................|
00000080  00 00 00 00 00 00 00 00  00 00 00 00 00 00 00 00  |................|
00000090  00 00 00 00 00 00 00 00  00 00 00 00 00 00 00 00  |................|
000000a0  00 00 00 00 00 00 00 00  00 00 00 00 00 00 00 00  |................|
000000b0  00 00 00 00 00 00 00 00  00 00 00 00 00 00 00 00  |................|
000000c0  00 00 00 00 00 00 00 00  00 00 00 00 00 00 00 00  |................|
000000d0  00 00 00 00 00 00 00 00  00 00 00 00 00 00 00 00  |................|
000000e0  00 00 00 00 00 00 00 00  00 00 00 00 00 00 00 00  |................|
000000f0  00 00 00 00 00 00 00 00  00 00 00 00 00 00 00 00  |................|
00000100  00 00 00 00 00 00 00 00  00 00 00 00 00 00 00 00  |................|
00000110  00 00 00 00 00 00 00 00  00 00 00 00 00 00 00 00  |................|
00000120  00 00 00 00 00 00 00 00  00 00 00 00 00 00 00 00  |................|
00000130  00 00 00 00 00 00 00 00  00 00 00 00 00 00 00 00  |................|
00000140  00 00 00 00 00 00 00 00  00 00 00 00 00 00 00 00  |................|
00000150  00 00 00 00 00 00 00 00  00 00 00 00 00 00 00 00  |................|
00000160  00 00 00 00 00 00 00 00  00 00 00 00 00 00 00 00  |................|
00000170  00 00 00 00 00 00 00 00  00 00 00 00 00 00 00 00  |................|
00000180  00 00 00 00 00 00 00 00  00 00 00 00 00 00 00 00  |................|
00000190  00 00 00 00 00 00 00 00  00 00 00 00 00 00 00 00  |................|
000001a0  00 00 00 00 00 00 00 00  00 00 00 00 00 00 00 00  |................|
000001b0  00 00 00 00 00 00 00 00  00 00 00 00 00 00 80 20  |............... |
000001c0  21 00 83 aa 28 82 00 08  00 00 00 00 20 00 00 aa  |!...(....... ...|
000001d0  29 82 83 fe ff ff 00 08  20 00 00 00 80 0c 00 fe  |)....... .......|
000001e0  ff ff 83 fe ff ff 00 08  a0 0c 00 80 1a 06 00 fe  |................|
000001f0  ff ff 05 fe ff ff 00 88  ba 12 00 78 45 06 55 aa  |...........xE.U.|
00000200
[root@CentOS6 ~]#reboot
有光盘的情况下:
![[外链图片转存失败,源站可能有防盗链机制,建议将图片保存下来直接上传(img-ADm7L1J9-1692688111217)(C:\Users\HUIO\AppData\Roaming\Typora\typora-user-images\image-20230817120203401.png)]](https://img-blog.csdnimg.cn/8d8cb079b50b42e7916a95d14a769beb.png)
**无光盘的情况下:**先尝试网络启动,失败后提示没有操作系统
![[外链图片转存失败,源站可能有防盗链机制,建议将图片保存下来直接上传(img-kYuLp9D2-1692688111217)(C:\Users\HUIO\AppData\Roaming\Typora\typora-user-images\image-20230817120333842.png)]](https://img-blog.csdnimg.cn/dc2311292c36451a919e9e83b43fc8e5.png)
修复:
连接光盘,重启加载时按下ESC显示boot menu,选择光盘启动
![[外链图片转存失败,源站可能有防盗链机制,建议将图片保存下来直接上传(img-Tx2IWxQa-1692688111218)(C:\Users\HUIO\AppData\Roaming\Typora\typora-user-images\image-20230817120550979.png)]](https://img-blog.csdnimg.cn/1584d2a8553e4e7087b0afaddfc82a2b.png)
选择救援模式
![[外链图片转存失败,源站可能有防盗链机制,建议将图片保存下来直接上传(img-1sB0G8t4-1692688111219)(C:\Users\HUIO\AppData\Roaming\Typora\typora-user-images\image-20230817120627264.png)]](https://img-blog.csdnimg.cn/b689c932e58f4aeba89f923a50609bcd.png)
配置语言、键盘、网络等
![[外链图片转存失败,源站可能有防盗链机制,建议将图片保存下来直接上传(img-DYfTFS7p-1692688111219)(C:\Users\HUIO\AppData\Roaming\Typora\typora-user-images\image-20230817120735142.png)]](https://img-blog.csdnimg.cn/ecdfaf2dd8084b35ac184cc666ec5b24.png)
回车启动一个shell
![[外链图片转存失败,源站可能有防盗链机制,建议将图片保存下来直接上传(img-QxHE4VYJ-1692688111220)(C:\Users\HUIO\AppData\Roaming\Typora\typora-user-images\image-20230817120824643.png)]](https://img-blog.csdnimg.cn/7f253618e4e640bd9b329733d88a3d13.png)
![[外链图片转存失败,源站可能有防盗链机制,建议将图片保存下来直接上传(img-rJAEFDVD-1692688111220)(C:\Users\HUIO\AppData\Roaming\Typora\typora-user-images\image-20230817120842025.png)]](https://img-blog.csdnimg.cn/776de0723c1d48dd9581bfef4adee077.png)
bash-4.1#df			#查看我们系统真正的硬盘被挂载到/mnt/sysimage
bash-4.1#chroot /mnt/sysimage/		#切换到系统的硬盘下
bash-4.1#grub-install /dev/sda		#修复sda
#提示成功
bash-4.1#sync		#将缓冲区内容写入到磁盘,防止直接重启而未写入磁盘
![[外链图片转存失败,源站可能有防盗链机制,建议将图片保存下来直接上传(img-EmpM0THp-1692688111221)(C:\Users\HUIO\AppData\Roaming\Typora\typora-user-images\image-20230817121137643.png)]](https://img-blog.csdnimg.cn/fbc95c0a9fc644478da528b9c94c3950.png)
bash-4.1#hexdump -C -n 512 /dev/sda		#查看sda的前512字节内容,已经修复
bash-4.1#reboot		#重启
![[外链图片转存失败,源站可能有防盗链机制,建议将图片保存下来直接上传(img-v5RNbyKY-1692688111221)(C:\Users\HUIO\AppData\Roaming\Typora\typora-user-images\image-20230817121358831.png)]](https://img-blog.csdnimg.cn/24f7d41496e045cd9a682c7dd14f9e0c.png)
成功启动
![[外链图片转存失败,源站可能有防盗链机制,建议将图片保存下来直接上传(img-9rTotLEj-1692688111222)(C:\Users\HUIO\AppData\Roaming\Typora\typora-user-images\image-20230817121630243.png)]](https://img-blog.csdnimg.cn/e664935f9b5a41f684c7cc771362aeeb.png)
例2:破坏C6系统的启动文件的第一阶段的446字节,然后使用grub修复
[root@CentOS6 ~]#dd if=/dev/zero of=/dev/sda bs=1 count=446		#将前446字节写为0
446+0 records in
446+0 records out
446 bytes (446 B) copied, 0.000366533 s, 1.2 MB/s[root@CentOS6 ~]#grub
Probing devices to guess BIOS drives. This may take a long time.GNU GRUB  version 0.97  (640K lower / 3072K upper memory)[ Minimal BASH-like line editing is supported.  For the first word, TABlists possible command completions.  Anywhere else TAB lists the possiblecompletions of a device/filename.]
grub> root (hd0,0)
root (hd0,0)Filesystem type is ext2fs, partition type 0x83
grub> setup (hd0)
setup (hd0)Checking if "/boot/grub/stage1" exists... noChecking if "/grub/stage1" exists... yesChecking if "/grub/stage2" exists... yesChecking if "/grub/e2fs_stage1_5" exists... yesRunning "embed /grub/e2fs_stage1_5 (hd0)"...  27 sectors are embedded.
succeededRunning "install /grub/stage1 (hd0) (hd0)1+27 p (hd0,0)/grub/stage2 /grub/grub.conf"... succeeded
Done.
[root@CentOS6 ~]#hexdump -C -n 512 /dev/sda
00000000  eb 48 90 00 00 00 00 00  00 00 00 00 00 00 00 00  |.H..............|
00000010  00 00 00 00 00 00 00 00  00 00 00 00 00 00 00 00  |................|
*
00000030  00 00 00 00 00 00 00 00  00 00 00 00 00 00 03 02  |................|
00000040  ff 00 00 20 01 00 00 00  00 02 fa 90 90 f6 c2 80  |... ............|
00000050  75 02 b2 80 ea 59 7c 00  00 31 c0 8e d8 8e d0 bc  |u....Y|..1......|
00000060  00 20 fb a0 40 7c 3c ff  74 02 88 c2 52 f6 c2 80  |. ..@|<.t...R...|
00000070  74 54 b4 41 bb aa 55 cd  13 5a 52 72 49 81 fb 55  |tT.A..U..ZRrI..U|
00000080  aa 75 43 a0 41 7c 84 c0  75 05 83 e1 01 74 37 66  |.uC.A|..u....t7f|
00000090  8b 4c 10 be 05 7c c6 44  ff 01 66 8b 1e 44 7c c7  |.L...|.D..f..D|.|
000000a0  04 10 00 c7 44 02 01 00  66 89 5c 08 c7 44 06 00  |....D...f.\..D..|
000000b0  70 66 31 c0 89 44 04 66  89 44 0c b4 42 cd 13 72  |pf1..D.f.D..B..r|
000000c0  05 bb 00 70 eb 7d b4 08  cd 13 73 0a f6 c2 80 0f  |...p.}....s.....|
000000d0  84 f0 00 e9 8d 00 be 05  7c c6 44 ff 00 66 31 c0  |........|.D..f1.|
000000e0  88 f0 40 66 89 44 04 31  d2 88 ca c1 e2 02 88 e8  |..@f.D.1........|
000000f0  88 f4 40 89 44 08 31 c0  88 d0 c0 e8 02 66 89 04  |..@.D.1......f..|
00000100  66 a1 44 7c 66 31 d2 66  f7 34 88 54 0a 66 31 d2  |f.D|f1.f.4.T.f1.|
00000110  66 f7 74 04 88 54 0b 89  44 0c 3b 44 08 7d 3c 8a  |f.t..T..D.;D.}<.|
00000120  54 0d c0 e2 06 8a 4c 0a  fe c1 08 d1 8a 6c 0c 5a  |T.....L......l.Z|
00000130  8a 74 0b bb 00 70 8e c3  31 db b8 01 02 cd 13 72  |.t...p..1......r|
00000140  2a 8c c3 8e 06 48 7c 60  1e b9 00 01 8e db 31 f6  |*....H|`......1.|
00000150  31 ff fc f3 a5 1f 61 ff  26 42 7c be 7f 7d e8 40  |1.....a.&B|..}.@|
00000160  00 eb 0e be 84 7d e8 38  00 eb 06 be 8e 7d e8 30  |.....}.8.....}.0|
00000170  00 be 93 7d e8 2a 00 eb  fe 47 52 55 42 20 00 47  |...}.*...GRUB .G|
00000180  65 6f 6d 00 48 61 72 64  20 44 69 73 6b 00 52 65  |eom.Hard Disk.Re|
00000190  61 64 00 20 45 72 72 6f  72 00 bb 01 00 b4 0e cd  |ad. Error.......|
000001a0  10 ac 3c 00 75 f4 c3 00  00 00 00 00 00 00 00 00  |..<.u...........|
000001b0  00 00 00 00 00 00 00 00  00 00 00 00 00 00 80 20  |............... |
000001c0  21 00 83 aa 28 82 00 08  00 00 00 00 20 00 00 aa  |!...(....... ...|
000001d0  29 82 83 fe ff ff 00 08  20 00 00 00 80 0c 00 fe  |)....... .......|
000001e0  ff ff 83 fe ff ff 00 08  a0 0c 00 80 1a 06 00 fe  |................|
000001f0  ff ff 05 fe ff ff 00 88  ba 12 00 78 45 06 55 aa  |...........xE.U.|
00000200
例3:破坏1.5阶段的第2至第25个扇区,将内容置为0,然后修复
[root@CentOS6 ~]#dd if=/dev/zero of=/dev/sda bs=512 count=25 seek=1
25+0 records in
25+0 records out
12800 bytes (13 kB) copied, 0.00245147 s, 5.2 MB/s[root@CentOS6 ~]#hexdump -C -n 5120 /dev/sda -v
00000000  eb 48 90 00 00 00 00 00  00 00 00 00 00 00 00 00  |.H..............|
00000010  00 00 00 00 00 00 00 00  00 00 00 00 00 00 00 00  |................|
00000020  00 00 00 00 00 00 00 00  00 00 00 00 00 00 00 00  |................|
00000030  00 00 00 00 00 00 00 00  00 00 00 00 00 00 03 02  |................|
00000040  ff 00 00 20 01 00 00 00  00 02 fa 90 90 f6 c2 80  |... ............|
00000050  75 02 b2 80 ea 59 7c 00  00 31 c0 8e d8 8e d0 bc  |u....Y|..1......|
00000060  00 20 fb a0 40 7c 3c ff  74 02 88 c2 52 f6 c2 80  |. ..@|<.t...R...|
00000070  74 54 b4 41 bb aa 55 cd  13 5a 52 72 49 81 fb 55  |tT.A..U..ZRrI..U|
00000080  aa 75 43 a0 41 7c 84 c0  75 05 83 e1 01 74 37 66  |.uC.A|..u....t7f|
00000090  8b 4c 10 be 05 7c c6 44  ff 01 66 8b 1e 44 7c c7  |.L...|.D..f..D|.|
000000a0  04 10 00 c7 44 02 01 00  66 89 5c 08 c7 44 06 00  |....D...f.\..D..|
000000b0  70 66 31 c0 89 44 04 66  89 44 0c b4 42 cd 13 72  |pf1..D.f.D..B..r|
000000c0  05 bb 00 70 eb 7d b4 08  cd 13 73 0a f6 c2 80 0f  |...p.}....s.....|
000000d0  84 f0 00 e9 8d 00 be 05  7c c6 44 ff 00 66 31 c0  |........|.D..f1.|
000000e0  88 f0 40 66 89 44 04 31  d2 88 ca c1 e2 02 88 e8  |..@f.D.1........|
000000f0  88 f4 40 89 44 08 31 c0  88 d0 c0 e8 02 66 89 04  |..@.D.1......f..|
00000100  66 a1 44 7c 66 31 d2 66  f7 34 88 54 0a 66 31 d2  |f.D|f1.f.4.T.f1.|
00000110  66 f7 74 04 88 54 0b 89  44 0c 3b 44 08 7d 3c 8a  |f.t..T..D.;D.}<.|
00000120  54 0d c0 e2 06 8a 4c 0a  fe c1 08 d1 8a 6c 0c 5a  |T.....L......l.Z|
00000130  8a 74 0b bb 00 70 8e c3  31 db b8 01 02 cd 13 72  |.t...p..1......r|
00000140  2a 8c c3 8e 06 48 7c 60  1e b9 00 01 8e db 31 f6  |*....H|`......1.|
00000150  31 ff fc f3 a5 1f 61 ff  26 42 7c be 7f 7d e8 40  |1.....a.&B|..}.@|
00000160  00 eb 0e be 84 7d e8 38  00 eb 06 be 8e 7d e8 30  |.....}.8.....}.0|
00000170  00 be 93 7d e8 2a 00 eb  fe 47 52 55 42 20 00 47  |...}.*...GRUB .G|
00000180  65 6f 6d 00 48 61 72 64  20 44 69 73 6b 00 52 65  |eom.Hard Disk.Re|
00000190  61 64 00 20 45 72 72 6f  72 00 bb 01 00 b4 0e cd  |ad. Error.......|
000001a0  10 ac 3c 00 75 f4 c3 00  00 00 00 00 00 00 00 00  |..<.u...........|
000001b0  00 00 00 00 00 00 00 00  00 00 00 00 00 00 80 20  |............... |
000001c0  21 00 83 aa 28 82 00 08  00 00 00 00 20 00 00 aa  |!...(....... ...|
000001d0  29 82 83 fe ff ff 00 08  20 00 00 00 80 0c 00 fe  |)....... .......|
000001e0  ff ff 83 fe ff ff 00 08  a0 0c 00 80 1a 06 00 fe  |................|
000001f0  ff ff 05 fe ff ff 00 88  ba 12 00 78 45 06 55 aa  |...........xE.U.|
00000200  00 00 00 00 00 00 00 00  00 00 00 00 00 00 00 00  |................|
00000210  00 00 00 00 00 00 00 00  00 00 00 00 00 00 00 00  |................|
00000220  00 00 00 00 00 00 00 00  00 00 00 00 00 00 00 00  |................|
00000230  00 00 00 00 00 00 00 00  00 00 00 00 00 00 00 00  |................|
00000240  00 00 00 00 00 00 00 00  00 00 00 00 00 00 00 00  |................|
00000250  00 00 00 00 00 00 00 00  00 00 00 00 00 00 00 00  |................|
00000260  00 00 00 00 00 00 00 00  00 00 00 00 00 00 00 00  |................|
00000270  00 00 00 00 00 00 00 00  00 00 00 00 00 00 00 00  |................|
00000280  00 00 00 00 00 00 00 00  00 00 00 00 00 00 00 00  |................|
00000290  00 00 00 00 00 00 00 00  00 00 00 00 00 00 00 00  |................|
000002a0  00 00 00 00 00 00 00 00  00 00 00 00 00 00 00 00  |................|
000002b0  00 00 00 00 00 00 00 00  00 00 00 00 00 00 00 00  |................|
000002c0  00 00 00 00 00 00 00 00  00 00 00 00 00 00 00 00  |................|
000002d0  00 00 00 00 00 00 00 00  00 00 00 00 00 00 00 00  |................|
000002e0  00 00 00 00 00 00 00 00  00 00 00 00 00 00 00 00  |................|
000002f0  00 00 00 00 00 00 00 00  00 00 00 00 00 00 00 00  |................|
00000300  00 00 00 00 00 00 00 00  00 00 00 00 00 00 00 00  |................|
00000310  00 00 00 00 00 00 00 00  00 00 00 00 00 00 00 00  |................|
00000320  00 00 00 00 00 00 00 00  00 00 00 00 00 00 00 00  |................|
00000330  00 00 00 00 00 00 00 00  00 00 00 00 00 00 00 00  |................|
00000340  00 00 00 00 00 00 00 00  00 00 00 00 00 00 00 00  |................|
00000350  00 00 00 00 00 00 00 00  00 00 00 00 00 00 00 00  |................|
00000360  00 00 00 00 00 00 00 00  00 00 00 00 00 00 00 00  |................|
00000370  00 00 00 00 00 00 00 00  00 00 00 00 00 00 00 00  |................|
00000380  00 00 00 00 00 00 00 00  00 00 00 00 00 00 00 00  |................|
00000390  00 00 00 00 00 00 00 00  00 00 00 00 00 00 00 00  |................|
000003a0  00 00 00 00 00 00 00 00  00 00 00 00 00 00 00 00  |................|
000003b0  00 00 00 00 00 00 00 00  00 00 00 00 00 00 00 00  |................|
000003c0  00 00 00 00 00 00 00 00  00 00 00 00 00 00 00 00  |................|
000003d0  00 00 00 00 00 00 00 00  00 00 00 00 00 00 00 00  |................|
000003e0  00 00 00 00 00 00 00 00  00 00 00 00 00 00 00 00  |................|
000003f0  00 00 00 00 00 00 00 00  00 00 00 00 00 00 00 00  |................|
00000400  00 00 00 00 00 00 00 00  00 00 00 00 00 00 00 00  |................|
00000410  00 00 00 00 00 00 00 00  00 00 00 00 00 00 00 00  |................|
00000420  00 00 00 00 00 00 00 00  00 00 00 00 00 00 00 00  |................|
00000430  00 00 00 00 00 00 00 00  00 00 00 00 00 00 00 00  |................|
00000440  00 00 00 00 00 00 00 00  00 00 00 00 00 00 00 00  |................|
00000450  00 00 00 00 00 00 00 00  00 00 00 00 00 00 00 00  |................|
00000460  00 00 00 00 00 00 00 00  00 00 00 00 00 00 00 00  |................|
00000470  00 00 00 00 00 00 00 00  00 00 00 00 00 00 00 00  |................|
00000480  00 00 00 00 00 00 00 00  00 00 00 00 00 00 00 00  |................|
00000490  00 00 00 00 00 00 00 00  00 00 00 00 00 00 00 00  |................|
000004a0  00 00 00 00 00 00 00 00  00 00 00 00 00 00 00 00  |................|
000004b0  00 00 00 00 00 00 00 00  00 00 00 00 00 00 00 00  |................|
000004c0  00 00 00 00 00 00 00 00  00 00 00 00 00 00 00 00  |................|
000004d0  00 00 00 00 00 00 00 00  00 00 00 00 00 00 00 00  |................|
000004e0  00 00 00 00 00 00 00 00  00 00 00 00 00 00 00 00  |................|
000004f0  00 00 00 00 00 00 00 00  00 00 00 00 00 00 00 00  |................|
00000500  00 00 00 00 00 00 00 00  00 00 00 00 00 00 00 00  |................|
00000510  00 00 00 00 00 00 00 00  00 00 00 00 00 00 00 00  |................|
00000520  00 00 00 00 00 00 00 00  00 00 00 00 00 00 00 00  |................|
00000530  00 00 00 00 00 00 00 00  00 00 00 00 00 00 00 00  |................|
00000540  00 00 00 00 00 00 00 00  00 00 00 00 00 00 00 00  |................|
00000550  00 00 00 00 00 00 00 00  00 00 00 00 00 00 00 00  |................|
00000560  00 00 00 00 00 00 00 00  00 00 00 00 00 00 00 00  |................|
00000570  00 00 00 00 00 00 00 00  00 00 00 00 00 00 00 00  |................|
00000580  00 00 00 00 00 00 00 00  00 00 00 00 00 00 00 00  |................|
00000590  00 00 00 00 00 00 00 00  00 00 00 00 00 00 00 00  |................|
000005a0  00 00 00 00 00 00 00 00  00 00 00 00 00 00 00 00  |................|
000005b0  00 00 00 00 00 00 00 00  00 00 00 00 00 00 00 00  |................|
000005c0  00 00 00 00 00 00 00 00  00 00 00 00 00 00 00 00  |................|
000005d0  00 00 00 00 00 00 00 00  00 00 00 00 00 00 00 00  |................|
000005e0  00 00 00 00 00 00 00 00  00 00 00 00 00 00 00 00  |................|
000005f0  00 00 00 00 00 00 00 00  00 00 00 00 00 00 00 00  |................|
00000600  00 00 00 00 00 00 00 00  00 00 00 00 00 00 00 00  |................|
00000610  00 00 00 00 00 00 00 00  00 00 00 00 00 00 00 00  |................|
00000620  00 00 00 00 00 00 00 00  00 00 00 00 00 00 00 00  |................|
00000630  00 00 00 00 00 00 00 00  00 00 00 00 00 00 00 00  |................|
00000640  00 00 00 00 00 00 00 00  00 00 00 00 00 00 00 00  |................|
00000650  00 00 00 00 00 00 00 00  00 00 00 00 00 00 00 00  |................|
00000660  00 00 00 00 00 00 00 00  00 00 00 00 00 00 00 00  |................|
00000670  00 00 00 00 00 00 00 00  00 00 00 00 00 00 00 00  |................|
00000680  00 00 00 00 00 00 00 00  00 00 00 00 00 00 00 00  |................|
00000690  00 00 00 00 00 00 00 00  00 00 00 00 00 00 00 00  |................|
000006a0  00 00 00 00 00 00 00 00  00 00 00 00 00 00 00 00  |................|
000006b0  00 00 00 00 00 00 00 00  00 00 00 00 00 00 00 00  |................|
000006c0  00 00 00 00 00 00 00 00  00 00 00 00 00 00 00 00  |................|
000006d0  00 00 00 00 00 00 00 00  00 00 00 00 00 00 00 00  |................|
[root@CentOS6 ~]#reboot
重启后系统无法打开,但错误提示不同:

此时1阶段正常,系统认为硬盘可以启动,所以一直在加载,而不去寻找光盘等设备来启动,就会卡在这里
**修复:**同样的,进入救援模式,然后切换根,然后grub-install /dev/sda即可
![[外链图片转存失败,源站可能有防盗链机制,建议将图片保存下来直接上传(img-faBAOoEz-1692688111222)(C:\Users\HUIO\AppData\Roaming\Typora\typora-user-images\image-20230817123704463.png)]](https://img-blog.csdnimg.cn/f84ff2357a95437b9bda032fd636f874.png)
1.3.2.3 grub legacy 管理
配置文件: /boot/grub/grub.conf <-- /etc/grub.conf
stage2及内核等通常放置于一个基本磁盘分区
grub legacy 功用:
- 提供启动菜单、并提供交互式接口
- a:内核参数
- e:编辑模式,用于编辑菜单
- c:命令模式,交互式接口
- 加载用户选择的内核或操作系统
- 允许传递参数给内核
- 可隐藏启动菜单
- 为菜单提供了保护机制
- 为编辑启动菜单进行认证
- 为启用内核或操作系统进行认证
grub的命令行接口
help: 获取帮助列表
help KEYWORD: 详细帮助信息
find (hd#,#)/PATH/TO/SOMEFILE:
root (hd#,#)
kernel /PATH/TO/KERNEL_FILE: 设定本次启动的内核文件,额外还可添加许多内核支持使用的cmdline参数
例如: max_loop=100 selinux=0 init=/path/to/initinitrd /PATH/TO/INITRAMFS_FILE: 设定为选定的内核提供额外文件的ramdisk
boot: 引导启动选定的内核
cat /proc/cmdline 内核参数
内核参数文档:
/usr/share/doc/kernel-doc-2.6.32/Documentation/kernel-parameters.txt
grub legacy识别硬盘设备
(hd#,#)
hd#	磁盘编号,用数字表示;从0开始编号
#		分区编号,用数字表示,从0开始编号示例:
(hd0,0) 第一块硬盘,第一个分区
手动在grub命令行接口启动系统
grub> root (hd#,#)
grub> kernel /vmlinuz-VERSION-RELEASE ro root=/dev/DEVICE
grub> initrd /initramfs-VERSION-RELEASE.img
grub> boot
grub legacy配置文件: /boot/grub/grub.conf
default=#:	设定默认启动的菜单项;落单项(title)编号从0开始
timeout=#:	指定菜单项等待选项选择的时长
splashimage=(hd#,#)/PATH/XPM_FILE:	菜单背景图片文件路径
password [--md5 | encrypt] STRING:	启动菜单编辑认证
hiddenmenu:	隐藏菜单
title TITLE:	定义菜单项“标题”,可出现多次
root (hd#,#):	查找stage2及kernel文件所在设备分区;为grub的根
kernel /PATH/TO/VMLINUZ_FILE [PARAMETERS]:	启动的内核
initrd /PATH/TO/INITRAMFS_FILE:	内核匹配的ramfs文件
password [--md5|--encrypted ] STRING:	启动选定的内核或操作系统时进行认证
grub加密生成grub口令
grub-md5-crypt
grub-crypt
破解root口令:
(1)编辑grub菜单(选定要编辑的title,而后使用a 或 e 命令)
(2)在选定的kernel后附加1,s,S,single 都可以进入单用户模式
(3)在kernel所在行,键入“b”命令
范例: 给grub 添加密码,防止破解root密码
[root@centos6 ~]#grub-crypt
Password:
Retype password:
S6SRedtvBe0DOsM8yKqSykwmmnHsDb9WDRUuZbC3H1ZNwITf/Mh88MXa3JzXToxyyohXIXFWLIOMdgmYFfkwxxkP.VW3ypITa4P5zUKuT.[root@centos6 ~]#vim /boot/grub/grub.conf
default=0
timeout=5
password --encrypt	#加上这一行
56SRedtvBe0DOsM8ykqSykwmmnHSDb9WDRUuZbC3H1ZNwI1f/Mh88MXa3JzX1oxyyohXIXFWLIOMdgmYFfkwxxkP.VW3ypI1a4P5zUKuT.
splashimage=(hd0,0)/grub /splash.xpm.gz
hiddenmenu
title Centos 6 (2.6.32-754.e16.x86_64)#然后在系统选择时输入口令才能进入编辑
#不过进入救援模式,仍然可以跳过这些安全步骤,并修改密码
1.3.3 加载 kernel
kernel自身初始化过程:
- 探测可识别到的所有硬件设备
- 加载硬件动程序 (借助于ramdisk加载动)
- 以只读方式挂载根文件系统
- 运行用户空间的第一个应用程序:/sbin/init
Linux内核特点:
- 支持模块化:.ko (内核对象),如: 文件系统,硬件驱动,网络协议等
- 支持内核模块的动态装载和卸载
内核组成部分:
-
核心文件: /boot/vmlinuz-VERSION-release
ramdisk:辅助的伪根系统,加载相应的硬件驱动,ramdisk --> ramfs 提高速度
C 5 /boot/initrd-VERSION-release.img
C 6以后版本 /boot/initramfs-VERSION-release.img
-
模块文件: /ib/modules/VERSION-release
ramdisk文件的制作:
mkinitrd命令
mkinitrd /boot/initramfs-$(uname -r).img $(uname -r)
dracut命令
dracut /boot/initramfs-$(uname -r).img $(uname -r)
例:误删除/boot/initramfs-2.6.32-754.el6.x86_64.img文件,导致系统无法启动,修复
[root@CentOS6 boot]#rm -f initrd-2.6.32-754.el6.x86_64kdump.img
[root@CentOS6 boot]#reboot
#进入救援模式
#chroot /mnt/sysimage	#切根
#mkinitrd /boot/initramfs-`uname -r`.img `uname -r`
#sync
#reboot
例:误删除/boot/vmlinuz-2.6.32-754.el6.x86_64文件,即内核文件,导致系统无法启动,修复
[root@CentOS6 boot]#rm -f /boot/vmlinuz-2.6.32-754.el6.x86_64
#方式1
[root@CentOS6 boot]#reboot
#进入救援模式
#chroot /mnt/sysimage	#切根
#mount /dev/sr0 /mnt/	#挂载光盘
#cp /mnt/isolinux/vmlinuz 	/boot/vmlinuz-2.6.32-754.el6.x86_64
#sync
#reboot#方式2
#由于vmlinuz文件来源于光盘里的kernel包,直接重装即可
[root@CentOS6 boot]#rpm -qf vmlinuz-2.6.32-754.el6.x86_64
kernel-2.6.32-754.el6.x86_64
例:误删除/boot/*,grub和内核都被删除,进行故障恢复
#先修复内核,再修复Grub
范例:生成背景图片
[root@centos6 ~]#convert -resize 640x480 -colors 14 winner.png splash.xpm
[root@centos6 ~]#more splash.xpm
#生成splash.xpm.gz
[rootacentos6 ~]#qzip  splash.xpm
[root@centos6 ~]#mv splash.xpm.gz /boot/grub
1.3.4 init 初始化
使POST --> BootSeguence (BIOS) -->Bootloader(MBR) --> kernel(ramdisk) --> rootfs(只读) -->init(systemd)
init程序的类型:
-
SysV: init,C5之前
配置文件:/etc/inittab
-
Upstart: init,C 6
配置文件:/etc/inittab,/etc/init/*.conf
-
Systemd:systemd,C 7
配置文件: /usr/lib/systemd/system;/etc/systemd/system
1.3.4.1 运行级别
运行级别: 为系统运行或维护等目的而设定,0-6:7个级别,一般使用3,5做为默认级别
0:关机
1:单用户模式(root自动登录),single,维护模式
2:多用户模式,启动网络功能,但不会启动NFS: 维护模式
3:多用户模式,正常模式:文本界面
4:预留级:可同3级别
5:多用户模式,正常模式:图形界面
6:重启
切换级别:
init #
查看级别:
runlevel
who -r
定义运行级别
/etc/inittab
C 5的inittab文件还定义以下内容
初始运行级别(RUN LEVEL)
系统初始化脚本
对应运行级别的脚本目录
捕获某个关键字顺序
定义UPS电源终端/恢复脚本
在虚拟控制台生成getty
在运行级别5初始化X
C 5的inittab文件每一行格式
id:runlevel:action:processid:是惟一标识该项的字符序列
runlevels: 定义了操作所使用的运行级别
action:指定了要执行的特定操作wait: 切换至此级别运行一次respawn: 此process终止,就重新启动之initdefault:设定默认运行级别;process省略sysinit:设定系统初始化方式
process:定义了要执行的进程
例:CentOS 6 /etc/inittab和相关文件
C6 init程序为 upstart, 其配置文件/etc/inittab,/etc/init/*.conf,配置文件的语法 遵循 upstart配置文件语法格式,和C 5不同
[root@CentOS6 ~]#cat /etc/inittab
# inittab is only used by upstart for the default runlevel.
#
# ADDING OTHER CONFIGURATION HERE WILL HAVE NO EFFECT ON YOUR SYSTEM.
#
# System initialization is started by /etc/init/rcS.conf
#
# Individual runlevels are started by /etc/init/rc.conf
#
# Ctrl-Alt-Delete is handled by /etc/init/control-alt-delete.conf
#
# Terminal gettys are handled by /etc/init/tty.conf and /etc/init/serial.conf,
# with configuration in /etc/sysconfig/init.
#
# For information on how to write upstart event handlers, or how
# upstart works, see init(5), init(8), and initctl(8).
#
# Default runlevel. The runlevels used are:
#   0 - halt (Do NOT set initdefault to this)
#   1 - Single user mode
#   2 - Multiuser, without NFS (The same as 3, if you do not have networking)
#   3 - Full multiuser mode
#   4 - unused
#   5 - X11
#   6 - reboot (Do NOT set initdefault to this)
#
id:3:initdefault:
例:control -alt-delete键默认行为是重启,工作中可以将其注释以防止误触
[root@CentOS6 init]#cat /etc/init/control-alt-delete.conf
# control-alt-delete - emergency keypress handling
#
# This task is run whenever the Control-Alt-Delete key combination is
# pressed.  Usually used to shut down the machine.
#
# Do not edit this file directly. If you want to change the behaviour,
# please create a file control-alt-delete.override and put your changes there.start on control-alt-deleteexec /sbin/shutdown -r now "Control-Alt-Delete pressed"
例:ntsysv图形界面修改服务,空格开启或关闭
![[外链图片转存失败,源站可能有防盗链机制,建议将图片保存下来直接上传(img-HbLCqmRt-1692688111223)(C:\Users\HUIO\AppData\Roaming\Typora\typora-user-images\image-20230818231950485.png)]](https://img-blog.csdnimg.cn/f2e4a36ec67b4eeab5a42b0d30c077ed.png)
例:一次性修改atd的7种模式
[root@CentOS6 init]#chkconfig --list atd
atd             0:off   1:off   2:off   3:on    4:on    5:on    6:off
[root@CentOS6 init]#chkconfig --level 34 atd off
[root@CentOS6 init]#chkconfig --list atd
atd             0:off   1:off   2:off   3:off   4:off   5:on    6:off
[root@CentOS6 init]#chkconfig atd on
[root@CentOS6 init]#chkconfig --list atd
atd             0:off   1:off   2:on    3:on    4:on    5:on    6:off
例:设置服务开机不启动
[root@CentOS6 init]#service iptables stop		#关闭服务
[root@CentOS6 init]#chkconfig iptables off	#设置开机不启动,开机启动则on
1.3.4.2 初始化脚本 sysinit
在所有服务加载之前执行初始化的脚本
/etc/rc.d/rc.sysinit
#由 rcS.conf文件调用
[root@CentOS6 init]#cat /etc/init/rcS.conf
exec /etc/rc.d/rc.sysinit
系统初始化脚本功能
- 设置主机名
- 设置欢迎信息
- 激活udev和selinux
- 挂载/etc/fstab文件中定义的文件系统
- 检测根文件系统,并以读写方式重新挂载根文件系统
- 设置系统时钟
- 激活swap设备
- 根据/etc/sysctl.conf文件设置内核参数
- 激活lvm及software raid设备
- 加载额外设备的驱动程序
- 清理操作
1.3.4.3 服务管理
service 命令:手动管理服务
service 服务 start|stop|restart
service --status-all
由rc.conf文件调用rc.d,rc调用服务脚本
[root@CentOS6 init]#cat /etc/init/rc.conf
exec /etc/rc.d/rc $RUNLEVEL
/etc/rc.d/rc 控制服务脚本的开机自动运行
for srv in /etc/rc.d/rcN.d/k*; do$srv stop
donefor srv in /etc/rc.d/rcN.d/s*; do$srv start
done
说明: rc N --> 意味着读取/etc/rc.d/rcN.d/
- K: K##: ##运行次序,数字越小,越先运行,数字越小的服务,通常为依赖到别的服务
- s: S##: ##运行次序,数字越小,越先运行,数字越小的服务,通常为被依赖到的服务
配置服务开机启动
- chkconfig命令
- ntsysv命令
chkconfig 命令管理服务
#查看服务在所有级别的启动或关闭设定情形:
chkconfig [--list] [name]#添加服务
Sysv的服务脚本放置于/etc/rc.d/init.d (/etc/init.d)
#!/bin/bash
chkconfig: LLLL nn nn	#LLLL 表示初始在哪个级别下启动,-表示都不启动
description :描述信息chkconfig --add name#删除服务
chkconfig --del name#修改指定的运行级别
chkconfig [--level levels] name <onlofflreset>
说明: --level LLLL:	指定要设置的级别;省略时表示2345
1.3.4.4 非独立服务
服务分为独立服务和非独立服务
瞬态 (Transient) 服务被超级守护进程 xinetd 进程所管理,也称为非独立服务,即用户不访问/使用该服务时,服务关闭,被xinetd进程所监控,当有用户访问某非独立服务时,则唤醒该非独立服务,使用结束则关闭服务
进入的请求首先被xinetd代理
配置文件:
etc/xinetd.conf
/etc/xinetd.d/<service>
用chkconfig控制非独立服务开机启动
示例: chkconfig tftp on
1.3.4.5 开机启动文件 rc.local
/etc/rc.d/rc.local
注意: 正常级别下,最后启动一个服务S99local没有链接至/etc/rc.d/init.d一个服务脚本,而是指向了/etc/rc.d/rc.local脚本
不便或不需写为服务脚本放置于/etc/rc.d/init.d/目录,且又想开机时自动运行的命令,可直接放警于/etc/rc.d/rc.local文件中
/etc/rc.d/rc.local在指定运行级别脚本后运行
1.3.5 Centos 启动过程总结
/sbin/init --> (/etc/inittab) --> 设置默认运行级别 --> 运行系统初始脚本/etc/rc.d/rc.sysinit、完成系统初始化 -->(关闭对应下需要关闭的服务)启动需要启动服务/etc/rc#.d/Sxxx,/etc/rc.d/rc.local --> 设置登录终端
参看: http://s4.51cto.com/wyfs02/M02/87/20/wKiom1fVBELjXsvaAAUkuL83t2Q304.jpg

1.4 自制linux系统
1.4.0为当前Linux系统增加硬盘
在现有Linux系统上构建系统,所以先在其上面加一块硬盘,上面存放文件系统与数据
在VMware上增加硬盘
![[外链图片转存失败,源站可能有防盗链机制,建议将图片保存下来直接上传(img-eP8rc43Y-1692688111224)(C:\Users\HUIO\AppData\Roaming\Typora\typora-user-images\image-20230820184900325.png)]](https://img-blog.csdnimg.cn/16ead1b8f409494f8cf5460ffbf3a223.png)
默认当前无法找到硬盘
![[外链图片转存失败,源站可能有防盗链机制,建议将图片保存下来直接上传(img-2GQhIH7k-1692688111225)(C:\Users\HUIO\AppData\Roaming\Typora\typora-user-images\image-20230820184934789.png)]](https://img-blog.csdnimg.cn/1d844e65dc52478c9548ed3774fe470d.png)
使用命令扫描一下磁盘
[root@CentOS6 ~]#lsblk
NAME   MAJ:MIN RM  SIZE RO TYPE MOUNTPOINT
sr0     11:0    1  3.7G  0 rom
sda      8:0    0  200G  0 disk
├─sda1   8:1    0    1G  0 part /boot
├─sda2   8:2    0  100G  0 part /
├─sda3   8:3    0 48.8G  0 part /data
├─sda4   8:4    0    1K  0 part
└─sda5   8:5    0    4G  0 part [SWAP]
[root@CentOS6 ~]#echo '- - -' > /sys/class/scsi_host/host0/scan
[root@CentOS6 ~]#echo '- - -' > /sys/class/scsi_host/host1/scan
[root@CentOS6 ~]#echo '- - -' > /sys/class/scsi_host/host2/scan
[root@CentOS6 ~]#lsblk
NAME   MAJ:MIN RM  SIZE RO TYPE MOUNTPOINT
sr0     11:0    1  3.7G  0 rom
sda      8:0    0  200G  0 disk
├─sda1   8:1    0    1G  0 part /boot
├─sda2   8:2    0  100G  0 part /
├─sda3   8:3    0 48.8G  0 part /data
├─sda4   8:4    0    1K  0 part
└─sda5   8:5    0    4G  0 part [SWAP]
sdb      8:16   0   20G  0 disk
1.4.1 分区并创建文件系统
fdisk /dev/sdb#分两个必要的分区:
[root@centos6 ~]#echo -e 'n\np\n1\n\n+1G\nw\n' fdisk /dev/sdb	#\n表示回车,给第一个分区分1G空间
[root@centos6 ~]#echo -e 'n\np\n2\n\n\n\nw\n' fdisk /dev/sdb		#将剩下空间给第二个分区
/dev/sdb1对应/boot /dev/sdb2对应根/[root@centos6 ~]#mkfs.ext4 /dev/sdb1
[root@centos6 ~]#mkfs.ext4 /dev/sdb2
例:
#1手动添加
[root@CentOS6 ~]#fdisk /dev/sdb
Device contains neither a valid DOS partition table, nor Sun, SGI or OSF disklabel
Building a new DOS disklabel with disk identifier 0x85b35a65.
Changes will remain in memory only, until you decide to write them.
After that, of course, the previous content won't be recoverable.Warning: invalid flag 0x0000 of partition table 4 will be corrected by w(rite)WARNING: DOS-compatible mode is deprecated. It's strongly recommended toswitch off the mode (command 'c') and change display units tosectors (command 'u').Command (m for help):
Command (m for help): n
Command actione   extendedp   primary partition (1-4)
p
Partition number (1-4): 1
First cylinder (1-2610, default 1):
Using default value 1
Last cylinder, +cylinders or +size{K,M,G} (1-2610, default 2610): +1GCommand (m for help): w
The partition table has been altered!Calling ioctl() to re-read partition table.
Syncing disks.
#2非交互式直接添加
[root@CentOS6 ~]#echo -e 'n\np\n2\n\n\n\nw\n' | fdisk /dev/sdbWARNING: DOS-compatible mode is deprecated. It's strongly recommended toswitch off the mode (command 'c') and change display units tosectors (command 'u').Command (m for help): Command actione   extendedp   primary partition (1-4)
Partition number (1-4): First cylinder (133-2610, default 133): Using default value 133
Last cylinder, +cylinders or +size{K,M,G} (133-2610, default 2610): Using default value 2610Command (m for help): Command (m for help): The partition table has been altered!Calling ioctl() to re-read partition table.
Syncing disks.
[root@CentOS6 ~]#lsblk
NAME   MAJ:MIN RM  SIZE RO TYPE MOUNTPOINT
sr0     11:0    1  3.7G  0 rom
sda      8:0    0  200G  0 disk
├─sda1   8:1    0    1G  0 part /boot
├─sda2   8:2    0  100G  0 part /
├─sda3   8:3    0 48.8G  0 part /data
├─sda4   8:4    0    1K  0 part
└─sda5   8:5    0    4G  0 part [SWAP]
sdb      8:16   0   20G  0 disk
├─sdb1   8:17   0    1G  0 part
└─sdb2   8:18   0   19G  0 part#格式化
[root@CentOS6 ~]#mkfs.ext4 /dev/sdb1
mke2fs 1.41.12 (17-May-2010)
Filesystem label=
OS type: Linux
Block size=4096 (log=2)
Fragment size=4096 (log=2)
Stride=0 blocks, Stripe width=0 blocks
66384 inodes, 265064 blocks
13253 blocks (5.00%) reserved for the super user
First data block=0
Maximum filesystem blocks=272629760
9 block groups
32768 blocks per group, 32768 fragments per group
7376 inodes per group
Superblock backups stored on blocks:32768, 98304, 163840, 229376Writing inode tables: done
Creating journal (8192 blocks): done
Writing superblocks and filesystem accounting information: doneThis filesystem will be automatically checked every 34 mounts or
180 days, whichever comes first.  Use tune2fs -c or -i to override.
[root@CentOS6 ~]#mkfs.ext4 /dev/sdb2
mke2fs 1.41.12 (17-May-2010)
Filesystem label=
OS type: Linux
Block size=4096 (log=2)
Fragment size=4096 (log=2)
Stride=0 blocks, Stripe width=0 blocks
1245184 inodes, 4976133 blocks
248806 blocks (5.00%) reserved for the super user
First data block=0
Maximum filesystem blocks=4294967296
152 block groups
32768 blocks per group, 32768 fragments per group
8192 inodes per group
Superblock backups stored on blocks:32768, 98304, 163840, 229376, 294912, 819200, 884736, 1605632, 2654208,4096000Writing inode tables: done
Creating journal (32768 blocks): done
Writing superblocks and filesystem accounting information: doneThis filesystem will be automatically checked every 22 mounts or
180 days, whichever comes first.  Use tune2fs -c or -i to override.
1.4.2 挂载boot
[root@centos6 ~]#mkdir /mnt/boot 		#子目录必须为boot
[root@centos6 ~]#mount /dev/sdb1 /mnt/boot/
1.4.3 安装grub
[root@centos6 ~]#grub-install --root-directory=/mnt /dev/sdb
例:
[root@CentOS6 ~]#mkdir /mnt/boot
[root@CentOS6 ~]#mount /dev/sdb1 /mnt/boot/
[root@CentOS6 ~]#grub-install --root-directory=/mnt /dev/sdb
Probing devices to guess BIOS drives. This may take a long time.
Installation finished. No error reported.
This is the contents of the device map /mnt/boot/grub/device.map.
Check if this is correct or not. If any of the lines is incorrect,
fix it and re-run the script `grub-install'.(fd0)   /dev/fd0
(hd0)   /dev/sda
(hd1)   /dev/sdb
[root@CentOS6 ~]#ls /mnt/boot
grub  lost+found
[root@CentOS6 ~]#ls /mnt/boot/grub
device.map     fat_stage1_5  iso9660_stage1_5  minix_stage1_5     stage1  ufs2_stage1_5    xfs_stage1_5
e2fs_stage1_5  ffs_stage1_5  jfs_stage1_5      reiserfs_stage1_5  stage2  vstafs_stage1_5
1.4.4 准备内核和initramfs文件
[root@CentOS6 ~]#cp /boot/vmlinuz-2.6.32-754.el6.x86_64 /mnt/boot/vmlinuz
[root@CentOS6 ~]#cp /boot/initramfs-2.6.32-754.el6.x86_64.img /mnt/boot/initramfs
1.4.5 手动建立grub.conf
[root@CentOS6 ~]#cat /mnt/boot/grub/grub.conf
default=0
timeout=5
title joyce linux
root (hd0,0)
kernel /vmlinuz root=/dev/sda2 selinux=0  init=/bin/bash
initrd /initramfs
[root@CentOS6 ~]#tree /mnt/boot
/mnt/boot
├── grub
│   ├── device.map
│   ├── e2fs_stage1_5
│   ├── fat_stage1_5
│   ├── ffs_stage1_5
│   ├── grub.conf
│   ├── iso9660_stage1_5
│   ├── jfs_stage1_5
│   ├── minix_stage1_5
│   ├── reiserfs_stage1_5
│   ├── stage1
│   ├── stage2
│   ├── ufs2_stage1_5
│   ├── vstafs_stage1_5
│   └── xfs_stage1_5
├── initramfs
├── lost+found
└── vmlinuz
1.4.6 准备根下面相关程序和库
mkdir /mnt/sysroot
mount /dev/sdb2 /mnt/sysroot
mkdir -pv /mnt/sysroot/{etc,lib,lib64,bin,sbin,tmp,var,usr,sys,proc,opt,home,root,boot,dev,mnt,media}
复制bash等命令和相关库文件,如: bash,ifconfig,insmod,ping,mount,ls,cat,df,lsblk,blkid,fdisk,tree,ip,ps等#查询网卡驱动并拷贝
[root@CentOS6 ~]#ethtool -i eth0
driver: e1000
version: 7.3.21-k8-NAPI
firmware-version:
bus-info: 0000:02:01.0
supports-stalistics: yes
supports-test: yes
supports-eeprom-access: yes
supports-register-dump: yes
supports-priv-flags: no
[root@CentOS6 ~]#modinfo -n e1000
/lib/modules/2.6.32-754.el6.x86_64/kernel/drivers/net/e1000/e1000.ko
[root@CentOS6 ~]#cp /lib/modules/2.6.32-754.el6.x86_64/kernel/drivers/net/e1000/e1000.ko /mnt/sysroot/lib/		#将网卡驱动放在/mnt/sysroot/lib下[root@centos6 ~]#chroot /mnt/sysroot
1.4.7 准备新的虚拟机
将当前C6机器关机,将刚创建的硬盘拷贝到test文件夹中
![[外链图片转存失败,源站可能有防盗链机制,建议将图片保存下来直接上传(img-yNjXPyrD-1692688111226)(C:\Users\HUIO\AppData\Roaming\Typora\typora-user-images\image-20230820201128691.png)]](https://img-blog.csdnimg.cn/932f065e1ec34ea9afc44e8776e23941.png)
创建一个新的Linux6虚拟机,将前一虚拟机sdb硬盘对应的vmdk文件增加进去,删除原有磁盘
![[外链图片转存失败,源站可能有防盗链机制,建议将图片保存下来直接上传(img-BZLgdncj-1692688111226)(C:\Users\HUIO\AppData\Roaming\Typora\typora-user-images\image-20230820201515816.png)]](https://img-blog.csdnimg.cn/033e4526e6b8460fbeea61da889d8c4e.png)
![[外链图片转存失败,源站可能有防盗链机制,建议将图片保存下来直接上传(img-bozx9Yha-1692688111227)(C:\Users\HUIO\AppData\Roaming\Typora\typora-user-images\image-20230820201618680.png)]](https://img-blog.csdnimg.cn/6f21279501a44e7686c7c828810bc6ec.png)
开机
![[外链图片转存失败,源站可能有防盗链机制,建议将图片保存下来直接上传(img-0GAmAOmD-1692688111227)(C:\Users\HUIO\AppData\Roaming\Typora\typora-user-images\image-20230820201712535.png)]](https://img-blog.csdnimg.cn/825c7ed67b144580bc37d4ea296bddeb.png)
1.5 启动过程的故障排错
1.5.1 实战案例
故障:删除 /sbin/init 无法启动
恢复过程
先进入grub菜单,在kernel参数后加 selinux=0 init=/bin/bash
mount -o remount,rw /
mount /dev/sr0 /mnt/
rpm2cpio /mnt/Packages/upstart.xxx.rpm cpio -idv ./sbin/init
mv ./sbin/init /sbin/
1.5.2 实战案例
故障:rm -rf /boot/* 和 /etc/fstab 进行恢复
恢复过程
1.用光盘进入 rescue mode,找到/ 所在分区并恢复/etc/fstab
进入救援模式,由于没有分区表,因此无法挂载操作系统的根
![[外链图片转存失败,源站可能有防盗链机制,建议将图片保存下来直接上传(img-qYr8fUCe-1692688111228)(C:\Users\HUIO\AppData\Roaming\Typora\typora-user-images\image-20230818164645440.png)]](https://img-blog.csdnimg.cn/637799b9772e426aa0c3c77c1cd22b4e.png)
fdisk -l
mkdir /mnt/rootdir
mount /dev/sdaN /mnt/rootdir
ls /mnt/rootdir
mount /dev/sda2 /mnt/rootdirvim /mnt/rootdir/etc/fstab
/dev/sda1 /boot ext4 defaults 0 0
/dev/sda2 /			ext4 defaults 0 0
/dev/sda3 /data ext4 defaults 0 0
/dev/sda5 swap 	swap defaults 0 0
reboot
2.rescue mode 恢复内核和initrd 文件
/dev/sda2 --> /mnt/sysimagechroot /mnt/sysimage
mount /dev/srO /mnt/
#方法1
rpm -ivh /mnt/Packages/kernel.xxxx.rpm --force#方法2
cp /mnt/isolinux/vmlinuz /boot/
mkinitrd /boot/initramfs.img `uname -r`
3.修复grub
grub-install /dev/sda
vim /boot/grub/grub.conf 方法2
[root@centos6 ~]#cat /boot/grub/grub.conf
default=0
timeout=5
title centos
kernel /vmlinuz root=/dev/sda2
initrd /initramfs.img
4.reboot
2 /proc 目录和内核参数管理
/proc目录: 内核把自己内部状态信息及统计信息,以及可配置参数通过proc伪文件系统加以输出帮助: man proc
内核参数:
- 只读:只用于输出信息
- 可写: 可接受用户指定“新值”来实现对内核某功能或特性的配置
/proc/sys 设置:
sysctl命令用于查看或设定此目录中诸多参数
sysctl -w path.to.parameter=VALUE例:
[root@CentOS6 ~]#cat /proc/sys/net/ipv4/ip_forward
0
[root@CentOS6 ~]#echo 1 >/proc/sys/net/ipv4/ip_forward
#等价于:
[root@CentOS6 ~]#sysctl -w net.ipv4.ip_forward=1
不过这是临时修改,无法持久保存
默认配置文件:/etc/sysct.conf (总文件)及以下文件
/run/sysctl.d/*.conf
/etc/sysctl.d/*.conf
/usr/local/lib/sysctl.d/* .conf
/usr/lib/sysctl.d/*.conf
lib/sysctl.d/* .conf
etc/sysctl.conf
最好是分类,单独放一个,或者放总文件里
范例:修改主机名
sysctl -w kernel.hostname=mail.joyce.com
echo命令通过重定向方式也可以修改大多数参数的值
echo "VALUE”> /proc/sys/path/to/parameter
范例:
echo “websrv” > /proc/sys/kernel/hostname
sysctl命令
-
临时设置某参数
sysctl -w parameter=VALUE -
通过读取配置文件设置参数
sysctl -p [/path/to/conf_filel -
查看所有生效参数
sysctl -a
常用的内核参数
net.ipv4.ip_forward
net.ipv4.icmp_echo_ignore_all	#设置1则其他主机无法ping通本主机
net.ipv4.ip_nonocal_bind		#允许应用程序可以监听本地不存在的IP
vm.drop_caches			#可以释放缓冲区
fs.file-max = 1020000	#最多可以打开的文件数,打开一个文件分配一个文件描述符
例:
[root@centos8 ~]#cat /proc/sys/net/ipv4/icmp_echo_ignore_all
0
[root@centos8 ~]#vim /etc/sysctl.d/test.conf
[root@centos8 ~]#cat /etc/sysctl.d/test.conf
net.ipv4.icmp_echo_ignore_all=1
[root@centos8 ~]#sysctl -p /etc/sysctl.d/test.conf
net.ipv4.icmp_echo_ignore_all =1
[root@centos8 ~]#cat /proc/sys/net/ipv4/icmp_echo_ignore_all
1
3 /sys 目录
/sys目录:
使用sysfs文件系统,为用户使用的伪文件系统,输出内核识别出的各硬件设备的相关属性信息,也有内核对硬件特性的设定信息,有些参数是可以修改的,用于调整硬件工作特性
udev通过此路径下输出的信息动态为各设备创建所需要设备文件,udev是运行用户空间程序专用工具: udevadmin,hotplug
udev为设备创建设备文件时,会读取其事先定义好的规则文件,一般在/etc/udev/rules.d及/usr/lib/udev/rules.d目录下
4 内核模块管理和编译
单内核体系设计、但充分借鉴了微内核设计体系的优点,为内核引入模块化机制
内核组成部分:、
- kernel: 内核核心,一般为bzlmage,通常在/boot目录下,名称为 vmlinuz-VERSION-RELEASE
- kernel object: 内核对象,一般放置于/lib/modules/VERSION-RELEASE/
- 辅助文件: ramdisk、initrd(C5及以前,模拟磁盘,进入后还要进入文件系统)、initramfs(C6及以后,模拟文件系统,直接接触文件)
4.1 内核版本
运行中的内核
uname命令
uname - print system informationuname [OPTION]..
选项:
-n: 显示节点名称
-r: 显示VERSION-RELEASE
-a:	显示所有信息
4.2 内核模块命令
lsmod命令
- 显示由核心已经装载(已被使用的)的内核模块
- 显示的内容来自于: /proc/modules文件
modinfo命令
功能:管理内核模块
配置文件: /etc/modprobe.conf,/etc/modprobe.d/*.conf
显示模块的详细描述信息
modinfo [ -k kernel ] [ modulename | filename... ]
常用选项:
-n:只显示模块文件路径-
-p:显示模块参数
-a:作者
-d:描述
装载或卸载内核模块
modprobe [ -C config-file ] [ modulename ] [ module parame-ters... ]
modprobe [ -r ] modulename...
depmod命令: 内核模块依赖关系文件及系统信息映射文件的生成工具
insmod命令: 指定模块文件,不能自动解决依赖模块
insmod [ filename ] [ module options...]
范例:
insmod modinfo -n exportfs
Insmod modinfo -n xfs
rmmod命令:卸载模块,类似于modprobe -r
rmmod [ modulename ]
范例:
rmmod xfs
rmmod exportfs
4.3 编译内核
编译安装内核准备:
- 准备好开发环境
- 获取目标主机上硬件设备的相关信息
- 获取目标主机系统功能的相关信息,例如:需要启用相应的文件系统
- 获取内核源代码包,www.kernel.org
4.3.1 编译准备
4.3.1.1.目标主机硬件设备相关信息
CPU:
cat /proc/cpuinfo
x86info -a
lscpu
lsblk 块设备
全部硬件设备信息: hal-device: Centos 6
4.3.1.2 开发环境相关包
安装相对应包:gcc make ncurses-devel flex bison openssl-devel elfutils-libelf-devel
4.3.1.3 内核编译安装实现
-
下载源码文件
-
准备文本配置文件/boot/config-`uname-r`
-
make menuconfig: 配置内核选项,相当于./configure
[ ] : N #未启用 [M] : M #存放在lib下的独立模块 [*] : Y #存放在核心里 -
make [-j #] 或者用以下两步实现
make -j # bzlmage #编译内核文件vmlinuz make -i # modules #编译lib/modules下的文件 -
安装模块: make modules_install
-
安装内核相关文件: make install
-
安装bzlmage为 /boot/vmlinuz-VERSION-RELEASE
-
生成initramfs文件
-
编辑grub的配置文件
-
4.3.1.4 编译安装内核实战案例
简述:
[root@CentOS8 ~]#yum -y install gcc make ncurses-devel flex bison openssl-devel elfutils-libelf-devel
[root@centos8 ~]#tar xf linux-5.4.13.tar.xz -C /usr/src
[root@centos8 ~]#cd /usr/src
[root@centos8 ~]#In -sv Tinux-5.4.13 Tinux
[rootacentos8 ~]#cd /usr/src/Tinux
[root@centos8 ~]#cp /boot/config-$(uname -r) ./.config
[root@centos8 ~]#vim .config
# CONFIG MODULE SIG is not set
CONFIG_SYSTEM_TRUSTED KEYS="
# CONFIG DEBUG INFO is not set
[rootacentos8 ~]#make hep
[rootacentos8 ~]#make menuconfig
[rootacentos8 ~]#make -j 2或者 make -j 2 bzImage ; make -j 2 modules
[rootacentos8 ~]#make modules install
[root@centos8 ~]#make install
[root@centos8 ~]#reboot
例:为C8安装最新内核6.4.11
[root@CentOS8 ~]#yum -y install gcc make ncurses-devel flex bison openssl-devel elfutils-libelf-devel
Last metadata expiration check: 1:31:08 ago on Sun 20 Aug 2023 10:37:38 PM CST.
Package gcc-8.5.0-4.el8_5.x86_64 is already installed.
Package make-1:4.2.1-10.el8.x86_64 is already installed.
Package ncurses-devel-6.1-9.20180224.el8.x86_64 is already installed.
Package openssl-devel-1:1.1.1k-5.el8_5.x86_64 is already installed.
Dependencies resolved.
===================================================================================================Package                         Architecture     Version                Repository           Size
===================================================================================================
Installing:bison                           x86_64           3.0.4-10.el8           AppStream           688 kelfutils-libelf-devel           x86_64           0.185-1.el8            BaseOS               59 kflex                            x86_64           2.6.1-9.el8            AppStream           320 kTransaction Summary
===================================================================================================
Install  3 PackagesTotal download size: 1.0 M
Installed size: 3.0 M
Downloading Packages:
(1/3): elfutils-libelf-devel-0.185-1.el8.x86_64.rpm                131 kB/s |  59 kB     00:00
(2/3): flex-2.6.1-9.el8.x86_64.rpm                                 339 kB/s | 320 kB     00:00
(3/3): bison-3.0.4-10.el8.x86_64.rpm                               569 kB/s | 688 kB     00:01
---------------------------------------------------------------------------------------------------
Total                                                              878 kB/s | 1.0 MB     00:01
Running transaction check
Transaction check succeeded.
Running transaction test
Transaction test succeeded.
Running transactionPreparing        :                                                                           1/1Installing       : elfutils-libelf-devel-0.185-1.el8.x86_64                                  1/3Installing       : flex-2.6.1-9.el8.x86_64                                                   2/3Running scriptlet: flex-2.6.1-9.el8.x86_64                                                   2/3Installing       : bison-3.0.4-10.el8.x86_64                                                 3/3Running scriptlet: bison-3.0.4-10.el8.x86_64                                                 3/3Verifying        : bison-3.0.4-10.el8.x86_64                                                 1/3Verifying        : flex-2.6.1-9.el8.x86_64                                                   2/3Verifying        : elfutils-libelf-devel-0.185-1.el8.x86_64                                  3/3Installed:bison-3.0.4-10.el8.x86_64   elfutils-libelf-devel-0.185-1.el8.x86_64   flex-2.6.1-9.el8.x86_64Complete![root@CentOS8 ~]#tar xvf linux-6.4.11.tar.xz -C /usr/local/src
[root@CentOS8 ~]#cd /usr/local/src
[root@CentOS8 src]#ls
httpd-2.4.57  httpd-2.4.57.tar.bz2  linux-6.4.11
[root@CentOS8 src]#du -sh .	#查看目录总大小
1.5G
[root@CentOS8 src]#find -name "*.c" | wc -l	#.c后缀文件个数
32793
[root@CentOS8 src]#find -name "*.c" | xargs cat|wc -l		#所有.c文件总行数
23223391
[root@CentOS8 src]#cd linux-6.4.11/
[root@CentOS8 linux-6.4.11]#ls
arch     CREDITS        fs        ipc      lib          mm      samples   tools
block    crypto         include   Kbuild   LICENSES     net     scripts   usr
certs    Documentation  init      Kconfig  MAINTAINERS  README  security  virt
COPYING  drivers        io_uring  kernel   Makefile     rust    sound
[root@CentOS8 linux-6.4.11]#cp /boot/config-4.18.0-348.el8.x86_64 .config
[root@CentOS8 linux-6.4.11]#ls -a
.              .config        .get_maintainer.ignore  Kbuild       Makefile       scripts
..             COPYING        .gitattributes          Kconfig      mm             security
arch           CREDITS        .gitignore              kernel       net            sound
block          crypto         include                 lib          README         tools
certs          Documentation  init                    LICENSES     rust           usr
.clang-format  drivers        io_uring                .mailmap     .rustfmt.toml  virt
.cocciconfig   fs             ipc                     MAINTAINERS  samples[root@CentOS8 linux-6.4.11]#vim .config
# CONFIG_MODULE_SIG is not set		#将其注释
CONFIG_SYSTEM_TRUSTED KEYS=""			#删除中间内容
# CONFIG DEBUG INFO is not set[root@CentOS8 linux-6.4.11]#make hel p
[root@CentOS8 linux-6.4.11]#make menuconfigHOSTCC  scripts/basic/fixdepHOSTCC  scripts/kconfig/mconf.oHOSTCC  scripts/kconfig/lxdialog/checklist.oHOSTCC  scripts/kconfig/lxdialog/inputbox.oHOSTCC  scripts/kconfig/lxdialog/menubox.oHOSTCC  scripts/kconfig/lxdialog/textbox.oHOSTCC  scripts/kconfig/lxdialog/util.oHOSTCC  scripts/kconfig/lxdialog/yesno.oHOSTCC  scripts/kconfig/confdata.oHOSTCC  scripts/kconfig/expr.oLEX     scripts/kconfig/lexer.lex.cYACC    scripts/kconfig/parser.tab.[ch]HOSTCC  scripts/kconfig/lexer.lex.oHOSTCC  scripts/kconfig/menu.oHOSTCC  scripts/kconfig/parser.tab.oHOSTCC  scripts/kconfig/preprocess.oHOSTCC  scripts/kconfig/symbol.oHOSTCC  scripts/kconfig/util.oHOSTLD  scripts/kconfig/mconf
.config:569:warning: symbol value 'm' invalid for I8K
.config:3027:warning: symbol value 'm' invalid for ISDN_CAPI
.config:6142:warning: symbol value 'm' invalid for VFIO_VIRQFD
configuration written to .config*** End of the configuration.
*** Execute 'make' to start the build or try 'make help'.[root@CentOS8 linux-6.4.11]#make -j 2或者 make -j 8 bzImage ; make -j 8 modules
[root@CentOS8 linux-6.4.11]#time make -j 16 ;date		#计时
real    71m7.093s
user    315m20.782s
sys     57m0.485s
Mon Aug 21 01:45:32 CST 2023[rootacentos8 ~]#make modules_install
[root@CentOS8 linux-6.4.11]# ls /lib/modules/
4.18.0-348.el8.x86_64  6.4.11joyce-linux-6-4-11
[root@CentOS8 linux-6.4.11]#du -sh /lib/modules/6.4.11joyce-linux-6-4-11/
4.7G    /lib/modules/6.4.11joyce-linux-6-4-11/[root@centos8 ~]#make install
[root@centos8 ~]#reboot
make menuconfig:
![[外链图片转存失败,源站可能有防盗链机制,建议将图片保存下来直接上传(img-n01g4qBu-1692688111229)(C:\Users\HUIO\AppData\Roaming\Typora\typora-user-images\image-20230821002421885.png)]](https://img-blog.csdnimg.cn/e9907894e3714123b77ea56a52c8f3cb.png)
![[外链图片转存失败,源站可能有防盗链机制,建议将图片保存下来直接上传(img-XfWUghek-1692688111229)(C:\Users\HUIO\AppData\Roaming\Typora\typora-user-images\image-20230821002538383.png)]](https://img-blog.csdnimg.cn/21bfd361f20d481b8e7862f97d14a6ba.png)
![[外链图片转存失败,源站可能有防盗链机制,建议将图片保存下来直接上传(img-gumYllcx-1692688111230)(C:\Users\HUIO\AppData\Roaming\Typora\typora-user-images\image-20230821002721884.png)]](https://img-blog.csdnimg.cn/05382ffa11934a58a1ebcc766600926f.png)
修改完后查看.config文件,NTFS已经被修改
![[外链图片转存失败,源站可能有防盗链机制,建议将图片保存下来直接上传(img-tTrJ2Y9f-1692688111232)(C:\Users\HUIO\AppData\Roaming\Typora\typora-user-images\image-20230821003030496.png)]](https://img-blog.csdnimg.cn/25aa981784f3483083cd7ab17ecfe4b5.png)
4.3.1.4 内核编译说明
1.配置内核选项:
支持“更新”模式进行配置: make help
- (a) make config: 基于命令行以遍历的方式配置内核中可配置的每个选项
- (b) make menuconfig: 基于curses的文本窗口界面
- © make gconfig: 基于GTK(GNOME) 环境窗口界面
- (d) make xconfig: 基于QT(KDE)环境的窗口界面
支持“全新配置”模式进行配置
- (a)make defconfig: 基于内核为目标平台提供的“默认”配置进行配置
- (b) make allyesconfig: 所有选项均回答为"yes"
- © make allnoconfig: 所有选项均回答为"no"
2.编译内核
-
全编译:
make [-j #] -
编译内核的一部分功能:
(a)只编译某子目录中的相关代码
cd /usr/src/linux; make dir/(b) 只编译一个特定的模块
cd /usr/src/linux; make dir/file.ko -
范例: 只为e1000编译驱动:
make drivers/net/ethernet/intel/e1000/e1000.ko
3 交叉编译内核
编译的目标平台与当前平台不相同
make ARCH=arch name
要获取特定目标平台的使用帮助
make ARCH=arch_name help
示例:
make ARCH=arm help
4重新编译需要事先清理操作
make clean: 清理大多数编译生成的文件,但会保留.config文件等
make mrproper: 清理所有编译生成的文件、config及某些备份文件
make distclean: 包含make mrproper,并清理patches以及编辑器备份文件
4.3.1.5 卸载内核
- 删除/usr/src/linux/目录下不需要的内核源码
- 删除/lib/modules/目录下不需要的内核库文件
- 删除/boot目录下启动的内核和内核映像文件
- 更改grub的配置文件,删除不需要的内核启动列表 grub2-mkconfig -o /boot/grub2/grub.cfg
- CentOS 8 还需要删除 /boot/loader/entries/5b85fc7444b240a992c42ce2a9f65db5-新内核版本.conf
5 Busybox
5.1 Busybox介绍

Busybox 最初是由 Bruce Perens 在 1996 年为 Debian GNU/Linux 安装盘编写的。其目标是在一张软盘(存储空间只有1MB多)上创建一个GNU/Linux 系统,可以用作安装盘和急救盘
Busybox 是一个开源项目,遵循GPL 2协议。Busybox将众多的UNIX命令集合进一个很小的可执行程序中,可以用来替代GNU fileutils、shellutils 等工具集。Busybox中各种命令与相应的GNU工具相比所能提供的选项比较少,但是也足够一般的应用了。Busybox主要用于嵌入式系统
Busybox 是一个集成了三百多个最常用Linux命令和工具的软件。BusyBox 包含了一些简单的工具,例如Is、cat和echo等等,还包含了一些更大、更复杂的工具,例grep、find、mount以及telnet。有些人将BusyBox 称为 Linux 工具里的瑞士军刀。简单的说BusyBox就好像是个大工具箱,它集成压缩了Linux 的许多工具和命令,也包含了 Android 系统的自带的shell
定制小型的Linux操作系统: inux内核+busybox
官方网站: https://busybox.net/
5.2 Busybox使用
busybox 的编译过程与Linux内核的编译类似
busybox的使用有三种方式
- busybox后直接跟命令,如 busybox ls
- 直接将busybox重命名,如 p busybox tar
- 创建符号链接,如 In -s busybox rm
busybox的安装
以上方法中,第三种方法最方便,但为busybox中每个命令都创建一个软链接,相当费事,busybox提供自动方法: busybox编译成功后,执行make install,则会产生一个 install目录,其中包含了busybox及每个命令的软链接
5.3 busybox编译安装
[root@centos7 ~]#yum -y install gcc gcc-c++ glibc glibc-devel make pcre pcre-devel openssl openssl-devel systemd-devel zlib-devel glibc-static ncurses-devel[root@centos7 ~]#wget https://busybox.net/downloads/busybox-1.36.1.tar.bz2
[root@centos7 ~]#tar xvf busybox-1.36.1.tar.bz2
[root@centos7 ~]#cd busybox-1.36.1/
[root@centos7 ~]#make menuconfig 按下面选择,把busybox编译也静态二进制、不用共享库
#Settings -->Build options -->[*] Build BusyBox as a static binary (no sharedTibs)
[root@centos7 ~]#make && make install#如果出错,执行make clean后,重新执行上面命令
[root@centos7 ~]#mkdir /mnt/sysroot/
[root@centos7 ~]#cp -a _install/* /mnt/sysroot/
6 systemd
6.1 systemd 特性
Systemd: 从 C 7 版本之后开始用 systemd 实现init进程,系统启动和服务器守护进程管理器,负责在系统启动或运行时,激活系统资源,服务器进程和其它进程
Systemd新特性
- 系统引导时实现服务并行启动
- 按需启动守护进程
- 自动化的服务依赖关系管理
- 完全代替xinetd
- 同时采用socket式与D-Bus总线式激活服务
- socket与服务程序分离
- 向后兼容sysv init脚本
- 使用systemctl 命令管理,systemctl命令固定不变,不可扩展,非由systemd启动的服务
- systemctl无法与之通信和控制
- 系统状态快照
systemd核心概念: unit
unit表示不同类型的systed对象,通过配置文件进行标识和配置;文件中主要包含了系统服务、监听socket、保存的系统快照以及其它与init相关的信息
Unit类型
#查看unit类型
systemctl -t help[root@CentOS7 yum.repos.d]#systemctl -t help
Available unit types:
service
socket
busname
target
snapshot
device
mount
automount
swap
timer
path
slice
scope
- service unit: 文件扩展名为.service,用于定义系统服务
- Target unit: 文件扩展名为.target,用于模拟实现运行级别
- Device unit: .device,用于定义内核识别的设备
- Mount unit:.mount, 定义文件系统挂载点
- Socket unit:.socket, 定义进程间通信用的socket文件,也可在系统启动时,延迟启动服务,实现按需启动
- Snapshot unit: .snapshot,管理系统快照
- Swap unit: .swap,用于标识swap设备
- Automount unit: .automount,文件系统的自动挂载点
- Path unit:.path,用于定义文件系统中的一个文件或目录使用,常用于当文件系统变化时,延时激活服务,如: spool 目录
unit的配置文件
/usr/lib/systemd/system;每个服务最主要的启动脚本设置,类似于之前的/etc/init.d/
/lib/systemd/system; :Ubuntu的对应目录/run/systemd/system; 系统执行过程中所产生的服务脚本,比上面目录优先运行
/etc/systemd/system; 管理员建立的执行脚本,类似于/etc/rcN.d/sxx的功能,比上面目录优先运行
6.2 systemctl管理系统服务service unit
命令
systemctl COMMAND name.service
例:
#启动:相当于service name start
systemctl start name.service#停止: 相当于service name stop
systemctl stop name.service#重启:相当于service name restart
systemctl restart name.service#查看状态: 相当于service name status
systemctl status name.service#禁止自动和手动启动:
systemctl mask name.service#取消禁止
systemctl unmask name.service#查看某服务当前激活与否的状态:
systemctl is-active name.service#查看所有已经激活的服务:
systemctl list-units --type-t service#查看所有服务:
systemctl list-units --type service --all|-a#设定某服务开机自启,相当于chkconfig name on
systemctl enable name.service#设定某服务开机禁止启动: 相当于chkconfig name off
systemctl disable name.service#立即启动某服务,并设置为开机自启
systemctl enable --now name.service#立即关闭某服务,并设置为开机不启动
systemctl disable --now name.service#查看所有服务的开机自启状态,相当于chkconfig --list
systemctl list-unit-files --type service#用来列出该服务在哪些运行级别下启用和禁用: chkconfig -list name
Is /etc/systemd/system/*.wants/name.service#查看服务是否开机自启:
systemctl is-enabled name.service#列出失败的服务
systemctl --failed --type=service#查看服务的依赖关系:
systemctl list-dependencies name.service#杀掉进程:
systemctl kill unitname
服务状态
#显示状态
systemctl list-unit-files --type service --all
- loaded Unit配置文件已处理
- active(running) 一次或多次持续处理的运行
- active(exited) 成功完成一次性的配置
- active(waiting) 运行中,等待一个事件
- inactive 不运行
- enabled 开机启动
- disabled 开机不启动
- static 开机不启动,但可被另一个启用的服务激活
- indirect 重定向到别处
例:
#显示所有单元状态
systemctl 或 systemctl list-units#只显示服务单元的状态
systemctl --type=service#显示sshd服务单元
systemctl -l status sshd.service#验证sshd服务当前是否活动
systemctl is-active sshd#启动,停止和重启sshd服务
systemct] start sshd.service
systemctl stop sshd.service
systemctT restart sshd.service#重新加载配置
systemct reload sshd.service#列出活动状态的所有服务单元
systemctl list-units --type=service#列出所有服务单元
systemctl list-units --type=service --all#查看服务单元的启用和禁用状态
systemctl list-unit-files --type=service#列出依赖的单元
systemctl list-dependencies sshd#验证sshd服务是否开机启动
systemctl is-enabled sshd#禁用network,使之不能自动启动,但手动可以
systemctl disable network#启用network
systemct] enabe network#禁用network,使之不能手动或自动启动
systemctl mask network#启用network
systemct] unmask network
6.3 service unit文件格式
/etc/systemd/system: 系统管理员和用户使用
/usr/lib/systemd/system: 发行版打包者使用
帮助参考:
systemd.directives (7),systemd.unit(5),systemd.service(5), systemd.socket(5),systemd.target(5),systemd.exec(5)
unit 格式说明:
- 以“#”开头的行后面的内容会被认为是注释
- 相关布尔值,1、yes、on、true 都是开启,0、no、off、false 都是关闭
- 时间单位默认是秒,所以要用毫秒 (ms)分钟 (m) 等须显式说明
service unit file文件通常由三部分组成**
[Unit]: 定义与Unit类型无关的通用选项;用于提供unit的描述信息、unit行为及依赖关系等
[Service]: 与特定类型相关的专用选项; 此处为Service类型
[Install]: 定义由“systemctl enable”以及”systemctl disable”命令在实现服务启用或禁用时用到的一些选项
Unit段的常用选项:
Description: 描述信息
After: 定义unit的启动次序,表示当前unit应该晚于哪些unit启动,其功能与Before相反
Requires: 依赖到的其它units,强依赖,被依赖的units无法激活时,当前unit也无法激活
Wants:依赖到的其它units,弱依赖
Conflicts: 定义units间的冲突关系
Service段的常用选项:
Type:定义影响ExecStart及相关参数的功能的unit进程启动类型simple: 默认值,这个daemon主要由ExecStart接的指令串来启动,启动后常驻于内存中forking: 由ExecStart启动的程序透过spawns延伸出其他子程序来作为此daemon的主要服务。原生父程序在启动结束后就会终止oneshot: 与simple类似,不过这个程序在工作完毕后就结束了,不会常驻在内存中dbus: 与simple类似,但这个daemon必须要在取得一个D-Bus的名称后,才会继续运作.因此通常也要同时设定BusNname= 才行onotify: 在启动完成后会发送一个通知消息。还需要配合 NotifyAccess 来让Systemd 接收消息idle: 与simple类似,要执行这个daemon必须要所有的工作都顺利执行完毕后才会执行。这类的daemon通常是开机到最后才执行即可的服务EnvironmentFile:环境配置文件
ExecStart:指明启动unit要运行命令或脚本的绝对路径
ExecStartPre:ExecStant前运行
ExecStartPost:ExecStart后运行
ExecStop:指明停止unit要运行的命令或脚本
Restart: 当设定Restart=1 时,则当次daemon服务意外终止后,会再次自动启动此服务
PrivateTmp: 设定为yes时,会在生成/tmp/systemd-private-UUID-NAME.service-XXXXX/tmp/目录
Install段的常用选项:
Alias: 别名,可使用systemctl command Alias.service
RequiredBy: 被哪些units所依赖,强依赖
WantedBy:被哪些units所依赖,弱依赖
Also: 安装本服务的时候还要安装别的相关服务
注意:对于新创建的unit文件,或者修改了的unit文件,要通知systemd重载此配置文件,而后可以选择重启
systemctl daemon-reToad
范例: 服务Unit文件——http
[unit]
Description=The Nginx HTTP Server daemon # 描述信息
After=network.target remote-fs.target nss-lookup.target # 指定启动nginx之前需要其他的其他服务,如network.target等[service]
# Type为服务类型,仅启动一个主进程的服务为simple,需要启动若干子进程的服务为forking
Type=forking# 设置执行systemctl start nginx后需要启动的具体命令
Execstart=/usr/ocal/nginx/sbin/nginx# 设置执行systemctl reload nginx后需要执行的具体命令
ExecReToad=/usr/local/nginx/sbin/nginx -s reload# 设置执行systemctl stop nginx后需要执行的具体命令
Execstop=/bin/kill -s OUIT ${MAINPID}[Install]
# 设置在什么模式下被安装,设置开机启动的时候需要
wantedBy=multi-user.target
范例: 服务Unit文件示例——tomcat
vim /usr/lib/systemd/system/tomcat.service
[unit]
Description=java tomcat project
After=sysTog.target network.target[service]
Type=forking
EnvironmentFile=/usr/local/tomcat/conf/tomcat.conf
Execstart=/usr/local/tomcat/bin/startup.sh
Execstop=/usr/local/tomcat/bin/shutdown.sh
PrivateTmp=true
User=tomcat[Install]
wantedBy=multi-user.target
**范例: 服务Unit文件示例——**bak
vim /etc/systemd/system/bak.service
[unit]
Description=backup /etc
Requires=atd.service[service]
Type=simple
Execstart=/bin/bash -c "echo /data/bak.sh | at now"[Install]
WantedBy=multi-user.target
systemctl daemon-reload
systemctl start bak
范例: Ubutun实现开机自动运行程序
[root@ubuntu1804 ~]#vim /etc/rc.local
[root@ubuntu1804 ~]#cat /etc/rc.local
#!/bin/bash
echo -e ' E[31;1mstarting test service E[Om
sleep 10
[root@ubuntu1804 ~]#chmod +x /etc/rc.local
6.4 运行级别
target units: 相当于CentOS 6之前的runlevel,unit配置文件: target
ls /usr/lib/systemd/system/*.target
systemctl list-unit-files --type target --a77
和运行级别对应关系
0 ==> runlevel0.target,poweroff.target
1 ==> runlevel1.target,rescue.target
2 ==> runlevel2.target,multi-user.target
3 ==> runlevel3.target,multi-user.target
4 ==> runlevel4.target,multi-user.target
5 ==> runlevel5.target,graphical.target
6 ==> runlevel6.target,reboot.target
查看依赖性:
systemct1 1ist-dependencies graphical.target
级别切换: 相当于 init N
systemct1 isolate name.target
进入默认target
systemct7 defau7t
范例:
#切换至字符模式
systemct] isolate multi-user.target
注意:只有/lib/systemd/system/*.target文件中Allowlsolate=yes 才能切换(修改文件需执行systemd daemon-reload才能生效)
获取默认运行级别:相当于查看 /etc/inittab
systemct1 get-defaut
修改默认级别: 相当于修改 /etc/inittab
systemct1 set-default name.target
范例:
[root@centos8 ~]#systemctl set-default multi-user.target
[root@centos8 ~]#ls -l /etc/systemd/system/default.target
lrwxrwxrwx. 1 root root 37 NoV 7 19:32 /etc/systemd/system/default.target	-> /1ib/systemd/system/multi-user.target
切换至紧急救援模式
systemct1 rescue
切换至emergency模式
systemctl emergency
说明: rescue.target 比emergency 支持更多的功能,例如日志等
传统命令init,poweroff,halt,reboot都成为systemctl的软链接
#关机
systemct1 halt、systemct1 poweroff#重启:
systemctl reboot#挂起:
systemct1 suspend#休眠:
systemct7
hibernate
#休眠并挂起:
systemct1 hybrid-sTeep
范例: 禁用ctrl+alt+delete 重启快捷键
[root@centos8 ~]#ls -l /1ib/systemd/system/ctrl-alt-del.target
lrwxrwxrwx. 1 root root 13 May 23 2019 /1ib/systemd/system/ctrl-alt-del.target -> reboot.target
[root@centos8 ~]#systemct1 mask ctrl-alt-de1.target
Created symlink /etc/systemd/system/ctr]-alt-del.target - /dev/nul1
[root@centos8 ~]#init q
[root@centos8 ~]#systemctl daemon-reload
6.5 Centos 7之后版本引导顺序
-
UEFi或BIOS初始化,运行POST开机自检
-
选择启动设备
-
引导装载程序,centos7是grub2,加载装载程序的配置文件
/etc/grub.d/
/etc/default/grub
/boot/grub2/grub.cfg
-
加载initramfs驱动模块
-
加载内核选项
-
内核初始化,centos7使用systemd代替init
-
执行initrd.target所有单元,包括挂载/etc/fstab
-
从initramfs根文件系统切换到磁盘根目录
-
systemd执行默认target配置,配置文件/etc/systemd/system/default.target
-
systemd执行sysinit.target初始化系统及basic.target准备操作系统
-
systemd启动multi-user.target下的本机与服务器服务
-
systemd执行multi-user.target下的/etc/rc.d/rc.local
-
Systemd执行multi-user.target下的getty.target及登录服务
-
systemd执行graphical需要的服务
通过systemd-analyze 工具可以了解启动的详细过程
[root@CentOS8 ~]#systemd-analyze blame40.827s dnf-makecache.service6.374s plymouth-quit-wait.service5.407s cockpit-motd.service3.263s unbound-anchor.service2.570s mysqld.service1.543s tuned.service1.443s postfix.service1.373s systemd-udev-settle.service1.329s vdo.service1.038s sssd.service796ms polkit.service777ms ModemManager.service679ms initrd-switch-root.service674ms lvm2-monitor.service553ms NetworkManager-wait-online.service516ms avahi-daemon.service429ms NetworkManager.service426ms smartd.service425ms dracut-initqueue.service258ms autofs.service202ms cups.service180ms packagekit.service175ms accounts-daemon.service171ms udisks2.service168ms systemd-udev-trigger.service163ms bluetooth.service159ms systemd-logind.service143ms systemd-tmpfiles-clean.service133ms systemd-udevd.service125ms user@0.service116ms sysroot.mount100ms sshd.service100ms rsyslog.service83ms initrd-parse-etc.service82ms gdm.service74ms systemd-tmpfiles-setup-dev.service69ms systemd-vconsole-setup.service68ms cockpit.service68ms sysstat-summary.service68ms systemd-modules-load.service61ms auditd.service59ms systemd-journald.service58ms nis-domainname.service57ms kmod-static-nodes.service56ms sys-kernel-debug.mount56ms boot.mount53ms dev-disk-by\x2duuid-80ee59c8\x2db184\x2d4f49\x2d9039\x2d5150257143b8.swap53ms systemd-remount-fs.service48ms plymouth-switch-root.service47ms systemd-fsck@dev-disk-by\x2duuid-54ead45a\x2d7577\x2d4b54\x2d9de2\x2d501aef04207a>42ms dracut-pre-pivot.service41ms dracut-cmdline.service41ms data.mount40ms dev-hugepages.mount37ms iscsi-shutdown.service36ms dev-mqueue.mount33ms systemd-user-sessions.service33ms systemd-journal-flush.service33ms systemd-tmpfiles-setup.service31ms rtkit-daemon.service40.827s dnf-makecache.service6.374s plymouth-quit-wait.service5.407s cockpit-motd.service3.263s unbound-anchor.service2.570s mysqld.service1.543s tuned.service1.443s postfix.service1.373s systemd-udev-settle.service1.329s vdo.service1.038s sssd.service796ms polkit.service777ms ModemManager.service679ms initrd-switch-root.service674ms lvm2-monitor.service553ms NetworkManager-wait-online.service516ms avahi-daemon.service429ms NetworkManager.service426ms smartd.service425ms dracut-initqueue.service258ms autofs.service202ms cups.service180ms packagekit.service175ms accounts-daemon.service171ms udisks2.service168ms systemd-udev-trigger.service163ms bluetooth.service159ms systemd-logind.service143ms systemd-tmpfiles-clean.service133ms systemd-udevd.service125ms user@0.service116ms sysroot.mount100ms sshd.service100ms rsyslog.service83ms initrd-parse-etc.service82ms gdm.service74ms systemd-tmpfiles-setup-dev.service69ms systemd-vconsole-setup.service68ms cockpit.service68ms sysstat-summary.service68ms systemd-modules-load.service61ms auditd.service59ms systemd-journald.service58ms nis-domainname.service57ms kmod-static-nodes.service56ms sys-kernel-debug.mount56ms boot.mount53ms dev-disk-by\x2duuid-80ee59c8\x2db184\x2d4f49\x2d9039\x2d5150257143b8.swap53ms systemd-remount-fs.service48ms plymouth-switch-root.service47ms systemd-fsck@dev-disk-by\x2duuid-54ead45a\x2d7577\x2d4b54\x2d9de2\x2d501aef04207a>42ms dracut-pre-pivot.service41ms dracut-cmdline.service41ms data.mount40ms dev-hugepages.mount37ms iscsi-shutdown.service36ms dev-mqueue.mount33ms systemd-user-sessions.service33ms systemd-journal-flush.service33ms systemd-tmpfiles-setup.service31ms rtkit-daemon.service30ms sysstat.service30ms systemd-random-seed.service28ms systemd-sysctl.service22ms import-state.service20ms dracut-pre-udev.service19ms plymouth-read-write.service18ms initrd-cleanup.service17ms plymouth-start.service17ms cockpit.socket15ms plymouth-quit.service14ms proc-sys-fs-binfmt_misc.mount14ms cockpit-wsinstance-https-factory.socket14ms systemd-fsck-root.service13ms systemd-rfkill.service12ms sys-fs-fuse-connections.mount11ms cockpit-wsinstance-http.socket9ms systemd-update-utmp.service9ms user-runtime-dir@0.service7ms systemd-update-utmp-runlevel.service6ms dracut-shutdown.service5ms initrd-udevadm-cleanup-db.service5ms sysstat-collect.service2ms sys-kernel-config.mount1ms cockpit-wsinstance-http-redirect.socket
lines 61-84/84 (END)30ms sysstat.service30ms systemd-random-seed.service28ms systemd-sysctl.service22ms import-state.service20ms dracut-pre-udev.service19ms plymouth-read-write.service18ms initrd-cleanup.service17ms plymouth-start.service17ms cockpit.socket15ms plymouth-quit.service14ms proc-sys-fs-binfmt_misc.mount14ms cockpit-wsinstance-https-facto>14ms systemd-fsck-root.service13ms systemd-rfkill.service
lines 61-74/84 87%30ms sysstat.service30ms systemd-random-seed.service28ms systemd-sysctl.service22ms import-state.service20ms dracut-pre-udev.service19ms plymouth-read-write.service18ms initrd-cleanup.service17ms plymouth-start.service17ms cockpit.socket15ms plymouth-quit.service14ms proc-sys-fs-binfmt_misc.mount14ms cockpit-wsinstance-https-factory.socket14ms systemd-fsck-root.service13ms systemd-rfkill.service12ms sys-fs-fuse-connections.mount11ms cockpit-wsinstance-http.socket9ms systemd-update-utmp.service9ms user-runtime-dir@0.service7ms systemd-update-utmp-runlevel.service6ms dracut-shutdown.service5ms initrd-udevadm-cleanup-db.service5ms sysstat-collect.service2ms sys-kernel-config.mount1ms cockpit-wsinstance-http-redirect.socket
lines 61-84/84 (END)#或xml文件
[root@CentOS8 ~]#systemd-analyze plot > boot.xml
然后传到win下,用浏览器打开
[外链图片转存失败,源站可能有防盗链机制,建议将图片保存下来直接上传(img-xvJxmwXs-1692688111234)(C:\Users\HUIO\AppData\Roaming\Typora\typora-user-images\image-20230822120113748.png)]
6.6 设置内核参数
设置内核参数,只影响当次启动
启动时,到启动菜单,按e键,找到在linux 开头的行后添加systemd.unit=desired.target
例如:
systemd.unit=emergency.target 或 systemd.unit=rescue.target
6.7 破解 CentOS 7和8的 root 密码
方法一
启动时任意键暂停启动
按e键进入编辑模式
将光标移动linux 开始的行(C7是Linux16那行	),添加内核参数rd.break
按ctrl-x启动
mount -o remount,rw /sysroot
chroot /sysroot
passwd root#如果SELinux是启用的,才需要执行下面操作,如查没有启动,不需要执行
touch /.autorelabelexit
reboot
方式二
启动时任意键暂停启动
按e键进入编辑模式
将光标移动linux 开始的行,改为rw init=/sysroot/bin/sh
按ctrl-x启动
chroot /sysroot
passwd root#如果SELinux是启用的,才需要执行下面操作,如查没有启动,不需要执行
touch /.autorelabelexit
reboot
6.8 实现GRUB2安全
#添加grub密码
[root@CentOS8 ~]#grub2-setpassword
Enter password:
Confirm password:
#查看文件
[root@CentOS8 ~]#ll /boot/grub2/
total 340
-rw-r--r--. 1 root root     64 May 30 23:36 device.map
drwxr-xr-x. 2 root root   4096 May 30 23:36 fonts
-rw-r--r--. 1 root root   6590 Jul 25 15:05 grub.cfg
-rw-------  1 root root   1024 Aug 16 13:51 grubenv
drwxr-xr-x. 2 root root  12288 May 30 23:36 i386-pc
-rw-r--r--  1 root root 309444 Aug 18 21:48 logo.xpm
-rw-------  1 root root    298 Aug 22 12:21 user.cfg
[root@CentOS8 ~]#cat /boot/grub2/user.cfg
GRUB2_PASSWORD=grub.pbkdf2.sha512.10000.0DCB0C5B0F0A9B3021C99E920A0731164C713BCA004314B049811590E32A84348686B899E6D161D11D6C663C10A0C33100BE582B7BA5CF39C5919E845D9AEA6B.4AF8E233565BF8508115991D41FCCB2B3387E35807D5BE510744A86AD64F7C0CB79CE1166AFAB1186E957D10060DFAD1CA6B57C067815CE744175070E5FD501D
#清空grub密码
[root@centos8 ~]#at /dev/null > /boot/grub2/user.cfg
6.9 修复GRUB2
GRUB2: Centos 7,8及ubuntu1804都使用
引导提示时可以使用命令行界面,可从文件系统引导
主要配置文件: /boot/grub2/grub.cfg修复配置文件: grub2-mkconfig > /boot/grub2/grub.cfg
修复grub
grub2-install /dev/sda	#BIOS环境
grub2-insta77				#UEFI环境
调整默认启动内核
#以下命令是修改 /boot/grub2/grubenv 实现
grub2-set-default 0			#适合C7,因为C8配置文件中不再存储内核对应的数字,不知道0、1对应的是哪个内核或者vim /etc/default/grub
GRUB_DEFAULT=0[root@CentOS8 ~]#cat /boot/grub2/grubenv		#默认启动内核
# GRUB Environment Block
saved_entry=34f09f8df29847998143d560b2af24fb-4.18.0-348.el8.x86_64	#修改为需要的内核即可,适合C8
kernelopts=root=UUID=f2c173be-7848-43e9-9d0b-da0f1841f93f ro resume=UUID=80ee59c8-b184-4f49-9039-5150257143b8 rhgb quiet net.ifnames=0
boot_success=1
boot_indeterminate=0
########################################################################################################################################################################################################################################################################################################################################################################################################################################################################################################################################################################################################################################################################################################################################################################################[root@CentOS8 ~]#cd
[root@CentOS8 ~]#ls /boot/loader/entries/		#查看所有内核
34f09f8df29847998143d560b2af24fb-0-rescue.conf
34f09f8df29847998143d560b2af24fb-4.18.0-348.el8.x86_64.conf
6.10 故障排错实战案例
6.10.1 实战案例1: centos 7,8 破坏MBR后进行恢复
dd if=/dev/zero of=/dev/sda bs=1 count=446
光盘进入救援模式
grub2-instal1 --root-directory=/mnt/sysimage /dev/sda
6.10.2 实战案例2: entos 7,8删除/boot/grub2/*所有内容进行恢复
#光盘进入救援模式
chroot /mnt/sysimage
grub2-install /dev/sda
grub2-mkconfig -o /boot/grub2/grub.cfg
6.10.3 实战案例3: Centos 7,8 删除/boot/下所有文件后进行恢复
#1 光盘救援模式下安装grub2
特别说明: centos8 必须先grub,再安装kernel,否则安装kernel-core时会提示grub出错
chroot /mnt/sysimage
mount /dev/sr0 /mnt
grub2-install /dev/sda#2 安装kernel
#Centos 7
rpm -ivh /mnt/Packages/kernel-3.10.0-1062.e17.x86_64.rpm --force
#Centos 8
rpm -ivh /mnt/Baseos/Packages/kernel-core-4.18.0-147.e18.x86_64.rpm --force#3 修复grub配置文件
生成grub2.cfg文件
grub2-mkconfig -o /boot/grub2/grub.cfg#4 退出重启
exit
exit
相关文章:
Linux_11_系统启动和内核管理
目录 1 C entOS 6 的启动管理1.1 Linux 组成1.2 内核设计流派1.3 CentOS 6启动流程1.3.1 CentOs 6 启动流程1.3.1 硬件启动POST1.3.2 bootloader 启动/引导加载器1.3.2.1 grub 功能和组成1.3.2.2 CentOS 6 grub 安装1.3.2.3 grub legacy 管理 1.3.3 加载 kernel1.3.4 init 初始…...

【从零学习python 】65. Python正则表达式修饰符及其应用详解
文章目录 正则表达式修饰符进阶案例 正则表达式修饰符 修饰符描述re.I使匹配对大小写不敏感re.M多行匹配,影响 ^ 和 $re.S使 . 匹配包括换行在内的所有字符 示例代码如下: import reprint(re.search(rL, hello)) # None# 不区分大小写,可…...
QA2
1. import shutil 是什么意思? 在 Python 中,import shutil 是导入标准库 shutil 的语句。shutil 提供了一些用于复制文件和文件夹、移动文件和文件夹、以及执行其他文件操作的函数。 通过导入 shutil,你可以使用其中的函数来处理文件和文件…...

centos7卸载docker
要在CentOS 7上干净地卸载Docker,可以执行以下步骤: 停止Docker服务: sudo systemctl stop docker移除所有Docker容器和镜像。这将删除所有相关数据,包括容器、镜像以及存储卷等。请注意,这将不可逆转地删除数据。 …...
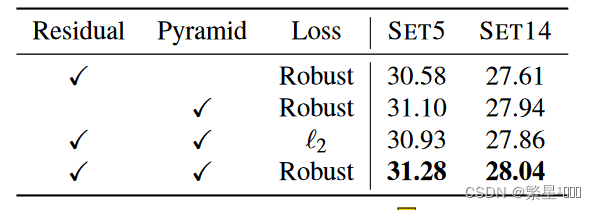
【计算机视觉】递归神经网络在图像超分的应用Deep Recursive Residual Network for Image Super Resolution
DRCN: Deeply-Recursive Convolutional Network for Image Super-Resolution 总结 这篇文章是第一次将之前已有的递归神经网络(Recursive Neural Network)结构应用在图像超分辨率上。为了增加网络的感受野,提高网络性能,引入了深度递归神经网络&#x…...
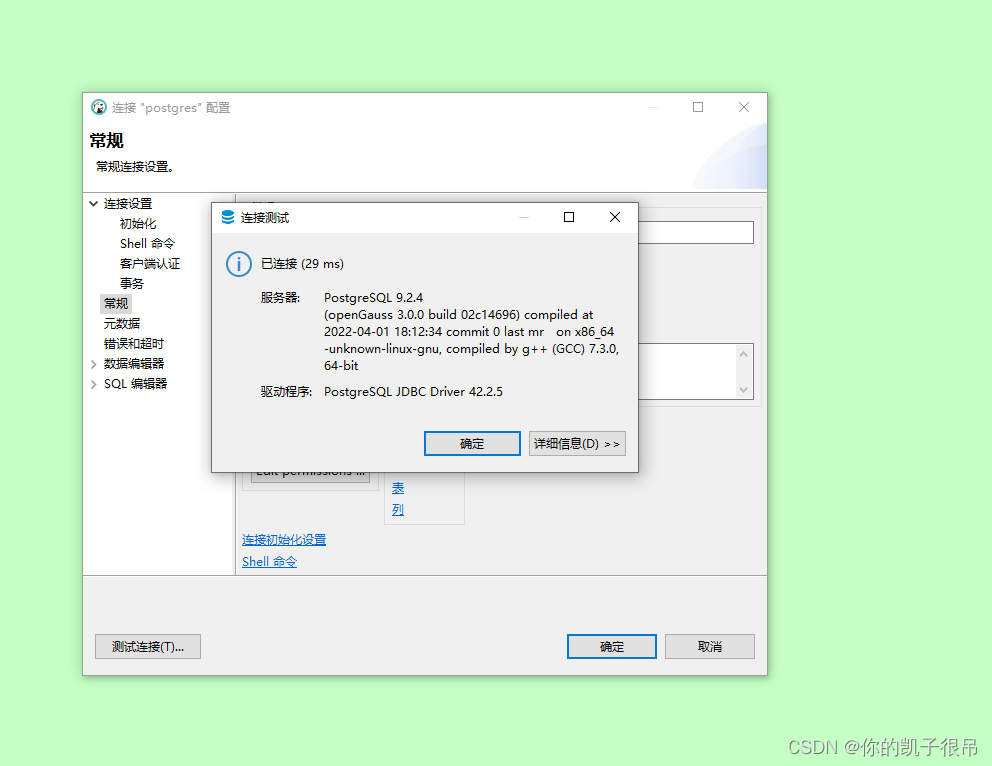
Centos 7 安装系列(8):openGauss 3.0.0
安装依赖包: yum -y install libaio-devel flex bison ncurses-devel glibc-devel patch redhat-lsb-core readline-devel openssl-devel sqlite-devel libnsl 安装插件: yum install -y bzip2 net-tools为什么要安装这两个? 安装bzip2 是…...

NOIP真题讲解 传球游戏 接水问题
传球游戏 说明 上体育课的时候,小蛮的老师经常带着同学们一起做游戏。这次,老师带着同学们一起做传球游戏。 游戏规则是这样的:n个同学站成一个圆圈,其中的一个同学手里拿着一个球,当老师吹哨子时开始传球,…...
《论文阅读18》 SSD: Single Shot MultiBox Detector
一、论文 研究领域: 2D目标检测论文:SSD: Single Shot MultiBox Detector ECCV 2016 数据集 论文链接论文github 二、论文概要 SSD网络是作者Wei Liu在ECCV 2016上发表的论文。对于输入尺寸300x300的网络 使用Nvidia Titan X在VOC 2007测试集上达到74…...

NOIP2016普及组第四题 魔法阵
魔法阵 题目描述 六十年一次的魔法战争就要开始了,大魔法师准备从附近的魔法场中汲取魔法能量。 大魔法师有m个魔法物品,编号分别为1,2,…,m。每个物品具有一个魔法值,我们用Xi表示编号为i的物品的魔法值。每个魔法值Xi是不超过n的正整数&…...
uniapp-滑块验证组件wo-slider
wo-slider是一款支持高度自定义的滑块验证组件,采用uniapp-vue2编写 采用touchstart、touchmove、touchend事件实现的滑块组件,支持H5、微信小程序(其他小程序未试过,可自行尝试) 可到插件市场下载尝试: https://ext.…...

NPM 管理组织成员
目录 1、向组织添加成员 1.1 邀请成员加入您的组织 1.2 撤销组织邀请 2、接收或拒接组织邀请 2.1 接收组织邀请 2.2 拒绝组织邀请 3、组织角色和权限 4、管理组织权限 5、从组织中删除成员 1、向组织添加成员 作为组织所有者,您可以将其他npm用户添加到…...
设计模式(3)抽象工厂模式
一、概述: 1、提供一个创建一系列相关或相互依赖对象的接口,而无须指定它们具体的类。 2、结构图: 3、举例代码: (1) 实体: public interface IUser {public void insert(User user);public…...
【C++】早绑定、析构与多态 | 一道关于多态的选择题记录
今天在和群友聊天的时候看到了一道很坑的题目,分享给大家 1.看题! 先来看看题目 struct Dad { public:Dad(){ echo();}~Dad(){ echo();}virtual void echo() {cout << "DAD ";} };struct Son:Dad { public:void echo() const override…...

mac下安装tomcat
1. 官网下载Apache Tomcat - Apache Tomcat 9 Software Downloads 2. 授权bin目录下所有.sh文件权限sudo chmod 755 *.sh 3. 启动程序(后台运行) sudo sh ./startup.sh 4. 在当前窗口启动程序,随时看到日志sudo sh ./catalina.sh run 5. 关闭程序 sudo sh ./shu…...

【小梦C嘎嘎——启航篇】string常用接口的模拟实现
【小梦C嘎嘎——启航篇】string常用接口的模拟实现😎 前言🙌string 模拟实现1、iterator 迭代器相关使用函数实现2、构造函数接口实现3、 传统写法——拷贝构造函数接口实现4、 现代写法——拷贝构造函数接口实现5、析构函数接口实现6、传统写法—— 赋…...
【Jenkins】持续集成部署学习
【Jenkins】持续集成部署学习 【一】安装部署【1】Jenkins所处位置【2】Docker安装Gitlab(1)首先准备一台空的虚拟机服务器(2)安装服务器所需的依赖(3)Docker的安装(4)阿里云镜像加速…...
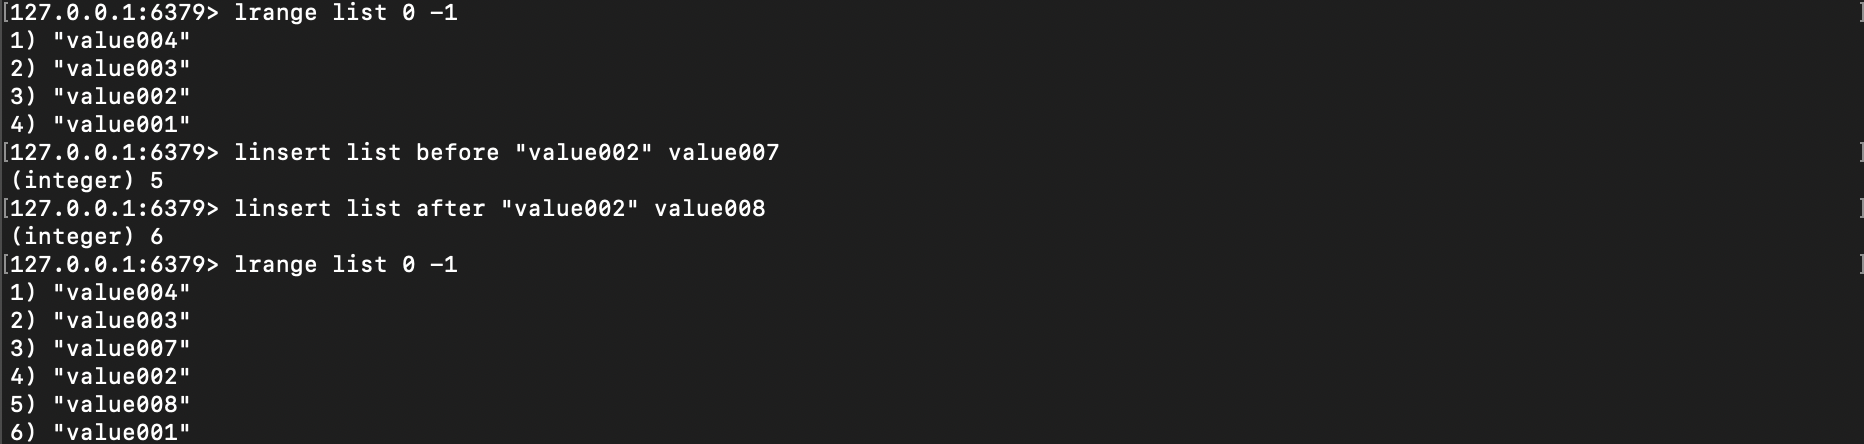
Redis数据结构之List
Redis 中列表(List)类型是用来存储多个有序的字符串,列表中的每个字符串成为元素 Eelement),一个列表最多可以存储 2^32-1 个元素。 在 Redis 中,可以对列表两端插入(push)和弹出&am…...

SpringCloud Alibaba实战和源码(7)Skywalking
什么是SkyWalking Skywalking是由国内开源爱好者吴晟开源并提交到Apache孵化器的产品,它同时吸收了Zipkin /Pinpoint /CAT 的设计思路。特点是:支持多种插件,UI功能较强,支持非侵入式埋点。目前使用厂商最多,版本更新较…...
、联合索引)
MySQL索引可能失效之or、is null、is not null、不等于(!=,<>)、联合索引
1、如果 A,B 两列都有索引,那么 select * from Table where Aa or Bb; 会走索引吗? 答案:会,因为 A,B都有索引; 2、如果 A,B有索引,但是C没有索引; select * from Table where Aa or Bb …...

无人机电力巡检:探索电力设施维护的新模式
电力巡检一直是电力行业中关键的环节,它的目的是确保电力设施的正常运行和安全稳定,对提高电力设施的可靠性、确保电力供应的稳定性和提高电力企业的管理水平具有重要的意义。传统的电力巡检方式通常采用人工的方式进行,这种方式存在很多的问…...

测试markdown--肇兴
day1: 1、去程:7:04 --11:32高铁 高铁右转上售票大厅2楼,穿过候车厅下一楼,上大巴车 ¥10/人 **2、到达:**12点多到达寨子,买门票,美团/抖音:¥78人 3、中饭&a…...

Qwen3-Embedding-0.6B深度解析:多语言语义检索的轻量级利器
第一章 引言:语义表示的新时代挑战与Qwen3的破局之路 1.1 文本嵌入的核心价值与技术演进 在人工智能领域,文本嵌入技术如同连接自然语言与机器理解的“神经突触”——它将人类语言转化为计算机可计算的语义向量,支撑着搜索引擎、推荐系统、…...
新能源汽车智慧充电桩管理方案:新能源充电桩散热问题及消防安全监管方案
随着新能源汽车的快速普及,充电桩作为核心配套设施,其安全性与可靠性备受关注。然而,在高温、高负荷运行环境下,充电桩的散热问题与消防安全隐患日益凸显,成为制约行业发展的关键瓶颈。 如何通过智慧化管理手段优化散…...
基础光照(Basic Lighting))
C++.OpenGL (10/64)基础光照(Basic Lighting)
基础光照(Basic Lighting) 冯氏光照模型(Phong Lighting Model) #mermaid-svg-GLdskXwWINxNGHso {font-family:"trebuchet ms",verdana,arial,sans-serif;font-size:16px;fill:#333;}#mermaid-svg-GLdskXwWINxNGHso .error-icon{fill:#552222;}#mermaid-svg-GLd…...
JVM 内存结构 详解
内存结构 运行时数据区: Java虚拟机在运行Java程序过程中管理的内存区域。 程序计数器: 线程私有,程序控制流的指示器,分支、循环、跳转、异常处理、线程恢复等基础功能都依赖这个计数器完成。 每个线程都有一个程序计数…...

破解路内监管盲区:免布线低位视频桩重塑停车管理新标准
城市路内停车管理常因行道树遮挡、高位设备盲区等问题,导致车牌识别率低、逃费率高,传统模式在复杂路段束手无策。免布线低位视频桩凭借超低视角部署与智能算法,正成为破局关键。该设备安装于车位侧方0.5-0.7米高度,直接规避树枝遮…...
MySQL的pymysql操作
本章是MySQL的最后一章,MySQL到此完结,下一站Hadoop!!! 这章很简单,完整代码在最后,详细讲解之前python课程里面也有,感兴趣的可以往前找一下 一、查询操作 我们需要打开pycharm …...

智能职业发展系统:AI驱动的职业规划平台技术解析
智能职业发展系统:AI驱动的职业规划平台技术解析 引言:数字时代的职业革命 在当今瞬息万变的就业市场中,传统的职业规划方法已无法满足个人和企业的需求。据统计,全球每年有超过2亿人面临职业转型困境,而企业也因此遭…...

在golang中如何将已安装的依赖降级处理,比如:将 go-ansible/v2@v2.2.0 更换为 go-ansible/@v1.1.7
在 Go 项目中降级 go-ansible 从 v2.2.0 到 v1.1.7 具体步骤: 第一步: 修改 go.mod 文件 // 原 v2 版本声明 require github.com/apenella/go-ansible/v2 v2.2.0 替换为: // 改为 v…...

文件上传漏洞防御全攻略
要全面防范文件上传漏洞,需构建多层防御体系,结合技术验证、存储隔离与权限控制: 🔒 一、基础防护层 前端校验(仅辅助) 通过JavaScript限制文件后缀名(白名单)和大小,提…...