Docker分布式仓库
Harbor 是一个用于存储和分发 Docker 镜像的企业级 Registry 服务器,由 vmware
开源,其通过添加一些企业必需的功能特性,例如安全、标识和管理等,扩展了开源
Docker Distribution。作为一个企业级私有 Registry 服务器,Harbor 提供了更
好的性能和安全。提升用户使用 Registry 构建和运行环境传输镜像的效率。Harbor
支持安装在多个 Registry 节点的镜像资源复制,镜像全部保存在私有 Registry 中,
确保数据和知识产权在公司内部网络中管控,另外,Harbor 也提供了高级的安全
特性,诸如用户管理,访问控制和活动审计等。
一. Harbor 功能介绍
基于角色的访问控制:用户与 Docker 镜像仓库通过“项目”进行组织管理,一个用户可
以对多个镜像仓库在同一命名空间(project)里有不同的权限。
镜像复制:镜像可以在多个 Registry 实例中复制(同步)。尤其适合于负载均衡,高
可用,混合云和多云的场景。
图形化用户界面:用户可以通过浏览器来浏览,检索当前 Docker 镜像仓库,管理项目
和命名空间。
AD/LDAP 支:Harbor 可以集成企业内部已有的 AD/LDAP,用于鉴权认证管理。
审计管理:所有针对镜像仓库的操作都可以被记录追溯,用于审计管理。
国际化:已拥有英文、中文、德文、日文和俄文的本地化版本。更多的语言将会添加进来。
RESTful API - RESTful API:提供给管理员对于 Harbor 更多的操控, 使得与其它管
理软件集成变得更容易。
部署简单:提供在线和离线两种安装工具, 也可以安装到 vSphere 平台(OVA 方
式)虚拟设备。
[外链图片转存失败,源站可能有防盗链机制,建议将图片保存下来直接上传(img-fYthEXdg-1692318555908)(png/2020-02-20-21-45-44.png)]
nginx:            harbor的一个反向代理组件,代理registry、ui、token等服务。这个代理会转发harbor web和docker client的各种请求到后端服务上。harbor-adminserver:harbor系统管理接口,可以修改系统配置以及获取系统信息。
harbor-db:         存储项目的元数据、用户、规则、复制策略等信息。
harbor-jobservice: harbor里面主要是为了镜像仓库之前同步使用的。
harbor-log:        收集其他harbor的日志信息。
harbor-ui:         一个用户界面模块,用来管理registry。
registry:          存储docker images的服务,并且提供pull/push服务。
redis:             存储缓存信息
webhook:           当registry中的image状态发生变化的时候去记录更新日志、复制等操作。
token service:     在docker client进行pull/push的时候负责token的发放。
二. Harbor 安装
Server1 安装 Docker
[root@docker-server-node1 ~]# wget -O /etc/yum.repos.d/docker-ce.repo https://mirrors.aliyun.com/docker-ce/linux/centos/docker-ce.repo
[root@docker-server-node1 ~]# yum install docker-ce -y
[root@docker-server-node1 ~]# systemctl start docker
Server2 安装 Docker
[root@docker-server-node2 ~]# wget -O /etc/yum.repos.d/docker-ce.repo https://mirrors.aliyun.com/docker-ce/linux/centos/docker-ce.repo
[root@docker-server-node2 ~]# yum install docker-ce -y
[root@docker-server-node2 ~]# systemctl start docker
下载 Harbor 安装包
本次使用当前 harbor 1.7.6 离线安装包,具体名称为
harbor-offline-installer-v1.7.6.tgz
离线安装包
推荐使用离线完整安装包
[root@docker-server-node1 ~]# cd /usr/local/src/
[root@docker-server-node1 src]# wget https://storage.googleapis.com/harbor-releases/release-1.7.0/harbor-offline-installer-v1.7.5.tgz
在线安装包
不推荐使用在线安装包安装,需要从网络下载全部所需文件
[root@docker-server-node1 src]# wget
https://github.com/vmware/harbor/releases/download/v1.7.5/harbor-online-
installer-v1.10.1.tgz
三.配置 Harbor
3.1 解压并编辑 harbor.cfg
[root@docker-server-node1 src]# tar -xf harbor-offline-installer-v1.7.6.tgz
[root@docker-server-node1 src]# ln -sv /usr/local/src/harbor /usr/local/
‘/usr/local/harbor’ -> ‘/usr/local/src/harbor’[root@docker-server-node1 src]# cd /usr/local/harbor/
[root@docker-server-node1 harbor]# ll
total 587744
drwxr-xr-x 3 root root        23 Feb 20 22:54 common
-rw-r--r-- 1 root root      3398 Feb 10 14:18 common.sh
-rw-r--r-- 1 root root       939 Sep 12 11:27 docker-compose.chartmuseum.yml
-rw-r--r-- 1 root root       975 Sep 12 11:27 docker-compose.clair.yml
-rw-r--r-- 1 root root      1434 Sep 12 11:27 docker-compose.notary.yml
-rw-r--r-- 1 root root      5608 Sep 12 11:27 docker-compose.yml
drwxr-xr-x 2 root root        35 Feb 20 22:44 goharbor
-rw-r--r-- 1 root root      8033 Sep 12 11:27 harbor.cfg
-rw-r--r-- 1 root root 600483180 Sep 12 11:28 harbor.v1.7.6.tar.gz
-rw-r--r-- 1 root root      5880 Feb 20 22:39 harbor.yml
drwxr-xr-x 2 root root        24 Feb 20 22:44 input
-rwxr-xr-x 1 root root      5739 Sep 12 11:27 install.sh
-rw-r--r-- 1 root root     11347 Sep 12 11:27 LICENSE
-rw-r--r-- 1 root root   1263409 Sep 12 11:27 open_source_license
-rwxr-xr-x 1 root root     36337 Sep 12 11:27 prepare
3.2 更新 harbor 配置
3.2.1 首次部署更新操作
# 使用prepare脚本更新配置
[root@docker-server-node1 harbor]# ./prepare
Generated and saved secret to file: /data/secretkey
Generated configuration file: ./common/config/nginx/nginx.conf
Generated configuration file: ./common/config/adminserver/env
Generated configuration file: ./common/config/core/env
Generated configuration file: ./common/config/registry/config.yml
Generated configuration file: ./common/config/db/env
Generated configuration file: ./common/config/jobservice/env
Generated configuration file: ./common/config/jobservice/config.yml
Generated configuration file: ./common/config/log/logrotate.conf
Generated configuration file: ./common/config/registryctl/env
Generated configuration file: ./common/config/core/app.conf
Generated certificate, key file: ./common/config/core/private_key.pem, cert file: ./common/config/registry/root.crt
The configuration files are ready, please use docker-compose to start the service.
执行完毕后会在当前目录生成一个 docker-compose.yml 文件,用于配置数据目
录等配置信息。
[root@docker-server-node1 harbor]# ll docker-compose.yml
-rw-r--r-- 1 root root 5608 Sep 12 11:27 docker-compose.yml
3.2.2 后期修改配置操作
如果 harbor 运行一段时间之后需要更改配置,则步骤如下:
停止 harbor 编辑配置文件
[root@docker-server-node1 harbor]# docker-compose stop
[root@docker-server-node1 harbor]# vim harbor.cfg
...
更新配置
[root@docker-server-node1 harbor]# ./prepare  # 使用该脚本更新配置,先删除,后再生成
Clearing the configuration file: ./common/config/adminserver/env
Clearing the configuration file: ./common/config/core/env
Clearing the configuration file: ./common/config/core/app.conf
Clearing the configuration file: ./common/config/core/private_key.pem
Clearing the configuration file: ./common/config/db/env
Clearing the configuration file: ./common/config/jobservice/env
Clearing the configuration file: ./common/config/jobservice/config.yml
Clearing the configuration file: ./common/config/registry/config.yml
Clearing the configuration file: ./common/config/registry/root.crt
Clearing the configuration file: ./common/config/registryctl/env
Clearing the configuration file: ./common/config/registryctl/config.yml
Clearing the configuration file: ./common/config/nginx/nginx.conf
Clearing the configuration file: ./common/config/log/logrotate.conf
loaded secret from file: /data/secretkey
Generated configuration file: ./common/config/nginx/nginx.conf
Generated configuration file: ./common/config/adminserver/env
Generated configuration file: ./common/config/core/env
Generated configuration file: ./common/config/registry/config.yml
Generated configuration file: ./common/config/db/env
Generated configuration file: ./common/config/jobservice/env
Generated configuration file: ./common/config/jobservice/config.yml
Generated configuration file: ./common/config/log/logrotate.conf
Generated configuration file: ./common/config/registryctl/env
Generated configuration file: ./common/config/core/app.conf
Generated certificate, key file: ./common/config/core/private_key.pem, cert file: ./common/config/registry/root.crt
The configuration files are ready, please use docker-compose to start the service.
启动 harbor
[root@docker-server-node1 harbor]# docker-compose start
Starting log         ... done
Starting registry    ... done
Starting registryctl ... done
Starting postgresql  ... done
Starting adminserver ... done
Starting core        ... done
Starting portal      ... done
Starting redis       ... done
Starting jobservice  ... done
Starting proxy       ... done
3.3 官方推荐的方式启动 harbor
3.3.1 部署
[root@docker-server-node1 harbor]# yum install python-pip –y
[root@docker-server-node1 harbor]# pip install docker-compose
......
gcc -pthread -fno-strict-aliasing -O2 -g -pipe -Wall -Wp,-D_FORTIFY_SOURCE=2 -fexceptions -fstack-protector-strong --param=ssp-buffer-size=4 -grecord-gcc-switches -m64 -mtune=generic -D_GNU_SOURCE -fPIC -fwrapv -DNDEBUG -O2 -g -pipe -Wall -Wp,-D_FORTIFY_SOURCE=2 -fexceptions -fstack-protector-strong --param=ssp-buffer-size=4 -grecord-gcc-switches -m64 -mtune=generic -D_GNU_SOURCE -fPIC -fwrapv -fPIC -I/usr/include/python2.7 -c _posixsubprocess.c -o build/temp.linux-x86_64-2.7/_posixsubprocess.o_posixsubprocess.c:16:20: fatal error: Python.h: No such file or directory  # 该错误是因为缺失python-devel#include "Python.h"^compilation terminated.error: command 'gcc' failed with exit status 1----------------------------------------
Command "/usr/bin/python2 -u -c "import setuptools, tokenize;__file__='/tmp/pip-build-pn2G8c/subprocess32/setup.py';exec(compile(getattr(tokenize, 'open', open)(__file__).read().replace('\r\n', '\n'), __file__, 'exec'))" install --record /tmp/pip-U1nvER-record/install-record.txt --single-version-externally-managed --compile" failed with error code 1 in /tmp/pip-build-pn2G8c/subprocess32/
You are using pip version 8.1.2, however version 20.0.2 is available.
You should consider upgrading via the 'pip install --upgrade pip' command.# 安装python-devel
[root@docker-server-node1 harbor]# yum install python-devel[root@docker-server-node1 harbor]# pip install docker-compose
Collecting docker-compose
......
Running setup.py install for functools32 ... doneRunning setup.py install for PyYAML ... doneRunning setup.py install for pycparser ... done
Successfully installed PyYAML-5.3 attrs-19.3.0 backports.shutil-get-terminal-size-1.0.0 bcrypt-3.1.7 cached-property-1.5.1 cffi-1.14.0 configparser-4.0.2 contextlib2-0.6.0.post1 cryptography-2.8 docker-4.2.0 docker-compose-1.25.4 enum34-1.1.6 functools32-3.2.3.post2 importlib-metadata-1.5.0 jsonschema-3.2.0 paramiko-2.7.1 pathlib2-2.3.5 pycparser-2.19 pynacl-1.3.0 pyrsistent-0.15.7 scandir-1.10.0 subprocess32-3.5.4 unknown-0.0.0 websocket-client-0.57.0[root@docker-server-node1 harbor]# ./install.sh  #官方构建harbor和启动方式,推荐此方法,会下载官方的docker 镜像
[root@docker-server-node2 harbor]# ./install.sh[Step 0]: checking installation environment ...Note: docker version: 19.03.6Note: docker-compose version: 1.25.4[Step 1]: loading Harbor images ...
b80136ee24a4: Loading layer [==================================================>]  34.25MB/34.25MB
1f2db9bc717e: Loading layer [==================================================>]  63.49MB/63.49MB
3ea31adb1f16: Loading layer [==================================================>]  52.48MB/52.48MB
70134bbcd2db: Loading layer [==================================================>]  6.656kB/6.656kB
1f1b4fc154ff: Loading layer [==================================================>]  2.048kB/2.048kB
f16fb7c6177e: Loading layer [==================================================>]   7.68kB/7.68kB
c63d53b4b8d0: Loading layer [==================================================>]   2.56kB/2.56kB
787514dd6c1a: Loading layer [==================================================>]   2.56kB/2.56kB
381c81ec71b2: Loading layer [==================================================>]   2.56kB/2.56kB
......
[Step 2]: preparing environment ...
Generated and saved secret to file: /data/secretkey
Generated configuration file: ./common/config/nginx/nginx.conf
Generated configuration file: ./common/config/adminserver/env
Generated configuration file: ./common/config/core/env
Generated configuration file: ./common/config/registry/config.yml
Generated configuration file: ./common/config/db/env
Generated configuration file: ./common/config/jobservice/env
Generated configuration file: ./common/config/jobservice/config.yml
Generated configuration file: ./common/config/log/logrotate.conf
Generated configuration file: ./common/config/registryctl/env
Generated configuration file: ./common/config/core/app.conf
Generated certificate, key file: ./common/config/core/private_key.pem, cert file: ./common/config/registry/root.crt
The configuration files are ready, please use docker-compose to start the service.[Step 3]: checking existing instance of Harbor ...[Step 4]: starting Harbor ...
Creating network "harbor_harbor" with the default driver
Creating harbor-log ... done
Creating registry           ... done
Creating harbor-db          ... done
Creating registryctl        ... done
Creating redis              ... done
Creating harbor-adminserver ... done
Creating harbor-core        ... done
Creating harbor-portal      ... done
Creating harbor-jobservice  ... done
Creating nginx              ... done✔ ----Harbor has been installed and started successfully.----Now you should be able to visit the admin portal at http://192.168.100.19.
For more details, please visit https://github.com/goharbor/harbor .
3.3.2 查看本地镜像
[root@docker-server-node2 harbor]# docker images
REPOSITORY                                                 TAG                 IMAGE ID            CREATED             SIZE
goharbor/chartmuseum-photon                                v0.8.1-v1.7.6       ca4e65cc8cbf        5 months ago        114MB
goharbor/harbor-migrator                                   v1.7.6              bd65976b2563        5 months ago        680MB
goharbor/redis-photon                                      v1.7.6              477066fd0e02        5 months ago        109MB
goharbor/clair-photon                                      v2.0.8-v1.7.6       a65550304aa5        5 months ago        165MB
goharbor/notary-server-photon                              v0.6.1-v1.7.6       1bfca6aac750        5 months ago        136MB
goharbor/notary-signer-photon                              v0.6.1-v1.7.6       8535add7bfa5        5 months ago        133MB
goharbor/harbor-registryctl                                v1.7.6              bb06dcda87fa        5 months ago        103MB
goharbor/registry-photon                                   v2.6.2-v1.7.6       8fa930eedbea        5 months ago        87.7MB
goharbor/nginx-photon                                      v1.7.6              fea7c162d250        5 months ago        37MB
goharbor/harbor-log                                        v1.7.6              f9b50bc6e136        5 months ago        82.6MB
goharbor/harbor-jobservice                                 v1.7.6              cfac2ab2d45a        5 months ago        85.1MB
goharbor/harbor-core                                       v1.7.6              37379145c410        5 months ago        96.6MB
goharbor/harbor-portal                                     v1.7.6              eafab006217d        5 months ago        41.7MB
goharbor/harbor-adminserver                                v1.7.6              2d91210e25ed        5 months ago        73.3MB
3.3.3 查看本地端口
[root@docker-server-node2 harbor]# ss -ntl
State      Recv-Q Send-Q                 Local Address:Port            Peer Address:Port
LISTEN     0      100                        127.0.0.1:25                         *:*
LISTEN     0      128                        127.0.0.1:9000                       *:*
LISTEN     0      1024                       127.0.0.1:1514                       *:*
LISTEN     0      50                                 *:3306                       *:*
LISTEN     0      128                                *:111                        *:*
LISTEN     0      128                                *:22                         *:*
LISTEN     0      100                            [::1]:25                      [::]:*
LISTEN     0      1024                            [::]:443                     [::]:*
LISTEN     0      1024                            [::]:4443                    [::]:*
LISTEN     0      128                             [::]:111                     [::]:*
LISTEN     0      1024                            [::]:80                      [::]:*
LISTEN     0      128                             [::]:22                      [::]:*
3.3.4 访问 web 管理界面
Server2:192.168.100.19
Server1:192.168.100.10
3.4 非官方推荐的方式启动 harbor
[root@docker-server-node1 harbor]# docker-compose up -d
四. 配置 docker 使用 harbor 仓库
4.1 编辑 docker 启动文件并重启
[root@docker-server-node2 ~]# vim /usr/lib/systemd/system/docker.service
[Service]
Type=notify
# the default is not to use systemd for cgroups because the delegate issues still
# exists and systemd currently does not support the cgroup feature set required
# for containers run by docker
ExecStart=/usr/bin/dockerd -H fd:// --containerd=/run/containerd/containerd.sock --insecure-registry 192.168.100.19:5000 --insecure-registry 192.168.100.10:5000
ExecReload=/bin/kill -s HUP $MAINPID
TimeoutSec=0
RestartSec=2
Restart=always[root@docker-server-node2 harbor]# systemctl daemon-reload
[root@docker-server-node2 harbor]# systemctl restart docker
[root@docker-server-node2 harbor]# docker-compose start
4.2 验证能否登陆
[root@docker-server-node1 harbor]# docker login 192.168.100.19
Username: admin
Password:
WARNING! Your password will be stored unencrypted in /root/.docker/config.json.
Configure a credential helper to remove this warning. See
https://docs.docker.com/engine/reference/commandline/login/#credentials-storeLogin Succeeded
4.3 测试上传镜像
将之前单机仓库构构建的 Nginx 镜像上传到 harbor 服务器用于测试
# 贴tag
[root@docker-server-node1 harbor]# docker tag alpine:latest 192.168.100.10/library/alpine:latest# 登录
[root@docker-server-node1 harbor]# docker login 192.168.100.19
Username: admin
Password:
WARNING! Your password will be stored unencrypted in /root/.docker/config.json.
Configure a credential helper to remove this warning. See
https://docs.docker.com/engine/reference/commandline/login/#credentials-storeLogin Succeeded# 上传
[root@docker-server-node2 harbor]# docker push 192.168.100.19/library/alpine:latest
The push refers to repository [192.168.100.19/library/alpine]
5216338b40a7: Pushed
latest: digest: sha256:ddba4d27a7ffc3f86dd6c2f92041af252a1f23a8e742c90e6e1297bfa1bc0c45 size: 528
web 界面确认
4.4 测试从 harbor 下载镜像使用
需要从 192.168.100.19 下载的 dockerd 都需要改启动文件加上
–insecure-registry 选项
[root@docker-server-node2 ~]# vim /usr/lib/systemd/system/docker.service
[Service]
Type=notify
# the default is not to use systemd for cgroups because the delegate issues still
# exists and systemd currently does not support the cgroup feature set required
# for containers run by docker
ExecStart=/usr/bin/dockerd -H fd:// --containerd=/run/containerd/containerd.sock --insecure-registry 192.168.100.19:5000 --insecure-registry 192.168.100.10:5000
ExecReload=/bin/kill -s HUP $MAINPID
TimeoutSec=0
RestartSec=2
Restart=always[root@docker-server-node2 harbor]# systemctl daemon-reload
[root@docker-server-node2 harbor]# systemctl restart docker
[root@docker-server-node2 harbor]# docker-compose start
测试下载,点击复制 pull 命令
[root@docker-server-node2 harbor]# docker pull 192.168.100.19/library/alpine:latest[root@docker-server-node2 harbor]# docker pull 192.168.100.19/library/alpine:latest
latest: Pulling from library/alpine
Digest: sha256:ddba4d27a7ffc3f86dd6c2f92041af252a1f23a8e742c90e6e1297bfa1bc0c45
Status: Downloaded newer image for 192.168.100.19/library/alpine:latest
192.168.100.19/library/alpine:latest[root@docker-server-node2 src]# docker images
[root@docker-server-node2 harbor]# docker images | grep alpine
192.168.100.19/library/alpine                              latest              e7d92cdc71fe        5 weeks ago         5.59MB
...[root@docker-server-node2 harbor]# docker run --rm -it 192.168.100.19/library/alpine:latest sh
/ # cat /etc/issue
Welcome to Alpine Linux 3.11
Kernel \r on an \m (\l)/ #
五.实现 harbor 高可用
- Harbor 有两种高可用实现方式:
- 基于共享存储实现
- 基于镜像复制实现
Harbor 支持基于策略的 Docker 镜像复制功能,这类似于 MySQL 的主从同步,
其可以实现不同的数据中心、不同的运行环境之间同步镜像,并提供友好的管理
界面,大大简化了实际运维中的镜像管理工作,已经有用很多互联网公司使用
harbor 搭建内网 docker 仓库的案例,并且还有实现了双向复制的案列。
5.1 新部署一台 harbor 服务器
Server1:192.168.100.10
此处 Server1 为从 Harbor,主 Harbor 为 Server2:192.168.100.19
主在向从复制镜像时,需要从 Harbor 有相同的镜像仓库名。此实验都使
用默认的 library。
部署:
[root@docker-server-node1 src]# pwd
/usr/local/src
[root@docker-server-node1 src]# tar xf harbor-offline-installer-v1.7.6.tgz
[root@docker-server-node1 local]# ln -s /usr/local/src/harbor /usr/local/harbor
[root@docker-server-node1 harbor]# pwd
/usr/local/harbor
[root@docker-server-node1 harbor]# ll
total 587744
drwxr-xr-x 4 root root        37 Feb 20 23:00 common
-rw-r--r-- 1 root root      3398 Feb 10 14:18 common.sh
-rw-r--r-- 1 root root       939 Sep 12 11:27 docker-compose.chartmuseum.yml
-rw-r--r-- 1 root root       975 Sep 12 11:27 docker-compose.clair.yml
-rw-r--r-- 1 root root      1434 Sep 12 11:27 docker-compose.notary.yml
-rw-r--r-- 1 root root      5608 Sep 12 11:27 docker-compose.yml
drwxr-xr-x 2 root root        35 Feb 20 22:44 goharbor
-rw-r--r-- 1 root root      8016 Feb 20 23:11 harbor.cfg
-rw-r--r-- 1 root root 600483180 Sep 12 11:28 harbor.v1.7.6.tar.gz
-rw-r--r-- 1 root root      5880 Feb 20 22:39 harbor.yml
drwxr-xr-x 2 root root        24 Feb 20 22:44 input
-rwxr-xr-x 1 root root      5739 Sep 12 11:27 install.sh
-rw-r--r-- 1 root root     11347 Sep 12 11:27 LICENSE
-rw-r--r-- 1 root root   1263409 Sep 12 11:27 open_source_license
-rwxr-xr-x 1 root root     36337 Sep 12 11:27 prepare[root@docker-server-node1 harbor]# ./prepare
......[root@docker-server-node1 harbor]# ./install.sh
......
从 Harbor 部署好的样子:
5.3 在主 Harbor 默认的 library 参考添加复制规则
从 harbor 的 library 仓库,与主 harbor 仓库名称 library 一致。当然,
也可以创建新的仓库,主从的仓库名保持一致即可。
在主 Harbor Server2:192.168.100.19 的仓库管理添加从 Harbor 作为目标:
在主 Harbor Server2:192.168.100.19 的 library 添加复制规则:
5.4 在从 harbor 仓库下载镜像使用
从 Harbor 上将同步的 alpine 镜像 pull 下来测试
[root@docker-server-node1 ~]# docker pull 192.168.100.10/library/alpine:latest
latest: Pulling from library/alpine
c9b1b535fdd9: Already exists
Digest: sha256:ddba4d27a7ffc3f86dd6c2f92041af252a1f23a8e742c90e6e1297bfa1bc0c45
Status: Downloaded newer image for 192.168.100.10/library/alpine:latest
192.168.100.10/library/alpine:latest[root@docker-server-node1 ~]# docker images | grep alpine
192.168.100.10/library/alpine                  latest              e7d92cdc71fe        5 weeks ago         5.59MB
...[root@docker-server-node1 ~]# docker run -it --rm 192.168.100.10/library/alpine:latest sh
/ # cat /etc/issue
Welcome to Alpine Linux 3.11
Kernel \r on an \m (\l)/ #
六.实现 harbor 双向同步
在从 Harbor(192.168.100.10)创建复制规则,将上传到从 Harbor 的镜像同步到
主 Harbor(192.168.100.19),两边都在 library 仓库创建复制规则。
6.1 在 docker 客户端导入 centos 基础镜像
在从 Harbor 的 docker 导入 centos 镜像,用于同步准备
[root@docker-server-node1 ~]# docker load -i /opt/centos-latest-image.tar.gz
0683de282177: Loading layer [==================================================>]  244.9MB/244.9MB
Loaded image: centos:latest
[root@docker-server-node1 ~]# docker images
REPOSITORY                                     TAG                 IMAGE ID            CREATED             SIZE
centos                                         latest              470671670cac        5 weeks ago         237MB
...
6.2 贴 tag
[root@docker-server-node1 ~]# docker tag centos:latest 192.168.100.10/library/centos:latest[root@docker-server-node1 ~]# docker images | grep centos
192.168.100.10/library/centos                  latest              470671670cac        5 weeks ago         237MB
centos                                         latest              470671670cac        5 weeks ago         237MB
6.3 上传到从 harbor
[root@docker-server-node1 ~]# docker push 192.168.100.10/library/centos:latest
The push refers to repository [192.168.100.10/library/centos]
0683de282177: Pushed
latest: digest: sha256:9e0c275e0bcb495773b10a18e499985d782810e47b4fce076422acb4bc3da3dd size: 529
6.4 在从 harbor 创建同步规则
规则方式与主 harbor 相同,写对方的 IP+用户名密码,然后点测试连接,确认可
以测试连接通过。
同样,创建规则时的目标要到仓库管理项去配置:新建目标
6.5 docker 端测试
[root@docker-server-node2 harbor]# docker images | grep centos
[root@docker-server-node2 harbor]# docker pull 192.168.100.19/library/centos:latest
latest: Pulling from library/centos
8a29a15cefae: Pull complete
Digest: sha256:9e0c275e0bcb495773b10a18e499985d782810e47b4fce076422acb4bc3da3dd
Status: Downloaded newer image for 192.168.100.19/library/centos:latest
192.168.100.19/library/centos:latest
[root@docker-server-node2 harbor]# docker run --rm -it 192.168.100.19/library/centos:latest bash
[root@63e4aa284f50 /]# cat /etc/issue
\S
Kernel \r on an \m
6.8 harbor https 配置
# openssl genrsa -out /usr/local/src/harbor/certs/harbor-ca.key 2048
# openssl req -x509 -new -nodes -key /usr/local/src/harbor/certs/harbor-ca.key  -subj "/CN=harbor.suosuoli.local -days 7120 -out /usr/local/src/harbor/certs/harbor-ca.crt# vim harbor.cfghostname = harbor.suosuoli.localui_url_protocol = httpsssl_cert = /usr/local/src/harbor/certs/harbor-ca.crt
ssl_cert_key = /usr/local/src/harbor/certs/harbor-ca.key
harbor_admin_password = stevenux
# ./install.sh
# yum install docker-ce-18.06.3.ce-3.el7.x86_64.rpm
# yum install docker-compose
# mkdir /etc/docker/certs.d/harbor.suosuoli.local -p
# cp certs/harbor-ca.crt  /etc/docker/certs.d/harbor.suosuli.local/
# docker login harbor.suosuoli.local
相关文章:

Docker分布式仓库
Harbor 是一个用于存储和分发 Docker 镜像的企业级 Registry 服务器,由 vmware 开源,其通过添加一些企业必需的功能特性,例如安全、标识和管理等,扩展了开源 Docker Distribution。作为一个企业级私有 Registry 服务器,…...
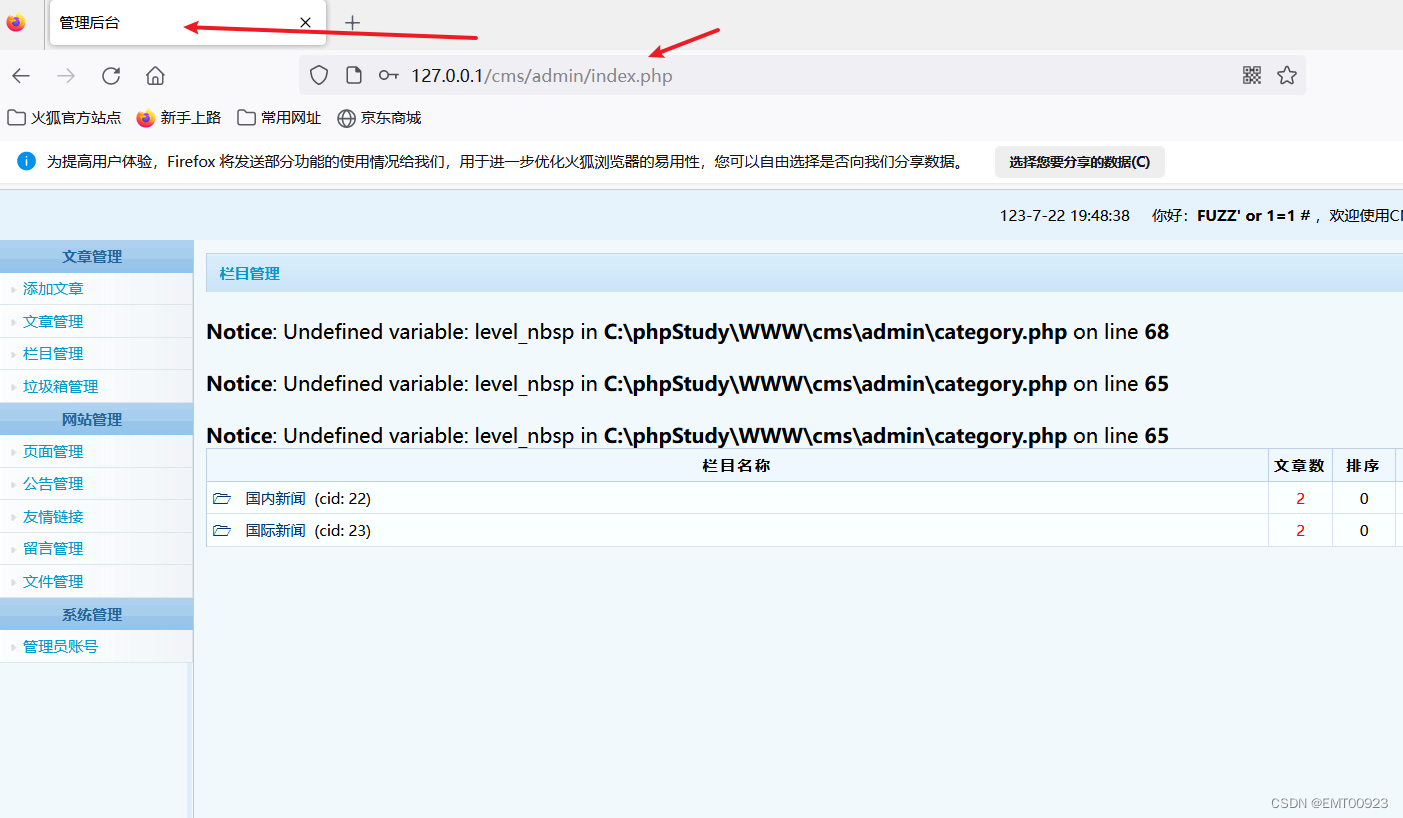
SQL注入之万能用户名
文章目录 分析代码原理实现 分析代码 在安装的cms数据库目录C:\phpStudy\WWW\cms\admin下找到login.action.php文件,查看第20行,发现如下php代码: $user_row $db->getOneRow("select userid from cms_users where username "…...
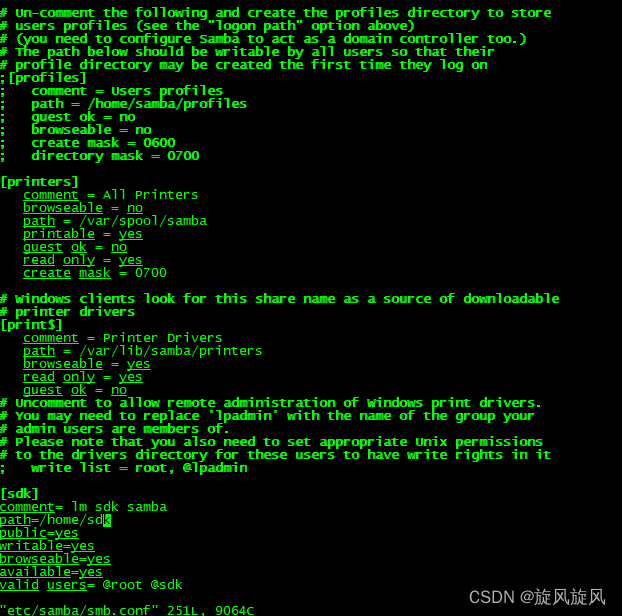
ubuntu20搭建环境使用的一下指令
1.更新源 sudo vim etc/apt/sources.listdeb http://mirrors.aliyun.com/ubuntu/ xenial main deb-src http://mirrors.aliyun.com/ubuntu/ xenial maindeb http://mirrors.aliyun.com/ubuntu/ xenial-updates main deb-src http://mirrors.aliyun.com/ubuntu/ xenial-updates…...
)
GAN(生成对抗网络)
简介:GAN生成对抗网络本质上是一种思想,其依靠神经网络能够拟合任意函数的能力,设计了一种架构来实现数据的生成。 原理:GAN的原理就是最小化生成器Generator的损失,但是在最小化损失的过程中加入了一个约束࿰…...
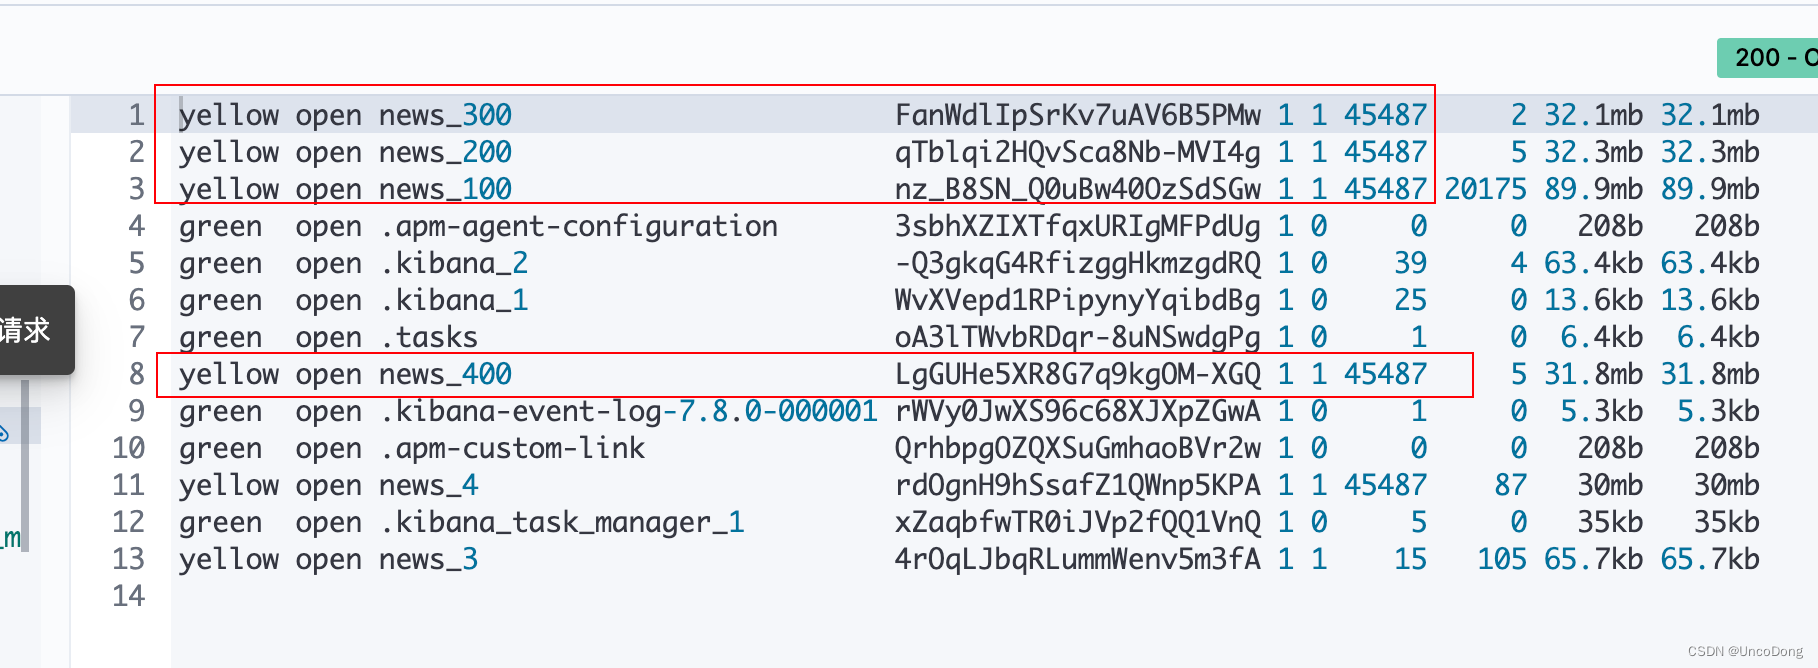
实时同步ES技术选型:Mysql+Canal+Adapter+ES+Kibana
基于之前的文章,精简操作而来 让ELK在同一个docker网络下通过名字直接访问Ubuntu服务器ELK部署与实践使用 Docker 部署 canal 服务实现MySQL和ES实时同步Docker部署ES服务,canal全量同步的时候内存爆炸,ES/Canal Adapter自动关闭,…...
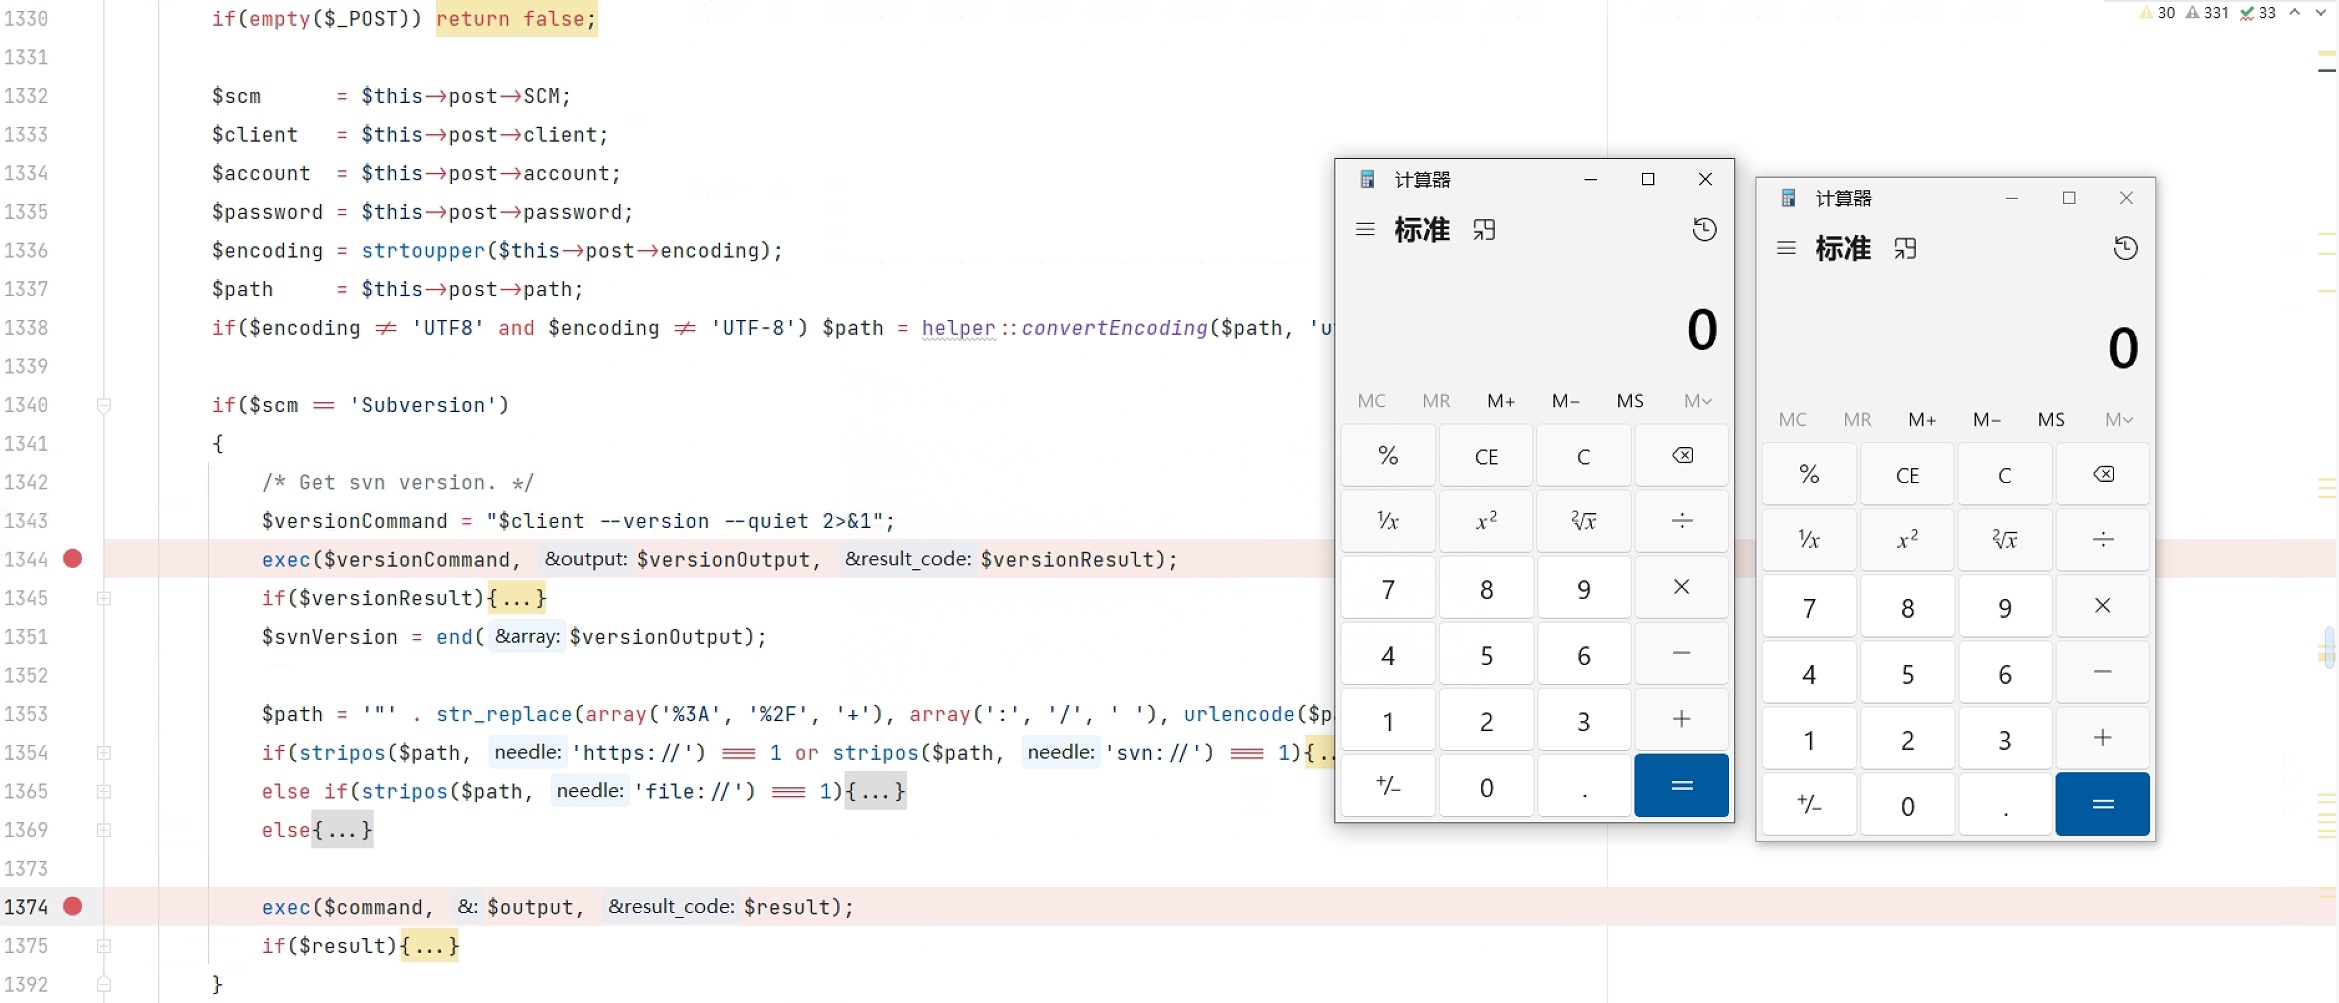
禅道后台命令执行漏洞
漏洞简介 禅道是第一款国产的开源项目管理软件。它集产品管理、项目管理、质量管理、文档管理、 组织管理和事务管理于一体,是一款专业的研发项目管理软件,完整地覆盖了项目管理的核心流程。 禅道管理思想注重实效,功能完备丰富,…...

基于Spark+django的国漫推荐系统--计算机毕业设计项目
近年来,随着互联网的蓬勃发展,企事业单位对信息的管理提出了更高的要求。以传统的管理方式已无法满足现代人们的需求。为了迎合时代需求,优化管理效率,各种各样的管理系统应运而生,随着各行业的不断发展,基…...

向量数据库 Milvus:实现高效向量搜索的技术解析
引言 随着人工智能、机器学习和深度学习技术的不断发展,越来越多的应用开始使用向量表示数据。向量数据具有高维、稀疏和相似性等特点,传统的关系型数据库和键值存储在处理这类数据时面临许多挑战。为了满足大规模、高并发的向量搜索需求,出现…...

恒运资本:信创概念再度活跃,华是科技再创新高,南天信息等涨停
信创概念21日盘中再度活跃,截至发稿,华是科技涨超17%,盘中一度触及涨停再创新高,中亦科技涨超13%亦创出新高,久其软件、南天信息、新炬网络、英飞拓均涨停。 音讯面上,自8月3日以来,财政部官网连…...
Synchronized锁升级
Java Synchronized 重量级锁原理深入剖析上(互斥篇) 为什么映入Monitor 处在重量级锁状态时说明有线程没拿到锁需要阻塞等待锁,当拥有锁的线程释放锁后唤醒它继续竞争锁。此处就引入了一个问题:其它线程如何找到被阻塞的线程?我们很容易想到…...

记一个宏定义写法
记一个宏定义写法 最近在看libevent源码,看到一个有趣的宏写法。特此记录。方便日后巩固学习。 源码写法: #define HT_FIND(name, head, elm) name##_HT_FIND((head), (elm))首先来简单分析一下: 定睛一看是一个宏,##是连接符…...
【数据结构】C语言实现栈(详细解读)
前言: 💥🎈个人主页:Dream_Chaser~ 🎈💥 ✨✨专栏:http://t.csdn.cn/oXkBa ⛳⛳本篇内容:c语言数据结构--C语言实现栈 目录 什么是栈 栈的概念及结构 实现栈的方式 链表的优缺点: 顺序表的优缺点: 栈…...
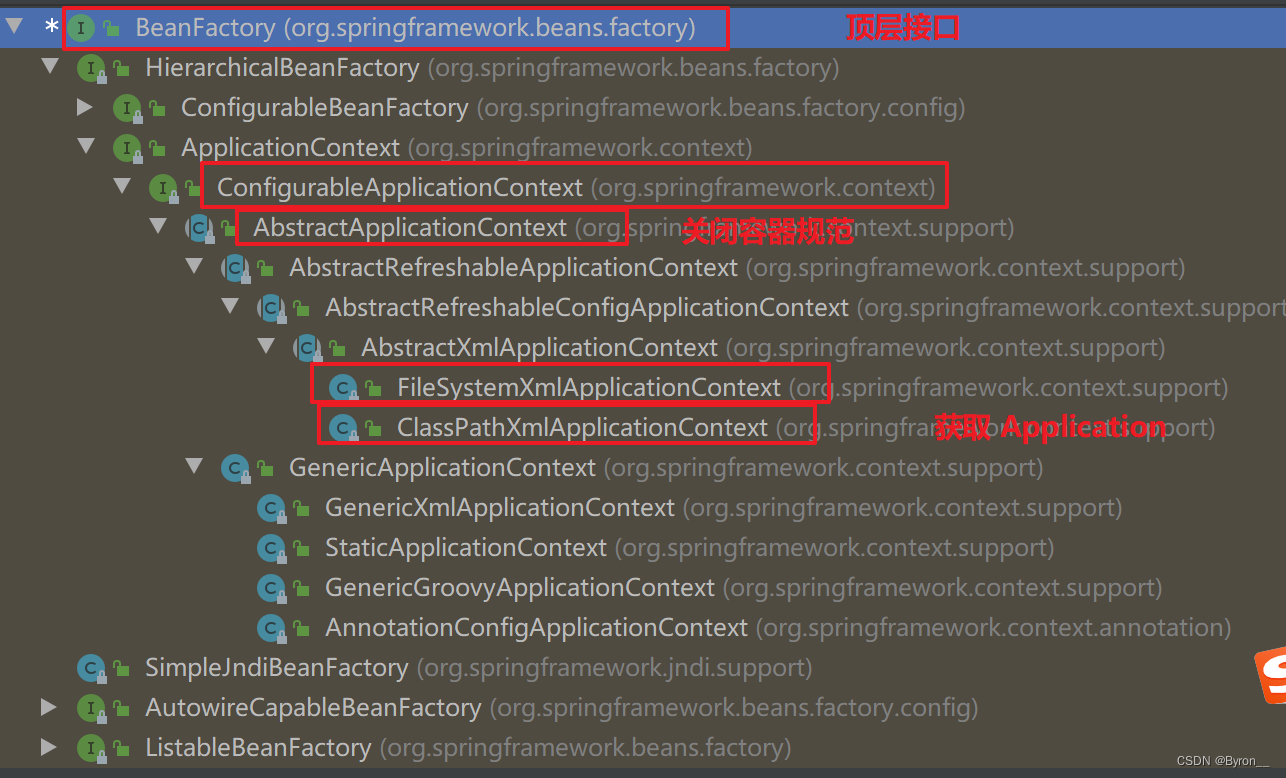
3、Spring_容器执行
容器执行点 1.整合 druid 连接池 添加依赖 <dependency><groupId>com.alibaba</groupId><artifactId>druid</artifactId><version>1.2.8</version> </dependency>1.硬编码方式整合 新建德鲁伊配置 <?xml version"1.…...

五、pikachu之RCE
文章目录 1、RCE概述2、exec "ping"3、exec"evel"4、连接符 1、RCE概述 RCE(emote command/code execute):可以让攻击者直接向后台服务器远程注入操作系统命令或者代码,从而控制后台系统。 远程系统命令执行 …...

最大不相交区间数量
给定 N 个闭区间 [ai,bi],请你在数轴上选择若干区间,使得选中的区间之间互不相交(包括端点)。 输出可选取区间的最大数量。 输入格式 第一行包含整数 N,表示区间数。 接下来 N 行,每行包含两个整数 ai,…...
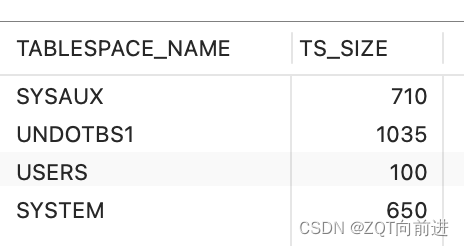
Oracle给表空间添加容量
假如给SYSTEM表空间添加 查看文件位置和容量:Select * FROM DBA_DATA_FILES; FILE_NAME就是要修改的文件 查看每一个表空间的容量,单位MB: SELECT t.tablespace_name, round(SUM(bytes / (1024 * 1024)), 0) ts_size FROM dba_tablespaces…...

2023年大数据与区块链国际会议 | EI、Scoups检索
会议简介 Brief Introduction 2023年大数据与区块链国际会议(ICBDB 2023) 会议时间:2023年11月17 -19日 召开地点:中国西安 大会官网:www.icobdb.org 2023年大数据与区块链国际会议(ICBDB 2023)…...

【洛谷算法题】P1000-超级玛丽游戏【入门1顺序结构】
👨💻博客主页:花无缺 欢迎 点赞👍 收藏⭐ 留言📝 加关注✅! 本文由 花无缺 原创 收录于专栏 【洛谷算法题】 文章目录 【洛谷算法题】P1000-超级玛丽游戏【入门1顺序结构】🌏题目描述🌏输入格…...

ubuntu or kylinos软件安装错误的终极解决方案
一、前言 所谓的软件安装,不管是那个系统,都是通过一定的方法把文件从源复制到目的,然后做一些配置工作,使其能正常的运行,卸载。 对于Linux来说,其目录的高度组织化,以及各软件依赖关系的复杂性,使得软件包数据库显得非常重要。 简单来说,软件包数据库最主要记录两…...

30分钟Python自动化从入门到实战(一)
第一章:自动化测试基础 第一节 软件测试分类 关于软件测试领域名词颇多,发现有许多测试新手混淆概念,从不同的角度可以将软件测试有不同的分类的方法;所以,这里汇总常见软件测试的相关名词,对软件测试领域有个概括的…...

OpenClaw权限隔离:ollama-QwQ-32B多用户任务队列与资源限制
OpenClaw权限隔离:ollama-QwQ-32B多用户任务队列与资源限制 1. 为什么需要权限隔离? 去年我在家里搭建了一个共享的AI工作站,让家人都能使用OpenClaw完成各自的自动化任务。最初我天真地以为"大家都会自觉遵守规则",结…...
无监督稳健的视觉特征学习)
(2024|TMLR|Meta,DINOv2,ViT,自蒸馏,iBOT,SwAV 中心化,判别式自监督预训练,分类/分割,分辨率调整)无监督稳健的视觉特征学习
DINOv2: Learning Robust Visual Features without Supervision 论文地址:https://arxiv.org/abs/2304.07193 项目页面:https://github.com/facebookresearch/dinov2 进 Q 学术交流群:922230617 或加 CV_EDPJ 进 W 交流群 目录 1. 引言 2…...

大鼠抗小鼠CD193抗体如何揭示CCL24-CCR3轴在心肌纤维化中的作用?
一、心脏巨噬细胞如何参与心肌纤维化进程?心肌纤维化是多种心脏疾病进展至心力衰竭的关键病理环节,其特征是心脏成纤维细胞过度活化并分泌大量细胞外基质蛋白,导致心肌僵硬与功能障碍。心脏组织中存在大量常驻巨噬细胞,它们在维持…...

Next.js + Drizzle ORM 全流程终极指南
📖 目录 🏗️ 全局架构逻辑图 (新增)前置准备:依赖安装核心配置:drizzle.config.ts (必填项检查)环境与安全:.env 与 .gitignoreTypeScript 增强:tsconfig.json 路径别名定义模型:db/schema.ts…...
)
2026.03.25(第一天)
练习题 1 答案 #include <stdio.h> int main() {int m;scanf("%d", &m);int k 2;while (k < m && (m % k))/************found************/k;/************found************/if (m k )printf("YES\n");elseprintf("NO\n&quo…...

Jetson Nano上Archiconda3安装避坑指南:从下载到换源完整流程
Jetson Nano开发者必备:Archiconda3高效配置与疑难排错全攻略 在边缘计算和嵌入式AI开发领域,Jetson Nano凭借其出色的能效比和紧凑体积,已成为众多开发者的首选平台。而Archiconda3作为专为ARM架构优化的Python环境管理工具,能够…...

材料安全评估新纪元:DeepChem驱动的AI预测模型与生物兼容性分析
材料安全评估新纪元:DeepChem驱动的AI预测模型与生物兼容性分析 【免费下载链接】deepchem Democratizing Deep-Learning for Drug Discovery, Quantum Chemistry, Materials Science and Biology 项目地址: https://gitcode.com/GitHub_Trending/de/deepchem …...

精确率 vs 召回率:为什么你的模型总是顾此失彼?
精确率 vs 召回率:为什么你的模型总是顾此失彼? 在机器学习项目的实际落地过程中,我们常常会遇到一个令人头疼的现象:当模型在某个评估指标上表现优异时,另一个指标却惨不忍睹。这种"按下葫芦浮起瓢"的困境&…...
)
C++开发者必看:nlohmann::json实战避坑指南(含性能优化技巧)
C开发者必看:nlohmann::json实战避坑指南(含性能优化技巧) 如果你正在用C处理JSON数据,nlohmann::json库大概率已经出现在你的项目依赖中。这个被戏称为"现代C的瑞士军刀"的库,确实让JSON操作变得像std::vec…...

深入理解RAC中的gc buffer busy:从原理到避坑指南
深入解析RAC中的gc buffer busy:原理剖析与实战优化 在Oracle RAC环境中,gc buffer busy等待事件是影响性能的常见瓶颈之一。不同于单机数据库中的buffer busy waits,这一现象直接反映了集群环境下多实例间数据块协同访问的复杂性。本文将带您…...