1.获取用户当前所在的位置
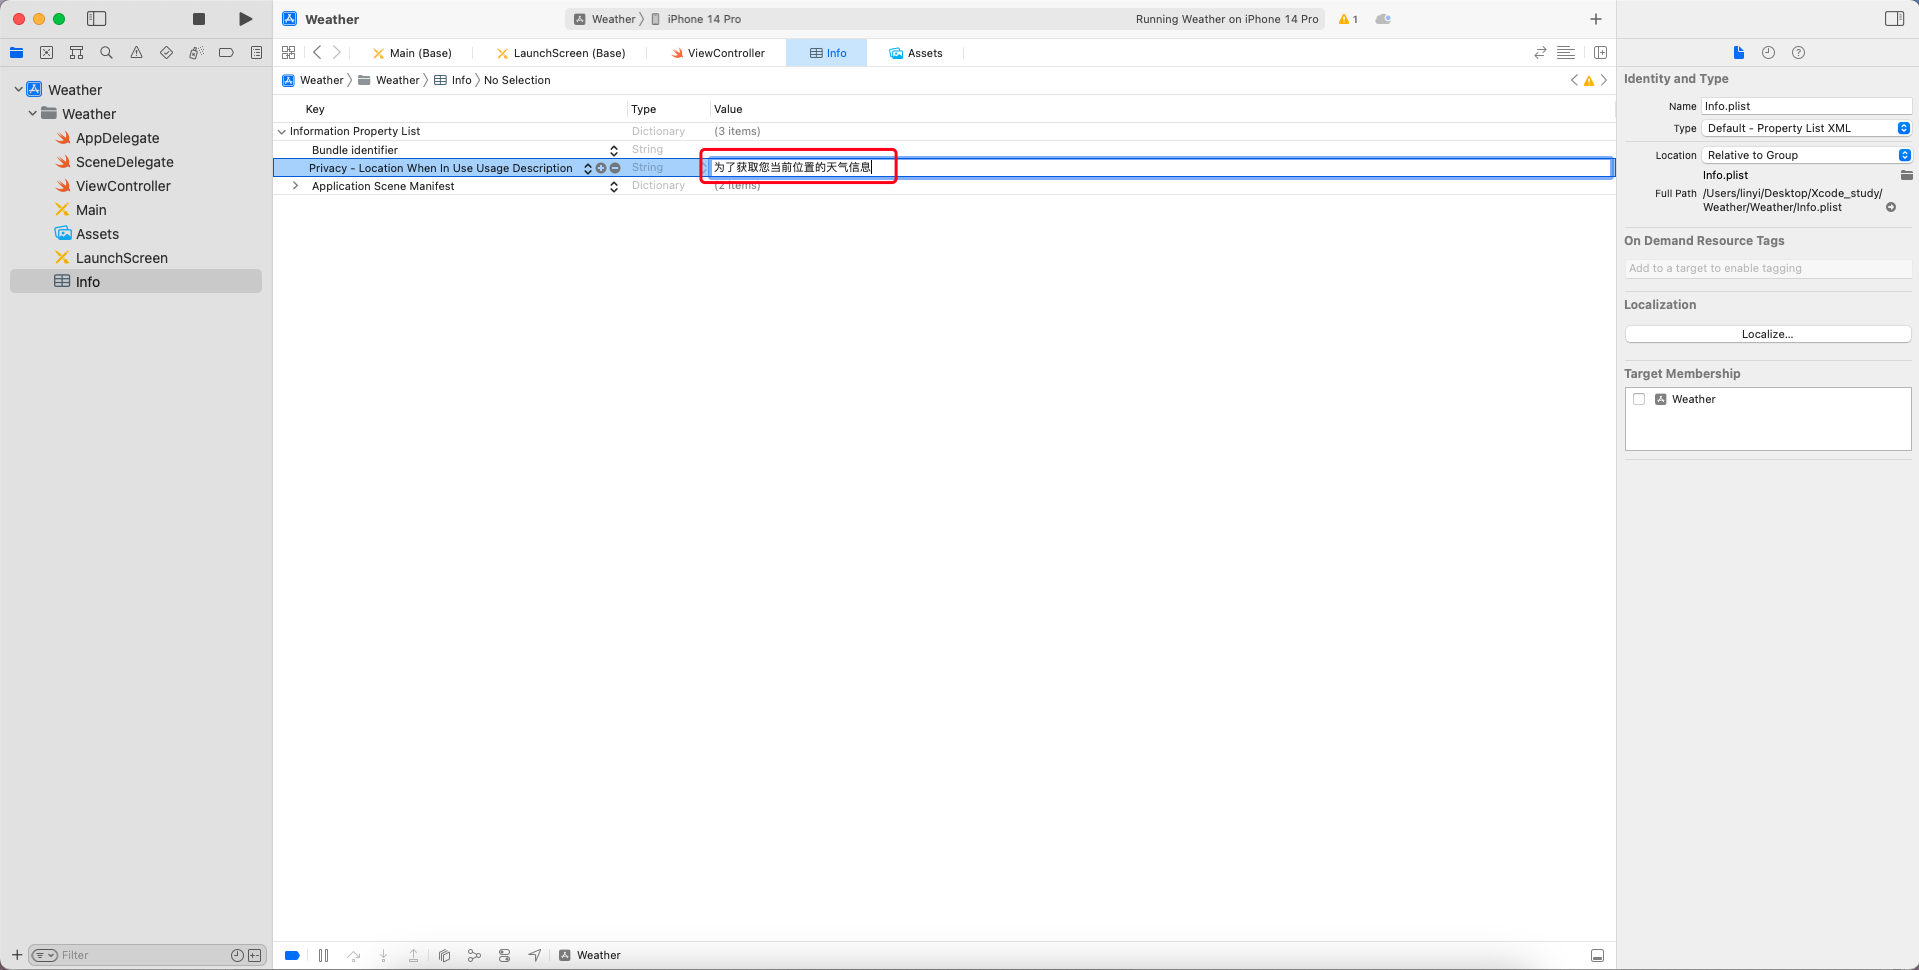
在infi中点击加号,选择权限:当用户使用app的时候获取位置权限.
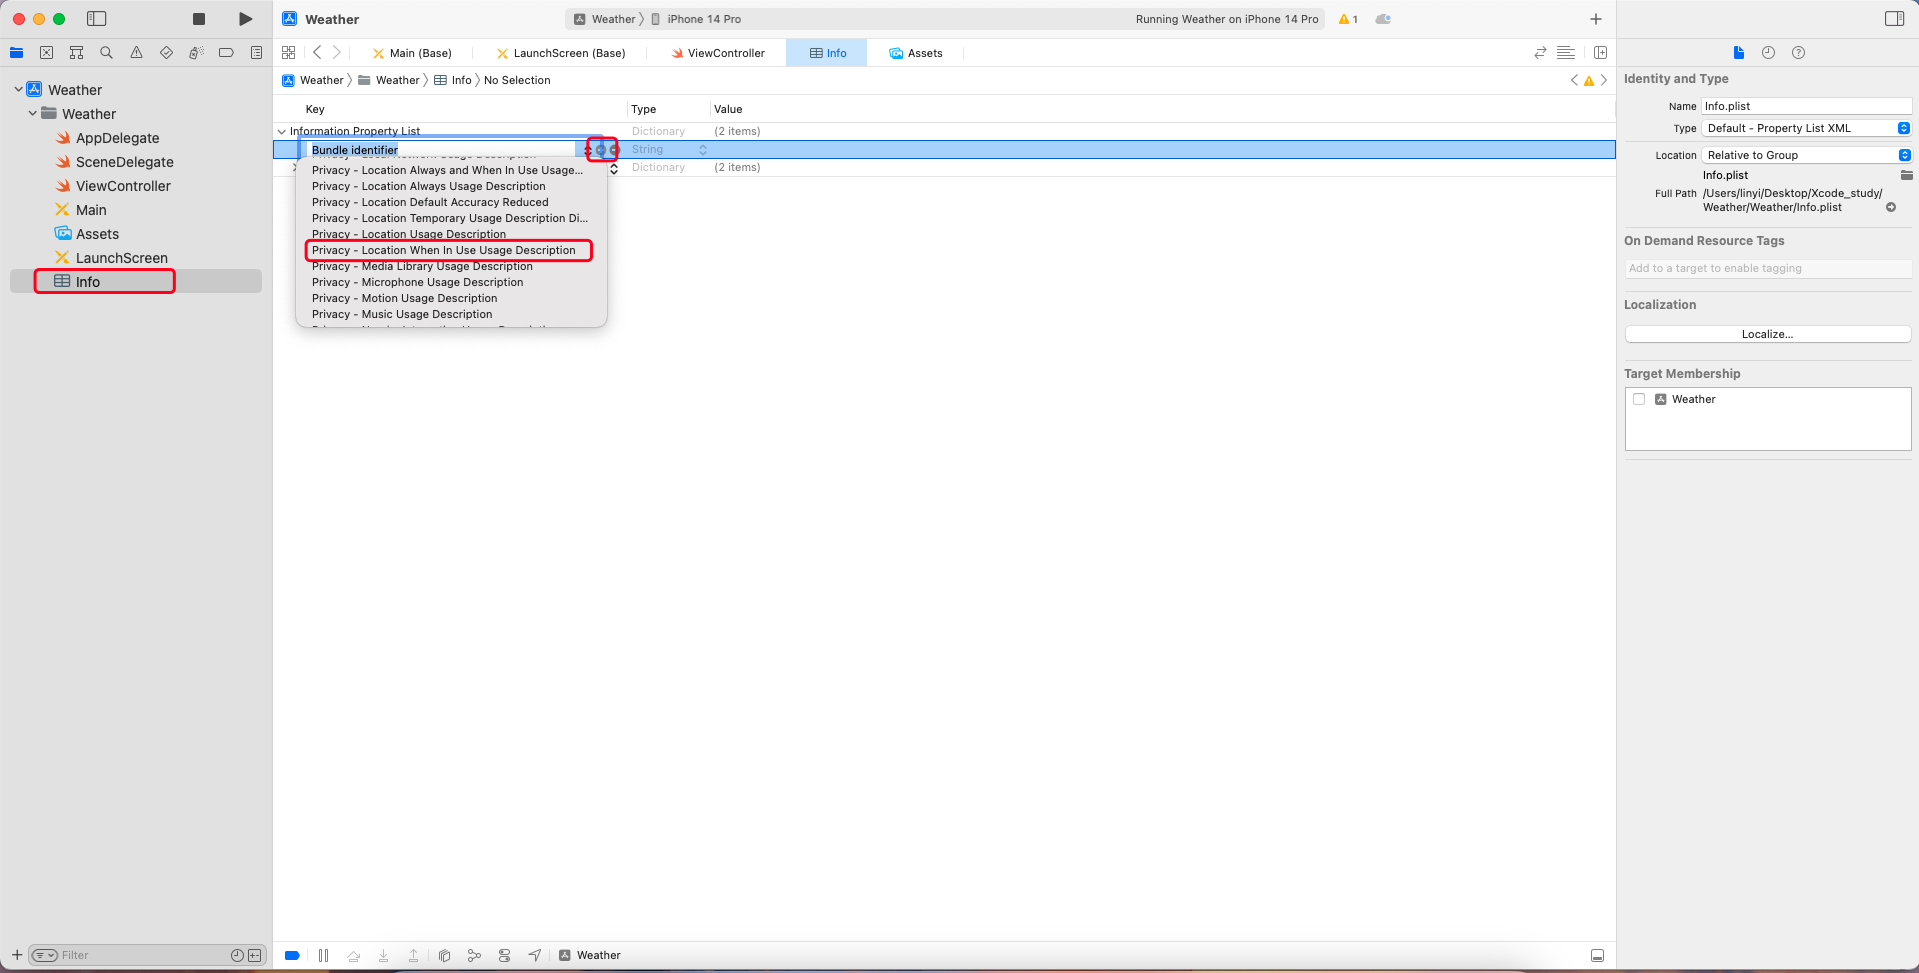
填写使用位置权限的目的.
2.获取用户的经纬度.
ViewController:
import UIKit
import CoreLocationclass ViewController: UIViewController, CLLocationManagerDelegate {    //遵循CLLocationManagerDelegate协议//位置管理器let locationManager = CLLocationManager()override func viewDidLoad() {super.viewDidLoad()// Do any additional setup after loading the view.locationManager.requestWhenInUseAuthorization()    //请求当用户正在使用app的时候允许后台得到用户位置.只会弹出来一次locationManager.delegate = self    //位置管理器代理人是view controller对象.希望view controller能通过实现CLLocationManagerDelegate协议中的方法,获取到当前用户位置信息locationManager.desiredAccuracy = kCLLocationAccuracyThreeKilometers    //设置需要的位置精度(三公里误差精度)locationManager.requestLocation()    //请求用户位置}func locationManager(_ manager: CLLocationManager, didUpdateLocations locations: [CLLocation]) {  //requesLocation请求到了的话会执行这个方法let lon = locations[0].coordinate.longitude   //精度.因为location可能实时变化(地图app),所以是一个数组.我们只需要使用第一个获取到的位置.let lat = locations[0].coordinate.latitude    //纬度print(lon)print(lat)}func locationManager(_ manager: CLLocationManager, didFailWithError error: Error) {    //requesLocation请求失败的话会执行这个方法print(error)}}

3.通过第三方服务获取当前天气
(1)安装cocoapods
https://dev.qweather.com/
在网站中可以找到,当向 https://devapi.qweather.com/v7/weather/now?[请求参数] 发送请求时,就可以得到当前天气.
通过依赖管理工具cocoapods命令行工具进行依赖管理.在终端里对它进行下载并安装,
在Mac的启动台上找到「终端」应用,或者在触控板上通过四指聚合来打开「启动台—终端」。
在命令行输入
sudo gem install cocoapods
(以超级管理员的身份,安装cocoapods这个应用.)
输入电脑开机密码.
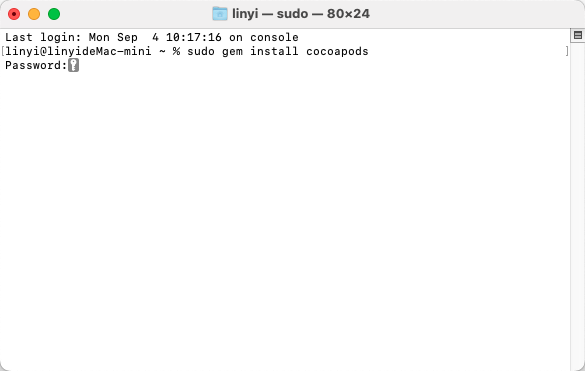
等待安装成功.

这里可能出现Error installing cocoapods:
The last version of activesupport (>= 5.0, < 8) to support your Ruby & RubyGems was 6.1.7.6. Try installing it with `gem install activesupport -v 6.1.7.6` and then running the current command again
activesupport requires Ruby version >= 2.7.0. The current ruby version is 2.6.10.210.
这个bug,解决方式请参照博客:https://www.cnblogs.com/lysboke/p/17678896.html
(2)安装功能包
在cocoapods官网https://cocoapods.org/的搜索栏搜索Alamofire.点击进入.
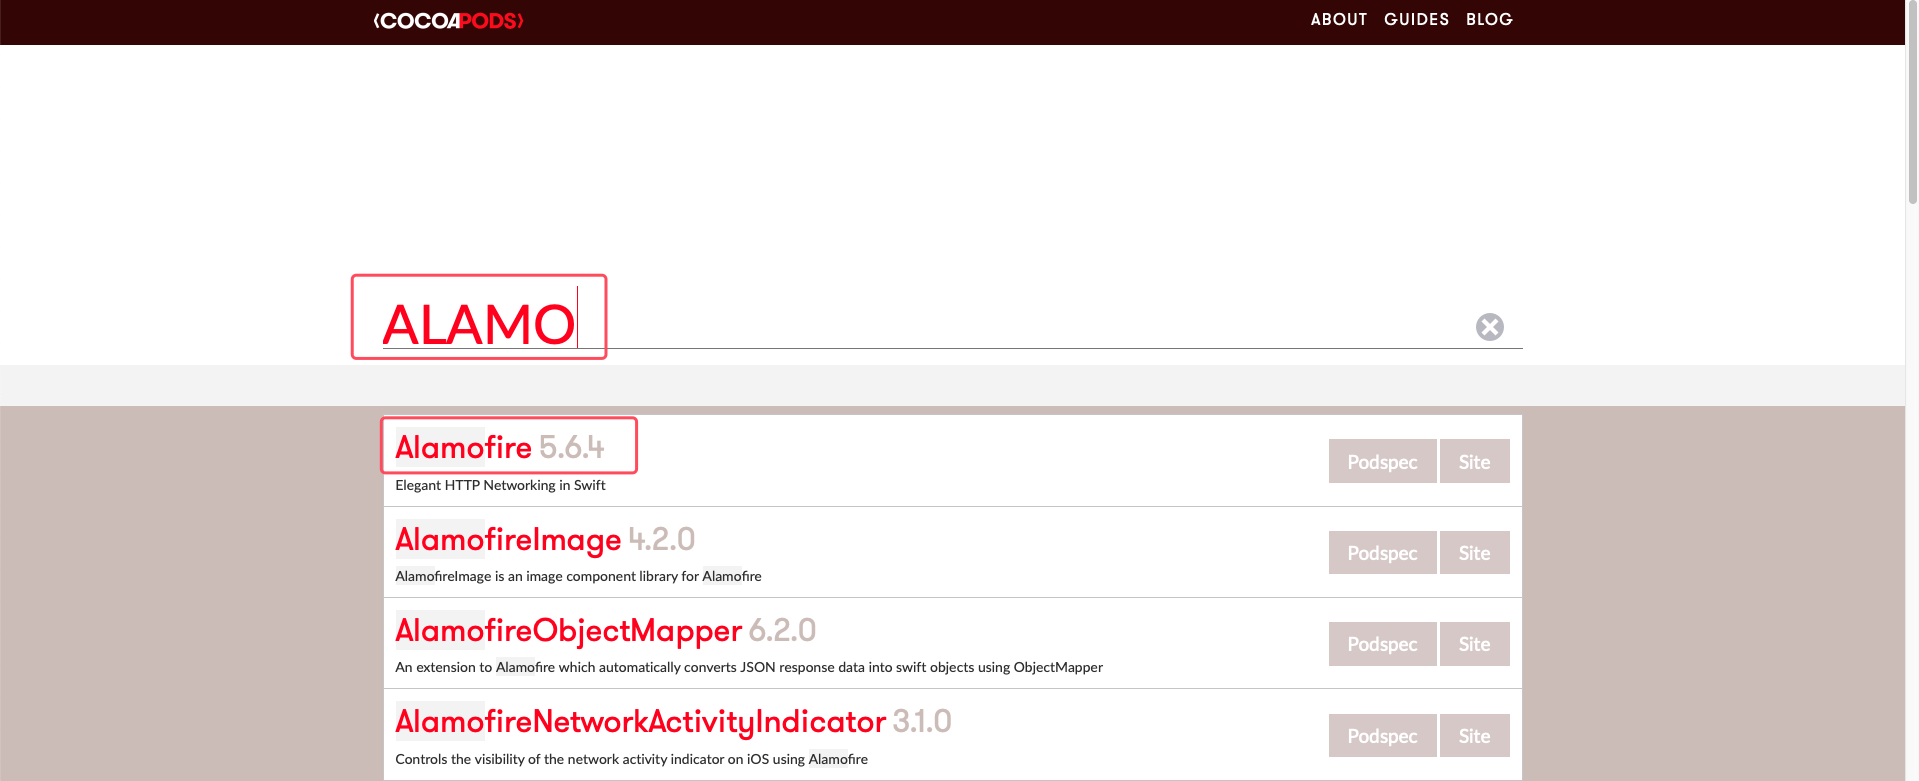
用cocoapods安装Alamofire.
在终端中输入cd空格,将项目文件夹Weather拖入到cd后面.点击回车.

终端输入
pod init
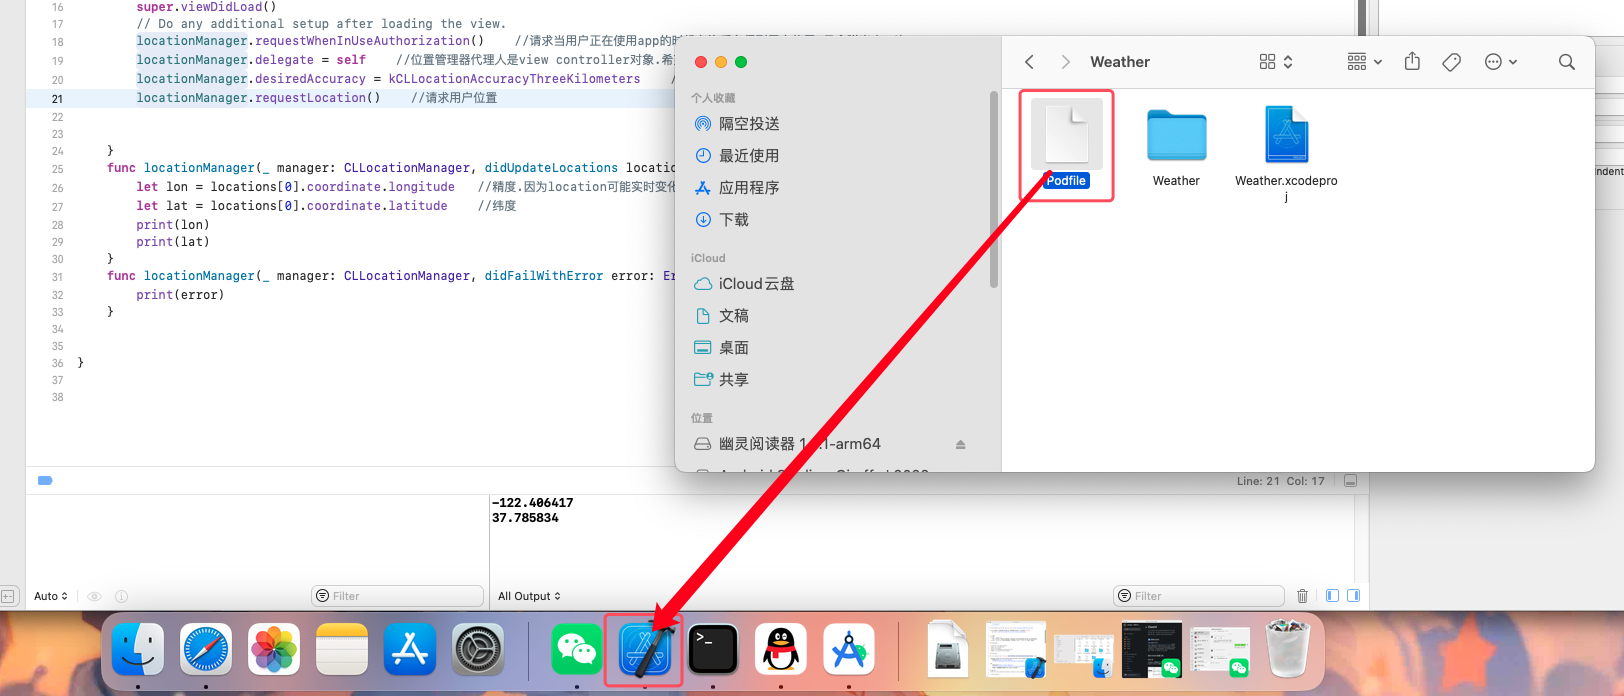
等待.完成之后打开Weather文件夹,发现成功创建Podfile文件.

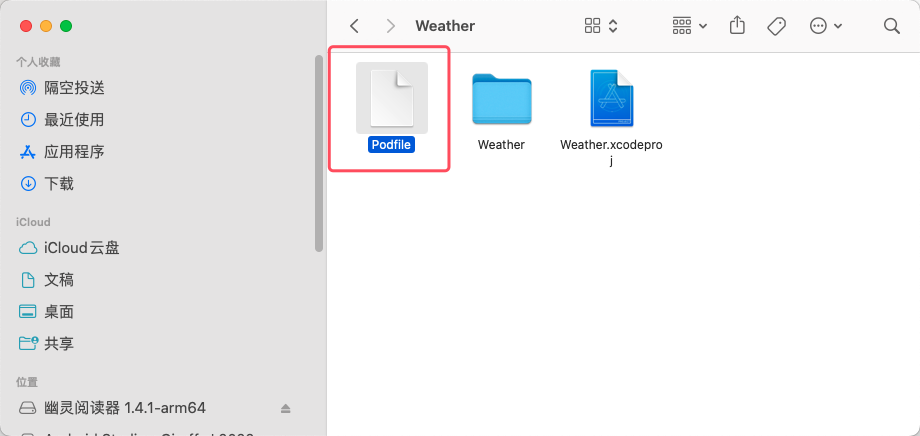
将Podfile拖入Xcode,Podfile自动弹出.
加入代码:
pod 'Alamofire'
保存并关闭Podfile.

在终端输入命令安装功能包:
pod install

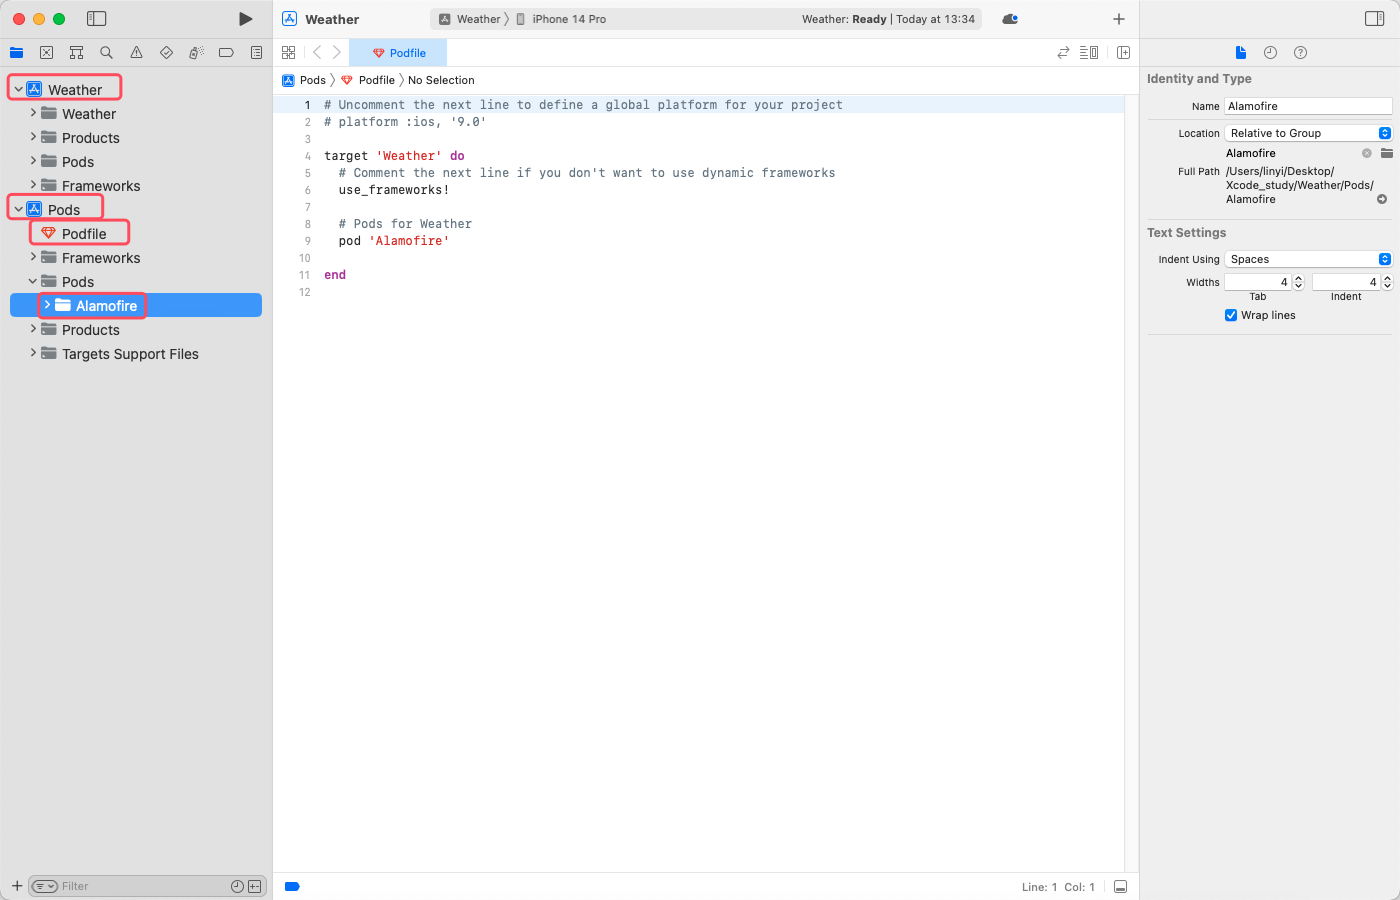
关闭Xcode,从Weather文件中打开Weather.xcworkspace,可以看到项目结构如下.
4.利用和风API获取当前位置的天气信息
注册和风天气账号.在和风天气中创建一个免费的新项目.
https://console.qweather.com/#/apps/create-app/create
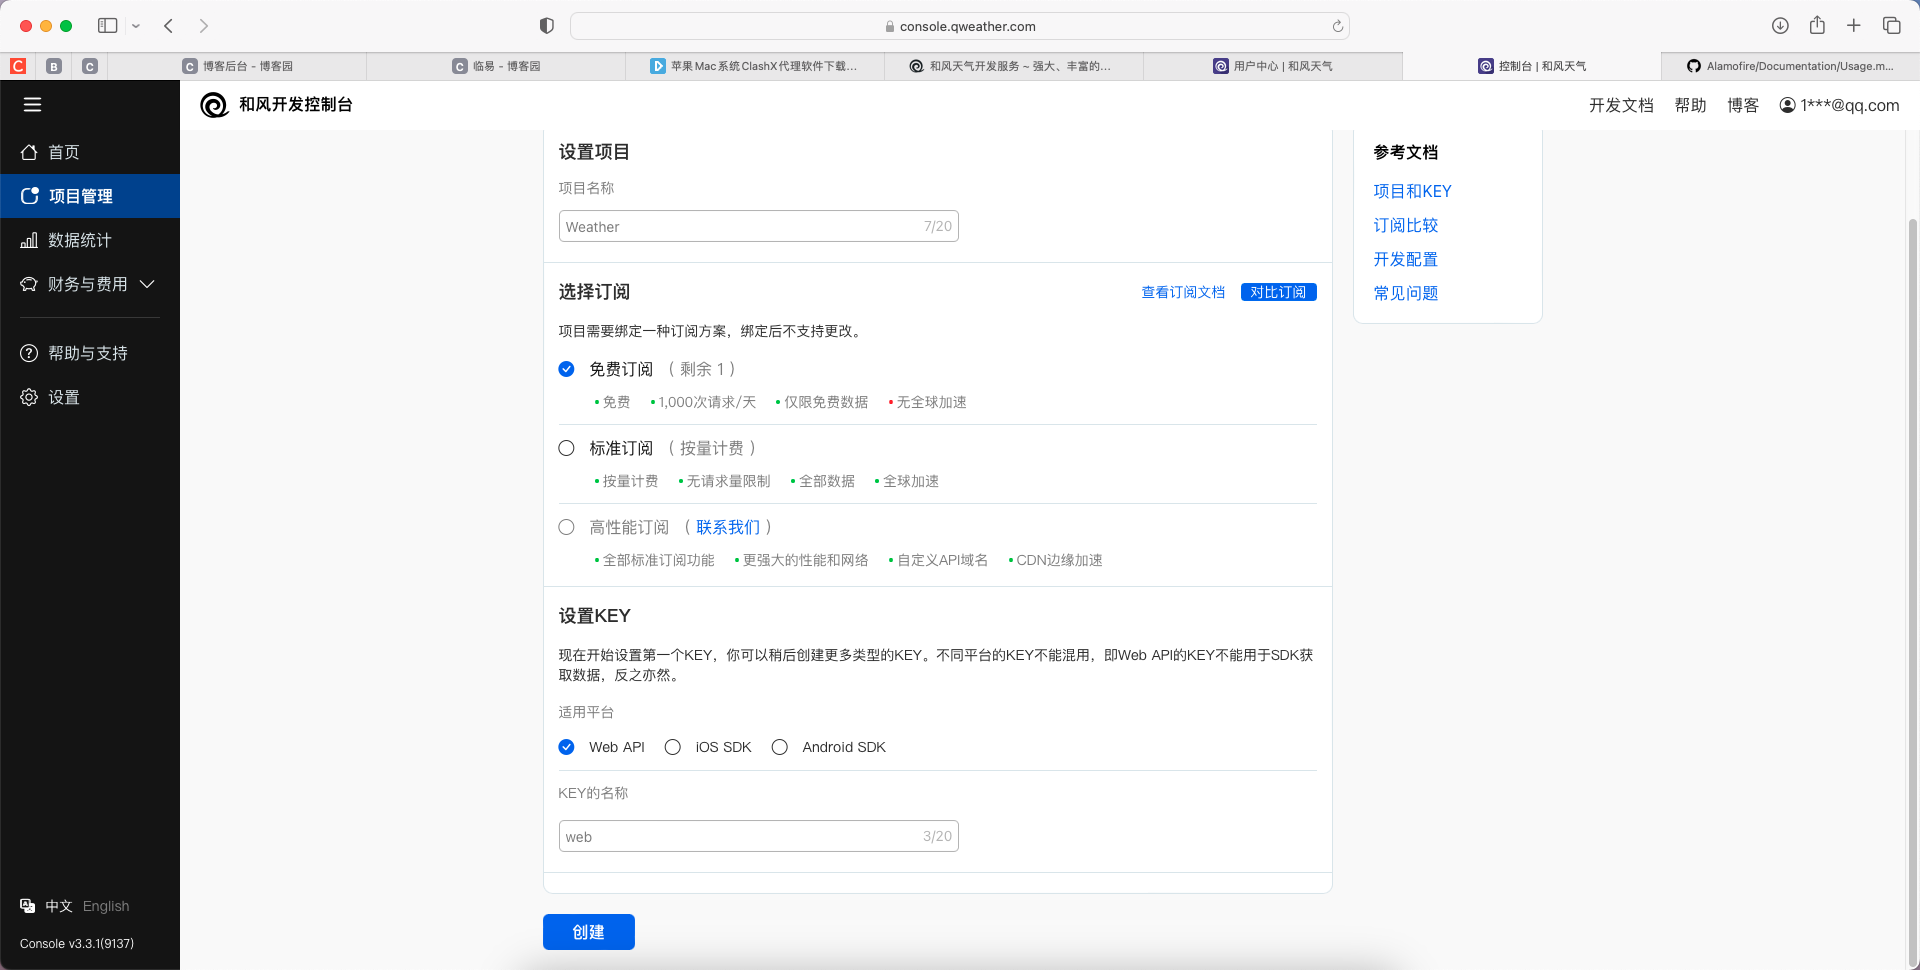
得到key.
编写代码得到当前经纬度下的天气数据信息.
import UIKit
import CoreLocation
import Alamofire   //引入和风API包class ViewController: UIViewController, CLLocationManagerDelegate {    //遵循CLLocationManagerDelegate协议//位置管理器let locationManager = CLLocationManager()override func viewDidLoad() {super.viewDidLoad()// Do any additional setup after loading the view.locationManager.requestWhenInUseAuthorization()    //请求当用户正在使用app的时候允许后台得到用户位置.只会弹出来一次locationManager.delegate = self    //位置管理器代理人是view controller对象.希望view controller能通过实现CLLocationManagerDelegate协议中的方法,获取到当前用户位置信息locationManager.desiredAccuracy = kCLLocationAccuracyThreeKilometers    //设置需要的位置精度(三公里误差精度)locationManager.requestLocation()    //请求用户位置}func locationManager(_ manager: CLLocationManager, didUpdateLocations locations: [CLLocation]) {  //requesLocation请求到了的话会执行这个方法let lon = locations[0].coordinate.longitude   //精度.因为location可能实时变化(地图app),所以是一个数组.我们只需要使用第一个获取到的位置.let lat = locations[0].coordinate.latitude    //纬度//print(lon)//print(lat)AF.request("https://devapi.qweather.com/v7/weather/now?location=\(lon),\(lat)&key=a91848aaab484a3599a703b139dfe87b").responseJSON { response inif let data = response.value{print(data)}}      //请求和风API的网址,得到当前位置的天气}func locationManager(_ manager: CLLocationManager, didFailWithError error: Error) {    //requesLocation请求失败的话会执行这个方法print(error)}
}
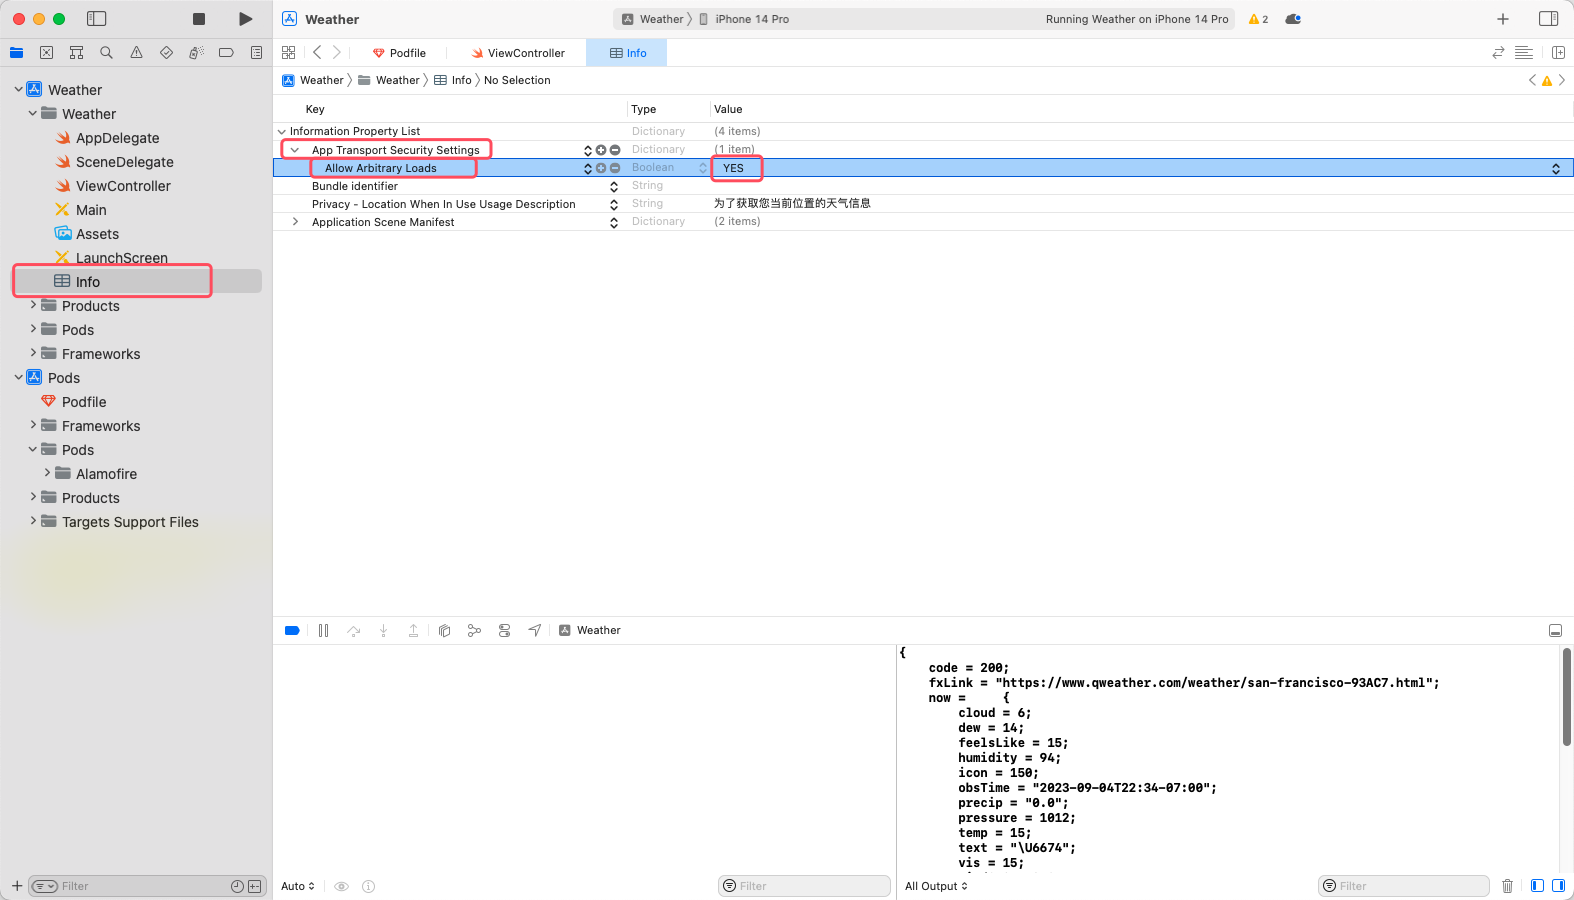
为了在测试中使用http传输,在Info中新增一个key和Value:App Transport Security Settings,在它里边再添加一个Allow Arbitrary Loads,Value设置为Yes.
5.解析和风API返回的JSON数据
在Xcode中的Podfile中添加如下:
pod 'SwiftyJSON', '~> 4.0'
保存之后在终端输入:
pod install

下载之后引入JSON解析包,写入代码,测试.
import UIKit
import CoreLocation
import Alamofire   //引入和风API包
import SwiftyJSON   //引入解析JSON数据的包class ViewController: UIViewController, CLLocationManagerDelegate {    //遵循CLLocationManagerDelegate协议//位置管理器let locationManager = CLLocationManager()override func viewDidLoad() {super.viewDidLoad()// Do any additional setup after loading the view.locationManager.requestWhenInUseAuthorization()    //请求当用户正在使用app的时候允许后台得到用户位置.只会弹出来一次locationManager.delegate = self    //位置管理器代理人是view controller对象.希望view controller能通过实现CLLocationManagerDelegate协议中的方法,获取到当前用户位置信息locationManager.desiredAccuracy = kCLLocationAccuracyThreeKilometers    //设置需要的位置精度(三公里误差精度)locationManager.requestLocation()    //请求用户位置}func locationManager(_ manager: CLLocationManager, didUpdateLocations locations: [CLLocation]) {  //requesLocation请求到了的话会执行这个方法let lon = locations[0].coordinate.longitude   //精度.因为location可能实时变化(地图app),所以是一个数组.我们只需要使用第一个获取到的位置.let lat = locations[0].coordinate.latitude    //纬度//print(lon)//print(lat)AF.request("https://devapi.qweather.com/v7/weather/now?location=\(lon),\(lat)&key=a91848aaab484a3599a703b139dfe87b").responseJSON { response inif let data = response.value{let weatherJSON = JSON(data)print(weatherJSON)}}      //请求和风API的网址,得到当前位置的天气}func locationManager(_ manager: CLLocationManager, didFailWithError error: Error) {    //requesLocation请求失败的话会执行这个方法print(error)}
}
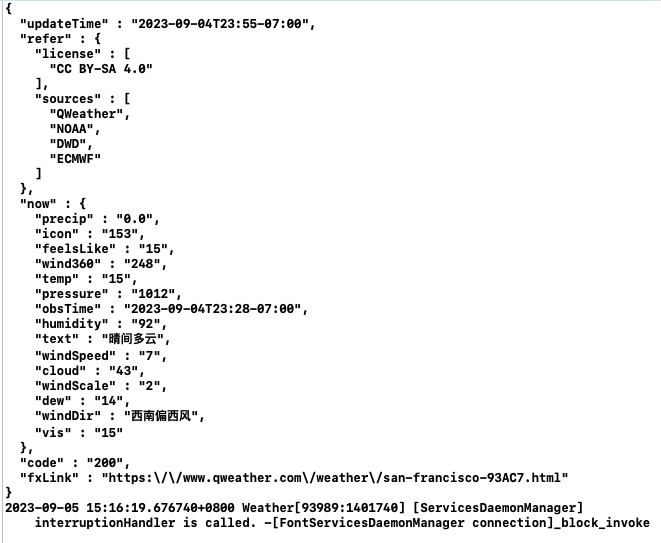
启动运行:
6.拿到天气数据并展示在界面上
把温度拖拽到ViewController中.
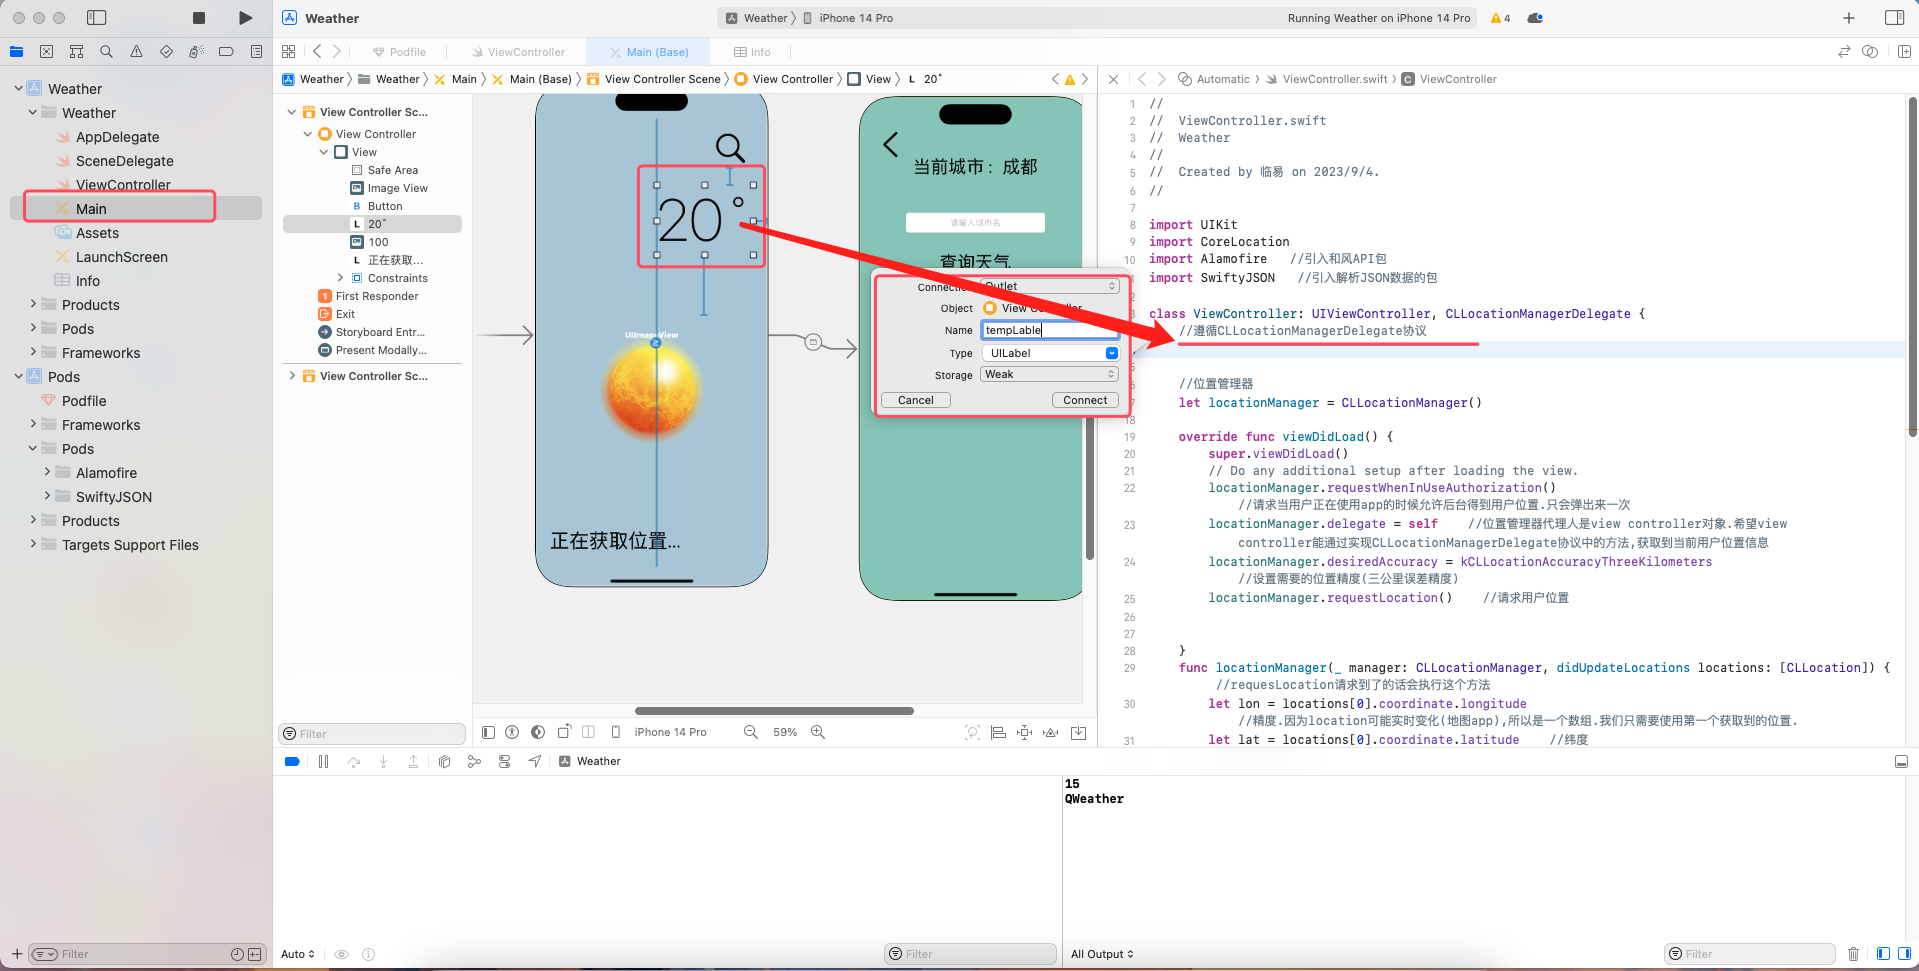
同理,将天气图标和用户当前所在的城市也拖拽到代码区.

新建一个swift文件:
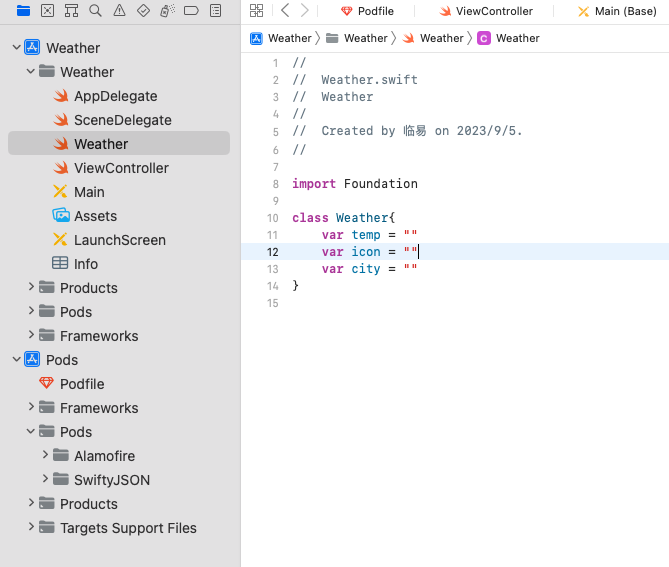
Weather.swift:
import Foundationclass Weather{var temp = ""var icon = ""var city = ""
}
ViewController:
import UIKit
import CoreLocation
import Alamofire   //引入和风API包
import SwiftyJSON   //引入解析JSON数据的包class ViewController: UIViewController, CLLocationManagerDelegate {    //遵循CLLocationManagerDelegate协议@IBOutlet weak var tempLable: UILabel!@IBOutlet weak var iconImageView: UIImageView!@IBOutlet weak var cityLable: UILabel!//位置管理器let locationManager = CLLocationManager()//Weather.swift实例化let weather = Weather()override func viewDidLoad() {super.viewDidLoad()// Do any additional setup after loading the view.locationManager.requestWhenInUseAuthorization()    //请求当用户正在使用app的时候允许后台得到用户位置.只会弹出来一次locationManager.delegate = self    //位置管理器代理人是view controller对象.希望view controller能通过实现CLLocationManagerDelegate协议中的方法,获取到当前用户位置信息locationManager.desiredAccuracy = kCLLocationAccuracyThreeKilometers    //设置需要的位置精度(三公里误差精度)locationManager.requestLocation()    //请求用户位置}func locationManager(_ manager: CLLocationManager, didUpdateLocations locations: [CLLocation]) {  //requesLocation请求到了的话会执行这个方法let lon = locations[0].coordinate.longitude   //精度.因为location可能实时变化(地图app),所以是一个数组.我们只需要使用第一个获取到的位置.let lat = locations[0].coordinate.latitude    //纬度//print(lon)//print(lat)AF.request("https://devapi.qweather.com/v7/weather/now?location=\(lon),\(lat)&key=a91848aaab484a3599a703b139dfe87b").responseJSON { response inif let data = response.value{let weatherJSON = JSON(data)//print(weatherJSON["now"]["temp"])    //或weatherJSON["now", "temp"]//print(weatherJSON["refer"]["sources"][0])     //weatherJSON["refer", "sources", 0]//MVC结构self.weather.temp = "\(weatherJSON["now"]["temp"].stringValue)˚"self.weather.icon = weatherJSON["now"]["icon"].stringValueself.tempLable.text = self.weather.tempself.iconImageView.image = UIImage(named: self.weather.icon)}}      //请求和风API的网址,得到当前位置的天气}func locationManager(_ manager: CLLocationManager, didFailWithError error: Error) {    //requesLocation请求失败的话会执行这个方法print(error)}
}
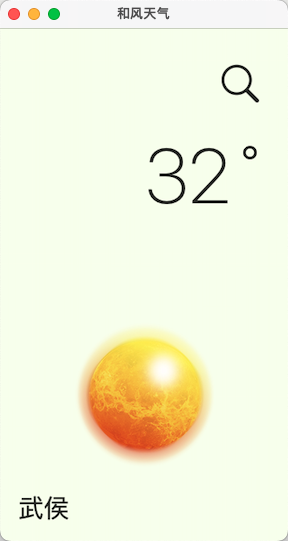
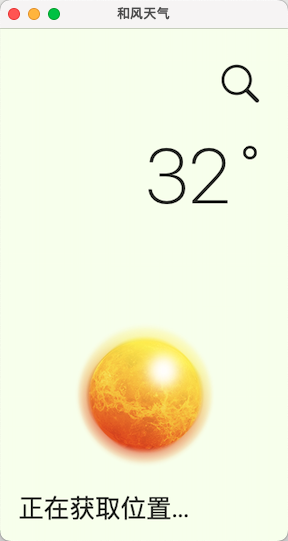
启动测试:
7.获取用户当前所在的城市
ViewController:
import UIKit
import CoreLocation
import Alamofire   //引入和风API包
import SwiftyJSON   //引入解析JSON数据的包class ViewController: UIViewController, CLLocationManagerDelegate {    //遵循CLLocationManagerDelegate协议@IBOutlet weak var tempLable: UILabel!@IBOutlet weak var iconImageView: UIImageView!@IBOutlet weak var cityLable: UILabel!//位置管理器let locationManager = CLLocationManager()//Weather.swift实例化let weather = Weather()override func viewDidLoad() {super.viewDidLoad()// Do any additional setup after loading the view.locationManager.requestWhenInUseAuthorization()    //请求当用户正在使用app的时候允许后台得到用户位置.只会弹出来一次locationManager.delegate = self    //位置管理器代理人是view controller对象.希望view controller能通过实现CLLocationManagerDelegate协议中的方法,获取到当前用户位置信息locationManager.desiredAccuracy = kCLLocationAccuracyThreeKilometers    //设置需要的位置精度(三公里误差精度)locationManager.requestLocation()    //请求用户位置}func locationManager(_ manager: CLLocationManager, didUpdateLocations locations: [CLLocation]) {  //requesLocation请求到了的话会执行这个方法let lon = locations[0].coordinate.longitude   //精度.因为location可能实时变化(地图app),所以是一个数组.我们只需要使用第一个获取到的位置.let lat = locations[0].coordinate.latitude    //纬度//print(lon)//print(lat)AF.request("https://devapi.qweather.com/v7/weather/now?location=\(lon),\(lat)&key=a91848aaab484a3599a703b139dfe87b").responseJSON { response inif let data = response.value{let weatherJSON = JSON(data)//print(weatherJSON["now"]["temp"])    //或weatherJSON["now", "temp"]//print(weatherJSON["refer"]["sources"][0])     //weatherJSON["refer", "sources", 0]//MVC结构self.weather.temp = "\(weatherJSON["now"]["temp"].stringValue)˚"self.weather.icon = weatherJSON["now"]["icon"].stringValueself.tempLable.text = self.weather.tempself.iconImageView.image = UIImage(named: self.weather.icon)}}      //请求和风API的网址,得到当前位置的天气AF.request("https://geoapi.qweather.com/v2/city/lookup?location=\(lon),\(lat)&key=a91848aaab484a3599a703b139dfe87b").responseJSON { response inif let data = response.value{let cityJSON = JSON(data)//处理数据self.weather.city = cityJSON["location", 0, "name"].stringValue//处理AIself.cityLable.text = self.weather.city}}}func locationManager(_ manager: CLLocationManager, didFailWithError error: Error) {    //requesLocation请求失败的话会执行这个方法
cityLable.text = "获取用户城市失败"
}}
启动测试:
