C++ list容器的实现及讲解
所需要的基础知识
对C++类的基本了解 默认构造函数 操作符重载 this指针 引用 模板等知识具有一定的了解,阅读该文章会很轻松。
链表节点
template<class T>struct list_node{T _data;list_node<T>* _next;list_node<T>* _prev;list_node(const T& x = T()):_data(x), _next(nullptr)//只需要将链表的节点初始化为空 在链表对象中重新进行节点的设置, _prev(nullptr){}};template<class T> 是类模板 取决于链表存的数据类型 因为链表可以存许多类型的数据类型 那么只要显示传类型 就可以反复去复用 类模板 但是该写的代码编译器会帮你写 就是每个类型都会有一份代码
默认构造函数 对链表成员进行初始化 运用了初始化列表 在花括号中只能进行赋值 不是初始化
链表list中的成员及函数
插入
从插入函数的实现就可以看出 该链表是双向循环链表
iterator insert(iterator pos, const T& x){node* cur = pos.node;node* newnode = new node(x);newnode->_next = cur->_next;newnode->_prev = cur;cur->_next->_prev = newnode;cur->_next = newnode;++_size;return newnode;}插入和C语言中链表的插入没有区别 创建一个新节点 先对新结点进行操作 再对要插入的位置进行操作一面将插入的位置丢失 无法将双向循环链表连接上
返回值是新节点的位置 防止你再再此处插入 方便插入
下面的头插尾插都是对插入接口的赋用
void push_back(const T& x){insert(--end(), x);}void push_front(const T& x){insert(begin(), x);}链表的遍历靠的就是迭代器 所以传迭代器就知道了链表的节点位置 依次可以插入 如果你要任意位置插入 那就要计算 迭代器的位置 进行传入
删除
iterator earse(iterator pos){node* cur = pos.node;node* next = cur->_next;node* prev = cur->_prev;delete cur;next->_prev = prev;prev->_next = next;--_size;return iterator(next);}删除也是和之前讲过的C语言部分链表一样 删除操作要返回下一个位置的迭代器
返回值这样设计 就可以自动向后遍历删除
头删尾删 就是对删除链表的复用
void pop_back(){earse(--end());}void pop_front(){earse(begin());}链表中的迭代器调用接口
iterator begin(){return _head->_next;}iterator end(){return _head;}const_iterator begin()const{return const_iterator(_head->_next);}const_iterator end()const{return const_iterator(_head);}reverse_iterator rbegin(){return reverse_iterator(end());}reverse_iterator rend(){return reverse_iterator(begin());}const_reverse_iterator rbegin()const{return const_reverse_iterator(end());} const_reverse_iterator rend()const{return const_reverse_iterator(begin());} 迭代器再外面就是这样调用的 只需调用list函数中的正向和反向迭代器接口 就可以进行正反向遍历
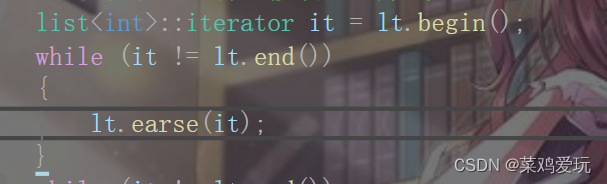
清除函数clear()
void clear(){iterator it = begin();while (it != end()){it = earse(it);//it++;//因为earse()返回的是该节点下一个节点 所以不用在进行++}}clear()就是复用earse()函数 只保留头节点_head
析构函数
~list(){clear();_size = 0;delete _head;_head = nullptr;}编译器自己写的析构函数对自定义类型不进行析构 链表节点就是自定义类型 所以需要自己写析构函数 进行数据的释放
赋值操作符重载“=”
void swap(list<T>& lt){std::swap(_head, lt._head);std::swap(_size, lt._size);}list<T>& operator=(list<T> x){swap(x);return *this;}operator=(参数) 参数是进行传值传参 传值传参就是原数据的拷贝 出了该函数这个拷贝参数x会自行销毁 会调用自己的构造函数 既然x和原数据类型值是一样的 所以就可以进行交换
swap(x)->this->swap(x) 在list函数内部除了static修饰的函数没有this指针其他函数都有this指针 你可以在函数内部进行显示调用 但是函数参数不能出现
如:A=B A的地址就是this B就是x;
链表中的类型及函数讲解
-
正向迭代器
typedef的类型简化
typedef list_node<T> Node;typedef list_iterator<T, Ref, Ptr> self;
由于原始类型过于繁杂 所以进行类型简化
迭代器函数介绍:
默认构造函数
list_iterator(Node* x):node(x){}因为迭代器中存的是 链表的节点 是自定义类型 需要调用对应的默认初始化函数
正向迭代器的功能就是将链表正向遍历一遍
既然是遍历肯定要将链表中的数据打印出来那就需要对应的函数去获取
操作符重载:

“*”->operator*()
Ref operator*(){return node->_data;}"->"operator->()
Ptr operator->(){return &node->_data;}
迭代器中存的是链表的节点 然而用迭代器是这么用的
list<T>::iterator it = begin()获取迭代器的首 it就是指针 所以你想获取链表节点中的数据就需要重载“*和->" *it的功能就是获取该节点的数据 只是迭代器中对其进行了重载实现 所以你可以这样使用 ”->"道理也是一样 都是迭代器进行了重载实现 功能就是通过指针进行迭代器中共有函数和成员的直接获取 淡然*it也是可以就需要叫“.”操作符进行公有成员和函数的获取
这两个返回值的类型是不一样的 “*”既然是数据 那么就可以引用返回 只要你不销毁程序不结束没有出作用域 就可以进行传引用返回 “->"返回的就是指针类型就是T* 他的返回值前面有个&取地址符 然而”*“和”->"两者遇到一起就抵消了 就剩下node->_data也就是你想要的节点数据 我就是这样理解操作符“->"的重载实现原理的
"前置++,--,后置++,--"
self& operator++(){node = node->_next;return *this;}self& operator--(){node = node->_prev;return *this;}self operator++(int){self tmp(*this);node = node->_next;return tmp;}self operator--(int){self tmp(*this);node = node->_prev;return tmp;}前置与后置操作的区别就是前置不需要数据类型进行占位 构成操作符重载
那么返回值类型就是迭代器的类型 返回值根据前置和后置的功能有所不同
前置:先++/--在用 也就迭代器要返回下一个位置 由于下一个位置是存在的你不销毁或者程序不结束 那么该位置始终是有效的 所以可以返回引用 &
后置:先用再++/-- 也就是要返回当前的值还要进行++/-- 那就要储存当前的值 不然进行完++/--找起来有点麻烦 可以找因为list的结构是双向循环链表可以向前查找 返回++/--的前一个节点就行
拷贝当前数据出了作用域该数据会销毁 那么就不能进行引用& 返回 只能传值拷贝返回
“比较操作符!=,==”因为不需要大于或小于 比较对象是指针
bool operator==(const self& x){return node == x.node;}bool operator!=(const self& x){return node != x.node;}既然是地址的比较就应该返回 bool类型的值 (true/false)
反向迭代器
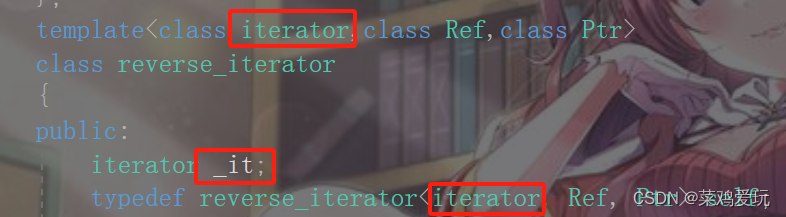
由上图可以看出 反向迭代器是对正向迭代器的赋用 而且反向迭代器中成员存的是正向迭代器_it
反向迭代器的默认构造函数
reverse_iterator(iterator it):_it(it){}用正向迭代器对其进行初始化
操作符重载——>"*和->"
Ref operator*(){iterator tmp = _it;return *(--tmp);}Ptr operator->(){iterator tmp = _it;return &(operator*());}
观察上图的反向迭代器的首部 再要获取节点的前一个位置 所以要先保存当前节点 再对当前进行前移 依次达到目的
“->"返回的就是指针类型就是T* 他的返回值前面有个&取地址符 然而”*“和”->"两者遇到一起就抵消了 就剩下node->_data也就是你想要的节点数据 我就是这样理解操作符“->"的重载实现原理的
所以返回的既然是数据 那么就可以复用 之前实现的“operator*()”,
Ref -> T& Ptr -> T* T就是模板参数 取决于外面链表中存的是什么类型的参数
操作符->前置“++/--”和后置"++/--"
self& operator++(){--_it;return *this;}self& operator--(){++_it;return *this;}self operator++(int){self tmp(*this);--_it;return *this;}self operator--(int){self tmp(*this);++_it;return *this;}前置++/-- 和后置++/-- 都是对链表节点进行操作 然而迭代器中存的是链表节点 在外界对迭代器进行操作 为了使类型可以对上 所以返回self 就是反向迭代器的简化类型
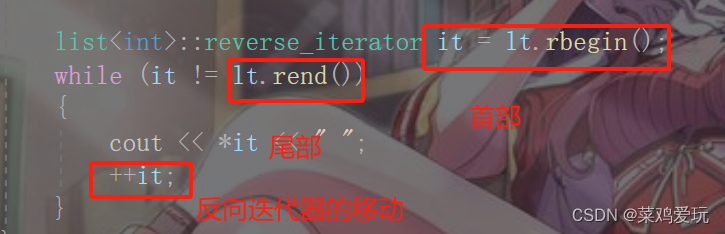
反向迭代器的运用

前置++/-- 和后置++/--原理是一样的 先++再用 先用再++ 在正向迭代器中讲过 所以不再重复
迭代器判断是否相等
bool operator!=(const self& s){return _it != s._it;} 
链表list对象的实现
#pragma once#include<iostream>
#include<string>
#include<vector>
using namespace std;namespace DZ
{template<class T>struct list_node{T _data;list_node<T>* _next;list_node<T>* _prev;list_node(const T& x = T()):_data(x), _next(nullptr)//只需要将链表的节点初始化为空 在链表对象中重新进行节点的设置, _prev(nullptr){}};template<class T, class Ref, class Ptr>class list_iterator{public:typedef list_node<T> Node;typedef list_iterator<T, Ref, Ptr> self;list_iterator(Node* x):node(x){}self& operator++(){node = node->_next;return *this;}self& operator--(){node = node->_prev;return *this;}self operator++(int){self tmp(*this);node = node->_next;return tmp;}self operator--(int){self tmp(*this);node = node->_prev;return tmp;}bool operator==(const self& x){return node == x.node;}bool operator!=(const self& x){return node != x.node;}Ref operator*(){return node->_data;}Ptr operator->(){return &node->_data;}Node* node;};template<class iterator,class Ref,class Ptr>class reverse_iterator{public:iterator _it;typedef reverse_iterator<iterator, Ref, Ptr> self;reverse_iterator(iterator it):_it(it){}Ref operator*(){iterator tmp = _it;return *(--tmp);}Ptr operator->(){iterator tmp = _it;return &(operator*());}self& operator++(){--_it;return *this;}self& operator--(){++_it;return *this;}self operator++(int){self tmp(*this);--_it;return *this;}self operator--(int){self tmp(*this);++_it;return *this;}bool operator!=(const self& s){return _it != s._it;}};template<class T>class list{public:typedef list_node<T> node;typedef list_iterator<T, T&, T*> iterator;typedef list_iterator<T, const T&, const T*> const_iterator;typedef reverse_iterator<const_iterator, const T&, const T*> const_reverse_iterator;typedef reverse_iterator<iterator, T&, T*> reverse_iterator;iterator begin(){return _head->_next;}iterator end(){return _head;}const_iterator begin()const{return const_iterator(_head->_next);}const_iterator end()const{return const_iterator(_head);}reverse_iterator rbegin(){return reverse_iterator(end());}reverse_iterator rend(){return reverse_iterator(begin());}const_reverse_iterator rbegin()const{return const_reverse_iterator(end());}const_reverse_iterator rend()const{return const_reverse_iterator(begin());}void empty_inti(){_head = new node;_head->_next = _head;_head->_prev = _head;}//it1(it2)list(const list<T>& x){empty_inti();for (auto& e : x){push_back(e);}}list(){empty_inti();_size = 0;}void push_back(const T& x){insert(--end(), x);}void push_front(const T& x){insert(begin(), x);}void pop_back(){earse(--end());}void pop_front(){earse(begin());}//list<T>& operator=(const list<T>& x)//{//	if (this != &x)//	{//		clear();//		for (auto& e : x)//		{//			push_back(e);//		}//	}//	return *this;//}//void swap(list<T>& x)//{//	std::swap(_size, x._size);//	std::swap(_head, x._head);//}void swap(list<T>& lt){std::swap(_head, lt._head);std::swap(_size, lt._size);}list<T>& operator=(list<T> x){swap(x);return *this;}~list(){clear();_size = 0;delete _head;_head = nullptr;}void clear(){iterator it = begin();while (it != end()){it = earse(it);//it++;//因为earse()返回的是该节点下一个节点 所以不用在进行++}}iterator insert(iterator pos, const T& x){node* cur = pos.node;node* newnode = new node(x);newnode->_next = cur->_next;newnode->_prev = cur;cur->_next->_prev = newnode;cur->_next = newnode;++_size;return newnode;}iterator earse(iterator pos){node* cur = pos.node;node* next = cur->_next;node* prev = cur->_prev;delete cur;next->_prev = prev;prev->_next = next;--_size;return iterator(next);}size_t size(){return _size;}private:size_t _size;node* _head;};void test_list1(){list<int> lt;lt.push_back(1);lt.push_back(2);lt.push_back(3);lt.push_back(4);lt.push_back(5);// 封装屏蔽底层差异和实现细节// 提供统一的访问修改遍历方式list<int>::iterator it = lt.begin();while (it != lt.end()){*it += 20;cout << *it << " ";++it;}cout << endl;for (auto e : lt){cout << e << " ";}cout << endl;/*set<int> s;s.insert(1);s.insert(3);s.insert(2);s.insert(4);set<int>::iterator sit = s.begin();while (sit != s.end()){cout << *sit << " ";++sit;}cout << endl;*/}void test_list2(){list<int> lt;lt.push_back(1);lt.push_back(2);lt.push_back(3);lt.push_back(4);lt.push_back(5);list<int> lt1(lt);for (auto e : lt){cout << e << " ";}cout << endl;for (auto e : lt1){cout << e << " ";}cout << endl;list<int> lt2;lt2.push_back(10);lt2.push_back(200);lt2.push_back(30);lt2.push_back(40);lt2.push_back(50);lt1 = lt2;for (auto e : lt1){cout << e << " ";}cout << endl;for (auto e : lt2){cout << e << " ";}cout << endl;}struct AA{AA(int a1 = 0, int a2 = 0):_a1(a1), _a2(a2){}int _a1;int _a2;};void test_list3(){list<AA> lt;lt.push_back(AA(1, 1));lt.push_back(AA(2, 2));lt.push_back(AA(3, 3));list<AA>::iterator it = lt.begin();while (it != lt.end()){//cout << (*it)._a1<<" "<<(*it)._a2 << endl;cout << it->_a1 << " " << it->_a2 << endl;cout << it.operator->()->_a1 << " " << it.operator->()->_a1 << endl;++it;}cout << endl;int* p = new int;*p = 1;AA* ptr = new AA;ptr->_a1 = 1;}template<typename Container>void print_container(const Container& con){typename Container::const_iterator it = con.begin();while (it != con.end()){cout << *it << " ";++it;}cout << endl;}void test_list4(){list<int> lt;lt.push_back(1);lt.push_back(2);lt.push_back(3);lt.push_back(4);lt.push_back(5);//print_list(lt);print_container(lt);list<string> lt1;lt1.push_back("1111111111111");lt1.push_back("1111111111111");lt1.push_back("1111111111111");lt1.push_back("1111111111111");lt1.push_back("1111111111111");//print_list(lt1);print_container(lt1);vector<string> v;v.push_back("222222222222222222222");v.push_back("222222222222222222222");v.push_back("222222222222222222222");v.push_back("222222222222222222222");//print_list(v);print_container(v);}void test_list5(){list<int> lt;lt.push_back(1);lt.push_back(2);lt.push_back(3);lt.push_back(4);lt.push_back(5);list<int>::reverse_iterator it = lt.rbegin();while (it != lt.rend()){cout << *it << " ";++it;}}
}
相关文章:
C++ list容器的实现及讲解
所需要的基础知识 对C类的基本了解 默认构造函数 操作符重载 this指针 引用 模板等知识具有一定的了解,阅读该文章会很轻松。 链表节点 template<class T>struct list_node{T _data;list_node<T>* _next;list_node<T>* _prev;list_node(const T&…...
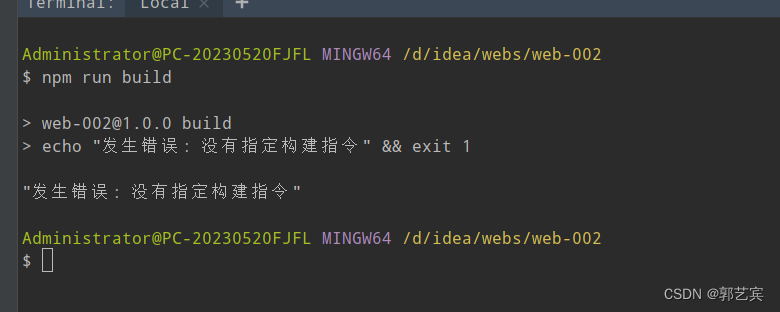
前端项目练习(练习-002-NodeJS项目初始化)
首先,创建一个web-002项目,内容和web-001一样。 下一步,规范一下项目结构,将html,js,css三个文件放到 src/view目录下面: 由于html引入css和js时,使用的是相对路径,所以…...

C++QT day11
绘制时钟 widget.h #ifndef WIDGET_H #define WIDGET_H#include <QWidget> #include <QPaintEvent>//绘制事件类 #include <QDebug>//信息调试类 #include <QPainter>//画家类 #include <QTimer>//定时器类 #include <QTime> #include &…...

Stable DIffusion 炫酷应用 | AI嵌入艺术字+光影光效
目录 1 生成AI艺术字基本流程 1.1 生成黑白图 1.2 启用ControlNet 参数设置 1.3 选择大模型 写提示词 2 不同效果组合 2.1 更改提示词 2.2 更改ControlNet 2.2.1 更改模型或者预处理器 2.2.2 更改参数 3. 其他应用 3.1 AI光影字 本节需要用到ControlNet,可…...

C#通过重写Panel改变边框颜色与宽度的方法
在C#中,Panel控件是一个容器控件,用于在窗体或用户控件中创建一个可用于容纳其他控件的面板。Panel提供了一种将相关控件组合在一起并进行布局的方式。以下是Panel控件的详细使用方法: 在窗体上放置 Panel 控件: 在 Visual Studio 的窗体设计器中,从工具箱中拖动并放置一…...
Vue2+ElementUI 静态首页案例
源码 <template><div class"app-container home"><el-row type"flex" justify"space-around" class"row-bg"><el-card class"box-card cardDiv1"><el-col :span"5"><div clas…...
Linux的socket通信
关于套接字通信定义如下: 套接字对应程序猿来说就是一套网络通信的接口,使用这套接口就可以完成网络通信。网络通信的主体主要分为两部分:客户端和服务器端。在客户端和服务器通信的时候需要频繁提到三个概念:IP、端口、通信数据&…...

MySQL学习大纲
了解 MySQL 的基础知识和命令是使用此数据库的前提。以下是一些必须了解的 MySQL 概念和命令,包括基础的 CRUD(创建,读取,更新,删除)操作,以及一些高级功能: 1. 安装和启动 命令su…...

【Ambari】银河麒麟V10 ARM64架构_安装Ambari2.7.6HDP3.3.1(HiDataPlus)
🍁 博主 "开着拖拉机回家"带您 Go to New World.✨🍁 🦄 个人主页——🎐开着拖拉机回家_大数据运维-CSDN博客 🎐✨🍁 🪁🍁 希望本文能够给您带来一定的帮助🌸文…...
驱动开发练习,platform实现如下功能
实验要求 驱动代码 #include <linux/init.h> #include <linux/module.h> #include <linux/platform_device.h> #include <linux/mod_devicetable.h> #include <linux/of_gpio.h> #include <linux/unistd.h> #include <linux/interrupt…...

QT之QString的用法介绍
QT之QString的用法介绍 成员函数常见用法 成员函数 1)QString &append(const QString &str) 将 str 字符串追加到当前字符串末尾,并返回修改后的 QString 对象的引用。 2)QString &prepend(const QString &str) 将 str 字符…...
基于Java+SpringBoot+Vue3+Uniapp前后端分离考试学习一体机设计与实现2.0版本(视频讲解,已发布上线)
博主介绍:✌全网粉丝4W,全栈开发工程师,从事多年软件开发,在大厂呆过。持有软件中级、六级等证书。可提供微服务项目搭建与毕业项目实战,博主也曾写过优秀论文,查重率极低,在这方面有丰富的经验…...
springboot 获取参数
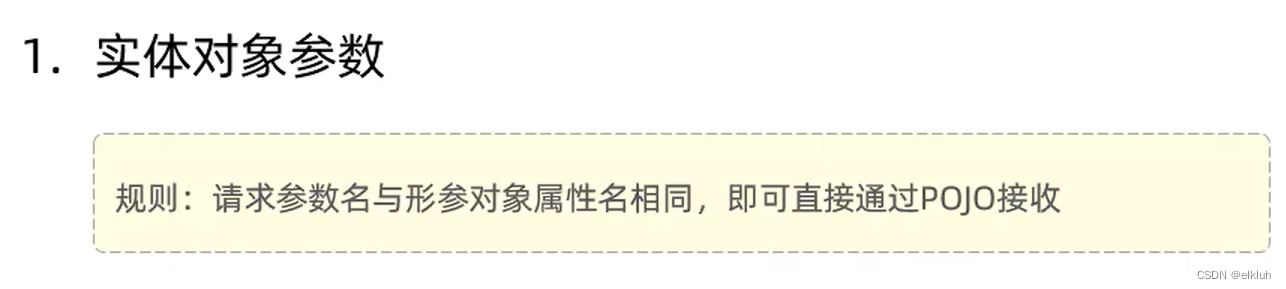
1.获取简单参数 2.实体对象参数...
【笔记】离线Ubuntu20.04+mysql 5.7.36 + xtrabackup定时增量备份脚本
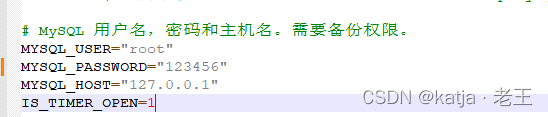
一、环境 ● Ubuntu版本查看 lsb_release -a● mysql 版本查看 mysql --version我的是ubuntu 20.04,mysql是5.7.36,所以要用 install_percona-xtrabackup-24 二、原理 备份 通过ubuntu自带的定时器运行增量备份脚本备份文件可以存储在映射后的其他…...

树哈希与换根dp:CF763D
采用的树哈希函数是: d p x w x ∑ y ∈ x d p y 2 w x 2 \Large dp_xw_x\times \sum_{y\in x}dp_y^2w_x^2 dpxwxy∈x∑dpy2wx2 发现从 x x x 到 y y y 时只有 x x x 与 y y y 的哈希值会变化,分别维护即可 #include<bits/stdc.h&…...
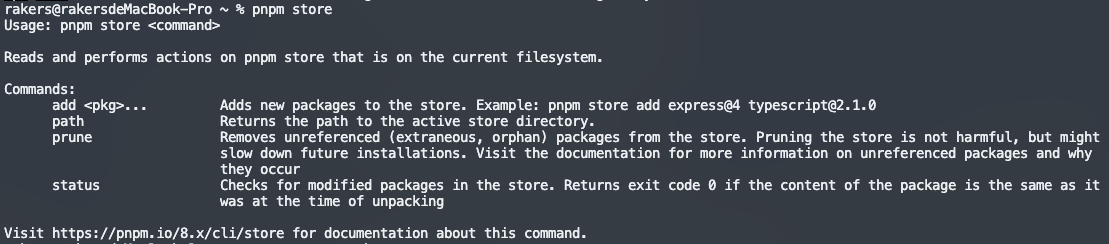
npm、yarn、pnpm如何清除缓存?
前端工程化创建项目会经常使用各种安装包管理工具,安装各种前端依赖包。例如,npm、yarn、pnpm等。时间一长,各种安装包管理工具的在安装依赖时,留下的缓存文件就会变得很大,以至于影响系统的运行,因此必要时…...

12款最火的AI画图软件,助你探索创新设计
ChatGPT火爆出圈,AI画图软件也如雨后春笋般流行起来。各类AI画图的软件工具横空出世,设计师与其焦虑工作会不会被人工智能取代,不如践行“工欲善其事必先利其器”,开拓思路,打开格局,好好地探索下如何利用好…...
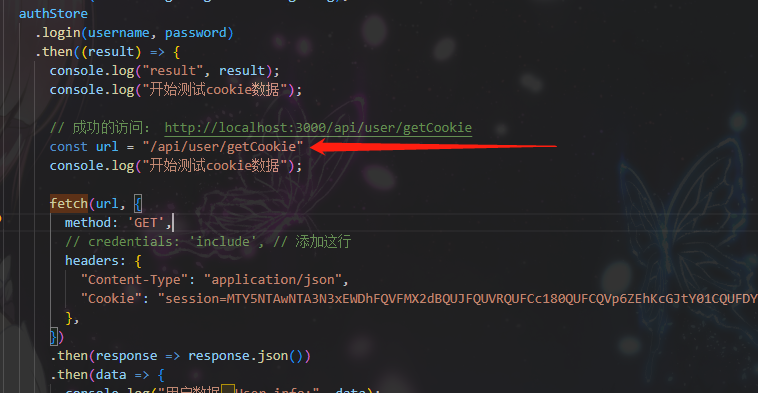
cookie信息无法获取问题研究
背景 在oneapi这个前后端都有的开源项目中,我想接入chatnextweb到oneapi的后端。 由于需要二开chatnextweb,添加登录注册功能,考虑到java后端的性能问题和内存占用,决定不重启写个服务,而是将登录注册接入到oneapi的…...
Linux:冯诺依曼系统和操作系统的概念
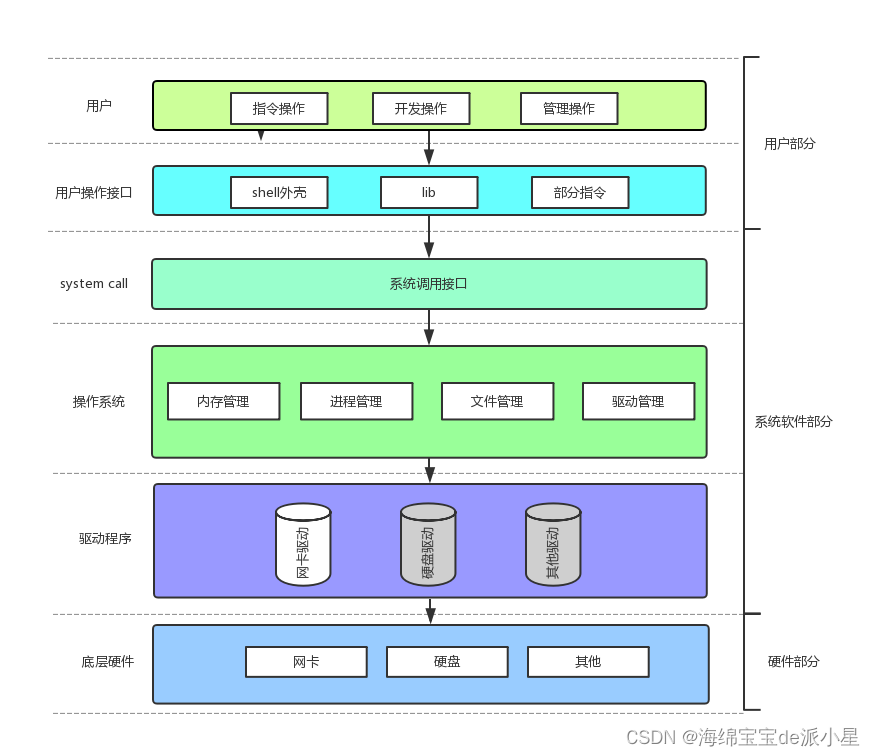
文章目录 冯诺依曼体系结构冯诺依曼体系的理解 操作系统操作系统的基本定位操作系统的理解1 操作系统的理解2总结 本篇主要总结的是操作系统的基本认知和一些概念 冯诺依曼体系结构 那么上图表示的就是冯诺依曼体系结构,那这个体系结构是什么?为什么要先…...
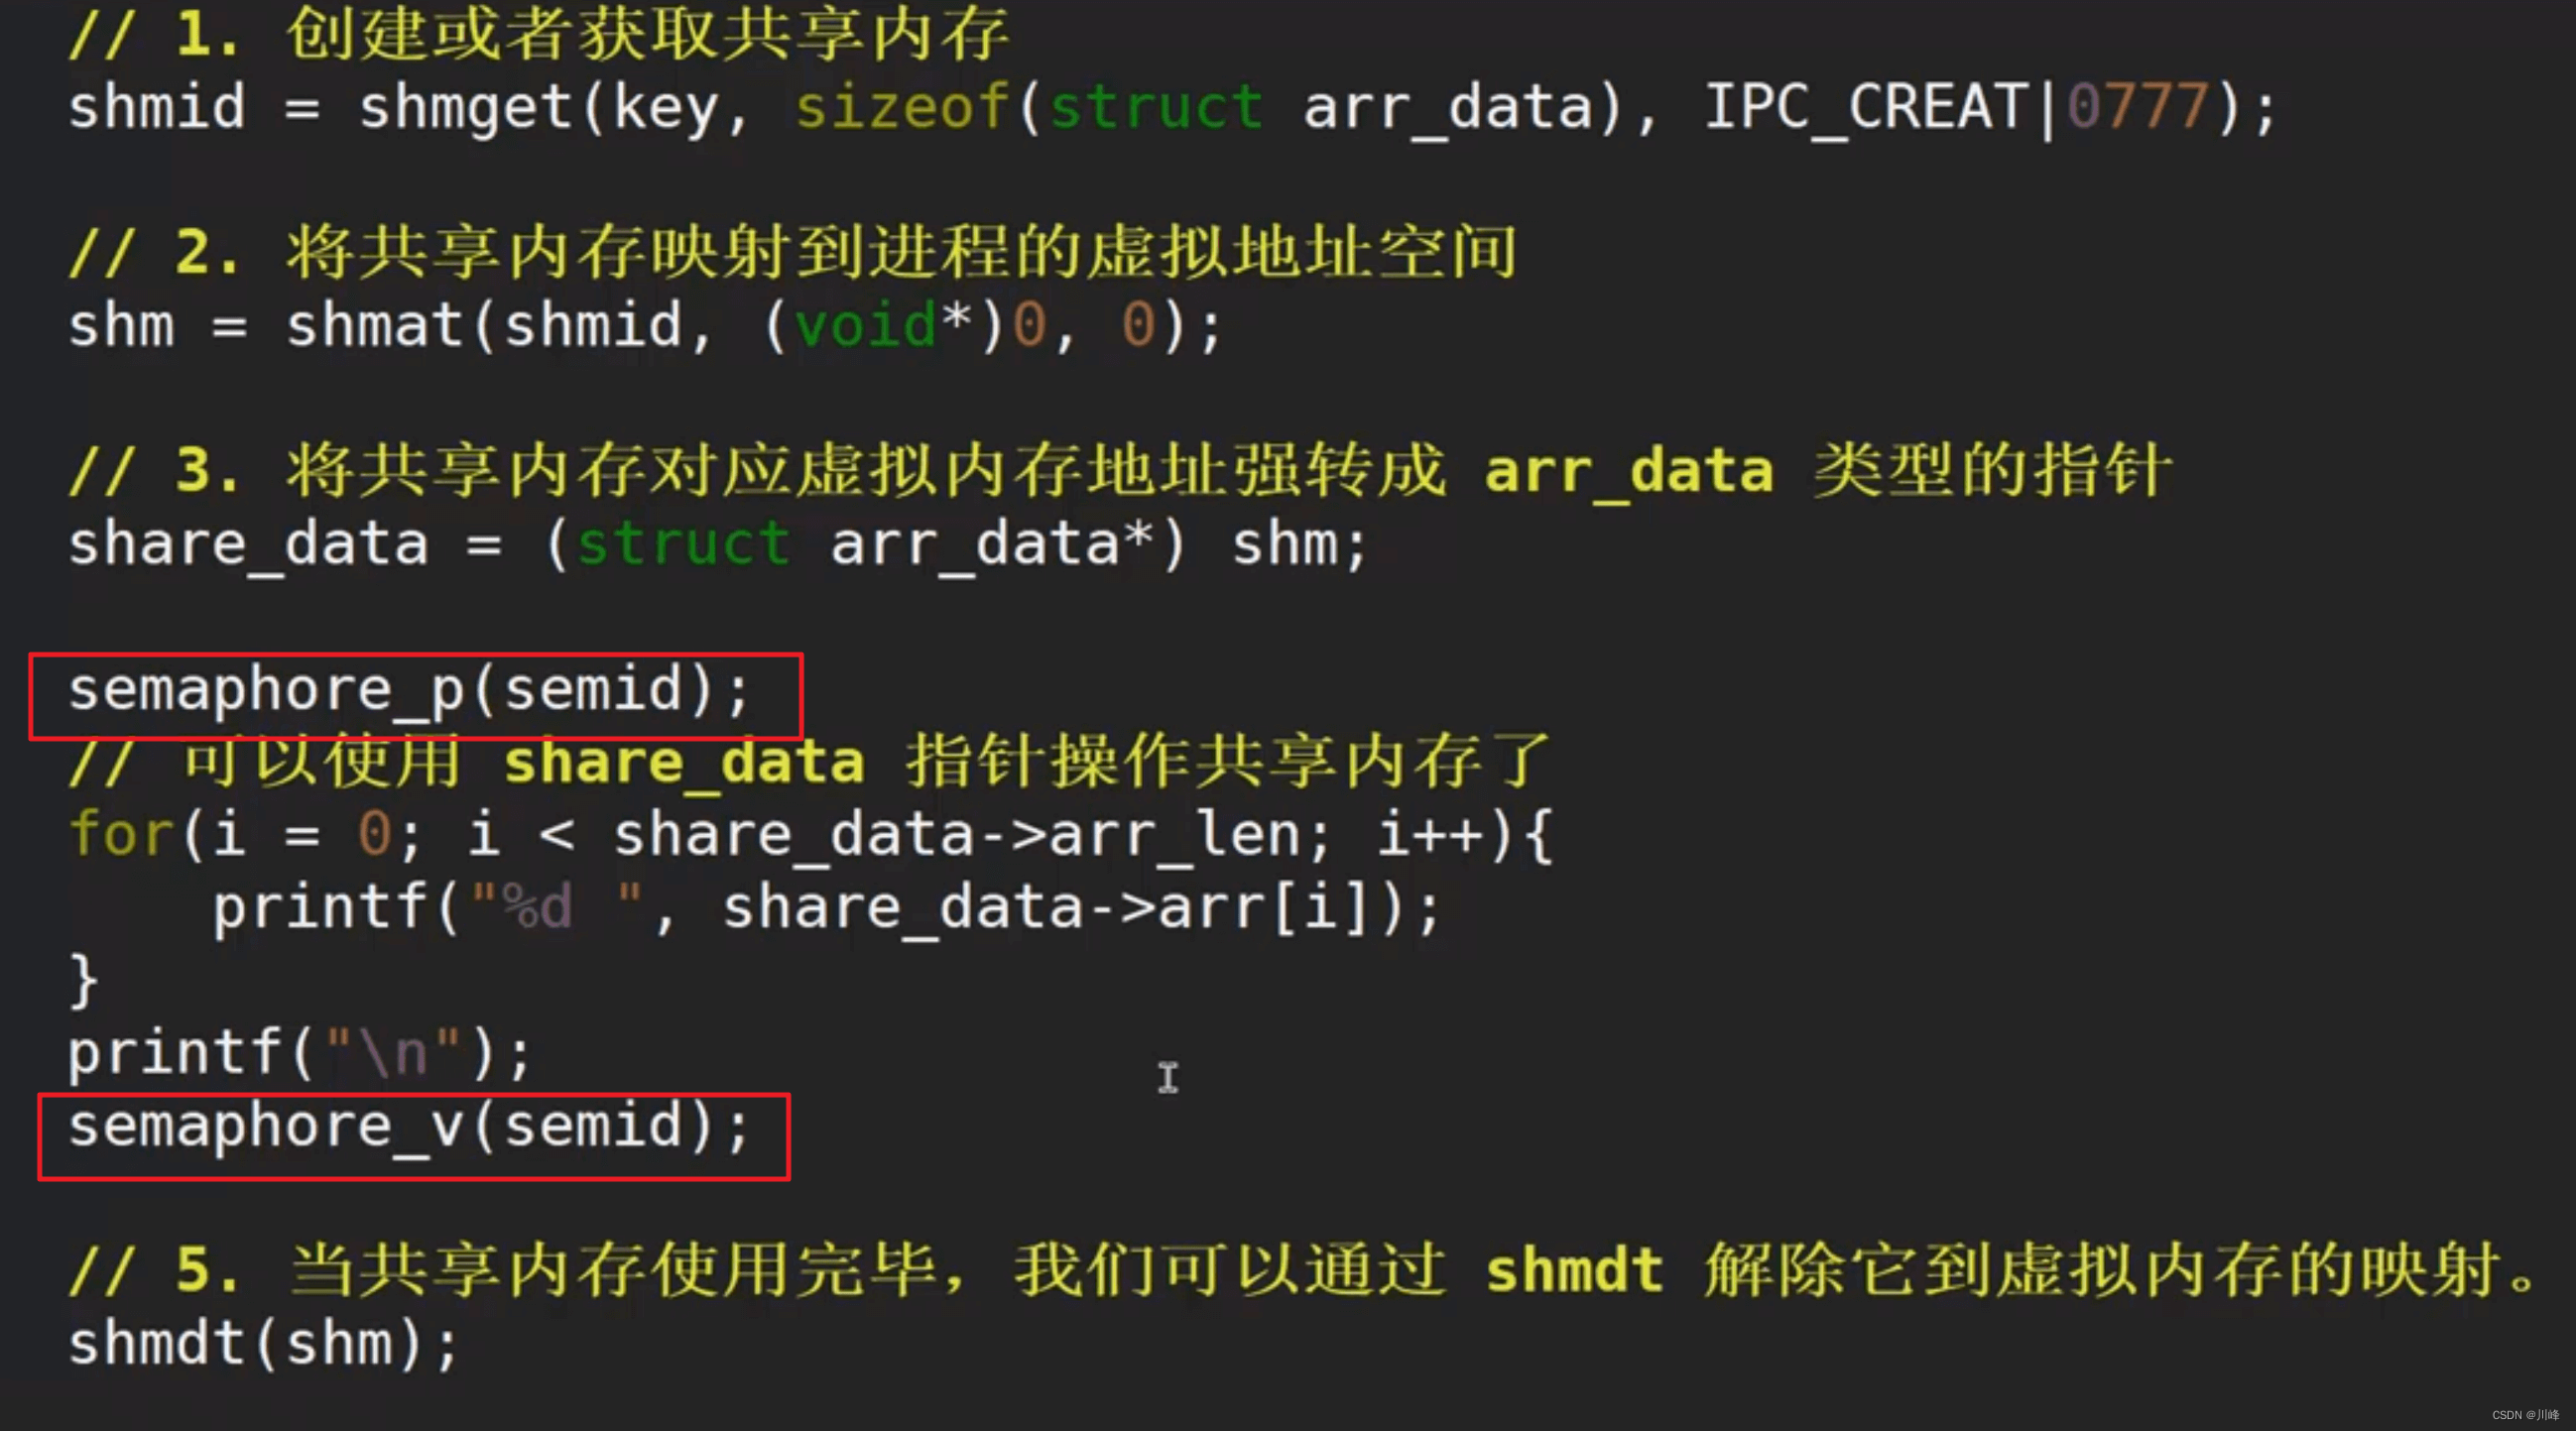
【操作系统笔记十一】进程间通信
Linux文件系统 inode 节点 (index node):给每个文件赋予一个称为 i 节点的数据结构。 inode 一开始是存储在硬盘中的,只有当文件被打开的时候,其对应的 i 节点才加载到内存中。 总结: Linux 中,…...
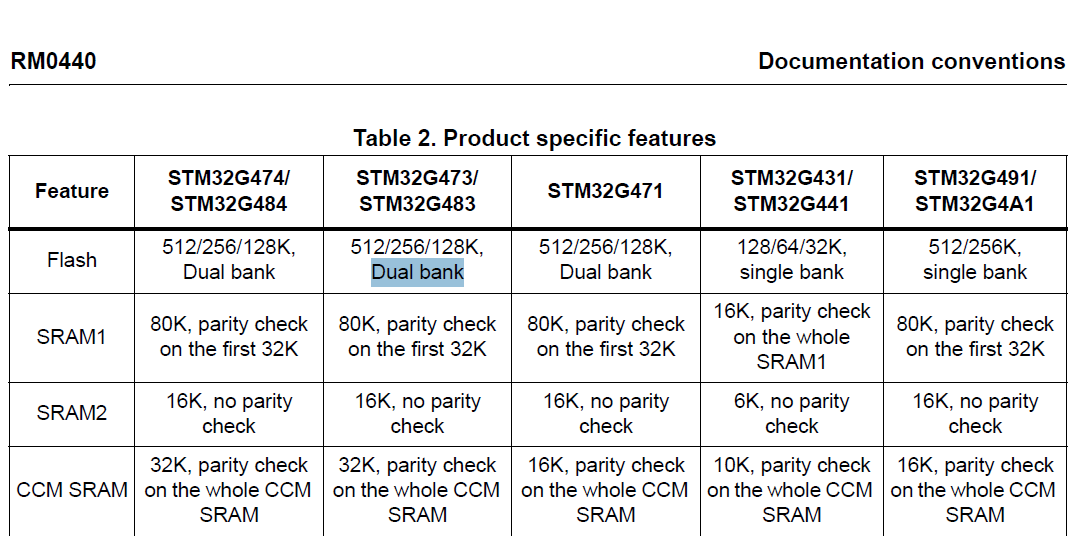
stm32G473的flash模式是单bank还是双bank?
今天突然有人stm32G473的flash模式是单bank还是双bank?由于时间太久,我真忘记了。搜搜发现,还真有人和我一样。见下面的链接:https://shequ.stmicroelectronics.cn/forum.php?modviewthread&tid644563 根据STM32G4系列参考手…...

k8s从入门到放弃之Ingress七层负载
k8s从入门到放弃之Ingress七层负载 在Kubernetes(简称K8s)中,Ingress是一个API对象,它允许你定义如何从集群外部访问集群内部的服务。Ingress可以提供负载均衡、SSL终结和基于名称的虚拟主机等功能。通过Ingress,你可…...

1688商品列表API与其他数据源的对接思路
将1688商品列表API与其他数据源对接时,需结合业务场景设计数据流转链路,重点关注数据格式兼容性、接口调用频率控制及数据一致性维护。以下是具体对接思路及关键技术点: 一、核心对接场景与目标 商品数据同步 场景:将1688商品信息…...

Spring AI与Spring Modulith核心技术解析
Spring AI核心架构解析 Spring AI(https://spring.io/projects/spring-ai)作为Spring生态中的AI集成框架,其核心设计理念是通过模块化架构降低AI应用的开发复杂度。与Python生态中的LangChain/LlamaIndex等工具类似,但特别为多语…...
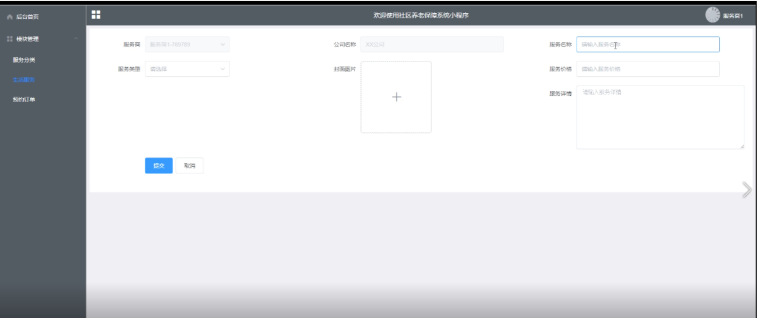
Springboot社区养老保险系统小程序
一、前言 随着我国经济迅速发展,人们对手机的需求越来越大,各种手机软件也都在被广泛应用,但是对于手机进行数据信息管理,对于手机的各种软件也是备受用户的喜爱,社区养老保险系统小程序被用户普遍使用,为方…...
)
Android第十三次面试总结(四大 组件基础)
Activity生命周期和四大启动模式详解 一、Activity 生命周期 Activity 的生命周期由一系列回调方法组成,用于管理其创建、可见性、焦点和销毁过程。以下是核心方法及其调用时机: onCreate() 调用时机:Activity 首次创建时调用。…...
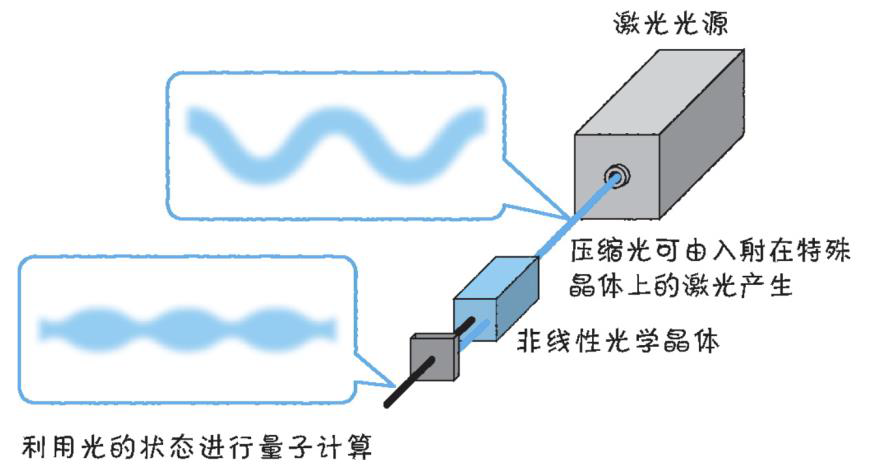
以光量子为例,详解量子获取方式
光量子技术获取量子比特可在室温下进行。该方式有望通过与名为硅光子学(silicon photonics)的光波导(optical waveguide)芯片制造技术和光纤等光通信技术相结合来实现量子计算机。量子力学中,光既是波又是粒子。光子本…...
中医有效性探讨
文章目录 西医是如何发展到以生物化学为药理基础的现代医学?传统医学奠基期(远古 - 17 世纪)近代医学转型期(17 世纪 - 19 世纪末)现代医学成熟期(20世纪至今) 中医的源远流长和一脉相承远古至…...
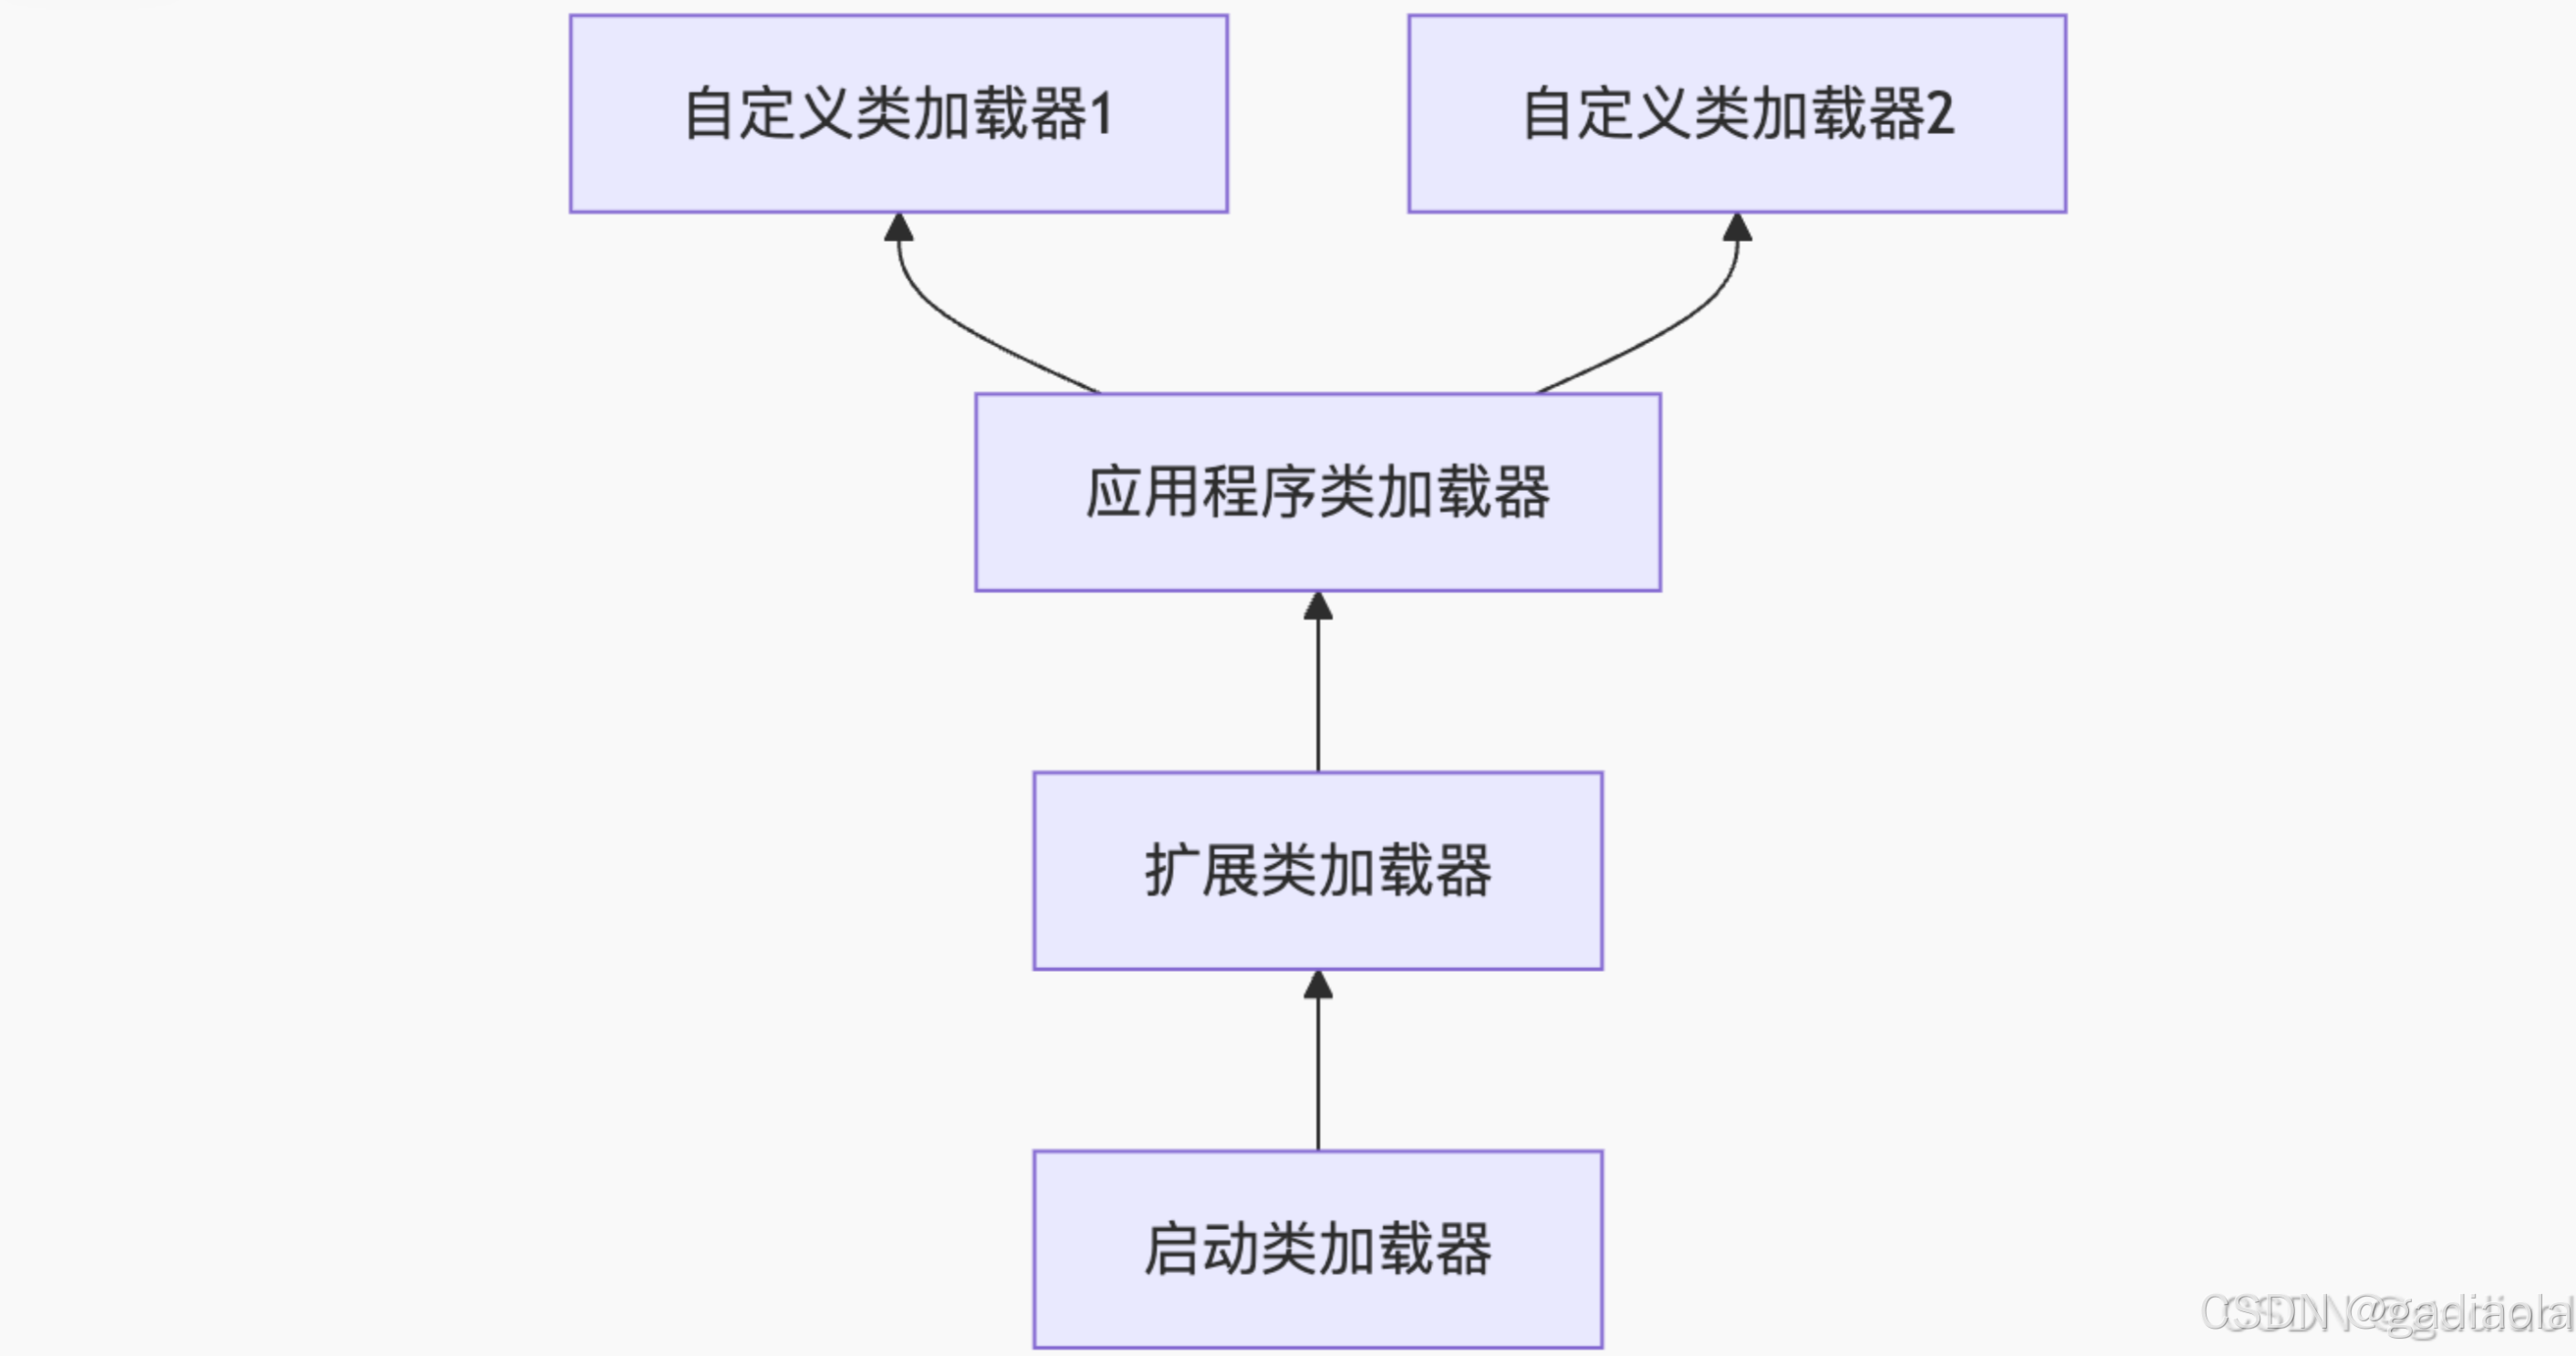
【JVM面试篇】高频八股汇总——类加载和类加载器
目录 1. 讲一下类加载过程? 2. Java创建对象的过程? 3. 对象的生命周期? 4. 类加载器有哪些? 5. 双亲委派模型的作用(好处)? 6. 讲一下类的加载和双亲委派原则? 7. 双亲委派模…...

2025年渗透测试面试题总结-腾讯[实习]科恩实验室-安全工程师(题目+回答)
安全领域各种资源,学习文档,以及工具分享、前沿信息分享、POC、EXP分享。不定期分享各种好玩的项目及好用的工具,欢迎关注。 目录 腾讯[实习]科恩实验室-安全工程师 一、网络与协议 1. TCP三次握手 2. SYN扫描原理 3. HTTPS证书机制 二…...