【Linux | ELK 8.2】搭建ELKB集群Ⅰ—— 实验环境说明和搭建Elasticsearch集群
目录
- 1. 实验环境
- 1.1 实验工具
- 1.2 操作系统
- 1.3 架构版本、IP地址规划与虚拟机配置要求
- 1.4 拓扑图
- 1.5 其他要求
- 2. 实验步骤
- 2.1 安装Elasticsearch(单节点)
- (1)检查系统jdk版本
- (2)下载elasticsearch
- (3)安装elasticsearch
- (4)配置elasticsearch
- (5)启动与查看服务
- (6)访问elasticsearch
- 2.2 搭建Elasticsearch集群
- (1)安装elasticsearch
- (2)配置elasticsearch集群
- 设置节点192.168.100.31
- 设置节点192.168.100.32
- 总结
- (3)重启elasticsearch服务
- (4)查看es集群信息
- 参考资料
- 关联博文
1. 实验环境
1.1 实验工具
VMware® Workstation 16 Pro
1.2 操作系统
CentOS 7.9.2009 (Linux)
1.3 架构版本、IP地址规划与虚拟机配置要求
| 开源软件 | 虚拟机IP地址 | 版本 | CPU与内存 |
|---|---|---|---|
| Elasticsearch | 192.168.100.31,192.168.100.32 | 8.2.1 | 大于1cpu, 大于1G内存 |
| Logstash | 192.168.100.33 | 8.2.0 | 大于1cpu, 大于1G内存 |
| Kibana | 192.168.100.33 | 8.2.1 | 大于1cpu, 大于1G内存 |
| Filebeat | 192.168.100.31-33 | 8.2.1 | 大于1cpu, 大于1G内存 |
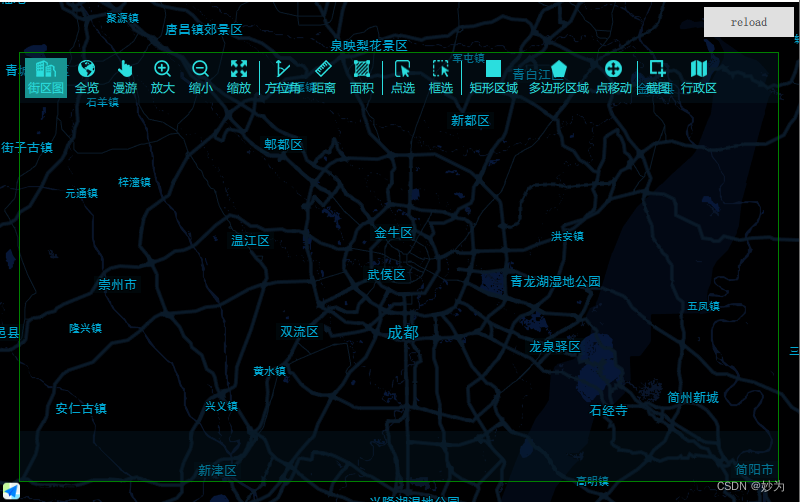
1.4 拓扑图

1.5 其他要求
- 所有虚拟机需要连接互联网,虚拟机网卡模式设置为NAT或桥接模式
2. 实验步骤
以下操作需要在三台虚拟机上同时进行
关闭防火墙
systemctl stop firewall
systemctl disabled firewall
将SELinux设置为disabled
vim /etc/selinux/config SELINUX=disabled
同步服务器时间
yum install ntp            #安装ntp服务
systemctl start ntpd       #启动ntp
systemctl enable ntpd      #设置开机自启
date                       #三台服务器的时间一致即可
2.1 安装Elasticsearch(单节点)
官方安装包下载地址:https://www.elastic.co/cn/downloads/elasticsearch
(1)检查系统jdk版本
rpm -qa | grep openjdk
java -version
如果系统没有java环境,需要自行安装。
yum install java
再次检查jdk环境

(2)下载elasticsearch
wget https://artifacts.elastic.co/downloads/elasticsearch/elasticsearch-8.2.2-x86_64.rpm
(3)安装elasticsearch
rpm -ivh elasticsearch-8.2.2-x86_64.rpm
警告:elasticsearch-8.2.2-x86_64.rpm: 头V4 RSA/SHA512 Signature, 密钥 ID d88e42b4: NOKEY
准备中...                          ################################# [100%]
正在升级/安装...1:elasticsearch-0:8.2.2-1          ################################# [100%]
--------------------------- Security autoconfiguration information ------------------------------Authentication and authorization are enabled.
TLS for the transport and HTTP layers is enabled and configured.The generated password for the elastic built-in superuser is : GjKOXtfn5q1ZlHq7dM2K    #内置超级用户密码If this node should join an existing cluster, you can reconfigure this with           #加入现有集群的命令
'/usr/share/elasticsearch/bin/elasticsearch-reconfigure-node --enrollment-token <token-here>'
after creating an enrollment token on your existing cluster.You can complete the following actions at any time:Reset the password of the elastic built-in superuser with                          #重置es内置超级用户的密码
'/usr/share/elasticsearch/bin/elasticsearch-reset-password -u elastic'.Generate an enrollment token for Kibana instances with                           #为 Kibana 实例生成一个注册令牌'/usr/share/elasticsearch/bin/elasticsearch-create-enrollment-token -s kibana'.Generate an enrollment token for Elasticsearch nodes with                #为 Elasticsearch 节点生成一个注册令牌
'/usr/share/elasticsearch/bin/elasticsearch-create-enrollment-token -s node'.-------------------------------------------------------------------------------------------------
### NOT starting on installation, please execute the following statements to configure elasticsearch service to start automatically using systemdsudo systemctl daemon-reloadsudo systemctl enable elasticsearch.service
### You can start elasticsearch service by executingsudo systemctl start elasticsearch.service
使用rpm包安装的elasticsearch其配置目录在/etc/elasticsearch;安装目录在/usr/share/elasticsearch
小技巧:通过rpm -qc命令查看elasticsearch的配置文件路径
# rpm -qc elasticsearch-8.2.2-1.x86_64
/etc/elasticsearch/elasticsearch-plugins.example.yml
/etc/elasticsearch/elasticsearch.yml
/etc/elasticsearch/jvm.options
/etc/elasticsearch/log4j2.properties
/etc/elasticsearch/role_mapping.yml
/etc/elasticsearch/roles.yml
/etc/elasticsearch/users
/etc/elasticsearch/users_roles
/etc/sysconfig/elasticsearch
/usr/lib/sysctl.d/elasticsearch.conf
/usr/lib/systemd/system/elasticsearch.service
(4)配置elasticsearch
vim /etc/elasticsearch/elasticsearch.yml
# ======================== Elasticsearch Configuration =========================
#
# NOTE: Elasticsearch comes with reasonable defaults for most settings.
#       Before you set out to tweak and tune the configuration, make sure you
#       understand what are you trying to accomplish and the consequences.
#
# The primary way of configuring a node is via this file. This template lists
# the most important settings you may want to configure for a production cluster.
#
# Please consult the documentation for further information on configuration options:
# https://www.elastic.co/guide/en/elasticsearch/reference/index.html
#
# ---------------------------------- Cluster -----------------------------------
#
# Use a descriptive name for your cluster:
#
cluster.name: elk-cluster                    #自定义集群名
#
# ------------------------------------ Node ------------------------------------
#
# Use a descriptive name for the node:
#
#node.name: node-1                           #自定义节点名
#
# Add custom attributes to the node:
#
#node.attr.rack: r1
#
# ----------------------------------- Paths ------------------------------------
#
# Path to directory where to store the data (separate multiple locations by comma):
#
path.data: /var/lib/elasticsearch            #elasticsearch数据存放路径
#
# Path to log files:
#
path.logs: /var/log/elasticsearch            #elasticsearch日志存放路径
#
# ----------------------------------- Memory -----------------------------------
#
# Lock the memory on startup:
#
#bootstrap.memory_lock: true
#
# Make sure that the heap size is set to about half the memory available
# on the system and that the owner of the process is allowed to use this
# limit.
#
# Elasticsearch performs poorly when the system is swapping the memory.
#
# ---------------------------------- Network -----------------------------------
#
# By default Elasticsearch is only accessible on localhost. Set a different
# address here to expose this node on the network:
#
network.host: 0.0.0.0            #设置能访问elasticsearch的IP地址,0.0.0.0表示所有IP都能访问,监听所有IP
#
# By default Elasticsearch listens for HTTP traffic on the first free port it
# finds starting at 9200. Set a specific HTTP port here:
#
http.port: 9200                 #设置elasticsearch数据传输端口号,即监听端口,默认为9200
#
# For more information, consult the network module documentation.
#
# --------------------------------- Discovery ----------------------------------
#
# Pass an initial list of hosts to perform discovery when this node is started:
# The default list of hosts is ["127.0.0.1", "[::1]"]
#
#discovery.seed_hosts: ["host1", "host2"]
#
# Bootstrap the cluster using an initial set of master-eligible nodes:
#
#cluster.initial_master_nodes: ["node-1", "node-2"]
#
# For more information, consult the discovery and cluster formation module documentation.
#
# --------------------------------- Readiness ----------------------------------
#
# Enable an unauthenticated TCP readiness endpoint on localhost
#
#readiness.port: 9399
#
# ---------------------------------- Various -----------------------------------
#
# Allow wildcard deletion of indices:
#
#action.destructive_requires_name: false#----------------------- BEGIN SECURITY AUTO CONFIGURATION -----------------------
#
# The following settings, TLS certificates, and keys have been automatically
# generated to configure Elasticsearch security features on 04-06-2022 20:18:05
#
# --------------------------------------------------------------------------------# Enable security features
xpack.security.enabled: true                             #elasticsearch v7以后自动开启安全模式xpack.security.enrollment.enabled: true# Enable encryption for HTTP API client connections, such as Kibana, Logstash, and Agents
xpack.security.http.ssl:enabled: truekeystore.path: certs/http.p12# Enable encryption and mutual authentication between cluster nodes
xpack.security.transport.ssl:enabled: trueverification_mode: certificatekeystore.path: certs/transport.p12truststore.path: certs/transport.p12
# Create a new cluster with the current node only
# Additional nodes can still join the cluster later
cluster.initial_master_nodes: ["vms31.rhce.cc"]# Allow HTTP API connections from anywhere
# Connections are encrypted and require user authentication
http.host: 0.0.0.0# Allow other nodes to join the cluster from anywhere
# Connections are encrypted and mutually authenticated
#transport.host: 0.0.0.0#----------------------- END SECURITY AUTO CONFIGURATION -------------------------
修改完后使用cat命令查看设置
# cat /etc/elasticsearch/elasticsearch.yml | grep -Ev "#|^$"
cluster.name: elk-cluster
path.data: /var/lib/elasticsearch
path.logs: /var/log/elasticsearch
network.host: 0.0.0.0
http.port: 9200
xpack.security.enabled: true
xpack.security.enrollment.enabled: true
xpack.security.http.ssl:enabled: truekeystore.path: certs/http.p12
xpack.security.transport.ssl:enabled: trueverification_mode: certificatekeystore.path: certs/transport.p12truststore.path: certs/transport.p12
cluster.initial_master_nodes: ["vms31.rhce.cc"]
http.host: 0.0.0.0
(5)启动与查看服务
启动服务
systemctl start elasticsearch.service
systemctl enable elasticsearch.service
查看启动端口
# netstat -ntlup | grep java
tcp6       0      0 :::9200                 :::*                    LISTEN      24625/java
tcp6       0      0 :::9300                 :::*                    LISTEN      24625/java
其中9200是数据传输端口,9300示集群通信端口。
(6)访问elasticsearch
使用curl命令访问
# curl -u elastic:GjKOXtfn5q1ZlHq7dM2K https://192.168.100.31:9200/ --insecure
{"name" : "vms31.rhce.cc","cluster_name" : "elk-cluster","cluster_uuid" : "4IoxZ9U5T_-7T26soNLm8A","version" : {"number" : "8.2.2","build_flavor" : "default","build_type" : "rpm","build_hash" : "9876968ef3c745186b94fdabd4483e01499224ef","build_date" : "2022-05-25T15:47:06.259735307Z","build_snapshot" : false,"lucene_version" : "9.1.0","minimum_wire_compatibility_version" : "7.17.0","minimum_index_compatibility_version" : "7.0.0"},"tagline" : "You Know, for Search"
}
使用浏览器访问:https://192.168.100.31:9200/

2.2 搭建Elasticsearch集群
为了安装elasticsearch集群,我们将
- 192.168.100.31节点设置为master
- 192.168.100.32和192.168.100.33节点视为node
(1)安装elasticsearch
根据2.1的(1)——(3),在另外两台服务器192.168.100.32和192.168.100.33上安装elasticsearch
(2)配置elasticsearch集群
设置节点192.168.100.31
# cat /etc/elasticsearch/elasticsearch.yml | grep -v "#"
cluster.name: elk-cluster
node.name: node-1
path.data: /var/lib/elasticsearch
path.logs: /var/log/elasticsearch
network.host: 0.0.0.0
http.port: 9200
discovery.seed_hosts: - 192.168.100.31:9300- 192.168.100.32:9300
cluster.initial_master_nodes: ["node-1", "node-2"]xpack.security.enabled: falsexpack.security.enrollment.enabled: truexpack.security.http.ssl:enabled: truekeystore.path: certs/http.p12xpack.security.transport.ssl:enabled: trueverification_mode: certificatekeystore.path: certs/transport.p12truststore.path: certs/transport.p12http.host: 0.0.0.0
设置节点192.168.100.32
# cat /etc/elasticsearch/elasticsearch.yml | grep -v "#"
cluster.name: elk-cluster
node.name: node-2
path.data: /var/lib/elasticsearch
path.logs: /var/log/elasticsearch
network.host: 0.0.0.0
http.port: 9200
discovery.seed_hosts: ["192.168.100.31:9300", "192.168.100.32:9300"]
cluster.initial_master_nodes: ["node-1", "node-2"]xpack.security.enabled: falsexpack.security.enrollment.enabled: truexpack.security.http.ssl:enabled: truekeystore.path: certs/http.p12xpack.security.transport.ssl:enabled: trueverification_mode: certificatekeystore.path: certs/transport.p12truststore.path: certs/transport.p12http.host: 0.0.0.0
总结
初始化集群时,所有节点的
- 集群名cluster.name要一致,
- 集群IP地址discovery.seed_hosts要一致,
(3)重启elasticsearch服务
systemctl restart elasticsearch
(4)查看es集群信息
# curl http://192.168.100.31:9200/_cluster/health?pretty
{"cluster_name" : "elk-cluster","status" : "green","timed_out" : false,"number_of_nodes" : 2,"number_of_data_nodes" : 2,"active_primary_shards" : 2,"active_shards" : 4,"relocating_shards" : 0,"initializing_shards" : 0,"unassigned_shards" : 0,"delayed_unassigned_shards" : 0,"number_of_pending_tasks" : 0,"number_of_in_flight_fetch" : 0,"task_max_waiting_in_queue_millis" : 0,"active_shards_percent_as_number" : 100.0
}# curl http://192.168.100.31:9200/_nodes/process?pretty
{"_nodes" : {"total" : 2,"successful" : 2,"failed" : 0},"cluster_name" : "elk-cluster","nodes" : {"8bB4P1EET2mjhecE4fez9Q" : {"name" : "node-2","transport_address" : "192.168.100.32:9300","host" : "192.168.100.32","ip" : "192.168.100.32","version" : "8.2.2","build_flavor" : "default","build_type" : "rpm","build_hash" : "9876968ef3c745186b94fdabd4483e01499224ef","roles" : ["data","data_cold","data_content","data_frozen","data_hot","data_warm","ingest","master","ml","remote_cluster_client","transform"],"attributes" : {"ml.machine_memory" : "4122771456","ml.max_jvm_size" : "2063597568","xpack.installed" : "true"},"process" : {"refresh_interval_in_millis" : 1000,"id" : 52915,"mlockall" : false}},"c69H-_ToSLOsbiiIZnY6QA" : {"name" : "node-1","transport_address" : "192.168.100.31:9300","host" : "192.168.100.31","ip" : "192.168.100.31","version" : "8.2.2","build_flavor" : "default","build_type" : "rpm","build_hash" : "9876968ef3c745186b94fdabd4483e01499224ef","roles" : ["data","data_cold","data_content","data_frozen","data_hot","data_warm","ingest","master","ml","remote_cluster_client","transform"],"attributes" : {"xpack.installed" : "true","ml.max_jvm_size" : "2063597568","ml.machine_memory" : "4122771456"},"process" : {"refresh_interval_in_millis" : 1000,"id" : 38585,"mlockall" : false}}}
}
参考资料
- Elasticsearch介绍:Elasticsearch 是什么?
- Elasticsearch文档:Elasticsearch Guide
- Logstash文档:Logstash Reference
- Kibana文档:Kibana Guide
- Filebeat文档:Filebeat Reference
关联博文
由于篇幅原因,关于搭建ELKB集群其他内容请查阅:
安装 Logstash 和 Kibana
安装 Filebeat和问题与解决方案
相关文章:
【Linux | ELK 8.2】搭建ELKB集群Ⅰ—— 实验环境说明和搭建Elasticsearch集群
目录1. 实验环境1.1 实验工具1.2 操作系统1.3 架构版本、IP地址规划与虚拟机配置要求1.4 拓扑图1.5 其他要求2. 实验步骤2.1 安装Elasticsearch(单节点)(1)检查系统jdk版本(2)下载elasticsearch(…...
)
不同情况下*p和*p的区别(指针)
一说到指针,不少同学就会觉得云里雾里。首先要明白,指针和地址是一个概念;然后明白指针和指针变量的区别。先理解地址和数据,想象内存里面是一个个的小盒子,每个盒子对应一个编号,这个编号就是地址…...
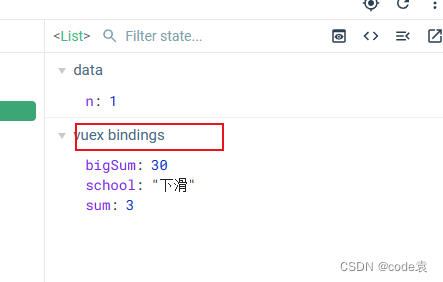
Vuex基础语法
Vuex vuex官网 文章目录Vuexvuex的工作原理图2.vuex的环境搭建3.vuex的使用1.actons2. mutations3.getters4.vuex中的map映射属性4.1 mapState和mapGetters4.2 mapMutations和mapActions5.vuex多组件通信1.通过计算属性获得2.通过mapState获得6.vuex模块化和命名空间6.1模块化…...

刚上岸字节测试开发岗,全网最真实的大厂面试真题
首先我来解释一下为什么说是全网最真实的面试题,相信大家也发现软件测试面试题在网上流传也已不少,但是经过仔细查看发现了两个很重要的问题。 第一,网上流传的面试题的答案并不能保证百分百正确。也就是说各位朋友辛辛苦苦花了很多时间准备…...

Mac监控键盘输入并执行动作
最新内容在我的另一个博客:Mac监控键盘输入并执行动作 背景 电脑的安全是非常重要的,特别是里面的敏感数据,若是被有心之人利用,那后果不堪设想。 所以我们部门定下了一个规矩,谁离开工位要是不锁屏,就可以…...

Transformer输出张量的值全部相同?!
Transformer输出张量的值全部相同?!现象原因解决现象 输入经过TransformerEncoderLayer之后,基本所有输出都相同了。 核心代码如下, from torch.nn import TransformerEncoderLayer self.trans TransformerEncoderLayer(d_mode…...

港科夜闻|全国政协副主席梁振英先生率香港媒体高管团到访香港科大(广州)...
关注并星标每周阅读港科夜闻建立新视野 开启新思维1、全国政协副主席梁振英先生率香港媒体高管团到访香港科大(广州)。2月21日下午,在全国政协副主席、广州南沙粤港合作咨询委员会顾问梁振英先生的带领下,香港20余家媒体的高管及知名媒体人士到访香港科大…...

XML调用 CAPL Test Function
🍅 我是蚂蚁小兵,专注于车载诊断领域,尤其擅长于对CANoe工具的使用🍅 寻找组织 ,答疑解惑,摸鱼聊天,博客源码,点击加入👉【相亲相爱一家人】🍅 玩转CANoe&…...
Linux网络配置(NAT)
在搭配好一台虚拟机的时候想要下载,安装些什么但一直失败这个时候就可以检查一下网络是否连接这里我们使用centos7举例子使用命令——ifconfig由此可见我们的系统中目前有3个网卡ens33——用于接入外网,该网卡默认关闭lo——用于访问本地网络,…...
——线性表总结)
数据结构——第二章 线性表(8)——线性表总结
线性表总结 线性表是线性结构的基本形式,用于描述一组同类型而具有1:1线性关系的数据对象。将此类数据对象存放在计算机的内存中时,必须考虑数据元素的存放和数据元素之间关系的存放。常用的存储结构有顺序存结构和链式结构。 顺序表存储特点是用一维数…...

3.7寸按键翻页工牌
产品参数 产品型号 ESL_BWR3.7_BLE 产品尺寸 (mm) 62.51066.5 显示技术 E ink 显示区域 (mm) 47.32(H)81.12(V) 分辨率 (像素) 280480 像素尺寸(mm) 0.1690.169 150dpi 显示颜色 黑/白 视觉角度 180 工作温度 0℃ - 50℃ 电池 500mAh ( Type-C 充电…...

西北工业大学大学物理(II)选填解析2019-2020期末
2 又是考查“一个电子和一个光子具有相同的波长,则二者动量相等。”4 斯特恩盖拉赫实验,原子的自旋磁矩取向量子化。7 通常我们感受不到电子的波动性。因为其波长短,其实也就是粒子运动速率高。10 考查无限长直导线周围B分布。常见的模型要记…...
[计算机网络(第八版)]第一章 概述(章节测试/章节作业)
随堂作业 练习版(无答案版) 1.2 因特网概述 1【单选题】因特网的前身是1969年创建的第一个分组交换网 A、internetB、InternetC、NSFNETD、ARPANET 2【单选题】因特网采用的核心技术是 A、TCP/IPB、局域网技术C、远程通信技术D、光纤技术 1.3 三种交换方式:电路…...

华为OD机试真题大全,用 Python 解华为机试题 | 机试宝典
文章目录2023 年用 Python 语言解华为 OD 机试题,一篇博客找全。华为 OD 机试题清单(机试题库还在逐日更新)2023 年用 Python 语言解华为 OD 机试题,一篇博客找全。 在 2023 年,Python 已成为广泛使用的编程语言之一&…...
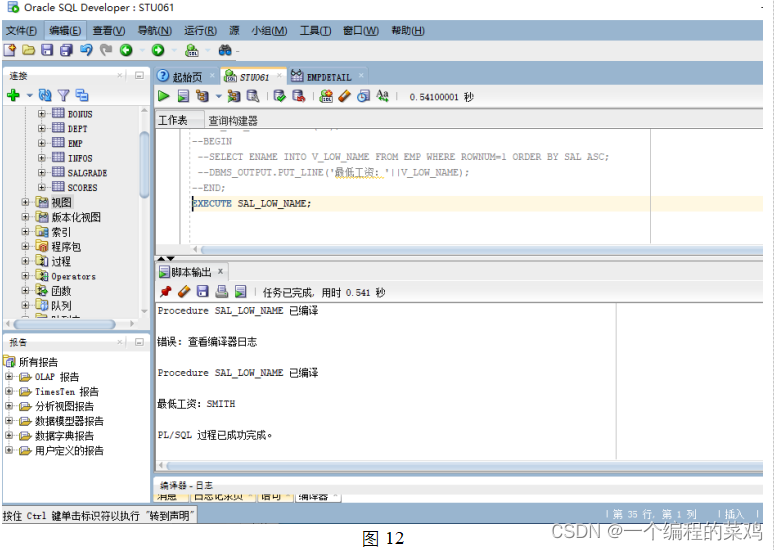
电子科技大学数据库与软件工程三
适用于网工和物联网专业 目录 一、实验目的 二、实验内容 三、实验软件 四、实验步骤及数据记录 1.子查询 2. 伪列 3.数据库对象 4. 块、存储过程和触发器 五、实验结论及思考题 实验结论: 思考题: 六、总结及心得体会 七、对本实验过程及方…...
华为开源自研AI框架昇思MindSpore数据变换:Transforms
目录一、环境准备1.进入ModelArts官网2.使用CodeLab体验Notebook实例二、数据变换 TransformsCommon TransformsComposeVision TransformsRescaleNormalizeHWC2CWHText TransformsBasicTokenizerLookupLambda Transforms通常情况下,直接加载的原始数据并不能直接送入…...

软件测试之边界值测试法
边界值测试法 1. 介绍 边界值分析法就是对输入或输出边界值进行测试的,也是一种黑盒测试. 边界值分析法通常作为等价类划分法的补充,其测试用例来自等价类的边界;长期的经验得知,大量的错误是发现在输入或输出范围的边界上,而不是发生再输入输出范围的内部&#…...

【华为OD机试模拟题】用 C++ 实现 - 最近的点(2023.Q1)
最近更新的博客 【华为OD机试模拟题】用 C++ 实现 - 获得完美走位(2023.Q1) 文章目录 最近更新的博客使用说明最近的点题目输入输出示例一输入输出Code使用说明 参加华为od机试,一定要注意不要完全背诵代码,需要理解之后模仿写出,通过率才会高。 华为 OD 清单查看地址…...
Qt windeployqt.exe 打包qml
Qt系列文章目录 文章目录Qt系列文章目录前言一、遇到的坑二、参考前言 我们在QtCreator下面开发程序,一般都会遇到工程发布给客户使用的情况。我们通常会使用Qt自带的打包工具:windeployqt.exe。 windeployqt.exe是Qt自带的工具,用于创建应用…...

【人脸识别】CurricularFace:自适应课程学习人脸识别损失函数
论文题目:《CurricularFace: Adaptive Curriculum Learning Loss for Deep Face Recognition》 论文地址:https://arxiv.org/pdf/2004.00288v1.pdf 代码地址:https://github.com/HuangYG123/CurricularFace 建议先了解下这篇文章:…...

无机布防火卷帘门报价透明,包工包料,一次说清所有费用
很多客户在选购无机布防火卷帘门时,最关心实际成交价格,也担心报价不清晰,后期产生各类额外支出。行业内产品定价参差不齐,选材做工不同,最终价位自然存在差距,挑选时不能只看表面低价。 👉 点击…...

Jetson Orin Nano 升级jetpack5.1.2刷机过程记录
一.刷机起因 orin nano 接了个IMX477的摄像头,用 命令行DISPLAY:0.0 nvgstcapture-1.0 显示的画面有撕裂,让卖家查问题,卖家测试没有撕裂,对比环境,orin nano出厂默认的是jetpack5.1.1,卖家用的jetpack5.1.2版本,为了解决差异,要升级jetpack版本,前后搞了2天半,记录一下. 另外…...
)
别再乱用npm install了!手把手教你用npx only-allow为项目指定包管理器(支持pnpm/yarn/npm)
用only-allow统一团队包管理器:从配置到CI的全流程指南 你是否曾经在拉取一个新项目后,面对npm install、yarn还是pnpm i的抉择感到困惑?或者更糟的是,团队成员混用不同包管理器导致node_modules结构不一致,引发各种诡…...

雪球网md5__1038参数逆向解析与Node.js复现
1. 这不是“破解”,而是对前端加密逻辑的常规逆向还原你打开雪球网任意一只股票详情页,F12 打开开发者工具,切到 Network 面板,刷新页面——很快就能在 XHR 请求里捕获到类似这样的接口:https://xueqiu.com/stock/cube…...
)
Midjourney锐化效果失效真相(2024官方未公开的渲染管线瓶颈解析)
更多请点击: https://intelliparadigm.com 第一章:Midjourney锐化效果失效真相(2024官方未公开的渲染管线瓶颈解析) 自2024年V6.2版本起,大量用户反馈 --stylize 与 --sharp 参数组合下图像边缘锐化效果显著弱化&am…...
)
Windows10下V-REP教育版安装保姆级教程(附百度网盘资源与避坑点)
Windows10系统V-REP教育版完整安装指南:从下载到实战避坑在机器人仿真和自动化控制领域,V-REP(现更名为CoppeliaSim)作为一款功能强大的跨平台机器人仿真软件,已经成为众多工科学生和研究人员的首选工具。特别是其教育…...

别再只比参数了!从插件生态到中文优化,聊聊ChatGPT和文心一言的“隐形”差异
超越参数之争:ChatGPT与文心一言的生态与本土化实战解析 当技术评测文章还在反复比较模型参数量与发布时间时,真正影响日常工作效率的往往是那些未被量化的"软实力"。本文将从插件生态构建与中文场景优化两个维度,带您重新认识这两…...

集成Taotoken为OpenClaw工作流提供持久化模型支持
🚀 告别海外账号与网络限制!稳定直连全球优质大模型,限时半价接入中。 👉 点击领取海量免费额度 集成Taotoken为OpenClaw工作流提供持久化模型支持 在构建基于OpenClaw的自动化Agent工作流时,一个稳定且可灵活切换的模…...

Lovable电商网站搭建:如何用不到3人技术团队,72小时内上线PCI-DSS合规MVP版本?
更多请点击: https://codechina.net 第一章:Lovable电商网站搭建 Lovable 是一个面向中小商户的轻量级电商解决方案,采用现代 Web 技术栈构建,强调可扩展性、用户体验与快速部署能力。本章将指导你从零开始搭建一个具备商品展示、…...

基于STM32WL与LoRaWAN的远程空气质量监测系统全栈开发实践
1. 项目概述:构建一个远程空气质量监测系统最近在做一个挺有意思的玩意儿:一个能自己找地方待着、靠太阳能供电,然后把周围空气数据悄无声息传回来的远程监测终端。核心想法很简单,就是想知道某个犄角旮旯,比如工厂周边…...