VScode跑通Remix.js官方的contact程序开发过程
目录
1 引言
2 安装并跑起来
3 设置根路由
4 用links来添加风格资源
5 联系人路由的UI
6 添加联系人的UI组件
7 嵌套路由和出口
8 类型推理
9 Loader里的URL参数
10 验证参数并抛出响应
书接上回,我们已经跑通了remix的quick start项目,接下来看看第2个教程,官网宣称耗时30分钟来学习。
1 引言
We'll be building a small, but feature-rich app that lets you keep track of your contacts. There's no database or other "production ready" things, so we can stay focused on Remix. We expect it to take about 30m if you're following along, otherwise it's a quick read.
我们将建立一个小而功能丰富的联系人管理程序。没有数据库或其他东西,所以我们可以专注于Remix。如果你跟上写的话,我们预计大概要花30分,否则就很快就能读完了。
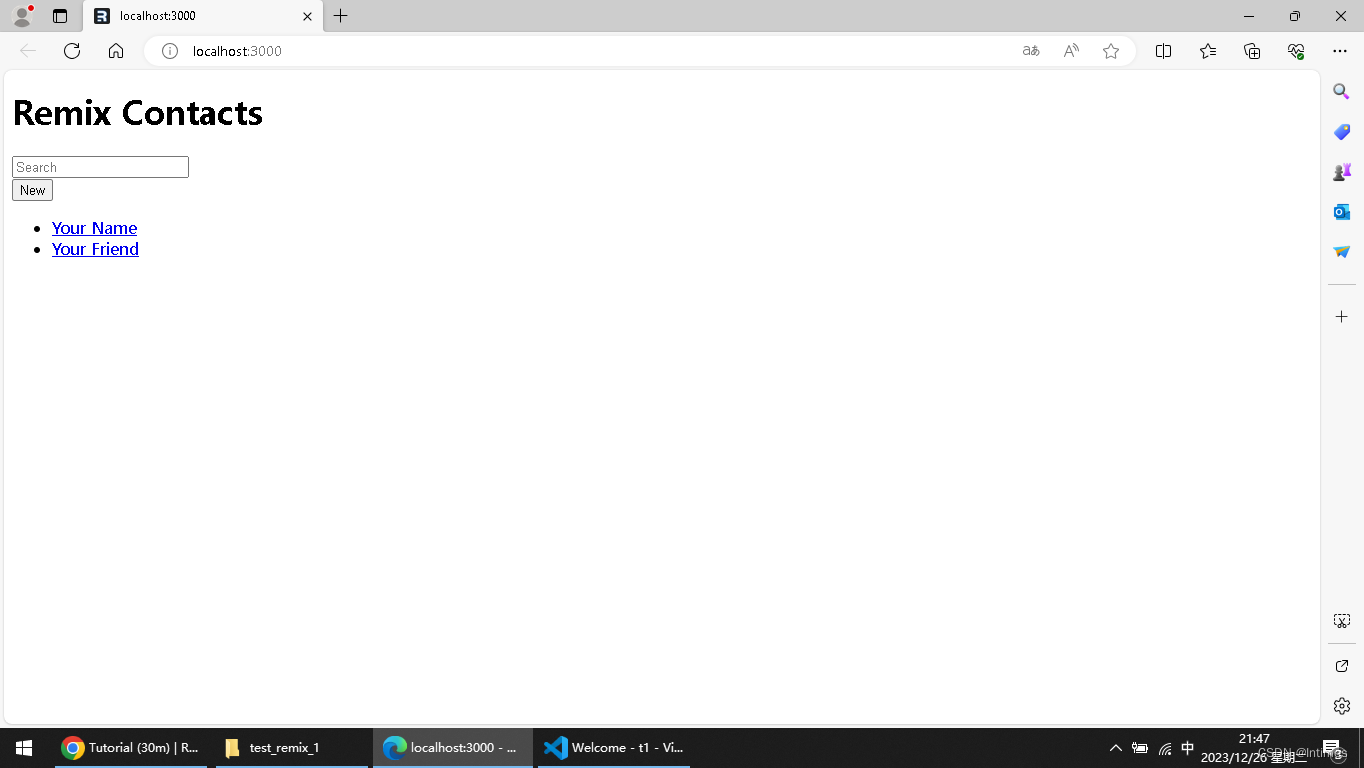
下图就是最后的效果。

2 安装并跑起来
首先,新建一个目录并转至目录下
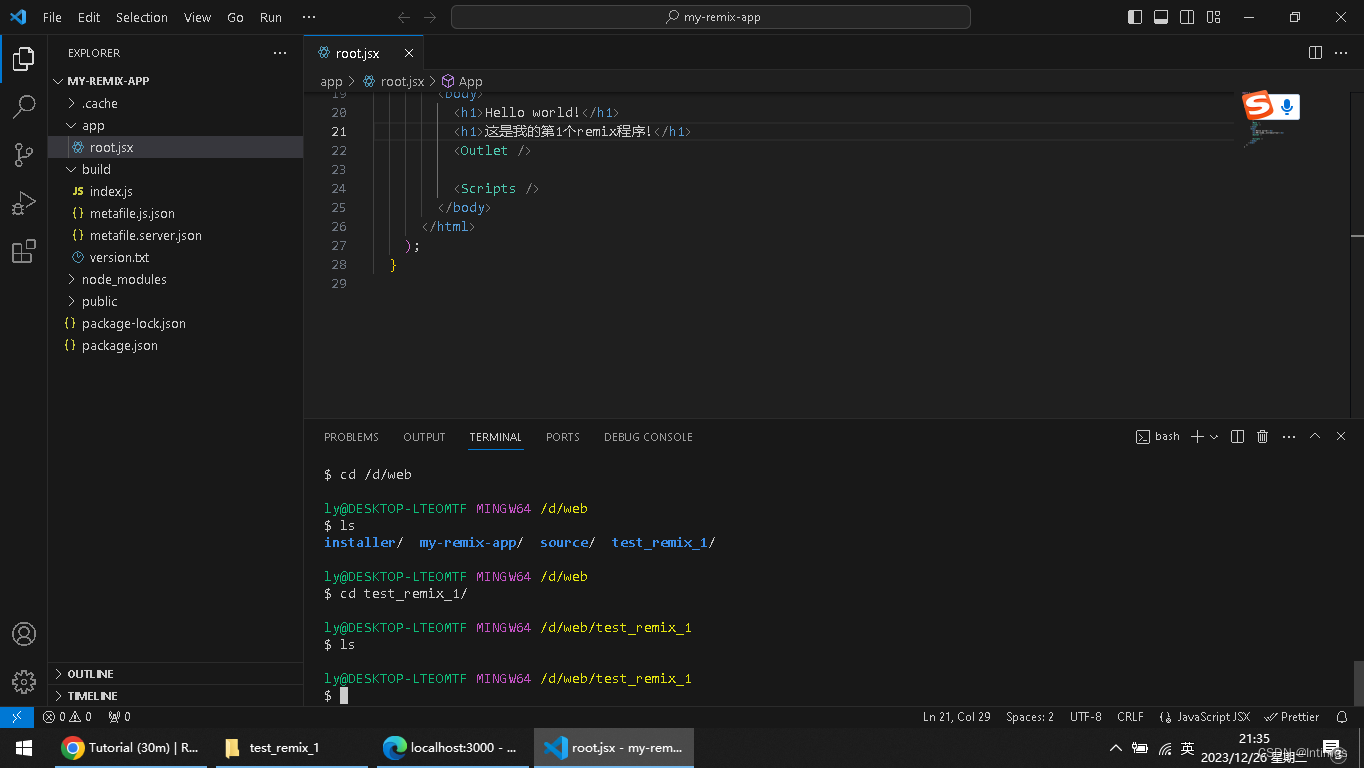
在这个目录下,测试下面命令,目的是生成一个基本模板。
npx create-remix@latest --template remix-run/remix/templates/remix-tutorial

也可能不需要创建新目录,不过我们还是稳妥起见,在目录下执行这个命令,选择y后,一顿安装。
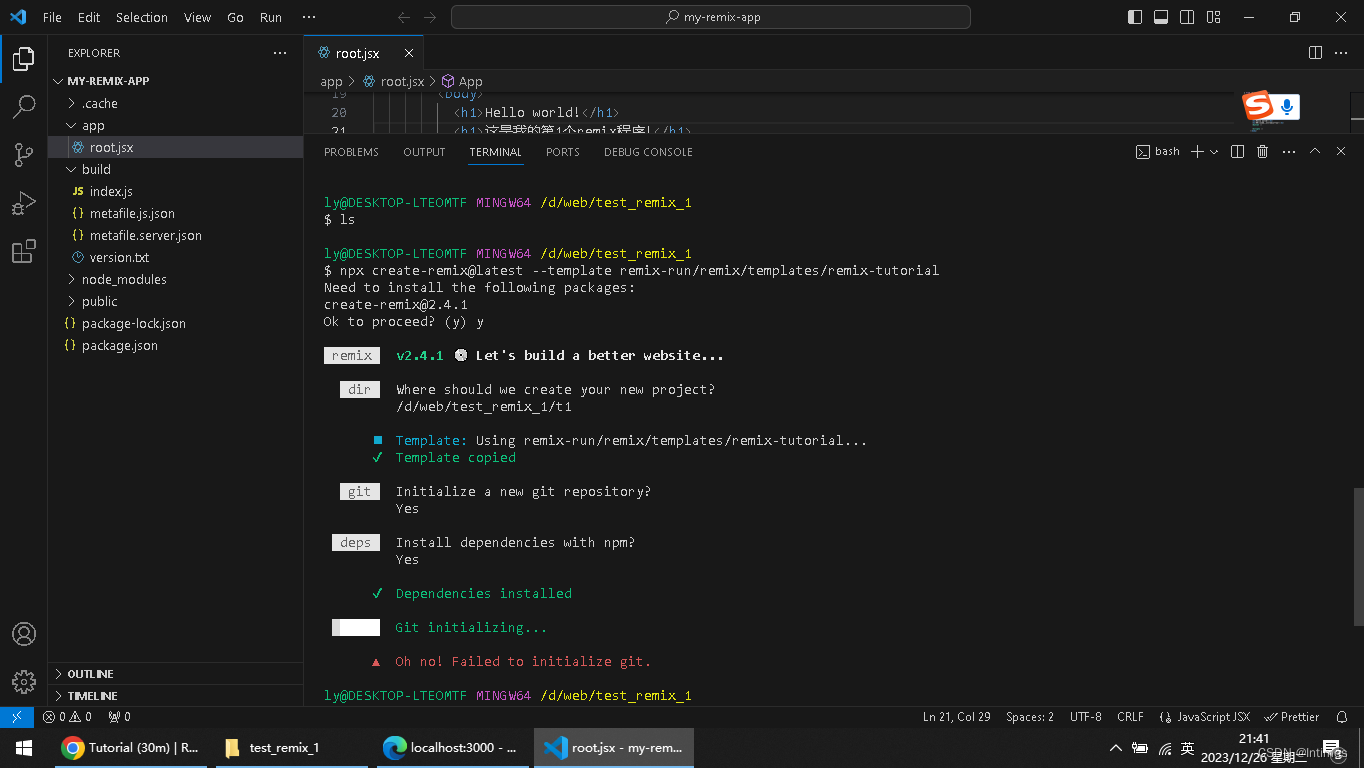
这就是全部过程了,会让你选择路径,我们输入了/d/web/...这里和我们创建的路径不一致。
最后git初始化失败了,没关系。文件夹快200m了。

接下来执行:
npm installnpm run dev
虽然过程有些错误,但是不影响。

启动app 成功。
3 设置根路由
根路由是要渲染的UI的基本组件。我们这里是用typescript来写的。
4 用links来添加风格资源
这里其实就是设置css。
While there are multiple ways to style your Remix app, we're going to use a plain stylesheet that's already been written to keep things focused on Remix.
虽然有多种方式来设置Remix应用程序风格,我们将使用一个简单的样式表。
You can import CSS files directly into JavaScript modules. The compiler will fingerprint the asset, save it to your assetsBuildDirectory, and provide your module with the publicly accessible href.
你可以将CSS文件直接导入到JavaScript模块中。编译器将对资产进行识别,将其保存到你的assetsBuildDirectory中,并为你的模块提供可公开访问的href。
import type { LinksFunction } from "@remix-run/node";
// existing importsimport appStylesHref from "./app.css";export const links: LinksFunction = () => [{ rel: "stylesheet", href: appStylesHref },
];
我们直接把这个段代码复制到root中,然后再执行依次npm run dev

看起来css已经加载了。成功。
Every route can export a links function. They will be collected and rendered into the <Links /> component we rendered in app/root.tsx.
每条路由都可以导出一个links功能。它们将被收集并呈现到我们在app/root.tsx中呈现的<Links />组件中。
The app should look something like this now. It sure is nice having a designer who can also write the CSS, isn't it? (Thank you, Jim ).
应用程序现在看起来应该是这样的。有一个能写CSS的设计师真是太好了,不是吗?(谢谢你,吉姆)。
5 联系人路由的UI
If you click on one of the sidebar items you'll get the default 404 page. Let's create a route that matches the url /contacts/1.
如果您单击其中一个侧边栏项,您将获得默认的404页面。让我们创建一个匹配url /contacts/1的路由。
我试过了,确实是404.
创建app/routes目录以及相应的文件
mkdir app/routes
touch app/routes/contacts.\$contactId.tsx
In the Remix route file convention, . will create a / in the URL and $ makes a segment dynamic. We just created a route that will match URLs that look like this:
在Remix路由文件约定中,.将在URL中创建一个/,而$将创建一个动态段。我们刚刚创建了一个路由,它将匹配如下所示的url:
/contacts/123/contacts/abc
6 添加联系人的UI组件
It's just a bunch of elements, feel free to copy/paste.
它只是一堆元素,随意复制/粘贴。
import { Form } from "@remix-run/react";
import type { FunctionComponent } from "react";import type { ContactRecord } from "../data";export default function Contact() {const contact = {first: "Your",last: "Name",avatar: "https://placekitten.com/g/200/200",twitter: "your_handle",notes: "Some notes",favorite: true,};return (<div id="contact"><div><imgalt={`${contact.first} ${contact.last} avatar`}key={contact.avatar}src={contact.avatar}/></div><div><h1>{contact.first || contact.last ? (<>{contact.first} {contact.last}</>) : (<i>No Name</i>)}{" "}<Favorite contact={contact} /></h1>{contact.twitter ? (<p><ahref={`https://twitter.com/${contact.twitter}`}>{contact.twitter}</a></p>) : null}{contact.notes ? <p>{contact.notes}</p> : null}<div><Form action="edit"><button type="submit">Edit</button></Form><Formaction="destroy"method="post"onSubmit={(event) => {const response = confirm("Please confirm you want to delete this record.");if (!response) {event.preventDefault();}}}><button type="submit">Delete</button></Form></div></div></div>);
}const Favorite: FunctionComponent<{contact: Pick<ContactRecord, "favorite">;
}> = ({ contact }) => {const favorite = contact.favorite;return (<Form method="post"><buttonaria-label={favorite? "Remove from favorites": "Add to favorites"}name="favorite"value={favorite ? "false" : "true"}>{favorite ? "★" : "☆"}</button></Form>);
};
Now if we click one of the links or visit /contacts/1 we get ... nothing new?
现在,如果我们点击其中一个链接或访问/联系人/1,我们得到…没有什么新的吗?
我试了下,其实就是不报404了。里面还用到了twitter的网页,确定我们能打开吗??
7 嵌套路由和出口
Since Remix is built on top of React Router, it supports nested routing. In order for child routes to render inside of parent layouts, we need to render an Outlet in the parent. Let's fix it, open up app/root.tsx and render an outlet inside.
由于Remix是建立在React Router之上的,所以它支持嵌套路由。为了让子路由在父布局中呈现,我们需要在父布局中呈现一个Outlet。让我们修复它,打开app/root。并在里面渲染一个出口。
这里涉及到一些代码的修改。import里新增一个outlet,然后在body里还要新增一个div。
import {Form,Links,LiveReload,Meta,Outlet,Scripts,ScrollRestoration,
} from "@remix-run/react";import type { LinksFunction } from "@remix-run/node";
// existing importsimport appStylesHref from "./app.css";export const links: LinksFunction = () => [{ rel: "stylesheet", href: appStylesHref },
];export default function App() {return (<html lang="en"><head><meta charSet="utf-8" /><meta name="viewport" content="width=device-width, initial-scale=1" /><Meta /><Links /></head><body><div id="sidebar"><h1>Remix Contacts</h1><div><Form id="search-form" role="search"><inputid="q"aria-label="Search contacts"placeholder="Search"type="search"name="q"/><div id="search-spinner" aria-hidden hidden={true} /></Form><Form method="post"><button type="submit">New</button></Form></div><nav><ul><li><a href={`/contacts/1`}>Your Name</a></li><li><a href={`/contacts/2`}>Your Friend</a></li></ul></nav></div><div id="detail"><Outlet /></div><ScrollRestoration /><Scripts /><LiveReload /></body></html>);
}
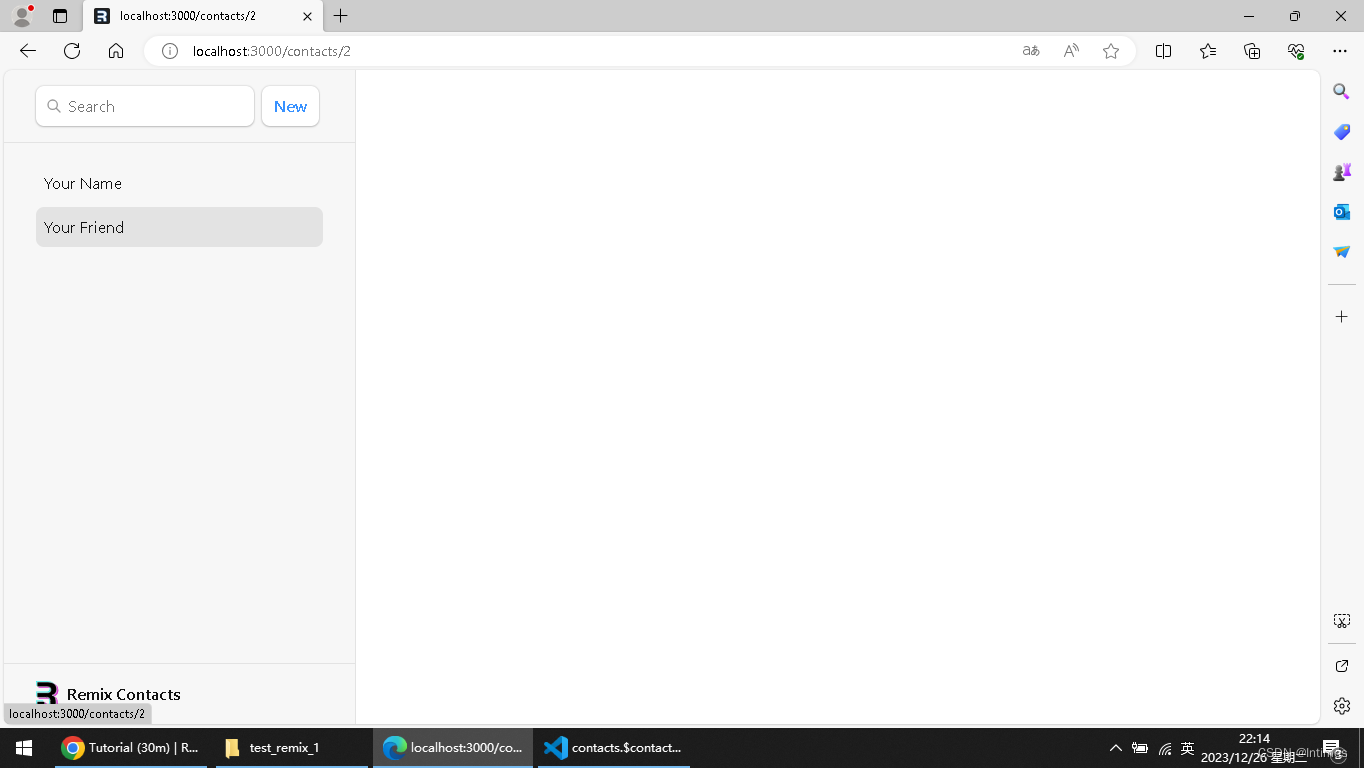
刷新一下,重新run,确实出来联系人界面了,只是猫猫和示例的姿势不一样。

8 客户边路由
You may or may not have noticed, but when we click the links in the sidebar, the browser is doing a full document request for the next URL instead of client side routing.
您可能注意到,也可能没有注意到,当我们单击侧边栏中的链接时,浏览器正在对下一个URL进行完整的文档请求,而不是客户端路由。
Client side routing allows our app to update the URL without requesting another document from the server. Instead, the app can immediately render new UI. Let's make it happen with <Link>.
客户端路由允许我们的应用程序更新URL,而不需要从服务器请求另一个文档。相反,应用程序可以立即呈现新的UI。让我们用<Link>实现它。
这段有点看不懂,先跟着做吧。
Change the sidebar <a href> to <Link to>
将侧边栏的...改为...
这里又是改代码,import里新增Link,然后在div里做相应修改即可。
做完以后网页没啥变化。
You can open the network tab in the browser devtools to see that it's not requesting documents anymore.
您可以在浏览器devtools中打开network选项卡,查看它不再请求文档了。
这里没试,暂时没啥影响,不管了。
8 加载数据
URL segments, layouts, and data are more often than not coupled (tripled?) together. We can see it in this app already:
URL段、布局和数据通常是耦合在一起的(三倍?)我们可以在这个应用程序中看到它:

Because of this natural coupling, Remix has data conventions to get data into your route components easily.
由于这种自然耦合,Remix具有数据约定,可以轻松地将数据放入路由组件中。
There are two APIs we'll be using to load data, loader and useLoaderData. First we'll create and export a loader function in the root route and then render the data.
我们将使用两个api来加载数据,loader和useLoaderData。首先,我们将在根路由中创建并导出一个加载器函数,然后渲染数据。
从root.tsx中导出一个loader函数,然后渲染数据。
import { json } from "@remix-run/node";import {Form,Link,Links,LiveReload,Meta,Outlet,Scripts,ScrollRestoration,useLoaderData,
} from "@remix-run/react";import { getContacts } from "./data";import type { LinksFunction } from "@remix-run/node";
// existing importsimport appStylesHref from "./app.css";export const links: LinksFunction = () => [{ rel: "stylesheet", href: appStylesHref },
];export const loader = async () => {const contacts = await getContacts();return json({ contacts });
};export default function App() {const { contacts } = useLoaderData();return (<html lang="en"><head><meta charSet="utf-8" /><meta name="viewport" content="width=device-width, initial-scale=1" /><Meta /><Links /></head><body><div id="sidebar"><h1>Remix Contacts</h1><div><Form id="search-form" role="search"><inputid="q"aria-label="Search contacts"placeholder="Search"type="search"name="q"/><div id="search-spinner" aria-hidden hidden={true} /></Form><Form method="post"><button type="submit">New</button></Form></div><nav>{contacts.length ? (<ul>{contacts.map((contact) => (<li key={contact.id}><Link to={`contacts/${contact.id}`}>{contact.first || contact.last ? (<>{contact.first} {contact.last}</>) : (<i>No Name</i>)}{" "}{contact.favorite ? (<span>★</span>) : null}</Link></li>))}</ul>) : (<p><i>No contacts</i></p>)}</nav></div><div id="detail"><Outlet /></div><ScrollRestoration /><Scripts /><LiveReload /></body></html>);
}
这个文件写完后,有2个报错
其中contacts上红线显示:
property contacts doesnot exist on type unknown ts2339
查了一下,挺复杂,主要是也不懂ts语法。
先不管,运行一下,结果居然能显示。也是服了。

可以看到,侧边栏有很多名字了,这就是数据。这些数据都是存在data.ts里的。
虽然报错,但总算是能运行,神奇啊。
8 类型推理
You may have noticed TypeScript complaining about the contact type inside the map. We can add a quick annotation to get type inference about our data with typeof loader:
你可能已经注意到TypeScript在抱怨map中的contact类型。我们可以通过typeof加载器添加一个快速注释来获取数据的类型推断:
onst { contacts } = useLoaderData<typeof loader>();上面还说有错呢,结果这里就更正了。所以说一直往下看可能有惊喜,没必要浪费那20分钟。试一下也许就行呢。
虽然也不知道到底是啥错误,主要是不懂ts
9 Loader里的URL参数
Click on one of the sidebar links
We should be seeing our old static contact page again, with one difference: the URL now has a real ID for the record.
单击其中一个侧边栏链接
我们应该再次看到旧的静态联系人页面,但有一点不同:URL现在有了记录的真实ID。
Remember the $contactId part of the file name at app/routes/contacts.$contactId.tsx? These dynamic segments will match dynamic (changing) values in that position of the URL. We call these values in the URL "URL Params", or just "params" for short.
还记得app/routes/contacts文件名称中的$contactId部分吗?这些动态段将匹配URL中该位置的动态(变化)值。我们将URL中的这些值称为“URL参数”,或者简称为“参数”。
These params are passed to the loader with keys that match the dynamic segment. For example, our segment is named $contactId so the value will be passed as params.contactId.
这些参数与匹配动态段的键一起传递给加载器。例如,我们的段命名为$contactId,因此值将作为params.contactId传递。
These params are most often used to find a record by ID. Let's try it out.
这些参数最常用于按ID查找记录。我们来试一下。
Add a loader function to the contact page and access data with useLoaderData
往联系人页面添加一个loader函数,用useLoaderData来与数据交互。

只修改标住的地方就可以。我们修改完以后会发现报错,真是坑啊然而作者知道这个情况···这时候还不能运行···只能接着往下走。
10 验证参数并抛出响应
TypeScript is very upset with us, let's make it happy and see what that forces us to consider
TypeScript对我们非常不满,让我们让它高兴一下,看看这会迫使我们考虑什么

还是照着改。
First problem this highlights is we might have gotten the param's name wrong between the file name and the code (maybe you changed the name of the file!). Invariant is a handy function for throwing an error with a custom message when you anticipated a potential issue with your code.
这突出的第一个问题是,我们可能在文件名和代码之间获得了错误的参数名称(可能您更改了文件名!)。当您预计代码可能出现问题时,Invariant是一个方便的函数,用于抛出带有自定义消息的错误。
Next, the useLoaderData<typeof loader>() now knows that we got a contact or null (maybe there is no contact with that ID). This potential null is cumbersome for our component code and the TS errors are flying around still.
接下来,useLoaderData<typeof loader>()现在知道我们得到了一个联系人或null(可能没有联系人的ID)。对于我们的组件代码来说,这个潜在的null很麻烦,TS错误仍然在到处乱飞。
We could account for the possibility of the contact being not found in component code, but the webby thing to do is send a proper 404. We can do that in the loader and solve all of our problems at once.
我们可以考虑在组件代码中找不到联系人的可能性,但是web要做的事情是发送适当的404。我们可以在加载器中这样做,并一次解决所有问题。
上面一大堆,我页看不懂,只能是照着往下走

修改到这里,错误就全部没有了,神奇啊。
Now, if the user isn't found, code execution down this path stops and Remix renders the error path instead. Components in Remix can focus only on the happy path 😁
现在,如果没有找到用户,代码将停止沿此路径执行,Remix将呈现错误路径。Remix中的组件只能关注快乐路径。
运行一下
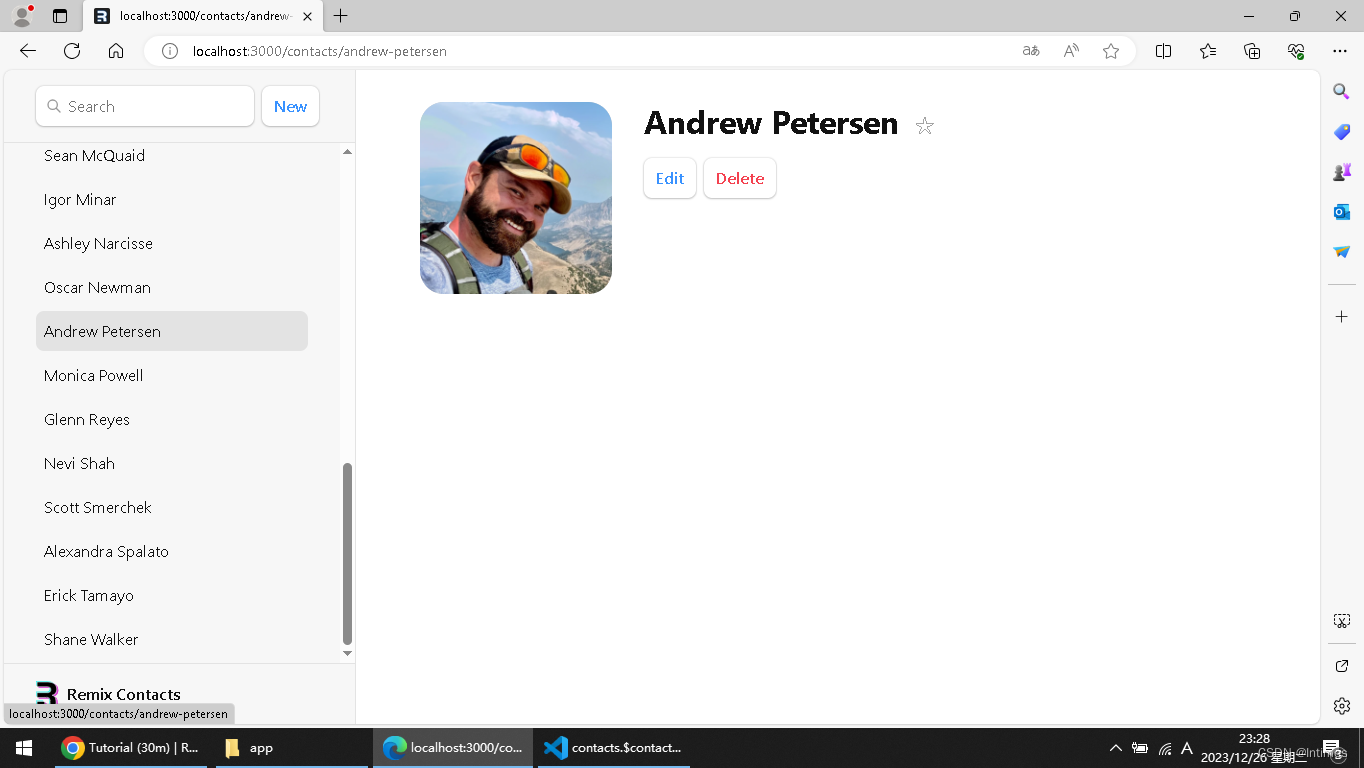
我只知道,这一步把头像加载出来了。里面全是胡子哥和大姐。要不就是秃头。没个能看的。
接下来的内容还挺多,今天暂时就到这里吧。
相关文章:
VScode跑通Remix.js官方的contact程序开发过程
目录 1 引言 2 安装并跑起来 3 设置根路由 4 用links来添加风格资源 5 联系人路由的UI 6 添加联系人的UI组件 7 嵌套路由和出口 8 类型推理 9 Loader里的URL参数 10 验证参数并抛出响应 书接上回,我们已经跑通了remix的quick start项目,接下…...

讲座思考 | 周志华教授:新型机器学习神经元模型的探索
12月22日,有幸听了南京大学周志华教授题为“新型机器学习神经元模型的探索”的讲座。现场热闹非凡,大家像追星一样拿着“西瓜书”找周教授签名。周教授讲得依旧循循善诱,由浅入深,听得我很入迷,故作此记。 周教授首先就…...
docker构建镜像及项目部署
文章目录 练习资料下载一、docker基础1. 基本概念2. docker常见命令3. 命令别名4. 数据卷 二、docker自定义镜像1. 了解镜像结构2. 了解Dockerfile3. 构建Dockerfile文件,完成自定义镜像 三、网络1. docker常见网络命令2. docker自带虚拟网络3. 自定义网络 四、dock…...

ARM串口通信编程实验
完成:从终端输入选项,完成点灯关灯,打开风扇关闭风扇等操作 #include "gpio.h" int main() {char a;//char buf[128];uart4_config();gpio_config();while(1){//接收一个字符数据a getchar();//发送接收的字符putchar(a);switch(…...
)
MyBatis的延迟加载(懒加载)
MyBatis 中的延迟加载是指在需要时才加载对象的某些属性或关联对象,而不是在初始查询时就加载所有数据。这对于性能优化和减少不必要的数据库查询非常有用。 1. 基于配置文件的延迟加载 在 MyBatis 的 XML 映射文件中,你可以使用 lazyLoadingEnabled 和…...
嵌入式-stm32-用PWM点亮LED实现呼吸灯
一:知识前置 1.1、LED灯怎么才能亮? 答:LED需要低电平才能亮,高电平是灯灭。 1.2、LED灯为什么可以越来越亮,越来越暗? 答:这是用到不同占空比来实现的,控制LED实现呼吸灯&…...

C语言初学7:循环
while 循环 一、while 循环语法: while(condition) {statement(s); } condition 为任意非零值时都为 true。当条件为 true 时执行循环。 当条件为 false 时,退出循环,程序流将继续执行紧接着循环的下一条语句。 二、while 循环举例 #inc…...

力扣69. x 的平方根
二分查找 思路: 设置 left 指针为 0,right 指针为 x;如果 mid (right - left) / 2 left 的平方小于或等于 x,此时移动 left mid 1,并缓存当前 mid 值,可能这个 mid 就是结果,或者 x 的平方…...

go语言学习计划。
第1周:Go语言概述与环境搭建 内容:了解Go语言的历史、特点和应用场景。安装Go环境,配置工作区。实践:编写第一个Go程序,了解Go的编译运行流程。 第2周:基本语法与数据类型 内容:学习基本数据…...

设计模式之-3种常见的工厂模式简单工厂模式、工厂方法模式和抽象工厂模式,每一种模式的概念、使用场景和优缺点。
系列文章目录 设计模式之-6大设计原则简单易懂的理解以及它们的适用场景和代码示列 设计模式之-单列设计模式,5种单例设计模式使用场景以及它们的优缺点 设计模式之-3种常见的工厂模式简单工厂模式、工厂方法模式和抽象工厂模式,每一种模式的概念、使用…...

docker run --help帮助文档
文章目录 基础环境docker run --helpdocker run --help中文翻译 基础环境 环境:ubuntu20.04 x64 使用apt install docker.io安装docker docker版本: rootky:/userdata/testOnebuttonDeploy/shsany_ai/kyai_arm_ubuntu# docker -v Docker version 24.0…...

【Qt-Timer】
Qt编程指南 ■ QTimeEvent■ Qtimer■ QDateTimeEdit■ QDateTime■■ ■ QTimeEvent 1.启动定时器 定时器ID startTimer (时间间隔); int idt startTimer (250); 每隔指定的时间间隔,触发一次定时器事件。 2.定时器事件处理 virtual void timerEvent (QTimeEvent…...
Java多线程技术五——单例模式与多线程-备份
1 概述 本章的知识点非常重要。在单例模式与多线程技术相结合的过程中,我们能发现很多以前从未考虑过的问题。这些不良的程序设计如果应用在商业项目中将会带来非常大的麻烦。本章的案例也充分说明,线程与某些技术相结合中,我们要考虑的事情会…...
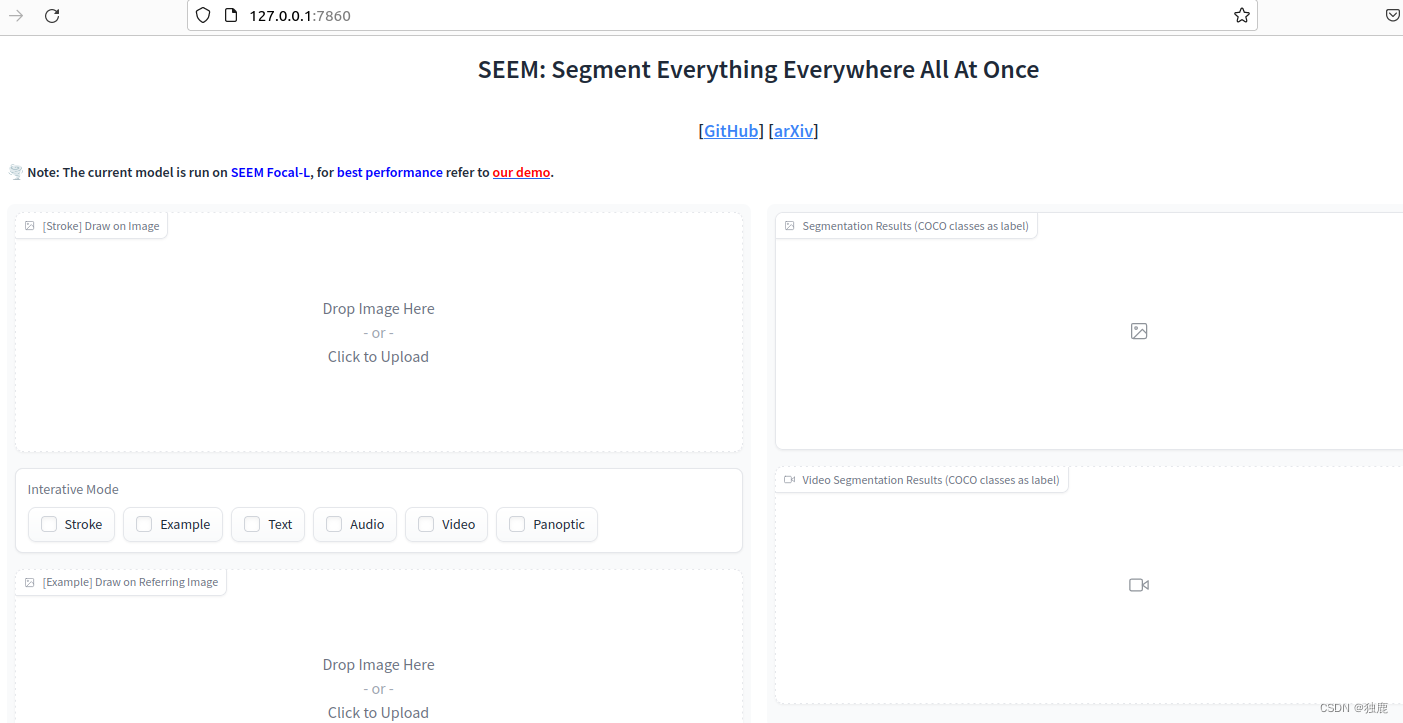
Seem环境安装
创建虚拟环境 conda create -n seem python3.8 conda activate seem 安装相关依赖:(不按照的话会报错) sudo apt-get install openmpi-bin libopenmpi-devconda install gcc_linux-64pip install mpi4py 导入环境 export PYTHONPATH$(pwd…...

java八股jvm
JVM虚拟机篇-01-JVM介绍、运行流程_哔哩哔哩_bilibili 1.PC程序计数器 2.堆 3.虚拟机栈 4.方法区/永久代/元空间 5.直接内存 JVM虚拟机篇-06-JVM组成-你听过直接内存吗_哔哩哔哩_bilibili 6.双亲委派 从下往上找,有同名类优先使用上级加载器的,不用自己…...
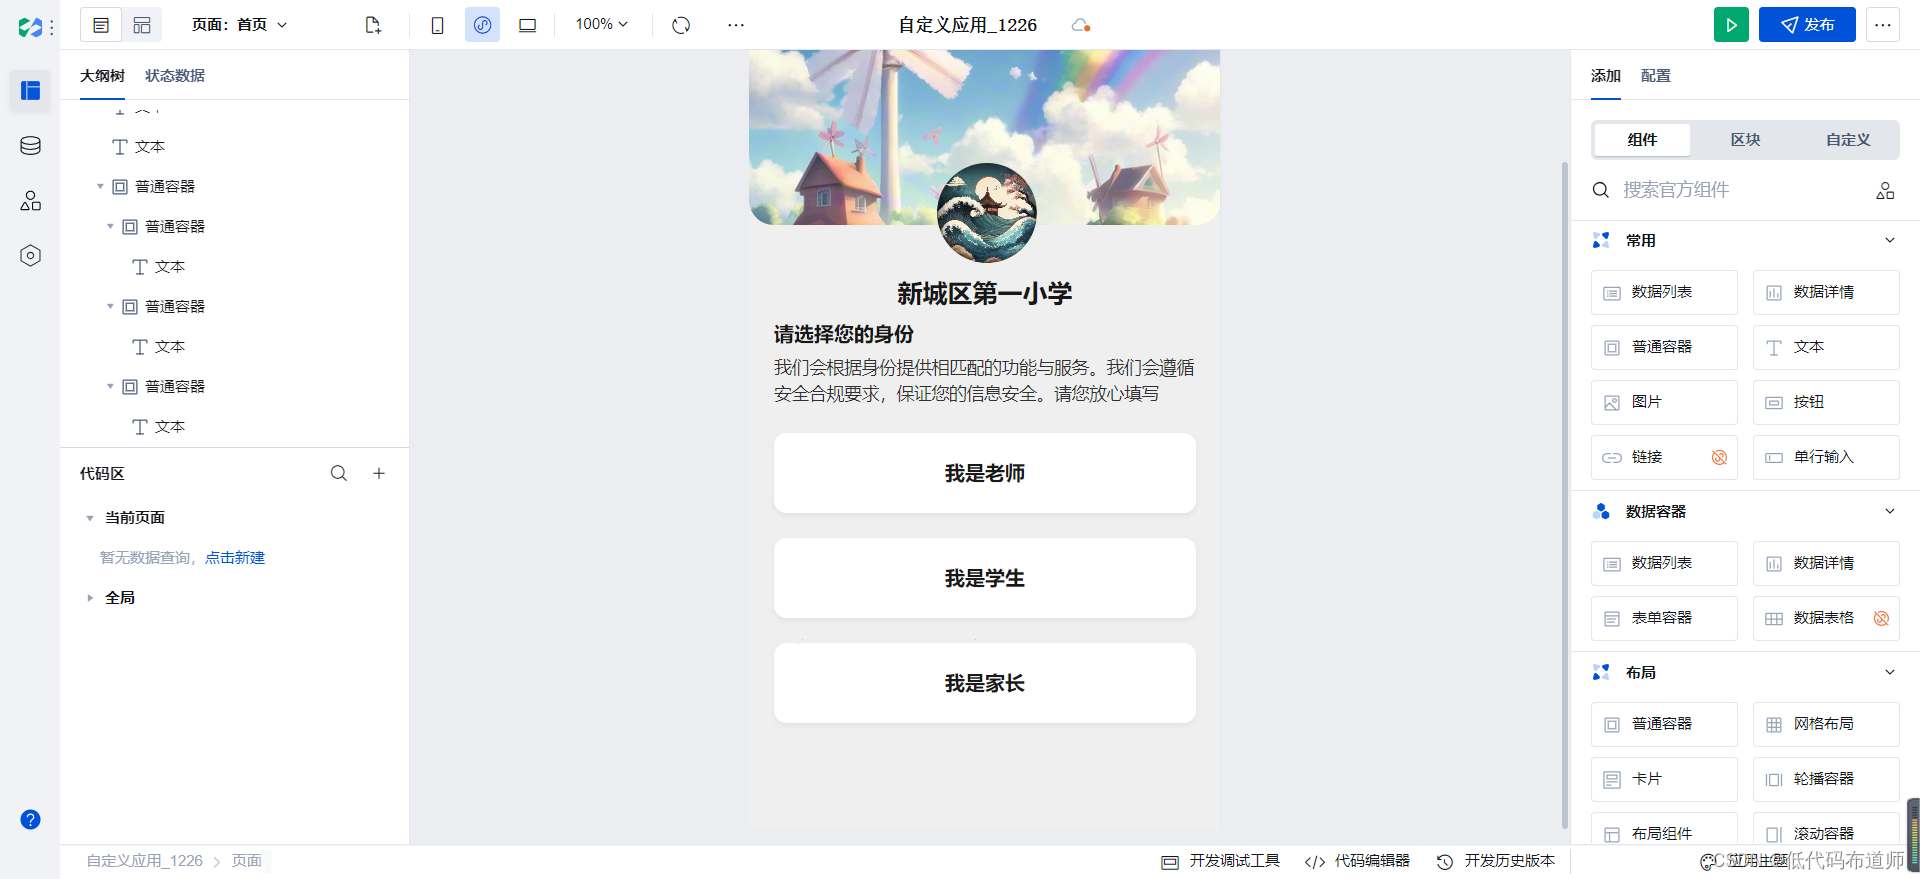
家校互通小程序实战开发02首页搭建
目录 1 创建应用2 搭建首页总结 我们上一篇介绍了家校互通小程序的需求,创建了对应的数据源。有了这个基础的分析之后,我们就可以进入到开发阶段了。开发小程序,先需要创建应用。 1 创建应用 登录控制台,点击创建应用,…...
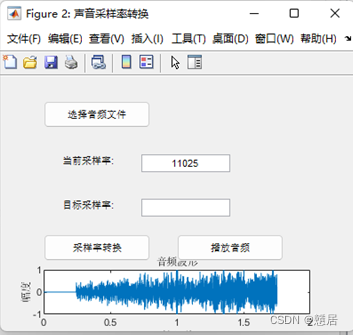
使用matlab制作声音采样率转换、播放以及显示的界面
利用matlab做一个声音采样率转换、播放以及显示的界面 大抵流程: 图形界面创建:使用figure函数创建名为“声音采样率转换”的图形界面,并设置了其位置和大小。 按钮和文本框:使用uicontrol函数创建了选择音频文件的按钮、显示当前…...
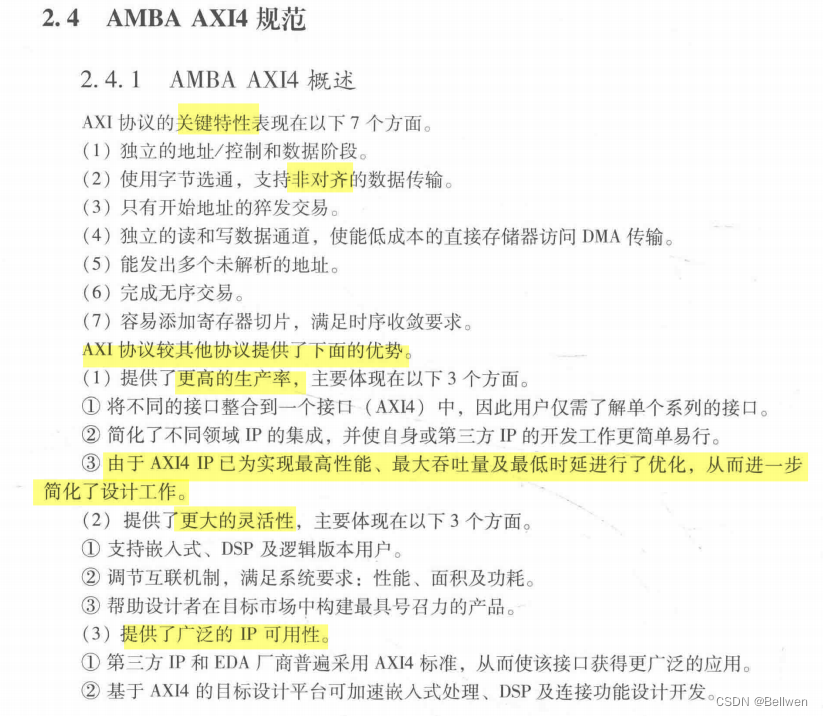
FPGA-AMBA协议、APB协议、AHB规范、AXI4协议规范概述及它们之间的关系
FPGA-AMBA协议、APB协议、AHB协议、AXI4协议规范概述 笔记记录,AMBA协议、APB协议、AHB规范、AXI4协议规范概述,只是概述描述,具体详细的协议地址传输、数据传输等内容将在下一章节详细说明。 文章目录 FPGA-AMBA协议…...

NI VeriStand中的硬件I / O延迟时间
NI VeriStand中的硬件I / O延迟时间 - NI 适用于 软件 VeriStand 问题详述 在我的VeriStand项目中,我要从DAQ或FPGA硬件中获取数据,在模型中处理输出,然后输出数据。在硬件输入和输出之间,我应该期望什么样的延迟?如…...

YoloV8的目标检测推理
YoloV8的目标检测推理 原始的YoloV8封装的层次太高,想要为我们所用可能需要阅读很多API,下面给出比较简单的使用方式 导入所需的库 os:用于操作文件系统。cv2 (OpenCV):用于图像处理。numpy:提供数学运算࿰…...

【磁盘】每天掌握一个Linux命令 - iostat
目录 【磁盘】每天掌握一个Linux命令 - iostat工具概述安装方式核心功能基础用法进阶操作实战案例面试题场景生产场景 注意事项 【磁盘】每天掌握一个Linux命令 - iostat 工具概述 iostat(I/O Statistics)是Linux系统下用于监视系统输入输出设备和CPU使…...

抖音增长新引擎:品融电商,一站式全案代运营领跑者
抖音增长新引擎:品融电商,一站式全案代运营领跑者 在抖音这个日活超7亿的流量汪洋中,品牌如何破浪前行?自建团队成本高、效果难控;碎片化运营又难成合力——这正是许多企业面临的增长困局。品融电商以「抖音全案代运营…...
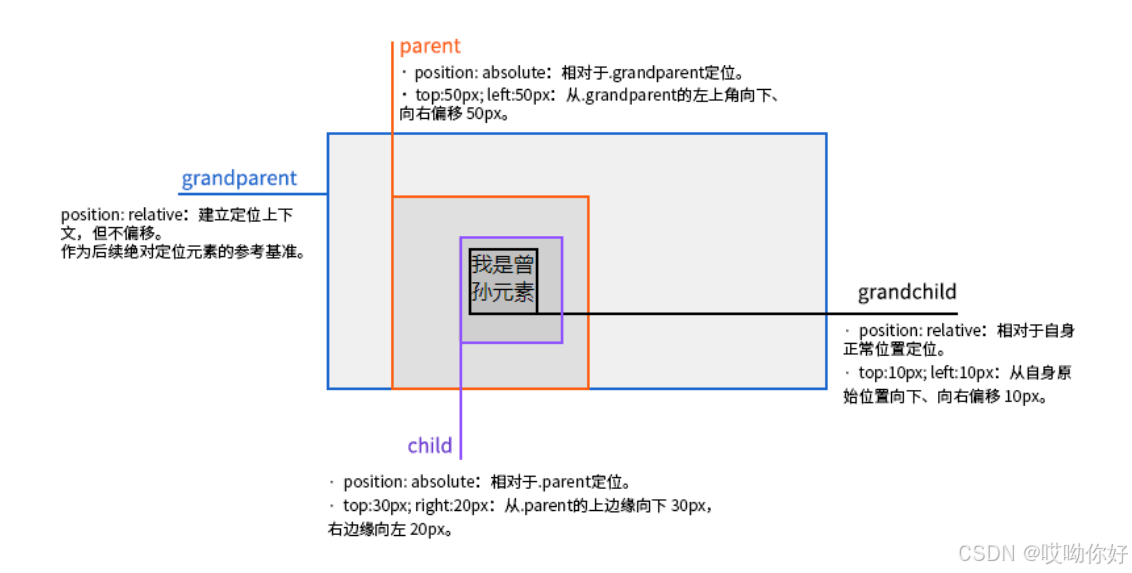
【CSS position 属性】static、relative、fixed、absolute 、sticky详细介绍,多层嵌套定位示例
文章目录 ★ position 的五种类型及基本用法 ★ 一、position 属性概述 二、position 的五种类型详解(初学者版) 1. static(默认值) 2. relative(相对定位) 3. absolute(绝对定位) 4. fixed(固定定位) 5. sticky(粘性定位) 三、定位元素的层级关系(z-i…...

【HTTP三个基础问题】
面试官您好!HTTP是超文本传输协议,是互联网上客户端和服务器之间传输超文本数据(比如文字、图片、音频、视频等)的核心协议,当前互联网应用最广泛的版本是HTTP1.1,它基于经典的C/S模型,也就是客…...

如何理解 IP 数据报中的 TTL?
目录 前言理解 前言 面试灵魂一问:说说对 IP 数据报中 TTL 的理解?我们都知道,IP 数据报由首部和数据两部分组成,首部又分为两部分:固定部分和可变部分,共占 20 字节,而即将讨论的 TTL 就位于首…...
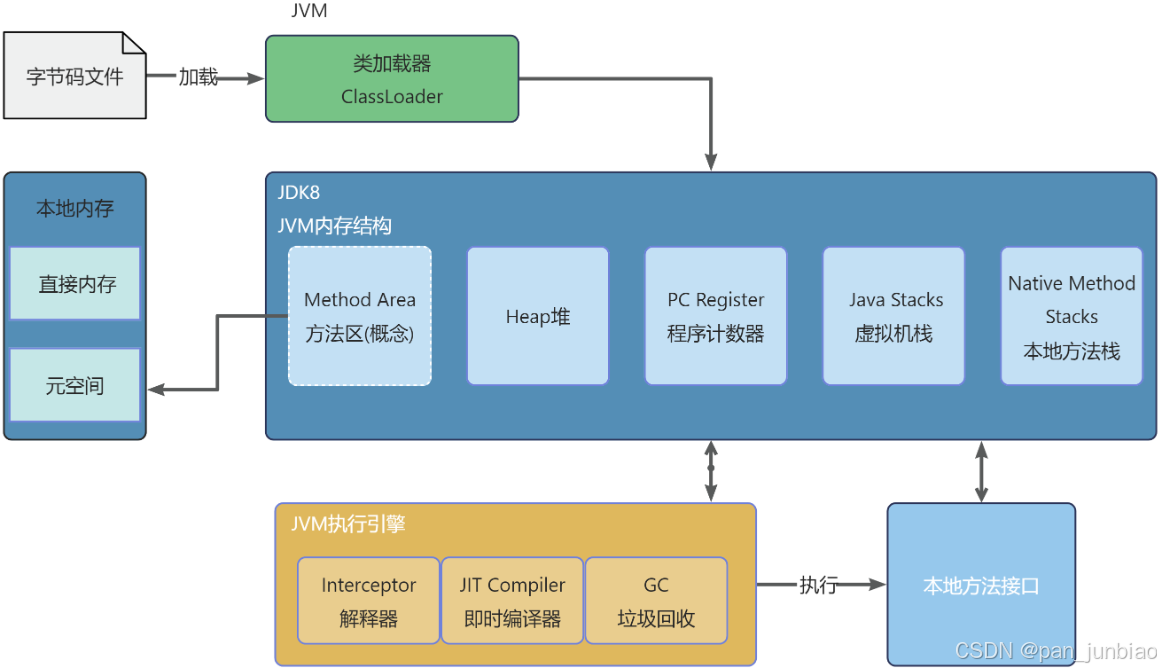
JVM虚拟机:内存结构、垃圾回收、性能优化
1、JVM虚拟机的简介 Java 虚拟机(Java Virtual Machine 简称:JVM)是运行所有 Java 程序的抽象计算机,是 Java 语言的运行环境,实现了 Java 程序的跨平台特性。JVM 屏蔽了与具体操作系统平台相关的信息,使得 Java 程序只需生成在 JVM 上运行的目标代码(字节码),就可以…...

CRMEB 中 PHP 短信扩展开发:涵盖一号通、阿里云、腾讯云、创蓝
目前已有一号通短信、阿里云短信、腾讯云短信扩展 扩展入口文件 文件目录 crmeb\services\sms\Sms.php 默认驱动类型为:一号通 namespace crmeb\services\sms;use crmeb\basic\BaseManager; use crmeb\services\AccessTokenServeService; use crmeb\services\sms\…...
基于Java+VUE+MariaDB实现(Web)仿小米商城
仿小米商城 环境安装 nodejs maven JDK11 运行 mvn clean install -DskipTestscd adminmvn spring-boot:runcd ../webmvn spring-boot:runcd ../xiaomi-store-admin-vuenpm installnpm run servecd ../xiaomi-store-vuenpm installnpm run serve 注意:运行前…...
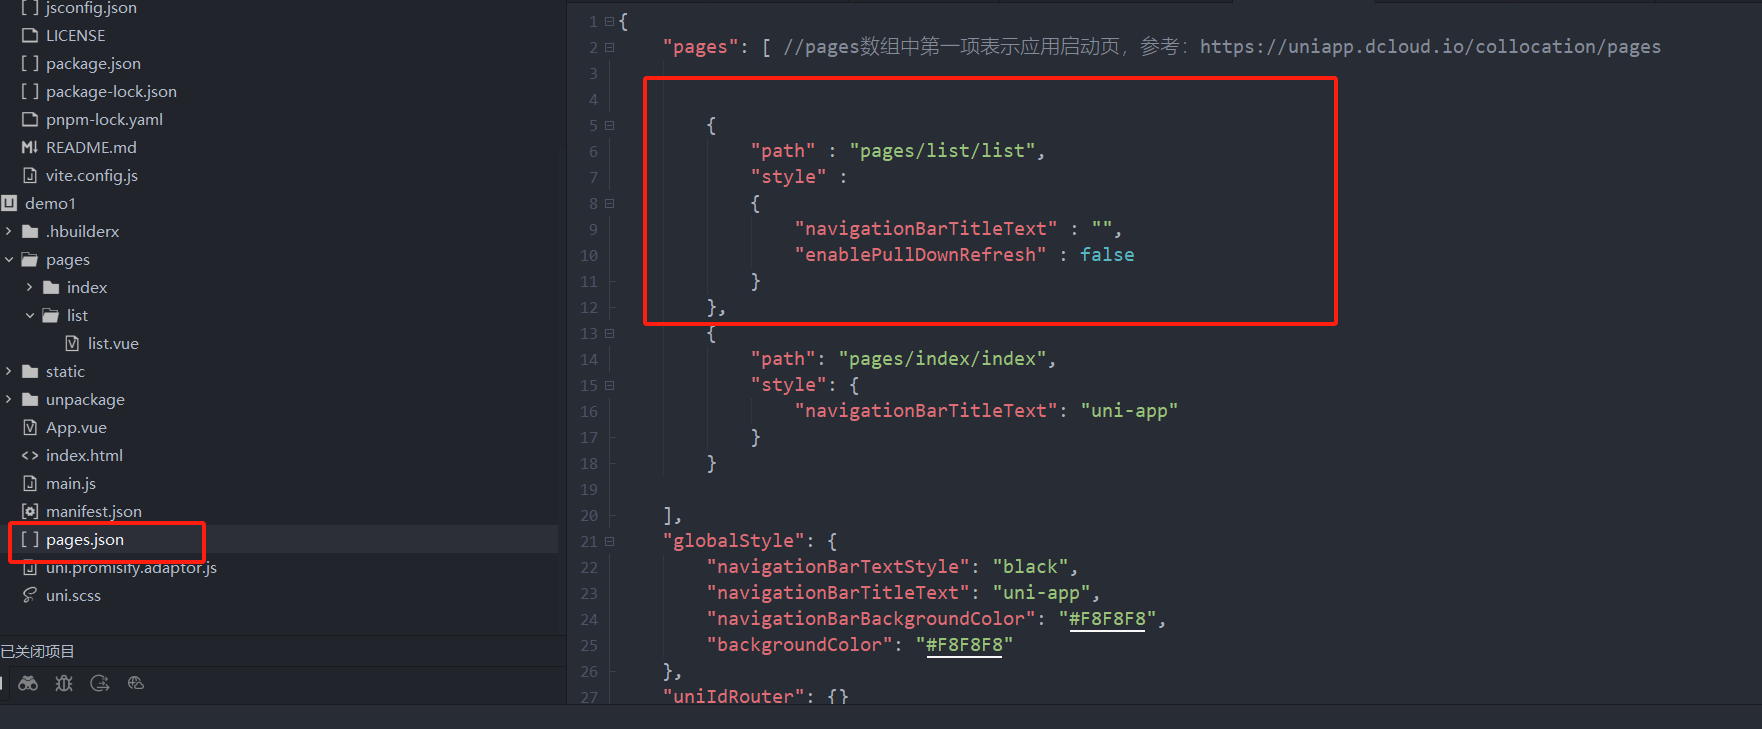
uniapp 小程序 学习(一)
利用Hbuilder 创建项目 运行到内置浏览器看效果 下载微信小程序 安装到Hbuilder 下载地址 :开发者工具默认安装 设置服务端口号 在Hbuilder中设置微信小程序 配置 找到运行设置,将微信开发者工具放入到Hbuilder中, 打开后出现 如下 bug 解…...
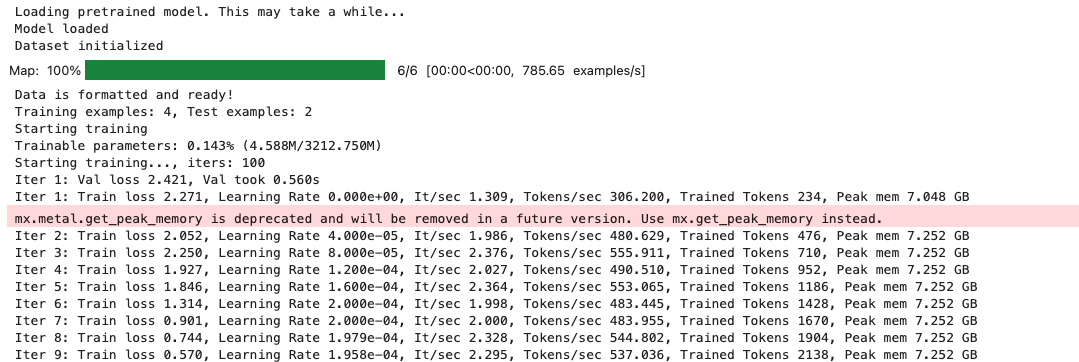
mac:大模型系列测试
0 MAC 前几天经过学生优惠以及国补17K入手了mac studio,然后这两天亲自测试其模型行运用能力如何,是否支持微调、推理速度等能力。下面进入正文。 1 mac 与 unsloth 按照下面的进行安装以及测试,是可以跑通文章里面的代码。训练速度也是很快的。 注意…...