Spring Boot | Spring Security ( SpringBoot安全管理 )、Spring Security中 的 “自定义用户认证“
目录 :
- Spring Boot 安全管理 :
- 一、Spring Security 介绍
- 二、Spring Security 快速入门
- 2.1 基础环境搭建 :
- ① 创建Spring Boot 项目
- ② 创建 html资源文件
- ③ 编写Web控制层
- 2.2 开启安全管理效果测试 :
- ④ 添加 spring-boot-starter-security 启动器
- ⑤ 项目启动测试
- 三、"MVC Security" 安全配置介绍
- 四、自定义 "用户认证" ( 确认用户"是否登录" , 并对登录进行 "管控" )
- 4.1 "内存" 身份认证 ( In-Memory Authentication ) - ( 开发测试环境中使用,无法用于"实际生产环境" ) :
- ① 自定义 WebSecurityConfigurerAdapter 配置类 ( 创建一个配置类,该类继承 WebSecurityConfigurerAdapter类 )
- ② 使用 "内存" 进行 "身份认证"
- ③ 效果测试
- 4.2 "JDBC" 身份认证 ( JDBC Authentication ) - ( 将"用户登录信息" 与 "数据库信息" 进行 比对,判断是否是"合法用户" ) :
- ① 数据准备
- ② 添加 "JDBC 连接数据库" 的 "依赖启动器"
- ③ application.properties 中 进行 "数据库连接配置"
- ④ 使用 JDBC 进行 "身份认证"
- ⑤ 效果测试
- 4.3 "UserDetailsService" 身份认证 :
- ① 基础项目文件准备
- ② 定义查询用户及角色信息的服务接口
- ③ 定义 "UserDetailsService" 用于封装认证用户信息 ( 创建类实现 "UserDetailsService接口" , 在该类中封装 "认证用户的信息" )
- ④ 使用 UserDetailsService 进行身份认证 ( 创建一个配置类,该类继承 WebSecurityConfigurerAdapter类 , 类中重写的方法中调用 userDetailsService( )实现 "UserDetailsService身份认证" )
- ⑤ 效果测试
Spring Boot 安全管理 :

作者简介 :一只大皮卡丘,计算机专业学生,正在努力学习、努力敲代码中! 让我们一起继续努力学习!
该文章参考学习教材为:
《Spring Boot企业级开发教程》 黑马程序员 / 编著
文章以课本知识点 + 代码为主线,结合自己看书学习过程中的理解和感悟 ,最终成就了该文章文章用于本人学习使用 , 同时希望能帮助大家。
欢迎大家点赞👍 收藏⭐ 关注💖哦!!!(侵权可联系我,进行删除,如果雷同,纯属巧合)
- 实际开发中,一些应用通常要考虑到 安全性问题。例如,对于一些重要的操作,有些请求需要用户验明身份后才可以执行,还有一些请求需要用户 具有特定权限才可以执行。这样做的意义不仅可以用来保护项目安全,还可以控制项目访问效果。
一、Spring Security 介绍
针对 项目的安全管理,Spring家族提供了安全框架 : Spring Security,它是一个 基于 Spring生态圈的,用于提供安全访问控制解决方案的框架,为了方便 Spring Boot 项目 的安全管理,Spring Boot 对 Spring Security 安全框架进行了 整合支持,并提供了 通用 的 自动化配置,从而实现了 Spring Security 安全框架中包含的多数安全管理功能,下面,针对 常见的安全管理功能进行介绍,具体如下 :
(1) MVC Security是 Spring Boot 整合 Spring MVC 搭建 Web 应用的安全管理框架,也是 开发中 "使用最多 的一款安全功能。
(2) WebFlux Security是 Spring Boot 整合 Spring WebFlux 搭建 Web 应用的安全管理。虽然 Spring WebFlux 框架刚出现不久、文档不够健全,但是它集成了其他安全功能的优点,后续有可能在 Web 开发中越来越流行。
(3) OAuth2是大型项目的安全管理框架,可以实现 第三方认证、单点登录 等功能,但是目前 Spring Boot 版本
还不支持 OAuth2 安全管理框架。(4) Actuator Security用于对项目的一些 运行环境提供安全监控,例如 Health 健康信息、Info 运行信息等,它主要作为系统指标供运维人员查看管理系统的运行情况。
上面介绍了 Spring Boot 整合 Spring Security 安全框架可以实现的一些安全管理功能。项目安全管理是一个很大的话题,开发者可以 根据实际项目需求,选择性地 使用 Spring Security 安全框架 中的功能。
二、Spring Security 快速入门
- Spring Security 的 安全管理有两个重要概念,分别是 Authentication ( 认证 )和 Authorization ( 授权 )。其中,
① 认证 即 确认用户是否登录,并对 用户登录 进行 管控;
② 授权 即 确定用户所拥有的功能权限,并对 用户权限进行管控。- 本章后续将对 Spring Boot 整合 Spring Security 进行安全管理的讲解和实现将围绕用户登录管理和访问权限控制进行。下面我们先通过一个 快速入门 的 案例 来体验 Spring Boot 整合 Spring Security 实现的 MVC Security 安全管理效果。
2.1 基础环境搭建 :
- 为了更好地使用 Spring Boot 整合实现 MVC Security 安全管理功能,实现 Authentication( 认证 ) 和 Authorization
( 授权 ) 的功能,下面通过一个案例进行演示讲解 。
① 创建Spring Boot 项目
创建项目 :
项目结构 :
② 创建 html资源文件
创建 html资源文件 :
index.html页面是项目首页页面,common和vip文件夹中分别对应的普通用户 和 VIP用户可访问的页面。index.html :
<!DOCTYPE html>
<!-- 配置开启thymeleaf模板引擎页面配置 -->
<html lang="en" xmlns:th="http://www.thymeleaf.org">
<head><meta charset="UTF-8"><title>影视直播厅</title>
</head>
<body><!-- index.html页面是项目首页页面,common和vip文件夹中分别对应的普通用户 和 VIP用户可访问的页面 -->
<h1 align="center">欢迎进入电影网站首页</h1>
<hr>
<h3>普通电影</h3>
<ul><li><a th:href="@{/detail/common/1}">飞驰人生</a></li><li><a th:href="@{/detail/common/2}">夏洛特烦恼</a></li>
</ul>
<h3>VIP专享</h3>
<ul><li><a th:href="@{/detail/vip/1}">速度与激情</a></li><li><a th:href="@{/detail/vip/1}">猩球崛起</a></li>
</ul>
</body>
</html>
1.html : ( 其他三个页面以此类推 )
<!DOCTYPE html>
<html lang="en" xmlns:th="http://www.thymeleaf.org">
<head><meta charset="UTF-8"><title>Title</title>
</head>
<body>
<!-- th:href="@{/}" : 返回项目首页-->
<a th:href="@{/}">返回</a>
<h1>飞驰人生</h1>
.....
</body>
</html>
③ 编写Web控制层
FileController.java :
import org.springframework.stereotype.Controller;
import org.springframework.web.bind.annotation.GetMapping;
import org.springframework.web.bind.annotation.PathVariable;@Controller //加入到IOC容器
public class FileController { //控制层类//影片详情页@GetMapping("/detail/{type}/{path}") //为路径变量public String toDetail(@PathVariable("type") String type, @PathVariable("path") String path) {//返回值为String类型,可用于返回视图页面return "detail/" + type + "/" + path;}}
2.2 开启安全管理效果测试 :
④ 添加 spring-boot-starter-security 启动器
在 Spring Boot 项目中 开启 Spring Security 的方式非常简单,只需要引入 spring-boot-starter-security 启动器即可。
<!-- Spring Security 的依赖启动器,其版本号由SpringBoot进行统一管理--> <dependency><groupId>org.springframework.boot</groupId><artifactId>spring-boot-starter-security</artifactId> </dependency>需要说明的是,一旦项目 引入 spring-boot-starter-security 启动器,MVC Security 和 WebFlux Security 负责的 安全功能都会立即生效 。
ps :
① WebFlux Security 生效的 另一个前提是项目 属于 WebFlux Web 项目 );
② 对于 OAuth2 安全管理功能来说,则还需要额外引入一些其他安全依赖。
⑤ 项目启动测试
启动项目后,仔细 查看控制台的打印信息,项目启动时会在 "控制台"上 自动生成一个“安全密码” ( security password ) , 这个
密码是每次项目启动时 "随机生成" 的 ,如下图所示 :
此时通过浏览器访问 http://localhost:8080/ 访问 项目首页,会自动跳转到一个新的登录链接页面 : http://localhost:8080/login , 这说明在项目中 添加 spring-boot-starter-security依赖启动器后,项目实现了 Spring Security 的 自动化配置,并且 具有了一些默认的安全管理功能。另外,项目中并没有手动创建用户登录页面,而添加了Security 依赖后,Spring Security 会 自带一个默认的登录页面。 如下图所示 :
在 登录页面随意输入一个错误的用户名和密码,会出现 错误提示,效果如下图所示 :
从上图可以看出,当在 Spring Security 提供的默认登录页面“/ogin”中输入错误登录信息后,会 重定向到“/ogin?error”页面并显示出错误信息“用户名或密码错误”。
需要说明的是,在 Spring Boot 项目中加入 spring-boot-starter-security 依赖启动器后Security 会默认提供一个可登录的用户信息,其中 用户名为 user ,密码随机生成,这个密码随着项目的 每次启动随机生成 并 打印在控制台 上。
输入账号 和 密码 后,会 自动跳转 到 “登录首页” :
注意点 :
这种默认安全管理方式存在诸多问题。例如,只有唯一的默认登录用户 :user、密码随机生成且过于暴露、登录页面及错误提示页面不是我们想要的等。
三、“MVC Security” 安全配置介绍
使用 Spring Boot与 Spring MVC 进行 Web 开发时,如果项目引入 spring-boot-starter-security 依赖启动器,MVC Security 安全管理功能就会自动生效,其 默认 的 安全配置 是在 ① SecurityAutoConfiguration 和
② UserDetailsServiceAutoConfiguration 中 实现的。其中,① SecurityAutoConfiguration 会 导入并自动化配置 : SpringBootWebSecurityConfiguration用于启动 Web安全管理,② UserDetailsServiceAutoConfiguration 则用于 配置用户身份信息。
通过自定义 WebSecurityConfigurerAdapter 类型的 Bean 组件,可以 完全关闭 Security 提供的 Web 应用默认安全配置,但是 不会关闭 UserDetailsService 用户信息自动配置类。如果要关闭 UserDetailsService默认用户信息配置,可以自定义UserDetailsService、AuthenticationProvider 或 AuthenticationManager 类型的 Bean 组件。
另外,可以通过自定义 WebSecurityConfigurerAdapter 类型的 Bean 组件 覆盖默认访问规则。Spring Boot 提供了非常多方便的方法,可用于覆盖请求映射和静态资源的访问规则。
下面我们通过 Spring Security API查看 WebSecurityConfigurerAdapter 的主要方法,具体如下表所示 :
方法 描述 configure ( AuthenticationManagerBuilder auth ) 定制用户认证管理器来实现 用户认证 ( 确认用户"是否登录" ,并对登录进行 “管控” ) configure ( HttpSecurity http ) 定制基于 HTTP 请求的 用户访问控制 ( 权限管理 / 授权管理 )
四、自定义 “用户认证” ( 确认用户"是否登录" , 并对登录进行 “管控” )
通过 自定义 WebSecurityConfigurerAdapter 类型的Bean 组件,并重写 confiqure ( AuthenticatiorManagerBuilder auth ) 方法,可以 自定义用户认证。
针对 自定义用户认证,Spring Security 提供了 多种自定义认证方式,包括有:
① In-Memory Authentication ( 内存身份认证 )
② JDBCAuthentication( JDBC 身份认证 )③ LDAP Authentication( LDAP 身份认证 )
④ AuthenticationProvider(身份认证提供商)
⑤ UserDetailsService( 身份详情服务 )。
下面我们选取其中 3个比较有代表性的方式讲解如何 实现自定义用户认证。
4.1 “内存” 身份认证 ( In-Memory Authentication ) - ( 开发测试环境中使用,无法用于"实际生产环境" ) :
- In-Memory Authentication ( 内存身份认证 ) 是 最简单的 身份认证方式 ( 用户凭证 :如 用户名、密码、角色 等存储在内存中,当用户尝试登录时,应用程序会在 内存中查询和匹配是否有该用户 ) ,主要 用于Security安全认证体验和测试。
- 自定义内存身份认证时,只需要在 重写的 configure ( AuthenticationManagerBuilder auth ) 方法中定义测试用户即可。
- 下面通过 Spring Boot 整合 Spring Security 实现 内存身份认证 ,具体步骤如下。
① 自定义 WebSecurityConfigurerAdapter 配置类 ( 创建一个配置类,该类继承 WebSecurityConfigurerAdapter类 )
在 上面已经创建的项目的基础上,创建 配置类 : SecurityConfig类,该类继承 WebSecurityConfigurerAdapter 类
SecurityConfig.java :
import org.springframework.security.config.annotation.web.configuration.*;@EnableWebSecurity //开启MVC Security 安全支持 public class SecurityConfig extends WebSecurityConfigurerAdapter{ //关于Spring Boot 安全管理 (安全框架) 的 配置类}上述代码中,自定义了一个 继承 自 WebSecurityConfigurerAdapter 的 SecurityConfig 配置类,用于进行 MVC Security 自定义配置,该类上方的 @EnableWebSecurity 注解是一个组合注解,其效果等同于 :
@Configuration、@lmport、@EnableGlobalAuthentication 的组合用法,关于这些注解的介绍具体如下:
注解 描述 @Configuration 注解 标记该类为SpringBoot 的 " 配置类"。 @lmport 注解 根据pom.xml中 导入 的 Web模块 和 Security模块 进行 自动化配置。 @EnableGlobalAuthentication 注解 用于 开启自定义 的 全局认证。
② 使用 “内存” 进行 “身份认证”
在自定义的 SecurityConfig 类中 重写 configure( AuthenticationManagerBuilder auth )方法 , 并在该方法中使用内存身份认证的方式进行 自定义用户认证 :
SecurityConfig.java :
import org.springframework.security.config.annotation.authentication.builders.AuthenticationManagerBuilder; import org.springframework.security.config.annotation.web.configuration.*; import org.springframework.security.crypto.bcrypt.BCryptPasswordEncoder;@EnableWebSecurity //开启MVC Security 安全支持 public class SecurityConfig extends WebSecurityConfigurerAdapter{ //关于 "内存身份认证" 的 配置类/*** 重写configure()方法,并在该方法中使用"内存身份认证"的方式进行"自定义用户认证"*/@Overrideprotected void configure(AuthenticationManagerBuilder auth) throws Exception {//密码需要设置编码器 (创建一个"密码编辑器")BCryptPasswordEncoder encoder = new BCryptPasswordEncoder();/*① auth.inMemoryAuthentication() : 将创建一组"硬编码"的 "用户名和密码",它们将用于身份验证 ,这种方式在"开发和测试环境"中非常有用,但在生产环境中可能不是最佳选择,因为用户名和密码直接存储在代码中。② 在Spring Security中配置了 "内存" 中的"用户身份验证" , 配置了两个用户 ,这两个用户可以直接用于身份验证,无需连接"数据库"或"其他外部数据源"。*/auth.inMemoryAuthentication()//设置一个"密码编辑器",用于在存储密码之前对其进行编码,这很重要,因为不能以明文形式存储密码。密码编码器可以将密码转换为一个不可逆的散列值.passwordEncoder(encoder)//为用户名"张三"创建一个用户,密码为"123456"(已编码),该用户具有"common角色".withUser("张三").password(encoder.encode("123456")).roles("common")//这是链式编程的一个常见模式,用于分隔不同的配置部分。.and()//为用户名"李四"创建一个用户,密码为"123456"(已编码),该用户具有"common角色".withUser("李四").password(encoder.encode("123456")).roles("vip");//配置了内存中的用户身份验证,设置了两个账户,两个用户可以直接用于身份验证,而无需连接数据库或其他外部数据源。}}在上面的代码文件中,重写了 WebSecurityConfigurerAdapter 类的 configure ( AuthenticationManageBuilder auth ) 方法,并在该方法中使用内存身份认证的方式自定义了认证用户信息。定义用户认证信息时,设置了两个用户,包括用户名、密码和角色。
( 存储了用户凭证 / 登录信息在内存中,当用户进行登录时,将登录信息与内存信息进行比对,进行“身份认证” )
注意点 :
上面的代码文件中进行的 自定义用户认证时,需要注意以下几个问题 :
(1) 从 Spring Security 5开始,自定义用户认证必须设置密码编码器用于保护密码,否则控制台会出现 “llegalArgumentException: There is no PasswordEncoder mapped for the idn"nul"”异常错误。(2) Spring Security 提供了多种密码编码器,包括 BcryptPasswordEncoder、Pbkdf2PasswordEncoder、ScryptPasswordEncoder等,密码设置不限于本例中的 BcryptPasswordEncoder 密码编码器。
(3) 自定义用户认证时,可以定义用户角色roles,也可以定义用户权限 authorities。在进行赋值时,权限通常是在角色值的基础上添加“ROLE”前级。例如,authorities("ROLE_common”) 和 roles(“common”)是等效的。
(4) 自定义用户认证时,可以为 某个用户 “一次指定多个” 角色或权限,例如 roles ( “common”,“vip” ) 或者 authorities(“ROLE common”," ROLE_vip")
③ 效果测试
此时重新启动项目,启动成功后,可以看到==**控制台没有默认发现没有默认安全管理时随机生成 **的 密码==了,如下图所示 :
此时通过浏览器访问 http://localhost:8080/ 访问 项目首页,效果如下图所示 :
从上图可以看出 执行 http://localhost:8080/ 访问首页时,同样自动跳转到了用户登录页面“http://localhost:8080/login”。
如果输入的用户名或者密码错误,会出现相应的错误提示,效果如下图1所示。如果输入的用户名和密码正确,那么会跳转进入网站首页,效果如下图2所示。
此时点击电影名称同样可以查看电影详情,说明通过内存身份认证方式实现了自定义用户认证。
( 实际开发中,用户都是在 页面注册和 登录 时进行认证管理的,而 非在程序内部 使用 内存管理的方式手动控制注册用户,所以上述使用内存身份认证的方式 无法用于实际生产,只可以作为初学者的测试使用,或者可在测试或开发环境使用。 )
4.2 “JDBC” 身份认证 ( JDBC Authentication ) - ( 将"用户登录信息" 与 “数据库信息” 进行 比对,判断是否是"合法用户" ) :
- JDBC 身份认证 : JDBC Authentication , 是通过 JDBC 连接数据库对已有用户身份进行认证,下面通过一个案例讲解 JDBC 身份认证 。
① 数据准备
JDBC 身份认证的本质是使用 数据库中已有的用户信息在项目中实现用户认证服务,所以需要提前准备好相关数据。这里我们使用之前创建的名为 springbootdata 的数据库,在该数据库中创建3个表t_customer、t_authority和 t_customer_authority,并预先插入几条测试数据。
security.sql
注意点 :
使用 JDBC 身份认证方式创建用户/权限表以及初始化数据时,应特别注意以下几点 :
(1) 创建用户表t_customer 时,用户名 username 必须唯一,因为 Security 在进行用户查询时是 先通过 username 定位是否存在唯一用户 的。
(2) 创建用户表t_customer 时,必须额外定义一个 tinyint类型的字段 (对应 boolean 类型的属性,例如示例中的 valid ),用于 校验用户身份是否合法 (默认都是合法的)。
(3) 初始化用户表 t_customer 数据时,插入的用户密码 password 必须是对应 编码器编码后的密码,例如示例中的 密码:y2ay10y5ooQl8dir8jv0/gCa1Six.GpzAdIPf6pMgdminZ/3ijYzivCyPIfK 是使用 BcryptPasswordEncoder 密码加密后的形式 ( 对应的原始密码为 123456)。因此
在 自定义配置类 中进行 用户密码查询 时,必须 使用与数据库密码统一的 密码编码器进行 编码 。(4)初始化权限表 t_authority 数据时,权限 authority 值必须 带有“ROLE ”前缀,而 默认 的 用户角色值 则是 对应权限值去掉“ROLE”前缀。
② 添加 “JDBC 连接数据库” 的 “依赖启动器”
在 pom.xml文件中,添加 Mysql数据库连接驱动的依赖 和 JDBC连接依赖 :
<!-- JDBC数据库连接启动器-->
<dependency><groupId>org.springframework.boot</groupId><artifactId>spring-boot-starter-jdbc</artifactId>
</dependency><!-- Mysql数据连接驱动-->
<dependency><groupId>mysql</groupId><artifactId>mysql-connector-java</artifactId><scope>runtime</scope>
</dependency>
③ application.properties 中 进行 “数据库连接配置”
#Mysql数据库连接配置 (配置数据库信息)
spring.datasource.driver-class-name=com.mysql.jdbc.Driver
spring.datasource.url=jdbc:mysql://localhost:3306/springbootdata?useUnicode=true&characterEncoding=utf-8&serverTimezone=GMT&nullCatalogMeansCurrent=true
spring.datasource.username=root
spring.datasource.password=root
④ 使用 JDBC 进行 “身份认证”
完成准备工作后,在 configure ( AuthenticationManagerBuilder auth )方法 中使用 JDBC 身份认证的方式进行自定义用户认证,代码例子如下 :
SecurityConfig.java :
import org.springframework.beans.factory.annotation.Autowired; import org.springframework.security.config.annotation.authentication.builders.AuthenticationManagerBuilder; import org.springframework.security.config.annotation.web.configuration.EnableWebSecurity; import org.springframework.security.config.annotation.web.configuration.WebSecurityConfigurerAdapter; import org.springframework.security.crypto.bcrypt.BCryptPasswordEncoder;import javax.sql.DataSource;//使用 JDBC 进行身份认证 @EnableWebSecurity //开启MVC Security 安全支持 public class SecurityConfig extends WebSecurityConfigurerAdapter{ //关于 "JDBC身份认证" 的 配置类@Autowiredprivate DataSource dataSource;/*** 重写configure()方法,并在该方法中使用"JDBC身份认证"的方式进行"自定义用户认证"*/@Overrideprotected void configure(AuthenticationManagerBuilder auth) throws Exception {//密码需要设置编码器 (创建一个"密码编辑器")BCryptPasswordEncoder encoder = new BCryptPasswordEncoder();/**使用 JDBC 进行身份认证*/String userSQL ="select username,password,valid from t_customer " +"where username = ?";String authoritySQL="select c.username,a.authority from t_customer c,t_authority a,"+"t_customer_authority ca where ca.customer_id=c.id " +"and ca.authority_id=a.id and c.username =?";//使用 JDBC 进行身份认证auth.jdbcAuthentication()//设置密码编码器.passwordEncoder(encoder)// 设置数据源.dataSource(dataSource)//设置一个自定义的SQL查询,用于根据"用户名"查找"用户信息".usersByUsernameQuery(userSQL)//设置一个自定义的SQL查询,用于根据"用户名"查找"用户的权限信息".authoritiesByUsernameQuery(authoritySQL);} }在上面的代码中,先使用 @Autwired 注解装配了 DataSource 数据源,重写的方法 : configure( AuthenticationManagerBuilderaut ) 方法中使用 JDBC 身份认证的方式进行身份认证。
使用 JDBC 身份认证 时,首先需要对 密码 进行 编码设置 ( 必须与数据库中用户密码加密方式一样 ) , 然后需要加载 JDBC 进行认证连接的数据源 DataSource ; 最后,执行SQL语句,实现 通过用户名 username 查询用户信息和用户权限。
⑤ 效果测试
和之前的访问url的测试流程是一样的。
4.3 “UserDetailsService” 身份认证 :
- 对于 用户流量较大的项目来说,频繁地使用JDBC 进行 数据库查询认证不仅麻烦,而且 会降低网站响应速度。对于一个 完善的项目来说,如果某些业务 已经 实现了用户信息查询的服务 ,就 没必要使用 JDBC 进行身份认证 了。
- "UserDetailsService" 身份认证 代码 案例如下 :
① 基础项目文件准备
创建项目 : ( 查询mysql数据库用的mybatis框架 )
项目结构 :
pom.xml :
<?xml version="1.0" encoding="UTF-8"?>
<project xmlns="http://maven.apache.org/POM/4.0.0" xmlns:xsi="http://www.w3.org/2001/XMLSchema-instance"xsi:schemaLocation="http://maven.apache.org/POM/4.0.0 https://maven.apache.org/xsd/maven-4.0.0.xsd"><modelVersion>4.0.0</modelVersion><parent><groupId>org.springframework.boot</groupId><artifactId>spring-boot-starter-parent</artifactId><version>2.1.3.RELEASE</version><relativePath/> <!-- lookup parent from repository --></parent><groupId>com.myh</groupId><artifactId>chapter_21</artifactId><version>0.0.1-SNAPSHOT</version><name>chapter_21</name><description>chapter_21</description><properties><java.version>1.8</java.version></properties><dependencies><!--  该依赖中的version不能省略,因为其是阿里巴巴为了迎合Springboot而有,不是Springboot自己制作的  --><dependency><groupId>com.alibaba</groupId><artifactId>druid-spring-boot-starter</artifactId></dependency><dependency><groupId>org.springframework.boot</groupId><artifactId>spring-boot-starter-data-redis</artifactId></dependency><dependency><groupId>org.springframework.boot</groupId><artifactId>spring-boot-starter-jdbc</artifactId></dependency><dependency><groupId>org.springframework.boot</groupId><artifactId>spring-boot-starter-security</artifactId></dependency><dependency><groupId>org.springframework.boot</groupId><artifactId>spring-boot-starter-thymeleaf</artifactId></dependency><dependency><groupId>org.springframework.boot</groupId><artifactId>spring-boot-starter-web</artifactId></dependency><!--       <dependency>-->
<!--          <groupId>org.thymeleaf.extras</groupId>-->
<!--          <artifactId>thymeleaf-extras-springsecurity6</artifactId>-->
<!--       </dependency>--><dependency><groupId>mysql</groupId><artifactId>mysql-connector-java</artifactId><scope>runtime</scope></dependency><dependency><groupId>org.springframework.boot</groupId><artifactId>spring-boot-starter-test</artifactId><scope>test</scope></dependency><dependency><groupId>org.springframework.security</groupId><artifactId>spring-security-test</artifactId><scope>test</scope></dependency><dependency><groupId>org.mybatis.spring.boot</groupId><artifactId>mybatis-spring-boot-starter</artifactId><version>2.0.1</version></dependency><dependency><groupId>com.alibaba</groupId><artifactId>druid-spring-boot-starter</artifactId><version>1.1.10</version></dependency><!--       <dependency>-->
<!--          <groupId>org.junit.jupiter</groupId>-->
<!--          <artifactId>junit-jupiter</artifactId>-->
<!--          <version>RELEASE</version>-->
<!--          <scope>test</scope>-->
<!--       </dependency>--></dependencies><!--    <build>-->
<!--       <plugins>-->
<!--          <plugin>-->
<!--             <groupId>org.springframework.boot</groupId>-->
<!--             <artifactId>spring-boot-maven-plugin</artifactId>-->
<!--          </plugin>-->
<!--       </plugins>-->
<!--    </build>--></project>
导入 Sql文件 ( 创建数据库表 ) :
security.sql
Customer.java :
import java.io.Serializable;public class Customer implements Serializable { //数据库表对应的实体类private Integer id;//表示数据库表中“字段名”对应的属性 (如果“字段名”和“属性名”一致,则可不用配置该注解)private String username;private String password;private Integer valid;public Integer getId() {return id;}public void setId(Integer id) {this.id = id;}public String getUsername() {return username;}public void setUsername(String username) {this.username = username;}public String getPassword() {return password;}public void setPassword(String password) {this.password = password;}public Integer getValid() {return valid;}public void setValid(Integer valid) {this.valid = valid;}@Overridepublic String toString() {return "Customer{" +"id=" + id +", username='" + username + '\'' +", password='" + password + '\'' +", valid=" + valid +'}';}
}
Authority.java :
import java.io.Serializable;public class Authority implements Serializable {private Integer id;private String authority;public Integer getId() {return id;}public void setId(Integer id) {this.id = id;}public String getAuthority() {return authority;}public void setAuthority(String authority) {this.authority = authority;}@Overridepublic String toString() {return "Authority{" +"id=" + id +", authority='" + authority + '\'' +'}';}
}
CustomerMapper.java :
import org.apache.ibatis.annotations.Mapper;
import org.apache.ibatis.annotations.Select;@Mapper
public interface CustomerMapper {/***  根据username查询信息*/@Select("select username,password,valid from t_customer where username =#{username}")Customer findByUsername(String username);
}
AuthorityMapper.java :
import org.apache.ibatis.annotations.Mapper;
import org.apache.ibatis.annotations.Select;import java.util.List;@Mapper
public interface AuthorityMapper {String authoritySQL = "select a.authority from t_customer c, t_authority a, t_customer_authority ca " +"where ca.customer_id = c.id " +"and ca.authority_id = a.id " +"and c.username = #{username}";/***  根据username查询"权限信息"*/@Select(authoritySQL)List<Authority> findAuthoritiesByUsername(String username);}
主程序启动类 :
import org.mybatis.spring.annotation.MapperScan;
import org.springframework.boot.SpringApplication;
import org.springframework.boot.autoconfigure.SpringBootApplication;@SpringBootApplication
@MapperScan("com.myh.chapter_21.mapper") //将该包下的所有接口都加入到IOC容器中
public class Chapter21Application {public static void main(String[] args) {SpringApplication.run(Chapter21Application.class, args);}
}
application.properties :
#allowPublicKeyRetrieval=true
#配置Mysql数据库信息
spring.datasource.driver-class-name=com.mysql.jdbc.Driver
spring.datasource.url=jdbc:mysql://localhost:3306/springbootdata?useUnicode=true&characterEncoding=utf-8&serverTimezone=GMT&nullCatalogMeansCurrent=true&useSSL=false
spring.datasource.username=root
spring.datasource.password=root#添加并配置第三方数据源Druid(数据库连接池)
spring.datasource.type=com.alibaba.druid.pool.DruidDataSource
#初始化时创建的连接数。当应用程序启动时,连接池会立即创建这么多连接。
spring.datasource.initialSize=20
#连接池中最小的空闲连接数。连接池会维护至少这么多的空闲连接,当空闲连接数低于这个数值时,连接池会创建新的连接。
spring.datasource.minIdle=10
#连接池中最大的活动连接数。这表示在任何时候,连接池中的活动(即被使用的)连接数不会超过这个数值。如果所有连接都在使用中,并且达到这个上限,那么新的数据库连接请求将被阻塞或拒绝,直到有连接可用。
spring.datasource.maxActive=100#配置Redis数据库连接信息/连接参数
spring.redis.host=127.0.0.1
#连接服务端口
spring.redis.port=6379
#连接密码 (默认为空)
spring.redis.password=123456
创建 html资源文件 :
index.html页面是项目首页页面,common和vip文件夹中分别对应的普通用户 和 VIP用户可访问的页面。index.html :
<!DOCTYPE html>
<!-- 配置开启thymeleaf模板引擎页面配置 -->
<html lang="en" xmlns:th="http://www.thymeleaf.org">
<head><meta charset="UTF-8"><title>影视直播厅</title>
</head>
<body><!-- index.html页面是项目首页页面,common和vip文件夹中分别对应的普通用户 和 VIP用户可访问的页面 -->
<h1 align="center">欢迎进入电影网站首页</h1>
<hr>
<h3>普通电影</h3>
<ul><li><a th:href="@{/detail/common/1}">飞驰人生</a></li><li><a th:href="@{/detail/common/2}">夏洛特烦恼</a></li>
</ul>
<h3>VIP专享</h3>
<ul><li><a th:href="@{/detail/vip/1}">速度与激情</a></li><li><a th:href="@{/detail/vip/1}">猩球崛起</a></li>
</ul>
</body>
</html>
1.html : ( 其他三个页面以此类推 )
<!DOCTYPE html>
<html lang="en" xmlns:th="http://www.thymeleaf.org">
<head><meta charset="UTF-8"><title>Title</title>
</head>
<body>
<!-- th:href="@{/}" : 返回项目首页-->
<a th:href="@{/}">返回</a>
<h1>飞驰人生</h1>
.....
</body>
</html>
② 定义查询用户及角色信息的服务接口
定义查询用户及角色信息的服务接口,在项目中创建一个 CustomerService业务处理类,用来通过用户名查询用
户信息及权限信息 :
CustomerService.java :
import org.springframework.beans.factory.annotation.Autowired;
import org.springframework.data.redis.cache.RedisCacheManager;
import org.springframework.data.redis.core.RedisTemplate;
import org.springframework.data.redis.core.ValueOperations;
import org.springframework.stereotype.Service;import java.util.List;// 对用户
@Service //加入到IOC容器
public class CustomerService {@Autowiredprivate CustomerMapper customerMapper;@Autowiredprivate AuthorityMapper authorityMapper;@Autowiredprivate RedisTemplate redisTemplate; //通过 Redis API 的方式来进行 "Redis缓存"/*** 业务控制 : 使用唯一用户名查询用户信息*/public Customer getCustomer(String username) {Customer customer = null;//从Redis数据库中获取"缓存数据"ValueOperations valueOperations = redisTemplate.opsForValue();Object obj = valueOperations.get("customer_" + username);//获得指定名称的"缓存数据"//判断是否有该缓存数据if (obj != null) {customer = (Customer) obj;} else { //不存在该缓存数据,则从数据库中查询缓存数据customer = customerMapper.findByUsername(username); //根据username来在数据库中查询数据if (customer != null) {redisTemplate.opsForValue().set("customer_"+username,customer);}}return customer;}/*** 业务控制 : 使用"唯一用户名"查询用户权限*/public List<Authority> getCustomerAuthority(String username) {List<Authority> authorities = null;//尝试从Redis数据库中获得缓存数据Object obj = redisTemplate.opsForValue().get("authorities_" + username);if (obj != null) {authorities = (List<Authority>) obj;} else {//没找到缓存数据则从Mysql数据库中查询数据authorities = authorityMapper.findAuthoritiesByUsername(username);//如果查询到了数据if (authorities.size() > 0) {redisTemplate.opsForValue().set("authorities"+username,authorities);}}return authorities;}}
③ 定义 “UserDetailsService” 用于封装认证用户信息 ( 创建类实现 “UserDetailsService接口” , 在该类中封装 “认证用户的信息” )
UserDetailsService接口 是 Security 提供的用于 封装认证用户信息的接口,该接口提供的 loadUserByUsername(Strings) 方法用于通过用户名加载用户信息。使用 UserDetailsService 进行 身份认证时,自定义一个UserDetailsService接口的 实现类,通过loadUserByUsername(String s)方法 封装用户详情信息 并 返回 UserDetails 对象 供 Security 认证使用。
UserDetailServiceImpl.java :
import org.springframework.beans.factory.annotation.Autowired; import org.springframework.security.core.authority.SimpleGrantedAuthority; import org.springframework.security.core.userdetails.User; import org.springframework.security.core.userdetails.UserDetails; import org.springframework.security.core.userdetails.UserDetailsService; import org.springframework.security.core.userdetails.UsernameNotFoundException; import org.springframework.stereotype.Service;import java.util.List; import java.util.stream.Collectors; import java.util.stream.Stream;//自定义一个UserDetailsService接口实现"用户认证信息"封装 : 在其中封装"用户认证信息" @Service public class UserDetailServiceImpl implements UserDetailsService { //实现 UserDetailsService接口@Autowiredprivate CustomerService customerService;@Overridepublic UserDetails loadUserByUsername(String username) throws UsernameNotFoundException {/**通过业务方法(业务层类)获取用户以及权限信息*///根据username获得Customer对象信息Customer customer = customerService.getCustomer(username);//根据username获得 "权限信息"List<Authority> authorities = customerService.getCustomerAuthority(username);/*** 对用户权限进行封装*/List<SimpleGrantedAuthority> list = authorities//"权限信息"集合 转换为一个流(Stream) , 以便进行后续的流式操作.stream()/*使用map操作 / map()函数 来转换流中的每个元素 (将流中的"每一个元素"转换为 "另一种形式")具体分析:authority -> 获得流中的每一个元素,将其转换为另一种形式authority.getAuthority() : 获得 authority 这个元素对象的"权限信息" ( 是一个"权限信息"的字符串 )new SimpleGrantedAuthority(authority.getAuthority())) : 使用这个 "权限信息字符串" 创建一个 SimpleGrantedAuthority对象,该对象 是 Spring Security框架中用于表示 "授权信息" 的类*/.map(authority -> new SimpleGrantedAuthority(authority.getAuthority()))/*以下是一个终端操作,它告诉流如何收集其元素以生成一个结果。具体分析:.collect(Collectors.toList()) : 收集转换后的 SimpleGrantedAuthority对象,并将其放入一个新的列表中*/.collect(Collectors.toList());/*** 创建 UserDetails (用户详情) 对象,并将该对象进行返回*/if (customer != null) {//用 username 、password 、权限信息集合 作为参数创建 UserDetails对象 ( 用户详情对象 )UserDetails userDetails = new User(customer.getUsername(), customer.getPassword(), list);return userDetails;} else {//如果查询的用户不存在 (用户名不存在 ) , 必须抛出异常throw new UsernameNotFoundException("用户名不存在!");}} }在上面的文件代码中,重写了UserDetailsService接口的 loadUserByUsername( )方法 ,用于借助 CustomerService 业务处理类获取 用户信息和 权限信息 ,并通过 UserDetails 进行认证信息封装。
需要注意的是 :
CustomerService 业务处理类获取User 实体类时,必须对当前用户进行 非空判断,这里使用 throw 进行异常处理,如果 查询的用户为空 ,throw会抛出 UsernameNotFoundException 的异常。如果没有 使用 throw 异常处理 ,Security 将无法识别,导致程序整体报错。
④ 使用 UserDetailsService 进行身份认证 ( 创建一个配置类,该类继承 WebSecurityConfigurerAdapter类 , 类中重写的方法中调用 userDetailsService( )实现 “UserDetailsService身份认证” )
SecurityConfig.java :
import org.springframework.beans.factory.annotation.Autowired;
import org.springframework.security.config.annotation.authentication.builders.AuthenticationManagerBuilder;
import org.springframework.security.config.annotation.web.builders.WebSecurity;
import org.springframework.security.config.annotation.web.configuration.EnableWebSecurity;
import org.springframework.security.config.annotation.web.configuration.WebSecurityConfigurerAdapter;
import org.springframework.security.crypto.bcrypt.BCryptPasswordEncoder;@EnableWebSecurity //开始MVC security身份认证
public class SecurityConfig extends WebSecurityConfigurerAdapter { // 该类为 : 进行 "UserDetailsService"身份认证 的 "配置类"@Autowiredprivate UserDetailServiceImpl userDetailService; //该类为 配置好了"UserDetailsService"身份认证 信息的类,使用该类来进行 "UserDetailsService"身份认证@Overrideprotected void configure(AuthenticationManagerBuilder auth) throws Exception {//密码需要设置编码器 ( 添加"密码编辑器")BCryptPasswordEncoder encoder = new BCryptPasswordEncoder();//使用UserDetailService进行"身份认证"auth.userDetailsService(userDetailService)//设置"密码编辑器".passwordEncoder(encoder);}
}
⑤ 效果测试
和之前的访问url的测试流程是一样的。
至此 ,关于 Spring Boot 整合 Spring Security 中的 自定义用户认证 知识讲述完毕。内存身份认证最为简单,主要用作测试和新手体验; JDBC 身份认证和 UserDetailsService 身份认证在实际开发中使用较多,而这两种认证方式的选择,主要根据实际开发中已有业务的支持来确定。
相关文章:

Spring Boot | Spring Security ( SpringBoot安全管理 )、Spring Security中 的 “自定义用户认证“
目录 : Spring Boot 安全管理 :一、Spring Security 介绍二、Spring Security 快速入门2.1 基础环境搭建 :① 创建Spring Boot 项目② 创建 html资源文件③ 编写Web控制层 2.2 开启安全管理效果测试 :④ 添加 spring-boot-starter-security 启动器⑤ 项目启动测试 三…...

力扣经典150题第五十五题:逆波兰表达式求值
目录 题目描述和要求示例解释解题思路算法实现复杂度分析测试和验证总结和拓展参考资料 题目描述和要求 给你一个字符串数组 tokens,表示一个根据逆波兰表示法表示的算术表达式。请你计算该表达式,并返回一个表示表达式值的整数。 注意: 有…...
C#队列(Queue)的基本使用
概述 在编程中,队列(Queue)是一种常见的数据结构,它遵循FIFO(先进先出)的原则。在C#中,.NET Framework提供了Queue<T>类,它位于System.Collections.Generic命名空间下&#x…...

预训练模型介绍
一、什么是GPT GPT 是由人工智能研究实验室 OpenAI 在2022年11月30日发布的全新聊天机器人模型, 一款人工智能技术驱动的自然语言处理工具 它能够通过学习和理解人类的语言来进行对话, 还能根据聊天的上下文进行互动,能完成撰写邮件、视频脚本、文案、翻译、代码等任务 二、 为…...

Pandas入门篇(三)-------数据可视化篇3(seaborn篇)(pandas完结撒花!!!)
目录 概述一、语法二、常用单变量绘图1. 直方图(histplot)2. 核密度预估图(kdeplot)3. 计数柱状图(countplot) 三、常用多变量绘图1.散点图(1) scatterplot(2)regplot 散点图拟合回归线(3)jointplot 散点图…...

SpringBoot中阿里OSS简单使用
官方文档:Java跨域设置实现跨域访问_对象存储(OSS)-阿里云帮助中心 1.pom中引入依赖 <dependency><groupId>com.aliyun.oss</groupId><artifactId>aliyun-sdk-oss</artifactId><version>3.15.1</version> </dependency> 如…...

websocket简介
服务端推送消息给浏览器 WebSocket 教程 - 阮一峰的网络日志...

Linux的shell外壳
Shell外壳 在计算机领域,“shell”(外壳)是指一种用户界面,提供了访问操作系统服务的方式。Shell 是用户与操作系统之间的桥梁,它解释并执行用户输入的命令。 Shell 的主要功能包括: 命令解释:…...

支付宝支付流程
第一步前端:点击去结算,前端将商品的信息传递给后端,后端返回一个商品的订单号给到前端,前端将商品的订单号进行存储。 对应的前端代码:然后再跳转到支付页面 // 第一步 点击去结算 然后生成一个订单号 // 将选中的商…...

打招呼得不到回复,跟头像还有关系?
现在很多人有个想法,那就是觉得某些公司是不是为了某些目的才往出发的招聘信息啊,其实他们并不需要招聘新员工。 目录 已读不回? 头像很重要 选择自己的精修照片 已读不回? 很有这种可能,但你细心观察会发现,的确有很多大公司,...
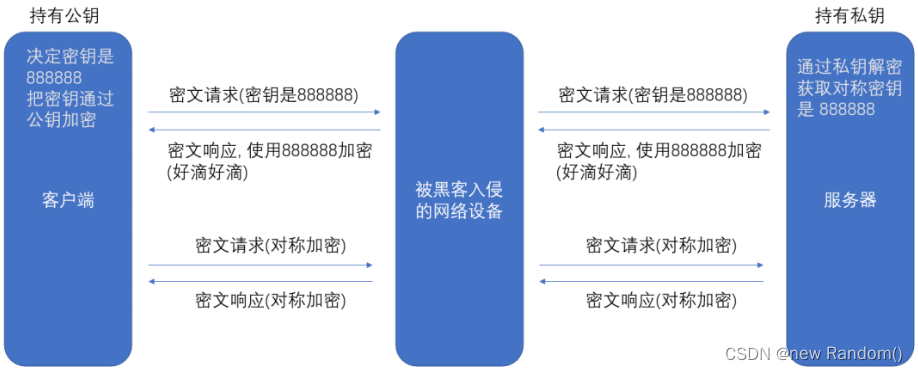
【网络原理】HTTPS 的工作过程
系列文章目录 【网络通信基础】网络中的常见基本概念 【网络编程】网络编程中的基本概念及Java实现UDP、TCP客户端服务器程序(万字博文) 【网络原理】UDP协议的报文结构 及 校验和字段的错误检测机制(CRC算法、MD5算法) 【网络…...
Python语言在地球科学中地理、气象、气候变化、水文、生态、传感器等数据可视化到常见数据分析方法的使用
Python是功能强大、免费、开源,实现面向对象的编程语言,Python能够运行在Linux、Windows、Macintosh、AIX操作系统上及不同平台(x86和arm),Python简洁的语法和对动态输入的支持,再加上解释性语言的本质&…...

【JVM】class文件格式,JVM加载class文件流程,JVM运行时内存区域,对象分配内存流程
这篇文章本来只是想讲一下class文件格式,讲着讲着越讲越多。JVM这一块吧,知识比较散比较多,如果深研究下去如死扣《深入理解Java虚拟机》,这本书很深很细,全记住是不可能的,其实也没必要。趁这个机会直接把…...

GPU系列(六)-NVIDIA GPU 驱动安装
1. 安装驱动 1.1 查看系统是否识别显卡 lspci | grep -i vga03:00.0 VGA compatible controller: NVIDIA Corporation GP102 [TITAN X] (rev a1) 0a:00.0 VGA compatible controller: Matrox Electronics Systems Ltd. G200eR2 (rev 01) 识别出显卡为 NVIDIA 的 TITAN X。 …...

第十五届蓝桥杯总结
因为本人不是计院的,以后可能也不会打算法类的竞赛了,故作此总结,纪念我四个月的算法学习经历,还算是对算法有了一定的基础,碰运气拿下了湖北b组省二,个人感觉比赛题目没有第十四届难,感觉就是纯…...
Linux异步通知)
Linux驱动开发——(八)Linux异步通知
目录 一、异步通知简介 二、信号处理 2.1 驱动程序中的处理 2.1.1 fasync_struct结构体 2.1.2 fasync操作函数 2.1.3 kill_fasync函数 2.2 应用程序中的处理 三、驱动代码 一、异步通知简介 异步通知的核心就是信号。信号类似于硬件上使用的中断,只不过信号…...

Docker知识点汇总表格总结
Docker容器给我的一个很直观的感受就是将项目以及中间件安装变得比较简单直接,运行维护起来也更方便。之前做的一些微服务项目也是用docker来部署,现在很多开源的项目也流行使用docker来部署,简化了很多手动安装和配置的步骤,将项…...
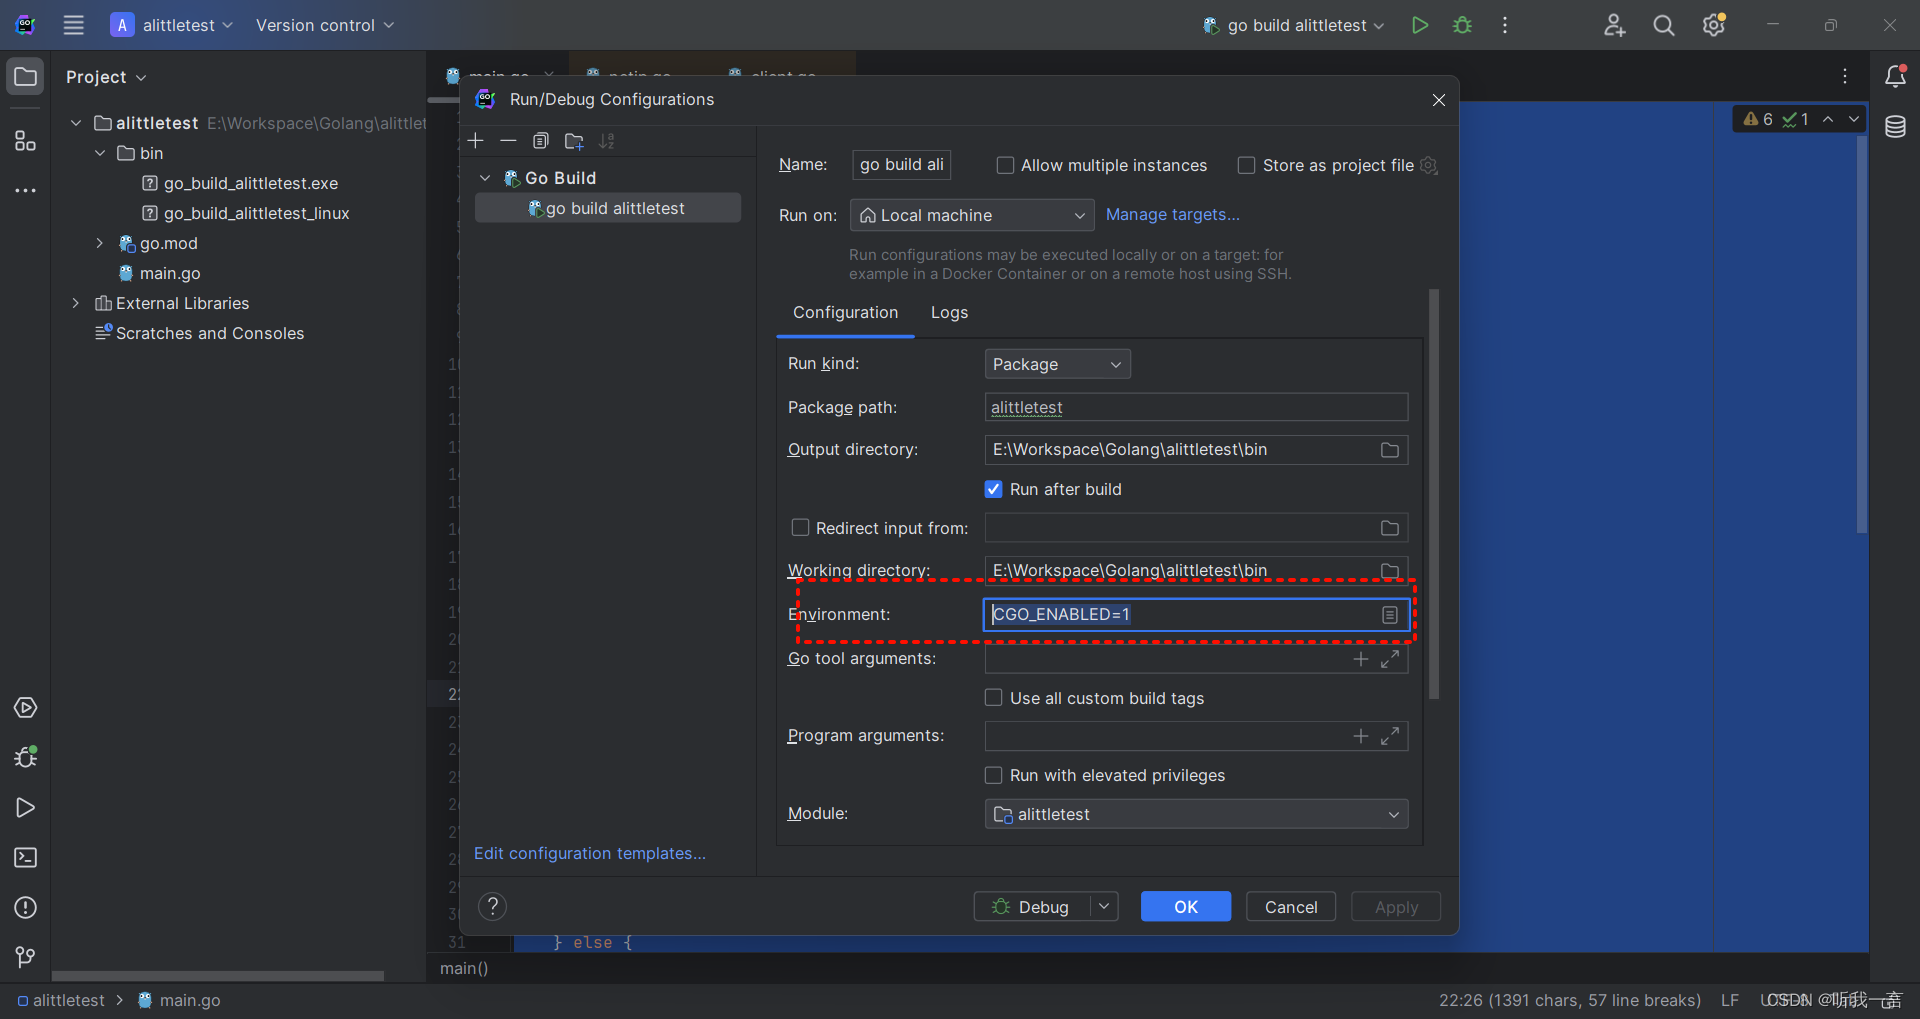
Golang中实现调用Windows API向指定目标发送ARP请求
简介 Go库中很多实现的arp都是支持osx/linux/bsd之类的, 但几乎没有支持windows的, 也试了一些方式, 目前还是选用调用windows的API, 记录一下这一次windows的API的调用经验。 实现 代码 package main/* #cgo CFLAGS: -I. #cgo …...

这是一个简单的照明材料网站,后续还会更新
1、首页效果图 代码 <!DOCTYPE html> <html><head><meta charset"utf-8" /><title>爱德照明网站首页</title><style>/*外部样式*/charset "utf-8";*{margin: 0;padding: 0;box-sizing: border-box;}a{text-dec…...

【设计模式】之模板方法模式
系列文章目录 【设计模式】之策略模式 【设计模式】之责任链模式 文章目录 系列文章目录 前言 一、什么是模板方法模式 定义 角色 二、为什么要使用模板方法模式 优点 缺点 三、案例 普通案例 模拟Servlet过程案例 总结 前言 今天给大家介绍23种设计模式中的模板方法模式&a…...

在HarmonyOS ArkTS ArkUI-X 5.0及以上版本中,手势开发全攻略:
在 HarmonyOS 应用开发中,手势交互是连接用户与设备的核心纽带。ArkTS 框架提供了丰富的手势处理能力,既支持点击、长按、拖拽等基础单一手势的精细控制,也能通过多种绑定策略解决父子组件的手势竞争问题。本文将结合官方开发文档,…...

Python爬虫实战:研究feedparser库相关技术
1. 引言 1.1 研究背景与意义 在当今信息爆炸的时代,互联网上存在着海量的信息资源。RSS(Really Simple Syndication)作为一种标准化的信息聚合技术,被广泛用于网站内容的发布和订阅。通过 RSS,用户可以方便地获取网站更新的内容,而无需频繁访问各个网站。 然而,互联网…...

【Web 进阶篇】优雅的接口设计:统一响应、全局异常处理与参数校验
系列回顾: 在上一篇中,我们成功地为应用集成了数据库,并使用 Spring Data JPA 实现了基本的 CRUD API。我们的应用现在能“记忆”数据了!但是,如果你仔细审视那些 API,会发现它们还很“粗糙”:有…...
)
【服务器压力测试】本地PC电脑作为服务器运行时出现卡顿和资源紧张(Windows/Linux)
要让本地PC电脑作为服务器运行时出现卡顿和资源紧张的情况,可以通过以下几种方式模拟或触发: 1. 增加CPU负载 运行大量计算密集型任务,例如: 使用多线程循环执行复杂计算(如数学运算、加密解密等)。运行图…...

Spring AI与Spring Modulith核心技术解析
Spring AI核心架构解析 Spring AI(https://spring.io/projects/spring-ai)作为Spring生态中的AI集成框架,其核心设计理念是通过模块化架构降低AI应用的开发复杂度。与Python生态中的LangChain/LlamaIndex等工具类似,但特别为多语…...
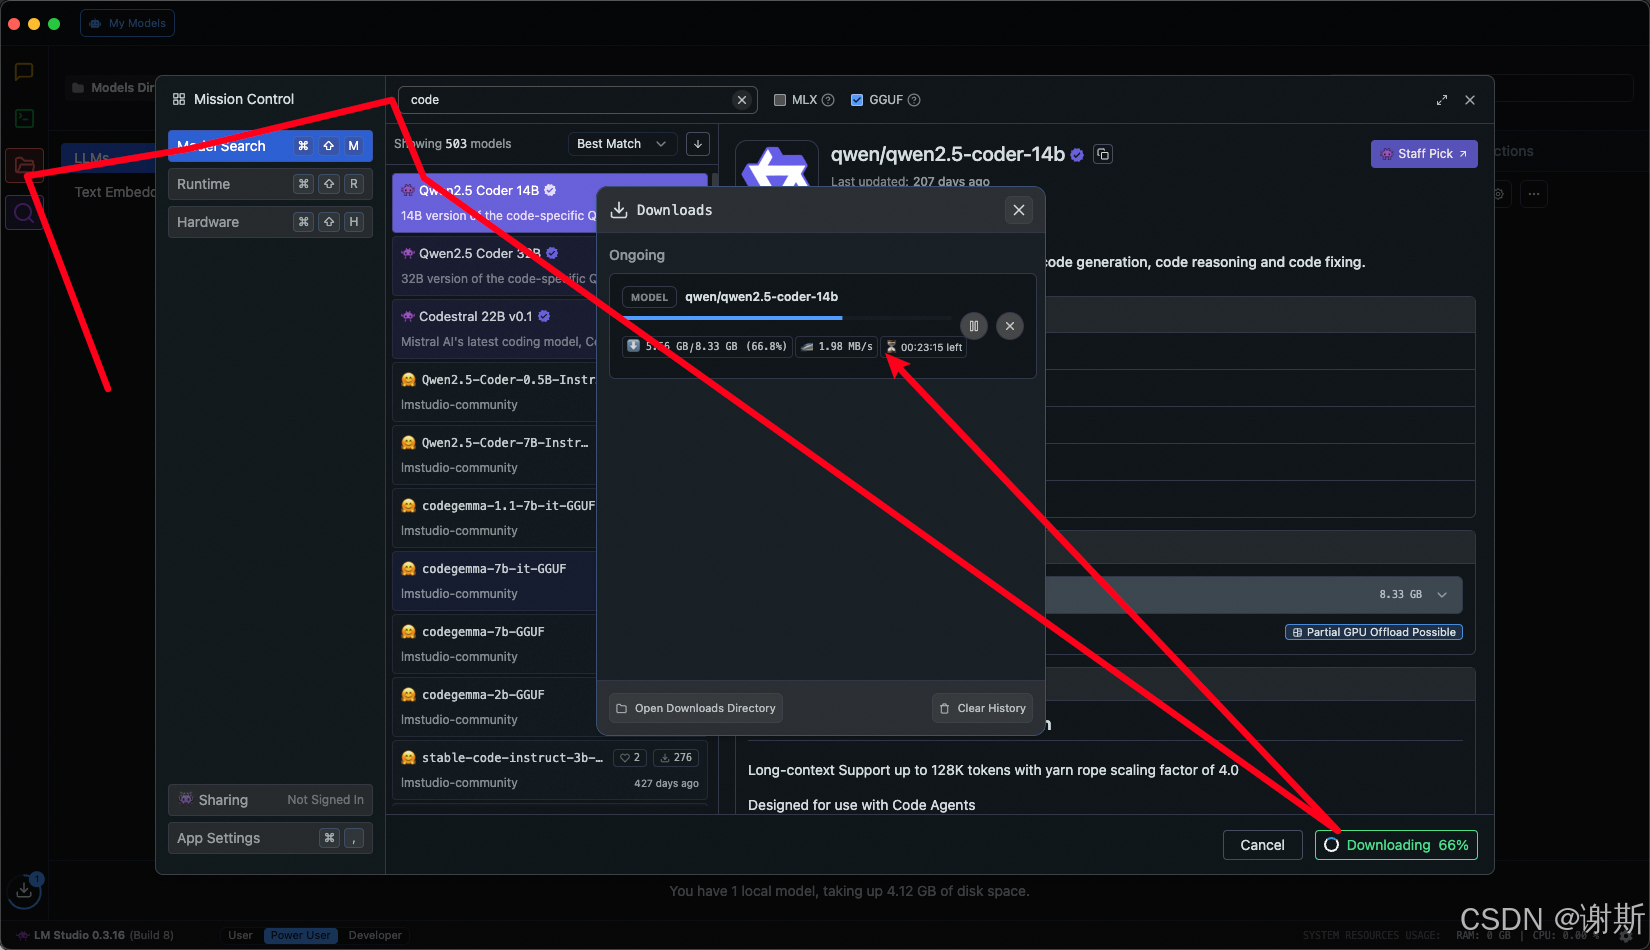
[大语言模型]在个人电脑上部署ollama 并进行管理,最后配置AI程序开发助手.
ollama官网: 下载 https://ollama.com/ 安装 查看可以使用的模型 https://ollama.com/search 例如 https://ollama.com/library/deepseek-r1/tags # deepseek-r1:7bollama pull deepseek-r1:7b改token数量为409622 16384 ollama命令说明 ollama serve #:…...

怎么让Comfyui导出的图像不包含工作流信息,
为了数据安全,让Comfyui导出的图像不包含工作流信息,导出的图像就不会拖到comfyui中加载出来工作流。 ComfyUI的目录下node.py 直接移除 pnginfo(推荐) 在 save_images 方法中,删除或注释掉所有与 metadata …...
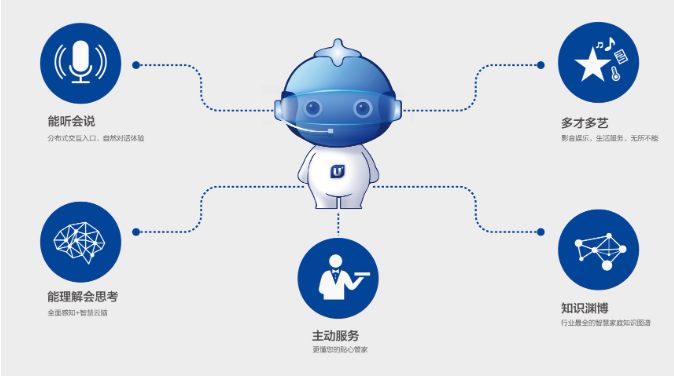
AI语音助手的Python实现
引言 语音助手(如小爱同学、Siri)通过语音识别、自然语言处理(NLP)和语音合成技术,为用户提供直观、高效的交互体验。随着人工智能的普及,Python开发者可以利用开源库和AI模型,快速构建自定义语音助手。本文由浅入深,详细介绍如何使用Python开发AI语音助手,涵盖基础功…...
springboot 日志类切面,接口成功记录日志,失败不记录
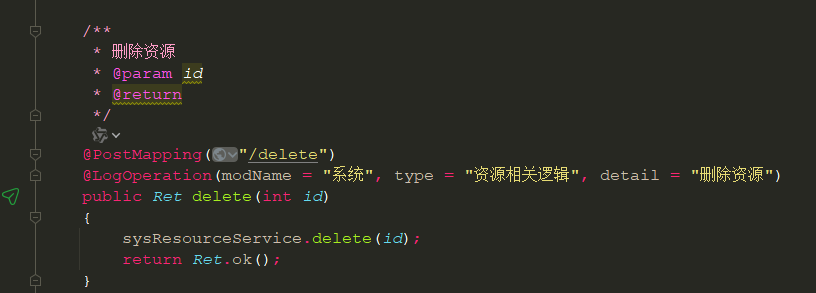
springboot 日志类切面,接口成功记录日志,失败不记录 自定义一个注解方法 import java.lang.annotation.ElementType; import java.lang.annotation.Retention; import java.lang.annotation.RetentionPolicy; import java.lang.annotation.Target;/***…...
《信号与系统》第 6 章 信号与系统的时域和频域特性
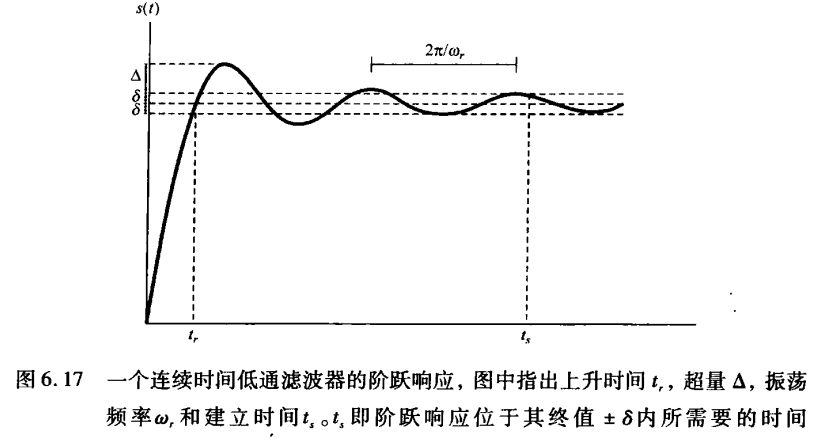
目录 6.0 引言 6.1 傅里叶变换的模和相位表示 6.2 线性时不变系统频率响应的模和相位表示 6.2.1 线性与非线性相位 6.2.2 群时延 6.2.3 对数模和相位图 6.3 理想频率选择性滤波器的时域特性 6.4 非理想滤波器的时域和频域特性讨论 6.5 一阶与二阶连续时间系统 6.5.1 …...


