k8s和deepflow部署与测试
Ubuntu-22-LTS部署k8s和deepflow
环境详情:
Static hostname: k8smaster.example.net
Icon name: computer-vm
Chassis: vm
Machine ID: 22349ac6f9ba406293d0541bcba7c05d
Boot ID: 605a74a509724a88940bbbb69cde77f2
Virtualization: vmware
Operating System: Ubuntu 22.04.4 LTS
Kernel: Linux 5.15.0-106-generic
Architecture: x86-64
Hardware Vendor: VMware, Inc.
Hardware Model: VMware Virtual Platform
当您在 Ubuntu 22.04 上安装 Kubernetes 集群时,您可以遵循以下步骤:
-
设置主机名并在 hosts 文件中添加条目:
-
登录到主节点并使用
hostnamectl命令设置主机名:hostnamectl set-hostname "k8smaster.example.net" -
在工作节点上,运行以下命令设置主机名(分别对应第一个和第二个工作节点):
hostnamectl set-hostname "k8sworker1.example.net" # 第一个工作节点 hostnamectl set-hostname "k8sworker2.example.net" # 第二个工作节点 -
在每个节点的
/etc/hosts文件中添加以下条目:10.1.1.70 k8smaster.example.net k8smaster 10.1.1.71 k8sworker1.example.net k8sworker1
-
-
禁用 swap 并添加内核设置:
-
在所有节点上执行以下命令以禁用交换功能:
swapoff -a sed -i '/swap/ s/^\(.*\)$/#\1/g' /etc/fstab -
加载以下内核模块:
tee /etc/modules-load.d/containerd.conf <<EOF overlay br_netfilter EOF modprobe overlay modprobe br_netfilter -
为 Kubernetes 设置以下内核参数:
tee /etc/sysctl.d/kubernetes.conf <<EOF
net.bridge.bridge-nf-call-ip6tables = 1
net.bridge.bridge-nf-call-iptables = 1
net.ipv4.ip_forward = 1
EOF
sysctl --system
-
-
安装 containerd 运行时:
-
首先安装 containerd 的依赖项:
apt install -y curl gnupg2 software-properties-common apt-transport-https ca-certificates -
启用 Docker 存储库:
curl -fsSL https://download.docker.com/linux/ubuntu/gpg | apt-key add - add-apt-repository "deb [arch=amd64] https://download.docker.com/linux/ubuntu $(lsb_release -cs) stable" -
安装 containerd:
apt update apt install -y containerd.io -
配置 containerd 使用 systemd 作为 cgroup:
containerd config default | tee /etc/containerd/config.toml > /dev/null 2>&1
sed -i 's/SystemdCgroup\\=false/SystemdCgroup\\=true/g' /etc/containerd/config.toml
部分配置手动修改
disabled_plugins = [] imports = [] oom_score = 0 plugin_dir = "" required_plugins = [] root = "/var/lib/containerd" state = "/run/containerd" temp = "" version = 2[cgroup] path = ""[debug] address = "" format = "" gid = 0 level = "" uid = 0[grpc] address = "/run/containerd/containerd.sock" gid = 0 max_recv_message_size = 16777216 max_send_message_size = 16777216 tcp_address = "" tcp_tls_ca = "" tcp_tls_cert = "" tcp_tls_key = "" uid = 0[metrics] address = "" grpc_histogram = false[plugins][plugins."io.containerd.gc.v1.scheduler"]deletion_threshold = 0mutation_threshold = 100pause_threshold = 0.02schedule_delay = "0s"startup_delay = "100ms"[plugins."io.containerd.grpc.v1.cri"]device_ownership_from_security_context = falsedisable_apparmor = falsedisable_cgroup = falsedisable_hugetlb_controller = truedisable_proc_mount = falsedisable_tcp_service = truedrain_exec_sync_io_timeout = "0s"enable_selinux = falseenable_tls_streaming = falseenable_unprivileged_icmp = falseenable_unprivileged_ports = falseignore_deprecation_warnings = []ignore_image_defined_volumes = falsemax_concurrent_downloads = 3max_container_log_line_size = 16384netns_mounts_under_state_dir = falserestrict_oom_score_adj = false# 修改以下这行sandbox_image = "registry.aliyuncs.com/google_containers/pause:3.8"selinux_category_range = 1024stats_collect_period = 10stream_idle_timeout = "4h0m0s"stream_server_address = "127.0.0.1"stream_server_port = "0"systemd_cgroup = falsetolerate_missing_hugetlb_controller = trueunset_seccomp_profile = ""[plugins."io.containerd.grpc.v1.cri".cni]bin_dir = "/opt/cni/bin"conf_dir = "/etc/cni/net.d"conf_template = ""ip_pref = ""max_conf_num = 1[plugins."io.containerd.grpc.v1.cri".containerd]default_runtime_name = "runc"disable_snapshot_annotations = truediscard_unpacked_layers = falseignore_rdt_not_enabled_errors = falseno_pivot = falsesnapshotter = "overlayfs"[plugins."io.containerd.grpc.v1.cri".containerd.default_runtime]base_runtime_spec = ""cni_conf_dir = ""cni_max_conf_num = 0container_annotations = []pod_annotations = []privileged_without_host_devices = falseruntime_engine = ""runtime_path = ""runtime_root = ""runtime_type = ""[plugins."io.containerd.grpc.v1.cri".containerd.default_runtime.options][plugins."io.containerd.grpc.v1.cri".containerd.runtimes][plugins."io.containerd.grpc.v1.cri".containerd.runtimes.runc]base_runtime_spec = ""cni_conf_dir = ""cni_max_conf_num = 0container_annotations = []pod_annotations = []privileged_without_host_devices = falseruntime_engine = ""runtime_path = ""runtime_root = ""runtime_type = "io.containerd.runc.v2"[plugins."io.containerd.grpc.v1.cri".containerd.runtimes.runc.options]BinaryName = ""CriuImagePath = ""CriuPath = ""CriuWorkPath = ""IoGid = 0IoUid = 0NoNewKeyring = falseNoPivotRoot = falseRoot = ""ShimCgroup = ""SystemdCgroup = true[plugins."io.containerd.grpc.v1.cri".containerd.untrusted_workload_runtime]base_runtime_spec = ""cni_conf_dir = ""cni_max_conf_num = 0container_annotations = []pod_annotations = []privileged_without_host_devices = falseruntime_engine = ""runtime_path = ""runtime_root = ""runtime_type = ""[plugins."io.containerd.grpc.v1.cri".containerd.untrusted_workload_runtime.options][plugins."io.containerd.grpc.v1.cri".image_decryption]key_model = "node"[plugins."io.containerd.grpc.v1.cri".registry]config_path = ""[plugins."io.containerd.grpc.v1.cri".registry.auths][plugins."io.containerd.grpc.v1.cri".registry.configs][plugins."io.containerd.grpc.v1.cri".registry.headers][plugins."io.containerd.grpc.v1.cri".registry.mirrors]# 添加如下4行[plugins."io.containerd.grpc.v1.cri".registry.mirrors."docker.io"]endpoint = ["https://docker.mirrors.ustc.edu.cn"][plugins."io.containerd.grpc.v1.cri".registry.mirrors."k8s.gcr.io"]endpoint = ["https://registry.aliyuncs.com/google_containers"][plugins."io.containerd.grpc.v1.cri".x509_key_pair_streaming]tls_cert_file = ""tls_key_file = ""[plugins."io.containerd.internal.v1.opt"]path = "/opt/containerd"[plugins."io.containerd.internal.v1.restart"]interval = "10s"[plugins."io.containerd.internal.v1.tracing"]sampling_ratio = 1.0service_name = "containerd"[plugins."io.containerd.metadata.v1.bolt"]content_sharing_policy = "shared"[plugins."io.containerd.monitor.v1.cgroups"]no_prometheus = false[plugins."io.containerd.runtime.v1.linux"]no_shim = falseruntime = "runc"runtime_root = ""shim = "containerd-shim"shim_debug = false[plugins."io.containerd.runtime.v2.task"]platforms = ["linux/amd64"]sched_core = false[plugins."io.containerd.service.v1.diff-service"]default = ["walking"][plugins."io.containerd.service.v1.tasks-service"]rdt_config_file = ""[plugins."io.containerd.snapshotter.v1.aufs"]root_path = ""[plugins."io.containerd.snapshotter.v1.btrfs"]root_path = ""[plugins."io.containerd.snapshotter.v1.devmapper"]async_remove = falsebase_image_size = ""discard_blocks = falsefs_options = ""fs_type = ""pool_name = ""root_path = ""[plugins."io.containerd.snapshotter.v1.native"]root_path = ""[plugins."io.containerd.snapshotter.v1.overlayfs"]mount_options = []root_path = ""sync_remove = falseupperdir_label = false[plugins."io.containerd.snapshotter.v1.zfs"]root_path = ""[plugins."io.containerd.tracing.processor.v1.otlp"]endpoint = ""insecure = falseprotocol = ""[proxy_plugins][stream_processors][stream_processors."io.containerd.ocicrypt.decoder.v1.tar"]accepts = ["application/vnd.oci.image.layer.v1.tar+encrypted"]args = ["--decryption-keys-path", "/etc/containerd/ocicrypt/keys"]env = ["OCICRYPT_KEYPROVIDER_CONFIG=/etc/containerd/ocicrypt/ocicrypt_keyprovider.conf"]path = "ctd-decoder"returns = "application/vnd.oci.image.layer.v1.tar"[stream_processors."io.containerd.ocicrypt.decoder.v1.tar.gzip"]accepts = ["application/vnd.oci.image.layer.v1.tar+gzip+encrypted"]args = ["--decryption-keys-path", "/etc/containerd/ocicrypt/keys"]env = ["OCICRYPT_KEYPROVIDER_CONFIG=/etc/containerd/ocicrypt/ocicrypt_keyprovider.conf"]path = "ctd-decoder"returns = "application/vnd.oci.image.layer.v1.tar+gzip"[timeouts] "io.containerd.timeout.bolt.open" = "0s" "io.containerd.timeout.shim.cleanup" = "5s" "io.containerd.timeout.shim.load" = "5s" "io.containerd.timeout.shim.shutdown" = "3s" "io.containerd.timeout.task.state" = "2s"[ttrpc] address = "" gid = 0 uid = 0 -
重启并启用容器服务:
systemctl restart containerd systemctl enable containerd -
设置crictl
cat > /etc/crictl.yaml <<EOF
runtime-endpoint: unix:///var/run/containerd/containerd.sock
image-endpoint: unix:///var/run/containerd/containerd.sock
timeout: 10
debug: false
pull-image-on-create: false
EOF
-
-
添加阿里云的 Kubernetes 源:
-
首先,导入阿里云的 GPG 密钥:
curl -fsSL https://mirrors.aliyun.com/kubernetes/apt/doc/apt-key.gpg | apt-key add - -
然后,添加阿里云的 Kubernetes 源:
tee /etc/apt/sources.list.d/kubernetes.list <<EOF
deb https://mirrors.aliyun.com/kubernetes/apt/ kubernetes-xenial main
EOF
-
-
安装 Kubernetes 组件:
-
更新软件包索引并安装 kubelet、kubeadm 和 kubectl:
apt-get update apt-get install -y kubelet kubeadm kubectl -
设置 kubelet 使用 systemd 作为 cgroup 驱动:
# 可忽略
# sed -i 's/cgroup-driver=systemd/cgroup-driver=cgroupfs/g' /var/lib/kubelet/kubeadm-flags.env
# systemctl daemon-reload
# systemctl restart kubelet
-
-
初始化 Kubernetes 集群:
-
使用 kubeadm 初始化集群,并指定阿里云的镜像仓库:
# kubeadm init --image-repository registry.aliyuncs.com/google_containers
I0513 14:16:59.740096   17563 version.go:256] remote version is much newer: v1.30.0; falling back to: stable-1.28
[init] Using Kubernetes version: v1.28.9
[preflight] Running pre-flight checks
[preflight] Pulling images required for setting up a Kubernetes cluster
[preflight] This might take a minute or two, depending on the speed of your internet connection
[preflight] You can also perform this action in beforehand using 'kubeadm config images pull'
W0513 14:17:01.440936   17563 checks.go:835] detected that the sandbox image "registry.aliyuncs.com/google_containers/pause:3.8" of the container runtime         is inconsistent with that used by kubeadm. It is recommended that using "registry.aliyuncs.com/google_containers/pause:3.9" as the CRI sandbox image.
[certs] Using certificateDir folder "/etc/kubernetes/pki"
[certs] Generating "ca" certificate and key
[certs] Generating "apiserver" certificate and key
[certs] apiserver serving cert is signed for DNS names [k8smaster.example.net kubernetes kubernetes.default kubernetes.default.svc kubernetes.default.svc.        cluster.local] and IPs [10.96.0.1 10.1.1.70]
[certs] Generating "apiserver-kubelet-client" certificate and key
[certs] Generating "front-proxy-ca" certificate and key
[certs] Generating "front-proxy-client" certificate and key
[certs] Generating "etcd/ca" certificate and key
[certs] Generating "etcd/server" certificate and key
[certs] etcd/server serving cert is signed for DNS names [k8smaster.example.net localhost] and IPs [10.1.1.70 127.0.0.1 ::1]
[certs] Generating "etcd/peer" certificate and key
[certs] etcd/peer serving cert is signed for DNS names [k8smaster.example.net localhost] and IPs [10.1.1.70 127.0.0.1 ::1]
[certs] Generating "etcd/healthcheck-client" certificate and key
[certs] Generating "apiserver-etcd-client" certificate and key
[certs] Generating "sa" key and public key
[kubeconfig] Using kubeconfig folder "/etc/kubernetes"
[kubeconfig] Writing "admin.conf" kubeconfig file
[kubeconfig] Writing "kubelet.conf" kubeconfig file
[kubeconfig] Writing "controller-manager.conf" kubeconfig file
[kubeconfig] Writing "scheduler.conf" kubeconfig file
[etcd] Creating static Pod manifest for local etcd in "/etc/kubernetes/manifests"
[control-plane] Using manifest folder "/etc/kubernetes/manifests"
[control-plane] Creating static Pod manifest for "kube-apiserver"
[control-plane] Creating static Pod manifest for "kube-controller-manager"
[control-plane] Creating static Pod manifest for "kube-scheduler"
[kubelet-start] Writing kubelet environment file with flags to file "/var/lib/kubelet/kubeadm-flags.env"
[kubelet-start] Writing kubelet configuration to file "/var/lib/kubelet/config.yaml"
[kubelet-start] Starting the kubelet
[wait-control-plane] Waiting for the kubelet to boot up the control plane as static Pods from directory "/etc/kubernetes/manifests". This can take up to         4m0s
[apiclient] All control plane components are healthy after 4.002079 seconds
[upload-config] Storing the configuration used in ConfigMap "kubeadm-config" in the "kube-system" Namespace
[kubelet] Creating a ConfigMap "kubelet-config" in namespace kube-system with the configuration for the kubelets in the cluster
[upload-certs] Skipping phase. Please see --upload-certs
[mark-control-plane] Marking the node k8smaster.example.net as control-plane by adding the labels: [node-role.kubernetes.io/control-plane node.kubernetes.        io/exclude-from-external-load-balancers]
[mark-control-plane] Marking the node k8smaster.example.net as control-plane by adding the taints [node-role.kubernetes.io/control-plane:NoSchedule]
[bootstrap-token] Using token: m9z4yq.dok89ro6yt23wykr
[bootstrap-token] Configuring bootstrap tokens, cluster-info ConfigMap, RBAC Roles
[bootstrap-token] Configured RBAC rules to allow Node Bootstrap tokens to get nodes
[bootstrap-token] Configured RBAC rules to allow Node Bootstrap tokens to post CSRs in order for nodes to get long term certificate credentials
[bootstrap-token] Configured RBAC rules to allow the csrapprover controller automatically approve CSRs from a Node Bootstrap Token
[bootstrap-token] Configured RBAC rules to allow certificate rotation for all node client certificates in the cluster
[bootstrap-token] Creating the "cluster-info" ConfigMap in the "kube-public" namespace
[kubelet-finalize] Updating "/etc/kubernetes/kubelet.conf" to point to a rotatable kubelet client certificate and key
[addons] Applied essential addon: CoreDNS
[addons] Applied essential addon: kube-proxyYour Kubernetes control-plane has initialized successfully!To start using your cluster, you need to run the following as a regular user:mkdir -p $HOME/.kubesudo cp -i /etc/kubernetes/admin.conf $HOME/.kube/configsudo chown $(id -u):$(id -g) $HOME/.kube/configAlternatively, if you are the root user, you can run:export KUBECONFIG=/etc/kubernetes/admin.confYou should now deploy a pod network to the cluster.
Run "kubectl apply -f [podnetwork].yaml" with one of the options listed at:https://kubernetes.io/docs/concepts/cluster-administration/addons/Then you can join any number of worker nodes by running the following on each as root:kubeadm join 10.1.1.70:6443 --token m9z4yq.dok89ro6yt23wykr \--discovery-token-ca-cert-hash sha256:17c3f29bd276592e668e9e6a7a187140a887254b4555cf7d293c3313d7c8a178
-
-
配置 kubectl:
-
为当前用户设置 kubectl 访问:
mkdir -p $HOME/.kube
cp -i /etc/kubernetes/admin.conf $HOME/.kube/config
chown $(id -u):$(id -g) $HOME/.kube/config
-
-
安装网络插件:
-
安装一个 Pod 网络插件,例如 Calico 或 Flannel。例如,使用 Calico:
kubectl apply -f https://docs.projectcalico.org/manifests/calico.yaml
# 网络插件初始化完毕之后,coredns容器就正常了
kubectl logs -n kube-system -l k8s-app=kube-dns
-
-
验证集群:
-
启动一个nginx pod:
# vim nginx_pod.yml
apiVersion: v1
kind: Pod
metadata:name: test-nginx-podnamespace: testlabels:app: nginx
spec:containers:- name: test-nginx-containerimage: nginx:latestports:- containerPort: 80tolerations:- key: "node-role.kubernetes.io/control-plane"operator: "Exists"effect: "NoSchedule"
---apiVersion: v1
kind: Service
# service和pod必须位于同一个namespace
metadata:name: nginx-servicenamespace: test
spec:type: NodePort# selector应该匹配pod的labelsselector:app: nginxports:- protocol: TCPport: 80nodePort: 30007targetPort: 80
启动
kubectl apply -f nginx_pod.yml
-
部署opentelemetry-collector测试
otel-collector和otel-agent需要程序集成API,发送到以DaemonSet运行在每个节点的otel-agent,otel-agent再将数据发送给otel-collector汇总,然后发往可以处理otlp trace数据的后端,如zipkin、jaeger等。
自定义测试yaml文件
apiVersion: v1
kind: ConfigMap
metadata:name: otel-collector-confnamespace: default
data:# 你的配置数据config.yaml: |receivers:otlp:protocols:grpc:http:processors:batch:exporters:logging:loglevel: debugservice:pipelines:traces:receivers: [otlp]processors: [batch]exporters: [logging]---
apiVersion: v1
kind: Service
metadata:name: otel-collectorlabels:app: opentelemetry
spec:type: NodePortports:- port: 4317targetPort: 4317nodePort: 30080name: otlp-grpc- port: 8888targetPort: 8888name: metricsselector:component: otel-collector---
apiVersion: apps/v1
kind: Deployment
metadata:name: otel-collectorlabels:app: opentelemetry
spec:replicas: 1selector:matchLabels:component: otel-collectortemplate:metadata:labels:component: otel-collectorspec:tolerations:- key: node-role.kubernetes.io/control-planeoperator: Existseffect: NoSchedulecontainers:- name: otel-collectorimage: otel/opentelemetry-collector:latestports:- containerPort: 4317- containerPort: 8888env:- name: MY_POD_IPvalueFrom:fieldRef:fieldPath: status.podIPvolumeMounts:- name: otel-collector-config-volmountPath: /confvolumes:- configMap:name: otel-collector-confname: otel-collector-config-vol
启动
mkdir /conf
kubectl apply -f otel-collector.yaml
kubectl get -f otel-collector.yaml
删除
kubectl delete -f otel-collector.yaml
使用官方提供示例
kubectl apply -f https://raw.githubusercontent.com/open-telemetry/opentelemetry-collector/main/examples/k8s/otel-config.yaml
根据需要修改文件
otel-config.yaml
---
apiVersion: v1
kind: ConfigMap
metadata:name: otel-agent-conflabels:app: opentelemetrycomponent: otel-agent-conf
data:otel-agent-config: |receivers:otlp:protocols:grpc:endpoint: ${env:MY_POD_IP}:4317http:endpoint: ${env:MY_POD_IP}:4318exporters:otlp:endpoint: "otel-collector.default:4317"tls:insecure: truesending_queue:num_consumers: 4queue_size: 100retry_on_failure:enabled: trueprocessors:batch:memory_limiter:# 80% of maximum memory up to 2Glimit_mib: 400# 25% of limit up to 2Gspike_limit_mib: 100check_interval: 5sextensions:zpages: {}service:extensions: [zpages]pipelines:traces:receivers: [otlp]processors: [memory_limiter, batch]exporters: [otlp]
---
apiVersion: apps/v1
kind: DaemonSet
metadata:name: otel-agentlabels:app: opentelemetrycomponent: otel-agent
spec:selector:matchLabels:app: opentelemetrycomponent: otel-agenttemplate:metadata:labels:app: opentelemetrycomponent: otel-agentspec:tolerations:- key: node-role.kubernetes.io/control-planeoperator: Existseffect: NoSchedulecontainers:- command:- "/otelcol"- "--config=/conf/otel-agent-config.yaml"image: otel/opentelemetry-collector:0.94.0name: otel-agentresources:limits:cpu: 500mmemory: 500Mirequests:cpu: 100mmemory: 100Miports:- containerPort: 55679 # ZPages endpoint.- containerPort: 4317 # Default OpenTelemetry receiver port.- containerPort: 8888  # Metrics.env:- name: MY_POD_IPvalueFrom:fieldRef:apiVersion: v1fieldPath: status.podIP- name: GOMEMLIMITvalue: 400MiBvolumeMounts:- name: otel-agent-config-volmountPath: /confvolumes:- configMap:name: otel-agent-confitems:- key: otel-agent-configpath: otel-agent-config.yamlname: otel-agent-config-vol
---
apiVersion: v1
kind: ConfigMap
metadata:name: otel-collector-conflabels:app: opentelemetrycomponent: otel-collector-conf
data:otel-collector-config: |receivers:otlp:protocols:grpc:endpoint: ${env:MY_POD_IP}:4317http:endpoint: ${env:MY_POD_IP}:4318processors:batch:memory_limiter:# 80% of maximum memory up to 2Glimit_mib: 1500# 25% of limit up to 2Gspike_limit_mib: 512check_interval: 5sextensions:zpages: {}exporters:otlp:endpoint: "http://someotlp.target.com:4317" # Replace with a real endpoint.tls:insecure: truezipkin:endpoint: "http://10.1.1.10:9411/api/v2/spans"format: "proto"service:extensions: [zpages]pipelines:traces/1:receivers: [otlp]processors: [memory_limiter, batch]exporters: [zipkin]
---
apiVersion: v1
kind: Service
metadata:name: otel-collectorlabels:app: opentelemetrycomponent: otel-collector
spec:ports:- name: otlp-grpc # Default endpoint for OpenTelemetry gRPC receiver.port: 4317protocol: TCPtargetPort: 4317- name: otlp-http # Default endpoint for OpenTelemetry HTTP receiver.port: 4318protocol: TCPtargetPort: 4318- name: metrics # Default endpoint for querying metrics.port: 8888selector:component: otel-collector
---
apiVersion: apps/v1
kind: Deployment
metadata:name: otel-collectorlabels:app: opentelemetrycomponent: otel-collector
spec:selector:matchLabels:app: opentelemetrycomponent: otel-collectorminReadySeconds: 5progressDeadlineSeconds: 120replicas: 1 #TODO - adjust this to your own requirementstemplate:metadata:labels:app: opentelemetrycomponent: otel-collectorspec:tolerations:- key: node-role.kubernetes.io/control-planeoperator: Existseffect: NoSchedulecontainers:- command:- "/otelcol"- "--config=/conf/otel-collector-config.yaml"image: otel/opentelemetry-collector:0.94.0name: otel-collectorresources:limits:cpu: 1memory: 2Girequests:cpu: 200mmemory: 400Miports:- containerPort: 55679 # Default endpoint for ZPages.- containerPort: 4317 # Default endpoint for OpenTelemetry receiver.- containerPort: 14250 # Default endpoint for Jaeger gRPC receiver.- containerPort: 14268 # Default endpoint for Jaeger HTTP receiver.- containerPort: 9411 # Default endpoint for Zipkin receiver.- containerPort: 8888  # Default endpoint for querying metrics.env:- name: MY_POD_IPvalueFrom:fieldRef:apiVersion: v1fieldPath: status.podIP- name: GOMEMLIMITvalue: 1600MiBvolumeMounts:- name: otel-collector-config-volmountPath: /conf
#        - name: otel-collector-secrets
#          mountPath: /secretsvolumes:- configMap:name: otel-collector-confitems:- key: otel-collector-configpath: otel-collector-config.yamlname: otel-collector-config-vol
#        - secret:
#            name: otel-collector-secrets
#            items:
#              - key: cert.pem
#                path: cert.pem
#              - key: key.pem
#                path: key.pem
部署deepflow监控单个k8s集群
官方文档
官方demo
安装helm
snap install helm --classic
设置pv
kubectl apply -f https://openebs.github.io/charts/openebs-operator.yaml
## config default storage class
kubectl patch storageclass openebs-hostpath  -p '{"metadata": {"annotations":{"storageclass.kubernetes.io/is-default-class":"true"}}}'
部署deepflow
helm repo add deepflow https://deepflowio.github.io/deepflow
helm repo update deepflow # use `helm repo update` when helm < 3.7.0
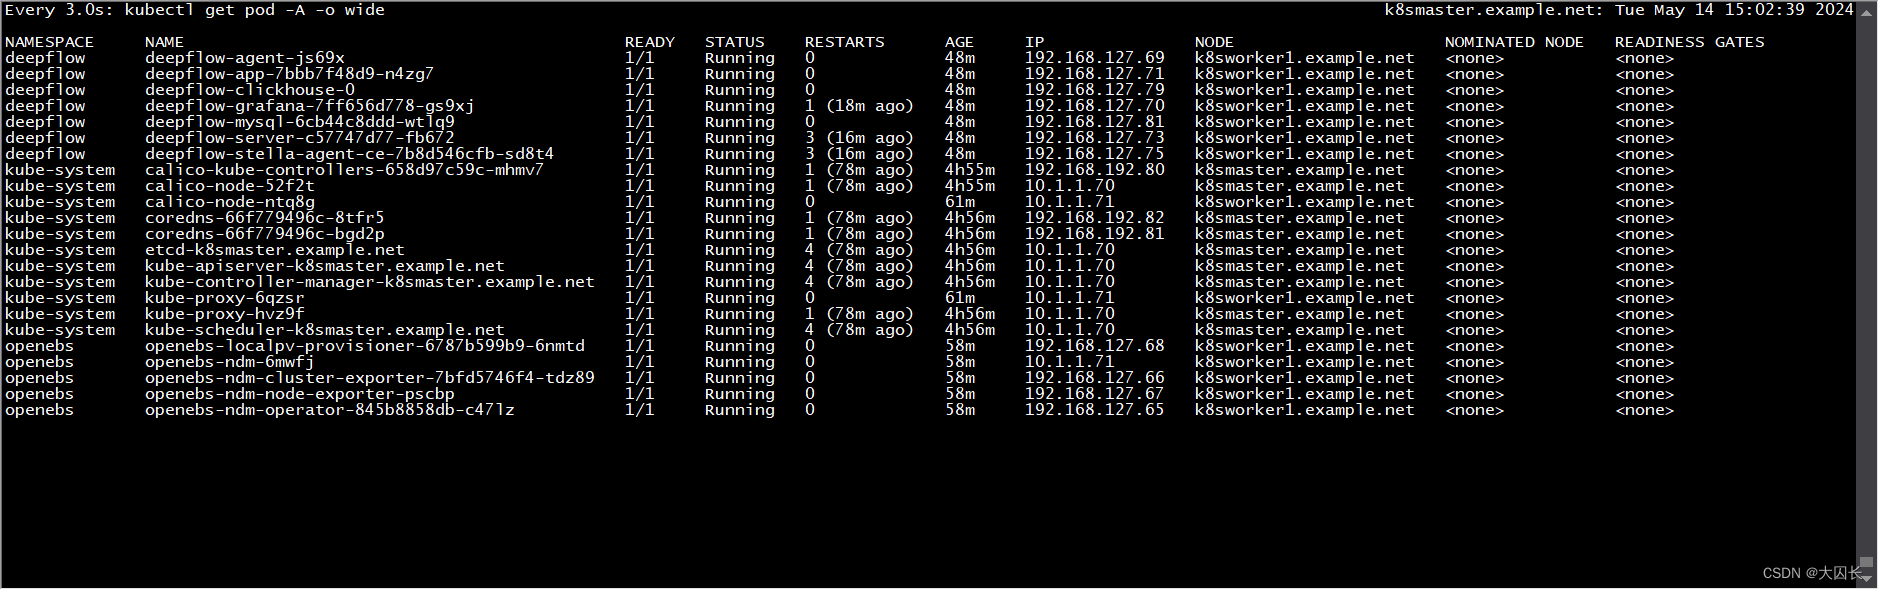
helm install deepflow -n deepflow deepflow/deepflow --create-namespace
# 显示如下
NAME: deepflow
LAST DEPLOYED: Tue May 14 14:13:50 2024
NAMESPACE: deepflow
STATUS: deployed
REVISION: 1
NOTES:
██████╗ ███████╗███████╗██████╗ ███████╗██╗ ██████╗ ██╗ ██╗
██╔══██╗██╔════╝██╔════╝██╔══██╗██╔════╝██║ ██╔═══██╗██║ ██║
██║ ██║█████╗ █████╗ ██████╔╝█████╗ ██║ ██║ ██║██║ █╗ ██║
██║ ██║██╔══╝ ██╔══╝ ██╔═══╝ ██╔══╝ ██║ ██║ ██║██║███╗██║
██████╔╝███████╗███████╗██║ ██║ ███████╗╚██████╔╝╚███╔███╔╝
╚═════╝ ╚══════╝╚══════╝╚═╝ ╚═╝ ╚══════╝ ╚═════╝ ╚══╝╚══╝ An automated observability platform for cloud-native developers.# deepflow-agent Port for receiving trace, metrics, and logdeepflow-agent service: deepflow-agent.deepflow
deepflow-agent Host listening port: 38086# Get the Grafana URL to visit by running these commands in the same shellNODE_PORT=$(kubectl get --namespace deepflow -o jsonpath="{.spec.ports[0].nodePort}" services deepflow-grafana)
NODE_IP=$(kubectl get nodes -o jsonpath="{.items[0].status.addresses[0].address}")
echo -e "Grafana URL: http://$NODE_IP:$NODE_PORT \nGrafana auth: admin:deepflow"
节点安装deepflow-ctl
curl -o /usr/bin/deepflow-ctl https://deepflow-ce.oss-cn-beijing.aliyuncs.com/bin/ctl/stable/linux/$(arch | sed 's|x86_64|amd64|' | sed 's|aarch64|arm64|')/deepflow-ctl
chmod a+x /usr/bin/deepflow-ctl
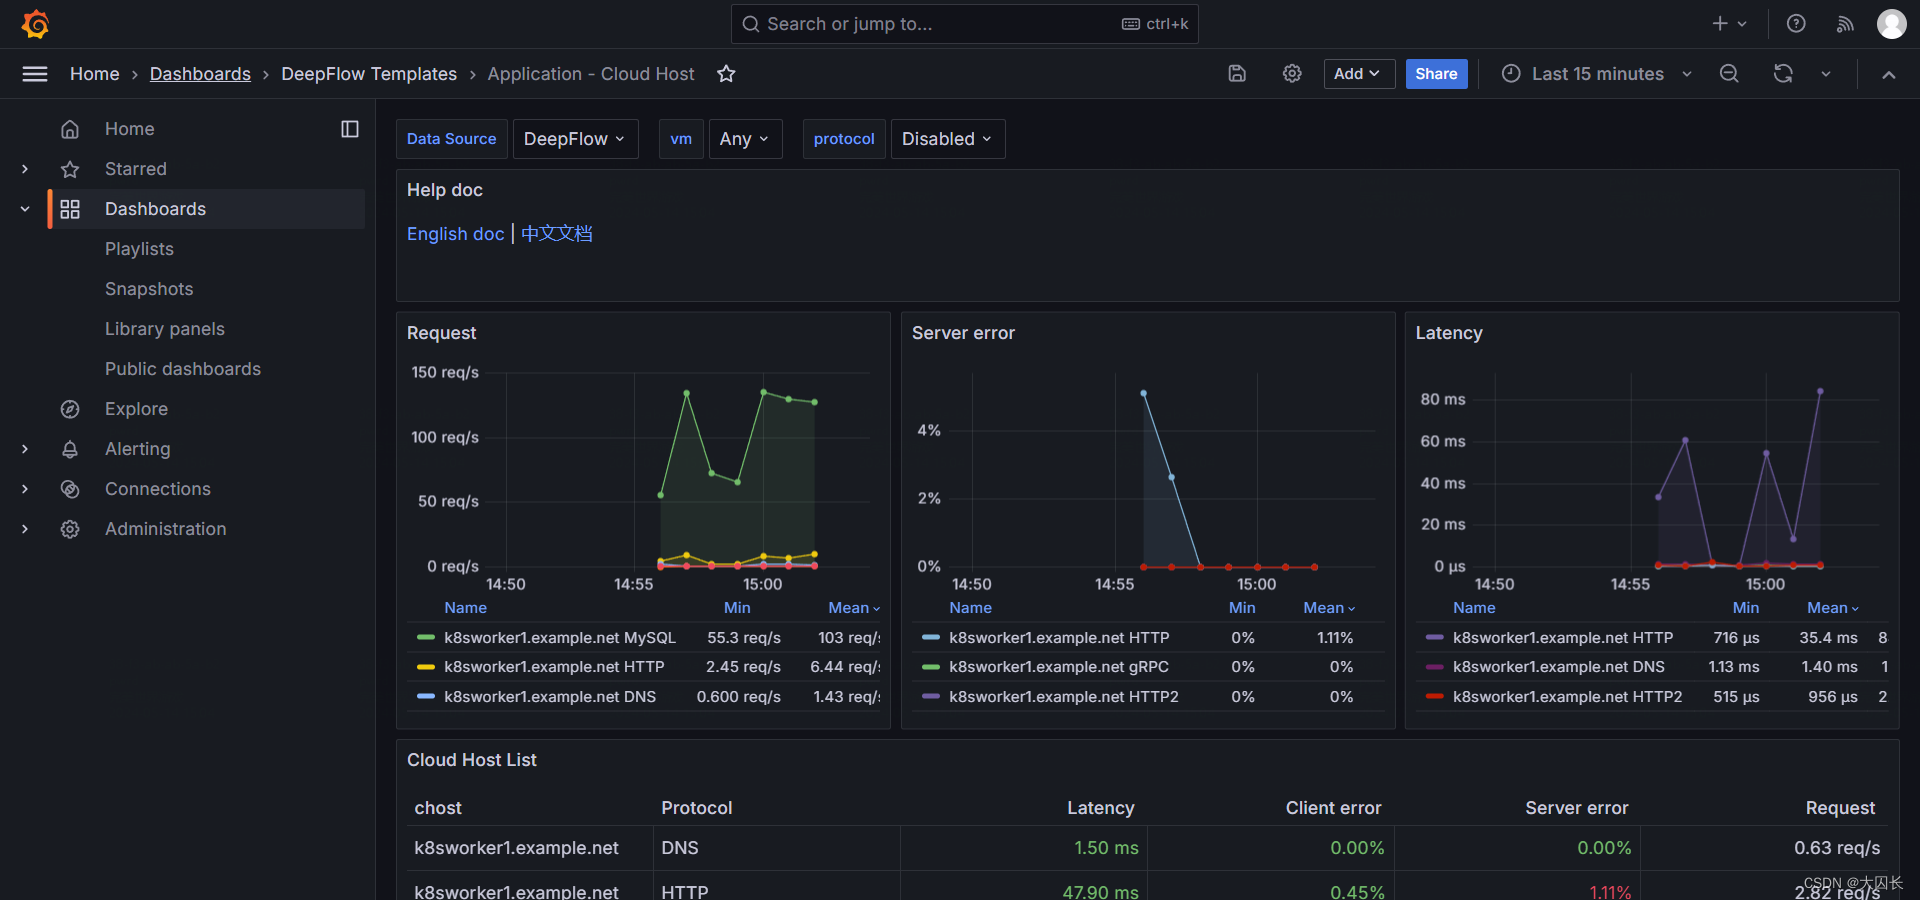
访问grafana页面
NODE_PORT=$(kubectl get --namespace deepflow -o jsonpath="{.spec.ports[0].nodePort}" services deepflow-grafana)
NODE_IP=$(kubectl get nodes -o jsonpath="{.items[0].status.addresses[0].address}")
echo -e "Grafana URL: http://$NODE_IP:$NODE_PORT  \nGrafana auth: admin:deepflow"
Ubuntu-22-LTS部署k8s和deepflow
环境详情:
Static hostname: k8smaster.example.net
Icon name: computer-vm
Chassis: vm
Machine ID: 22349ac6f9ba406293d0541bcba7c05d
Boot ID: 605a74a509724a88940bbbb69cde77f2
Virtualization: vmware
Operating System: Ubuntu 22.04.4 LTS
Kernel: Linux 5.15.0-106-generic
Architecture: x86-64
Hardware Vendor: VMware, Inc.
Hardware Model: VMware Virtual Platform
当您在 Ubuntu 22.04 上安装 Kubernetes 集群时,您可以遵循以下步骤:
-
设置主机名并在 hosts 文件中添加条目:
-
登录到主节点并使用
hostnamectl命令设置主机名:hostnamectl set-hostname "k8smaster.example.net" -
在工作节点上,运行以下命令设置主机名(分别对应第一个和第二个工作节点):
hostnamectl set-hostname "k8sworker1.example.net" # 第一个工作节点 hostnamectl set-hostname "k8sworker2.example.net" # 第二个工作节点 -
在每个节点的
/etc/hosts文件中添加以下条目:10.1.1.70 k8smaster.example.net k8smaster 10.1.1.71 k8sworker1.example.net k8sworker1
-
-
禁用 swap 并添加内核设置:
-
在所有节点上执行以下命令以禁用交换功能:
swapoff -a sed -i '/swap/ s/^\(.*\)$/#\1/g' /etc/fstab -
加载以下内核模块:
tee /etc/modules-load.d/containerd.conf <<EOF overlay br_netfilter EOF modprobe overlay modprobe br_netfilter -
为 Kubernetes 设置以下内核参数:
tee /etc/sysctl.d/kubernetes.conf <<EOF
net.bridge.bridge-nf-call-ip6tables = 1
net.bridge.bridge-nf-call-iptables = 1
net.ipv4.ip_forward = 1
EOF
sysctl --system
-
-
安装 containerd 运行时:
-
首先安装 containerd 的依赖项:
apt install -y curl gnupg2 software-properties-common apt-transport-https ca-certificates -
启用 Docker 存储库:
curl -fsSL https://download.docker.com/linux/ubuntu/gpg | apt-key add - add-apt-repository "deb [arch=amd64] https://download.docker.com/linux/ubuntu $(lsb_release -cs) stable" -
安装 containerd:
apt update apt install -y containerd.io -
配置 containerd 使用 systemd 作为 cgroup:
containerd config default | tee /etc/containerd/config.toml > /dev/null 2>&1
sed -i 's/SystemdCgroup\\=false/SystemdCgroup\\=true/g' /etc/containerd/config.toml
部分配置手动修改
disabled_plugins = [] imports = [] oom_score = 0 plugin_dir = "" required_plugins = [] root = "/var/lib/containerd" state = "/run/containerd" temp = "" version = 2[cgroup] path = ""[debug] address = "" format = "" gid = 0 level = "" uid = 0[grpc] address = "/run/containerd/containerd.sock" gid = 0 max_recv_message_size = 16777216 max_send_message_size = 16777216 tcp_address = "" tcp_tls_ca = "" tcp_tls_cert = "" tcp_tls_key = "" uid = 0[metrics] address = "" grpc_histogram = false[plugins][plugins."io.containerd.gc.v1.scheduler"]deletion_threshold = 0mutation_threshold = 100pause_threshold = 0.02schedule_delay = "0s"startup_delay = "100ms"[plugins."io.containerd.grpc.v1.cri"]device_ownership_from_security_context = falsedisable_apparmor = falsedisable_cgroup = falsedisable_hugetlb_controller = truedisable_proc_mount = falsedisable_tcp_service = truedrain_exec_sync_io_timeout = "0s"enable_selinux = falseenable_tls_streaming = falseenable_unprivileged_icmp = falseenable_unprivileged_ports = falseignore_deprecation_warnings = []ignore_image_defined_volumes = falsemax_concurrent_downloads = 3max_container_log_line_size = 16384netns_mounts_under_state_dir = falserestrict_oom_score_adj = false# 修改以下这行sandbox_image = "registry.aliyuncs.com/google_containers/pause:3.8"selinux_category_range = 1024stats_collect_period = 10stream_idle_timeout = "4h0m0s"stream_server_address = "127.0.0.1"stream_server_port = "0"systemd_cgroup = falsetolerate_missing_hugetlb_controller = trueunset_seccomp_profile = ""[plugins."io.containerd.grpc.v1.cri".cni]bin_dir = "/opt/cni/bin"conf_dir = "/etc/cni/net.d"conf_template = ""ip_pref = ""max_conf_num = 1[plugins."io.containerd.grpc.v1.cri".containerd]default_runtime_name = "runc"disable_snapshot_annotations = truediscard_unpacked_layers = falseignore_rdt_not_enabled_errors = falseno_pivot = falsesnapshotter = "overlayfs"[plugins."io.containerd.grpc.v1.cri".containerd.default_runtime]base_runtime_spec = ""cni_conf_dir = ""cni_max_conf_num = 0container_annotations = []pod_annotations = []privileged_without_host_devices = falseruntime_engine = ""runtime_path = ""runtime_root = ""runtime_type = ""[plugins."io.containerd.grpc.v1.cri".containerd.default_runtime.options][plugins."io.containerd.grpc.v1.cri".containerd.runtimes][plugins."io.containerd.grpc.v1.cri".containerd.runtimes.runc]base_runtime_spec = ""cni_conf_dir = ""cni_max_conf_num = 0container_annotations = []pod_annotations = []privileged_without_host_devices = falseruntime_engine = ""runtime_path = ""runtime_root = ""runtime_type = "io.containerd.runc.v2"[plugins."io.containerd.grpc.v1.cri".containerd.runtimes.runc.options]BinaryName = ""CriuImagePath = ""CriuPath = ""CriuWorkPath = ""IoGid = 0IoUid = 0NoNewKeyring = falseNoPivotRoot = falseRoot = ""ShimCgroup = ""SystemdCgroup = true[plugins."io.containerd.grpc.v1.cri".containerd.untrusted_workload_runtime]base_runtime_spec = ""cni_conf_dir = ""cni_max_conf_num = 0container_annotations = []pod_annotations = []privileged_without_host_devices = falseruntime_engine = ""runtime_path = ""runtime_root = ""runtime_type = ""[plugins."io.containerd.grpc.v1.cri".containerd.untrusted_workload_runtime.options][plugins."io.containerd.grpc.v1.cri".image_decryption]key_model = "node"[plugins."io.containerd.grpc.v1.cri".registry]config_path = ""[plugins."io.containerd.grpc.v1.cri".registry.auths][plugins."io.containerd.grpc.v1.cri".registry.configs][plugins."io.containerd.grpc.v1.cri".registry.headers][plugins."io.containerd.grpc.v1.cri".registry.mirrors]# 添加如下4行[plugins."io.containerd.grpc.v1.cri".registry.mirrors."docker.io"]endpoint = ["https://docker.mirrors.ustc.edu.cn"][plugins."io.containerd.grpc.v1.cri".registry.mirrors."k8s.gcr.io"]endpoint = ["https://registry.aliyuncs.com/google_containers"][plugins."io.containerd.grpc.v1.cri".x509_key_pair_streaming]tls_cert_file = ""tls_key_file = ""[plugins."io.containerd.internal.v1.opt"]path = "/opt/containerd"[plugins."io.containerd.internal.v1.restart"]interval = "10s"[plugins."io.containerd.internal.v1.tracing"]sampling_ratio = 1.0service_name = "containerd"[plugins."io.containerd.metadata.v1.bolt"]content_sharing_policy = "shared"[plugins."io.containerd.monitor.v1.cgroups"]no_prometheus = false[plugins."io.containerd.runtime.v1.linux"]no_shim = falseruntime = "runc"runtime_root = ""shim = "containerd-shim"shim_debug = false[plugins."io.containerd.runtime.v2.task"]platforms = ["linux/amd64"]sched_core = false[plugins."io.containerd.service.v1.diff-service"]default = ["walking"][plugins."io.containerd.service.v1.tasks-service"]rdt_config_file = ""[plugins."io.containerd.snapshotter.v1.aufs"]root_path = ""[plugins."io.containerd.snapshotter.v1.btrfs"]root_path = ""[plugins."io.containerd.snapshotter.v1.devmapper"]async_remove = falsebase_image_size = ""discard_blocks = falsefs_options = ""fs_type = ""pool_name = ""root_path = ""[plugins."io.containerd.snapshotter.v1.native"]root_path = ""[plugins."io.containerd.snapshotter.v1.overlayfs"]mount_options = []root_path = ""sync_remove = falseupperdir_label = false[plugins."io.containerd.snapshotter.v1.zfs"]root_path = ""[plugins."io.containerd.tracing.processor.v1.otlp"]endpoint = ""insecure = falseprotocol = ""[proxy_plugins][stream_processors][stream_processors."io.containerd.ocicrypt.decoder.v1.tar"]accepts = ["application/vnd.oci.image.layer.v1.tar+encrypted"]args = ["--decryption-keys-path", "/etc/containerd/ocicrypt/keys"]env = ["OCICRYPT_KEYPROVIDER_CONFIG=/etc/containerd/ocicrypt/ocicrypt_keyprovider.conf"]path = "ctd-decoder"returns = "application/vnd.oci.image.layer.v1.tar"[stream_processors."io.containerd.ocicrypt.decoder.v1.tar.gzip"]accepts = ["application/vnd.oci.image.layer.v1.tar+gzip+encrypted"]args = ["--decryption-keys-path", "/etc/containerd/ocicrypt/keys"]env = ["OCICRYPT_KEYPROVIDER_CONFIG=/etc/containerd/ocicrypt/ocicrypt_keyprovider.conf"]path = "ctd-decoder"returns = "application/vnd.oci.image.layer.v1.tar+gzip"[timeouts] "io.containerd.timeout.bolt.open" = "0s" "io.containerd.timeout.shim.cleanup" = "5s" "io.containerd.timeout.shim.load" = "5s" "io.containerd.timeout.shim.shutdown" = "3s" "io.containerd.timeout.task.state" = "2s"[ttrpc] address = "" gid = 0 uid = 0 -
重启并启用容器服务:
systemctl restart containerd systemctl enable containerd -
设置crictl
cat > /etc/crictl.yaml <<EOF
runtime-endpoint: unix:///var/run/containerd/containerd.sock
image-endpoint: unix:///var/run/containerd/containerd.sock
timeout: 10
debug: false
pull-image-on-create: false
EOF
-
-
添加阿里云的 Kubernetes 源:
-
首先,导入阿里云的 GPG 密钥:
curl -fsSL https://mirrors.aliyun.com/kubernetes/apt/doc/apt-key.gpg | apt-key add - -
然后,添加阿里云的 Kubernetes 源:
tee /etc/apt/sources.list.d/kubernetes.list <<EOF
deb https://mirrors.aliyun.com/kubernetes/apt/ kubernetes-xenial main
EOF
-
-
安装 Kubernetes 组件:
-
更新软件包索引并安装 kubelet、kubeadm 和 kubectl:
apt-get update apt-get install -y kubelet kubeadm kubectl -
设置 kubelet 使用 systemd 作为 cgroup 驱动:
# 可忽略
# sed -i 's/cgroup-driver=systemd/cgroup-driver=cgroupfs/g' /var/lib/kubelet/kubeadm-flags.env
# systemctl daemon-reload
# systemctl restart kubelet
-
-
初始化 Kubernetes 集群:
-
使用 kubeadm 初始化集群,并指定阿里云的镜像仓库:
# kubeadm init --image-repository registry.aliyuncs.com/google_containers
I0513 14:16:59.740096   17563 version.go:256] remote version is much newer: v1.30.0; falling back to: stable-1.28
[init] Using Kubernetes version: v1.28.9
[preflight] Running pre-flight checks
[preflight] Pulling images required for setting up a Kubernetes cluster
[preflight] This might take a minute or two, depending on the speed of your internet connection
[preflight] You can also perform this action in beforehand using 'kubeadm config images pull'
W0513 14:17:01.440936   17563 checks.go:835] detected that the sandbox image "registry.aliyuncs.com/google_containers/pause:3.8" of the container runtime         is inconsistent with that used by kubeadm. It is recommended that using "registry.aliyuncs.com/google_containers/pause:3.9" as the CRI sandbox image.
[certs] Using certificateDir folder "/etc/kubernetes/pki"
[certs] Generating "ca" certificate and key
[certs] Generating "apiserver" certificate and key
[certs] apiserver serving cert is signed for DNS names [k8smaster.example.net kubernetes kubernetes.default kubernetes.default.svc kubernetes.default.svc.        cluster.local] and IPs [10.96.0.1 10.1.1.70]
[certs] Generating "apiserver-kubelet-client" certificate and key
[certs] Generating "front-proxy-ca" certificate and key
[certs] Generating "front-proxy-client" certificate and key
[certs] Generating "etcd/ca" certificate and key
[certs] Generating "etcd/server" certificate and key
[certs] etcd/server serving cert is signed for DNS names [k8smaster.example.net localhost] and IPs [10.1.1.70 127.0.0.1 ::1]
[certs] Generating "etcd/peer" certificate and key
[certs] etcd/peer serving cert is signed for DNS names [k8smaster.example.net localhost] and IPs [10.1.1.70 127.0.0.1 ::1]
[certs] Generating "etcd/healthcheck-client" certificate and key
[certs] Generating "apiserver-etcd-client" certificate and key
[certs] Generating "sa" key and public key
[kubeconfig] Using kubeconfig folder "/etc/kubernetes"
[kubeconfig] Writing "admin.conf" kubeconfig file
[kubeconfig] Writing "kubelet.conf" kubeconfig file
[kubeconfig] Writing "controller-manager.conf" kubeconfig file
[kubeconfig] Writing "scheduler.conf" kubeconfig file
[etcd] Creating static Pod manifest for local etcd in "/etc/kubernetes/manifests"
[control-plane] Using manifest folder "/etc/kubernetes/manifests"
[control-plane] Creating static Pod manifest for "kube-apiserver"
[control-plane] Creating static Pod manifest for "kube-controller-manager"
[control-plane] Creating static Pod manifest for "kube-scheduler"
[kubelet-start] Writing kubelet environment file with flags to file "/var/lib/kubelet/kubeadm-flags.env"
[kubelet-start] Writing kubelet configuration to file "/var/lib/kubelet/config.yaml"
[kubelet-start] Starting the kubelet
[wait-control-plane] Waiting for the kubelet to boot up the control plane as static Pods from directory "/etc/kubernetes/manifests". This can take up to         4m0s
[apiclient] All control plane components are healthy after 4.002079 seconds
[upload-config] Storing the configuration used in ConfigMap "kubeadm-config" in the "kube-system" Namespace
[kubelet] Creating a ConfigMap "kubelet-config" in namespace kube-system with the configuration for the kubelets in the cluster
[upload-certs] Skipping phase. Please see --upload-certs
[mark-control-plane] Marking the node k8smaster.example.net as control-plane by adding the labels: [node-role.kubernetes.io/control-plane node.kubernetes.        io/exclude-from-external-load-balancers]
[mark-control-plane] Marking the node k8smaster.example.net as control-plane by adding the taints [node-role.kubernetes.io/control-plane:NoSchedule]
[bootstrap-token] Using token: m9z4yq.dok89ro6yt23wykr
[bootstrap-token] Configuring bootstrap tokens, cluster-info ConfigMap, RBAC Roles
[bootstrap-token] Configured RBAC rules to allow Node Bootstrap tokens to get nodes
[bootstrap-token] Configured RBAC rules to allow Node Bootstrap tokens to post CSRs in order for nodes to get long term certificate credentials
[bootstrap-token] Configured RBAC rules to allow the csrapprover controller automatically approve CSRs from a Node Bootstrap Token
[bootstrap-token] Configured RBAC rules to allow certificate rotation for all node client certificates in the cluster
[bootstrap-token] Creating the "cluster-info" ConfigMap in the "kube-public" namespace
[kubelet-finalize] Updating "/etc/kubernetes/kubelet.conf" to point to a rotatable kubelet client certificate and key
[addons] Applied essential addon: CoreDNS
[addons] Applied essential addon: kube-proxyYour Kubernetes control-plane has initialized successfully!To start using your cluster, you need to run the following as a regular user:mkdir -p $HOME/.kubesudo cp -i /etc/kubernetes/admin.conf $HOME/.kube/configsudo chown $(id -u):$(id -g) $HOME/.kube/configAlternatively, if you are the root user, you can run:export KUBECONFIG=/etc/kubernetes/admin.confYou should now deploy a pod network to the cluster.
Run "kubectl apply -f [podnetwork].yaml" with one of the options listed at:https://kubernetes.io/docs/concepts/cluster-administration/addons/Then you can join any number of worker nodes by running the following on each as root:kubeadm join 10.1.1.70:6443 --token m9z4yq.dok89ro6yt23wykr \--discovery-token-ca-cert-hash sha256:17c3f29bd276592e668e9e6a7a187140a887254b4555cf7d293c3313d7c8a178
-
-
配置 kubectl:
-
为当前用户设置 kubectl 访问:
mkdir -p $HOME/.kube
cp -i /etc/kubernetes/admin.conf $HOME/.kube/config
chown $(id -u):$(id -g) $HOME/.kube/config
-
-
安装网络插件:
-
安装一个 Pod 网络插件,例如 Calico 或 Flannel。例如,使用 Calico:
kubectl apply -f https://docs.projectcalico.org/manifests/calico.yaml
# 网络插件初始化完毕之后,coredns容器就正常了
kubectl logs -n kube-system -l k8s-app=kube-dns
-
-
验证集群:
-
启动一个nginx pod:
# vim nginx_pod.yml
apiVersion: v1
kind: Pod
metadata:name: test-nginx-podnamespace: testlabels:app: nginx
spec:containers:- name: test-nginx-containerimage: nginx:latestports:- containerPort: 80tolerations:- key: "node-role.kubernetes.io/control-plane"operator: "Exists"effect: "NoSchedule"
---apiVersion: v1
kind: Service
# service和pod必须位于同一个namespace
metadata:name: nginx-servicenamespace: test
spec:type: NodePort# selector应该匹配pod的labelsselector:app: nginxports:- protocol: TCPport: 80nodePort: 30007targetPort: 80
启动
kubectl apply -f nginx_pod.yml
-
部署opentelemetry-collector测试
otel-collector和otel-agent需要程序集成API,发送到以DaemonSet运行在每个节点的otel-agent,otel-agent再将数据发送给otel-collector汇总,然后发往可以处理otlp trace数据的后端,如zipkin、jaeger等。
自定义测试yaml文件
apiVersion: v1
kind: ConfigMap
metadata:name: otel-collector-confnamespace: default
data:# 你的配置数据config.yaml: |receivers:otlp:protocols:grpc:http:processors:batch:exporters:logging:loglevel: debugservice:pipelines:traces:receivers: [otlp]processors: [batch]exporters: [logging]---
apiVersion: v1
kind: Service
metadata:name: otel-collectorlabels:app: opentelemetry
spec:type: NodePortports:- port: 4317targetPort: 4317nodePort: 30080name: otlp-grpc- port: 8888targetPort: 8888name: metricsselector:component: otel-collector---
apiVersion: apps/v1
kind: Deployment
metadata:name: otel-collectorlabels:app: opentelemetry
spec:replicas: 1selector:matchLabels:component: otel-collectortemplate:metadata:labels:component: otel-collectorspec:tolerations:- key: node-role.kubernetes.io/control-planeoperator: Existseffect: NoSchedulecontainers:- name: otel-collectorimage: otel/opentelemetry-collector:latestports:- containerPort: 4317- containerPort: 8888env:- name: MY_POD_IPvalueFrom:fieldRef:fieldPath: status.podIPvolumeMounts:- name: otel-collector-config-volmountPath: /confvolumes:- configMap:name: otel-collector-confname: otel-collector-config-vol
启动
mkdir /conf
kubectl apply -f otel-collector.yaml
kubectl get -f otel-collector.yaml
删除
kubectl delete -f otel-collector.yaml
使用官方提供示例
kubectl apply -f https://raw.githubusercontent.com/open-telemetry/opentelemetry-collector/main/examples/k8s/otel-config.yaml
根据需要修改文件
otel-config.yaml
---
apiVersion: v1
kind: ConfigMap
metadata:name: otel-agent-conflabels:app: opentelemetrycomponent: otel-agent-conf
data:otel-agent-config: |receivers:otlp:protocols:grpc:endpoint: ${env:MY_POD_IP}:4317http:endpoint: ${env:MY_POD_IP}:4318exporters:otlp:endpoint: "otel-collector.default:4317"tls:insecure: truesending_queue:num_consumers: 4queue_size: 100retry_on_failure:enabled: trueprocessors:batch:memory_limiter:# 80% of maximum memory up to 2Glimit_mib: 400# 25% of limit up to 2Gspike_limit_mib: 100check_interval: 5sextensions:zpages: {}service:extensions: [zpages]pipelines:traces:receivers: [otlp]processors: [memory_limiter, batch]exporters: [otlp]
---
apiVersion: apps/v1
kind: DaemonSet
metadata:name: otel-agentlabels:app: opentelemetrycomponent: otel-agent
spec:selector:matchLabels:app: opentelemetrycomponent: otel-agenttemplate:metadata:labels:app: opentelemetrycomponent: otel-agentspec:tolerations:- key: node-role.kubernetes.io/control-planeoperator: Existseffect: NoSchedulecontainers:- command:- "/otelcol"- "--config=/conf/otel-agent-config.yaml"image: otel/opentelemetry-collector:0.94.0name: otel-agentresources:limits:cpu: 500mmemory: 500Mirequests:cpu: 100mmemory: 100Miports:- containerPort: 55679 # ZPages endpoint.- containerPort: 4317 # Default OpenTelemetry receiver port.- containerPort: 8888  # Metrics.env:- name: MY_POD_IPvalueFrom:fieldRef:apiVersion: v1fieldPath: status.podIP- name: GOMEMLIMITvalue: 400MiBvolumeMounts:- name: otel-agent-config-volmountPath: /confvolumes:- configMap:name: otel-agent-confitems:- key: otel-agent-configpath: otel-agent-config.yamlname: otel-agent-config-vol
---
apiVersion: v1
kind: ConfigMap
metadata:name: otel-collector-conflabels:app: opentelemetrycomponent: otel-collector-conf
data:otel-collector-config: |receivers:otlp:protocols:grpc:endpoint: ${env:MY_POD_IP}:4317http:endpoint: ${env:MY_POD_IP}:4318processors:batch:memory_limiter:# 80% of maximum memory up to 2Glimit_mib: 1500# 25% of limit up to 2Gspike_limit_mib: 512check_interval: 5sextensions:zpages: {}exporters:otlp:endpoint: "http://someotlp.target.com:4317" # Replace with a real endpoint.tls:insecure: truezipkin:endpoint: "http://10.1.1.10:9411/api/v2/spans"format: "proto"service:extensions: [zpages]pipelines:traces/1:receivers: [otlp]processors: [memory_limiter, batch]exporters: [zipkin]
---
apiVersion: v1
kind: Service
metadata:name: otel-collectorlabels:app: opentelemetrycomponent: otel-collector
spec:ports:- name: otlp-grpc # Default endpoint for OpenTelemetry gRPC receiver.port: 4317protocol: TCPtargetPort: 4317- name: otlp-http # Default endpoint for OpenTelemetry HTTP receiver.port: 4318protocol: TCPtargetPort: 4318- name: metrics # Default endpoint for querying metrics.port: 8888selector:component: otel-collector
---
apiVersion: apps/v1
kind: Deployment
metadata:name: otel-collectorlabels:app: opentelemetrycomponent: otel-collector
spec:selector:matchLabels:app: opentelemetrycomponent: otel-collectorminReadySeconds: 5progressDeadlineSeconds: 120replicas: 1 #TODO - adjust this to your own requirementstemplate:metadata:labels:app: opentelemetrycomponent: otel-collectorspec:tolerations:- key: node-role.kubernetes.io/control-planeoperator: Existseffect: NoSchedulecontainers:- command:- "/otelcol"- "--config=/conf/otel-collector-config.yaml"image: otel/opentelemetry-collector:0.94.0name: otel-collectorresources:limits:cpu: 1memory: 2Girequests:cpu: 200mmemory: 400Miports:- containerPort: 55679 # Default endpoint for ZPages.- containerPort: 4317 # Default endpoint for OpenTelemetry receiver.- containerPort: 14250 # Default endpoint for Jaeger gRPC receiver.- containerPort: 14268 # Default endpoint for Jaeger HTTP receiver.- containerPort: 9411 # Default endpoint for Zipkin receiver.- containerPort: 8888  # Default endpoint for querying metrics.env:- name: MY_POD_IPvalueFrom:fieldRef:apiVersion: v1fieldPath: status.podIP- name: GOMEMLIMITvalue: 1600MiBvolumeMounts:- name: otel-collector-config-volmountPath: /conf
#        - name: otel-collector-secrets
#          mountPath: /secretsvolumes:- configMap:name: otel-collector-confitems:- key: otel-collector-configpath: otel-collector-config.yamlname: otel-collector-config-vol
#        - secret:
#            name: otel-collector-secrets
#            items:
#              - key: cert.pem
#                path: cert.pem
#              - key: key.pem
#                path: key.pem
部署deepflow监控单个k8s集群
官方文档
官方demo
安装helm
snap install helm --classic
设置pv
kubectl apply -f https://openebs.github.io/charts/openebs-operator.yaml
## config default storage class
kubectl patch storageclass openebs-hostpath  -p '{"metadata": {"annotations":{"storageclass.kubernetes.io/is-default-class":"true"}}}'
部署deepflow
helm repo add deepflow https://deepflowio.github.io/deepflow
helm repo update deepflow # use `helm repo update` when helm < 3.7.0
helm install deepflow -n deepflow deepflow/deepflow --create-namespace
# 显示如下
NAME: deepflow
LAST DEPLOYED: Tue May 14 14:13:50 2024
NAMESPACE: deepflow
STATUS: deployed
REVISION: 1
NOTES:
██████╗ ███████╗███████╗██████╗ ███████╗██╗      ██████╗ ██╗    ██╗
██╔══██╗██╔════╝██╔════╝██╔══██╗██╔════╝██║     ██╔═══██╗██║    ██║
██║  ██║█████╗  █████╗  ██████╔╝█████╗  ██║     ██║   ██║██║ █╗ ██║
██║  ██║██╔══╝  ██╔══╝  ██╔═══╝ ██╔══╝  ██║     ██║   ██║██║███╗██║
██████╔╝███████╗███████╗██║     ██║     ███████╗╚██████╔╝╚███╔███╔╝
╚═════╝ ╚══════╝╚══════╝╚═╝     ╚═╝     ╚══════╝ ╚═════╝  ╚══╝╚══╝ An automated observability platform for cloud-native developers.# deepflow-agent Port for receiving trace, metrics, and logdeepflow-agent service: deepflow-agent.deepflow
deepflow-agent Host listening port: 38086# Get the Grafana URL to visit by running these commands in the same shellNODE_PORT=$(kubectl get --namespace deepflow -o jsonpath="{.spec.ports[0].nodePort}" services deepflow-grafana)
NODE_IP=$(kubectl get nodes -o jsonpath="{.items[0].status.addresses[0].address}")
echo -e "Grafana URL: http://$NODE_IP:$NODE_PORT  \nGrafana auth: admin:deepflow"
节点安装deepflow-ctl
curl -o /usr/bin/deepflow-ctl https://deepflow-ce.oss-cn-beijing.aliyuncs.com/bin/ctl/stable/linux/$(arch | sed 's|x86_64|amd64|' | sed 's|aarch64|arm64|')/deepflow-ctl
chmod a+x /usr/bin/deepflow-ctl
访问grafana页面
NODE_PORT=$(kubectl get --namespace deepflow -o jsonpath="{.spec.ports[0].nodePort}" services deepflow-grafana)
NODE_IP=$(kubectl get nodes -o jsonpath="{.items[0].status.addresses[0].address}")
echo -e "Grafana URL: http://$NODE_IP:$NODE_PORT  \nGrafana auth: admin:deepflow"
FAQ
如何将pod的端口暴露出来
在 Kubernetes 中,如果你想要将 Pod 的端口暴露给集群外部的用户或服务访问,你可以通过创建 Service 来实现。Service 提供了几种不同的类型来支持不同的用例和网络需求。以下是一些常见的方法:
-
NodePort:这种类型的 Service 会在集群的所有节点上开放一个指定的端口(通常在 30000-32767 范围内),任何发送到这个端口的流量都会被转发到对应的 Pod。这是最简单的方式,但它会占用节点上的端口。
示例 YAML 配置:
apiVersion: v1 kind: Service metadata:name: my-service spec:type: NodePortselector:app: MyAppports:- protocol: TCPport: 80targetPort: 9376nodePort: 30007 -
LoadBalancer:这种类型的 Service 通常由云提供商支持,它会为 Service 分配一个外部 IP 地址,所有发送到这个 IP 地址的流量都会被转发到 Pod。这种方式适用于需要直接从互联网访问服务的场景。
示例 YAML 配置:
apiVersion: v1 kind: Service metadata:name: my-service spec:selector:app: MyAppports:- protocol: TCPport: 80targetPort: 9376type: LoadBalancer -
Ingress:Ingress 是一个 API 对象,它定义了外部访问到集群服务的规则。它可以提供负载均衡、SSL 终端和基于名称的虚拟托管。这是一个更高级的暴露方式,可以让你使用一个单一的入口点来管理多个服务的访问。
示例 YAML 配置:
apiVersion: networking.k8s.io/v1 kind: Ingress metadata:name: example-ingress spec:rules:- host: www.example.comhttp:paths:- path: /pathType: Prefixbackend:service:name: my-serviceport:number: 80 -
Port Forwarding:如果你只是临时需要从本地机器访问 Pod,可以使用
kubectl port-forward命令将本地端口转发到 Pod 中的端口。示例命令:
kubectl port-forward pods/my-pod 8080:80
这些方法可以根据你的具体需求和环境来选择使用。
deepflow是一个可观测平台吗
是的,DeepFlow 是一个可观测性平台。它是由云杉网络开发的,旨在为复杂的云基础设施及云原生应用提供深度可观测性。DeepFlow 基于 eBPF 技术实现了应用性能指标、分布式追踪、持续性能剖析等观测信号的零侵扰采集,并结合智能标签技术实现了所有观测信号的全栈关联和高效存取¹。
DeepFlow 提供了以下核心特性:
- 全景图:利用 eBPF 技术零侵扰绘制生产环境的服务全景图。
- 分布式追踪:基于 eBPF 和 Wasm 技术零侵扰实现分布式追踪。
- 持续性能剖析:利用 eBPF 技术以低开销零侵扰采集生产环境进程的性能剖析数据。
- 存储性能优化:通过 SmartEncoding 机制大幅降低存储成本。
- 无缝集成:可以作为 Prometheus、OpenTelemetry、SkyWalking、Pyroscope 的存储后端,也提供 SQL、PromQL、OTLP 等数据接口¹。
DeepFlow 旨在解决传统 APM 方案中的侵扰性和观测盲点问题,提供一种更高效、自动化的可观测性解决方案。
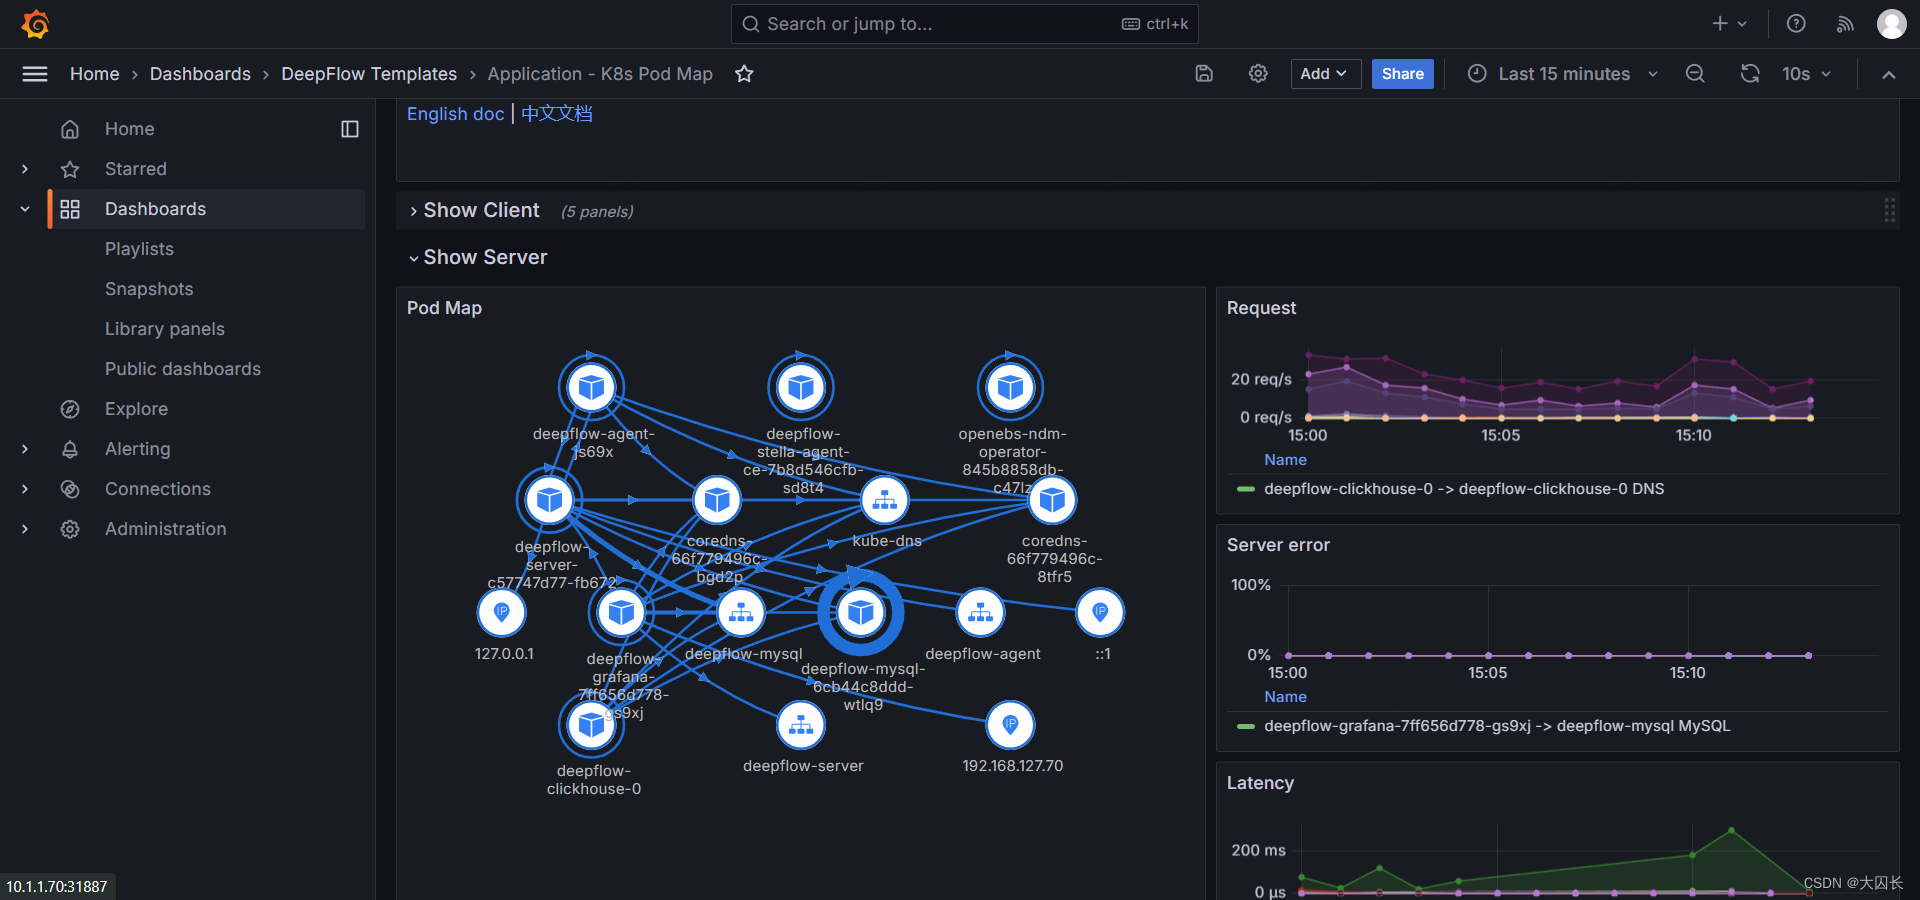
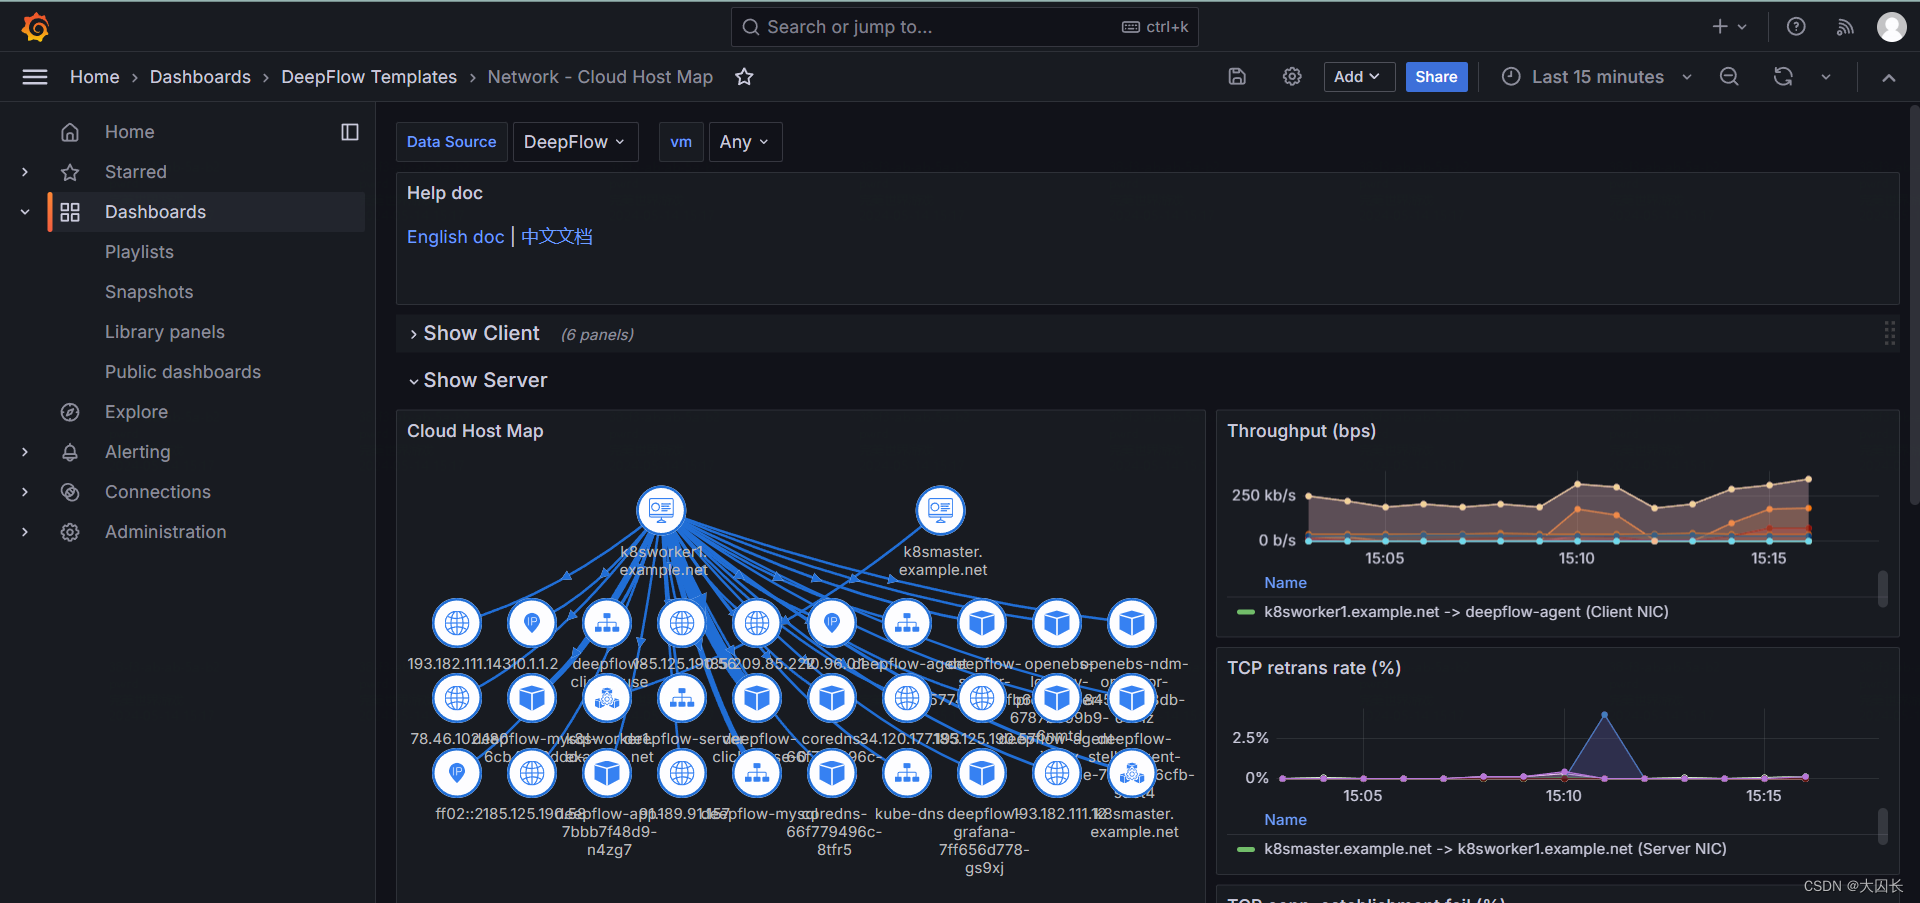
deepflow会自动监控k8s中的pod应用吗
是的,DeepFlow 可以自动监控 Kubernetes 中的 Pod 应用。DeepFlow 是一个可观测性平台,它基于 eBPF 技术实现了应用性能指标、分布式追踪、持续性能剖析等观测信号的零侵扰采集,并结合智能标签技术实现了所有观测信号的全栈关联和高效存取。
以下是 DeepFlow 在 Kubernetes 中自动监控 Pod 应用的一些特性:
-
零侵扰采集:
DeepFlow 使用 eBPF 技术,无需修改应用程序代码,即可自动收集应用性能指标、分布式追踪数据和持续性能剖析信息。 -
全栈关联:
DeepFlow 通过智能标签技术,将所有观测信号(指标、日志、追踪)关联到全栈中的不同组件,帮助您更好地理解应用程序的整体性能。 -
自动标记 K8s 资源:
DeepFlow 自动标记 Kubernetes 资源(如 Pod、Service、Deployment 等),使您可以轻松地按照资源维度进行监控。 -
持续性能剖析:
DeepFlow 可以低开销地采集生产环境进程的性能剖析数据,帮助您深入分析应用程序的性能瓶颈。
总之,DeepFlow 是一个强大的可观测性工具,可以自动监控 Kubernetes 中的应用程序,帮助您更好地理解和优化应用性能。
FAQ
如何将pod的端口暴露出来
在 Kubernetes 中,如果你想要将 Pod 的端口暴露给集群外部的用户或服务访问,你可以通过创建 Service 来实现。Service 提供了几种不同的类型来支持不同的用例和网络需求。以下是一些常见的方法:
-
NodePort:这种类型的 Service 会在集群的所有节点上开放一个指定的端口(通常在 30000-32767 范围内),任何发送到这个端口的流量都会被转发到对应的 Pod。这是最简单的方式,但它会占用节点上的端口。
示例 YAML 配置:
apiVersion: v1 kind: Service metadata:name: my-service spec:type: NodePortselector:app: MyAppports:- protocol: TCPport: 80targetPort: 9376nodePort: 30007 -
LoadBalancer:这种类型的 Service 通常由云提供商支持,它会为 Service 分配一个外部 IP 地址,所有发送到这个 IP 地址的流量都会被转发到 Pod。这种方式适用于需要直接从互联网访问服务的场景。
示例 YAML 配置:
apiVersion: v1 kind: Service metadata:name: my-service spec:selector:app: MyAppports:- protocol: TCPport: 80targetPort: 9376type: LoadBalancer -
Ingress:Ingress 是一个 API 对象,它定义了外部访问到集群服务的规则。它可以提供负载均衡、SSL 终端和基于名称的虚拟托管。这是一个更高级的暴露方式,可以让你使用一个单一的入口点来管理多个服务的访问。
示例 YAML 配置:
apiVersion: networking.k8s.io/v1 kind: Ingress metadata:name: example-ingress spec:rules:- host: www.example.comhttp:paths:- path: /pathType: Prefixbackend:service:name: my-serviceport:number: 80 -
Port Forwarding:如果你只是临时需要从本地机器访问 Pod,可以使用
kubectl port-forward命令将本地端口转发到 Pod 中的端口。示例命令:
kubectl port-forward pods/my-pod 8080:80
这些方法可以根据你的具体需求和环境来选择使用。
deepflow是一个可观测平台吗
是的,DeepFlow 是一个可观测性平台。它是由云杉网络开发的,旨在为复杂的云基础设施及云原生应用提供深度可观测性。DeepFlow 基于 eBPF 技术实现了应用性能指标、分布式追踪、持续性能剖析等观测信号的零侵扰采集,并结合智能标签技术实现了所有观测信号的全栈关联和高效存取¹。
DeepFlow 提供了以下核心特性:
- 全景图:利用 eBPF 技术零侵扰绘制生产环境的服务全景图。
- 分布式追踪:基于 eBPF 和 Wasm 技术零侵扰实现分布式追踪。
- 持续性能剖析:利用 eBPF 技术以低开销零侵扰采集生产环境进程的性能剖析数据。
- 存储性能优化:通过 SmartEncoding 机制大幅降低存储成本。
- 无缝集成:可以作为 Prometheus、OpenTelemetry、SkyWalking、Pyroscope 的存储后端,也提供 SQL、PromQL、OTLP 等数据接口¹。
DeepFlow 旨在解决传统 APM 方案中的侵扰性和观测盲点问题,提供一种更高效、自动化的可观测性解决方案。
deepflow会自动监控k8s中的pod应用吗
是的,DeepFlow 可以自动监控 Kubernetes 中的 Pod 应用。DeepFlow 是一个可观测性平台,它基于 eBPF 技术实现了应用性能指标、分布式追踪、持续性能剖析等观测信号的零侵扰采集,并结合智能标签技术实现了所有观测信号的全栈关联和高效存取。
以下是 DeepFlow 在 Kubernetes 中自动监控 Pod 应用的一些特性:
-
零侵扰采集:
DeepFlow 使用 eBPF 技术,无需修改应用程序代码,即可自动收集应用性能指标、分布式追踪数据和持续性能剖析信息。 -
全栈关联:
DeepFlow 通过智能标签技术,将所有观测信号(指标、日志、追踪)关联到全栈中的不同组件,帮助您更好地理解应用程序的整体性能。 -
自动标记 K8s 资源:
DeepFlow 自动标记 Kubernetes 资源(如 Pod、Service、Deployment 等),使您可以轻松地按照资源维度进行监控。 -
持续性能剖析:
DeepFlow 可以低开销地采集生产环境进程的性能剖析数据,帮助您深入分析应用程序的性能瓶颈。
总之,DeepFlow 是一个强大的可观测性工具,可以自动监控 Kubernetes 中的应用程序,帮助您更好地理解和优化应用性能。
相关文章:
k8s和deepflow部署与测试
Ubuntu-22-LTS部署k8s和deepflow 环境详情: Static hostname: k8smaster.example.net Icon name: computer-vm Chassis: vm Machine ID: 22349ac6f9ba406293d0541bcba7c05d Boot ID: 605a74a509724a88940bbbb69cde77f2 Virtualization: vmware Operating System: U…...
matlab使用教程(92)—流线图、流带图和流管图
1.使用向量数据显示流线图 MATLAB 向量数据集 wind 代表北美地区的气流。本示例结合使用了几种方法: 利用流线跟踪风速 利用切片平面显示数据的横截面视图 利用切片平面上的等高线提高切片平面着色的可见性 1.1确定坐标的范围 加载数据并确定用来定位切片平面…...

全网最全!场外个股期权的询价下单流程的详细解析
场外个股期权的询价下单流程 场外个股期权交易,作为在交易所外进行的个性化期权交易方式,为投资者提供了更加灵活和定制化的交易选择。以下是场外个股期权询价下单流程的详细步骤: 文章来源/:财智财经 第一步:明确交…...

linux 如何解压 zip
使用unzip命令解压zip文件: unzip file.zip这将会将file.zip文件解压到当前目录。 使用tar命令解压zip文件: tar -xf file.zip这将会将file.zip文件解压到当前目录。 使用7z命令解压zip文件: 7z x file.zip这将会将file.zip文件解压到当…...

【ubuntu】增加samba服务和文件夹
发现ai -server的ubuntu机器无法git clone 下来github的文件所以 使用samba 连接到linux的文件夹proj然后在我的windows上git clone 即可。安装samba Creating config file /etc/samba/smb.conf with new version Setting up libcephfs2 (17.2.7-0ubuntu0.22.04.1) ... Setting…...

vue3中作用域插槽
1、先说一下具名插槽 有时在一个组件中包含多个插槽出口是很有用的。举例来说,在一个 组件中,有如下模板: <div class"container"><header><!-- 标题内容放这里 --></header><main><!-- 主要内容…...

Vuforia AR篇(六)— Mid Air 半空识别
目录 前言一、什么是Mid Air?二、使用步骤三、示例代码四、效果 前言 增强现实(AR)技术正在改变我们与数字世界的互动方式。Vuforia作为先进的AR开发平台,提供了多种工具来创造引人入胜的AR体验。其中,Mid Air功能以其…...
统计信号处理-匹配滤波器实现与验证(matlab仿真)
什么是匹配滤波器 匹配滤波器是一种信号处理技术,它用于从噪声中提取信号,特别是在信号与噪声比率较低的情况下。匹配滤波器之所以存在,是因为它在信号检测和估计方面具有几个关键的优势: 最大化信噪比:匹配滤波器设计…...

四川汇聚荣聚荣科技有限公司综合实力如何?
在探讨一个公司的综合实力时,我们不仅关注其经济表现,还应深入分析其技术实力、市场地位、创新能力、团队素质以及社会责任感等多个维度。四川汇聚荣聚荣科技有限公司作为一家立足于科技领域的企业,其实力究竟如何呢?接下来的内容将围绕这一…...

【Power Compiler手册】7.功耗分析
概述 `report_power` 命令分析并报告设计中各种元素的功耗。在执行此命令之前,必须捕获开关活动,将设计映射到门级,并标注设计。 该工具为以下设计元素创建功耗报告: - 设计 - 模块 - 网络 - 单元或特定类型的单元组 - 多角多模式设计的场景 `report_power` 命令使用…...

详解MySQL的MVCC机制与间隙锁
在MySQL的InnoDB存储引擎中,MVCC(多版本并发控制)和间隙锁(Gap Lock)是两种关键的并发控制机制。MVCC主要用于提高读写并发性能,而间隙锁则用于实现更严格的事务隔离,防止幻读现象。以下是对MyS…...

新版校园跑腿外卖独立版+APP+小程序前端外卖配送平台源码
源码介绍: 同城校园跑腿外卖配送平台源码,支持自定义diy 你可以设计你的页面,设计你自己的风格,支持多校园,独立版本,多商户,有用户端,骑手端,商家端,强大的…...
)
# ROS 获取激光雷达数据 (Python实现)
ROS 获取激光雷达数据 (Python实现) 实现思路 构建一个新的软件包,包名叫做lidar_pkg在软件包中新建一个节点,节点名叫做lidar_node.py在节点中,向ROS大管家rospy申请订阅话题/scan,并设置回调函数为Lidarcallback()构建回调函数…...

单点登录(SSO)前端怎么做
单点登录(SSO)前端怎么做 本文介绍单点登录(SSO)是什么,还有就是前端怎么做。 单点登录(SSO)是什么 单点登录(SSO,Single Sign On),是在企业内部…...

【面试干货】索引的作用
【面试干货】索引的作用 1、索引的作用 💖The Begin💖点点关注,收藏不迷路💖 1、索引的作用 索引 可以协助 快速查询、更新数据库表中数据。 通过使用索引,数据库系统能够快速定位到符合查询条件的数据,提…...

【成品设计】基于红外线的目标跟踪无线测温系统设计
《基于红外线的目标跟踪无线测温系统设计》 整体功能: A端:无线跟踪端 主控:采用STM32F103C8T6单片机作为核心控制。360度编码模块数字脉冲输出红外解码编码模块OLED屏幕。 B端:无线待测端 主控:采用STM32F103C8T…...

抽象,自定义函数,递归
6.1懒惰是一种美德 如果你 在一个地方编写了一些代码,但需要在另一个地方再次使用,该如何办呢? 假设你编写了一段代码,它计算一些斐波那契数(一种数列,其中每个数都是前两个数的和)。 现在的…...

php设计模式之策略模式详解
策略模式(Strategy Pattern)是一种行为设计模式,它使你能在运行时改变对象的行为。在PHP中应用策略模式可以让你轻松地根据需要选择和交换算法或策略,而无需修改使用这些算法的代码。 策略模式的核心概念: 目的&…...

Android在不同层面增加应用
1 App 应用代码一般在开发者的项目目录下,packages/apps/YourApp/,比如app/src/main/java目录下 对于系统应用,源代码可能位于packages/apps/目录下,例如packages/apps/Settings。 用户安装的应用(从Google Play或其…...
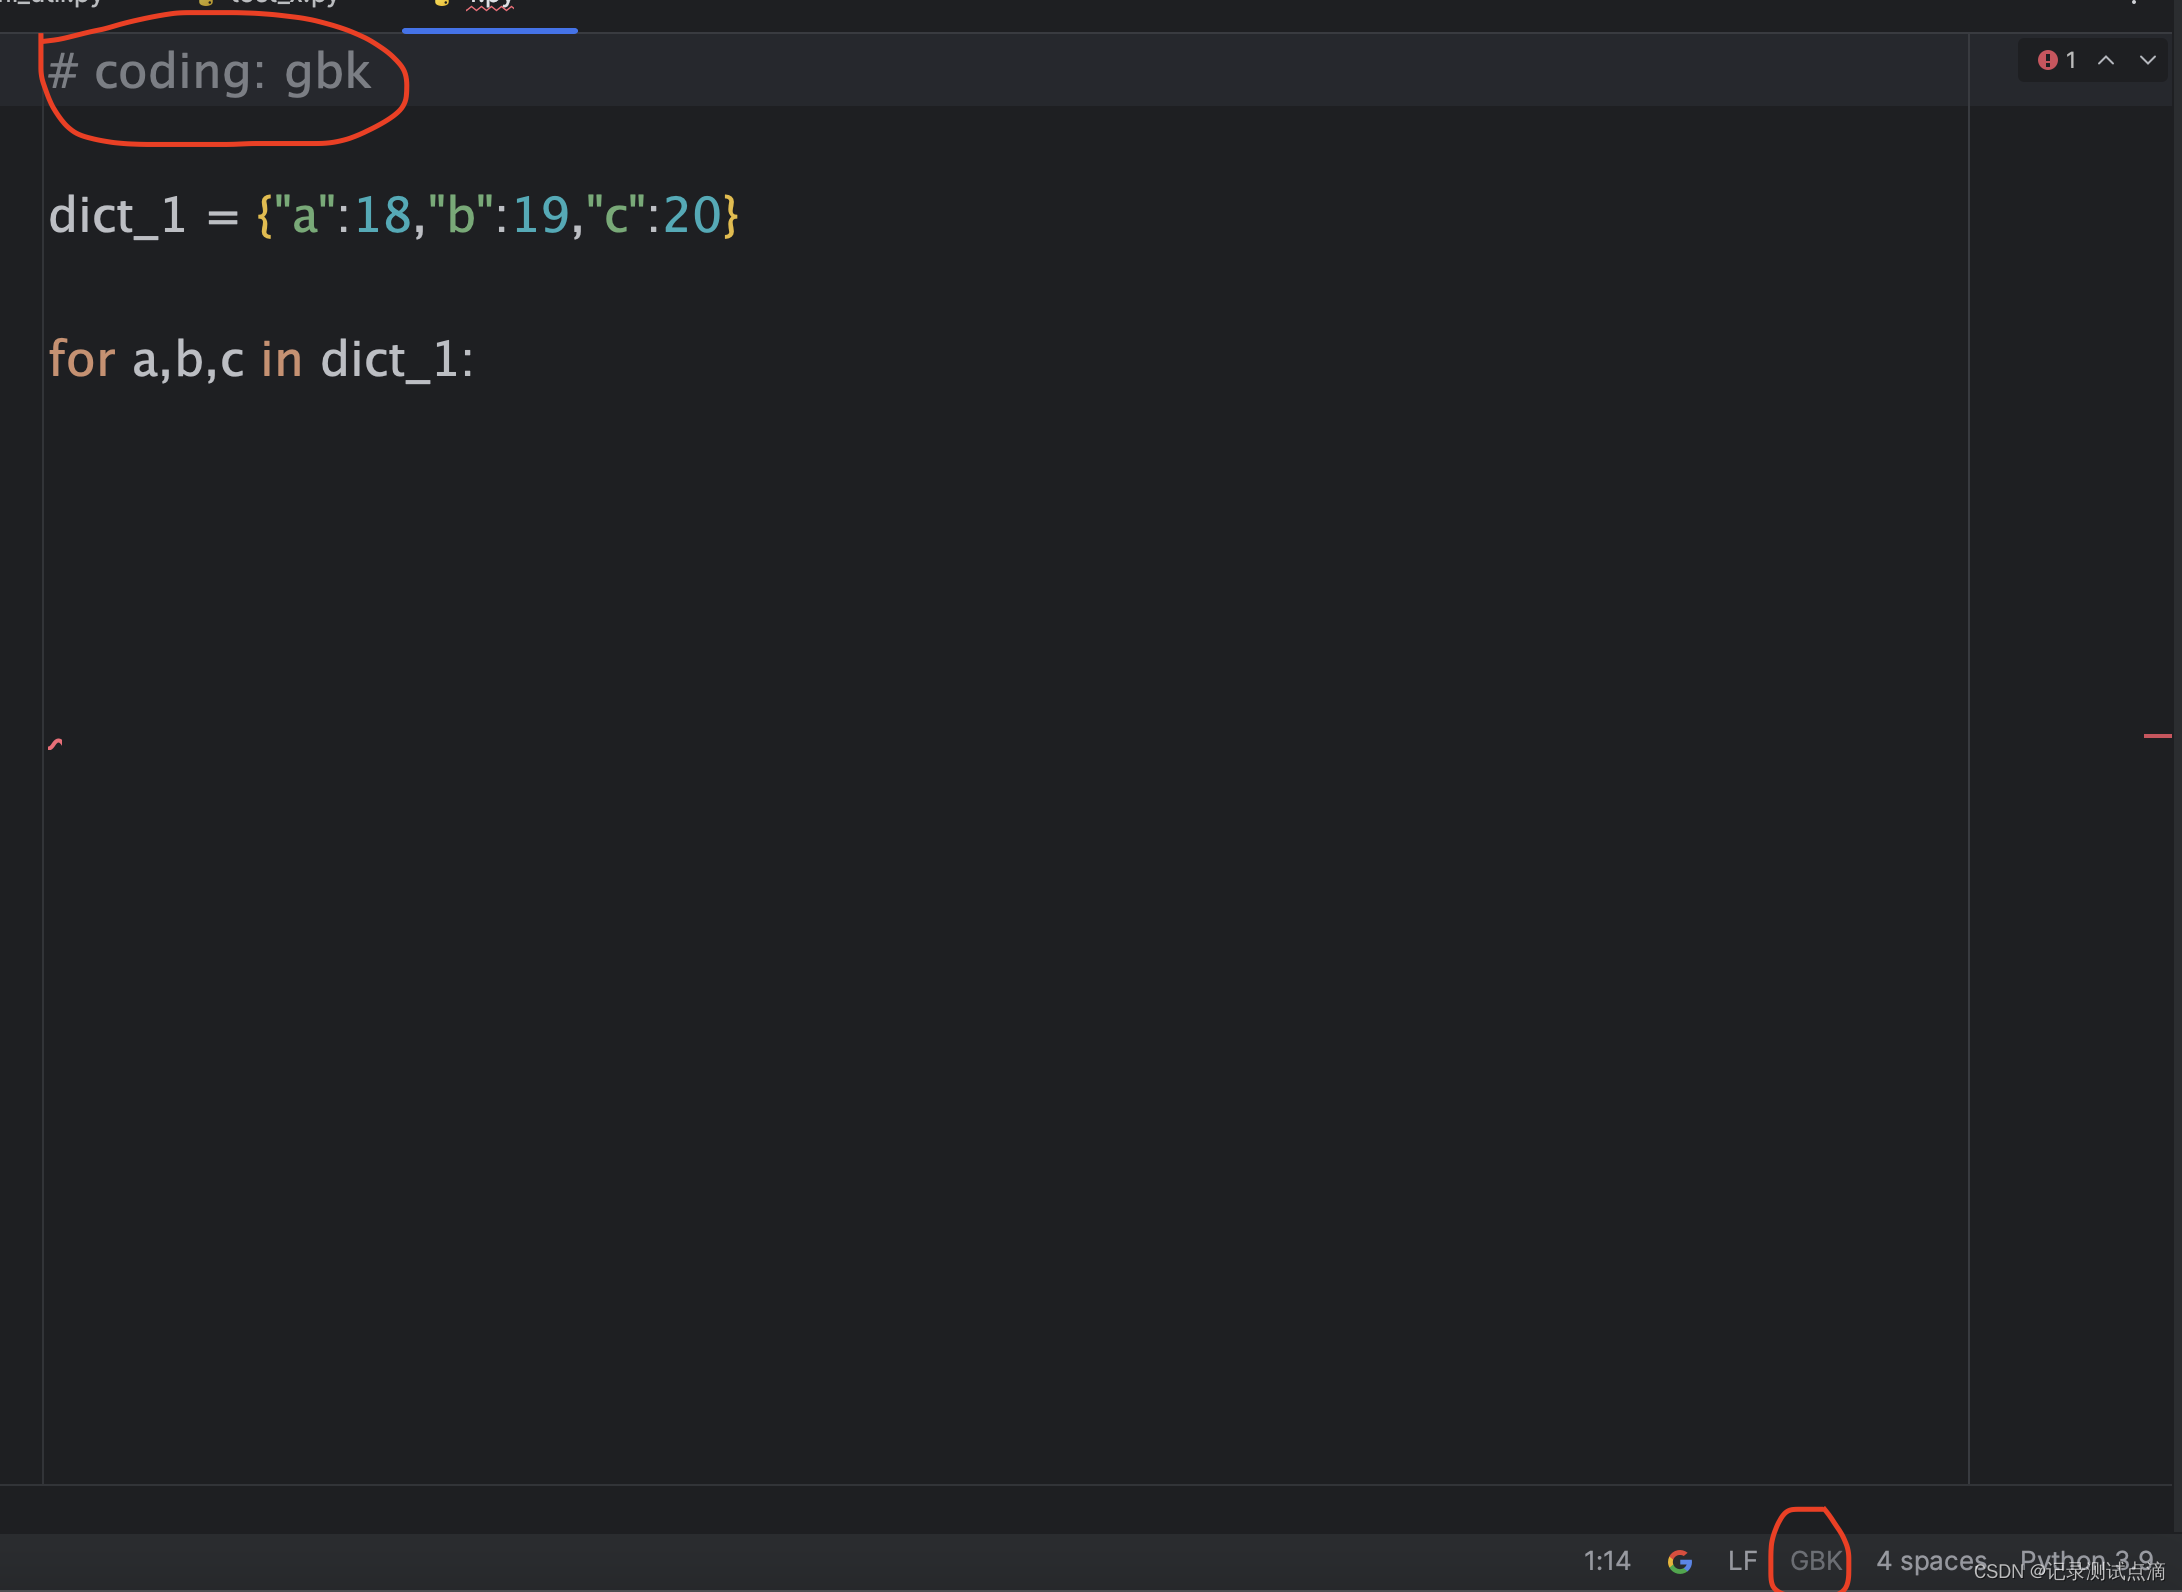
【Pycharm】功能介绍
1.Code Reformat Code 格式化代码,可以帮助我们去自动调整空格等,根据python语法规范自动调整 2.Settings 1.创建py文件默认填充模版 3.读写py文件编码格式一致性 顶部代码指定的编码方式作用: 可以保证python2/3解释器在读取文件的时候按…...

【杂谈】-递归进化:人工智能的自我改进与监管挑战
递归进化:人工智能的自我改进与监管挑战 文章目录 递归进化:人工智能的自我改进与监管挑战1、自我改进型人工智能的崛起2、人工智能如何挑战人类监管?3、确保人工智能受控的策略4、人类在人工智能发展中的角色5、平衡自主性与控制力6、总结与…...
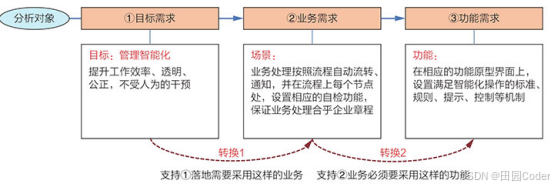
大话软工笔记—需求分析概述
需求分析,就是要对需求调研收集到的资料信息逐个地进行拆分、研究,从大量的不确定“需求”中确定出哪些需求最终要转换为确定的“功能需求”。 需求分析的作用非常重要,后续设计的依据主要来自于需求分析的成果,包括: 项目的目的…...
)
Java 语言特性(面试系列1)
一、面向对象编程 1. 封装(Encapsulation) 定义:将数据(属性)和操作数据的方法绑定在一起,通过访问控制符(private、protected、public)隐藏内部实现细节。示例: public …...

循环冗余码校验CRC码 算法步骤+详细实例计算
通信过程:(白话解释) 我们将原始待发送的消息称为 M M M,依据发送接收消息双方约定的生成多项式 G ( x ) G(x) G(x)(意思就是 G ( x ) G(x) G(x) 是已知的)࿰…...

测试markdown--肇兴
day1: 1、去程:7:04 --11:32高铁 高铁右转上售票大厅2楼,穿过候车厅下一楼,上大巴车 ¥10/人 **2、到达:**12点多到达寨子,买门票,美团/抖音:¥78人 3、中饭&a…...
Nuxt.js 中的路由配置详解
Nuxt.js 通过其内置的路由系统简化了应用的路由配置,使得开发者可以轻松地管理页面导航和 URL 结构。路由配置主要涉及页面组件的组织、动态路由的设置以及路由元信息的配置。 自动路由生成 Nuxt.js 会根据 pages 目录下的文件结构自动生成路由配置。每个文件都会对…...
Maven 概述、安装、配置、仓库、私服详解
目录 1、Maven 概述 1.1 Maven 的定义 1.2 Maven 解决的问题 1.3 Maven 的核心特性与优势 2、Maven 安装 2.1 下载 Maven 2.2 安装配置 Maven 2.3 测试安装 2.4 修改 Maven 本地仓库的默认路径 3、Maven 配置 3.1 配置本地仓库 3.2 配置 JDK 3.3 IDEA 配置本地 Ma…...

python执行测试用例,allure报乱码且未成功生成报告
allure执行测试用例时显示乱码:‘allure’ �����ڲ����ⲿ���Ҳ���ǿ�&am…...
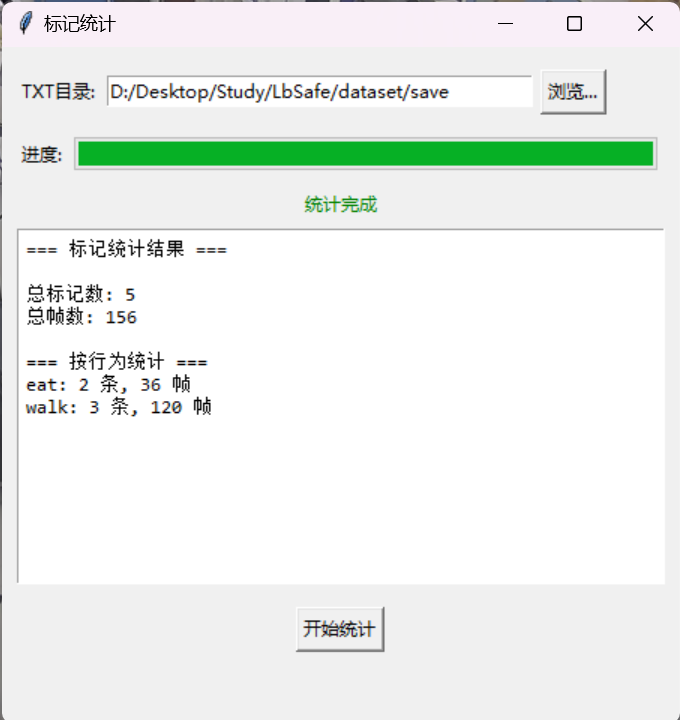
视频行为标注工具BehaviLabel(源码+使用介绍+Windows.Exe版本)
前言: 最近在做行为检测相关的模型,用的是时空图卷积网络(STGCN),但原有kinetic-400数据集数据质量较低,需要进行细粒度的标注,同时粗略搜了下已有开源工具基本都集中于图像分割这块,…...
详细解析)
Caliper 负载(Workload)详细解析
Caliper 负载(Workload)详细解析 负载(Workload)是 Caliper 性能测试的核心部分,它定义了测试期间要执行的具体合约调用行为和交易模式。下面我将全面深入地讲解负载的各个方面。 一、负载模块基本结构 一个典型的负载模块(如 workload.js)包含以下基本结构: use strict;/…...