由浅入深,走进深度学习(2)
今天分享的学习内容主要就是神经网络里面的知识啦,用到的框架就是torch
在这里我也是对自己做一个学习记录,如果不符合大家的口味,大家划走就可以啦
可能没有什么文字或者原理上的讲解,基本上都是代码,但是我还是想说,如果基础不是很好,认认真真敲一遍,会有不一样的感受!!
在这里还有一篇相关内容的补充,大家也可以看一看:
由浅入深,走进深度学习(补充篇:神经网络基础)-CSDN博客
由浅入深,走进深度学习(补充篇:神经网络结构层基础)-CSDN博客
主要内容:
目录
内容六 卷积原理、卷积层、卷积层处理图片
内容七 最大池化层
内容八 非线性激活
内容九 线性层以及其他层
内容十 实战,搭建一个小型的神经网络
正片开始
内容六 卷积原理、卷积层、卷积层处理图片
import torch
import torch.nn.functional as Finput = torch.tensor([[1, 2, 0, 3, 1],[0, 1, 2, 3, 1],[1, 2, 1, 0, 0],[5, 6, 2, 2, 1],[3, 2, 3, 5, 1]])kernel = torch.tensor([[1, 2, 1],[2, 3, 1],[3, 0, 1]])print(input.shape)
print(kernel.shape)input = torch.reshape(input, (1, 1, 5, 5))
kernel = torch.reshape(kernel, (1, 1, 3, 3))
print(input.shape)
print(input)
print(kernel.shape)
print(kernel)output = F.conv2d(input, kernel, stride = 1)
print(output.shape)
print(output)import torch
import torch.nn.functional as Finput = torch.tensor([[1, 2, 0, 3, 1],[0, 1, 2, 3, 1],[1, 2, 1, 0, 0],[5, 6, 2, 2, 1],[3, 2, 3, 5, 1]])kernel = torch.tensor([[1, 2, 1],[2, 3, 1],[3, 0, 1]])print(input.shape)
print(kernel.shape)input = torch.reshape(input, (1, 1, 5, 5))
kernel = torch.reshape(kernel, (1, 1, 3, 3))
print(input.shape)
print(input)
print(kernel.shape)
print(kernel)output = F.conv2d(input, kernel, stride = 2)
print(output.shape)
print(output)# 步幅、填充原理
# 步幅:卷积核经过输入特征图的采样间隔。设置步幅的目的:希望减小输入参数的数目,减少计算量
# 填充:在输入特征图的每一边添加一定数目的行列。设置填充的目的:希望每个输入方块都能作为卷积窗口的中心,或使得输出的特征图的长、宽 = 输入的特征图的长、宽。
# 一个尺寸 a * a 的特征图,经过 b * b 的卷积层,步幅(stride)= c,填充(padding)= d,若d等于0,也就是不填充,输出的特征图的尺寸 =(a-b)/ c+1;若d不等于0,也就是填充,输出的特征图的尺寸 =(a+2d-b)/ c+1
import torch
import torch.nn.functional as Finput = torch.tensor([[1, 2, 0, 3, 1],[0, 1, 2, 3, 1],[1, 2, 1, 0, 0],[5, 6, 2, 2, 1],[3, 2, 3, 5, 1]])kernel = torch.tensor([[1, 2, 1],[2, 3, 1],[3, 0, 1]])print(input.shape)
print(kernel.shape)input = torch.reshape(input, (1, 1, 5, 5))
kernel = torch.reshape(kernel, (1, 1, 3, 3))
print(input.shape)
print(input)
print(kernel.shape)
print(kernel)output = F.conv2d(input, kernel, stride = 1, padding = 1) # 周围只填充一层
print(output.shape)
print(output)# 内容六 卷积层
# Conv1d代表一维卷积,Conv2d代表二维卷积,Conv3d代表三维卷积
# kernel_size在训练过程中不断调整,定义为3就是3 * 3的卷积核,实际我们在训练神经网络过程中其实就是对kernel_size不断调整import torch
from torch import nn
from torch.nn import Conv2d
from torch.utils.data import DataLoader
import torchvision# dataset = torchvision.datasets.CIFAR10("dataset", train=False, transform=torchvision.transforms.ToTensor(), download=True)
# dataloader = DataLoader(dataset, batch_size = 64)class net(nn.Module):def __init__(self):super(net, self).__init__()self.conv1 = Conv2d(in_channels = 3, out_channels = 6, kernel_size = 3, stride = 1, padding = 0) # 彩色图像输入为3层,我们想让它的输出为6层,选3 * 3 的卷积def forward(self, x):x = self.conv1return xmodel = net()
print(model)# 卷积层处理图片
import torch
from torch import nn
from torch.nn import Conv2d
from torch.utils.data import DataLoader
import torchvisiondataset = torchvision.datasets.CIFAR10("dataset", train=False, transform=torchvision.transforms.ToTensor(), download=True)
dataloader = DataLoader(dataset, batch_size = 64)class net(nn.Module):def __init__(self):super(net, self).__init__()self.conv1 = Conv2d(in_channels = 3, out_channels = 6, kernel_size = 3, stride = 1, padding = 0)def forward(self, x):x = self.conv1(x)return xmodel = net()
for data in dataloader:img, targets = dataoutput = model(img)# print(img.shape)# print(output.shape) # 输入为3通道32×32的64张图片# print(targets.shape) # 输出为6通道30×30的64张图片
内容七 最大池化层
# 最大池化层有时也被称为下采样   dilation为空洞卷积
# Ceil_model为当超出区域时,只取最左上角的值
# 池化使得数据由5 * 5 变为3 * 3,甚至1 * 1的,这样导致计算的参数会大大减小。例如1080P的电影经过池化的转为720P的电影、或360P的电影后,同样的网速下,视频更为不卡
import torch
from torch import nn
from torch.nn import MaxPool2dinput = torch.tensor([[3, 4, 6, 1, 8],[4, 0, 8, 0, 1],[1, 2, 4, 5, 1],[2, 3, 1, 5, 1],[3, 3, 1, 5, 0]], dtype = torch.float32)input = torch.reshape(input, (-1, 1, 5, 5))
print(input.shape)class net(nn.Module):def __init__(self):super(net, self).__init__()self.maxpool = MaxPool2d(kernel_size = 3, ceil_mode = True)def forward(self, x):x = self.maxpool(x)return xmodel = net()
output = model(input)
print(output.shape)
print(output)import torch
import torchvision
from torch import nn
from torch.nn import MaxPool2d
from torch.utils.data import DataLoaderdataset = torchvision.datasets.CIFAR10("dataset", train=False, transform=torchvision.transforms.ToTensor(), download=True)
dataloader = DataLoader(dataset, batch_size = 64)class net(nn.Module):def __init__(self):super(net, self).__init__()self.maxpool = MaxPool2d(kernel_size = 3, ceil_mode = True)def forward(self, x):x = self.maxpool(x)return xmodel = net()
epoch = 0for data in dataloader:img, tagets = data# print('input', img, epoch)output = model(img)# print('output', output, epoch)epoch = epoch + 1
内容八 非线性激活
# inplace为原地替换,若为True,则变量的值被替换。若为False,则会创建一个新变量,将函数处理后的值赋值给新变量,原始变量的值没有修改
import torch
from torch import nn
from torch.nn import ReLUinput = torch.tensor([[1, -2],[-0.7, 3]])input = torch.reshape(input, (-1, 1, 2, 2))
print(input.shape)class net(nn.Module):def __init__(self):super(net, self).__init__()self.relu = ReLU()def forward(self, x):x = self.relu(x)return xmodel = net()
output = model(input)
print(output.shape)
print(output)
print(output[0][0][1][1])import torch
import torchvision
from torch import nn
from torch.nn import ReLU, Sigmoid
from torch.utils.data import DataLoaderdataset = torchvision.datasets.CIFAR10("dataset", train=False, transform=torchvision.transforms.ToTensor(), download=True)
dataloader = DataLoader(dataset, batch_size = 64)class net(nn.Module):def __init__(self):super(net, self).__init__()self.relu = ReLU()self.sigmoid = Sigmoid()def forward(self, x):x1 = self.relu(x)x2 = self.sigmoid(x1)return x2model = net()
epoch = 0for data in dataloader:imgs, targets = dataoutput = model(imgs)# print(output.shape)epoch = epoch + 1
内容九 线性层以及其他层
# 线性拉平
import torch
import torchvision
from torch import nn
from torch.nn import ReLU, Sigmoid
from torch.utils.data import DataLoaderdataset = torchvision.datasets.CIFAR10("dataset", train=False, transform=torchvision.transforms.ToTensor(), download=True)
dataloader = DataLoader(dataset, batch_size = 64)for data in dataloader:imgs, targets = data# print(imgs.shape)output = torch.reshape(imgs, (1, 1, 1, -1))# print(output.shape)# 线性层
import torch
import torchvision
from torch import nn
from torch.nn import Linear
from torch.utils.data import DataLoaderdataset = torchvision.datasets.CIFAR10("dataset", train=False, transform=torchvision.transforms.ToTensor(), download=True)
dataloader = DataLoader(dataset, batch_size = 64, drop_last=True)
# drop_last=True:如果设置为 True,则当数据集的大小不能被 batch_size 整除时,会丢弃最后一个不足一个批次的数据
# drop_last=False:如果设置为 False(也是默认值),则当数据集的大小不能被 batch_size 整除时,最后一个批次会包含剩下的样本,可能少于 batch_size
class net(nn.Module):def __init__(self):super(net, self).__init__()self.linear = Linear(196608, 10)def forward(self, x):x = self.linear(x)return xmodel = net()
epoch = 0for data in dataloader:imgs, targets = data# print(imgs.shape)imgs_reshape = torch.reshape(imgs, (1, 1, 1, -1)) # 方法一 拉平# print(imgs_reshape.shape)output = model(imgs_reshape)# print(output.shape)# epoch = epoch + 1# 线性层
import torch
import torchvision
from torch import nn
from torch.nn import Linear
from torch.utils.data import DataLoaderdataset = torchvision.datasets.CIFAR10("dataset", train=False, transform=torchvision.transforms.ToTensor(), download=True)
dataloader = DataLoader(dataset, batch_size = 64, drop_last=True)
# drop_last=True:如果设置为 True,则当数据集的大小不能被 batch_size 整除时,会丢弃最后一个不足一个批次的数据
# drop_last=False:如果设置为 False(也是默认值),则当数据集的大小不能被 batch_size 整除时,最后一个批次会包含剩下的样本,可能少于 batch_size
class net(nn.Module):def __init__(self):super(net, self).__init__()self.linear = Linear(196608, 20)def forward(self, x):x = self.linear(x)return xmodel = net()
epoch = 0for data in dataloader:imgs, targets = data# print(imgs.shape)imgs_flatten = torch.flatten(imgs) # 方法二 拉平展为一维# print(imgs_flatten.shape)output = model(imgs_flatten)# print(output.shape)# epoch = epoch + 1
内容十 实战,搭建一个小型的神经网络
# 把网络结构放在Sequential里面,好处就是代码写起来比较简介、易懂
# 可以根据神经网络每层的尺寸,根据下图的公式计算出神经网络中的参数
import torch
import torchvision
from torch import nn
from torch.nn import Linear, Conv2d, MaxPool2d, Flatten
from torch.utils.data import DataLoader# dataset = torchvision.datasets.CIFAR10("dataset", train=False, transform=torchvision.transforms.ToTensor(), download=True)
# dataloader = DataLoader(dataset, batch_size = 64, drop_last=True)class net(nn.Module):def __init__(self):super(net, self).__init__()self.conv1 = Conv2d(in_channels = 3, out_channels = 32, kernel_size = 5, stride = 1, padding = 2)self.maxpool1 = MaxPool2d(kernel_size = 2, ceil_mode = True)self.conv2 = Conv2d(in_channels = 32, out_channels = 32, kernel_size = 5, stride = 1, padding = 2)self.maxpool2 = MaxPool2d(kernel_size = 2, ceil_mode = True)self.conv3 = Conv2d(in_channels = 32, out_channels = 64, kernel_size = 5, stride = 1, padding = 2)self.maxpool3 = MaxPool2d(kernel_size = 2, ceil_mode = True)self.flatten = Flatten()self.linear1 = Linear(1024, 64)self.linear2 = Linear(64, 10)def forward(self, x):x = self.conv1(x)print(x.shape)x = self.maxpool1(x)print(x.shape)x = self.conv2(x)print(x.shape)x = self.maxpool2(x)print(x.shape)x = self.conv3(x)print(x.shape)x = self.maxpool3(x)print(x.shape)x = self.flatten(x)print(x.shape)x = self.linear1(x)print(x.shape)x = self.linear2(x)print(x.shape)return xmodel = net()
print(model)input = torch.ones((64, 3, 32, 32))
output = model(input)
print(output.shape)
# Sequential神经网络
import torch
import torchvision
from torch import nn
from torch.nn import Linear, Conv2d, MaxPool2d, Flatten, Sequential
from torch.utils.data import DataLoaderclass net(nn.Module):def __init__(self):super(net, self).__init__()self.model = Sequential(Conv2d(in_channels = 3, out_channels = 32, kernel_size = 5, stride = 1, padding = 2),MaxPool2d(kernel_size = 2, ceil_mode = True),Conv2d(in_channels = 32, out_channels = 32, kernel_size = 5, stride = 1, padding = 2),MaxPool2d(kernel_size = 2, ceil_mode = True),Conv2d(in_channels = 32, out_channels = 64, kernel_size = 5, stride = 1, padding = 2),MaxPool2d(kernel_size = 2, ceil_mode = True),Flatten(),Linear(1024, 64),Linear(64, 10))def forward(self, x):x = self.model(x)return xmodel = net()
print(model)input = torch.ones((64, 3, 32, 32))
output = model(input)
print(output.shape)注:上述内容参考b站up主“我是土堆”的视频!!!
相关文章:
)
由浅入深,走进深度学习(2)
今天分享的学习内容主要就是神经网络里面的知识啦,用到的框架就是torch 在这里我也是对自己做一个学习记录,如果不符合大家的口味,大家划走就可以啦 可能没有什么文字或者原理上的讲解,基本上都是代码,但是我还是想说…...
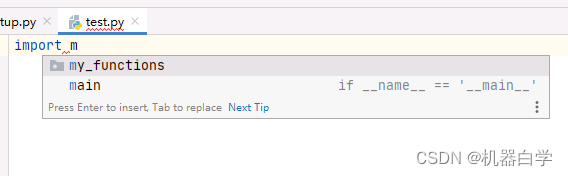
【Python Tips】创建自己的函数包并安装进Anaconda,像引入标准包一样直接import导入
目录 一、引言 二、方法步骤 步骤一:创建包目录结构 步骤二:配置__init__.py文件 步骤三:文件夹外配置setup.py文件 步骤四:终端Pip安装 三、结尾 一、引言 在编写项目代码的时候,有些自定义功能的函数是可以复用的。…...

【Python机器学习实战】 | 基于支持向量机(Support Vector Machine, SVM)进行分类和回归任务分析
🎩 欢迎来到技术探索的奇幻世界👨💻 📜 个人主页:一伦明悦-CSDN博客 ✍🏻 作者简介: C软件开发、Python机器学习爱好者 🗣️ 互动与支持:💬评论 &…...

备份和还原
stai和dnta snat:源地址转换 内网---外网 内网ip转换成可以访问外网的ip 内网的多个主机可以使用一个有效的公网ip地址访问外部网络 DNAT:目的地址转发 外部用户,可以通过一个公网地址访问服务内部的私网服务。 私网的ip和公网ip做一个…...

Java数组的初始化方法
Java数组的初始化方法 大家好,我是免费搭建查券返利机器人省钱赚佣金就用微赚淘客系统3.0的小编,也是冬天不穿秋裤,天冷也要风度的程序猿!在Java编程中,数组是一种非常基础也非常重要的数据结构,它能够存储…...

通过分离有色和无色pdf页面减少打印费
前言 该工具是我认识的一位中科大的大佬在本科毕业的时候做的一个小工具,去打印店打印全彩的毕业论文的话会比较贵,他想到有没有一种方案可以实现有彩色页面的pdf和没有彩色页面的pdf分开打印,前者打印彩色,后者打印黑白…...
c语言--指针
前言 欢迎来到我的博客 个人主页:北岭敲键盘的荒漠猫-CSDN博客 本文整理c语言中指针的相关知识点。 指针概念 指针存储的就是数据的地址。 直观理解: 李华家是北洋路130号1单元101 用变量处理数据: 我们去李华家拿数据。 用指针处理数据: 我们去北洋路130号1单元101拿数据…...
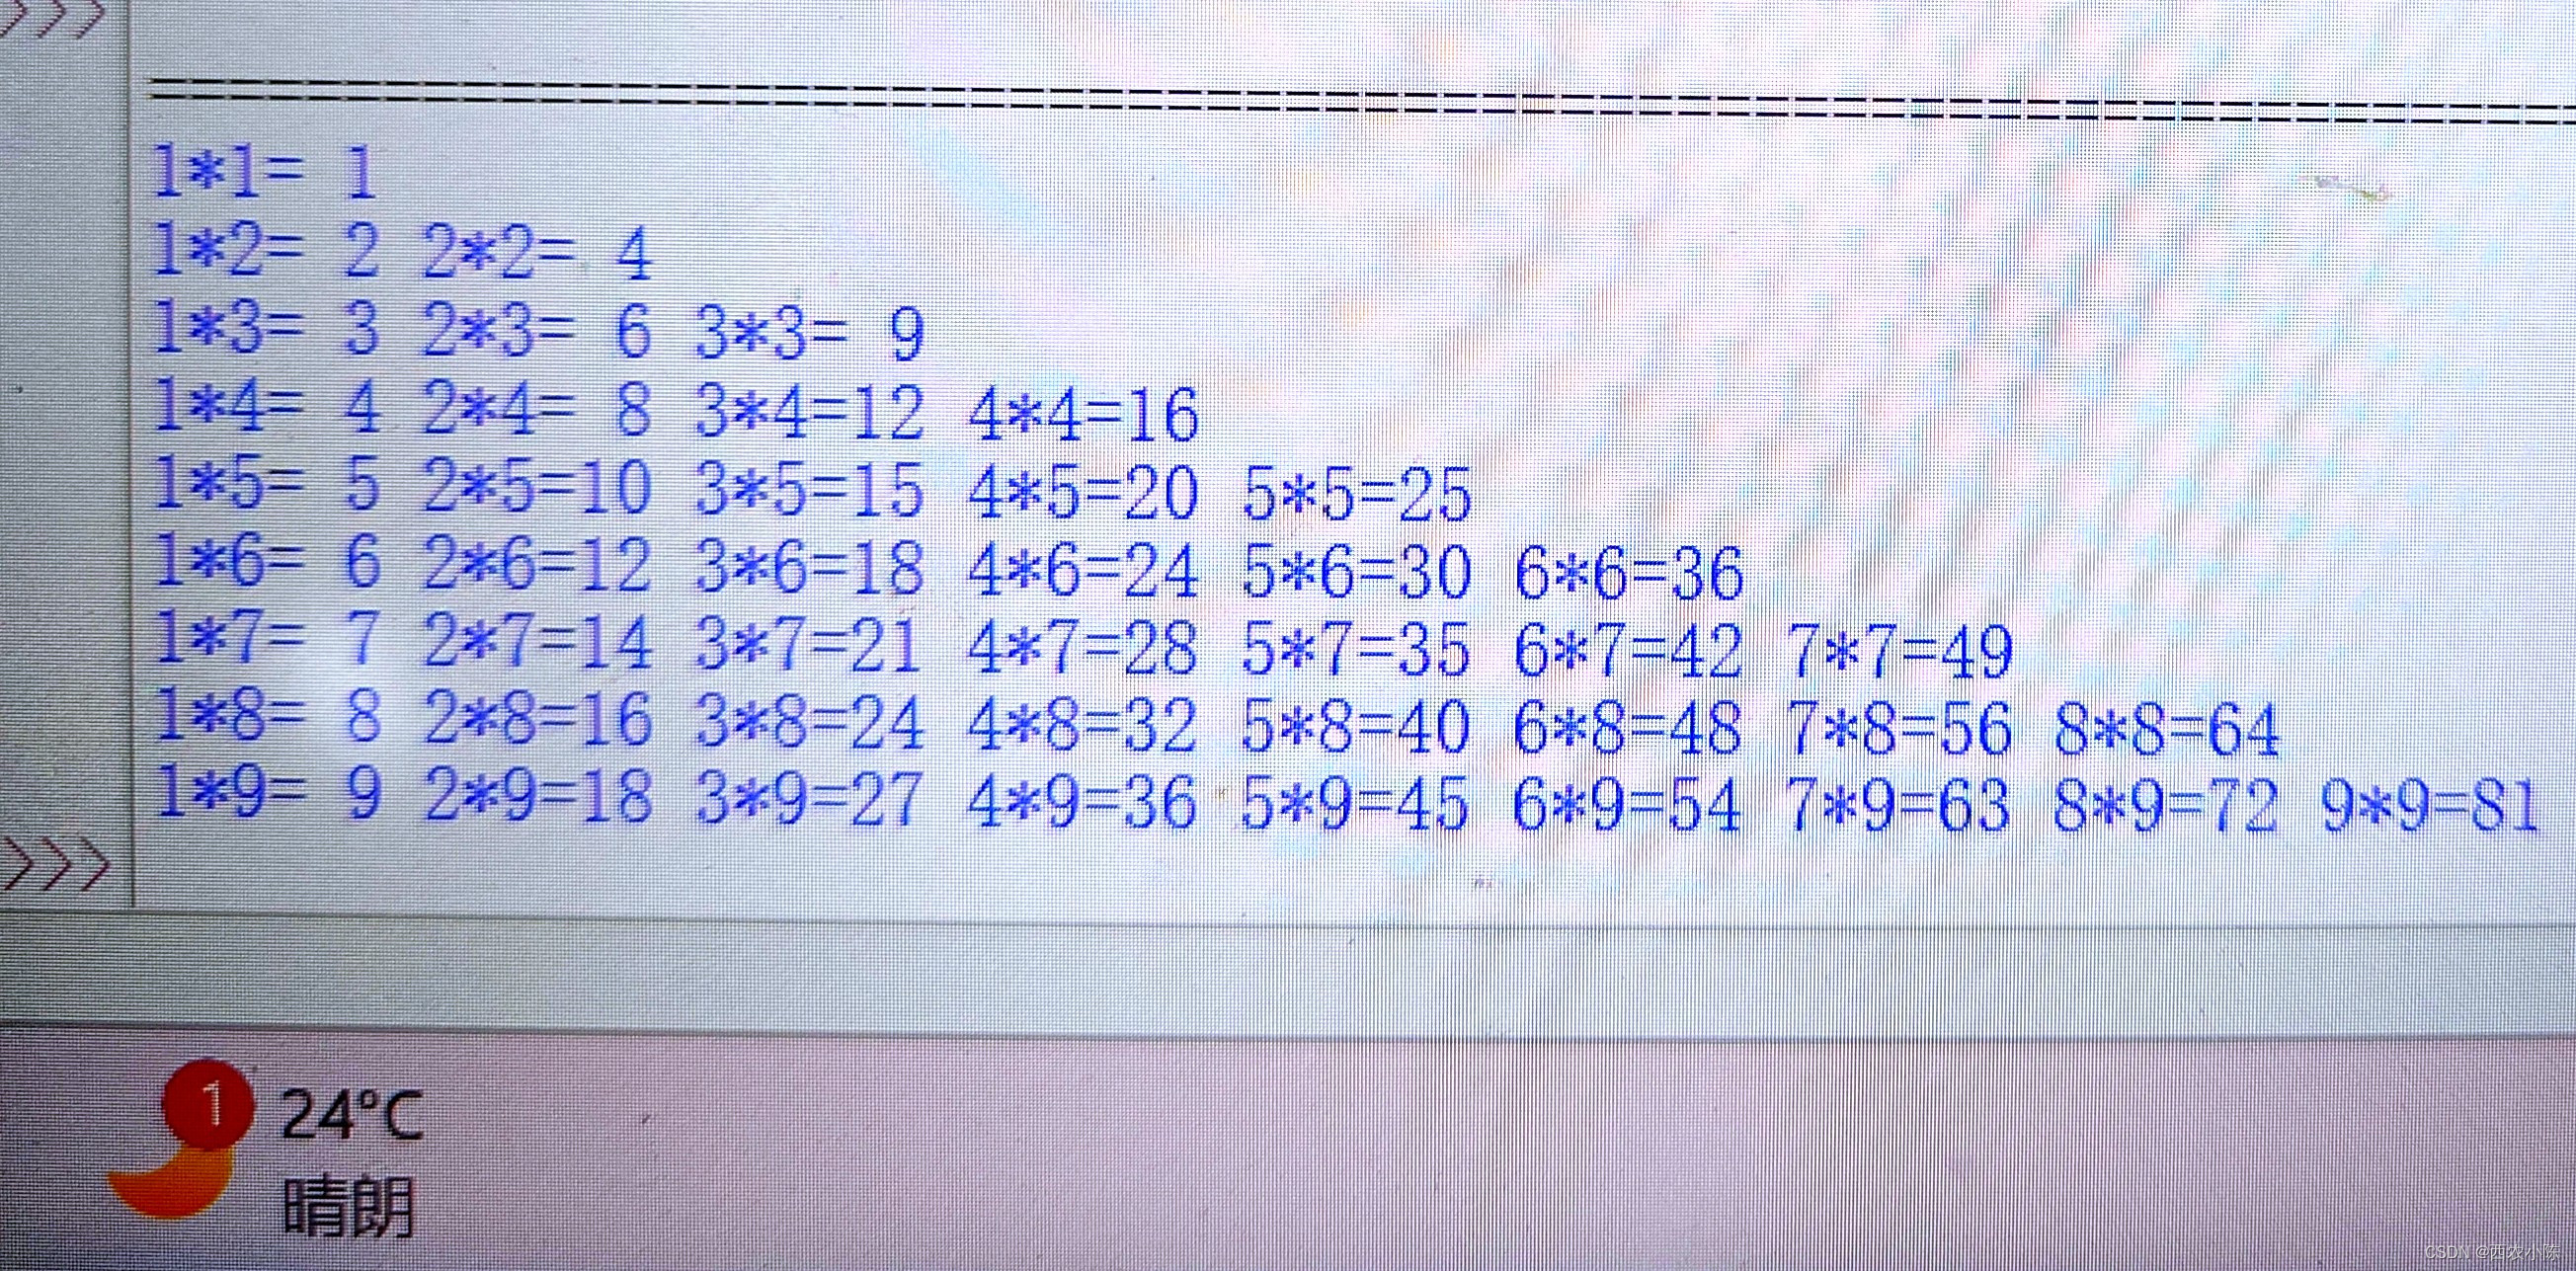
python-九九乘法表(对齐式1)
[题目描述] 输出九九乘法表,输出格式见样例。输入格式: 无输出格式: 输出乘法表,对齐方式见样例输出。样例输入 无样例输出 来源/分类(难度系数:一星) 完整代码展示: #对齐式1 a[] …...

thinkphp单独为某个接口设置缓存
参考 官方文档 $this->request->cache(__URL__,600);只需要在接口方法的开头添加这个代码即可...

OpenCV视觉--视频人脸微笑检测(超详细,附带检测资源)
目录 概述 具体实现 1.加载分类器 2.打开摄像头并识别人脸 3.处理人脸并检测是否微笑 效果 总结 概述 OpenCV(Open Source Computer Vision Library)是一个开源的计算机视觉和机器学习库,广泛应用于图像处理和视频分析等领…...
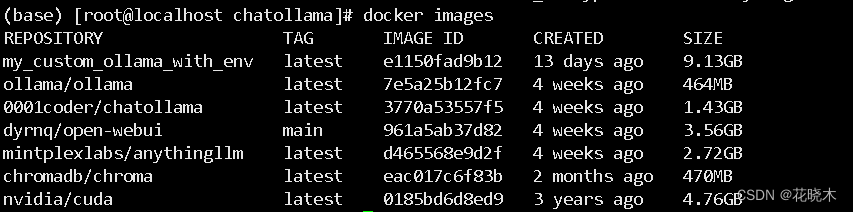
docker 搭建 AI大数据模型 --- 使用GPU
docker 搭建 AI大数据模型 — 使用GPU方式 搭建本地大模型,最简单的方法!效果直逼GPT 服务器GPU系统HP580 G8P40Rocky9.2 安装程序AnythingLLM前端界面Open WebUIChatOllamaollama 一、AnythingLLM 介绍 AnythingLLM 是 Mintplex Labs Inc. 开发的一…...

面向对象, 常用类, 集合, 异常, JDBC, mysql数据库 复习
1.面向对象 (1)面向过程和面向对象 ● 面向过程的程序设计思想 (procedure -Oriented Programming),简称POP ● 关注的焦点是过程:过程就是操作数据的步骤。如果某个过程的实现代码重复出 现,那么就可…...

js取数组最大值之Math.max、Math.max.apply
js取数组最大值之Math.max、Math.max.apply Math.maxMath.max.applyapply()第一个参数为什么可以是null 最小值同理 Math.max Math.max(n1,n2,n3,…,nX) 支持传递多个参数,带有较大的值的那个数 Math.max(2,5,3,6,2,4,2,15,9,6,0,1)Math.max.apply apply() 语法&a…...

各种中间件的安装
文章目录 20232306mysql的wondows安装 2023 2306 mysql的wondows安装 常用mysql教程 springboot整合druid连接池SpringBoot配置Druid连接池 mysql的wondows安装 MySQL学习笔记 01、MySQL安装 这个是安装的具体思路 win10 安装 mysql 5.7 msi版的教程图文详解 这个是安装的…...

【Mysql】多表查询、隐式内链接、显式内连接、左外连接、右外连接
多表查询 什么是多表查询 •DQL: 查询多张表,获取到需要的数据 •比如 我们要查询家电分类下 都有哪些商品,那么我们就需要查询分类与商品这两张表 数据准备 创建db3_2 数据库 -- 创建 db3_2 数据库,指定编码 CREATE DATABASE db3_2 CHARACTER SET utf8;创建分类表与商品表 …...

Linux驱动开发(三)--新字符设备驱动开发 LED驱动开发升级
1、新字符设备驱动原理 使用 register_chrdev 函数注册字符设备的时候只需要给定一个主设备号即可,但是这样会 带来两个问题 需要我们事先确定好哪些主设备号没有使用 会将一个主设备号下的所有次设备号都使用掉,比如现在设置 LED 这个主设备号为200&…...

MCU的最佳存储方案CS创世 SD NAND
大家都知道MCU是一种"麻雀"虽小,却"五脏俱全"的主控。它的应用领域非常广泛,小到手机手表,大到航空航天的设备上都会用到MCU.市面上目前几个主流厂商有意法半导体(其中最经典的一款就是STM32系列)…...
40岁学习java是否需要报班学习?
在开始前刚好我有一些资料,是我根据网友给的问题精心整理了一份「java的资料从专业入门到高级教程」, 点个关注在评论区回复“666”之后私信回复“666”,全部无偿共享给大家!!!应该不需要。各种公开免费的…...

Vitis Accelerated Libraries 学习笔记--OpenCV 运行测试
目录 1. 简介 2. 实例测试 2.1 实例介绍 2.2 创建工程 2.2.1 创建工程 2.2.2 获取路径 2.2.3 设置路径 2.2.4 打开工程 2.2.5 添加文件 2.2.6 启动 GUI 2.2.7 配置 csim 参数 3 常见错误 3.1 核心共享库报错 4. 总结 1. 简介 在《Vitis Accelerated Libraries …...
加固三防平板如何提高轨道交通系统的运营效率?
在当今快节奏的社会中,轨道交通系统作为城市交通的重要组成部分,其运营效率的提升对于缓解交通拥堵、满足人们的出行需求以及促进城市的发展具有至关重要的意义。而加固三防平板作为一种先进的技术设备,正逐渐在轨道交通领域发挥着关键作用&a…...

DAMOYOLO-S实战教程:对接企业OA系统实现图片自动审核与标注
DAMOYOLO-S实战教程:对接企业OA系统实现图片自动审核与标注 1. 引言:从手动审核到智能自动化的跨越 想象一下这个场景:你是一家电商公司的运营,每天有上千张商品图片需要上传到后台。按照公司规定,每张图片都需要人工…...

tcc-g15:硬件级散热控制的开源替代方案 | 轻量无广告设计
tcc-g15:硬件级散热控制的开源替代方案 | 轻量无广告设计 【免费下载链接】tcc-g15 Thermal Control Center for Dell G15 - open source alternative to AWCC 项目地址: https://gitcode.com/gh_mirrors/tc/tcc-g15 tcc-g15作为Dell G15系列游戏本的开源替代…...
)
Unity 2021/2019 项目里用 NModbus4.dll 搞定 Modbus TCP 通信(附测试工具和避坑指南)
Unity工业通信实战:用NModbus4实现Modbus TCP全流程开发指南 当游戏引擎遇上工业协议,会碰撞出怎样的火花?三年前接手一个智能制造培训项目时,我首次尝试在Unity中集成Modbus通信。原以为简单的协议对接,却因线程冲突导…...

Flux Sea Studio 与Node.js全栈项目集成:打造在线海景艺术画廊
Flux Sea Studio 与Node.js全栈项目集成:打造在线海景艺术画廊 最近在做一个挺有意思的业余项目,想给喜欢海洋艺术的朋友们弄个在线画廊。这个画廊的特别之处在于,它不只是展示静态图片,而是能让用户自己动手,用文字描…...

3大突破!开源RGB控制终极指南:从多软件混战到统一灯光管理
3大突破!开源RGB控制终极指南:从多软件混战到统一灯光管理 【免费下载链接】OpenRGB Open source RGB lighting control that doesnt depend on manufacturer software. Supports Windows, Linux, MacOS. Mirror of https://gitlab.com/CalcProgrammer1/…...

pnpm+turbo迅速搭建monorepo工程
关于monorepo monorepo 并不是一个框架、一个包、一个依赖。而是一种单仓库多包管理模式,也是基于中心化思想的实践产物。 举个例子,假设我们现在有6个项目,传统的项目管理方式(Multirepo)会按照6个代码仓库去管理&a…...

3步终结C盘爆红:WindowsCleaner革新性磁盘清理工具高效释放空间
3步终结C盘爆红:WindowsCleaner革新性磁盘清理工具高效释放空间 【免费下载链接】WindowsCleaner Windows Cleaner——专治C盘爆红及各种不服! 项目地址: https://gitcode.com/gh_mirrors/wi/WindowsCleaner 问题剖析:你是否正遭遇这些…...

告别复杂状态机:用C语言结构体数组为STM32设计可维护的多级菜单
用结构体数组重构STM32菜单系统:从状态机到模块化设计的进阶之路 在嵌入式开发中,菜单系统是许多产品不可或缺的交互界面。传统的状态机或switch-case实现方式虽然直接,但随着功能迭代,代码往往会变得臃肿难维护。我曾接手过一个使…...

基于Koopman算子的四旋翼无人机MPC控制开发:一种创新的数据驱动方法
318-一种基于Koopman算子的模型预测控制MPC控制四旋翼无人机开发 简介: 一种基于Koopman算子和扩展动态模式分解(EDMD)的四旋翼无人机学习和控制的新型数据驱动方法。 基于欧拉角(表示方向)等传统方法构建EDMD的观测器已知涉及奇异性。 为了解决这个问题,…...

CSS 嵌套语法最佳实践:从入门到精通的完整指南
CSS 嵌套语法最佳实践:从入门到精通的完整指南 CSS 是流动的韵律,JS 是叙事的节奏。而 CSS 嵌套,是让这份韵律更加优雅、结构更加清晰的魔法。 一、CSS 嵌套:现代样式表的革命 CSS 嵌套(Nesting)是 CSS 原…...