基于riscv64架构的Dayu800开发板的napi_demo开发介绍
itopen组织
1、提供OpenHarmony优雅实用的小工具
2、手把手适配riscv + qemu + linux的三方库移植
3、未来计划riscv + qemu + ohos的三方库移植 + 小程序开发
4、一切拥抱开源,拥抱国产化
一、环境准备工作
1.1 Ubuntu20.04环境配置
如果已经配置OpenHarmony的编译环境则不需要要配置
# root环境配置
git clone https://gitee.com/itopen/openharmony_env_init
cd openharmony_env_init
bash root_init.sh# 个人用户环境配置
git config --global user.name "yourname"
git config --global user.email "your-email-address"
git config --global core.editor vim
git config --global credential.helper store
git config --global http.sslverify false
1.2 下载、安装DevEco Studio
dayu800使用的是Openharmony-3.2-Release分支,所对应的API版本为9,DevEco Studio目前最新版的5.x支持的API版本为10、11、12,并不支持9,所以需要下载3.1.1Release版本
DevEco Studio 下载链接
下载完毕后安装,可以直接勾选修改“PATH”后重启,这样不用手动添加环境变量
1.3 初始化DevEco Studio环境
以管理员权限启动DevEco,然后create project,选择空项目即可,按照提示完成环境配置,之后根据UI提示等待环境配置完成。
有可能还需要配置SDK,在工具栏file>setting>SDK中配置。
二、下载、编译、烧录duyu800代码
2.1 下载duyu800代码
代码下载使用自动化下载工具下载,关于自动化下载工具使用参见itopen: 一键下载openharmony代码
# 下载dayu800代码,关于
git clone https://gitee.com/itopen/ohos_download.git
cd ohos_download
./ohos_download
# 选择1.1
2.2 编译dayu800代码
# 首次编译需要下载预处理文件
cd ~/Openharmony/dayu800-ohos
./build/prebuilts_download.sh# 全量编译代码,添加--gn-args full_mini_debug=false这次参数会编译比较快,否则中间会有一段停留30分钟的时间
./build.sh --product-name dayu800 --gn-args full_mini_debug=false --ccache
2.3 镜像烧录
关于dayu800的烧录参考itopen: dayu800开发板使用说明
三、NAPI Demo介绍
3.1 napi demo代码处理
将itopen: napi_demo代码下载放置到dayu800-ohos代码的device/soc/thead/th1520/hardware目录下,然后在BUILD.gn中添加napi_demo模块
cd device/soc/thead/th1520/hardware
git clone https://gitee.com/itopen/napi_demo.git
vim BUILD.gn
# 添加napi_demo:napi_demo
group("hardware_group") {deps = ["bootanimation:bootanimation","isp8000:isp8000","camera:camera","hap:th1520_hap","napi_demo:napi_demo", # 第一个napi_demo表示napi_demo目录,第二个napi_demo表示napi_demo目录下BUILD.gn中的napi_demo模块]
}
3.2 查看接口功能
关于NAPI有哪些接口请查看OpenHarmony NAPI接口介绍和使用
NAPI提供了提供了一系列接口函数,需要声明包含如下2个头文件中
#include "napi/native_api.h"
#include "napi/native_node_api.h"
该头文件在//foundation/arkui/napi/interfaces/kits/napi和//foundation/arkui/napi/interfaces/inner_api/napi之中
3.3 代码简单介绍
代码结构如下
.
├── BUILD.gn
├── CMakeLists.txt
├── include
│   ├── i_serialport_client.h
│   ├── log
│   │   └── serialport_log_wrapper.h
│   ├── serial_callback_base.h
│   └── serialport_types.h
├── serial_async_callback.cpp
├── serial_async_callback.h
├── serial_helper.cpp
├── serial_opt.cpp
├── serial_opt.h
├── types
│   └── libserialhelper
│       ├── package.json
│       └── serialhelper.d.ts
├── x_napi_tool.cpp
└── x_napi_tool.h
下面以一段打开串口的代码为例进行说明。
void OpenSerial_execute(XNapiTool *pxt, void *data)
{OpenSerial_value_struct *vio = (OpenSerial_value_struct *)data;vio->out = OpenSerial(vio->in0.c_str());return;
}void OpenSerial_complete(XNapiTool *pxt, void *data)
{int32_t ret = -1;OpenSerial_value_struct *vio = (OpenSerial_value_struct *)data;napi_value result = nullptr;result = NUMBER_C_2_JS(pxt, Int32, vio->out);{napi_value args[XNapiTool::ARGV_CNT] = {result, nullptr};if(vio->out > 0)ret = 0;pxt->FinishAsync(ret, args);}delete vio;
}
napi_value OpenSerial_middle(napi_env env, napi_callback_info info)
{XNapiTool *pxt = std::make_unique<XNapiTool>(env, info).release();if (pxt->IsFailed()) {napi_value err = pxt->GetError();delete pxt;return err;}struct OpenSerial_value_struct *vio = new OpenSerial_value_struct();pxt->SwapJs2CUtf8(pxt->GetArgv(0), vio->in0);napi_value result = pxt->StartAsync(OpenSerial_execute, vio, OpenSerial_complete,pxt->GetArgc() == 2 ? pxt->GetArgv(1) : nullptr);if (pxt->IsFailed()) {result = pxt->GetError();}return result;
}
- 这段C++函数用于在node.js环境中通过NAPI异步打开串口
- 主要流程如下
- JavaScript调用:从JavaScript代码中调用 openSerial函数。
- 中间层函数:OpenSerial_middle函数被调用,准备参数并启动异步操作。
- 后台线程执行:OpenSerial_execute函数在后台线程中执行,执行实际的串口打开操作。
- 主线程回调:一旦后台操作完成,OpenSerial_complete函数在主线程中被调用,处理结果并回调到JavaScript。
3.4 创建类型声明文件
类型声明文件的命名方式为动态库名称.d.ts,参照以下编写
/** Copyright (C) 2021-2022 Huawei Device Co., Ltd.* Licensed under the Apache License, Version 2.0 (the "License");* you may not use this file except in compliance with the License.* You may obtain a copy of the License at**     http://www.apache.org/licenses/LICENSE-2.0** Unless required by applicable law or agreed to in writing, software* distributed under the License is distributed on an "AS IS" BASIS,* WITHOUT WARRANTIES OR CONDITIONS OF ANY KIND, either express or implied.* See the License for the specific language governing permissions and* limitations under the License.*/import {AsyncCallback, Callback} from "basic";/*** Provides methods related to serialport services.** @since 7* @syscap SystemCapability.Miscservices.SerialportService*/
declare namespace serialHelper {
/*** Set serial port options.* @param dev Indicates the serial port dev.* @param speeds baud rate.* @param bits 7/8.* @param events 'O'/'E'/'N'* @param stops 1/2*/function setOptions(dev:string, speeds:number, bits:number, events:number, stops: number, callback: AsyncCallback<void>): void;function setOptions(dev:string, speeds:number, bits:number, events:number, stops: number): Promise<void>;/*** Open serial port.* @param dev Indicates the serial port dev.*/function openSerial(dev:string, callback: AsyncCallback<void>): void;function openSerial(dev:string): Promise<void>;/*** Close serial port.* @param dev Indicates the serial port dev.*/function closeSerial(dev:string, callback: AsyncCallback<void>): void;function closeSerial(dev:string): Promise<void>;/*** tcflush serial port.* @param dev Indicates the serial port dev.* @param selector 0 in 1 out 2 in&out.*/function clearBuffer(dev:string, selector:number, callback: AsyncCallback<void>): void;function clearBuffer(dev:string, selector:number): Promise<void>;/*** Send data to serial port.* @param dev Indicates the serial port dev.* @param data.*/function sendData(dev:string, data:Uint8Array, callback: AsyncCallback<void>): void;function sendData(dev:string, data:Uint8Array): Promise<void>;/*** read data from serial port.* @param dev Indicates the serial port dev.* @param timeout*/function recvData(dev:string, timeout:number, callback: AsyncCallback<Uint8Array>): void;function recvData(dev:string, timeout:number): Promise<Uint8Array>;/*** transmit Send and Read data* @param dev Indicates the serial port dev.* @param cmd Indicates the command.* @param timeout* @param callback Returns the Uint8Array*/function transmit(dev:string, cmd: Uint8Array, timeout: number, callback: AsyncCallback<Uint8Array>): void;function transmit(dev:string, cmd: Uint8Array, timeout: number): Promise<Uint8Array>;/*** on/off serial data* @param type Indicates the serial port dev.* @param callback serial data*/function on(type: '/dev/ttyXRUSB0', callback: Callback<Uint8Array>): void;function on(type: '/dev/ttyXRUSB1', callback: Callback<Uint8Array>): void;function on(type: '/dev/ttyXRUSB2', callback: Callback<Uint8Array>): void;function on(type: '/dev/ttyXRUSB3', callback: Callback<Uint8Array>): void;function off(type: '/dev/ttyXRUSB0'): void;function off(type: '/dev/ttyXRUSB1'): void;function off(type: '/dev/ttyXRUSB2'): void;function off(type: '/dev/ttyXRUSB3'): void;/*** Set GPIO Direction.** @param portNo Gpio number.* @param dirIn Is it an input port.* @permission None*/function setGPIODirection(portNo:number, dirIn:boolean, callback: AsyncCallback<void>): void;function setGPIODirection(portNo:number, dirIn:boolean): Promise<void>;/*** Set GPIO Value.** @param portNo Gpio number.* @param value Gpio value, 0 or 1.* @permission None*/function setGPIOValue(portNo:number, value:number, callback: AsyncCallback<void>): void;function setGPIOValue(portNo:number, value:number): Promise<void>;/*** Get GPIO Value.** @param portNo Gpio number.* @param callback Returns gpio value of portNo, 0 or 1.* @permission None*/function getGPIOValue(portNo:number, callback: AsyncCallback<number>): void;function getGPIOValue(portNo:number): Promise<number>;
}export default serialHelper;
3.5 BUILD.gn文件介绍
import("//build/ohos.gni")#ohos_shared_library()中的serialhelper决定了生成动态库的名称,增量编译阶段生成动态库libserialhelper.z.soohos_shared_library("serialhelper") {#编译需要的源文件sources = ["serial_opt.cpp",  "serial_helper.cpp","x_napi_tool.cpp",]include_dirs = [#根据增量编译阶段报错添加的头文件目录"//third_party/node/src","./include","//base/hiviewdfx/hilog/interfaces/native/kits/include",]remove_configs = [ "//build/config/compiler:no_rtti","//build/config/compiler:no_exceptions",]
#根据增量编译时clang编译器报警,添加的cflagcflags = [ "-mno-relax","-fpermissive","-Wno-writable-strings","-Wno-error=pointer-to-int-cast","-Wno-error=void-pointer-to-int-cast","-Wno-error=conversion","-Wno-error=implicit-function-declaration","-Wno-error",]ldflags = ["-lpthread","-ldl","-lrt",]#指定编译依赖hilog_ndkdeps = ["//base/hiviewdfx/hilog/frameworks/hilog_ndk:hilog_ndk",]#指定编译依赖libhilog.z.so动态库external_deps = [ "hilog_native:libhilog","napi:ace_napi",]defines = [ "MY_TEST_DEFINE" ]#组件名称是prebuilt_happart_name = "prebuilt_hap"#子系统名称是applicationssubsystem_name = "applications"
}ohos_executable("serialdebug") {sources = ["serial_opt.cpp",]include_dirs = ["//third_party/node/src","./include","//base/hiviewdfx/hilog/interfaces/native/kits/include",]remove_configs = [ "//build/config/compiler:no_rtti","//build/config/compiler:no_exceptions",] cflags = [ "-mno-relax","-fpermissive","-Wno-writable-strings","-Wno-error=pointer-to-int-cast","-Wno-error=void-pointer-to-int-cast","-Wno-error=conversion","-Wno-error=implicit-function-declaration","-Wno-error",]ldflags = ["-lpthread","-ldl","-lrt",]deps = ["//base/hiviewdfx/hilog/frameworks/hilog_ndk:hilog_ndk",]external_deps = [ "hilog_native:libhilog","napi:ace_napi",]defines = [ "MY_TEST_DEFINE" ]part_name = "prebuilt_hap"subsystem_name = "applications"
}group("napi_demo") {deps = [":serialhelper",":serialdebug",]
}
3.6 napi_demo编译
- 为了节省时间,可以先通过指定target的指令先查看是否编写错误 ./build.sh --product-name dayu800 --ccache --build-target=serialhelperlib或者直接./build.sh --product-name dayu800 --ccache进行全量编译
- 全量编译完成后,使用find -name 指令查找类似libserialhelper.z.so的文件,若找到则编译完成,将其发送到烧录了Openharmony3.2.2镜像的设备的/system/lib64/module目录中
./build.sh --product-name dayu800 --ccache --build-target=napi_demo# 编译的libserialhelper.z.so和serialdebug位于./out/dayu800/thead_products/thead_products/目录中
四、测试NAPI接口功能
4.1 编写测试ets
打开DevEco Studio并创建一个空项目
在entry/src/main/ets/pages/Index.ets中编写typescript程序。
// 示例代码
// @ts-ignore
import testNapi from '@ohos.serialhelper'@Entry
@Component
struct Index {@State message: string = 'Hello World'fd: number = -1devPath: string = '/dev/ttyS3'async openChuankouFn() {this.fd = await testNapi.openSerial(this.devPath);console.log('daihai openChuankouFn this.fd: ' + this.fd)}async serialSet() {let ret = await testNapi.setOptions(this.fd, 115200, 8, 0, 1);console.log('daihai serialSet ret: ' + ret)}async SerialSend() {const databuff = [0x61, 0xaa, 0x0a, 0x15, 0x00]; // send ABCDEconsole.log('daihai SerialSend databuff len: ' + databuff.length)let uint8Arr = new Uint8Array(databuff);let ret = await testNapi.sendData(this.fd, uint8Arr);console.log('daihai SerialSend ret: ' + ret)// if (msg[9] == this.dwMap[this.index]) {//   this.warnFlag[this.index] = '2'// }}async SerialRecv(timeout?: number) {let revTestInfo = await testNapi.recvData(this.fd, timeout, 16);console.log('daihai revTestInfo: ',JSON.stringify(revTestInfo))//let revTestInfo = testNapi.SerialRecv(this.fd, timeout, 6);// const message = revTestInfo?.recevedBuf?.toString()// console.log('daihai revTestInfo.revTestInfo.recevedLen: ',revTestInfo.recevedLen)// console.log('daihai revTestInfo.recevedBuf.toString(): ',revTestInfo.recevedBuf)// console.log('daihai revTestInfo.recevedBuf.toString(): ',revTestInfo.recevedBuf.toString())}openChuankouFnCb() {testNapi.openSerial(this.devPath, (err, ret) => {console.log('daihai openChuankouFn this.fd: ' + this.fd)})}serialSetCb() {testNapi.setOptions(this.fd, 115200, 8, 0, 1, (err, ret) => {console.log('daihai serialSet ret: ' + ret)})}SerialSendCb() {const databuff = [0x61, 0xaa, 0x0a, 0x15, 0x00]; // send ABCDEconsole.log('daihai SerialSend databuff len: ' + databuff.length)let uint8Arr = new Uint8Array(databuff);testNapi.sendData(this.fd, uint8Arr, (err, ret) => {console.log('daihai SerialSend ret: ' + ret)})// if (msg[9] == this.dwMap[this.index]) {//   this.warnFlag[this.index] = '2'// }}SerialRecvCb(timeout?: number) {testNapi.recvData(this.fd, timeout, 16, (err, revTestInfo) => {console.log('daihai revTestInfo: ',JSON.stringify(revTestInfo))})}build() {Row() {Column() {Button('open').fontSize(20).fontWeight(FontWeight.Bold).onClick(() => {this.openChuankouFn()})Button('open cb').fontSize(20).fontWeight(FontWeight.Bold).onClick(() => {this.openChuankouFnCb()}).margin({ top: 20 })Button('serialSet').fontSize(20).fontWeight(FontWeight.Bold).onClick(() => {this.serialSet()}).margin({ top: 20 })Button('serialSet cb').fontSize(20).fontWeight(FontWeight.Bold).onClick(() => {this.serialSetCb()}).margin({ top: 20 })Button('SerialSend').fontSize(20).fontWeight(FontWeight.Bold).onClick(() => {this.SerialSend()}).margin({ top: 20 })Button('SerialSend cb').fontSize(20).fontWeight(FontWeight.Bold).onClick(() => {this.SerialSendCb()}).margin({ top: 20 })Button('SerialRecv').fontSize(20).fontWeight(FontWeight.Bold).onClick(() => {this.SerialRecv(3000)}).margin({ top: 20 })Button('SerialRecv cb').fontSize(20).fontWeight(FontWeight.Bold).onClick(() => {this.SerialRecvCb(3000)}).margin({ top: 20 })}.width('100%')}.height('100%')}
}
因为在编写接口时已经将d.ts文件加入so库中,所以需要加入// @ts-ignore防止编译失败
编写完成后点击右上角头像进行登陆,然后选择file>Project Structure>Signing configs>Automatically generate signature进行自动签名
连接开发板,点击右上角的debug按钮
点击下方log按钮,在搜索栏内设置过滤白名单,点击设备上显示的open按钮,查看返回信息
相关文章:

基于riscv64架构的Dayu800开发板的napi_demo开发介绍
itopen组织1、提供OpenHarmony优雅实用的小工具2、手把手适配riscv qemu linux的三方库移植3、未来计划riscv qemu ohos的三方库移植 小程序开发4、一切拥抱开源,拥抱国产化 一、环境准备工作 1.1 Ubuntu20.04环境配置 如果已经配置OpenHarmony的编译环境则…...

HAL STM32 SPI/ABZ/PWM方式读取MT6816磁编码器数据
HAL STM32 SPI/ABZ/PWM方式读取MT6816磁编码器数据 📚MT6816相关资料(来自商家的相关资料): 资料:https://pan.baidu.com/s/1CAbdLBRi2dmL4D7cFve1XA?pwd8888 提取码:8888📍驱动代码编写&…...

HarmonyOS应用开发者高级认证,Next版本发布后最新题库 - 多选题序号5
基础认证题库请移步:HarmonyOS应用开发者基础认证题库 注:有读者反馈,题库的代码块比较多,打开文章时会卡死。所以笔者将题库拆分,单选题20个为一组,多选题10个为一组,题库目录如下,…...

Tekion 选择 ClickHouse Cloud 提升应用性能和指标监控
本文字数:4187;估计阅读时间:11 分钟 作者:ClickHouse team 本文在公众号【ClickHouseInc】首发 Tekion 由前 Tesla CIO Jay Vijayan 于 2016 年创立,利用大数据、人工智能和物联网等技术,为其汽车客户解决…...

mysql之触发器的使用
cr一:创建goods表和orders表; mysql> use mydb16_tirgeer Database changed mysql> create table goods(-> gid char(8) primary key,-> name varchar(10),-> price decimal(8,2),->-> num int); Query OK, 0 rows affected (0.0…...

使用Java和Hazelcast实现分布式数据存储
使用Java和Hazelcast实现分布式数据存储 大家好,我是微赚淘客系统3.0的小编,是个冬天不穿秋裤,天冷也要风度的程序猿! 在分布式系统中,实现高效的数据存储和管理是非常重要的。Hazelcast作为一个内存数据网格(IMDG)&…...

Hi3751V560_SELinux
Hi3751V560_SELinux setenforce Enforcing setenforce Permissive(或“setenforce 0”) getenforce V560:demo本身的: [ 13.765161] type=1400 audit(1628821512.905:4): avc: denied { read } for pid=1926 comm="system_server" name="ifindex" d…...

邮件安全篇:邮件反垃圾系统运作机制简介
1. 什么是邮件反垃圾系统? 邮件反垃圾系统是一种专门设计用于检测、过滤和阻止垃圾邮件的技术解决方案。用于保护用户的邮箱免受未经请求的商业广告、诈骗信息、恶意软件、钓鱼攻击和其他非用户意愿接收的电子邮件的侵扰。 反垃圾系统的常见部署形式 2. 邮件反垃圾…...

LoRaWAN设备的两种入网方式(ABP和OTAA)
目录 一、OTAA 1、名词解释 2、入网流程 二、ABP 三、两种入网方式的比较 一、OTAA 1、名词解释 (1)AppEUI:64位(8字节)的唯一标识符,用于标识特定的应用程序或组织(如果用的是chirpstac…...

【Rust光年纪】极致性能与灵活选择:Rust语言数学优化库详解
Rust语言中的数学优化:六大利器汇总 前言 在当今信息时代,数据处理和数学优化成为了各行各业中不可或缺的重要环节。为了满足对高效、快速计算的需求,Rust语言逐渐成为了许多开发者的首选,因其性能优越、并发安全等特点。本文将…...
机器学习 | 回归算法原理——最小二乘法
Hi,大家好,我是半亩花海。很早便想学习并总结一本很喜欢的机器学习图书——立石贤吾的《白话机器学习的数学》,可谓通俗易懂,清晰形象。那就在此分享并作为学习笔记来记录我的学习过程吧!本章的回归算法原理基于《基于…...

.NET Core 中的字符串压缩方法
字符串压缩的概念 字符串压缩通常指的是通过算法减少字符串表示所需的数据量,同时保持字符串的原始信息或能够无损地恢复原始字符串。这种压缩可以是针对文本数据的特定算法,也可以是更通用的数据压缩算法。 .NET Core 中的字符串压缩方法 使用数据压…...

SQL 基础知识
SQL(结构化查询语言)是一种用于管理和操作关系数据库的标准编程语言。以下是一些 SQL 的基础知识: 基本概念 数据库(Database): 存储和管理数据的容器。一个数据库可以包含多个表。 表(Table&…...

【数据结构初阶】单链表经典算法题十二道——得道飞升(上篇)
目录 1、移除元素 2、反转链表 3、链表的中间节点 4、合并两个有序链表 Relaxing Time!!! ———————————————— 天气之子幻 ———————————————— 1、移除元素 思路: 创建一个新链表࿰…...

Python爬虫技术 第16节 XPath
XPath是一种在XML文档中查找信息的语言,尽管XML和HTML在语法上有区别,但XPath同样适用于HTML文档的解析,尤其是在使用如lxml这样的库时。XPath提供了一种强大的方法来定位和提取XML/HTML文档中的元素和属性。 XPath基础 XPath表达式由路径表…...

本地部署,Whisper: 开源语音识别模型
目录 简介 特点 应用 使用方法 总结 GitHub - openai/whisper: Robust Speech Recognition via Large-Scale Weak SupervisionRobust Speech Recognition via Large-Scale Weak Supervision - openai/whisperhttps://github.com/openai/whisper 简介 Whisper 是一个由 O…...

history,hash缓存那些事
vue-router 中的 createWebHistory,createWebHashHistory两种模式 createWebHistory 是基于 window.history 对象是HTML5提供的用于维护当前标签页浏览历史的对象,主要功能是前进后退和在不刷新页面的情况下,修改地址栏里的URL地址。histor…...

Spring Boot的Web开发
目录 Spring Boot的Web开发 1.静态资源映射规则 第一种静态资源映射规则 2.enjoy模板引擎 3.springMVC 3.1请求处理 RequestMapping DeleteMapping 删除 PutMapping 修改 GetMapping 查询 PostMapping 新增 3.2参数绑定 一.支持数据类型: 3.3常用注解 一.Request…...

Spark 解析嵌套的 JSON 文件
1、什么是嵌套的JSON文件? 嵌套的JSON文件是指文件中包含了嵌套的JSON对象或数组。例如,以下是一个嵌套的JSON文件的示例: {"name": "John","age": 30,"address": {"street": "123…...
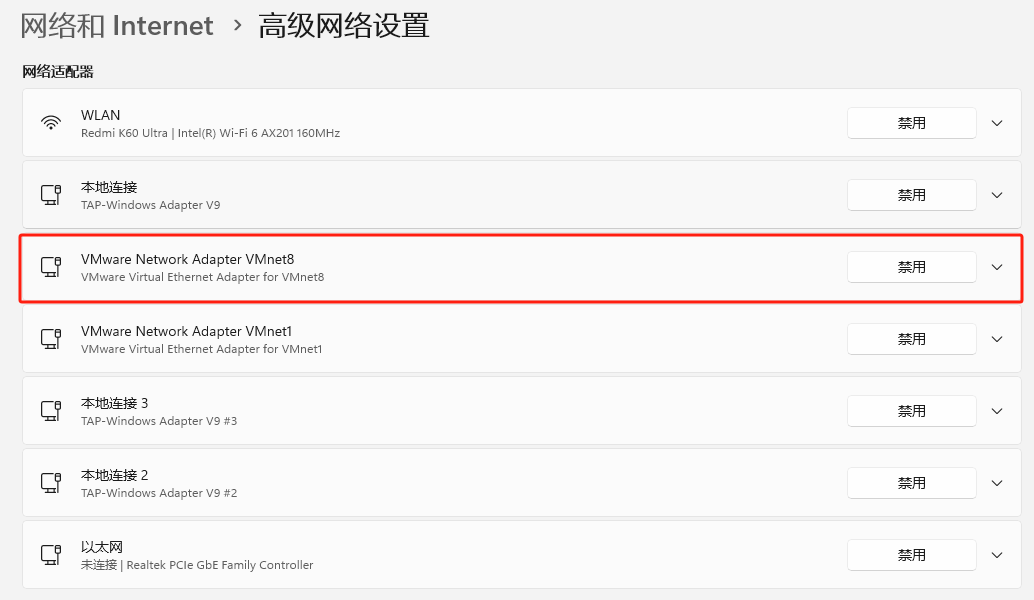
VMware虚拟机中CentOS7自定义ip地址并且固定ip
配置固定ip(虚拟机) 前提:虚拟机网络配置成,自定义网络并选择VMnet8(NAT 模式) 操作(如下图):点击虚拟机–》设置–》–》硬件–》网络适配器–》自定义:特定虚拟网络–》选择:VMnet8(NAT 模式) 虚拟机网络设置 需要记…...

智能安卓主板选型指南:从需求分析到量产落地的全流程解析
1. 项目概述:智能安卓主板选型的核心价值在嵌入式开发和智能硬件项目里,选对一块主板,往往意味着项目成功了一半。我见过太多团队,前期功能设计得天花乱坠,结果卡在了硬件选型上,要么性能过剩成本失控&…...

TPU核心引擎的‘血管网络’:用Python建模与可视化理解脉动阵列数据流
TPU核心引擎的‘血管网络’:用Python建模与可视化理解脉动阵列数据流 在AI加速器的世界里,TPU(张量处理单元)的脉动阵列就像一台精密的机械钟表,每个齿轮的咬合都遵循着严格的时序规律。但与硬件工程师通过RTL语言&qu…...

别再说国产模型不行了!DeepSeek V4 + Claude Code,编程体验直接起飞
别再说国产模型不行了!DeepSeek V4 Claude Code,编程体验直接起飞 还在觉得 DeepSeek V4 不如国外模型? 醒醒,2026 年了。DeepSeek V4 系列在代码能力上已经卷到让人窒息——而且价格只有 Claude 官方的零头。 但问题来了&…...

2026 年 AI 编程工具横评:Claude Code、Cursor、Copilot、Codex 谁才是真正的生产力?
爆款标题备选我把五个 AI 编程工具全装了一遍,只有一个让我想付费Claude Code vs Cursor vs Copilot:2026 开发者选型实战指南Copilot 的垄断结束了——2026 AI 编程工具真实横评花了一周用 AI 编程 Agent 写项目,最后留下了这一个AI 编程工具…...

从‘盲猜’到‘先知’:深度解读神经RRT*如何让采样规划拥有‘大局观’
神经RRT*:当路径规划算法学会"思考"的范式革命 在自动驾驶汽车寻找最短路径、无人机规划避障航线的场景中,传统RRT算法就像一位盲人摸象的探险者——它通过随机撒点的方式探索环境,虽然最终能找到出路,却需要耗费大量时…...

【Perplexity诗词歌赋搜索黑科技】:20年NLP专家首度公开5大语义对齐技巧,让古诗检索准确率飙升至98.7%
更多请点击: https://kaifayun.com 第一章:Perplexity诗词歌赋搜索黑科技全景透视 Perplexity 并非专为古籍设计的搜索引擎,但其基于大语言模型的实时语义理解与多源交叉验证机制,意外地在诗词歌赋领域展现出颠覆性能力——它不依…...

MaterialSkin 2.0终极指南:3步解锁现代化WinForms界面设计
MaterialSkin 2.0终极指南:3步解锁现代化WinForms界面设计 【免费下载链接】MaterialSkin Theming .NET WinForms, C# or VB.Net, to Googles Material Design Principles. 项目地址: https://gitcode.com/gh_mirrors/mat/MaterialSkin 还在为传统WinForms应…...

告别熬夜做答辩 PPT!用 paperxie 一键把毕业论文转成专业演示稿
paperxie-免费查重复率aigc检测/开题报告/毕业论文/智能排版/文献综述/AI PPThttps://www.paperxie.cn/ppt/createhttps://www.paperxie.cn/ppt/create 谁写毕业论文没被答辩 PPT 搞崩过心态?对着万字论文抠重点、调排版、找模板,半天时间耗在「做 PPT」…...

企业级应用如何通过taotoken统一管理多个大模型api调用与成本
🚀 告别海外账号与网络限制!稳定直连全球优质大模型,限时半价接入中。 👉 点击领取海量免费额度 企业级应用如何通过Taotoken统一管理多个大模型API调用与成本 对于需要集成多种大语言模型的企业技术团队而言,直接对接…...

BIN文件操作指南:从字节视角到实战应用
1. 项目概述:为什么我们需要系统性地掌握BIN文件操作?在嵌入式开发、固件逆向、游戏修改乃至数据恢复这些领域里,我们经常会遇到一个后缀名为.bin的文件。很多新手朋友第一次接触时可能会有点懵,这既不是文本文件可以直接打开看&a…...