第五章Vue路由
文章目录
- 相关理解
- vue-router的理解
- 对SPA应用的理解
- 路由的理解
- 基本路由
- 几个注意点
- 嵌套路由——多级路由
- 路由query参数
- 命名路由
- 路由的params参数
- 路由的props配置
- 路由跳转的replace方法
- 编程式路由导航
- 缓存路由组件
- 路由组件独有的生命钩子
- activated和deactivated
- 路由守卫
- 全局路由守卫
- 独享路由守卫
- 组件内路由守卫
- 路由器的两种工作模式
相关理解
vue-router的理解
- vue 的一个插件库,专门用来实现SPA 应用
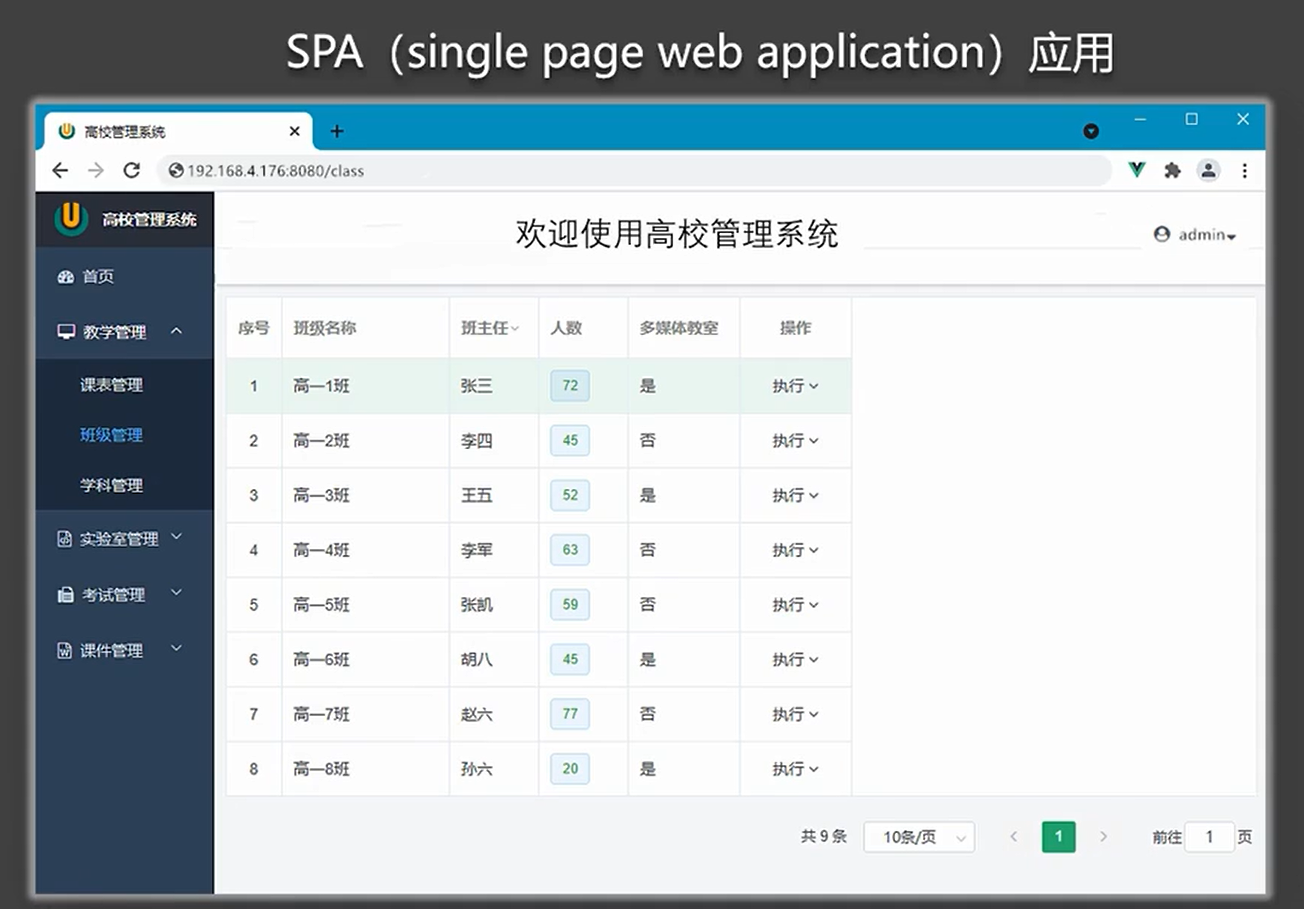
对SPA应用的理解
- 单页 Web 应用(single page web application,SPA)
- 整个应用只有一个完整的页面
- 点击页面中的
导航链接不会刷新页面,只会做页面的局部更新 - 数据需要通过ajax请求获取
路由的理解
什么是路由?
-
一个路由就是一组映射关系(key - value)
-
key 为路径,value 可能是 function 或 componen
路由分类
后端路由:
-
理解:value 是 function,用于处理客户端提交的请求
-
工作过程:服务器接收到一个请求时,根据请求路径找到匹配的函数来处理请求,返回响应数据
前端路由:
- 理解:value 是 component,用于展示页面内容
- 工作过程:当浏览器的路径改变时,对应的组件就会显示
基本路由
下载vue-router:npm i vue-router
About.vue
<template><h2>我是About组件的内容</h2></template><script>export default {name:'About'}</script>Home.vue
<template><h2>我是Home组件的内容</h2></template><script>export default {name:'Home'}</script>src/router/index.js
//该文件专门用于创建整个应用的路由器
import VueRouter from "vue-router";
//引入组件
import Home from '../components/Home'
import About from '../components/About'//创建并暴露一个路由器
export default new VueRouter({routes:[{path:'/about',component:About},{path:'/home',component:Home}]
})
main.js
import Vue from 'vue'
import App from './App.vue'
import VueRouter from 'vue-router'
import router from './router'Vue.config.productionTip = false
Vue.use(VueRouter)new Vue({el:"#app",render: h => h(App),router
})
App.vue
<template><div><div class="row"><div class="col-xs-offset-2 col-xs-8"><div class="page-header"><h2>Vue Router Demo</h2></div></div></div><div class="row"><div class="col-xs-2 col-xs-offset-2"><div class="list-group"><!-- 原始html中我们使用a标签实现页面跳转 --><!-- <a class="list-group-item active" href="./about.html">About</a><a class="list-group-item" href="./home.html">Home</a> --><!-- Vue中借助router-link标签实现路由的切换 --><router-link class="list-group-item" active-class="active" to="/about"> 			About</router-link><router-link class="list-group-item" active-class="active" to="/home">Home</router-link></div></div><div class="col-xs-6"><div class="panel"><div class="panel-body"><!-- 指定组件的呈现位置 --><router-view></router-view></div></div></div></div></div>
</template><script>export default {name:'App',}
</script>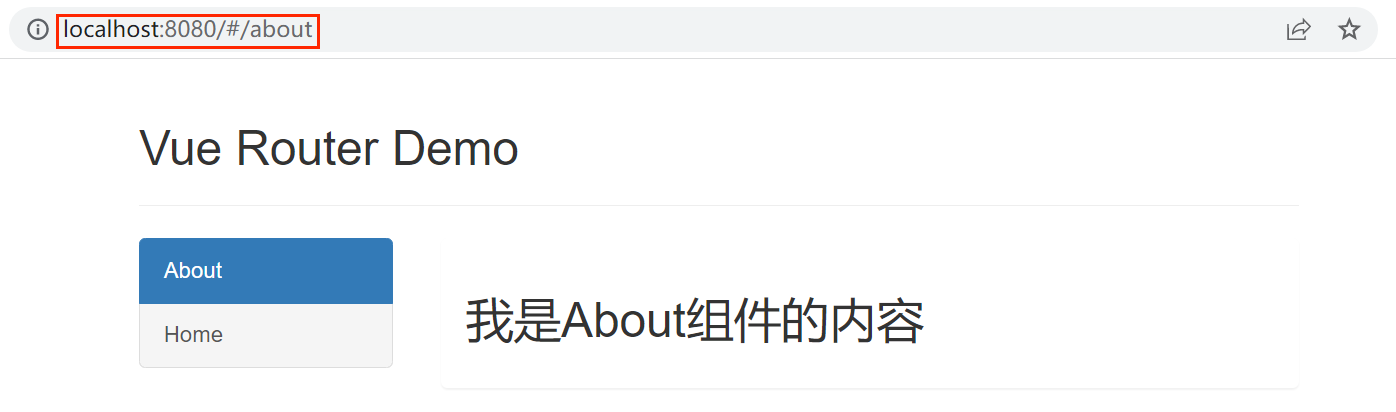
总结:
-
安装vue-router,命令:npm i vue-router
-
应用插件:Vue.use(VueRouter)
编写router配置项:
//引入VueRouter
import VueRouter from 'vue-router'
//引入Luyou 组件
import About from '../components/About'
import Home from '../components/Home'//创建router实例对象,去管理一组一组的路由规则
const router = new VueRouter({routes:[{path:'/about',component:About},{path:'/home',component:Home}]
})
export default router
- 首先引入对应的组件,然后配置路由的key:value格式的数据
- //暴露router export default router
实现切换(active-class可配置高亮样式):
<router-link active-class="active" to="/about">About</router-link><router-view></router-view>来指定我们的路由组件的显示地方
指定展示位:
<router-view></router-view>
几个注意点
- 路由组件通常存放在
pages文件夹,一般组件通常存放在components文件夹 - 通过切换,“隐藏”了的路由组件,默认是被销毁掉的,需要的时候再去挂载
- 每个组件都有自己的
$route属性,里面存储着自己的路由信息 - 整个应用只有一个router,可以通过组件的
$router属性获取到
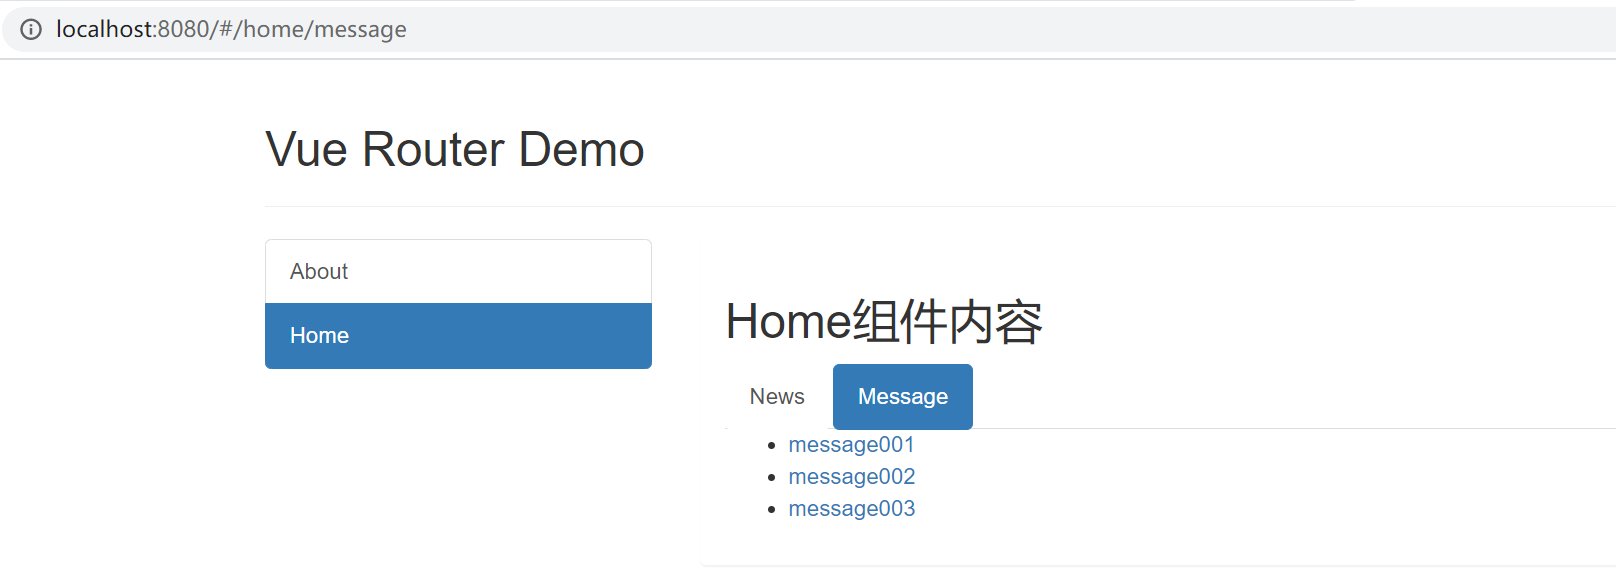
嵌套路由——多级路由
home.vue
<template><div><h2>Home组件内容</h2><div><ul class="nav nav-tabs"><li><router-link class="list-group-item" active-class="active" to="/home/news"> News</router-link></li><li><router-link class="list-group-item" active-class="active" to="/home/message">Message</router-link></li></ul><router-view></router-view></div></div>
</template><script>export default {name:'Home'}
</script>
About.vue
<template><h2>我是About组件的内容</h2></template><script>export default {name:'About'}</script>News.vue
<template><ul><li>news001</li><li>news002</li><li>news003</li></ul>
</template><script>export default {name:'News'}
</script>
router/index.js
//该文件专门用于创建整个应用的路由器
import VueRouter from "vue-router";
//引入组件
import Home from '../pages/Home'
import About from '../pages/About'
import News from '../pages/News'
import Message from '../pages/Message'//创建并暴露一个路由器
export default new VueRouter({routes:[{path:'/about',component:About},{path:'/home',component:Home,children:[{path:'news',component:News},{path:'message',component:Message}]}]
})
总结:
配置多级路由规则,使用children配置项:
routes:[{path:'/about',component:About,},{path:'/home',component:Home,children:[ //通过children配置子级路由{path:'news', //此处一定不要写:/newscomponent:News},{path:'message', //此处一定不要写:/messagecomponent:Message}]}
]
- 是在哪个路由组件中,就去对应的router中配置children的子级路由
跳转(要写完整路径):<router-link to="/home/news">News</router-link>
路由query参数
将数据写入queryString中来进行数据传递
Messgae.vue
<template><div><ul><li v-for="m in messageList" :key="m.id"><!-- 跳转路由并携带query参数,to的字符串写法 --><!-- <router-link :to="`/home/message/detail?id=${m.id}&title=${m.title}`">{{m.title}}</router-link> --><!-- 跳转路由并携带query参数,to的对象写法 --><router-link :to="{path:'/home/message/detail',query:{id:m.id,title:m.title}}">{{m.title}}</router-link> </li></ul><hr/><router-view></router-view></div>
</template><script>export default {name:'News',data(){return{messageList:[{id:'001',title:'消息001'},{id:'002',title:'消息002'},{id:'003',title:'消息003'}]}}}
</script>Detail.vue
<template><ul><li>消息编号:{{$route.query.id}}</li><li>消息标题:{{$route.query.title}}</li></ul>
</template><script>export default {name:'Detail'}
</script>
router/index.js
//该文件专门用于创建整个应用的路由器
import VueRouter from "vue-router";
//引入组件
import Home from '../pages/Home'
import About from '../pages/About'
import News from '../pages/News'
import Message from '../pages/Message'
import Detail from '../pages/Detail'//创建并暴露一个路由器
export default new VueRouter({routes:[{path:'/about',component:About},{path:'/home',component:Home,children:[{path:'news',component:News},{path:'message',component:Message,children:[{path:'detail',component:Detail}]}]}]
})
总结:
传递参数
- to的字符串写法,我们需要给to加上:,因为是为了让其识别query参数,所以要将其识别为js语法,而不是字符串,为了能使用模板${},所以字符串内写成
"``"
 <router-link :to="`/home/message/detail?id=${m.id}&title=${m.title}`">{{m.title}}</router-link><!-- 跳转并携带query参数,to的对象写法 -->
<router-link :to="{path:'/home/message/detail',query:{id:666,title:'你好'}
}">跳转</router-link>
- 如果比较复杂,就写成对象模式,不负责就写成字符串形式
接收参数:
- $route.query.id
- $route.query.title
命名路由
//该文件专门用于创建整个应用的路由器
import VueRouter from "vue-router";
//引入组件
import Home from '../pages/Home'
import About from '../pages/About'
import News from '../pages/News'
import Message from '../pages/Message'
import Detail from '../pages/Detail'//创建并暴露一个路由器
export default new VueRouter({routes:[{path:'/about',component:About},{path:'/home',component:Home,children:[{path:'news',component:News},{//name配置项为路由命名name:'xiangqing',path:'message',component:Message,children:[{path:'detail',component:Detail}]}]}]
})
使用路由名进行跳转
<template><div><ul><li v-for="m in messageList" :key="m.id"><!-- 跳转路由并携带query参数,to的字符串写法 --><!-- <router-link :to="`/home/message/detail?id=${m.id}&title=${m.title}`">{{m.title}}</router-link> --><!-- 跳转路由并携带query参数,to的对象写法 --><router-link :to="{//使用name进行跳转name:'xiangqing',query:{id:m.id,title:m.title}}">{{m.title}}</router-link> </li></ul><hr/><router-view></router-view></div>
</template><script>export default {name:'News',data(){return{messageList:[{id:'001',title:'消息001'},{id:'002',title:'消息002'},{id:'003',title:'消息003'}]}}}
</script>总结:
命名路由:
- 作用:可以简化路由的跳转
如何使用:
- 给路由命名 在路由配置中,给对应的路由配置name属性
{path:'/demo',component:Demo,children:[{path:'test',component:Test,children:[{name:'hello' //给路由命名path:'welcome',component:Hello,}]}]
}
简化跳转:
- 我们在跳转的时候可以使用path方式,也可以使用name方式
- 如果是使用对象形式实现name跳转,在对象中就可以配置name属性
- 如果使用字符串使用name方式,实现字符串的对象形式实现
<!--简化前,需要写完整的路径 -->
<router-link to="/demo/test/welcome">跳转</router-link><!--简化后,直接通过名字跳转 -->
<router-link :to="{name:'hello'}">跳转</router-link><!--简化写法配合传递参数 -->
<router-link :to="{name:'hello',query:{id:666,title:'你好'}}"
跳转</router-link>
路由的params参数
将数据写在url中,来进行数据传递
Message.vue
<template><div><ul><li v-for="m in messageList" :key="m.id"><!-- 跳转路由并携带params参数,to的字符串写法 --><!-- <router-link :to="`/home/message/detail/${m.id}/${m.title}`">{{m.title}}</router-link> --><!-- 跳转路由并携带params参数,to的对象写法 --><router-link :to="{name:'xiangqing',params:{id:m.id,title:m.title}}">{{m.title}}</router-link> </li></ul><hr/><router-view></router-view></div>
</template><script>export default {name:'News',data(){return{messageList:[{id:'001',title:'消息001'},{id:'002',title:'消息002'},{id:'003',title:'消息003'}]}}}
</script>Detail.vue
<template><ul><li>消息编号:{{$route.params.id}}</li><li>消息标题:{{$route.params.title}}</li></ul>
</template><script>export default {name:'Detail'}
</script>
router/idnex.js
//该文件专门用于创建整个应用的路由器
import VueRouter from "vue-router";
//引入组件
import Home from '../pages/Home'
import About from '../pages/About'
import News from '../pages/News'
import Message from '../pages/Message'
import Detail from '../pages/Detail'//创建并暴露一个路由器
export default new VueRouter({routes:[{path:'/about',component:About},{path:'/home',component:Home,children:[{path:'news',component:News},{path:'message',component:Message,children:[{name:'xiangqing',path:'detail/:id/:title',//使用占位符声明接收params参数component:Detail}]}]}]
})
总结
- 我们在路由配置中使用占位符声明接收的params参数
{path:'/home',component:Home,children:[{path:'news',component:News},{component:Message,children:[{name:'xiangqing',path:'detail/:id/:title', //使用占位符声明接收params参数component:Detail}]}]
}- 跳转路由时候,需要带着对应的params数据
- 字符串形式
- 对象形式
<!-- 跳转并携带params参数,to的字符串写法 -->
<router-link :to="/home/message/detail/666/你好">跳转</router-link><!-- 跳转并携带params参数,to的对象写法 -->
<router-link :to="{name:'xiangqing',params:{id:666,title:'你好'}}"
>跳转</router-link>
特别注意:路由携带params参数时,若使用to的对象写法,则不能使用path配置项,必须使用name配置!
- 使用数据使用$route.params.属性名
$route.params.id
$route.params.title
路由的props配置
我们去取params的数据或者是query数据,都需要通过this.route.params或者是this.route.query,如果都写在组件中,就会显示的很长,所以我们可以通过props来进行简化,将对应的数据直接转换成我们的props中的数据
Message.vue
<template><div><ul><li v-for="m in messageList" :key="m.id"><router-link :to="{name:'xiangqing',params:{id:m.id,title:m.title}}">{{m.title}}</router-link> </li></ul><hr/><router-view></router-view></div>
</template><script>export default {name:'News',data(){return{messageList:[{id:'001',title:'消息001'},{id:'002',title:'消息002'},{id:'003',title:'消息003'}]}}}
</script>index.js
//该文件专门用于创建整个应用的路由器
import VueRouter from "vue-router";
//引入组件
import Home from '../pages/Home'
import About from '../pages/About'
import News from '../pages/News'
import Message from '../pages/Message'
import Detail from '../pages/Detail'//创建并暴露一个路由器
export default new VueRouter({routes:[{path:'/about',component:About},{path:'/home',component:Home,children:[{path:'news',component:News},{path:'message',component:Message,children:[{name:'xiangqing',path:'detail/:id/:title',component:Detail,//props的第一种写法,值为对象,该对象中的所有key-value都会以props的形式传给Detail组件。// props:{a:1,b:'hello'}//props的第二种写法,值为布尔值,若布尔值为真,就会把该路由组件收到的所有params参数,以props的形式传给Detail组件。// props:true//props的第三种写法,值为函数props($route){return {id:$route.params.id,title:$route.params.title,}}}]}]}]
})
Detail.vue
<template><ul><li>消息编号:{{id}}</li><li>消息标题:{{title}}</li></ul>
</template><script>export default {name:'Detail',props:['id','title']}
</script>
总结:
- 作用:让路由组件更方便的收到参数
{name:'xiangqing',path:'detail/:id',component:Detail,//第一种写法:props值为对象,该对象中所有的key-value的组合最终都会通过props传给Detail组件// props:{a:900}//第二种写法:props值为布尔值,布尔值为true,则把路由收到的所有params参数通过props传给Detail组件// props:true//第三种写法:props值为函数,该函数返回的对象中每一组key-value都会通过props传给Detail组件props(route){return {id:route.query.id,title:route.query.title}}
}
- 三种写法
- 第一种比较死板,是写死在我们的路由配置中,不管怎么跳转都有这个数据
- 第二种只能用于params方式传值转换为我们的props
- 第三种比较灵活这种方式就将组件中的业务逻辑转移到配置中,组件就专注页面,不会那么复杂
路由跳转的replace方法
<template><div><h2>Home组件内容</h2><div><ul class="nav nav-tabs"><li><router-link replace class="list-group-item" active-class="active" to="/home/news">News</router-link></li><li><router-link replace class="list-group-item" active-class="active" to="/home/message">Message</router-link></li></ul><router-view></router-view></div></div>
</template><script>export default {name:'Home'}
</script>
总结:
- 作用:控制路由跳转时操作浏览器历史记录的模式
- 浏览器的历史记录有两种写入方式:push和replace,其中push是追加历史记录,replace是替换当前记录。路由跳转时候默认为push方式
- 每进一个路由,就会往栈中进入一个路由记录,如果是push状态,就是一直往栈顶进入一个新的路由记录
- 如果是replace模式,那么每进一个路由,就把栈顶的路由记录进行替换
- 开启replace模式:
<router-link replace ...>News</router-link>
编程式路由导航
我们有时候的进行路由跳转可能是通过点击按钮来进行路由跳转,所以就用不了我们的<router-link>,这时候就会用到我们的编程式导航
Banner.vue
<template><div class="col-xs-offset-2 col-xs-8"><div class="page-header"><h2>Vue Router Demo</h2><button @click="back">后退</button><button @click="forward">前进</button><button @click="test">测试一下go</button></div></div>
</template><script>export default {name:'Banner',methods:{back(){this.$router.back()},forward(){this.$router.forward()},test(){this.$router.go(3)}},}
</script>
Message.vue
<template><div><ul><li v-for="m in messageList" :key="m.id"><router-link :to="{name:'xiangqing',params:{id:m.id,title:m.title}}">{{m.title}}</router-link><button @click="showPush(m)">push查看</button><button @click="showReplace(m)">replace查看</button></li></ul><hr/><router-view></router-view></div>
</template><script>export default {name:'News',data(){return{messageList:[{id:'001',title:'消息001'},{id:'002',title:'消息002'},{id:'003',title:'消息003'}]}},methods:{showPush(m){this.$router.push({name:'xiangqing',query:{id:m.id,title:m.title}})},showReplace(m){this.$router.replace({name:'xiangqing',query:{id:m.id,title:m.title}})}}}
</script>
总结:
- 作用:不借助
<router-link>实现路由跳转,让路由跳转更加灵活
具体编码:
this.$router.push({name:'xiangqing',params:{id:xxx,title:xxx}
})this.$router.replace({name:'xiangqing',params:{id:xxx,title:xxx}
})
this.$router.forward() //前进
this.$router.back() //后退
this.$router.go() //可前进也可后退
缓存路由组件
我们知道从一个路由切换到另一个路由,会导致前一个路由页面销毁,但是有时候我们在这个被销毁的页面填写的数据,我们不希望数据消失,这时候就需要缓存路由了
News.vue
<template><ul><li>news001 <input type="text"></li><li>news002 <input type="text"></li><li>news003 <input type="text"></li></ul>
</template><script>export default {name:'News'}
</script>
Home.vue
<template><div><h2>Home组件内容</h2><div><ul class="nav nav-tabs"><li><router-link replace class="list-group-item" active-class="active" to="/home/news">News</router-link></li><li><router-link replace class="list-group-item" active-class="active" to="/home/message">Message</router-link></li></ul><keep-alive include="News"><router-view></router-view></keep-alive></div></div>
</template><script>export default {name:'Home'}
</script>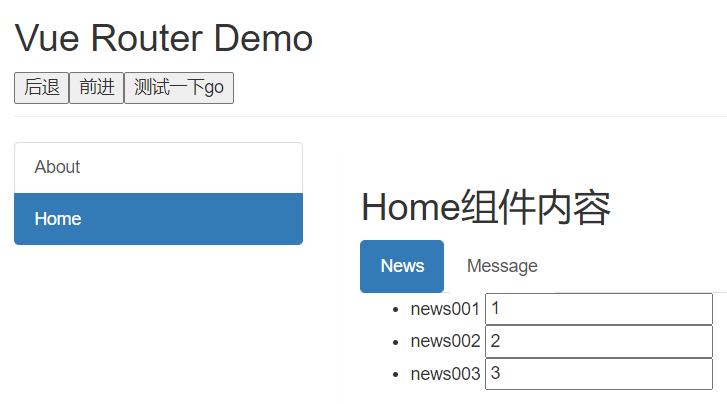
总结:
- 作用:让不展示的路由组件保持挂载,不被销毁
具体编码:
//缓存一个路由组件
<keep-alive include="News"> //include中写想要缓存的组件名,不写表示全部缓存<router-view></router-view>
</keep-alive>//缓存多个路由组件
<keep-alive :include="['News','Message']"> <router-view></router-view>
</keep-alive>- include里面写的组件名,也就是我们组件中name属性
路由组件独有的生命钩子
activated和deactivated
<template><ul><li :style="{opacity}">欢迎学习vue</li><li>news001 <input type="text"></li><li>news002 <input type="text"></li><li>news003 <input type="text"></li></ul>
</template><script>export default {name:'News',data(){return{opacity:1}},activated(){console.log('News组件被激活了')this.timer = setInterval(() => {this.opacity -= 0.01if(this.opacity <= 0) this.opacity = 1},16)},deactivated(){console.log('News组件失活了')clearInterval(this.timer)}}
</script>
总结:
activated和deactivated是路由组件所独有的两个钩子,用于捕获路由组件的激活状态- 具体使用:
activated路由组件被激活时触发deactivated路由组件失活时触发
如果我们对路由页面不进行缓存,那么我们离开这个页面就会触发这个组件的销毁,进入时触发组件的创建,但是我们如果对路由页面进行缓存,那么我们离开的时候并不会导致组件的销毁,但是有些东西我们希望离开页面就不需要运行了,比如某些定时器,所以我们的可以使用
activated和deactivated
路由守卫
全局路由守卫
//该文件专门用于创建整个应用的路由器
import VueRouter from "vue-router";
//引入组件
import Home from '../pages/Home'
import About from '../pages/About'
import News from '../pages/News'
import Message from '../pages/Message'
import Detail from '../pages/Detail'//创建一个路由器
const router = new VueRouter({routes:[{name:'guanyv',path:'/about',component:About,meta:{title:'关于'}},{name:'zhuye',path:'/home',component:Home,meta:{title:'主页'},children:[{name:'xinwen',path:'news',component:News,meta:{isAuth:true,title:'新闻'}},{name:'xiaoxi',path:'message',component:Message,meta:{isAuth:true,title:'消息'},children:[{name:'xiangqing',path:'detail',component:Detail,meta:{isAuth:true,title:'详情'},props($route){return {id:$route.query.id,title:$route.query.title,}}}]}]}]
})//全局前置路由守卫————初始化的时候、每次路由切换之前被调用
router.beforeEach((to,from,next) => {console.log('前置路由守卫',to,from)//to.meta.isAuth如果为true,说明我们这个页面需要进行权限验证if(to.meta.isAuth){if(localStorage.getItem('school')==='atguigu'){next()}else{alert('学校名不对,无权限查看!')}}else{next()}
})//全局后置路由守卫————初始化的时候被调用、每次路由切换之后被调用
router.afterEach((to,from)=>{console.log('后置路由守卫',to,from)document.title = to.meta.title || '硅谷系统'
})//导出路由器
export default router- meta是我们路由提供给我们程序员来写一些元数据的地方
- next表示放行,也就是进行了路由页面跳转
- to表示当前去哪个页面
- from表示当前来自于哪个页面
独享路由守卫
//该文件专门用于创建整个应用的路由器
import VueRouter from "vue-router";
//引入组件
import Home from '../pages/Home'
import About from '../pages/About'
import News from '../pages/News'
import Message from '../pages/Message'
import Detail from '../pages/Detail'//创建一个路由器
const router = new VueRouter({routes:[{name:'guanyv',path:'/about',component:About,meta:{title:'关于'}},{name:'zhuye',path:'/home',component:Home,meta:{title:'主页'},children:[{name:'xinwen',path:'news',component:News,meta:{title:'新闻'},//独享守卫,特定路由切换之后被调用beforeEnter(to,from,next){console.log('独享路由守卫',to,from)if(localStorage.getItem('school') === 'atguigu'){next()}else{alert('暂无权限查看')}}},{name:'xiaoxi',path:'message',component:Message,meta:{title:'消息'},children:[{name:'xiangqing',path:'detail',component:Detail,meta:{title:'详情'},props($route){return {id:$route.query.id,title:$route.query.title,}}}]}]}]
})//全局后置路由守卫————初始化的时候被调用、每次路由切换之后被调用
router.afterEach((to,from)=>{console.log('后置路由守卫',to,from)document.title = to.meta.title || '硅谷系统'
})//导出路由器
export default router
组件内路由守卫
<template><h2>我是About组件的内容</h2>
</template><script>export default {name:'About',//通过路由规则,离开该组件时被调用beforeRouteEnter (to, from, next) {console.log('About--beforeRouteEnter',to,from)if(localStorage.getItem('school')==='atguigu'){next()}else{alert('学校名不对,无权限查看!')}},//通过路由规则,离开该组件时被调用beforeRouteLeave (to, from, next) {console.log('About--beforeRouteLeave',to,from)next()}}
</script>
总结:
- 作用:对路由进行权限控制
- 分类:全局守卫、独享守卫、组件内守卫
全局守卫:
//全局前置守卫:初始化时执行、每次路由切换前执行
router.beforeEach((to,from,next)=>{console.log('beforeEach',to,from)if(to.meta.isAuth){ //判断当前路由是否需要进行权限控制if(localStorage.getItem('school') === 'atguigu'){ //权限控制的具体规则next() //放行}else{alert('暂无权限查看')}}else{next() //放行}
})//全局后置守卫:初始化时执行、每次路由切换后执行
router.afterEach((to,from) => {console.log('afterEach',to,from)if(to.meta.title){ document.title = to.meta.title //修改网页的title}else{document.title = 'vue_test'}
})
独享守卫:
beforeEnter(to,from,next){console.log('beforeEnter',to,from)if(localStorage.getItem('school') === 'atguigu'){next()}else{alert('暂无权限查看')}
}
组件内守卫:
//进入守卫:通过路由规则,进入该组件时被调用
beforeRouteEnter (to, from, next) {...},
//离开守卫:通过路由规则,离开该组件时被调用
beforeRouteLeave (to, from, next) {...},
路由器的两种工作模式
对于一个url来说,什么是hash值?—— #及其后面的内容就是hash值
- hash值不会包含在 HTTP 请求中,即:hash值不会带给服务器
hash模式:
-
地址中永远带着#号,不美观
-
若以后将地址通过第三方手机app分享,若app校验严格,则地址会被标记为不合法
-
兼容性较好
history模式:
- 地址干净,美观
- 兼容性和hash模式相比略差
- 应用部署上线时需要后端人员支持,解决刷新页面服务端404的问题
相关文章:
第五章Vue路由
文章目录相关理解vue-router的理解对SPA应用的理解路由的理解基本路由几个注意点嵌套路由——多级路由路由query参数命名路由路由的params参数路由的props配置路由跳转的replace方法编程式路由导航缓存路由组件路由组件独有的生命钩子activated和deactivated路由守卫全局路由守…...

Git常用指令
Git是什么: Git是分布式版本控制系统(Distributed Version Control System,简称 DVCS),分为两种类型的仓库: 本地仓库和远程仓库 第一步先新建仓库,本地 init ,然后提交分枝 链接仓库…...

Java每日一练(20230329)
目录 1. 环形链表 II 🌟🌟 2. 基础语句 ※ 3. 最小覆盖子串 🌟🌟🌟 🌟 每日一练刷题专栏 🌟 Golang每日一练 专栏 Python每日一练 专栏 C/C每日一练 专栏 Java每日一练 专栏 1. 环形…...
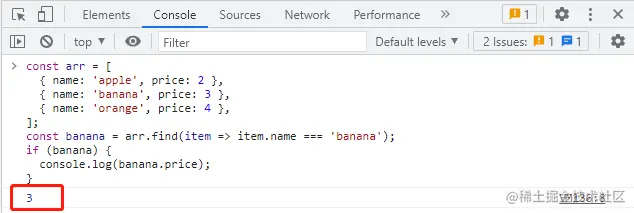
【面试题】JS的一些优雅写法 reduce和map
大厂面试题分享 面试题库 前后端面试题库 (面试必备) 推荐:★★★★★ 地址:前端面试题库 web前端面试题库 VS java后端面试题库大全 JS的一些优雅写法 reduce 1、可以使用 reduce 方法来实现对象数组中根据某一key值求和 …...
)
【蓝桥杯真题】包子凑数(裴蜀定理、动态规划、背包问题)
题意 小明几乎每天早晨都会在一家包子铺吃早餐。他发现这家包子铺有N种蒸笼,其中第i种蒸笼恰好能放Ai个包子。每种蒸笼都有非常多笼,可以认为是无限笼。 每当有顾客想买X个包子,卖包子的大叔就会迅速选出若干笼包子来,使得这若干…...

一种免费将PDF转word的方式
pdf转word的需求对我来说很重要,我经常会有PDF转word的方式,但是网上搜索到的方式,要么收费、要么限制pdf大小或者限制转换次数。这里我分享一种免费转换的方式:用Acrobat Pro 来做转换。Adobe Acrobat Pro拥有强大的功能…...
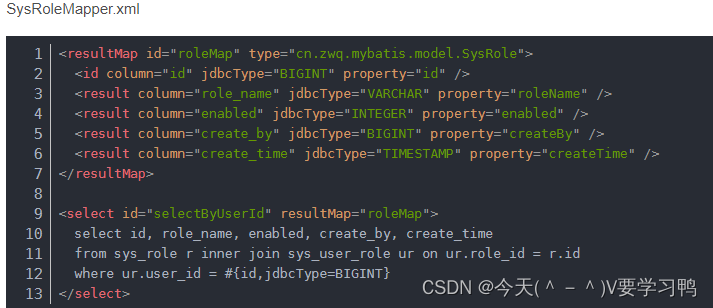
MyBatis-面试题
文章目录1.什么是MyBatis?2.#{}和${}的区别是什么?3.MyBatis的一级、二级缓存4.MyBatis的优缺点5.当实体类中的属性名和表中的字段名不一样 ,怎么办 ?6.模糊查询like语句该怎么写?7.Mybatis是如何进行分页的?分页插件的原理是什…...
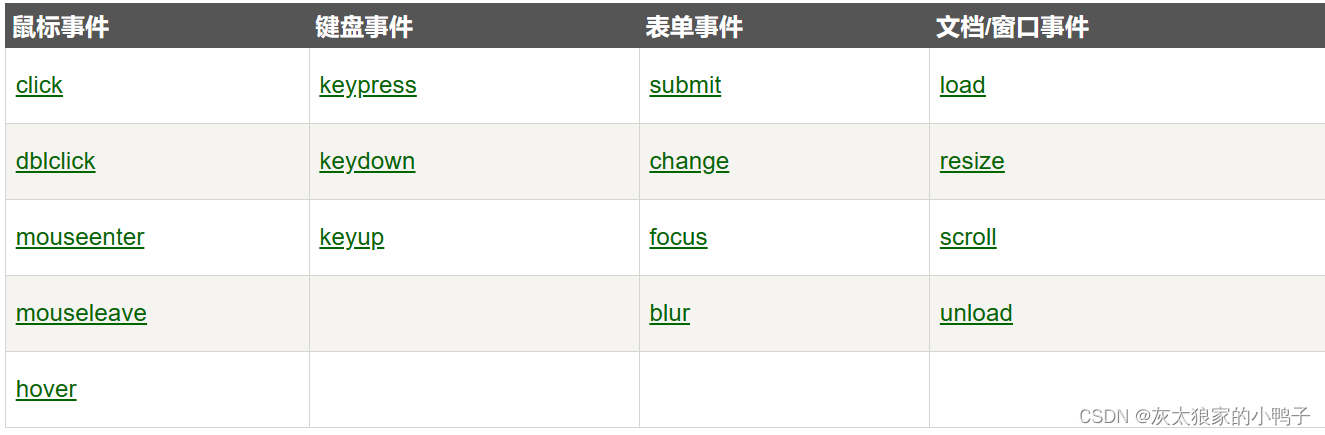
jQuery一些问题和ajax操作
jQuery语法: 文档就绪事件:文档加载之后运行jQuery代码,相当于jQuery的入口函数。 $(document).ready(function(){// 开始写 jQuery 代码...}); 简写: $(function(){// 开始写 jQuery 代码...}); jQuery选择器: …...

Pytorch构建自己的数据集
1.Pytorch内置的Dataset Pytorch中内置了许多数据集,我们可以从torchvision库中进行导入。比如,我们可以导入Fashion-MNIST数据集 import torch from torch.utils.data import Dataset from torchvision import datasets from torchvision.transforms …...
)
信息论小课堂:纠错码(海明码在信息传输编码时,通过巧妙的信道编码保证有了错误能够自动纠错。)
文章目录 引言I 纠错1.1 信息纠错的前提:信息冗余1.2 发现抄写错误的方法1.3 计算机的信息校验原理:奇偶校验1.4 有效的纠错编码II 案例2.1 例子1:自身DNA的编码2.2 例子2:海明码引言 预则立,不预则废:不确定性是我们这个世界自然的属性,在解决问题之前,要考虑到世界的不…...

MySQL执行计划(explain)
MySQL执行计划(explain) 1.什么是执行计划 2.如何分析执行计划 执行计划一共有12列,每一列都有着特殊的含义,接下来我们逐一分析 id select语句的查询顺序,包含一组数字,如果数字相同则从上到下,如果数字不同则从大到小。 select_type …...

思必驰回复第二轮审核问询,如何与科大讯飞、阿里巴巴“虎口夺食”?
数据智能产业创新服务媒体——聚焦数智 改变商业3月21日,思必驰科技股份有限公司(以下简称“思必驰”)更新上市申请审核动态,已回复上交所第二轮审核问询函,回复了涵盖关于实际控制人的认定、关于预计持续亏损及关于…...

基于Spring、SpringMVC、MyBatis的汽车租赁系统设计
文章目录 项目介绍主要功能截图:前台首页汽车信息列表汽车租赁留言反馈个人信息管理后台汽车类型管理汽车信息管理租赁信息管理用户管理续租信息管理归还信息管理保险信息管理违章登记管理部分代码展示设计总结项目获取方式🍅 作者主页:Java韩立 🍅 简介:Java领域优质创…...

读《刻意练习》后感,与原文好句摘抄
第一章,有目的的练习 所谓“天真的练习”,基本上只是反复的做某件事情,并指望只靠这种反复的练习,就能够提高表现和水平。 有目的练习的四个特点 有目的的练习具有定义明确的特定目标有目的的练习是专注的有目的的练习包含反馈…...

华为OD机试用java实现 -【选座位】
最近更新的博客 华为od 2023 | 什么是华为od,od 薪资待遇,od机试题清单华为OD机试真题大全,用 Python 解华为机试题 | 机试宝典【华为OD机试】全流程解析+经验分享,题型分享,防作弊指南华为od机试,独家整理 已参加机试人员的实战技巧本篇题解:选座位 题目 疫情期间需要大…...

国产蓝牙耳机怎么挑选?口碑最好的国产蓝牙耳机
蓝牙耳机已经成为现代人生活中必不可少的设备之一,因此市场上涌现出了众多的品牌和型号。但是,在这个竞争激烈的市场中,哪些品牌的蓝牙耳机更受欢迎呢?以下是几款口碑不错的蓝牙耳机品牌。 一、南卡小音舱蓝牙耳机 推荐系数&…...
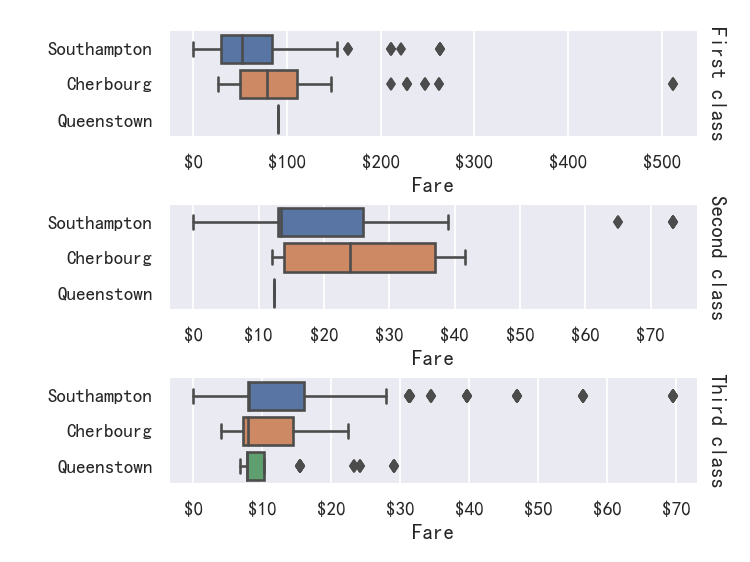
seaborn从入门到精通03-绘图功能实现02-分类绘图Categorical plots
seaborn从入门到精通03-绘图功能实现02-分类绘图Categorical plots总结参考关系-分布-分类分类绘图-Visualizing categorical data图形级接口catplot--figure-level interface导入库与查看tips和diamonds 数据分类散点图参考分布散点图stripplot分布密度散点图-swarmplot&#…...

❤️独特的算法❤️:一文解决编辑距离问题
编辑距离问题 题目关键点115. 不同的子序列 - 力扣(LeetCode)*dp数组定义,情况讨论583. 两个字符串的删除操作 - 力扣(LeetCode)两个字符串删除,情况讨论多加一种72. 编辑距离 - 力扣(LeetCode…...

三次样条样条:Bézier样条和Hermite样条
总结 What is the Difference Between Natural Cubic Spline, Hermite Spline, Bzier Spline and B-spline? 1.多项式拟合中的 Runge Phenomenon 找到一条通过N1个点的多项式曲线 ,需要N次曲线。通过两个点的多项式曲线为一次,三个点的多项式曲线为二…...
Redis面试题 (2023最新版)
文章目录一、Redis为什么快?1、纯内存访问2、单线程,避免上下文切换3、渐进式ReHash、缓存时间戳(1)渐进式ReHash:(2)缓存时间戳:二、Redis合适的应用场景常用基本数据类型ÿ…...

open-vm-tools 开发入门:如何为开源虚拟化工具贡献代码
open-vm-tools 开发入门:如何为开源虚拟化工具贡献代码 【免费下载链接】open-vm-tools Official repository of VMware open-vm-tools project 项目地址: https://gitcode.com/gh_mirrors/op/open-vm-tools open-vm-tools 是 VMware 官方开源的虚拟化工具集…...

微信聊天记录全掌控:PyWxDump本地化备份与深度管理指南
微信聊天记录全掌控:PyWxDump本地化备份与深度管理指南 【免费下载链接】PyWxDump 删库 项目地址: https://gitcode.com/GitHub_Trending/py/PyWxDump 在数字时代,微信聊天记录已成为个人和企业重要的信息资产。无论是商务沟通的关键凭证、项目协…...

零基础掌握IP地址定位技术 - 提升开发效率90%
零基础掌握IP地址定位技术 - 提升开发效率90% 【免费下载链接】ip2region PHP版本的离线IP地址定位库 项目地址: https://gitcode.com/gh_mirrors/ip2/ip2region 在数字化时代,IP地址定位技术已成为众多应用的基础能力。无论是电商平台的物流优化、社交应用的…...
)
避坑指南:Raspberry Pi5安装LineageOS21常见问题全解(SSD启动/存储扩容/Play商店报错)
Raspberry Pi5安装LineageOS 21避坑指南:从SSD启动到Play商店认证全流程解析 当Raspberry Pi5遇上LineageOS 21,这个组合让单板计算机瞬间变身高性能Android设备。但实际安装过程中,从存储介质选择到Google服务集成,每个环节都可能…...

深蓝词库转换器:3分钟掌握30+输入法词库互转的终极指南
深蓝词库转换器:3分钟掌握30输入法词库互转的终极指南 【免费下载链接】imewlconverter ”深蓝词库转换“ 一款开源免费的输入法词库转换程序 项目地址: https://gitcode.com/gh_mirrors/im/imewlconverter 你是否曾因更换输入法而丢失多年积累的个人词库&am…...

革新性炉石传说插件:如何通过游戏体验增强实现效率提升
革新性炉石传说插件:如何通过游戏体验增强实现效率提升 【免费下载链接】HsMod Hearthstone Modification Based on BepInEx 项目地址: https://gitcode.com/GitHub_Trending/hs/HsMod 在快节奏的现代生活中,炉石传说玩家常常面临三大核心痛点&am…...

C#窗体上位机的创建、学习
创建窗体项目所有Windows窗体属性设计(Name): 代码中用来标识该对象的名称。唯一,不能重复。外观Text: 与控件关联的文本。窗体Form1(Frm)属性:布局->StartPosition:CenterScreen(屏幕中央)布局->…...

Windows Android子系统全栈指南:从技术原理到实战应用
Windows Android子系统全栈指南:从技术原理到实战应用 【免费下载链接】WSA Developer-related issues and feature requests for Windows Subsystem for Android 项目地址: https://gitcode.com/gh_mirrors/ws/WSA 价值定位:打破系统边界的跨平台…...

都是微软亲儿子,WPF凭啥干不掉WinForm?这3个场景说明白了
大家好,我是码农刚子。 前两天有个刚入行的兄弟问我:“现在学桌面开发,是学WinForm还是WPF?我看网上也有人问都是基于.NET平台,WPF能取代Winform吗?” 我听完笑了笑。这个问题吧,就跟“C#能不能取代Java”一…...

单片机核心功能解析与实战技巧
1. 单片机学习的核心功能解析作为一名在嵌入式领域摸爬滚打多年的工程师,我深知单片机学习的关键不在于死记硬背,而在于掌握几个核心功能的底层逻辑和应用场景。很多初学者容易陷入"学了很多却不会用"的困境,根本原因就是没有抓住这…...