电脑连接海康相机并在PictureBox和HWindowControl中分别显示。
展示结果:

下面附上界面中所有控件的Name,只需照着红字设置对应的控件Name即可

下面附上小编主界面的全部代码:
using System;
using System.Collections.Generic;
using System.ComponentModel;
using System.Data;
using System.Drawing;
using System.Linq;
using System.Runtime.InteropServices;
using System.Text;
using System.Threading;
using System.Threading.Tasks;
using System.Windows.Forms;
using HalconDotNet;
using MvCameraControl;namespace MVC
{public partial class Form1 : Form{// ch:枚举的相机类型 | en:TLayerType for enumerate devicesreadonly DeviceTLayerType enumTLayerType = DeviceTLayerType.MvGigEDevice | DeviceTLayerType.MvUsbDevice| DeviceTLayerType.MvGenTLGigEDevice | DeviceTLayerType.MvGenTLCXPDevice | DeviceTLayerType.MvGenTLCameraLinkDevice | DeviceTLayerType.MvGenTLXoFDevice;List<IDeviceInfo> deviceInfoList = new List<IDeviceInfo>();IDevice device = null;bool isGrabbing = false; //是否正在取图Thread receiveThread = null;  //接收图像线程Thread receiveImage = null;IntPtr pictureBoxHandle = IntPtr.Zero; //显示图像的控件句柄public Form1(){InitializeComponent();}private void Form1_Load(object sender, EventArgs e){//初始化SDKSDKSystem.Initialize();//枚举设备RefreshDeviceList();}/// <summary>/// ch:显示错误信息 | en:Show error message/// </summary>private void ShowErrorMsg(string message, int errorCode){string errorMsg;if (errorCode == 0){errorMsg = message;}else{errorMsg = message + ": Error =" + String.Format("{0:X}", errorCode);}switch (errorCode){case MvError.MV_E_HANDLE: errorMsg += " Error or invalid handle "; break;case MvError.MV_E_SUPPORT: errorMsg += " Not supported function "; break;case MvError.MV_E_BUFOVER: errorMsg += " Cache is full "; break;case MvError.MV_E_CALLORDER: errorMsg += " Function calling order error "; break;case MvError.MV_E_PARAMETER: errorMsg += " Incorrect parameter "; break;case MvError.MV_E_RESOURCE: errorMsg += " Applying resource failed "; break;case MvError.MV_E_NODATA: errorMsg += " No data "; break;case MvError.MV_E_PRECONDITION: errorMsg += " Precondition error, or running environment changed "; break;case MvError.MV_E_VERSION: errorMsg += " Version mismatches "; break;case MvError.MV_E_NOENOUGH_BUF: errorMsg += " Insufficient memory "; break;case MvError.MV_E_UNKNOW: errorMsg += " Unknown error "; break;case MvError.MV_E_GC_GENERIC: errorMsg += " General error "; break;case MvError.MV_E_GC_ACCESS: errorMsg += " Node accessing condition error "; break;case MvError.MV_E_ACCESS_DENIED: errorMsg += " No permission "; break;case MvError.MV_E_BUSY: errorMsg += " Device is busy, or network disconnected "; break;case MvError.MV_E_NETER: errorMsg += " Network error "; break;}MessageBox.Show(errorMsg, "PROMPT");}private void RefreshDeviceList(){//创建设备列表cbDeviceList.Items.Clear();int nRet = DeviceEnumerator.EnumDevices(enumTLayerType, out deviceInfoList);if (nRet != MvError.MV_OK){ShowErrorMsg("Enumerate devices fail !", nRet);return;}//在窗体列表中显示设备名for (int i = 0; i < deviceInfoList.Count; i++){IDeviceInfo deviceInfo = deviceInfoList[i];if (deviceInfo.UserDefinedName != ""){cbDeviceList.Items.Add(deviceInfo.TLayerType.ToString() + ": " + deviceInfo.UserDefinedName + " (" + deviceInfo.SerialNumber + ")");}else{cbDeviceList.Items.Add(deviceInfo.TLayerType.ToString() + ": " + deviceInfo.ManufacturerName + " " + deviceInfo.ModelName + " (" + deviceInfo.SerialNumber + ")");}}//选择第一项if (deviceInfoList.Count != 0){cbDeviceList.SelectedIndex = 0;}}private void bnClose_Click(object sender, EventArgs e){//取流标志位清零if (isGrabbing == true){bnStopGrab_Click(sender, e);}//关闭设备if (device != null){device.Close();device.Dispose();}//控件操作SetCtrlWhenClose();}private void SetCtrlWhenClose(){bnOpen.Enabled = true;bnClose.Enabled = false;bnStartGrab.Enabled = false;bnStopGrab.Enabled = false;bnContinuesMode.Enabled = false;bnTriggerMode.Enabled = false;cbSoftTrigger.Enabled = false;bnTriggerExec.Enabled = false;tbExposure.Enabled = false;tbGain.Enabled = false;tbFrameRate.Enabled = false;bnGetParam.Enabled = false;bnSetParam.Enabled = false;}private void bnEnum_Click(object sender, EventArgs e){RefreshDeviceList();}private void bnOpen_Click(object sender, EventArgs e){if (deviceInfoList.Count == 0 || cbDeviceList.SelectedIndex == -1){ShowErrorMsg("No device, please select", 0);return;}//获取选择的设备信息IDeviceInfo deviceInfo = deviceInfoList[cbDeviceList.SelectedIndex];try{//打开设备device = DeviceFactory.CreateDevice(deviceInfo);}catch (Exception ex){MessageBox.Show("Create Device fail !" + ex.Message);return;}int result = device.Open();if (result != MvError.MV_OK){ShowErrorMsg("Open Device fail", result);return;}//判断是否为gige设备if (device is IGigEDevice){//转换为gige设备IGigEDevice gigEDevice = device as IGigEDevice;//探测网络最佳包大小int optionPacketSize;result = gigEDevice.GetOptimalPacketSize(out optionPacketSize);if (result != MvError.MV_OK){ShowErrorMsg("Waring: Get packet Size failed !", result);}else{result = device.Parameters.SetIntValue("GevSCPSPPacketSize", (long)optionPacketSize);if (result != MvError.MV_OK){ShowErrorMsg("Waring: Set Packet Size failed", result);}}}//设置采集卡连续模式device.Parameters.SetEnumValueByString("AcauisitionMode", "Continuous");device.Parameters.SetEnumValueByString("TriggerMode", "Off");//关闭触发模式//控件操作SetCtrlWhenOpen();//获取参数bnGetParam_Click(null, null);}private void SetCtrlWhenOpen(){bnOpen.Enabled = false;bnClose.Enabled = true;bnStartGrab.Enabled = true;bnStopGrab.Enabled = false;bnContinuesMode.Enabled = true;bnContinuesMode.Checked = true;//bnContinuesMode_CheckedChanged(null,null);bnTriggerMode.Enabled = true;cbSoftTrigger.Enabled = false;bnTriggerExec.Enabled = false;tbExposure.Enabled = true;tbGain.Enabled = true;tbFrameRate.Enabled = true;bnGetParam.Enabled = true;bnSetParam.Enabled = true;}private void GetTriggerMode(){IEnumValue enumValue;int result = device.Parameters.GetEnumValue("TriggerMode", out enumValue);if (result == MvError.MV_OK){if (enumValue.CurEnumEntry.Symbolic == "On"){bnTriggerMode.Checked = true;bnContinuesMode.Checked = false;result = device.Parameters.GetEnumValue("TriggerMode", out enumValue);if (result == MvError.MV_OK){if (enumValue.CurEnumEntry.Symbolic == "TriggerSoftware"){cbSoftTrigger.Enabled = true;cbSoftTrigger.Checked = true;if (isGrabbing){bnTriggerExec.Enabled = true;}}}}else{bnContinuesMode.Checked = true;bnTriggerMode.Checked = false;}}}private void bnGetParam_Click(object sender, EventArgs e){GetTriggerMode();IFloatValue floatValue;int result = device.Parameters.GetFloatValue("ExposureTime", out floatValue);if (result == MvError.MV_OK){tbExposure.Text = floatValue.CurValue.ToString("F1");}result = device.Parameters.GetFloatValue("Gain", out floatValue);if (result == MvError.MV_OK){tbGain.Text = floatValue.CurValue.ToString("F1");}result = device.Parameters.GetFloatValue("ResultingFrameRate", out floatValue);if (result == MvError.MV_OK){tbFrameRate.Text = floatValue.CurValue.ToString("F1");}IEnumValue enumValue;result = device.Parameters.GetEnumValue("PixelFormat", out enumValue);if (result == MvError.MV_OK){tbPixelFormat.Text = enumValue.CurEnumEntry.Symbolic;}}private void bnSetParam_Click(object sender, EventArgs e){try{float.Parse(tbExposure.Text);float.Parse(tbGain.Text);float.Parse(tbFrameRate.Text);}catch{ShowErrorMsg("Please enter correct type !", 0);return;}device.Parameters.SetEnumValue("ExposureAuto", 0);int result = device.Parameters.SetFloatValue("ExposureTime", float.Parse(tbExposure.Text));if (result != MvError.MV_OK){ShowErrorMsg("Set Gain Fail", result);}device.Parameters.SetEnumValue("GainAuto", 0);result = device.Parameters.SetFloatValue("Gain", float.Parse(tbGain.Text));if (result != MvError.MV_OK){ShowErrorMsg("Set Gain Fail !", result);}result = device.Parameters.SetBoolValue("AcquisitionFrameRateEnable", true);if (result != MvError.MV_OK){ShowErrorMsg("Set AcquisitionFrameRateEnable Fail !", result);}else{result = device.Parameters.SetFloatValue("AcquisitionFrameRate", float.Parse(tbFrameRate.Text));if (result != MvError.MV_OK){ShowErrorMsg("Set Frame Rate Fail !", result);}}}private void bnStopGrab_Click(object sender, EventArgs e){//标志位设为falseisGrabbing = false;receiveThread.Join();//停止采集int result = device.StreamGrabber.StopGrabbing();if (result != MvError.MV_OK){ShowErrorMsg("Stop Grabbing Fail !", result);}//控件操作SetCtrlWhenStopGrab();}private void SetCtrlWhenStopGrab(){bnStartGrab.Enabled = true;bnStopGrab.Enabled = false;cbSoftTrigger.Enabled = false;bnTriggerExec.Enabled = false;}private void bnTriggerExec_Click(object sender, EventArgs e){//触发命令int result = device.Parameters.SetCommandValue("TriggerSoftware");if (result != MvError.MV_OK){ShowErrorMsg("Trigger Software Fail !", result);}}private void cbSoftTrigger_CheckedChanged(object sender, EventArgs e){//触发源设为软触发if (cbSoftTrigger.Checked){device.Parameters.SetEnumValueByString("TriggerSource", "Software");if (isGrabbing){bnTriggerExec.Enabled = true;}}if (!cbSoftTrigger.Checked){device.Parameters.SetEnumValueByString("TriggerSource", "Line0");bnTriggerExec.Enabled = false;}}private void Form1_FormClosing(object sender, FormClosingEventArgs e){bnClose_Click(null, null);//反初始化SDKSystem.Finalize();}private void bnContinuesMode_CheckedChanged(object sender, EventArgs e){if (bnContinuesMode.Checked){device.Parameters.SetEnumValueByString("TriggerMode", "Off");cbSoftTrigger.Enabled = false;bnTriggerExec.Enabled = false;}}private void bnTriggerMode_CheckedChanged(object sender, EventArgs e){if (bnTriggerMode.Checked){//打开触发模式device.Parameters.SetEnumValueByString("TriggerMode", "On");if ((bool)cbSoftTrigger.Checked){device.Parameters.SetEnumValueByString("TriggerSource", "Software");if (isGrabbing){bnTriggerExec.Enabled = true;}}else{device.Parameters.SetEnumValueByString("TriggerSource", "Line0");}cbSoftTrigger.Enabled = true;cbSoftTrigger.Checked = true;}}public void ReciveThreadProcess(){IFrameOut frameOut = null;int result = MvError.MV_OK;while (isGrabbing){result = device.StreamGrabber.GetImageBuffer(1000, out frameOut);if (result == MvError.MV_OK){device.ImageRender.DisplayOneFrame(pictureBoxHandle, frameOut.Image);device.StreamGrabber.FreeImageBuffer(frameOut);}}}public void ReciveThreadImage(){IFrameOut frameOut = null;int result = MvError.MV_OK;int windowWidth = hWindowControl1.Width;int windowHeight = hWindowControl1.Height;double windowAspect = (double)windowWidth / windowHeight;while (isGrabbing){result = device.StreamGrabber.GetImageBuffer(1000, out frameOut);if (result == MvError.MV_OK){IImage image = frameOut.Image;int width = (int)image.Width;int height = (int)image.Height;double imageAspect = (double)width / height;int row1, col1, row2, col2;if (imageAspect > windowAspect){col1 = 0;col2 = width - 1;int newHeight = (int)(width / windowAspect);row1 = (width - newHeight) / 2;row2 = row1 + newHeight - 1;}else{row1 = 0;row2 = height - 1;int newWidth = (int)(height * windowAspect);col1 = (width - newWidth)/2;col2 = col1 + newWidth - 1;}hWindowControl1.HalconWindow.SetPart(row1, col1, row2, col2);IntPtr imagePtr = image.PixelDataPtr;Console.WriteLine(image.PixelType);if (image.PixelType == MvGvspPixelType.PixelType_Gvsp_BayerBG8){HImage hImage = new HImage("byte",width,height,imagePtr);HObject rgbImage;HOperatorSet.CfaToRgb(hImage, out rgbImage, "bayer_bg", "bilinear");HOperatorSet.DispObj(rgbImage, hWindowControl1.HalconWindow);hImage.Dispose();rgbImage.Dispose();}}}}private void bnStartGrab_Click(object sender, EventArgs e){try{isGrabbing = true;pictureBoxHandle = displayArea.Handle;receiveThread = new Thread(ReciveThreadProcess);receiveThread.Start();receiveImage = new Thread(ReciveThreadImage);receiveImage.Start();}catch (Exception ex){MessageBox.Show("Start thread failed !" + ex.Message);return;}//开始采集int result = device.StreamGrabber.StartGrabbing();if (result != MvError.MV_OK){isGrabbing = false;receiveThread.Join();ShowErrorMsg("Start Grabbing Fail !", result);return;}SetCtrlWhenStartGrab();}private void SetCtrlWhenStartGrab(){bnStartGrab.Enabled = false;bnStopGrab.Enabled = true;if ((bool)bnTriggerMode.Checked){cbSoftTrigger.Enabled = true;if ((bool)cbSoftTrigger.Checked){bnTriggerExec.Enabled = true;}}}}
}
相关文章:
电脑连接海康相机并在PictureBox和HWindowControl中分别显示。
展示结果: 下面附上界面中所有控件的Name,只需照着红字设置对应的控件Name即可 下面附上小编主界面的全部代码: using System; using System.Collections.Generic; using System.ComponentModel; using System.Data; using System.Drawing; …...

直播系统源码技术搭建部署流程及配置步骤
系统环境要求 PHP版本:5.6、7.3 Mysql版本:5.6,5.7需要关闭严格模式 Nginx:任何版本 Redis:需要给所有PHP版本安装Redis扩展,不需要设置Redis密码 最好使用面板安装:宝塔面板 - 简单好用的…...

Spring+ActiveMQ
1. 环境搭建 1.1 env-version JDK 1.8 Spring 2.7.13 Maven 3.6 ActiveMQ 5.15.2 1.2 docker-compose.yml version: 3.8services:activemq:image: rmohr/activemq:5.16.3container_name: activemqports:- "61616:61616"- "8161:8161"environment…...

Linux 常用命令总汇
查询所有wifi nmcli dev wifi list 链接wifi sudo nmcli dev wifi connect XXXX password XXXX 查询本机IP ifconfig 查询联网情况 ping www.baidu.com 进入.bash gedit ~/.bashrc sudo dpkg -i XXX.deb 安装超级终端 sudo apt install terminator 超级终端常用…...

fmql之Linux RTC
模拟i2c,连接rtc芯片。 dts: /{ // 根节点i2c_gpio: i2c-gpio {#address-cells <1>;#size-cells <0>;compatible "i2c-gpio";// MIO56-SDA, MIO55-SCL // 引脚编号gpios <&portc 2 0&portc 1 0 >;i2c-gp…...

Flask-SocketIO 简单示例
用于服务端和客户端通信,服务端主动给客户端发送消息 前提: 确保安装了socket库: pip install flask-socketio python-socketio服务端代码 from flask import Flask from flask_socketio import SocketIO import threading import timeap…...
)
Vue 3 的组件式开发(2)
1 Vue 3 组件的插槽 插槽(Slot)是Vue组件中的一个重要概念,它允许父组件向子组件中插入HTML结构或其他组件,从而实现内容的自定义和复用。以下是对Vue 3组件插槽的详细讲解: 1.1 插槽的基本概念 插槽可以被视为子组…...

python 爬虫 入门 四、线程,进程,协程
目录 一、进程 特征: 使用: 初始代码 进程改装代码 二、线程 特征: 使用: 三、协程 后续:五、抓取图片、视频 线程和进程大部分人估计都知道,但协程就不一定了。 一、进程 进程是操作系统分配资…...

cloak斗篷伪装下的独立站
随着互联网的不断进步,越来越多的跨境电商卖家开始认识到独立站的重要性,并纷纷建立自己的独立站点。对于那些有志于进入这一领域的卖家来说,独立站是什么呢?独立站是指个人或小型团队自行搭建和运营的网站。 独立站能够帮助跨境…...

【Nas】X-DOC:在Mac OS X 中使用 WOL 命令唤醒局域网内 PVE 主机
【Nas】X-DOC:在Mac OS X 中使用 WOL 命令唤醒局域网内 PVE 主机 1、Mac OS X 端2、PVE 端(Debian Linux) 1、Mac OS X 端 (1)安装 wakeonlan 工具 brew install wakeonlan(2)唤醒 PVE 命令 …...

u盘装win10系统提示“windows无法安装到这个磁盘,选中的磁盘采用GPT分区形式”解决方法
我们在u盘安装原版win10 iso镜像时,发现在选择硬盘时提示了“windows无法安装到这个磁盘,选中的磁盘采用GPT分区形式”,直接导致了无法继续安装下去。出现这种情况要怎么解决呢?下面小编分享u盘安装win10系统提示“windows无法安装到这个磁盘…...

Linux系统之dc计算器工具的基本使用
Linux系统之dc计算器工具的基本使用 一、DC工具介绍二、dc命令的基本用法2.1 dc命令的help帮助信息2.2 dc命令基本用法2.3 dc命令常用操作符 三、dc命令的基本使用3.1dc命令的用法步骤3.2 简单数学计算3.3 通过文件来计算3.4 使用--expression计算3.5 使用dc命令进行高精度计算…...

使用Python计算相对强弱指数(RSI)进阶
使用Python计算相对强弱指数(RSI)进阶 废话不多说,直接上主题:> 代码实现 以下是实现RSI计算的完整代码: # 创建一个DataFramedata {DATE: date_list, # 日期CLOSE: close_px_list, # 收盘价格 }df pd.DataF…...

vue 解决:npm ERR! code ERESOLVE 及 npm ERR! ERESOLVE could not resolve 的方案
1、问题描述: 其一、需求为: 想要安装项目所需依赖,成功运行 vue 项目,想要在浏览器中能成功访问项目地址 其二、问题描述为: 在 package.json 文件打开终端平台,通过执行 npm install 命令,…...

Android 原生开发与Harmony原生开发浅析
Android系统 基于Linux ,架构如下 底层 (Linux )> Native ( C层) > FrameWork层 (SystemService) > 系统应用 (闹钟/日历等) 从Android发版1.0开始到现在15,经历了大大小小的变革 从Android6.0以下是个分水岭,6.0之前权限都是直接卸载Manifest中配置 6.0开始 则分普…...
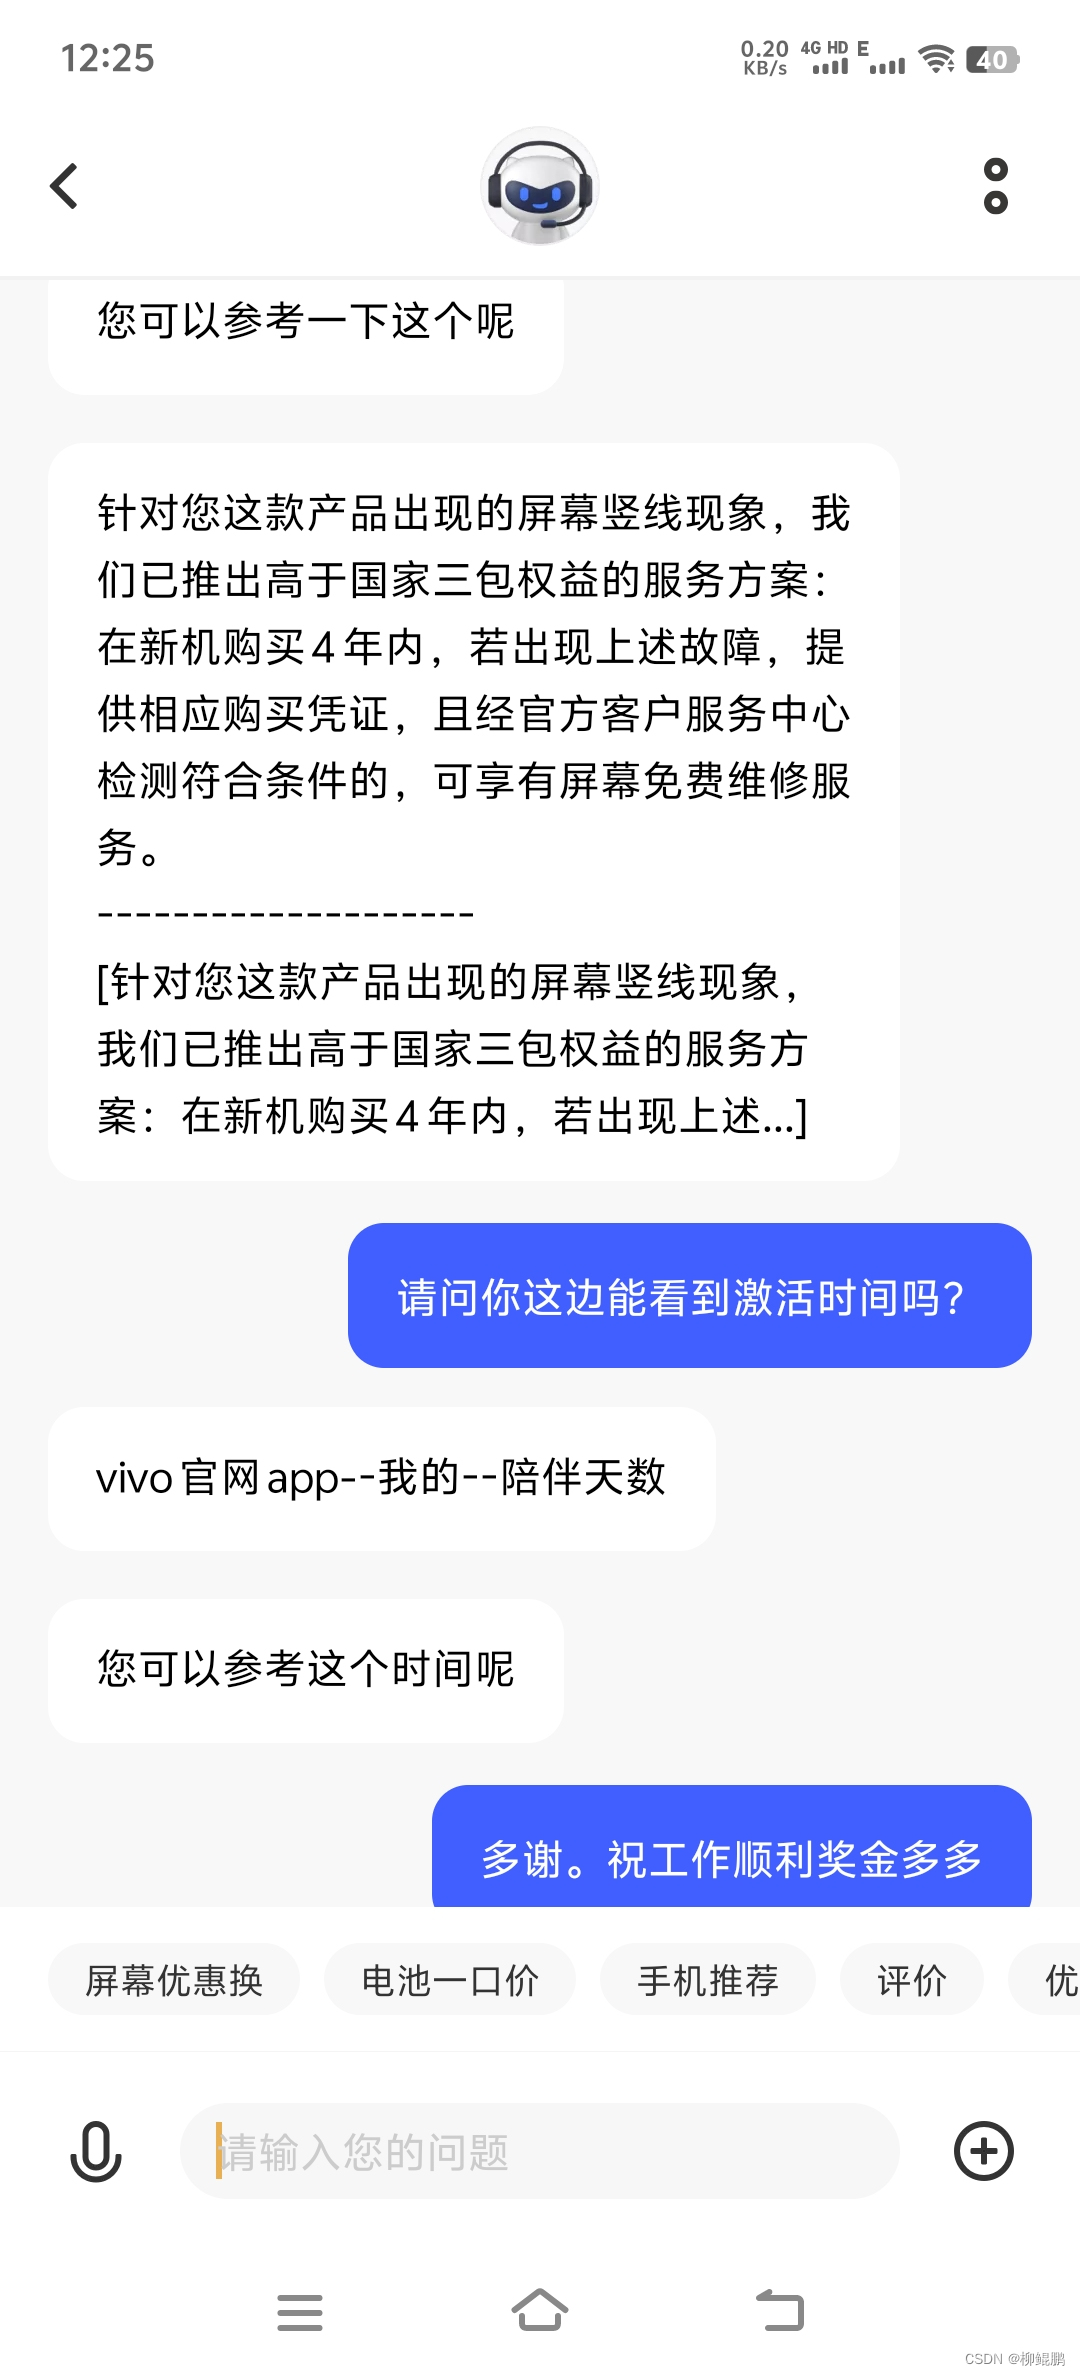
VIVO售后真好:屏幕绿线,4年免费换屏
只要亮屏就有。这也太影响使用了。 本来想换趁机换手机,看了VIVO发布的X200,决定等明年的X200 ULTRA。手头这个就准备修。 查了一下价格,换屏1600,优惠1100。咸鱼上X70 PRO也就800。能不能简单维修就解决呢?于是联系…...

数据类型【MySQL】
文章目录 建立表查看表删除表数据类型floatcharvarcharchar&&varchar 时间日期类型enum和setenum和set查找 建立表 mysql> create table if not exists user1(-> id int ,-> name varchar (20) comment 用户名 ,-> password char (32) comment 用户名的…...

流媒体协议.之(RTP,RTCP,RTSP,RTMP,HTTP)(二)
继续上篇介绍,本篇介绍一下封装RTP的数据格式,如何将摄像头采集的码流,音频的码流,封装到rtp里,传输。 有自己私有协议例子,有rtp协议,参考代码。注意不是rtsp协议。 一、私有协议 玩过tcp协议…...
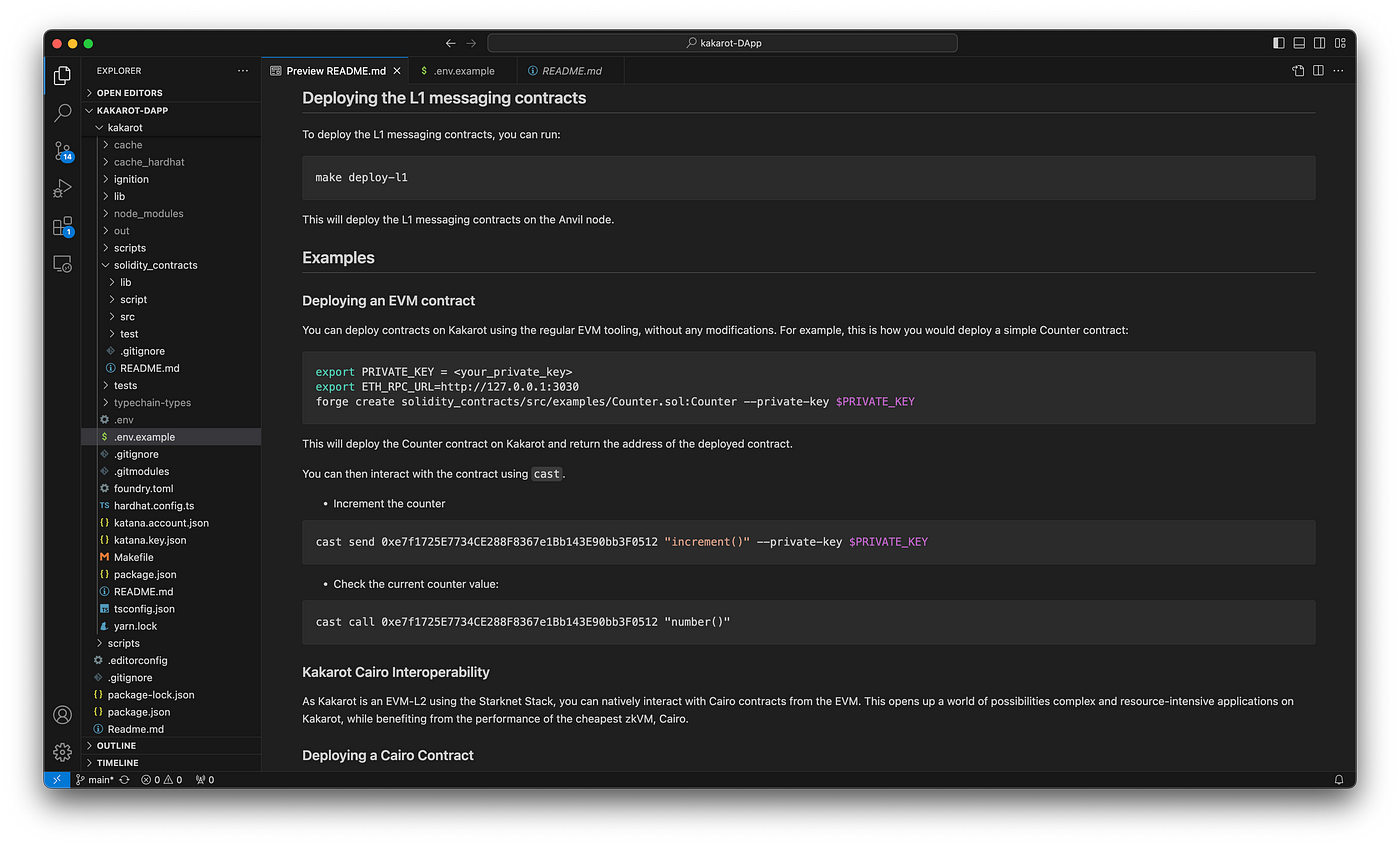
在 Kakarot ZkEVM 上使用 Starknet Scaffold 构建应用
Starknet 和 EVM 我们所知的智能合约世界一直围绕着以太坊虚拟机(EVM),其主要语言是 Solidity。 尽管 Starknet 通过 STARKs 为以太坊开辟了新的可能性,但其缺点是它有一个不同的虚拟机 (CairoVM),这要求开发者学习 …...
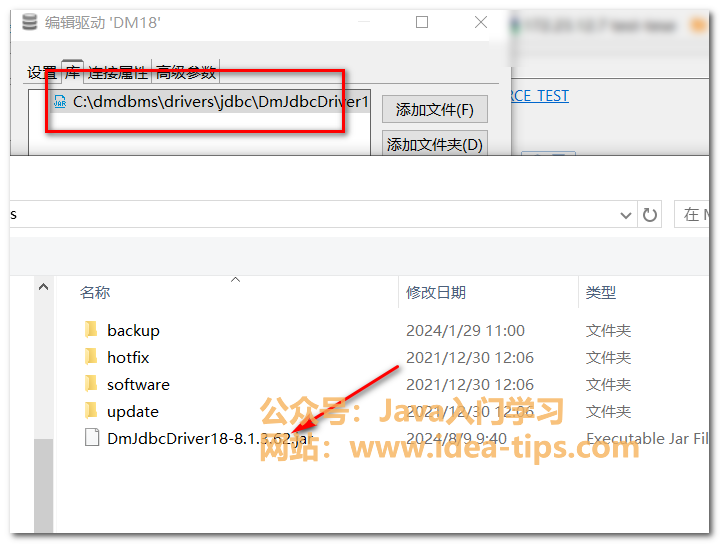
DBeave如何连接达梦数据库,设置达梦驱动,真酷
前言 我们在使用DBeaver连接数据库时,默认可以连接常用的数据库,如mysql数据库,postgresql数据库,oracle数据库。但是,我们的国产数据库达梦数据库,默认在IDEA里面没有驱动,所以还得配置一下才…...

PX4倾转垂起固定翼混控配置与硬件适配实战
1. PX4倾转垂起固定翼的核心概念解析 第一次接触倾转垂起固定翼的朋友可能会被这个名词吓到,其实它的原理并不复杂。简单来说,这是一种既能像多旋翼一样垂直起降,又能像固定翼飞机一样高效巡航的混合飞行器。我经手过的项目中,这种…...

如何在5分钟内快速上手LeRobot机器人AI控制框架:从零到一的完整指南
如何在5分钟内快速上手LeRobot机器人AI控制框架:从零到一的完整指南 【免费下载链接】lerobot 🤗 LeRobot: Making AI for Robotics more accessible with end-to-end learning 项目地址: https://gitcode.com/GitHub_Trending/le/lerobot 还在为…...
)
告别卡顿!在Qt/C++中手动绑定线程到指定CPU核心(附性能对比测试)
告别卡顿!在Qt/C中手动绑定线程到指定CPU核心(附性能对比测试) 在开发高性能桌面应用时,卡顿问题往往让开发者头疼不已。无论是音视频处理软件还是大型游戏客户端,流畅的用户体验都离不开高效的线程调度。现代操作系统…...

华为MateBook D 2018 BIOS隐藏选项实战:手动解锁TPM2.0迎战Win11
1. 为什么需要手动解锁TPM2.0 去年Windows 11正式发布时,很多华为MateBook D 2018用户都遇到了一个尴尬问题:明明硬件配置完全达标,却因为BIOS里找不到TPM2.0开关而无法升级。我当时也卡在这个环节整整两天,直到发现原来TPM功能被…...

搞AI的你踩坑了吗?Ubuntu更新后GPU突然‘失联’的排查与修复实录
搞AI的你踩坑了吗?Ubuntu更新后GPU突然‘失联’的排查与修复实录 凌晨三点的实验室,显示器泛着冷光,训练了72小时的模型即将收敛。你按下回车键查看进度,却看到一行刺眼的报错:NVIDIA-SMI has failed because it could…...

算法23,寻找峰值
这是一道经典的二分查找应用题:寻找峰值(Find Peak Element)。笔记中已经总结了核心逻辑,我将为你梳理其背后的数学原理(二段性),并提供标准的代码实现。1. 核心原理:什么是“二段性…...

Onyx:基于Next.js 14的全栈MVP模板,集成Supabase与现代化工具链
1. 项目概述:Onyx,一个开箱即用的全栈Next.js 14 MVP模板如果你正在寻找一个能让你在几天内,而不是几周内,就启动一个现代化、功能齐全的Web应用原型的起点,那么Onyx很可能就是你需要的那个“瑞士军刀”。这不是一个简…...

Linux系统级音频处理:JDSP4Linux架构、DSP效果器与实战调音指南
1. 项目概述:从“听个响”到“听个准”的桌面音频革命如果你是一个对电脑音质有追求的Linux用户,或者是一个音频领域的开发者,那么你很可能经历过这样的困扰:系统自带的音频管理就像个“大锅饭”,所有声音都混在一起&a…...

机器人伦理工程化:从道德困境到可解释决策系统的技术实现
1. 项目概述:当机器人需要做出道德抉择十年前,当我在实验室里调试一台协作机器人的碰撞检测算法时,一个从未预想过的问题出现了:在一条狭窄的通道里,机器人的移动路径上同时出现了一位匆忙的工程师和一个价值百万的实验…...

基于Tauri框架构建轻量级ChatGPT桌面客户端:从原理到实践
1. 项目概述:一个基于Tauri的ChatGPT桌面客户端 最近在折腾AI应用本地化部署的时候,发现了一个挺有意思的项目: pljhonglu/ChatGPT-T 。这是一个用Tauri框架开发的ChatGPT桌面客户端,它的前端界面直接复用了开源项目 chatgpt-…...