【harbor】离线安装2.9.0-arm64架构服务制作和升级部署
harbor官网地址:Harbor
参考文档可以看这里:部署 harbor 2.10.1 arm64 - 简书。
前提环境准备: 安装docker 和 docker-compose
先拉arm64架构的harbor相关镜像
docker pull --platform=linux/arm64 ghcr.io/octohelm/harbor/harbor-registryctl:v2.9.0
docker pull --platform=linux/arm64 ghcr.io/octohelm/harbor/nginx-photon:v2.9.0
docker pull --platform=linux/arm64 ghcr.io/octohelm/harbor/registry-photon:v2.9.0
docker pull --platform=linux/arm64 ghcr.io/octohelm/harbor/prepare:v2.9.0
docker pull --platform=linux/arm64 ghcr.io/octohelm/harbor/harbor-portal:v2.9.0
docker pull --platform=linux/arm64 ghcr.io/octohelm/harbor/harbor-log:v2.9.0
docker pull --platform=linux/arm64 ghcr.io/octohelm/harbor/harbor-exporter:v2.9.0
docker pull --platform=linux/arm64 ghcr.io/octohelm/harbor/redis-photon:v2.9.0
docker pull --platform=linux/arm64 ghcr.io/octohelm/harbor/trivy-adapter-photon:v2.9.0
docker pull --platform=linux/arm64 ghcr.io/octohelm/harbor/harbor-core:v2.9.0
docker pull --platform=linux/arm64 ghcr.io/octohelm/harbor/harbor-db:v2.9.0
docker pull --platform=linux/arm64 ghcr.io/octohelm/harbor/harbor-jobservice:v2.9.0 -
将相关镜像修改名称
docker tag ghcr.io/octohelm/harbor/harbor-registryctl:v2.9.0 goharbor/harbor-registryctl:v2.9.0
docker tag ghcr.io/octohelm/harbor/nginx-photon:v2.9.0 goharbor/nginx-photon:v2.9.0
docker tag ghcr.io/octohelm/harbor/registry-photon:v2.9.0 goharbor/registry-photon:v2.9.0
docker tag ghcr.io/octohelm/harbor/prepare:v2.9.0 goharbor/prepare:v2.9.0
docker tag ghcr.io/octohelm/harbor/harbor-portal:v2.9.0 goharbor/harbor-portal:v2.9.0
docker tag ghcr.io/octohelm/harbor/harbor-log:v2.9.0 goharbor/harbor-log:v2.9.0
docker tag ghcr.io/octohelm/harbor/harbor-exporter:v2.9.0 goharbor/harbor-exporter:v2.9.0
docker tag ghcr.io/octohelm/harbor/redis-photon:v2.9.0 goharbor/redis-photon:v2.9.0
docker tag ghcr.io/octohelm/harbor/trivy-adapter-photon:v2.9.0 goharbor/trivy-adapter-photon:v2.9.0
docker tag ghcr.io/octohelm/harbor/harbor-core:v2.9.0 goharbor/harbor-core:v2.9.0
docker tag ghcr.io/octohelm/harbor/harbor-db:v2.9.0 goharbor/harbor-db:v2.9.0
docker tag ghcr.io/octohelm/harbor/harbor-jobservice:v2.9.0 goharbor/harbor-jobservice:v2.9.0-
将harbor相关镜像导出为tar包
docker save -o goharbor-harbor-registryctl-v2.9.0.tar goharbor/harbor-registryctl:v2.9.0
docker save -o goharbor-nginx-photon-v2.9.0.tar goharbor/nginx-photon:v2.9.0
docker save -o goharbor-registry-photon-v2.9.0.tar goharbor/registry-photon:v2.9.0
docker save -o goharbor-prepare-v2.9.0.tar goharbor/prepare:v2.9.0
docker save -o goharbor-harbor-portal-v2.9.0.tar goharbor/harbor-portal:v2.9.0
docker save -o goharbor-harbor-log-v2.9.0.tar goharbor/harbor-log:v2.9.0
docker save -o goharbor-harbor-exporter-v2.9.0.tar goharbor/harbor-exporter:v2.9.0
docker save -o goharbor-redis-photon-v2.9.0.tar goharbor/redis-photon:v2.9.0
docker save -o goharbor-trivy-adapter-photon-v2.9.0.tar goharbor/trivy-adapter-photon:v2.9.0
docker save -o goharbor-harbor-core-v2.9.0.tar goharbor/harbor-core:v2.9.0
docker save -o goharbor-harbor-db-v2.9.0.tar goharbor/harbor-db:v2.9.0
docker save -o goharbor-harbor-jobservice-v2.9.0.tar goharbor/harbor-jobservice:v2.9.0
将harbor相关的tar包全部合并成一个gz包
tar -czvf harbor.v2.9.0-arm64.tar.gz *.tar
下载官网离线安装包x86的版本,
主要是为了拿里面的配置文件,将里面的harbor.v2.9.0.tar.gz,替换我们上面制作好的harbor.v2.9.0-arm64.tar.gz镜像包即可。
x86版本的下载地址: https://github.com/goharbor/harbor/releases/download/v2.9.0/harbor-offline-installer-v2.9.0.tgz

-
替换好后重新打包全部合并成一个gz包
tar -czvf harbor-offline-installer-v2.9.0-arm64.tar.gz harbor

开始安装
解压文件 tar -zxf harbor-offline-installer-v2.9.0.tgz
然后修改habor.yaml的配置文件
# Configuration file of Harbor# The IP address or hostname to access admin UI and registry service.
# DO NOT use localhost or 127.0.0.1, because Harbor needs to be accessed by external clients.
hostname: 10.99.xxx.xxx #自己主机ip# http related config
http:# port for http, default is 80. If https enabled, this port will redirect to https portport: 8081# https related config  没用http
#https:# https port for harbor, default is 443
#  port: 444# The path of cert and key files for nginx  cert.crt and key.key#配置证书和秘钥的文件路径  是自签名的
#  certificate: /root/dockerregistry/pki/registry.crt
#  private_key: /root/dockerregistry/pki/registry_private.key# # Uncomment following will enable tls communication between all harbor components
# internal_tls:
#   # set enabled to true means internal tls is enabled
#   enabled: true
#   # put your cert and key files on dir
#   dir: /etc/harbor/tls/internal
#   # enable strong ssl ciphers (default: false)
#   strong_ssl_ciphers: false# Uncomment external_url if you want to enable external proxy
# And when it enabled the hostname will no longer used
# external_url: https://reg.mydomain.com:8433# The initial password of Harbor admin
# It only works in first time to install harbor
# Remember Change the admin password from UI after launching Harbor.
harbor_admin_password: Harbor12345# Harbor DB configuration
database:# The password for the root user of Harbor DB. Change this before any production use.password: root123# The maximum number of connections in the idle connection pool. If it <=0, no idle connections are retained.max_idle_conns: 100# The maximum number of open connections to the database. If it <= 0, then there is no limit on the number of open connections.# Note: the default number of connections is 1024 for postgres of harbor.max_open_conns: 900# The maximum amount of time a connection may be reused. Expired connections may be closed lazily before reuse. If it <= 0, connections are not closed due to a connection's age.# The value is a duration string. A duration string is a possibly signed sequence of decimal numbers, each with optional fraction and a unit suffix, such as "300ms", "-1.5h" or "2h45m". Valid time units are "ns", "us" (or "µs"), "ms", "s", "m", "h".conn_max_lifetime: 5m# The maximum amount of time a connection may be idle. Expired connections may be closed lazily before reuse. If it <= 0, connections are not closed due to a connection's idle time.# The value is a duration string. A duration string is a possibly signed sequence of decimal numbers, each with optional fraction and a unit suffix, such as "300ms", "-1.5h" or "2h45m". Valid time units are "ns", "us" (or "µs"), "ms", "s", "m", "h".conn_max_idle_time: 0# The default data volume  宿主机上的目录 存放数据目录的
data_volume: /data# Harbor Storage settings by default is using /data dir on local filesystem
# Uncomment storage_service setting If you want to using external storage
# storage_service:
#   # ca_bundle is the path to the custom root ca certificate, which will be injected into the truststore
#   # of registry's containers.  This is usually needed when the user hosts a internal storage with self signed certificate.
#   ca_bundle:#   # storage backend, default is filesystem, options include filesystem, azure, gcs, s3, swift and oss
#   # for more info about this configuration please refer https://docs.docker.com/registry/configuration/
#   filesystem:
#     maxthreads: 100
#   # set disable to true when you want to disable registry redirect
#   redirect:
#     disable: false# Trivy configuration
#
# Trivy DB contains vulnerability information from NVD, Red Hat, and many other upstream vulnerability databases.
# It is downloaded by Trivy from the GitHub release page https://github.com/aquasecurity/trivy-db/releases and cached
# in the local file system. In addition, the database contains the update timestamp so Trivy can detect whether it
# should download a newer version from the Internet or use the cached one. Currently, the database is updated every
# 12 hours and published as a new release to GitHub.
trivy:# ignoreUnfixed The flag to display only fixed vulnerabilitiesignore_unfixed: false# skipUpdate The flag to enable or disable Trivy DB downloads from GitHub## You might want to enable this flag in test or CI/CD environments to avoid GitHub rate limiting issues.# If the flag is enabled you have to download the `trivy-offline.tar.gz` archive manually, extract `trivy.db` and# `metadata.json` files and mount them in the `/home/scanner/.cache/trivy/db` path.skip_update: false## The offline_scan option prevents Trivy from sending API requests to identify dependencies.# Scanning JAR files and pom.xml may require Internet access for better detection, but this option tries to avoid it.# For example, the offline mode will not try to resolve transitive dependencies in pom.xml when the dependency doesn't# exist in the local repositories. It means a number of detected vulnerabilities might be fewer in offline mode.# It would work if all the dependencies are in local.# This option doesn't affect DB download. You need to specify "skip-update" as well as "offline-scan" in an air-gapped environment.offline_scan: false## Comma-separated list of what security issues to detect. Possible values are `vuln`, `config` and `secret`. Defaults to `vuln`.security_check: vuln## insecure The flag to skip verifying registry certificateinsecure: false# github_token The GitHub access token to download Trivy DB## Anonymous downloads from GitHub are subject to the limit of 60 requests per hour. Normally such rate limit is enough# for production operations. If, for any reason, it's not enough, you could increase the rate limit to 5000# requests per hour by specifying the GitHub access token. For more details on GitHub rate limiting please consult# https://docs.github.com/rest/overview/resources-in-the-rest-api#rate-limiting## You can create a GitHub token by following the instructions in# https://help.github.com/en/github/authenticating-to-github/creating-a-personal-access-token-for-the-command-line## github_token: xxxjobservice:# Maximum number of job workers in job servicemax_job_workers: 10# The jobLoggers backend name, only support "STD_OUTPUT", "FILE" and/or "DB"job_loggers:- STD_OUTPUT- FILE# - DB# The jobLogger sweeper duration (ignored if `jobLogger` is `stdout`)logger_sweeper_duration: 1 #daysnotification:# Maximum retry count for webhook jobwebhook_job_max_retry: 3# HTTP client timeout for webhook jobwebhook_job_http_client_timeout: 3 #seconds# Log configurations 日志输出的地方
log:# options are debug, info, warning, error, fatallevel: info# configs for logs in local storagelocal:# Log files are rotated log_rotate_count times before being removed. If count is 0, old versions are removed rather than rotated.rotate_count: 50# Log files are rotated only if they grow bigger than log_rotate_size bytes. If size is followed by k, the size is assumed to be in kilobytes.# If the M is used, the size is in megabytes, and if G is used, the size is in gigabytes. So size 100, size 100k, size 100M and size 100G# are all valid.rotate_size: 200M# The directory on your host that store loglocation: /var/log/harbor# Uncomment following lines to enable external syslog endpoint.# external_endpoint:#   # protocol used to transmit log to external endpoint, options is tcp or udp#   protocol: tcp#   # The host of external endpoint#   host: localhost#   # Port of external endpoint#   port: 5140#This attribute is for migrator to detect the version of the .cfg file, DO NOT MODIFY!
_version: 2.9.0# Uncomment external_database if using external database.
# external_database:
#   harbor:
#     host: harbor_db_host
#     port: harbor_db_port
#     db_name: harbor_db_name
#     username: harbor_db_username
#     password: harbor_db_password
#     ssl_mode: disable
#     max_idle_conns: 2
#     max_open_conns: 0# Uncomment redis if need to customize redis db
# redis:
#   # db_index 0 is for core, it's unchangeable
#   # registry_db_index: 1
#   # jobservice_db_index: 2
#   # trivy_db_index: 5
#   # it's optional, the db for harbor business misc, by default is 0, uncomment it if you want to change it.
#   # harbor_db_index: 6
#   # it's optional, the db for harbor cache layer, by default is 0, uncomment it if you want to change it.
#   # cache_db_index: 7# Uncomment redis if need to customize redis db
# redis:
#   # db_index 0 is for core, it's unchangeable
#   # registry_db_index: 1
#   # jobservice_db_index: 2
#   # trivy_db_index: 5
#   # it's optional, the db for harbor business misc, by default is 0, uncomment it if you want to change it.
#   # harbor_db_index: 6
#   # it's optional, the db for harbor cache layer, by default is 0, uncomment it if you want to change it.
#   # cache_layer_db_index: 7# Uncomment external_redis if using external Redis server
# external_redis:
#   # support redis, redis+sentinel
#   # host for redis: <host_redis>:<port_redis>
#   # host for redis+sentinel:
#   #  <host_sentinel1>:<port_sentinel1>,<host_sentinel2>:<port_sentinel2>,<host_sentinel3>:<port_sentinel3>
#   host: redis:6379
#   password:
#   # Redis AUTH command was extended in Redis 6, it is possible to use it in the two-arguments AUTH <username> <password> form.
#   # there's a known issue when using external redis username ref:https://github.com/goharbor/harbor/issues/18892
#   # if you care about the image pull/push performance, please refer to this https://github.com/goharbor/harbor/wiki/Harbor-FAQs#external-redis-username-password-usage
#   # username:
#   # sentinel_master_set must be set to support redis+sentinel
#   #sentinel_master_set:
#   # db_index 0 is for core, it's unchangeable
#   registry_db_index: 1
#   jobservice_db_index: 2
#   trivy_db_index: 5
#   idle_timeout_seconds: 30
#   # it's optional, the db for harbor business misc, by default is 0, uncomment it if you want to change it.
#   # harbor_db_index: 6
#   # it's optional, the db for harbor cache layer, by default is 0, uncomment it if you want to change it.
#   # cache_layer_db_index: 7# Uncomment uaa for trusting the certificate of uaa instance that is hosted via self-signed cert.  配置自签名证书
#uaa:
#   ca_file: /root/dockerregistry/pki/registry.crt# Global proxy
# Config http proxy for components, e.g. http://my.proxy.com:3128
# Components doesn't need to connect to each others via http proxy.
# Remove component from `components` array if want disable proxy
# for it. If you want use proxy for replication, MUST enable proxy
# for core and jobservice, and set `http_proxy` and `https_proxy`.
# Add domain to the `no_proxy` field, when you want disable proxy
# for some special registry.
proxy:http_proxy:https_proxy:no_proxy:components:- core- jobservice- trivy# metric:
#   enabled: false
#   port: 9090
#   path: /metrics# Trace related config
# only can enable one trace provider(jaeger or otel) at the same time,
# and when using jaeger as provider, can only enable it with agent mode or collector mode.
# if using jaeger collector mode, uncomment endpoint and uncomment username, password if needed
# if using jaeger agetn mode uncomment agent_host and agent_port
# trace:
#   enabled: true
#   # set sample_rate to 1 if you wanna sampling 100% of trace data; set 0.5 if you wanna sampling 50% of trace data, and so forth
#   sample_rate: 1
#   # # namespace used to differenciate different harbor services
#   # namespace:
#   # # attributes is a key value dict contains user defined attributes used to initialize trace provider
#   # attributes:
#   #   application: harbor
#   # # jaeger should be 1.26 or newer.
#   # jaeger:
#   #   endpoint: http://hostname:14268/api/traces
#   #   username:
#   #   password:
#   #   agent_host: hostname
#   #   # export trace data by jaeger.thrift in compact mode
#   #   agent_port: 6831
#   # otel:
#   #   endpoint: hostname:4318
#   #   url_path: /v1/traces
#   #   compression: false
#   #   insecure: true
#   #   # timeout is in seconds
#   #   timeout: 10# Enable purge _upload directories
upload_purging:enabled: true# remove files in _upload directories which exist for a period of time, default is one week.age: 168h# the interval of the purge operationsinterval: 24hdryrun: false# Cache layer configurations
# If this feature enabled, harbor will cache the resource
# `project/project_metadata/repository/artifact/manifest` in the redis
# which can especially help to improve the performance of high concurrent
# manifest pulling.
# NOTICE
# If you are deploying Harbor in HA mode, make sure that all the harbor
# instances have the same behaviour, all with caching enabled or disabled,
# otherwise it can lead to potential data inconsistency.
cache:# not enabled by defaultenabled: false# keep cache for one day by defaultexpire_hours: 24# Harbor core configurations
# Uncomment to enable the following harbor core related configuration items.
# core:
#   # The provider for updating project quota(usage), there are 2 options, redis or db,
#   # by default is implemented by db but you can switch the updation via redis which
#   # can improve the performance of high concurrent pushing to the same project,
#   # and reduce the database connections spike and occupies.
#   # By redis will bring up some delay for quota usage updation for display, so only
#   # suggest switch provider to redis if you were ran into the db connections spike aroud
#   # the scenario of high concurrent pushing to same project, no improvment for other scenes.
#   quota_update_provider: redis # Or db
配置
执行: .prepare
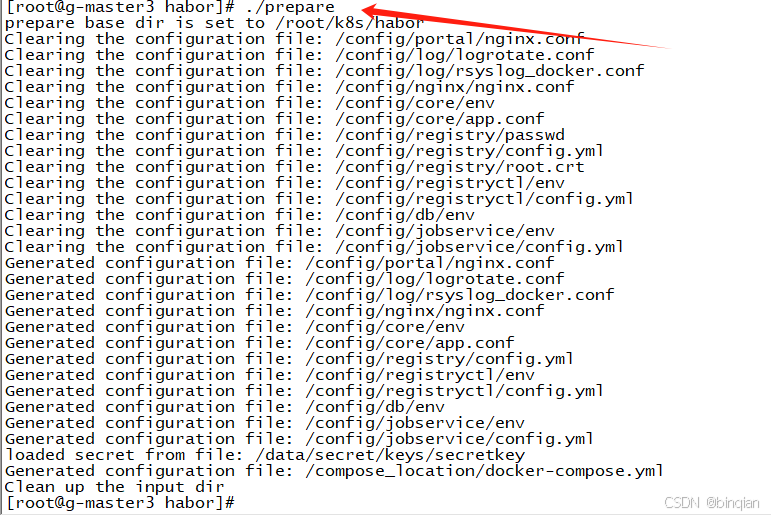
启动
执行命令 docker-compose up -d 或者 ./install.sh也一样。
install.sh脚本包含了:docker load、./prepare、docker-compose up -d3个命令。
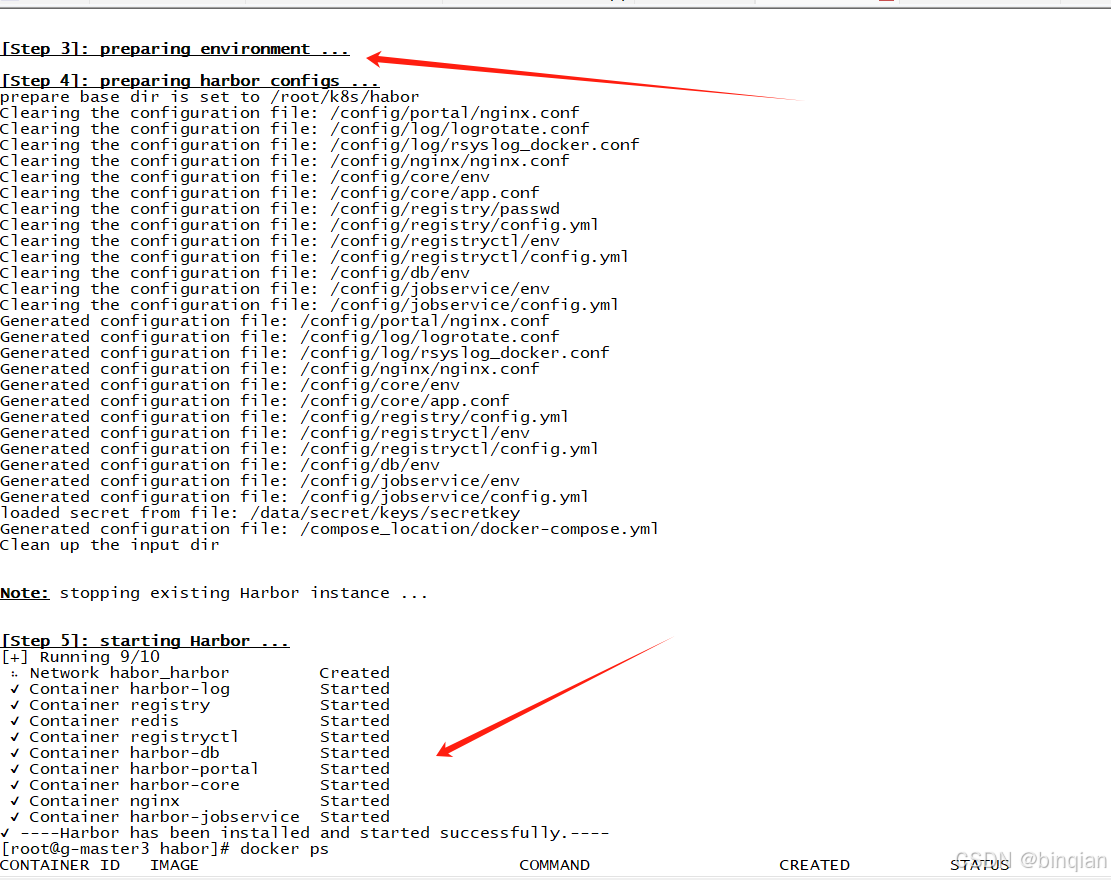
这样就安装完成;
安装时碰到一些小问题是: install.sh中的 docker load -i habor...gz文件的时候报错,我是直接注释了docker load -i ,, 自己直接解压压缩包 然后手动一个一个镜像执行docker load -i 其他的没有碰到到什么问题。
Harbor的登录
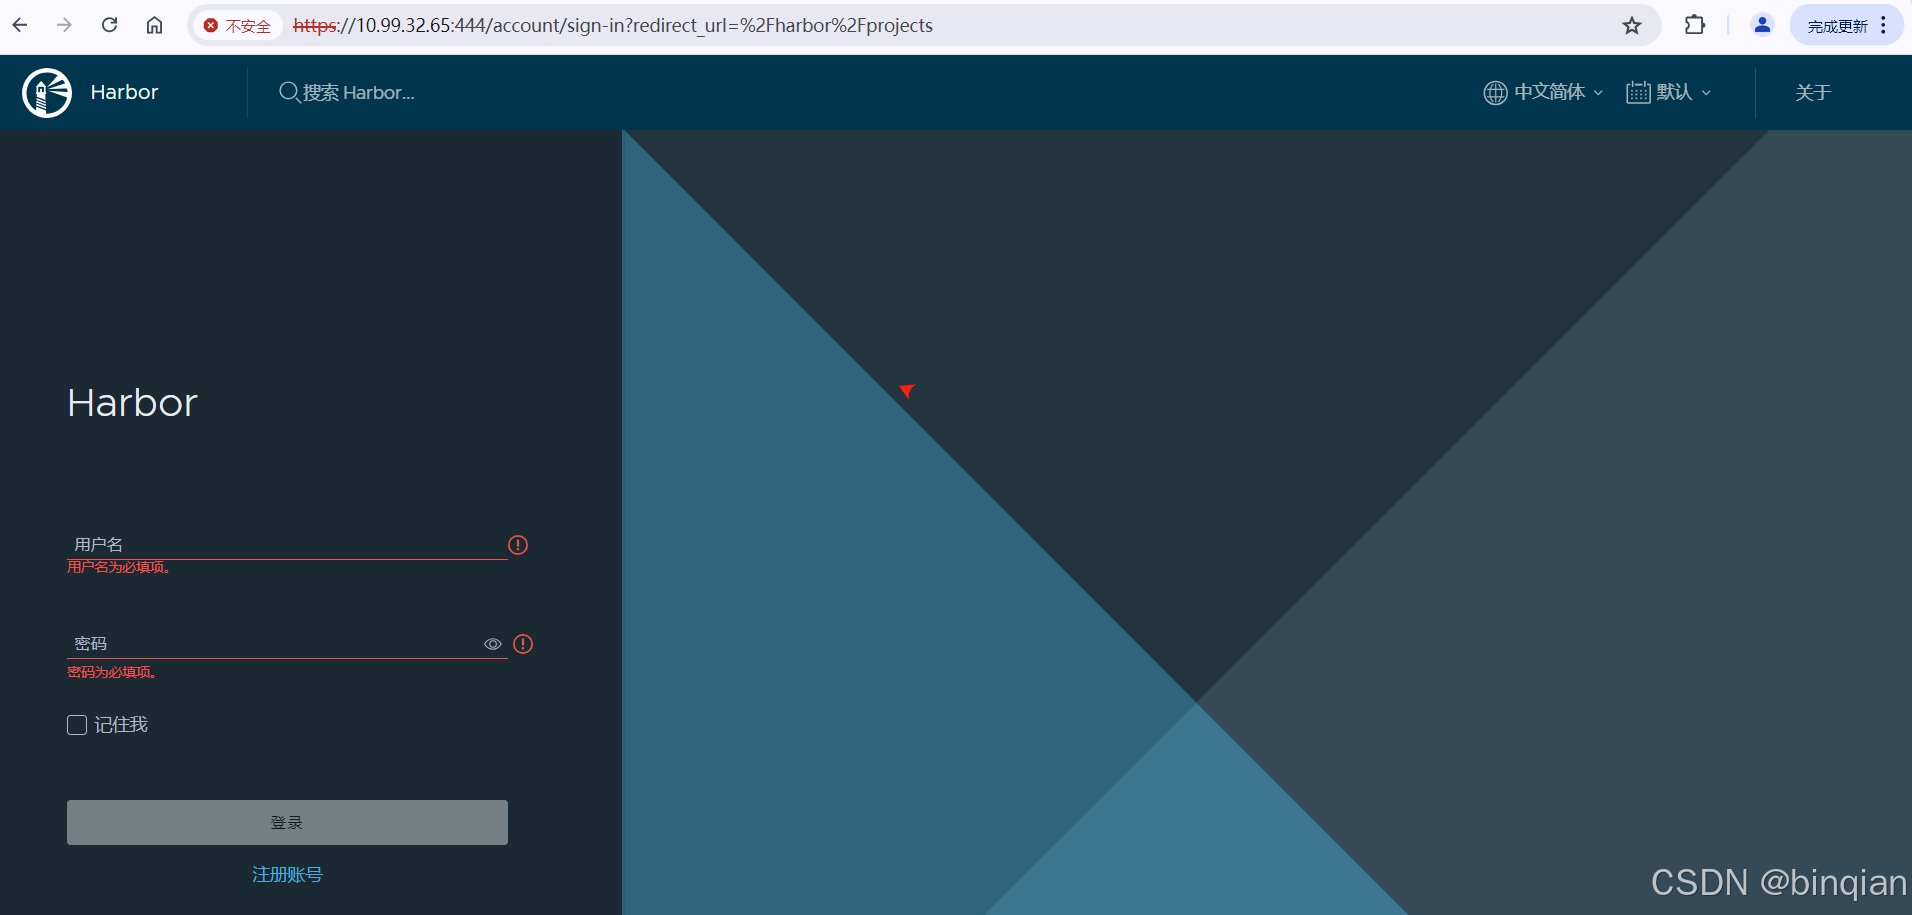
用户名和密码使用默认的在habor.yaml文件中有:
登录失败遇到的问题
登录提示核心功能启动失败,查看日志,发现redis没有成功

链接不了,查看docker logs redis_container_id
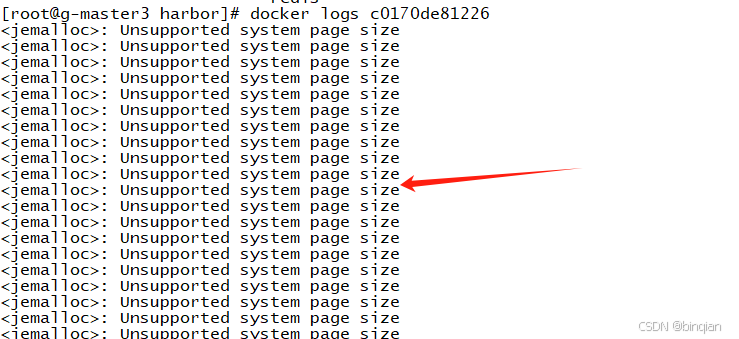
这个应该是和系统内存页分配相关的问题,就是redis和系统提供的参数不匹配
直接修改docker-compose.yaml把redis镜像换成其他版本,arm系统兼容版本就可以了,我用的是arm 7.0版本
登录成功!

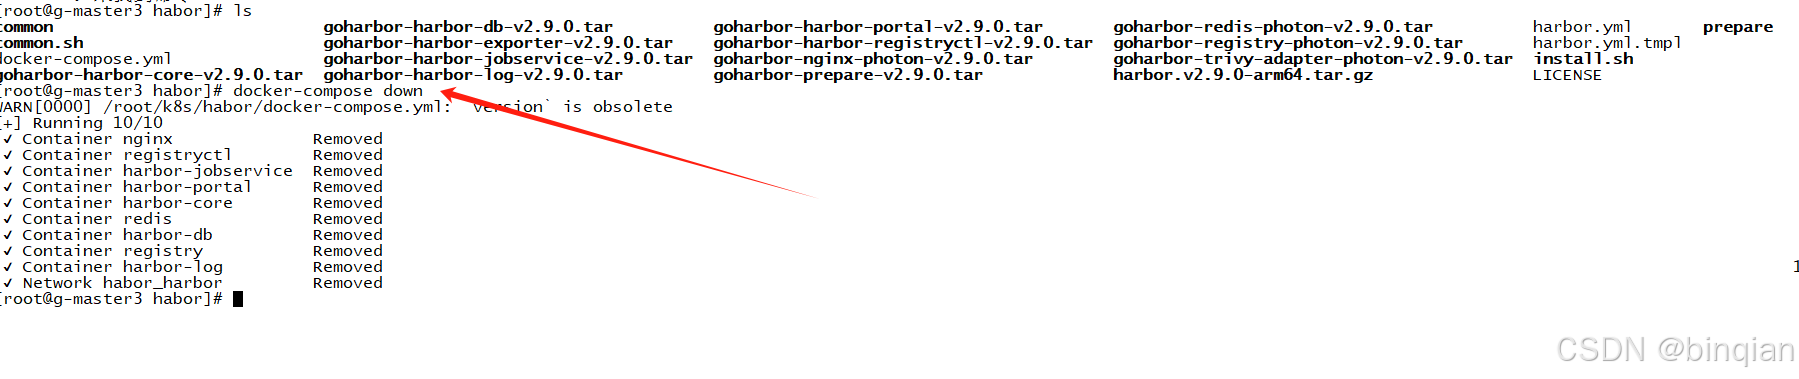
关停Habor
docker-compose down
修改配置更新操作
如果修改了配置,那么就需要关停,然后重新配置,安装更新
docker-compose down
./prepare
docker-compose up -d
问题1 - harbor中的hostname 和 external_url
如果harbor的认证服务地址我们是通过 external_url 配置的,那么harbor主机ip地址变化时,无须对harbor配置进行调整。
否则,如果hostname配置的是 域名,那么也无须对harbor配置进行调整。
否则,如果hostname配置的是内网ip,那么就需要更改harbor配置中的hostname属性。
然后执行下面命令:
docker-compose down
./prepare
docker-compose up -d
客户端如果时通过内网ip来访问 harbor的话,也需要同时修改 daemon.json文件配置,并重启docker
问题2 - 重置harbor的admin密码
harbor的admin密码存储在 postgresql数据库中。如果忘记密码的话,可以使用SQL客户端连接postgre数据库,删除admin密码即可。
具体步骤:
- 停止harbor服务:docker-compose down
- 修改docker-compose文件中:postgresql服务的端口导出:如ports: -5432:5432(5432是harbor postgresql的缺省端口)
- 重启harbor:docker-compose up -d
- 使用任意客户端工具连接postgresql数据库,数据库缺省密码为 postgres / root123,数据库:registry
- 更新密码:update harbor_user set password='',salt='' where username='admin'
- 再次停止harbor服务:docker-compose down
- 修改harbor.yml文件中登录密码
- 重新生成配置文件 ./prepare
- 再次重启harbor:docker-compose up -d
开启Https功能
首先创建私钥和自签名证书:可以参考:【Docker】安装registry本地镜像库,开启Https功能-CSDN博客
修改harbor.yml配置文件:
# https related config
https:# https port for harbor, default is 443port: 444# The path of cert and key files for nginx  cert.crt and key.keycertificate: /root/dockerregistry/pki/registry.crt  [你主机上存放的证书]private_key: /root/dockerregistry/pki/registry_private.key  [这个证书对应的私钥]# Uncomment uaa for trusting the certificate of uaa instance that is hosted via self-signed cert.
uaa:ca_file: /root/dockerregistry/pki/registry.crt [你主机上存放的证书]
删除把之前的data_volume中的数据全部删除,然后
./prepare
./install.sh
就可以了
推送镜像
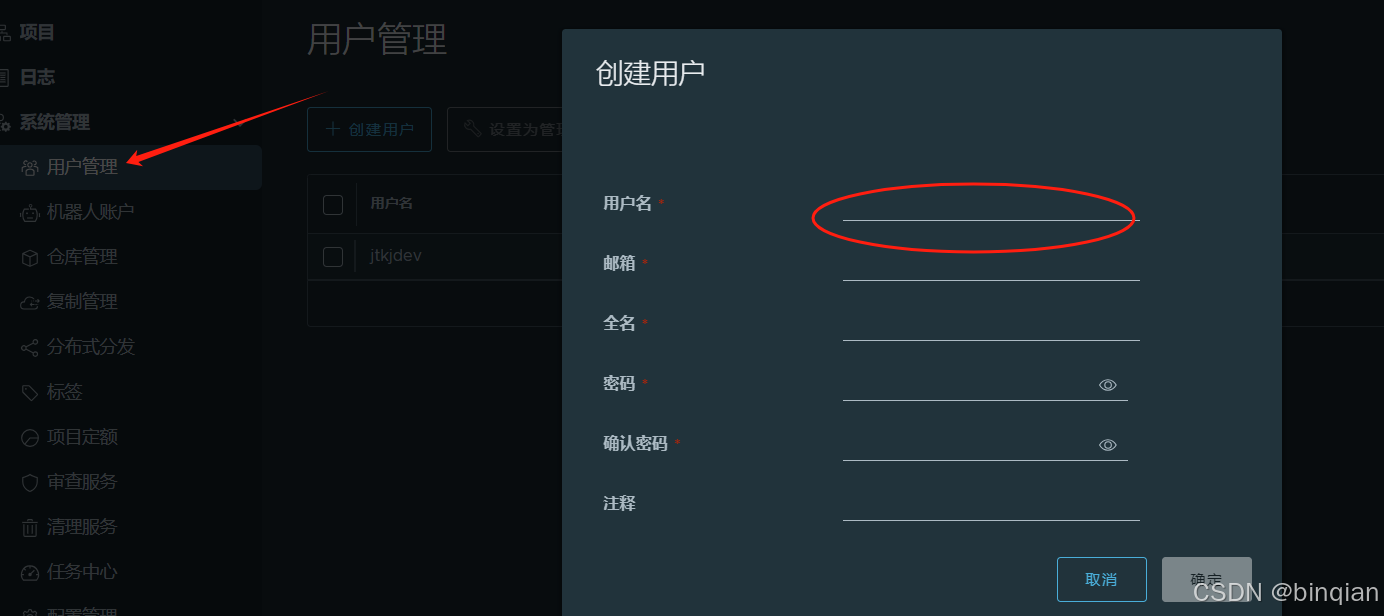
1、创建用户
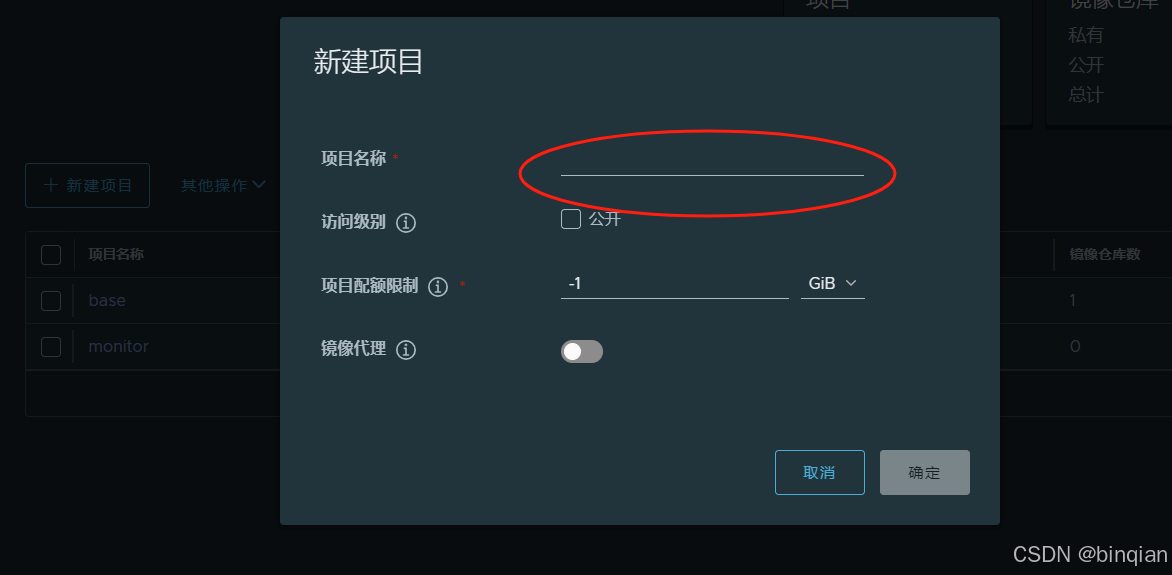
2、创建项目
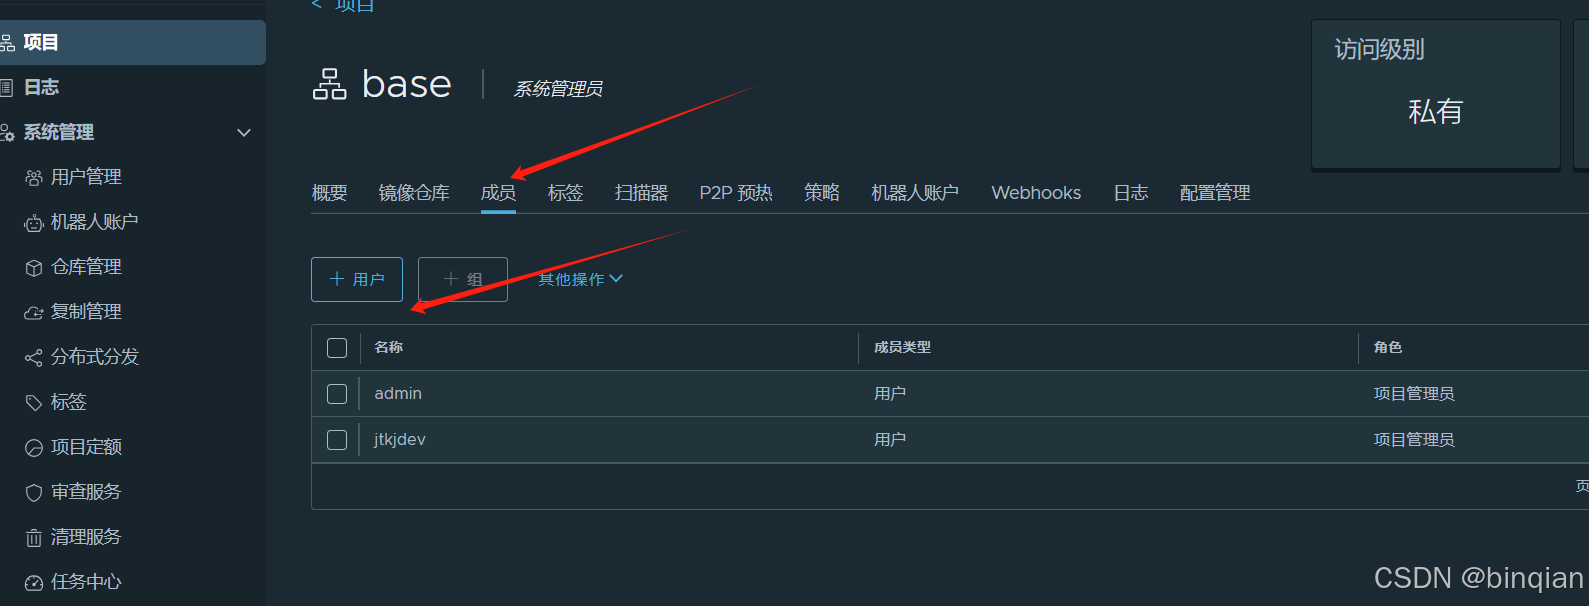
3、项目添加用户成员
4、推送镜像
(a) 把harbor的签名证书放到docker的配置目录:
/etc/docker/certs.d/12.34.34.45[ip]:444[端口]/ca.crt
(b) 推送镜像
docker push 12.34.34.45:444/base/pause:9
记得base是刚才创建的一个名称,这个路径要加上,不然推送不了。 然后用base这个项目的关联用户登录下docker ,就可以推送了 docker login 12.34.34.45:444 -u xxxxx -p xxxxx
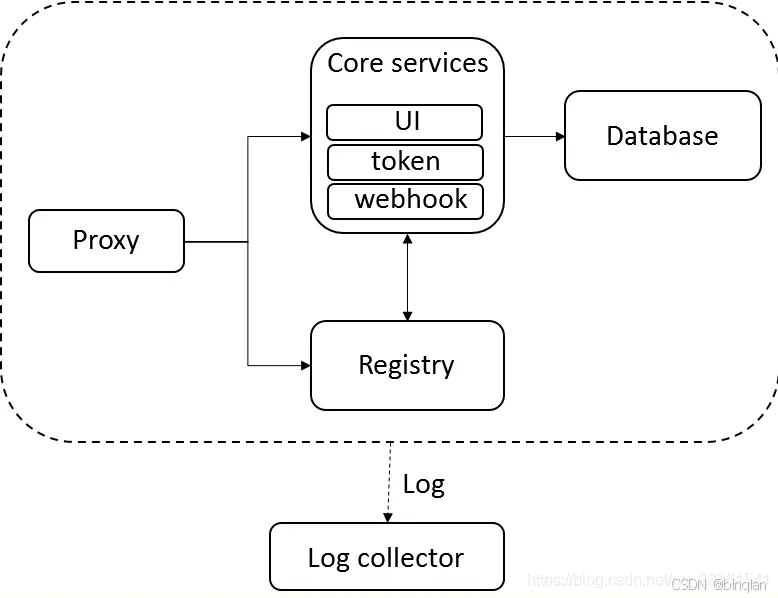
Harbor核心组件解释
Harbor在架构上主要由6个组件构成:
Proxy:Harbor的registry, UI, token等服务,通过一个前置的反向代理统一接收浏览器、Docker客户端的请求,并将请求转发给后端不同的服务。
Registry: 负责储存Docker镜像,并处理docker push/pull 命令。由于我们要对用户进行访问控制,即不同用户对Docker image有不同的读写权限,Registry会指向一个token服务,强制用户的每次docker pull/push请求都要携带一个合法的token, Registry会通过公钥对token 进行解密验证。
Core services: 这是Harbor的核心功能,主要提供以下服务:
UI:提供图形化界面,帮助用户管理registry上的镜像(image), 并对用户进行授权。
webhook:为了及时获取registry 上image状态变化的情况, 在Registry上配置webhook,把状态变化传递给UI模块。
token 服务:负责根据用户权限给每个docker push/pull命令签发token. Docker 客户端向Regiøstry服务发起的请求,如果不包含token,会被重定向到这里,获得token后再重新向Registry进行请求。
Database:为core services提供数据库服务,负责储存用户权限、审计日志、Docker image分组信息等数据。
Job Services:提供镜像远程复制功能,可以把本地镜像同步到其他Harbor实例中。
Log collector:为了帮助监控Harbor运行,负责收集其他组件的log,供日后进行分析。
各个组件之间的关系如下图所示:
三、Harbor特性
基于角色的访问控制 :用户与Docker镜像仓库通过“项目”进行组织管理,一个用户可以对多个镜像仓库在同一命名空间(project)里有不同的权限。
镜像复制 : 镜像可以在多个Registry实例中复制(同步)。尤其适合于负载均衡,高可用,混合云和多云的场景。
图形化用户界面 : 用户可以通过浏览器来浏览,检索当前Docker镜像仓库,管理项目和命名空间。
AD/LDAP 支持 : Harbor可以集成企业内部已有的AD/LDAP,用于鉴权认证管理。
审计管理 : 所有针对镜像仓库的操作都可以被记录追溯,用于审计管理。
国际化 : 已拥有英文、中文、德文、日文和俄文的本地化版本。更多的语言将会添加进来。
RESTful API : RESTful API 提供给管理员对于Harbor更多的操控, 使得与其它管理软件集成变得更容易。
部署简单 : 提供在线和离线两种安装工具, 也可以安装到vSphere平台(OVA方式)虚拟设备。
四、Harbor和Registry的比较
Harbor和Registry都是Docker的镜像仓库,但是Harbor作为更多企业的选择,是因为相比较于Regisrty来说,它具有很多的优势。
1.提供分层传输机制,优化网络传输
Docker镜像是是分层的,而如果每次传输都使用全量文件(所以用FTP的方式并不适合),显然不经济。必须提供识别分层传输的机制,以层的UUID为标识,确定传输的对象。
2.提供WEB界面,优化用户体验
只用镜像的名字来进行上传下载显然很不方便,需要有一个用户界面可以支持登陆、搜索功能,包括区分公有、私有镜像。
3.支持水平扩展集群
当有用户对镜像的上传下载操作集中在某服务器,需要对相应的访问压力作分解。
4.良好的安全机制
企业中的开发团队有很多不同的职位,对于不同的职位人员,分配不同的权限,具有更好的安全性。
5.Harbor提供了基于角色的访问控制机制,并通过项目来对镜像进行组织和访问权限的控制。kubernetes中通过namespace来对资源进行隔离,在企业级应用场景中,通过将两者进行结合可以有效将kubernetes使用的镜像资源进行管理和访问控制,增强镜像使用的安全性。尤其是在多租户场景下,可以通过租户、namespace和项目相结合的方式来实现对多租户镜像资源的管理和访问控制。
相关文章:
【harbor】离线安装2.9.0-arm64架构服务制作和升级部署
harbor官网地址:Harbor 参考文档可以看这里:部署 harbor 2.10.1 arm64 - 简书。 前提环境准备: 安装docker 和 docker-compose 先拉arm64架构的harbor相关镜像 docker pull --platformlinux/arm64 ghcr.io/octohelm/harbor/harbor-regist…...

ESLint 使用教程(五):ESLint 和 Prettier 的结合使用与冲突解决
前言 在现代前端开发中,代码质量与代码风格的统一是两个非常重要的方面。良好的代码质量能减少 bug 的产生,而统一的代码风格则能提高团队协作的效率。为了实现这两个目标,我们通常会使用一些工具。 为了保证代码的可读性和维护性࿰…...

uniApp之uni-file-picker使用踩坑
标题党~也不算坑吧 就是初体验 上传是需要存储一下子的,我以为uniApp是自己免费开的服务给大家中转使用,就没管这个事,但是官网是这么说的: 就我是怎么发现的,使用了一段时间后,上传的图片都裂了ÿ…...

【C语言】。末尼
用js写一个冒泡排序 当然可以。在JavaScript中,你可以使用递归的方式来实现冒泡排序算法。这是一个简单的示例: function bubbleSort(arr) { let len arr.length; if(len < 1){ return arr; // 如果数组只有一个元素或为空…...

【鉴权】深入解析 Token:身份认证的核心技术
目录 引言一、Token 的定义与概念1.1 Token 是什么?1.2 无状态性与自包含性1.3 Token 的工作流程1.3.1 基本工作流程1.3.2 工作流程图示 二、Token 的常见用途2.1 用户身份验证2.2 授权控制2.3 防止跨站请求伪造(CSRF)2.4 跨域认证 三、Token…...
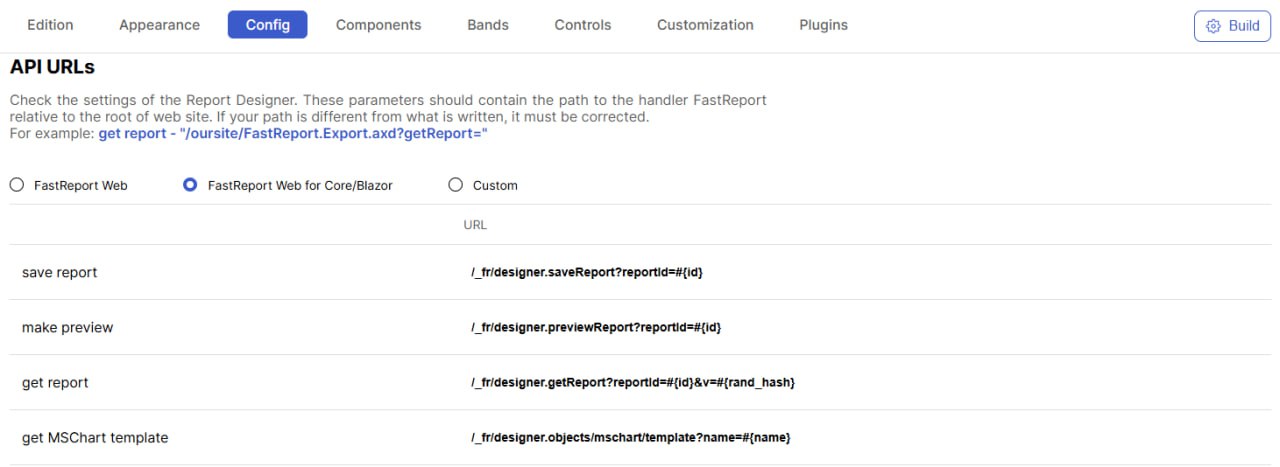
FastReport将停止 .NET Framework 上的 WebReport 更新
从2024/ 12 /1 日起,Fastreport将停止发布更新和提供对 FastReport.Web (.NET Framework) 的技术支持。该库一直是使用 Online Designer 的许多项目中报告的核心。这些更改意味着 FastReport.Web (Legacy) 库(FastReport.Net包的一部分)将不再…...

面试:TCP、UDP如何解决丢包问题
文章目录 一、TCP丢包原因、解决办法1.1 TCP为什么会丢包1.2 TCP传输协议如何解决丢包问题1.3 其他丢包情况(拓展)1.4 补充1.4.1 TCP端口号1.4.2 多个TCP请求的逻辑1.4.3 处理大量TCP连接请求的方法1.4.4 总结 二、UDP丢包2.1 UDP协议2.1.1 UDP简介2.1.2…...

在Ubuntu下安装RabbitMQ、添加一个新的登录用户并设置密码
在Ubuntu下安装RabbitMQ、添加一个新的登录用户并设置密码 在Ubuntu下安装RabbitMQ可以按照以下步骤进行:步骤 1: 更新系统步骤 2: 安装Erlang步骤 3: 添加RabbitMQ仓库步骤 4: 更新APT索引并安装RabbitMQ步骤 5: 启动RabbitMQ服务步骤 6: 检查RabbitMQ状态步骤 7: …...

HTTPS通信和TCP通信有什么不一样
HTTPS通信和TCP通信的主要区别如下: 协议层次:HTTPS是应用层协议,建立在HTTP协议之上,并增加了SSL/TLS加密层;而TCP是传输层协议,提供可靠的数据传输服务。安全性:HTTPS通过SSL/TLS加密…...

Kafka 的一些问题,夺命15连问
kafka-中的组成员 kafka四大核心 生产者API 允许应用程序发布记录流至一个或者多个kafka的主题(topics)。 消费者API 允许应用程序订阅一个或者多个主题,并处理这些主题接收到的记录流 StreamsAPI 允许应用程序充当流处理器(s…...

unity3d————延时函数
1.public void InvokeRepeating(string methodName, float time, float repeatRate); 延迟重复执行函数 InvokeRepeating 参数一:函数名字符串 参数二:第一次执行的延迟时间 参数三:之后每次执行的间隔时间 注意: 1-1.延时函数第…...

计算机学生自我提升方法——善用搜索引擎
计算机学生自我提升方法——善用搜索引擎 在信息爆炸的时代,计算机专业的学生如何有效地自我提升?答案可能就藏在一个简单却强大的工具——搜索引擎中。搜索引擎不仅是获取知识的入口,更是解决问题的利器。下面,我将分享一些善用…...

游戏引擎学习第一天
视频参考: https://www.bilibili.com/video/BV1zGDCYHErA/ 创建一个保存项目的路径 VS的安装略过,个人自行百度 1. vs 创建第一个CMAKE的窗口项目 game.cpp 修改如下的代码 到https://learn.microsoft.com/en-us/windows/win32/api/winbase/nf-winbase-winmain 去…...

uni-app view循环绑定click和 v-if
<view class"layout-wrap-item" v-for"(item, index) in menuItems" :key"index" click"item.clickHandler" :v-if"showMenu(item)"></view> const xxx (id) > { }; // 定义菜单项数组 const menuItems …...

Redis 高并发分布式锁实战
目录 环境准备 一 . Redis 安装 二:Spring boot 项目准备 三:nginx 安装 四:Jmeter 下载和配置 案例实战 优化一:加 synchronized 锁 优化二:使用 redis 的 setnx 实现分布式锁 优化三:使用 Lua 脚本…...

关于elementui el-radio 赋值问题
今天遇到这样的问题: 点击的时候,同时选中 照抄官网! 后来发现了问题: 也就是说如果你的版本太低,就不能用value,而得用label,于是修改 <el-radio-group v-model"searchTime"&g…...

2024-11-6----Android 11(全志713m)----- 关于添加 Selinux 权限
需求 节点: /sys/devices/platform/motor0/motor_ctrl上层 APP 使用 JNI 需要对该节点进行 echo 的操作,操作失败。 添加前的验证工作 adb 进去验证下,如下图所示: 发现权限不够。su 以后再操作是OK的,如下图: 添加前的修改 为防止报权限错误,直接给777,因为该…...
)
shodan5(泷羽sec)
声明 学习视频来自B站UP主 泷羽sec,如涉及侵泷羽sec权马上删除文章。 笔记只是方便各位师傅学习知识,以下网站只涉及学习内容,其他的都与本人无关,切莫逾越法律红线,否则后果自负 这节课旨在扩大自己在网络安全方面的知识面,了解网络安全领域的见闻,了…...

【Linux】Ansible集中化运维工具(详解)安装、常用模块、playbook脚本
文章目录 一、Ansible安装及远程控制1、关闭防火墙和SELinux2、安装ansible3、配置SSH无密码登录1、在管理机上生成一对密钥2、将公钥下发到远程主机3、保管密钥 4、主机目录 二、常用模块1、setup模块2、copy模块3、file模块4、shell模块5、script模块6、ping模块7、group模块…...

惠州石湾DELL T130服务器黄灯不开机案例
惠州石湾一个朋友反馈一台DELL PowerEdge T130 塔式服务器故障为 通电后无法开机,前面同时亮3个故障灯。闪电灯,电压灯,高温灯 1:这种情况建议大家更换一个同型号的电源进行故障排除。 2:朋友把该服务器硬件最小化测…...

驱动管理与系统优化:Driver Store Explorer全方位空间清理指南
驱动管理与系统优化:Driver Store Explorer全方位空间清理指南 【免费下载链接】DriverStoreExplorer Driver Store Explorer [RAPR] 项目地址: https://gitcode.com/gh_mirrors/dr/DriverStoreExplorer 你是否遇到过系统C盘空间莫名减少的情况?即…...

【Openwrt】高通qsdk6.10下IPQ4019的WAN/LAN网口自定义与VLAN隔离实战
1. 理解IPQ4019的网口架构与VLAN隔离需求 IPQ4019作为高通面向中高端路由设备的SoC芯片,其内置的ESS交换控制器管理着所有物理网口。在默认的qsdk6.10系统中,这些网口的WAN/LAN划分是通过DTS设备树文件硬编码实现的。这就带来一个问题:当我们…...

电源设计避坑指南:为什么你的滤波电容总发热?从充放电曲线看懂RC参数选择
电源设计避坑指南:为什么你的滤波电容总发热?从充放电曲线看懂RC参数选择 在嵌入式硬件开发中,电源设计往往是决定系统稳定性的关键因素之一。许多工程师在调试阶段都会遇到一个共同的问题:滤波电容异常发热。这不仅影响元件寿命&…...
 2025)
北京市自动驾驶汽车年度评估报告(2024-2025) 2025
本报告由北京市经信局等多部门主编,系统梳理了北京市自动驾驶汽车产业在 2024-2025 年的发展成果、测评情况、场景落地及产业生态建设等方面内容,展现了北京作为国内自动驾驶产业创新高地的发展全貌,也明确了产业现阶段的技术短板与未来发展方…...
)
Windows 11下OpenVINO 2022.1保姆级安装指南(AMD CPU实测可用)
Windows 11下OpenVINO 2022.1在AMD平台的实战部署指南 当大多数开发者认为OpenVINO只能在Intel硬件上运行时,我们却在AMD Ryzen 7 5800H上成功完成了全套计算机视觉模型的部署。本文将打破"Intel Only"的认知局限,手把手带你完成从环境准备到模…...
)
2026/3/23(上周速览AI)
上周速览 上周最强的主线,不是“又出了一个新模型”,而是 AI 正在从模型竞争转向三场更大的战争: 第一,中国大厂集体把重心推向智能体(agent)和超级入口,腾讯、百度、阿里、小米都在加码。第二&…...

【架构实战】云原生架构设计原则
一、什么是云原生 云原生(Cloud Native)是一种构建和运行应用程序的方法论,充分利用云计算的优势,让系统更加弹性、可靠、高效。 核心定义 云原生计算基金会(CNCF)对云原生的定义:云原生技术使组…...

如何快速搭建macOS开发环境:dev-setup一键配置终极指南
如何快速搭建macOS开发环境:dev-setup一键配置终极指南 【免费下载链接】dev-setup macOS development environment setup: Easy-to-understand instructions with automated setup scripts for developer tools like Vim, Sublime Text, Bash, iTerm, Python data …...

西门子S7 - 200PLC与组态王构建自动化搬运机械手组态系统
西门子S7-200PLC和组态王自动化搬运机械手的组态系统在自动化控制领域,西门子S7 - 200PLC与组态王相结合来打造自动化搬运机械手的组态系统,是实现高效生产流程的关键一步。今天咱就唠唠这其中的门道。 西门子S7 - 200PLC基础 西门子S7 - 200PLC作为一款…...

使用LaTeX排版春联生成模型的研究报告与技术文档
使用LaTeX排版春联生成模型的研究报告与技术文档 1. 引言 如果你正在研究春联生成这类有趣的AI模型,或者任何其他技术项目,最终总得把成果整理成一份像样的报告或论文。这时候,文档的“颜值”和专业性就变得至关重要了。你肯定不希望辛辛苦…...