Linux下Python脚本的编写解析fio(minimal格式)(三)
在服务器测试(storage)过程中,会看到很多人写跑fio的脚本用minimal格式来解析,因为这种格式返回的结果对与脚本(shell,python)解析log非常方便.下面介绍一下这种方式下,用Python来解析log
1 一般客户会要求结果中出现一下参数的值:
bandwidth
iops
clat_p99
clat_p999
clat_p9999
lat_max
lat_avg
那么就要知道这些参数的下标:
7  read_bandwidth_kb   带宽值8  read_iops                     IOPS值
30  read_clat_pct13    p99的值
32  read_clat_pct15  p999的值
34  read_clat_pct17   p9999的值
39  read_lat_max_us       lat  max值
40  read_lat_mean_us    lat平均值48  write_bandwidth_kb   带宽值
49  write_iops                     IOPS值
71  write_clat_pct13      p99值
73  write_clat_pct15      p999的值
75  write_clat_pct17       p9999的值
80  write_lat_max_us     lat最大值
81  write_lat_mean_us   lat平均值
2 先写一个跑fio的脚本,以HDD为例子吧
#!/bin/bash
if [ $# != 2 ]; thenecho "You must input  the time of each testcase (unit is second)"exit -1
fi
hdd=$1
time=$2
date
echo " sequential random  write  test start"
for ioengine in libaio sync
do
for rw  in   write  randwrite
dofor bs in 128k
dofor iodepth in 16
dofor jobs in 1
do	    date  echo "$hdd $rw $bs iodepth=$iodepth numjobs=$jobs  test satrt"job_name="${ioengine}_${bs}B_${rw}_${jobs}job_${iodepth}QD"fio  --name=$job_name  --filename=/dev/$hdd --ioengine=${ioengine} --direct=1 --thread=1 --numjobs=${jobs} --iodepth=${iodepth} --rw=${rw} --bs=${bs} --runtime=$time --time_based=1  --size=100% --group_reporting  --minimal  >>${hdd}_write.log
done
done
done
done
done
echo " sequential  randrom read  test start"
for ioengine in libaio sync
do
for rw  in   read  randread
dofor bs in 128k
dofor iodepth in 16
dofor jobs in 1
do	    date  echo "$hdd $rw $bs iodepth=$iodepth numjobs=$jobs  test satrt"job_name="${ioengine}_${bs}B_${rw}_${jobs}job_${iodepth}QD"fio  --name=$job_name  --filename=/dev/$hdd --ioengine=${ioengine} --direct=1 --thread=1 --numjobs=${jobs} --iodepth=${iodepth} --rw=${rw} --bs=${bs} --runtime=$time --time_based=1  --size=100% --group_reporting  --minimal  >>${hdd}_read.log
done
done
done
done
done
echo " sequential randmon  mix  test"
date
for ioengine in libaio sync
do
for rw in rw randrw
do
for mixread in 80
do
for blk_size in 1024k
do
for jobs in 1
do
for queue_depth in  16
do      job_name="${ioengine}_${rw}_${blk_size}B_mix_read${mixread}_${jobs}job_QD${queue_depth}"echo "$hdd $job_name  test satrt"fio --name=${job_name} --filename=/dev/$hdd --ioengine=libaio --direct=1 --thread=1 --numjobs=${jobs} --iodepth=${queue_depth} --rw=${rw} --bs=${blk_size} --rwmixread=$mixread --runtime=$time --time_based=1 --size=100% --group_reporting  --minimal >> "$hdd"_mix_data.log
done
done
done
done
done
done
mkdir $hdd
mkdir $hdd/test_data
mkdir $hdd/test_log
mv $hdd*.log   $hdd/test_log
mv $hdd*.csv    $hdd/test_data
echo "test has been finsished"
执行一下这脚本如下:
bash hdd-single-fio.sh sdb 1
以混合mix的log为例,先看下这个log
[root@dhcp-10-131-201-78 test_log]# cat sdb_mix_data.log
3;fio-3.19;libaio_rw_1024kB_mix_read80_1job_QD16;0;0;221184;141512;138;1563;8;215;20.126759;15.524727;7460;70547;30223.547625;18514.367104;1.000000%=7766;5.000000%=7766;10.000000%=11468;20.000000%=15138;30.000000%=15663;40.000000%=19005;50.000000%=23199;60.000000%=29491;70.000000%=39583;80.000000%=50069;90.000000%=60555;95.000000%=67633;99.000000%=70778;99.500000%=70778;99.900000%=70778;99.950000%=70778;99.990000%=70778;0%=0;0%=0;0%=0;7477;70557;30243.804338;18512.970716;147456;230400;100.000000%;188928.000000;58650.264859;59392;37998;37;1563;17;70;43.056138;10.402632;10657;1018269;309182.507707;302540.018880;1.000000%=10682;5.000000%=22151;10.000000%=30015;20.000000%=61603;30.000000%=93847;40.000000%=125304;50.000000%=152043;60.000000%=183500;70.000000%=396361;80.000000%=641728;90.000000%=775946;95.000000%=943718;99.000000%=1019215;99.500000%=1019215;99.900000%=1019215;99.950000%=1019215;99.990000%=1019215;0%=0;0%=0;0%=0;10698;1018299;309225.685569;302542.033998;18432;54400;95.836623%;36416.000000;25433.216706;0.128041%;0.320102%;276;0;1;0.4%;0.7%;1.5%;2.9%;94.5%;0.0%;0.0%;0.00%;0.00%;0.00%;0.00%;0.00%;0.00%;0.00%;0.00%;0.00%;0.00%;0.00%;0.00%;4.74%;32.48%;28.10%;20.07%;6.57%;2.55%;3.28%;1.46%;0.73%;0.00%;sdb;297;60;0;0;8639;12462;21101;95.45%
3;fio-3.19;libaio_randrw_1024kB_mix_read80_1job_QD16;0;0;73728;55226;53;1335;14;60;25.792681;5.446517;10041;908942;180405.286694;196438.088237;1.000000%=10027;5.000000%=21364;10.000000%=29753;20.000000%=49545;30.000000%=66846;40.000000%=80216;50.000000%=112721;60.000000%=145752;70.000000%=191889;80.000000%=256901;90.000000%=375390;95.000000%=666894;99.000000%=910163;99.500000%=910163;99.900000%=910163;99.950000%=910163;99.990000%=910163;0%=0;0%=0;0%=0;10062;908956;180431.227708;196437.318347;43008;75911;100.000000%;59459.500000;23265.934421;24576;18408;17;1335;29;52;45.625042;5.136300;2266;913806;334865.698542;330929.496869;1.000000%=2277;5.000000%=2342;10.000000%=2375;20.000000%=2375;30.000000%=4227;40.000000%=11730;50.000000%=212860;60.000000%=492830;70.000000%=549453;80.000000%=700448;90.000000%=759169;95.000000%=851443;99.000000%=910163;99.500000%=910163;99.900000%=910163;99.950000%=910163;99.990000%=910163;0%=0;0%=0;0%=0;2296;913852;334911.450250;330931.072562;2048;19381;58.205671%;10714.500000;12256.281838;0.074963%;0.149925%;97;0;1;1.0%;2.1%;4.2%;8.3%;84.4%;0.0%;0.0%;0.00%;0.00%;0.00%;0.00%;0.00%;0.00%;0.00%;0.00%;0.00%;0.00%;0.00%;7.29%;2.08%;4.17%;12.50%;18.75%;26.04%;12.50%;11.46%;5.21%;0.00%;0.00%;sdb;119;19;0;0;11431;4186;15616;91.45%
3;fio-3.19;sync_rw_1024kB_mix_read80_1job_QD16;0;0;247808;237591;232;1043;13;46;23.595277;5.565957;5485;234301;37825.893731;26041.930279;1.000000%=9633;5.000000%=14614;10.000000%=18743;20.000000%=22675;30.000000%=24248;40.000000%=28180;50.000000%=34865;60.000000%=41680;70.000000%=45350;80.000000%=49020;90.000000%=53739;95.000000%=58458;99.000000%=233832;99.500000%=233832;99.900000%=233832;99.950000%=233832;99.990000%=233832;0%=0;0%=0;0%=0;5532;234314;37849.606860;26040.562642;238664;238664;100.000000%;238664.000000;0.000000;63488;60870;59;1043;14;57;37.554565;10.139959;4380;356638;120652.004097;97710.572417;1.000000%=4358;5.000000%=5472;10.000000%=10682;20.000000%=25821;30.000000%=56360;40.000000%=78118;50.000000%=101187;60.000000%=135266;70.000000%=166723;80.000000%=189792;90.000000%=295698;95.000000%=308281;99.000000%=358612;99.500000%=358612;99.900000%=358612;99.950000%=358612;99.990000%=358612;0%=0;0%=0;0%=0;4409;356674;120689.674952;97710.473096;58053;58053;95.372104%;58053.000000;0.000000;0.000000%;0.767018%;305;0;1;0.3%;0.7%;1.3%;2.6%;95.1%;0.0%;0.0%;0.00%;0.00%;0.00%;0.00%;0.00%;0.00%;0.00%;0.00%;0.00%;0.00%;0.00%;0.00%;2.96%;11.18%;56.91%;17.43%;9.21%;2.30%;0.00%;0.00%;0.00%;0.00%;sdb;255;53;0;0;7514;6259;13773;90.30%
3;fio-3.19;sync_randrw_1024kB_mix_read80_1job_QD16;0;0;103424;86619;84;1194;13;54;25.225010;5.761086;11167;897215;186167.299069;170611.347990;1.000000%=16908;5.000000%=21626;10.000000%=23986;20.000000%=38535;30.000000%=65798;40.000000%=94896;50.000000%=147849;60.000000%=200278;70.000000%=244318;80.000000%=283115;90.000000%=383778;95.000000%=488636;99.000000%=876609;99.500000%=893386;99.900000%=893386;99.950000%=893386;99.990000%=893386;0%=0;0%=0;0%=0;11192;897239;186192.659624;170611.730086;63488;88832;87.925282%;76160.000000;17920.914262;33792;28301;27;1194;27;63;41.979727;7.398398;2228;8460;2903.612667;1232.327555;1.000000%=2244;5.000000%=2277;10.000000%=2342;20.000000%=2342;30.000000%=2375;40.000000%=2506;50.000000%=2539;60.000000%=2572;70.000000%=2637;80.000000%=2899;90.000000%=3260;95.000000%=6127;99.000000%=8454;99.500000%=8454;99.900000%=8454;99.950000%=8454;99.990000%=8454;0%=0;0%=0;0%=0;2262;8488;2945.728455;1229.188149;20480;37148;100.000000%;28814.000000;11786.055829;0.000000%;0.419111%;135;0;1;0.7%;1.5%;3.0%;6.0%;88.8%;0.0%;0.0%;0.00%;0.00%;0.00%;0.00%;0.00%;0.00%;0.00%;0.00%;0.00%;0.00%;0.00%;22.39%;2.24%;2.99%;17.16%;10.45%;23.88%;17.91%;1.49%;1.49%;0.00%;0.00%;sdb;152;35;0;0;16193;101;16295;91.85%
3 下面开始用Python来解析这个log,我们需要用到Python中文件函数open,调用两个模块sys和argparse模块 如下:
#!/usr/bin/python
import argparse
import sys
inputfile = sys.argv[1]
resultfile = sys.argv[2]
rwm = sys.argv[3]
sys.argv[n]是传递Python脚本的第几个参数,这里我主要用到三个参数:
inputfile :代表要打开的fio log文件
resultfile:代表要输出的解析结果
rwm: 代表read.write,mix三种读写模式
(1)下面用open函数来处理一下sdb_mix_data.log
先用换行符进行分割,因为总共有4个workload,也就是4个换行,分割之后,列表里就会有5个元素第5个元素为空,需要用函数pop(-1)去掉最后一个元素空
#!/usr/bin/python
import argparse
import sys
inputfile = "sdb_mix_data.log"
resultfile = "sdb_mix.csv"
rwm = "read"
datastr = open(inputfile).read()
data = datastr.split('\n')
data.pop(-1)
print "len(data)"
执行结果:

(2) 第二步就是用open函数write一个输出表格 如下:
#!/usr/bin/python
import argparse
import sys
inputfile = "sdb_mix_data.log"
resultfile = "sdb_mix.csv"
rwm = "read"
datastr = open(inputfile).read()
data = datastr.split('\n')
data.pop(-1)
if rwm == "read":f=open(resultfile,"a")f.write("workload,bandwith(kb/s),IOPS,lat-avg(us),Qos(us) 99%,Qos(us) 99_9%, Qos(us) 99_99%,lat-max(us)\n")f.close()
生成表格如下:

(3)第三步 就是把log的数据追加到CSV里
#!/usr/bin/python
import argparse
import sys
inputfile = "sdb_mix_data.log"
resultfile = "sdb_mix.csv"
rwm = "read"
datastr = open(inputfile).read()
data = datastr.split('\n')
data.pop(-1)
if rwm == "read":f=open(resultfile,"a")f.write("workload,bandwith(kb/s),IOPS,lat-avg(us),Qos(us) 99%,Qos(us) 99_9%, Qos(us) 99_99%,lat-max(us)\n")f.close()for i in data:oneCaseList = i.split(";")caseName = oneCaseList[2]oneCaseRes = caseName +  "," + oneCaseList[6] + "," + oneCaseList[7] + "," + oneCaseList[39].split(".")[0] + "," + oneCaseList[29].split("=")[1] + "," + oneCaseList[31].split("=")[1] + "," + oneCaseList[33].split("=")[1] + "," +  oneCaseList[38].split(".")[0] + "\n"f = open(resultfile,"a")f.write(oneCaseRes)f.close()
结果如下图:

(4)这个是read的数据,下面看看write的数据
#!/usr/bin/python
import argparse
import sys
inputfile = "sdb_mix_data.log"
resultfile = "sdb_mix.csv"
rwm = "write"
datastr = open(inputfile).read()
data = datastr.split('\n')
data.pop(-1)
if rwm == "read":f=open(resultfile,"a")f.write("workload,bandwith(kb/s),IOPS,lat-avg(us),Qos(us) 99%,Qos(us) 99_9%, Qos(us) 99_99%,lat-max(us)\n")f.close()for i in data:oneCaseList = i.split(";")caseName = oneCaseList[2]oneCaseRes = caseName +  "," + oneCaseList[6] + "," + oneCaseList[7] + "," + oneCaseList[39].split(".")[0] + "," + oneCaseList[29].split("=")[1] + "," + oneCaseList[31].split("=")[1] + "," + oneCaseList[33].split("=")[1] + "," +  oneCaseList[38].split(".")[0] + "\n"f = open(resultfile,"a")f.write(oneCaseRes)f.close()
if rwm == "write":f=open(resultfile,"a")f.write("workload,bandwith(kb/s),IOPS,lat-avg(us),Qos(us) 99%,Qos(us) 99_9%, Qos(us) 99_99%,lat-max(us)\n")f.close()for i in data:oneCaseList = i.split(";")caseName = oneCaseList[2]oneCaseRes = caseName +  ","  + oneCaseList[47] + "," + oneCaseList[48] + "," + oneCaseList[80] + "," + oneCaseList[70].split(".")[0] + "," + oneCaseList[72].split("=")[1] + "," + oneCaseList[74].split("=")[1]  + "," +  oneCaseList[79].split(".")[0] + "\n"f = open(resultfile,"a")f.write(oneCaseRes)f.close()
结果如下:

(5) 因为是读写混合数据,是要把read和write的数据放在同一个CSV里边的 如下:
#!/usr/bin/python
import argparse
import sys
inputfile = "sdb_mix_data.log"
resultfile = "sdb_mix.csv"
rwm = "mix"
datastr = open(inputfile).read()
data = datastr.split('\n')
data.pop(-1)
if rwm == "read":f=open(resultfile,"a")f.write("workload,bandwith(kb/s),IOPS,lat-avg(us),Qos(us) 99%,Qos(us) 99_9%, Qos(us) 99_99%,lat-max(us)\n")f.close()for i in data:oneCaseList = i.split(";")caseName = oneCaseList[2]oneCaseRes = caseName + "," + oneCaseList[6] + "," + oneCaseList[7] + "," + oneCaseList[39].split(".")[0] + "," + oneCaseList[29].split("=")[1] + "," + oneCaseList[31].split("=")[1] + "," + oneCaseList[33].split("=")[1] + "," + oneCaseList[38].split(".")[0] + "\n"f = open(resultfile,"a")f.write(oneCaseRes)f.close()
if rwm == "write":f=open(resultfile,"a")f.write("workload,bandwith(kb/s),IOPS,lat-avg(us),Qos(us) 99%,Qos(us) 99_9%, Qos(us) 99_99%,lat-max(us)\n")f.close()for i in data:oneCaseList = i.split(";")caseName = oneCaseList[2]oneCaseRes = caseName + "," + oneCaseList[47] + "," + oneCaseList[48] + "," + oneCaseList[80] + "," + oneCaseList[70].split(".")[0] + "," + oneCaseList[72].split("=")[1] + "," + oneCaseList[74].split("=")[1] + "," + oneCaseList[79].split(".")[0] + "\n"f = open(resultfile,"a")f.write(oneCaseRes)f.close()
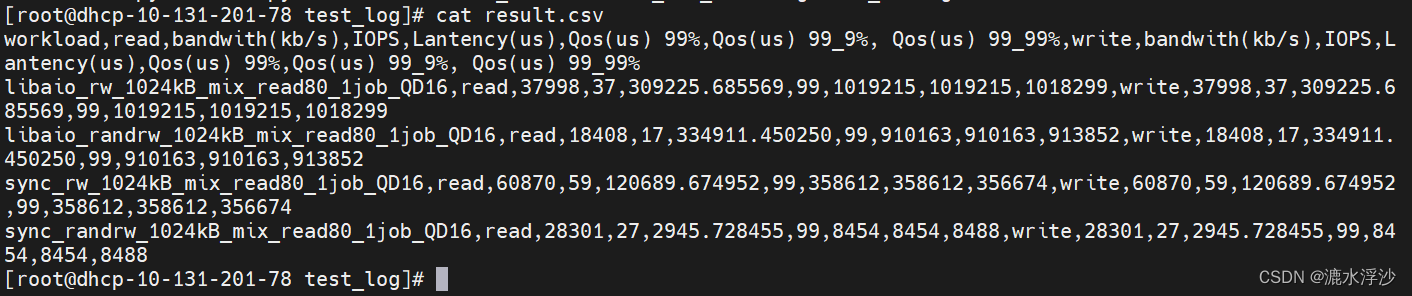
if rwm == "mix":f=open(resultfile,"a")f.write("workload,read,bandwith(kb/s),IOPS,Lantency(us),Qos(us) 99%,Qos(us) 99_9%, Qos(us) 99_99%,write,bandwith(kb/s),IOPS,Lantency(us),Qos(us) 99%,Qos(us) 99_9%, Qos(us) 99_99%\n")f.close()for i in data:oneCaseList = i.split(";")caseName = oneCaseList[2]oneCaseRes = caseName + "," + "read" + "," + oneCaseList[47] + "," + oneCaseList[48] + "," + oneCaseList[80] + "," + oneCaseList[70].split(".")[0] + "," + oneCaseList[72].split("=")[1] + "," + oneCaseList[74].split("=")[1] + "," + oneCaseList[79].split(".")[0] + "," + "write" + "," + oneCaseList[47] + "," + oneCaseList[48] + "," + oneCaseList[80] + "," + oneCaseList[70].split(".")[0] + "," + oneCaseList[72].split("=")[1] + "," + oneCaseList[74].split("=")[1] + "," + oneCaseList[79].split(".")[0] + "\n"f = open(resultfile,"a")f.write(oneCaseRes)f.close()
结果如下图:

(6) 把三个参数(inputfile , resultfile ,rwm )写进函数里 最终的Python脚本如下:
#!/usr/bin/python
import argparse
import sys
def fiodata(inputFile, resultFile,rwm):datastr = open(inputfile).read()data = datastr.split('\n')data.pop(-1)if rwm == "read":f=open(resultfile,"a")f.write("workload,bandwith(kb/s),IOPS,lat-avg(us),Qos(us) 99%,Qos(us) 99_9%, Qos(us) 99_99%,lat-max(us)\n")f.close()for i in data:oneCaseList = i.split(";")caseName = oneCaseList[2]oneCaseRes = caseName +  "," + oneCaseList[6] + "," + oneCaseList[7] + "," + oneCaseList[39].split(".")[0] + "," + oneCaseList[29].split("=")[1] + "," + oneCaseList[31].split("=")[1] + "," + oneCaseList[33].split("=")[1] + "," +  oneCaseList[38].split(".")[0] + "\n"f = open(resultfile,"a")f.write(oneCaseRes)f.close()if rwm == "write":f=open(resultfile,"a")f.write("workload,bandwith(kb/s),IOPS,lat-avg(us),Qos(us) 99%,Qos(us) 99_9%, Qos(us) 99_99%,lat-max(us)\n")f.close()for i in data:oneCaseList = i.split(";")caseName = oneCaseList[2]oneCaseRes = caseName +  ","  + oneCaseList[47] + "," + oneCaseList[48] + "," + oneCaseList[80] + "," + oneCaseList[70].split(".")[0] + "," + oneCaseList[72].split("=")[1] + "," + oneCaseList[74].split("=")[1]  + "," +  oneCaseList[79].split(".")[0] + "\n"f = open(resultfile,"a")f.write(oneCaseRes)f.close()if rwm == "mix":f=open(resultfile,"a")f.write("workload,read,bandwith(kb/s),IOPS,Lantency(us),Qos(us) 99%,Qos(us) 99_9%, Qos(us) 99_99%,write,bandwith(kb/s),IOPS,Lantency(us),Qos(us) 99%,Qos(us) 99_9%, Qos(us) 99_99%\n")f.close()for i in data:oneCaseList = i.split(";")caseName = oneCaseList[2]oneCaseRes = caseName +  "," + "read" + "," + oneCaseList[47] + "," + oneCaseList[48] + "," + oneCaseList[80] + "," + oneCaseList[70].split(".")[0] + "," + oneCaseList[72].split("=")[1] + "," + oneCaseList[74].split("=")[1]  + "," +  oneCaseList[79].split(".")[0] + "," + "write" + "," + oneCaseList[47] + "," + oneCaseList[48] + "," + oneCaseList[80] + "," + oneCaseList[70].split(".")[0] + "," + oneCaseList[72].split("=")[1] + "," + oneCaseList[74].split("=")[1]  + "," +  oneCaseList[79].split(".")[0] + "\n" f = open(resultfile,"a")f.write(oneCaseRes)f.close()
inputfile = sys.argv[1]
resultfile = sys.argv[2]
rwm = sys.argv[3]
fiodata(inputfile,resultfile,rwm)
运行:
python3 minmal.py sdb_mix_data.log result.csv mix
结果:
4 接下来需要在shell脚本里调用Python脚本 如下:
#!/bin/bash
if [ $# != 2 ]; thenecho "You must input  the time of each testcase (unit is second)"exit -1
fi
hdd=$1
time=$2
date
echo " sequential random  write  test start"
for ioengine in libaio sync
do
for rw  in   write  randwrite
dofor bs in 128k
dofor iodepth in 16
dofor jobs in 1
do	    date  echo "$hdd $rw $bs iodepth=$iodepth numjobs=$jobs  test satrt"job_name="${ioengine}_${bs}B_${rw}_${jobs}job_${iodepth}QD"fio  --name=$job_name  --filename=/dev/$hdd --ioengine=${ioengine} --direct=1 --thread=1 --numjobs=${jobs} --iodepth=${iodepth} --rw=${rw} --bs=${bs} --runtime=$time --time_based=1  --size=100% --group_reporting  --minimal  >>${hdd}_write.log
done
done
done
done
done
python3 minimal.py ${hdd}_write.log  ${hdd}_rw_write.csv  write
echo " sequential  randrom read  test start"
for ioengine in libaio sync
do
for rw  in   read  randread
dofor bs in 128k
dofor iodepth in 16
dofor jobs in 1
do	    date  echo "$hdd $rw $bs iodepth=$iodepth numjobs=$jobs  test satrt"job_name="${ioengine}_${bs}B_${rw}_${jobs}job_${iodepth}QD"fio  --name=$job_name  --filename=/dev/$hdd --ioengine=${ioengine} --direct=1 --thread=1 --numjobs=${jobs} --iodepth=${iodepth} --rw=${rw} --bs=${bs} --runtime=$time --time_based=1  --size=100% --group_reporting  --minimal  >>${hdd}_read.log
done
done
done
done
done
python3 minimal.py ${hdd}_read.log  ${hdd}_rw_read.csv  read
echo " sequential randmon  mix  test"
date
for ioengine in libaio sync
do
for rw in rw randrw
do
for mixread in 80
do
for blk_size in 1024k
do
for jobs in 1
do
for queue_depth in  16
do      job_name="${ioengine}_${rw}_${blk_size}B_mix_read${mixread}_${jobs}job_QD${queue_depth}"echo "$hdd $job_name  test satrt"fio --name=${job_name} --filename=/dev/$hdd --ioengine=libaio --direct=1 --thread=1 --numjobs=${jobs} --iodepth=${queue_depth} --rw=${rw} --bs=${blk_size} --rwmixread=$mixread --runtime=$time --time_based=1 --size=100% --group_reporting  --minimal >> "$hdd"_mix_data.log
done
done
done
done
done
done
python3 minimal.py ${hdd}_mix_data.log  ${hdd}_mix.csv  mix
mkdir $hdd
mkdir $hdd/test_data
mkdir $hdd/test_log
mv $hdd*.log   $hdd/test_log
mv $hdd*.csv    $hdd/test_data
echo "test has been finsished"
5 OK 到这里测试脚本已经完成,测试一下:
bash hdd-single-fio.sh sdk 1 (跑一个HDD 1秒钟)
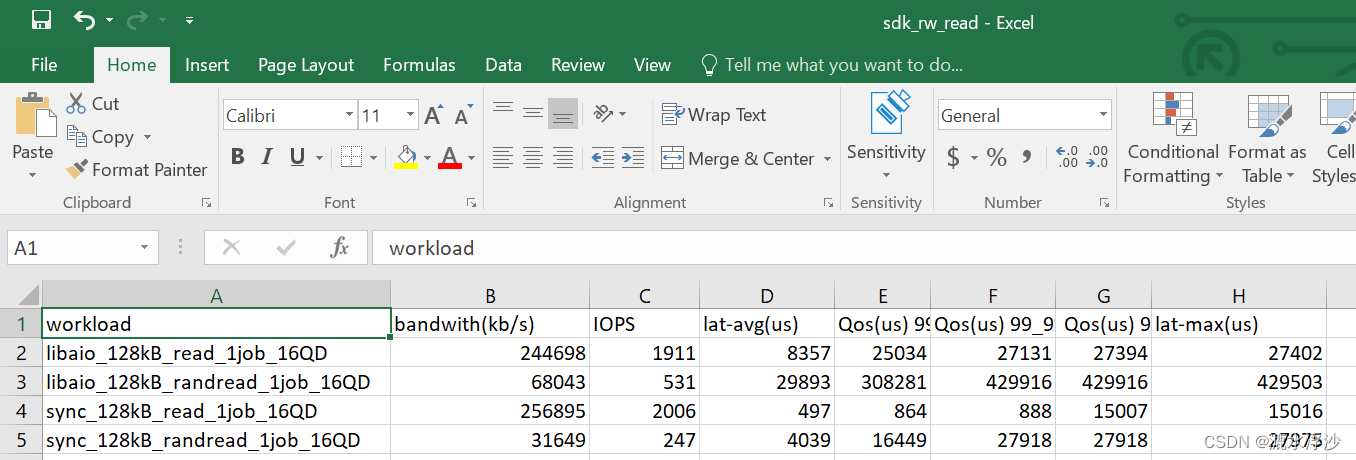
结果如下:
read的结果
 write的结果
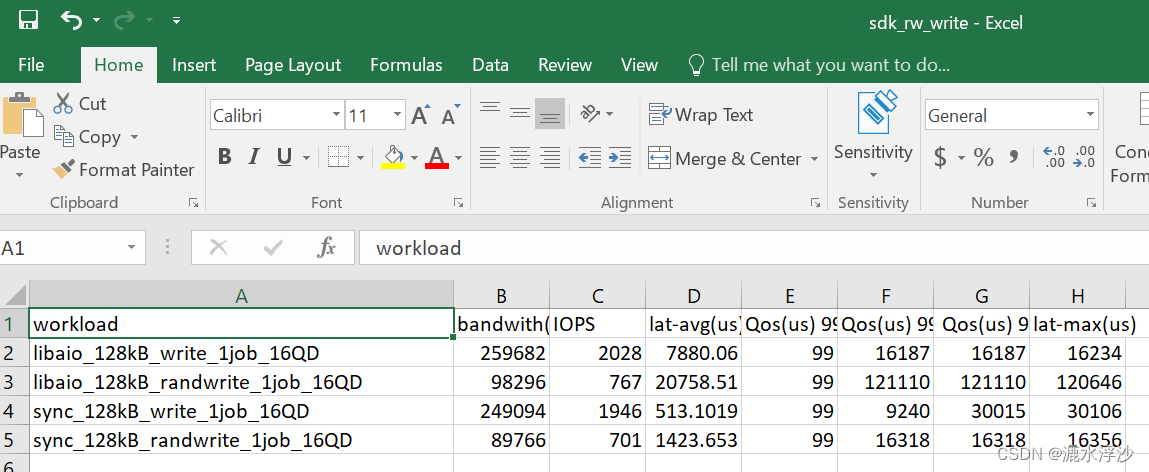
混合结果
相关文章:
Linux下Python脚本的编写解析fio(minimal格式)(三)
在服务器测试(storage)过程中,会看到很多人写跑fio的脚本用minimal格式来解析,因为这种格式返回的结果对与脚本(shell,python)解析log非常方便.下面介绍一下这种方式下,用Python来解析log 1 一般客户会要求结果中出现一下参数的值: bandwidth…...
【实战场景二】如何设计一个分布式锁?
如何优雅的设计一个分布式锁?如何设计一个分布式锁?1、什么是分布式锁2、那么分布式锁,具备什么条件呢?3、设计分布式锁有哪些方式?3.1 利用redis实现分布式锁原理3.2 基于数据库做分布式锁3.3 基于zookeeper实现分布式…...

Java中ThreadLocal类详解
ThreadLocal从名字上我们看出,它叫做本地线程变量,每个线程都有各自的的变量,而不再是我们之前的两个线程共用同一个变量;以这个类创建的变量,在多个线程都用到这个变量时,可以为每一个线程创建一个变量副本…...
从一致性角度考虑推荐冷启动长尾推荐问题(一)
前言:目前中长尾推荐的方法有很多,主流的方法有几类比如:1)在没有项目ID嵌入的情况下提高推荐模型的鲁棒性,2)利用有限的交互数据提高学习效率,如使用元学习方法;3)利用物品侧面信息,便于物品ID嵌入的初始化࿰…...
常用快捷键)
电脑(Windows)常用快捷键
简述:实用的键盘快捷键是一个程序员的必备技能,下面给大家整理了一下常用的键盘快捷键; ⭐CtrlP 打开“打印机”对话框; ⭐CtrlW 关闭当前网页; ⭐CtrlF 查找(网页内查找); ⭐…...

Java类加载器
1 类加载器 1.1 类加载 当程序要使用某个类时,如果该类还未被加载到内存中,则系统会通过类的加载,类的连接,类的初始化这三个步骤来对类进行初始化。如果不出现意外情况,JVM将会连续完成这三个步骤,所以有时也把这三个步骤统称为…...

信号完整性设计规则之单根信号失真最小化
本文内容从《信号完整性与电源完整性分析》整理而来,加入了自己的理解,如有错误,欢迎批评指正。 1. 通常采用所能容许的最长上升边。 上升边越短,带宽越大,信号完整性问题越严重。 2. 使用可控阻抗走线。 可控阻抗…...

Python3 数据结构
列表 Python中列表是可变的,这是它区别于字符串和元组的最重要的特点,一句话概括即:列表可以修改,而字符串和元组不能。 以下是 Python 中列表的方法: 方法 描述 list.append(x) 把一个元素添加到列表的结尾…...

Compose-Navigation带参传递
带参传递 目前 compose 还不支持传入对象作为参数! 简单双参数 根目录下新建文件夹 entity,新建单例类 ContentType 作为数据类存储位置 新增数据类 DemoContent,这表示我们需要传入的两个参数,后面带问号判空 object ContentT…...
【函数栈帧的创建和销毁】 -- 神仙级别底层原理,你学会了吗?
文章目录1.函数的调用方式 2.函数在栈区上的动作 1.函数的调用方式 相信你对调用函数一点都不陌生,但是在调用函数的过程中,却存在着很多你无法见到的东西,这是底层信息,想要理解透彻,就得深入底层去观察。 本文以…...

Promise的使用及原理
此文章主要讲解核心思想和基本用法,想要了解更多细节全面的使用方式,请阅读官方API 这篇文章假定你具备最基本的异步编程知识,例如知道什么是回调,知道什么是链式调用,同时具备最基本的单词量,例如page、us…...
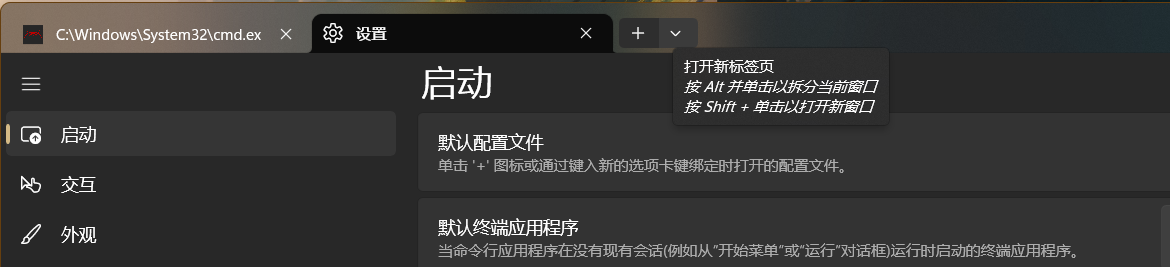
怎么拥有一个帅气的 CMD 命令窗口 ❓ - Windows
自从拥有这样一个炫酷的命令窗口,我都舍不得关掉它了 关于我为什么我要闲的去 “打扮” 一个命令窗口,这要从星期五下午的一场 摸鱼 🐠 开始,当时我要创建一个 vue ts vite 的项目练练手,为新项目开始做准备&#x…...
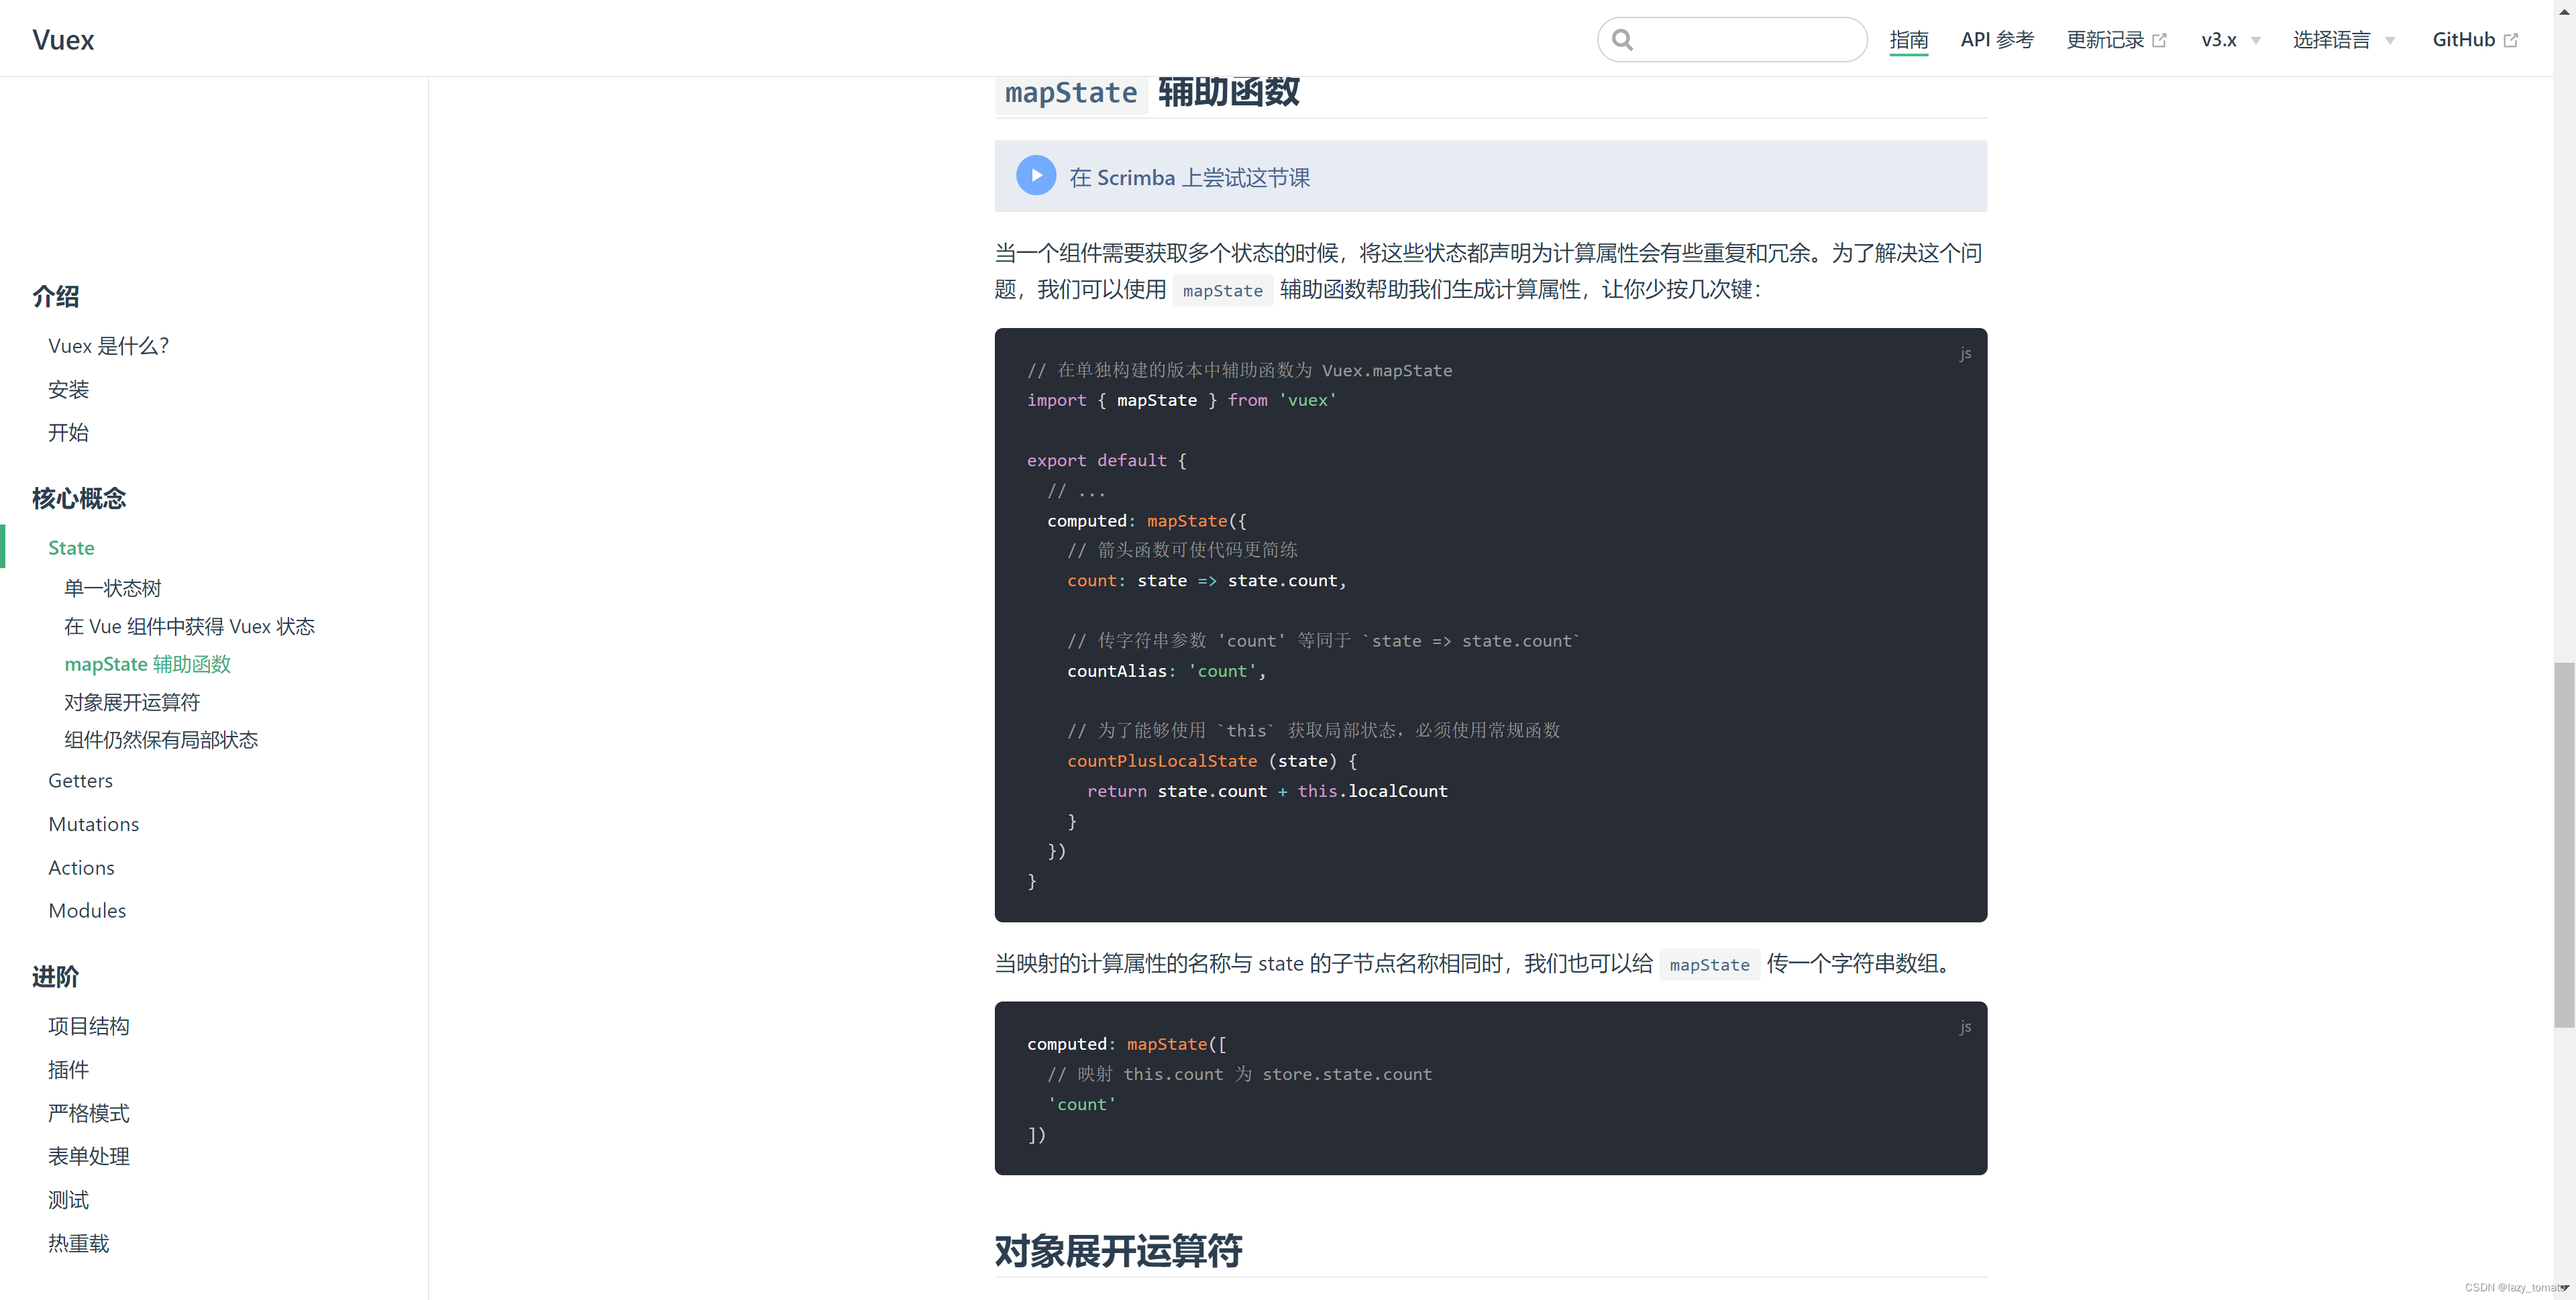
时隔多年再学习Vuex,什么?原来如此简单!
时隔多年再学习Vuex,什么?原来如此简单! start 写 Vue 写了好多年了,少不了和 Vuex 打交道。虽然使用它的次数非常频繁,但是潜意识里总觉得这东西很难,导致遇到与之相关的问题就容易慌张。时至今日,升级版…...

Linux笔记_gcc
Linux_gcc程序的翻译链接库make与makefile关于gcc的一些笔记。 程序的翻译 gcc/g是一个编译器。 预处理:头文件展开、条件编译、宏替换、去注释 编译:C语言汇编语言 汇编:汇编->可重定位目标二进制文件,不可以被执行࿰…...

2023美赛MCM A题 详细思路
2023美赛(MCM/ICM)如期开赛,为了尽早的帮大家确定选题。这里我们加急为大家编辑出A赛题详细思路,方便大家快速对A题目的难度有个大致的了解。同时,我们也给出了A题目简要的解题思路,以及该问题在实际解决中可能会遇到的难点。A题的…...
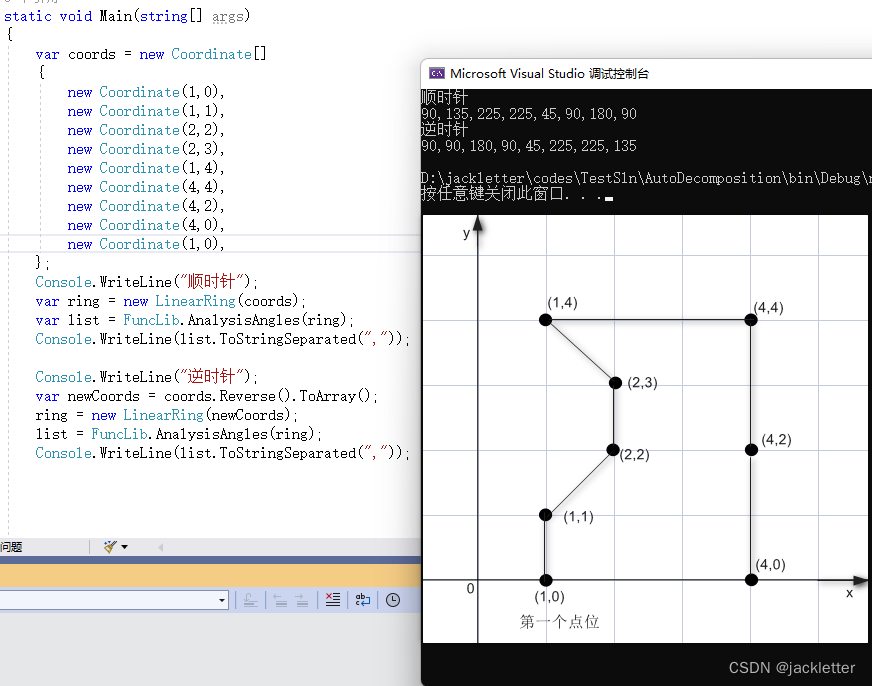
c#: NetTopologySuite凹凸多边形计算
环境: .net 6.0NetTopologySuite 2.5.0vs2022平面二维 一、夹角计算 1.1 计算向量与x轴正方向的夹角 方法: AngleUtility.Angle(Coordinate p) 下图上的t2即为p,之所以这么写是为了和AngleUtility.AngleBetweenOriented做比较 注意: 结果…...

NFT Insider #86:A16z 领投,YGG 获得 1380 万美元融资,The Sandbox与《北斗神拳》合作
引言:NFT Insider由NFT收藏组织WHALE Members、BeepCrypto联合出品,浓缩每周NFT新闻,为大家带来关于NFT最全面、最新鲜、最有价值的讯息。每期周报将从NFT市场数据,艺术新闻类,游戏新闻类,虚拟世界类&#…...

Sort_Algorithm
排序算法前言插入排序折半插入排序希尔排序冒泡排序快速排序选择排序堆排序归并排序前言 排序算法:将一堆数据元素按关键字递增或者递减的顺序,进行排序。 排序算法的评价指标:时间复杂度,空间复杂度,算法稳定性。 算…...
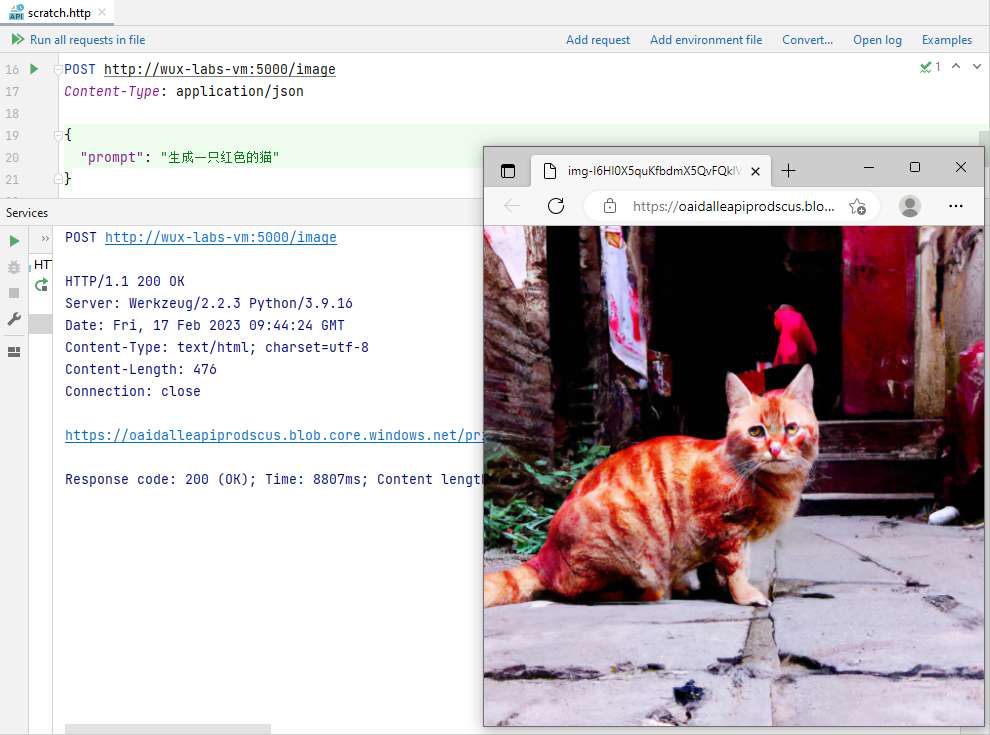
【初探人工智能】2、雏形开始长成
【初探人工智能】2、雏形开始长成【初探人工智能】2、雏形开始长成安装Flask封装Web接口雏形设置接收参数功能验证聊天写代码代码补全生成图片写在后面笔者初次接触人工智能领域,文章中错误的地方还望各位大佬指正! 【初探人工智能】2、雏形开始长成 在…...
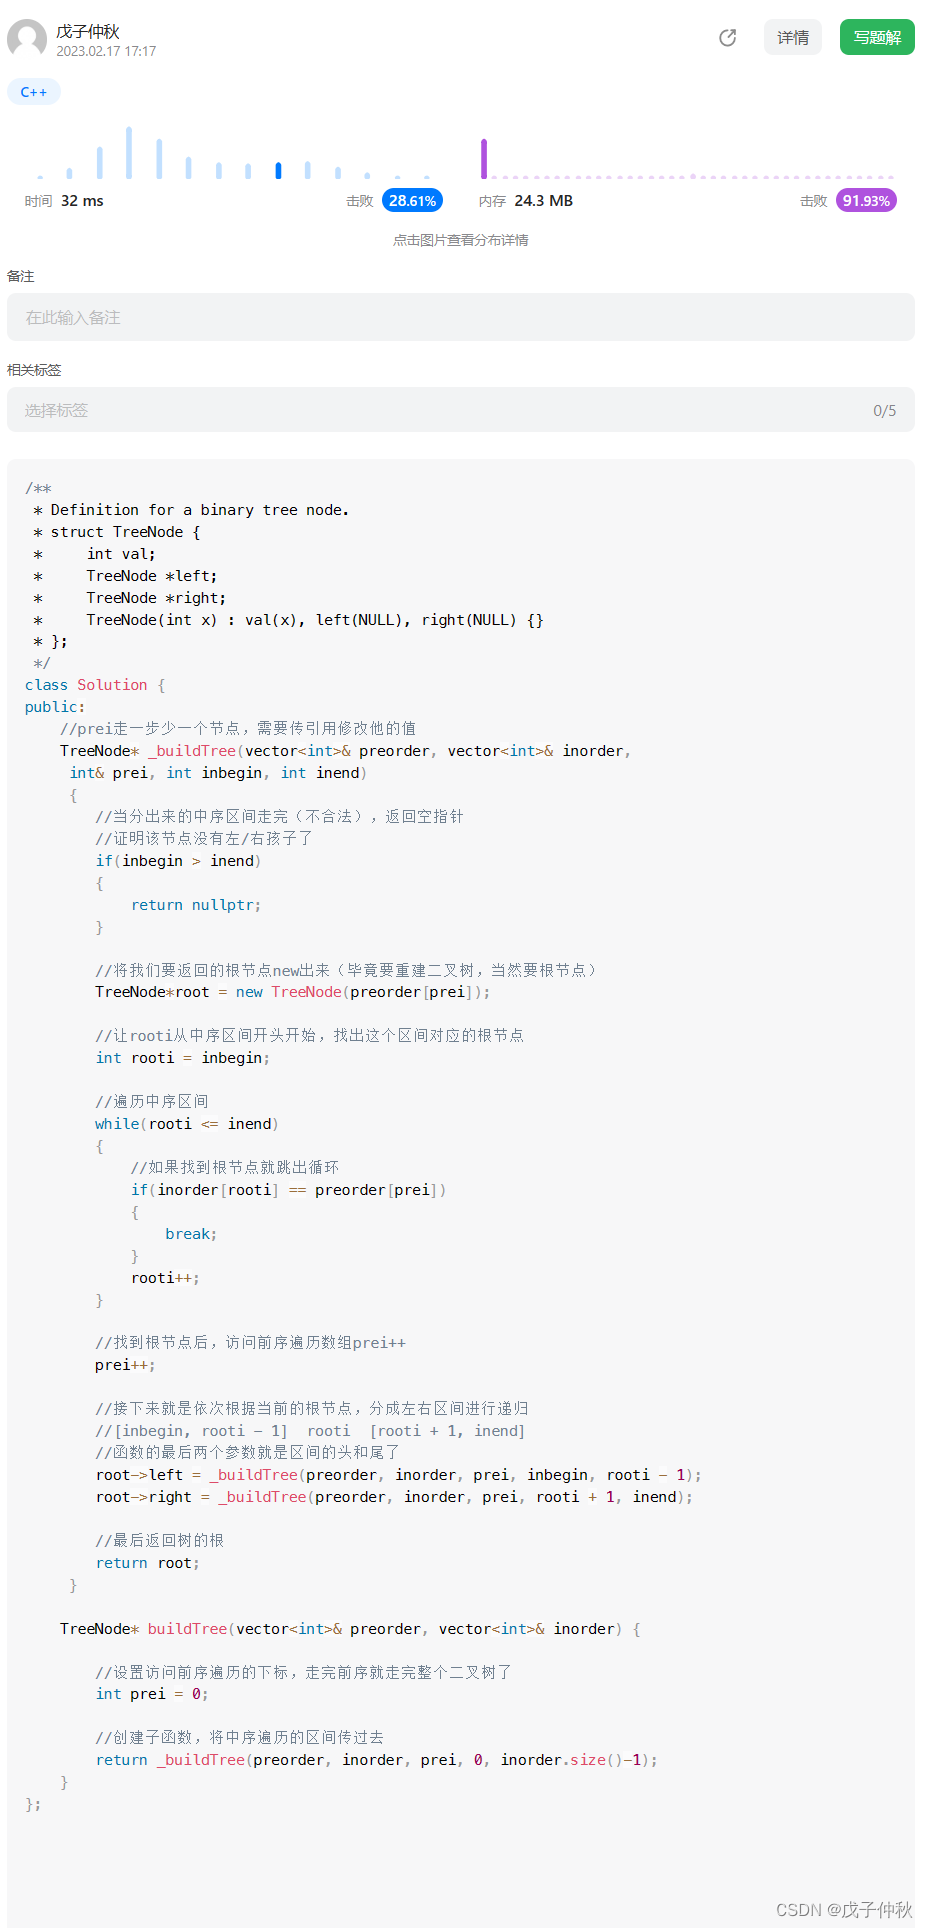
【LeetCode】剑指 Offer(2)
目录 写在前面: 题目: 题目的接口: 解题思路: 代码: 过啦!!! 写在最后: 写在前面: 今天的每日一题好难,我不会dp啊啊啊啊啊啊。 所以&am…...

技术面试官喜欢问什么问题?
技术面试是求职过程中至关重要的一环,面试官的问题往往决定了候选人能否顺利拿到offer。那么,技术面试官究竟喜欢问哪些问题?这些问题背后又隐藏着怎样的考察意图?了解这些问题的类型和应对策略,可以帮助求职者更有针对…...

Qwen3-0.6B-FP8部署教程:多用户并发测试与显存稳定性压力验证记录
Qwen3-0.6B-FP8部署教程:多用户并发测试与显存稳定性压力验证记录 1. 引言:为什么需要压力测试? 你刚部署好一个AI模型,界面能打开,也能正常对话,是不是就万事大吉了?作为一个过来人ÿ…...

你还在手动整理会议笔记?2026奇点大会演示的AI学习助手已实现“语义意图捕获→知识脉络自构→能力缺口反推”全链路闭环
第一章:2026奇点智能技术大会:AI学习助手 2026奇点智能技术大会(https://ml-summit.org) 本届大会首次发布开源AI学习助手框架 SingularityLearner v1.0,专为开发者与教育者设计,支持多模态知识理解、上下文感知式提问引导及自适…...
)
保姆级教程:在STM32CubeIDE上为STM32F103配置USART3的DMA收发(支持RS485硬件控制)
STM32F103实战:用CubeIDE实现USART3的DMA驱动RS485全双工通信 第一次用STM32CubeIDE配置DMA串口时,盯着那些晦涩的选项足足发呆了半小时——时钟树、DMA通道优先级、中断嵌套...这些概念对初学者来说就像一堵高墙。直到成功让STM32F103通过RS485收发数据…...

MySQL中事务、索引和数据库管理设计
1. 事务和索引 事务ACID原则特性英文通俗解释原子性Atomicity事务是最小单位,不可分割。要么全成功,要么全失败一致性Consistency执行前后数据总量不变(转账:A 扣钱 B 加钱 总金额不变)隔离性Isolation多个事务同时执…...

高效清理磁盘,优化电脑性能,数据治理4-企业数仓开发标准与规范。
磁盘清理工具的使用方法 Windows系统内置的磁盘清理工具可帮助释放存储空间。打开“此电脑”,右键点击需要清理的磁盘,选择“属性”。在“常规”选项卡中点击“磁盘清理”,系统会自动扫描可删除的文件类型。勾选需要清理的项目(如…...
)
“程序包io.swagger.annotations不存在”终极解决方案:从原理到实战的万字深度剖析(2026年最全最新解决方案)
在现代Java Web开发中,API文档的自动生成与可视化测试已成为提升团队协作效率的关键环节。Swagger作为业界最主流的OpenAPI规范实现工具,凭借其强大的注解驱动能力,让开发者能够“代码即文档”。然而,许多开发者在初次集成或升级项…...

HFSS实战指南:从零到一完成矩形贴片微带天线参数化调优
1. HFSS与微带天线设计基础 刚接触HFSS时,我也曾被它复杂的界面吓到过。但用熟后发现,这简直就是射频工程师的"瑞士军刀"。就拿最常见的矩形贴片微带天线来说,用HFSS做参数化调优,效率比手工计算高太多了。先说说这个天…...
”冠军)
国泰君安国际荣获2025年度离岸中资基金大奖“货币市场基金 - 港币(1年)”冠军
近日,香港中资基金业协会(HKCAMA)与彭博联合宣布2025年度“离岸中资基金大奖”获奖名单。国泰海通集团下属公司国泰君安国际控股有限公司(“国泰君安国际”或“公司”,股份代号:1788.HK)旗下国泰…...

服务器SSH登录卡在‘pledge: network’?别慌,试试重启systemd-logind服务
服务器SSH登录卡在‘pledge: network’的快速诊断与修复指南 当你正通过SSH远程管理服务器时,突然发现连接需要等待几十秒才能成功——这种延迟不仅影响工作效率,更可能掩盖着潜在的系统问题。最近不少运维人员报告遇到SSH卡在pledge: network阶段的状况…...