菜鸟Vue教程 - 实现带国际化的注册登陆页面
初接触vue的时候觉得vue好难,因为项目中要用到,就硬着头皮上,慢慢的发现也不难,无外乎画个布局,然后通过样式调整界面。在通过属性和方法跟js交互。js就和我们写的java代码差不多了,复杂一点的就是引用这种那种库,然后就能做出来一个界面了。如果你的项目就是和服务器交互,感觉用vue来做确实也蛮合适的。
在上手之前,我先说下我们要实现的场景。我们需要做一个注册登陆的功能,相关字段只有用户名密码昵称,注册之后就能登陆,相关的后端逻辑,我会在另外一篇文章提到,这里只需要关心前端逻辑,我们需要实现的功能有:
- 注册页面
- 登陆页面
- 注册后保存用户名密码到本地
- 登陆页面取本地用户名密码填充
- 点击按钮登录并根据返回跳转
- 国际化
Get Start
使用HbuildX创建一个Vue2的项目,什么模板都不选,就最基础的那种。创建完之后,参考一下我的目录结果,吧缺失的文件补一下:
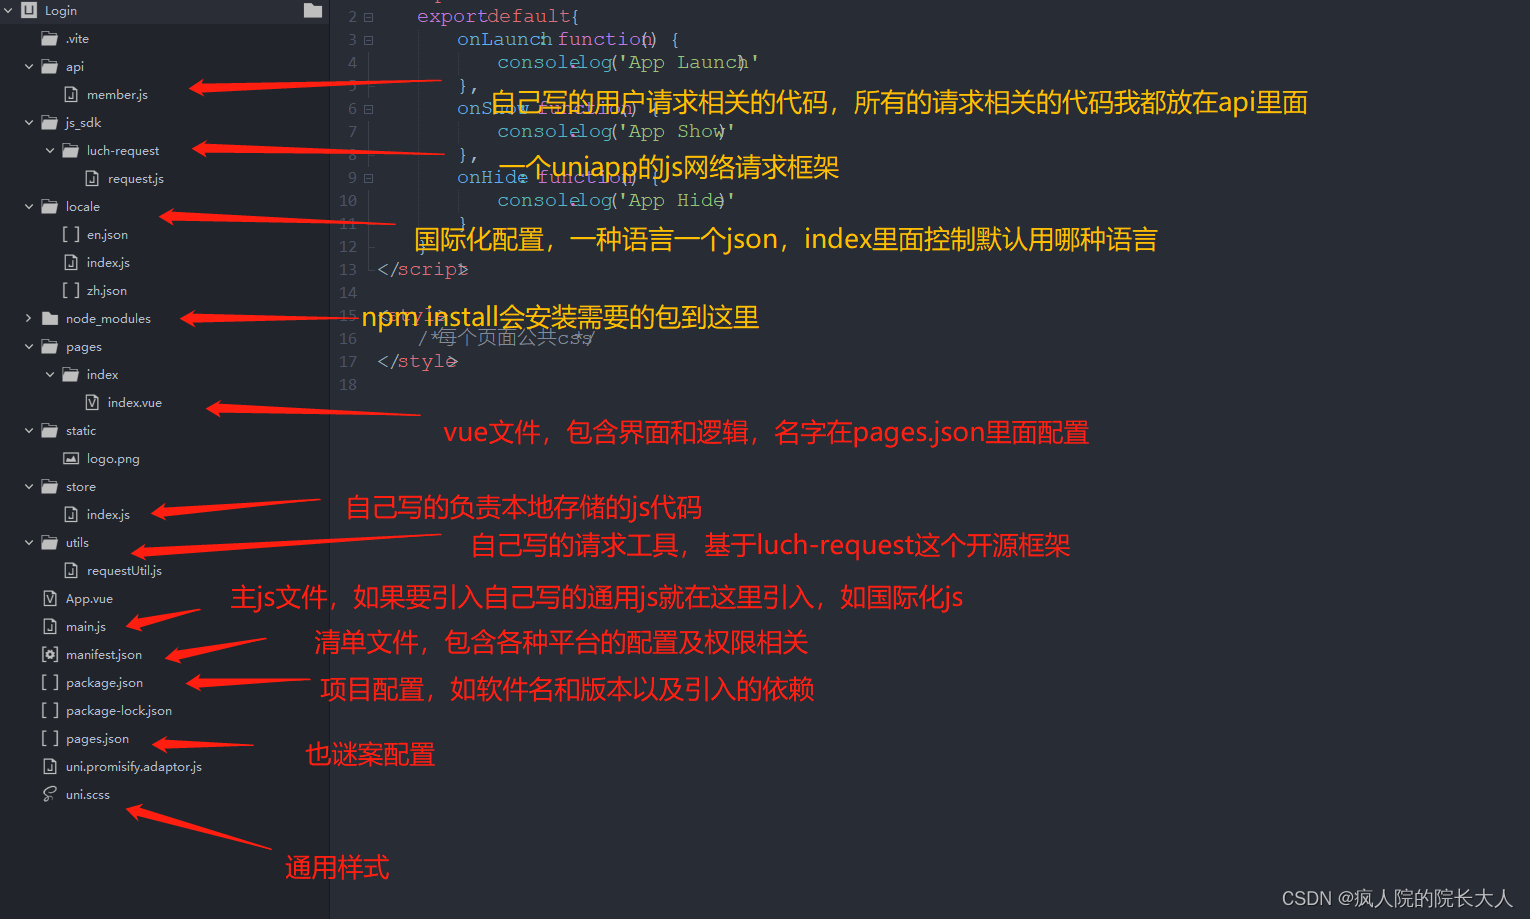
本来要新创建一个vue页面的,我为了省事直接修改了index.vue,在里面添加了登陆界面,注册界面通过登陆界面的注册按钮打开。
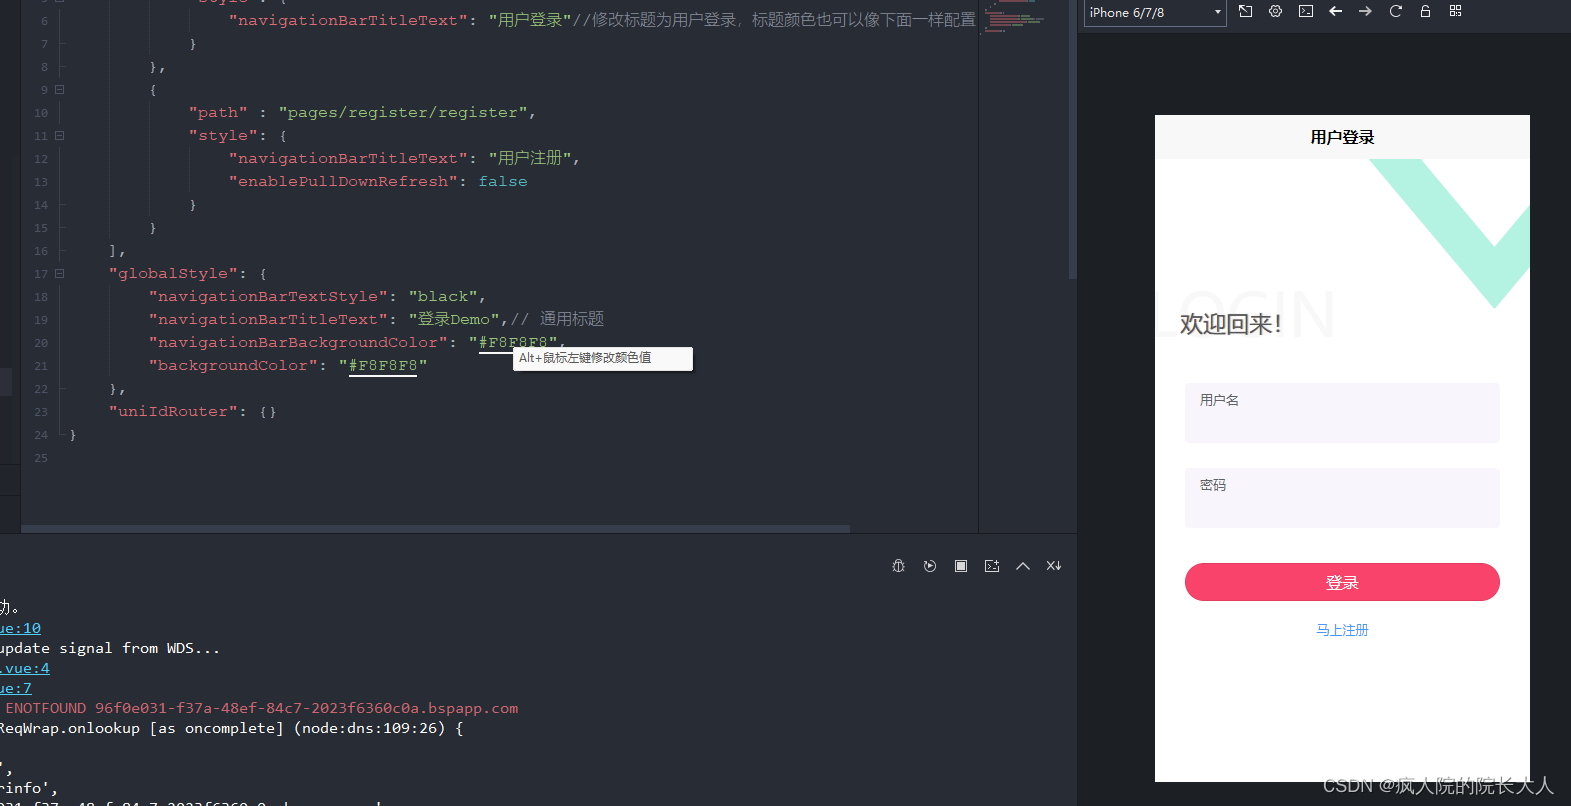
我们先在pages.json把页面名自定义一下,默认是uni-app,我们改成用户登录。同时我添加了用户注册的页面,并在对应的位置创建了Vue文件。
{"pages": [ //pages数组中第一项表示应用启动页,参考:https://uniapp.dcloud.io/collocation/pages{"path": "pages/index/index","style": {"navigationBarTitleText": "用户登录"//修改标题为用户登录,标题颜色也可以像下面一样配置}},{"path": "pages/register/register","style": {"navigationBarTitleText": "用户注册"}}],"globalStyle": {"navigationBarTextStyle": "black","navigationBarTitleText": "登录Demo",// 通用标题"navigationBarBackgroundColor": "#F8F8F8","backgroundColor": "#F8F8F8"},"uniIdRouter": {}
}
引入网络请求库luch-request。这个类比较长这里就不贴出来了,大家可以去这里下载:
也可以按照她开发者文档上说的去配置,我是下过来使用的。我们来实现登陆界面:
<template><view class="container"><view class="left-bottom-sign"></view><view class="back-btn yticon icon-zuojiantou-up" @click="navBack"></view><view class="right-top-sign"></view><!-- 设置白色背景防止软键盘把下部绝对定位元素顶上来盖住输入框等 --><view class="wrapper"><view class="left-top-sign">{{$t('vue.public.login')}}</view><view class="welcome">{{$t('vue.public.welcomeback')}}</view><view class="input-content"><view class="input-item"><text class="tit">{{$t('vue.public.username')}}</text><input type="text" v-model="username"  maxlength="11"/></view><view class="input-item"><text class="tit">{{$t('vue.public.pwd')}}</text><input type="text" v-model="password"  placeholder-class="input-empty" maxlength="20"password @confirm="toLogin" /></view></view><button class="confirm-btn" @click="toLogin" :disabled="logining">{{$t('vue.public.tologin')}}</button><view class="forget-section" @click="toRegist">{{$t('vue.public.forgetpwd')}}</view></view><view class="register-section">{{$t('vue.public.notaccount')}}<text @click="toRegist">{{$t('vue.public.registernow')}}</text></view></view>
</template><script>import {mapMutations} from 'vuex';import {memberLogin,memberInfo} from '@/api/member.js';export default {data() {return {username: '',password: '',logining: false}},onLoad() {this.username = uni.getStorageSync('username') || '';this.password = uni.getStorageSync('password') || '';},methods: {...mapMutations(['login']),navBack() {uni.navigateBack();},toRegist() {uni.navigateTo({url:'/pages/public/register'});},async toLogin() {this.logining = true;memberLogin({username: this.username,password: this.password}).then(response => {let token = response.data.tokenHead+response.data.token;uni.setStorageSync('token',token);uni.setStorageSync('username',this.username);uni.setStorageSync('password',this.password);memberInfo().then(response=>{this.login(response.data);uni.navigateTo({url:'/pages/user/user'});});}).catch(() => {this.logining = false;});},},}
</script><style lang='scss'>page {background: #fff;}.container {padding-top: 115px;position: relative;width: 100vw;height: 100vh;overflow: hidden;background: #fff;}.wrapper {position: relative;z-index: 90;background: #fff;padding-bottom: 40upx;}.back-btn {position: absolute;left: 40upx;z-index: 9999;padding-top: var(--status-bar-height);top: 40upx;font-size: 40upx;color: $font-color-dark;}.left-top-sign {font-size: 120upx;color: $page-color-base;position: relative;left: -16upx;}.right-top-sign {position: absolute;top: 80upx;right: -30upx;z-index: 95;&:before,&:after {display: block;content: "";width: 400upx;height: 80upx;background: #b4f3e2;}&:before {transform: rotate(50deg);border-radius: 0 50px 0 0;}&:after {position: absolute;right: -198upx;top: 0;transform: rotate(-50deg);border-radius: 50px 0 0 0;/* background: pink; */}}.left-bottom-sign {position: absolute;left: -270upx;bottom: -320upx;border: 100upx solid #d0d1fd;border-radius: 50%;padding: 180upx;}.welcome {position: relative;left: 50upx;top: -90upx;font-size: 46upx;color: #555;text-shadow: 1px 0px 1px rgba(0, 0, 0, .3);}.input-content {padding: 0 60upx;}.input-item {display: flex;flex-direction: column;align-items: flex-start;justify-content: center;padding: 0 30upx;background: $page-color-light;height: 120upx;border-radius: 4px;margin-bottom: 50upx;&:last-child {margin-bottom: 0;}.tit {height: 50upx;line-height: 56upx;font-size: $font-sm+2upx;color: $font-color-base;}input {height: 60upx;font-size: $font-base + 2upx;color: $font-color-dark;width: 100%;}}.confirm-btn {width: 630upx;height: 76upx;line-height: 76upx;border-radius: 50px;margin-top: 70upx;background: $uni-color-primary;color: #fff;font-size: $font-lg;&:after {border-radius: 100px;}}.confirm-btn2 {width: 630upx;height: 76upx;line-height: 76upx;border-radius: 50px;margin-top: 40upx;background: $uni-color-primary;color: #fff;font-size: $font-lg;&:after {border-radius: 100px;}}.forget-section {font-size: $font-sm+2upx;color: $font-color-spec;text-align: center;margin-top: 40upx;}.register-section {position: absolute;left: 0;bottom: 50upx;width: 100%;font-size: $font-sm+2upx;color: $font-color-base;text-align: center;text {color: $font-color-spec;margin-left: 10upx;}}
</style>
接着我们在主js中引入我们添加的依赖,以便于全局生效。
main.js:
import Vue from 'vue'
import store from './store'
import App from './App'
import i18n from './locale'const msg = (title, duration=1500, mask=false, icon='none')=>{//统一提示方便全局修改if(Boolean(title) === false){return;}uni.showToast({title,duration,mask,icon});
}const prePage = ()=>{let pages = getCurrentPages();let prePage = pages[pages.length - 2];// #ifdef H5return prePage;// #endifreturn prePage.$vm;
}Vue.config.productionTip = false
Vue.prototype.$fire = new Vue();
Vue.prototype.$store = store;
Vue.prototype.$api = {msg, prePage};App.mpType = 'app'const app = new Vue({i18n,...App
})
app.$mount()
我们可以看到main.js引入了vuw的脚本,本地化的脚本(store/index.js)以及国际化脚本(locale/index.js)。Vue的脚本这里你可以要可以不要,我就写了一个界面的日志跟踪:
<script>export default {onLaunch: function() {console.log('App Launch')},onShow: function() {console.log('App Show')},onHide: function() {console.log('App Hide')}}
</script><style>/*每个页面公共css */
</style>
然后再store这里,通过mutations定义了两个常量方法,一个是登录,一个是登出,这两个方法通过调用vue的store管理方法来存储登陆状态和登录信息。mutations表示常量,类似java中的static。
import Vue from 'vue'
import Vuex from 'vuex'Vue.use(Vuex)const store = new Vuex.Store({state: {hasLogin: false,userInfo: {},},mutations: {login(state, provider) {state.hasLogin = true;state.userInfo = provider;uni.setStorage({//缓存用户登陆状态key: 'userInfo', data: provider }) console.log(state.userInfo);},logout(state) {state.hasLogin = false;state.userInfo = {};uni.removeStorage({ key: 'userInfo' });uni.removeStorage({key: 'token' })}},actions: {}
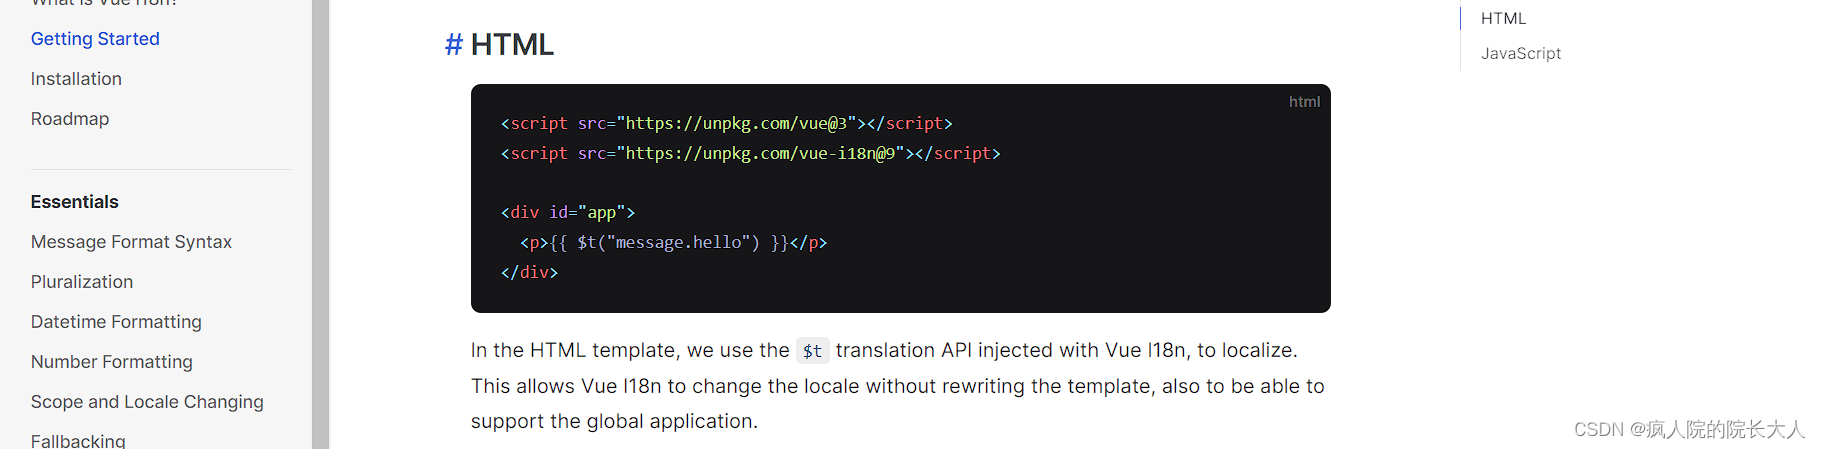
})export default store然后我们把locale的内容也补充一下,因为再login.vue中引用到了国际化的字符串。当然了我们也可以再page中也进行国际化。vue官方支持国家话方案,可以参考这里。
locale/index.js:
import Vue from "vue";
import VueI18n from 'vue-i18n'
import en from './en.json'
import zh from './zh.json'
Vue.use(VueI18n);   // 全局注册国际化包// 准备翻译的语言环境信息
const i18n = new VueI18n({locale: "zn",   // 初始化中文messages: {"zn":zh,"en":en}
});
export default i18n
国际化的文案分别放在各个国家的json中,比如zh.json:
{"vue.public.login": "LOGIN","vue.public.welcomeback": "欢迎回来!","vue.public.welcomeregister": "欢迎注册!","vue.public.username": "用户名","vue.public.nickname": "昵称","vue.public.inputusername": "请输入用户名","vue.public.inputnickname": "请输入昵称","vue.public.pwd": "密码","vue.public.inputpwdhint": "8-18位不含特殊字符的数字、字母组合","vue.public.tologin": "登录","vue.public.alreadyRegister": "已有账号?","vue.public.loginnow": "前往登录","vue.public.toregister": "注册","vue.public.testlogin": "获取体验账号","vue.public.forgetpwd": "忘记密码?","vue.public.notaccount": "还没有账号?","vue.public.registernow": "马上注册"
}
英文的国家化和其他的国际化都是使用上述json格式,只不过冒号后面的值不一样而已。到这里界面已经写好了,虽然还不能做网络请求,至少我们可以看看效果了。再看效果之前,我们需要再项目的根目录打开终端,输入npm install ,也可以加上-t查看安装进度。然后可以使用npm run dev或者使用HbuildX提供的运行按钮来运行到内置浏览器或Chrome:
注册界面也写一下:
<template><view class="container"><view class="left-bottom-sign"></view><view class="back-btn yticon icon-zuojiantou-up" @click="navBack"></view><view class="right-top-sign"></view><!-- 设置白色背景防止软键盘把下部绝对定位元素顶上来盖住输入框等 --><view class="wrapper"><view class="left-top-sign">{{$t('vue.public.login')}}</view><view class="welcome">{{$t('vue.public.welcomeregister')}}</view><view class="input-content"><view class="input-item"><text class="tit">{{$t('vue.public.username')}}</text><input type="text" v-model="username" :placeholder="$t('vue.public.inputusername')" maxlength="11"/></view><view class="input-item"><text class="tit">{{$t('vue.public.nickname')}}</text><input type="text" v-model="nickname" :placeholder="$t('vue.public.inputnickname')" maxlength="11"/></view><view class="input-item"><text class="tit">{{$t('vue.public.pwd')}}</text><input type="text" v-model="password" :placeholder="$t('vue.public.inputpwdhint')" placeholder-class="input-empty" maxlength="20"password /></view></view><button class="confirm-btn" @click="toRegister" >{{$t('vue.public.toregister')}}</button></view><view class="register-section">{{$t('vue.public.alreadyRegister')}}<text @click="toLogin">{{$t('vue.public.loginnow')}}</text></view></view>
</template><script>import {mapMutations} from 'vuex';import {memberLogin,memberInfo, memberRegister} from '@/api/member.js';export default {data() {return {username: '',nickname: '',password: '',}},methods: {...mapMutations(['login']),navBack() {uni.navigateBack();},toLogin() {uni.navigateTo({url:'/pages/public/login'});},async toRegister() {memberRegister({username: this.username,nickname: this.nickname,password: this.password}).then(response => {//this.toLogin();console.log(response);if(response.code == 200){uni.showToast({title:'Register Success.',duration:1500});setTimeout(this.toLogin, 2000);}}).catch(() => {});},},}
</script><style lang='scss'>page {background: #fff;}.container {padding-top: 115px;position: relative;width: 100vw;height: 100vh;overflow: hidden;background: #fff;}.wrapper {position: relative;z-index: 90;background: #fff;padding-bottom: 40upx;}.back-btn {position: absolute;left: 40upx;z-index: 9999;padding-top: var(--status-bar-height);top: 40upx;font-size: 40upx;color: $font-color-dark;}.left-top-sign {font-size: 120upx;color: $page-color-base;position: relative;left: -16upx;}.right-top-sign {position: absolute;top: 80upx;right: -30upx;z-index: 95;&:before,&:after {display: block;content: "";width: 400upx;height: 80upx;background: #b4f3e2;}&:before {transform: rotate(50deg);border-radius: 0 50px 0 0;}&:after {position: absolute;right: -198upx;top: 0;transform: rotate(-50deg);border-radius: 50px 0 0 0;/* background: pink; */}}.left-bottom-sign {position: absolute;left: -270upx;bottom: -320upx;border: 100upx solid #d0d1fd;border-radius: 50%;padding: 180upx;}.welcome {position: relative;left: 50upx;top: -90upx;font-size: 46upx;color: #555;text-shadow: 1px 0px 1px rgba(0, 0, 0, .3);}.input-content {padding: 0 60upx;}.input-item {display: flex;flex-direction: column;align-items: flex-start;justify-content: center;padding: 0 30upx;background: $page-color-light;height: 120upx;border-radius: 4px;margin-bottom: 50upx;&:last-child {margin-bottom: 0;}.tit {height: 50upx;line-height: 56upx;font-size: $font-sm+2upx;color: $font-color-base;}input {height: 60upx;font-size: $font-base + 2upx;color: $font-color-dark;width: 100%;}}.confirm-btn {width: 630upx;height: 76upx;line-height: 76upx;border-radius: 50px;margin-top: 70upx;background: $uni-color-primary;color: #fff;font-size: $font-lg;&:after {border-radius: 100px;}}.confirm-btn2 {width: 630upx;height: 76upx;line-height: 76upx;border-radius: 50px;margin-top: 40upx;background: $uni-color-primary;color: #fff;font-size: $font-lg;&:after {border-radius: 100px;}}.forget-section {font-size: $font-sm+2upx;color: $font-color-spec;text-align: center;margin-top: 40upx;}.register-section {position: absolute;left: 0;bottom: 50upx;width: 100%;font-size: $font-sm+2upx;color: $font-color-base;text-align: center;text {color: $font-color-spec;margin-left: 10upx;}}
</style>
登陆页面和注册页面写好了,我们要来实现网络请求,在请求之前先做一个配置,主要是服务器和拦截器的设置,拦截器有利于我们跟踪代码运行,requestUtil.js:
import Request from '@/js_sdk/luch-request/request.js'
import i18n from "../locale";const http = new Request()http.setConfig((config) => { /* 设置全局配置 */config.baseUrl = 'http://127.0.0.1:8902' /* 根域名不同 */config.header = {...config.header}return config
})/*** 自定义验证器,如果返回true 则进入响应拦截器的响应成功函数(resolve),否则进入响应拦截器的响应错误函数(reject)* @param { Number } statusCode - 请求响应体statusCode(只读)* @return { Boolean } 如果为true,则 resolve, 否则 reject*/
http.validateStatus = (statusCode) => {return statusCode === 200
}http.interceptor.request((config, cancel) => { /* 请求之前拦截器 */const token = uni.getStorageSync('token');if(token){config.header = {'Authorization':token,...config.header}}else{config.header = {...config.header}}/*if (!token) { // 如果token不存在,调用cancel 会取消本次请求,但是该函数的catch() 仍会执行cancel('token 不存在') // 接收一个参数,会传给catch((err) => {}) err.errMsg === 'token 不存在'}*/return config
})http.interceptor.response((response) => { /* 请求之后拦截器 */const res = response.data;if (res.code !== 200) {//提示错误信息uni.showToast({title:res.message,duration:1500})//401未登录处理if (res.code === 401) {uni.showModal({title: i18n.t('vue.request.permit'),  //'提示'content:i18n.t('vue.request.permithint'),  //'你已被登出,可以取消继续留在该页面,或者重新登录',confirmText:i18n.t('vue.request.relogin'),  //'重新登录',cancelText:i18n.t('vue.request.cancel'),  //'取消',success: function(res) {if (res.confirm) {uni.navigateTo({url: '/pages/public/login'})} else if (res.cancel) {console.log('用户点击取消');}}});}return Promise.reject(response);} else {return response.data;}
}, (response) => {//提示错误信息console.log('response error', JSON.stringify(response));uni.showToast({title:response.errMsg,duration:1500})return Promise.reject(response);
})export function request (options = {}) {return http.request(options);
}export default request
上面的vue页面,我们再注册调用了注册方法memberRegister,再登录调用了memberLogin登陆方法。我们把这个功能实现下(api/member.js):
import request from '@/utils/requestUtil'export function memberLogin(data) {return request({method: 'POST',url: '/sso/login',header: {'content-type': 'application/x-www-form-urlencoded;charset=utf-8'},data: data})
}export function memberRegister(data) {return request({method: 'POST',url: '/sso/register',header: {'content-type': 'application/x-www-form-urlencoded;charset=utf-8'},data: data})
}export function memberInfo() {return request({method: 'GET',url: '/sso/info'})
}
到这里我们前端页面的注册登陆就写好了,你可以配合服务端来测试。
相关文章:
菜鸟Vue教程 - 实现带国际化的注册登陆页面
初接触vue的时候觉得vue好难,因为项目中要用到,就硬着头皮上,慢慢的发现也不难,无外乎画个布局,然后通过样式调整界面。在通过属性和方法跟js交互。js就和我们写的java代码差不多了,复杂一点的就是引用这种…...

Mybatis ORDER BY 排序失效 ORDER BY 与 CASE WHEN THEN 排序问题
一、ORDER BY 排序失效 如果传递给 mapper 的参数值是以 #{test_参数} 的形式,那么就会报错 具体如下: 传递参数是 name 排序规则是升序 asc package com.ruoyi.web.mapper; public interface TestMapper {List<TestEntity> getTestData( Para…...
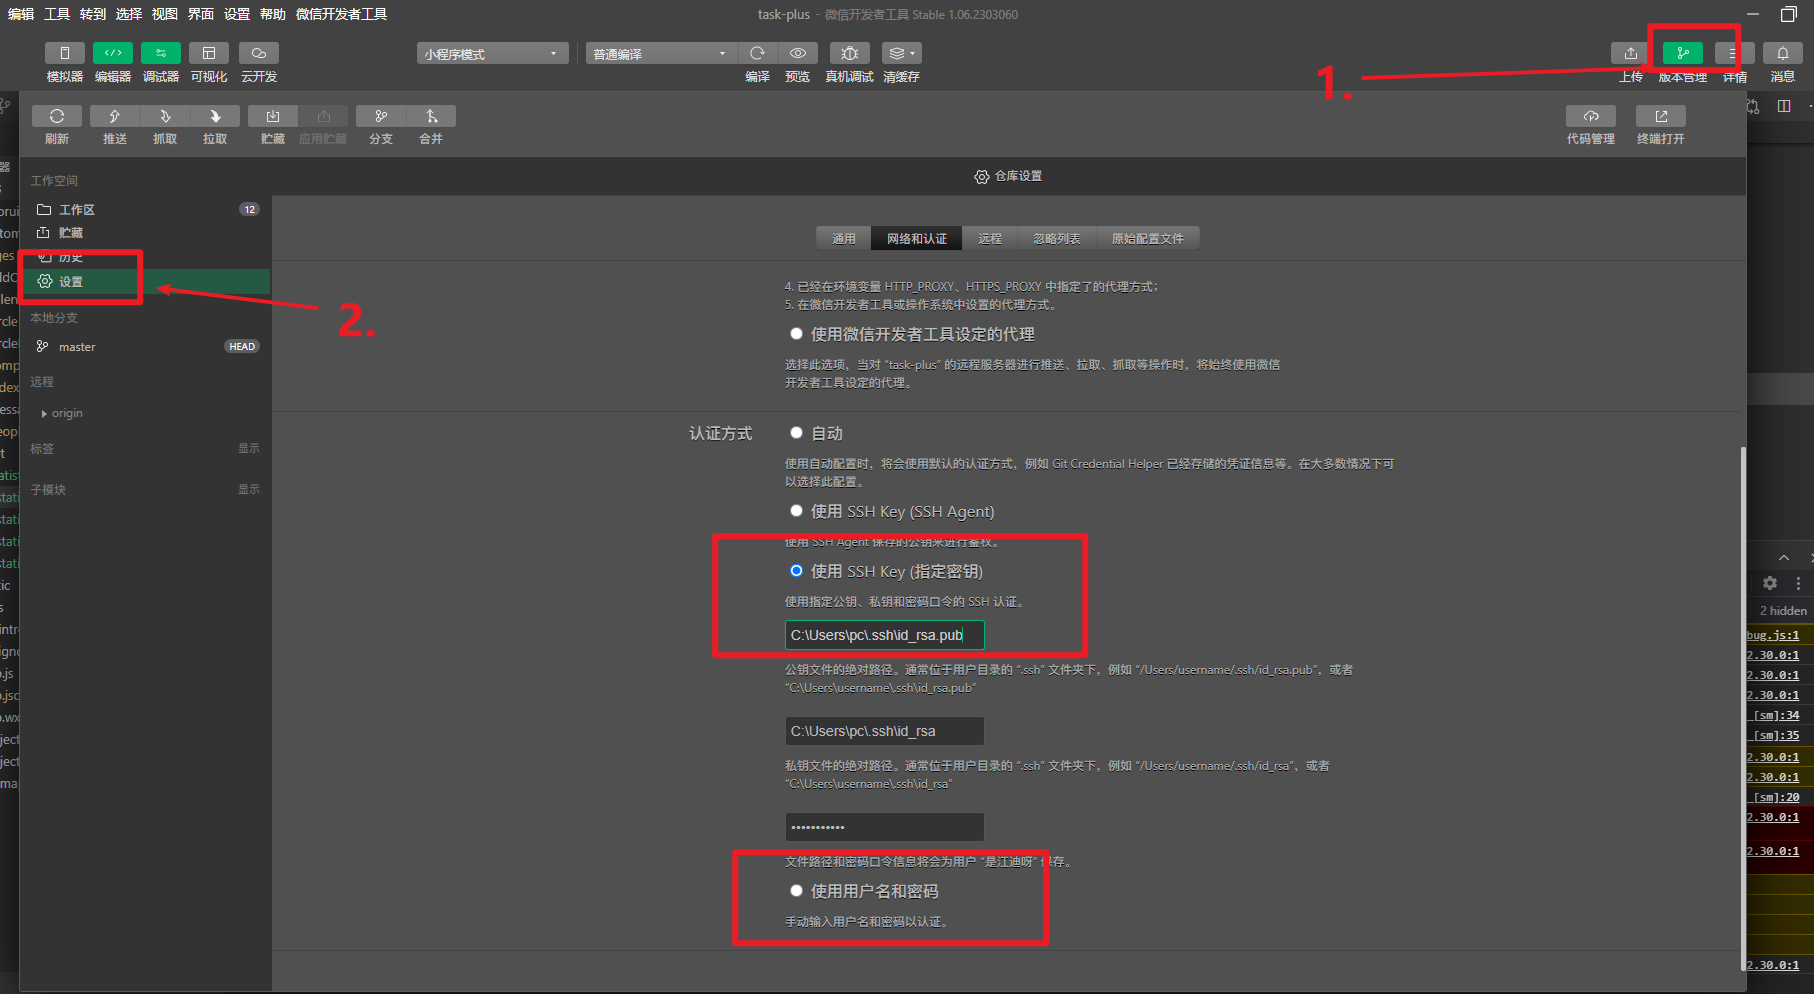
日常BUG——微信小程序提交代码报错
😜作 者:是江迪呀✒️本文关键词:日常BUG、BUG、问题分析☀️每日 一言 :存在错误说明你在进步! 一、问题描述 在使用微信小程序开发工具进行提交代码时,报出如下错误: Invalid a…...

1048:有一门课不及格的学生
【题目描述】 给出一名学生的语文和数学成绩,判断他是否恰好有一门课不及格(成绩小于60分)。若该生恰好有一门课不及格,输出1;否则输出0。 【输入】 一行,包含两个在0到100之间的整数,分别是该生的语文成绩和数学成…...
数据结构——B-树、B+树、B*树
一、B-树 1. B-树概念 B树是一种适合外查找的、平衡的多叉树。一棵m阶(m>2)的B树,是一棵平衡的M路平衡搜索树,它可以是空树或满足以下性质: (1)根节点至少有两个孩子。 (2&#…...
2023国赛数学建模思路 - 案例:FPTree-频繁模式树算法
文章目录 算法介绍FP树表示法构建FP树实现代码 建模资料 ## 赛题思路 (赛题出来以后第一时间在CSDN分享) https://blog.csdn.net/dc_sinor?typeblog 算法介绍 FP-Tree算法全称是FrequentPattern Tree算法,就是频繁模式树算法,…...

GPT系列总结
1.GPT1 无监督预训练有监督的子任务finetuning https://cdn.openai.com/research-covers/language-unsupervised/language_understanding_paper.pdf 1.1 Unsupervised pre-training (1)基于一个transformer decoder,通过一个窗口的输入得…...
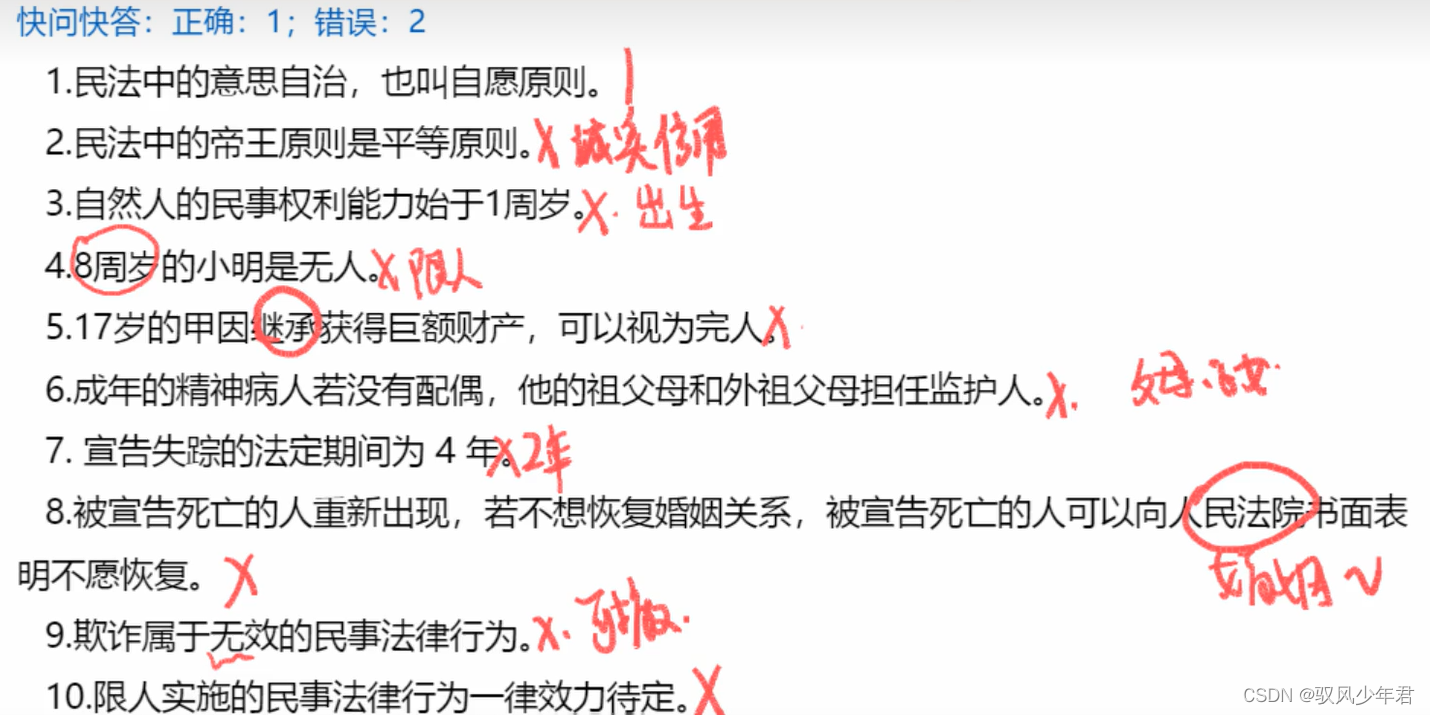
【福建事业单位-综合基础知识】05民法典
这里写自定义目录标题 一、民法概述概念原则总结 二、自然人概念总结 三、民事法律行为总结 民法考察2-4题(重点总则篇) 一、民法概述 概念原则 总结 二、自然人 概念 总结 三、民事法律行为 总结...

微服务篇
微服务篇 springcloud 常见组件有哪些 面试官: Spring Cloud 5大组件有哪些? 候选人: 早期我们一般认为的Spring Cloud五大组件是 Eureka:注册中心Ribbon:负载均衡Feign:远程调用Hystrix:…...
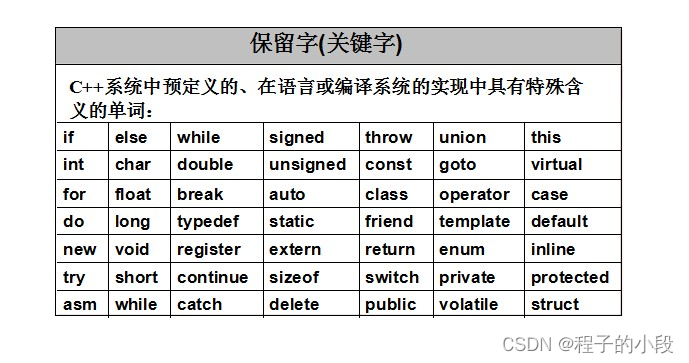
C++ 的关键字(保留字)完整介绍
1. asm asm (指令字符串):允许在 C 程序中嵌入汇编代码。 2. auto auto(自动,automatic)是存储类型标识符,表明变量"自动"具有本地范围,块范围的变量声明(如for循环体内的变量声明…...
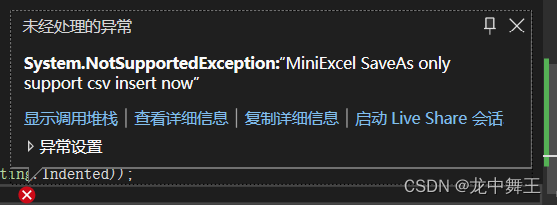
C#小轮子:MiniExcel,快速操作Excel
文章目录 前言环境安装功能测试普通读写读新建Excel表格完全一致测试:成功大小写测试:严格大小写别名读测试:成功 写普通写别名写内容追加更新模板写 其它功能xlsx和CSV互转 前言 Excel的操作是我们最常用的操作,Excel相当于一个…...
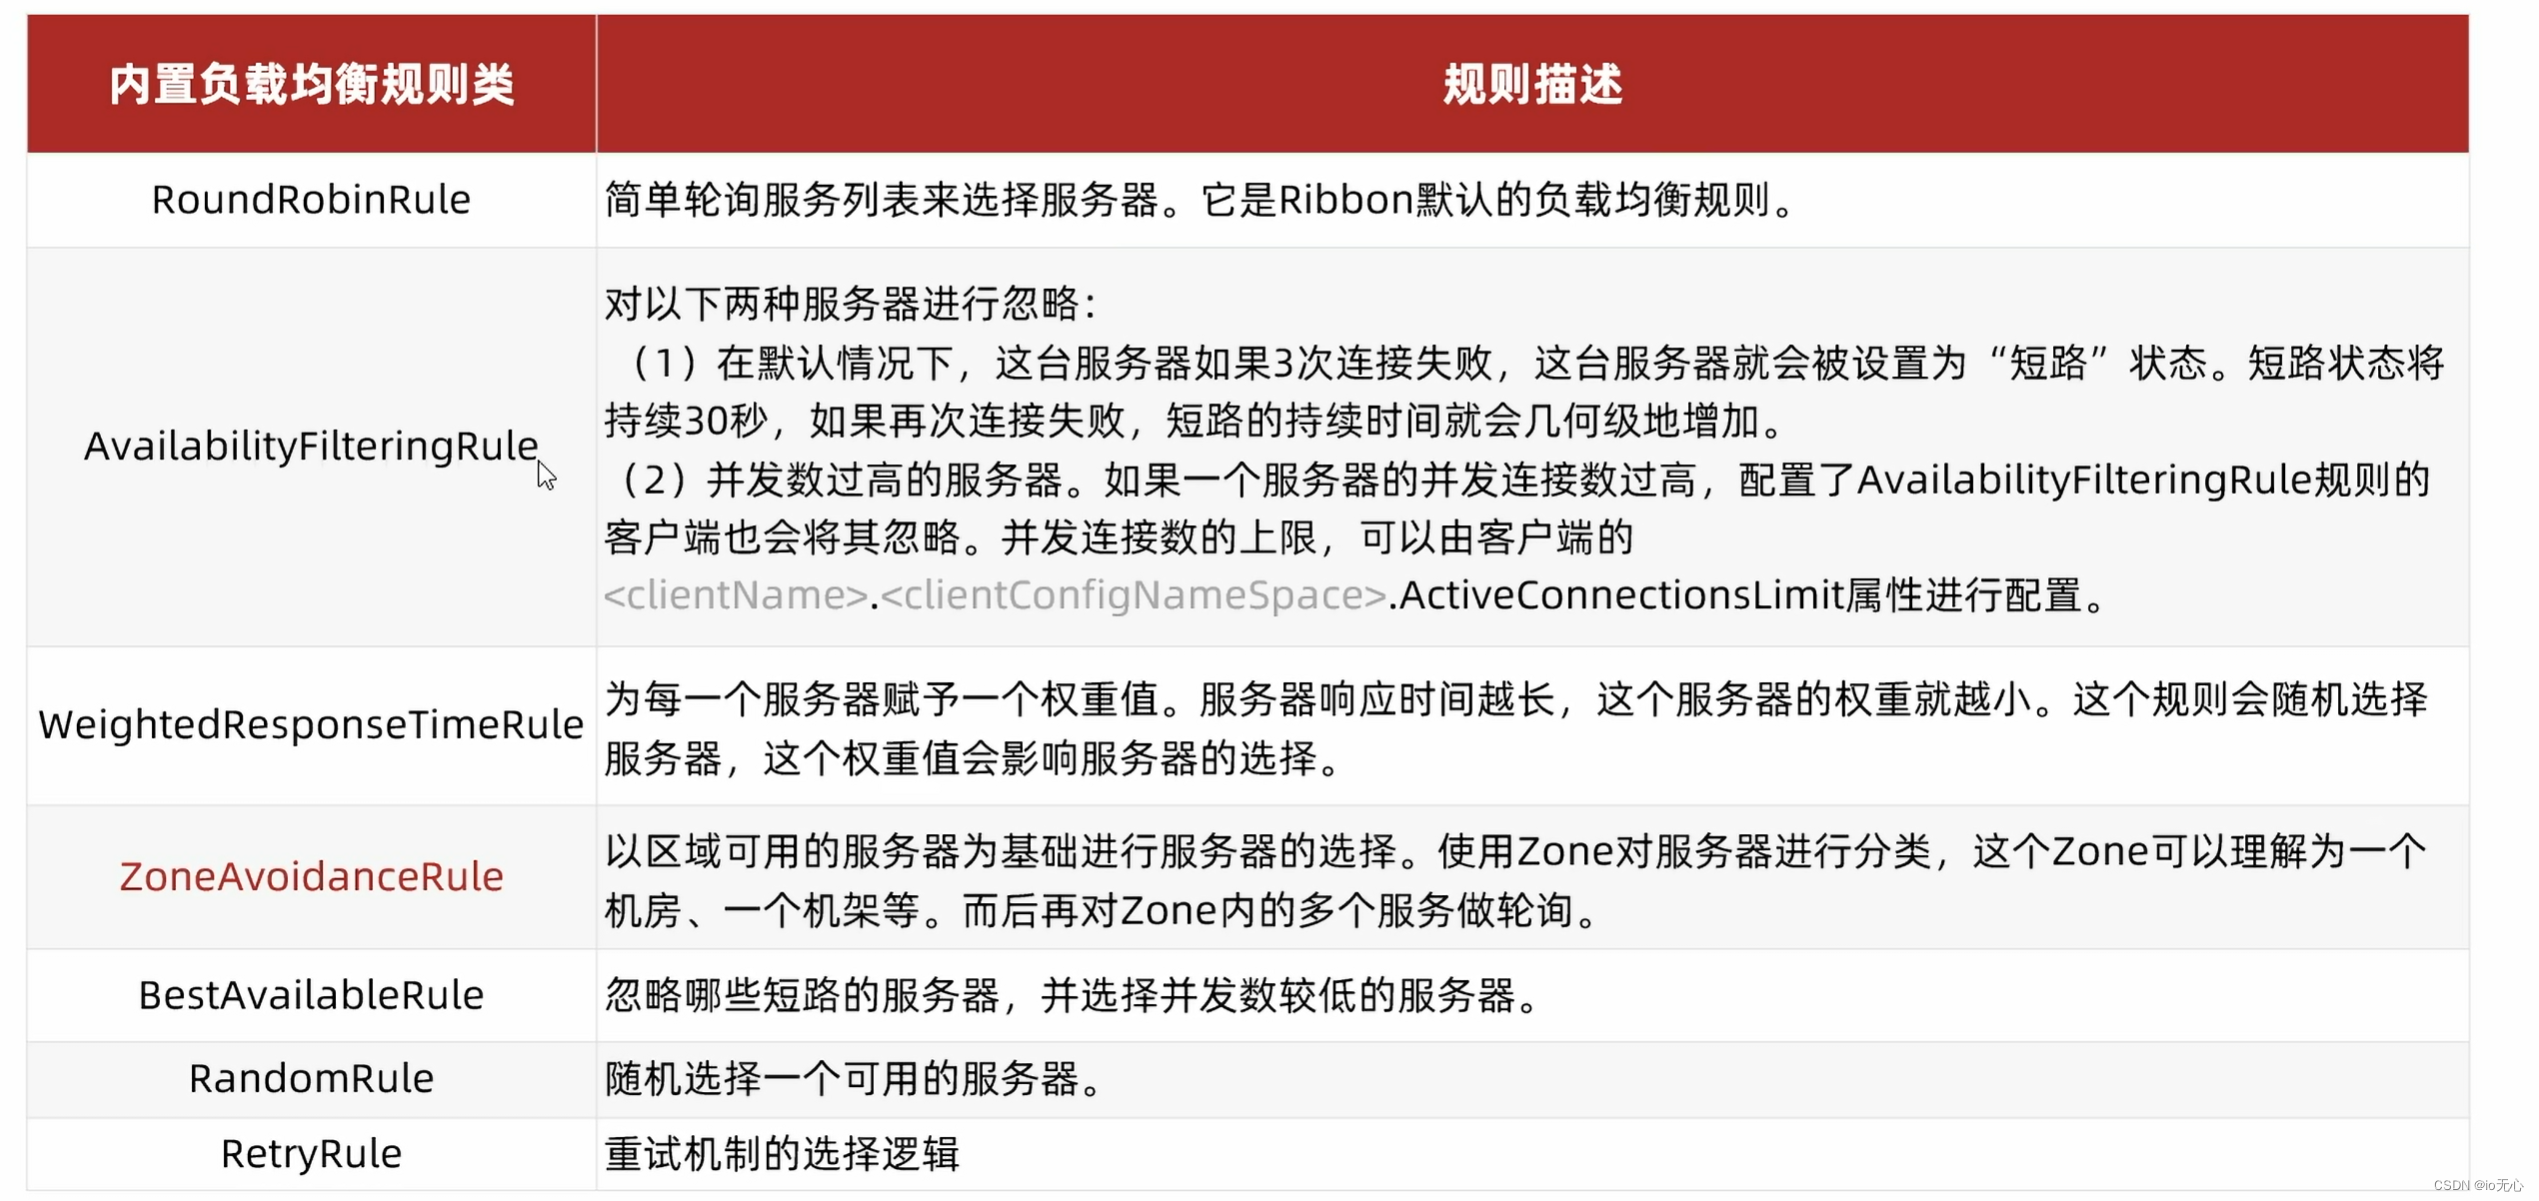
Ribbon负载均衡
Ribbon与Eureka的关系 Eureka的服务拉取与负载均衡都是由Ribbon来实现的。 当服务发送http://userservice/user/xxxhtt://userservice/user/xxx请求时,是无法到达userservice服务的,会通过Ribbon会把这个请求拦截下来,通过Eureka-server转换…...
LeetCode--HOT100题(33)
目录 题目描述:148. 排序链表(中等)题目接口解题思路代码 PS: 题目描述:148. 排序链表(中等) 给你链表的头结点 head ,请将其按 升序 排列并返回 排序后的链表 。 LeetCode做题链接࿱…...

【docker练习】
1.安装docker服务,配置镜像加速器 看这篇文章https://blog.csdn.net/HealerCCX/article/details/132342679?spm1001.2014.3001.5501 2.下载系统镜像(Ubuntu、 centos) [rootnode1 ~]# docker pull centos [rootnode1 ~]# docker pull ubu…...
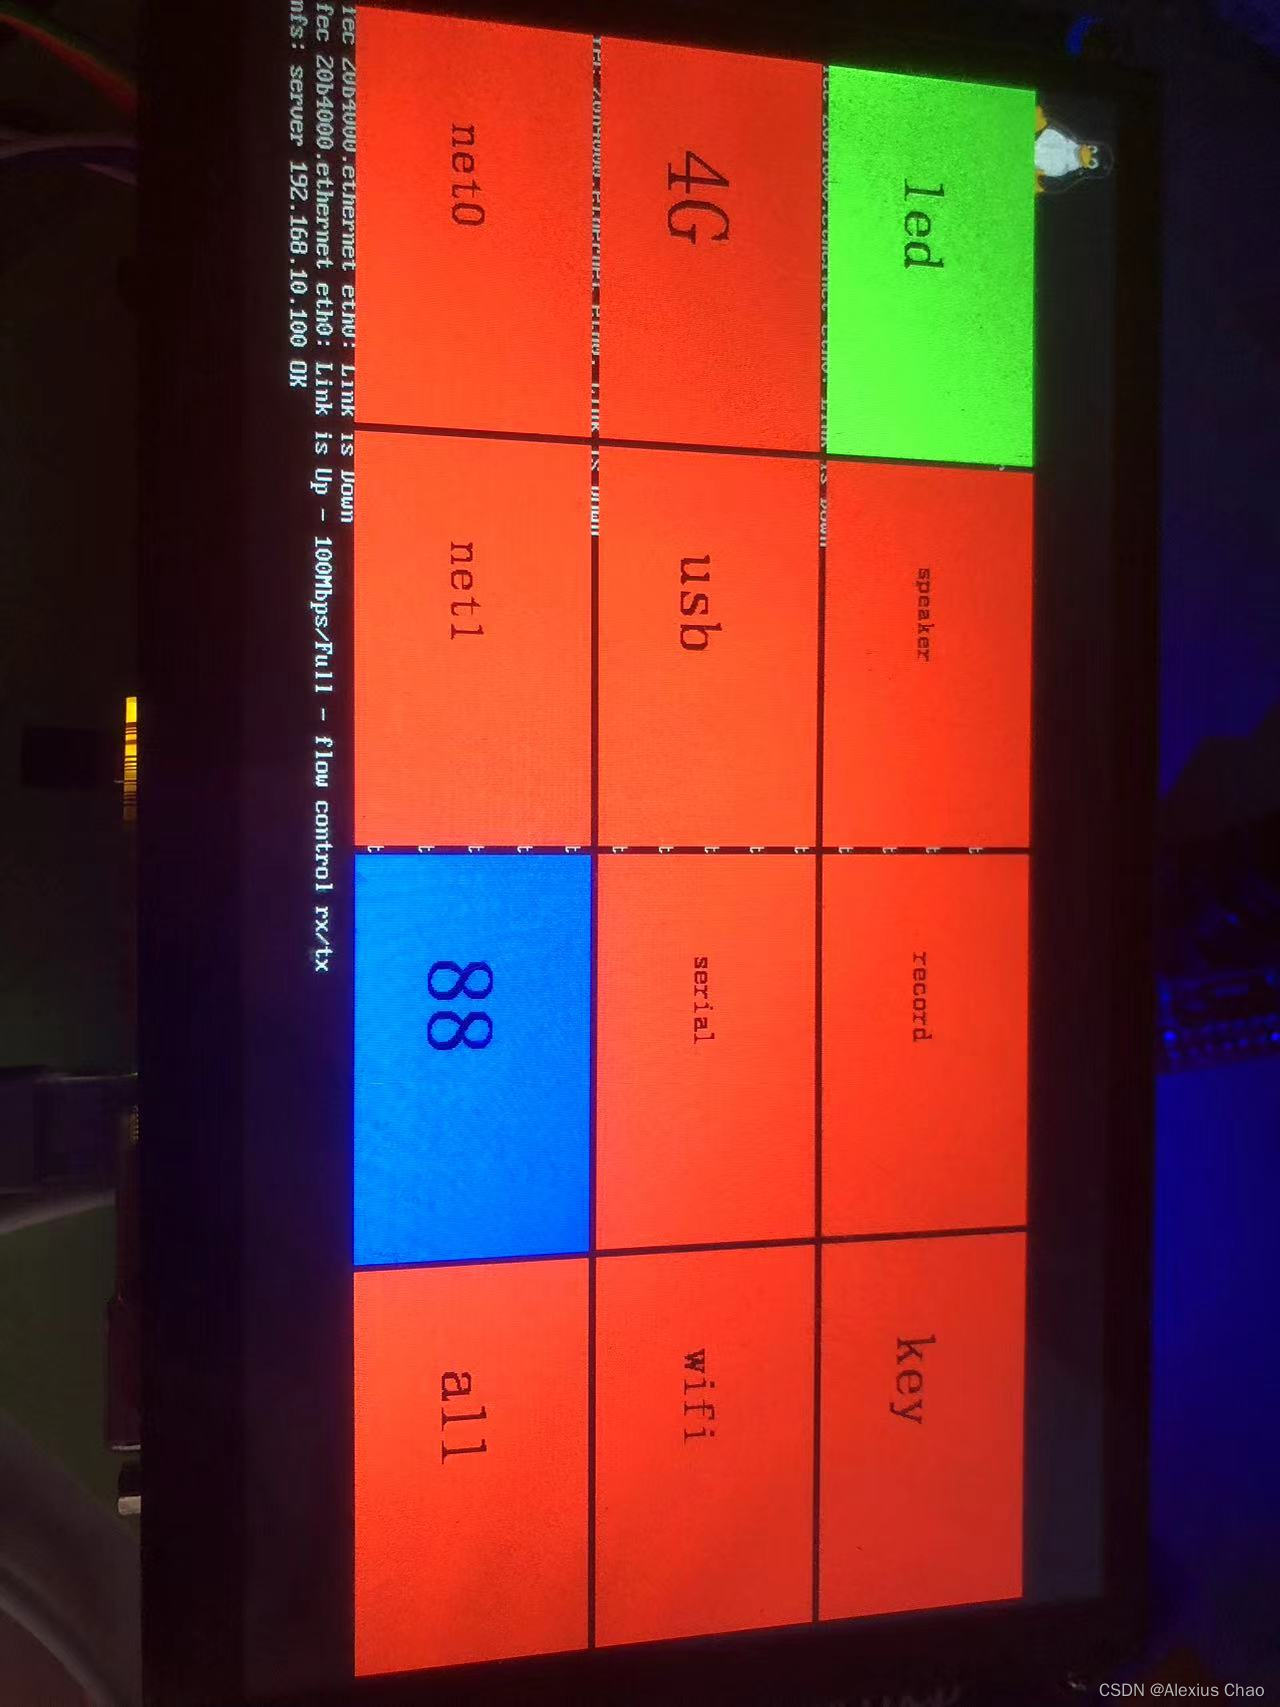
韦东山-电子量产工具项目:业务系统
代码结构 所有代码都已通过测试跑通,其中代码结构如下: 一、include文件夹 1.1 common.h #ifndef _COMMON_H #define _COMMON_Htypedef struct Region {int iLeftUpX; //区域左上方的坐标int iLeftUpY; //区域左下方的坐标int iWidth; //区域宽…...
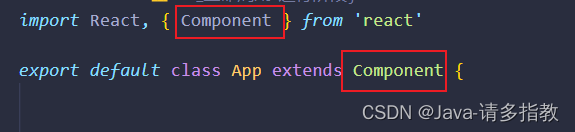
React(6)
1.React插槽 import React, { Component } from react import Child from ./compoent/Childexport default class App extends Component {render() {return (<div><Child><div>App下的div</div></Child></div>)} }import React, { Compon…...
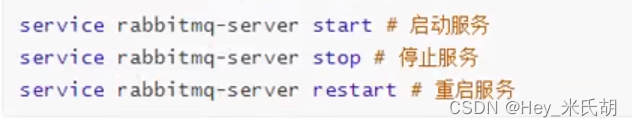
RabbitMq-2安装与配置
Rabbitmq的安装 1.上传资源 注意:rabbitmq的版本必须与erlang编译器的版本适配 2.安装依赖环境 //打开虚拟机 yum install build-essential openssl openssl-devel unixODBC unixODBC-devel make gcc gcc-c kernel-devel m4 ncurses-devel tk tc xz3.安装erlan…...
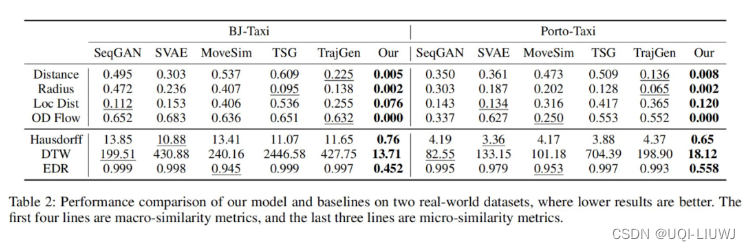
论文笔记:Continuous Trajectory Generation Based on Two-Stage GAN
2023 AAAI 1 intro 1.1 背景 建模人类个体移动模式并生成接近真实的轨迹在许多应用中至关重要 1)生成轨迹方法能够为城市规划、流行病传播分析和交通管控等城市假设分析场景提供仿仿真数据支撑2)生成轨迹方法也是目前促进轨迹数据开源共享与解决轨迹数…...

redis实战-缓存数据解决缓存与数据库数据一致性
缓存的定义 缓存(Cache),就是数据交换的缓冲区,俗称的缓存就是缓冲区内的数据,一般从数据库中获取,存储于本地代码。防止过高的数据访问猛冲系统,导致其操作线程无法及时处理信息而瘫痪,这在实际开发中对企业讲,对产品口碑,用户评价都是致命的;所以企业非常重视缓存…...

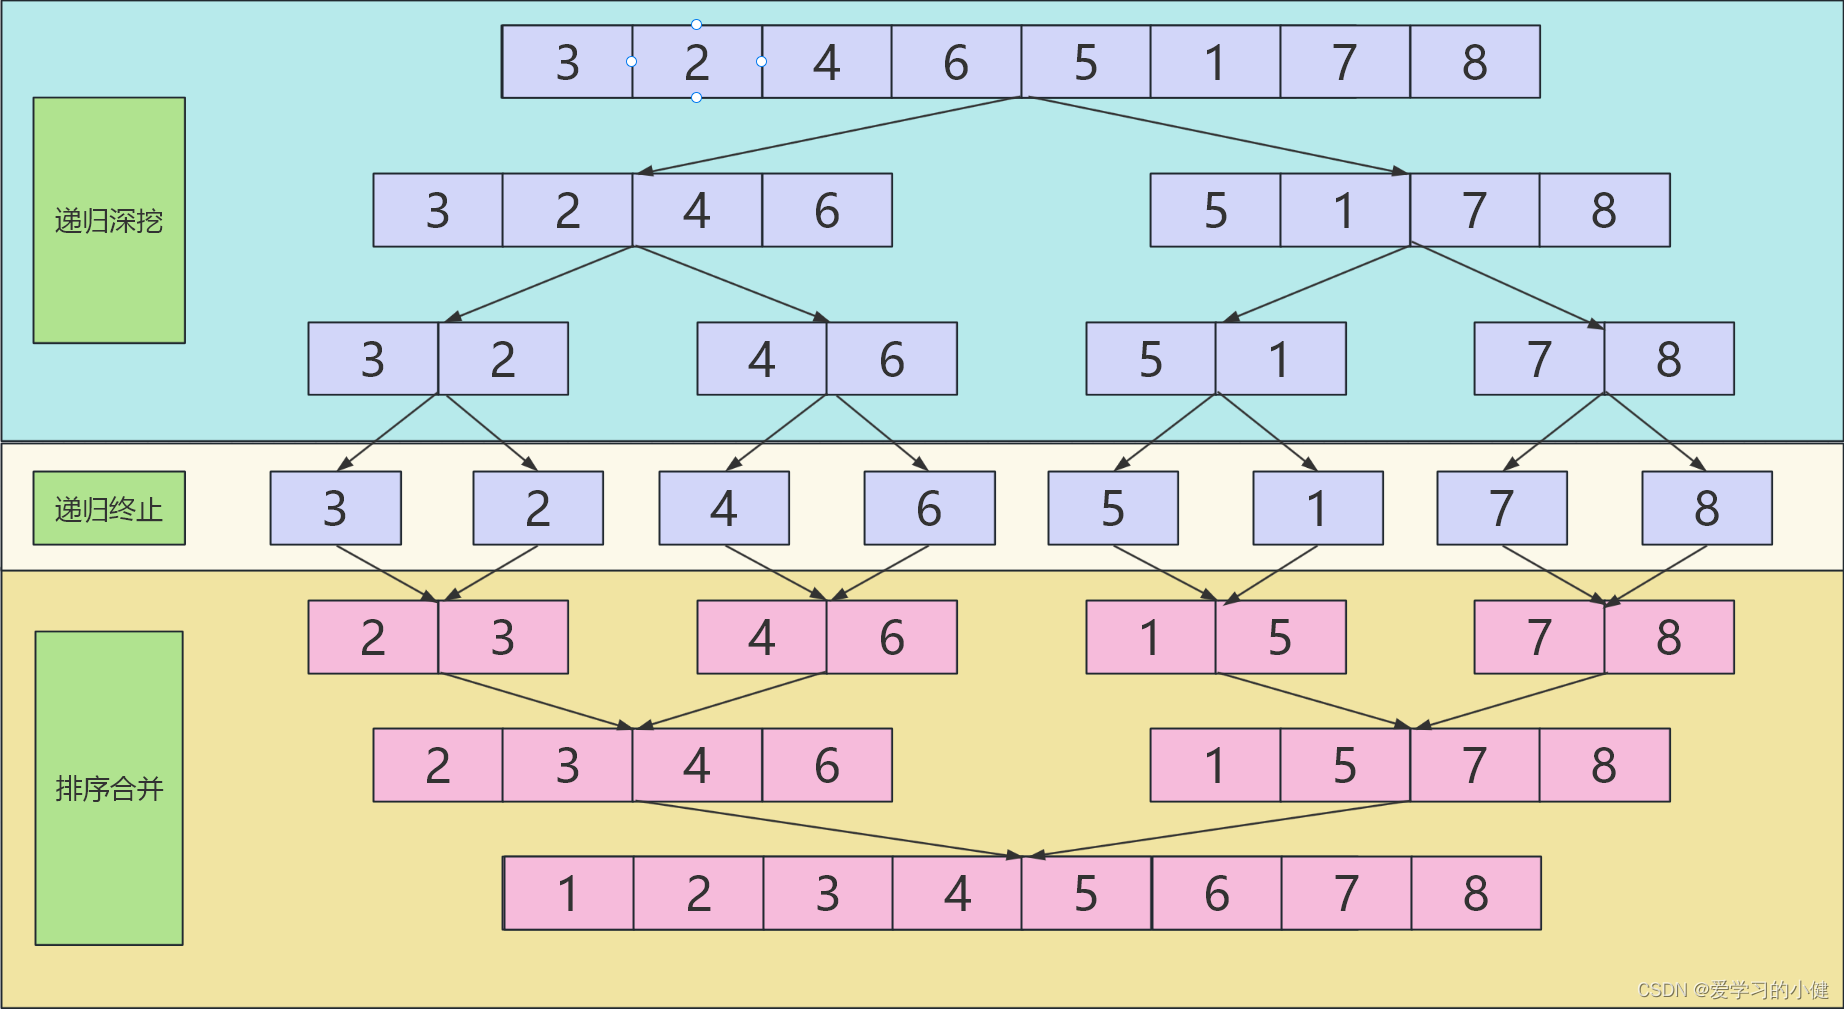
【排序】选择排序
文章目录 选择排序时间复杂度空间复杂度稳定性 代码 选择排序 以从小到大为例进行说明。 选择排序就是定义出一个最小值下标,然后遍历整个剩下的数组选择出最小的放进最小值下标的位置。 时间复杂度 O(N) 遍历一次即可 空间复杂度 O(1) 稳定性 不稳定 代码 p…...

FPGA电源系统设计与线性/开关稳压器应用指南
1. FPGA电源系统设计基础在数字系统设计中,FPGA因其可编程性和高性能已成为现代电子系统的核心器件。随着工艺技术进步,当代FPGA集成了数百万逻辑门、高速收发器、锁相环和专用处理单元,这些复杂模块对供电系统提出了严苛要求。一个典型的Xil…...

观察在虚拟机内使用Taotoken调用API的延迟与稳定性表现
🚀 告别海外账号与网络限制!稳定直连全球优质大模型,限时半价接入中。 👉 点击领取海量免费额度 观察在虚拟机内使用Taotoken调用API的延迟与稳定性表现 在开发与测试环境中,虚拟机(VM)是常见的…...

OnmyojiAutoScript:阴阳师全自动脚本终极指南,30+日常任务智能托管解放双手
OnmyojiAutoScript:阴阳师全自动脚本终极指南,30日常任务智能托管解放双手 【免费下载链接】OnmyojiAutoScript Onmyoji Auto Script | 阴阳师脚本 项目地址: https://gitcode.com/gh_mirrors/on/OnmyojiAutoScript 阴阳师作为一款深受玩家喜爱的…...

D3KeyHelper:暗黑3游戏宏助手终极指南,五分钟轻松搞定技能连点
D3KeyHelper:暗黑3游戏宏助手终极指南,五分钟轻松搞定技能连点 【免费下载链接】D3keyHelper D3KeyHelper是一个有图形界面,可自定义配置的暗黑3鼠标宏工具。 项目地址: https://gitcode.com/gh_mirrors/d3/D3keyHelper 想要在《暗黑破…...

基于Terraform与Ansible的OpenClaw私有化AI代理自动化部署实践
1. 项目概述如果你和我一样,对AI助手的能力有更高的期待,希望它能深度融入你的工作流,甚至能帮你处理一些自动化任务,那么OpenClaw这个项目绝对值得你花时间研究。它不是一个简单的聊天机器人,而是一个可以部署在你私有…...

别墅装修里的石材,选错是费钱,用错是麻烦
每次去工地,尤其是那些还没完工的别墅,总能看到角落里堆着几块大板。业主或者设计师会指着它们,兴奋地描述这里用爵士白,那里用鱼肚灰。但说实话,很多时候,这些选择在落地前,就已经埋下了后期保…...

多Agent协作是趋势,但谁来管这些Agent
如果你最近参加过AI相关的技术沙龙或者行业峰会,大概率会听到一个词:多Agent协作。简单说就是,不是一个AI帮你干完所有事,而是多个AI各司其职、互相配合。比如一个Agent负责理解需求,一个Agent负责写代码,一…...

如何高效采集直播数据:微信视频号监控工具的完整实战指南
如何高效采集直播数据:微信视频号监控工具的完整实战指南 【免费下载链接】wxlivespy 微信视频号直播间弹幕信息抓取工具 项目地址: https://gitcode.com/gh_mirrors/wx/wxlivespy 在直播电商时代,掌握实时互动数据已成为提升直播效果的关键。你是…...

物理神经计算:突破冯·诺依曼瓶颈的新范式
1. 物理神经计算:突破冯诺依曼瓶颈的新范式在传统计算架构面临能效瓶颈的今天,物理神经计算(Physical Neural Computing)正在掀起一场硬件革命。这种新型计算范式不再依赖传统的数字逻辑门和冯诺依曼架构,而是直接利用…...

6自由度机械臂精准控制:开源ROS方案的技术突破与工业应用
6自由度机械臂精准控制:开源ROS方案的技术突破与工业应用 【免费下载链接】pick-place-robot Object picking and stowing with a 6-DOF KUKA Robot using ROS 项目地址: https://gitcode.com/gh_mirrors/pi/pick-place-robot 在工业自动化领域,…...