MongoDB实验——在Java应用程序中操作 MongoDB 数据
在Java应用程序中操作 MongoDB 数据
1. 启动MongoDB Shell
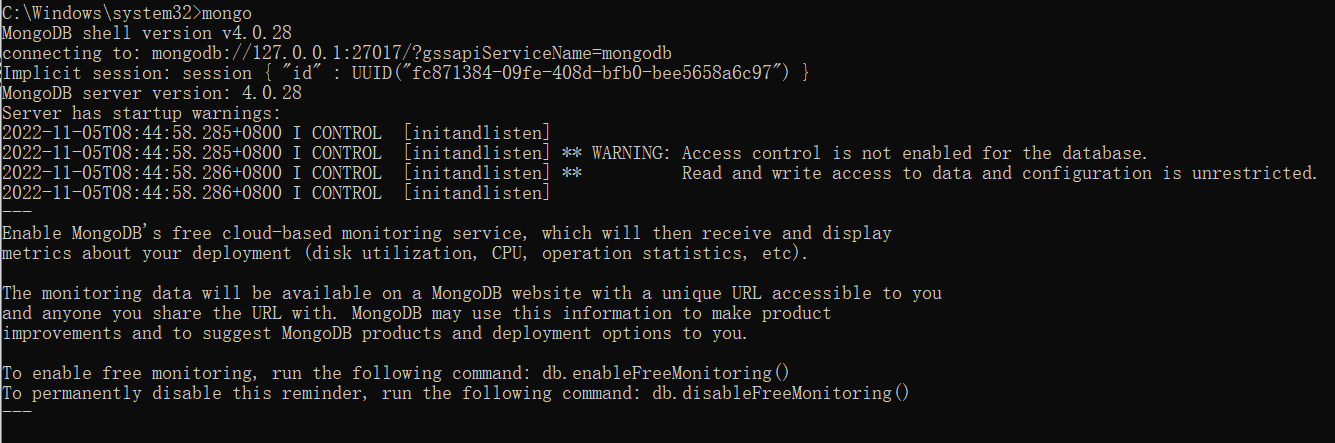
2. 切换到admin数据库,使用root账户

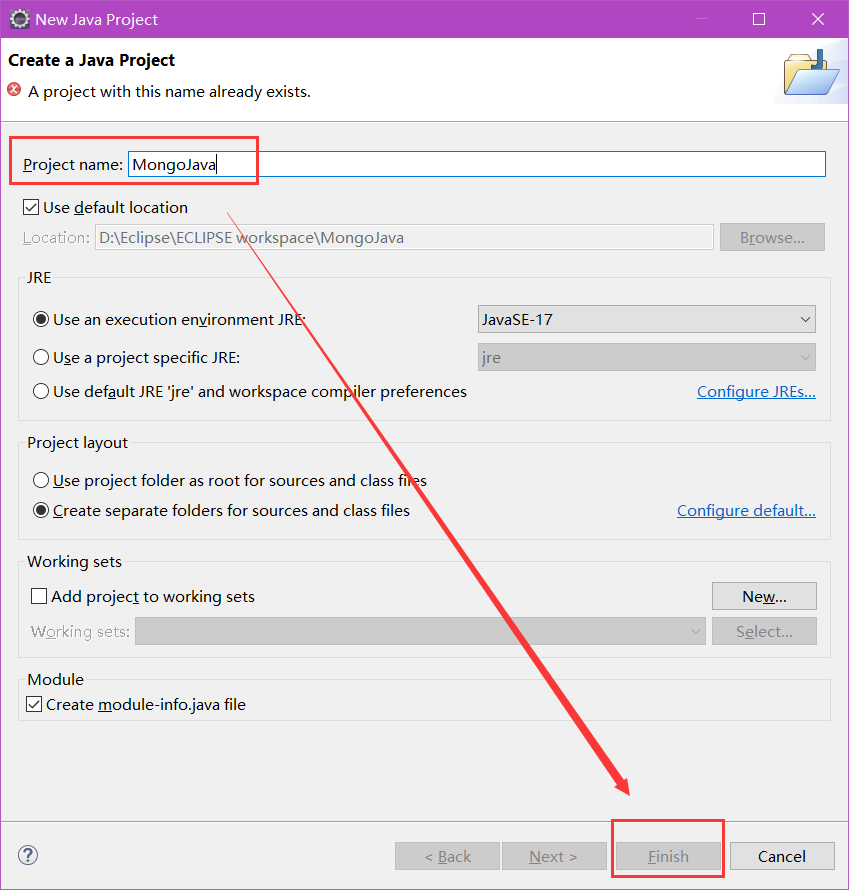
3.开启Eclipse,创建Java Project项目,命名为MongoJava
File --> New --> Java Project
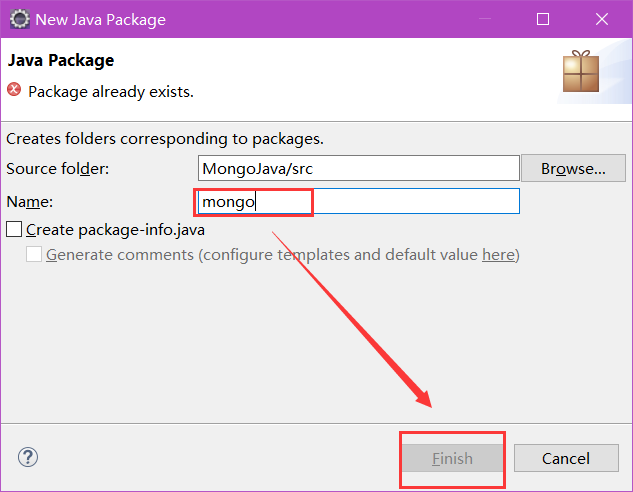
4.在MongoJava项目下新建包,包名为mongo
MongoJava右键 --> New --> mongo
5. 在mongo包下新建类,类名为mimalianjie
mongo右键 --> New --> Class

6. 添加项目依赖的jar包,右键单击MongoJava,选择Import
7. 选择General中的File System,点击Next

8. 选择存放mongo连接java的驱动程序的文件夹,并进行勾选Create top-level folder
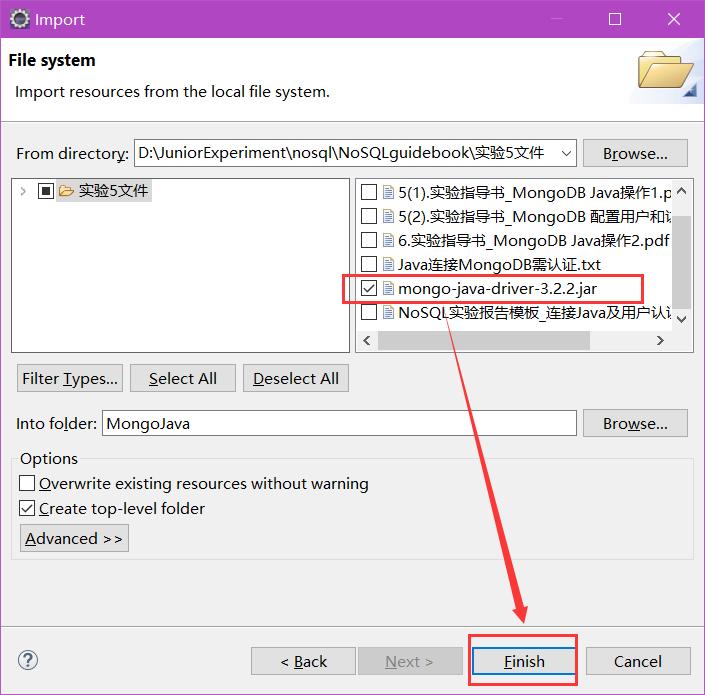
9. 选中导入的文件夹中的mongo-java-driver-3.2.2.jar,右击选择Build Path中的Add to Build Path。
10. 连接数据库:编写代码,功能为连接Mongodb数据库。我们需要指定数据库名称,如果指定的数据库不存在,mongo会自动创建数据库
package mongo;import java.util.ArrayList;import com.mongodb.MongoClient;
import com.mongodb.MongoCredential;
import com.mongodb.ServerAddress;
import com.mongodb.client.MongoDatabase;public class mimalianjie {public static void main(String[] args) {try {ServerAddress serverAddress = new ServerAddress("localhost",27017);ArrayList<ServerAddress> addrs = new ArrayList<ServerAddress>();addrs.add(serverAddress);MongoCredential credential = MongoCredential.createScramSha1Credential("root", "admin", "strongs".toCharArray());ArrayList<MongoCredential> credentials = newArrayList<MongoCredential>();credentials.add(credential);MongoClient mongoClient = new MongoClient(addrs,credentials);MongoDatabase mongoDatabase = mongoClient.getDatabase("databaseName");System.out.println("Connect to database successfully");} catch (Exception e) {System.err.println( e.getClass().getName() + ": " + e.getMessage() );}}}

11. 创建集合:与上述步骤相同,在mongo包下新建类,类名为chuangjianjihe,编写代码,功能为在test库下创建集合mycol(使用com.mongodb.client.MongoDatabase类中的createCollection()来创建集合)
package mongo;import java.util.ArrayList;import com.mongodb.MongoClient;
import com.mongodb.MongoCredential;
import com.mongodb.ServerAddress;
import com.mongodb.client.MongoDatabase;public class chuanjianjihe {public static void main(String[] args) {try {ServerAddress serverAddress = new ServerAddress("localhost",27017);ArrayList<ServerAddress> addrs = new ArrayList<ServerAddress>();addrs.add(serverAddress);MongoCredential credential = MongoCredential.createScramSha1Credential("root","admin","strongs".toCharArray());ArrayList<MongoCredential> credentials = new ArrayList<MongoCredential>();credentials.add(credential);MongoClient mongoClient = new MongoClient(addrs,credentials);MongoDatabase mongoDatabase = mongoClient.getDatabase("test");System.out.println("Connect to database successfully");mongoDatabase.createCollection("mycol");System.out.println("集合mycol创建成功");}catch (Exception e) {System.err.println( e.getClass().getName() + ": " + e.getMessage());}}}

12. 在mongodb中进行验证

13. 获取集合:在mongo包下新建类,名为huoqujihe,并编写代码,功能为获取所需集合(使用com.mongodb.client.MongoDatabase类的 getCollection() 方法来获取一个集合)
package mongo;import java.util.ArrayList;import com.mongodb.MongoClient;
import com.mongodb.MongoCredential;
import com.mongodb.ServerAddress;
import com.mongodb.client.MongoCollection;
import com.mongodb.client.MongoDatabase;public class huoqujihe {public static void main(String[] args) {try {ServerAddress serverAddress = new ServerAddress("localhost",27017);ArrayList<ServerAddress> addrs = new ArrayList<ServerAddress>();addrs.add(serverAddress);MongoCredential credential = MongoCredential.createScramSha1Credential("root","admin","strongs".toCharArray());ArrayList<MongoCredential> credentials = new ArrayList<MongoCredential>();credentials.add(credential);MongoClient mongoClient = new MongoClient(addrs,credentials);MongoDatabase mongoDatabase = mongoClient.getDatabase("test");System.out.println("Connect to database successfully");MongoCollection<org.bson.Document> collection = mongoDatabase.getCollection("mycol");System.out.println("集合mycol选择成功");} catch (Exception e) {System.err.println( e.getClass().getName() + ": " + e.getMessage());}}}

14.插入文档:在mongo包中新建类,名为charuwendang,功能为连接test库,选择mycol集合并向其中插入文档。(使用com.mongodb.client.MongoCollection类的insertMany()方法来插入一个文档)
package mongo;import java.util.ArrayList;
import java.util.List;import org.bson.Document;import com.mongodb.MongoClient;
import com.mongodb.MongoCredential;
import com.mongodb.ServerAddress;
import com.mongodb.client.MongoCollection;
import com.mongodb.client.MongoDatabase;public class charuwendang {public static void main (String[] args) {try {ServerAddress serverAddress = new ServerAddress("localhost",27017);ArrayList<ServerAddress> addrs = new ArrayList<ServerAddress>();addrs.add(serverAddress);MongoCredential credential = MongoCredential.createScramSha1Credential("root","admin","strongs".toCharArray());ArrayList<MongoCredential> credentials = new ArrayList<MongoCredential>();credentials.add(credential);MongoClient mongoClient = new MongoClient(addrs,credentials);MongoDatabase mongoDatabase = mongoClient.getDatabase("test");System.out.println("Connect to database successfully");MongoCollection<org.bson.Document> collection = mongoDatabase.getCollection("mycol");System.out.println("集合mycol选择成功");Document document = new Document("name", "zhangyudashuju").append("description", "YXCX").append("likes", 100).append("location", "BJ");List<Document> documents = new ArrayList<Document>();documents.add(document);collection.insertMany(documents);System.out.println("文档插入成功");}catch(Exception e) {System.err.println( e.getClass().getName() + ": " + e.getMessage() );}}
}

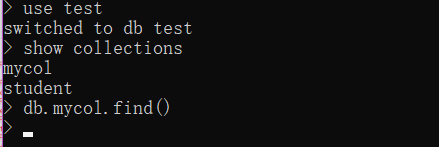
15.在mongodb中进行查询验证

16. 检索文档:在mongo包中新建类,名为jiansuosuoyouwendang,功能为检索test库下,mycol集合中的所有文档(使用 com.mongodb.client.MongoCollection 类中的 find() 方法来获取集合中的所有文档)
package mongo;import java.util.ArrayList;import org.bson.Document;import com.mongodb.MongoClient;
import com.mongodb.MongoCredential;
import com.mongodb.ServerAddress;
import com.mongodb.client.FindIterable;
import com.mongodb.client.MongoCollection;
import com.mongodb.client.MongoCursor;
import com.mongodb.client.MongoDatabase;public class jiansuosuoyouwendang {public static void main( String args[] ){try{ServerAddress serverAddress = new ServerAddress("localhost",27017);ArrayList<ServerAddress> addrs = new ArrayList<ServerAddress>();addrs.add(serverAddress);MongoCredential credential = MongoCredential.createScramSha1Credential("root","admin", "strongs".toCharArray());ArrayList<MongoCredential> credentials = new ArrayList<MongoCredential>();credentials.add(credential);MongoClient mongoClient = new MongoClient(addrs,credentials);MongoDatabase mongoDatabase = mongoClient.getDatabase("test");System.out.println("Connect to database successfully");MongoCollection<org.bson.Document> collection = mongoDatabase.getCollection("mycol");System.out.println("集合mycol选择成功");FindIterable<Document> findIterable = collection.find();MongoCursor<Document> mongoCursor = findIterable.iterator();while(mongoCursor.hasNext()){System.out.println(mongoCursor.next());}}catch(Exception e){System.err.println( e.getClass().getName() + ": " + e.getMessage() );}}
}

17. 更新文档:在mongo包中新建类,名为gengxinwendang,功能为选择test库下mycol集合,将文档中的likes=100改为likes=200(使用 com.mongodb.client.MongoCollection 类中的updateMany()方法来更新集合中的文档)
package mongo;import java.util.ArrayList;import org.bson.Document;import com.mongodb.MongoClient;
import com.mongodb.MongoCredential;
import com.mongodb.ServerAddress;
import com.mongodb.client.FindIterable;
import com.mongodb.client.MongoCollection;
import com.mongodb.client.MongoCursor;
import com.mongodb.client.MongoDatabase;
import com.mongodb.client.model.Filters;public class gengxinwendang {public static void main( String args[] ){try{ServerAddress serverAddress = new ServerAddress("localhost",27017);ArrayList<ServerAddress> addrs = new ArrayList<ServerAddress>();addrs.add(serverAddress);MongoCredential credential = MongoCredential.createScramSha1Credential("root","admin", "strongs".toCharArray());ArrayList<MongoCredential> credentials = new ArrayList<MongoCredential>();credentials.add(credential);MongoClient mongoClient = new MongoClient(addrs,credentials);MongoDatabase mongoDatabase = mongoClient.getDatabase("test");System.out.println("Connect to database successfully");MongoCollection<org.bson.Document> collection = mongoDatabase.getCollection("mycol");System.out.println("集合mycol选择成功");collection.updateMany(Filters.eq("likes", 100), new Document("$set",new Document("likes",200)));FindIterable<Document> findIterable = collection.find();MongoCursor<Document> mongoCursor = findIterable.iterator();while(mongoCursor.hasNext()){System.out.println(mongoCursor.next());}}catch(Exception e){System.err.println( e.getClass().getName() + ": " + e.getMessage() );}}
}

18. 在mongodb中进行查询验证

19. 删除文档:在mongo包中新建类,名为sanchuwendang,功能为选择test库下mycol集合,删除所有符合条件(likes=200)的文档。(使用com.mongodb.DBCollection类中的findOne()方法来获取第一个文档,然后使用remove方法删除)
package mongo;import java.util.ArrayList;import org.bson.Document;import com.mongodb.MongoClient;
import com.mongodb.MongoCredential;
import com.mongodb.ServerAddress;
import com.mongodb.client.FindIterable;
import com.mongodb.client.MongoCollection;
import com.mongodb.client.MongoCursor;
import com.mongodb.client.MongoDatabase;
import com.mongodb.client.model.Filters;public class shanchuwendang {public static void main( String args[] ){try{ServerAddress serverAddress = new ServerAddress("localhost",27017);ArrayList<ServerAddress> addrs = new ArrayList<ServerAddress>();addrs.add(serverAddress);MongoCredential credential = MongoCredential.createScramSha1Credential("root","admin", "strongs".toCharArray());ArrayList<MongoCredential> credentials = new ArrayList<MongoCredential>();credentials.add(credential);MongoClient mongoClient = new MongoClient(addrs,credentials);MongoDatabase mongoDatabase = mongoClient.getDatabase("test");System.out.println("Connect to database successfully");MongoCollection<org.bson.Document> collection = mongoDatabase.getCollection("mycol");System.out.println("集合mycol选择成功");//删除符合条件的第一个文档//collection.deleteOne(Filters.eq("likes", 200));//删除所有符合条件的文档collection.deleteMany (Filters.eq("likes", 200));//检索查看结果FindIterable<Document> findIterable = collection.find();MongoCursor<Document> mongoCursor = findIterable.iterator();while(mongoCursor.hasNext()){System.out.println(mongoCursor.next());}}catch(Exception e){System.err.println( e.getClass().getName() + ": " + e.getMessage() );}}
}

20. 在mongodb中进行查询验证
查询结果为空,证明文档已被删除。
至此,实验结束!
相关文章:
MongoDB实验——在Java应用程序中操作 MongoDB 数据
在Java应用程序中操作 MongoDB 数据 1. 启动MongoDB Shell 2. 切换到admin数据库,使用root账户 3.开启Eclipse,创建Java Project项目,命名为MongoJava File --> New --> Java Project 4.在MongoJava项目下新建包,包名为mo…...
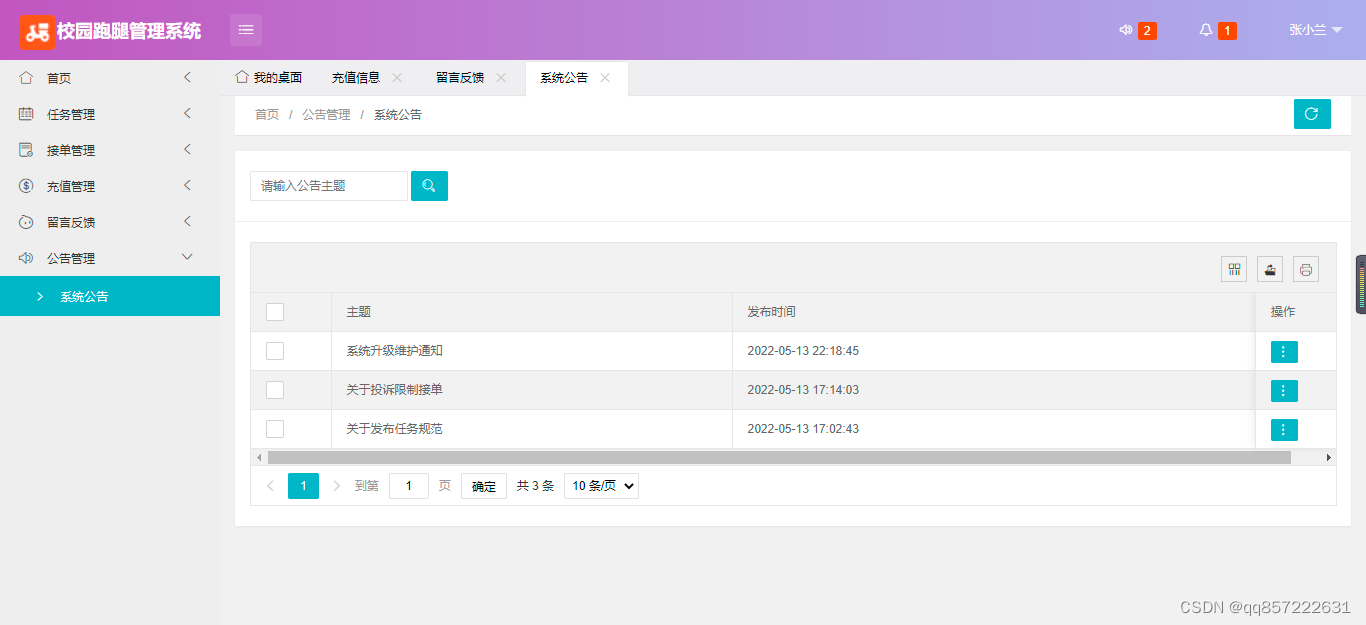
java+springboot+mysql校园跑腿管理系统
项目介绍: 使用javaspringbootmysql开发的校园跑腿管理系统,系统包含超级管理员,系统管理员、用户角色,功能如下: 超级管理员:管理员管理;用户管理(充值);任…...

ubuntu20.04 server 安装后磁盘空间只有一半的处理
这里扩展:/dev/mapper/ubuntu–vg-ubuntu–lv rootbook:/data# df -h Filesystem Size Used Avail Use% Mounted on udev 3.9G 0 3.9G 0% /dev tmpfs 795M 1.2M 79…...

〔017〕Stable Diffusion 之 常用模型推荐 篇
✨ 目录 🎈 模型网站🎈 仿真系列🎈 国风系列🎈 卡通动漫系列🎈 3D系列🎈 一些好用的lora模型🎈 模型网站 由于现在大模型超级多,导致每种画风的模型太多,那么如何选择最好最适合的模型,成了很多人头疼的问题由于用的大部分都是1.5的模型,所以优先下载 safete…...
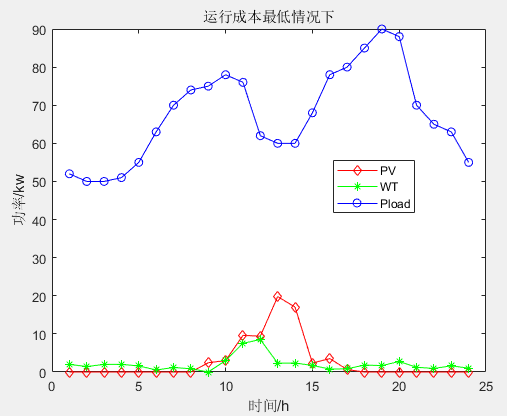
多目标应用:基于多目标人工蜂鸟算法(MOAHA)的微电网多目标优化调度MATLAB
一、微网系统运行优化模型 参考文献: [1]李兴莘,张靖,何宇,等.基于改进粒子群算法的微电网多目标优化调度[J].电力科学与工程, 2021, 37(3):7 二、多目标人工蜂鸟算法MOAHA 多目标人工蜂鸟算法(multi-objective artificial hummingbird algorithm&…...

【HTML5】HTML5 特性
HTML5 特性 1. 语义化标签 <header>:表示网页或某个区域的页眉部分,通常包含网站的标志、导航菜单等内容。<nav>:表示导航区域,用于包含网站的主要导航链接。<main>:表示网页的主要内容区域&#…...

【FreeRTOS】互斥量的使用与逐步实现
在FreeRTOS中,互斥量是一种用于保护共享资源的同步机制。它通过二进制信号量的方式,确保在任意时刻只有一个任务可以获取互斥量并访问共享资源,其他任务将被阻塞。使用互斥量的基本步骤包括创建互斥量、获取互斥量、访问共享资源和释放互斥量…...
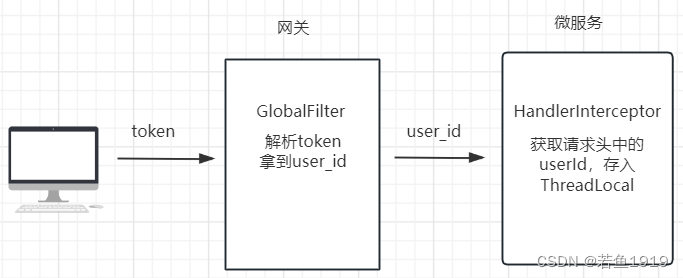
Spring-Cloud-Openfeign如何传递用户信息?
用户信息传递 微服务系统中,前端会携带登录生成的token访问后端接口,请求会首先到达网关,网关一般会做token解析,然后把解析出来的用户ID放到http的请求头中继续传递给后端的微服务,微服务中会有拦截器来做用户信息的…...

OpenCV(十一):图像仿射变换
目录 1.图像仿射变换介绍 仿射变换: 仿射变换矩阵: 仿射变换公式: 2.仿射变换函数 仿射变换函数:warpAffine() 图像旋转:getRotationMatrix2D() 计算仿射变换矩阵:getAffineTransform() 3.demo 1.…...
多路波形发生器的控制
本次波形发生器,主要使用运算放大器、NE555以及一些其他的电阻电容器件来实现。整体电路图如下所示: 产生的三角波如下: 正弦波如下 方波如下: 运算放大器(Operational Amplifier,简称OP-AMP)是…...

[C/C++]天天酷跑超详细教程-中篇
个人主页:北海 🎐CSDN新晋作者 🎉欢迎 👍点赞✍评论⭐收藏✨收录专栏:C/C🤝希望作者的文章能对你有所帮助,有不足的地方请在评论区留言指正,大家一起学习交流!ǹ…...
面试被打脸,数据结构底层都不知道么--回去等通知吧
数据结构之常见的8种数据结构: -数组Array -链表 Linked List -堆 heap -栈 stack -队列 Queue -树 Tree -散列表 Hash -图 Graph 数据结构-链表篇 Linklist定义: -是一种线性表,并不会按线性的顺序存储数据,即逻辑上相邻…...
)
微服务面试问题小结( 微服务、分布式、MQ、网关、zookeeper、nginx)
什么是微服务,单体架构的优点和缺点,微服务架构的优点和缺点? 单体架构 优点:架构简单,维护成本低缺点:各个模块耦合度太高,当对一个模块进行更新修改时,会影响到其他模块ÿ…...

Vue3全局变量使用
全局变量(函数等)可以在任意组件内访问,可以当组件间的传值使用。 main.js import ./assets/main.cssimport { createApp } from vue import App from ./App.vueconst app createApp(App); app.config.globalProperties.$global_id10; app.…...

拼多多海量商品数据接口API 商品详情接口 商品价格主图接口
拼多多,作为中国最大的社交电商之一,提供了丰富的商品信息和海量的用户数据。对于广大开发者而言,如何快速、准确地获取这些数据,进而开发出各种创新应用,是他们关心的问题。本文将详细介绍拼多多海量商品数据接口API的…...

结构化日志记录增强网络安全性
日志是一种宝贵的资产,在监视和分析应用程序或组织的 IT 基础结构的整体安全状况和性能方面发挥着至关重要的作用。它们提供系统事件、用户活动、网络流量和应用程序行为的详细记录,从而深入了解潜在威胁或未经授权的访问尝试。虽然组织历来依赖于传统的…...
企业架构LNMP学习笔记5
Nginx: 常见用法: 1)web服务器软件 httpd http协议 同类的web服务器软件:apache Nginx(俄罗斯)IIS(微软)lighttpd(德国) 2)代理服务器 反向代…...
Idea安装免注册版ChatGPT
文章目录 一、前期准备二、开始使用 一、前期准备 1.准备Idea开发软件并打开(VS Code同理)! 2.【CtrlAltS】快捷键调出Settings窗口,如图 3.找到NexChatGPT 此插件不需要注册,可以直接使用(高级一些的需要会员收费限…...

git操作
一、查看远程分支 使用如下git命令查看所有远程分支: git branch -r 查看远程和本地所有分支: git branch -a 查看本地分支: git branch 在输出结果中,前面带* 的是当前分支。 二、拉取远程分支并创建本地分支 方法一 使用如下…...

9 | 求出不同性别和不同科目的学生平均分数
需求描述:学生成绩分析 背景: 我们有一组学生的成绩数据,其中包括学生的姓名、性别和科目,我们需要分析不同性别和不同科目的学生平均分数。 功能要求: 从数据源中获取学生的成绩数据,包括学生姓名、性别和科目。使用Spark进行数据处理,将学生数据按性别和科目分组。计…...

DLL与静态库怎么选?5个真实案例解析动态链接库的优劣
DLL与静态库的架构决策:5个实战场景下的技术选型指南 1. 模块化开发中的DLL实践 在大型软件系统中,模块化设计是降低复杂度的关键策略。我们曾为某金融交易系统设计插件架构时,DLL的动态加载特性展现出独特优势: 内存共享机制&…...

论文降AI率完整操作教程:检测→定位→降AI→复查全流程详解
论文降AI率完整操作教程:检测→定位→降AI→复查全流程详解 很多同学一听"降AI率"就觉得很复杂。网上教程要么讲得太笼统(“用工具处理一下就好了”),要么一上来就推荐工具却不讲完整流程。 这篇教程不一样。我把降AI率…...
:变量、数据类型与类型转换)
Python从入门到精通(03章):变量、数据类型与类型转换
Python从入门到精通(第03章):变量、数据类型与类型转换 开头导语 这是本系列第03章。本文采用“知识点讲解 错误示例 正确写法 自测清单”的结构,目标是让你不仅能看懂,还能独立写出可运行代码。建议你边看边敲&…...

飞书文档全流程备份终极方案:从手动操作到自动化管理的完美转型
飞书文档全流程备份终极方案:从手动操作到自动化管理的完美转型 【免费下载链接】feishu-doc-export 项目地址: https://gitcode.com/gh_mirrors/fe/feishu-doc-export 价值定位:破解企业文档管理的三大核心痛点 📊 在数字化办公日益…...

雷达式多参数水文监测站
雷达式多参数水文监测站用先进的非接触式测量技术,结合水库断面参数精准计算流量,全程无需接触水体,从根源上规避水体环境对监测设备的影响。不受风、环境温度、雾霾、水体泥沙、漂浮物等外界因素干扰,即便在汛期水流浑浊、漂浮物…...

面向开发者的Qwen3-32B实战:Clawdbot平台集成Python SDK调用与流式响应处理
面向开发者的Qwen3-32B实战:Clawdbot平台集成Python SDK调用与流式响应处理 重要提示:本文基于企业内部部署环境,所有技术方案和代码示例均适用于私有化部署场景。实际部署时请根据您的网络环境和安全要求进行调整。 1. 项目背景与价值 在企…...

ai辅助开发:基于快马平台为trea国际版添加汇率数据智能分析功能
最近在开发Trea国际版应用时,遇到了一个需求:如何让用户更直观地理解汇率波动趋势,并通过自然语言交互获得分析结果。这个功能看似复杂,但借助InsCode(快马)平台的AI辅助开发能力,整个过程变得异常简单。下面分享我的实…...

用Python手把手实现乘幂法:从理论到代码,5分钟搞定矩阵最大特征值计算
用Python手把手实现乘幂法:从理论到代码,5分钟搞定矩阵最大特征值计算 矩阵特征值计算是线性代数的核心问题之一,在机器学习、物理模拟和工程分析中无处不在。但当你面对一个实际项目时,真正需要的往往不是繁琐的数学推导…...

Python调用SM9遭遇“Unknown curve”?紧急修复手册:从OpenSSL 3.0.7到国密SM9曲线OID映射全对照
第一章:Python调用SM9遭遇“Unknown curve”问题的根源定位当使用 Python(如通过 cryptography 或 gmssl 库)实现国密 SM9 算法时,常见报错 ValueError: Unknown curve 并非源于椭圆曲线参数缺失,而是因底层密码学库未…...

SEO_网站排名不上去?试试这几个SEO解决办法
SEO:网站排名不上去?试试这几个SEO解决办法 如果你发现自己的网站在百度上的排名一直不上去,你可能正面临着一场SEO战争。SEO,全称搜索引擎优化,是提高网站在搜索引擎结果中排名的关键技术。本文将为你详细探讨一些常见…...