Android 中集成 TensorFlow Lite图片识别

在上图通过手机的相机拍摄到的物体识别出具体的名称,这个需要通过TensorFlow 训练的模型引用到项目中;以下就是详细地集成 TensorFlow步骤,请按照以下步骤进行操作:
在项目的根目录下的
build.gradle文件中添加 TensorFlow 的 Maven 仓库。在repositories部分添加以下行:
allprojects {repositories {// 其他仓库...maven {url 'https://google.bintray.com/tensorflow'}}
}
在应用的
build.gradle文件中添加 TensorFlow Lite 的依赖。在dependencies部分添加以下行:
implementation 'org.tensorflow:tensorflow-lite:2.5.0'将 TensorFlow Lite 模型文件添加到你的 Android 项目中。将模型文件(
.tflite)复制到app/src/main/assets目录下。如果assets目录不存在,可以手动创建。创建一个
TFLiteObjectDetectionAPIModel类,用于加载和运行 TensorFlow Lite 模型。以下是一个示例代码:
import org.tensorflow.lite.Interpreter;public class TFLiteObjectDetectionAPIModel implements Classifier {private static final Logger LOGGER = new Logger();// Only return this many results.private static final int NUM_DETECTIONS = 10;// Float modelprivate static final float IMAGE_MEAN = 128.0f;private static final float IMAGE_STD = 128.0f;// Number of threads in the java appprivate static final int NUM_THREADS = 4;private boolean isModelQuantized;// Config values.private int inputSize;// Pre-allocated buffers.private Vector<String> labels = new Vector<String>();private int[] intValues;// outputLocations: array of shape [Batchsize, NUM_DETECTIONS,4]// contains the location of detected boxesprivate float[][][] outputLocations;// outputClasses: array of shape [Batchsize, NUM_DETECTIONS]// contains the classes of detected boxesprivate float[][] outputClasses;// outputScores: array of shape [Batchsize, NUM_DETECTIONS]// contains the scores of detected boxesprivate float[][] outputScores;// numDetections: array of shape [Batchsize]// contains the number of detected boxesprivate float[] numDetections;private ByteBuffer imgData;private Interpreter tfLite;private TFLiteObjectDetectionAPIModel() {}/** Memory-map the model file in Assets. */private static MappedByteBuffer loadModelFile(AssetManager assets, String modelFilename)throws IOException {AssetFileDescriptor fileDescriptor = assets.openFd(modelFilename);FileInputStream inputStream = new FileInputStream(fileDescriptor.getFileDescriptor());FileChannel fileChannel = inputStream.getChannel();long startOffset = fileDescriptor.getStartOffset();long declaredLength = fileDescriptor.getDeclaredLength();return fileChannel.map(FileChannel.MapMode.READ_ONLY, startOffset, declaredLength);}/*** Initializes a native TensorFlow session for classifying images.** @param assetManager The asset manager to be used to load assets.* @param modelFilename The filepath of the model GraphDef protocol buffer.* @param labelFilename The filepath of label file for classes.* @param inputSize The size of image input* @param isQuantized Boolean representing model is quantized or not*/public static Classifier create(final AssetManager assetManager,final String modelFilename,final String labelFilename,final int inputSize,final boolean isQuantized)throws IOException {final TFLiteObjectDetectionAPIModel d = new TFLiteObjectDetectionAPIModel();InputStream labelsInput = null;String actualFilename = labelFilename.split("file:///android_asset/")[1];labelsInput = assetManager.open(actualFilename);BufferedReader br = null;br = new BufferedReader(new InputStreamReader(labelsInput));String line;while ((line = br.readLine()) != null) {LOGGER.w(line);d.labels.add(line);}br.close();d.inputSize = inputSize;try {d.tfLite = new Interpreter(loadModelFile(assetManager, modelFilename));} catch (Exception e) {throw new RuntimeException(e);}d.isModelQuantized = isQuantized;// Pre-allocate buffers.int numBytesPerChannel;if (isQuantized) {numBytesPerChannel = 1; // Quantized} else {numBytesPerChannel = 4; // Floating point}d.imgData = ByteBuffer.allocateDirect(1 * d.inputSize * d.inputSize * 3 * numBytesPerChannel);d.imgData.order(ByteOrder.nativeOrder());d.intValues = new int[d.inputSize * d.inputSize];d.tfLite.setNumThreads(NUM_THREADS);d.outputLocations = new float[1][NUM_DETECTIONS][4];d.outputClasses = new float[1][NUM_DETECTIONS];d.outputScores = new float[1][NUM_DETECTIONS];d.numDetections = new float[1];return d;}@Overridepublic List<Recognition> recognizeImage(final Bitmap bitmap) {// Log this method so that it can be analyzed with systrace.Trace.beginSection("recognizeImage");Trace.beginSection("preprocessBitmap");// Preprocess the image data from 0-255 int to normalized float based// on the provided parameters.bitmap.getPixels(intValues, 0, bitmap.getWidth(), 0, 0, bitmap.getWidth(), bitmap.getHeight());imgData.rewind();for (int i = 0; i < inputSize; ++i) {for (int j = 0; j < inputSize; ++j) {int pixelValue = intValues[i * inputSize + j];if (isModelQuantized) {// Quantized modelimgData.put((byte) ((pixelValue >> 16) & 0xFF));imgData.put((byte) ((pixelValue >> 8) & 0xFF));imgData.put((byte) (pixelValue & 0xFF));} else { // Float modelimgData.putFloat((((pixelValue >> 16) & 0xFF) - IMAGE_MEAN) / IMAGE_STD);imgData.putFloat((((pixelValue >> 8) & 0xFF) - IMAGE_MEAN) / IMAGE_STD);imgData.putFloat(((pixelValue & 0xFF) - IMAGE_MEAN) / IMAGE_STD);}}}Trace.endSection(); // preprocessBitmap// Copy the input data into TensorFlow.Trace.beginSection("feed");outputLocations = new float[1][NUM_DETECTIONS][4];outputClasses = new float[1][NUM_DETECTIONS];outputScores = new float[1][NUM_DETECTIONS];numDetections = new float[1];Object[] inputArray = {imgData};Map<Integer, Object> outputMap = new HashMap<>();outputMap.put(0, outputLocations);outputMap.put(1, outputClasses);outputMap.put(2, outputScores);outputMap.put(3, numDetections);Trace.endSection();// Run the inference call.Trace.beginSection("run");tfLite.runForMultipleInputsOutputs(inputArray, outputMap);Trace.endSection();// Show the best detections.// after scaling them back to the input size.final ArrayList<Recognition> recognitions = new ArrayList<>(NUM_DETECTIONS);for (int i = 0; i < NUM_DETECTIONS; ++i) {final RectF detection =new RectF(outputLocations[0][i][1] * inputSize,outputLocations[0][i][0] * inputSize,outputLocations[0][i][3] * inputSize,outputLocations[0][i][2] * inputSize);// SSD Mobilenet V1 Model assumes class 0 is background class// in label file and class labels start from 1 to number_of_classes+1,// while outputClasses correspond to class index from 0 to number_of_classesint labelOffset = 1;recognitions.add(new Recognition("" + i,labels.get((int) outputClasses[0][i] + labelOffset),outputScores[0][i],detection));}Trace.endSection(); // "recognizeImage"return recognitions;}@Overridepublic void enableStatLogging(final boolean logStats) {}@Overridepublic String getStatString() {return "";}@Overridepublic void close() {}public void setNumThreads(int num_threads) {if (tfLite != null) tfLite.setNumThreads(num_threads);}@Overridepublic void setUseNNAPI(boolean isChecked) {if (tfLite != null) tfLite.setUseNNAPI(isChecked);}
}确保替换 modelPath 参数为你的模型文件在 assets 目录中的路径。
在你的应用程序中使用 TFLiteObjectDetectionAPIModel 类进行推理。以下是一个简单的示例:
@Override
public void onPreviewSizeChosen(final Size size, final int rotation) {final float textSizePx =TypedValue.applyDimension(TypedValue.COMPLEX_UNIT_DIP, TEXT_SIZE_DIP, getResources().getDisplayMetrics());borderedText = new BorderedText(textSizePx);borderedText.setTypeface(Typeface.MONOSPACE);tracker = new MultiBoxTracker(this);int cropSize = TF_OD_API_INPUT_SIZE;try {detector =TFLiteObjectDetectionAPIModel.create(getAssets(),TF_OD_API_MODEL_FILE,TF_OD_API_LABELS_FILE,TF_OD_API_INPUT_SIZE,TF_OD_API_IS_QUANTIZED);cropSize = TF_OD_API_INPUT_SIZE;} catch (final IOException e) {e.printStackTrace();LOGGER.e(e, "Exception initializing classifier!");Toast toast =Toast.makeText(getApplicationContext(), "Classifier could not be initialized", Toast.LENGTH_SHORT);toast.show();finish();}
// 解析输出数据
// ...根据你的模型和任务,你可能需要根据模型的规范和文档来解析输出数据。
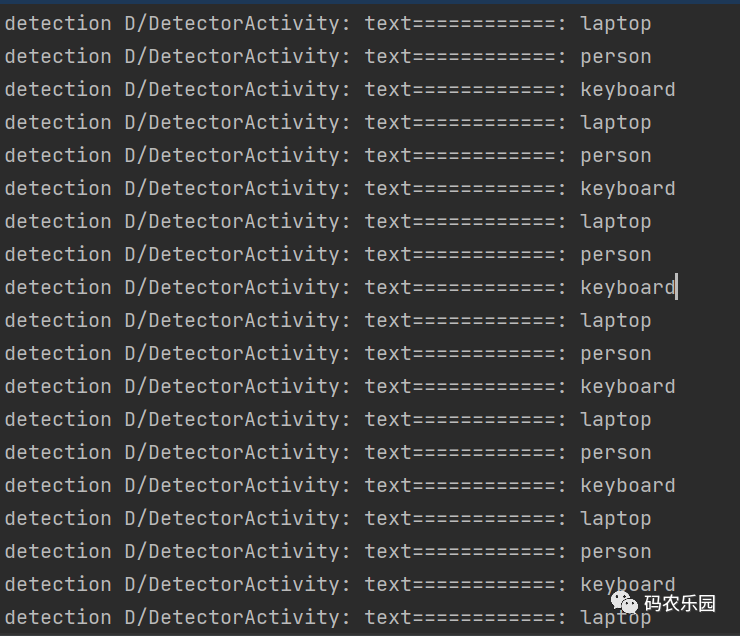
输出解析文本数据
需要项目源码私聊
相关文章:
Android 中集成 TensorFlow Lite图片识别
在上图通过手机的相机拍摄到的物体识别出具体的名称,这个需要通过TensorFlow 训练的模型引用到项目中;以下就是详细地集成 TensorFlow步骤,请按照以下步骤进行操作: 在项目的根目录下的 build.gradle 文件中添加 TensorFlow 的 Ma…...
NSSCTF之Misc篇刷题记录(16)
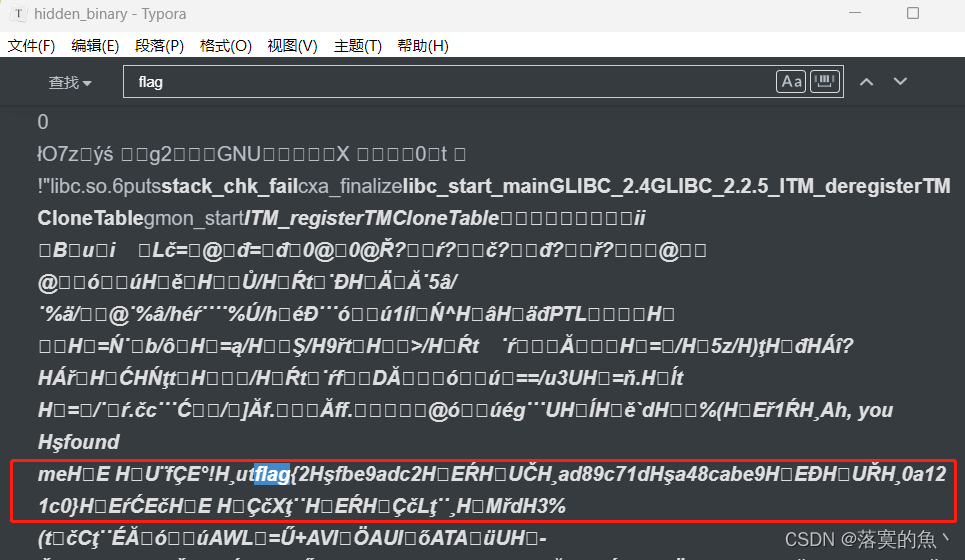
NSSCTF之Misc篇刷题记录(16) [黑盾杯 2020]encrypt[UTCTF 2020]Spectre[UTCTF 2020]Observe closely NSSCTF平台:https://www.nssctf.cn/ PS:所有FLAG改为NSSCTF [黑盾杯 2020]encrypt UTAxSlUwTkRWRVo3Um1GclpWOWxibU55ZVhCMGFX…...

域名解析--nslookup和dig
dig (Domain Information Groper) dig 是一个功能强大且更灵活的 DNS 查询工具,通常在 Linux 和 macOS 等 Unix-like 操作系统上使用。以下是 dig 的一些常见用法和区别: 查询域名信息 dig example.com这将返回与指定域名相关的 DNS 记录,…...
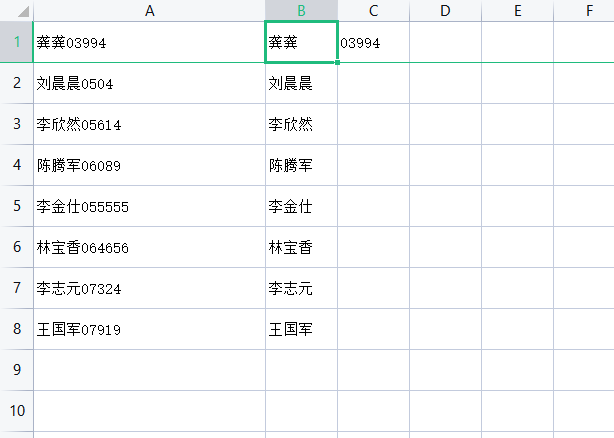
EXCEL如何把一个单元格内的文本和数字分开?例如:龚龚15565 = 龚龚 15565
使用工具:WPS 举例: EXCEL如何把一个单元格内的文本和数字批量分开?不使用数据分列。 第一步、将第二行数据冻结 第二步、在B1、C1单元格输入需要分开的示例 第三步、点击选中B1单元格,输入快捷键【CTRLE】进行填充。B2单元格也是…...
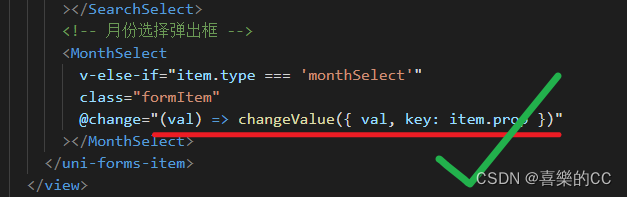
uniapp抽取组件绑定事件中箭头函数含花括号无法解析
版本: "dcloudio/uni-ui": "^1.4.27", "vue": "> 2.6.14 < 2.7"... 箭头函数后含有花括号的时候, getData就拿不到val参数 , 解决办法就是去除花括号 // 错误代码: <SearchComp change"(val) > { getData({ val …...

猫头虎博主第四期赠书活动:《精通Go语言:(第2版) 》
🌷🍁 博主猫头虎(🐅🐾)带您 Go to New World✨🍁 🦄 博客首页——🐅🐾猫头虎的博客🎐 🐳 《面试题大全专栏》 🦕 文章图文…...

【学习总结】EasyExcel合并同列不同行,表格数据相同的行
实体类 Data HeadRowHeight(50) ContentStyle(horizontalAlignment HorizontalAlignmentEnum.CENTER, verticalAlignment VerticalAlignmentEnum.CENTER, wrapped BooleanEnum.TRUE) public class CriterionDataExportDTO {ColumnWidth(15)ExcelProperty(value "所属…...
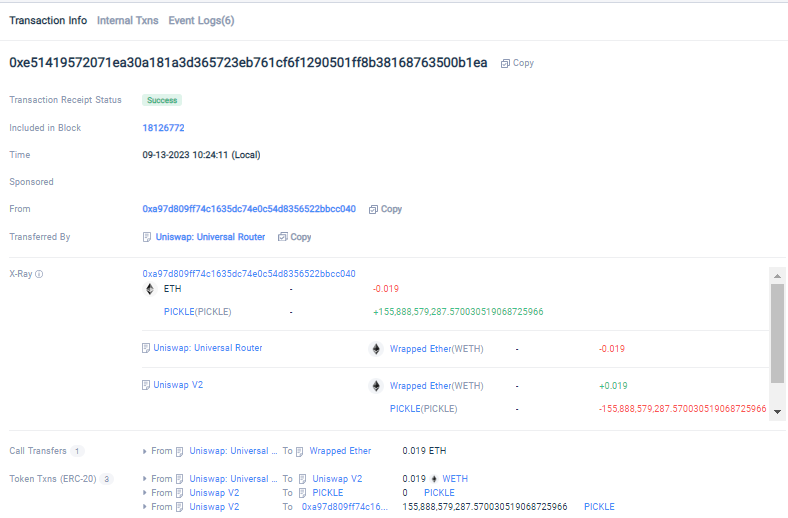
Tokenview X-ray功能:深入探索EVM系列浏览器的全新视角
Tokenview作为一家领先的多链区块浏览器,为了进一步优化区块链用户的使用体验,我们推出了X-ray(余额透视)功能。该功能将帮助您深入了解EVM系列浏览器上每个地址的交易过程,以一种直观、简洁的方式呈现地址的进出账情况…...
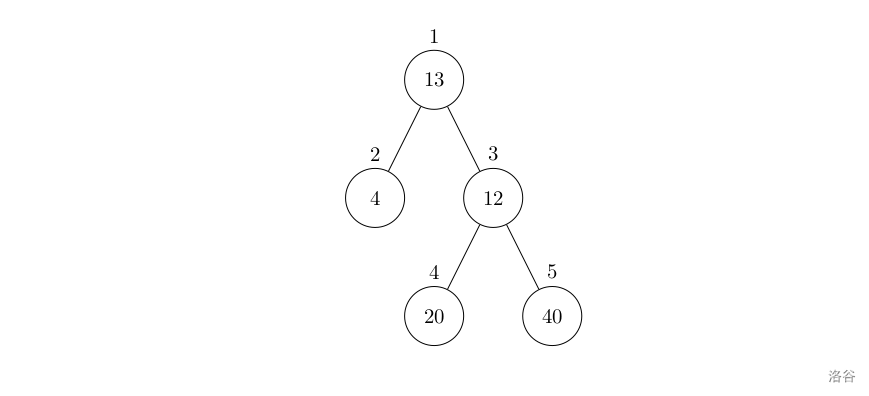
【洛谷 P1364】医院设置 题解(图论+深度优先搜索)
医院设置 题目描述 设有一棵二叉树,如图: 其中,圈中的数字表示结点中居民的人口。圈边上数字表示结点编号,现在要求在某个结点上建立一个医院,使所有居民所走的路程之和为最小,同时约定,相邻接…...

【Java基础】- RMI原理和使用详解
【Java基础】- RMI原理和使用详解 文章目录 【Java基础】- RMI原理和使用详解一、什么RMI二、RMI原理2.1 工作原理图2.2 工作原理 三、RMI远程调用步骤3.1 RMI远程调用运行流程图3.2 RMI 远程调用步骤 四、JAVA RMI简单实现4.1 如何实现一个RMI程序4.2 JAVA实现RMI程序 一、什么…...
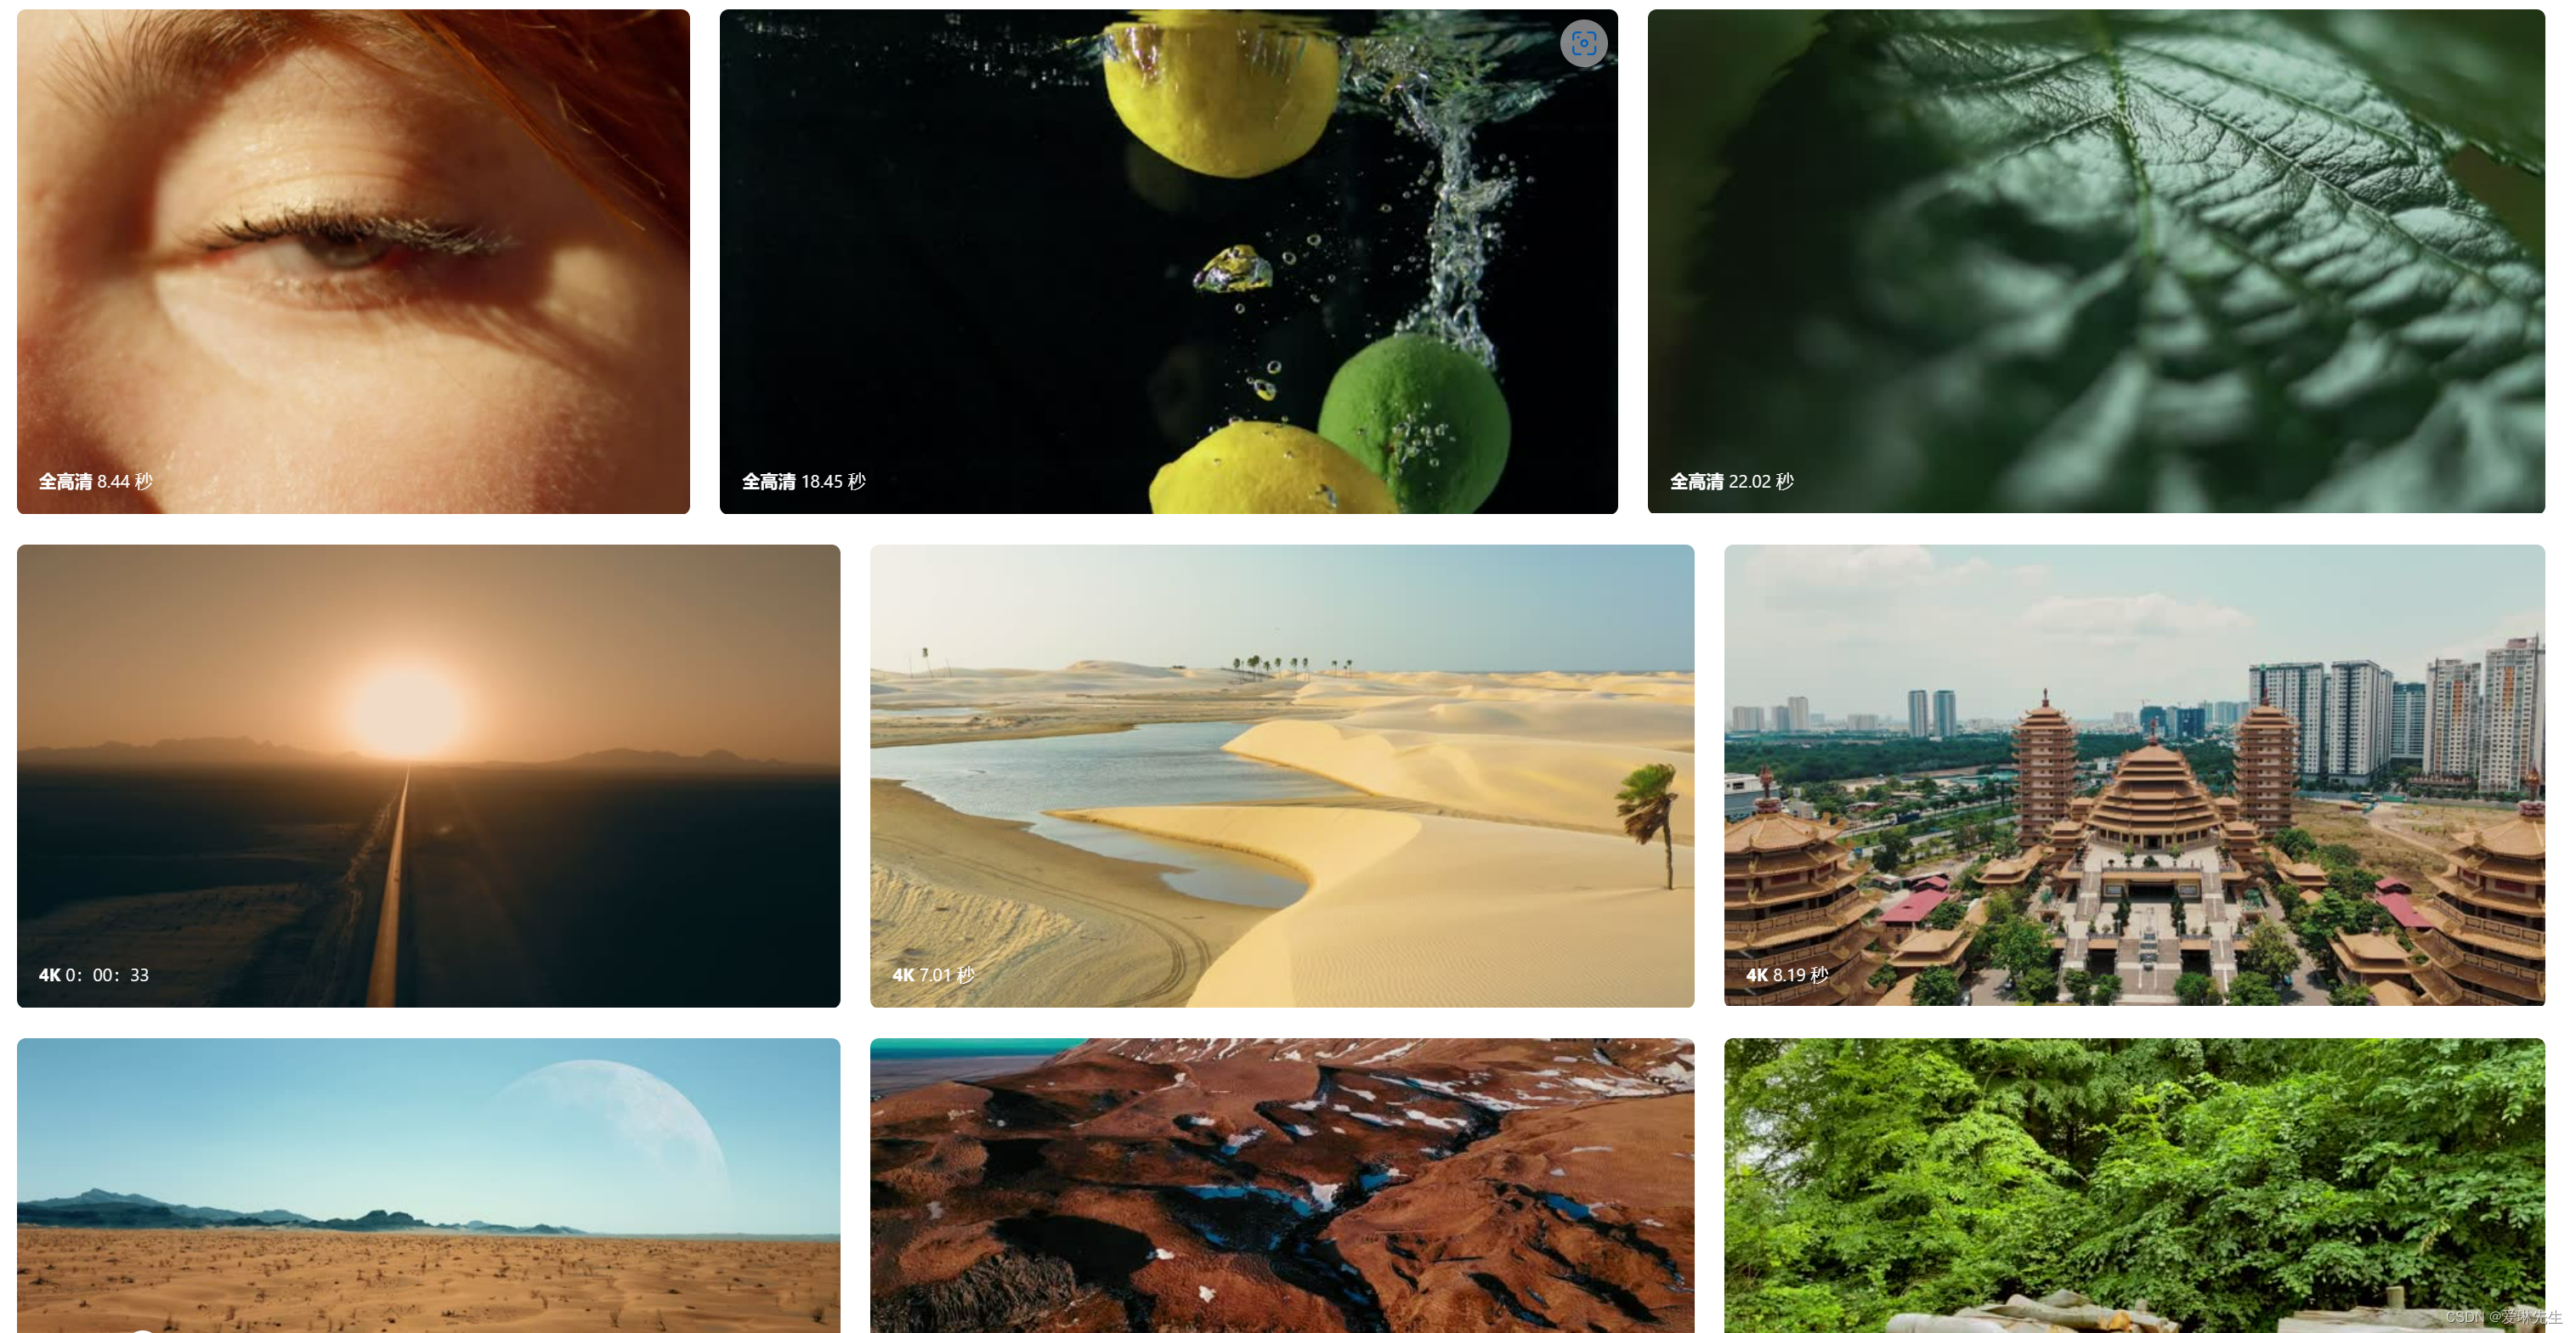
无水印免费4K视频素材网站 可商用-Free Stock Video
Free Stock Video是一个在线无水印免费4K视频素材网站,提供各种类型的4k、1080p的视频素材共免费下载,包括美食、水、自然、冬季、无人机、云朵、慢动作、夕阳、动态背景、缩时摄影、旅游和烟火,也可通过关键词搜索方式找到相关视频素材内容&…...

kubesphere中间件部署
微服务部署前中间件部署 一、MySQL部署 1.1 使用Docker实现MySQL主从复制 docker run -p 3307:3306 --name mysql-master \ -v /mydata/mysql/master/log:/var/log/mysql \ -v /mydata/mysql/master/data:/var/lib/mysql \ -v /mydata/mysql/master/conf:/etc/mysql \ -e My…...

使用 AWS S3 SDK 访问 COS-腾讯云国际站代充
腾讯云国际站对象存储(Cloud Object Storage,COS)提供了 AWS S3 兼容的 API,因此当用户的数据从 S3 迁移到 COS 之后,只需要进行简单的配置修改,即可让客户端应用轻松兼容 COS 服务。下面unirech小编主要介…...

c语言每日一练(15)
前言:每日一练系列,每一期都包含5道选择题,2道编程题,博主会尽可能详细地进行讲解,令初学者也能听的清晰。每日一练系列会持续更新,上学期间将看学业情况更新。 五道选择题: 1、程序运行的结果…...
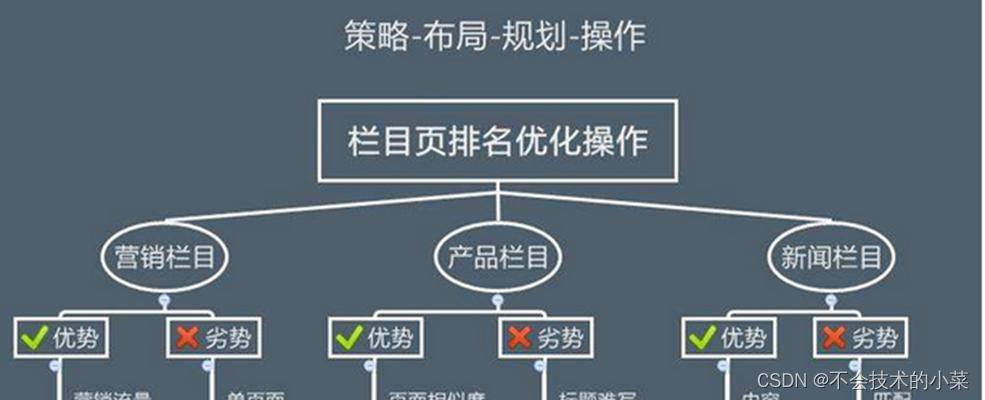
如何利用软文推广进行SEO优化(打造优质软文,提升网站排名)
在当今的互联网时代,SEO优化成为了网站推广的关键。而软文推广作为一种有效的推广方式,其优点不仅仅局限于SEO,还可以带来更多的曝光和用户流量。本文将深入探讨如何做好软文推广,从而提升网站排名和流量。 了解目标受众群体 内容…...
)
Java线程池ExecutorService和Executors应用(Spring Boot微服务)
记录:476 场景:在Spring Boot微服务中使用ExecutorService管理Java线程池。使用Executors创建线程池。使用Runnable接口实现类提交线程任务到线程池执行。 版本:JDK 1.8,Spring Boot 2.6.3。 1.线程和线程池基础 JDK自带线程和线程池包位…...

机器学习笔记之最优化理论与方法(八)无约束优化问题——常用求解方法(中)
机器学习笔记之最优化理论与方法——基于无约束优化问题的常用求解方法[中] 引言回顾:最速下降算法的缺陷经典牛顿法基本介绍经典牛顿法的问题经典牛顿法的优点与缺陷经典牛顿法示例 修正牛顿法介绍拟牛顿法拟牛顿法的算法过程 矩阵 B k 1 \mathcal B_{k1} Bk1的…...

Django系列:Django简介与MTV架构体系概述
Django系列 Django简介与MTV架构体系概述 作者:李俊才 (jcLee95):https://blog.csdn.net/qq_28550263 邮箱 :291148484163.com 本文地址:https://blog.csdn.net/qq_28550263/article/details/132890054 【介…...

锐捷交换机WEB管理系统EXCU_SHELL密码信息泄漏漏洞
一、漏洞简介 锐捷交换机 WEB 管理系统 EXCU_SHELL存在密码信息泄露漏洞,攻击者可从漏洞获取到管理员账号密码,从而以管理员权限登录。 二、影响版本 锐捷交换机 WEB 管理系统 三、资产测绘 hunterweb.body"img/free_login_ge.gif"&&…...

线性代数(六) 线性变换
前言 《线性空间》定义了空间,这章节来研究空间与空间的关联性 函数 函数是一个规则或映射,将一个集合中的每个元素(称为自变量)映射到另一个集合中的唯一元素(称为因变量)。 一般函数从 “A” 的每个元…...
)
Java 语言特性(面试系列1)
一、面向对象编程 1. 封装(Encapsulation) 定义:将数据(属性)和操作数据的方法绑定在一起,通过访问控制符(private、protected、public)隐藏内部实现细节。示例: public …...

ssc377d修改flash分区大小
1、flash的分区默认分配16M、 / # df -h Filesystem Size Used Available Use% Mounted on /dev/root 1.9M 1.9M 0 100% / /dev/mtdblock4 3.0M...
【网络安全产品大调研系列】2. 体验漏洞扫描
前言 2023 年漏洞扫描服务市场规模预计为 3.06(十亿美元)。漏洞扫描服务市场行业预计将从 2024 年的 3.48(十亿美元)增长到 2032 年的 9.54(十亿美元)。预测期内漏洞扫描服务市场 CAGR(增长率&…...
【第二十一章 SDIO接口(SDIO)】
第二十一章 SDIO接口 目录 第二十一章 SDIO接口(SDIO) 1 SDIO 主要功能 2 SDIO 总线拓扑 3 SDIO 功能描述 3.1 SDIO 适配器 3.2 SDIOAHB 接口 4 卡功能描述 4.1 卡识别模式 4.2 卡复位 4.3 操作电压范围确认 4.4 卡识别过程 4.5 写数据块 4.6 读数据块 4.7 数据流…...

macOS多出来了:Google云端硬盘、YouTube、表格、幻灯片、Gmail、Google文档等应用
文章目录 问题现象问题原因解决办法 问题现象 macOS启动台(Launchpad)多出来了:Google云端硬盘、YouTube、表格、幻灯片、Gmail、Google文档等应用。 问题原因 很明显,都是Google家的办公全家桶。这些应用并不是通过独立安装的…...
MySQL 8.0 OCP 英文题库解析(十三)
Oracle 为庆祝 MySQL 30 周年,截止到 2025.07.31 之前。所有人均可以免费考取原价245美元的MySQL OCP 认证。 从今天开始,将英文题库免费公布出来,并进行解析,帮助大家在一个月之内轻松通过OCP认证。 本期公布试题111~120 试题1…...
全志A40i android7.1 调试信息打印串口由uart0改为uart3
一,概述 1. 目的 将调试信息打印串口由uart0改为uart3。 2. 版本信息 Uboot版本:2014.07; Kernel版本:Linux-3.10; 二,Uboot 1. sys_config.fex改动 使能uart3(TX:PH00 RX:PH01),并让boo…...
Python 实现 Web 静态服务器(HTTP 协议)
目录 一、在本地启动 HTTP 服务器1. Windows 下安装 node.js1)下载安装包2)配置环境变量3)安装镜像4)node.js 的常用命令 2. 安装 http-server 服务3. 使用 http-server 开启服务1)使用 http-server2)详解 …...

Java求职者面试指南:Spring、Spring Boot、Spring MVC与MyBatis技术解析
Java求职者面试指南:Spring、Spring Boot、Spring MVC与MyBatis技术解析 一、第一轮基础概念问题 1. Spring框架的核心容器是什么?它的作用是什么? Spring框架的核心容器是IoC(控制反转)容器。它的主要作用是管理对…...

Vue3中的computer和watch
computed的写法 在页面中 <div>{{ calcNumber }}</div>script中 写法1 常用 import { computed, ref } from vue; let price ref(100);const priceAdd () > { //函数方法 price 1price.value ; }//计算属性 let calcNumber computed(() > {return ${p…...