Linux系统编程详解
Linux 多线程编程
什么是线程?
与线程类似,线程是允许应用程序并发执行多个任务的一种机制
线程是轻量级的进程(LWP:Light Weight Process),在 Linux 环境下线程的本 质仍是进程。
一个进程可以包含多个线程。同一个程序中的所有线程均会独立执行相同程序,且共 享同一份全局内存区域,其中包括初始化数据段、未初始化数据段,以及堆内存段。(传 统意义上的 UNIX 进程只是多线程程序的一个特例,该进程只包含一个线程) ◼ 进程是 CPU 分配资源的最小单位,线程是操作系统调度执行的最小单位。
查看指定进程的 LWP 号:ps –Lf pid

进程与线程的区别?
-
进程间的信息难以共享。除去只读代码段外,父子进程并未共享内存,因此必须采用一些进程间通信方式,在进程间进行信息交换。
-
调用
fork()来创建进程的相对代价较高,即便利用写时复制等技术,仍然需要复制诸如内存页表和文件描述符之类的进程属性,意味着fork()在时间开销上依然不菲。 -
线程之间能够快速的,方便的分享信息,只需要将数据复制到(全局数据段或堆)变量即可。
-
创建线程比创建线程要快10倍甚至更多,线程间是共享虚拟地址空间的,无需使用写时拷贝技术复制内存,也无需复制页表。
线程间的共享资源和非共享资源

创建线程
包含头文件
#include<pthread>
函数原型
int pthread_create(pthread_t *__restrict__ __newthread, const pthread_attr_t *__restrict__ __attr, void *(*__start_routine)(void *), void *__restrict__ __arg)
返回值:
成功返回0,失败返回 -1
案例
#include <cstdio>
#include <iostream>
#include <sys/types.h>
#include <unistd.h>
#include <pthread.h>
#include <thread>
using namespace std;
void *func(void *arg)
{for (int i = 0; i < 4; i++){cout << "子线程运行中.........." << endl;sleep(3);}return NULL;
}
int main()
{pthread_t th;int ret = pthread_create(&th, NULL, func, NULL);if (ret != 0){perror("pthread_create");exit(-1);}
int i = 0;while (i < 5){i++;cout << i << ' ';}
}
使用编译命令:
g++ -o main main.cpp -std=c++11 -pthread
使用线程库的时候需要加上-pthread或-lpthread这两个 其中一个参数,编译选项选择-std=c++11
不添加编译选项-pthread,则运行出现Enable multithreading to use std::thread: Operation not permitted。
终止线程
函数原型
void pthread_exit(void *res)
返回值
无
作用
终止当前任意线程
#include <cstdio>
#include <iostream>
#include <cstring>
#include <pthread.h>
#include <thread>
using namespace std;
void *func(void *arg)
{printf("子线程 id = %d \n", pthread_self());return NULL;
}
int main()
{pthread_t th; // 创建一个子线程int ret = pthread_create(&th, NULL, func, NULL);if (ret != 0){perror("pthread_create");exit(-1);}
for (int i = 0; i < 10; i++)cout << i << endl;printf("主线程 id = %d \n", pthread_self());pthread_exit(NULL); // 让主线程退出,不会影响其他运行的线程return 0;
}
输出

连接已终止的线程
函数原型:
int pthread_join(pthread_t __th, void **__thread_return)/*参数需要回收的子线程id接受子线程回收时的返回值*/
返回值:
成功返回0,失败返回 error
功能:
和一个已终止的线程进行连接,回收子进程的资源;该函数是阻塞函数,调用一次只能回收一次资源,一般在主线程中使用。
案例
pthread.cpp
#include <cstdio>
#include <iostream>
#include <cstring>
#include <pthread.h>
#include <thread>
#include<unistd.h>
using namespace std;
void *func(void *arg)
{printf("子线程 id = %d \n", pthread_self());sleep(2);return NULL;
}
int main()
{pthread_t th; // 创建一个线程int ret = pthread_create(&th, NULL, func, NULL);if (ret != 0){perror("pthread_create");exit(-1);}// 主线程调用pthread_join回收线程资源ret = pthread_join(th,NULL);printf("ret = %d\n",ret);cout<<"回收子线程资源成功"<<endl;printf("主线程  id = %d \n", pthread_self());pthread_exit(NULL); // 让主线程退出,不会影响其他运行的线程return 0;
}
输出
[chen@VM-24-13-centos test]$ g++ -o main main.cpp -std=c++11 -pthread
[chen@VM-24-13-centos test]$ ./main
子线程 id = 2088679168
ret = 0
回收子线程资源成功
主线程  id = 2105562944
线程分离
函数原型
int pthread_detach(pthread_t pthread)/*参数 : 需要分离的id*/
返回值
成功返回0 ,失败返回 error
功能
分离一个线程,被分离的线程在终止的时候会自动释放资源给系统
不能多次分离一个线程 会产生不可预估的错误
不可以去连接一个自动分离的线程
案例
#include <cstdio>
#include <iostream>
#include <cstring>
#include <pthread.h>
#include <thread>
#include <unistd.h>
using namespace std;
void *func(void *arg)
{printf("chiad thread id = %d \n", pthread_self());sleep(2);return NULL;
}
int main()
{pthread_t th;int ret = pthread_create(&th, NULL, func, NULL);if (ret != 0){perror("pthread_create");exit(-1);}// 输出子线程和主线程的idprintf("th id = %ld thread id = %ld\n", th, pthread_self());pthread_detach(th);printf("子线程已分离!\n");pthread_exit(NULL);// 设置子线程分离
}
输出
[chen@VM-24-13-centos test]$ g++ -o main main.cpp -std=c++11 -pthread
[chen@VM-24-13-centos test]$ ./main
th id = 140585734616832 thread id = 140585751500608
子线程已分离!
chiad thread id = -1429883136
线程取消
函数原型
int pthread_cancel(pthread_t __th)// 函数参数:需要终止线程运行的线程 id
返回值:
成功返回0,失败返回 error
案例 :终止一个线程的运行
#include <cstdio>
#include <iostream>
#include <cstring>
#include <pthread.h>
#include <thread>
#include <unistd.h>
using namespace std;
void *func(void *arg)
{printf("chiad thread id = %d \n", pthread_self());for (int i = 0; i < 6; i++)printf("chaid i = %d \n", i);return NULL;
}
int main()
{pthread_t th;int ret = pthread_create(&th, NULL, func, NULL);if (ret != 0){perror("pthread_create");exit(-1);}pthread_cancel(th);printf("线程已取消!\n");for (int i = 0; i < 5; i++)cout << i << endl;printf("chrid id = %d mian pthread id = %d\n", th, pthread_self());
}
线程属性操作函数
PSIOX标准中,线程属性使用pthread_arrt_t类型的变量表示
#include<pthread.h>
pthread_arrt_t st;
pthread_arrt_t是一个结构体,当中包括了线程的各种信息
#include <pthread.h>typedef struct __pthread_attr_s
{int                       __detachstate;   // 线程的分离状态int                       __schedpolicy;   // 线程调度策略structsched_param         __schedparam;    // 线程的调度参数int                       __inheritsched;  // 线程的继承性int                       __scope;         // 线程的作用域size_t                    __guardsize;     // 线程栈末尾的警戒缓冲区大小int                       __stackaddr_set; // 线程的栈设置void*                     __stackaddr;     // 线程栈的位置size_t                    __stacksize;     // 线程栈的大小
} pthread_attr_t;int pthread_attr_init(pthread_attr_t *attr);
int pthread_attr_destroy(pthread_attr_t *attr);
接下来,我们将从中挑选出几个常用的属性,讲解它们的功能以及修改的方法。
(1) __detachstate
我们知道,默认属性的线程在执行完目标函数后,占用的私有资源并不会立即释放,要么执行完 pthread_join() 函数后释放,要么整个进程执行结束后释放。某些场景中,我们并不需要接收线程执行结束后的返回值,如果想让线程执行完后立即释放占用的私有资源,就可以通过修改 __detachstate 属性值来实现。
__detachstate 属性值用于指定线程终止执行的时机,该属性的值有两个,分别是:
-
PTHREAD_CREATE_JOINABLE(默认值):线程执行完函数后不会自行释放资源;
-
PTHREAD_CREATE_DETACHED:线程执行完函数后,会自行终止并释放占用的资源。
关于 __detachstate 属性,<pthread.h> 头文件中提供了 2 个与它相关的函数,分别是:
int pthread_attr_getdetachstate(const pthread_attr_t * attr,int * detachstate);
int pthread_attr_setdetachstate(pthread_attr_t *sttr,int detachstate);
pthread_attr_getdetachstate() 函数用于获取 detachstate 属性的值,detachstate 指针用于接收 detachstate 属性的值;pthread_attr_setdetachstate() 函数用于修改 detachstate 属性的值,detachstate 整形变量即为新的 detachstate 属性值。两个函数执行成功时返回数字 0,反之返回非零数。
此外,<pthread.h> 头文件还提供有 pthread_detach() 函数,可以直接将目标线程的 __detachstate 属性改为 PTHREAD_CREATE_DETACHED,语法格式如下:
int pthread_detach(pthread_t thread);
函数执行成功时返回数字 0 ,反之返回非零数。
(2) __schedpolicy
__schedpolicy 属性用于指定系统调度该线程所用的算法,它的值有以下 3 个:
-
SCHED_OTHER(默认值):分时调度算法;
-
SCHED_FIFO:先到先得(实时调度)算法;
-
SCHED_RR:轮转法;
其中,SCHED_OTHER 调度算法不支持为线程设置优先级,而另外两种调度算法支持。
<pthread.h> 头文件提供了如下两个函数,专门用于访问和修改 __schedpolicy 属性:
int pthread_attr_getschedpolicy(const pthread_attr_t *, int * policy)
int pthread_attr_setschedpolicy(pthread_attr_*, int policy)
pthread_attr_getschedpolicy() 函数用于获取当前 schedpolicy 属性的值;pthread_attr_setschedpolicy() 函数用于修改 schedpolicy 属性的值。函数执行成功时,返回值为数字 0,反之返回非零数。
(3) __schedparam
scheparam 用于设置线程的优先级(默认值为 0),该属性仅当线程的 schedpolicy 属性为 SCHED_FIFO 或者 SCHED_RR 时才能发挥作用。
<pthread.h> 头文件中提供了如下两个函数,用于获取和修改 __schedparam 属性的值:
int pthread_attr_getschedparam(const pthread_attr_t *attr, struct sched_param *param);
int pthread_attr_setschedparam(pthread_attr_t *attr, const struct sched_param *param);
其中,param 参数用于接收或者修改 __scheparam 属性的优先级,它是 sched_param 结构体类型的变量,定义在 <sched.h> 头文件中,内部仅有一个 sched_priority 整形变量,用于表示线程的优先级。函数执行成功时返回数字 0,反之返回非零数。
当需要修改线程的优先级时,我们只需创建一个 sched_param 类型的变量并为其内部的 sched_priority 成员赋值,然后将其传递给 pthrerd_attr_setschedparam() 函数。
不同的操作系统,线程优先级的值的范围不同,您可以通过调用如下两个系统函数获得当前系统支持的最大和最小优先级的值:
int sched_get_priority_max(int policy);   //获得最大优先级的值
int sched_get_priority_min(int policy);   //获得最小优先级的值
其中,policy 的值可以为 SCHED_FIFO、SCHED_RR 或者 SCHED_OTHER,当 policy 的值为 SCHED_OTHER 时,最大和最小优先级的值都为 0。
(4) __inheritsched
新建线程的调度属性(schedpolicy 和 schedparam 属性)默认遵循父线程的属性(谁创建它,谁就是它的父线程),如果我们想自定义线程的调度属性,就需要借助 inheritsched 属性。
也就是说,新线程的调度属性要么遵循父线程,要么遵循 myAttr 规定的属性,默认情况下 inheritsched 规定新线程的调度属性遵循父线程,我们也可以修改 inheritsched 的值,使新线程的调度属性遵循自定义的属性变量(如文章开头定义的 myAttr)规定的值。
<pthread.h> 头文件提供了如下两个函数,分别用于获取和修改 __inheritsched 属性的值:
//获取 __inheritsched 属性的值
int pthread_attr_getinheritsched(const pthread_attr_t *attr,int *inheritsched);
//修改 __inheritsched 属性的值
int pthread_attr_setinheritsched(pthread_attr_t *attr,int inheritsched);
其中在 pthread_attr_setinheritsched() 函数中,inheritsched 参数的可选值有两个,分别是:
-
PTHREAD_INHERIT_SCHED(默认值):新线程的调度属性继承自父线程;
-
PTHREAD_EXPLICIT_SCHED:新线程的调度属性继承自 myAttr 规定的值。
以上两个函数执行成功时返回数字 0,反之返回非零数。
(5) __scope
线程执行过程中,可以只和同进程内的其它线程争夺 CPU 资源,也可以和系统中所有的其它线程争夺 CPU 资源,__scope 属性用于指定目标线程和哪些线程抢夺 CPU 资源。
<pthread.h> 头文件中提供了如下两个函数,分别用于获取和修改 __scope 属性的值:
//获取 __scope 属性的值
int pthread_attr_getscope(const pthread_attr_t * attr,int * scope);
//修改 __scope 属性的值
int pthread_attr_setscope(pthread_attr_t * attr,int * scope);
当调用 pthread_attr_setscope() 函数时,scope 参数的可选值有两个,分别是:
-
PTHREAD_SCOPE_PROCESS:同一进程内争夺 CPU 资源;
-
PTHREAD_SCOPE_SYSTEM:系统所有线程之间争夺 CPU 资源。
Linux系统仅支持 PTHREAD_SCOPE_SYSTEM,即所有线程之间争夺 CPU 资源。
当函数执行成功时,返回值为数字 0,反之返回非零数。
(6) __stacksize
每个线程都有属于自己的内存空间,通常称为栈(有时也称堆栈、栈空间、栈内存等)。某些场景中,线程执行可能需要较大的栈内存,此时就需要我们自定义线程拥有的栈的大小。
__stacksize 属性用于指定线程所拥有的栈内存的大小。<pthread.h> 提供有以下两个函数,分别用于获取和修改栈空间的大小:
//获取当前栈内存的大小
int pthread_attr_getstacksize(const pthread_attr_t * attr,size_t * stacksize);
//修改栈内存的大小
int pthread_attr_setsstacksize(pthread_attr_t * attr,size_t * stacksize);
函数执行成功时,返回值为数字 0,反之返回非零数。
(8) __guardsize
每个线程中,栈内存的后面都紧挨着一块空闲的内存空间,我们通常称这块内存为警戒缓冲区,它的功能是:一旦我们使用的栈空间超出了额定值,警戒缓冲区可以确保线程不会因“栈溢出”立刻执行崩溃。
guardsize 属性专门用来设置警戒缓冲区的大小,<pthread.h> 头文件中提供了如下两个函数,分别用于获取和修改 guardsize 属性的值:
int pthread_attr_getguardsize(const pthread_attr_t *restrict attr,size_t *restrict guardsize);
int pthread_attr_setguardsize(pthread_attr_t *attr ,size_t *guardsize);
pthread_attr_setguardsize() 函数中,设置警戒缓冲区的大小为参数 guardsize 指定的字节数。函数执行成功时返回数字 0,反之返回非零数。
这是一些设置线程属性的接口
int pthread_attr_init(pthread_attr_t * attr); // 初始化一个线程
int pthread_detach(pthread_t thread); // 设置线程分离设置线程是否和其他线程分离(能否调用pthread_join()回收), 运行时可以调用pthread_detach()完成。int pthread_attr_setdetachstate(pthread_attr_t *attr, int detachstate);
int pthread_attr_getdetachstate(pthread_attr_t *attr, int *detachstate);
案例
#include <stdio.h>
#include <stdlib.h>
#include <pthread.h>
#include <unistd.h>
#include <string.h>// 线程主控函数
void *tfn(void *arg)
{int n = 3;while (n--){printf("thread count %d\n", n);sleep(1);}return (void *)1;
}int main(void)
{pthread_t tid;void *tret;int err;pthread_attr_t attr;// 初始化线程属性pthread_attr_init(&attr);// 设置线程属性为分离状态pthread_attr_setdetachstate(&attr, PTHREAD_CREATE_DETACHED);pthread_create(&tid, &attr, tfn, NULL);int state;// 获取线程属性pthread_attr_getdetachstate(&attr, &state);// 判断线程属性是否为分离if (state == PTHREAD_CREATE_DETACHED){puts("pthread is PTHREAD_CREATE_DETACHED");}// 销毁线程属性所占用的资源pthread_attr_destroy(&attr);// 此时调用pthread_join会失败err = pthread_join(tid, &tret);if (err != 0){// 回收失败fprintf(stderr, "thread %s\n", strerror(err));}else{fprintf(stderr, "thread exit code %d\n", (int *)tret);}sleep(4);return 0;
}
线程同步
在多线程编程中,我们需要使用多个线程完成某个任务但是需要并发的访问对应的资源达到并发执行任务的效果
-
线程的主要优势在于,能够通过全局变量来共享信息。不过,这种便捷的共享是有代价 的:必须确保多个线程不会同时修改同一变量,或者某一线程不会读取正在由其他线程 修改的变量。
-
临界区是指访问某一共享资源的代码片段,并且这段代码的执行应为原子操作,也就是 同时访问同一共享资源的其他线程不应终端该片段的执行。
-
线程同步:即当有一个线程在对内存进行操作时,其他线程都不可以对这个内存地址进 行操作,直到该线程完成操作,其他线程才能对该内存地址进行操作,而其他线程则处 于等待状态。
案例
#include <cstdio>
#include <stdlib.h>
#include <pthread.h>
#include <unistd.h>
#include <string.h>
#include <iostream>
// 线程主控函数
using namespace std;
int N = 100; // 全局变量,所有线程都共享
void *tfn(void *arg)
{// 买票逻辑while (N > 0){printf("%ld 号窗口 第 %d 票已卖出\n", pthread_self(), N);sleep(1);N--;}return NULL;
}int main(void)
{pthread_t t1, t2, t3;pthread_create(&t1, NULL, tfn, NULL);pthread_create(&t2, NULL, tfn, NULL);pthread_create(&t3, NULL, tfn, NULL);// 回收子线程的资源pthread_join(t1, NULL);pthread_join(t2, NULL);pthread_join(t3, NULL);// 设置线程分离pthread_cancel(t1);pthread_cancel(t2);pthread_cancel(t3);pthread_exit(NULL); // 退出主线程
}
互斥锁
-
为避免线程更新共享变量时出现问题,可以使用互斥量(mutex 是 mutual exclusion 的缩写)来确保同时仅有一个线程可以访问某项共享资源。可以使用互斥量来保证对任意共 享资源的原子访问。
-
互斥量有两种状态:已锁定(locked)和未锁定(unlocked)。任何时候,至多只有一 个线程可以锁定该互斥量。试图对已经锁定的某一互斥量再次加锁,将可能阻塞线程或者报 错失败,具体取决于加锁时使用的方法。
-
一旦线程锁定互斥量,随即成为该互斥量的所有者,只有所有者才能给互斥量解锁。一般情 况下,对每一共享资源(可能由多个相关变量组成)会使用不同的互斥量,
-
每一线程在访问 同一资源时将采用如下协议:
-
-
针对共享资源锁定互斥量
-
访问共享资源
-
对互斥量解锁
-
互斥量的类型
pthread_mutex_t
int pthread_mutex_init(pthread_mutex_t *restrict mutex,  const pthread_mutexattr_t *restrict attr); // 初始化互斥量int pthread_mutex_destroy(pthread_mutex_t *mutex); //释放互斥量
int pthread_mutex_lock(pthread_mutex_t *mutex); // 线程加锁int pthread_mutex_trylock(pthread_mutex_t *mutex); // 判断线程释放能加锁
int pthread_mutex_unlock(pthread_mutex_t *mutex); // 线程解锁
案例
#include <cstdio>
#include <stdlib.h>
#include <pthread.h>
#include <unistd.h>
#include <string.h>
#include <iostream>
// 线程主控函数
using namespace std;
int N = 1000; // 全局变量,所有线程都共享
pthread_mutex_t st;
void *tfn(void *arg)
{// 买票逻辑while (1){pthread_mutex_lock(&st); // 线程加锁if (N > 0){printf("%ld 号窗口 第 %d 票已卖出\n", pthread_self(), N);}else{pthread_mutex_unlock(&st); // 线程解锁break;}pthread_mutex_unlock(&st); // 线程解锁N--;}return NULL;
}int main(void)
{pthread_t t1, t2, t3;pthread_mutex_init(&st, NULL);pthread_create(&t1, NULL, tfn, NULL);pthread_create(&t2, NULL, tfn, NULL);pthread_create(&t3, NULL, tfn, NULL);// 回收子线程的资源pthread_join(t1, NULL);pthread_join(t2, NULL);pthread_join(t3, NULL);// 释放互斥量pthread_mutex_destroy(&st);pthread_exit(NULL); // 退出主线程
}
线程死锁
有时一个线程需要访问一个或者多个线程资源的时候,而每个资源都由不同的互斥量管理,当超过一个线程加锁同一组互斥量的时候,就容易出现死锁的情况。
当两个或两个以上线程在执行过程中,在争夺共享资源的时候造成的一种互相等待的情况,如果不人为干预,任何一方都无法继续执行下去,此时称系统产生了死锁或者说系统处于死锁状态。

死锁发生的原因?
线程未及时释放锁
重复加锁
多线程多锁,抢占锁资源
案例
#include <cstdio>
#include <stdlib.h>
#include <pthread.h>
#include <unistd.h>
#include <string.h>
#include <iostream>
// 线程主控函数
using namespace std;// 创建2个互斥量
pthread_mutex_t mutex1, mutex2;void *workA(void *arg)
{pthread_mutex_lock(&mutex1);sleep(1);pthread_mutex_lock(&mutex2);printf("workA....\n");pthread_mutex_unlock(&mutex2);pthread_mutex_unlock(&mutex1);return NULL;
}void *workB(void *arg)
{pthread_mutex_lock(&mutex2);sleep(1);pthread_mutex_lock(&mutex1);printf("workB....\n");pthread_mutex_unlock(&mutex1);pthread_mutex_unlock(&mutex2);return NULL;
}int main()
{// 初始化互斥量pthread_mutex_init(&mutex1, NULL);pthread_mutex_init(&mutex2, NULL);// 创建2个子线程pthread_t tid1, tid2;pthread_create(&tid1, NULL, workA, NULL);pthread_create(&tid2, NULL, workB, NULL);// 回收子线程资源pthread_join(tid1, NULL);pthread_join(tid2, NULL);// 释放互斥量资源pthread_mutex_destroy(&mutex1);pthread_mutex_destroy(&mutex2);return 0;
}
读写锁
-
读写锁的类型
-
当有一个线程已经持有互斥锁时,互斥锁将所有试图进入临界区的线程都阻塞住。但是考 虑一种情形,当前持有互斥锁的线程只是要读访问共享资源,而同时有其它几个线程也想 读取这个共享资源,但是由于互斥锁的排它性,所有其它线程都无法获取锁,也就无法读 访问共享资源了,但是实际上多个线程同时读访问共享资源并不会导致问题。
-
在对数据的读写操作中,更多的是读操作,写操作较少,例如对数据库数据的读写应用。 为了满足当前能够允许多个读出,但只允许一个写入的需求,线程提供了读写锁来实现。
-
读写锁的特点:- 如果有其它线程读数据,则允许其它线程执行读操作,但不允许写操作。 如果有其它线程写数据,则其它线程都不允许读、写操作。 写是独占的,写的优先级高.
 pthread_rwlock_t int pthread_rwlock_init(pthread_rwlock_t *restrict rwlock,  const pthread_rwlockattr_t *restrict attr);  int pthread_rwlock_destroy(pthread_rwlock_t *rwlock);
int pthread_rwlock_rdlock(pthread_rwlock_t *rwlock);
int pthread_rwlock_tryrdlock(pthread_rwlock_t *rwlock);
int pthread_rwlock_wrlock(pthread_rwlock_t *rwlock);
int pthread_rwlock_trywrlock(pthread_rwlock_t *rwlock);
int pthread_rwlock_unlock(pthread_rwlock_t *rwlock)
案例
#include <cstdio>
#include <iostream>
#include <pthread.h>
#include <unistd.h>
using namespace std;
/*
三个线程不定时写一个全局变量 五个线程不定时的读全局变量
*/// 共享资源
int num = 1;
pthread_rwlock_t rwlock; // 读写锁
pthread_mutex_t mutex;
void *Wnum(void *arg)
{while (true){pthread_rwlock_rdlock(&rwlock);++num;printf("write : ++num = %d tid = %ld\n", num, pthread_self());usleep(100);pthread_mutex_unlock(&mutex);}return NULL;
}void *Rnum(void *arg)
{while (true){pthread_rwlock_rdlock(&rwlock);++num;printf("read : ++num = %d tid = %ld\n", num, pthread_self());usleep(100);pthread_mutex_unlock(&mutex);}return NULL;
}
pthread_mutex_t mux; // 全局互斥量
int main()
{// 五个读线程 三个写线程pthread_t w[3], r[5];pthread_rwlock_init(&rwlock, NULL);for (int i = 0; i < 3; i++){pthread_create(&w[i], NULL, Wnum, NULL);}for (int i = 0; i < 5; i++){pthread_create(&r[i], NULL, Rnum, NULL);}// 设置线程分离for (int i = 0; i < 3; i++){pthread_detach(w[i]);}for (int i = 0; i < 5; i++){pthread_detach(r[i]);}pthread_rwlock_destroy(&rwlock);pthread_exit(NULL);
}
输出

可以看到线程有序的进行读写,而不影响效率,而且读写锁比互斥锁的效率高
来段代码对互斥锁和读写锁效率的测试
#include <stdio.h>
#include <stdlib.h>
#include <pthread.h>
#include <sys/time.h>
#include <unistd.h>// 创建互斥锁
pthread_mutex_t mutex;// 创建读写锁
pthread_rwlock_t rwlock;// 全局变量,父子进程、线程间都是相同的
int data = 123456;// 读取次数
long count = 10000000; // 互斥读函数
void *mfunc(void *arg) {int read = 0;for (long i = 0; i < count; ++i) {// 加锁pthread_mutex_lock(&mutex);read = data;// 解锁pthread_mutex_unlock(&mutex);}// 结束线程pthread_exit(NULL);
}// 读写锁读
void *rwfunc(void *arg) {int read = 0;for (long i = 0; i < count; ++i) {// 加锁pthread_rwlock_rdlock(&rwlock);read = data;// 解锁pthread_rwlock_unlock(&rwlock);}// 结束线程pthread_exit(NULL);
}int main() {// 初始化互斥锁pthread_mutex_init(&mutex, NULL);// 创建两个进程,父进程中使用互斥锁读取,子进程使用读写锁读取int pid = fork();if (pid > 0) {// parent process// 创建十个线程,并开始计时pthread_t mtids[10];struct timeval start;gettimeofday(&start, NULL);for (int i = 0; i < 10; ++i) {pthread_create(&mtids[i], NULL, mfunc, NULL);}// 在主线程中,调用join函数,回收线程,线程回收完成后,结束计时for (int i = 0; i < 10; ++i) {pthread_join(mtids[i], NULL);}struct timeval end;gettimeofday(&end, NULL);long timediff = (end.tv_sec - start.tv_sec) * 1000000 + end.tv_usec - start.tv_usec;printf("互斥锁读全部线程执行完毕,总耗时: %ld us\n", timediff);// 回收子进程wait(NULL);} else if (pid == 0) {// child process// 初始化读写锁pthread_rwlock_init(&rwlock, NULL);// 创建十个线程,并开始计时pthread_t rwtids[10];struct timeval start;gettimeofday(&start, NULL);for (int i = 0; i < 10; ++i) {pthread_create(&rwtids[i], NULL, rwfunc, NULL);}// 在主线程中,调用join函数,回收线程,线程回收完成后,结束计时for (int i = 0; i < 10; ++i) {pthread_join(rwtids[i], NULL);}struct timeval end;gettimeofday(&end, NULL);long timediff = (end.tv_sec - start.tv_sec) * 1000000 + end.tv_usec - start.tv_usec;printf("读写锁读全部线程执行完毕,总耗时: %ld us\n", timediff);// 结束子进程exit(0);}return 0;
}
输出

总结:当需要使用多个线程对共享资源进行读写操作时,使用读写锁效率更高
C++中的读写锁(ReadWrite Lock)是一种多线程同步机制,它具有以下特性:
-
读写互斥:读写锁允许多个线程同时读取共享数据,但只允许一个线程进行写操作。这意味着多个线程可以同时获取读锁,但写锁只能被单独的一个线程获取。
-
写写互斥:写锁之间是互斥的,即同时只能有一个线程持有写锁执行写操作。
-
读写互斥:如果有线程持有读锁,则写锁必须等待,直到所有读锁被释放。
-
写读互斥:如果有线程持有写锁,则读锁必须等待,直到写锁被释放。
相比于互斥锁,读写锁具有更高的效率,原因如下:
-
并发读取:读写锁允许多个线程同时读取共享数据,这对于读取密集型的操作非常有利。互斥锁则会导致读取操作串行化,效率较低。
-
写操作互斥:写锁保证了写操作的互斥性,避免了数据竞争。而互斥锁会导致所有的读写操作都变得串行化,降低了效率。
因此,读写锁在读取频繁、写入相对较少的场景中比互斥锁的效率高一倍。但需要注意的是,如果写入操作非常频繁,读写锁的性能优势可能会减弱,因为写锁会阻塞其他的读和写请求。
生产者消费者模型
生产者消费者模型是一种并发编程中常用的设计模式。它用于解决多个线程之间的协作问题,其中生产者负责生成数据并将其放入一个共享的缓冲区,而消费者则负责从缓冲区中取出数据进行处理或消费。
该模型的主要目的是控制生产者和消费者之间的数据传递,确保线程之间的同步和协调。它通过引入一个共享的缓冲区作为生产者和消费者之间的交互介质,实现了线程之间的解耦和资源的合理利用。
生产者和消费者模型的典型实现涉及以下几个关键操作:
-
生产者将数据放入缓冲区,如果缓冲区已满,则生产者将等待直到有空间可用。
-
消费者从缓冲区中取出数据进行处理,如果缓冲区为空,则消费者将等待直到有数据可用。
-
生产者和消费者都需要正确地处理缓冲区的状态变化和互斥访问,以避免竞态条件和死锁等并发问题。
生产者消费者模型在处理数据流和任务调度等场景中非常有用,可以有效提高系统的性能和资源利用率。
/*生产者消费者模型(粗略的版本)
*/
#include <stdio.h>
#include <pthread.h>
#include <stdlib.h>
#include <unistd.h>// 创建一个互斥量
pthread_mutex_t mutex;struct Node{int num;struct Node *next;
};// 头结点
struct Node * head = NULL;void * producer(void * arg) {// 不断的创建新的节点,添加到链表中while(1) {pthread_mutex_lock(&mutex);struct Node * newNode = (struct Node *)malloc(sizeof(struct Node));newNode->next = head;head = newNode;newNode->num = rand() % 1000;printf("add node, num : %d, tid : %ld\n", newNode->num, pthread_self());pthread_mutex_unlock(&mutex);usleep(100);}return NULL;
}void * customer(void * arg) {while(1) {pthread_mutex_lock(&mutex);// 保存头结点的指针struct Node * tmp = head;// 判断是否有数据if(head != NULL) {// 有数据head = head->next;printf("del node, num : %d, tid : %ld\n", tmp->num, pthread_self());free(tmp);pthread_mutex_unlock(&mutex);usleep(100);} else {// 没有数据pthread_mutex_unlock(&mutex);}}return  NULL;
}int main() {pthread_mutex_init(&mutex, NULL);// 创建5个生产者线程,和5个消费者线程pthread_t ptids[5], ctids[5];for(int i = 0; i < 5; i++) {pthread_create(&ptids[i], NULL, producer, NULL);pthread_create(&ctids[i], NULL, customer, NULL);}for(int i = 0; i < 5; i++) {pthread_detach(ptids[i]);pthread_detach(ctids[i]);}while(1) {sleep(10);}pthread_mutex_destroy(&mutex);pthread_exit(NULL);return 0;
}
条件变量
条件变量的类型 pthread_cond_t
int pthread_cond_init(pthread_cond_t *restrict cond, const  pthread_condattr_t *restrict attr); int pthread_cond_destroy(pthread_cond_t *cond); int pthread_cond_wait(pthread_cond_t *restrict cond,  pthread_mutex_t *restrict mutex);
// 等待 调用该函数会阻塞int pthread_cond_timedwait(pthread_cond_t *restrict cond,  pthread_mutex_t *restrict mutex, const struct timespec *restrict  abstime);
// 等待到指定时间结束阻塞
int pthread_cond_signal(pthread_cond_t *cond);
// H唤醒一个或者多个正在等待的线程
int pthread_cond_broadcast(pthread_cond_t *cond);
// 唤醒所有正在等待的线程
案例
#include <pthread.h>
#include <stdio.h>pthread_mutex_t mutex; // 互斥锁
pthread_cond_t cond;   // 条件变量int shared_data = 0;   // 共享数据void *thread1(void *arg) {pthread_mutex_lock(&mutex);printf("Thread 1 is running\n");// 等待条件变量满足,如果条件不满足则阻塞并释放互斥锁while (shared_data < 10) {pthread_cond_wait(&cond, &mutex);}printf("Thread 1 received signal, shared_data = %d\n", shared_data);pthread_mutex_unlock(&mutex);pthread_exit(NULL);
}void *thread2(void *arg) {pthread_mutex_lock(&mutex);printf("Thread 2 is running\n");// 修改共享数据shared_data += 10;printf("Thread 2 sends signal, shared_data = %d\n", shared_data);// 发送信号通知等待该条件变量的线程pthread_cond_signal(&cond);pthread_mutex_unlock(&mutex);pthread_exit(NULL);
}int main() {pthread_mutex_init(&mutex, NULL);pthread_cond_init(&cond, NULL);pthread_t tid1, tid2;pthread_create(&tid1, NULL, thread1, NULL);pthread_create(&tid2, NULL, thread2, NULL);pthread_join(tid1, NULL);pthread_join(tid2, NULL);pthread_mutex_destroy(&mutex);pthread_cond_destroy(&cond);return 0;
}
在这个案例中,我们创建了两个线程(thread1和thread2)。thread1首先获得互斥锁,然后调用pthread_cond_wait函数等待条件满足。thread2获取互斥锁后,执行一些工作后满足条件,并通过pthread_cond_signal发送一个信号通知thread1。thread1被唤醒后继续执行,并输出相应的信息。 在这个案例中,条件变量起到了线程间同步的作用,使得线程能够等待某个条件变为真,并在条件满足时被唤醒。
输出

总结:为了线程安全尽可能的使用条件变量
信号量
C++线程信号量(semaphore)是一种同步机制,用于协调多个线程之间的并发操作。它可以用于控制对临界资源的访问,确保线程以特定的顺序执行,并防止竞态条件(race condition)的发生。
信号量通过维护一个内部计数器来实现其功能。当计数器的值大于零时,线程可以继续执行;当计数器的值为零时,线程需要等待。当一个线程使用完临界资源时,它会释放信号量,使得其他等待的线程可以继续执行。
要使用信号量,可以按照以下步骤进行:
-
包含头文件
<semaphore>。 -
创建一个信号量对象,可以是全局变量或局部变量。例如:
std::semaphore mySemaphore; -
在需要对临界资源进行访问的代码段之前,使用
mySemaphore.acquire()来申请获取信号量。 -
在使用完临界资源后,使用
mySemaphore.release()来释放信号量,以允许其他线程获取资源。
需要注意的是,信号量的初始值和每次请求和释放的数量都可以根据具体需求进行调整。此外,C++标准库还提供了其他类型的信号量,如计时器信号量(std::counting_semaphore)和二进制信号量(std::binary_semaphore),可根据实际情况选择使用。
信号量的类型 sem_t
int sem_init(sem_t *sem, int pshared, unsigned int value);
初始化信号量
int sem_destroy(sem_t *sem);
// 释放信号量
int sem_wait(sem_t *sem);
// 阻塞当前信号量
int sem_trywait(sem_t *sem);
// 重置信号量int sem_timedwait(sem_t *sem, const struct timespec *abs_timeout);
// int sem_post(sem_t *sem);
// 信号量 ++
int sem_getvalue(sem_t *sem, int *sval) //
案例
#include <stdio.h>
#include <stdlib.h>
#include <string.h>
#include <unistd.h>
#include <pthread.h>
#include <semaphore.h>// 定义信号量变量sem_t sem;void *func1(void *arg)
{int i = 0;// 申请资源 将可用资源减1sem_wait(&sem);for (i = 'A'; i <= 'Z'; i++){putchar(i);fflush(stdout);usleep(10000); // 100ms}// 释放资源 将可用资源加1sem_post(&sem);return NULL;
}void *func2(void *arg)
{int i = 0;// 申请资源 将可用资源减1sem_wait(&sem);for (i = 'a'; i <= 'z'; i++){putchar(i);fflush(stdout);usleep(10000); // 100ms}// 释放资源 将可用资源加1sem_post(&sem);return NULL;
}int main()
{pthread_t tid1, tid2;// 初始化信号量sem_init(&sem, 0, 1);// 创建线程pthread_create(&tid1, NULL, func1, NULL);pthread_create(&tid2, NULL, func2, NULL);// 等待线程结束pthread_join(tid1, NULL);pthread_join(tid2, NULL);printf("\nmain exit...\n");// 销毁信号量sem_destroy(&sem);return 0;
}
g++ -o main main.cpp -std=c++11 -pthread
使用信号量实现生产者消费者模型
#include <pthread.h>
#include <stdio.h>
#include <string.h>
#include <unistd.h>
#include <sys/types.h>
#include <time.h>
#include <sys/time.h>
#include <sys/wait.h>
#include <stdlib.h>
#include <semaphore.h>//缓冲区
int *buf;
int bufSize = 100;
int bufPtr;
int count;
//三个信号量
sem_t full, empty, mutex;//生产者线程
void *producer(void *arg)
{while (bufPtr < bufSize){//信号量模型sem_wait(&full);sem_wait(&mutex);buf[++bufPtr] = bufPtr;sem_post(&mutex);sem_post(&empty);}
}//消费者线程
void *consumer(void *arg)
{while (1){//信号量模型sem_wait(&empty);sem_wait(&mutex);count = (count + 1) % __INT32_MAX__;printf("pid[%ld], count[%d], data[%d]\n", pthread_self(), count, buf[bufPtr--]);sem_post(&mutex);sem_post(&full);}
}
int main()
{//初始化三个信号量sem_init(&full, 0, bufSize);sem_init(&empty, 0, 0);sem_init(&mutex, 0, 1);//初始化读写指针、缓冲区bufPtr = -1;count = 0;buf = (int *)malloc(sizeof(int) * bufSize);//创建6个线程,一个作生产者,5个消费者pthread_t ppid, cpids[5];pthread_create(&ppid, NULL, producer, NULL);for (int i = 0; i < 5; ++i){pthread_create(&cpids[i], NULL, consumer, NULL);}//detach分离,线程自动回收资源pthread_detach(ppid);for (int i = 0; i < 5; ++i){pthread_detach(cpids[i]);}//主线程结束pthread_exit(NULL);return 0;
}
g++ -o main main.cpp -std=c++11 -pthread

完结撒花!
相关文章:

Linux系统编程详解
Linux 多线程编程 什么是线程? 与线程类似,线程是允许应用程序并发执行多个任务的一种机制 线程是轻量级的进程(LWP:Light Weight Process),在 Linux 环境下线程的本 质仍是进程。 一个进程可以包含多个线…...

ios设备管理软件iMazing 2.17.11官方中文版新增功能介绍
iMazing 2.17.11官方中文版(ios设备管理软件)是一款管理苹果设备的软件, Windows 平台上的一款帮助用户管理 IOS 手机的应用程序,软件功能非常强大,界面简洁明晰、操作方便快捷,设计得非常人性化。iMazing官方版与苹果设备连接后&…...
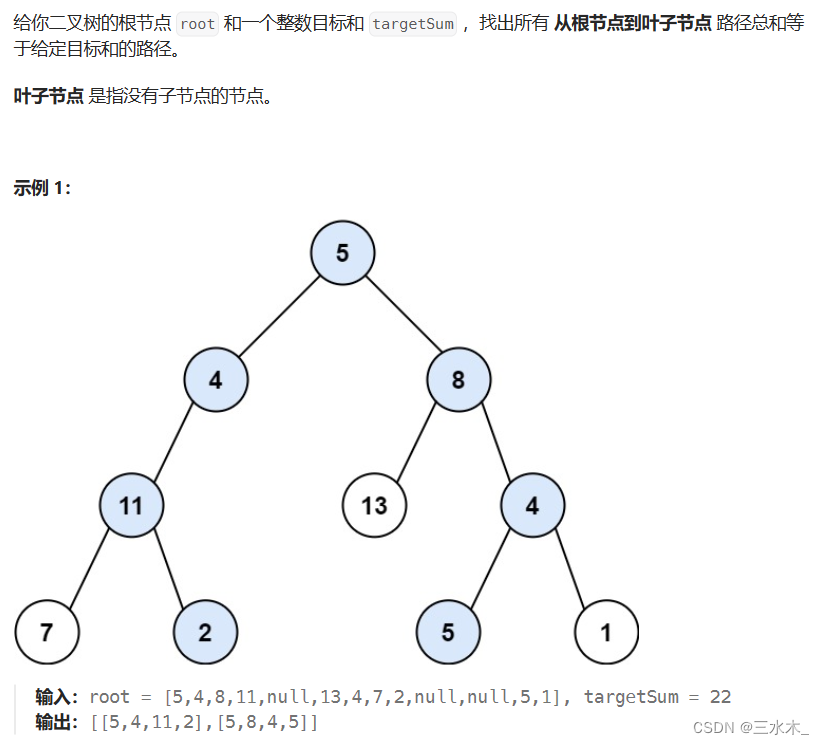
算法通关村第18关【青铜】| 回溯
回溯算法是一种解决组合优化问题和搜索问题的算法。它通过尝试各种可能的选择来找到问题的解决方案。回溯算法通常用于问题的解空间非常大,而传统的穷举法会导致计算时间爆炸的情况。回溯算法可以帮助限制搜索空间,以提高效率。 回溯算法的核心思想是在…...

【环境搭建】linux docker-compose安装seata1.6.1,使用nacos注册、db模式
新建目录,挂载用 mkdir -p /data/docker/seata/resources mkdir -p /data/docker/seata/logs 给权限 chmod -R 777 /data/docker/seata 先在/data/docker/seata目录编写一个使用file启动的docker-compose.yml文件(seata包目录的script文件夹有&#…...

20231008-20231013 读书笔记
计算机硬件 基本硬件系统:运算器、控制器、存储器、输入设备和输出设备中央处理单元(CPU):运算器、控制器、寄存器组和内部总线等部件组成 功能:程序控制、操作控制、时间控制、数据处理运算器:ALU、AC、DR、PSW控制器…...

YOLOv8 windows下的离线安装 offline install 指南 -- 以 带有CUDA版本的pytorch 为例
文章大纲 简介基础环境与安装包的准备windows 下 lap 包的离线安装conda 打包基础环境使用 pip 下载 whl 包特别的注意:pytorch cuda 版本的下载迁移与部署流程基础python 的conda 环境迁移与准备必备包: 安装cuda 版本 的torch,torchvision,ultralytics参考文献与学习路径…...
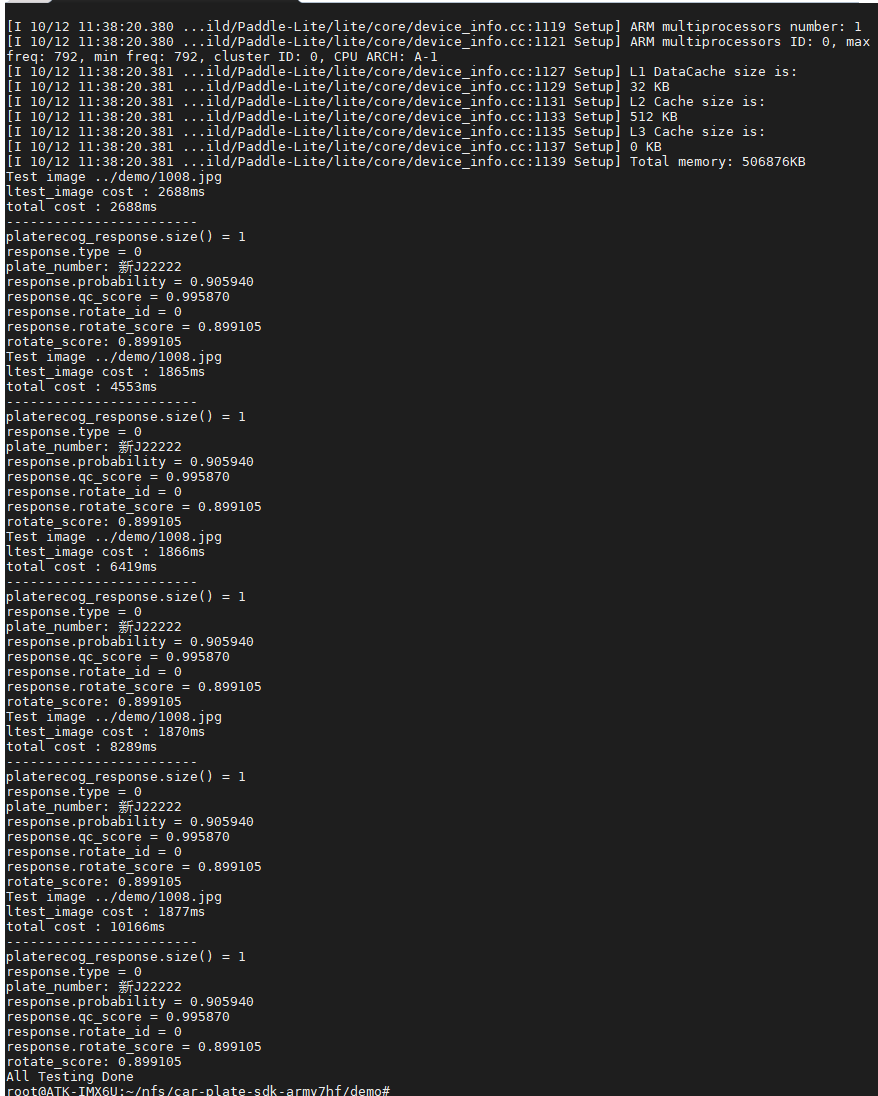
百度车牌识别AI Linux使用方法-armV7交叉编译
1、获取百度ai的sdk 百度智能云-登录 (baidu.com) 里面有两个版本的armV7和armV8架构。v7架构的性能比较低往往需要交叉编译,v8的板子性能往往比较好,可以直接在板子上编译。 解压到ubuntu里面。这里介绍v7架构的。 2、ubuntu环境配置 ubuntu下安装软件…...

数学建模——确定性时间序列分析方法
目录 介绍 确定性时间序列分析方法 1、时间序列的常见趋势 (1)长期趋势 (2)季节变动 (3)循环变动 (4)不规则变动 常见的时间序列模型有以下几类 2、时间序列预测的具体方法 …...
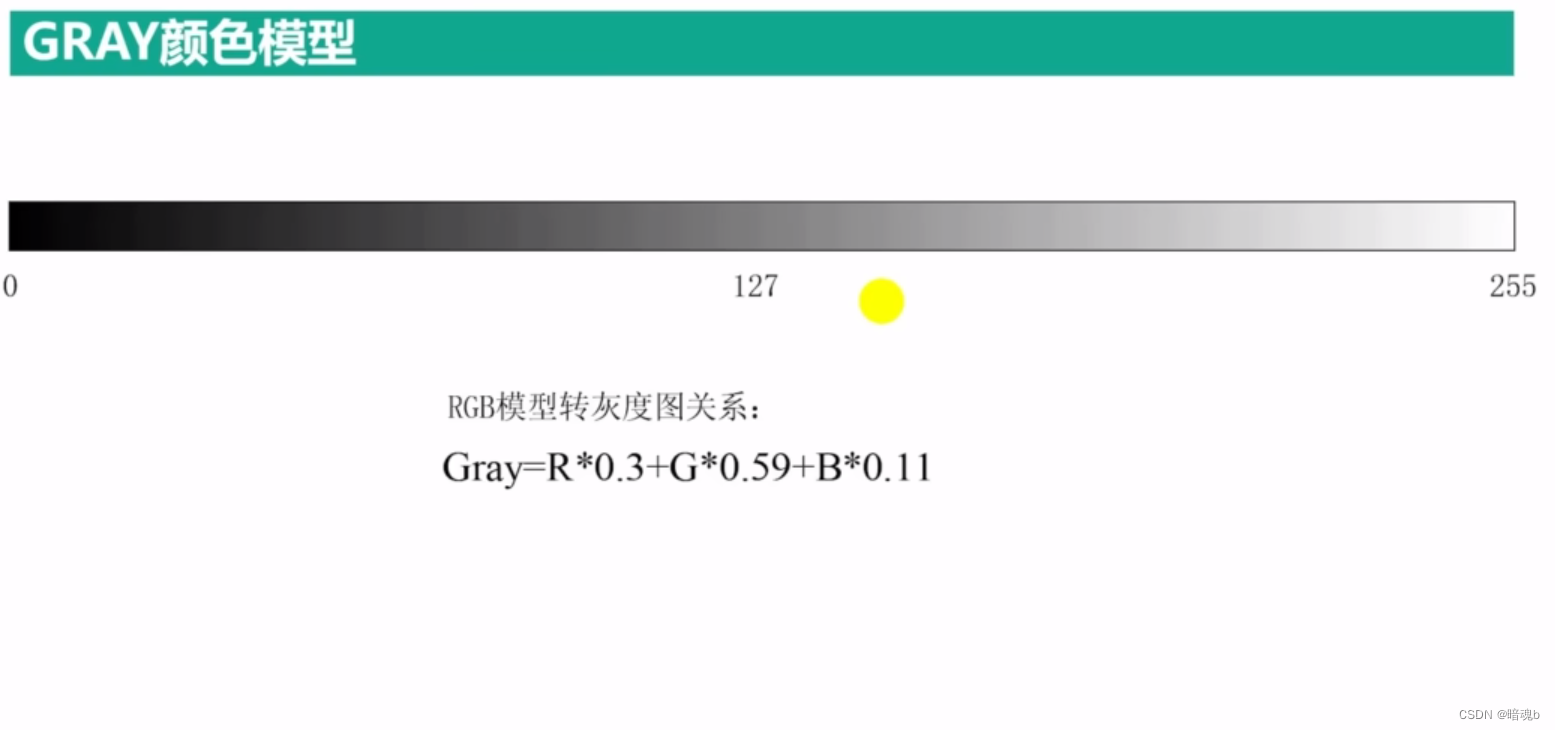
Opencv——颜色模型+通道分离与合并
视频加载/摄像头调用 VideoCapture允许一开始定义一个空的对象 VideoCapture video VideoCapture(const String &filename,int apiPreferenceCAP_ANY) filename:读取的视频文件或者图像序列名称 apiPreference:读取数据时设置的属性,例如编码格式、是否调用Op…...
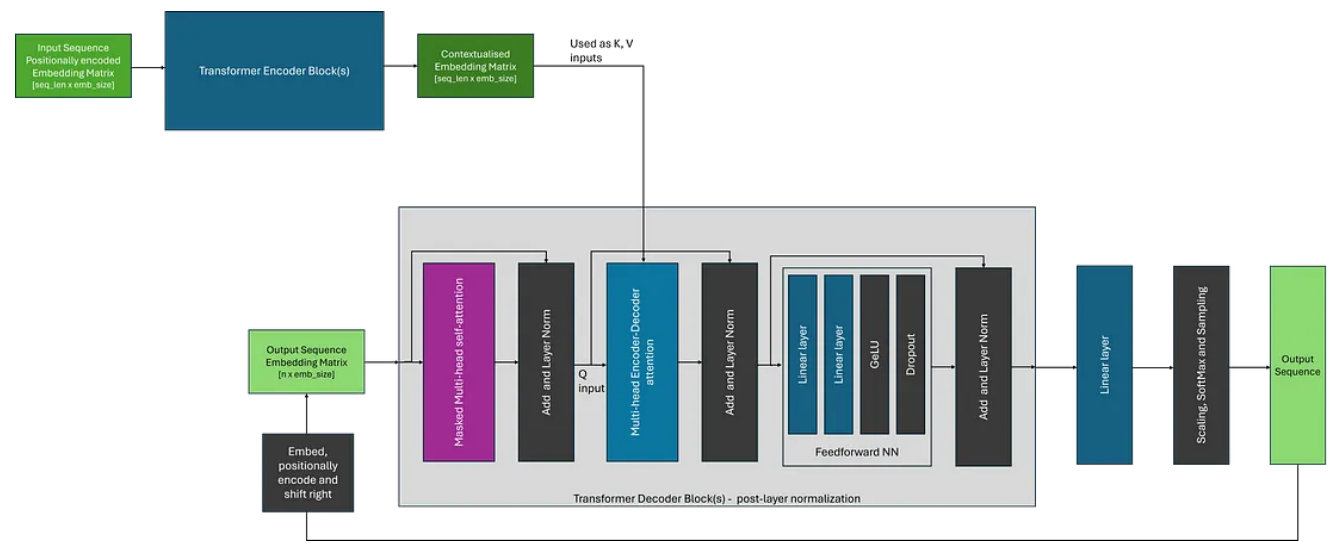
解码自然语言处理之 Transformers
自 2017 年推出以来,Transformer 已成为机器学习领域的一支重要力量,彻底改变了翻译和自动完成服务的功能。 最近,随着 OpenAI 的 ChatGPT、GPT-4 和 Meta 的 LLama 等大型语言模型的出现,Transformer 的受欢迎程度进一步飙升。这…...

【前端设计模式】之迭代器模式
迭代器模式是一种行为设计模式,它允许我们按照特定的方式遍历集合对象,而无需暴露其内部实现。在前端开发中,迭代器模式可以帮助我们更好地管理和操作数据集合。 迭代器模式特性 封装集合对象的内部结构,使其对外部透明。提供一…...

【Android知识笔记】图片专题(BitmapDrawable)
如何计算一张图片的占用内存大小? 注意是占用内存,不是文件大小可以运行时获取重要的是能直接掌握计算方法基础知识 Android 屏幕像素密度分类: (其实还有一种 ldpi = 120,不过这个已经绝种了,所以最低的只需关心mdpi即可) 上表中的比例为:m : h : xh : xxh: xxxh = …...
)
前端工程化知识系列(10)
目录 91. 了解前端工程化中的容器化和云部署概念,以及如何使用Docker和Kubernetes等工具来实现它们?92. 你如何管理前端项目的文档和知识共享,以确保团队成员都能理解和使用前端工程化工具和流程?93. 了解前端开发中的大规模和跨团…...
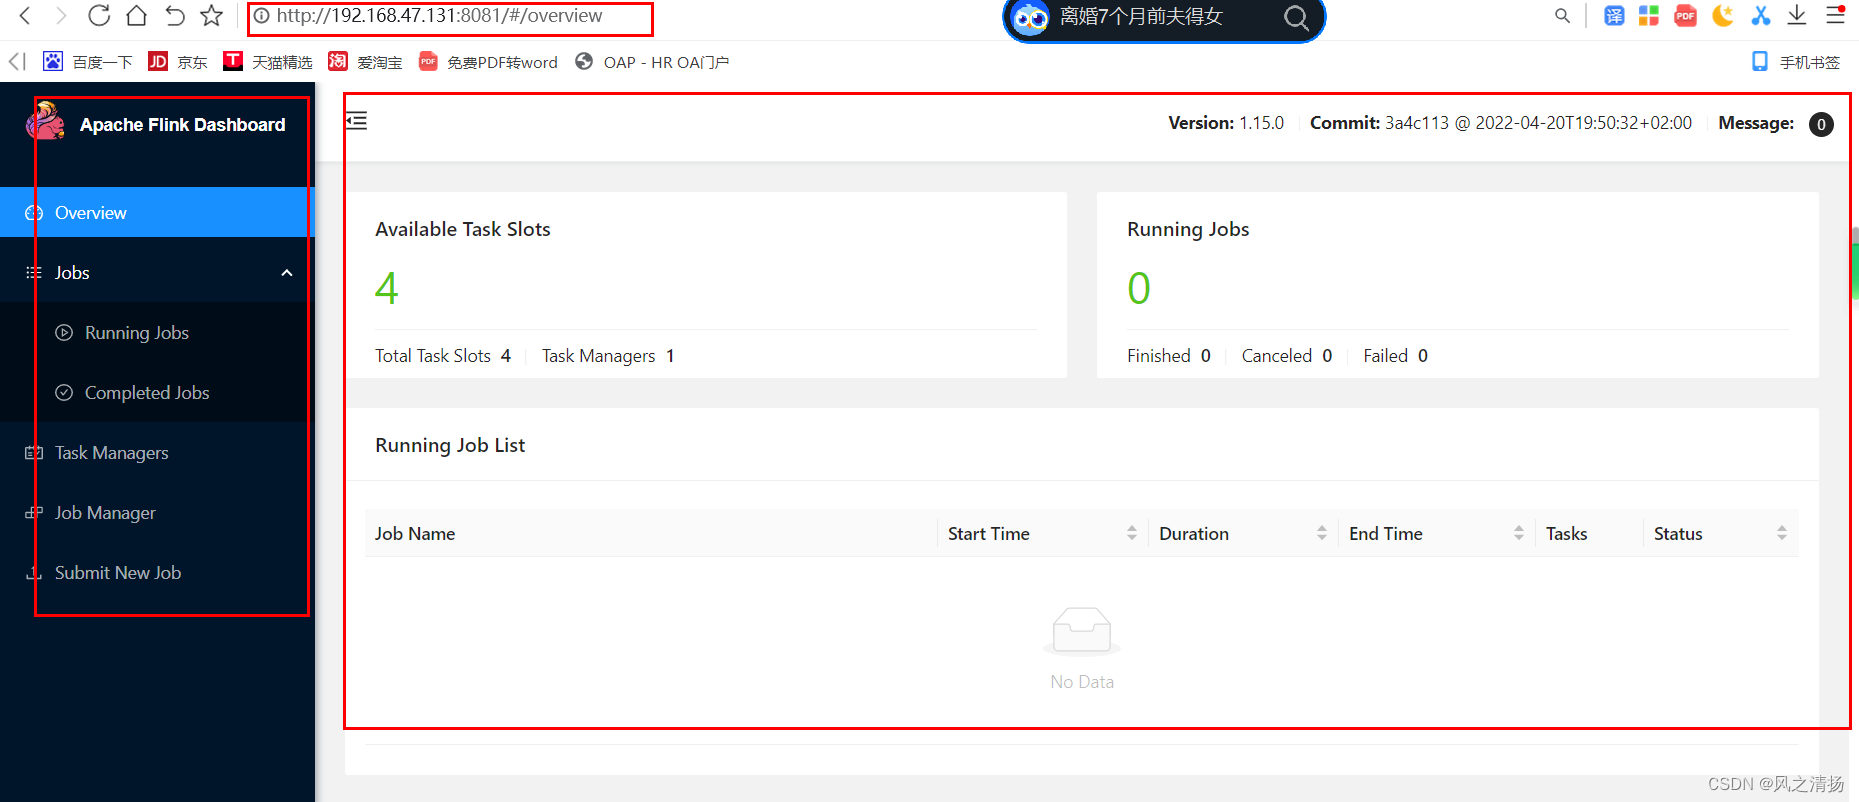
大数据flink篇之三-flink运行环境安装(一)单机Standalone安装
一、安装包下载地址 https://archive.apache.org/dist/flink/flink-1.15.0/ 二、安装配置流程 前提基础:Centos环境(建议7以上) 安装命令: 解压:tar -zxvf flink-xxxx.tar.gz 修改配置conf/flink-conf.yaml࿱…...

Redisson使用延时队列
延时队列 在开发中,有时需要使用延时队列。 比如,订单15分钟内未支付自动取消。 jdk延时队列 如果使用 jdk自带的延时队列,那么服务器挂了或者重启时,延时队列里的数据就会失效,可用性比较差。 Redisson延时队列 …...

基于php 进行每半小时钉钉预警
前言 业务场景:监控当前业务当出现并发情况时技术人员可以可以及时处理 使用技术栈: laravelredis 半小时触发一次报警信息实现思路 1、xshell脚本 具体参数就不详细解释了,想要详细了解可以自行百度 curl -H "Content-Type:appl…...

5.Python-使用XMLHttpRequest对象来发送Ajax请求
题记 使用XMLHttpRequest对象来发送Ajax请求,以下是一个简单的实例和操作过程。 安装flask模块 pip install flask 安装mysql.connector模块 pip install mysql-connector-python 编写app.py文件 app.py文件如下: from flask import Flask, reque…...

八皇后问题的解析与实现
问题描述 八皇后问题是一个古老而又著名的问题。 时间退回到1848年,国际西洋棋棋手马克斯贝瑟尔提出了这样的一个问题: 在88格的国际象棋上摆放八个皇后,使其不能互相攻击,即任意两个皇后都不能处于同一行、同一列或同一斜线上,问一共有多少种摆法。 如何找到这所有的…...

论文浅尝 | 深度神经网络的模型压缩
笔记整理:闵德海,东南大学硕士,研究方向为知识图谱 链接:https://arxiv.org/abs/1412.6550 动机 提高神经网络的深度通常可以提高网络性能,但它也使基于梯度的训练更加困难,因为更深的网络往往更加强的非线…...

进阶JAVA篇- DateTimeFormatter 类与 Period 类、Duration类的常用API(八)
目录 1.0 DateTimeFormatter 类的说明 1.1 如何创建格式化器的对象呢? 1.2 DateTimeFormatter 类中的 format(LocalDateTime ldt) 实例方法 2.0 Period 类的说明 2.1 Period 类中的 between(localDate1,localDate2) 静态方法来创建对象。 3.…...

Linux应用开发之网络套接字编程(实例篇)
服务端与客户端单连接 服务端代码 #include <sys/socket.h> #include <sys/types.h> #include <netinet/in.h> #include <stdio.h> #include <stdlib.h> #include <string.h> #include <arpa/inet.h> #include <pthread.h> …...
大数据学习栈记——Neo4j的安装与使用
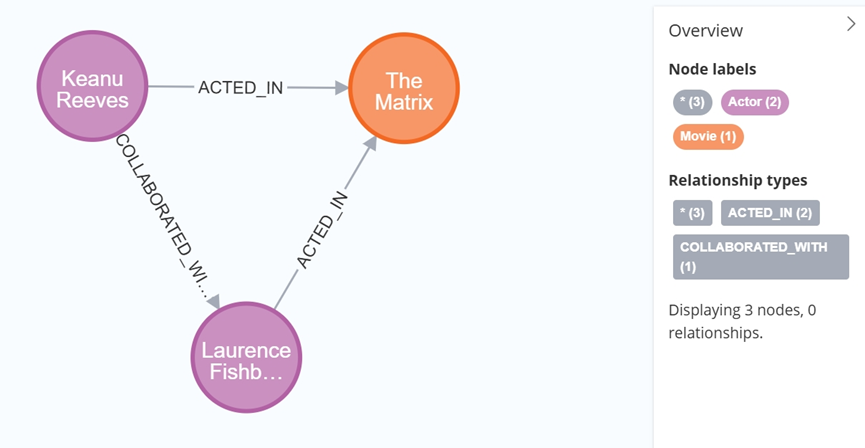
本文介绍图数据库Neofj的安装与使用,操作系统:Ubuntu24.04,Neofj版本:2025.04.0。 Apt安装 Neofj可以进行官网安装:Neo4j Deployment Center - Graph Database & Analytics 我这里安装是添加软件源的方法 最新版…...

基于大模型的 UI 自动化系统
基于大模型的 UI 自动化系统 下面是一个完整的 Python 系统,利用大模型实现智能 UI 自动化,结合计算机视觉和自然语言处理技术,实现"看屏操作"的能力。 系统架构设计 #mermaid-svg-2gn2GRvh5WCP2ktF {font-family:"trebuchet ms",verdana,arial,sans-…...

PHP和Node.js哪个更爽?
先说结论,rust完胜。 php:laravel,swoole,webman,最开始在苏宁的时候写了几年php,当时觉得php真的是世界上最好的语言,因为当初活在舒适圈里,不愿意跳出来,就好比当初活在…...

条件运算符
C中的三目运算符(也称条件运算符,英文:ternary operator)是一种简洁的条件选择语句,语法如下: 条件表达式 ? 表达式1 : 表达式2• 如果“条件表达式”为true,则整个表达式的结果为“表达式1”…...

uniapp中使用aixos 报错
问题: 在uniapp中使用aixos,运行后报如下错误: AxiosError: There is no suitable adapter to dispatch the request since : - adapter xhr is not supported by the environment - adapter http is not available in the build 解决方案&…...
混合(Blending))
C++.OpenGL (20/64)混合(Blending)
混合(Blending) 透明效果核心原理 #mermaid-svg-SWG0UzVfJms7Sm3e {font-family:"trebuchet ms",verdana,arial,sans-serif;font-size:16px;fill:#333;}#mermaid-svg-SWG0UzVfJms7Sm3e .error-icon{fill:#552222;}#mermaid-svg-SWG0UzVfJms7Sm3e .error-text{fill…...

libfmt: 现代C++的格式化工具库介绍与酷炫功能
libfmt: 现代C的格式化工具库介绍与酷炫功能 libfmt 是一个开源的C格式化库,提供了高效、安全的文本格式化功能,是C20中引入的std::format的基础实现。它比传统的printf和iostream更安全、更灵活、性能更好。 基本介绍 主要特点 类型安全:…...

使用SSE解决获取状态不一致问题
使用SSE解决获取状态不一致问题 1. 问题描述2. SSE介绍2.1 SSE 的工作原理2.2 SSE 的事件格式规范2.3 SSE与其他技术对比2.4 SSE 的优缺点 3. 实战代码 1. 问题描述 目前做的一个功能是上传多个文件,这个上传文件是整体功能的一部分,文件在上传的过程中…...
与文本切分器(Splitter)详解《二》)
LangChain 中的文档加载器(Loader)与文本切分器(Splitter)详解《二》
🧠 LangChain 中 TextSplitter 的使用详解:从基础到进阶(附代码) 一、前言 在处理大规模文本数据时,特别是在构建知识库或进行大模型训练与推理时,文本切分(Text Splitting) 是一个…...
