Ingress安全网关

目录
文章目录
- 目录
- 本节实战
- TCP 流量拆分
- ==🚩 实战:TCP 流量拆分-2023.11.15(测试成功)==
- Ingress安全网关
- Kubernetes Ingress
- ==🚩 实战:Kubernetes Ingress-2023.11.15(测试成功)==
- Ingress Gateway
- Ingress Gateway
- ==🚩 实战:Ingress Gateway-2023.11.15(测试成功)==
- 安全网关
- ==🚩 实战:istio安全网关-2023.11.16(测试成功)==
- 1.单主机配置 TLS Ingress Gateway
- 2.多个主机配置 TLS Ingress Gateway
- 3.双向 TLS Ingress Gateway
- Ingress Gateway TLS 透传
- 1.TLS Termination
- 2.TLS Origination
- 3.TLS 透传
- ==🚩 实战:TLS 透传-2023.11.16(测试成功)==
- 关于我
- 最后
本节实战
| 实战名称 |
|---|
| 🚩 实战:TCP 流量拆分-2023.11.15(测试成功) |
| 🚩 实战:Kubernetes Ingress-2023.11.15(测试成功) |
| 🚩 实战:Ingress Gateway-2023.11.15(测试成功) |
| 🚩 实战:istio安全网关-2023.11.16(测试成功) |
| 🚩 实战:TLS 透传-2023.11.16(测试成功) |
TCP 流量拆分
🚩 实战:TCP 流量拆分-2023.11.15(测试成功)
实验环境:
k8s v1.27.6(containerd://1.6.20)(cni:flannel:v0.22.2)[root@master1 ~]#istioctl version
client version: 1.19.3
control plane version: 1.19.3
data plane version: 1.19.3 (8 proxies)
实验软件:
链接:https://pan.baidu.com/s/1pMnJxgL63oTlGFlhrfnXsA?pwd=7yqb
提取码:7yqb
2023.11.5-实战:BookInfo 示例应用-2023.11.5(测试成功) --本节测试yaml在此目录里

实验步骤:
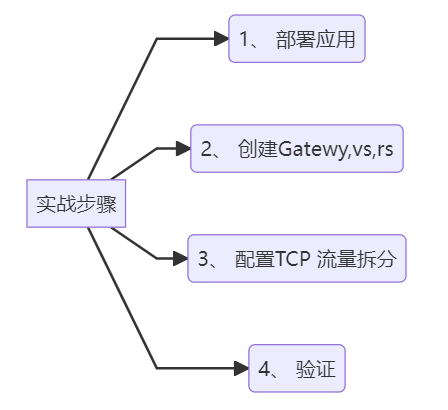
graph LRA[实战步骤] -->B(1、 部署应用)A[实战步骤] -->C(2、 创建Gatewy,vs,rs)A[实战步骤] -->D(3、 配置TCP 流量拆分)A[实战步骤] -->E(4、 验证)
前面我们试验了 HTTP 的流量拆分,那么 TCP 流量拆分如何实现呢?TCP 流量拆分是指将来自客户端的 TCP 流量分发到多个后端服务的过程。在 Istio 中,TCP 流量拆分是通过 VirtualService 和 DestinationRule 对象来实现的。
这里我们来演示如何将 TCP 流量从微服务的一个版本迁移到另一个版本。我们将会把 100% 的 TCP 流量分配到 tcp-echo:v1,接着,再通过配置 Istio 路由权重把 20% 的 TCP 流量分配到 tcp-echo:v2。
- 首先部署
tcp-echo服务的v1和v2两个版本:
kubectl apply -f samples/tcp-echo/tcp-echo-services.yaml
查看:
[root@master1 istio-1.19.3]#kubectl get po -l app=tcp-echo
NAME                           READY   STATUS    RESTARTS   AGE
tcp-echo-v1-64c9b4bc95-hc5z7   2/2     Running   0          69s
tcp-echo-v2-5b5657b486-dlsqf   2/2     Running   0          69s
[root@master1 istio-1.19.3]#kubectl get svc tcp-echo
NAME       TYPE        CLUSTER-IP     EXTERNAL-IP   PORT(S)             AGE
tcp-echo   ClusterIP   10.99.200.47   <none>        9000/TCP,9001/TCP   71s
该资源对象中包含 tcp-echo 的两个 Deployment 对象,包含 9000、9001、9002 三个端口,但是通过 Service 只暴露了 9000 和 9001 两个端口,省略了 9002 端口是为了测试透传能力,内容如下所示:
apiVersion: v1
kind: Service
metadata:name: tcp-echolabels:app: tcp-echoservice: tcp-echo
spec:ports:- name: tcpport: 9000- name: tcp-otherport: 9001# Port 9002 is omitted intentionally for testing the pass through filter chain.selector:app: tcp-echo
---
apiVersion: apps/v1
kind: Deployment
metadata:name: tcp-echo-v1labels:app: tcp-echoversion: v1
spec:selector:matchLabels:app: tcp-echoversion: v1template:metadata:labels:app: tcp-echoversion: v1spec:containers:- name: tcp-echoimage: docker.io/istio/tcp-echo-server:1.2imagePullPolicy: IfNotPresentargs: ["9000,9001,9002", "one"]ports:- containerPort: 9000- containerPort: 9001
---
apiVersion: apps/v1
kind: Deployment
metadata:name: tcp-echo-v2labels:app: tcp-echoversion: v2
spec:selector:matchLabels:app: tcp-echoversion: v2template:metadata:labels:app: tcp-echoversion: v2spec:containers:- name: tcp-echoimage: docker.io/istio/tcp-echo-server:1.2imagePullPolicy: IfNotPresentargs: ["9000,9001,9002", "two"]ports:- containerPort: 9000- containerPort: 9001
- 然后同样再部署一个 sleep 示例应用,作为发送请求的测试源:
kubectl apply -f samples/sleep/sleep.yaml
对应的 Pod 如下所示:
[root@master1 istio-1.19.3]#kubectl get pods
NAME                             READY   STATUS    RESTARTS   AGE
……
sleep-9454cc476-nx668            2/2     Running   0          11s
tcp-echo-v1-64c9b4bc95-hc5z7     2/2     Running   0          27m
tcp-echo-v2-5b5657b486-dlsqf     2/2     Running   0          27m
- 接下来我们将所有 TCP 流量路由到微服务
tcp-echo的v1版本,应用下面的资源清单即可:
$ kubectl apply -f samples/tcp-echo/tcp-echo-all-v1.yaml
查看:
[root@master1 istio-1.19.3]#kubectl get gateway
NAME               AGE
bookinfo-gateway   2d16h
tcp-echo-gateway   41s
[root@master1 istio-1.19.3]#kubectl get vs
NAME          GATEWAYS               HOSTS             AGE
bookinfo      ["bookinfo-gateway"]   ["*"]             2d16h
……
tcp-echo      ["tcp-echo-gateway"]   ["*"]             46s
[root@master1 istio-1.19.3]#kubectl get dr
NAME                   HOST          AGEtcp-echo-destination   tcp-echo      57s
该资源对象中包含了 tcp-echo 服务的 Gateway、DestinationRule 和 VirtualService 对象,内容如下所示:
apiVersion: networking.istio.io/v1alpha3
kind: Gateway
metadata:name: tcp-echo-gateway
spec:selector:istio: ingressgatewayservers:- port:number: 31400 # istio-ingressgateway 包含该端口name: tcpprotocol: TCPhosts:- "*"
---
apiVersion: networking.istio.io/v1alpha3
kind: DestinationRule
metadata:name: tcp-echo-destination
spec:host: tcp-echosubsets:- name: v1labels:version: v1 # 匹配 tcp-echo-v1 的标签- name: v2labels:version: v2 # 匹配 tcp-echo-v2 的标签
---
apiVersion: networking.istio.io/v1alpha3
kind: VirtualService
metadata:name: tcp-echo
spec:hosts:- "*"gateways:- tcp-echo-gateway # 关联上面的 Gatewaytcp:- match:- port: 31400 # 匹配上面 Gateway 的端口route:- destination: # 路由导 tcp-echo 服务host: tcp-echoport:number: 9000subset: v1 # 全部路由到 v1 子集
上面的资源清单中单独定义了一个 Gateway 对象,用来暴露 TCP 流量的端口,然后通过 VirtualService 对象将 TCP 流量路由到 tcp-echo 服务的 v1 版本,这样所有的流量都会被路由到 tcp-echo:v1,需要注意的是 VirtualService 对象中配置的是 tcp 协议,而不是 http 协议了,因为我们这里要处理的是一个 TCP 服务,其他方式方法都是一样的。
查看下istio-ingressgateway内容:
[root@master1 istio-1.19.3]#kubectl get svc istio-ingressgateway -nistio-system -oyaml
……ports:- name: status-portnodePort: 31410port: 15021protocol: TCPtargetPort: 15021- name: http2nodePort: 31666port: 80protocol: TCPtargetPort: 8080- name: httpsnodePort: 32213port: 443protocol: TCPtargetPort: 8443- name: tcpnodePort: 30291 ##port: 31400 ##protocol: TCPtargetPort: 31400 ##证明容器里也有一个应用监听31400端口- name: tlsnodePort: 31787port: 15443protocol: TCPtargetPort: 15443
……
[root@master1 istio-1.19.3]#kubectl get po istio-ingressgateway-9c8b9b586-vj44l  -nistio-system -oyaml
……
image: docker.io/istio/proxyv2:1.19.3imagePullPolicy: IfNotPresentname: istio-proxyports:- containerPort: 15021protocol: TCP- containerPort: 8080 #httpprotocol: TCP- containerPort: 8443 #httpsprotocol: TCP- containerPort: 31400 #TCP流量protocol: TCP- containerPort: 15443protocol: TCP- containerPort: 15090name: http-envoy-promprotocol: TCP
……
- 我们可以用下面的方式来测试,首先获得 Ingress Gateway 的访问入口地址和端口:
export TCP_INGRESS_PORT=$(kubectl -n istio-system get service istio-ingressgateway -o jsonpath='{.spec.ports[?(@.name=="tcp")].nodePort}')
export INGRESS_HOST=$(kubectl get po -l istio=ingressgateway -n istio-system -o jsonpath='{.items[0].status.hostIP}')
查看:
echo $TCP_INGRESS_PORT #istio-ingressgateway svc的nodePort(监听器端口),因为这里的SVC是LoadBalancer类型的,因为我们通过NodePort来访问就行。
echo $INGRESS_HOST[root@master1 istio-1.19.3]#echo $TCP_INGRESS_PORT #svc的nodePort
30291
[root@master1 istio-1.19.3]#echo $INGRESS_HOST
172.29.9.63
- 然后通过 sleep 容器中的
nc命令来发送 TCP 流量:
[root@master1 istio-1.19.3]#export SLEEP=$(kubectl get pod -l app=sleep -o jsonpath={.items..metadata.name})
[root@master1 istio-1.19.3]#echo $SLEEP
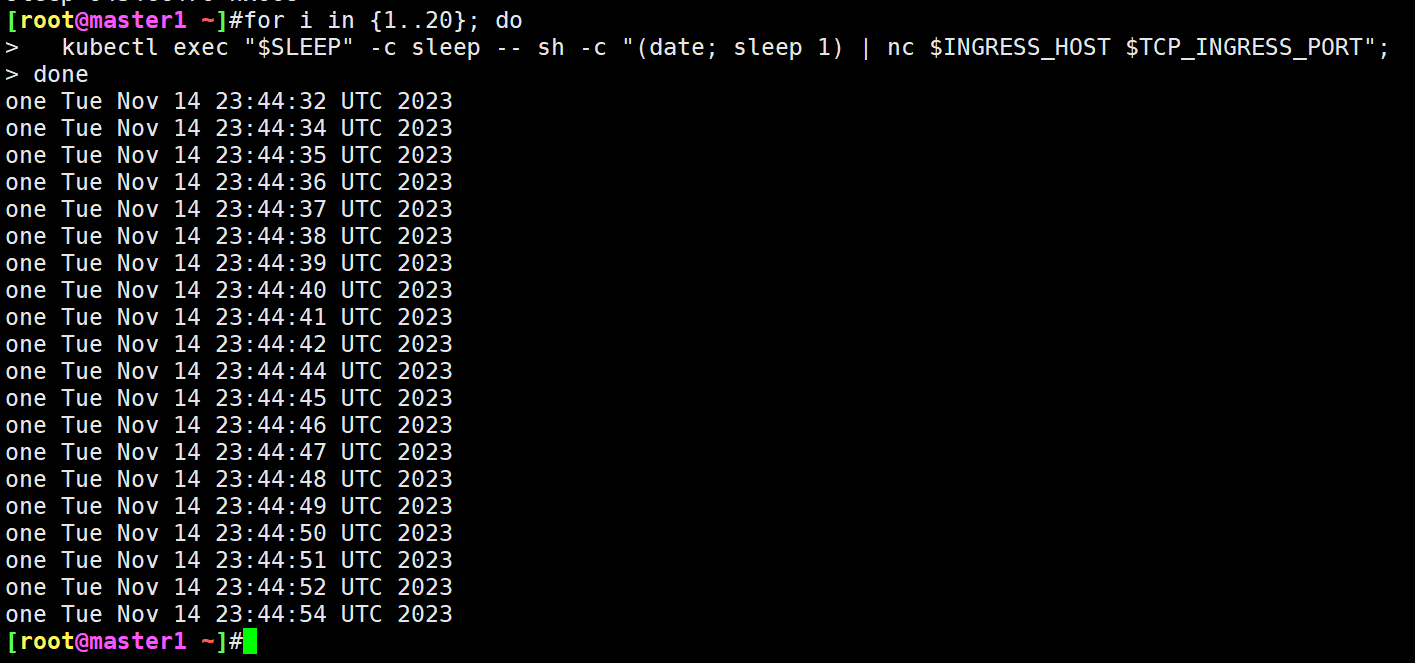
sleep-9454cc476-nx668$ for i in {1..20}; dokubectl exec "$SLEEP" -c sleep -- sh -c "(date; sleep 1) | nc $INGRESS_HOST $TCP_INGRESS_PORT";
done
one Mon Nov 13 03:23:59 UTC 2023
one Mon Nov 13 03:24:00 UTC 2023
one Mon Nov 13 03:24:01 UTC 2023
# ......
可以看到所有时间戳都有一个前缀 one,说明所有流量都被路由到 tcp-echo 的 v1 版本,当然我们也可以在 v1 版本的 Pod 中查看到相应的日志。
查看v1 版本的 Pod 中查看到相应的日志:
[root@master1 istio-1.19.3]#kubectl logs -f tcp-echo-v1-64c9b4bc95-hc5z7
listening on [::]:9002, prefix: one
listening on [::]:9000, prefix: one
listening on [::]:9001, prefix: onerequest: Tue Nov 14 23:44:32 UTC 2023
response: one Tue Nov 14 23:44:32 UTC 2023
request: Tue Nov 14 23:44:34 UTC 2023
response: one Tue Nov 14 23:44:34 UTC 2023
request: Tue Nov 14 23:44:35 UTC 2023
response: one Tue Nov 14 23:44:35 UTC 2023
request: Tue Nov 14 23:44:36 UTC 2023
response: one Tue Nov 14 23:44:36 UTC 2023
request: Tue Nov 14 23:44:37 UTC 2023
……
- 接下来我们将 20% 的 TCP 流量路由到
tcp-echo:v2版本,应用下面的资源清单即可:
kubectl apply -f samples/tcp-echo/tcp-echo-20-v2.yaml
该清单文件内容如下所示:
apiVersion: networking.istio.io/v1alpha3
kind: VirtualService
metadata:name: tcp-echo
spec:hosts:- "*"gateways:- tcp-echo-gatewaytcp:- match:- port: 31400route:- destination:host: tcp-echoport:number: 9000subset: v1weight: 80 # 80% 的流量路由到 v1- destination:host: tcp-echoport:number: 9000subset: v2weight: 20 # 20% 的流量路由到 v2
这里我们更新了 VirtualService 对象,将 tcp-echo 服务的 v1 版本和 v2 版本的权重分别设置为 80% 和 20%,这样 20% 的流量就会被路由到 tcp-echo:v2 版本了,这和前面的 HTTP 基于权重的流量拆分是一样的方式。
- 应用成功后,我们再次发送 TCP 流量来验证:
$ export SLEEP=$(kubectl get pod -l app=sleep -o jsonpath={.items..metadata.name})
$ for i in {1..20}; dokubectl exec "$SLEEP" -c sleep -- sh -c "(date; sleep 1) | nc $INGRESS_HOST $TCP_INGRESS_PORT";
done
one Mon Nov 13 03:29:32 UTC 2023
one Mon Nov 13 03:29:33 UTC 2023
one Mon Nov 13 03:29:34 UTC 2023
one Mon Nov 13 03:29:36 UTC 2023
one Mon Nov 13 03:29:37 UTC 2023
one Mon Nov 13 03:29:38 UTC 2023
one Mon Nov 13 03:29:39 UTC 2023
two Mon Nov 13 03:29:40 UTC 2023
one Mon Nov 13 03:29:41 UTC 2023
one Mon Nov 13 03:29:42 UTC 2023
two Mon Nov 13 03:29:43 UTC 2023
# ......
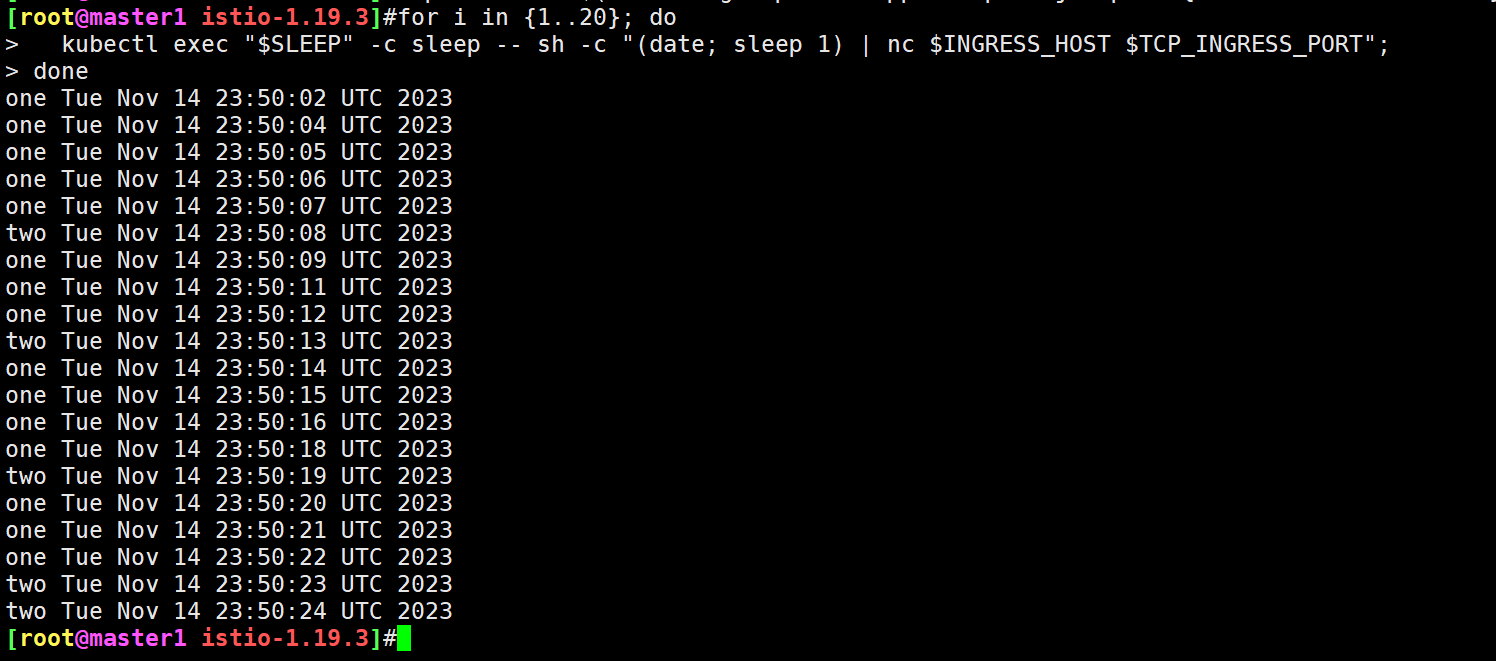
输出结果中大约有 20% 的时间戳带有前缀 two,说明 80% 的 TCP 流量被路由到 tcp-echo 的 v1 版本,而 20% 的流量被路由到 v2 版本,证明我们的 TCP 服务基于权重的流量拆分配置成功了。
- 当然最后我们同样可以去查看下 Envoy Sidecar 的具体配置,注意我们这里是通过 Istio Ingress Gateway 来暴露 TCP 流量的端口的,所以我们这里直接查看
31400端口的监听器配置即可:
$ istioctl proxy-config listeners istio-ingressgateway-9c8b9b586-s6s48 -n istio-system --port 31400 -o yaml
- address:socketAddress:address: 0.0.0.0portValue: 31400# ......filterChains:- filters:# ......- name: envoy.filters.network.tcp_proxytypedConfig:'@type': type.googleapis.com/envoy.extensions.filters.network.tcp_proxy.v3.TcpProxy# ......statPrefix: tcp-echo.defaultweightedClusters:clusters:- name: outbound|9000|v1|tcp-echo.default.svc.cluster.localweight: 80- name: outbound|9000|v2|tcp-echo.default.svc.cluster.localweight: 20name: 0.0.0.0_31400trafficDirection: OUTBOUND
我们可以发现上面的监听器配置下面的过滤器链中直接使用的是一个 envoy.filters.network.tcp_proxy 过滤器,用来处理 TCP 流量,而不是 HTTP 流量了,而且直接在该过滤器下面配置了 weightedClusters 权重集群,用来实现基于权重的流量拆分,可以看到 v1 和 v2 版本的权重分别为 80 和 20,符合我们的预期。
- 最后测试完后可以清理下资源:
kubectl delete -f samples/tcp-echo/tcp-echo-all-v1.yaml
kubectl delete -f samples/sleep/sleep.yaml
kubectl delete -f samples/tcp-echo/tcp-echo-services.yaml
测试结束。😘
Ingress安全网关
我们知道在 Kubernetes 中我们会使用 Ingress 来暴露 HTTP 流量的入口,在 Istio 中我们是通过 Gateway 来暴露流量入口的,那么我们是否可以使用 Ingress 对象来支持 Istio 的流量入口呢?答案是肯定的,但是我们还是建议使用 Gateway 而不是 Ingress 来使用 Istio 提供的完整功能集,例如丰富的流量管理和安全功能。
k8s gateway api。
Kubernetes Ingress
🚩 实战:Kubernetes Ingress-2023.11.15(测试成功)
实验环境:
k8s v1.27.6(containerd://1.6.20)(cni:flannel:v0.22.2)[root@master1 ~]#istioctl version
client version: 1.19.3
control plane version: 1.19.3
data plane version: 1.19.3 (8 proxies)
实验软件:
链接:https://pan.baidu.com/s/1VEYZ8jPDGsHXvnxwkKHzZA?pwd=062k
提取码:062k
2023.11.15-实战:Kubernetes Ingress-2023.11.15(测试成功)

应用程序在以下链接里:
链接:https://pan.baidu.com/s/1pMnJxgL63oTlGFlhrfnXsA?pwd=7yqb
提取码:7yqb
2023.11.5-实战:BookInfo 示例应用-2023.11.5(测试成功)
实验步骤:
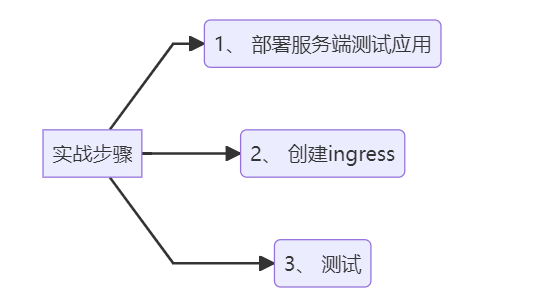
graph LRA[实战步骤] -->B(1、 部署服务端测试应用)A[实战步骤] -->C(2、 创建ingress)A[实战步骤] -->D(3、 测试)
下面我们来使用 Ingress 资源配置 Istio 的入口网关,使用 Kubernetes Ingress 可以暴露从集群外到集群内服务的 HTTP 和 HTTPS 路由。
- 这里我们部署一个
httpbin应用,用来测试:
kubectl apply -f samples/httpbin/httpbin.yaml
查看:
[root@master1 istio-1.19.3]#kubectl get po -l app=httpbin
NAME                       READY   STATUS    RESTARTS   AGE
httpbin-86869bccff-7lpjx   2/2     Running   0          2d14h
[root@master1 istio-1.19.3]#kubectl get svc
NAME          TYPE        CLUSTER-IP       EXTERNAL-IP   PORT(S)             AGE
httpbin       ClusterIP   10.111.57.195    <none>        8000/TCP            2d14h
……
- 创建后我们就可以创建一个
Ingress对象来暴露httpbin服务了:
⚠️ 特别注意:
#httpbin-ingress.yaml
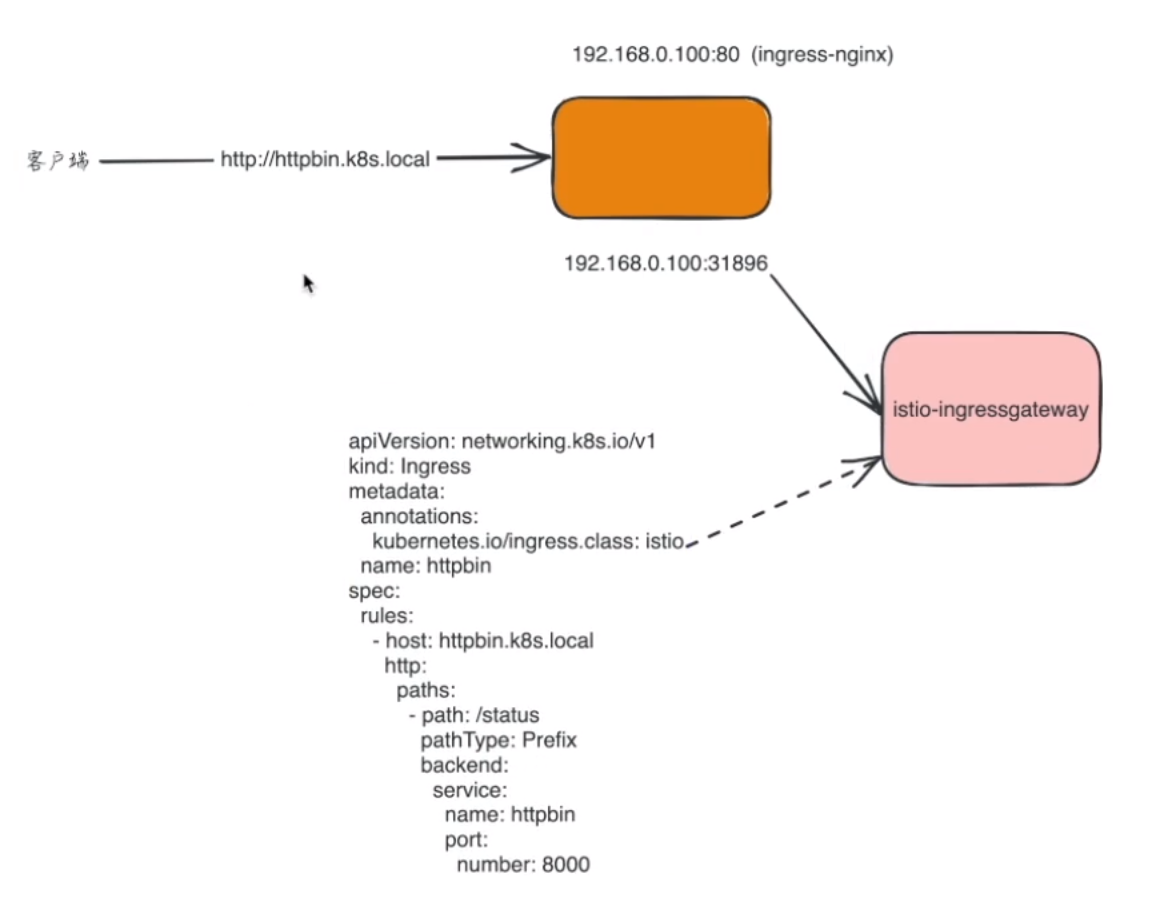
apiVersion: networking.k8s.io/v1
kind: Ingress
metadata:annotations:kubernetes.io/ingress.class: istioname: httpbin
spec:rules:- host: httpbin.k8s.localhttp:paths:- path: /statuspathType: Prefixbackend:service:name: httpbinport:number: 8000
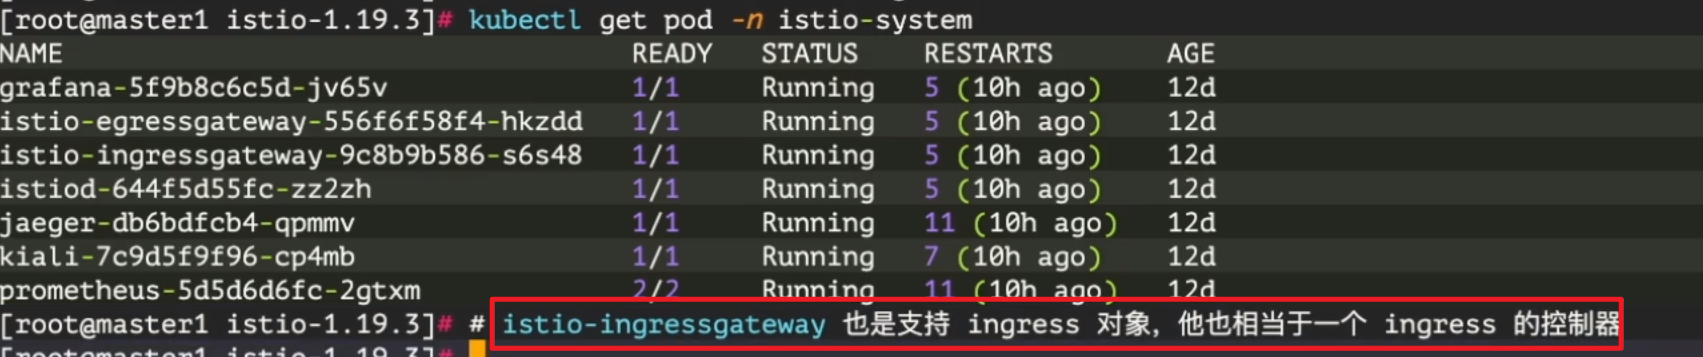
可以看到这个 Ingress 对象和我们在 Kubernetes 中的使用方法没有什么区别,唯一不同的是我们这里使用了一个 kubernetes.io/ingress.class 注解来告知 Istio Ingress Gateway 它应该处理该 Ingress,否则它将被忽略。
我们应用上面的资源清单:
[root@master1 istio-1.19.3]#kubectl apply -f httpbin-ingress.yaml
ingress.networking.k8s.io/httpbin created
Warning: annotation "kubernetes.io/ingress.class" is deprecated, please use 'spec.ingressClassName' instead
- 我们可以通过
kubectl get ingress命令来查看下 Ingress 对象的状态:
$ kubectl get ingress
NAME      CLASS    HOSTS              ADDRESS   PORTS   AGE
httpbin   <none>   httpbin.k8s.local            80      6s
- 然后我们可以使用
curl来访问httpbin服务:
# 获取 Ingress Gateway 的地址和端口
export INGRESS_PORT=$(kubectl -n istio-system get service istio-ingressgateway -o jsonpath='{.spec.ports[?(@.name=="http2")].nodePort}')
export INGRESS_HOST=$(kubectl get pod -l istio=ingressgateway -n istio-system -o jsonpath='{.items[0].status.hostIP}')echo $INGRESS_PORT
echo $INGRESS_HOST# 访问 httpbin 服务
$ curl -s -I -HHost:httpbin.k8s.local "http://$INGRESS_HOST:$INGRESS_PORT/status/200"
HTTP/1.1 200 OK
server: istio-envoy
date: Mon, 13 Nov 2023 06:10:13 GMT
content-type: text/html; charset=utf-8
# .......
注意使用 -H 标志将 Host 的 HTTP 头设置为 httpbin.k8s.local, 因为 Ingress 中已经配置为处理访问该域名的请求,但是在测试环境中,该域名并没有相应的 DNS 绑定,当然我们也可以直接在 /etc/hosts 中添加一个映射(当然是istio-ingressgateway-9c8b9b586-vj44lpod所在node节点了)。

- 访问未指定的其他 URL 时,将返回 HTTP 404 错误:
$ curl -s -I -HHost:httpbin.k8s.local "http://$INGRESS_HOST:$INGRESS_PORT/headers"
HTTP/1.1 404 Not Found
#......

- 注意下:自己当前istio环境
[root@master1 istio-1.19.3]#export INGRESS_PORT=$(kubectl -n istio-system get service istio-ingressgateway -o jsonpath='{.spec.ports[?(@.name=="http2")].nodePort}')
[root@master1 istio-1.19.3]#export INGRESS_HOST=$(kubectl get pod -l istio=ingressgateway -n istio-system -o jsonpath='{.items[0].status.hostIP}')
[root@master1 istio-1.19.3]#echo $INGRESS_PORT
31666
[root@master1 istio-1.19.3]#echo $INGRESS_HOST
172.29.9.63[root@master1 istio-1.19.3]#kubectl get po -owide -l istio=ingressgateway -nistio-system
NAME                                   READY   STATUS    RESTARTS   AGE    IP            NODE    NOMINATED NODE   READINESS GATES
istio-ingressgateway-9c8b9b586-vj44l   1/1     Running   0          3d6h   10.244.2.15   node2   <none>           <none>
[root@master1 istio-1.19.3]#kubectl get svc -nistio-system
NAME                   TYPE           CLUSTER-IP       EXTERNAL-IP   PORT(S)                                                                      AGE
istio-egressgateway    ClusterIP      10.109.85.119    <none>        80/TCP,443/TCP                                                               8d
istio-ingressgateway   LoadBalancer   10.105.233.167   <pending>     15021:31410/TCP,80:31666/TCP,443:32213/TCP,31400:30291/TCP,15443:31787/TCP   8d
istiod                 ClusterIP      10.109.185.251   <none>        15010/TCP,15012/TCP,443/TCP,15014/TCP                                        8d
- 在 Kubernetes 1.18 中,添加了新资源
IngressClass,以替换 Ingress 资源上的kubernetes.io/ingress.class注解,我们也可以使用该资源来替换注解的方式,需要将controller字段设置为istio.io/ingress-controller,如下所示:
#httpbin-ingress2.yaml
apiVersion: networking.k8s.io/v1
kind: IngressClass
metadata:name: istio
spec:controller: istio.io/ingress-controller # 指定 Ingress Controller 为 istio
---
apiVersion: networking.k8s.io/v1
kind: Ingress
metadata:name: httpbin
spec:ingressClassName: istio # 指定 IngressClass 为 istiorules:- host: httpbin.k8s.localhttp:paths:- path: /pathType: Prefixbackend:service:name: httpbinport:number: 8000
上面这种方式更加简洁,而且可以避免使用注解的方式,但是需要注意的是,该资源对象只能在 Kubernetes 1.18 及以上版本中使用。
- 应用上面ingress对象
#先删除旧的ingress对象
[root@master1 istio-1.19.3]#kubectl delete -f httpbin-ingress.yaml
ingress.networking.k8s.io "httpbin" deleted[root@master1 istio-1.19.3]#kubectl apply -f httpbin-ingress2.yaml
ingressclass.networking.k8s.io/istio created
ingress.networking.k8s.io/ingress created#查看
[root@master1 istio-1.19.3]#kubectl get ingressclass
NAME    CONTROLLER                    PARAMETERS   AGE
istio   istio.io/ingress-controller   <none>       27s
[root@master1 istio-1.19.3]#kubectl get ingress
NAME      CLASS   HOSTS               ADDRESS   PORTS   AGE
ingress   istio   httpbin.k8s.local             80      35s
- 再次测试
[root@master1 istio-1.19.3]#curl -s -I -HHost:httpbin.k8s.local "http://$INGRESS_HOST:$INGRESS_PORT/status/200"
HTTP/1.1 200 OK
server: istio-envoy
date: Wed, 15 Nov 2023 12:51:24 GMT
content-type: text/html; charset=utf-8
access-control-allow-origin: *
access-control-allow-credentials: true
content-length: 0
x-envoy-upstream-service-time: 6[root@master1 istio-1.19.3]#curl -s -I -HHost:httpbin.k8s.local "http://$INGRESS_HOST:$INGRESS_PORT/headers"
HTTP/1.1 200 OK
server: istio-envoy
date: Wed, 15 Nov 2023 12:51:29 GMT
content-type: application/json
content-length: 597
access-control-allow-origin: *
access-control-allow-credentials: true
x-envoy-upstream-service-time: 12
符合预期,测试结束。😘
- 记得回收掉刚才创建的资源
[root@master1 istio-1.19.3]#kubectl delete -f httpbin-ingress2.yaml
ingressclass.networking.k8s.io "istio" deleted
ingress.networking.k8s.io "ingress" deleted
此外 Ingress 还可以进行 TLS 设置,Istio 支持此功能,但是引用的 Secret 必须存在于 istio-ingressgateway 部署的命名空间(通常是 istio-system)中。
通过 Kubernetes Ingress 我们可以将流量导入到 Istio 中,但是对于一些高级的流量管理功能,比如路由、熔断、限流等就很难实现了,所以我们还是建议使用 Istio 的 Gateway 资源来暴露流量入口。
Ingress Gateway
前面我们都是通过 Istio 提供的 Gateway 资源来暴露流量入口,与 Ingress 相比,Gateway 提供了更广泛的自定义和灵活性,并允许将 Istio 功能(例如监控和路由规则)应用于进入集群的流量。
Ingress Gateway
🚩 实战:Ingress Gateway-2023.11.15(测试成功)
实验环境:
k8s v1.27.6(containerd://1.6.20)(cni:flannel:v0.22.2)[root@master1 ~]#istioctl version
client version: 1.19.3
control plane version: 1.19.3
data plane version: 1.19.3 (8 proxies)
实验软件:
链接:https://pan.baidu.com/s/1C-ZlPHuXzzXGPAlNEYdySA?pwd=lpyx
提取码:lpyx
2023.11.15-实战:Ingress Gateway-2023.11.15(测试成功)

应用程序在以下链接里:
链接:https://pan.baidu.com/s/1pMnJxgL63oTlGFlhrfnXsA?pwd=7yqb
提取码:7yqb
2023.11.5-实战:BookInfo 示例应用-2023.11.5(测试成功)

实验步骤:

graph LRA[实战步骤] -->B(1、 部署服务端测试应用)A[实战步骤] -->C(2、 创建ingress)A[实战步骤] -->D(3、 测试)
Ingress Gateway 描述在网格边界运作的负载均衡器,用于接收传入的 HTTP/TCP 连接。它会配置暴露的端口、协议等,但与 Kubernetes Ingress 资源不同,Gateway 对象不会包括任何流量路由配置,和路由规则相关的配置需要使用 VirtualService 和 DestinationRule 资源来实现。
- 比如上面的
httpbin应用,如果通过Gateway对象来暴露流量入口,那么我们需要创建一个Gateway对象,然后再创建一个VirtualService对象来配置流量路由,内容如下所示:
#ingress-gateway.yaml
apiVersion: networking.istio.io/v1alpha3
kind: Gateway
metadata:name: httpbin-gateway
spec:selector:istio: ingressgatewayservers:- port:number: 80name: httpprotocol: HTTPhosts:- "httpbin.k8s.local"
---
apiVersion: networking.istio.io/v1alpha3
kind: VirtualService
metadata:name: httpbin
spec:hosts:- "httpbin.k8s.local"gateways:- httpbin-gatewayhttp:- match:- uri:prefix: /status- uri:prefix: /delayroute:- destination:port:number: 8000host: httpbin
上面的资源清单我们就通过 Gateway 对象暴露了 HTTP 流量的入口,然后通过 VirtualService 对象来配置流量路由,一共配置了两个路由规则,允许流量流向路径 /status 和 /delay。gateways 列表指定了哪些请求允许通 httpbin-gateway 网关,所有其他外部请求均被拒绝并返回 404 响应。
- 直接应用上面的资源清单
kubectl apply -f ingress-gateway.yaml
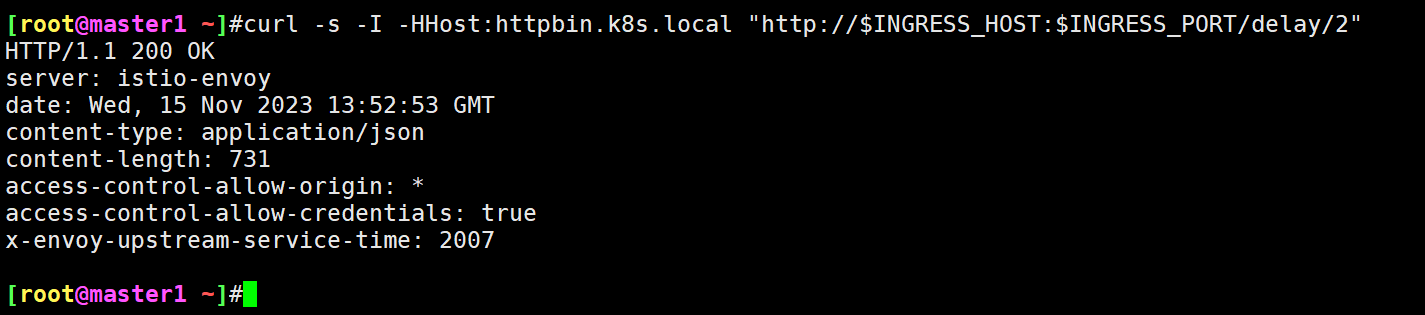
- 然后我们可以通过
curl来访问httpbin服务:
# 获取 Ingress Gateway 的地址和端口
export INGRESS_PORT=$(kubectl -n istio-system get service istio-ingressgateway -o jsonpath='{.spec.ports[?(@.name=="http2")].nodePort}')
export INGRESS_HOST=$(kubectl get pod -l istio=ingressgateway -n istio-system -o jsonpath='{.items[0].status.hostIP}')# 访问 httpbin 服务
$ curl -s -I -HHost:httpbin.k8s.local "http://$INGRESS_HOST:$INGRESS_PORT/status/200"
HTTP/1.1 200 OK
server: istio-envoy
date: Mon, 13 Nov 2023 06:32:58 GMT
content-type: text/html; charset=utf-8
# .......$ curl -s -I -HHost:httpbin.k8s.local "http://$INGRESS_HOST:$INGRESS_PORT/delay/2" #延迟2s
- 如果请求
/status、/delay以外的路径,将会返回 404 错误:
$ curl -s -I -HHost:httpbin.k8s.local "http://$INGRESS_HOST:$INGRESS_PORT/headers"
HTTP/1.1 404 Not Found
...
测试结束。😘
- 回收刚才创建的资源
kubectl delete -f ingress-gateway.yaml
当然除了这最基本的功能之外,Gateway 还支持很多其他高级功能,比如 TLS、SNI 等。
安全网关
我们已经了解了如何使用 Gateway 对象来对外暴露 HTTP 服务,那么我们如何使用 TLS 或 mTLS 来暴露安全的 HTTPS 服务呢?
🚩 实战:istio安全网关-2023.11.16(测试成功)
实验环境:
k8s v1.27.6(containerd://1.6.20)(cni:flannel:v0.22.2)[root@master1 ~]#istioctl version
client version: 1.19.3
control plane version: 1.19.3
data plane version: 1.19.3 (8 proxies)
实验软件:
链接:https://pan.baidu.com/s/1jw67Xvj-2ZYl3uuq59kO1g?pwd=p2mr
提取码:p2mr
–来自百度网盘超级会员V8的分享
2023.11.16-实战:istio安全网关-2023.11.16(测试成功)

应用程序在以下链接里:
链接:https://pan.baidu.com/s/1pMnJxgL63oTlGFlhrfnXsA?pwd=7yqb
提取码:7yqb
2023.11.5-实战:BookInfo 示例应用-2023.11.5(测试成功)
前期准备:
- 这里我们还是使用
httpbin应用来演示:
kubectl apply -f samples/httpbin/httpbin.yaml
接下来我们需要使用 openssl 命令来生成客户端和服务器证书和密钥。
⚠️ 注意:
以下证书、私钥创建的有点多哦,注意下。
(0)
- 首先创建用于服务签名的根证书和私钥:
mkdir example_certs1
openssl req -x509 -sha256 -nodes -days 365 -newkey rsa:2048 -subj '/O=example Inc./CN=example.com' -keyout example_certs1/example.com.key -out example_certs1/example.com.crt

[root@master1 ~]#ll example_certs1/
total 8
-rw-r--r-- 1 root root 1164 Nov 16 05:59 example.com.crt
-rw-r--r-- 1 root root 1708 Nov 16 05:59 example.com.key
(1)
- 接着为
httpbin.example.com创建证书和私钥:
openssl req -out example_certs1/httpbin.example.com.csr -newkey rsa:2048 -nodes -keyout example_certs1/httpbin.example.com.key -subj "/CN=httpbin.example.com/O=httpbin organization"openssl x509 -req -sha256 -days 365 -CA example_certs1/example.com.crt -CAkey example_certs1/example.com.key -set_serial 0 -in example_certs1/httpbin.example.com.csr -out example_certs1/httpbin.example.com.crt


- 创建第二组相同类型的证书和密钥:(用同一组根证书为一个域名签发了2套证书,用于后期测试)
mkdir example_certs2
openssl req -x509 -sha256 -nodes -days 365 -newkey rsa:2048 -subj '/O=example Inc./CN=example.com' -keyout example_certs2/example.com.key -out example_certs2/example.com.crtopenssl req -out example_certs2/httpbin.example.com.csr -newkey rsa:2048 -nodes -keyout example_certs2/httpbin.example.com.key -subj "/CN=httpbin.example.com/O=httpbin organization"
openssl x509 -req -sha256 -days 365 -CA example_certs2/example.com.crt -CAkey example_certs2/example.com.key -set_serial 0 -in example_certs2/httpbin.example.com.csr -out example_certs2/httpbin.example.com.crt
查看:
[root@master1 ~]#ll example_certs2/
total 20
-rw-r--r-- 1 root root 1164 Nov 16 06:08 example.com.crt
-rw-r--r-- 1 root root 1704 Nov 16 06:08 example.com.key
-rw-r--r-- 1 root root 1054 Nov 16 06:08 httpbin.example.com.crt
-rw-r--r-- 1 root root  948 Nov 16 06:08 httpbin.example.com.csr
-rw-r--r-- 1 root root 1704 Nov 16 06:08 httpbin.example.com.key
(2)
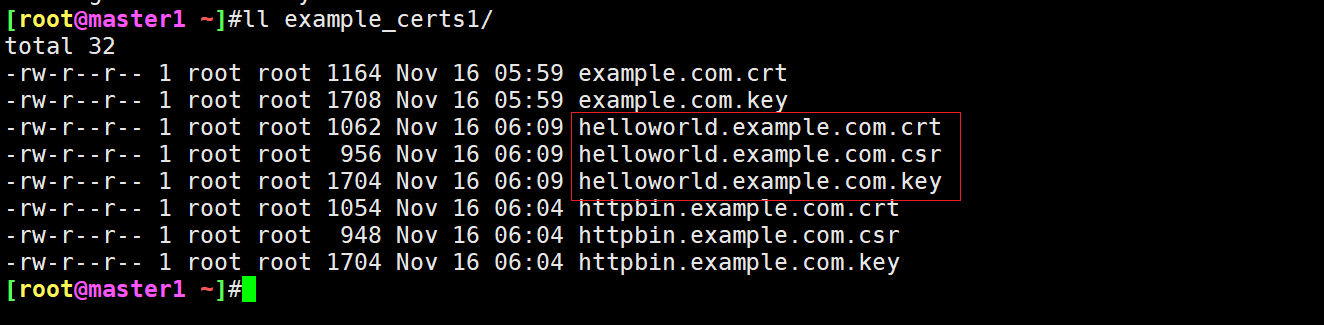
- 为
helloworld.example.com生成证书和私钥:
openssl req -out example_certs1/helloworld.example.com.csr -newkey rsa:2048 -nodes -keyout example_certs1/helloworld.example.com.key -subj "/CN=helloworld.example.com/O=helloworld organization"openssl x509 -req -sha256 -days 365 -CA example_certs1/example.com.crt -CAkey example_certs1/example.com.key -set_serial 1 -in example_certs1/helloworld.example.com.csr -out example_certs1/helloworld.example.com.crt
(3)
- 生成客户端证书和私钥:
openssl req -out example_certs1/client.example.com.csr -newkey rsa:2048 -nodes -keyout example_certs1/client.example.com.key -subj "/CN=client.example.com/O=client organization"openssl x509 -req -sha256 -days 365 -CA example_certs1/example.com.crt -CAkey example_certs1/example.com.key -set_serial 1 -in example_certs1/client.example.com.csr -out example_certs1/client.example.com.crt
- 您可以通过运行以下命令确认您拥有所有需要的文件:
$ ls example_cert*
example_certs1:
client.example.com.crt          example.com.key                 httpbin.example.com.crt
client.example.com.csr          helloworld.example.com.crt      httpbin.example.com.csr
client.example.com.key          helloworld.example.com.csr      httpbin.example.com.key
example.com.crt                 helloworld.example.com.keyexample_certs2:
example.com.crt         httpbin.example.com.crt httpbin.example.com.key
example.com.key         httpbin.example.com.csr
1.单主机配置 TLS Ingress Gateway
接下来我们就可以在 Gateway 对象中配置 TLS 了。
- 首先我们需要创建一个
Secret对象,用来存储证书和密钥:
$ kubectl create -n istio-system secret tls httpbin-credential \--key=example_certs1/httpbin.example.com.key \--cert=example_certs1/httpbin.example.com.crt
查看:
[root@master1 ~]#kubectl get secret -nistio-system
NAME                 TYPE                DATA   AGE
httpbin-credential   kubernetes.io/tls   2      11s
……
- 然后在
Gateway对象中需要定义一个443端口的网关,并将credentialName的值设置为httpbin-credential,该值与Secret的名称相同,TLS 模式的值应为SIMPLE,内容如下所示:
#tls-gateway.yaml
apiVersion: networking.istio.io/v1alpha3
kind: Gateway
metadata:name: mygateway
spec:selector:istio: ingressgateway # use istio default ingress gatewayservers:- port:number: 443name: httpsprotocol: HTTPStls:mode: SIMPLEcredentialName: httpbin-credential # 必须和 secret 对象名称一致hosts:- httpbin.example.com
- 接下来,通过定义相应的
VirtualService对象来配置网关的入口流量路由:
#tls-gateway.yaml
apiVersion: networking.istio.io/v1alpha3
kind: VirtualService
metadata:name: httpbin
spec:hosts:- "httpbin.example.com"gateways:- mygatewayhttp:- match:- uri:prefix: /status- uri:prefix: /delayroute:- destination:port:number: 8000host: httpbin
- 部署上面2个对象
完整清单:
#tls-gateway.yaml
apiVersion: networking.istio.io/v1alpha3
kind: Gateway
metadata:name: mygateway
spec:selector:istio: ingressgateway # use istio default ingress gatewayservers:- port:number: 443name: httpsprotocol: HTTPStls:mode: SIMPLEcredentialName: httpbin-credential # 必须和 secret 对象名称一致hosts:- httpbin.example.com---
apiVersion: networking.istio.io/v1alpha3
kind: VirtualService
metadata:name: httpbin
spec:hosts:- "httpbin.example.com"gateways:- mygatewayhttp:- match:- uri:prefix: /status- uri:prefix: /delayroute:- destination:port:number: 8000host: httpbin
部署:
[root@master1 istio-1.19.3]#kubectl apply -f tls-gateway.yaml
gateway.networking.istio.io/mygateway created
virtualservice.networking.istio.io/httpbin created
查看:
[root@master1 istio-1.19.3]#kubectl get gateway
NAME               AGE
……
mygateway          26s
[root@master1 istio-1.19.3]#kubectl get vs
NAME          GATEWAYS               HOSTS                     AGE
……
httpbin       ["mygateway"]          ["httpbin.example.com"]   26s
……
- 应用上面的资源对象后,我们就可以向
httpbin服务发送 HTTPS 请求了:
这里要用到的是istio-ingressgateway的443端口:
[root@master1 istio-1.19.3]#kubectl get svc -nistio-system
NAME                   TYPE           CLUSTER-IP       EXTERNAL-IP   PORT(S)                                                                      AGE
istio-egressgateway    ClusterIP      10.109.85.119    <none>        80/TCP,443/TCP                                                               8d
istio-ingressgateway   LoadBalancer   10.105.233.167   <pending>     15021:31410/TCP,80:31666/TCP,443:32213/TCP,31400:30291/TCP,15443:31787/TCP   8d
istiod                 ClusterIP      10.109.185.251   <none>        15010/TCP,15012/TCP,443/TCP,15014/TCP                                        8d
# 获取 Ingress Gateway 的地址和 HTTPS 端口
export INGRESS_HOST=$(kubectl get pod -l istio=ingressgateway -n istio-system -o jsonpath='{.items[0].status.hostIP}')
export SECURE_INGRESS_PORT=$(kubectl -n istio-system get service istio-ingressgateway -o jsonpath='{.spec.ports[?(@.name=="https")].nodePort}')
echo $INGRESS_HOST
echo $SECURE_INGRESS_PORT
#[root@master1 istio-1.19.3]#echo $INGRESS_HOST
#172.29.9.63
#[root@master1 istio-1.19.3]#echo $SECURE_INGRESS_PORT
#32213# 访问 httpbin 服务
$ curl -v -HHost:httpbin.example.com --resolve "httpbin.example.com:$SECURE_INGRESS_PORT:$INGRESS_HOST" \--cacert example_certs1/example.com.crt "https://httpbin.example.com:$SECURE_INGRESS_PORT/status/418"
# ......
* Initializing NSS with certpath: sql:/etc/pki/nssdb
*   CAfile: example_certs1/example.com.crtCApath: none
* SSL connection using TLS_ECDHE_RSA_WITH_AES_128_GCM_SHA256
* Server certificate:
*       subject: O=httpbin organization,CN=httpbin.example.com
*       start date: Nov 13 06:58:40 2023 GMT
*       expire date: Nov 12 06:58:40 2024 GMT
*       common name: httpbin.example.com
*       issuer: CN=example.com,O=example Inc.
> GET /status/418 HTTP/1.1
> User-Agent: curl/7.29.0
> Accept: */*
> Host:httpbin.example.com
>
< HTTP/1.1 418 Unknown
< server: istio-envoy
# ......-=[ teapot ]=-_...._.'  _ _ `.| ."` ^ `". _,\_;`"---"`|//|       ;/\_     _/`"""`

- 接着我们可以删除网关的 Secret 然后使用不同的证书和密钥重新创建它来更改网关的凭据:
kubectl -n istio-system delete secret httpbin-credential# 创建新的证书和密钥
kubectl create -n istio-system secret tls httpbin-credential \--key=example_certs2/httpbin.example.com.key \--cert=example_certs2/httpbin.example.com.crt
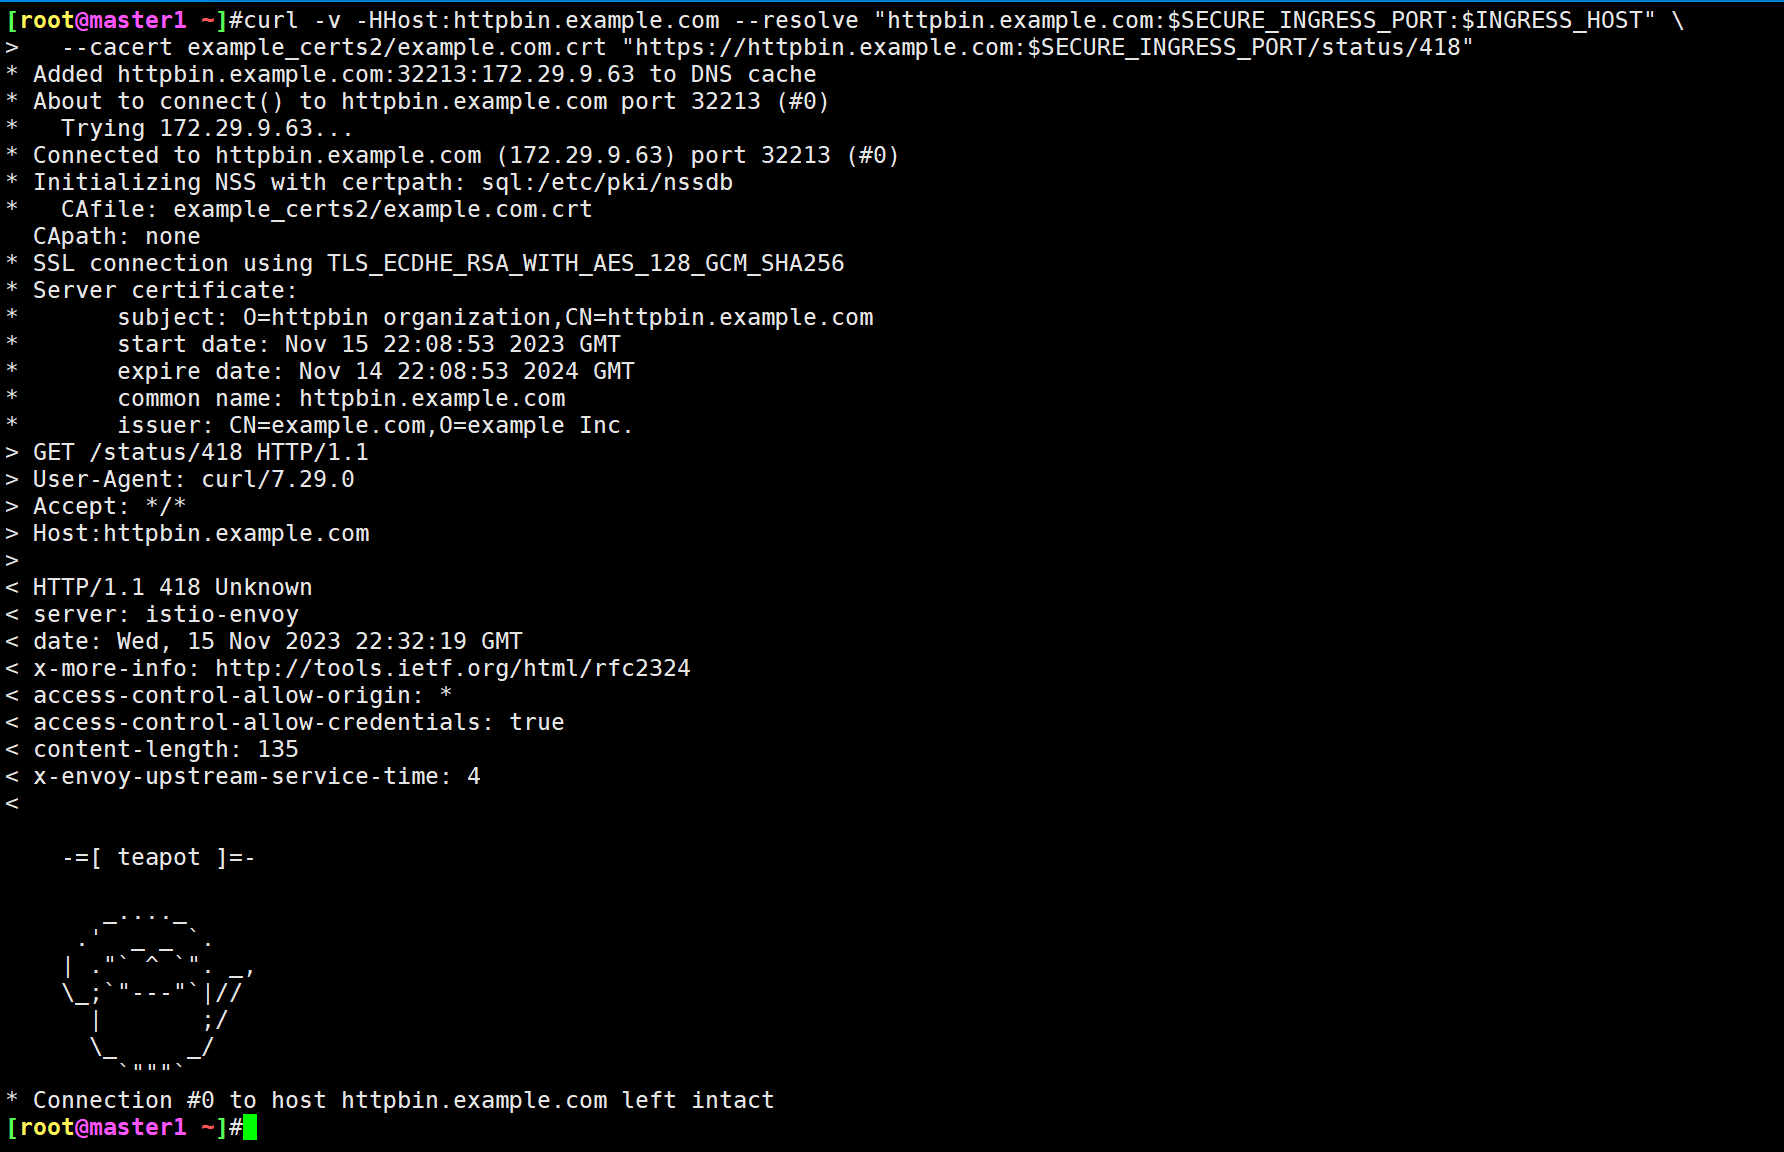
- 使用新的证书链和
curl来访问httpbin服务:
$ curl -v -HHost:httpbin.example.com --resolve "httpbin.example.com:$SECURE_INGRESS_PORT:$INGRESS_HOST" \--cacert example_certs2/example.com.crt "https://httpbin.example.com:$SECURE_INGRESS_PORT/status/418"
...
HTTP/1.1 418 Unknown
...-=[ teapot ]=-_...._.'  _ _ `.| ."` ^ `". _,\_;`"---"`|//|       ;/\_     _/`"""`
- 如果使用之前的证书链来访问 httpbin,则会失败:
$ curl -v -HHost:httpbin.example.com --resolve "httpbin.example.com:$SECURE_INGRESS_PORT:$INGRESS_HOST" \--cacert example_certs1/example.com.crt "https://httpbin.example.com:$SECURE_INGRESS_PORT/status/418"
# ......
* Initializing NSS with certpath: sql:/etc/pki/nssdb
*   CAfile: example_certs1/example.com.crtCApath: none
* Server certificate:
*       subject: O=httpbin organization,CN=httpbin.example.com
*       start date: Nov 13 06:59:17 2023 GMT
*       expire date: Nov 12 06:59:17 2024 GMT
*       common name: httpbin.example.com
*       issuer: CN=example.com,O=example Inc.
* NSS error -8182 (SEC_ERROR_BAD_SIGNATURE)
* Peer's certificate has an invalid signature.
* Closing connection 0
curl: (60) Peer's certificate has an invalid signature.
# ......
测试结束。😘
2.多个主机配置 TLS Ingress Gateway
上面是为单个主机配置 TLS 入口网关的方法。
此外我们还可以为多个主机(例如 httpbin.example.com 和 helloworld-v1.example.com)配置入口网关,入口网关配置有与每个主机相对应的唯一凭据。
- 首先删除并使用原始证书和密钥重新创建 Secret 来恢复上一个示例中的
httpbin凭据:
kubectl -n istio-system delete secret httpbin-credentialkubectl create -n istio-system secret tls httpbin-credential \--key=example_certs1/httpbin.example.com.key \--cert=example_certs1/httpbin.example.com.crt
- 然后我们启动
helloworld-v1示例:
还可以这样搞哦:
# 创建 service=helloworld 的服务
$ kubectl apply -f samples/helloworld/helloworld.yaml -l service=helloworld# 创建 version=v1 的应用
$ kubectl apply -f samples/helloworld/helloworld.yaml -l version=v1
- 然后创建
helloworld-credentialSecret:
$ kubectl create -n istio-system secret tls helloworld-credential --key=example_certs1/helloworld.example.com.key --cert=example_certs1/helloworld.example.com.crt
- 然后使用
httpbin.example.com和helloworld.example.com主机配置入口网关,创建如下所示的Gateway对象:
#tls2-gateway.yaml
apiVersion: networking.istio.io/v1alpha3
kind: Gateway
metadata:name: mygateway
spec:selector:istio: ingressgateway # use istio default ingress gatewayservers:- port:number: 443name: https-httpbinprotocol: HTTPStls:mode: SIMPLEcredentialName: httpbin-credentialhosts:- httpbin.example.com- port:number: 443name: https-helloworldprotocol: HTTPStls:mode: SIMPLEcredentialName: helloworld-credentialhosts:- helloworld.example.com
这里我们为 443 端口定义一个具有两个 server 配置的网关,将每个端口上的 credentialName 值分别设置为 httpbin-credential 和 helloworld-credential,将 TLS 模式设置为 SIMPLE。
- 然后定义相应的
VirtualService来配置网关的流量路由。
#tls2-gateway.yaml
apiVersion: networking.istio.io/v1alpha3
kind: VirtualService
metadata:name: helloworld
spec:hosts:- helloworld.example.comgateways:- mygatewayhttp:- match:- uri:exact: /helloroute:- destination:host: helloworldport:number: 5000
- 直接应用上面的资源对象即可
完整清单如下:
#tls2-gateway.yaml
apiVersion: networking.istio.io/v1alpha3
kind: Gateway
metadata:name: mygateway
spec:selector:istio: ingressgateway # use istio default ingress gatewayservers:- port:number: 443name: https-httpbinprotocol: HTTPStls:mode: SIMPLEcredentialName: httpbin-credentialhosts:- httpbin.example.com- port:number: 443name: https-helloworldprotocol: HTTPStls:mode: SIMPLEcredentialName: helloworld-credentialhosts:- helloworld.example.com---
apiVersion: networking.istio.io/v1alpha3
kind: VirtualService
metadata:name: helloworld
spec:hosts:- helloworld.example.comgateways:- mygatewayhttp:- match:- uri:exact: /helloroute:- destination:host: helloworldport:number: 5000
部署:
kubectl apply -f tls2-gateway.yaml
查看:
[root@master1 ~]#kubectl get gateway
NAME               AGE
mygateway          20m
[root@master1 ~]#kubectl get vs
NAME          GATEWAYS               HOSTS                        AGE
helloworld    ["mygateway"]          ["helloworld.example.com"]   19s
httpbin       ["mygateway"]          ["httpbin.example.com"]      20m
- 然后向
helloworld.example.com发送 HTTPS 请求:
$ curl -v -HHost:helloworld.example.com --resolve "helloworld.example.com:$SECURE_INGRESS_PORT:$INGRESS_HOST" \--cacert example_certs1/example.com.crt "https://helloworld.example.com:$SECURE_INGRESS_PORT/hello"
# ......
* Initializing NSS with certpath: sql:/etc/pki/nssdb
*   CAfile: example_certs1/example.com.crtCApath: none
* SSL connection using TLS_ECDHE_RSA_WITH_AES_128_GCM_SHA256
* Server certificate:
*       subject: O=helloworld organization,CN=helloworld.example.com
*       start date: Nov 13 07:01:57 2023 GMT
*       expire date: Nov 12 07:01:57 2024 GMT
*       common name: helloworld.example.com
*       issuer: CN=example.com,O=example Inc.
# ......
< HTTP/1.1 200 OK
# ......
Hello version: v1, instance: helloworld-v1-b6c45f55-85l49

- 同样向
httpbin.example.com发送一个 HTTPS 请求,仍然返回一个茶壶:
$ curl -v -HHost:httpbin.example.com --resolve "httpbin.example.com:$SECURE_INGRESS_PORT:$INGRESS_HOST" \--cacert example_certs1/example.com.crt "https://httpbin.example.com:$SECURE_INGRESS_PORT/status/418"
# ......-=[ teapot ]=-_...._.'  _ _ `.| ."` ^ `". _,\_;`"---"`|//|       ;/\_     _/`"""`
测试结束。😘
3.双向 TLS Ingress Gateway
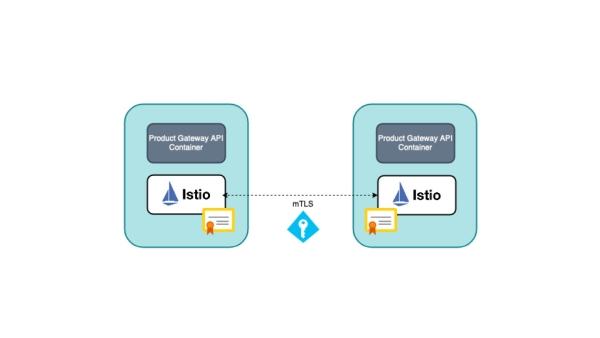
同样我们还可以扩展网关的定义以支持双向 TLS。双向 TLS 简称 mTLS,是一种相互身份验证的方法。mTLS 通过验证他们都拥有正确的私人密钥来确保网络连接两端的各方都是他们声称的身份。他们各自的 TLS 证书中的信息提供了额外的验证。
k8s里很多地方都是一个双向认证。
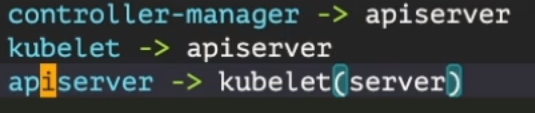
通常在 TLS 中,服务器有一个 TLS 证书和一个公钥/私钥对,而客户端没有,典型的 TLS 流程是这样运作的:
- 客户端连接到服务器
- 服务器出示其 TLS 证书
- 客户端验证服务器的证书
- 客户端和服务器通过加密的 TLS 连接交换信息

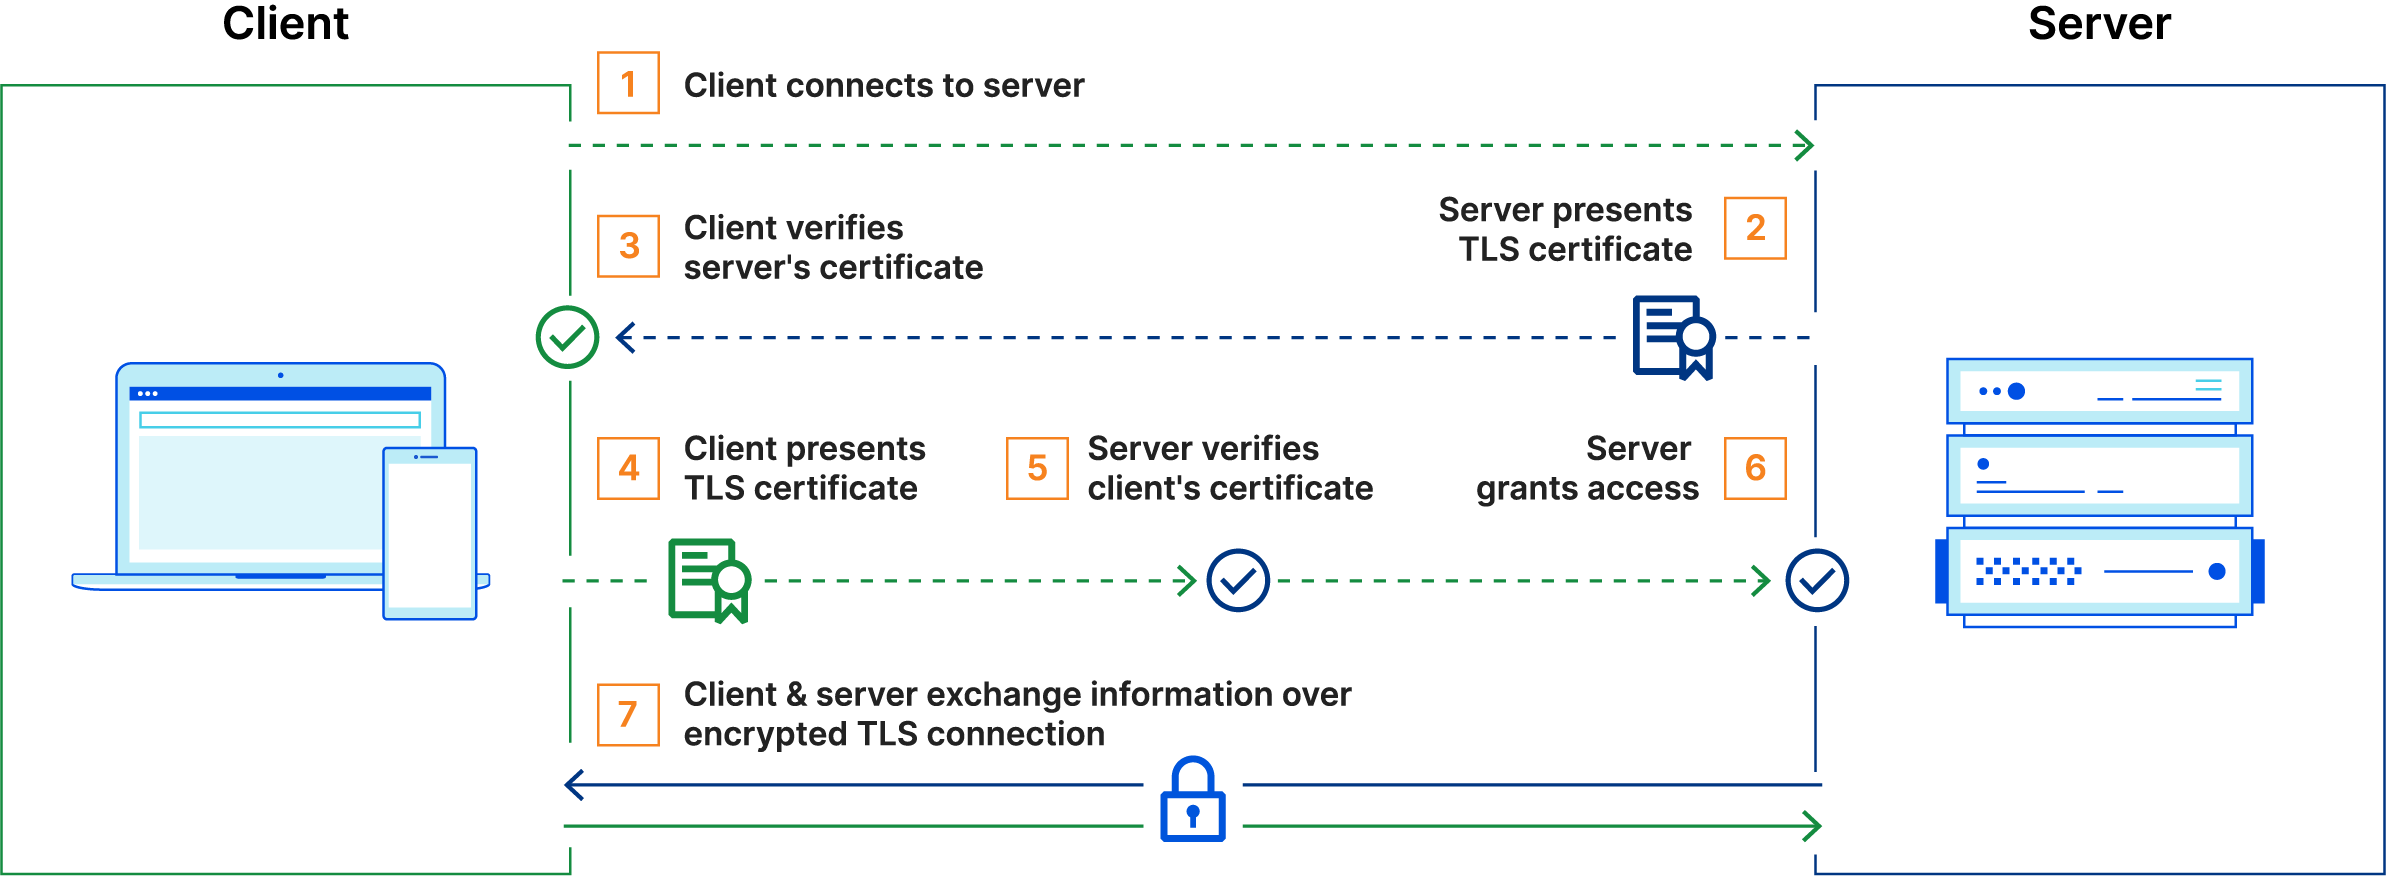
然而,在 mTLS 中,客户端和服务器都有一个证书,并且双方都使用它们的公钥/私钥对进行身份验证。与常规 TLS 相比,mTLS 中有一些额外步骤来验证双方。
- 客户端连接到服务器
- 服务器出示其 TLS 证书
- 客户端验证服务器的证书
- 客户端出示其 TLS 证书
- 服务器验证客户端的证书
- 服务器授予访问权限
- 客户端和服务器通过加密的 TLS 连接交换信息
接下来我们就来使用 mTLS 来配置 Ingress Gateway。
- 首先还是删除其 Secret 并创建一个新的来更改入口网关的凭据,需要注意的是服务器使用 CA 证书来验证其客户端,我们必须使用名称
cacert来持有 CA 证书。
$ kubectl -n istio-system delete secret httpbin-credential$ kubectl create -n istio-system secret generic httpbin-credential \--from-file=tls.key=example_certs1/httpbin.example.com.key \--from-file=tls.crt=example_certs1/httpbin.example.com.crt \--from-file=ca.crt=example_certs1/example.com.crt
- 接下来更改
Gateway的定义将 TLS 模式设置为MUTUAL。
#tls3-gateway.yaml
apiVersion: networking.istio.io/v1alpha3
kind: Gateway
metadata:name: mygateway
spec:selector:istio: ingressgateway # use istio default ingress gatewayservers:- port:number: 443name: httpsprotocol: HTTPStls:mode: MUTUAL # 设置为 MUTUAL,双向 TLScredentialName: httpbin-credentialhosts:- httpbin.example.com
部署:
kubectl apply -f tls3-gateway.yaml
- 应用后我们来尝试使用之前的方法发送 HTTPS 请求:
$ curl -v -HHost:httpbin.example.com --resolve "httpbin.example.com:$SECURE_INGRESS_PORT:$INGRESS_HOST" \
--cacert example_certs1/example.com.crt "https://httpbin.example.com:$SECURE_INGRESS_PORT/status/418"
# ......
*   CAfile: example_certs1/example.com.crtCApath: none
* NSS: client certificate not found (nickname not specified)
* NSS error -12227 (SSL_ERROR_HANDSHAKE_FAILURE_ALERT)
* SSL peer was unable to negotiate an acceptable set of security parameters.
* Closing connection 0
curl: (35) NSS: client certificate not found (nickname not specified)
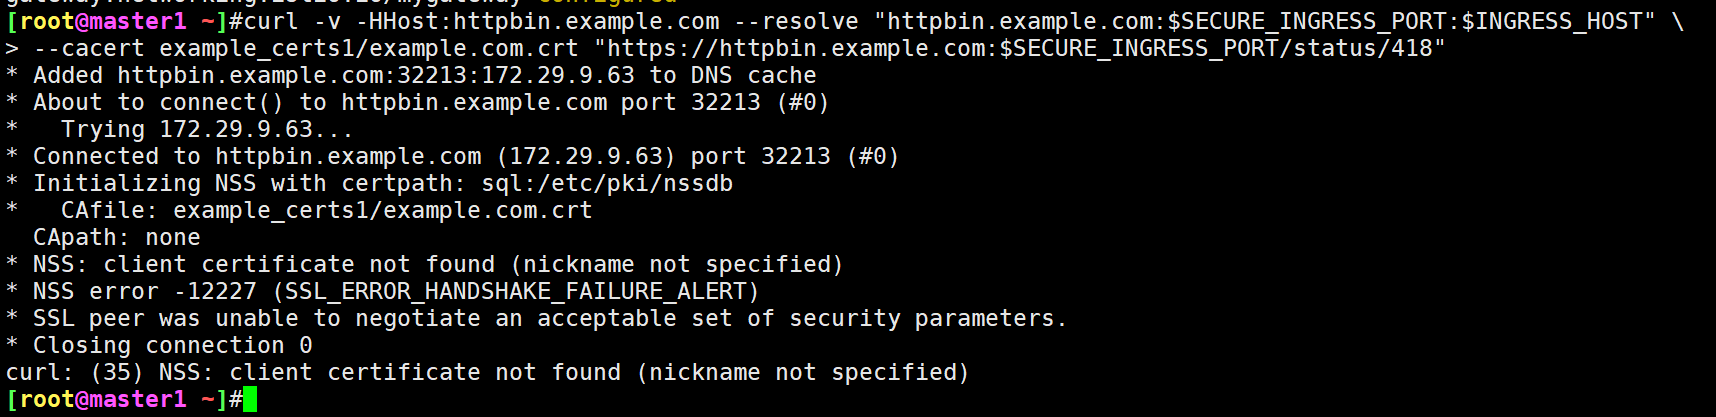
- 从提示可以看出,客户端证书没有找到,由于我们这里配置的是双向 TLS 的方式,我们没有将客户端证书传递给 curl,我们可以通过
--cert和--key标志来进行传递:
$ curl -v -HHost:httpbin.example.com --resolve "httpbin.example.com:$SECURE_INGRESS_PORT:$INGRESS_HOST" \--cacert example_certs1/example.com.crt --cert example_certs1/client.example.com.crt --key example_certs1/client.example.com.key \"https://httpbin.example.com:$SECURE_INGRESS_PORT/status/418"
# ......
* Initializing NSS with certpath: sql:/etc/pki/nssdb
*   CAfile: example_certs1/example.com.crtCApath: none
* NSS: client certificate from file
*       subject: O=client organization,CN=client.example.com
*       start date: Nov 13 07:02:22 2023 GMT
*       expire date: Nov 12 07:02:22 2024 GMT
*       common name: client.example.com
*       issuer: CN=example.com,O=example Inc.
* SSL connection using TLS_ECDHE_RSA_WITH_AES_128_GCM_SHA256
* Server certificate:
*       subject: O=httpbin organization,CN=httpbin.example.com
*       start date: Nov 13 06:58:40 2023 GMT
*       expire date: Nov 12 06:58:40 2024 GMT
*       common name: httpbin.example.com
*       issuer: CN=example.com,O=example Inc.
< HTTP/1.1 418 Unknown
# ......
<-=[ teapot ]=-_...._.'  _ _ `.| ."` ^ `". _,\_;`"---"`|//|       ;/\_     _/`"""`
到这里我们就验证了通过 TLS 或 mTLS 将服务暴露到服务网格外。
- 测试完成后记得清理下资源:(6)
# 删除网关配置和路由:
kubectl delete gateway mygateway
kubectl delete virtualservice httpbin helloworld# 删除 Secret、证书和密钥:
kubectl delete -n istio-system secret httpbin-credential helloworld-credential
rm -rf ./example_certs1 ./example_certs2# 关闭 httpbin 和 helloworld 服务:
kubectl delete -f samples/httpbin/httpbin.yaml
kubectl delete deployment helloworld-v1
kubectl delete service helloworld
Ingress Gateway TLS 透传
前面我们了解了如何为 HTTP 服务配置 HTTPS 访问入口,那如果我们的后台服务本身就是 HTTPS 的,那么如何为 HTTPS 服务配置 HTTPS 访问入口,即配置 Ingress Gateway 执行 SNI 透传,而不是对传入请求进行 TLS 终止。
既然提到了 TLS 终止,那么我们可以先了解下什么是 TLS 终止(TLS Termination)。

1.TLS Termination
它的主要作用是,作为一个前置代理服务器接收外部到达的加密 TLS 流量,然后将其解密为 HTTP 明文,最后再将流量转发到内部的某个服务。
在实际应用中,内部的服务通常是以 HTTP 明文的方式通信,然后通过一个边界入口网关(ingress gateway)统一处理所有的 TLS 流量。这样 TLS 对所有的内部服务都是透明的,无需对每个服务去配置证书和私钥。通过一个统一的入口配置,我们还可以做很多事情,如日志,路由,路由策略等。
当然,对于一些安全级别较高的内部服务来说,未加密的流量可能是不可接受的,我们也可以配置来将加密的流量透传到该服务中,也就是这里我们需要的 SNI 透传。
同样的如果反过来,就是 TLS Origination。
2.TLS Origination
作为一个代理服务器,接收内部服务的 HTTP 明文流量,然后将其加密,最后转发到一个 HTTPS 服务上,该服务既可以是内部,也可以是外部的,但看起来就像是一个内部的服务,流程如下,

作为与边界入口网关对立的存在,出口网关也通常放置在网络的边界。所有的出口流量都被它接管,在这个节点上我们可以统一实施一些访问控制策略,或监控,或日志等,这和 Ingres Gateway 的功能其实是一样的,最大的不同在于将明文流量加密再转发。
3.TLS 透传
🚩 实战:TLS 透传-2023.11.16(测试成功)
实验环境:
k8s v1.27.6(containerd://1.6.20)(cni:flannel:v0.22.2)[root@master1 ~]#istioctl version
client version: 1.19.3
control plane version: 1.19.3
data plane version: 1.19.3 (8 proxies)
实验软件:
链接:https://pan.baidu.com/s/1tpP4vWjOUqNyW2rBLqzVZg?pwd=0l54
提取码:0l54
–来自百度网盘超级会员V8的分享
2023.11.16-实战:TLS 透传-2023.11.16(测试成功)
接下来我们用一个 NGINX 服务来演示下 TLS 透传的配置。首先在 Kubernetes 集群中创建一个 NGINX 服务,然后通过 Gateway 给这个服务配置一个域名是 nginx.example.com 的访问入口。
首先生成客户端和服务端的证书和密钥,同样我们这里使用 openssl 命令来生成。
- 创建根证书和私钥来为你的服务签名证书:
openssl req -x509 -sha256 -nodes -days 365 -newkey rsa:2048 -subj '/O=example Inc./CN=example.com' -keyout example.com.key -out example.com.crt
- 为
nginx.example.com创建证书和私钥:
openssl req -out nginx.example.com.csr -newkey rsa:2048 -nodes -keyout nginx.example.com.key -subj "/CN=nginx.example.com/O=some organization"openssl x509 -req -sha256 -days 365 -CA example.com.crt -CAkey example.com.key -set_serial 0 -in nginx.example.com.csr -out nginx.example.com.crt
查看:
[root@master1 ~]#ll nginx.example.com.*
-rw-r--r-- 1 root root 1050 Nov 16 07:24 nginx.example.com.crt
-rw-r--r-- 1 root root  940 Nov 16 07:24 nginx.example.com.csr
-rw-r--r-- 1 root root 1704 Nov 16 07:24 nginx.example.com.key
- 接着创建一个 Kubernetes 的 Secret 资源来保存服务的证书:
kubectl create secret tls nginx-server-certs --key nginx.example.com.key --cert nginx.example.com.crt
- 为 NGINX 服务创建一个配置文件:
cat <<\EOF > ./nginx.conf
events {
}http {log_format main '$remote_addr - $remote_user [$time_local]  $status ''"$request" $body_bytes_sent "$http_referer" ''"$http_user_agent" "$http_x_forwarded_for"';access_log /var/log/nginx/access.log main;error_log  /var/log/nginx/error.log;server {listen 443 ssl;root /usr/share/nginx/html;index index.html;server_name nginx.example.com;ssl_certificate /etc/nginx-server-certs/tls.crt;ssl_certificate_key /etc/nginx-server-certs/tls.key;}
}
EOF
- 创建一个 Kubernetes 的 ConfigMap 资源来保存 NGINX 服务的配置:
kubectl create configmap nginx-configmap --from-file=nginx.conf=./nginx.conf
- 部署 NGINX 服务
cat <<EOF | istioctl kube-inject -f - | kubectl apply -f -
apiVersion: v1
kind: Service
metadata:name: my-nginxlabels:run: my-nginx
spec:ports:- port: 443protocol: TCPselector:run: my-nginx
---
apiVersion: apps/v1
kind: Deployment
metadata:name: my-nginx
spec:selector:matchLabels:run: my-nginxtemplate:metadata:labels:run: my-nginxspec:containers:- name: my-nginximage: nginxports:- containerPort: 443volumeMounts:- name: nginx-configmountPath: /etc/nginxreadOnly: true- name: nginx-server-certsmountPath: /etc/nginx-server-certsreadOnly: truevolumes:- name: nginx-configconfigMap:name: nginx-configmap- name: nginx-server-certssecret:secretName: nginx-server-certs
EOF
- 要测试 NGINX 服务是否已成功部署,需要从其 Sidecar 代理发送请求,并忽略检查服务端的证书(使用
curl的-k选项)。确保正确打印服务端的证书,即common name (CN)等于nginx.example.com即可:
$ kubectl get pods -l run=my-nginx
NAME                        READY   STATUS    RESTARTS   AGE
my-nginx-74df679cd5-5g7ss   2/2     Running   0          5m47s$ kubectl exec "$(kubectl get pod  -l run=my-nginx -o jsonpath={.items..metadata.name})" -c istio-proxy -- curl -sS -v -k --resolve nginx.example.com:443:127.0.0.1 https://nginx.example.com
# ......
* SSL connection using TLSv1.2 / ECDHE-RSA-AES256-GCM-SHA384
* ALPN, server accepted to use http/1.1
* Server certificate:
*  subject: CN=nginx.example.com; O=some organization
*  start date: Nov 13 08:27:26 2023 GMT
*  expire date: Nov 12 08:27:26 2024 GMT
*  issuer: O=example Inc.; CN=example.com
*  SSL certificate verify result: unable to get local issuer certificate (20), continuing anyway.
* TLSv1.2 (OUT), TLS header, Supplemental data (23):
} [5 bytes data]> GET / HTTP/1.1
> User-Agent: curl/7.58.0
> Host: nginx.example.com
# ......
<!DOCTYPE html>
<html>
<head>
<title>Welcome to nginx!</title>
<style>
html { color-scheme: light dark; }
body { width: 35em; margin: 0 auto;
font-family: Tahoma, Verdana, Arial, sans-serif; }
</style>
</head>
# ......
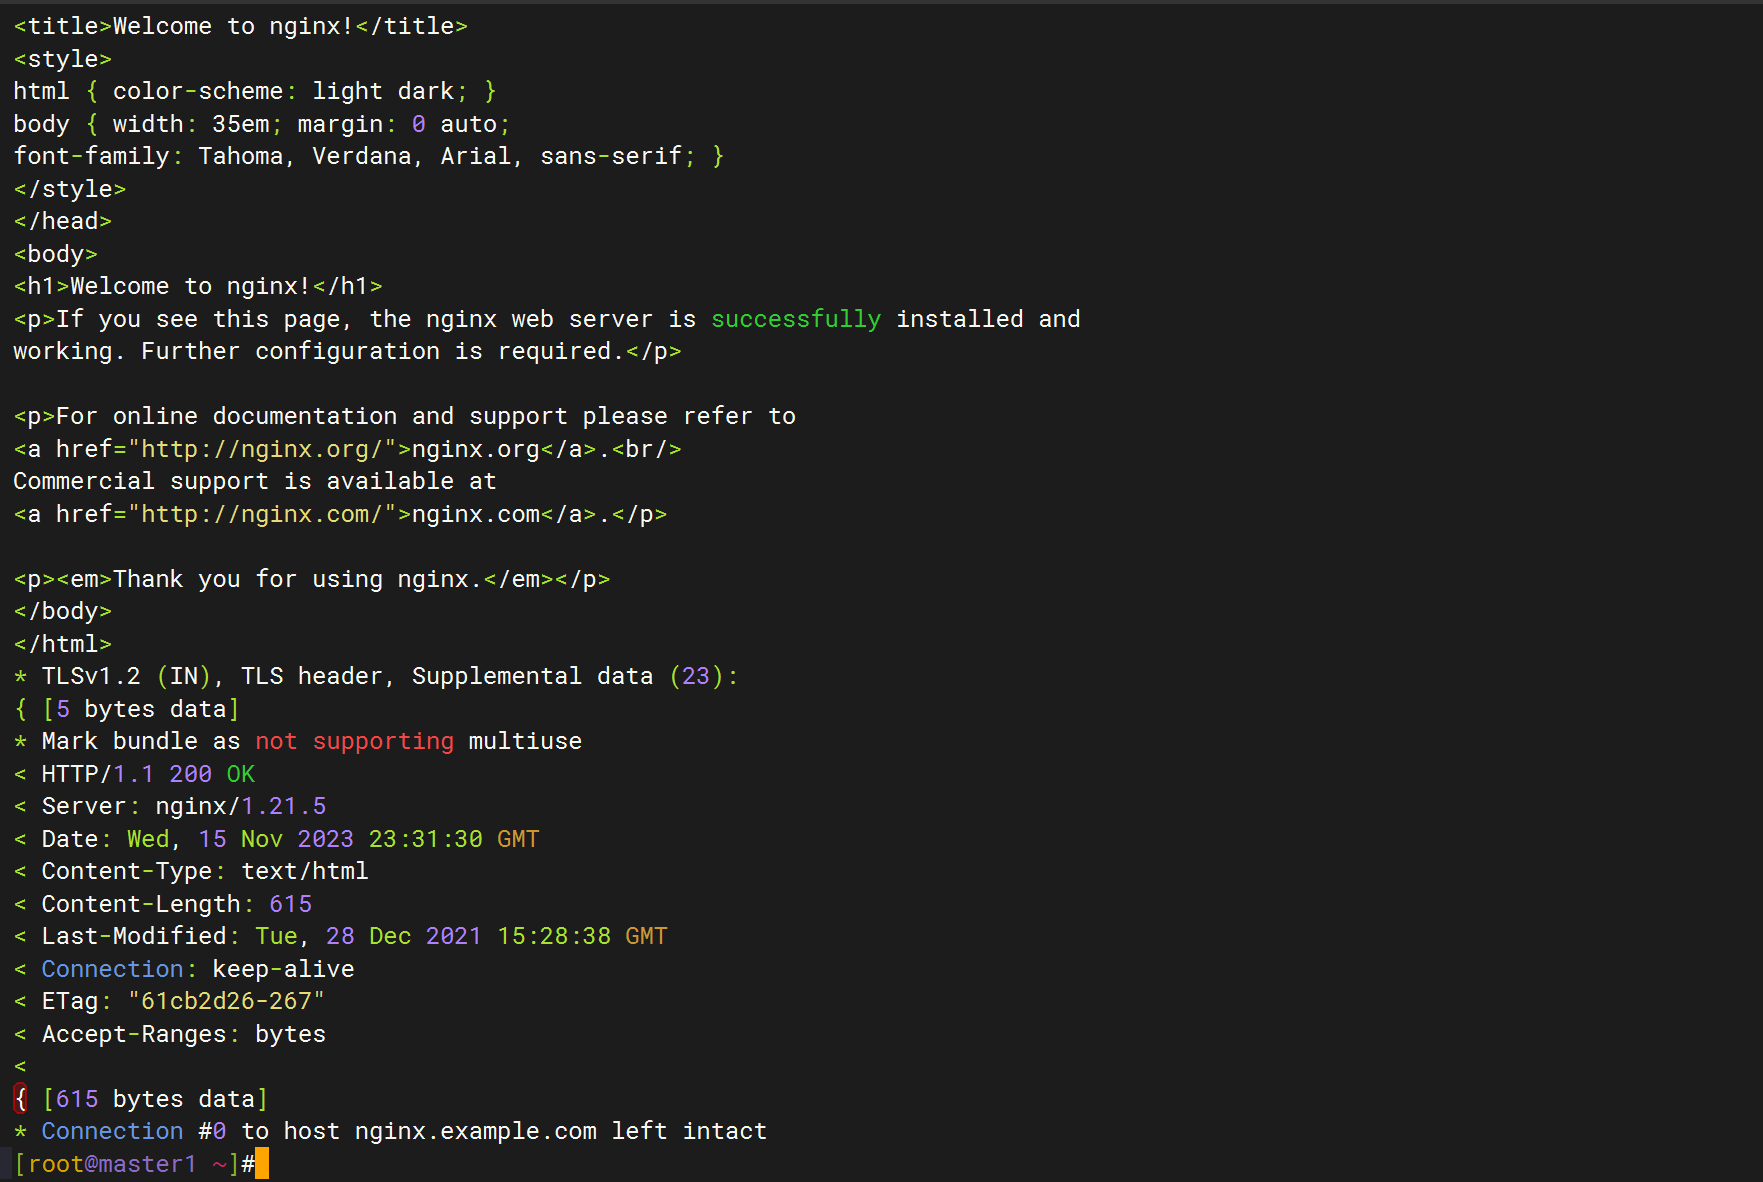
到这里我们的 HTTPS 服务就准备好了。
- 接下来我们就可以配置 Ingress Gateway 来将流量透传到 NGINX 服务中了,在
Gateway对象中定义 443 端口的网关,需要注意的是将 TLS 模式设置为PASSTHROUGH,该模式指示Gateway以透传方式传递入口流量,而不终止 TLS,内容如下所示:
#tls4-gateway.yaml
apiVersion: networking.istio.io/v1alpha3
kind: Gateway
metadata:name: mygateway
spec:selector:istio: ingressgateway # use istio default ingress gatewayservers:- port:number: 443name: httpsprotocol: HTTPStls:mode: PASSTHROUGHhosts:- nginx.example.com
- 然后为通过
Gateway进入的流量配置路由规则:
#tls4-gateway.yaml
apiVersion: networking.istio.io/v1alpha3
kind: VirtualService
metadata:name: nginx
spec:hosts:- nginx.example.comgateways:- mygatewaytls:- match:- port: 443sniHosts: # 指定 SNI 主机名- nginx.example.comroute:- destination:host: my-nginxport:number: 443
需要注意的是,这里的 VirtualService 对象中我们配置的 tls 字段了,描述了用于路由未终止的 TLS 流量(TLS/HTTPS)的匹配条件和动作。它通过 sniHosts 指定了 SNI 主机名,以便 Gateway 可以将流量路由到正确的 VirtualService。
- 部署资源
完整清单如下:
#tls4-gateway.yaml
apiVersion: networking.istio.io/v1alpha3
kind: Gateway
metadata:name: mygateway
spec:selector:istio: ingressgateway # use istio default ingress gatewayservers:- port:number: 443name: httpsprotocol: HTTPStls:mode: PASSTHROUGHhosts:- nginx.example.com---
apiVersion: networking.istio.io/v1alpha3
kind: VirtualService
metadata:name: nginx
spec:hosts:- nginx.example.comgateways:- mygatewaytls:- match:- port: 443sniHosts: # 指定 SNI 主机名- nginx.example.comroute:- destination:host: my-nginxport:number: 443
部署:
[root@master1 ~]#kubectl apply -f tls4-gateway.yaml
gateway.networking.istio.io/mygateway created
virtualservice.networking.istio.io/nginx created
- 应用上面的资源对象后,我们就可以向
nginx.example.com发送 HTTPS 请求了:
# 获取 Ingress Gateway 的地址和 HTTPS 端口
export INGRESS_HOST=$(kubectl get pod -l istio=ingressgateway -n istio-system -o jsonpath='{.items[0].status.hostIP}')
export SECURE_INGRESS_PORT=$(kubectl -n istio-system get service istio-ingressgateway -o jsonpath='{.spec.ports[?(@.name=="https")].nodePort}')# 访问 nginx 服务
$ curl -v --resolve "nginx.example.com:$SECURE_INGRESS_PORT:$INGRESS_HOST" --cacert example.com.crt "https://nginx.example.com:$SECURE_INGRESS_PORT"
# ......
* SSL connection using TLS_ECDHE_RSA_WITH_AES_256_GCM_SHA384
* Server certificate:
*       subject: O=some organization,CN=nginx.example.com
*       start date: Nov 13 08:27:26 2023 GMT
*       expire date: Nov 12 08:27:26 2024 GMT
*       common name: nginx.example.com
*       issuer: CN=example.com,O=example Inc.
> GET / HTTP/1.1
> User-Agent: curl/7.29.0
> Host: nginx.example.com:30808
> Accept: */*
>
< HTTP/1.1 200 OK
< Server: nginx/1.21.5
< Date: Mon, 13 Nov 2023 08:50:27 GMT
< Content-Type: text/html
< Content-Length: 615
< Last-Modified: Tue, 28 Dec 2021 15:28:38 GMT
< Connection: keep-alive
< ETag: "61cb2d26-267"
< Accept-Ranges: bytes
<
<!DOCTYPE html>
<html>
<head>
<title>Welcome to nginx!</title>
<style>
html { color-scheme: light dark; }
body { width: 35em; margin: 0 auto;
font-family: Tahoma, Verdana, Arial, sans-serif; }
</style>
</head>
<body>
<h1>Welcome to nginx!</h1>
<p>If you see this page, the nginx web server is successfully installed and
working. Further configuration is required.</p><p>For online documentation and support please refer to
<a href="http://nginx.org/">nginx.org</a>.<br/>
Commercial support is available at
<a href="http://nginx.com/">nginx.com</a>.</p><p><em>Thank you for using nginx.</em></p>
</body>
</html>
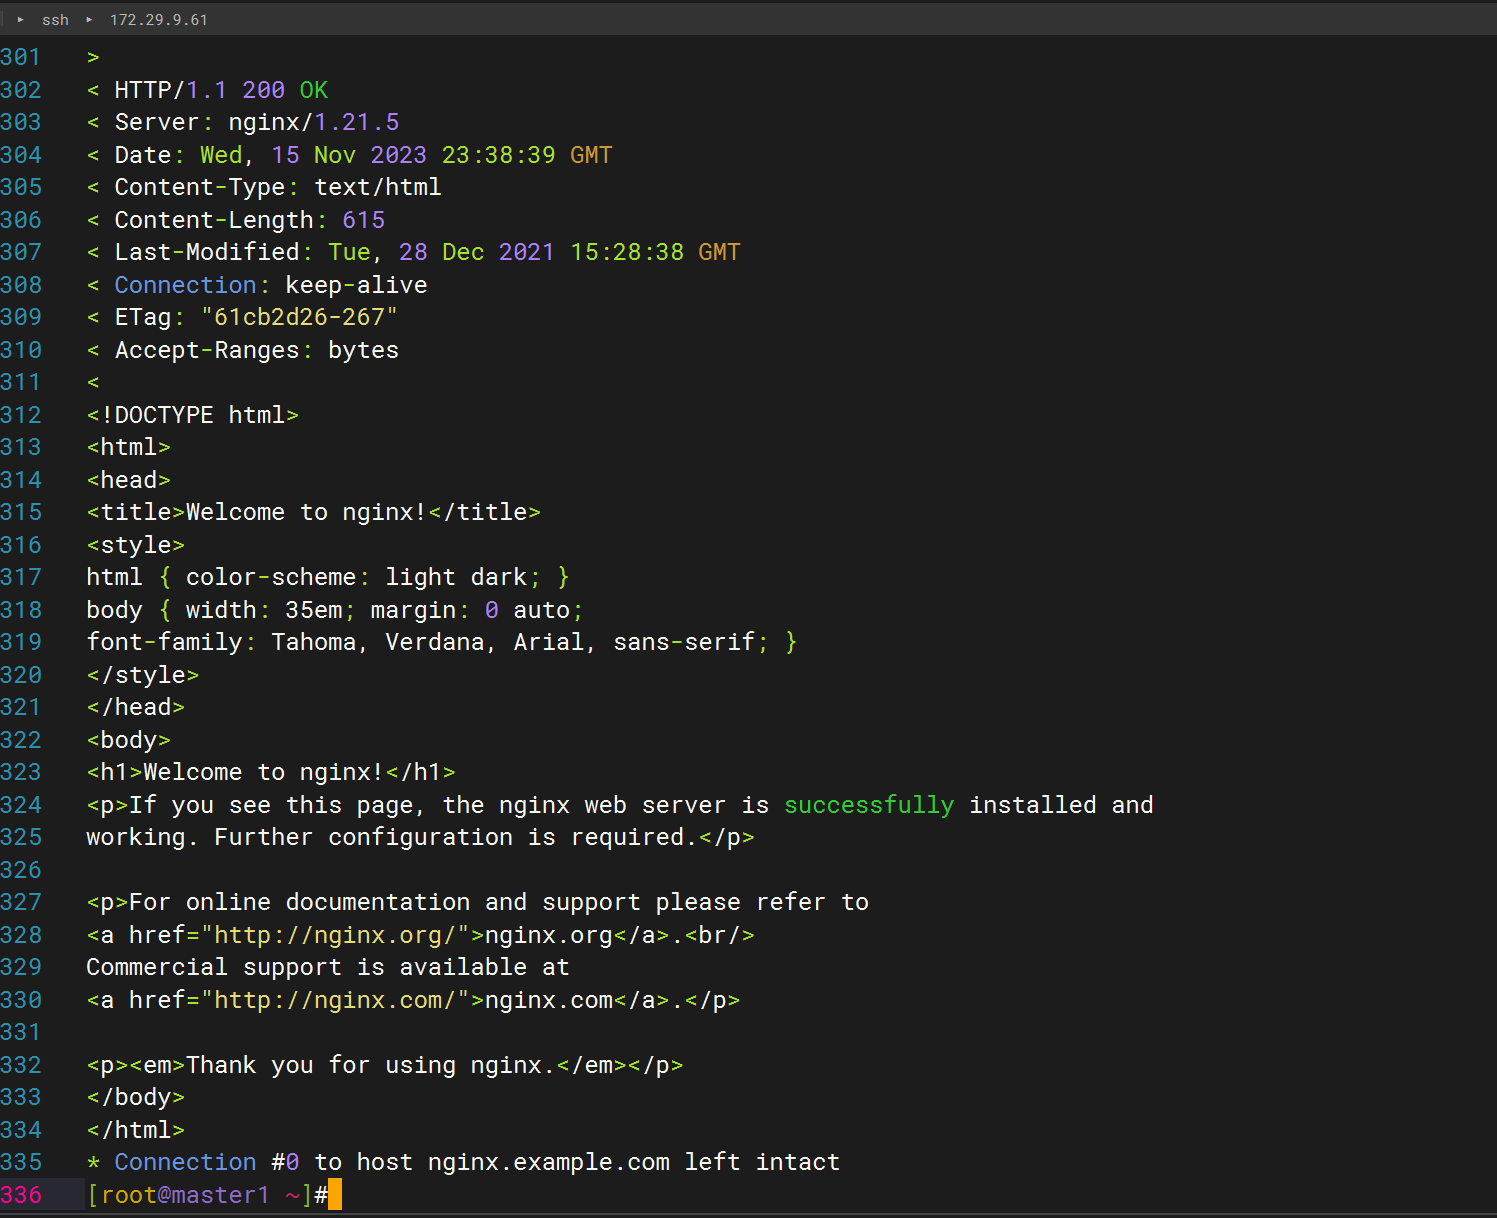
可以看到,我们成功访问了 NGINX 服务。
测试结束。😘
关于我
我的博客主旨:
- 排版美观,语言精炼;
- 文档即手册,步骤明细,拒绝埋坑,提供源码;
- 本人实战文档都是亲测成功的,各位小伙伴在实际操作过程中如有什么疑问,可随时联系本人帮您解决问题,让我们一起进步!
🍀 微信二维码
x2675263825 (舍得), qq:2675263825。

🍀 微信公众号
《云原生架构师实战》

🍀 个人博客站点
http://onedayxyy.cn/

🍀 语雀
https://www.yuque.com/xyy-onlyone
🍀 csdn
https://blog.csdn.net/weixin_39246554?spm=1010.2135.3001.5421

🍀 知乎
https://www.zhihu.com/people/foryouone
最后
好了,关于本次就到这里了,感谢大家阅读,最后祝大家生活快乐,每天都过的有意义哦,我们下期见!

相关文章:
Ingress安全网关
目录 文章目录 目录本节实战TCP 流量拆分🚩 实战:TCP 流量拆分-2023.11.15(测试成功) Ingress安全网关Kubernetes Ingress🚩 实战:Kubernetes Ingress-2023.11.15(测试成功) Ingress GatewayIngress Gateway🚩 实战&am…...

Jmeter控制RPS
一、前言 RPS (Request Per Second)一般用来衡量服务端的吞吐量,相比于并发模式,更适合用来摸底服务端的性能。我们可以通过使用 JMeter 的常数吞吐量定时器来限制每个线程的RPS。对于RPS,我们可以把他理解为我们的TPS,我们就不…...

【Nginx】转发配置nginx.conf
文章目录 NginxNginx主要作用转发配置相关问题参考推荐阅读 Nginx Nginx (engine x) 是一个高性能的HTTP和反向代理web服务器,同时也提供了IMAP/POP3/SMTP服务。Nginx是由伊戈尔赛索耶夫为俄罗斯访问量第二的Rambler.ru站点(俄文:Рамбл…...

uniapp实现下载图片到本地
uniapp实现下载图片到本地 在uniapp开发中,可以使用uni.downloadFile方法实现下载文件功能,客户端直接发起一个 HTTP GET 请求,返回文件的本地临时路径。 const urlPath http://192.168.0.1:8080/fileApi/logo.png uni.downloadFile({url:…...
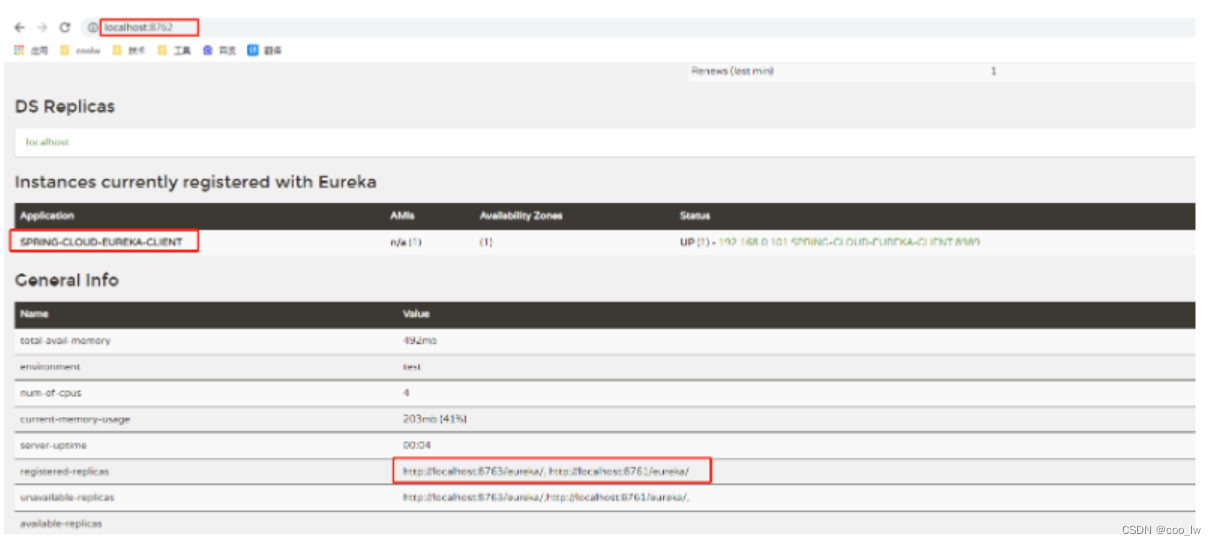
spring cloud-注册中心(Eureka)
一、服务注册中心组件(*) 定义:服务注册中心就是在整个微服务架构单独抽取一个服务,该服务不做项目中任何业务功能,仅用来在微服务中记录微服务、对微服务进行健康状态检查,及服务元数据信息存储常用的注册中心:eurek…...

004 OpenCV akaze特征点检测匹配
目录 一、环境 二、akaze特征点算法 2.1、基本原理 2.2、实现过程 2.3、实际应用 2.4、优点与不足 三、代码 3.1、数据准备 3.2、完整代码 一、环境 本文使用环境为: Windows10Python 3.9.17opencv-python 4.8.0.74 二、akaze特征点算法 特征点检测算法…...
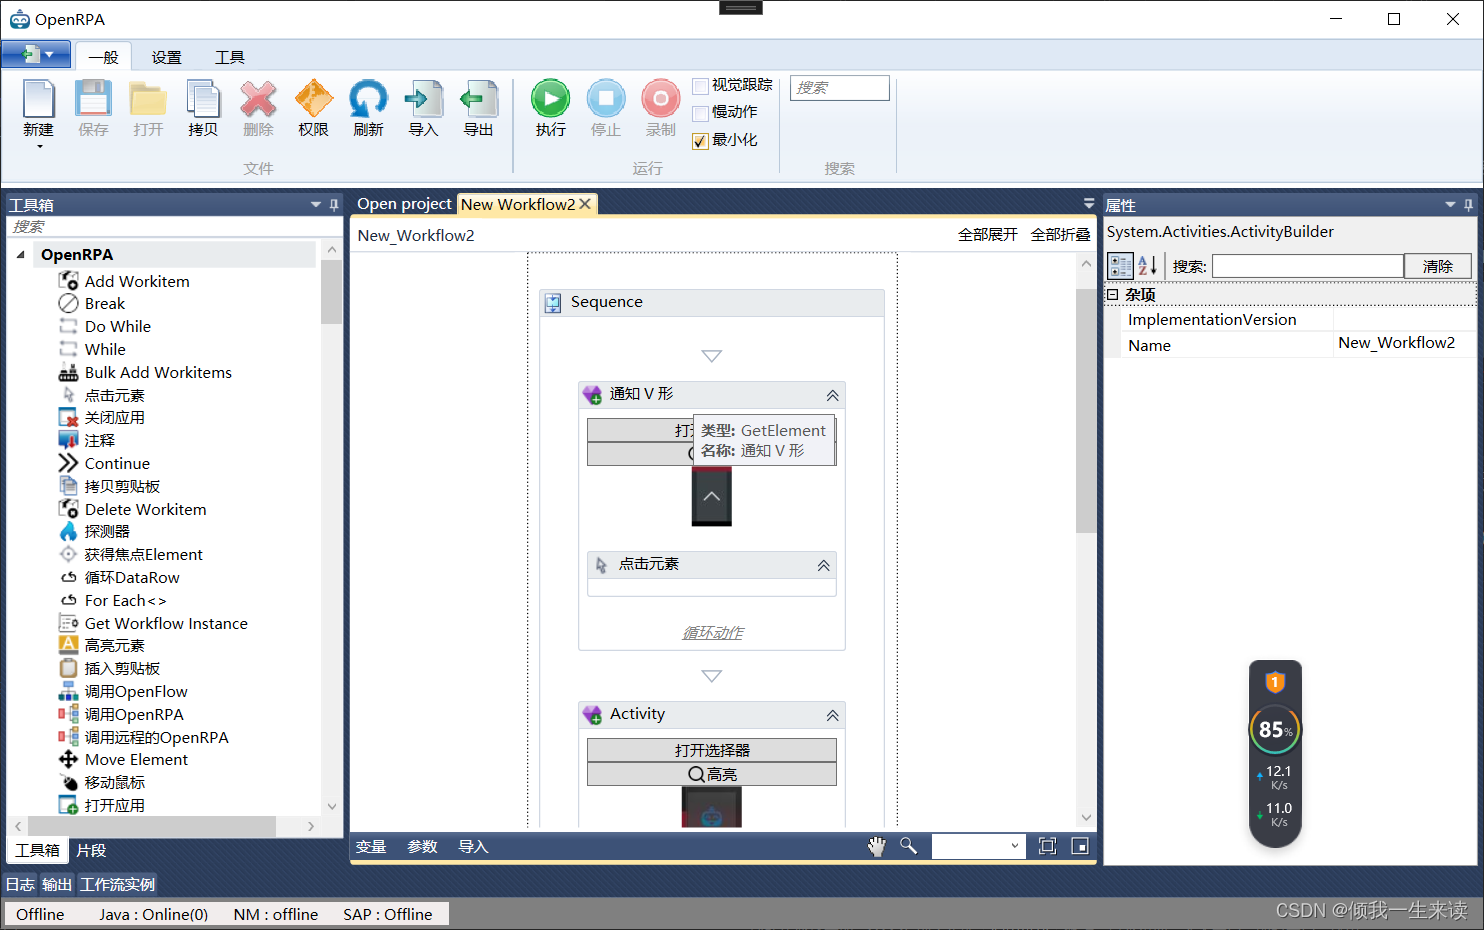
openRPA开源项目源码编译
最近接触到了一个新的领域——RPA,RPA全称Robotic Process Automation,中文名为机器人流程自动化。RPA可以视作一个数字机器人,它可以通过程序来模拟人与软件系统的交互过程,代替人工将大量重复、有规则的计算机操作自动化&#x…...
飞书开发学习笔记(八)-开发飞书小程序Demo
飞书开发学习笔记(八)-开发飞书小程序Demo 一.小程序开发概述 1.1 小程序开发概述 飞书开发文档中查看:小程序开发概述 飞书小程序是指可以运行在飞书客户端中的小程序,小程序的一套代码可以适配 Android、iOS、PC 多平台,且用户体验与飞书…...

Unity UI 完全解决方案
Unity UI 完全解决方案 在我学习开发 unity 游戏尝试进行 UI 的构建的过程中,尝试寻找当前 Unity 最为推荐的 UI 构建方式,或者说最优的框架方案。 在中文网里寻找了半天,总感觉很多文章和教程给了方案,但又说不清楚为啥用这个方…...

为什么打开idea时,没有启动页面,如何解决?
更新idea2021.2后,当双击idea打开时,发现没有启动界面,直接进入IDEA界面,中间等待时间,让人误以为没有打开idea成功,使得多次点击idea图标。 解决方案就是 在idea界面菜单栏中找到帮助(Help)&a…...

golang - 嵌入静态文件打包
go-bindata - embed结合嵌入静态文件打包可执行二进制文件 ## embed 嵌入静态文件到可执行二进制文件 # 安装go-bindata go get -u github.com/jteeuwen/go-bindata/... # 打包静态文件 go-bindata web/... 执行次命令之后会在项目目录下生成bindata.go文件,示例命令中模板文…...
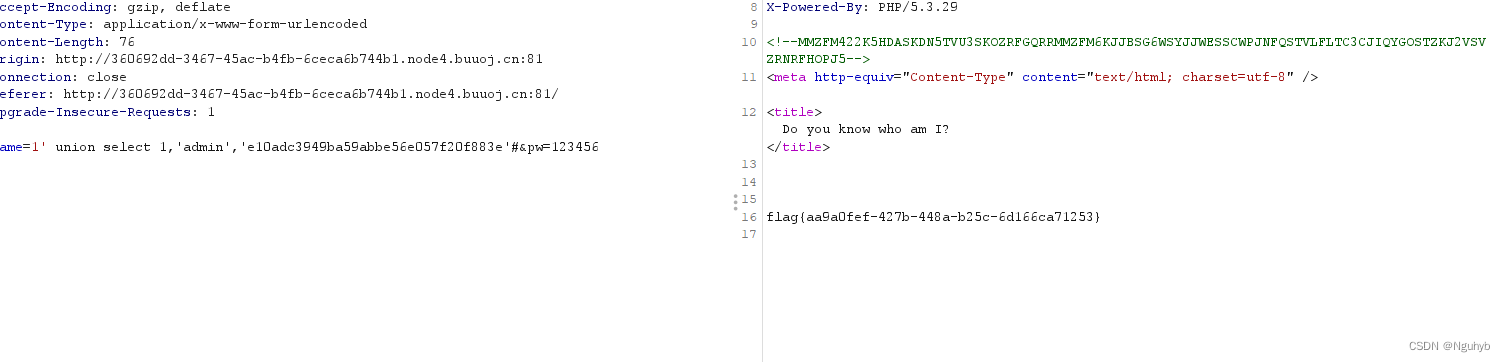
SQL题
[极客大挑战 2019]EasySQL 进行简单的尝试,就知道是单引号的字符型注入 万能密码进行一个简单的尝试 结果就出来了 还是要了解一下原理 输入的是1,形成的sql语句是错误的SELECT*FROM table_name WHERE username1and password123; 第一个单引号和第二个…...

GUN介绍
介绍 GNU(GNU’s Not Unix)是一个自由操作系统项目,名字是一个递归的 GNU’s Not Unix 缩写,其目标是创建一个类Unix的操作系统。 该项目由Richard Stallman于1983年发起,并由自由软件基金会(Free Softwa…...

《Effective C++》条款15
在资源管理类中提供对原始资源的访问 class A {... }; int day(const A* ptr) {... } int main() {shared_ptr<A> ptr(new A);cout << day(ptr) << endl; } 这样写是错误的。因为day函数要求的参数是指针,而你传的实际上是一个对象。 如何解决呢&…...
CTFd-Web题目动态flag
CTFd-Web题目动态flag 1. dockerhub注册2. dockerfile编写3. 上传到docker仓库4. 靶场配置5. 动态flag实现 1. dockerhub注册 想要把我们的web题目容器上传到docker仓库中,我们需要dockerhub官网注册一个账号,网址如下 https://hub.docker.com/2. dock…...
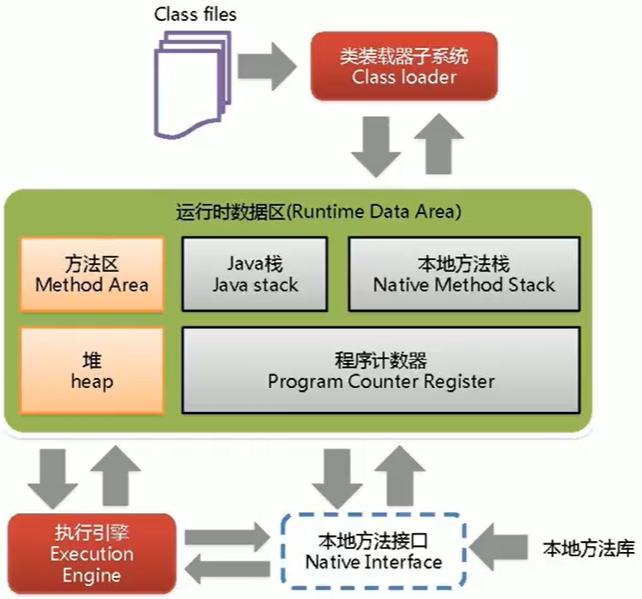
系列九、对象的生命周期和GC
一、堆细分 Java堆从GC的角度还可以细分为:新生代(eden【伊甸园区】、from【幸存者0区】、to【幸存者1区】)和老年代。 二、MinorGC的过程 复制>清空》交换 1、eden、from区中的对象复制到to区,年龄1 首先,当eden区…...

spark 窗口滑动用于在不同的数据块之间执行操作
在 Scala 中进行分布式执行,例如使用 Apache Spark,可以通过设置窗口滑动来实现不同 RDD 之间的关联处理。窗口滑动是一种窗口操作,用于在不同的数据块之间执行操作。 以下是一个简单的示例,演示如何在 Spark 中使用窗口滑动&…...
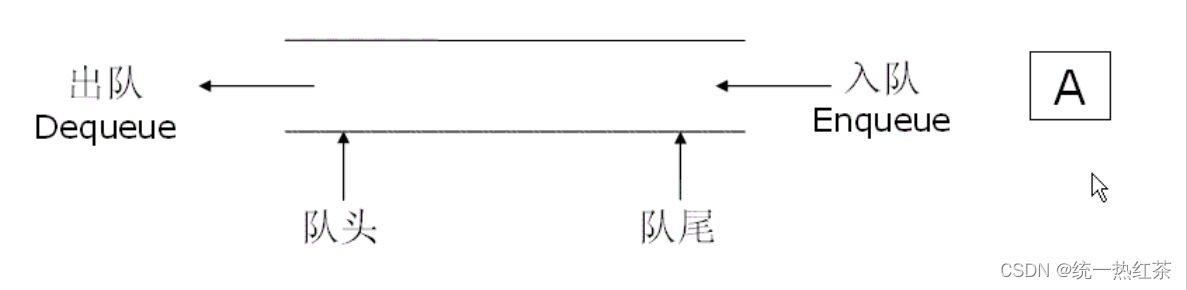
【数据结构】栈与队列的实现
栈与队列是数据结构中重要的结构, 可以用于解决一些题目 模拟实现时可以增加对于这些结构的理解,也可以巩固我们的语言水平,解决某些题目也会有很好的效果 话不多说 目录 栈的实现结构体的定义:初始化栈:压栈:出栈&am…...
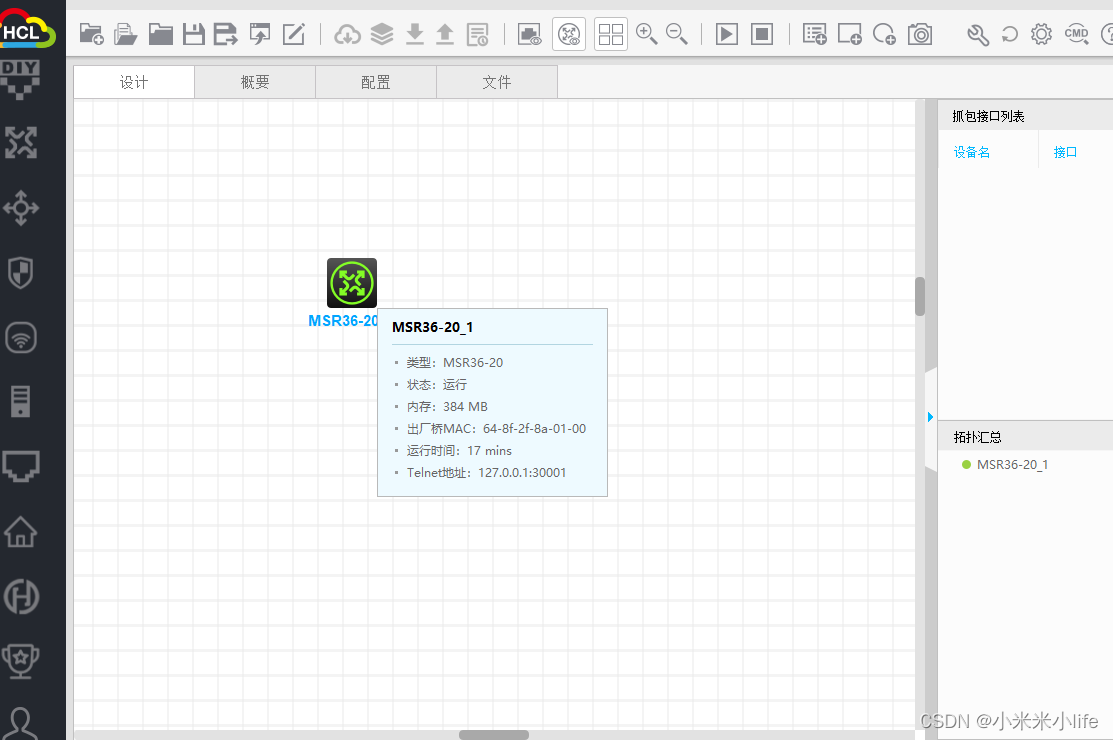
HCL设备启动失败——已经解决
摸索了一个多小时,终于搞定了,首先HCL这款软件是需要安装Oracle VM Visual Box的,小伙伴们安装的时候记得点击安装Visual Box; 安装完后显示设备不能启动,然后我根据这个 HCL模拟器中Server设备启动失败的解决办法_hc…...
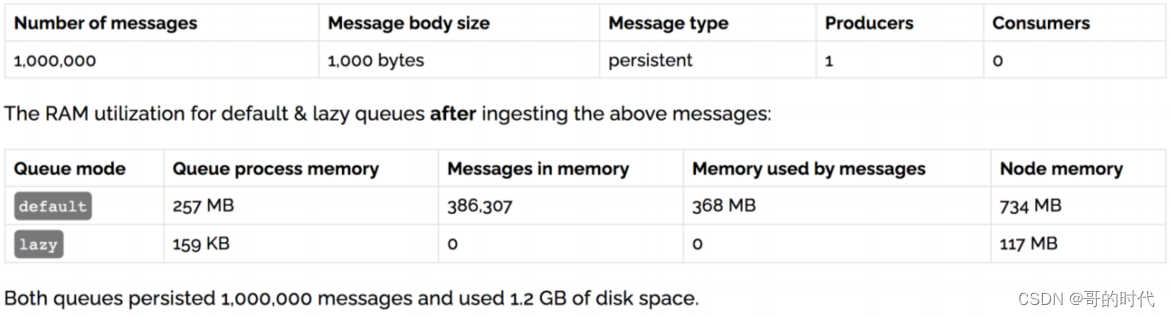
RabbitMQ的幂等性、优先级队列和惰性队列
文章目录 一、幂等性1、概念2、消息重复消费3、解决思路4、消费端的幂等性保障5、唯一 ID指纹码机制6、Redis 原子性 二、优先级队列1、使用场景2、如何添加3、实战 三、惰性队列1、使用场景2、两种模式3、内存开销对比 总结 一、幂等性 1、概念 用户对于同一操作发起的一次请…...

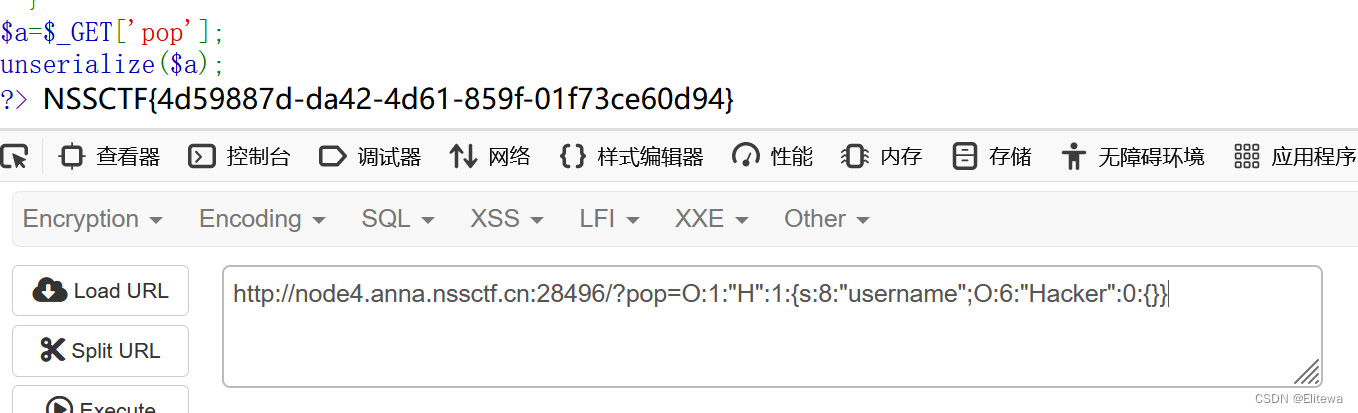
从ValueError到顺畅加载:揭秘load_dataset中trust_remote_code参数的实战应用
1. 那个让人头疼的ValueError:不只是Stable Diffusion的烦恼 不知道你有没有遇到过这种情况:好不容易在Hugging Face Hub上找到了一个非常适合自己项目的数据集,满心欢喜地准备用load_dataset把它拉下来开始干活,结果终端里“啪”…...

STC8HK64U国产8051功能板:双CAN+可调电源+闭环电机控制实训平台
1. 项目概述STC8HK64U功能板是一款面向嵌入式学习与工程验证的国产单片机开发平台,以宏晶科技STC8HK64U为核心控制器。该芯片属于STC8H系列高可靠性增强型8051内核MCU,集成64KB Flash、4KB SRAM、硬件AES加密模块、多路高级PWM、独立看门狗及丰富外设资源…...

PP-DocLayoutV3效果实测:上传文档图片,秒级输出彩色标注框
PP-DocLayoutV3效果实测:上传文档图片,秒级输出彩色标注框 你有没有遇到过这样的场景?面对一堆扫描的合同、发票或者论文,想要快速提取里面的文字和表格,结果发现传统的OCR工具把标题、正文、表格全都混在一起&#x…...

品牌关键词优化:如何用5步提升你的内容搜索排名?
随着生成式AI的兴起,GEO(生成式引擎优化)已成为企业提升品牌曝光和流量获取的重要手段。为了帮助大家更好地选择适合自己的GEO服务提供商,我们对市面上主流的GEO产品进行了深度测评。以下是本次参与测评的产品名单:沐廉…...

深入学习 Windows 系统安全2
在上篇内容中,我们解析了 Windows 系统的基础特性、经典漏洞 MS17-010 的利用方法,以及用户权限管理和后门创建手段。但 Windows 系统的安全风险并非仅来自系统自身,第三方应用程序的漏洞同样是攻击者的重要突破口,微信、WPS、向日…...

从夯到拉排名
演示:https://tools-1gv2l4bw0df7c19c-1332856697.tcloudbaseapp.com/ 演示链接有效期至 2026-09-12,因为是微信小程序新人0元领的6个月的服务器 源码:https://gitee.com/weiANDyou/conghangdaola.git...

婴儿监护婴幼儿姿势识别婴儿行为状态检测数据集VOC+YOLO格式3143张6类别
注意数据集中大约1000张是原图剩余是增强图片主要是对目标区域改变对比亮度和加椒盐噪声数据集格式:Pascal VOC格式YOLO格式(不包含分割路径的txt文件,仅仅包含jpg图片以及对应的VOC格式xml文件和yolo格式txt文件)图片数量(jpg文件个数):3143…...

2026年存储市场核心数据与趋势分析
市场规模与增长2026年全球存储市场规模预计达2200亿美元(TrendForce数据),年复合增长率约8.3%。NAND Flash和DRAM将分别占据52%与48%份额,企业级SSD需求增速显著,预计年增14%。技术路线演变3D NAND层数突破600层&#…...
的机制与调试)
DisplayPort链路训练实战:深入解析时钟恢复(CR)的机制与调试
1. 从黑屏到点亮:为什么时钟恢复是DP调试的第一道坎 大家好,我是老张,在芯片原厂和硬件设计圈里摸爬滚打了十几年,经手调试过的DisplayPort接口没有一千也有八百了。今天想和大家掏心窝子聊聊一个让无数硬件工程师头疼,…...
)
Python实战:用ncnn验证模型转换成功的3种方法(附完整代码)
Python实战:用ncnn验证模型转换成功的3种方法(附完整代码) 最近在移动端部署模型时,ncnn框架成了不少开发者的首选。它轻量、高效,但模型从PyTorch或TensorFlow转换到ncnn格式后,心里总有点不踏实ÿ…...