【STM32】STM32学习笔记-ADC单通道 ADC多通道(22)
00. 目录
文章目录
- 00. 目录
- 01. ADC简介
- 02. ADC相关API
- 2.1 RCC_ADCCLKConfig
- 2.2 ADC_RegularChannelConfig
- 2.3 ADC_Init
- 2.4 ADC_InitTypeDef
- 2.5 ADC_Cmd
- 2.6 ADC_ResetCalibration
- 2.7 ADC_GetResetCalibrationStatus
- 2.8 ADC_StartCalibration
- 2.9 ADC_GetCalibrationStatus
- 2.10 ADC_SoftwareStartConvCmd
- 2.11 ADC_GetFlagStatus
- 2.12 ADC_GetConversionValue
- 03. ADC单通道接线图
- 04. ADC单通道示例
- 05. ADC多通道接线图
- 06. 热敏传感器
- 07. 光敏传感器
- 08. 反射式红外传感器
- 09. ADC多通道示例
- 10. 程序下载
- 11. 附录
01. ADC简介
小容量产品是指闪存存储器容量在16K至32K字节之间的STM32F101xx、STM32F102xx和STM32F103xx微控制器。
中容量产品是指闪存存储器容量在64K至128K字节之间的STM32F101xx、STM32F102xx和STM32F103xx微控制器。
大容量产品是指闪存存储器容量在256K至512K字节之间的STM32F101xx和STM32F103xx微控制器。
互联型产品是指STM32F105xx和STM32F107xx微控制器。
12位ADC是一种逐次逼近型模拟数字转换器。它有多达18个通道,可测量16个外部和2个内部信号源。各通道的A/D转换可以单次、连
续、扫描或间断模式执行。ADC的结果可以左对齐或右对齐方式存储在16位数据寄存器中。
模拟看门狗特性允许应用程序检测输入电压是否超出用户定义的高/低阀值。
ADC的输入时钟不得超过14MHz,它是由PCLK2经分频产生。
02. ADC相关API
2.1 RCC_ADCCLKConfig
/*** @brief  Configures the ADC clock (ADCCLK).* @param  RCC_PCLK2: defines the ADC clock divider. This clock is derived from *   the APB2 clock (PCLK2).*   This parameter can be one of the following values:*     @arg RCC_PCLK2_Div2: ADC clock = PCLK2/2*     @arg RCC_PCLK2_Div4: ADC clock = PCLK2/4*     @arg RCC_PCLK2_Div6: ADC clock = PCLK2/6*     @arg RCC_PCLK2_Div8: ADC clock = PCLK2/8* @retval None*/
void RCC_ADCCLKConfig(uint32_t RCC_PCLK2)
功能:设置 ADC 时钟(ADCCLK)
参数:RCC_ADCCLKSource: 定义 ADCCLK,该时钟源自 APB2 时钟(PCLK2)
返回值:无
2.2 ADC_RegularChannelConfig
/*** @brief  Configures for the selected ADC regular channel its corresponding*         rank in the sequencer and its sample time.* @param  ADCx: where x can be 1, 2 or 3 to select the ADC peripheral.* @param  ADC_Channel: the ADC channel to configure. *   This parameter can be one of the following values:*     @arg ADC_Channel_0: ADC Channel0 selected*     @arg ADC_Channel_1: ADC Channel1 selected*     @arg ADC_Channel_2: ADC Channel2 selected*     @arg ADC_Channel_3: ADC Channel3 selected*     @arg ADC_Channel_4: ADC Channel4 selected*     @arg ADC_Channel_5: ADC Channel5 selected*     @arg ADC_Channel_6: ADC Channel6 selected*     @arg ADC_Channel_7: ADC Channel7 selected*     @arg ADC_Channel_8: ADC Channel8 selected*     @arg ADC_Channel_9: ADC Channel9 selected*     @arg ADC_Channel_10: ADC Channel10 selected*     @arg ADC_Channel_11: ADC Channel11 selected*     @arg ADC_Channel_12: ADC Channel12 selected*     @arg ADC_Channel_13: ADC Channel13 selected*     @arg ADC_Channel_14: ADC Channel14 selected*     @arg ADC_Channel_15: ADC Channel15 selected*     @arg ADC_Channel_16: ADC Channel16 selected*     @arg ADC_Channel_17: ADC Channel17 selected* @param  Rank: The rank in the regular group sequencer. This parameter must be between 1 to 16.* @param  ADC_SampleTime: The sample time value to be set for the selected channel. *   This parameter can be one of the following values:*     @arg ADC_SampleTime_1Cycles5: Sample time equal to 1.5 cycles*     @arg ADC_SampleTime_7Cycles5: Sample time equal to 7.5 cycles*     @arg ADC_SampleTime_13Cycles5: Sample time equal to 13.5 cycles*     @arg ADC_SampleTime_28Cycles5: Sample time equal to 28.5 cycles	*     @arg ADC_SampleTime_41Cycles5: Sample time equal to 41.5 cycles	*     @arg ADC_SampleTime_55Cycles5: Sample time equal to 55.5 cycles	*     @arg ADC_SampleTime_71Cycles5: Sample time equal to 71.5 cycles	*     @arg ADC_SampleTime_239Cycles5: Sample time equal to 239.5 cycles	* @retval None*/
void ADC_RegularChannelConfig(ADC_TypeDef* ADCx, uint8_t ADC_Channel, uint8_t Rank, uint8_t ADC_SampleTime)
功能:设置指定 ADC 的规则组通道,设置它们的转化顺序和采样时间
参数:ADCx:x 可以是 1 或者 2 来选择 ADC 外设 ADC1 或 ADC2ADC_Channel:被设置的 ADC 通道Rank:规则组采样顺序。取值范围 1 到 16。ADC_SampleTime:指定 ADC 通道的采样时间值
返回值:无
2.3 ADC_Init
/*** @brief  Initializes the ADCx peripheral according to the specified parameters*         in the ADC_InitStruct.* @param  ADCx: where x can be 1, 2 or 3 to select the ADC peripheral.* @param  ADC_InitStruct: pointer to an ADC_InitTypeDef structure that contains*         the configuration information for the specified ADC peripheral.* @retval None*/
void ADC_Init(ADC_TypeDef* ADCx, ADC_InitTypeDef* ADC_InitStruct)
功能:根据 ADC_InitStruct 中指定的参数初始化外设 ADCx 的寄存器
参数:ADCx:x 可以是 1 或者 2 来选择 ADC 外设 ADC1 或 ADC2ADC_InitStruct:指向结构 ADC_InitTypeDef 的指针,包含了指定外设 ADC 的配置信息
返回值:无
2.4 ADC_InitTypeDef
/** * @brief  ADC Init structure definition  */typedef struct
{uint32_t ADC_Mode;                      /*!< Configures the ADC to operate in independent ordual mode. This parameter can be a value of @ref ADC_mode */FunctionalState ADC_ScanConvMode;       /*!< Specifies whether the conversion is performed inScan (multichannels) or Single (one channel) mode.This parameter can be set to ENABLE or DISABLE */FunctionalState ADC_ContinuousConvMode; /*!< Specifies whether the conversion is performed inContinuous or Single mode.This parameter can be set to ENABLE or DISABLE. */uint32_t ADC_ExternalTrigConv;          /*!< Defines the external trigger used to start the analogto digital conversion of regular channels. This parametercan be a value of @ref ADC_external_trigger_sources_for_regular_channels_conversion */uint32_t ADC_DataAlign;                 /*!< Specifies whether the ADC data alignment is left or right.This parameter can be a value of @ref ADC_data_align */uint8_t ADC_NbrOfChannel;               /*!< Specifies the number of ADC channels that will be convertedusing the sequencer for regular channel group.This parameter must range from 1 to 16. */
}ADC_InitTypeDef;
ADC_mode
/** @defgroup ADC_mode * @{*/#define ADC_Mode_Independent                       ((uint32_t)0x00000000)
#define ADC_Mode_RegInjecSimult                    ((uint32_t)0x00010000)
#define ADC_Mode_RegSimult_AlterTrig               ((uint32_t)0x00020000)
#define ADC_Mode_InjecSimult_FastInterl            ((uint32_t)0x00030000)
#define ADC_Mode_InjecSimult_SlowInterl            ((uint32_t)0x00040000)
#define ADC_Mode_InjecSimult                       ((uint32_t)0x00050000)
#define ADC_Mode_RegSimult                         ((uint32_t)0x00060000)
#define ADC_Mode_FastInterl                        ((uint32_t)0x00070000)
#define ADC_Mode_SlowInterl                        ((uint32_t)0x00080000)
#define ADC_Mode_AlterTrig                         ((uint32_t)0x00090000)
ADC_ExternalTrigConv
/** @defgroup ADC_external_trigger_sources_for_regular_channels_conversion * @{*/#define ADC_ExternalTrigConv_T1_CC1                ((uint32_t)0x00000000) /*!< For ADC1 and ADC2 */
#define ADC_ExternalTrigConv_T1_CC2                ((uint32_t)0x00020000) /*!< For ADC1 and ADC2 */
#define ADC_ExternalTrigConv_T2_CC2                ((uint32_t)0x00060000) /*!< For ADC1 and ADC2 */
#define ADC_ExternalTrigConv_T3_TRGO               ((uint32_t)0x00080000) /*!< For ADC1 and ADC2 */
#define ADC_ExternalTrigConv_T4_CC4                ((uint32_t)0x000A0000) /*!< For ADC1 and ADC2 */
#define ADC_ExternalTrigConv_Ext_IT11_TIM8_TRGO    ((uint32_t)0x000C0000) /*!< For ADC1 and ADC2 */#define ADC_ExternalTrigConv_T1_CC3                ((uint32_t)0x00040000) /*!< For ADC1, ADC2 and ADC3 */
#define ADC_ExternalTrigConv_None                  ((uint32_t)0x000E0000) /*!< For ADC1, ADC2 and ADC3 */#define ADC_ExternalTrigConv_T3_CC1                ((uint32_t)0x00000000) /*!< For ADC3 only */
#define ADC_ExternalTrigConv_T2_CC3                ((uint32_t)0x00020000) /*!< For ADC3 only */
#define ADC_ExternalTrigConv_T8_CC1                ((uint32_t)0x00060000) /*!< For ADC3 only */
#define ADC_ExternalTrigConv_T8_TRGO               ((uint32_t)0x00080000) /*!< For ADC3 only */
#define ADC_ExternalTrigConv_T5_CC1                ((uint32_t)0x000A0000) /*!< For ADC3 only */
#define ADC_ExternalTrigConv_T5_CC3                ((uint32_t)0x000C0000) /*!< For ADC3 only */
ADC_data_align
/** @defgroup ADC_data_align * @{*/#define ADC_DataAlign_Right                        ((uint32_t)0x00000000)
#define ADC_DataAlign_Left                         ((uint32_t)0x00000800)
2.5 ADC_Cmd
/*** @brief  Enables or disables the specified ADC peripheral.* @param  ADCx: where x can be 1, 2 or 3 to select the ADC peripheral.* @param  NewState: new state of the ADCx peripheral.*   This parameter can be: ENABLE or DISABLE.* @retval None*/
void ADC_Cmd(ADC_TypeDef* ADCx, FunctionalState NewState)
功能:使能或者失能指定的 ADC
参数:ADCx:x 可以是 1 或者 2 来选择 ADC 外设 ADC1 或 ADC2NewState:外设 ADCx 的新状态
返回值:无
2.6 ADC_ResetCalibration
/*** @brief  Resets the selected ADC calibration registers.* @param  ADCx: where x can be 1, 2 or 3 to select the ADC peripheral.* @retval None*/
void ADC_ResetCalibration(ADC_TypeDef* ADCx)
功能:重置指定的 ADC 的校准寄存器
参数:ADCx:x 可以是 1 或者 2 来选择 ADC 外设 ADC1 或 ADC2
返回值:无
2.7 ADC_GetResetCalibrationStatus
/*** @brief  Gets the selected ADC reset calibration registers status.* @param  ADCx: where x can be 1, 2 or 3 to select the ADC peripheral.* @retval The new state of ADC reset calibration registers (SET or RESET).*/
FlagStatus ADC_GetResetCalibrationStatus(ADC_TypeDef* ADCx)
功能:获取 ADC 重置校准寄存器的状态
参数:ADCx:x 可以是 1 或者 2 来选择 ADC 外设 ADC1 或 ADC2
返回值:ADC 重置校准寄存器的新状态(SET 或者 RESET)
2.8 ADC_StartCalibration
/*** @brief  Starts the selected ADC calibration process.* @param  ADCx: where x can be 1, 2 or 3 to select the ADC peripheral.* @retval None*/
void ADC_StartCalibration(ADC_TypeDef* ADCx)
功能:开始指定 ADC 的校准状态
参数:ADCx:x 可以是 1 或者 2 来选择 ADC 外设 ADC1 或 ADC2
返回值:无
2.9 ADC_GetCalibrationStatus
/*** @brief  Gets the selected ADC calibration status.* @param  ADCx: where x can be 1, 2 or 3 to select the ADC peripheral.* @retval The new state of ADC calibration (SET or RESET).*/
FlagStatus ADC_GetCalibrationStatus(ADC_TypeDef* ADCx)
功能:获取指定 ADC 的校准程序状态
参数:ADCx:x 可以是 1 或者 2 来选择 ADC 外设 ADC1 或 ADC2
返回值:ADC 校准的新状态(SET 或者 RESET)
2.10 ADC_SoftwareStartConvCmd
/*** @brief  Enables or disables the selected ADC software start conversion .* @param  ADCx: where x can be 1, 2 or 3 to select the ADC peripheral.* @param  NewState: new state of the selected ADC software start conversion.*   This parameter can be: ENABLE or DISABLE.* @retval None*/
void ADC_SoftwareStartConvCmd(ADC_TypeDef* ADCx, FunctionalState NewState)
功能:使能或者失能指定的 ADC 的软件转换启动功能
参数:ADCx:x 可以是 1 或者 2 来选择 ADC 外设 ADC1 或 ADC2 NewState:指定 ADC 的软件转换启动新状态
返回值:无
2.11 ADC_GetFlagStatus
/*** @brief  Checks whether the specified ADC flag is set or not.* @param  ADCx: where x can be 1, 2 or 3 to select the ADC peripheral.* @param  ADC_FLAG: specifies the flag to check. *   This parameter can be one of the following values:*     @arg ADC_FLAG_AWD: Analog watchdog flag*     @arg ADC_FLAG_EOC: End of conversion flag*     @arg ADC_FLAG_JEOC: End of injected group conversion flag*     @arg ADC_FLAG_JSTRT: Start of injected group conversion flag*     @arg ADC_FLAG_STRT: Start of regular group conversion flag* @retval The new state of ADC_FLAG (SET or RESET).*/
FlagStatus ADC_GetFlagStatus(ADC_TypeDef* ADCx, uint8_t ADC_FLAG)
功能:检查制定 ADC 标志位置 1 与否
参数:ADCx:x 可以是 1 或者 2 来选择 ADC 外设 ADC1 或 ADC2 ADC_FLAG:指定需检查的标志位
返回值:ADC状态(SET 或者 RESET)
2.12 ADC_GetConversionValue
/*** @brief  Returns the last ADCx conversion result data for regular channel.* @param  ADCx: where x can be 1, 2 or 3 to select the ADC peripheral.* @retval The Data conversion value.*/
uint16_t ADC_GetConversionValue(ADC_TypeDef* ADCx)
功能:返回最近一次 ADCx 规则组的转换结果
参数:ADCx:x 可以是 1 或者 2 来选择 ADC 外设 ADC1 或 ADC2
返回值:转换结果
03. ADC单通道接线图

04. ADC单通道示例
单次转换,非扫描模式
adc.h
#ifndef __ADC_H__
#define __ADC_H__#include "stm32f10x.h"                  // Device headervoid adc_init(void);uint16_t adc_getvalue(void);#endif /*__ADC_H__*/
adc.c
#include "adc.h"void adc_init(void)
{GPIO_InitTypeDef GPIO_InitStructure;ADC_InitTypeDef ADC_InitStruct;//开启ADC时钟  PA0 --> ADC1_0RCC_APB2PeriphClockCmd(RCC_APB2Periph_ADC1, ENABLE);//开启GPIOA的时钟RCC_APB2PeriphClockCmd(RCC_APB2Periph_GPIOA, ENABLE);//设置为6分频  72M / 6 = 12M RCC_ADCCLKConfig(RCC_PCLK2_Div6);//GPIO配置 GPIO_InitStructure.GPIO_Pin = GPIO_Pin_0;GPIO_InitStructure.GPIO_Mode = GPIO_Mode_AIN;GPIO_InitStructure.GPIO_Speed =   GPIO_Speed_50MHz;GPIO_Init(GPIOA, &GPIO_InitStructure);//ADC配置ADC_InitStruct.ADC_ContinuousConvMode = DISABLE;ADC_InitStruct.ADC_ScanConvMode = DISABLE;ADC_InitStruct.ADC_DataAlign = ADC_DataAlign_Right;ADC_InitStruct.ADC_ExternalTrigConv = ADC_ExternalTrigConv_None;ADC_InitStruct.ADC_Mode = ADC_Mode_Independent;ADC_InitStruct.ADC_NbrOfChannel = 1;ADC_Init(ADC1, &ADC_InitStruct);ADC_RegularChannelConfig(ADC1, ADC_Channel_0, 1, ADC_SampleTime_55Cycles5);//使能ADCADC_Cmd(ADC1, ENABLE);//校准ADCADC_ResetCalibration(ADC1);while(ADC_GetResetCalibrationStatus(ADC1));ADC_StartCalibration(ADC1);while(ADC_GetCalibrationStatus(ADC1));}uint16_t adc_getvalue(void)
{ADC_SoftwareStartConvCmd(ADC1, ENABLE);while(ADC_GetFlagStatus(ADC1, ADC_FLAG_EOC) != SET);return ADC_GetConversionValue(ADC1);
}
main.c
#include "stm32f10x.h"#include "delay.h"
#include "oled.h"
#include "adc.h"int main(void){	uint16_t value = 0;float volate = 0;//初始化OLED_Init();adc_init();//显示字符串OLED_ShowString(1, 1, "ADCValue: ");OLED_ShowString(2, 1, "Volate:0.00V");while(1){value = adc_getvalue();volate = (float)value / 4095 * 3.3;OLED_ShowNum(1, 10, value, 4);OLED_ShowNum(2, 8, volate, 1);		 OLED_ShowNum(2, 10, (uint16_t)(volate * 100) % 100, 2);	delay_ms(100);}}
连续转换,非扫描模式
adc.h
#ifndef __ADC_H__
#define __ADC_H__#include "stm32f10x.h"                  // Device headervoid adc_init(void);uint16_t adc_getvalue(void);#endif /*__ADC_H__*/
adc.c
#include "adc.h"void adc_init(void)
{GPIO_InitTypeDef GPIO_InitStructure;ADC_InitTypeDef ADC_InitStruct;//开启ADC时钟  PA0 --> ADC1_0RCC_APB2PeriphClockCmd(RCC_APB2Periph_ADC1, ENABLE);//开启GPIOA的时钟RCC_APB2PeriphClockCmd(RCC_APB2Periph_GPIOA, ENABLE);//设置为6分频  72M / 6 = 12M RCC_ADCCLKConfig(RCC_PCLK2_Div6);//GPIO配置 GPIO_InitStructure.GPIO_Pin = GPIO_Pin_0;GPIO_InitStructure.GPIO_Mode = GPIO_Mode_AIN;GPIO_InitStructure.GPIO_Speed =   GPIO_Speed_50MHz;GPIO_Init(GPIOA, &GPIO_InitStructure);//ADC配置ADC_InitStruct.ADC_ContinuousConvMode = ENABLE; //连续转换模式ADC_InitStruct.ADC_ScanConvMode = DISABLE;ADC_InitStruct.ADC_DataAlign = ADC_DataAlign_Right;ADC_InitStruct.ADC_ExternalTrigConv = ADC_ExternalTrigConv_None;ADC_InitStruct.ADC_Mode = ADC_Mode_Independent;ADC_InitStruct.ADC_NbrOfChannel = 1;ADC_Init(ADC1, &ADC_InitStruct);ADC_RegularChannelConfig(ADC1, ADC_Channel_0, 1, ADC_SampleTime_55Cycles5);//使能ADCADC_Cmd(ADC1, ENABLE);//校准ADCADC_ResetCalibration(ADC1);while(ADC_GetResetCalibrationStatus(ADC1));ADC_StartCalibration(ADC1);while(ADC_GetCalibrationStatus(ADC1));//启动一次转换即可ADC_SoftwareStartConvCmd(ADC1, ENABLE);}uint16_t adc_getvalue(void)
{while(ADC_GetFlagStatus(ADC1, ADC_FLAG_EOC) != SET);return ADC_GetConversionValue(ADC1);
}
main.c
#include "stm32f10x.h"#include "delay.h"
#include "oled.h"
#include "adc.h"int main(void){	uint16_t value = 0;float volate = 0;//初始化OLED_Init();adc_init();//显示字符串OLED_ShowString(1, 1, "ADCValue: ");OLED_ShowString(2, 1, "Volate:0.00V");while(1){value = adc_getvalue();volate = (float)value / 4095 * 3.3;OLED_ShowNum(1, 10, value, 4);OLED_ShowNum(2, 8, volate, 1);		 OLED_ShowNum(2, 10, (uint16_t)(volate * 100) % 100, 2);	delay_ms(100);} }
05. ADC多通道接线图

06. 热敏传感器

07. 光敏传感器

08. 反射式红外传感器

09. ADC多通道示例
adc.h
#ifndef __ADC_H__
#define __ADC_H__#include "stm32f10x.h"                  // Device headervoid adc_init(void);uint16_t adc_getvalue(uint8_t ADC_Channel);#endif /*__ADC_H__*/
adc.c
#include "adc.h"void adc_init(void)
{GPIO_InitTypeDef GPIO_InitStructure;ADC_InitTypeDef ADC_InitStruct;//开启ADC时钟  PA0 --> ADC1_0RCC_APB2PeriphClockCmd(RCC_APB2Periph_ADC1, ENABLE);//开启GPIOA的时钟RCC_APB2PeriphClockCmd(RCC_APB2Periph_GPIOA, ENABLE);//设置为6分频  72M / 6 = 12M RCC_ADCCLKConfig(RCC_PCLK2_Div6);//GPIO配置 GPIO_InitStructure.GPIO_Pin = GPIO_Pin_0 | GPIO_Pin_1 | GPIO_Pin_2 | GPIO_Pin_3;GPIO_InitStructure.GPIO_Mode = GPIO_Mode_AIN;GPIO_InitStructure.GPIO_Speed =   GPIO_Speed_50MHz;GPIO_Init(GPIOA, &GPIO_InitStructure);//ADC配置ADC_InitStruct.ADC_ContinuousConvMode = DISABLE; ADC_InitStruct.ADC_ScanConvMode = DISABLE;ADC_InitStruct.ADC_DataAlign = ADC_DataAlign_Right;ADC_InitStruct.ADC_ExternalTrigConv = ADC_ExternalTrigConv_None;ADC_InitStruct.ADC_Mode = ADC_Mode_Independent;ADC_InitStruct.ADC_NbrOfChannel = 1;ADC_Init(ADC1, &ADC_InitStruct);//使能ADCADC_Cmd(ADC1, ENABLE);//校准ADCADC_ResetCalibration(ADC1);while(ADC_GetResetCalibrationStatus(ADC1));ADC_StartCalibration(ADC1);while(ADC_GetCalibrationStatus(ADC1));}uint16_t adc_getvalue(uint8_t ADC_Channel)
{ADC_RegularChannelConfig(ADC1, ADC_Channel, 1, ADC_SampleTime_55Cycles5);ADC_SoftwareStartConvCmd(ADC1, ENABLE);while(ADC_GetFlagStatus(ADC1, ADC_FLAG_EOC) != SET);return ADC_GetConversionValue(ADC1);
}
main.c
#include "stm32f10x.h"#include "delay.h"
#include "oled.h"
#include "adc.h"int main(void){	uint16_t ad0 = 0;uint16_t ad1 = 0;uint16_t ad2 = 0;uint16_t ad3 = 0;float volate = 0;//初始化OLED_Init();adc_init();//显示字符串OLED_ShowString(1, 1, "AD0: ");OLED_ShowString(2, 1, "AD1: ");OLED_ShowString(3, 1, "AD2: ");OLED_ShowString(4, 1, "AD3: ");while(1){ad0 = adc_getvalue(ADC_Channel_0);ad1 = adc_getvalue(ADC_Channel_1);ad2 = adc_getvalue(ADC_Channel_2);ad3 = adc_getvalue(ADC_Channel_3);		 OLED_ShowNum(1, 5, ad0, 4);OLED_ShowNum(2, 5, ad1, 4);OLED_ShowNum(3, 5, ad2, 4);OLED_ShowNum(4, 5, ad3, 4);		 delay_ms(100);}}
10. 程序下载
16-ADC单通道连续转换.rar
17-ADC单通道单次转换.rar
18-ADC多通道.rar
11. 附录
参考: 【STM32】江科大STM32学习笔记汇总
相关文章:
【STM32】STM32学习笔记-ADC单通道 ADC多通道(22)
00. 目录 文章目录 00. 目录01. ADC简介02. ADC相关API2.1 RCC_ADCCLKConfig2.2 ADC_RegularChannelConfig2.3 ADC_Init2.4 ADC_InitTypeDef2.5 ADC_Cmd2.6 ADC_ResetCalibration2.7 ADC_GetResetCalibrationStatus2.8 ADC_StartCalibration2.9 ADC_GetCalibrationStatus2.10 A…...
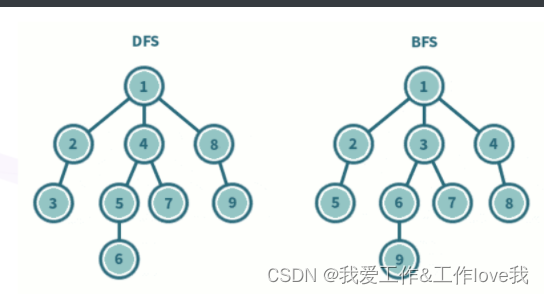
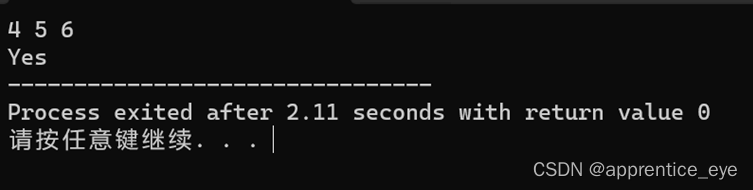
1329:【例8.2】细胞 广度优先搜索
1329:【例8.2】细胞 时间限制: 1000 ms 内存限制: 65536 KB 【题目描述】 一矩形阵列由数字0 到9组成,数字1到9 代表细胞,细胞的定义为沿细胞数字上下左右还是细胞数字则为同一细胞,求给定矩形阵列的细胞个数。如: 4 10 0234500067 1034560500 2045600671 00000000…...

9款免费网络钓鱼模拟器详解
根据《2023年网络钓鱼状况报告》显示,自2022年第四季度至2023年第三季度,网络钓鱼电子邮件数量激增了1265%。其中,利用ChatGPT等生成式人工智能工具和聊天机器人的形式尤为突出。 除了数量上的激增外,网络钓鱼攻击模式也在不断进…...

linux cpu、memory 、io、网络、文件系统多种类型负荷模拟调测方法工具
目录 一、概述 二、stress介绍和使用 2.1 介绍 2.2 使用 三、stress-ng介绍和使用 3.1 介绍 3.2 使用 3.3 实例 四、sysbench 4.1 介绍 4.2 使用 五、lmbench 5.1 介绍 5.2 使用 一、概述 今天介绍两款cpu负荷调试工具,用来模拟多种类型的负载。主要用来模拟CPU…...
1018:奇数偶数和1028:I love 闰年!和1029:三角形判定
1018:奇数偶数 要求:输入一个整数,判断该数是奇数还是偶数。如果该数是奇数就输出“odd”,偶数就输出“even”(输出不含双引号)。 输入样例:8 输出样例:even 程序流程图:…...

数据密集型应用系统设计--第2章 数据模型与查询语言
一、引言 数据模型可能是开发软件最重要的部分,而且还对如何思考待解决的问题都有深远的影响。 大多数应用程序是通过一层一层叠加数据模型来构建的。每一层都面临的关键问题是:如何将其用下一层来表示? 1.作为一名应用程序开发人员,观测现实…...
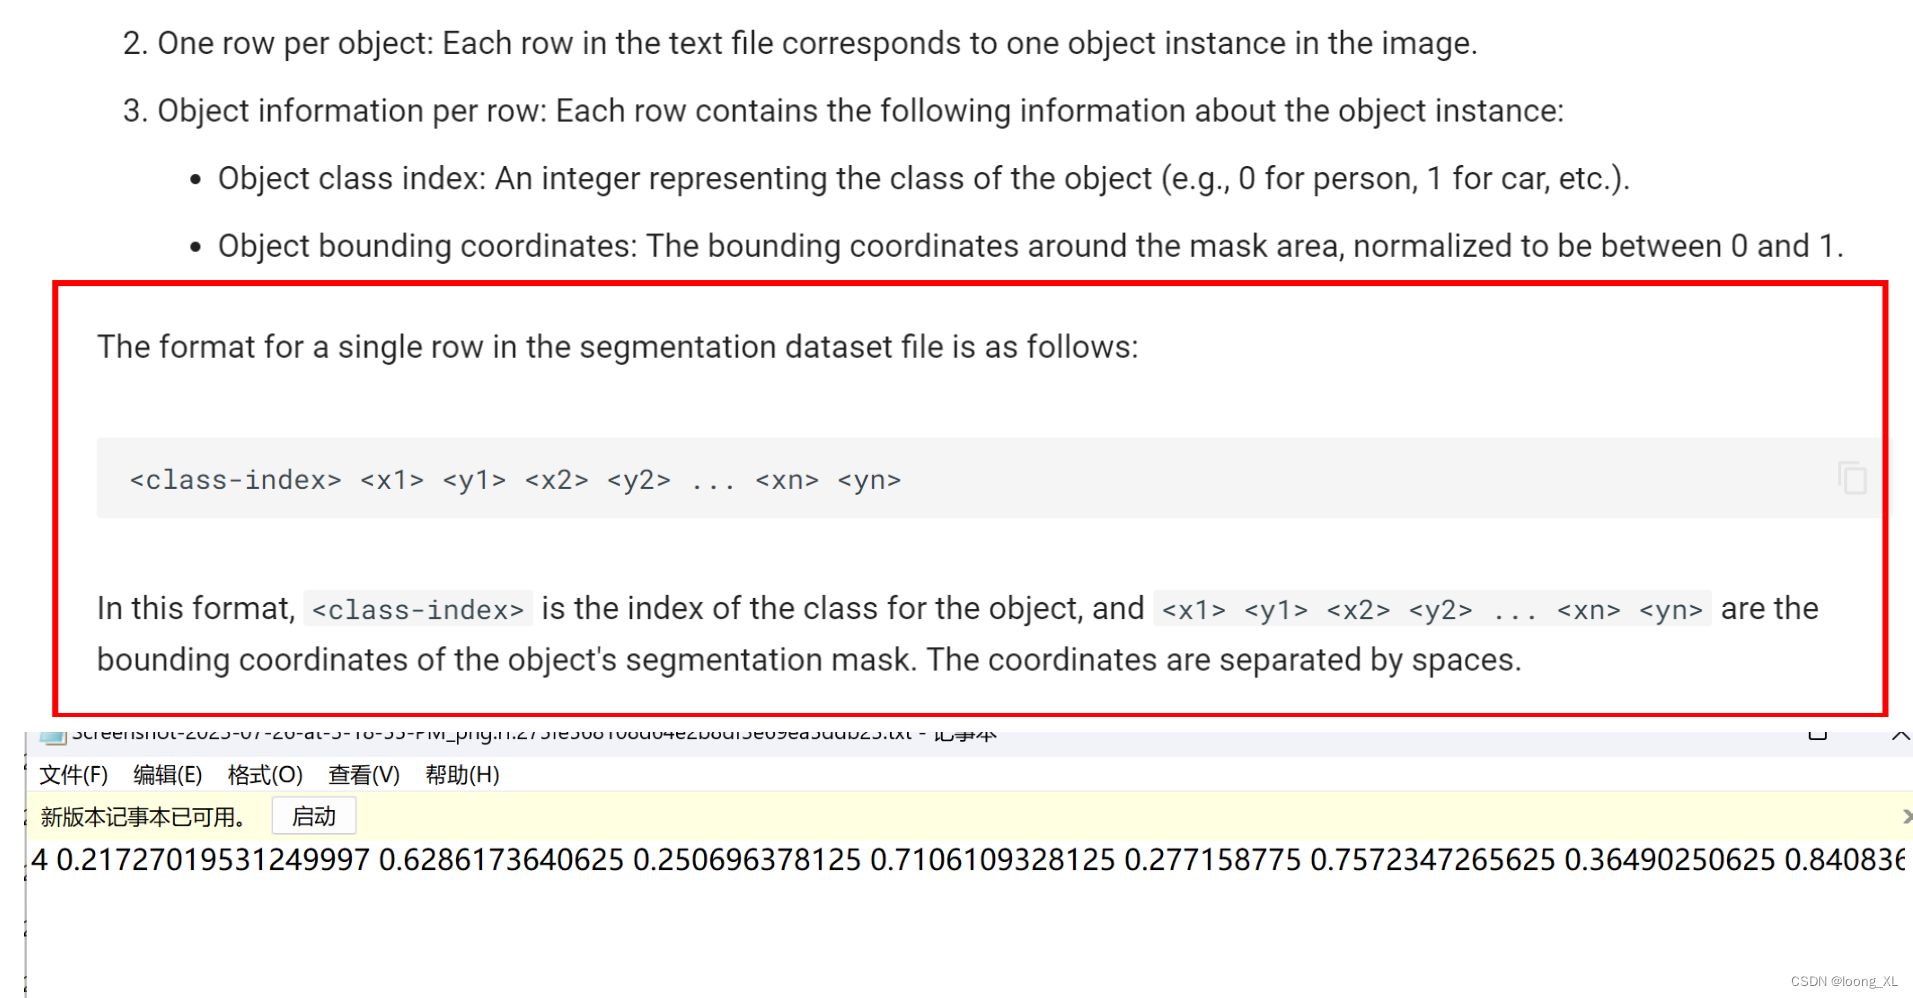
yolo 分割label格式标注信息图片显示可视化查看
参考: https://github.com/ultralytics/ultralytics/issues/3137 https://blog.csdn.net/weixin_42357472/article/details/135218349?spm=1001.2014.3001.5501 需要把坐标信息在图片上显示 代码 1)只画出了坐标边缘 import cv2 import numpy as np from random impor…...
霍兰德职业兴趣测试 60题(免费版)
霍兰德职业兴趣理论从兴趣的角度出发探索职业指导的问题,明确了职业兴趣的人格观念,使得人们对于职业兴趣的认识有了质的变化。在霍兰德职业兴趣理论提出来之前,职业兴趣和职业环境二者分别独立存在,正是霍兰德的总结,…...

MySQL之视图内连接、外连接、子查询
目录 一、视图 1.1 含义 2.1 视图的基本语法 二、案例 三、思维导图 一、视图 1.1 含义 虚拟表,和普通表一样使用 视图(view)是一个虚拟表,其内容由查询定义。同真实的表一样,视图包含一系列带有名称的列和行数据…...

以报时机器人为例详细介绍tracker_store和event_broker
报时机器人源码参考[1][2],本文重点介绍当 tracker_store 类型为 SQL 时,events 表的表结构以及数据是如何生成的。以及当 event_broker 类型为 SQL 时,events 表的表结构以及数据是如何生成的。 一.报时机器人启动 [3] Rasa 对话系统启动方…...

理解JavaScript事件循环机制
JavaScript作为前端开发的核心语言之一,其事件循环机制是实现异步编程的关键。本文将深入探讨JavaScript事件循环机制,帮助您更好地理解它是如何工作的,以及如何在前端开发中充分利用这一机制。 1. 什么是事件循环? JavaScript是…...

自定义View之重写onMeasure
一、重写onMeasure()来修改已有的View的尺寸 步骤: 重写 onMeasure(),并调用 super.onMeasure() 触发原先的测量用 getMeasuredWidth() 和 getMeasuredHeight() 取到之前测得的尺寸,利用这两个尺寸来计算出最终尺寸使用 setMeasuredDimensio…...

专为Mac用户设计的思维导图软件MindNode 2023 for Mac助您激发创意!
在现代快节奏的生活中,我们经常需要整理思绪、规划项目、记录灵感。而思维导图作为一种高效的思维工具,能够帮助我们更好地整理和展现思维。现在,我们介绍一款强大而直观的思维导图软件——MindNode 2023 for Mac,助您拓展思维边界…...

Linux命令——用户和权限相关
文章目录 1 用户管理1.1 用户标识符1.2 用户添加1.3 用户删除1.4 用户配置文件1.4.1 passwd文件1.4.2 shadow文件1.4.3 group文件 2 密码管理3 权限管理 1 用户管理 1.1 用户标识符 用户标识符主要是UID和GID,UID表示用户id,GID表示用户组id。在登录的…...
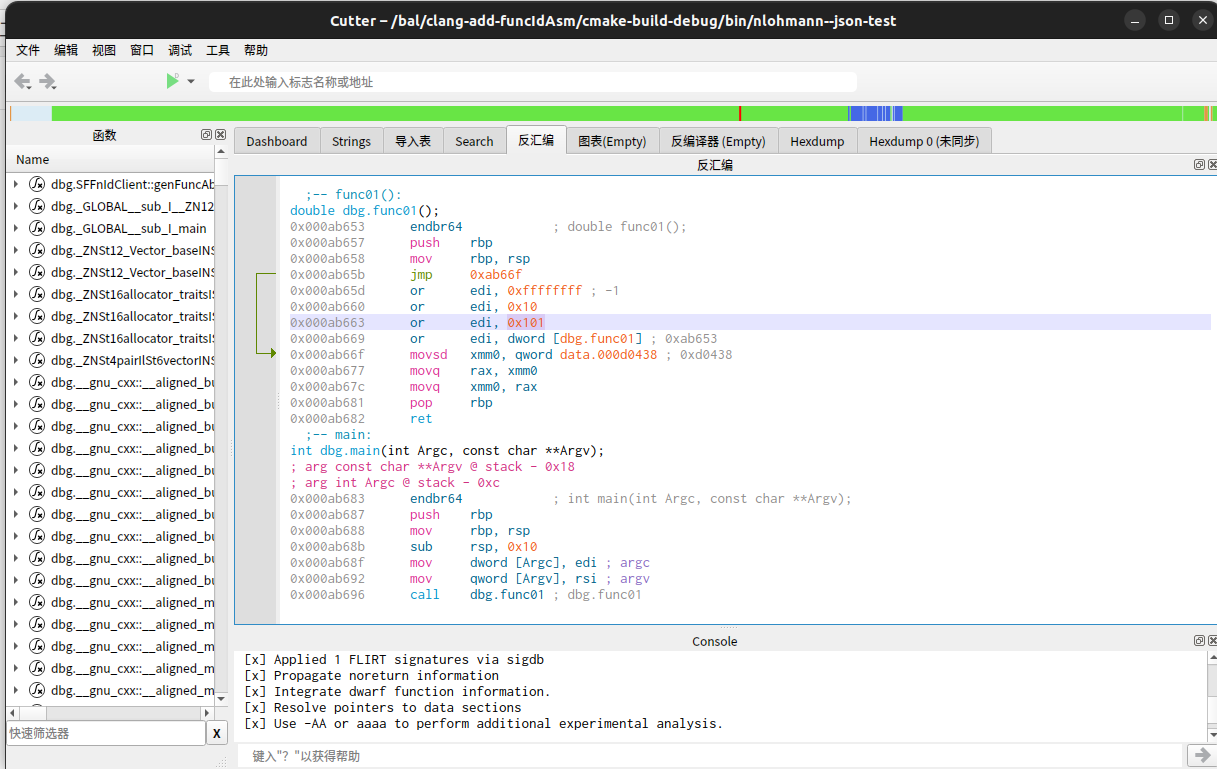
linux反汇编工具: ida pro、rizinorg/cutter; ubuntu 22 flameshot延迟截图 以应对下拉菜单
rizinorg/cutter rizinorg/cutter 是 命令行反汇编工具 rizinorg/rizin 的图形化界面, 这比 ida pro跑在kvm虚拟机中方便多了, ubuntu22.04下直接下载Cutter-v2.3.2-Linux-x86_64.AppImage后即可运行,如下图: 注意 有个同名的报废品: radare2/Cutter 即 radare2的图形化界…...
】使用NiosV/m 处理器,niosv-download 为什么会失败?)
【INTEL(ALTERA)】使用NiosV/m 处理器,niosv-download 为什么会失败?
说明 在英特尔 Quartus Prime Pro Edition 软件 23.3 版及更高版本中将 Nios V 处理器软件下载到非流水线Nios V/m 处理器时,可能会出现此问题。 这是由于处理器限制,仅影响非流水线Nios V/m 处理器。 以下其他处理器不受此限制的影响: 管道…...
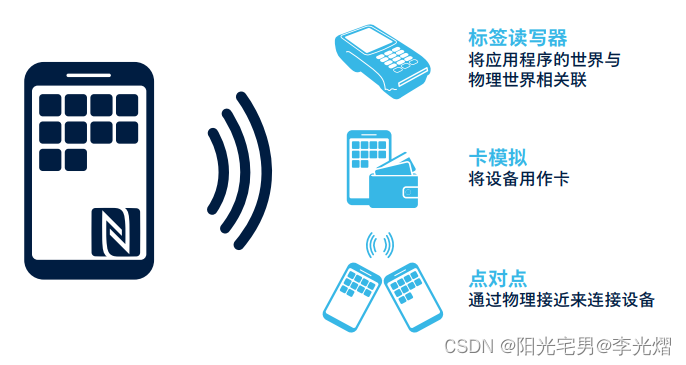
【无线通信专题】NFC通信模式及可能的应用方式
在文章【无线通信专题】NFC基本原理中我们讲到了NFC工作模式。其中NFC工作模式主要有三种,读写模式、卡模拟模式、点对点模式。 NFC通信模式丰富,NFC Forum定义了三种NFC设备:通用NFCForum设备、读写器设备和标签设备。这些NFC设备可以在三种通信模式下运行,并对应用案例进…...
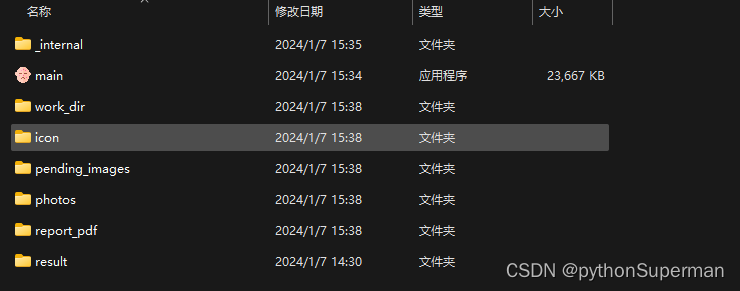
pyinstaller生成的exe文件启动时间漫长的原因
加-F慢的原因是,pyinstaller把所有资源文件包括python解释器的依赖文件和库都打包到exe一个文件中,用户打开时,pyinstaller需要先执行一边解压操作,把依赖文件全部解压出来。慢就慢在这里。 如果不加-F,你会发现那些文…...

C语言基本语句介绍
c程序的执行部分是由语句组成的。程序的功能也是由执行语句来实现的,c语句分为6类 1表达式语句 表达式语句由表达式加上分号“;”组成 一般形式:表达式; 2函数调用语句 由函数名,实际参数加上分号“;”…...
【QT】QString类型中,Empty和NULL有什么区别在qt里,对比C#
在 Qt 中,QString 类型的字符串使用 isEmpty() 方法来检查字符串是否为空,而不是使用 null。这与 C# 中的 string.IsNullOrEmpty 方法略有不同。 QString::isEmpty(): 用于检查字符串是否为空。一个 QString 对象可能是空字符串,即…...
)
Android开发者必看:360加固保最新配置避坑指南(2024版)
Android应用安全加固实战:360加固保2024高效配置与深度优化指南 移动应用安全已成为开发者不可忽视的核心议题。作为国内领先的Android应用保护方案,360加固保持续迭代其防护能力,但许多开发团队在实际配置过程中仍会遇到各种"暗礁"…...
)
手把手教你用开疆智能网关搞定PROFINET与EtherCAT混搭网络(附TIA Portal配置避坑点)
工业自动化实战:PROFINET与EtherCAT异构网络高效互联指南 在工业自动化现场,工程师们常常面临一个现实挑战:如何让不同协议的设备在同一系统中无缝协作?想象这样一个场景——您的产线以西门子S7-1500 PLC为核心构建了PROFINET网络…...

无线功率传输三相两电平逆变器供电的无刷直流电机仿真 Matlab/simulink仿真(201...
无线功率传输三相两电平逆变器供电的无刷直流电机仿真 Matlab/simulink仿真(2018a及以上版本), 最近在搞一个挺有意思的玩意儿——用无线充电给无刷电机供电。说人话就是让电机摆脱电源线的束缚,还能保持稳定运行。这种玩法在机器人关节、无人机驱动场景…...

RISC-V PMA与PMP协同设计:从硬件属性到软件权限的完整内存保护链
1. 理解RISC-V内存保护的双重防线 第一次接触RISC-V的内存保护机制时,我被PMA和PMP这两个缩写搞晕了——它们看起来都跟内存保护相关,但具体区别是什么?后来在调试一块物联网模组时,我才真正理解它们的协同价值。当时遇到一个诡异…...

杨立昆等联合发文:为何AI还不能自学习?如何实现?
当前,人工智能(AI)在自主学习方面存在一个根本性缺陷:缺乏像人一样学习的能力。儿童从出生起就在学习和行动,他们能灵活选择关注什么、学习什么、何时行动、何时观察,并在不同学习模式间自由切换。相比之下…...

ESP32+ENC28J60以太网Web服务器兼容库
1. 项目概述WebServer_ESP32_ENC 是一个专为 ESP32 平台设计的、面向 ENC28J60 以太网控制器的轻量级 Web 服务封装库。其核心定位并非从零构建 TCP/IP 协议栈,而是深度集成 ESP32 官方 SDK 中成熟的 LwIP 协议栈与硬件抽象层(HAL)࿰…...

从Mask2Former到ONNX:实战部署与疑难排错指南
1. 环境准备:从零搭建Mask2Former转ONNX的完整工具链 第一次尝试将Mask2Former模型转为ONNX格式时,我花了整整三天时间在环境配置上。各种版本冲突、依赖缺失的问题接踵而至,甚至一度让我怀疑人生。后来才发现,关键在于从一开始就…...

用ConvLSTM+注意力机制搞定强降水预测:双偏振雷达数据实战指南
基于ConvLSTM与注意力机制的双偏振雷达强降水预测实战 气象预测领域正经历一场由深度学习驱动的技术革命。本文将手把手带您实现一个融合ConvLSTM与CBAM注意力机制的强降水预测系统,从数据预处理到模型部署全流程解析。不同于传统理论探讨,我们聚焦工程实…...

《Foundation 网格系统》
《Foundation 网格系统》 引言 随着互联网技术的飞速发展,网站设计的重要性日益凸显。良好的网站设计不仅能够提升用户体验,还能为企业带来更高的转化率。本文将深入探讨Foundation网格系统,为您解析其特点、应用以及如何有效地运用在网站设计中。 一、什么是Foundation网…...

OpenCV颜色查找表LUT的5个高级用法:从图像反转到颜色空间缩减
OpenCV颜色查找表LUT的5个高级用法:从图像反转到颜色空间缩减 在数字图像处理领域,颜色查找表(Look Up Table,简称LUT)是一种高效且强大的工具。它通过预先计算的映射关系,能够实现像素值的快速转换&#x…...