输入输出流、字符字节流、NIO
1、对输入输出流、字符字节流的学习,以之前做的批量下载功能为例
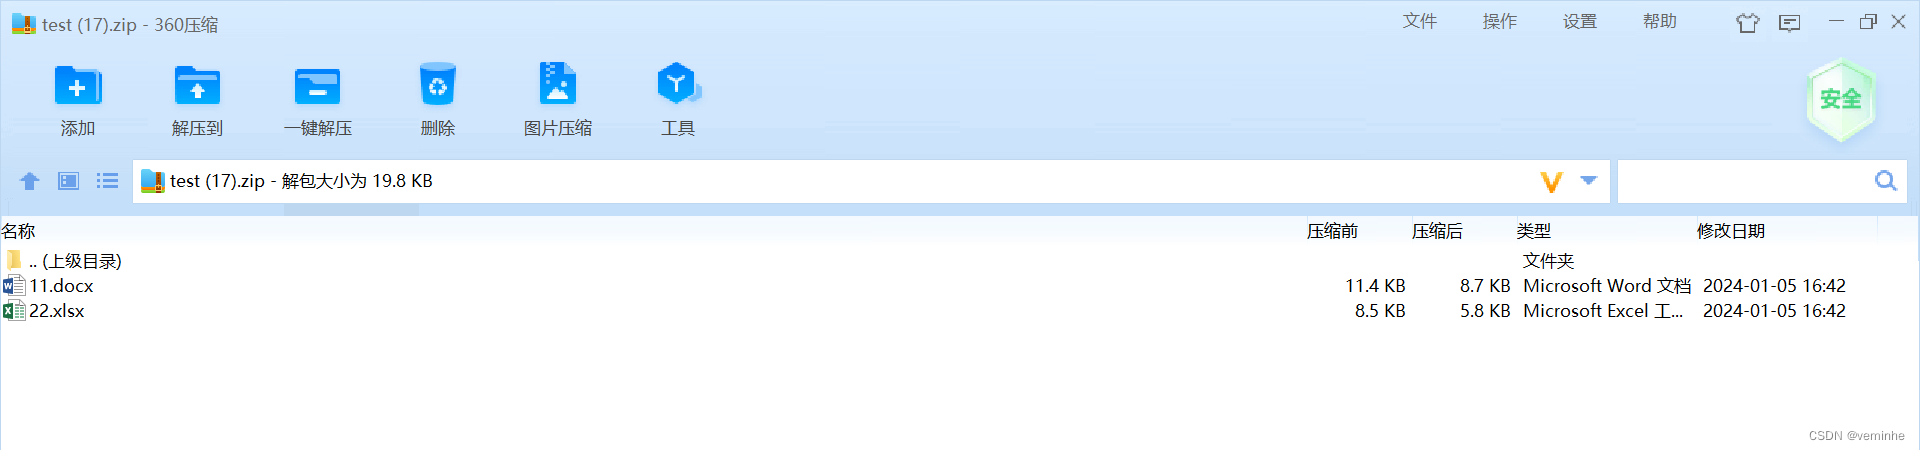
批量下载指的是,将多个文件打包到zip文件中,然后下载该zip文件。
1.1下载网络上的文件
代码参考如下:
import java.io.*;
import java.net.URL;
import java.net.URLConnection;
import java.util.zip.ZipEntry;
import java.util.zip.ZipOutputStream;public class MultiDownloadByUrlTest {public static void main(String[] args) throws IOException {//如果zip文件不存在则创建zipString localZipFile = "D:/temp/testUrl.zip" ;File file = new File(localZipFile);if(!file.exists()){file.createNewFile();}ZipOutputStream out = new ZipOutputStream(new FileOutputStream(localZipFile));byte[] buffer = new byte[1024];//要批量下载的文件数组String[] urls = new String[] {"http://www.baidu.com/img/PCfb_5bf082d29588c07f842ccde3f97243ea.png","https://img-home.csdnimg.cn/images/20201124032511.png"};//依次获取批量下载的文件for(int i =0; i<urls.length;i++){//从数据库中获取文件的路径和文件名,并放入zip文件中String urlFile = urls[i];out.putNextEntry(new ZipEntry(i+".png"));int len;URL url = new URL(urlFile);URLConnection conn = url.openConnection();InputStream inStream = conn.getInputStream();//读入需要下载的文件的内容,打包到zip文件while ((len = inStream.read(buffer)) > 0) {out.write(buffer, 0, len);}out.closeEntry();inStream.close();}out.close();}}
1.2、下载磁盘中的多个文件到zip文件中
import java.io.*;
import java.util.zip.ZipEntry;
import java.util.zip.ZipOutputStream;public class MultiDownloadTest {public static void main(String[] args) throws IOException {//如果zip文件不存在则创建zipString localZipFile = "D:/temp/test.zip" ;File file = new File(localZipFile);if(!file.exists()){file.createNewFile();}ZipOutputStream out = new ZipOutputStream(new FileOutputStream(localZipFile));//要批量下载的文件数组String[] ids = new String[] {"11.docx","22.xlsx"};byte[] buffer = new byte[1024];//依次获取批量下载的文件for(int i =0; i<ids.length;i++){String fileName = ids[i];out.putNextEntry(new ZipEntry(fileName));int len;FileInputStream inStream = new FileInputStream(new File("D:/temp/"+fileName));//读入需要下载的文件的内容,打包到zip文件while ((len = inStream.read(buffer)) > 0) {out.write(buffer, 0, len);}out.closeEntry();inStream.close();}out.close();}}
1.3编写接口,下载该zip文件
Controller类代码如下:
package com.hmblogs.backend.controller;import com.hmblogs.backend.util.MultiDownloadTest;
import lombok.extern.slf4j.Slf4j;
import org.springframework.web.bind.annotation.*;import javax.servlet.ServletOutputStream;
import javax.servlet.http.HttpServletRequest;
import javax.servlet.http.HttpServletResponse;
import java.io.*;@RestController
@Slf4j
public class FileController {/*** get方式下载zip文件* @return*/@GetMapping(value = "/downloadZipByGet")public void downloadZipByGet(HttpServletRequest request,HttpServletResponse response) throws IOException {log.info("downloadZipByGet prepare begin.");MultiDownloadTest.preMultiDownload();log.info("downloadZipByGet prepare end.");log.info("downloadZipByGet begin.");String zipFileName = "D:/temp/test.zip";InputStream is = new FileInputStream(new File(zipFileName));// 设置response参数,可以打开下载页面response.reset();response.setContentType("application/octet-stream;charset=utf-8");response.setHeader("Access-Control-Expose-Headers", "content-disposition");response.setHeader("Content-Disposition", "attachment;filename=test.zip");ServletOutputStream out = response.getOutputStream();BufferedInputStream bis = null;BufferedOutputStream bos = null;try {bis = new BufferedInputStream(is);bos = new BufferedOutputStream(out);byte[] buff = new byte[2048];int bytesRead;while (-1 != (bytesRead = bis.read(buff, 0, buff.length))) {bos.write(buff, 0, bytesRead);}log.info("downloadZipByGet end.");} catch (final IOException e) {log.error("downloadZipByGet errors, reason:{}", e.getMessage());} finally {if (bis != null){bis.close();}if (is != null){is.close();}if (bos != null){bos.close();}if (out != null){out.close();}}// 用后删除临时用途的zip文件File fileTempZip = new File(zipFileName);if(fileTempZip.exists()){fileTempZip.delete();}}/*** post方式下载zip文件* @return*/@RequestMapping(value = "/downloadZipByPost",method = RequestMethod.POST)public void downloadZipByPost(){}}
工具类MultiDownloadTest.java代码如下:
package com.hmblogs.backend.util;import java.io.File;
import java.io.FileInputStream;
import java.io.FileOutputStream;
import java.io.IOException;
import java.util.zip.ZipEntry;
import java.util.zip.ZipOutputStream;public class MultiDownloadTest {public static void preMultiDownload() throws IOException {//如果zip文件不存在则创建zipString localZipFile = "D:/temp/test.zip" ;File file = new File(localZipFile);if(!file.exists()){file.createNewFile();}ZipOutputStream out = new ZipOutputStream(new FileOutputStream(localZipFile));//要批量下载的文件数组String[] ids = new String[] {"11.docx","22.xlsx"};byte[] buffer = new byte[1024];//依次获取批量下载的文件for(int i =0; i<ids.length;i++){String fileName = ids[i];out.putNextEntry(new ZipEntry(fileName));int len;FileInputStream inStream = new FileInputStream(new File("D:/temp/"+fileName));//读入需要下载的文件的内容,打包到zip文件while ((len = inStream.read(buffer)) > 0) {out.write(buffer, 0, len);}out.closeEntry();inStream.close();}out.close();}}
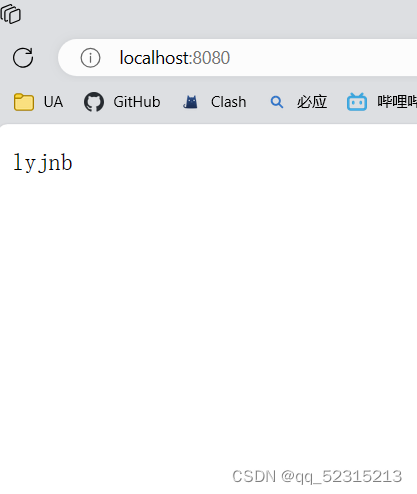
1.4访问接口
http://localhost:8080/backend/downloadZipByGet
下载了文件,能正常打开,且文件都是正常的。
二、学习NIO
参考Java之NIO基本简介_java_脚本之家
2.1开发一个简单的服务端接收客户端发过来的消息的功能
服务端Server.java代码如下:
import java.io.IOException;
import java.net.InetSocketAddress;
import java.nio.ByteBuffer;
import java.nio.channels.*;
import java.util.Iterator;
public class Server {public static void main(String[] args) {try {//1.获取管道ServerSocketChannel serverSocketChannel = ServerSocketChannel.open();//2.设置非阻塞模式serverSocketChannel.configureBlocking(false);//3.绑定端口serverSocketChannel.bind(new InetSocketAddress(8888));//4.获取选择器Selector selector = Selector.open();//5.将通道注册到选择器上,并且开始指定监听的接收事件serverSocketChannel.register(selector, SelectionKey.OP_ACCEPT);//6.轮询已经就绪的事件while (selector.select() > 0){System.out.println("开启事件处理");//7.获取选择器中所有注册的通道中已准备好的事件Iterator<SelectionKey> it = selector.selectedKeys().iterator();//8.开始遍历事件while (it.hasNext()){SelectionKey selectionKey = it.next();//9.判断这个事件具体是啥if (selectionKey.isAcceptable()){System.out.println("isAcceptable--->"+selectionKey);//10.获取当前接入事件的客户端通道SocketChannel socketChannel = serverSocketChannel.accept();//11.切换成非阻塞模式socketChannel.configureBlocking(false);//12.将本客户端注册到选择器socketChannel.register(selector,SelectionKey.OP_READ);}else if (selectionKey.isReadable()){System.out.println("isReadable--->"+selectionKey);//13.获取当前选择器上的读SocketChannel socketChannel = (SocketChannel) selectionKey.channel();//14.读取ByteBuffer buffer = ByteBuffer.allocate(1024);int len;while ((len = socketChannel.read(buffer)) > 0){buffer.flip();System.out.println(new String(buffer.array(),0,len));//清除之前的数据(覆盖写入)buffer.clear();}}//15.处理完毕后,移除当前事件it.remove();}}} catch (IOException e) {e.printStackTrace();}}
}
客户端Client.java代码如下:
import java.io.IOException;
import java.net.InetSocketAddress;
import java.nio.ByteBuffer;
import java.nio.channels.SocketChannel;
import java.util.Scanner;
public class Client {public static void main(String[] args) {try {SocketChannel socketChannel = SocketChannel.open(new InetSocketAddress("127.0.0.1",8888));socketChannel.configureBlocking(false);ByteBuffer buffer = ByteBuffer.allocate(1024);Scanner scanner = new Scanner(System.in);while (true){System.out.print("请输入:");String msg = scanner.nextLine();buffer.put(msg.getBytes());buffer.flip();socketChannel.write(buffer);buffer.clear();}} catch (IOException e) {e.printStackTrace();}}
}
运行Server
然后运行Client
在Client输入wwww
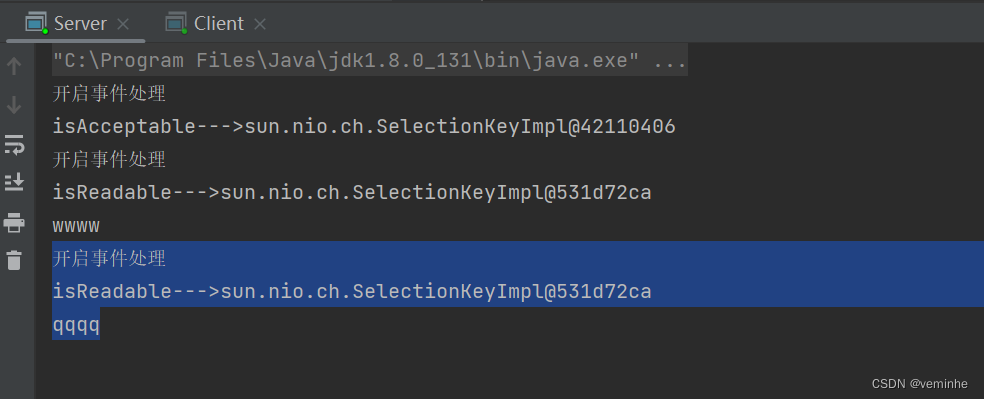
然后看到Server打印如下内容:
开启事件处理
isAcceptable--->sun.nio.ch.SelectionKeyImpl@42110406
开启事件处理
isReadable--->sun.nio.ch.SelectionKeyImpl@531d72ca
wwww
可以看到, 这时先开启了isAcceptable事件处理,然后开启了isReadable事件处理。
然后再在Client输入qqqq
然后看到Server打印如下内容:
开启事件处理
isReadable--->sun.nio.ch.SelectionKeyImpl@531d72ca
qqqq
这时只开启了isReadable这样的事件处理,不用再开启isAcceptable事件处理
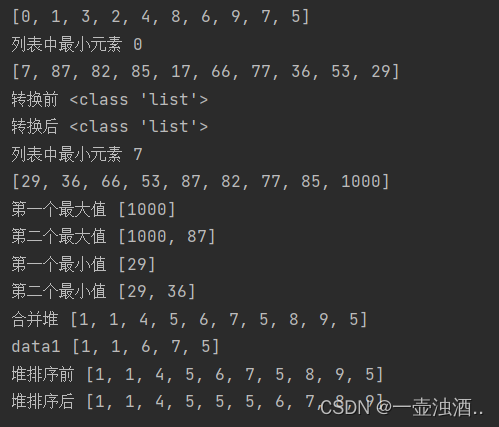
server控制台截图如下
client的控制台如下: 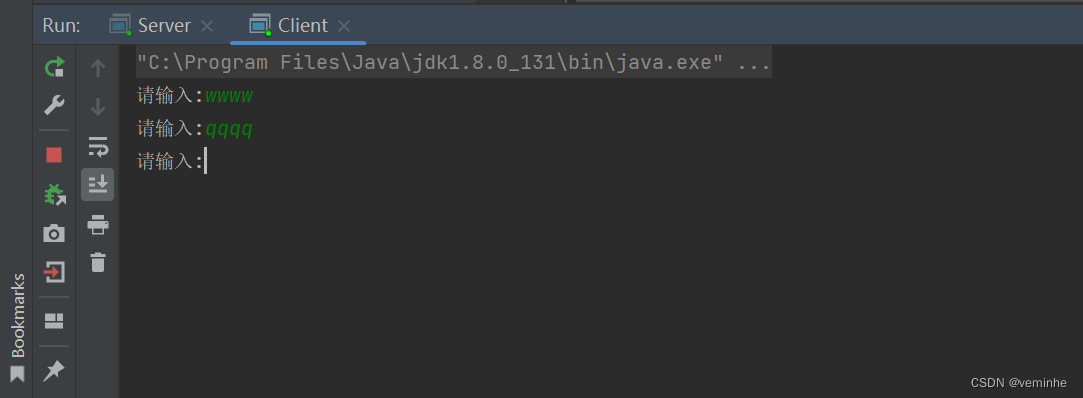
2.2开发网络编程应用实例-群聊系统
需求:进一步理解 NIO 非阻塞网络编程机制,实现多人群聊
编写一个 NIO 群聊系统,实现客户端与客户端的通信需求(非阻塞)
服务器端:可以监测用户上线,离线,并实现消息转发功能
客户端:通过 channel 可以无阻塞发送消息给其它所有客户端用户,同时可以接受其它客户端用户通过服务端转发来的消息
Server.java代码如下:
import java.io.IOException;
import java.net.InetSocketAddress;
import java.nio.ByteBuffer;
import java.nio.channels.*;
import java.util.Iterator;
/****/
public class Server {//定义属性private Selector selector;private ServerSocketChannel ssChannel;private static final int PORT = 9999;//构造器//初始化工作public Server() {try {// 1、获取通道ssChannel = ServerSocketChannel.open();// 2、切换为非阻塞模式ssChannel.configureBlocking(false);// 3、绑定连接的端口ssChannel.bind(new InetSocketAddress(PORT));// 4、获取选择器Selectorselector = Selector.open();// 5、将通道都注册到选择器上去,并且开始指定监听接收事件ssChannel.register(selector , SelectionKey.OP_ACCEPT);}catch (IOException e) {e.printStackTrace();}}//监听public void listen() {System.out.println("监听线程:" + Thread.currentThread().getName());try {while (selector.select() > 0){// 7、获取选择器中的所有注册的通道中已经就绪好的事件Iterator<SelectionKey> it = selector.selectedKeys().iterator();// 8、开始遍历这些准备好的事件while (it.hasNext()){// 提取当前这个事件SelectionKey sk = it.next();// 9、判断这个事件具体是什么if(sk.isAcceptable()){// 10、直接获取当前接入的客户端通道SocketChannel schannel = ssChannel.accept();// 11 、切换成非阻塞模式schannel.configureBlocking(false);// 12、将本客户端通道注册到选择器System.out.println(schannel.getRemoteAddress() + " 上线 ");schannel.register(selector , SelectionKey.OP_READ);//提示}else if(sk.isReadable()){//处理读 (专门写方法..)readData(sk);}it.remove(); // 处理完毕之后需要移除当前事件}}}catch (Exception e) {e.printStackTrace();}finally {//发生异常处理....}}//读取客户端消息private void readData(SelectionKey key) {//获取关联的channelSocketChannel channel = null;try {//得到channelchannel = (SocketChannel) key.channel();//创建bufferByteBuffer buffer = ByteBuffer.allocate(1024);int count = channel.read(buffer);//根据count的值做处理if(count > 0) {//把缓存区的数据转成字符串String msg = new String(buffer.array());//输出该消息System.out.println("来自客户端---> " + msg);//向其它的客户端转发消息(去掉自己), 专门写一个方法来处理sendInfoToOtherClients(msg, channel);}}catch (IOException e) {try {System.out.println(channel.getRemoteAddress() + " 离线了..");e.printStackTrace();//取消注册key.cancel();//关闭通道channel.close();}catch (IOException e2) {e2.printStackTrace();;}}}//转发消息给其它客户(通道)private void sendInfoToOtherClients(String msg, SocketChannel self ) throws  IOException{System.out.println("服务器转发消息中...");System.out.println("服务器转发数据给客户端线程: " + Thread.currentThread().getName());//遍历 所有注册到selector 上的 SocketChannel,并排除 selffor(SelectionKey key: selector.keys()) {//通过 key  取出对应的 SocketChannelChannel targetChannel = key.channel();//排除自己if(targetChannel instanceof  SocketChannel && targetChannel != self) {//转型SocketChannel dest = (SocketChannel)targetChannel;//将msg 存储到bufferByteBuffer buffer = ByteBuffer.wrap(msg.getBytes());//将buffer 的数据写入 通道dest.write(buffer);}}}public static void main(String[] args) {//创建服务器对象Server groupChatServer = new Server();groupChatServer.listen();}
}
Client.java代码如下:
import java.io.IOException;
import java.net.InetSocketAddress;
import java.nio.ByteBuffer;
import java.nio.channels.SelectionKey;
import java.nio.channels.Selector;
import java.nio.channels.SocketChannel;
import java.util.Iterator;
import java.util.Scanner;
public class Client {//定义相关的属性private final String HOST = "127.0.0.1"; // 服务器的ipprivate final int PORT = 9999; //服务器端口private Selector selector;private SocketChannel socketChannel;private String username;//构造器, 完成初始化工作public Client() throws IOException {selector = Selector.open();//连接服务器socketChannel = socketChannel.open(new InetSocketAddress("127.0.0.1", PORT));//设置非阻塞socketChannel.configureBlocking(false);//将channel 注册到selectorsocketChannel.register(selector, SelectionKey.OP_READ);//得到usernameusername = socketChannel.getLocalAddress().toString().substring(1);System.out.println(username + " is ok...");}//向服务器发送消息public void sendInfo(String info) {info = username + " 说:" + info;try {socketChannel.write(ByteBuffer.wrap(info.getBytes()));}catch (IOException e) {e.printStackTrace();}}//读取从服务器端回复的消息public void readInfo() {try {int readChannels = selector.select();if(readChannels > 0) {//有可以用的通道Iterator<SelectionKey> iterator = selector.selectedKeys().iterator();while (iterator.hasNext()) {SelectionKey key = iterator.next();if(key.isReadable()) {//得到相关的通道SocketChannel sc = (SocketChannel) key.channel();//得到一个BufferByteBuffer buffer = ByteBuffer.allocate(1024);//读取sc.read(buffer);//把读到的缓冲区的数据转成字符串String msg = new String(buffer.array());System.out.println(msg.trim());}}iterator.remove(); //删除当前的selectionKey, 防止重复操作} else {//System.out.println("没有可以用的通道...");}}catch (Exception e) {e.printStackTrace();}}public static void main(String[] args) throws Exception {//启动我们客户端Client chatClient = new Client();//启动一个线程, 每个3秒,读取从服务器发送数据new Thread() {public void run() {while (true) {chatClient.readInfo();try {Thread.currentThread().sleep(3000);}catch (InterruptedException e) {e.printStackTrace();}}}}.start();//发送数据给服务器端Scanner scanner = new Scanner(System.in);while (scanner.hasNextLine()) {System.out.print("请输入:");String s = scanner.nextLine();chatClient.sendInfo(s);}}
}
Client22.java代码如下:就是Client.java的代码复制一份,改下文件名而已。
import java.io.IOException;
import java.net.InetSocketAddress;
import java.nio.ByteBuffer;
import java.nio.channels.SelectionKey;
import java.nio.channels.Selector;
import java.nio.channels.SocketChannel;
import java.util.Iterator;
import java.util.Scanner;public class Client22 {//定义相关的属性private final String HOST = "127.0.0.1"; // 服务器的ipprivate final int PORT = 9999; //服务器端口private Selector selector;private SocketChannel socketChannel;private String username;//构造器, 完成初始化工作public Client22() throws IOException {selector = Selector.open();//连接服务器socketChannel = socketChannel.open(new InetSocketAddress("127.0.0.1", PORT));//设置非阻塞socketChannel.configureBlocking(false);//将channel 注册到selectorsocketChannel.register(selector, SelectionKey.OP_READ);//得到usernameusername = socketChannel.getLocalAddress().toString().substring(1);System.out.println(username + " is ok...");}//向服务器发送消息public void sendInfo(String info) {info = username + " 说:" + info;try {socketChannel.write(ByteBuffer.wrap(info.getBytes()));}catch (IOException e) {e.printStackTrace();}}//读取从服务器端回复的消息public void readInfo() {try {int readChannels = selector.select();if(readChannels > 0) {//有可以用的通道Iterator<SelectionKey> iterator = selector.selectedKeys().iterator();while (iterator.hasNext()) {SelectionKey key = iterator.next();if(key.isReadable()) {//得到相关的通道SocketChannel sc = (SocketChannel) key.channel();//得到一个BufferByteBuffer buffer = ByteBuffer.allocate(1024);//读取sc.read(buffer);//把读到的缓冲区的数据转成字符串String msg = new String(buffer.array());System.out.println(msg.trim());}}iterator.remove(); //删除当前的selectionKey, 防止重复操作} else {//System.out.println("没有可以用的通道...");}}catch (Exception e) {e.printStackTrace();}}public static void main(String[] args) throws Exception {//启动我们客户端Client22 chatClient = new Client22();//启动一个线程, 每个3秒,读取从服务器发送数据new Thread() {public void run() {while (true) {chatClient.readInfo();try {Thread.currentThread().sleep(3000);}catch (InterruptedException e) {e.printStackTrace();}}}}.start();//发送数据给服务器端Scanner scanner = new Scanner(System.in);while (scanner.hasNextLine()) {System.out.print("请输入:");String s = scanner.nextLine();chatClient.sendInfo(s);}}
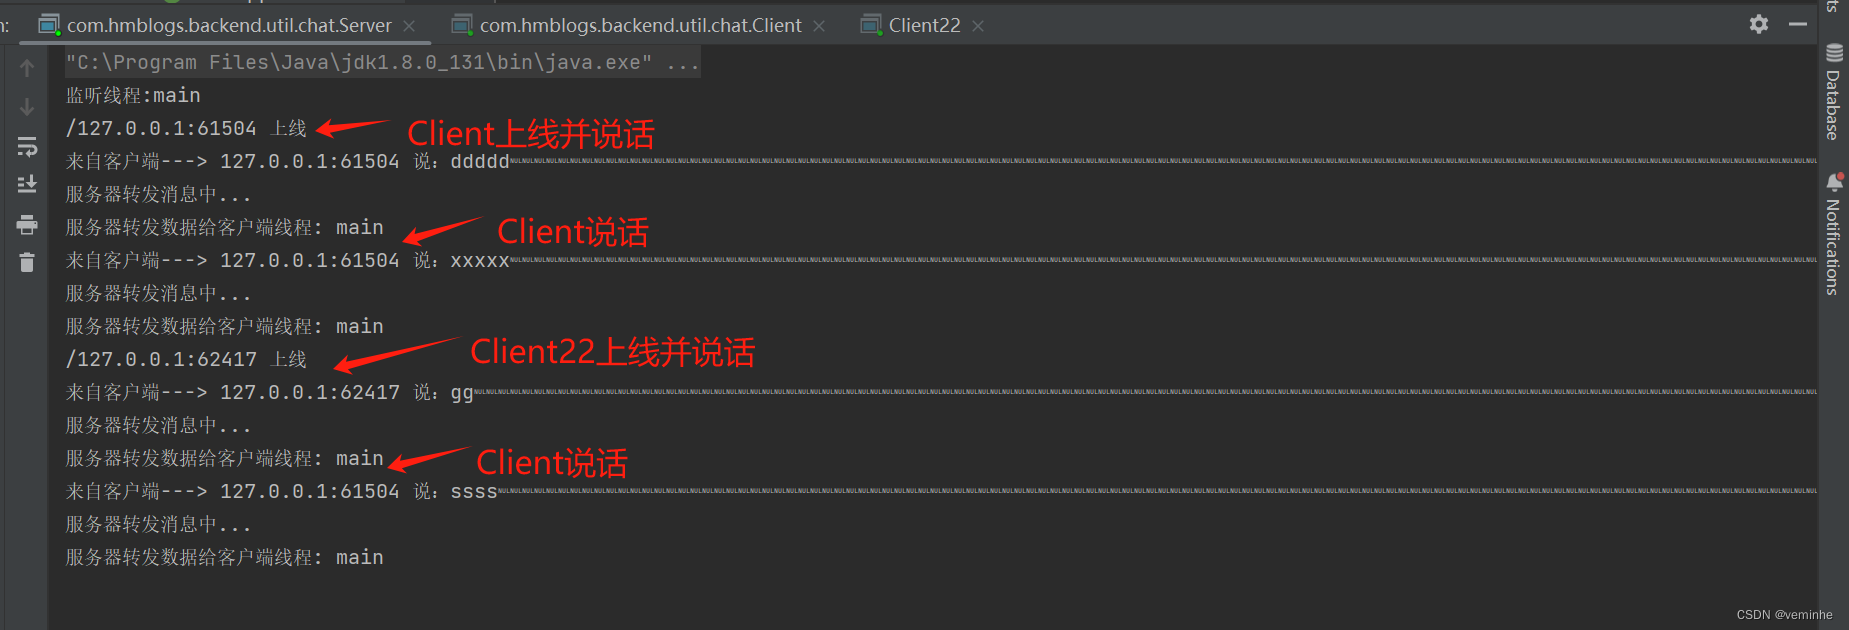
}启动Server、Client、Client22后,在Client输入内容、在Client22输入内容后,对3个控制台截图如下
Server控制台截图如下:
Client控制台如下:
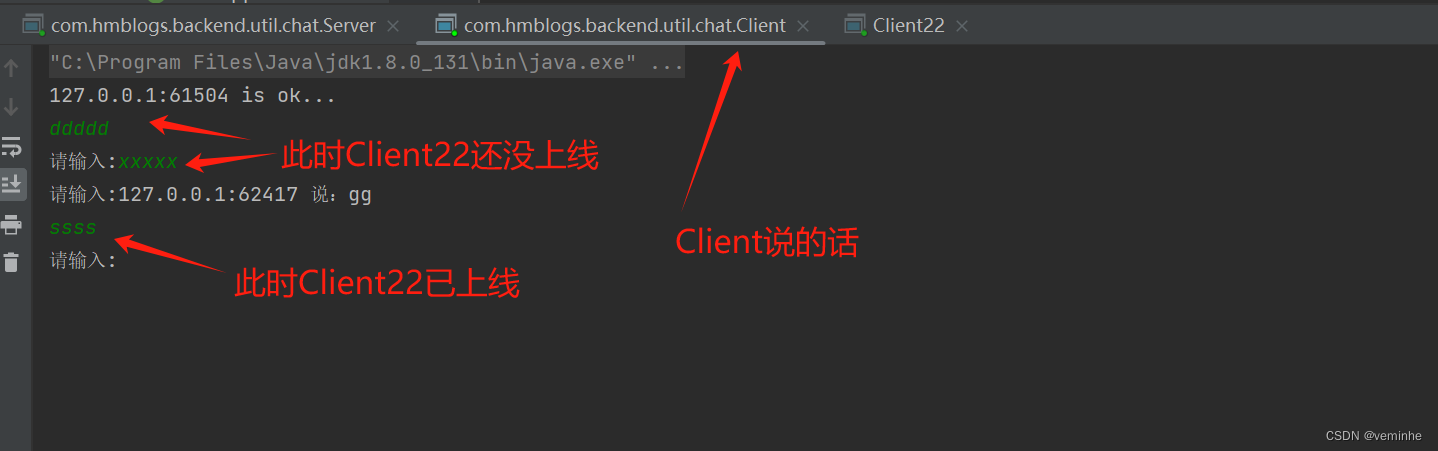
Client22控制台如下:
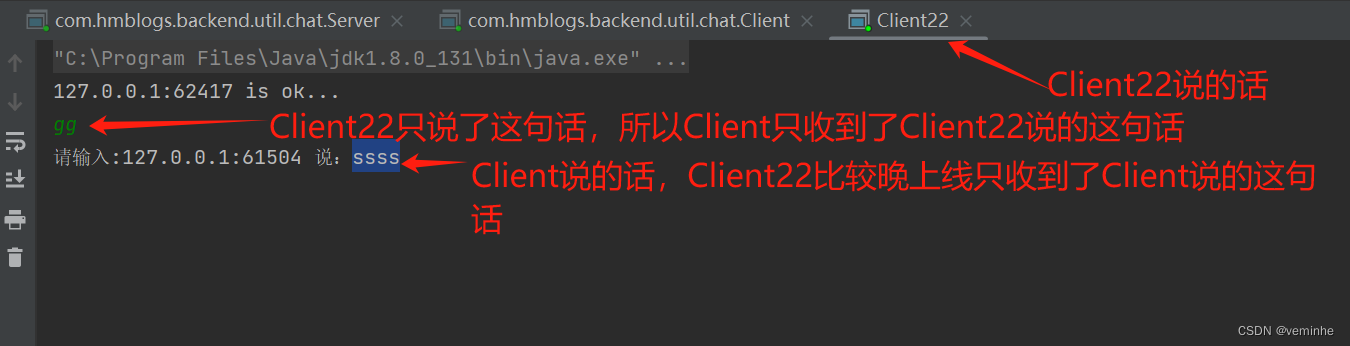
简单的需求目的达到了。
相关文章:
输入输出流、字符字节流、NIO
1、对输入输出流、字符字节流的学习,以之前做的批量下载功能为例 批量下载指的是,将多个文件打包到zip文件中,然后下载该zip文件。 1.1下载网络上的文件 代码参考如下: import java.io.*; import java.net.URL; import java.n…...
格式化处理)
js中对数字,超大金额(千位符,小数点)格式化处理
前言 这个问题的灵感来自线上一个小bug,前两天刚看完同事写的代码,对数字类型处理的很好,之前一直都是用正则和toFixed(2)处理数字相关,后面发现使用numeral.js处理更完美。 对于下面这种数据的处理,你能想到几种方法…...

Android 打开热点2.4G系统重启解决
Android 打开热点2.4G系统重启解决 文章目录 Android 打开热点2.4G系统重启解决一、前言二、过程分析1、Android 设备开机后第一次打开热点2.4G系统重启2、日志分析3、设备重启原因 三、解决方法四、其他1、wifi/有线网 代理信息也可能导致系统重启2、Android13 热点默认5G频道…...

全链路压力测试有哪些主要作用
全链路压力测试是在软件开发和维护过程中不可或缺的一环,尤其在复杂系统和高并发场景下显得尤为重要。下面将详细介绍全链路压力测试的主要作用。 一、全链路压力测试概述 全链路压力测试是指对软件系统的全部组件(包括前端、后端、数据库、网络、中间件等)在高负载…...

【python基础教程】print输出函数和range()函数的正确使用方式
嗨喽,大家好呀~这里是爱看美女的茜茜呐 print()有多个参数,参数个数不固定。 有四个关键字参数(sep end file flush),这四个关键字参数都有默认值。 print作用是将objects的内容输出到file中,objects中的…...

LeetCode255.用队列实现栈
题目传送门:Leetcode255.用队列实现栈 请你仅使用两个队列实现一个后入先出(LIFO)的栈,并支持普通栈的全部四种操作(push、top、pop 和 empty)。 实现 MyStack 类: void push(int x) 将元素 x 压…...
PHPStudy快速搭建网站并结合内网穿透远程访问本地站点
文章目录 [toc]使用工具1. 本地搭建web网站1.1 下载phpstudy后解压并安装1.2 打开默认站点,测试1.3 下载静态演示站点1.4 打开站点根目录1.5 复制演示站点到站网根目录1.6 在浏览器中,查看演示效果。 2. 将本地web网站发布到公网2.1 安装cpolar内网穿透2…...

AI嵌入式K210项目(1)-芯片开发板介绍
系列文章目录 在人工智能大潮滚滚而来的时代,作为一个从事嵌入式行业多年的程序猿倍感焦虑,有被替代的焦虑,也有跟不上新技术步伐的无奈,本系列文章将介绍一个从硬件设计到ai训练、最后到模型部署的完整案例;第一阶段…...
Blazor中使用impress.js
impress.js是什么? 你想在浏览器中做PPT吗?比如在做某些类似于PPT自动翻页,局部放大之类,炫酷无比。 在Blazor中,几经尝试,用以下方法可以实现。写文不易,请点赞、收藏、关注,并在转…...

ros2 ubuntu 20.04 安装 foxy
设置区域设置 确保您有一个支持UTF-8. 如果您处于最小环境(例如 docker 容器)中,则区域设置可能是最小的,例如POSIX. 我们使用以下设置进行测试。但是,如果您使用不同的 UTF-8 支持的区域设置,应该没问题。…...
Blazor 错误笔记
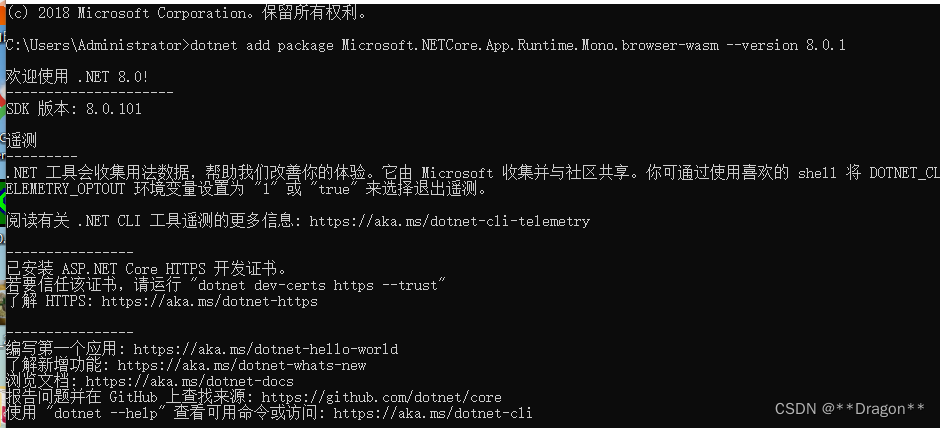
1. 运行时问题 Microsoft.NETCore.App.Runtime.Mono.browser-wasm Microsoft.NETCore.App.Runtime.Mono.browser-wasm 是一个 .NET Core 运行时的包,用于在浏览器中运行 .NET Core 应用程序。它是针对 WebAssembly 架构的 .NET Core 运行时,可以在浏览…...

【深度学习1对1指导】
...
XUbuntu22.04之快速复制绝对路径(二百零五)
简介: CSDN博客专家,专注Android/Linux系统,分享多mic语音方案、音视频、编解码等技术,与大家一起成长! 优质专栏:Audio工程师进阶系列【原创干货持续更新中……】🚀 优质专栏:多媒…...
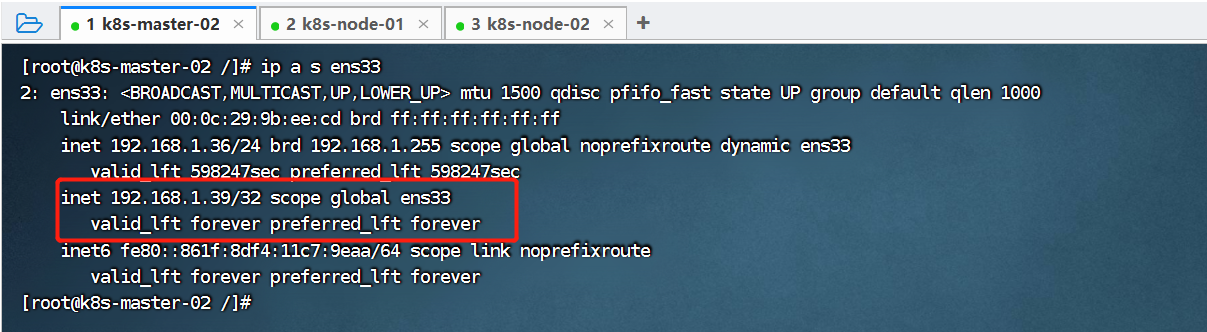
21、Kubernetes核心技术 - 高可用集群搭建(kubeadm+keepalived+haproxy)
目录 一、简介 二、高可用集群架构说明 三、部署环境说明 四、高可用集群搭建 (1)、初始化所有节点 (2)、修改host文件 (3)、调整内核参数 (4)、所有节点安装Docker (4-1)、配置 docker 的阿里 yum 源 (4-2)、yum 安装 docker (4-3)、配置 docker 的镜像源 (4-4)…...

使用SpringDataRedis操作Redis
Redis的java客户端 jedisLettuceSpring Data Redis Spring Data redis 是Spring的一部分,对 Redis 底层开发包进行了高度封装。在Spring项目中,可以使用Spring Data Redis来简化操作。 Spring Data Redis使用方式 操作步骤: 导入Spring …...
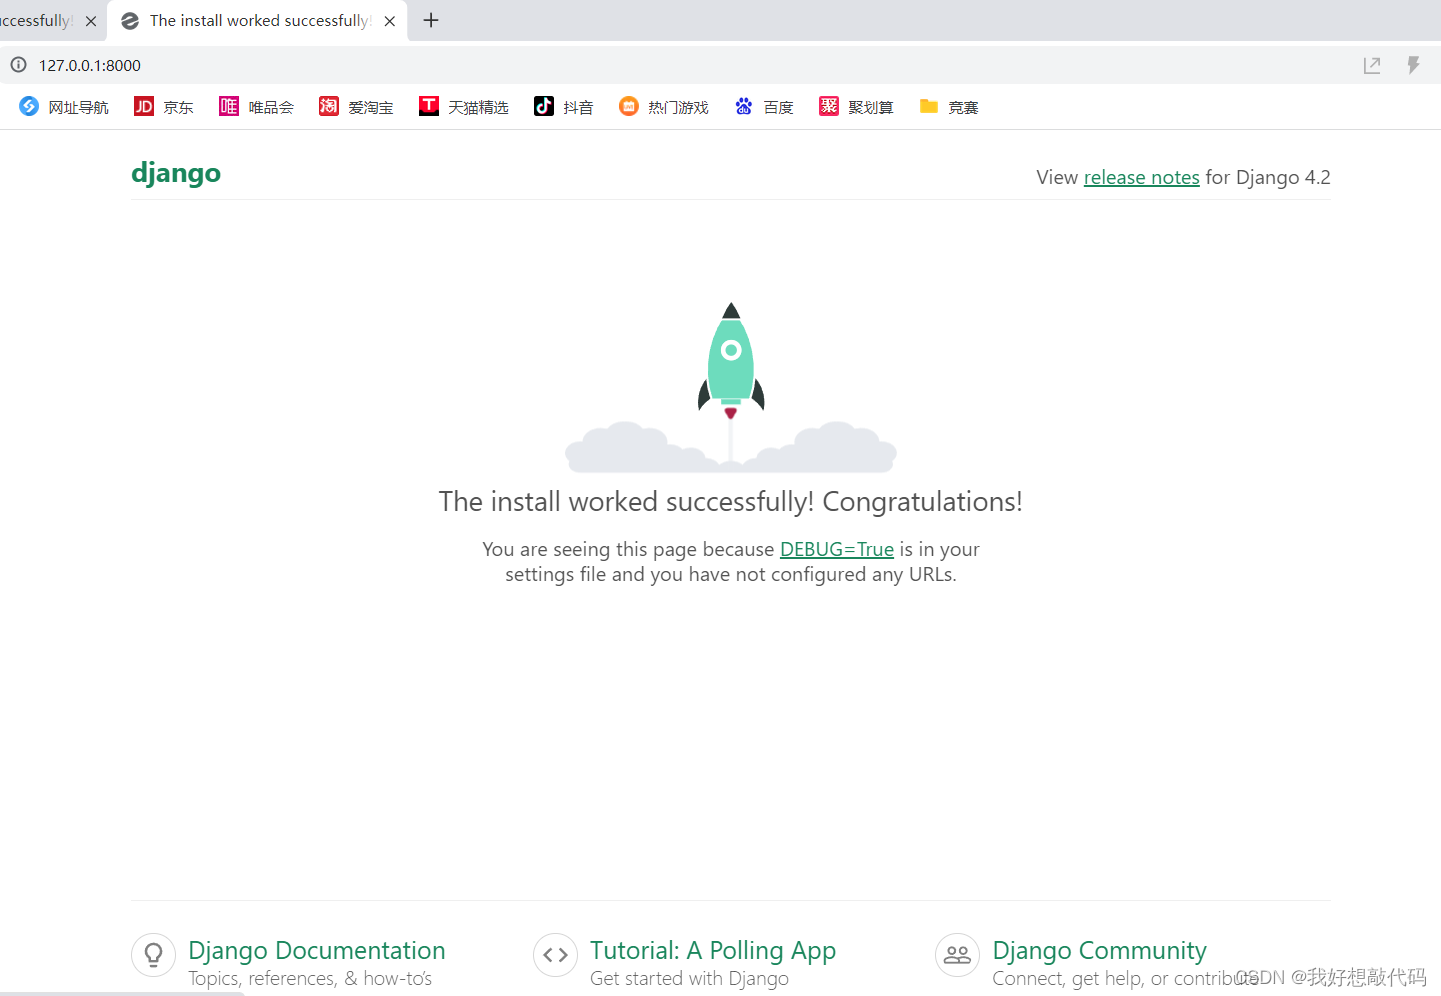
PyCharm社区版如何创建Django项目并运行
一、配置Django环境 1、使用PyCharm打开一个普通的Python项目 2、为该项目配置Django环境 (1)点击"File"-"Settings" (2)点击"Project:项目名"-"Python Interpreter"-"号" &…...

深度探讨鸿蒙工程师面试题
深度探讨鸿蒙工程师面试题 第一部分:引言 鸿蒙(HarmonyOS)作为华为推出的全场景分布式操作系统,引领着未来智能化时代的潮流。鸿蒙工程师在这一创新性领域中扮演着至关重要的角色。本文将深入研究一系列鸿蒙工程师面试题&#x…...
python数据结构堆栈
堆 堆是一种树形结构:满足两个主要性质 堆是一种完全二叉树:堆中所有层级除了最后一层都是完全填满的,且最后一层的节点都是向左排列堆中的任意节点都不大于(或不小于)其子节点的值,这也是堆的属性 impo…...
从网页连接socket服务器和I/O
1.i/o InputStream和InputStreamReader是Java I/O类库中的两个关键类,用于处理字节流。它们的主要区别在于它们处理数据的方式。 InputStream: InputStream是用于读取字节流的抽象类。它是所有字节输入流类的父类。InputStream的子类可以从不同的数据源读取字节&…...
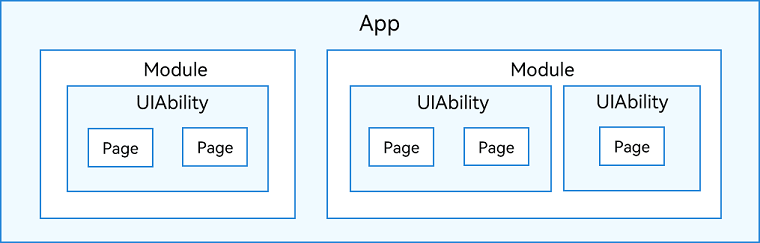
鸿蒙HarmonyOS学习手册_入门篇
鸿蒙HarmonyOS学习手册_入门篇 文章目录 鸿蒙HarmonyOS学习手册_入门篇入门快速入门开发准备基本概念UI框架应用模型工具准备 构建第一个ArkTS应用(Stage模型)-快速入门-入门创建ArkTS工程ArkTS工程目录结构(Stage模型)构建第一个…...

电磁波衰减在气象雷达探测中的关键影响与优化策略
1. 电磁波衰减如何影响气象雷达的"视力" 想象一下你戴着沾满雨滴的眼镜看世界——视线模糊、细节丢失、距离判断失误。气象雷达遭遇电磁波衰减时,面临的正是类似的困境。当雷达发射的电磁波穿越雨雪云层时,能量就像被层层"抽成"&…...

2025届学术党必备的十大降AI率网站推荐榜单
Ai论文网站排名(开题报告、文献综述、降aigc率、降重综合对比) TOP1. 千笔AI TOP2. aipasspaper TOP3. 清北论文 TOP4. 豆包 TOP5. kimi TOP6. deepseek 为对付维普系统含有对AI生成内容的识别机制,若想降低AI生成内容被识别的风险&am…...

DYOR 世茂集团 00813.HK
文章目录1. 公司概况:老牌闽系房企的沉浮1.1 简介1.2 股权结构1.2 核心资质与定位2. 财务表现:2025年成功扭亏为盈2.1 2025年核心财务数据2.2 收入结构变化:多元化成效显现2.3 偿债能力与流动性2.4 估值与市场表现3. 债务重组:境外…...
)
从电机到USB:一文搞懂嵌入式里的感性负载、容性负载与阻抗匹配(附功率因数校正实例)
从电机到USB:一文搞懂嵌入式里的感性负载、容性负载与阻抗匹配(附功率因数校正实例) 在嵌入式系统设计中,工程师常常需要同时面对两种看似截然不同的挑战:大功率电机驱动的强电控制和高速数字通信的弱电信号处理。当电…...
)
保姆级教程:用cam_lidar_calibration搞定激光雷达与相机标定(附避坑指南)
从零实现激光雷达与相机高精度标定:cam_lidar_calibration实战全解析 当激光雷达的点云遇上相机的像素,如何让它们"说同一种语言"?传感器标定就像给两个陌生人做翻译,而外参标定决定了翻译的准确性。今天我们要拆解的ca…...

【5大突破】WarcraftHelper:让经典RTS重获新生的跨系统优化方案
【5大突破】WarcraftHelper:让经典RTS重获新生的跨系统优化方案 【免费下载链接】WarcraftHelper Warcraft III Helper , support 1.20e, 1.24e, 1.26a, 1.27a, 1.27b 项目地址: https://gitcode.com/gh_mirrors/wa/WarcraftHelper WarcraftHelper作为开源解…...

实战演练:基于快马平台快速开发数据库连接池监控与告警脚本
实战演练:基于快马平台快速开发数据库连接池监控与告警脚本 最近线上应用频繁出现响应缓慢的问题,经过初步排查,怀疑是数据库连接数过多导致的。作为运维工程师,我们需要快速开发一个监控脚本,实时掌握数据库连接状态…...
)
SEO必备!WordPress伪静态设置避坑指南(附5种验证方法)
WordPress伪静态配置实战:从原理到验证的完整指南 伪静态配置是WordPress站长提升SEO效果的基础操作之一。但很多人在完成设置后,往往陷入"到底生效没有"的困惑中。本文将带您深入理解伪静态的工作原理,并提供五种可靠的验证方法&a…...

Campus-Imaotai:基于Java的茅台自动预约系统深度解析与实战指南
Campus-Imaotai:基于Java的茅台自动预约系统深度解析与实战指南 【免费下载链接】campus-imaotai i茅台app自动预约,每日自动预约,支持docker一键部署(本项目不提供成品,使用的是已淘汰的算法) 项目地址:…...

多模型协作测试:OpenClaw同时调用Qwen3-32B与其他轻量镜像
多模型协作测试:OpenClaw同时调用Qwen3-32B与其他轻量镜像 1. 混合模型工作流的设计初衷 去年冬天的一个深夜,我正在调试一个需要同时处理代码生成和文本摘要的自动化任务。当时我的OpenClaw配置只能串行调用单一模型,每次任务切换都需要重…...