【建议收藏】深入浅出Yolo目标检测算法(含Python实现源码)
深入浅出Yolo目标检测算法(含Python实现源码)
文章目录
- 深入浅出Yolo目标检测算法(含Python实现源码)
- 1. One-stage & Two-stage
- 2. Yolo详解
- 2.1 Yolo命名
- 2.2 端到端输入输出
- 2.3 Yolo中的标定框
- 2.4 Yolo网络结构
- 2.5 Yolo的算法流程
- 2.6 Yolo的局限性
- 3. Yolo的历史改进
- 3.1 Yolo2
- 3.2 Yolo3
- 4. 代码工程实现
- 4.1 yolo检测主体流程实现
- 4.2 yolo3的网络结构定义
- 4.3 通用辅助功能配置
- 4.4 工程入口程序
- 4.5 测试
1. One-stage & Two-stage

目标检测方法分为One-stage检测和Two-stage两个分支,从字面意思来看,就是将目标检测算法的提取候选区域和框出目标分两步进行还是一步到位,Two-stage属于候选区域/框 + 深度学习分类,即通过提取候选区域,并对相应区域进行以深度学习方法为主的分类的方案;One-stage算法速度比较快,因为其不再单独生成proposal框。
One-stage
two-stage算法会先使用一个网络生成proposal,RPN网络接在图像特征提取网络backbone后,会设置RPN loss(bbox regression loss+classification loss)对RPN网络进行训练,RPN生成的proposal再送到后面的网络中进行更精细的bbox regression和classification。
Two-stage
One-stage追求速度舍弃了two-stage架构,即不再设置单独网络生成proposal,而
是直接在feature map上进行密集抽样,产生大量的先验框,如YOLO的网格方法。这些先验框没有经过两步处理,且框的尺寸往往是人为规定。
One stage & Two stage 算法应用:
two-stage算法主要是RCNN系列,包括RCNN, Fast-RCNN,Faster-RCNN。之后的Mask-RCNN融合了Faster-RCNN架构、ResNet和FPN(Feature Pyramid Networks)backbone,以及FCN里的segmentation方法,在完成了segmentation的同时也提高了detection的精度。
one-stage算法最典型的是YOLO,该算法速度极快。

2. Yolo详解
2.1 Yolo命名
Yolo(You Only Look Once),从取名上能够体现出算法检测快的特点。
2.2 端到端输入输出

YOLO算法采用一个单独的CNN模型实现end-to-end(端到端)的目标检测:
- Resize成448×448448\times 448448×448,图片分割得到7×77\times 77×7网格单元(cell)
- CNN提取特征和预测: 卷积部分提取特征,FC(全连接)部分负责预测。
- 通过非极大值抑制的方式过滤bbox
非极大值抑制(NMS)已在笔者《CV学习笔记-边缘提取》中介绍过,读者不清楚的可以自行查阅或者参考此博文。

上面图片中的例子中将图片划分为了3×33\times 33×3的网格单元,这模拟了Yolo算法中的将输入的图片划分为s×ss\times ss×s网格的过程,只不过s=3s=3s=3,当目标的中心点在某个格子中出现时,那么算法就以这个格子为中心检测这个目标,在上图的例子中,目标就是蓝衣服的人、狗、小马驹。
Yolo网络的输入与输出尺寸相同(但是通道数不同),也即图片输入网络中尺寸为S×SS\times SS×S,最后的输出是S×S×nS\times S\times nS×S×n,nnn即为通道数。重点是通道数的确定,通道数是由标定框、框置信度、检测目标的类别数。后面的章节会重点介绍。
输出的通道数等于2×(4+1)+[class_num]2\times (4+1)+[class\_num]2×(4+1)+[class_num],这里的2指的是每个格子有两个标定框(论文指出的),4代表标定框的坐标信息, 1代表标定框的置信度,[class_num][class\_num][class_num]是检测目标的类别数。
2.3 Yolo中的标定框

根据上节所提的通道数的计算,也反应了标定框的参考指标,所谓4代表了标定框的坐标信息,就如上图中的绿色部分,tx,ty,tw,tht_x,t_y,t_w,t_htx,ty,tw,th分别指标定框的x坐标、y坐标、宽度、高度信息,1表示的标定框的置信度,可以通俗的想象成是目标检测效果的分数或者说是准确度信息,而粉色部分就是对应的每个类别的概率信息,故而检测的目标有多少种类别,这粉色数据就有多少维。
Yolo对于标定框中心坐标的预测,并不是直接给出中心坐标的确切坐标,Yolo会给出:
- 与预测目标的网格单元左上角相关的偏移
- 使用特征图单元的维度进行归一化的偏移
以上图为例,如果中心的预测是 (0.4,0.7)(0.4, 0.7)(0.4,0.7),则中心在13×1313\times1313×13 特征图上的坐标是 (6.4,6.7)(6.4, 6.7)(6.4,6.7)(红色单元的左上角坐标是 (6,6)(6,6)(6,6))。
但是,如果预测到的 x,y 坐标大于 1,比如 (1.2,0.7)(1.2,0.7)(1.2,0.7) 。那么预测的中心坐标是(7.2,6.7)(7.2, 6.7)(7.2,6.7) 。注意该中心在红色单元右侧的单元中。这打破了 YOLO 背后的理论,因为如果我们假设红色框负责预测目标狗,那么狗的中心必须在红色单元中,不应该在它旁边的网格单元中。
因此,为了解决这个问题,我们对输出执行 sigmoid 函数,将输出压缩到区间 0 到 1 之间,有效确保中心处于执行预测的网格单元中。
那么所谓标定框的置信度按照以下的公式计算,这样就计算出各个标定框的类别置信度(class-specific confidence scores/ class scores),其表达的是该标定框中目标属于各个类别的可能性大小以及标定框匹配目标的好坏。
Pr(Classi∣Object)⋅Pr(Object)⋅IOUpredtruth=Pr(Classi)×IOUpredtruthPr(Class_i|Object)\cdot Pr(Object)\cdot IOU_{pred}^{truth}=Pr(Class_i)\times IOU_{pred}^{truth}Pr(Classi∣Object)⋅Pr(Object)⋅IOUpredtruth=Pr(Classi)×IOUpredtruth
其中,Pr(Object)⋅IOUpredtruthPr(Object)\cdot IOU_{pred}^{truth}Pr(Object)⋅IOUpredtruth中左边代表包含这个标定框的格子里是否有目标。有=1没有=0。右边代表标定框的准确程度, 右边的部分是把两个标定框(一个是Ground truth,一个是预测的标定框)进行一个IOU操作,即两个标定框的交集比并集,数值越大,即标定框重合越多,越准确。
IOU交并比在笔者的上一篇博文(《CV学习笔记-Faster-RCNN》中已经介绍过,若有不清楚的读者可以翻阅此博文。
公式整体每个网格预测的class信息和bounding box预测的confidence信息相乘,就得到每个bounding box的class-specific confidence score。
2.4 Yolo网络结构

在上图的示例中,输入尺寸为448×448448\times 448448×448,取尺寸S为7,标定框的个数为2,一共有20个类别,那么输出的尺寸就为7×7×307\times 7\times 307×7×30的一个tensor。
通道的计算方式上面章节中已经提到过,现在将其抽象总结,设:
- 输入图像尺寸为S×SS\times SS×S
- 标定框的个数为B
- 检测的类别数为C
- 标定框的信息(tx,ty,tw,th)(t_x,t_y,t_w,t_h)(tx,ty,tw,th)加一个置信度,共5个维度,称为标定框的信息
那么网络的输出为S×S×(5×B+C)S\times S\times (5\times B +C)S×S×(5×B+C)的一个tensor
将上面图中的过程拆解开来,精细化的过程如下:

其进行了20多次卷积操作以及4次max pooling,其中3×33\times 33×3卷积用于提取特征,1×11\times 11×1卷积用于压缩特征改变通道,最后将图像压缩到7×7×filter7\times 7\times filter7×7×filter的大小,相当于将整个图像划分为7×77\times 77×7的网格,每个网格负责自己这一块区域的目标检测。
整个网络最后利用全连接层输出尺寸为7×7×307\times 7\times 307×7×30,7×77\times 77×7表示的是7×77\times 77×7的网格,通道数30由以下部分组成:
- 前20个代表的是预测的种类
- 后10(5×25\times 25×2)代表两个预测框及其置信度。
2.5 Yolo的算法流程
有目标的中心点像素找出标定框(示例中是两个),原图输入尺寸为7×77\times 77×7,输出的前两个维度保持不变,通道数确定过程如下:
一个标定框有(tx,ty,tw,th)(t_x,t_y,t_w,t_h)(tx,ty,tw,th)和一个置信度5个参数,那么两个框的5个参数信息进行interpretation整合,整合完成后有10。

此时由于每个框要检测的类别数量为20,故拼接上20个种类的概率置信度信息,这样通道数就变成了10+20=30个,那么最终网络的输出就是7×7×307\times 7\times 307×7×30的tensor。


根据类别置信度的计算公式
Pr(Classi∣Object)⋅Pr(Object)⋅IOUpredtruth=Pr(Classi)×IOUpredtruthPr(Class_i|Object)\cdot Pr(Object)\cdot IOU_{pred}^{truth}=Pr(Class_i)\times IOU_{pred}^{truth}Pr(Classi∣Object)⋅Pr(Object)⋅IOUpredtruth=Pr(Classi)×IOUpredtruth
需要将标定框的置信度和每个类别的置信度信息进行乘积,4+1中的1代表的Pr(Object)Pr(Object)Pr(Object),而后面的每个类别的置信度信息为后验概率Pr(Classi∣Object)Pr(Class_i|Object)Pr(Classi∣Object),这样得到一个20×120\times 120×1的向量(bbox),记为bbx(x为序号),向量中有类别的分数。

对每一个网格的每一个bbox执行同样操作: 7x7x2 = 98 bbox (每个bbox既有对应的class信息又有坐标信息)

对每个网格做完操作之后得到98个bbox

得到每个bbox的class-specific confidence score以后,设置阈值,滤掉得分低的boxes,按类别分数分别对98个bbox进行排序筛选,对保留的boxes进行NMS处理,就得到最终的检测结果。

排序筛选的过程展开来看(以类别狗为例)

以最大值作为bbox_max,并与比它小的非0值(bbox_cur)做比较,其他非0值代表本中心点检测到其他类别的概率也是有的,需要参考指标IOU进行下一步筛选。

当有保留值时,递归进行,以下一个非0 bbox_cur(0.2)作为bbox_max继续比较IOU:

最终剩下需要的框

返回主线的流程,对保留的boxes进行NMS处理,就得到最终的检测结果。

对于结果的分析即是:
- class:对bb3(20×1)类别的分数,找分数对应最大类别的索引.
- score:bb3(20×1)中最大的分

最终的结果效果示意图:

整个Yolo的过程图示化:

2.6 Yolo的局限性
当我们使用一种算法的时候,要清楚算法的优缺点,通过需求和具体实际开发环境(如数据集,精准度等)进行trade-off,Yolo的优点在上面已经交代清楚,最大的特点就是快,而算法肯定有他的局限性:
- YOLO对相互靠的很近的物体(挨在一起且中点都落在同一个格子上的情况),还有很小的群体检测效果不好,这是因为一个网格中只预测了两个框,并且只属于一类。
- 测试图像中,当同一类物体出现不常见的长宽比和其他情况时泛化能力偏弱。
3. Yolo的历史改进
3.1 Yolo2
Yolo2的网络结构如下:

改进点:
- 使用了新的分类网络结构作为特征提取部分
- 增加了3×33\times 33×3卷积核的使用,同时池化操作后将通道数加倍
- 将1×11\times 11×1卷积部分加入了各个3×33\times 33×3的卷积中间,起到压缩特征的作用
- 加入了BN(Batch Normalization)归一化加速收敛
- 借鉴残差结构保留了一个shortcut覆盖原始信息,存储之前的特征
- 加入了先验框部分,最后输出的conv_dec的尺寸为13×13×42513\times 13\times 42513×13×425
13×13×42513\times 13\times 42513×13×425的计算方式为13×1313\times 1313×13是将输入网格划分为13×1313\times 1313×13的网格,425(85×585\times 585×5),其中85(80+5)中的80为coco数据集中的个类别,5就是每个框的(tx,ty,tw,th)(t_x,t_y,t_w,t_h)(tx,ty,tw,th)和一个置信度;85×585\times 585×5的5是对应了5个先验框。

Yolo2中的维度聚类(Dimension Clusters):
K-means聚类获取先验框:YOLO2尝试统计出更符合样本中对象尺寸的先验框,这样就可以减少网络微调先验框到实际位置的难度。YOLO2的做法是对训练集中标注的边框进行聚类分析,以寻找尽可能匹配样本的边框尺寸。聚类算法最重要的是选择如何计算两个边框之间的“距离”,对于常用的欧式距离,大边框会产生更大的误差,但我们关心的是边框的IOU。所以,YOLO2在聚类时采用以下公式来计算两个边框之间的“距离”。
d(box,centroid)=1−IOU(box,centroid)d(box,centroid)=1-IOU(box,centroid) d(box,centroid)=1−IOU(box,centroid)
在选择不同的聚类k值情况下,得到的k个centroid边框,计算样本中标注的边框与各centroid的Avg IOU。显然,边框数k越多,Avg IOU越大。
YOLO2选择k=5作为边框数量与IOU的折中。对比手工选择的先验框,使用5个聚类框即可达到61 Avg IOU,相当于9个手工设置的先验框60.9 Avg IOU

作者最终选取5个聚类中心作为先验框。对于两个数据集,5个先验框的width和height如下:
COCO: (0.57273, 0.677385), (1.87446, 2.06253), (3.33843, 5.47434), (7.88282, 3.52778), (9.77052,
9.16828)
VOC: (1.3221, 1.73145), (3.19275, 4.00944), (5.05587, 8.09892), (9.47112, 4.84053), (11.2364, 10.0071)
3.2 Yolo3
Yolov3是相较v2改进最大,用的最广泛的目标检测网络,其网络结构:

改进点:
- 使用了残差网络Residual
- 提取多特征层进行目标检测,一共提取三个特征层,它的shape分别为(13,13,75),(26,26,75),(52,52,75)。最后一个维度为75是因为该图是基于voc数据集的,它的类为20种。yolo3针对每一个特征层存在3个先验框,所以最后维度为3x25。
- 其采用了UpSampling2d设计
4. 代码工程实现
工程基于tensorflow实现
4.1 yolo检测主体流程实现
yolo_predict.py实现了yolo的主体流程,获取yolo模型的关键代码为model = yolo(config.norm_epsilon, config.norm_decay, self.anchors_path, self.classes_path, pre_train = False)
import os
import config
import random
import colorsys
import numpy as np
import tensorflow as tf
from model.yolo3_model import yoloclass yolo_predictor:def __init__(self, obj_threshold, nms_threshold, classes_file, anchors_file):"""Introduction------------初始化函数Parameters----------obj_threshold: 目标检测为物体的阈值nms_threshold: nms阈值"""self.obj_threshold = obj_thresholdself.nms_threshold = nms_threshold# 预读取self.classes_path = classes_fileself.anchors_path = anchors_file# 读取种类名称self.class_names = self._get_class()# 读取先验框self.anchors = self._get_anchors()# 画框框用hsv_tuples = [(x / len(self.class_names), 1., 1.)for x in range(len(self.class_names))]self.colors = list(map(lambda x: colorsys.hsv_to_rgb(*x), hsv_tuples))self.colors = list(map(lambda x: (int(x[0] * 255), int(x[1] * 255), int(x[2] * 255)), self.colors))random.seed(10101)random.shuffle(self.colors)random.seed(None)def _get_class(self):"""Introduction------------读取类别名称"""classes_path = os.path.expanduser(self.classes_path)with open(classes_path) as f:class_names = f.readlines()class_names = [c.strip() for c in class_names]return class_namesdef _get_anchors(self):"""Introduction------------读取anchors数据"""anchors_path = os.path.expanduser(self.anchors_path)with open(anchors_path) as f:anchors = f.readline()anchors = [float(x) for x in anchors.split(',')]anchors = np.array(anchors).reshape(-1, 2)return anchors#---------------------------------------##   对三个特征层解码#   进行排序并进行非极大抑制#---------------------------------------#def boxes_and_scores(self, feats, anchors, classes_num, input_shape, image_shape):"""Introduction------------将预测出的box坐标转换为对应原图的坐标,然后计算每个box的分数Parameters----------feats: yolo输出的feature mapanchors: anchor的位置class_num: 类别数目input_shape: 输入大小image_shape: 图片大小Returns-------boxes: 物体框的位置boxes_scores: 物体框的分数,为置信度和类别概率的乘积"""# 获得特征box_xy, box_wh, box_confidence, box_class_probs = self._get_feats(feats, anchors, classes_num, input_shape)# 寻找在原图上的位置boxes = self.correct_boxes(box_xy, box_wh, input_shape, image_shape)boxes = tf.reshape(boxes, [-1, 4])# 获得置信度box_confidence * box_class_probsbox_scores = box_confidence * box_class_probsbox_scores = tf.reshape(box_scores, [-1, classes_num])return boxes, box_scores# 获得在原图上框的位置def correct_boxes(self, box_xy, box_wh, input_shape, image_shape):"""Introduction------------计算物体框预测坐标在原图中的位置坐标Parameters----------box_xy: 物体框左上角坐标box_wh: 物体框的宽高input_shape: 输入的大小image_shape: 图片的大小Returns-------boxes: 物体框的位置"""box_yx = box_xy[..., ::-1]box_hw = box_wh[..., ::-1]# 416,416input_shape = tf.cast(input_shape, dtype = tf.float32)# 实际图片的大小image_shape = tf.cast(image_shape, dtype = tf.float32)new_shape = tf.round(image_shape * tf.reduce_min(input_shape / image_shape))offset = (input_shape - new_shape) / 2. / input_shapescale = input_shape / new_shapebox_yx = (box_yx - offset) * scalebox_hw *= scalebox_mins = box_yx - (box_hw / 2.)box_maxes = box_yx + (box_hw / 2.)boxes = tf.concat([box_mins[..., 0:1],box_mins[..., 1:2],box_maxes[..., 0:1],box_maxes[..., 1:2]], axis = -1)boxes *= tf.concat([image_shape, image_shape], axis = -1)return boxes# 其实是解码的过程def _get_feats(self, feats, anchors, num_classes, input_shape):"""Introduction------------根据yolo最后一层的输出确定bounding boxParameters----------feats: yolo模型最后一层输出anchors: anchors的位置num_classes: 类别数量input_shape: 输入大小Returns-------box_xy, box_wh, box_confidence, box_class_probs"""num_anchors = len(anchors)anchors_tensor = tf.reshape(tf.constant(anchors, dtype=tf.float32), [1, 1, 1, num_anchors, 2])grid_size = tf.shape(feats)[1:3]predictions = tf.reshape(feats, [-1, grid_size[0], grid_size[1], num_anchors, num_classes + 5])# 这里构建13*13*1*2的矩阵,对应每个格子加上对应的坐标grid_y = tf.tile(tf.reshape(tf.range(grid_size[0]), [-1, 1, 1, 1]), [1, grid_size[1], 1, 1])grid_x = tf.tile(tf.reshape(tf.range(grid_size[1]), [1, -1, 1, 1]), [grid_size[0], 1, 1, 1])grid = tf.concat([grid_x, grid_y], axis = -1)grid = tf.cast(grid, tf.float32)# 将x,y坐标归一化,相对网格的位置box_xy = (tf.sigmoid(predictions[..., :2]) + grid) / tf.cast(grid_size[::-1], tf.float32)# 将w,h也归一化box_wh = tf.exp(predictions[..., 2:4]) * anchors_tensor / tf.cast(input_shape[::-1], tf.float32)box_confidence = tf.sigmoid(predictions[..., 4:5])box_class_probs = tf.sigmoid(predictions[..., 5:])return box_xy, box_wh, box_confidence, box_class_probsdef eval(self, yolo_outputs, image_shape, max_boxes = 20):"""Introduction------------根据Yolo模型的输出进行非极大值抑制,获取最后的物体检测框和物体检测类别Parameters----------yolo_outputs: yolo模型输出image_shape: 图片的大小max_boxes:  最大box数量Returns-------boxes_: 物体框的位置scores_: 物体类别的概率classes_: 物体类别"""# 每一个特征层对应三个先验框anchor_mask = [[6, 7, 8], [3, 4, 5], [0, 1, 2]]boxes = []box_scores = []# inputshape是416x416# image_shape是实际图片的大小input_shape = tf.shape(yolo_outputs[0])[1 : 3] * 32# 对三个特征层的输出获取每个预测box坐标和box的分数,score = 置信度x类别概率#---------------------------------------##   对三个特征层解码#   获得分数和框的位置#---------------------------------------#for i in range(len(yolo_outputs)):_boxes, _box_scores = self.boxes_and_scores(yolo_outputs[i], self.anchors[anchor_mask[i]], len(self.class_names), input_shape, image_shape)boxes.append(_boxes)box_scores.append(_box_scores)# 放在一行里面便于操作boxes = tf.concat(boxes, axis = 0)box_scores = tf.concat(box_scores, axis = 0)mask = box_scores >= self.obj_thresholdmax_boxes_tensor = tf.constant(max_boxes, dtype = tf.int32)boxes_ = []scores_ = []classes_ = []#---------------------------------------##   1、取出每一类得分大于self.obj_threshold#   的框和得分#   2、对得分进行非极大抑制#---------------------------------------## 对每一个类进行判断for c in range(len(self.class_names)):# 取出所有类为c的boxclass_boxes = tf.boolean_mask(boxes, mask[:, c])# 取出所有类为c的分数class_box_scores = tf.boolean_mask(box_scores[:, c], mask[:, c])# 非极大抑制nms_index = tf.image.non_max_suppression(class_boxes, class_box_scores, max_boxes_tensor, iou_threshold = self.nms_threshold)# 获取非极大抑制的结果class_boxes = tf.gather(class_boxes, nms_index)class_box_scores = tf.gather(class_box_scores, nms_index)classes = tf.ones_like(class_box_scores, 'int32') * cboxes_.append(class_boxes)scores_.append(class_box_scores)classes_.append(classes)boxes_ = tf.concat(boxes_, axis = 0)scores_ = tf.concat(scores_, axis = 0)classes_ = tf.concat(classes_, axis = 0)return boxes_, scores_, classes_#---------------------------------------##   predict用于预测,分三步#   1、建立yolo对象#   2、获得预测结果#   3、对预测结果进行处理#---------------------------------------#def predict(self, inputs, image_shape):"""Introduction------------构建预测模型Parameters----------inputs: 处理之后的输入图片image_shape: 图像原始大小Returns-------boxes: 物体框坐标scores: 物体概率值classes: 物体类别"""model = yolo(config.norm_epsilon, config.norm_decay, self.anchors_path, self.classes_path, pre_train = False)# yolo_inference用于获得网络的预测结果output = model.yolo_inference(inputs, config.num_anchors // 3, config.num_classes, training = False)boxes, scores, classes = self.eval(output, image_shape, max_boxes = 20)return boxes, scores, classes
4.2 yolo3的网络结构定义
yolo3_model.py实现了yolo3的网络结构定义
# -*- coding:utf-8 -*-import numpy as np
import tensorflow as tf
import osclass yolo:def __init__(self, norm_epsilon, norm_decay, anchors_path, classes_path, pre_train):"""Introduction------------初始化函数Parameters----------norm_decay: 在预测时计算moving average时的衰减率norm_epsilon: 方差加上极小的数,防止除以0的情况anchors_path: yolo anchor 文件路径classes_path: 数据集类别对应文件pre_train: 是否使用预训练darknet53模型"""self.norm_epsilon = norm_epsilonself.norm_decay = norm_decayself.anchors_path = anchors_pathself.classes_path = classes_pathself.pre_train = pre_trainself.anchors = self._get_anchors()self.classes = self._get_class()#---------------------------------------##   获取种类和先验框#---------------------------------------#def _get_class(self):"""Introduction------------获取类别名字Returns-------class_names: coco数据集类别对应的名字"""classes_path = os.path.expanduser(self.classes_path)with open(classes_path) as f:class_names = f.readlines()class_names = [c.strip() for c in class_names]return class_namesdef _get_anchors(self):"""Introduction------------获取anchors"""anchors_path = os.path.expanduser(self.anchors_path)with open(anchors_path) as f:anchors = f.readline()anchors = [float(x) for x in anchors.split(',')]return np.array(anchors).reshape(-1, 2)#---------------------------------------##   用于生成层#---------------------------------------## l2 正则化def _batch_normalization_layer(self, input_layer, name = None, training = True, norm_decay = 0.99, norm_epsilon = 1e-3):'''Introduction------------对卷积层提取的feature map使用batch normalizationParameters----------input_layer: 输入的四维tensorname: batchnorm层的名字trainging: 是否为训练过程norm_decay: 在预测时计算moving average时的衰减率norm_epsilon: 方差加上极小的数,防止除以0的情况Returns-------bn_layer: batch normalization处理之后的feature map'''bn_layer = tf.layers.batch_normalization(inputs = input_layer,momentum = norm_decay, epsilon = norm_epsilon, center = True,scale = True, training = training, name = name)return tf.nn.leaky_relu(bn_layer, alpha = 0.1)# 这个就是用来进行卷积的def _conv2d_layer(self, inputs, filters_num, kernel_size, name, use_bias = False, strides = 1):"""Introduction------------使用tf.layers.conv2d减少权重和偏置矩阵初始化过程,以及卷积后加上偏置项的操作经过卷积之后需要进行batch norm,最后使用leaky ReLU激活函数根据卷积时的步长,如果卷积的步长为2,则对图像进行降采样比如,输入图片的大小为416*416,卷积核大小为3,若stride为2时,(416 - 3 + 2)/ 2 + 1, 计算结果为208,相当于做了池化层处理因此需要对stride大于1的时候,先进行一个padding操作, 采用四周都padding一维代替'same'方式Parameters----------inputs: 输入变量filters_num: 卷积核数量strides: 卷积步长name: 卷积层名字trainging: 是否为训练过程use_bias: 是否使用偏置项kernel_size: 卷积核大小Returns-------conv: 卷积之后的feature map"""conv = tf.layers.conv2d(inputs = inputs, filters = filters_num,kernel_size = kernel_size, strides = [strides, strides], kernel_initializer = tf.glorot_uniform_initializer(),padding = ('SAME' if strides == 1 else 'VALID'), kernel_regularizer = tf.contrib.layers.l2_regularizer(scale = 5e-4), use_bias = use_bias, name = name)return conv# 这个用来进行残差卷积的# 残差卷积就是进行一次3X3的卷积,然后保存该卷积layer# 再进行一次1X1的卷积和一次3X3的卷积,并把这个结果加上layer作为最后的结果def _Residual_block(self, inputs, filters_num, blocks_num, conv_index, training = True, norm_decay = 0.99, norm_epsilon = 1e-3):"""Introduction------------Darknet的残差block,类似resnet的两层卷积结构,分别采用1x1和3x3的卷积核,使用1x1是为了减少channel的维度Parameters----------inputs: 输入变量filters_num: 卷积核数量trainging: 是否为训练过程blocks_num: block的数量conv_index: 为了方便加载预训练权重,统一命名序号weights_dict: 加载预训练模型的权重norm_decay: 在预测时计算moving average时的衰减率norm_epsilon: 方差加上极小的数,防止除以0的情况Returns-------inputs: 经过残差网络处理后的结果"""# 在输入feature map的长宽维度进行paddinginputs = tf.pad(inputs, paddings=[[0, 0], [1, 0], [1, 0], [0, 0]], mode='CONSTANT')layer = self._conv2d_layer(inputs, filters_num, kernel_size = 3, strides = 2, name = "conv2d_" + str(conv_index))layer = self._batch_normalization_layer(layer, name = "batch_normalization_" + str(conv_index), training = training, norm_decay = norm_decay, norm_epsilon = norm_epsilon)conv_index += 1for _ in range(blocks_num):shortcut = layerlayer = self._conv2d_layer(layer, filters_num // 2, kernel_size = 1, strides = 1, name = "conv2d_" + str(conv_index))layer = self._batch_normalization_layer(layer, name = "batch_normalization_" + str(conv_index), training = training, norm_decay = norm_decay, norm_epsilon = norm_epsilon)conv_index += 1layer = self._conv2d_layer(layer, filters_num, kernel_size = 3, strides = 1, name = "conv2d_" + str(conv_index))layer = self._batch_normalization_layer(layer, name = "batch_normalization_" + str(conv_index), training = training, norm_decay = norm_decay, norm_epsilon = norm_epsilon)conv_index += 1layer += shortcutreturn layer, conv_index#---------------------------------------##   生成_darknet53#---------------------------------------#def _darknet53(self, inputs, conv_index, training = True, norm_decay = 0.99, norm_epsilon = 1e-3):"""Introduction------------构建yolo3使用的darknet53网络结构Parameters----------inputs: 模型输入变量conv_index: 卷积层数序号,方便根据名字加载预训练权重weights_dict: 预训练权重training: 是否为训练norm_decay: 在预测时计算moving average时的衰减率norm_epsilon: 方差加上极小的数,防止除以0的情况Returns-------conv: 经过52层卷积计算之后的结果, 输入图片为416x416x3,则此时输出的结果shape为13x13x1024route1: 返回第26层卷积计算结果52x52x256, 供后续使用route2: 返回第43层卷积计算结果26x26x512, 供后续使用conv_index: 卷积层计数,方便在加载预训练模型时使用"""with tf.variable_scope('darknet53'):# 416,416,3 -> 416,416,32conv = self._conv2d_layer(inputs, filters_num = 32, kernel_size = 3, strides = 1, name = "conv2d_" + str(conv_index))conv = self._batch_normalization_layer(conv, name = "batch_normalization_" + str(conv_index), training = training, norm_decay = norm_decay, norm_epsilon = norm_epsilon)conv_index += 1# 416,416,32 -> 208,208,64conv, conv_index = self._Residual_block(conv, conv_index = conv_index, filters_num = 64, blocks_num = 1, training = training, norm_decay = norm_decay, norm_epsilon = norm_epsilon)# 208,208,64 -> 104,104,128conv, conv_index = self._Residual_block(conv, conv_index = conv_index, filters_num = 128, blocks_num = 2, training = training, norm_decay = norm_decay, norm_epsilon = norm_epsilon)# 104,104,128 -> 52,52,256conv, conv_index = self._Residual_block(conv, conv_index = conv_index, filters_num = 256, blocks_num = 8, training = training, norm_decay = norm_decay, norm_epsilon = norm_epsilon)# route1 = 52,52,256route1 = conv# 52,52,256 -> 26,26,512conv, conv_index = self._Residual_block(conv, conv_index = conv_index, filters_num = 512, blocks_num = 8, training = training, norm_decay = norm_decay, norm_epsilon = norm_epsilon)# route2 = 26,26,512route2 = conv# 26,26,512 -> 13,13,1024conv, conv_index = self._Residual_block(conv, conv_index = conv_index,  filters_num = 1024, blocks_num = 4, training = training, norm_decay = norm_decay, norm_epsilon = norm_epsilon)# route3 = 13,13,1024return  route1, route2, conv, conv_index# 输出两个网络结果# 第一个是进行5次卷积后,用于下一次逆卷积的,卷积过程是1X1,3X3,1X1,3X3,1X1# 第二个是进行5+2次卷积,作为一个特征层的,卷积过程是1X1,3X3,1X1,3X3,1X1,3X3,1X1def _yolo_block(self, inputs, filters_num, out_filters, conv_index, training = True, norm_decay = 0.99, norm_epsilon = 1e-3):"""Introduction------------yolo3在Darknet53提取的特征层基础上,又加了针对3种不同比例的feature map的block,这样来提高对小物体的检测率Parameters----------inputs: 输入特征filters_num: 卷积核数量out_filters: 最后输出层的卷积核数量conv_index: 卷积层数序号,方便根据名字加载预训练权重training: 是否为训练norm_decay: 在预测时计算moving average时的衰减率norm_epsilon: 方差加上极小的数,防止除以0的情况Returns-------route: 返回最后一层卷积的前一层结果conv: 返回最后一层卷积的结果conv_index: conv层计数"""conv = self._conv2d_layer(inputs, filters_num = filters_num, kernel_size = 1, strides = 1, name = "conv2d_" + str(conv_index))conv = self._batch_normalization_layer(conv, name = "batch_normalization_" + str(conv_index), training = training, norm_decay = norm_decay, norm_epsilon = norm_epsilon)conv_index += 1conv = self._conv2d_layer(conv, filters_num = filters_num * 2, kernel_size = 3, strides = 1, name = "conv2d_" + str(conv_index))conv = self._batch_normalization_layer(conv, name = "batch_normalization_" + str(conv_index), training = training, norm_decay = norm_decay, norm_epsilon = norm_epsilon)conv_index += 1conv = self._conv2d_layer(conv, filters_num = filters_num, kernel_size = 1, strides = 1, name = "conv2d_" + str(conv_index))conv = self._batch_normalization_layer(conv, name = "batch_normalization_" + str(conv_index), training = training, norm_decay = norm_decay, norm_epsilon = norm_epsilon)conv_index += 1conv = self._conv2d_layer(conv, filters_num = filters_num * 2, kernel_size = 3, strides = 1, name = "conv2d_" + str(conv_index))conv = self._batch_normalization_layer(conv, name = "batch_normalization_" + str(conv_index), training = training, norm_decay = norm_decay, norm_epsilon = norm_epsilon)conv_index += 1conv = self._conv2d_layer(conv, filters_num = filters_num, kernel_size = 1, strides = 1, name = "conv2d_" + str(conv_index))conv = self._batch_normalization_layer(conv, name = "batch_normalization_" + str(conv_index), training = training, norm_decay = norm_decay, norm_epsilon = norm_epsilon)conv_index += 1route = convconv = self._conv2d_layer(conv, filters_num = filters_num * 2, kernel_size = 3, strides = 1, name = "conv2d_" + str(conv_index))conv = self._batch_normalization_layer(conv, name = "batch_normalization_" + str(conv_index), training = training, norm_decay = norm_decay, norm_epsilon = norm_epsilon)conv_index += 1conv = self._conv2d_layer(conv, filters_num = out_filters, kernel_size = 1, strides = 1, name = "conv2d_" + str(conv_index), use_bias = True)conv_index += 1return route, conv, conv_index# 返回三个特征层的内容def yolo_inference(self, inputs, num_anchors, num_classes, training = True):"""Introduction------------构建yolo模型结构Parameters----------inputs: 模型的输入变量num_anchors: 每个grid cell负责检测的anchor数量num_classes: 类别数量training: 是否为训练模式"""conv_index = 1# route1 = 52,52,256、route2 = 26,26,512、route3 = 13,13,1024conv2d_26, conv2d_43, conv, conv_index = self._darknet53(inputs, conv_index, training = training, norm_decay = self.norm_decay, norm_epsilon = self.norm_epsilon)with tf.variable_scope('yolo'):#--------------------------------------##   获得第一个特征层#--------------------------------------## conv2d_57 = 13,13,512,conv2d_59 = 13,13,255(3x(80+5))conv2d_57, conv2d_59, conv_index = self._yolo_block(conv, 512, num_anchors * (num_classes + 5), conv_index = conv_index, training = training, norm_decay = self.norm_decay, norm_epsilon = self.norm_epsilon)#--------------------------------------##   获得第二个特征层#--------------------------------------#conv2d_60 = self._conv2d_layer(conv2d_57, filters_num = 256, kernel_size = 1, strides = 1, name = "conv2d_" + str(conv_index))conv2d_60 = self._batch_normalization_layer(conv2d_60, name = "batch_normalization_" + str(conv_index),training = training, norm_decay = self.norm_decay, norm_epsilon = self.norm_epsilon)conv_index += 1# unSample_0 = 26,26,256unSample_0 = tf.image.resize_nearest_neighbor(conv2d_60, [2 * tf.shape(conv2d_60)[1], 2 * tf.shape(conv2d_60)[1]], name='upSample_0')# route0 = 26,26,768route0 = tf.concat([unSample_0, conv2d_43], axis = -1, name = 'route_0')# conv2d_65 = 52,52,256,conv2d_67 = 26,26,255conv2d_65, conv2d_67, conv_index = self._yolo_block(route0, 256, num_anchors * (num_classes + 5), conv_index = conv_index, training = training, norm_decay = self.norm_decay, norm_epsilon = self.norm_epsilon)#--------------------------------------##   获得第三个特征层#--------------------------------------# conv2d_68 = self._conv2d_layer(conv2d_65, filters_num = 128, kernel_size = 1, strides = 1, name = "conv2d_" + str(conv_index))conv2d_68 = self._batch_normalization_layer(conv2d_68, name = "batch_normalization_" + str(conv_index), training=training, norm_decay=self.norm_decay, norm_epsilon = self.norm_epsilon)conv_index += 1# unSample_1 = 52,52,128unSample_1 = tf.image.resize_nearest_neighbor(conv2d_68, [2 * tf.shape(conv2d_68)[1], 2 * tf.shape(conv2d_68)[1]], name='upSample_1')# route1= 52,52,384route1 = tf.concat([unSample_1, conv2d_26], axis = -1, name = 'route_1')# conv2d_75 = 52,52,255_, conv2d_75, _ = self._yolo_block(route1, 128, num_anchors * (num_classes + 5), conv_index = conv_index, training = training, norm_decay = self.norm_decay, norm_epsilon = self.norm_epsilon)return [conv2d_59, conv2d_67, conv2d_75]
4.3 通用辅助功能配置
utils.py包含了代码过程中用到的助手工具
import json
import numpy as np
import tensorflow as tf
from PIL import Image
from collections import defaultdictdef load_weights(var_list, weights_file):"""Introduction------------加载预训练好的darknet53权重文件Parameters----------var_list: 赋值变量名weights_file: 权重文件Returns-------assign_ops: 赋值更新操作"""with open(weights_file, "rb") as fp:_ = np.fromfile(fp, dtype=np.int32, count=5)weights = np.fromfile(fp, dtype=np.float32)ptr = 0i = 0assign_ops = []while i < len(var_list) - 1:var1 = var_list[i]var2 = var_list[i + 1]# do something only if we process conv layerif 'conv2d' in var1.name.split('/')[-2]:# check type of next layerif 'batch_normalization' in var2.name.split('/')[-2]:# load batch norm paramsgamma, beta, mean, var = var_list[i + 1:i + 5]batch_norm_vars = [beta, gamma, mean, var]for var in batch_norm_vars:shape = var.shape.as_list()num_params = np.prod(shape)var_weights = weights[ptr:ptr + num_params].reshape(shape)ptr += num_paramsassign_ops.append(tf.assign(var, var_weights, validate_shape=True))# we move the pointer by 4, because we loaded 4 variablesi += 4elif 'conv2d' in var2.name.split('/')[-2]:# load biasesbias = var2bias_shape = bias.shape.as_list()bias_params = np.prod(bias_shape)bias_weights = weights[ptr:ptr + bias_params].reshape(bias_shape)ptr += bias_paramsassign_ops.append(tf.assign(bias, bias_weights, validate_shape=True))# we loaded 1 variablei += 1# we can load weights of conv layershape = var1.shape.as_list()num_params = np.prod(shape)var_weights = weights[ptr:ptr + num_params].reshape((shape[3], shape[2], shape[0], shape[1]))# remember to transpose to column-majorvar_weights = np.transpose(var_weights, (2, 3, 1, 0))ptr += num_paramsassign_ops.append(tf.assign(var1, var_weights, validate_shape=True))i += 1return assign_opsdef letterbox_image(image, size):"""Introduction------------对预测输入图像进行缩放,按照长宽比进行缩放,不足的地方进行填充Parameters----------image: 输入图像size: 图像大小Returns-------boxed_image: 缩放后的图像"""image_w, image_h = image.sizew, h = sizenew_w = int(image_w * min(w*1.0/image_w, h*1.0/image_h))new_h = int(image_h * min(w*1.0/image_w, h*1.0/image_h))resized_image = image.resize((new_w,new_h), Image.BICUBIC)boxed_image = Image.new('RGB', size, (128, 128, 128))boxed_image.paste(resized_image, ((w-new_w)//2,(h-new_h)//2))return boxed_imagedef draw_box(image, bbox):"""Introduction------------通过tensorboard把训练数据可视化Parameters----------image: 训练数据图片bbox: 训练数据图片中标记box坐标"""xmin, ymin, xmax, ymax, label = tf.split(value = bbox, num_or_size_splits = 5, axis=2)height = tf.cast(tf.shape(image)[1], tf.float32)weight = tf.cast(tf.shape(image)[2], tf.float32)new_bbox = tf.concat([tf.cast(ymin, tf.float32) / height, tf.cast(xmin, tf.float32) / weight, tf.cast(ymax, tf.float32) / height, tf.cast(xmax, tf.float32) / weight], 2)new_image = tf.image.draw_bounding_boxes(image, new_bbox)tf.summary.image('input', new_image)def voc_ap(rec, prec):"""--- Official matlab code VOC2012---mrec=[0 ; rec ; 1];mpre=[0 ; prec ; 0];for i=numel(mpre)-1:-1:1mpre(i)=max(mpre(i),mpre(i+1));endi=find(mrec(2:end)~=mrec(1:end-1))+1;ap=sum((mrec(i)-mrec(i-1)).*mpre(i));"""rec.insert(0, 0.0)  # insert 0.0 at begining of listrec.append(1.0)  # insert 1.0 at end of listmrec = rec[:]prec.insert(0, 0.0)  # insert 0.0 at begining of listprec.append(0.0)  # insert 0.0 at end of listmpre = prec[:]for i in range(len(mpre) - 2, -1, -1):mpre[i] = max(mpre[i], mpre[i + 1])i_list = []for i in range(1, len(mrec)):if mrec[i] != mrec[i - 1]:i_list.append(i)ap = 0.0for i in i_list:ap += ((mrec[i] - mrec[i - 1]) * mpre[i])return ap, mrec, mpre
config.py包含了参数的配置信息
num_parallel_calls = 4
input_shape = 416
max_boxes = 20
jitter = 0.3
hue = 0.1
sat = 1.0
cont = 0.8
bri = 0.1
norm_decay = 0.99
norm_epsilon = 1e-3
pre_train = True
num_anchors = 9
num_classes = 80
training = True
ignore_thresh = .5
learning_rate = 0.001
train_batch_size = 10
val_batch_size = 10
train_num = 2800
val_num = 5000
Epoch = 50
obj_threshold = 0.5
nms_threshold = 0.5
gpu_index = "0"
log_dir = './logs'
data_dir = './model_data'
model_dir = './test_model/model.ckpt-192192'
pre_train_yolo3 = True
yolo3_weights_path = './model_data/yolov3.weights'
darknet53_weights_path = './model_data/darknet53.weights'
anchors_path = './model_data/yolo_anchors.txt'
classes_path = './model_data/coco_classes.txt'image_file = "./img/img.jpg"
4.4 工程入口程序
detect.py为工程的入口主程序,包含了预处理和检测的主要流程
import os
import config
import argparse
import numpy as np
import tensorflow as tf
from yolo_predict import yolo_predictor
from PIL import Image, ImageFont, ImageDraw
from utils import letterbox_image, load_weights# 指定使用GPU的Index
os.environ["CUDA_VISIBLE_DEVICES"] = config.gpu_indexdef detect(image_path, model_path, yolo_weights = None):"""Introduction------------加载模型,进行预测Parameters----------model_path: 模型路径,当使用yolo_weights无用image_path: 图片路径"""#---------------------------------------##   图片预处理#---------------------------------------#image = Image.open(image_path)# 对预测输入图像进行缩放,按照长宽比进行缩放,不足的地方进行填充resize_image = letterbox_image(image, (416, 416))image_data = np.array(resize_image, dtype = np.float32)# 归一化image_data /= 255.# 转格式,第一维度填充image_data = np.expand_dims(image_data, axis = 0)#---------------------------------------##   图片输入#---------------------------------------## input_image_shape原图的sizeinput_image_shape = tf.placeholder(dtype = tf.int32, shape = (2,))# 图像input_image = tf.placeholder(shape = [None, 416, 416, 3], dtype = tf.float32)# 进入yolo_predictor进行预测,yolo_predictor是用于预测的一个对象predictor = yolo_predictor(config.obj_threshold, config.nms_threshold, config.classes_path, config.anchors_path)with tf.Session() as sess:#---------------------------------------##   图片预测#---------------------------------------#if yolo_weights is not None:with tf.variable_scope('predict'):boxes, scores, classes = predictor.predict(input_image, input_image_shape)# 载入模型load_op = load_weights(tf.global_variables(scope = 'predict'), weights_file = yolo_weights)sess.run(load_op)# 进行预测out_boxes, out_scores, out_classes = sess.run([boxes, scores, classes],feed_dict={# image_data这个resize过input_image: image_data,# 以y、x的方式传入input_image_shape: [image.size[1], image.size[0]]})else:boxes, scores, classes = predictor.predict(input_image, input_image_shape)saver = tf.train.Saver()saver.restore(sess, model_path)out_boxes, out_scores, out_classes = sess.run([boxes, scores, classes],feed_dict={input_image: image_data,input_image_shape: [image.size[1], image.size[0]]})#---------------------------------------##   画框#---------------------------------------## 找到几个box,打印print('Found {} boxes for {}'.format(len(out_boxes), 'img'))font = ImageFont.truetype(font = 'font/FiraMono-Medium.otf', size = np.floor(3e-2 * image.size[1] + 0.5).astype('int32'))# 厚度thickness = (image.size[0] + image.size[1]) // 300for i, c in reversed(list(enumerate(out_classes))):# 获得预测名字,box和分数predicted_class = predictor.class_names[c]box = out_boxes[i]score = out_scores[i]# 打印label = '{} {:.2f}'.format(predicted_class, score)# 用于画框框和文字draw = ImageDraw.Draw(image)# textsize用于获得写字的时候,按照这个字体,要多大的框label_size = draw.textsize(label, font)# 获得四个边top, left, bottom, right = boxtop = max(0, np.floor(top + 0.5).astype('int32'))left = max(0, np.floor(left + 0.5).astype('int32'))bottom = min(image.size[1]-1, np.floor(bottom + 0.5).astype('int32'))right = min(image.size[0]-1, np.floor(right + 0.5).astype('int32'))print(label, (left, top), (right, bottom))print(label_size)if top - label_size[1] >= 0:text_origin = np.array([left, top - label_size[1]])else:text_origin = np.array([left, top + 1])# My kingdom for a good redistributable image drawing library.for i in range(thickness):draw.rectangle([left + i, top + i, right - i, bottom - i],outline = predictor.colors[c])draw.rectangle([tuple(text_origin), tuple(text_origin + label_size)],fill = predictor.colors[c])draw.text(text_origin, label, fill=(0, 0, 0), font=font)del drawimage.show()image.save('./img/result1.jpg')if __name__ == '__main__':# 当使用yolo3自带的weights的时候if config.pre_train_yolo3 == True:detect(config.image_file, config.model_dir, config.yolo3_weights_path)# 当使用模型的时候else:detect(config.image_file, config.model_dir)
注意,工程中的预训练权重文件和COCO数据集等均可以在互联网上轻易找到

4.5 测试
python detect.py --image_file ./img.jpg
测试图片如下:

效果:

相关文章:

【建议收藏】深入浅出Yolo目标检测算法(含Python实现源码)
深入浅出Yolo目标检测算法(含Python实现源码) 文章目录深入浅出Yolo目标检测算法(含Python实现源码)1. One-stage & Two-stage2. Yolo详解2.1 Yolo命名2.2 端到端输入输出2.3 Yolo中的标定框2.4 Yolo网络结构2.5 Yolo的算法流…...
Vue常见的事件修饰符
前言 vue一共给我们准备了6个事件修饰符,前三个比较常用,后三个少见,这里着重讲下前三个 1.prevent:阻止默认事件(常用) 2. stop:阻止事件冒泡(常用) 3. once:事件只触发一次(常用) 4.captrue:使用事件的捕捉模式(不常用) 5.self:只有event…...
【卷积神经网络】激活函数 | Tanh / Sigmoid / ReLU / Leaky ReLU / ELU / SiLU / GeLU
文章目录一、Tanh二、Sigmoid三、ReLU四、Leaky ReLU五、ELU六、SiLU七、Mish本文主要介绍卷积神经网络中常用的激活函数及其各自的优缺点 最简单的激活函数被称为线性激活,其中没有应用任何转换。 一个仅由线性激活函数组成的网络很容易训练,但不能学习…...

刷题记录:牛客NC24048[USACO 2017 Jan P]Promotion Counting 求子树的逆序对个数
传送门:牛客 题目描述 奶牛们又一次试图创建一家创业公司,还是没有从过去的经验中吸取教训–牛是可怕的管理者! 为了方便,把奶牛从 1∼n1\sim n1∼n 编号,把公司组织成一棵树,1 号奶牛作为总裁(这棵树的根…...

MpAndroidChart3最强实践攻略
本篇主要总结下Android非常火爆的一个三方库MpAndroidChart的使用。可能在大多数情况下,我们很少会在Android端去开发图表。但如果说去做一些金融财经类、工厂类、大数据类等的app,那么绝对会用到MpAndroidChart。 一、前言 2018年,那年的我…...
:事务管理ACID)
Spring笔记(9):事务管理ACID
一、事务管理 一个数据库事务是一个被视为单一的工作单元操作序列。 事务管理有四个原则,被成为ACID: Atomicity 原子性—— 事务作为独立单元进行操作,整个序列是一体的,操作全都成功或失败。Consistency 一致性—— 引用完整…...

io流 知识点+代码实例
需求 : 如何实现读写文件内部的内容?流 : 数据以先入先出的方式进行流动相当于管道,作用用来传输数据数据源-->流-->目的地流的分类 :流向分 : 以程序为中心输入流输出流操作单元 :字节流 : 万能流字符流 : 只能操作纯文本文件功能分 :节点流 : 真实实现读写的功能流(包…...
【MySQL】P8 多表查询(2) - 连接查询 联合查询
连接查询以及联合查询多表查询概述连接查询内连接隐式内连接显式内连接外连接左外连接右外连接自连接联合查询多表查询概述 建表语句见上一篇博文:https://blog.csdn.net/weixin_43098506/article/details/129402302 e.g.e.g.e.g. select * from emp, dept where e…...

QML动画(Animator)
在Qt5.2之后,引入Animator动画元素。这种方式可以直接所用于Qt Quick的场景图形系统,这使得基于Animator元素的动画及时在ui界面线程阻塞的情况下仍然能通过图形系统的渲染线程来工作,比传统的基于对象和属性的Animation元素能带来更好的用户…...
Git 分支操作【解决分支冲突问题】
1. 什么是分支 在版本控制过程中,同时推进多个任务,为每个任务,我们就可以创建每个任务的单独分支。使用分支意味着程序员可以把自己的工作从开发主线上分离开来,开发自己分支的时候,不会影响主线分支的运行。对于初学…...

盘点全球10大女性技术先驱
盘点全球10大女性技术先驱 人们普遍认为技术是男性主导的领域,但事实,技术或编程与性别无关,几乎任何人都可以成为技术大神。已经有很多案例证明女性同样可以在技术领域施展才能。在女神节来临之际,我为大家盘点一下为编程做出卓越…...

C++之dynamic_cast
C之dynamic_cast前言dynamic_castNote:示例:前言 dynamic_cast运算符牵扯到的面向对象的多态性跟程序运行时的状态,所以不能完全的使用传统的转换方式来替代。因此是最常用,最不可缺少的一个运算符,与static_cast一样,dynamic_cas…...

JavaScript 箭头函数、函数参数
箭头函数: 箭头函数是一种更加简洁的函数书写方式箭头函数本身没有作用域(无this)箭头函数的this指向上一层,上下文决定其this基本语法:参数 > 函数体 a. 基本用法 let fn v > v; //等价于 let fn function(…...
JavaScript_Object.keys() Object.values()
目录 一、Object.keys() 二、Object.values() 一、Object.keys() Object.keys( ) 的 用法 : 作用 :遍历对象 { } 返回结果:返回 对象中 每一项 的 key 值 返回值 : 是一个 *** [ 数 组 ] *** 例子 ( 1 ) : <script>// 1. 定义一个对象var obj …...

扬帆优配|高送转+高分红+高增长潜力股揭秘
高送转且高分红的高增加股票,有望跑赢大盘。 此前七连阴的泽宇智能,今日早盘大幅高开。到上午收盘,该股飙涨9.3%,位居涨幅榜前列。音讯面上,3月7日晚间,泽宇智能发表2022年年报,年报显现&#x…...
基于transformer的多帧自监督深度估计 Multi-Frame Self-Supervised Depth with Transformers
Multi-Frame Self-Supervised Depth with Transformers基于transformer的多帧自监督深度估计0 Abstract 多帧深度估计除了学习基于外观的特征外,也通过特征匹配利用图像之间的几何关系来改善单帧估计。我们采用深度离散的核极抽样来选择匹配像素,并通过一…...

设计模式: 单例模式
目录单例模式应用场景实现步骤涉及知识点设计与实现单例模式 通过单例模式的方法创建的类在当前进程中只有一个实例; 应用场景 配置管理 日志记录 线程池 连接池 内存池 对象池 消息队列 实现步骤 将类的构造方法定义为私有方法 定义一个私有的静态实例 提供一…...

idea编辑XML文件出现:Tag name expected报错
说明 Tag name expected解释其实就是:需要标记名称,也就是符号不能直接使用的意思 XML (eXtensible Markup Language) 是一种标记语言,用于存储和传输数据。在 XML 中,有些字符被视为特殊字符,这些字符在 XML 中具有…...

第十三届蓝桥杯省赛C++ A组 爬树的甲壳虫(简单概率DP)
题目如下: 思路 or 题解: 概率DP 状态定义: dp[i]dp[i]dp[i] 表示从树根到第 iii 层的期望 状态转移: dp[i](dp[i−1]1)∗11−pdp[i] (dp[i - 1] 1) * \frac{1}{1-p}dp[i](dp[i−1]1)∗1−p1 这个式子的意思是:…...
手动集成Tencent SDK遇到的坑!!!
手动集成的原因 由于腾讯未把Tencent SDK上传到Github中,所以我们不能通过Cocoapods的方式集成,只能通过官方下载其SDK手动集成。 Tencent SDK手动集成步骤 1.访问腾讯开放平台SDK下载界面,找到并下载iOS_SDK_V3.5.1。(目前最新…...

Vim 调用外部命令学习笔记
Vim 外部命令集成完全指南 文章目录 Vim 外部命令集成完全指南核心概念理解命令语法解析语法对比 常用外部命令详解文本排序与去重文本筛选与搜索高级 grep 搜索技巧文本替换与编辑字符处理高级文本处理编程语言处理其他实用命令 范围操作示例指定行范围处理复合命令示例 实用技…...
。】2022-5-15)
【根据当天日期输出明天的日期(需对闰年做判定)。】2022-5-15
缘由根据当天日期输出明天的日期(需对闰年做判定)。日期类型结构体如下: struct data{ int year; int month; int day;};-编程语言-CSDN问答 struct mdata{ int year; int month; int day; }mdata; int 天数(int year, int month) {switch (month){case 1: case 3:…...

ubuntu搭建nfs服务centos挂载访问
在Ubuntu上设置NFS服务器 在Ubuntu上,你可以使用apt包管理器来安装NFS服务器。打开终端并运行: sudo apt update sudo apt install nfs-kernel-server创建共享目录 创建一个目录用于共享,例如/shared: sudo mkdir /shared sud…...

Golang 面试经典题:map 的 key 可以是什么类型?哪些不可以?
Golang 面试经典题:map 的 key 可以是什么类型?哪些不可以? 在 Golang 的面试中,map 类型的使用是一个常见的考点,其中对 key 类型的合法性 是一道常被提及的基础却很容易被忽视的问题。本文将带你深入理解 Golang 中…...
自然语言处理——循环神经网络
自然语言处理——循环神经网络 循环神经网络应用到基于机器学习的自然语言处理任务序列到类别同步的序列到序列模式异步的序列到序列模式 参数学习和长程依赖问题基于门控的循环神经网络门控循环单元(GRU)长短期记忆神经网络(LSTM)…...
可以参考以下方法:)
根据万维钢·精英日课6的内容,使用AI(2025)可以参考以下方法:
根据万维钢精英日课6的内容,使用AI(2025)可以参考以下方法: 四个洞见 模型已经比人聪明:以ChatGPT o3为代表的AI非常强大,能运用高级理论解释道理、引用最新学术论文,生成对顶尖科学家都有用的…...

Java多线程实现之Thread类深度解析
Java多线程实现之Thread类深度解析 一、多线程基础概念1.1 什么是线程1.2 多线程的优势1.3 Java多线程模型 二、Thread类的基本结构与构造函数2.1 Thread类的继承关系2.2 构造函数 三、创建和启动线程3.1 继承Thread类创建线程3.2 实现Runnable接口创建线程 四、Thread类的核心…...

Scrapy-Redis分布式爬虫架构的可扩展性与容错性增强:基于微服务与容器化的解决方案
在大数据时代,海量数据的采集与处理成为企业和研究机构获取信息的关键环节。Scrapy-Redis作为一种经典的分布式爬虫架构,在处理大规模数据抓取任务时展现出强大的能力。然而,随着业务规模的不断扩大和数据抓取需求的日益复杂,传统…...
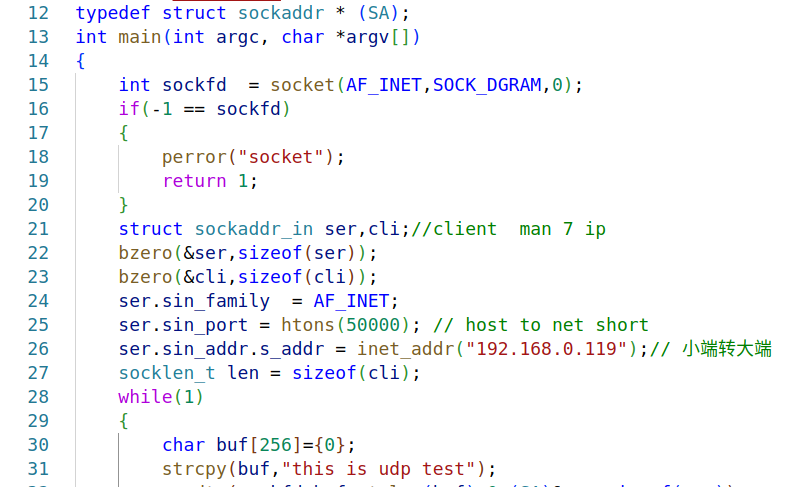
嵌入式学习之系统编程(九)OSI模型、TCP/IP模型、UDP协议网络相关编程(6.3)
目录 一、网络编程--OSI模型 二、网络编程--TCP/IP模型 三、网络接口 四、UDP网络相关编程及主要函数 编辑编辑 UDP的特征 socke函数 bind函数 recvfrom函数(接收函数) sendto函数(发送函数) 五、网络编程之 UDP 用…...

高防服务器价格高原因分析
高防服务器的价格较高,主要是由于其特殊的防御机制、硬件配置、运营维护等多方面的综合成本。以下从技术、资源和服务三个维度详细解析高防服务器昂贵的原因: 一、硬件与技术投入 大带宽需求 DDoS攻击通过占用大量带宽资源瘫痪目标服务器,因此…...
