uni-app(优医咨询)项目实战 - 第7天
学习目标:
-
能够基于 WebSocket 完成问诊全流程
-
能够使用 uniCloud 云存储上传文件
-
能够完成查看电子处方的功能
-
能够完成医生评价的功能
一、问诊室
以对话聊天的方式向医生介绍病情并获取诊断方案,聊天的内容支持文字和图片两种形式。
首先新建一个页面并完成分包的配置:
{"subPackages": [{"root": "subpkg_consult","pages": [{"path": "room/index","style": {"navigationBarTitleText": "问诊室"}}]},]
}
该页面的内容特别多我们分段来数据模板代码移到项目当中:
<!-- subpkg_consult/room/index.vue --> <script setup></script> <template><view class="room-page"> <scroll-viewrefresher-enabledrefresher-background="#f2f2f2"scroll-ystyle="flex: 1; overflow: hidden"><view class="message-container"><!-- 此处将来填充更多代码... --></view></scroll-view> <!-- 发送消息 --><view class="message-bar"><template v-if="true"><uni-easyinputdisabled:clearable="false":input-border="false"placeholder-style="font-size: 32rpx; color: #c3c3c5;"placeholder="问医生"/><view class="image-button"><uni-icons size="40" color="#979797" type="image"></uni-icons></view></template><button v-else class="uni-button">咨询其它医生</button></view></view> </template> <style lang="scss">@import './index.scss'; </style>
// subpkg_consult/room/index.scss
.room-page {display: flex;flex-direction: column;height: 100vh;/* #ifdef H5 */height: calc(100vh - 44px);/* #endif */overflow: hidden;box-sizing: border-box;background-color: #f2f2f2;
}
.message-container {padding: 0 30rpx 60rpx;overflow: hidden;
}
.message-bar {background-color: red;display: flex;padding: 30rpx 30rpx calc(env(safe-area-inset-bottom) + 40rpx);background-color: #fff;
:deep(.is-disabled) {background-color: transparent !important;}
:deep(.uni-easyinput__content-input) {height: 88rpx;padding: 0 44rpx !important;border-radius: 88rpx;color: #3c3e42;font-size: 32rpx;background-color: #f6f6f6;}
.image-button {display: flex;justify-content: center;align-items: center;height: 88rpx;width: 88rpx;margin-left: 30rpx;}
.uni-button {flex: 1;}
}
1.1 WebSocket 连接
首先安装 Socket.IO
npm install socket.io-client
然后建立连接,在建立连接进需要传入参数和登录信息:
-
auth登录状态信息,即token -
query建立连接时传递的参数 -
transports建立连接时使用的协议 -
timeout超时设置
<!-- subpkg_consult/room/index.vue -->
<script setup>import { ref } from 'vue'import { io } from 'socket.io-client'import { useUserStore } from '@/stores/user'
// 用户登录信息(不具有响应式)const { token } = useUserStore()
// 获取地址中的参数const props = defineProps({orderId: String,})
// 建立 socket 连接const socket = io('https://consult-api.itheima.net', {auth: { token: 'Bearer ' + token },query: { orderId: props.orderId },transports: ['websocket', 'polling'],timeout: 5000,})
</script>
1.2 接收消息
Socket.IO 是基于事件来实现数据通信的,事件的名称是由前后端商定好的,详见接口文档说明,消息的获取分成两种情况:
-
历史消息,事件名称为
chatMsgList -
即时消息,事件名称为
receiveChatMsg
1.2.1 消息列表
在建立连接时服务端会通过 chatMsgList 传递历史数据,通过 on 方法进行监听来获取这些数据:
<!-- subpkg_consult/room/index.vue -->
<script setup>import { ref } from 'vue'import { io } from 'socket.io-client'import { useUserStore } from '@/stores/user'
// 省略前面小节的代码...// 消息列表const messageList = ref([])// 获取历史消息socket.on('chatMsgList', ({ code, data }) => {// 没有返回数据if (code !== 10000) return// 提取列表数据data.forEach(({ items }) => {// 追加到消息列表中messageList.value.push(...items)})})
</script>
在消息列表数据中包含了不同类型的消息且展示的方式也不相同,因此在对数据进行遍历的过程中需要通过 v-if 来渲染不同的模板,不同的类型对应了一个数值:
| 消息类型 | 说明 | 备注 |
|---|---|---|
| 21 | 患者信息 | |
| 22 | 处方信息 | |
| 23 | 未提交评价 | |
| 24 | 已提交评价 | |
| 31 | 普通通知 | 白底黑字 |
| 32 | 温馨提示 | |
| 33 | 取消订单 | 灰底黑字 |
| 4 | 图片消息 | |
| 1 | 文字消息 |
首次进入问诊室返回的 3 条件的类型分别为患者信息(21)、普通通知(31)、温馨提示(32),我们逐个进行渲染。
1.2.2 患者消息
首先创建患者消息组件,组件的模板布局如下:
<!-- subpkg_consult/room/components/patient-info.vue -->
<script setup></script>
<template><!-- 患者信息(21) --><view class="patient-info"><view class="header"><view class="title">李富贵 男 31岁</view><view class="note">一周内 | 未去医院就诊</view></view><view class="content"><view class="list-item"><text class="label">病情描述</text><text class="note">头痛、头晕、恶心</text></view><view class="list-item"><text class="label">图片</text><text class="note">点击查看</text></view></view></view>
</template>
<style lang="scss">.patient-info {padding: 30rpx;margin-top: 60rpx;border-radius: 20rpx;box-sizing: border-box;background-color: #fff;
.header {padding-bottom: 20rpx;border-bottom: 1rpx solid #ededed;
.title {font-size: 32rpx;color: #121826;margin-bottom: 10rpx;}
.note {font-size: 26rpx;color: #848484;}}
.content {margin-top: 20rpx;font-size: 26rpx;
.list-item {display: flex;margin-top: 10rpx;}
.label {width: 130rpx;color: #3c3e42;}
.note {flex: 1;line-height: 1.4;color: #848484;}}}
</style>
接下来分成3个步骤来实现:
-
自定义组件的相关逻辑,要求组件能接收外部传入的数据
<!-- subpkg_consult/room/components/patient-info.vue -->
<script setup>// 定义属性接收外部传入的数据const props = defineProps({info: {type: Object,default: {},},})// 患病时长const illnessTimes = {1: '一周内',2: '一个月内',3: '半年内',4: '半年以上',}// 是否就诊过const consultFlags = {1: '就诊过',0: '没有就诊过',}
</script>
<template>...
</template>
-
在页面应用组件并传入数据
<!-- subpkg_consult/room/index.vue -->
<script setup>import { ref } from 'vue'import { io } from 'socket.io-client'import { useUserStore } from '@/stores/user'// 引入患者信息组件import patientInfo from './components/patient-info.vue'// 省略前面小节的代码
</script>
<template><view class="room-page"><!-- 此处将来填充更多代码... --><scroll-viewrefresher-enabledrefresher-background="#f2f2f2"scroll-ystyle="flex: 1; overflow: hidden"><view class="message-container"><template v-for="message in messageList" :key="message.id"><!-- 患者信息(21) --><patient-infov-if="message.msgType === 21":info="message.msg.consultRecord"/><!-- 此处将来填充更多代码... --></template></view></scroll-view><!-- 发送消息 --><view class="message-bar">...</view></view>
</template>
-
在组件内部接收并渲染数据
<!-- subpkg_consult/room/components/patient-info.vue -->
<script setup>// 省略前面小节的代码...
</script><template><!-- 患者信息(21) --><view class="patient-info"><view class="header"><view class="title">{{ props.info.patientInfo.name }}{{ props.info.patientInfo.genderValue }}{{ props.info.patientInfo.age }}岁</view><view class="note">{{ illnessTimes[props.info.illnessTime] }}|{{ consultFlags[props.info.illnessType] }}</view></view><view class="content"><view class="list-item"><text class="label">病情描述</text><text class="note">{{ props.info.illnessDesc }}</text></view><view class="list-item"><text class="label">图片</text><text v-if="props.info.pictures?.length" class="note"> 点击查看 </text><text v-else class="note">暂无图片</text></view></view></view>
</template>
-
大图查看患者病情图片,uni-app 提供了大图查看图片的 API
uni.previewImage
<script setup>// 省略前面小节的代码...// 点击查看病情介绍图片async function onPreviewClick(urls) {uni.previewImage({urls: urls.map((item) => item.url),})}
</script><template><!-- 患者信息(21) --><view class="patient-info"><view class="header">...</view><view class="content"><view class="list-item"><text class="label">病情描述</text><text class="note">{{ props.info.illnessDesc }}</text></view><view class="list-item"><text class="label">图片</text><textv-if="props.info.pictures?.length"@click="onPreviewClick(props.info.pictures)"class="note">点击查看</text><text v-else class="note">暂无图片</text></view></view></view>
</template>
1.2.3 通知消息
通知消息分为3种,分别为:
| 消息类型 | 说明 | 备注 |
|---|---|---|
| 31 | 普通通知 | 白底黑字 |
| 32 | 温馨提示 | |
| 33 | 取消订单 | 灰底黑字 |
首先创建消息通知组伯,通知消息的模板如下:
<!-- subpkg_consult/room/components/notify-info.vue -->
<script setup></script><template><!-- 普通通知(31) --><view class="message-tips"><view class="wrapper">医护人员正在赶来,请耐心等候</view></view><!-- 温馨提示(32) --><view class="message-tips"><view class="wrapper"><text class="label">温馨提示:</text>在线咨询不能代替面诊,医护人员建议仅供参考</view></view>
</template><style lang="scss">.message-tips {display: flex;justify-content: center;margin-top: 60rpx;&:first-child {margin-top: 30rpx;}}.wrapper {line-height: 1;text-align: center;padding: 20rpx 30rpx;// margin-top: 60rpx;font-size: 24rpx;border-radius: 70rpx;color: #848484;background-color: #fff;.label {color: #16c2a3;}}
</style>
接下来分成3个步骤来实现:
-
定义组件的逻辑,要求能区分通知的类型并通过插槽来展示内容
<!-- subpkg_consult/room/components/notify-info.vue -->
<script setup>// 接收外部传入的数据const props = defineProps({type: {type: Number,default: 31,},})
</script>
<template><!-- 温馨提示(32) --><view class="message-tips"><text class="label">温馨提示:</text><slot /></view>
</template>
-
在页面应用通知消息组件并传入数据
<!-- subpkg_consult/room/index.vue -->
<script setup>import { ref } from 'vue'import { io } from 'socket.io-client'import { useUserStore } from '@/stores/user'// 引入通知消息组件import notifyInfo from './components/notify-info.vue'// 省略前面小节的代码
</script>
<template><view class="room-page"><!-- 此处将来填充更多代码... --><scroll-viewrefresher-enabledrefresher-background="#f2f2f2"scroll-ystyle="flex: 1; overflow: hidden"><view class="message-container"><template v-for="message in messageList" :key="message.id"><!-- 消息通知 --><notify-info v-if="message.msgType >= 31" :type="message.msgType">{{ message.msg.content }}</notify-info><!-- 此处将来填充更多代码... --></template></view></scroll-view><!-- 发送消息 --><view class="message-bar">...</view></view>
</template>
-
接收并渲染组件数据
<!-- subpkg_consult/room/components/notify-info.vue -->
<script setup>// 省略前面小节的代码...
</script>
<template><!-- 温馨提示(32) --><view class="message-tips"><text v-if="props.type === 32" class="label">温馨提示:</text><slot /></view>
</template>
1.2.4 文字/图片消息
实时接收到医生发送过来的消息,包括文字消息和图片消息两种类型,使用超级医生来模拟医生端发送消息,根据订单 ID 来打通医生端和患者端的聊天连接。
首先接收医生端的回复的消息需要监听的事件为 receiveChatMsg
<!-- subpkg_consult/room/index.vue -->
<script setup>import { ref } from 'vue'import { io } from 'socket.io-client'import { useUserStore } from '@/stores/user'// 省略前面小节的代码...// 接收消息socket.on('receiveChatMsg', (message) => {// 修改消息为已读socket.emit('updateMsgStatus', message.id)// 接收到的消息追加到消息列表中messageList.value.push(message)})
</script>
然后创建文字消息组件,组件模板如下:
<!-- subpkg_consult/room/components/message-info.vue -->
<script setup></script><template><!-- 文字/图片消息 --><view class="message-item reverse"><image class="room-avatar" src="/static/uploads/doctor-avatar-2.png" /><view class="room-message"><view class="time">14:13</view><view class="text">您好,我是医师王医生,已收到您的问诊信息,我会尽量及时、准确、负责的回复您的问题,请您稍等。</view><imagev-if="false"class="image"src="/static/uploads/feed-1.jpeg"mode="widthFix"/></view></view>
</template><style lang="scss">.message-item {display: flex;align-self: flex-start;margin-top: 60rpx;.room-avatar {width: 80rpx;height: 80rpx;border-radius: 50%;}.room-message {margin-left: 20rpx;}.time {font-size: 26rpx;color: #979797;}.image {max-width: 420rpx;margin-top: 10rpx;}.text {max-width: 420rpx;line-height: 1.75;padding: 30rpx 40rpx;margin-top: 16rpx;border-radius: 20rpx;font-size: 30rpx;color: #3c3e42;background-color: #fff;position: relative;&::after {content: '';position: absolute;top: 0;left: -25rpx;width: 26rpx;height: 52rpx;background-image: url(https://consult-patient.oss-cn-hangzhou.aliyuncs.com/static/images/im-arrow-1.png);background-size: contain;}}&.reverse {flex-direction: row-reverse;align-self: flex-end;.room-message {margin-left: 0;margin-right: 20rpx;}.time {text-align: right;}.text {background-color: #16c2a3;color: #fff;&::after {left: auto;right: -25rpx;background-image: url(https://consult-patient.oss-cn-hangzhou.aliyuncs.com/static/images/im-arrow-2.png);}}}}
</style>
接下来分成3个步骤来实现:
-
定义组件的逻辑,要求能接收外部传入的数据
<!-- subpkg_consult/room/components/message-info.vue -->
<script setup>// 接收外部传入的数据const props = defineProps({info: {type: Object,default: {},},type: {type: Number,default: 1,},})
</script>
-
到页面中应用组件并传入数据
<!-- subpkg_consult/room/index.vue -->
<script setup>import { ref } from 'vue'import { io } from 'socket.io-client'import { useUserStore } from '@/stores/user'// 引入通知消息组件import messageInfo from './components/message-info.vue'// 省略前面小节的代码
</script>
<template><view class="room-page"><!-- 此处将来填充更多代码... --><scroll-viewrefresher-enabledrefresher-background="#f2f2f2"scroll-ystyle="flex: 1; overflow: hidden"><view class="message-container"><template v-for="message in messageList" :key="message.id"><!-- 文字图片消息 --><message-infov-if="message.msgType <= 4":info="message":type="message.msgType"/><!-- 此处将来填充更多代码... --></template></view></scroll-view><!-- 发送消息 --><view class="message-bar">...</view></view>
</template>
-
到组件是接收并渲染数据
<!-- subpkg_consult/room/components/message-info.vue -->
<script setup>// ...
</script><template><!-- 文字/图片消息 --><view class="message-item"><image class="room-avatar" :src="props.info.fromAvatar" /><view class="room-message"><view class="time">{{ props.info.createTime }}</view><!-- 文字消息 --><view v-if="props.type === 1" class="text">{{ props.info.msg.content }}</view><!-- 图片消息 --><imagev-if="props.type === 4"class="image":src="props.info.msg.picture.url"mode="widthFix"/></view></view>
</template>
-
处理消息的时间,安装
dayjs
npm install dayjs
<!-- subpkg_consult/room/index.vue -->
<script setup>import dayjs from 'dayjs'// 省略前面小节的代码...// 格式化显示时间function dateFormat(date) {return dayjs(date).format('hh:mm:ss')}
</script><template><!-- 文字/图片消息 --><view class="message-item"><image class="room-avatar" :src="props.info.fromAvatar" /><view class="room-message"><view class="time">{{ dateFormat(props.info.createTime) }}</view><view v-if="props.type === 1" class="text">{{ props.info.msg.content }}</view><imagev-if="props.type === 4"class="image":src="props.info.msg.picture.url"mode="widthFix"/></view></view>
</template>
1.2.5 处方消息
医生根据问诊的情况开具诊断结果即为处方消息,到消息的类型值为 22,首先创建组件,布局模板如下所示:
1
接下来分成3个步骤来实现:
-
定义组件逻辑,要求能接收组件外部传入的数据
<!-- subpkg_consult/room/components/prescription-info.vue -->
<script setup>// 接收组件外部传入的数据const props = defineProps({info: {type: Object,default: {},},})
</script>
-
在页面中应用组件并传入数据
<!-- subpkg_consult/room/index.vue -->
<script setup>import { ref } from 'vue'import { io } from 'socket.io-client'import { useUserStore } from '@/stores/user'// 引入处方消息组件import prescriptionInfo from './components/prescription-info.vue'// 省略前面小节的代码
</script>
<template><view class="room-page"><!-- 此处将来填充更多代码... --><scroll-viewrefresher-enabledrefresher-background="#f2f2f2"scroll-ystyle="flex: 1; overflow: hidden">    <view class="message-container"><template v-for="message in messageList" :key="message.id"><!-- 电子处方 --><prescription-infov-if="message.msgType === 22":info="message.msg.prescription"/><!-- 此处将来填充更多代码... --></template></view></scroll-view><!-- 发送消息 --><view class="message-bar">...</view></view>
</template>
-
在组件中接收并渲染数据
<!-- subpkg_consult/room/components/prescription-info.vue -->
<script setup>// ...
</script><template><!-- 处方消息(22)--><view class="e-prescription"><view class="prescription-content"><view class="list-title"><view class="label">电子处方</view><view class="extra">原始处方<uni-icons size="16" color="#848484" type="right" /></view></view><view class="list-item">{{ props.info.name }}{{ props.info.genderValue }}{{ props.info.age }}岁{{ props.info.diagnosis }}</view><view class="list-item">开方时间:{{ props.info.createTime }}</view><view class="dividing-line"></view><template v-for="medicine in props.info.medicines" :key="medicine.id"><view class="list-title"><view class="label"><text class="name">{{ medicine.name }}</text><text class="unit">85ml</text><text class="quantity">x{{ medicine.quantity }}</text></view></view><view class="list-item">{{ medicine.usageDosag }}</view></template></view><navigatorclass="uni-link"hover-class="none"url="/subpkg_medicine/payment/index">购买药品</navigator></view>
</template>
1.2.6 原始处方
在医生开完处方后会生成电子版的处方,通过调用接口进行查看。
1.2.7 医生评价
在医生端结束问诊后,患者可以对医生进行评价,医生评价的布局模板为:
<!-- subpkg_consult/room/components/rate-info.vue -->
<script setup></script>
<template><!-- 医生评价 --><view class="doctor-rating"><view class="title">医生服务评价</view><view class="subtitle">本次在线问诊服务您还满意吗?</view><view class="rating"><uni-rate :size="28" margin="12" :value="0" /></view><view class="text"><uni-easyinputtype="textarea"maxlength="150":input-border="false":styles="{ backgroundColor: '#f6f6f6' }"placeholder-style="font-size: 28rpx; color: #979797"placeholder="请描述您对医生的评价或是在医生看诊过程中遇到的问题"/><text class="word-count">0/150</text></view><view class="anonymous"><uni-icons v-if="true" size="16" color="#16C2A3" type="checkbox-filled" /><uni-icons v-else size="16" color="#d1d1d1" type="circle" /><text class="label">匿名评价</text></view><button disabled class="uni-button">提交</button></view>
</template><script>export default {options: {styleIsolation: 'shared',},}
</script>
<style lang="scss">.doctor-rating {padding: 30rpx 30rpx 40rpx;border-radius: 20rpx;background-color: #fff;margin-top: 60rpx;.title {text-align: center;font-size: 30rpx;color: #121826;}.subtitle {text-align: center;font-size: 24rpx;color: #6f6f6f;margin: 10rpx 0 20rpx;}.rating {display: flex;justify-content: center;}.text {padding: 20rpx 30rpx;margin-top: 20rpx;background-color: #f6f6f6;border-radius: 20rpx;position: relative;}:deep(.uni-easyinput__content-textarea) {font-size: 28rpx;}.word-count {position: absolute;bottom: 20rpx;right: 30rpx;line-height: 1;font-size: 24rpx;color: #6f6f6f;}.anonymous {display: flex;align-items: center;justify-content: center;margin: 30rpx 0;color: #6f6f6f;font-size: 24rpx;.label {margin-left: 6rpx;}}.uni-button[disabled] {color: #a6dbd5;background-color: #eaf8f6;}}
</style>
接下来分成5个步骤来实现:
-
到页面中应用该组件,消息的类型值是
23
<!-- subpkg_consult/room/index.vue -->
<script setup>import { ref } from 'vue'import { io } from 'socket.io-client'import { useUserStore } from '@/stores/user'// 引入处方消息组件import rateInfo from './components/rate-info.vue'// 省略前面小节的代码
</script>
<template><view class="room-page"><!-- 此处将来填充更多代码... --><scroll-viewrefresher-enabledrefresher-background="#f2f2f2"scroll-ystyle="flex: 1; overflow: hidden"><view class="message-container"><template v-for="message in messageList" :key="message.id"><!-- 医生评价 --><rate-info v-if="message.msgType === 23"></rate-info><!-- 此处将来填充更多代码... --></template></view></scroll-view><!-- 发送消息 --><view class="message-bar">...</view></view>
</template>
-
获取评价数据并对数据进行验证:
-
v-model获取数据 -
字数统计使用计算属性
-
控制字数使用
maxlength
-
<!-- subpkg_consult/room/components/rate-info.vue -->
<script setup>import { computed, ref } from 'vue'// 评价内容const formData = ref({score: 0,content: '',anonymousFlag: 0,})// 统计字数const wordCount = computed(() => {return formData.value.content.length})// 是否允许提交const buttonEnable = computed(() => {return formData.value.score})// 是否匿名评价function onAnonymousClick() {formData.value.anonymousFlag = Math.abs(formData.value.anonymousFlag - 1)}
</script><template><!-- 医生评价 --><view class="doctor-rating"><view class="title">医生服务评价</view><view class="subtitle">本次在线问诊服务您还满意吗?</view><view class="rating"><uni-rate v-model="formData.score" :size="28" margin="12" /></view><view class="text"><uni-easyinputtype="textarea"maxlength="150"v-model="formData.content":input-border="false":styles="{ backgroundColor: '#f6f6f6' }"placeholder-style="font-size: 28rpx; color: #979797"placeholder="请描述您对医生的评价或是在医生看诊过程中遇到的问题"/><text class="word-count">{{ wordCount }}/150</text></view><view @click="onAnonymousClick" class="anonymous"><uni-iconsv-if="formData.anonymousFlag"size="16"color="#16C2A3"type="checkbox-filled"/><uni-icons v-else size="16" color="#d1d1d1" type="circle" /><text class="label">匿名评价</text></view><button :disabled="!buttonEnable" class="uni-button">提交</button></view>
</template>
-
在提交评价时,需要获取问诊订单详情,在问诊订单详情中包含了医生的 ID,接口文档在这里
// services/consult.js
import { http } from '@/utils/http'// 省略前面小节的代码.../*** 问诊订单详情*/
export const orderDetailApi = (orderId) => {return http.get('/patient/consult/order/detail', { params: { orderId } })
}
将订单 ID 和医生 ID 传入组件
<!-- subpkg_consult/room/index.vue -->
<script setup>import { ref } from 'vue'import { io } from 'socket.io-client'import { useUserStore } from '@/stores/user'import { orderDetailApi } from '@/services/consult'// 省略前面小节的代码...// 问诊订单详情const orderDetail = ref({})// 省略前面小节的代码...// 获取问诊订单详情async function getOrderDetail() {// 调用接口const { code, data, message } = await orderDetailApi(props.orderId)// 检测接口是否调用成功if (code !== 10000) return uni.utils.toast(message)// 渲染问诊订单数据orderDetail.value = data}getOrderDetail()
</script><template><view class="room-page"><!-- 此处将来填充更多代码... --><scroll-viewrefresher-enabledrefresher-background="#f2f2f2"scroll-ystyle="flex: 1; overflow: hidden"><view class="message-container"><template v-for="message in messageList" :key="message.id"><!-- 医生评价 --><rate-info:order-id="props.orderId":doctor-id="orderDetail.docInfo?.id"v-if="message.msgType === 23"/><!-- 此处将来填充更多代码... --></template></view></scroll-view><!-- 发送消息 --><view class="message-bar">...</view></view>
</template>
-
调用接口提交评价的数据,接口文档在这里
// services/doctor.js
import { http } from '@/utils/http'// 省略了前面小节的代码.../*** 评价医生*/
export const evaluateDoctorApi = (data) => {return http.post('/patient/order/evaluate', data)
}
<!-- subpkg_consult/room/components/rate-info.vue -->
<script setup>import { computed, ref } from 'vue'import { evaluateDoctorApi } from '@/services/doctor'// 接收组件外部的数据const props = defineProps({orderId: String,doctorId: String,})// 提交表单async function onFormSubmit() {// 调用接口const { code, data, message } = await evaluateDoctorApi({docId: props.doctorId,orderId: props.orderId,...formData.value,})// 检测接口是否调用成功if (code !== 10000) return uni.utils.toast(message)uni.utils.toast('感谢您的评价!')// 标记已经评价过hasEvaluate.value = true}
</script><template><!-- 医生评价 --><view class="doctor-rating"><view class="title">医生服务评价</view><view class="subtitle">本次在线问诊服务您还满意吗?</view><view class="rating"><uni-rate v-model="formData.score" :size="28" margin="12" /></view><view class="text"><uni-easyinputtype="textarea"maxlength="150"v-model="formData.content":input-border="false":styles="{ backgroundColor: '#f6f6f6' }"placeholder-style="font-size: 28rpx; color: #979797"placeholder="请描述您对医生的评价或是在医生看诊过程中遇到的问题"/><text class="word-count">{{ wordCount }}/150</text></view><view @click="onAnonymousClick" v-if="!hasEvaluate" class="anonymous"><uni-iconsv-if="formData.anonymousFlag"size="16"color="#16C2A3"type="checkbox-filled"/><uni-icons v-else size="16" color="#d1d1d1" type="circle" /><text class="label">匿名评价</text></view><buttonv-if="!hasEvaluate":disabled="!buttonEnable"@click="onFormSubmit"class="uni-button">提交</button></view>
</template>
-
已评价状态,消息类型值 为 24
<!-- subpkg_consult/room/components/rate-info.vue -->
<script setup>import { ref, computed } from 'vue'import { evaluateDoctorApi } from '@/services/doctor'// 接收组件外部的数据const props = defineProps({orderId: String,doctorId: String,// 是否已评价过hasEvaluate: {type: Boolean,default: false,},// 评价的内容evaluateDoc: {type: Object,default: {},},})// 评价内容const formData = ref({score: props.evaluateDoc.score,content: props.evaluateDoc.content,// 注意要指定一个默认值为 0anonymousFlag: 0,})// 是否已经评价过const hasEvaluate = ref(props.hasEvaluate)// 统计字数const wordCount = computed(() => {// 通过 ? 来避免初始数据中 content 不存在的情况return formData.value.content?.length || 0})
</script>
<!-- subpkg_consult/room/index.vue -->
<script setup>import { ref } from 'vue'import { io } from 'socket.io-client'import { useUserStore } from '@/stores/user'import { orderDetailApi } from '@/services/consult'// 省略前面小节的代码...
</script><template><view class="room-page"><!-- 此处将来填充更多代码... --><scroll-viewrefresher-enabledrefresher-background="#f2f2f2"scroll-ystyle="flex: 1; overflow: hidden"><view class="message-container"><template v-for="message in messageList" :key="message.id"><!-- 医生评价(已评价) --><rate-info:evaluateDoc="message.msg.evaluateDoc"has-evaluatev-if="message.msgType === 24"/><!-- 此处将来填充更多代码... --></template></view></scroll-view><!-- 发送消息 --><view class="message-bar"></view></view>
</template>
1.3 发送消息
患者向医生告之病情及询问诊断方法,分为文字图片消息两种类型,且只有问诊订单状态处理咨询中时才以发送消息,问诊订单的状态包含在订单详情数据中。
<!-- subpkg_consult/room/index.vue -->
<script setup>// 省略前面小节的代码...// 订单状态为3时,表示 问诊中...// 监听订单状态变化socket.on('statusChange', getOrderDetail)// 省略前面小节的代码...
</script>
<template><view class="room-page"><!-- 此处将来填充更多代码... --><scroll-viewrefresher-enabledrefresher-background="#f2f2f2"scroll-ystyle="flex: 1; overflow: hidden"><view class="message-container"><!-- 省略前面小节的代码... --></view></scroll-view><!-- 发送消息 --><view class="message-bar"><template v-if="true"><uni-easyinput:disabled="orderDetail.status !== 3":clearable="false":input-border="false"placeholder-style="font-size: 32rpx; color: #c3c3c5;"placeholder="问医生"/><view class="image-button"><uni-icons size="40" color="#979797" type="image"></uni-icons></view></template><button v-else class="uni-button">咨询其它医生</button></view></view>
</template>
1.3.1 文字消息
发送文字消息分3个步骤来实现:
-
监听
uni-easyinput组件的confirm事件并使用v-model获取表单的内容
<!-- subpkg_consult/room/index.vue -->
<script setup>// 省略前面小节的代码...// 文字消息const textMessage = ref('')// 省略前面小节的代码...// 发送文字消息function onInputConfirm() {console.log(textMessage.value)}// 省略前面小节的代码...
</script><template><view class="room-page"><!-- 此处将来填充更多代码... --><scroll-viewrefresher-enabledrefresher-background="#f2f2f2"scroll-ystyle="flex: 1; overflow: hidden"><view class="message-container">...</view></scroll-view><!-- 发送消息 --><view class="message-bar"><template v-if="true"><uni-easyinputv-model="textMessage"@confirm="onInputConfirm":disabled="orderDetail.status !== 3":clearable="false":input-border="false"placeholder-style="font-size: 32rpx; color: #c3c3c5;"placeholder="问医生"/><view class="image-button"><uni-icons size="40" color="#979797" type="image"></uni-icons></view></template><button v-else class="uni-button">咨询其它医生</button></view></view>
</template>
-
触发服务端正在监听的事件类型,文档地址在这里
<script setup>// 省略前面小节的代码...// 用户登录信息(不具有响应式)const { token, userId } = useUserStore()// 问诊订单详情const orderDetail = ref({})// 文字消息const textMessage = ref('')// 省略前面小节的代码...// 发送文字消息function onInputConfirm() {// 发送消息socket.emit('sendChatMsg', {// 当前登录用户的IDfrom: userId,to: orderDetail.value?.docInfo?.id,msgType: 1,msg: {content: textMessage.value,},})// 清空表单textMessage.value = ''}// 省略前面小节的代码...
</script>
在用户登录成功时,只记录了用户的 token 在患者向医生发送消息时还需要传递用户的 ID,在 Pinia 中添加数据来记录登录用户的 ID
// stores/user.js
import { ref } from 'vue'
import { defineStore } from 'pinia'export const useUserStore = defineStore('user',() => {// 记录用户登录状态const token = ref('')// 记录登录成功后要路转的地址(默认值为首页)const redirectURL = ref('/pages/index/index')// 跳转地址时采用的 API 名称const openType = ref('switchTab')// 用户IDconst userId = ref('')return { token, userId, redirectURL, openType }},{persist: {paths: ['token', 'userId', 'redirectURL', 'openType'],},}
)
<!-- pages/login/index.vue -->
<script setup>async function onFormSubmit() {// 判断是否勾选协议if (!isAgree.value) return uni.utils.toast('请先同意协议!')// 调用 uniForms 组件验证数据的方法try {// 省略前面小节的代码...// 持久化存储 tokenuserStore.token = data.token// 存储登录用户的 IDuserStore.userId = data.id} catch (error) {console.log(error)}}
</script>
-
调整消息的对齐方式,患者消息靠右显示
在消息中包含的属性 from 是消息发送者的 ID,如果与登录用户的 ID 一致,则表示是患者发送的消息,消息的内容要靠右显示,类名 reverse 可以控制靠右对齐。
<!-- subpkg_consult/room/components/message-info.vue -->
<script setup>import dayjs from 'dayjs'import { useUserStore } from '@/stores/user.js'// 登录用户 IDconst { userId } = useUserStore()// 省略前面小节的代码...
</script><template><!-- 文字/图片消息 --><view :class="{ reverse: props.info.from === userId }" class="message-item"><image class="room-avatar" :src="props.info.fromAvatar" /><view class="room-message"><view class="time">{{ dateFormat(props.info.createTime) }}</view><view v-if="props.type === 1" class="text">{{ props.info.msg.content }}</view><imagev-if="props.type === 4"class="image":src="props.info.msg.picture.url"mode="widthFix"/></view></view>
</template>
1.3.2 图片消息
发送图片消息需要将图片上传到云空间,需要调用 uniCloud 提供的 API chooseAndUploadFile,我们分x步来实现:
-
判断问诊订单状态是否为问诊中
<!-- subpkg_consult/room/index.vue -->
<script setup>// 省略前面小节代码...// 发送图片消息function onImageButtonClick() {// 是否在问诊状态中...if (orderDetail.value.status !== 3) {return uni.utils.toast('医生当前不在线!')}}// 省略前面小节代码...
</script><template><view class="room-page"><!-- 此处将来填充更多代码... --><scroll-viewrefresher-enabledrefresher-background="#f2f2f2"scroll-ystyle="flex: 1; overflow: hidden"><view class="message-container">...</view></scroll-view><!-- 发送消息 --><view class="message-bar"><template v-if="true"><uni-easyinputv-model="textMessage"@confirm="onInputConfirm":disabled="orderDetail.status !== 3":clearable="false":input-border="false"placeholder-style="font-size: 32rpx; color: #c3c3c5;"placeholder="问医生"/><view @click="onImageButtonClick" class="image-button"><uni-icons size="40" color="#979797" type="image"></uni-icons></view></template><button v-else class="uni-button">咨询其它医生</button></view></view>
</template>
-
调用 API 上传到 uniCloud 存储空间
<!-- subpkg_consult/room/index.vue -->
<script setup>// 省略前面小节代码...// 发送图片消息function onImageButtonClick() {// 是否在问诊状态中...if (orderDetail.value.status !== 3) {return uni.utils.toast('医生当前不在线!')}// 上传图片到 uniClouduniCloud.chooseAndUploadFile({type: 'image',count: 1,extension: ['.jpg', '.png', '.gif'],success: ({ tempFiles }) => {console.log(tempFiles)},})}// 省略前面小节代码...
</script><template>...
</template>
-
向医生发送图片消息,文档地址在这里
<!-- subpkg_consult/room/index.vue -->
<script setup>// 省略前面小节代码...// 用户登录信息(不具有响应式)const { token, userId } = useUserStore()// 发送图片消息function onImageButtonClick() {// 是否在问诊状态中...if (orderDetail.value.status !== 3) {return uni.utils.toast('医生当前不在线!')}// 上传图片到 uniClouduniCloud.chooseAndUploadFile({type: 'image',count: 1,extension: ['.jpg', '.png', '.gif'],success: ({ tempFiles }) => {// 上传成功的图片const picture = {id: tempFiles[0].lastModified,url: tempFiles[0].url,}// 发送消息socket.emit('sendChatMsg', {from: userId,to: orderDetail.value?.docInfo?.id,msgType: 4,msg: { picture },})},})}// 省略前面小节代码...
</script>
1.4 问诊订单状态
患者在与医生对话的过程中问诊订单状态会发生改变,包括待支付、待接诊、咨询中、已完成、已取消,在页面的顶部要根据订单的状态展示不同的内容。
-
将问诊状态的布局模板独立到组件中,要求组件能接收3个数据
-
status问诊订单的状态值 -
statusValue问诊订单的文字描述 -
countdown倒计时剩余时长
-
<!-- subpkg_consult/room/components/room-status.vue -->
<script setup>// 接收组件外部传入的数据const props = defineProps({status: Number,statusValue: String,countdown: Number,})
</script>
<template><!-- 咨询室状态 --><view class="room-status"><view class="status countdown" v-if="false"><text class="label">咨询中</text><view class="time">剩余时间:<uni-countdowncolor="#3c3e42":font-size="14":show-day="false":second="0"/></view></view><view v-else-if="false" class="status waiting">已通知医生尽快接诊,24小时内医生未回复将自动退款</view><view v-else class="status"><uni-icons size="20" color="#121826" type="checkbox-filled" />已结束</view></view>
</template><style lang="scss">.room-status {font-size: 26rpx;position: sticky;top: 0;z-index: 99;.status {display: flex;padding: 30rpx;background-color: #fff;}.waiting {color: #16c2a3;background-color: #eaf8f6;}.countdown {justify-content: space-between;}.label {color: #16c2a3;}.icon-done {color: #121826;font-size: 28rpx;margin-right: 5rpx;}.time {display: flex;color: #3c3e42;}:deep(.uni-countdown) {margin-left: 6rpx;}}
</style>
-
在页面中应用组件并传入数据,查询订单状态的的 API 在前面小节中已经调用了,即
getOrderDetail
<!-- subpkg_consult/room/index.vue -->
<script setup>// 省略前面小节的代码...// 问诊订单详情const orderDetail = ref({})// 获取问诊订单详情async function getOrderDetail() {// 调用接口const { code, data, message } = await orderDetailApi(props.orderId)// 检测接口是否调用成功if (code !== 10000) return uni.utils.toast(message)// 渲染问诊订单数据orderDetail.value = data}// 省略前面小节的代码...
</script>
<template><view class="room-page"><!-- 问诊订单状态 --><room-status:status-value="orderDetail.statusValue":countdown="orderDetail.countdown":status="orderDetail.status"/><!-- 省略前面小节的代码 --></view>
</template>
-
根据传入组件的订单状态展示数据
<!-- subpkg_consult/room/components/room-status.vue -->
<template><!-- 咨询室状态 --><view class="room-status"><!-- 待接诊(status: 2) --><view v-if="props.status === 2" class="status waiting">{{ props.statusValue }}</view><!-- 咨询中(status: 3) --><view class="status" v-if="props.status === 3"><text class="label">{{ props.statusValue }}</text><view class="time">剩余时间:<uni-countdowncolor="#3c3e42":font-size="14":show-day="false":second="props.countdown"/></view></view><!-- 已完成(status: 4) --><view v-if="props.status === 4" class="status"><view class="wrap"><uni-icons size="20" color="#121826" type="checkbox-filled" />{{ props.statusValue }}</view></view></view>
</template>
1.5 消息分段
每次重新建立 Socket 连接后(刷新页面),后端都会对数据进行分组,前端在进行展示时也相应的需要展示分段的时间节点,这个时间节点按通知消息类型处理。
<!-- subpkg_consult/room/index.vue -->
<script setup>// 省略前面小节的代码...// 接收消息列表socket.on('chatMsgList', ({ code, data }) => {// 没有返回数据if (code !== 10000) return// 提取列表数据const tempList = []data.forEach(({ createTime, items }) => {// 追加到消息列表中tempList.push(// 构造一条数据,显示时间节点{msgType: 31,msg: { content: createTime },id: createTime,},...items)})// 追加到消息列表中messageList.value.unshift(...tempList)})// 省略后面小节的代码...
</script>
在返回的数据中 data 是一个数组,每个单元是一个消息的分组,在对该数组遍历时前端构造一条数据放到数组单元中,被构告的这条件数据仅仅是要显示一个时间节点。
1.6 历史消息
用户下拉操作时分页获取聊天记录,按以下几个步骤来实现:
-
启动下拉刷新并监听下拉操作
<!-- subpkg_consult/room/index.vue -->
<script setup>// 省略前面小节的代码...// 关闭下拉动画交互const refreshTrigger = ref(false)// 省略前面小节的代码...// 下拉获取历史消息function onPullDownRefresh() {// 开启下拉交互动画refreshTrigger.value = truesetTimeout(() => {// 关闭下拉交互动画refreshTrigger.value = false}, 1000)}// 省略前面小节的代码...
</script><template><view class="room-page"><!-- 省略前面小节的代码... --><scroll-view@refresherrefresh="onPullDownRefresh"refresher-enabled:refresher-triggered="refreshTrigger"background-color="#f2f2f2">...</scroll-view><!-- 省略前面小节的代码... --></view>
</template>
-
触发后端定义的事件类型获取历史消息,文档地址在这里。
<!-- subpkg_consult/room/index.vue -->
<script setup>// 省略前面小节的代码...// 关闭下拉动画交互const refreshTrigger = ref(false)// 上次获取历史消息节点const lastTime = ref(dayjs().format('YYYY-MM-DD HH:mm:ss'))// 省略前面小节的代码...// 下拉获取历史消息function onPullDownRefresh() {// 开启下拉交互动画refreshTrigger.value = true// 获取历史消息socket.emit('getChatMsgList', 20, lastTime.value, props.orderId)}// 省略前面小节的代码...
</script><template><view class="room-page"><!-- 省略前面小节的代码... --><scroll-page@refresherrefresh="onPullDownRefresh"refresher-enabled:refresher-triggered="refreshTrigger"background-color="#f2f2f2">...</scroll-page><!-- 省略前面小节的代码... --></view>
</template>
-
更新时间节点,获取的历史消息会返回给客户端
<!-- subpkg_consult/room/index.vue -->
<script setup>// 省略前面小节的代码...// 接收消息列表socket.on('chatMsgList', ({ code, data }) => {// 关闭下拉交互动画refreshTrigger.value = false// 没有返回数据if (code !== 10000) return// 提取列表数据const tempList = []data.forEach(({ createTime, items }, index) => {// 获取消息的时间节点if (index === 0) lastTime.value = createTime// 追加到消息列表中tempList.push({msgType: 31,msg: { content: createTime },id: createTime,},...items)})// 是否获取到新数据if (tempList.length === 0) return uni.utils.toast('没有更多聊天记录了')// 追加到消息列表中messageList.value.unshift(...tempList)})// 省略前面小节的代码...
</script>
注意事项:
-
历史消息是以从后往前的顺序获取,将历史消息中第1个分组的时间节点做为下一次获取历史消息的起始点
-
获取数据即表示请求结束,要关闭下拉交互的动画
-
判断是否还存在更多的历史消息
支付宝支付账号,密码为 111111
scobys4865@sandbox.com
askgxl8276@sandbox.com
相关文章:
项目实战 - 第7天)
uni-app(优医咨询)项目实战 - 第7天
学习目标: 能够基于 WebSocket 完成问诊全流程 能够使用 uniCloud 云存储上传文件 能够完成查看电子处方的功能 能够完成医生评价的功能 一、问诊室 以对话聊天的方式向医生介绍病情并获取诊断方案,聊天的内容支持文字和图片两种形式。 首先新建一…...

推荐系统学习 二
双塔模型的结构 用户的特征,我们知道用户ID还能从用户填写的资料和用户行为中获取很多特征,包括离散特征和连续特征。所有这些特征不能直接输入神经网络,而是要先做一些处理,比如用embedding层把用户ID映射到一个向量 跟之前我们…...
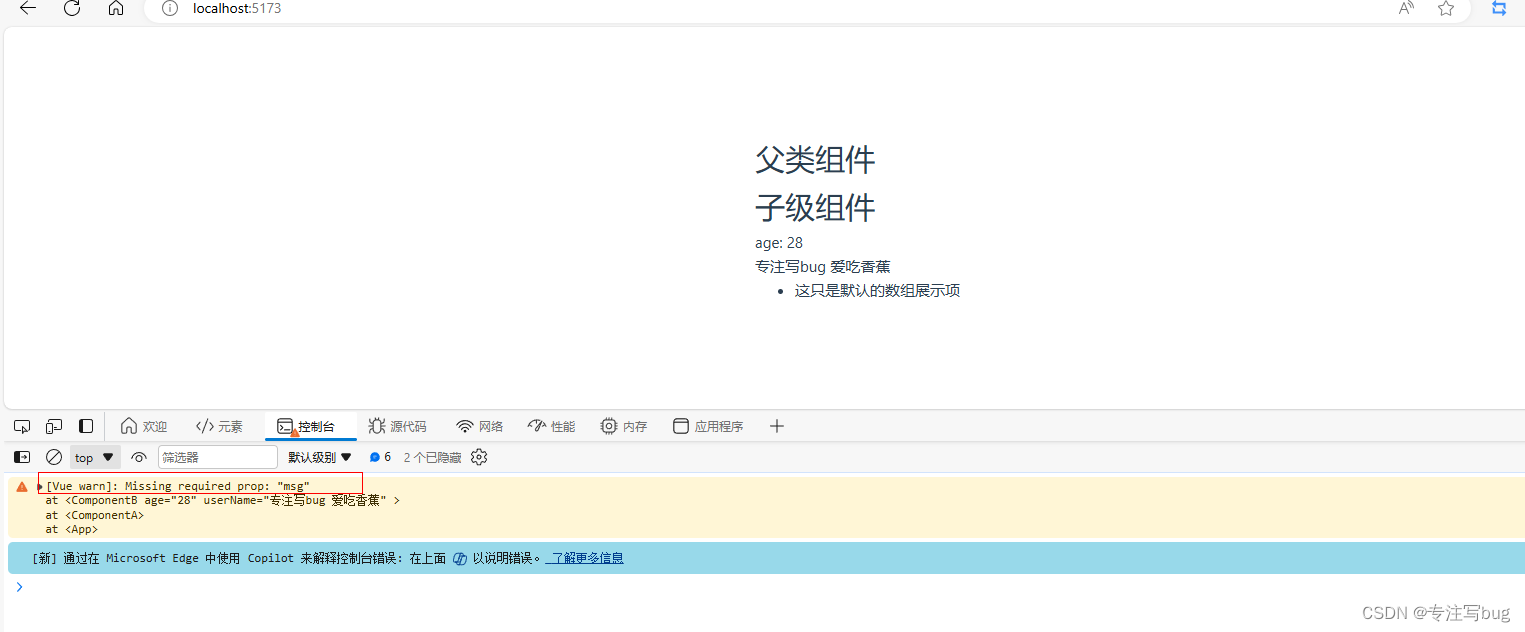
Vue——组件数据传递与props校验
文章目录 前言组件数据传递的几种类型简单字符串类型数据专递其他类型数据(数字、数组、对象)传递注意事项 数据传递值校验限定数据类型 type给定默认值 default指定必选项 required 前言 组件与组件之间并不是完全独立的,他们之间可以进行一些数据的传递操作。传递…...
)
Java 基础面试300题 (261-290)
Java 基础面试300题 (261-290) 261.CompletableFuture.runAsync和CompletableFuture.supplyAsync方法有什么区别? 这两个方法都可用于异步运行代码。但两者之间有一些区别如下 : runAsync不返回结果,返回的是一个Com…...
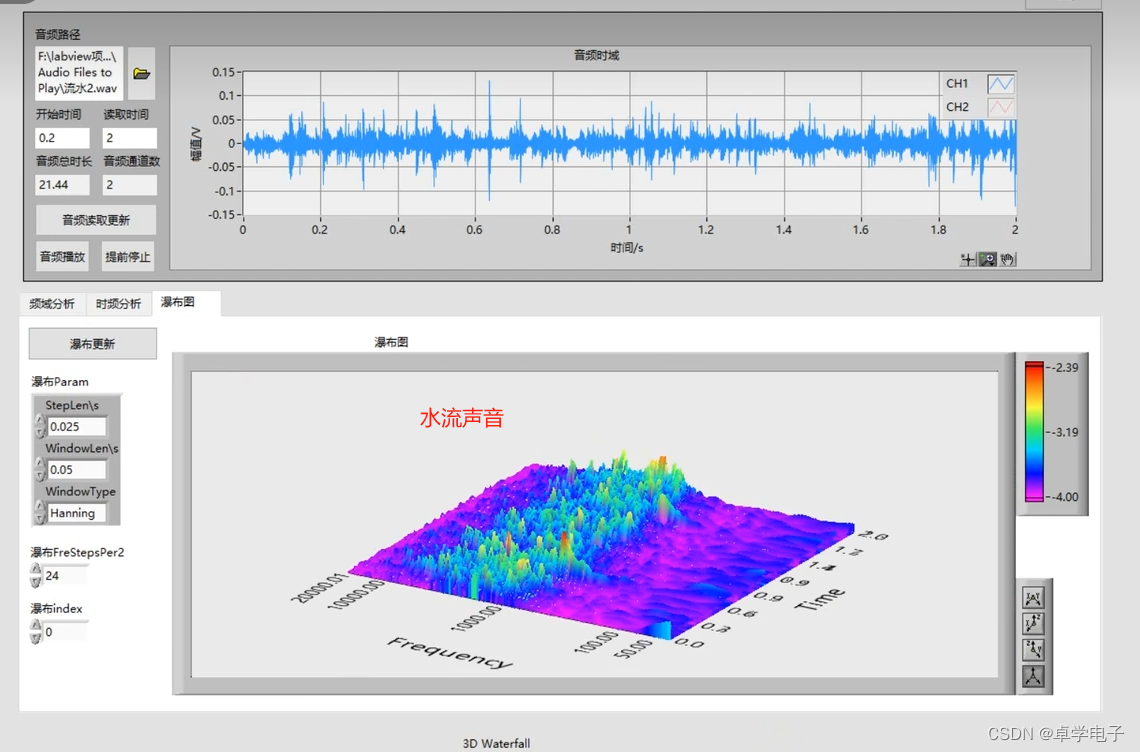
音频信号分析与实践
音频信号分析与实践课程,方便理解音频信号原理和过程 1.音频信号采集与播放 两种采样模式和标准的采样流程 人说话的声音一般在2kHz一下: 采样频率的影响:采样率要大于等于信号特征频率的2倍;一般保证信号完整,需要使用10倍以上的…...

程序媛:拽姐
更多精彩内容在公众号。 最近都在玩梗图,我也来玩下拽姐的梗图。来说说拽姐做为程序媛的痛。 程序媛的痛不在于996,而在于无休止的攻关。拽姐刚入职听领导说攻关不多,一年也就一次,拽姐心中暗喜,觉得来对了地方。结果…...

前端面试题日常练-day54 【面试题】
题目 希望这些选择题能够帮助您进行前端面试的准备,答案在文末 1. 在PHP中,以下哪个函数用于将一个字符串转换为日期时间对象? a) date() b) strtotime() c) datetime() d) time() 2. PHP中的超全局变量$_COOKIE用于存储什么类型的数据&a…...

054、Python 函数的概念以及定义
编程大师Martin Fowler曾说过:“代码有很多种坏味道,重复是最坏的一种。” 那么遇到重复的代码,如何做?答案就是:函数。 函数就是把重复的代码封装在一起,然后通过调用该函数从而实现在不同地方运行同样的…...
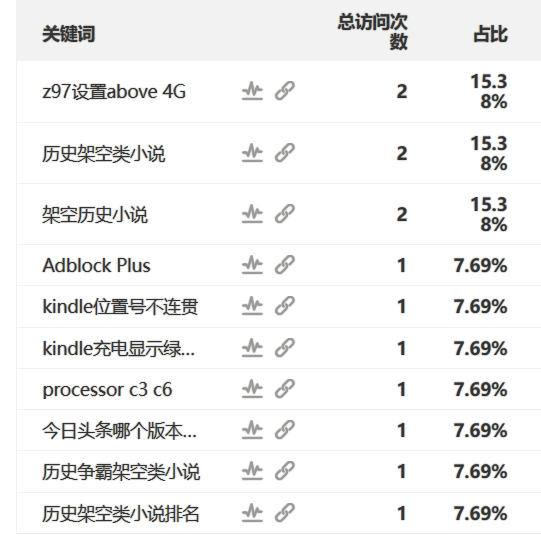
今时今日蜘蛛池还有用吗?
最近不知道哪里又开始刮起“蜘蛛池”这个风气了,售卖、购买蜘蛛池的行为又开始在新手站长圈里开始蔓延和流行了起来,乍一看到“蜘蛛池”这个词给明月的感受就是陌生,要经过回忆才能想起来一些残存的记忆,所谓的蜘蛛池说白了就是利…...
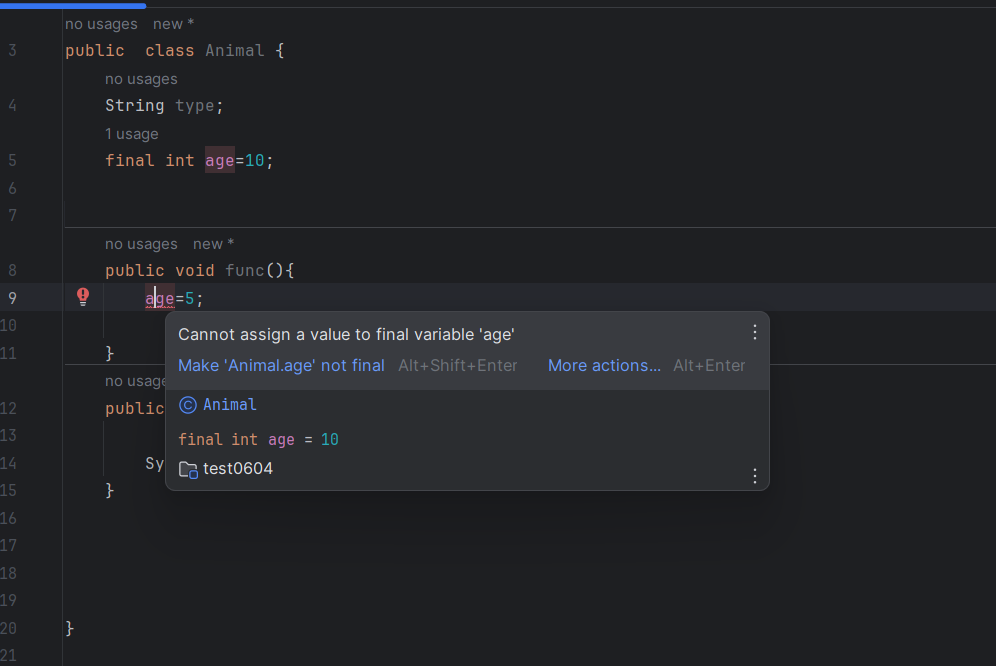
【一步一步了解Java系列】:重磅多态
看到这句话的时候证明:此刻你我都在努力 加油陌生人 个人主页:Gu Gu Study专栏:一步一步了解Java 喜欢的一句话: 常常会回顾努力的自己,所以要为自己的努力留下足迹 喜欢的话可以点个赞谢谢了。 作者:小闭…...
运维工具 - SFTP 和 FTP 的区别?
SFTP 和 FTP 的区别有三点 连接方式 SFTP 是在客户端和服务器之间通过 SSH 协议建立的安全连接来传输文件,而 FTP 则是 TCP 端口 21 上的控制连接建立连接。 安全性 SFTP 使用加密传输认证信息来传输数据,因此 SFTP 相对于 FTP 更安全的。 效率 SF…...

创新入门|营销中的视频内容:不可或缺的策略
视频在营销中日益重要。你是否也发现,视频内容最近似乎无处不在?它占据着社交媒体的推文、网站首页,甚至电子邮件中的位置。事实上,并不是你一个人有这样的感受。在过去十年中,视频作为一种营销手段日益成熟和强大。这是因为,人类天生就是视觉动物。我们大脑处理视觉信息的速度…...

《探索Stable Diffusion:AI绘画的创意之路与实战秘籍》
《Stable Diffusion AI 绘画从提示词到模型出图》介绍了 Stable Diffusion AI 绘画工具及其使用技巧。书中内容分为两部分:“基础操作篇”,讲解了 SD 文生图、图生图、提示词、模型、ControlNet 插件等核心技术的应用,帮助读者快速从新手成长…...
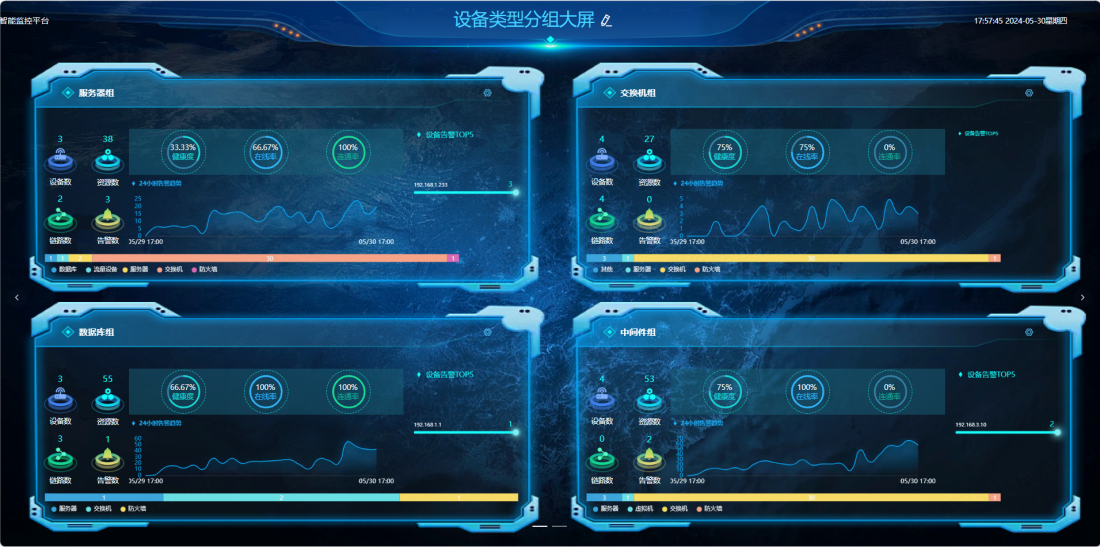
某铁路信息中心运营监测项目
某铁路信息中心承担大量实时监测、例行巡检和排障维护等工作,为巩固信息化建设成果,提高整体运维效果,保障铁路信息系统稳定运行,需对现有网络监测系统进行升级改造。 设备类型:服务器、交换机、数据库、中间件、虚拟…...

Threejs加载DOM+CSS到场景中,实现3D场景展示2D平面的效果
1. 前言 本篇文章主要实现了将DOM元素转换为Threejs可以使用的数据结构,使用CSS2DRenderer渲染器渲染这些DOMCSS的平面,使其可以作为一个物体添加到Threejs场景里 如下效果图: 2. 实现步骤 首先创建一个ThreejsVueVite的项目,作为本次的demo项目下载Threejs第三方库 yarn…...
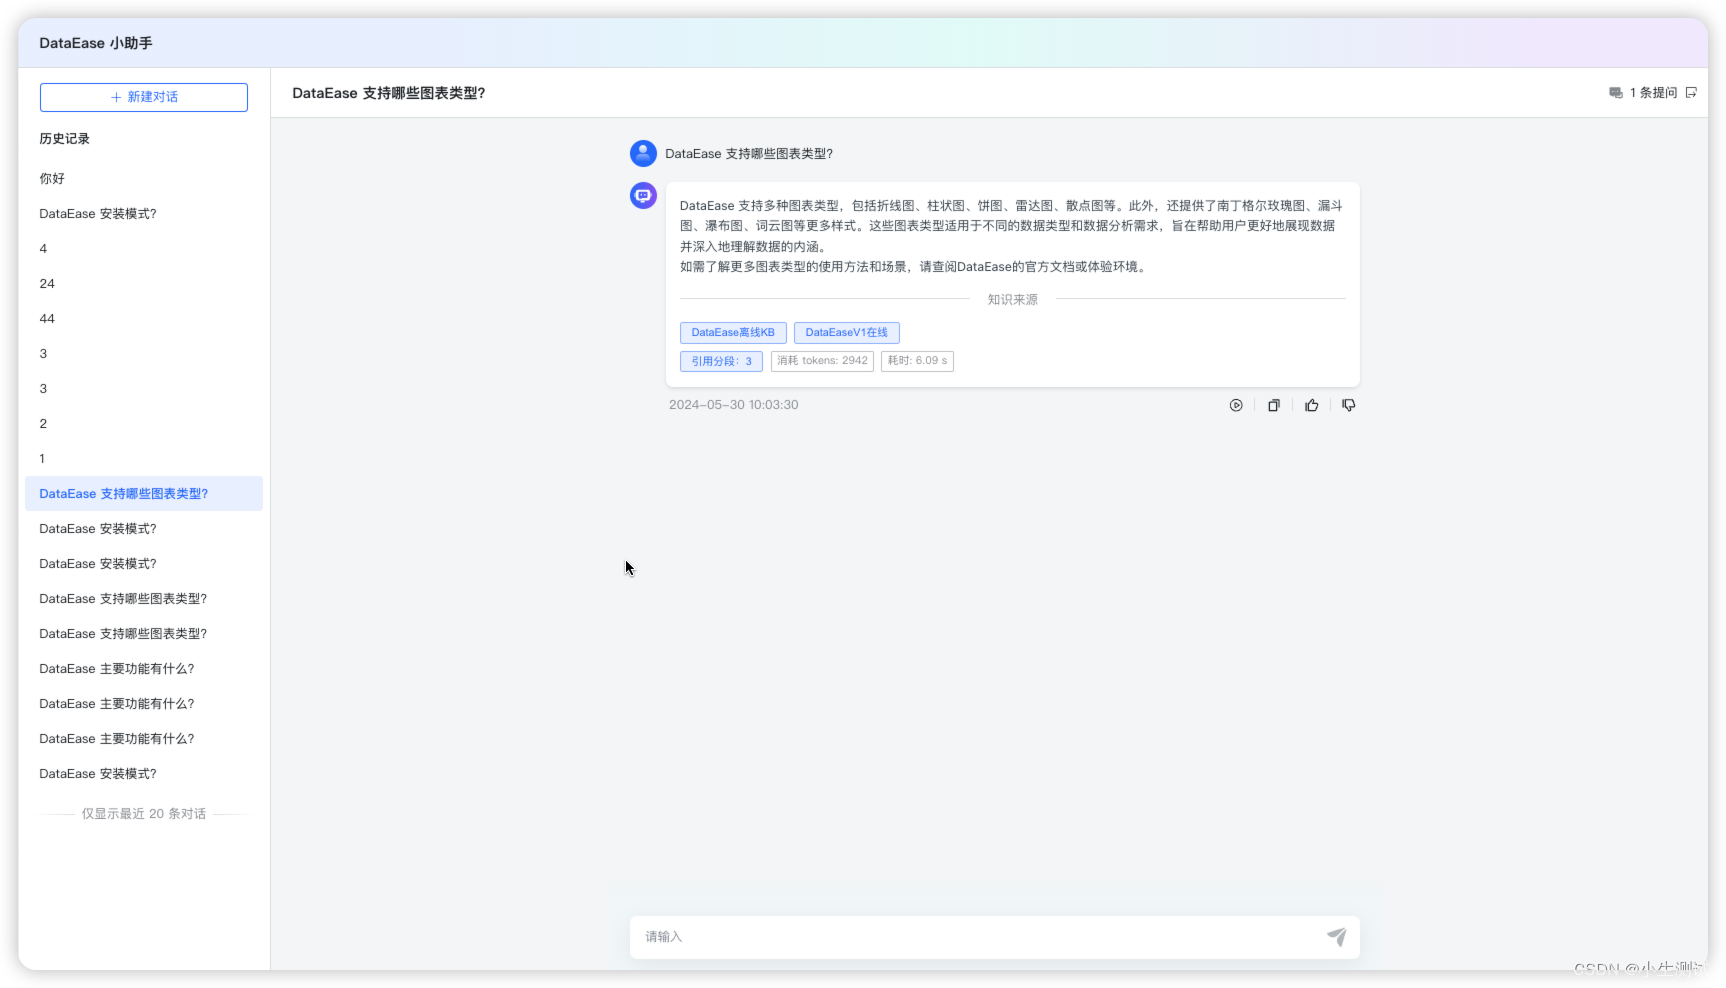
本地知识库开源框架Fastgpt、MaxKB产品体验
本地知识库开源框架Fastgpt、MaxKB产品体验 背景fastgpt简介知识库共享部署 MaxKB总结 背景 上一篇体验了Quivr、QAnything两个开源知识库模型框架,这次介绍两款小众但是体验比较好的产品。 fastgpt 简介 FastGPT 是一个基于 LLM 大语言模型的知识库问答系统&am…...

音视频开发15 FFmpeg FLV封装格式分析
FLV(Flash Video)简介 FLV(Flash Video)是Adobe公司推出的⼀种流媒体格式,由于其封装后的⾳视频⽂件体积⼩、封装简单等特点,⾮常适合于互联⽹上使⽤。⽬前主流的视频⽹站基本都⽀持FLV。采⽤ FLV格式封装的⽂件后缀为.flv。 FLV封装格式的组成 FLV封装…...
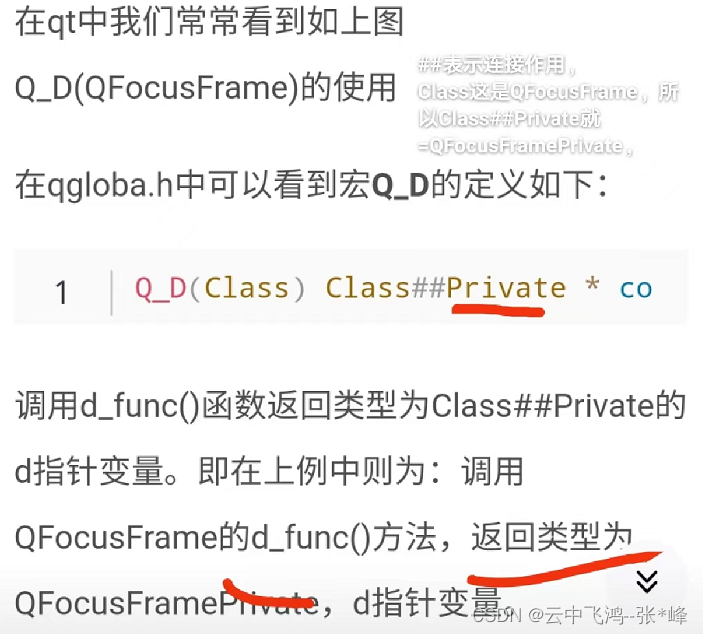
Qt 的 d_ptr (d-pointer) 和 q_ptr (q-pointer)解析;Q_D和Q_Q指针
篇一: Qt之q指针(Q_Q)d指针(Q_D)源码剖析---源码面前了无秘密_qtq指针-CSDN博客 通常情况下,与一个类密切相关的数据会被作为数据成员直接定义在该类中。然而,在某些场合下,我们会…...

【机器学习】深度探索:从基础概念到深度学习关键技术的全面解析——梯度下降、激活函数、正则化与批量归一化
🔥 个人主页:空白诗 文章目录 一、机器学习的基本概念与原理二、深度学习与机器学习的关系2.1 概念层次的关系2.2 技术特点差异2.3 机器学习示例:线性回归(使用Python和scikit-learn库)2.4 深度学习示例:简…...

C++模板类与Java泛型类的实战应用及对比分析
C模板类和Java泛型类都是用于实现代码重用和类型安全性的重要工具,但它们在实现方式和应用上有一些明显的区别。下面,我将先分别介绍它们的实战应用,然后进行对比分析。 C模板类的实战应用 C模板类允许你定义一种通用的类,其中类…...
云启出海,智联未来|阿里云网络「企业出海」系列客户沙龙上海站圆满落地
借阿里云中企出海大会的东风,以**「云启出海,智联未来|打造安全可靠的出海云网络引擎」为主题的阿里云企业出海客户沙龙云网络&安全专场于5.28日下午在上海顺利举办,现场吸引了来自携程、小红书、米哈游、哔哩哔哩、波克城市、…...

FastAPI 教程:从入门到实践
FastAPI 是一个现代、快速(高性能)的 Web 框架,用于构建 API,支持 Python 3.6。它基于标准 Python 类型提示,易于学习且功能强大。以下是一个完整的 FastAPI 入门教程,涵盖从环境搭建到创建并运行一个简单的…...
dedecms 织梦自定义表单留言增加ajax验证码功能
增加ajax功能模块,用户不点击提交按钮,只要输入框失去焦点,就会提前提示验证码是否正确。 一,模板上增加验证码 <input name"vdcode"id"vdcode" placeholder"请输入验证码" type"text&quo…...

【android bluetooth 框架分析 04】【bt-framework 层详解 1】【BluetoothProperties介绍】
1. BluetoothProperties介绍 libsysprop/srcs/android/sysprop/BluetoothProperties.sysprop BluetoothProperties.sysprop 是 Android AOSP 中的一种 系统属性定义文件(System Property Definition File),用于声明和管理 Bluetooth 模块相…...
现代密码学 | 椭圆曲线密码学—附py代码
Elliptic Curve Cryptography 椭圆曲线密码学(ECC)是一种基于有限域上椭圆曲线数学特性的公钥加密技术。其核心原理涉及椭圆曲线的代数性质、离散对数问题以及有限域上的运算。 椭圆曲线密码学是多种数字签名算法的基础,例如椭圆曲线数字签…...
BCS 2025|百度副总裁陈洋:智能体在安全领域的应用实践
6月5日,2025全球数字经济大会数字安全主论坛暨北京网络安全大会在国家会议中心隆重开幕。百度副总裁陈洋受邀出席,并作《智能体在安全领域的应用实践》主题演讲,分享了在智能体在安全领域的突破性实践。他指出,百度通过将安全能力…...

Python如何给视频添加音频和字幕
在Python中,给视频添加音频和字幕可以使用电影文件处理库MoviePy和字幕处理库Subtitles。下面将详细介绍如何使用这些库来实现视频的音频和字幕添加,包括必要的代码示例和详细解释。 环境准备 在开始之前,需要安装以下Python库:…...

laravel8+vue3.0+element-plus搭建方法
创建 laravel8 项目 composer create-project --prefer-dist laravel/laravel laravel8 8.* 安装 laravel/ui composer require laravel/ui 修改 package.json 文件 "devDependencies": {"vue/compiler-sfc": "^3.0.7","axios": …...
【LeetCode】算法详解#6 ---除自身以外数组的乘积
1.题目介绍 给定一个整数数组 nums,返回 数组 answer ,其中 answer[i] 等于 nums 中除 nums[i] 之外其余各元素的乘积 。 题目数据 保证 数组 nums之中任意元素的全部前缀元素和后缀的乘积都在 32 位 整数范围内。 请 不要使用除法,且在 O…...

Python 训练营打卡 Day 47
注意力热力图可视化 在day 46代码的基础上,对比不同卷积层热力图可视化的结果 import torch import torch.nn as nn import torch.optim as optim from torchvision import datasets, transforms from torch.utils.data import DataLoader import matplotlib.pypl…...