MongoDB - 组合聚合阶段:$group、$match、$limit、$sort、$skip、$project、$count
文章目录
- 1. $group
- 2. $group-> $project
- 2.1 $group
- 2.2 $group-> $project
- 2.3 SpringBoot 整合 MongoDB
- 3. $match-> $group -> $match
- 3.1 $match
- 3.2 $match-> $group
- 3.3 $match-> $group-> $match
- 3.4 SpringBoot 整合 MongoDB
- 4. $match-> $group-> $project-> $sort-> skip-> $limit
- 4.1 $match
- 4.2 $match-> $group
- 4.3 $match-> $group-> $project
- 4.4 $match-> $group-> $project-> $sort
- 4.5 $match-> $group-> $project-> $sort-> $skip
- 4.5 $match-> $group-> $project-> $sort-> $skip-> $limit
- 4.6 SpringBoot 整合 MongoDB
- 5. $group-> $project
- 5.1 $group 多字段分组聚合
- 5.2 $group-> $project
- 5.3 $group-> $project-> $sort
- 5.4 $group-> $project-> $sort-> $limit
- 5.5 SpringBoot 整合 MongoDB
根据工作中常见的业务需求,构造了一些场景来练习 mongodb 聚合阶段的使用。
1. $group
$group 根据单个字段对文档进行分组。
构造测试数据:
db.sales.drop()db.sales.insertMany([{ "_id": 1, "product": "A", "category": "Electronics", "quantity": 10, "price": 100 },{ "_id": 2, "product": "B", "category": "Electronics", "quantity": 5, "price": 200 },{ "_id": 3, "product": "C", "category": "Electronics", "quantity": 5, "price": 300 },{ "_id": 4, "product": "D", "category": "Electronics", "quantity": 10, "price": 500 },{ "_id": 5, "product": "A", "category": "Clothing", "quantity": 8, "price": 500},{ "_id": 6, "product": "B", "category": "Clothing", "quantity": 12, "price": 200 },{ "_id": 7, "product": "C", "category": "Clothing", "quantity": 8, "price": 600 },{ "_id": 8, "product": "D", "category": "Clothing", "quantity": 12, "price": 700 }
])
根据 category 字段对文档进行分组并计算每个分组内文档的数量:
db.sales.aggregate([{$group : {_id : "$category",count: { $sum: 1 }}}
])
执行 $group 聚合阶段后输出的文档:
// 1
{"_id": "Clothing","count": 4
}// 2
{"_id": "Electronics","count": 4
}
SpringBoot整合MongoDB实现:
// 输入文档
@Data
@Document(collection = "sales")
public class Sales {@MongoIdprivate int _id;private String product;private String category;private int quantity;private int price;
}// 输出文档
@Data
public class AggregationResult {private int _id;private int count;
}// 聚合操作
@Test
public void aggregateTest() {// $group 聚合阶段GroupOperation group = Aggregation.group("category").count().as("count");// 组合聚合阶段Aggregation aggregation = Aggregation.newAggregation(group);// 执行聚合查询AggregationResults<AggregationResult> results= mongoTemplate.aggregate(aggregation, Sales.class, AggregationResult.class);List<AggregationResult> mappedResults = results.getMappedResults();// 打印结果mappedResults.forEach(System.out::println);//AggregationResult(_id=Clothing, count=4)//AggregationResult(_id=Electronics, count=4)
}
2. $group-> $project
$group 单字段分组 + $project 排除字段 + $project 重命名字段
构造测试数据:
db.sales.drop()db.sales.insertMany([{ "_id": 1, "product": "A", "category": "Electronics", "quantity": 10, "price": 100 },{ "_id": 2, "product": "B", "category": "Electronics", "quantity": 5, "price": 200 },{ "_id": 3, "product": "C", "category": "Electronics", "quantity": 5, "price": 300 },{ "_id": 4, "product": "D", "category": "Electronics", "quantity": 10, "price": 500 },{ "_id": 5, "product": "A", "category": "Clothing", "quantity": 8, "price": 500},{ "_id": 6, "product": "B", "category": "Clothing", "quantity": 12, "price": 200 },{ "_id": 7, "product": "C", "category": "Clothing", "quantity": 8, "price": 600 },{ "_id": 8, "product": "D", "category": "Clothing", "quantity": 12, "price": 700 }
])
2.1 $group
执行 $group 聚合阶段后输出的文档:
db.sales.aggregate([{$group : {_id : "$category",count: { $sum: 1 }}}
])
// 1
{"_id": "Clothing","count": 4
}// 2
{"_id": "Electronics","count": 4
}
2.2 $group-> $project
执行 g r o u p + group+ group+project 聚合阶段后输出的文档:
db.sales.aggregate([// $group阶段:将聚合管道内的文档按照category分组,并计算分组内的文档数量{$group : {_id : "$category",count: { $sum: 1 }}},// $project阶段:将聚合管道内的文档排除_id字段,并将count字段的名称重命名newCount字段{$project : {_id : 0,newCount: "$count"}}
])
// 1
{"newCount": 4
}// 2
{"newCount": 4
}
2.3 SpringBoot 整合 MongoDB
// 输入文档实体类
@Data
@Document(collection = "sales")
public class Sales {@Idprivate int _id;private String product;private String category;private int quantity;private int price;
}// 输出文档实体类
@Data
public class AggregationResult {private String newCount;
}// 聚合操作
@SpringBootTest
@RunWith(SpringRunner.class)
public class BeanLoadServiceTest {@Autowiredprivate MongoTemplate mongoTemplate;@Testpublic void aggregateTest() {// $group 聚合阶段GroupOperation group = Aggregation.group("category").count().as("count");// $project 聚合阶段ProjectionOperation project = Aggregation.project().andExclude("_id").and("count").as("newCount");// 组合聚合阶段Aggregation aggregation = Aggregation.newAggregation(group,project);// 执行聚合查询AggregationResults<AggregationResult> results= mongoTemplate.aggregate(aggregation, Sales.class, AggregationResult.class);List<AggregationResult> mappedResults = results.getMappedResults();// 打印结果mappedResults.forEach(System.out::println);//AggregationResult(newCount=4)//AggregationResult(newCount=4)}
}
3. $match-> $group -> $match
$match 根据条件筛选文档+ $group 根据单字段分组文档 + $match 筛选分组后的文档
构造测试数据:
db.sales.drop()db.sales.insertMany([{ "_id": 1, "product": "A", "category": "Electronics", "quantity": 10, "price": 100 },{ "_id": 2, "product": "B", "category": "Electronics", "quantity": 5, "price": 200 },{ "_id": 3, "product": "C", "category": "Electronics", "quantity": 5, "price": 300 },{ "_id": 4, "product": "D", "category": "Electronics", "quantity": 10, "price": 500 },{ "_id": 5, "product": "A", "category": "Clothing", "quantity": 8, "price": 500},{ "_id": 6, "product": "B", "category": "Clothing", "quantity": 12, "price": 200 },{ "_id": 7, "product": "C", "category": "Clothing", "quantity": 8, "price": 600 },{ "_id": 8, "product": "D", "category": "Clothing", "quantity": 12, "price": 700 }
])
3.1 $match
执行 $match 聚合阶段输出的文档为:
db.sales.aggregate([// 第一阶段:筛选出 price>=300 的文档{$match : {"price": { $gte: 300 }}}
])
// 1
{"_id": 3,"product": "C","category": "Electronics","quantity": 5,"price": 300
}// 2
{"_id": 4,"product": "D","category": "Electronics","quantity": 10,"price": 500
}// 3
{"_id": 5,"product": "A","category": "Clothing","quantity": 8,"price": 500
}// 4
{"_id": 7,"product": "C","category": "Clothing","quantity": 8,"price": 600
}// 5
{"_id": 8,"product": "D","category": "Clothing","quantity": 12,"price": 700
}
3.2 $match-> $group
执行 m a t c h + match+ match+group 聚合阶段是输出的文档为:
db.sales.aggregate([// 第一阶段:筛选出 price>=300 的文档{$match : {"price": { $gte: 300 }}},// 第二阶段:将聚合管道内的文档按照category分组,并计算分组内的文档数量{$group : {_id : "$category",count: { $sum: 1 }}}
])
// 1
{"_id": "Clothing","count": 3
}// 2
{"_id": "Electronics","count": 2
}
3.3 $match-> $group-> $match
执行 m a t c h + match+ match+group+$match 聚合阶段是输出的文档为:
db.sales.aggregate([// 第一阶段:筛选出 price>=300 的文档{$match : {"price": { $gte: 300 }}},// 第二阶段:将聚合管道内的文档按照category分组,并计算分组内的文档数量{$group : {_id : "$category",count: { $sum: 1 }}},// 第三阶段:筛选出 count>=3 的文档{$match : {"count": { $gte: 3 }}}
])
// 1
{"_id": "Clothing","count": 3
}
3.4 SpringBoot 整合 MongoDB
// 输入文档实体
@Data
@Document(collection = "sales")
public class Sales {@Idprivate int _id;private String product;private String category;private int quantity;private int price;
}// 输出文档实体
@Data
public class AggregationResult {private String _id;private int count;
}// 执行聚合阶段
@SpringBootTest
@RunWith(SpringRunner.class)
public class BeanLoadServiceTest {@Autowiredprivate MongoTemplate mongoTemplate;@Testpublic void aggregateTest() {// $match 聚合阶段MatchOperation match1 = Aggregation.match(Criteria.where("price").gte(300));// $group 聚合阶段GroupOperation group = Aggregation.group("category").count().as("count");// $match 聚合阶段MatchOperation match2 = Aggregation.match(Criteria.where("count").gte(3));// 组合聚合阶段Aggregation aggregation = Aggregation.newAggregation(match1,group,match2);// 执行聚合查询AggregationResults<AggregationResult> results= mongoTemplate.aggregate(aggregation, Sales.class, AggregationResult.class);List<AggregationResult> mappedResults = results.getMappedResults();// 打印结果mappedResults.forEach(System.out::println);//AggregationResult(_id=Clothing, count=3)}
}
4. $match-> $group-> $project-> $sort-> skip-> $limit
$match 根据条件筛选文档+ $group 根据单字段分组文档 + $project 重命名字段+ $sort 对文档按照唯一键排序
构造测试数据:
db.sales.drop()db.sales.insertMany([{ "_id": 1, "product": "C", "category": "Electronics", "quantity": 10, "price": 100 },{ "_id": 2, "product": "A", "category": "Electronics", "quantity": 5, "price": 200 },{ "_id": 3, "product": "A", "category": "Electronics", "quantity": 5, "price": 300 },{ "_id": 4, "product": "D", "category": "Electronics", "quantity": 10, "price": 500 },{ "_id": 5, "product": "A", "category": "Clothing", "quantity": 8, "price": 500},{ "_id": 6, "product": "B", "category": "Clothing", "quantity": 12, "price": 200 },{ "_id": 7, "product": "B", "category": "Clothing", "quantity": 8, "price": 600 },{ "_id": 8, "product": "C", "category": "Clothing", "quantity": 12, "price": 700 }
])
4.1 $match
执行 $match 聚合阶段输出的文档为:
db.sales.aggregate([// $match 阶段:筛选出 price>100 的文档{$match : {"price": { $gt: 100 }}}
])
// 1
{"_id": 2,"product": "A","category": "Electronics","quantity": 5,"price": 200
}// 2
{"_id": 3,"product": "A","category": "Electronics","quantity": 5,"price": 300
}// 3
{"_id": 4,"product": "D","category": "Electronics","quantity": 10,"price": 500
}// 4
{"_id": 5,"product": "A","category": "Clothing","quantity": 8,"price": 500
}// 5
{"_id": 6,"product": "B","category": "Clothing","quantity": 12,"price": 200
}// 6
{"_id": 7,"product": "B","category": "Clothing","quantity": 8,"price": 600
}// 7
{"_id": 8,"product": "C","category": "Clothing","quantity": 12,"price": 700
}
4.2 $match-> $group
执行 $match + $group 聚合阶段输出的文档为:
db.sales.aggregate([// $match阶段:筛选出 price>=300 的文档{$match : {"price": { $gt: 100 }}},// $group阶段:将聚合管道内的文档按照category分组,并计算分组内的文档数量{$group : {_id : "$product",count: { $sum: 1 }}}
])
// 1
{"_id": "C","count": 1
}// 2
{"_id": "D","count": 1
}// 3
{"_id": "B","count": 2
}// 4
{"_id": "A","count": 3
}
4.3 $match-> $group-> $project
执行$match + $group + $project 聚合阶段输出的文档为:
db.sales.aggregate([// $match阶段:筛选出 price>=300 的文档{$match : {"price": { $gt: 100 }}},// $group阶段:将聚合管道的文档按照category分组,并计算分组内的文档数量{$group : {_id : "$product",count: { $sum: 1 }}},// $project阶段:输出文档排除_id字段,包含count字段,并将_id字段重命名为product字段{$project : {_id:0,count: 1,product: "$_id"}}
])
// 1
{"count": 1,"product": "C"
}// 2
{"count": 1,"product": "D"
}// 3
{"count": 2,"product": "B"
}// 4
{"count": 3,"product": "A"
}
4.4 $match-> $group-> $project-> $sort
执行$match + $group + $project + $sort 聚合阶段输出的文档为:
db.sales.aggregate([// $match阶段:筛选出 price>=300 的文档{$match : {"price": { $gt: 100 }}}, // $group阶段:将聚合管道的文档按照category分组,并计算分组内的文档数量{$group : {_id : "$product",count: { $sum: 1 }}},// $project阶段:将聚合管道内的文档排除_id字段,包含count字段,并将_id字段重命名为product字段{$project : {_id:0,count: 1,product: "$_id"}},// $sort阶段:将聚合管道内的文档按照count字段降序排序{$sort : {count:-1}}
])
// 1
{"count": 3,"product": "A"
}// 2
{"count": 2,"product": "B"
}// 3
{"count": 1,"product": "C"
}// 4
{"count": 1,"product": "D"
}
4.5 $match-> $group-> $project-> $sort-> $skip
db.sales.aggregate([// $match阶段:筛选出 price>=300 的文档{$match : {"price": { $gt: 100 }}}, // $group阶段:将聚合管道的文档按照category分组,并计算分组内的文档数量{$group : {_id : "$product",count: { $sum: 1 }}},// $project阶段:将聚合管道内的文档排除_id字段,包含count字段,并将_id字段重命名为product字段{$project : {_id:0,count: 1,product: "$_id"}},// $sort阶段:将聚合管道内的文档按照count字段降序排序{$sort : {count:-1}},// $skip阶段:跳过聚合管道的前2个文档并输出{$skip: 2}
])
// 1
{"count": 1,"product": "C"
}// 2
{"count": 1,"product": "D"
}
4.5 $match-> $group-> $project-> $sort-> $skip-> $limit
执行 $match + $group + $project + $sort + $limit 聚合阶段输出的文档为:
db.sales.aggregate([// $match阶段:筛选出 price>=300 的文档{$match : {"price": { $gt: 100 }}}, // $group阶段:将聚合管道的文档按照category分组,并计算分组内的文档数量{$group : {_id : "$product",count: { $sum: 1 }}},// $project阶段:将聚合管道内的文档排除_id字段,包含count字段,并将_id字段重命名为product字段{$project : {_id:0,count: 1,product: "$_id"}},// $sort阶段:将聚合管道内的文档按照count字段降序排序{$sort : {count:-1}},// $skip阶段:跳过聚合管道的前2个文档并输出{$skip: 2},// $limit阶段:仅输出聚合管道内的前1个文档{$limit: 1}
])
// 1
{"count": 1,"product": "C"
}
4.6 SpringBoot 整合 MongoDB
// 输入文档实体类
@Data
@Document(collection = "sales")
public class Sales {@Idprivate int _id;private String product;private String category;private int quantity;private int price;
}// 输出文档实体类
@Data
public class AggregationResult {private int count;private String product;
}// 执行聚合操作
@SpringBootTest
@RunWith(SpringRunner.class)
public class BeanLoadServiceTest {@Autowiredprivate MongoTemplate mongoTemplate;@Testpublic void aggregateTest() {// $match 聚合阶段MatchOperation match = Aggregation.match(Criteria.where("price").gt(100));// $group 聚合阶段GroupOperation group = Aggregation.group("product").count().as("count");// $project 聚合阶段ProjectionOperation project = Aggregation.project("count").andExclude("_id").and("$_id").as("product");// $sort聚合阶段SortOperation sort = Aggregation.sort(Sort.Direction.DESC, "count");// $skip 聚合阶段SkipOperation skip = Aggregation.skip(2);// $limit 聚合阶段LimitOperation limit = Aggregation.limit(1);// 组合聚合阶段Aggregation aggregation = Aggregation.newAggregation(match,group,project,sort,skip,limit);// 执行聚合查询AggregationResults<AggregationResult> results= mongoTemplate.aggregate(aggregation, Sales.class, AggregationResult.class);List<AggregationResult> mappedResults = results.getMappedResults();// 打印结果mappedResults.forEach(System.out::println);//AggregationResult(count=1, product=C)}
}
5. $group-> $project
构造测试数据:
db.sales.drop()db.sales.insertMany([{ "_id": 1, "product": "C", "category": "Electronics", "quantity": 10, "price": 100 },{ "_id": 2, "product": "A", "category": "Electronics", "quantity": 5, "price": 200 },{ "_id": 3, "product": "A", "category": "Electronics", "quantity": 5, "price": 300 },{ "_id": 4, "product": "D", "category": "Electronics", "quantity": 10, "price": 500 },{ "_id": 5, "product": "A", "category": "Clothing", "quantity": 8, "price": 500},{ "_id": 6, "product": "B", "category": "Clothing", "quantity": 12, "price": 200 },{ "_id": 7, "product": "B", "category": "Clothing", "quantity": 8, "price": 600 },{ "_id": 8, "product": "C", "category": "Clothing", "quantity": 12, "price": 700 }
])
5.1 $group 多字段分组聚合
$group 根据 category 和 product 字段分组后输出的文档为:
db.sales.aggregate([{// $group聚合阶段:将输入文档按照category和product字段分组$group: {_id: {category: "$category",product: "$product"},count: { $sum: 1 }}}
])
// 1
{"_id": {"category": "Clothing","product": "C"},"count": 1
}// 2
{"_id": {"category": "Clothing","product": "B"},"count": 2
}// 3
{"_id": {"category": "Clothing","product": "A"},"count": 1
}// 4
{"_id": {"category": "Electronics","product": "A"},"count": 2
}// 5
{"_id": {"category": "Electronics","product": "D"},"count": 1
}// 6
{"_id": {"category": "Electronics","product": "C"},"count": 1
}
5.2 $group-> $project
执行 $group + $project 聚合阶段后输出的文档为:
db.sales.aggregate([// $group聚合阶段:将输入文档按照category和product字段分组{$group: {_id: {category: "$category",product: "$product"},count: { $sum: 1 }}},// $project聚合阶段:发将_id.category重命名为category,将_id.product重命名为product,包含count字段,排除_id字段{$project: {category: "$_id.category",product: "$_id.product",count: 1,_id: 0}}
])
// 1
{"count": 1,"category": "Clothing","product": "C"
}// 2
{"count": 2,"category": "Clothing","product": "B"
}// 3
{"count": 1,"category": "Clothing","product": "A"
}// 4
{"count": 2,"category": "Electronics","product": "A"
}// 5
{"count": 1,"category": "Electronics","product": "D"
}// 6
{"count": 1,"category": "Electronics","product": "C"
}
5.3 $group-> $project-> $sort
执行 $group + $project + $sort 聚合阶段后输出的文档为:
db.sales.aggregate([// $group聚合阶段:将输入文档按照category和product字段分组{$group: {_id: {category: "$category",product: "$product"},count: { $sum: 1 }}},// $project聚合阶段:发将_id.category重命名为category,将_id.product重命名为product,包含count字段,排除_id字段{$project: {category: "$_id.category",product: "$_id.product",count: 1,_id: 0}},// $sort聚合阶段:将聚合管道内的文档按照count字段升序排序{$sort: {count:1}}
])
// 1
{"count": 1,"category": "Clothing","product": "C"
}// 2
{"count": 1,"category": "Clothing","product": "A"
}// 3
{"count": 1,"category": "Electronics","product": "D"
}// 4
{"count": 1,"category": "Electronics","product": "C"
}// 5
{"count": 2,"category": "Clothing","product": "B"
}// 6
{"count": 2,"category": "Electronics","product": "A"
}
5.4 $group-> $project-> $sort-> $limit
执行 $group + $project + $sort + $limit 聚合阶段后输出的文档为:
db.sales.aggregate([// $group聚合阶段:将输入文档按照category和product字段分组{$group: {_id: {category: "$category",product: "$product"},count: { $sum: 1 }}},// $project聚合阶段:发将_id.category重命名为category,将_id.product重命名为product,包含count字段,排除_id字段{$project: {category: "$_id.category",product: "$_id.product",count: 1,_id: 0}},// $sort聚合阶段:将聚合管道内的文档按照count字段升序排序{$sort: {count:1}},// $limit聚合阶段:仅输出聚合管道内的前2个文档{$limit:2}
])
// 1
{"count": 1,"category": "Clothing","product": "A"
}// 2
{"count": 1,"category": "Clothing","product": "C"
}
5.5 SpringBoot 整合 MongoDB
// 输入文档实体类
@Data
@Document(collection = "sales")
public class Sales {@Idprivate int _id;private String product;private String category;private int quantity;private int price;
}// 输出文档实体类
@Data
public class AggregationResult {private int count;private String product;private String category;
}// 执行聚合操作
@SpringBootTest
@RunWith(SpringRunner.class)
public class BeanLoadServiceTest {@Autowiredprivate MongoTemplate mongoTemplate;@Testpublic void aggregateTest() {// $group 聚合阶段GroupOperation group = Aggregation.group("category","product").count().as("count");// $project 聚合阶段ProjectionOperation project = Aggregation.project("count").andExclude("_id").and("$_id.category").as("category").and("$_id.product").as("product");// $sort聚合阶段SortOperation sort = Aggregation.sort(Sort.Direction.DESC, "count");// $limit 聚合阶段LimitOperation limit = Aggregation.limit(2);// 组合聚合阶段Aggregation aggregation = Aggregation.newAggregation(group,project,sort,limit);// 执行聚合查询AggregationResults<AggregationResult> results= mongoTemplate.aggregate(aggregation, Sales.class, AggregationResult.class);List<AggregationResult> mappedResults = results.getMappedResults();// 打印结果mappedResults.forEach(System.out::println);//AggregationResult(count=2, product=A, category=Electronics)//AggregationResult(count=2, product=B, category=Clothing)}
}
相关文章:

MongoDB - 组合聚合阶段:$group、$match、$limit、$sort、$skip、$project、$count
文章目录 1. $group2. $group-> $project2.1 $group2.2 $group-> $project2.3 SpringBoot 整合 MongoDB 3. $match-> $group -> $match3.1 $match3.2 $match-> $group3.3 $match-> $group-> $match3.4 SpringBoot 整合 MongoDB 4. $match-> $group->…...

vue element-ui日期控件传参
前端:Vue element-ui <el-form-item label"过期时间" :rules"[ { required: true, message: 请选择过期时间, trigger: blur }]"><el-date-picker v-model"form.expireTime" type"date" format"yyyy-MM-dd&…...

MacOS安装SDKMan管理Java版本
文章目录 1 简介2 安装与卸载2.1 安装2.2 卸载 3 使用3.1 查看其他工具:支持 Ant, Maven 等3.2 查看Java版本3.3 安装Java,加上相关的版本3.4 设置Java版本(全局)3.5 只在当前窗口生效3.6 卸载1 默认环境无法卸载 4 jdk安装的位置5 与IDEA集成参考 1 简介…...

【网络安全的神秘世界】文件包含漏洞
🌝博客主页:泥菩萨 💖专栏:Linux探索之旅 | 网络安全的神秘世界 | 专接本 | 每天学会一个渗透测试工具 一、概述 文件包含:重复使用的函数写在文件里,需要使用某个函数时直接调用此文件,而无需再…...

并发编程--volatile
1.什么是volatile volatile是 轻 量 级 的 synchronized,它在多 处 理器开 发 中保 证 了共享 变 量的 “ 可 见 性 ” 。可 见 性的意思是当一个 线 程 修改一个共享变 量 时 ,另外一个 线 程能 读 到 这 个修改的 值 。如果 volatile 变 量修 饰 符使用…...

记录unraid docker更新的域名
背景:级联 一、安装内容 unraid更新docker,之前一直失败,修改网络后可以进行安装。 二、查看域名 查看域名,发现是走github的,怪不得有一些docker无法正常更新 三、解决方法 更改代理,这里为unraid的…...

SpringCloud+Vue3多对多,多表联查
♥️作者:小宋1021 🤵♂️个人主页:小宋1021主页 ♥️坚持分析平时学习到的项目以及学习到的软件开发知识,和大家一起努力呀!!! 🎈🎈加油! 加油!…...

麒麟系统信创改造
麒麟系统信创改造 一、查看操作系统架构下载相应的依赖,压缩包1、查看Linux系统架构、CPU(1)uname -m(2)lscpu(3)cat /proc/cpuinfo(4)arch(5)getconf LONG_BIT(6)dmidecode2、根据Linux系统架构、CPU的差异进行下载相关依赖,看第二项二、以下是根据本系统的aarc…...
【Android】ListView和RecyclerView知识总结
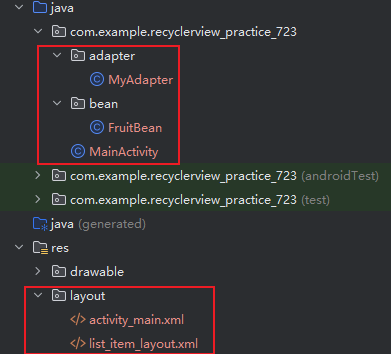
文章目录 ListView步骤适配器AdpterArrayAdapterSimpleAdapterBaseAdpter效率问题 RecyclerView具体实现不同布局形式的设置横向滚动瀑布流网格 点击事件 ListView ListView 是 Android 中的一种视图组件,用于显示可滚动的垂直列表。每个列表项都是一个视图对象&…...

泛域名绑定到wordpress网站二级目录
要将WordPress的泛域名绑定到二级目录,你需要在你的服务器上修改Apache或Nginx配置文件。以下是两种最常见的服务器配置的示例: Apache服务器 编辑你的虚拟主机配置文件,通常位于/etc/apache2/sites-available/目录下。 <VirtualHost *…...

8、从0搭建企业门户网站——网站部署
目录 正文 1、域名解析 2、云服务器端口授权 3、Mysql数据库初始化 4、上传网站软件包 5、Tomcat配置 6、运行Tomcat 7、停止Tomcat 8、部署后发现验证码无法使用 完毕! 正文 当云服务器租用、域名购买和软件开发都完成后,我们就可以开始网站部署上线,ICP备案会长…...

uniapp中出现图片过小会与盒子偏离
结论:在image的父盒子中加上display: flex,原因不清楚 出问题的代码和图片如下: <template><view style" background-color: greenyellow; height: 10rpx;width: 10rpx;"><image :src"imgSrc.seatnull" …...

MySQL练手 --- 1934. 确认率
题目链接:1934. 确认率 思路 由题可知,两个表,一个表为Signups注册表,另一个表为Confirmations信息确认表,表的关联关系为 一对一,且user_id作为两个表的连接条件(匹配字段)&#…...

【OpenCV C++20 学习笔记】扫描图片数据
扫描图片数据 应用情景图像数据扫描的难点颜色空间缩减(color space reduction)查询表 扫描算法计算查询表统计运算时长连续内存3种扫描方法C风格的扫描方法迭代器方法坐标方法LUT方法 算法效率对比结论 应用情景 图像数据扫描的难点 在上一篇文章《基…...
)
LeetCode:爬楼梯(C语言)
1、问题概述:每次可以爬 1 或 2 个台阶。有多少种不同的方法可以爬到楼顶 2、示例 示例 1: 输入:n 2 输出:2 解释:有两种方法可以爬到楼顶。 1. 1 阶 1 阶 2. 2 阶 示例 2: 输入:n 3 输出&a…...
环境下通过docker安装postgis3,并实现数据整体迁移)
银河麒麟(arm64)环境下通过docker安装postgis3,并实现数据整体迁移
银河麒麟(arm64)环境下通过docker安装postgis3,并实现数据整体迁移 硬件配置:麒麟9006C 系统环境:银河麒麟桌面版v10 sp1 数据库:postgresql11+postgis3.0 具体的步骤参考https://blog.csdn.net/qq_34817440/article/details/103914574 -----主要操作-----------------…...

C语言 | Leetcode C语言题解之第278题第一个错误的版本
题目: 题解: int firstBadVersion(int n) {int left 1, right n;while (left < right) { // 循环直至区间左右端点相同int mid left (right - left) / 2; // 防止计算时溢出if (isBadVersion(mid)) {right mid; // 答案在区间 [left, mid] 中…...

京东科技集团将在香港发行与港元1:1挂钩的加密货币稳定币
据京东科技集团旗下公司京东币链科技(香港)官网信息,京东稳定币是一种基于公链并与港元(HKD) 1:1挂钩的稳定币,将在公共区块链上发行,其储备由高度流动且可信的资产组成,这些资产安全存放于持牌金融机构的独立账户中,通…...

Vue 实现电子签名并生成签名图片
目录 前言项目结构代码实现 安装依赖创建签名画布组件生成签名图片 总结相关阅读 1. 前言 电子签名在现代Web应用中越来越普遍,例如合同签署、确认表单等。本文将介绍如何使用Vue.js实现一个简单的电子签名功能,并将签名生成图片。 2. 项目结构 项…...

Visual Studio 2022美化
说明: VS版本:Visual Studio Community 2022 背景美化 【扩展】【管理扩展】搜索“ClaudiaIDE”,【下载】,安装完扩展要重启VS 在wallhaven下载壁纸图片作为文本编辑器区域背景图片 【工具】【选项】搜索ClaudiaIDEÿ…...

Suricata在CentOS7上的性能优化:如何配置网卡混杂模式与端口聚合
Suricata在CentOS7上的性能优化:网卡混杂模式与端口聚合实战指南 当企业网络流量突破千兆级别时,传统单网卡监控方案往往力不从心。我曾为某金融客户部署Suricata时,单台服务器每天要处理超过2TB的流量数据,正是通过下文介绍的网卡…...

AI如何助力人力资源管理:从效率工具到战略伙伴的跃迁
去年某互联网大厂HR负责人跟我说,他们团队用AI筛选简历后,招聘周期从45天缩短到28天,但更让他意外的是——AI还帮他们发现了一个被忽视3年的优质候选人。这个案例折射出AI对人力资源管理的深层改变:不只是提速,更是让H…...

如何通过AndroidAnnotations与Kotlin扩展函数实现极速Android开发:新手必备指南
如何通过AndroidAnnotations与Kotlin扩展函数实现极速Android开发:新手必备指南 【免费下载链接】androidannotations Fast Android Development. Easy maintainance. 项目地址: https://gitcode.com/gh_mirrors/an/androidannotations AndroidAnnotations是…...

别再瞎找了!盘点2026年顶流之选的AI论文写作软件
一天写完毕业论文在2026年已不再是天方夜谭。2026年最炸裂的AI论文写作软件来了,实测提速效果惊人,覆盖选题、撰写、查重、排版全流程,让你高效搞定论文不再难。 一、全流程王者:一站式搞定论文全链路(一天定稿首选&am…...

STM32duino S2-LP无线驱动库:Sub-1GHz低功耗可靠通信实现
1. 项目概述STM32duino X-NUCLEO-S2868A2 是一款面向 STM32 平台的 Arduino 兼容库,专为驱动意法半导体(STMicroelectronics)推出的 X-NUCLEO-S2868A2 扩展板而设计。该扩展板核心搭载 S2-LP 超低功耗 Sub-1GHz 射频收发器芯片(型…...

OpenClaw隐私保护实践:GLM-4.7-Flash本地处理敏感数据
OpenClaw隐私保护实践:GLM-4.7-Flash本地处理敏感数据 1. 为什么选择本地化方案处理敏感数据 去年我在处理一批客户合同时遇到了一个棘手问题——合同中包含大量身份证号、银行账号等敏感信息,而团队当时使用的云端AI解析服务需要上传完整文件。虽然服…...

MultiHighlight插件完全指南:5步提升代码阅读效率300%
MultiHighlight插件完全指南:5步提升代码阅读效率300% 【免费下载链接】MultiHighlight Jetbrains IDE plugin: highlight identifiers with custom colors 🎨💡 项目地址: https://gitcode.com/gh_mirrors/mu/MultiHighlight 在当今快…...

OpenClaw可视化监控:为nanobot任务添加Web仪表盘
OpenClaw可视化监控:为nanobot任务添加Web仪表盘 1. 为什么需要可视化监控? 去年夏天,我部署了一个基于OpenClaw的nanobot自动化任务,用于定时抓取行业动态并生成日报。最初几周运行良好,直到某天早上发现连续三天的…...

如何快速搭建专业级游戏串流系统:Sunshine完整教程
如何快速搭建专业级游戏串流系统:Sunshine完整教程 【免费下载链接】Sunshine Sunshine: Sunshine是一个自托管的游戏流媒体服务器,支持通过Moonlight在各种设备上进行低延迟的游戏串流。 项目地址: https://gitcode.com/GitHub_Trending/su/Sunshine …...
梭哈配置主线设备树)
正点原子IMX6ULL史诗级新内核Linux7.0移植教程(5)梭哈配置主线设备树
正点原子IMX6ULL史诗级新内核Linux7.0移植教程(5)梭哈配置主线设备树 仓库已经开源,可以研究补丁和直接看完整教程:https://github.com/Awesome-Embedded-Learning-Studio/imx-forge 有任何意见欢迎提出 PR!会第一时间…...