【Unity编辑器拓展】GraphView自定义可视化节点
1、创建节点区域脚本
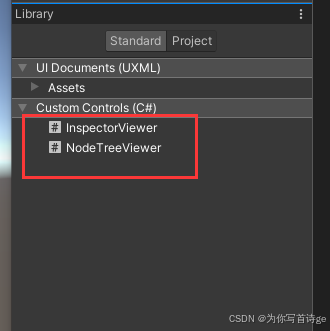
其中的new class UxmlFactory,可以让该元素显示在UI Builder中,我们就可以在Library-Project中看到我们新建的这两个UI元素,就可以拖入我们的UI窗口编辑了
public class NodeTreeViewer : GraphView
{public new class UxmlFactory : UxmlFactory<NodeTreeViewer, UxmlTraits> { }
}
默认的GraphView是一片黑屏。在这里,我们给我们的GraphView窗口添加上网格和拖拽缩放功能。
public class NodeTreeViewer : GraphView
{public new class UxmlFactory : UxmlFactory<NodeTreeViewer, UxmlTraits> { }public NodeTree tree;public Action<NodeView> OnNodeSelected;public NodeTreeViewer(){Insert(0, new GridBackground());this.AddManipulator(new ContentZoomer());this.AddManipulator(new ContentDragger());this.AddManipulator(new SelectionDragger());this.AddManipulator(new RectangleSelector());var styleSheet = AssetDatabase.LoadAssetAtPath<StyleSheet>("Assets/NodeEditor/Editor/UI/NodeTreeViewer.uss");styleSheets.Add(styleSheet);}
}
uss代码参考,上面代码的uss路径要根据项目实际路径进行设置。
GridBackground{--grid-background-color: rgb(40,40,40);--line-color: rgba(193,196,192,0.1);--thick-line-color: rgba(193,196,192,0.1);--spacing: 15;
}
2、创建节点和删除选中元素
2.1 创建节点类
using System;
using System.Collections;
using System.Collections.Generic;
using UnityEditor.Experimental.GraphView;
using UnityEngine;public class NodeView : UnityEditor.Experimental.GraphView.Node
{public Node node;public Port input;public Port output;public Action<NodeView> OnNodeSelected;public NodeView(Node node){this.node = node;this.title = node.name;this.viewDataKey = node.guid;style.left = node.position.x;style.top = node.position.y;CreateInputPorts();CreateOutputPorts();}//创建输入端口private void CreateInputPorts(){input = InstantiatePort(Orientation.Vertical, Direction.Input, Port.Capacity.Multi, typeof(bool));if(input != null ){input.portName = "";inputContainer.Add(input);}}//创建输出端口private void CreateOutputPorts(){output = InstantiatePort(Orientation.Vertical, Direction.Output, Port.Capacity.Multi, typeof(bool));if (output != null){output.portName = "";outputContainer.Add(output);}}//选中该节点时传递事件public override void OnSelected(){base.OnSelected();if( OnNodeSelected != null ){OnNodeSelected?.Invoke(this);}}//设置生成时位置public override void SetPosition(Rect newPos){base.SetPosition(newPos);node.position.x = newPos.xMin;node.position.y = newPos.yMin;}}
2.2 节点区域创建节点和删除选中元素功能
//重写该方法,可以添加右键菜单按钮public override void BuildContextualMenu(ContextualMenuPopulateEvent evt){var types = TypeCache.GetTypesDerivedFrom<Node>();foreach (var type in types){evt.menu.AppendAction($"创建节点/{type.Name}", a => CreateNode(type));}evt.menu.AppendAction("删除选中元素", DeleteSelecteNode);}//删除选中元素,节点或者连线private void DeleteSelecteNode(DropdownMenuAction action){DeleteSelection();}//创建节点private void CreateNode(Type type){Node node = tree.CreateNode(type);CreateNodeView(node);}private void CreateNodeView(Node node){NodeView nodeView = new NodeView(node);nodeView.OnNodeSelected = OnNodeSelected;AddElement(nodeView);}
3、设置节点元素输出端可连接端口
public override List<Port> GetCompatiblePorts(Port startPort, NodeAdapter nodeAdapter){return ports.ToList().Where(endpost => endpost.direction != startPort.direction && endpost.node != startPort.node).ToList();}
4、打开或者重新展示已有内容
internal void PopulateView(NodeTree tree){this.tree = tree;graphViewChanged -= OnGraphViewChange;DeleteElements(graphElements.ToList());graphViewChanged += OnGraphViewChange;tree.nodes.ForEach(n => CreateNodeView(n));tree.nodes.ForEach(n =>{var children = tree.GetChildren(n);children.ForEach(c =>{NodeView parentView = FindNodeView(n);NodeView childView = FindNodeView(c);Edge edge = parentView.output.ConnectTo(childView.input);AddElement(edge);});});}
5、当节点区域元素改变时,实现对应逻辑数据的修改
该方法在打开或展现时注册事件
private GraphViewChange OnGraphViewChange(GraphViewChange graphViewChange){if(graphViewChange.elementsToRemove != null){graphViewChange.elementsToRemove.ForEach(elem => { NodeView nodeview = elem as NodeView;if(nodeview != null){tree.DeleteNode(nodeview.node);}Edge edge = elem as Edge;if(edge != null){NodeView parentView = edge.output.node as NodeView;NodeView childView = edge.input.node as NodeView;tree.RemoveChild(parentView.node, childView.node);}});}if(graphViewChange.edgesToCreate != null){graphViewChange.edgesToCreate.ForEach(edge =>{NodeView parentView = edge.output.node as NodeView;NodeView childView = edge.input.node as NodeView;tree.AddChild(parentView.node, childView.node);});}return graphViewChange;}
6、完整代码
运行时代码Runtime Code
6.1 Node
using System.Collections;
using System.Collections.Generic;
using UnityEngine;public abstract class Node : ScriptableObject
{public enum State { Running, Waiting}public State state = State.Waiting;public bool started = false;public List<Node> children = new List<Node>();[HideInInspector] public string guid;[HideInInspector] public Vector2 position;public Node OnUpdate(){if(!started){OnStart();started = true;}Node currentNode = LogicUpdate();if(state != State.Running){OnStop();started = false;}return currentNode;}public abstract Node LogicUpdate();public abstract void OnStart();public abstract void OnStop();}
6.2 NormalNode
using System.Collections;
using System.Collections.Generic;
using UnityEngine;[CreateAssetMenu]
public class NormalNode : Node
{[TextArea]public string dialogueContent;public override Node LogicUpdate(){// 判断进入下一节点条件成功时 需将节点状态改为非运行中 且 返回对应子节点if (Input.GetKeyDown(KeyCode.Space)){state = State.Waiting;if (children.Count > 0){children[0].state = State.Running;return children[0];}}return this;}public override void OnStart(){Debug.Log(dialogueContent);}public override void OnStop(){Debug.Log("OnStop");}
}
6.3 NodeTree
using System.Collections;
using System.Collections.Generic;
using UnityEditor;
using UnityEngine;[CreateAssetMenu]
public class NodeTree : ScriptableObject
{public Node rootNode;public Node runningNode;public Node.State treeState = Node.State.Waiting;public List<Node> nodes = new List<Node>();public virtual void Update(){if(treeState == Node.State.Running && runningNode.state == Node.State.Running){runningNode = runningNode.OnUpdate();}}/// <summary>/// 对话树开始的触发方法/// </summary>public virtual void OnTreeStart(){treeState = Node.State.Running;runningNode.state = Node.State.Running;}/// <summary>/// 对话树结束的触发方法/// </summary>public void OnTreeEnd(){treeState = Node.State.Waiting;}#if UNITY_EDITORpublic Node CreateNode(System.Type type){Node node = ScriptableObject.CreateInstance(type) as Node;node.name = type.Name;node.guid = GUID.Generate().ToString();nodes.Add(node);if (!Application.isPlaying){AssetDatabase.AddObjectToAsset(node, this);}AssetDatabase.SaveAssets();return node;}public Node DeleteNode(Node node){nodes.Remove(node);AssetDatabase.RemoveObjectFromAsset(node);AssetDatabase.SaveAssets();return node;}public void RemoveChild(Node parent, Node child){parent.children.Remove(child);}public void AddChild(Node parent, Node child){parent.children.Add(child);}public List<Node> GetChildren(Node parent){return parent.children;}
#endif
}
6.4 NodeTreeRunner
using System.Collections;
using System.Collections.Generic;
using UnityEngine;public class NodeTreeRunner : MonoBehaviour
{public NodeTree tree;void Start(){}void Update(){if(Input.GetKeyDown(KeyCode.P)){tree.OnTreeStart();}if(tree != null && tree.treeState == Node.State.Running){tree.Update();}if(Input.GetKeyDown(KeyCode.D)){tree.OnTreeEnd();}}
}
可视化编辑器代码 Editor
6.5 Uxml和Uss
NodeEditor Uxml
<ui:UXML xmlns:ui="UnityEngine.UIElements" xmlns:uie="UnityEditor.UIElements" xsi="http://www.w3.org/2001/XMLSchema-instance" engine="UnityEngine.UIElements" editor="UnityEditor.UIElements" noNamespaceSchemaLocation="../../../../UIElementsSchema/UIElements.xsd" editor-extension-mode="True"><Style src="NodeEditor.uss" /><ui:VisualElement style="flex-grow: 1; flex-direction: row;"><ui:VisualElement name="LeftDiv" style="flex-grow: 0.3;"><ui:Label text="Inspector" display-tooltip-when-elided="true" name="Inspector" style="font-size: 15px; -unity-font-style: bold;" /><uie:ObjectField label="NodeTree" name="NodeTree" style="flex-grow: 0; flex-shrink: 0; min-width: auto; align-items: stretch; flex-wrap: nowrap; flex-direction: row; width: auto; max-width: none;" /><InspectorViewer style="flex-grow: 1;" /></ui:VisualElement><ui:VisualElement name="RightDiv" style="flex-grow: 0.7;"><ui:Label text="NodeTreeVirwer" display-tooltip-when-elided="true" name="NodeTreeVirwer" style="-unity-font-style: bold; font-size: 15px;" /><NodeTreeViewer focusable="true" style="flex-grow: 1;" /></ui:VisualElement></ui:VisualElement>
</ui:UXML>
NodeTreeViewer Uss
GridBackground{--grid-background-color: rgb(40,40,40);--line-color: rgba(193,196,192,0.1);--thick-line-color: rgba(193,196,192,0.1);--spacing: 15;
}
编辑器面板代码
6.6 NodeEdtor
using System;
using UnityEditor;
using UnityEditor.UIElements;
using UnityEngine;
using UnityEngine.UIElements;public class NodeEditor : EditorWindow
{public NodeTreeViewer nodeTreeViewer;public InspectorViewer inspectorViewer;public ObjectField nodeTreeObj;[MenuItem("MyWindows/NodeEditor")]public static void ShowExample(){NodeEditor wnd = GetWindow<NodeEditor>();wnd.titleContent = new GUIContent("NodeEditor");}public void CreateGUI(){// Each editor window contains a root VisualElement objectVisualElement root = rootVisualElement;// Import UXMLvar visualTree = AssetDatabase.LoadAssetAtPath<VisualTreeAsset>("Assets/NodeEditor/Editor/UI/NodeEditor.uxml");visualTree.CloneTree(root);var styleSheet = AssetDatabase.LoadAssetAtPath<StyleSheet>("Assets/NodeEditor/Editor/UI/NodeEditor.uss");root.styleSheets.Add(styleSheet);nodeTreeViewer = root.Q<NodeTreeViewer>();inspectorViewer = root.Q<InspectorViewer>();nodeTreeObj = root.Q("NodeTree") as ObjectField;nodeTreeObj.objectType = typeof(NodeTree);nodeTreeViewer.OnNodeSelected = OnNodeSelectionChanged;}private void OnNodeSelectionChanged(NodeView view){inspectorViewer.UpdateSelection(view.node);}private void OnSelectionChange(){NodeTree tree = Selection.activeObject as NodeTree;if (tree){nodeTreeViewer.PopulateView(tree);nodeTreeObj.value = tree;}else{nodeTreeViewer.CloseNodeTreeViewer();nodeTreeObj.value = null;}}}
6.7 NodeTreeViewer
using BehaviorDesigner.Runtime.Tasks.Unity.UnityInput;
using System;
using System.Collections.Generic;
using System.Linq;
using UnityEditor;
using UnityEditor.Experimental.GraphView;
using UnityEngine;
using UnityEngine.UIElements;public class NodeTreeViewer : GraphView
{public new class UxmlFactory : UxmlFactory<NodeTreeViewer, UxmlTraits> { }public NodeTree tree;public Action<NodeView> OnNodeSelected;private Vector2 curMousePos;ContentZoomer contentZoomer;ContentDragger contentDragger;public NodeTreeViewer(){Insert(0, new GridBackground());contentZoomer = new ContentZoomer();this.AddManipulator(contentZoomer);contentDragger = new ContentDragger();this.AddManipulator(contentDragger);this.AddManipulator(new SelectionDragger());this.AddManipulator(new RectangleSelector());var styleSheet = AssetDatabase.LoadAssetAtPath<StyleSheet>("Assets/NodeEditor/Editor/UI/NodeTreeViewer.uss");styleSheets.Add(styleSheet);this.RegisterCallback<MouseDownEvent>(OnMouseDown);}private void OnMouseDown(MouseDownEvent evt){Debug.Log(evt.localMousePosition);curMousePos = evt.localMousePosition;Debug.Log(contentZoomer.scaleStep);Debug.Log(contentZoomer.referenceScale);//Debug.Log(contentDragger.p)}public override void BuildContextualMenu(ContextualMenuPopulateEvent evt){var types = TypeCache.GetTypesDerivedFrom<Node>();foreach (var type in types){evt.menu.AppendAction($"创建节点/{type.Name}", a => CreateNode(type));}evt.menu.AppendAction("删除选中元素", DeleteSelecteNode);}private void DeleteSelecteNode(DropdownMenuAction action){DeleteSelection();}private void CreateNode(Type type){Node node = tree.CreateNode(type);node.position = curMousePos;CreateNodeView(node);}private void CreateNodeView(Node node){NodeView nodeView = new NodeView(node);nodeView.OnNodeSelected = OnNodeSelected;AddElement(nodeView);}internal void PopulateView(NodeTree tree){this.tree = tree;graphViewChanged -= OnGraphViewChange;DeleteElements(graphElements.ToList());graphViewChanged += OnGraphViewChange;tree.nodes.ForEach(n => CreateNodeView(n));tree.nodes.ForEach(n =>{var children = tree.GetChildren(n);children.ForEach(c =>{NodeView parentView = FindNodeView(n);NodeView childView = FindNodeView(c);Edge edge = parentView.output.ConnectTo(childView.input);AddElement(edge);});});}public void CloseNodeTreeViewer(){this.tree = null;graphViewChanged -= OnGraphViewChange;DeleteElements(graphElements.ToList());}private GraphViewChange OnGraphViewChange(GraphViewChange graphViewChange){if(graphViewChange.elementsToRemove != null){graphViewChange.elementsToRemove.ForEach(elem => { NodeView nodeview = elem as NodeView;if(nodeview != null){tree.DeleteNode(nodeview.node);}Edge edge = elem as Edge;if(edge != null){NodeView parentView = edge.output.node as NodeView;NodeView childView = edge.input.node as NodeView;tree.RemoveChild(parentView.node, childView.node);}});}if(graphViewChange.edgesToCreate != null){graphViewChange.edgesToCreate.ForEach(edge =>{NodeView parentView = edge.output.node as NodeView;NodeView childView = edge.input.node as NodeView;tree.AddChild(parentView.node, childView.node);});}return graphViewChange;}NodeView FindNodeView(Node node){return GetNodeByGuid(node.guid) as NodeView;}public override List<Port> GetCompatiblePorts(Port startPort, NodeAdapter nodeAdapter){return ports.ToList().Where(endpost => endpost.direction != startPort.direction && endpost.node != startPort.node).ToList();}}
6.8 NodeView
using System;
using System.Collections;
using System.Collections.Generic;
using UnityEditor.Experimental.GraphView;
using UnityEngine;public class NodeView : UnityEditor.Experimental.GraphView.Node
{public Node node;public Port input;public Port output;public Action<NodeView> OnNodeSelected;public NodeView(Node node){this.node = node;this.title = node.name;this.viewDataKey = node.guid;style.left = node.position.x;style.top = node.position.y;CreateInputPorts();CreateOutputPorts();}private void CreateInputPorts(){input = InstantiatePort(Orientation.Vertical, Direction.Input, Port.Capacity.Multi, typeof(bool));if(input != null ){input.portName = "input";inputContainer.Add(input);}}private void CreateOutputPorts(){output = InstantiatePort(Orientation.Vertical, Direction.Output, Port.Capacity.Multi, typeof(bool));if (output != null){output.portName = "output";outputContainer.Add(output);}}public override void OnSelected(){base.OnSelected();if( OnNodeSelected != null ){OnNodeSelected?.Invoke(this);}}public override void SetPosition(Rect newPos){Debug.Log(newPos);base.SetPosition(newPos);node.position.x = newPos.xMin;node.position.y = newPos.yMin;}}
6.9 InspectorViewer
using System.Collections;
using System.Collections.Generic;
using UnityEditor;
using UnityEngine;
using UnityEngine.UIElements;public class InspectorViewer : VisualElement
{public new class UxmlFactory : UxmlFactory<InspectorViewer, UxmlTraits> { }Editor editor;public InspectorViewer(){//this.AddManipulator(new drag)}internal void UpdateSelection(Node node){Clear();UnityEngine.Object.DestroyImmediate(editor);editor = Editor.CreateEditor(node);IMGUIContainer container = new IMGUIContainer(() =>{if (editor.target){editor.OnInspectorGUI();}});Add(container);}}
【Unity UIToolkit】UIBuilder基础教程-制作简易的对话系统编辑器 3步教你玩转Unity编辑器扩展工具_unity uibuilder-CSDN博客
[Unity] GraphView 可视化节点的事件行为树(二) UI Toolkit介绍,制作事件行为树的UI_unity graphview-CSDN博客
相关文章:
【Unity编辑器拓展】GraphView自定义可视化节点
1、创建节点区域脚本 其中的new class UxmlFactory,可以让该元素显示在UI Builder中,我们就可以在Library-Project中看到我们新建的这两个UI元素,就可以拖入我们的UI窗口编辑了 public class NodeTreeViewer : GraphView {public new class…...
教程系列4 | 趋动云『社区项目』极速体验 LivePortrait 人脸表情“移花接木”大法
LivePortrait LivePortrait 由快手可灵大模型团队开源,只需 1 张原图就能生成动态视频。 LivePortrait 的核心优势在于其卓越的表情"迁移"技术,能够令静态图像中的人物瞬间焕发活力,无论是眨眼、微笑还是转头,皆栩栩如…...

WGS84、GCJ-02、BD09三大坐标系详解
文章目录 前言WGS84坐标系定义应用WGS84 Web 墨卡托投影 GCJ-02坐标系(火星坐标系)定义应用GCJ-02经纬度投影与Web墨卡托投影 BD09坐标系(百度坐标系)定义应用BD09经纬度投影与Web墨卡托投影 坐标系之间的区别与注意事项总结 前言…...

css上下动画 和淡化
.popup_hidden_bg { transition: opacity .5s ease-out; opacity: 0; pointer-events: none; /* 防止在隐藏时仍然能点击 */ } keyframes popupShop { from { transform: translateY(100%); opacity: 0; } to {transform: translateY(0);opacity: 1; }} keyframes popupHidd…...

深入解析C#中的URI和URL编码:理解EscapeDataString、EscapeUriString和UrlEncode的区别及字符编码错误处理
在C#中,处理URI(统一资源标识符)和URL(统一资源定位符)时,可以使用Uri.EscapeDataString、Uri.EscapeUriString和HttpUtility.UrlEncode(或WebUtility.UrlEncode)方法来编码字符串。…...

【CSS】给图片设置 max-width
.logo img{width:100%; /* 缩成父盒子的100% */max-width:100%; /* (谁小用谁的百分之百) *//* max-width:100%;【1】图片比盒子大,缩成父盒子的100%【2】图片比盒子小,图片自身的100%*/ }示例 设置样式 .el-image {width: 100%;max-width: 100%;max-…...
)
区块链——代码格式检查(prettier、solhint)
一、引入依赖 // 导入prettier prettier-plugin-solidity yarn add --dev prettier prettier-plugin-solidity yarn add --dev solhint二、创建.prettierrc文件 {"tabWidth": 2,"semi": false,"useTabs": false,"singleQuote": fals…...
搭建自动化 Web 页面性能检测系统 —— 部署篇
作为一个前端想去做全栈的项目时,可能第一个思路是 node vue/react。一开始可能会新建多个工程目录去实现,假设分别为 web 和 server,也许还有管理后台的代码 admin,那么就有了三个工程的代码。此时为了方便管理就需要在远程仓库…...

知识图谱增强的RAG(KG-RAG)详细解析
转自:知识图谱科技 这是一个与任务无关的框架,它将知识图谱(KG)的显性知识与大型语言模型(LLM)的隐含知识结合起来。这是该工作的arXiv预印本 https://arxiv.org/abs/2311.17330 。 我们在这里利用一个名为…...

python中list的深拷贝和浅拷贝
其实这还是涉及到python中的可变对象和不可变对象的概念。 https://www.cnblogs.com/poloyy/p/15073168.html # -*- coding: utf-8 -*-person [name, [savings, 100.00]] hubby person[:] # slice copy wifey list(person) # fac func copy a [id(x) for x in person] b …...

【LeetCode】字母异位词分组
题目描述: 给你一个字符串数组,请你将字母异位词组合在一起。可以按任意顺序返回结果列表。 字母异位词 是由重新排列源单词的所有字母得到的一个新单词。 示例 1: 输入: strs [“eat”, “tea”, “tan”, “ate”, “nat”, “bat”] 输出: [[“bat”…...

Golang | Leetcode Golang题解之第295题数据流的中位数
题目: 题解: type MedianFinder struct {nums *redblacktree.Treetotal intleft, right iterator }func Constructor() MedianFinder {return MedianFinder{nums: redblacktree.NewWithIntComparator()} }func (mf *MedianFinder) AddNum(…...

【C语言】C语言期末突击/考研--数据的输入输出
目录 一、printf()输出函数介绍 二、scanf读取标准输入 (一)scanf函数的原理 (二)多种数据类型混合输入 三、练习题 今天我们学习printf和scanf读取标准输入。下面我们开始正式的学习吧。 C语言中有很多内置函数,今…...

How can I fix my Flask server‘s 405 error that includes OpenAi api?
题意:解决包含OpenAI API的Flask服务器中出现的405错误(Method Not Allowed,即方法不允许) 问题背景: Im trying to add an API to my webpage and have never used any Flask server before, I have never used Java…...
LeetCode Hot100 将有序数组转换为二叉搜索树
给你一个整数数组 nums ,其中元素已经按 升序 排列,请你将其转换为一棵 平衡 二叉搜索树。 示例 1: 输入:nums [-10,-3,0,5,9] 输出:[0,-3,9,-10,null,5] 解释:[0,-10,5,null,-3,null,9] 也将被视为正确…...

【Linux】线程的控制
目录 线程等待 线程退出 线程的优缺点 线程独占和共享的数据 我们说Linux是用进程模拟的线程,所以Linux中只有轻量级进程的概念,但是,用户是只认线程的,所以我们有一个叫原生线程库的东西,它就负责把轻量级进程的系…...

Vue3自研开源Tree组件:人性化的拖拽API设计
针对Element Plus Tree组件拖拽功能API用的麻烦,小卷开发了一个API使用简单的JuanTree组件。拖拽功能用起来非常简单! 文章目录 使用示例allowDragallowDrop支持节点勾选支持dirty检测后台API交互 源码实现 使用示例 组件的使用很简单: 通过…...

MYSQL--触发器详解
触发器 1.触发器简介 触发器(trigger)是一个特殊的存储过程,它的执行不是由程序调用,也不是手工启动,而是由事件来触发,比如当对一个表进行操作( insert,delete, update…...

C++实用指南:Lambda 表达式的妙用
Lambda 表达式的灵活性和强大功能确实为编程提供了许多便利。但是我们发现许多开发者仍然无法灵活运用其便利,于是写了这篇文章。 Lambda 允许我们编写更简洁和灵活的代码。例如在处理网络请求时,我们经常需要确保响应与当前的状态或需求仍然相关。通过…...

FastAPI(七十八)实战开发《在线课程学习系统》接口开发-- 评论
源码见:"fastapi_study_road-learning_system_online_courses: fastapi框架实战之--在线课程学习系统" 梳理下思路 1.判断是否登录 2.课程是否存在 3.如果是回复,查看回复是否存在 4.是否有权限 5.发起评论 首先新增pydantic模型 class Cour…...

【视频监控国标GB/T28181】GB28181 ONVIF 协议集成方案
GB28181 & ONVIF 协议集成方案 Context 本项目(ruoyi-vue-pro / 自进化AIoT平台)已有完善的 IoT 模块(yudao-module-iot),支持 MQTT、HTTP、TCP、UDP、WebSocket、CoAP、Modbus 等 9 种协议。但缺少视频监控领域的核心协议支持:GB28181(国标视频监控)和 ONVIF(国…...

金仓数据库在MySQL迁移中的实践复盘:一家三甲医院电子病历系统性能与成本优化实录
金仓数据库在MySQL迁移中的实践复盘:一家三甲医院电子病历系统性能与成本优化实录 2024年初,西安市第一医院信息科主任老张盯着监控大屏皱眉:“早高峰挂号排队超3分钟,电子病历调阅平均要4.7秒——这哪是‘智慧医院’,…...

StressTheGPU v1.44 丨便携显卡压力测试工具
StressTheGPU v1.44 便携版是轻量免安装的专业显卡压力测试工具,适配 Windows 全系列系统,凭借低 CPU 占用的优势,可在极端负载下精准评估显卡稳定性与性能,支持实时监控与基准测试,全面满足硬件验机、调试等核心需求。…...

MinerU 2.5-1.2B保姆级教学:环境、配置、使用,一篇搞定
MinerU 2.5-1.2B保姆级教学:环境、配置、使用,一篇搞定 1. 引言:为什么你需要这个工具? 如果你经常需要从PDF里提取内容,尤其是那些排版复杂的学术论文、技术报告,那你一定遇到过这些头疼事:表…...

DCT-Net人像卡通化效果实测:多张照片转换对比,卡通化效果自然
DCT-Net人像卡通化效果实测:多张照片转换对比,卡通化效果自然 1. 引言:当照片遇上卡通魔法 你有没有想过,把自己的照片变成卡通头像,会是什么样子?是像迪士尼动画里的角色一样灵动,还是像日漫…...
)
Vue 3 + TypeScript 开发必备:vue-tsc 类型检查实战指南(附常见错误解决)
Vue 3 TypeScript 开发实战:vue-tsc 类型检查深度解析与高频错误处理 当我们在Vue 3项目中引入TypeScript时,类型系统就像一位严格的代码审查员,而vue-tsc则是这位审查员的得力助手。作为专为Vue单文件组件设计的类型检查工具,vu…...
文化元素拆解)
软萌拆拆屋效果展示:国潮风(水墨+书法+印章)文化元素拆解
软萌拆拆屋效果展示:国潮风(水墨书法印章)文化元素拆解 1. 什么是软萌拆拆屋?——一件衣服的“解构美学”革命 你有没有想过,一件旗袍、一套汉服、甚至是一条扎染长裙,其实可以像打开一本立体书那样&…...

番茄小说下载器终极指南:三步打造你的离线小说图书馆
番茄小说下载器终极指南:三步打造你的离线小说图书馆 【免费下载链接】Tomato-Novel-Downloader 番茄小说下载器不精简版 项目地址: https://gitcode.com/gh_mirrors/to/Tomato-Novel-Downloader 你是否经常遇到网络信号不好,想看的番茄小说加载缓…...
)
MobileNet实战:深度可分离卷积在移动端的高效应用(附PyTorch代码)
MobileNet实战:深度可分离卷积在移动端的高效应用(附PyTorch代码) 当你在手机上使用人脸解锁或实时滤镜时,有没有想过这些AI功能如何在资源有限的移动设备上流畅运行?答案就藏在深度可分离卷积这项关键技术中。与标准卷…...

光伏储能系统电流传感器选型指南:从霍尔效应到磁通门技术
光伏储能系统电流传感器选型指南:从霍尔效应到磁通门技术 在光伏储能系统设计中,电流测量环节的精度与可靠性直接影响整个系统的发电效率与安全运行。随着双碳目标的推进,2023年全球光伏新增装机容量突破400GW,其中配备储能系统的…...