vitepress博客模板搭建
vitepress博客搭建
个人博客技术栈更新,快速搭建一个vitepress自定义博客
建议去博客查看文章,观感更佳。原文地址
模板仓库:
vitepress-blog-template
前言
服务器过期快一年了,博客也快一年没更新了,最近重新搭建了一下博客,记录一下搭建过程。
以前的博客是使用vuepress搭建的,这次换成了vitepress,vitepress是vuepress的下一代,使用vite构建,性能更好,体验更好
缺点:vitepress的插件生态还没有vuepress那么丰富,很多功能需要自己实现
优点:vitepress可配置项、api都比较多,大部分功能都能实现
相关链接:
vuepress博客
vuepress仓库地址
vitepress博客
vitepress仓库地址
旧版本预览:
| 首页 | 文章 | 标签 |
|---|---|---|
 |  |  |
博客介绍
- 自定义首页
- 网站加载页
- 全文搜索
- 全文图片放大
- 网站访问量统计
- GitHub评论系统
- 自动配置侧边栏
- 自动打包部署GitHub Pages
- 自动统计文章字数/阅读时间/最近更新时间
- 未完待续…
1. 安装
vitepress官方文档
Node.js 18 及以上版本,推荐使用pnpm安装
# 创建项目并安装 VitePress 依赖
mkdir blog
cd blog
pnpm init
pnpm add -D vitepress# 使用 VitePress CLI 初始化目录结构
pnpm vitepress init
┌ Welcome to VitePress!
│
◇ Where should VitePress initialize the config?
│ ./docs
│
◇ Site title:
│ My Awesome Project
│
◇ Site description:
│ A VitePress Site
│
◇ Theme:
│ ● Default Theme (Out of the box, good-looking docs)
│ ○ Default Theme + Customization
│ ○ Custom Theme
│
◇ Use TypeScript for config and theme files?
│  Yes
│
◆ Add VitePress npm scripts to package.json?
│  Yes
└
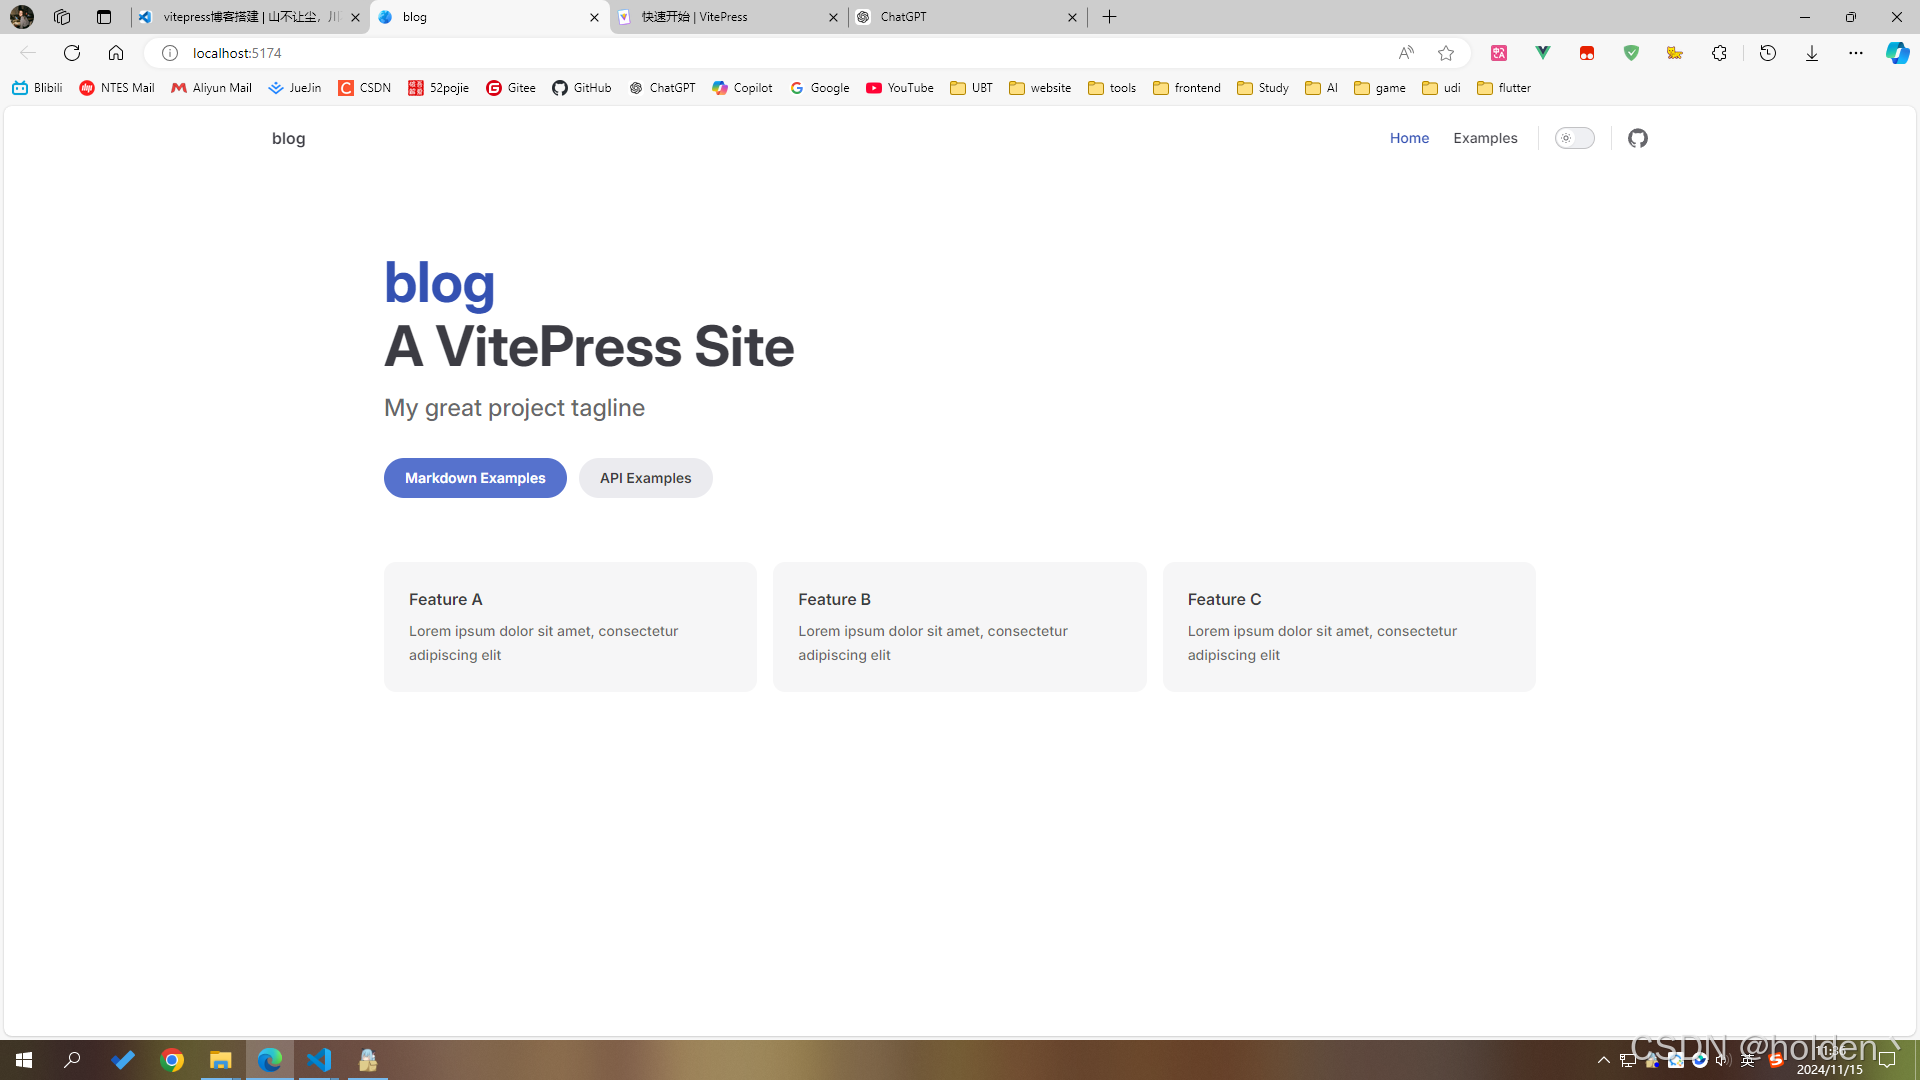
2. 运行
pnpm docs:dev
3. 结构
官方文档:vitepress目录结构
需要手动新建文件夹,我的目录结构如下:
.
├─ .github                # 配置GitHub Actions
├─ docs
│  ├─ .vitepress
│  │  ├─ components       # 自定义组件
│  │  ├─ plugins          # 自定义插件
│  │  ├─ theme            # 主题配置
│  │  ├─ utils            # 工具函数
│  │  └─ config.mts       # 配置文件
│  ├─ 2024
│  │  └─ xx.md            # 文章
│  ├─ img                 # 文章图片
│  ├─ pages               # 自定义页面
│  ├─ public              # 静态资源
│  └─ index.md            # 首页
└─ package.json
4. 导航栏
配置文件:/docs/.vitepress/config.mts
4.1 标题
官方文档:vitepress站点标题和图标
export default defineConfig({title:'山不让尘,川不辞盈',// ...
})
4.2 搜索
官方文档:vitepress搜索
有多种方式可以实现,我采用的是 vitepress-plugin-pagefind 插件
该插件支持i18n,具体配置请查看文档
pnpm add vitepress-plugin-pagefind pagefind
import { pagefindPlugin } from 'vitepress-plugin-pagefind'export default defineConfig({title:'山不让尘,川不辞盈',vite:{plugins:[pagefindPlugin({btnPlaceholder: '搜索',placeholder: '搜索文档',emptyText: '空空如也',heading: '共: {{searchResult}} 条结果',customSearchQuery(input) {return input.replace(/[\u4E00-\u9FA5]/g, ' $& ').replace(/\s+/g, ' ').trim()},}),]}// ...
})
4.3 导航链接
官方文档:vitepress导航链接
配置中的link是md文件的地址,比如:/pages/about 对应 docs/pages/about.md
export default defineConfig({title:'山不让尘,川不辞盈',themeConfig:{nav: [{ text: '主页', link: '/' },{ text: '闲聊', link: '/pages/comment' },{ text: '关于', link: '/pages/about' },{text: '推荐',items: [{items: [{ text: '实用网页', link: '/pages/webPage' },{ text: '工具插件', link: '/pages/tools' },],},],},],}// ...
})
4.4 社交链接
官方文档:vitepress社交链接
export default defineConfig({themeConfig: {socialLinks: [{ icon: 'github', link: 'https://github.com/vuejs/vitepress' },{ icon: 'twitter', link: '...' },// 可以通过将 SVG 作为字符串传递来添加自定义图标:{icon: {svg: '<svg role="img" viewBox="0 0 24 24" xmlns="http://www.w3.org/2000/svg"><title>Dribbble</title><path d="M12...6.38z"/></svg>',},link: '...',// 也可以为无障碍添加一个自定义标签 (可选但推荐):ariaLabel: 'cool link',},],},
})
4.5 效果
配置完后效果图:

5. 布局框架
5.1 Naive UI
Naive UI 文档
(1)安装
图标库:xicons material
时间库:dayjs
pnpm add -D @css-render/vue3-ssr naive-ui @vicons/material dayjs
(2)配置
新建 .vitepress/theme/index.ts 文件
import { defineComponent, h, inject } from 'vue'
import DefaultTheme from 'vitepress/theme'
import { NConfigProvider } from 'naive-ui'
import { setup } from '@css-render/vue3-ssr'
import { useRoute } from 'vitepress'const { Layout } = DefaultThemeconst CssRenderStyle = defineComponent({setup() {const collect = inject<() => string>('css-render-collect')return {style: collect ? collect() : '',}},render() {return h('css-render-style', {innerHTML: this.style,})},
})const VitepressPath = defineComponent({setup() {const route = useRoute()return () => {return h('vitepress-path', null, [route.path])}},
})const NaiveUIProvider = defineComponent({render() {return h(NConfigProvider,{ abstract: true, inlineThemeDisabled: true },{default: () => [h(Layout, null, { default: this.$slots.default?.() }),import.meta.env.SSR ? [h(CssRenderStyle), h(VitepressPath)] : null,],})},
})export default {extends: DefaultTheme,Layout: NaiveUIProvider,enhanceApp: ({ app }) => {if (import.meta.env.SSR) {const { collect } = setup(app)app.provide('css-render-collect', collect)}},
}
.vitepress/config.mts 文件
import { defineConfig } from 'vitepress'const fileAndStyles: Record<string, string> = {}export default defineConfig({// ...vite: {ssr: {noExternal: ['naive-ui', 'date-fns', 'vueuc'],},},postRender(context) {const styleRegex = /<css-render-style>((.|\s)+)<\/css-render-style>/const vitepressPathRegex = /<vitepress-path>(.+)<\/vitepress-path>/const style = styleRegex.exec(context.content)?.[1]const vitepressPath = vitepressPathRegex.exec(context.content)?.[1]if (vitepressPath && style) {fileAndStyles[vitepressPath] = style}context.content = context.content.replace(styleRegex, '')context.content = context.content.replace(vitepressPathRegex, '')},transformHtml(code, id) {const html = id.split('/').pop()if (!html) returnconst style = fileAndStyles[`/${html}`]if (style) {return code.replace(/<\/head>/, `${style}</head>`)}},// ...
})
(3)解决ts报错
安装vite
pnpm add -D vite vue
根目录下新建 type.d.ts 文件
/// <reference types="vite/client" />interface ImportMetaEnv {}interface ImportMeta {readonly env: ImportMetaEnv
}
(5)测试
在 docs/index.md 文件中测试
<script setup>
import { NButton } from 'naive-ui'
</script><NButton>Hello World</NButton>
按钮正常出现 ,则配置完成

5.2 Sass
此项为选配,按需安装
(1)安装
pnpm add -D sass
(2)忽视告警
安装sass会出现此告警,目前没有发现什么问题
Deprecation Warning: The legacy JS API is deprecated and will be removed in Dart Sass 2.0.0
.vitepress/config.mts
import { defineConfig } from 'vite'export default defineConfig({// ...vite:{css: {preprocessorOptions: {scss: {api: 'modern-compiler', // or 'modern'},},},}// ...
})
6. 首页
默认首页是docs/index.md
6.1 自定义组件
由于想自己写首页样式,所以仅保留 layout: home
新建 docs/.vitepress/components/ArticleList.vue 文件
<script setup lang="ts"></script><template><div class="artical-list"></div>
</template><style scoped lang="scss">
.artical-list {width: 100%;height: 100%;color: var(--black-color-1);
}
</style>
修改 docs/index.md 文件
---
layout: home
---<script setup>
import ArticleList from './.vitepress/components/ArticleList.vue'
</script><ArticleList />
此时首页会白屏,因为自定义组件没有内容

6.2 设置文章信息
首先得了解 vitepress frontmatter . 文章可以在顶部自定义信息,如标题、描述、作者、标签、时间等,自定义信息后,可使用各种api访问
-
在 docs文件夹下新建 2023、2024 、pages 文件夹,移入示例文章
此项目的是以文件夹的名称按年份排序,个人习惯,可根据个人需求调整

-
frontmatter 可自定义key,我的配置如下(
每个文章都需要配置):--- title: vitepress博客搭建 date: 2024-11-12 info: 个人博客技术栈更新,快速搭建一个vitepress自定义博客 tags:- vitepress- vuepress --- -
示例md
next/pre指的是文章底部的下一篇/上一篇sidebar指的是左侧文章列表about.md文件--- title: 关于我 date: 2024-11-12 prev: false next: false ---# 关于我这里是关于我页面webPage.md文件--- title: 实用网页 date: 2024-11-12 prev: false next: false sidebar: false ---# 实用网页这里是实用网页页面
6.3 首页获取文章列表
官方文档:vitepress createcontentloader
VitePress 提供了一个 createContentLoader 辅助函数,可通过它获取到匹配的文章列表信息
-
ESM模式
package.json"type": "module" -
新建
.vitepress/utils/posts.data.ts文件import { createContentLoader } from 'vitepress'export default createContentLoader('../docs/*/*.md' /* options */) -
在主页组件中引入并打印
.vitepress/components/ArticleList.vue此处用了类型忽略// @ts-ignore import { data as posts } from '../utils/posts.data' console.log(posts)

6.4 时间线展示文章
此处可以自行设计,我使用的是时间线展示。
-
首先,需要定义一些暗色和亮色的公共样式
官方文档:vitepress 自定义css
新建
.vitepress/theme/styles/global.css&.vitepress/theme/styles/rewrite.css文件此处是区分重写样式和个人自定义的样式,可根据个人需求调整
global.css文件@import './rewrite.css';:root {--border-color-1: rgb(242, 243, 245);--black-color-1: rgb(60, 60, 67);--grey-color-1: rgb(134, 144, 156);--grey-color-2: rgb(229, 230, 235);--blue-color-1: rgb(22, 93, 255);--border-radius: 8px;img {display: block;margin: auto;cursor: pointer;}.vp-doc {h2:first-of-type {margin: 10px 0 16px;padding-top: 15px;}}.VPHome {margin-bottom: 23px;} }.dark {--border-color-1: rgba(255, 255, 255, 0.08);--black-color-1: rgba(255, 255, 255, 0.9);--grey-color-1: rgba(255, 255, 255, 0.5);--grey-color-2: rgb(72, 72, 73);--blue-color-1: rgb(60, 126, 255); }rewrite.css文件.VPNavBar.home.top { border-bottom: 1px solid #f2f3f5; }.dark { .VPNavBar.home.top {border-bottom: 1px solid #000; } }:root { .vp-doc .custom-block {padding: 8px 16px; }.vp-doc .custom-block :first-child:first-child {margin: 8px 0; }.VPMenuGroup > .title {font-size: 0.7em; }/* 链接 */.vp-doc a {background: linear-gradient(var(--vp-c-brand-soft), var(--vp-c-brand-soft)) no-repeat centerbottom / 100% 2px;text-decoration: none;transition: 0.2s; }.vp-doc a:hover {border-radius: 0.2em;background: linear-gradient(var(--vp-c-brand-soft), var(--vp-c-brand-soft)) no-repeat centerbottom / 100% 100%; }.vp-doc strong {background: linear-gradient(var(--vp-c-brand-soft), var(--vp-c-brand-soft)) no-repeat centerbottom / 100% 40%; }.vp-doc s {opacity: 0.6; }/* 文章目录hover */ .VPDocOutlineItem.root > li > a, .VPDocOutlineItem.nested > li > a {padding-left: 5px;padding-right: 5px;border-radius: 5px; } .VPDocOutlineItem.root > li > a:first-child:hover, .VPDocOutlineItem.root > li > a:first-child.active, .VPDocOutlineItem.nested li > a:hover, .VPDocOutlineItem.nested li > a.active {background-color: var(--grayA3); } } -
导入样式
官方文档:vitepress 自定义主题
新建
.vitepress/theme/index.ts文件import './styles/global.css' // ... -
主页设计
不多解释,放置一个头像
docs/public/assets/avatar.jpg即可。注意:此处深色区域,过滤了
/pages/路径下的文章,因为该路径下的文件是作为独立页面展示的,参考博客中的关于我/闲聊。<script setup lang="ts"> import { NTimeline, NTimelineItem, NIcon, NBackTop, NTag } from 'naive-ui' import { useRouter } from 'vitepress' import dayjs from 'dayjs' import { EmailOutlined, DiscountOutlined } from '@vicons/material' // @ts-ignore import { data as posts } from '../utils/posts.data' const router = useRouter() const list = posts.filter((item) => !item.url.includes('/pages/')).map((item) => ({...item,unixDate: dayjs(item.frontmatter.date).unix(),})).sort((a, b) => b.unixDate - a.unixDate).map((item) => {const { unixDate, ...rest } = itemreturn rest}) const jump = (path: string) => {router.go(path) } </script><template><div class="artical-list"><section class="left-wrapper"><img class="avatar" src="/assets/avatar.jpg" alt="avatar" /><p class="name">holden</p><p class="text">快不快乐有天总过去</p><div class="email"><NIcon :size="23"><EmailOutlined /></NIcon>holden.lee@aliyun.com</div></section><section class="right-wrapper"><n-timeline size="large"><n-timeline-item v-for="item in list"><template #icon><div class="icon"><p>{{ dayjs(item.frontmatter.date).format('YYYY-MM-DD') }}</p><div class="dot"></div></div></template><template #default><div class="card" @click="jump(item.url)"><div class="title">{{ item.frontmatter.title }}</div><div class="tags"><n-tag :bordered="false" type="info" v-for="tagItem in item.frontmatter.tags">{{ tagItem }}<template #icon><n-icon :size="16" :component="DiscountOutlined" /></template></n-tag></div><div class="info">{{ item.frontmatter.info ?? '无简介' }}</div><div class="date">{{ dayjs(item.frontmatter.date).format('YYYY-MM-DD') }}</div></div></template></n-timeline-item></n-timeline></section><n-back-top :right="10" /></div> </template><style scoped lang="scss"> .artical-list {width: 100%;height: 100%;color: var(--black-color-1);display: flex;.left-wrapper {position: sticky;top: 92px;margin-top: 3vh;border: 1px solid var(--border-color-1);width: 250px;height: 300px;display: flex;flex-direction: column;align-items: center;border-radius: var(--border-radius);p {margin: 0;}.avatar {width: 100px;border-radius: 100%;user-select: none;cursor: auto;margin: 40px 0 0 0;}.name {font-size: 20px;margin: 10px 0;}.text {font-size: 14px;color: var(--grey-color-1);user-select: none;}.email {width: 100%;height: 25px;display: flex;align-items: center;justify-content: center;cursor: pointer;margin-top: 10px;}}.right-wrapper {margin-left: 150px;margin-top: 3vh;width: calc(100% - 250px - 150px);min-width: 300px;:deep(.n-timeline-item-timeline__line) {background-color: var(--grey-color-2);}.card {cursor: pointer;}.icon {width: 6px;height: 6px;position: relative;p {position: absolute;margin: 0;width: 130px;left: -140px;top: -2px;font-size: 12px;line-height: 12px;height: 12px;text-align: right;}.dot {width: 100%;height: 100%;border-radius: 100%;background-color: var(--blue-color-1);}}.card {width: 100%;min-height: 120px;color: var(--black-color-1);border: 1px solid var(--border-color-1);border-radius: var(--border-radius);padding: 15px;display: flex;flex-direction: column;justify-content: space-around;.title {font-size: 20px;font-weight: 700;cursor: pointer;}.tags {width: 100%;display: flex;flex-wrap: wrap;.n-tag {margin-right: 10px;}}.info,.date {font-size: 14px;color: var(--grey-color-1);margin-top: 5px;overflow: hidden;white-space: nowrap;text-overflow: ellipsis;}.date {display: none;}}} }@media (max-width: 730px) {.artical-list {flex-direction: column;.left-wrapper {min-width: 300px;width: 100%;position: static;}.right-wrapper {margin-left: 0;width: 100%;.icon {p {display: none;}}}.card {.date {display: block !important;}.info {display: none !important;}}} } </style> -
效果图

7. 文章侧边栏
官方文档:vitepress 侧边栏
正常情况下,需要手动配置侧边栏
export default {themeConfig: {sidebar: [{text: 'Guide',items: [{ text: 'Introduction', link: '/introduction' },{ text: 'Getting Started', link: '/getting-started' },...]}]}
}
7.1 使用插件
插件可以自动生成侧边栏并且根据文章名称日期排序
vitepress-sidebar
pnpm add -D vitepress-sidebar
.vitepress/config.mts 文件,具体配置请看官方文档
import { generateSidebar } from 'vitepress-sidebar'
// ...const autoSidebar = () => {let result: any = generateSidebar({documentRootPath: '/docs',collapseDepth: 2,useTitleFromFrontmatter: true,sortMenusByFrontmatterDate: true,sortMenusOrderByDescending: true,})return result.map((year) => ({...year,items: year.items.reverse(),}))
}export default defineConfig({// ...themeConfig: {sidebar: autoSidebar(),},// ...
})
配置完成后的效果

7.2 优化
侧边栏中,会显示docs文件夹下所有的md,包括了我们需要单独显示的pages目录
如果直接在autoSideBar函数中过滤pages目录下的文件,则无法跳转,因此得从页面下手,css隐藏。(如果不需要隐藏该目录的话,以下步骤忽视)
-
新建
.vitepress/theme/MyLayout.vue文件<script setup lang="ts"> import DefaultTheme from 'vitepress/theme' import { useRoute } from 'vitepress' import { watch, nextTick, onMounted } from 'vue' const { Layout } = DefaultTheme const route = useRoute()onMounted(() => {hideSpecificSidebarItem() })watch(() => route.path,(_, oldPath) => {if (oldPath === '/') {nextTick(() => {hideSpecificSidebarItem()})}} )// 隐藏pages function hideSpecificSidebarItem() {const sidebarItems = document.querySelectorAll('#VPSidebarNav > .group') as NodeListOf<HTMLElement>sidebarItems.forEach((item, index) => {const textContent = item.querySelector('.text')?.textContent?.trim()if (textContent === 'pages') {item.style.display = 'none'sidebarItems[index + 1].style.borderTop = 'none'}}) } </script><template><Layout></Layout> </template><style scoped lang="scss"></style> -
修改
.vitepress/theme/index.ts文件import MyLayout from './MyLayout.vue' // ...const NaiveUIProvider = defineComponent({render() {return h(NConfigProvider,{ abstract: true, inlineThemeDisabled: true },{default: () => [h(MyLayout, null, { default: this.$slots.default?.() }),import.meta.env.SSR ? [h(CssRenderStyle), h(VitepressPath)] : null,],})}, })// ... -
效果

8. 文章信息统计

-
新建
.vitepress/utils/getReadingTime.ts文件export function getWords(content: string): RegExpMatchArray | null {// 仅匹配英文单词,忽略标点和纯数字return content.match(/\b[a-zA-Z]+(?:['-]?[a-zA-Z]+)?\b/gu) }export function getChinese(content: string): RegExpMatchArray | null {// 匹配中文字符return content.match(/[\u4E00-\u9FD5]/gu) }export function getEnWordCount(content: string): number {// 英文单词数量return getWords(content)?.length || 0 }export function getCnWordCount(content: string): number {// 中文字符数量return getChinese(content)?.length || 0 }export function getWordNumber(content: string): number {// 总字数统计const enWordCount = getEnWordCount(content)const cnWordCount = getCnWordCount(content)return enWordCount + cnWordCount }export function getReadingTime(content: string, cnWordPerMinute = 350, enWordPerMinute = 160) {const trimmedContent = content.trim()const enWord = getEnWordCount(trimmedContent)const cnWord = getCnWordCount(trimmedContent)const totalWords = enWord + cnWordconst words = totalWords >= 1000 ? `${Math.round(totalWords / 100) / 10}k` : totalWordsconst readingTime = cnWord / cnWordPerMinute + enWord / enWordPerMinuteconst readTime = Math.ceil(readingTime)return {readTime,words,} } -
新建
.vitepress/plugins/headerPlugin.ts文件import { Plugin } from 'vite' import { getReadingTime } from '../utils/getReadingTime' import fs from 'fs'export function HeaderPlugin(): Plugin {return {name: 'header-plugin',enforce: 'pre',async transform(code, id) {if (!id.match(/\.md\b/)) return nullconst cleanContent = cleanMarkdownContent(code)// 获取文件的最近更新时间const lastUpdated = getLastUpdatedTime(id)// 获取阅读时间和字数const { readTime, words } = getReadingTime(cleanContent)// 插入组件到文章中code = insertReadingTimeAndWords(`<ArticleHeader readTime="${readTime}" words="${words}" lastUpdated="${lastUpdated}" />`,code)return code},} }// 获取文件的最近更新时间 function getLastUpdatedTime(filePath: string): string {const stats = fs.statSync(filePath)const lastModifiedTime = stats.mtimereturn lastModifiedTime.toLocaleString() }// 插入目标字符串到第一个一级标题后 function insertReadingTimeAndWords(target: string, source: string) {const headerRegex = /(^#\s.+$)/mreturn source.replace(headerRegex, `$1\n\n${target}`) }// 去掉 Frontmatter function cleanMarkdownContent(content: string): string {return content.replace(/^---[\s\S]+?---\n+/g, '').trim() } -
.vitepress/config.mts文件import { HeaderPlugin } from './plugins/headerPlugin' // ... export default defineConfig({vite: [// ...HeaderPlugin(),], }) -
新建
.vitepress/components/ArticleHeader.vue组件<script setup lang="ts"> import {AccessTimeFilled,ArticleOutlined,BorderColorOutlined,UpdateOutlined,DiscountOutlined, } from '@vicons/material' import { NIcon, NTag } from 'naive-ui' import { useData } from 'vitepress' import dayjs from 'dayjs' const { frontmatter } = useData() defineProps<{readTime: stringwords: stringlastUpdated: string }>() </script><template><div class="header"><section class="info"><div class="read"><NIcon :size="20"><AccessTimeFilled /></NIcon>阅读时间:<p>{{ readTime }}</p>分钟</div><div class="words"><NIcon :size="20"><ArticleOutlined /></NIcon>文章字数:<p>{{ words }}</p>字</div><div class="write"><NIcon :size="18"><BorderColorOutlined /></NIcon>发布日期:<p>{{ dayjs(frontmatter.date).format('YYYY-MM-DD') }}</p></div><div class="update"><NIcon :size="20"><UpdateOutlined /></NIcon>最近更新:<p>{{ dayjs(lastUpdated).format('YYYY-MM-DD') }}</p></div></section><section class="tags"><n-tag :bordered="false" type="info" v-for="item in frontmatter.tags">{{ item }}<template #icon><n-icon :size="16" :component="DiscountOutlined" /></template></n-tag></section></div> </template><style scoped lang="scss"> .header {width: 100%;.info {width: 100%;display: flex;margin-top: 5px;margin-bottom: 5px;flex-wrap: wrap;font-size: 14px;color: var(--grey-color-1);.read,.words,.write,.update {display: flex;align-items: center;justify-content: center;margin-right: 8px;p {margin: 0 5px;}i {margin-right: 2px;}}}.tags {width: 100%;display: flex;flex-wrap: wrap;.n-tag {margin-right: 10px;margin-bottom: 10px;}} } </style> -
配置全局组件
.vitepress/theme/index.tsimport ArticleHeader from '../components/ArticleHeader.vue' // ... export default {extends: DefaultTheme,Layout: NaiveUIProvider,enhanceApp: ({ app }) => {import ArticleHeader from '../components/ArticleHeader.vue'if (import.meta.env.SSR) {const { collect } = setup(app)app.provide('css-render-collect', collect)}}, } -
效果

9. 评论插件
我使用的是:@giscus/vue,无跟踪,无广告,永久免费,github邮箱通知,支持暗色切换。
9.1 安装配置
-
新建一个
公开仓库,打开仓库 Settings,勾选 Discussions,开启评论区私有仓库的话访客无法查看讨论

-
GitHub 安装 giscus
点击此处安装

-
giscus 配置
安装完毕后,点击 Configure 配置 giscus,选中刚刚创建的仓库,点击保存

-
项目中安装
pnpm add -D @giscus/vue
9.2 获取设置
-
去官方文档获取设置
点击这里去获取
-
填写自己的仓库信息

-
滚到到下边,获取设置

9.3 使用
利用默认布局组件 Layout 的 doc-after 插槽将 giscus 组件放入页面中
官方文档:vitepress 布局插槽
.vitepress/theme/MyLayout.vue 文件
<script setup lang="ts">
import Giscus from '@giscus/vue'
import { useRoute,useData } from "vitepress";
const { page } = useData()
// ...
</script>
<template><Layout><template #doc-after><div style="margin-top: 24px"><Giscus:key="page.filePath"repo="lee-holden/vitepress-blog-template"repo-id="R_kgDONRAkeA"category="Announcements"category-id="IC_kwDONRAkeM4CkXRA"mapping="title"strict="0"reactions-enabled="1"emit-metadata="0"input-position="top"lang="zh-CN"crossorigin="anonymous"/></div></template></Layout>
</template><style scoped lang="scss"></style>
效果

9.4 优化
尝试切换亮/暗样式会发现评论组件不会跟随切换,这需要与 giscus 通信实现。
giscus 可以通过 message 与 giscus iframe 通信,所以我们在切换样式时通知 giscus 同步切换即可,恰好vitepress提供了 isDark 数据,我们可以监听它进行切换
官方文档:vitepress useData
官方文档:giscus-to-parent-message-events
.vitepress/theme/MyLayout.vue 文件
<script setup lang="ts">
const { page, isDark } = useData()
import { useRoute, useData, inBrowser } from 'vitepress'watch(isDark, (dark) => {if (!inBrowser) returnconst iframe = document.querySelector('giscus-widget')?.shadowRoot?.querySelector('iframe')iframe?.contentWindow?.postMessage({ giscus: { setConfig: { theme: dark ? 'dark' : 'light' } } },'https://giscus.app')
})// ...
</script><template><Layout><template #doc-after><div style="margin-top: 24px"><Giscus:key="page.filePath"repo="lee-holden/vitepress-blog-template"repo-id="R_kgDONRAkeA"category="Announcements"category-id="IC_kwDONRAkeM4CkXRA"mapping="title"strict="0"reactions-enabled="1"emit-metadata="0"input-position="top":theme="isDark ? 'dark' : 'light'"lang="zh-CN"crossorigin="anonymous"/></div></template></Layout>
</template><style scoped lang="scss"></style>
效果

10. 项目配置
10.1 prettier
-
安装vscode拓展:Prettier - Code formatter
-
安装prettier库
pnpm add -D prettier -
项目根目录,新建
.prettierrc文件{"printWidth": 100,"tabWidth": 2,"useTabs": false,"semi": false,"singleQuote": true,"quoteProps": "as-needed","jsxSingleQuote": false,"trailingComma": "es5","bracketSpacing": true,"jsxBracketSameLine": false,"arrowParens": "always","proseWrap": "preserve","htmlWhitespaceSensitivity": "css","endOfLine": "lf" } -
项目根目录,新建
.vscode/settings.json{"editor.defaultFormatter": "esbenp.prettier-vscode","editor.formatOnSave": true,"[javascript]": {"editor.defaultFormatter": "esbenp.prettier-vscode"},"[typescript]": {"editor.defaultFormatter": "esbenp.prettier-vscode"},"[json]": {"editor.defaultFormatter": "esbenp.prettier-vscode"},"[html]": {"editor.defaultFormatter": "esbenp.prettier-vscode"},"[css]": {"editor.defaultFormatter": "esbenp.prettier-vscode"},"[scss]": {"editor.defaultFormatter": "esbenp.prettier-vscode"},"[vue]": {"editor.defaultFormatter": "esbenp.prettier-vscode"},"prettier.configPath": "./.prettierrc" } -
项目根目录,新建
.prettierignore文件cache node_modules dist temp public !docs -
格式化全部文件
pnpm prettier --write .
10.2 git
-
项目根目录,新建
.gitignore文件node_modules .temp docs/.vitepress/cache dist cache .eslintcache components.d.ts .env.local .env.\*.local npm-debug.log* yarn-debug.log* yarn-error.log* pnpm-debug.log* meta.json -
配置git仓库并且推送
git init
git add .
git commit -m 'first commit'
git remote add origin git@github.com:lee-holden/vitepress-blog-template.git
git push -u origin master
11. 自动部署GitHub Pages
官方文档:vitepress 部署
-
设置根目录
官方文档:vitepress 根目录设置
如果你使用的是 Github 页面并部署到 user.github.io/repo/,请将 base 设置为 /repo/。
.vitepress/config.mts文件// ... export default defineConfig({base: '/vitepress-blog-template/', // 替换成你的仓库名称// ... }).vitepress/components/ArticleList.vue<script setup lang="ts"> // ... const jump = (path: string) => {router.go('vitepress-blog-template' + path) } </script>// ... -
开启GitHub Pages 功能

-
项目根目录,新建
.github/workflows/deploy.yml官方示例# 构建 VitePress 站点并将其部署到 GitHub Pages 的示例工作流程 # name: Deploy VitePress site to Pageson:# 在针对 `main` 分支的推送上运行。如果你# 使用 `master` 分支作为默认分支,请将其更改为 `master`push:branches: [main]# 允许你从 Actions 选项卡手动运行此工作流程workflow_dispatch:# 设置 GITHUB_TOKEN 的权限,以允许部署到 GitHub Pages permissions:contents: readpages: writeid-token: write# 只允许同时进行一次部署,跳过正在运行和最新队列之间的运行队列 # 但是,不要取消正在进行的运行,因为我们希望允许这些生产部署完成 concurrency:group: pagescancel-in-progress: falsejobs:# 构建工作build:runs-on: ubuntu-lateststeps:- name: Checkoutuses: actions/checkout@v4with:fetch-depth: 0 # 如果未启用 lastUpdated,则不需要# - uses: pnpm/action-setup@v3 # 如果使用 pnpm,请取消此区域注释# with:# version: 9# - uses: oven-sh/setup-bun@v1 # 如果使用 Bun,请取消注释- name: Setup Nodeuses: actions/setup-node@v4with:node-version: 20cache: npm # 或 pnpm / yarn- name: Setup Pagesuses: actions/configure-pages@v4- name: Install dependenciesrun: npm ci # 或 pnpm install / yarn install / bun install- name: Build with VitePressrun: npm run docs:build # 或 pnpm docs:build / yarn docs:build / bun run docs:build- name: Upload artifactuses: actions/upload-pages-artifact@v3with:path: docs/.vitepress/dist# 部署工作deploy:environment:name: github-pagesurl: ${{ steps.deployment.outputs.page_url }}needs: buildruns-on: ubuntu-latestname: Deploysteps:- name: Deploy to GitHub Pagesid: deploymentuses: actions/deploy-pages@v4我的pnpm配置name: Deploy VitePress site to Pageson:push:branches:- master- mainworkflow_dispatch:permissions:contents: readpages: writeid-token: writeconcurrency:group: pagescancel-in-progress: falsejobs:build:runs-on: ubuntu-lateststeps:- name: Checkoutuses: actions/checkout@v4with:fetch-depth: 1 # 如果启用了 vitepress lastUpdated,则改成 0- uses: pnpm/action-setup@v3with:version: 9- name: Setup Nodeuses: actions/setup-node@v4with:node-version: 20cache: pnpm- name: Setup Pagesuses: actions/configure-pages@v4- name: Install dependenciesrun: pnpm install- name: Build with VitePressrun: pnpm docs:build- name: Upload artifactuses: actions/upload-pages-artifact@v3with:path: docs/.vitepress/dist# 部署工作deploy:environment:name: github-pagesurl: ${{ steps.deployment.outputs.page_url }}needs: buildruns-on: ubuntu-latestname: Deploysteps:- name: Deploy to GitHub Pagesid: deploymentuses: actions/deploy-pages@v4 -
推送代码到仓库,查看Action
此处可以看到,Action已经成功运行,点进去可以看到build和部署进程,如果出现报错,可以查看报错信息


-
部署成功
vitepress-blog-template
12. 访问统计
用的是 busuanzi
-
安装
pnpm add -D busuanzi.pure.js -
.vitepress/theme/index.ts文件import { inBrowser } from 'vitepress' import busuanzi from 'busuanzi.pure.js' // ...export default {extends: DefaultTheme,Layout: NaiveUIProvider,enhanceApp: ({ app, router }) => {app.component('ArticleHeader', ArticleHeader)if (import.meta.env.SSR) {const { collect } = setup(app)app.provide('css-render-collect', collect)}if (inBrowser) {router.onAfterRouteChanged = () => {busuanzi.fetch()}}}, } -
.vitepress/theme/MyLayout.vue文件在网站底部插槽放入,官方文档:vitepress 布局插槽
<template><Layout><template #layout-bottom><div class="bottom"><div>本站总访问量<span id="busuanzi_value_site_pv" class="font-bold">--</span> 次 本站访客数<span id="busuanzi_value_site_uv" class="font-bold">--</span> 人次</div><p>前端狗都不如 © 2021-2024 holden</p></div></template></Layout><!-- ... --> </template><style lang="scss" scoped> .bottom {margin-left: 5%;width: 90%;height: 100px;display: flex;flex-direction: column;align-items: center;justify-content: center;border-top: 1px solid var(--border-color-1);text-align: center;p {margin-top: 5px;} } </style> -
效果
可以自行调整底部样式

13. 网站加载
部署Github Pages后发现,白屏时间比较长,此时可以考虑使用加载页
-
新建
.vitepress/components/Loading.vue文件<script setup lang="ts"></script><template><div class="loading"><div class="loader"><div v-for="_ in 5"></div></div></div> </template><style scoped lang="scss"> $color: #3451b2;.loading {width: 100vw;height: 100vh;display: flex;justify-content: center;align-items: center; }.loader {position: relative; } .loader > div:nth-child(2) {-webkit-animation: pacman-balls 1s -0.99s infinite linear;animation: pacman-balls 1s -0.99s infinite linear; } .loader > div:nth-child(3) {-webkit-animation: pacman-balls 1s -0.66s infinite linear;animation: pacman-balls 1s -0.66s infinite linear; } .loader > div:nth-child(4) {-webkit-animation: pacman-balls 1s -0.33s infinite linear;animation: pacman-balls 1s -0.33s infinite linear; } .loader > div:nth-child(5) {-webkit-animation: pacman-balls 1s 0s infinite linear;animation: pacman-balls 1s 0s infinite linear; } .loader > div:first-of-type {width: 0px;height: 0px;border-right: 25px solid transparent;border-top: 25px solid $color;border-left: 25px solid $color;border-bottom: 25px solid $color;border-radius: 25px;-webkit-animation: rotate_pacman_half_up 0.5s 0s infinite;animation: rotate_pacman_half_up 0.5s 0s infinite;position: relative;left: -30px; } .loader > div:nth-child(2) {width: 0px;height: 0px;border-right: 25px solid transparent;border-top: 25px solid $color;border-left: 25px solid $color;border-bottom: 25px solid $color;border-radius: 25px;-webkit-animation: rotate_pacman_half_down 0.5s 0s infinite;animation: rotate_pacman_half_down 0.5s 0s infinite;margin-top: -50px;position: relative;left: -30px; } .loader > div:nth-child(3), .loader > div:nth-child(4), .loader > div:nth-child(5), .loader > div:nth-child(6) {background-color: $color;width: 15px;height: 15px;border-radius: 100%;margin: 2px;width: 10px;height: 10px;position: absolute;-webkit-transform: translate(0, -6.25px);transform: translate(0, -6.25px);top: 25px;left: 70px; } @-webkit-keyframes cube-transition {25% {-webkit-transform: translateX(50px) scale(0.5) rotate(-90deg);transform: translateX(50px) scale(0.5) rotate(-90deg);}50% {-webkit-transform: translate(50px, 50px) rotate(-180deg);transform: translate(50px, 50px) rotate(-180deg);}75% {-webkit-transform: translateY(50px) scale(0.5) rotate(-270deg);transform: translateY(50px) scale(0.5) rotate(-270deg);}100% {-webkit-transform: rotate(-360deg);transform: rotate(-360deg);} } @keyframes cube-transition {25% {-webkit-transform: translateX(50px) scale(0.5) rotate(-90deg);transform: translateX(50px) scale(0.5) rotate(-90deg);}50% {-webkit-transform: translate(50px, 50px) rotate(-180deg);transform: translate(50px, 50px) rotate(-180deg);}75% {-webkit-transform: translateY(50px) scale(0.5) rotate(-270deg);transform: translateY(50px) scale(0.5) rotate(-270deg);}100% {-webkit-transform: rotate(-360deg);transform: rotate(-360deg);} } @-webkit-keyframes pacman-balls {75% {opacity: 0.7;}100% {-webkit-transform: translate(-100px, -6.25px);transform: translate(-100px, -6.25px);} } @keyframes pacman-balls {75% {opacity: 0.7;}100% {-webkit-transform: translate(-100px, -6.25px);transform: translate(-100px, -6.25px);} } @-webkit-keyframes rotate_pacman_half_down {0% {-webkit-transform: rotate(90deg);transform: rotate(90deg);}50% {-webkit-transform: rotate(0deg);transform: rotate(0deg);}100% {-webkit-transform: rotate(90deg);transform: rotate(90deg);} } @keyframes rotate_pacman_half_down {0% {-webkit-transform: rotate(90deg);transform: rotate(90deg);}50% {-webkit-transform: rotate(0deg);transform: rotate(0deg);}100% {-webkit-transform: rotate(90deg);transform: rotate(90deg);} } @-webkit-keyframes rotate_pacman_half_up {0% {-webkit-transform: rotate(270deg);transform: rotate(270deg);}50% {-webkit-transform: rotate(360deg);transform: rotate(360deg);}100% {-webkit-transform: rotate(270deg);transform: rotate(270deg);} } @keyframes rotate_pacman_half_up {0% {-webkit-transform: rotate(270deg);transform: rotate(270deg);}50% {-webkit-transform: rotate(360deg);transform: rotate(360deg);}100% {-webkit-transform: rotate(270deg);transform: rotate(270deg);} } </style> -
.vitepress/theme/MyLayout.vue文件<script setup lang="ts"> // ... import { watch, nextTick, onMounted, ref } from 'vue' import Loading from '../components/Loading.vue' const loading = ref(true)onMounted(() => {loading.value = false })// ... </script><template><Loading v-show="loading" /><Layout v-show="!loading"><!-- ... --></Layout> </template> -
效果

14. 图片放大
vitepress文章中,图片点击没有任何效果,可以使用 vitepress-plugin-image-viewer 这个插件
-
安装
If you use pnpm to install, you need to install viewerjs additionally.pnpm add vitepress-plugin-image-viewer viewerjs -
.vitepress/theme/index.ts文件// ... import 'viewerjs/dist/viewer.min.css' import imageViewer from 'vitepress-plugin-image-viewer' import vImageViewer from 'vitepress-plugin-image-viewer/lib/vImageViewer.vue'// ... export default {extends: DefaultTheme,Layout: NaiveUIProvider,enhanceApp: ({ app, router }) => {app.component('ArticleHeader', ArticleHeader)app.component('vImageViewer', vImageViewer)if (import.meta.env.SSR) {const { collect } = setup(app)app.provide('css-render-collect', collect)}if (inBrowser) {router.onAfterRouteChanged = () => {busuanzi.fetch()}}},setup() {const route = useRoute()imageViewer(route)}, } -
效果

总结
从0创建vitepress博客,一步步来,收获满满。
有什么问题欢迎到评论区咨询,一起交流学习。
相关文章:

vitepress博客模板搭建
vitepress博客搭建 个人博客技术栈更新,快速搭建一个vitepress自定义博客 建议去博客查看文章,观感更佳。原文地址 模板仓库: vitepress-blog-template 前言 服务器过期快一年了,博客也快一年没更新了,最近重新搭…...

Git入门图文教程 -- 深入浅出 ( 保姆级 )
01、认识一下Git!—简介 Git是当前最先进、最主流的分布式版本控制系统,免费、开源!核心能力就是版本控制。再具体一点,就是面向代码文件的版本控制,代码的任何修改历史都会被记录管理起来,意味着可以恢复…...
Linux编辑器 - vim
目录 一、vim 的基本概念 1. 正常/普通/命令模式(Normal mode) 2. 插入模式(Insert mode) 3. 末行模式(last line mode) 二、vim 的基本操作 三、vim 正常模式命令集 1. 插入模式 2. 移动光标 3. 删除文字 4. 复制 5. 替换 6. 撤销上一次操作 7. 更改 8. 调至指定…...

Spring Security使用基本认证(Basic Auth)保护REST API
基本认证概述 基本认证(Basic Auth)是保护REST API最简单的方式之一。它通过在HTTP请求头中携带Base64编码过的用户名和密码来进行身份验证。由于基本认证不使用cookie,因此没有会话或用户登出的概念,这意味着每次请求都必须包含…...

MySQL —— explain 查看执行计划与 MySQL 优化
文章目录 explain 查看执行计划explain 的作用——查看执行计划explain 查看执行计划返回信息详解表的读取顺序(id)查询类型(select_type)数据库表名(table)联接类型(type)可用的索引…...

出海第一步:搞定业务系统的多区域部署
出海的企业越来越多,他们不约而同开始在全球范围内部署应用程序。这样做的原因有很多,例如降低延迟,改善用户体验;满足一些国家或地区的数据隐私法规与合规要求;通过在全球范围内部署应用程序来提高容灾能力和可用性&a…...

二手手机回收小程序,一键便捷高效回收
随着科技的不断升级,智能手机也在快速进行更新换代,出现了大量的闲置手机,这为二手手机市场提供了巨大的发展空间! 经过手机回收市场的快速发展,二手手机回收已经成为了消费者的新选择,既能够减少手机的浪…...
)
开源模型应用落地-Qwen2.5-7B-Instruct与vllm实现离线推理-性能分析(四)
一、前言 离线推理能够在模型训练完成后,特别是在处理大规模数据时,利用预先准备好的输入数据进行批量推理,从而显著提高计算效率和响应速度。通过离线推理,可以在不依赖实时计算的情况下,快速生成预测结果,从而优化决策流程和提升用户体验。此外,离线推理还可以降低云计…...

深入解析小程序组件:view 和 scroll-view 的基本用法
深入解析小程序组件:view 和 scroll-view 的基本用法 引言 在微信小程序的开发中,组件是构建用户界面的基本单元。两个常用的组件是 view 和 scroll-view。这两个组件不仅功能强大,而且使用灵活,是开发者实现复杂布局和交互的基础。本文将深入探讨这两个组件的基本用法,…...

【汇编语言】转移指令的原理(三) —— 汇编跳转指南:jcxz、loop与位移的深度解读
文章目录 前言1. jcxz 指令1.1 什么是jcxz指令1.2 如何操作 2. loop 指令2.1 什么是loop指令2.2 如何操作 3. 根据位移进行转移的意义3.1 为什么?3.2 举例说明 4. 编译器对转移位移超界的检测结语 前言 📌 汇编语言是很多相关课程(如数据结构…...

opencv-python 分离边缘粘连的物体(距离变换)
import cv2 import numpy as np# 读取图像,这里添加了判断图像是否读取成功的逻辑 img cv2.imread("./640.png") # 灰度图 gray cv2.cvtColor(img, cv2.COLOR_BGR2GRAY) # 高斯模糊 gray cv2.GaussianBlur(gray, (5, 5), 0) # 二值化 ret, binary cv2…...

机器学习杂笔记1:类型-数据集-效果评估-sklearn-机器学习算法分类
文章目录 1.类型2.数据集3.效果评估4.sklearn5.sklearn机器学习算法七种数据分析方法1.对比分析2.细分分析3.A/B测试 (单一变量分析)4.漏斗分析5.留存分析6.相关分析7.聚类分析 1.类型 【1】监督学习:从成对的已经标记好的输入和输出经验数据…...

Django+Nginx+uwsgi网站使用Channels+redis+daphne实现简单的多人在线聊天及消息存储功能
网站部署在华为云服务器上,Debian系统,使用DjangoNginxuwsgi搭建。最终效果如下图所示。 一、响应逻辑顺序 1. 聊天页面请求 客户端请求/chat/(输入聊天室房间号界面)和/chat/room_name(某个聊天室页面)链…...

数据结构在二叉树Oj中利用子问题思路来解决问题
二叉树Oj题 获取二叉树的节点数获取二叉树的终端节点个数获取k层节点的个数获取二叉树的高度检测为value的元素是否存在判断两颗树是否相同判断是否是另一棵的子树反转二叉树判断一颗二叉树是否是平衡二叉树时间复杂度O(n*n)复杂度O(N) 二叉树的遍历判断是否是对称的二叉树二叉…...

华为openEuler考试真题演练(附答案)
【单选题】 以下关于互联网的描述,哪个选项是正确的? A:Nginx 在万维网中可以作为 ftp 服务器的反向代理,并与ftp服务器的数量--对应 B:Nginx 在互联网中可以作为 web服务器端,成为万维网的一个节点 C:互联网上的的资源需使用 Nginx进行七层…...

生成自签名证书并配置 HTTPS 使用自签名证书
生成自签名证书 1. 运行 OpenSSL 命令生成证书和私钥 在终端中输入以下命令,生成自签名证书和私钥文件: sudo openssl req -x509 -nodes -days 365 -newkey rsa:2048 -keyout self_signed.key -out self_signed.pem-x509:生成自签名证书。…...

物联网核心安全系列——智能汽车安全防护的重要性
汽车行业引入的智能硬件技术已经越来越多,早先设计者更多考虑到的是硬件成本和软件用户体验等因素,但随着国外两位技术人员成功实现远程控制汽车的视频曝出后,智能汽车安全便成为了一个热议话题。 汽车总线架构及原理比较复杂,日…...

数据库视图
数据库视图(Database View)是数据库中的虚拟表,其内容由查询定义,通常用来简化复杂的查询或提供安全访问数据。视图并不存储实际数据,而是将查询的结果集作为一个“虚拟表”呈现。用户通过查询视图,就可以看…...

从传统分析到智能问数,打造零门槛数据分析方案
众所周知,传统报表和自助分析工具存在使用门槛,且早期智能分析不够智能。随着AI技术发展,现有数据应用模式难以满足多样化、快速变化的需求,数据驱动、敏捷决策、精细运营成为了各大企业的新课题。 01企业数据应用挑战 业务人员的…...

java 设计模式 模板方法模式
模板方法模式(Template Method Pattern)是一种行为型设计模式,它在父类中定义一个算法的框架,允许子类在不改变算法结构的情况下重写算法的某些特定步骤。这种模式非常适合于那些有一定公共流程,但某些步骤需要子类定制…...

C# SqlSugar:依赖注入与仓储模式实践
C# SqlSugar:依赖注入与仓储模式实践 在 C# 的应用开发中,数据库操作是必不可少的环节。为了让数据访问层更加简洁、高效且易于维护,许多开发者会选择成熟的 ORM(对象关系映射)框架,SqlSugar 就是其中备受…...

如何理解 IP 数据报中的 TTL?
目录 前言理解 前言 面试灵魂一问:说说对 IP 数据报中 TTL 的理解?我们都知道,IP 数据报由首部和数据两部分组成,首部又分为两部分:固定部分和可变部分,共占 20 字节,而即将讨论的 TTL 就位于首…...
)
.Net Framework 4/C# 关键字(非常用,持续更新...)
一、is 关键字 is 关键字用于检查对象是否于给定类型兼容,如果兼容将返回 true,如果不兼容则返回 false,在进行类型转换前,可以先使用 is 关键字判断对象是否与指定类型兼容,如果兼容才进行转换,这样的转换是安全的。 例如有:首先创建一个字符串对象,然后将字符串对象隐…...
微软PowerBI考试 PL300-在 Power BI 中清理、转换和加载数据
微软PowerBI考试 PL300-在 Power BI 中清理、转换和加载数据 Power Query 具有大量专门帮助您清理和准备数据以供分析的功能。 您将了解如何简化复杂模型、更改数据类型、重命名对象和透视数据。 您还将了解如何分析列,以便知晓哪些列包含有价值的数据,…...
JVM 内存结构 详解
内存结构 运行时数据区: Java虚拟机在运行Java程序过程中管理的内存区域。 程序计数器: 线程私有,程序控制流的指示器,分支、循环、跳转、异常处理、线程恢复等基础功能都依赖这个计数器完成。 每个线程都有一个程序计数…...

无人机侦测与反制技术的进展与应用
国家电网无人机侦测与反制技术的进展与应用 引言 随着无人机(无人驾驶飞行器,UAV)技术的快速发展,其在商业、娱乐和军事领域的广泛应用带来了新的安全挑战。特别是对于关键基础设施如电力系统,无人机的“黑飞”&…...

如何更改默认 Crontab 编辑器 ?
在 Linux 领域中,crontab 是您可能经常遇到的一个术语。这个实用程序在类 unix 操作系统上可用,用于调度在预定义时间和间隔自动执行的任务。这对管理员和高级用户非常有益,允许他们自动执行各种系统任务。 编辑 Crontab 文件通常使用文本编…...
免费数学几何作图web平台
光锐软件免费数学工具,maths,数学制图,数学作图,几何作图,几何,AR开发,AR教育,增强现实,软件公司,XR,MR,VR,虚拟仿真,虚拟现实,混合现实,教育科技产品,职业模拟培训,高保真VR场景,结构互动课件,元宇宙http://xaglare.c…...

解决:Android studio 编译后报错\app\src\main\cpp\CMakeLists.txt‘ to exist
现象: android studio报错: [CXX1409] D:\GitLab\xxxxx\app.cxx\Debug\3f3w4y1i\arm64-v8a\android_gradle_build.json : expected buildFiles file ‘D:\GitLab\xxxxx\app\src\main\cpp\CMakeLists.txt’ to exist 解决: 不要动CMakeLists.…...
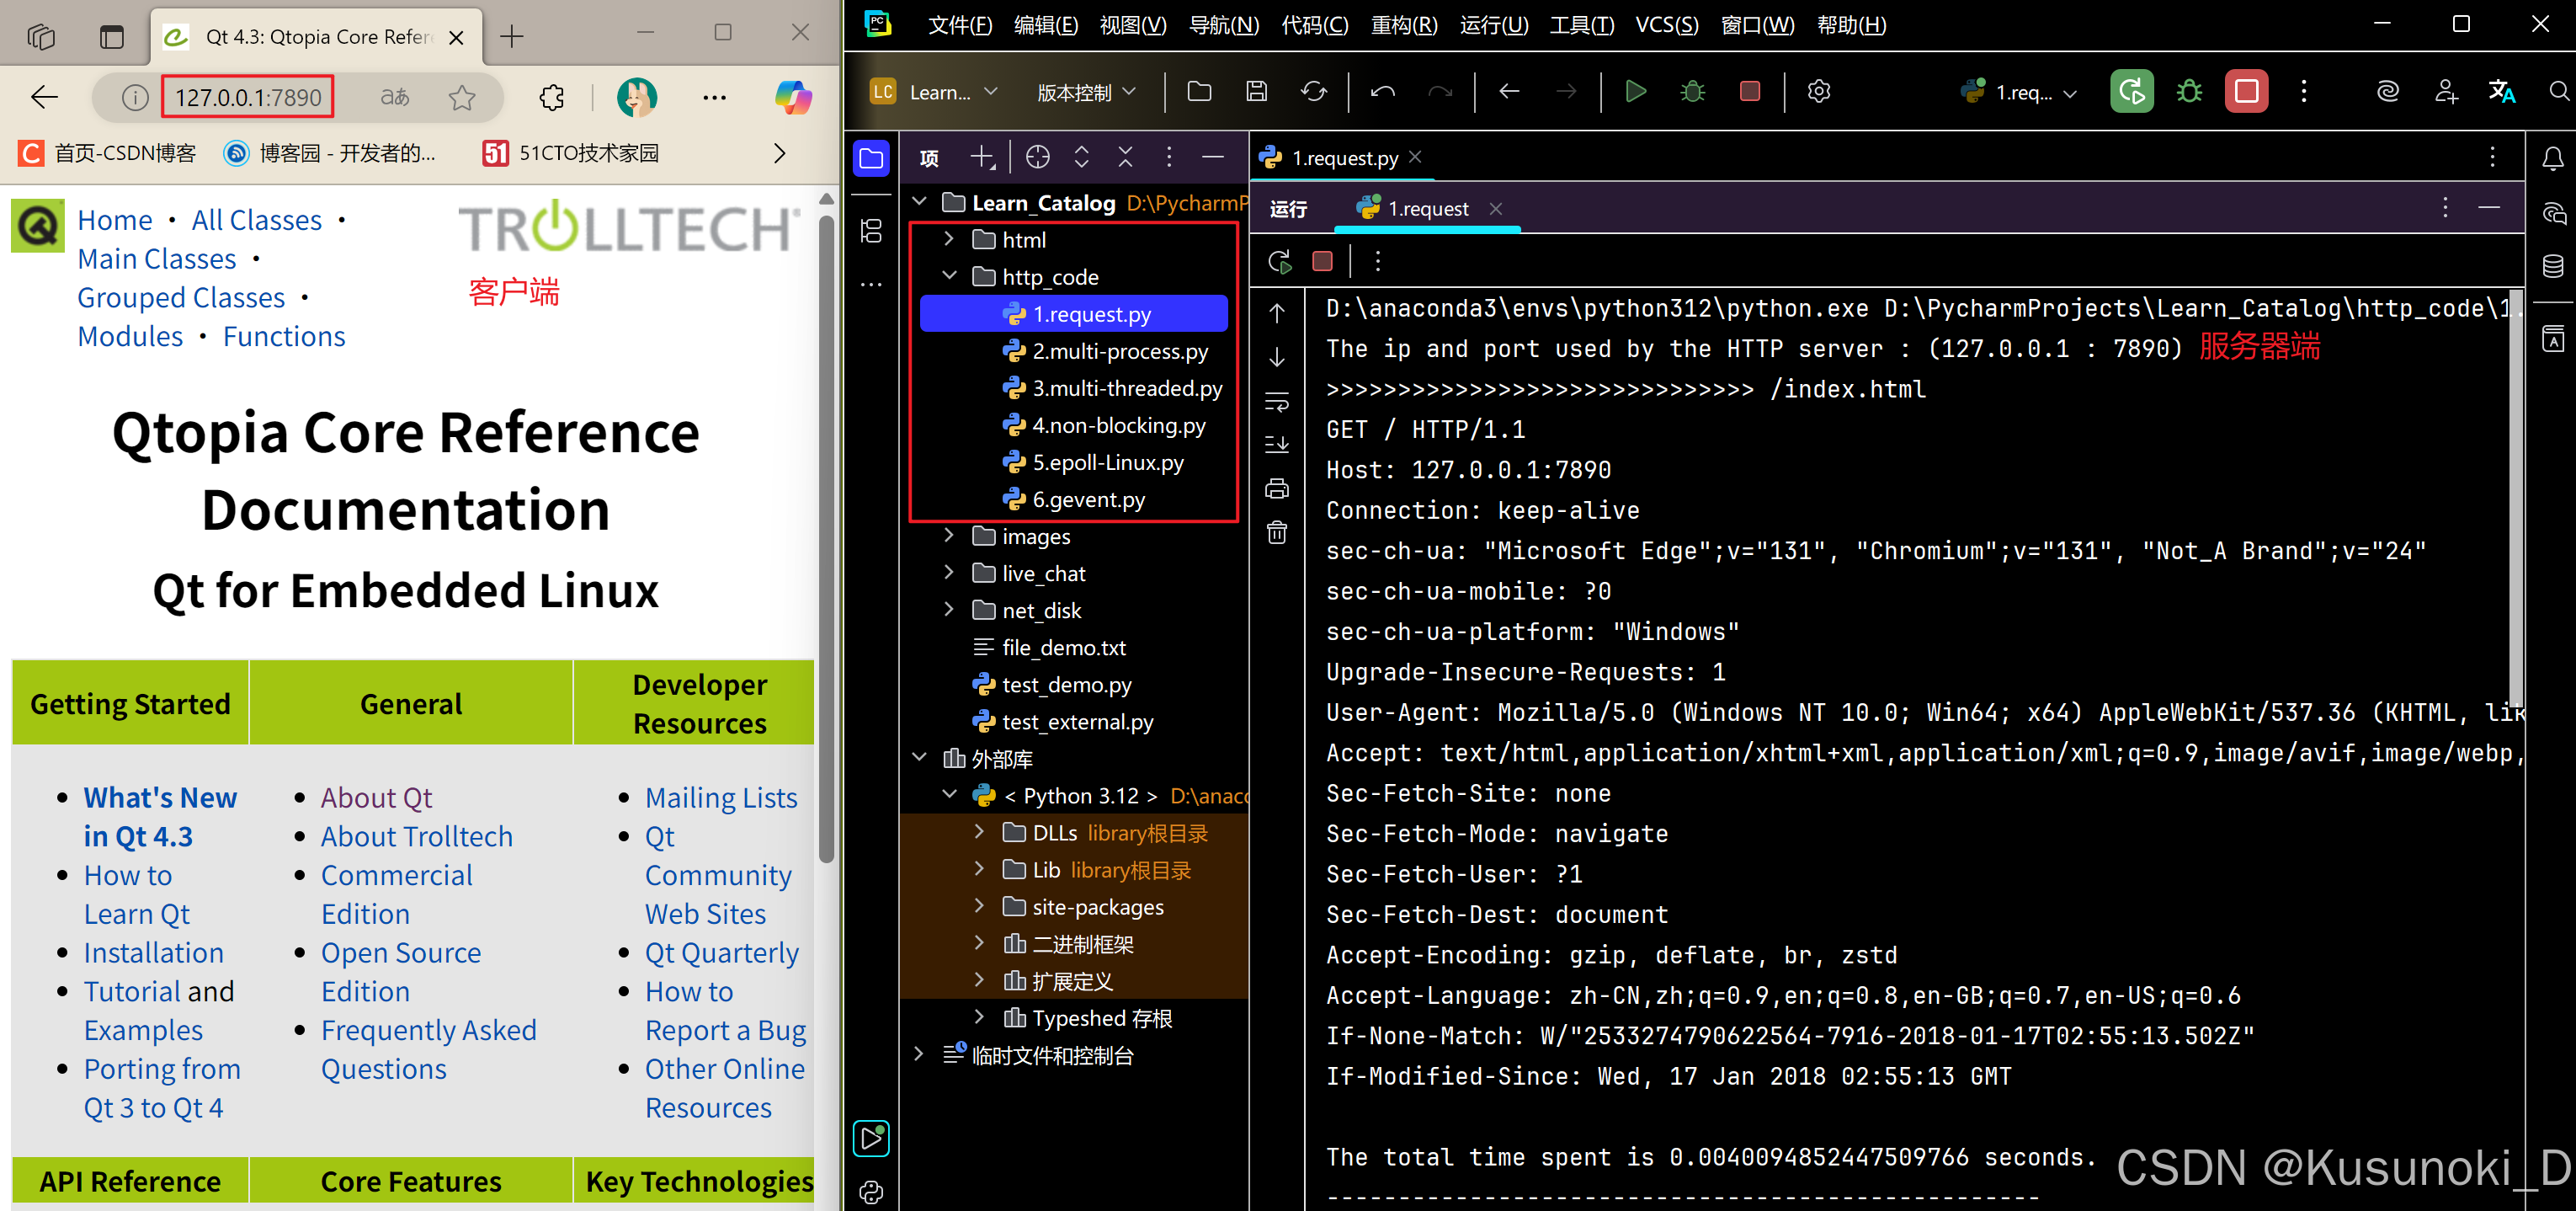
Python 实现 Web 静态服务器(HTTP 协议)
目录 一、在本地启动 HTTP 服务器1. Windows 下安装 node.js1)下载安装包2)配置环境变量3)安装镜像4)node.js 的常用命令 2. 安装 http-server 服务3. 使用 http-server 开启服务1)使用 http-server2)详解 …...
