aws(学习笔记第十五课) 如何从灾难中恢复(recover)
aws(学习笔记第十五课)
- 如何从灾难中恢复
学习内容:
- 使用
CloudWatch对服务器进行监视与恢复 - 区域(
region),可用区(available zone)和子网(subnet) - 使用自动扩展(
AutoScalingGroup)
1. 使用CloudWatch对服务器进行监视与恢复
- 整体架构
这里模拟Jenkins Server在灾难时候,可以由AWS Cloudwatch Alarm监视到,之后将其recover。
在这里,elastic ip定义了,并且将其指向了Jenkins Server。为什么平时没有使用elastic ip,这里特意使用它呢。
因为默认如果让AWS自动配置给ec2的internet ip,都是临时的ip,每次ec2实例重启了之后,都会重新分配ip。但是作为Jenkins Server来使用,并且一旦从灾难中recover之后,ip address变化的话,运用起来将会特别不方便。

2. 代码解析
- 代码
{"AWSTemplateFormatVersion": "2010-09-09","Description": " (Jenkins (CI server) running on EC2 with AWS CloudWatch recovery)","Parameters": {"KeyName": {"Description": "Key Pair name","Type": "AWS::EC2::KeyPair::KeyName","Default": "my-cli-key"},"JenkinsAdminPassword": {"Description": "Password for Jenkins admin user","Type": "String","AllowedPattern" : "[a-zA-Z0-9]*","MinLength" : "8","MaxLength" : "42"}},"Mappings": {"EC2RegionMap": {"ap-northeast-1": {"AmazonLinuxAMIHVMEBSBacked64bit": "ami-cbf90ecb"},"ap-southeast-1": {"AmazonLinuxAMIHVMEBSBacked64bit": "ami-68d8e93a"},"ap-southeast-2": {"AmazonLinuxAMIHVMEBSBacked64bit": "ami-fd9cecc7"},"eu-central-1": {"AmazonLinuxAMIHVMEBSBacked64bit": "ami-a8221fb5"},"eu-west-1": {"AmazonLinuxAMIHVMEBSBacked64bit": "ami-a10897d6"},"sa-east-1": {"AmazonLinuxAMIHVMEBSBacked64bit": "ami-b52890a8"},"us-east-1": {"AmazonLinuxAMIHVMEBSBacked64bit": "ami-1ecae776"},"us-west-1": {"AmazonLinuxAMIHVMEBSBacked64bit": "ami-d114f295"},"us-west-2": {"AmazonLinuxAMIHVMEBSBacked64bit": "ami-e7527ed7"}}},"Resources": {"VPC": {"Type": "AWS::EC2::VPC","Properties": {"EnableDnsSupport": "true","EnableDnsHostnames": "true","CidrBlock": "10.0.0.0/16","Tags": [{"Key": "Name","Value": "jenkins-recovery"}]}},"Subnet": {"Type": "AWS::EC2::Subnet","Properties": {"VpcId": {"Ref": "VPC"},"AvailabilityZone": {"Fn::Select": ["0", {"Fn::GetAZs": ""}]},"CidrBlock": "10.0.0.0/24","Tags": [{"Key": "Name","Value": "jenkins-recovery"}]}},"InternetGateway": {"Type": "AWS::EC2::InternetGateway","Properties": {"Tags": [{"Key": "Name","Value": "jenkins-recovery"}]}},"GatewayToInternet": {"Type": "AWS::EC2::VPCGatewayAttachment","Properties": {"VpcId": {"Ref": "VPC"},"InternetGatewayId": {"Ref": "InternetGateway"}}},"RouteTable": {"Type": "AWS::EC2::RouteTable","Properties": {"VpcId": {"Ref": "VPC"},"Tags": [{"Key": "Name","Value": "jenkins-recovery"}]}},"InternetRoute": {"Type": "AWS::EC2::Route","Properties": {"RouteTableId": {"Ref": "RouteTable"},"DestinationCidrBlock": "0.0.0.0/0","GatewayId": {"Ref": "InternetGateway"}},"DependsOn": "GatewayToInternet" },"RouteTableAssociation": {"Type": "AWS::EC2::SubnetRouteTableAssociation","Properties": {"SubnetId": {"Ref": "Subnet"},"RouteTableId": {"Ref": "RouteTable"}}},"NetworkAcl": {"Type": "AWS::EC2::NetworkAcl","Properties": {"VpcId": {"Ref": "VPC"},"Tags": [{"Key": "Name","Value": "jenkins-recovery"}]}},"NetworkAceSSH": {"Type": "AWS::EC2::NetworkAclEntry","Properties": {"NetworkAclId": {"Ref": "NetworkAcl"},"RuleNumber": "10","Protocol": "6","RuleAction": "allow","Egress": "false","CidrBlock": "0.0.0.0/0","PortRange": {"From": "22","To": "22"}}},"NetworkAceJenkinsHTTP": {"Type": "AWS::EC2::NetworkAclEntry","Properties": {"NetworkAclId": {"Ref": "NetworkAcl"},"RuleNumber": "11","Protocol": "6","RuleAction": "allow","Egress": "false","CidrBlock": "0.0.0.0/0","PortRange": {"From": "8080","To": "8080"}}},"NetworkAceNTP": {"Type": "AWS::EC2::NetworkAclEntry","Properties": {"NetworkAclId": {"Ref": "NetworkAcl"},"RuleNumber": "20","Protocol": "17","RuleAction": "allow","Egress": "false","CidrBlock": "0.0.0.0/0","PortRange": {"From": "123","To": "123"}}},"NetworkAceICMP": {"Type": "AWS::EC2::NetworkAclEntry","Properties": {"NetworkAclId": {"Ref": "NetworkAcl"},"RuleNumber": "30","Protocol": "1","RuleAction": "allow","Egress": "false","CidrBlock": "0.0.0.0/0","Icmp": {"Code": "-1","Type": "-1"}}},"NetworkAceHighPortsTCP": {"Type": "AWS::EC2::NetworkAclEntry","Properties": {"NetworkAclId": {"Ref": "NetworkAcl"},"RuleNumber": "40","Protocol": "6","RuleAction": "allow","Egress": "false","CidrBlock": "0.0.0.0/0","PortRange": {"From": "1024","To": "65535"}}},"NetworkAceHighPortsUDP": {"Type": "AWS::EC2::NetworkAclEntry","Properties": {"NetworkAclId": {"Ref": "NetworkAcl"},"RuleNumber": "41","Protocol": "17","RuleAction": "allow","Egress": "false","CidrBlock": "0.0.0.0/0","PortRange": {"From": "1024","To": "65535"}}},"NetworkAceEgress": {"Type": "AWS::EC2::NetworkAclEntry","Properties": {"NetworkAclId": {"Ref": "NetworkAcl"},"RuleNumber": "10","Protocol": "-1","RuleAction": "allow","Egress": "true","CidrBlock": "0.0.0.0/0","PortRange": {"From": "0","To": "65535"}}},"NetworkAclAssociation": {"Type": "AWS::EC2::SubnetNetworkAclAssociation","Properties": {"SubnetId": {"Ref": "Subnet"},"NetworkAclId": {"Ref": "NetworkAcl"}}},"SecurityGroup": {"Type": "AWS::EC2::SecurityGroup","Properties": {"GroupDescription": "SecurityGroupforjenkins","VpcId": {"Ref": "VPC"},"Tags": [{"Key": "Name","Value": "jenkins-recovery"}],"SecurityGroupIngress": [{"IpProtocol": "tcp","FromPort": "22","ToPort": "22","CidrIp": "0.0.0.0/0"},{"IpProtocol": "tcp","FromPort": "8080","ToPort": "8080","CidrIp": "0.0.0.0/0"},{"IpProtocol": "icmp","FromPort": "-1","ToPort": "-1","CidrIp": "0.0.0.0/0"}]}},"ElasticIP": {"Type": "AWS::EC2::EIP","Properties": {"InstanceId": {"Ref": "Server"},"Domain": "vpc"},"DependsOn": "GatewayToInternet"},"Server": {"Type": "AWS::EC2::Instance","Properties": {"ImageId": {"Fn::FindInMap": ["EC2RegionMap", {"Ref": "AWS::Region"}, "AmazonLinuxAMIHVMEBSBacked64bit"]},"InstanceType": "t2.micro","KeyName": {"Ref": "KeyName"},"SecurityGroupIds": [{"Ref": "SecurityGroup"}],"SubnetId": {"Ref": "Subnet"},"UserData": {"Fn::Base64": {"Fn::Join": ["", ["#!/bin/bash -ex\n","wget http://pkg.jenkins-ci.org/redhat/jenkins-1.616-1.1.noarch.rpm\n","rpm --install jenkins-1.616-1.1.noarch.rpm\n","sed -i -e 's/JENKINS_ARGS=\\\"\\\"/JENKINS_ARGS=\\\"--argumentsRealm.passwd.admin=", {"Ref": "JenkinsAdminPassword"}, " --argumentsRealm.roles.admin=admin\\\"/g' /etc/sysconfig/jenkins\n","echo \"<?xml version='1.0' encoding='UTF-8'?><hudson><version>1.0</version><useSecurity>true</useSecurity><authorizationStrategy class=\\\"hudson.security.FullControlOnceLoggedInAuthorizationStrategy\\\"/><securityRealm class=\\\"hudson.security.LegacySecurityRealm\\\"/></hudson>\" > /var/lib/jenkins/config.xml\n","service jenkins start\n"]]}},"Tags": [{"Key": "Name","Value": "jenkins-recovery"}]},"DependsOn": "GatewayToInternet"},"RecoveryAlarm": {"Type": "AWS::CloudWatch::Alarm","Properties": {"AlarmDescription": "Recover server when underlying hardware fails.","Namespace": "AWS/EC2" ,"MetricName": "StatusCheckFailed_System","Statistic": "Minimum","Period": "60","EvaluationPeriods": "5","ComparisonOperator": "GreaterThanThreshold","Threshold": "0","AlarmActions": [{"Fn::Join": ["", ["arn:aws:automate:", { "Ref": "AWS::Region"}, ":ec2:recover"]]}],"Dimensions": [{"Name": "InstanceId", "Value": {"Ref": "Server"}}]}}},"Outputs": {"JenkinsURL": {"Description": "URL to access web interface of Jenkins server.","Value": {"Fn::Join": ["", ["http://", {"Ref": "ElasticIP"}, ":8080"]]}},"User": {"Description": "Administrator user for Jenkins.","Value": "admin"},"Password": {"Description": "Password for Jenkins administrator user.","Value": {"Ref": "JenkinsAdminPassword"}}} } - 分析
- 这里使用了
AWS:CloudWatch:Alarm,如下所示。
这里,设置了"RecoveryAlarm": {"Type": "AWS::CloudWatch::Alarm","Properties": {"AlarmDescription": "Recover server when underlying hardware fails.","Namespace": "AWS/EC2" ,"MetricName": "StatusCheckFailed_System","Statistic": "Minimum","Period": "60","EvaluationPeriods": "5","ComparisonOperator": "GreaterThanThreshold","Threshold": "0","AlarmActions": [{"Fn::Join": ["", ["arn:aws:automate:", { "Ref": "AWS::Region"}, ":ec2:recover"]]}],"Dimensions": [{"Name": "InstanceId", "Value": {"Ref": "Server"}}]}}AWS::CloudWatch::Alarm,每隔60秒检查下ec2的状态,如有ec2有问题,那么使用arn:aws:automate:进行在其他的Available Zone恢复,但是这里无法让ec2 server模拟出问题的场合,所以这里不能实际上让arn:aws:automate:ec2:recover发生。
- 这里使用了
2. 区域(region),可用区(available zone)和子网(subnet)
- 区域(
region),可用区(available zone)- 一个区域(
region)里面,包含多个可用区(available zone),每个可用区(available zone)有多个数据中心(DataCenter)。 - 不同区域(
region)的之间通过低延时的链路链接。可以想象,在同一个region的服务之前的网络延时会非常小。

- 一个区域(
- 全球性的服务跨多个区域
- 各种服务的不同区域

- 各种服务的不同区域
VPC,区域(region)以及子网(subnet)VPC一定会属于一个区域(region)- 子网(
subnet)一定属于一个可用区(Availibility Zone)

3. 使用自动扩展(AutoScalingGroup)
-
使用自动扩展(
AutoScalingGroup),可以保证执行数量的虚拟服务器一直运行。- 代码
{"AWSTemplateFormatVersion": "2010-09-09","Description": "(Jenkins (CI server) running with Auto Scaling Group over multiple AZs)","Parameters": {"KeyName": {"Description": "Key Pair name","Type": "AWS::EC2::KeyPair::KeyName","Default": "my-cli-key"},"JenkinsAdminPassword": {"Description": "Password for Jenkins admin user","Type": "String","AllowedPattern" : "[a-zA-Z0-9]*","MinLength" : "8","MaxLength" : "42"}},"Mappings": {"EC2RegionMap": {"ap-northeast-1": {"AmazonLinuxAMIHVMEBSBacked64bit": "ami-cbf90ecb"},"ap-southeast-1": {"AmazonLinuxAMIHVMEBSBacked64bit": "ami-68d8e93a"},"ap-southeast-2": {"AmazonLinuxAMIHVMEBSBacked64bit": "ami-fd9cecc7"},"eu-central-1": {"AmazonLinuxAMIHVMEBSBacked64bit": "ami-a8221fb5"},"eu-west-1": {"AmazonLinuxAMIHVMEBSBacked64bit": "ami-a10897d6"},"sa-east-1": {"AmazonLinuxAMIHVMEBSBacked64bit": "ami-b52890a8"},"us-east-1": {"AmazonLinuxAMIHVMEBSBacked64bit": "ami-1ecae776"},"us-west-1": {"AmazonLinuxAMIHVMEBSBacked64bit": "ami-d114f295"},"us-west-2": {"AmazonLinuxAMIHVMEBSBacked64bit": "ami-e7527ed7"}}},"Resources": {"VPC": {"Type": "AWS::EC2::VPC","Properties": {"EnableDnsSupport": "true","EnableDnsHostnames": "true","CidrBlock": "10.0.0.0/16","Tags": [{"Key": "Name","Value": "jenkins-multiaz"}]}},"SubnetA": {"Type": "AWS::EC2::Subnet","Properties": {"VpcId": {"Ref": "VPC"},"AvailabilityZone": {"Fn::Select": ["0", {"Fn::GetAZs": ""}]},"CidrBlock": "10.0.0.0/24","Tags": [{"Key": "Name","Value": "jenkins-multiaz"}]}},"SubnetB": {"Type": "AWS::EC2::Subnet","Properties": {"VpcId": {"Ref": "VPC"},"AvailabilityZone": {"Fn::Select": ["1", {"Fn::GetAZs": ""}]},"CidrBlock": "10.0.1.0/24","Tags": [{"Key": "Name","Value": "jenkins-multiaz"}]}},"InternetGateway": {"Type": "AWS::EC2::InternetGateway","Properties": {"Tags": [{"Key": "Name","Value": "jenkins-multiaz"}]}},"GatewayToInternet": {"Type": "AWS::EC2::VPCGatewayAttachment","Properties": {"VpcId": {"Ref": "VPC"},"InternetGatewayId": {"Ref": "InternetGateway"}}},"RouteTable": {"Type": "AWS::EC2::RouteTable","Properties": {"VpcId": {"Ref": "VPC"},"Tags": [{"Key": "Name","Value": "jenkins-multiaz"}]}},"InternetRoute": {"Type": "AWS::EC2::Route","Properties": {"RouteTableId": {"Ref": "RouteTable"},"DestinationCidrBlock": "0.0.0.0/0","GatewayId": {"Ref": "InternetGateway"}},"DependsOn": "GatewayToInternet"},"RouteTableAssociationA": {"Type": "AWS::EC2::SubnetRouteTableAssociation","Properties": {"SubnetId": {"Ref": "SubnetA"},"RouteTableId": {"Ref": "RouteTable"}}},"RouteTableAssociationB": {"Type": "AWS::EC2::SubnetRouteTableAssociation","Properties": {"SubnetId": {"Ref": "SubnetB"},"RouteTableId": {"Ref": "RouteTable"}}},"NetworkAcl": {"Type": "AWS::EC2::NetworkAcl","Properties": {"VpcId": {"Ref": "VPC"},"Tags": [{"Key": "Name","Value": "jenkins-multiaz"}]}},"NetworkAceSSH": {"Type": "AWS::EC2::NetworkAclEntry","Properties": {"NetworkAclId": {"Ref": "NetworkAcl"},"RuleNumber": "10","Protocol": "6","RuleAction": "allow","Egress": "false","CidrBlock": "0.0.0.0/0","PortRange": {"From": "22","To": "22"}}},"NetworkAceJenkinsHTTP": {"Type": "AWS::EC2::NetworkAclEntry","Properties": {"NetworkAclId": {"Ref": "NetworkAcl"},"RuleNumber": "11","Protocol": "6","RuleAction": "allow","Egress": "false","CidrBlock": "0.0.0.0/0","PortRange": {"From": "8080","To": "8080"}}},"NetworkAceNTP": {"Type": "AWS::EC2::NetworkAclEntry","Properties": {"NetworkAclId": {"Ref": "NetworkAcl"},"RuleNumber": "20","Protocol": "17","RuleAction": "allow","Egress": "false","CidrBlock": "0.0.0.0/0","PortRange": {"From": "123","To": "123"}}},"NetworkAceICMP": {"Type": "AWS::EC2::NetworkAclEntry","Properties": {"NetworkAclId": {"Ref": "NetworkAcl"},"RuleNumber": "30","Protocol": "1","RuleAction": "allow","Egress": "false","CidrBlock": "0.0.0.0/0","Icmp": {"Code": "-1","Type": "-1"}}},"NetworkAceHighPortsTCP": {"Type": "AWS::EC2::NetworkAclEntry","Properties": {"NetworkAclId": {"Ref": "NetworkAcl"},"RuleNumber": "40","Protocol": "6","RuleAction": "allow","Egress": "false","CidrBlock": "0.0.0.0/0","PortRange": {"From": "1024","To": "65535"}}},"NetworkAceHighPortsUDP": {"Type": "AWS::EC2::NetworkAclEntry","Properties": {"NetworkAclId": {"Ref": "NetworkAcl"},"RuleNumber": "41","Protocol": "17","RuleAction": "allow","Egress": "false","CidrBlock": "0.0.0.0/0","PortRange": {"From": "1024","To": "65535"}}},"NetworkAceEgress": {"Type": "AWS::EC2::NetworkAclEntry","Properties": {"NetworkAclId": {"Ref": "NetworkAcl"},"RuleNumber": "10","Protocol": "-1","RuleAction": "allow","Egress": "true","CidrBlock": "0.0.0.0/0","PortRange": {"From": "0","To": "65535"}}},"NetworkAclAssociationA": {"Type": "AWS::EC2::SubnetNetworkAclAssociation","Properties": {"SubnetId": {"Ref": "SubnetA"},"NetworkAclId": {"Ref": "NetworkAcl"}}},"NetworkAclAssociationB": {"Type": "AWS::EC2::SubnetNetworkAclAssociation","Properties": {"SubnetId": {"Ref": "SubnetB"},"NetworkAclId": {"Ref": "NetworkAcl"}}},"SecurityGroupJenkins": {"Type": "AWS::EC2::SecurityGroup","Properties": {"GroupDescription": "SecurityGroupforjenkins","VpcId": {"Ref": "VPC"},"Tags": [{"Key": "Name","Value": "jenkins-multiaz"}],"SecurityGroupIngress": [{"IpProtocol": "tcp","FromPort": "22","ToPort": "22","CidrIp": "0.0.0.0/0"},{"IpProtocol": "tcp","FromPort": "8080","ToPort": "8080","CidrIp": "0.0.0.0/0"},{"IpProtocol": "icmp","FromPort": "-1","ToPort": "-1","CidrIp": "0.0.0.0/0"}]}},"LaunchTemplate": {"Type": "AWS::EC2::LaunchTemplate","Properties": {"LaunchTemplateName": "LaunchTemplate","LaunchTemplateData":{"ImageId": {"Fn::FindInMap": ["EC2RegionMap", {"Ref": "AWS::Region"}, "AmazonLinuxAMIHVMEBSBacked64bit"]},"KeyName": {"Ref": "KeyName"},"NetworkInterfaces":[{"DeviceIndex":0,"AssociatePublicIpAddress":true,"Groups":[{"Ref": "SecurityGroupJenkins"}],"DeleteOnTermination":true}],"InstanceType": "t2.micro","UserData": {"Fn::Base64": {"Fn::Join": ["",["#!/bin/bash -ex\n","wget http://pkg.jenkins-ci.org/redhat/jenkins-1.616-1.1.noarch.rpm\n","rpm --install jenkins-1.616-1.1.noarch.rpm\n","sed -i -e 's/JENKINS_ARGS=\\\"\\\"/JENKINS_ARGS=\\\"--argumentsRealm.passwd.admin=", {"Ref": "JenkinsAdminPassword"}, " --argumentsRealm.roles.admin=admin\\\"/g' /etc/sysconfig/jenkins\n","echo \"<?xml version='1.0' encoding='UTF-8'?><hudson><version>1.0</version><useSecurity>true</useSecurity><authorizationStrategy class=\\\"hudson.security.FullControlOnceLoggedInAuthorizationStrategy\\\"/><securityRealm class=\\\"hudson.security.LegacySecurityRealm\\\"/></hudson>\" > /var/lib/jenkins/config.xml\n","service jenkins start\n"]]}}}}},"AutoScalingGroup": {"Type": "AWS::AutoScaling::AutoScalingGroup","Properties": {"LaunchTemplate" : {"LaunchTemplateId" : {"Ref" : "LaunchTemplate"},"Version" : {"Fn::GetAtt" : ["LaunchTemplate","LatestVersionNumber"]}},"Tags": [{"Key": "Name","Value": "jenkins-multiaz","PropagateAtLaunch": true}],"DesiredCapacity": 1,"MinSize": 1,"MaxSize": 1,"VPCZoneIdentifier": [{"Ref": "SubnetA"}, {"Ref": "SubnetB"}],"HealthCheckGracePeriod": 600,"HealthCheckType": "EC2"},"DependsOn": "GatewayToInternet"}} } - 代码解析
AutoScalingGroup设定了两个subnet,可以在一个subnet的EC2 server出现问题的时候,在另一个subnet启动另一个EC2 server。

subnet A和subnet B
每个subnet都在不同的Availability Zone。

- 创建一个
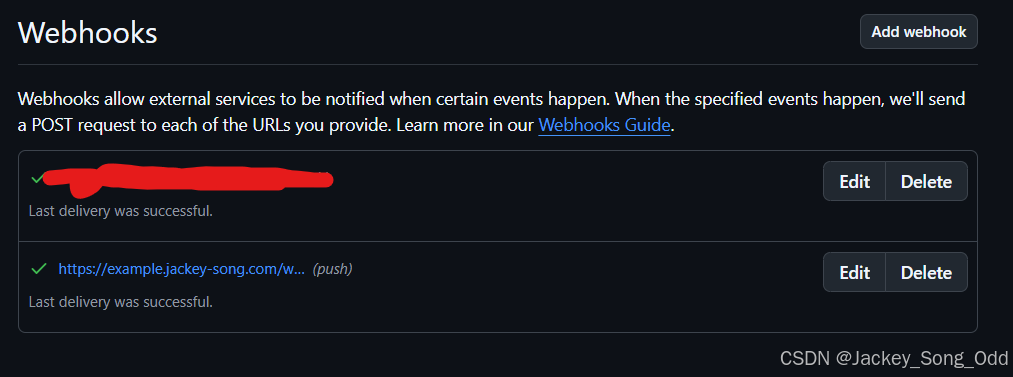
jenkins task

- 删除
jenkins实例

- 检测
Auto Scaling Group的动作
可以看到Auto Scaling Group会马上启动另一个EC2 server来支持jenkins服务。

注意,这里,IP地址和建立的jenkins task都已经没有了,接下来解决两个问题。 - 代码
-
使用
AMI进行恢复。- 在现在的
jenkins server上建立task

- 对当前的
jenkins server保存镜像Dell@DESKTOP-DHMQMJG MINGW64 ~/.ssh $ aws ec2 create-image --instance-id i-05593a7ba7b94e566 --name jenkins-multiaz {"ImageId": "ami-01ed9b718c5a467c4" } - 对
cloudformation进行更新
*在参数中增加AMISnapshot,稍后更新CloudFormation的时候会选择上面建立的AMI。

-
对
cloudformation进行更新,LaunchTemplate里面设定AMI参数- 在参数中增加
AMISnapshot,稍后更新CloudFormation的时候会选择上面建立的AMI。

- 对
cloudformation进行更新

- 在参数中增加
-
Cloudformation更新成功

-
删除当前的
Jenkins server

-
重启之后的
jenkins server确认
可以看到上面建立的jenkins task已经保留过来了,原因是使用了AMI,对当前的EBS进行了保存。

-
cloudformation代码{"AWSTemplateFormatVersion": "2010-09-09","Description": "AWS in Action: chapter 11 (Jenkins (CI server) running with Auto Scaling Group over multiple AZs)","Parameters": {"KeyName": {"Description": "Key Pair name","Type": "AWS::EC2::KeyPair::KeyName","Default": "my-cli-key"},"JenkinsAdminPassword": {"Description": "Password for Jenkins admin user","Type": "String","AllowedPattern" : "[a-zA-Z0-9]*","MinLength" : "8","MaxLength" : "42"},"AMISnapshot": {"Description": "AMI ID to start virtual server from.","Type": "String","AllowedPattern" : "[\u0020-\uD7FF\uE000-\uFFFD\uD800\uDC00-\uDBFF\uDFFF\r\n\t]*","MinLength" : "1","MaxLength" : "255"}},"Resources": {"VPC": {"Type": "AWS::EC2::VPC","Properties": {"EnableDnsSupport": "true","EnableDnsHostnames": "true","CidrBlock": "10.0.0.0/16","Tags": [{"Key": "Name","Value": "jenkins-multiaz"}]}},"SubnetA": {"Type": "AWS::EC2::Subnet","Properties": {"VpcId": {"Ref": "VPC"},"AvailabilityZone": {"Fn::Select": ["0", {"Fn::GetAZs": ""}]},"CidrBlock": "10.0.0.0/24","Tags": [{"Key": "Name","Value": "jenkins-multiaz"}]}},"SubnetB": {"Type": "AWS::EC2::Subnet","Properties": {"VpcId": {"Ref": "VPC"},"AvailabilityZone": {"Fn::Select": ["1", {"Fn::GetAZs": ""}]},"CidrBlock": "10.0.1.0/24","Tags": [{"Key": "Name","Value": "jenkins-multiaz"}]}},"InternetGateway": {"Type": "AWS::EC2::InternetGateway","Properties": {"Tags": [{"Key": "Name","Value": "jenkins-multiaz"}]}},"GatewayToInternet": {"Type": "AWS::EC2::VPCGatewayAttachment","Properties": {"VpcId": {"Ref": "VPC"},"InternetGatewayId": {"Ref": "InternetGateway"}}},"RouteTable": {"Type": "AWS::EC2::RouteTable","Properties": {"VpcId": {"Ref": "VPC"},"Tags": [{"Key": "Name","Value": "jenkins-multiaz"}]}},"InternetRoute": {"Type": "AWS::EC2::Route","Properties": {"RouteTableId": {"Ref": "RouteTable"},"DestinationCidrBlock": "0.0.0.0/0","GatewayId": {"Ref": "InternetGateway"}},"DependsOn": "GatewayToInternet"},"RouteTableAssociationA": {"Type": "AWS::EC2::SubnetRouteTableAssociation","Properties": {"SubnetId": {"Ref": "SubnetA"},"RouteTableId": {"Ref": "RouteTable"}}},"RouteTableAssociationB": {"Type": "AWS::EC2::SubnetRouteTableAssociation","Properties": {"SubnetId": {"Ref": "SubnetB"},"RouteTableId": {"Ref": "RouteTable"}}},"NetworkAcl": {"Type": "AWS::EC2::NetworkAcl","Properties": {"VpcId": {"Ref": "VPC"},"Tags": [{"Key": "Name","Value": "jenkins-multiaz"}]}},"NetworkAceSSH": {"Type": "AWS::EC2::NetworkAclEntry","Properties": {"NetworkAclId": {"Ref": "NetworkAcl"},"RuleNumber": "10","Protocol": "6","RuleAction": "allow","Egress": "false","CidrBlock": "0.0.0.0/0","PortRange": {"From": "22","To": "22"}}},"NetworkAceJenkinsHTTP": {"Type": "AWS::EC2::NetworkAclEntry","Properties": {"NetworkAclId": {"Ref": "NetworkAcl"},"RuleNumber": "11","Protocol": "6","RuleAction": "allow","Egress": "false","CidrBlock": "0.0.0.0/0","PortRange": {"From": "8080","To": "8080"}}},"NetworkAceNTP": {"Type": "AWS::EC2::NetworkAclEntry","Properties": {"NetworkAclId": {"Ref": "NetworkAcl"},"RuleNumber": "20","Protocol": "17","RuleAction": "allow","Egress": "false","CidrBlock": "0.0.0.0/0","PortRange": {"From": "123","To": "123"}}},"NetworkAceICMP": {"Type": "AWS::EC2::NetworkAclEntry","Properties": {"NetworkAclId": {"Ref": "NetworkAcl"},"RuleNumber": "30","Protocol": "1","RuleAction": "allow","Egress": "false","CidrBlock": "0.0.0.0/0","Icmp": {"Code": "-1","Type": "-1"}}},"NetworkAceHighPortsTCP": {"Type": "AWS::EC2::NetworkAclEntry","Properties": {"NetworkAclId": {"Ref": "NetworkAcl"},"RuleNumber": "40","Protocol": "6","RuleAction": "allow","Egress": "false","CidrBlock": "0.0.0.0/0","PortRange": {"From": "1024","To": "65535"}}},"NetworkAceHighPortsUDP": {"Type": "AWS::EC2::NetworkAclEntry","Properties": {"NetworkAclId": {"Ref": "NetworkAcl"},"RuleNumber": "41","Protocol": "17","RuleAction": "allow","Egress": "false","CidrBlock": "0.0.0.0/0","PortRange": {"From": "1024","To": "65535"}}},"NetworkAceEgress": {"Type": "AWS::EC2::NetworkAclEntry","Properties": {"NetworkAclId": {"Ref": "NetworkAcl"},"RuleNumber": "10","Protocol": "-1","RuleAction": "allow","Egress": "true","CidrBlock": "0.0.0.0/0","PortRange": {"From": "0","To": "65535"}}},"NetworkAclAssociationA": {"Type": "AWS::EC2::SubnetNetworkAclAssociation","Properties": {"SubnetId": {"Ref": "SubnetA"},"NetworkAclId": {"Ref": "NetworkAcl"}}},"NetworkAclAssociationB": {"Type": "AWS::EC2::SubnetNetworkAclAssociation","Properties": {"SubnetId": {"Ref": "SubnetB"},"NetworkAclId": {"Ref": "NetworkAcl"}}},"SecurityGroupJenkins": {"Type": "AWS::EC2::SecurityGroup","Properties": {"GroupDescription": "SecurityGroupforjenkins","VpcId": {"Ref": "VPC"},"Tags": [{"Key": "Name","Value": "jenkins-multiaz"}],"SecurityGroupIngress": [{"IpProtocol": "tcp","FromPort": "22","ToPort": "22","CidrIp": "0.0.0.0/0"},{"IpProtocol": "tcp","FromPort": "8080","ToPort": "8080","CidrIp": "0.0.0.0/0"},{"IpProtocol": "icmp","FromPort": "-1","ToPort": "-1","CidrIp": "0.0.0.0/0"}]}},"LaunchTemplate": {"Type": "AWS::EC2::LaunchTemplate","Properties": {"LaunchTemplateName": "LaunchTemplate","LaunchTemplateData":{"ImageId": {"Ref": "AMISnapshot"},"KeyName": {"Ref": "KeyName"},"NetworkInterfaces":[{"DeviceIndex":0,"AssociatePublicIpAddress":true,"Groups":[{"Ref": "SecurityGroupJenkins"}],"DeleteOnTermination":true}],"InstanceType": "t2.micro","UserData": {"Fn::Base64": {"Fn::Join": ["",["#!/bin/bash -ex\n","wget http://pkg.jenkins-ci.org/redhat/jenkins-1.616-1.1.noarch.rpm\n","rpm --install jenkins-1.616-1.1.noarch.rpm\n","sed -i -e 's/JENKINS_ARGS=\\\"\\\"/JENKINS_ARGS=\\\"--argumentsRealm.passwd.admin=", {"Ref": "JenkinsAdminPassword"}, " --argumentsRealm.roles.admin=admin\\\"/g' /etc/sysconfig/jenkins\n","echo \"<?xml version='1.0' encoding='UTF-8'?><hudson><version>1.0</version><useSecurity>true</useSecurity><authorizationStrategy class=\\\"hudson.security.FullControlOnceLoggedInAuthorizationStrategy\\\"/><securityRealm class=\\\"hudson.security.LegacySecurityRealm\\\"/></hudson>\" > /var/lib/jenkins/config.xml\n","service jenkins start\n"]]}}}}},"AutoScalingGroup": {"Type": "AWS::AutoScaling::AutoScalingGroup","Properties": {"LaunchTemplate" : {"LaunchTemplateId" : {"Ref" : "LaunchTemplate"},"Version" : {"Fn::GetAtt" : ["LaunchTemplate","LatestVersionNumber"]}},"Tags": [{"Key": "Name","Value": "jenkins-multiaz","PropagateAtLaunch": true}],"DesiredCapacity": 1,"MinSize": 1,"MaxSize": 1,"VPCZoneIdentifier": [{"Ref": "SubnetA"}, {"Ref": "SubnetB"}],"HealthCheckGracePeriod": 600,"HealthCheckType": "EC2"},"DependsOn": "GatewayToInternet"}} }
- 在现在的
-
使用
elastic IP进行对网络接口进行固定。IP地址每次都要发生变化,还是不理想。- 利用
elastic IP进行网络接口的固定 - 修改的代码
-
设定
IamRole"IamRole": {"Type": "AWS::IAM::Role","Properties": {"AssumeRolePolicyDocument": {"Version": "2012-10-17","Statement": [{"Effect": "Allow","Principal": {"Service": ["ec2.amazonaws.com"]},"Action": ["sts:AssumeRole"]}]},"Path": "/","Policies": [{"PolicyName": "root","PolicyDocument": {"Version": "2012-10-17","Statement": [{"Action": ["ec2:AssociateAddress"],"Resource": ["*"],"Effect": "Allow"}]}}]}},"IamInstanceProfile": {"Type": "AWS::IAM::InstanceProfile","Properties": {"Path": "/","Roles": [{"Ref": "IamRole"}]}},
- 为
LaunchTemplate设定IamRole参数
这里主要是为了给EC2 server实例设定IamRole,以便EC2 server能够执行aws ec2 associate-address命令,在灾难恢复的时候设定固定的Elastic IP。

- 更新
cloudformation堆栈

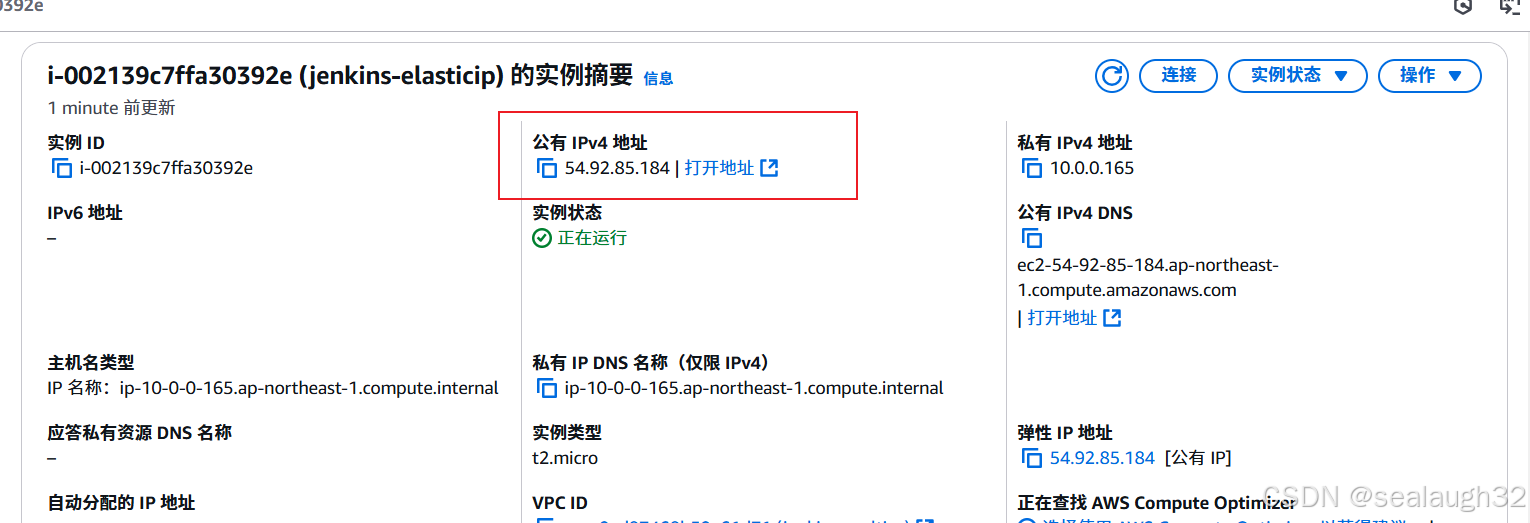
Elastic IP整体代码{"AWSTemplateFormatVersion": "2010-09-09","Description": "AWS in Action: chapter 11 (Jenkins (CI server) running with Auto Scaling Group over multiple AZs)","Parameters": {"KeyName": {"Description": "Key Pair name","Type": "AWS::EC2::KeyPair::KeyName","Default": "my-cli-key"},"JenkinsAdminPassword": {"Description": "Password for Jenkins admin user","Type": "String","AllowedPattern" : "[a-zA-Z0-9]*","MinLength" : "8","MaxLength" : "42"},"AMISnapshot": {"Description": "AMI ID to start virtual server from.","Type": "String","AllowedPattern" : "[\u0020-\uD7FF\uE000-\uFFFD\uD800\uDC00-\uDBFF\uDFFF\r\n\t]*","MinLength" : "1","MaxLength" : "255"}},"Mappings": {"EC2RegionMap": {"ap-northeast-1": {"AmazonLinuxAMIHVMEBSBacked64bit": "ami-cbf90ecb"},"ap-southeast-1": {"AmazonLinuxAMIHVMEBSBacked64bit": "ami-68d8e93a"},"ap-southeast-2": {"AmazonLinuxAMIHVMEBSBacked64bit": "ami-fd9cecc7"},"eu-central-1": {"AmazonLinuxAMIHVMEBSBacked64bit": "ami-a8221fb5"},"eu-west-1": {"AmazonLinuxAMIHVMEBSBacked64bit": "ami-a10897d6"},"sa-east-1": {"AmazonLinuxAMIHVMEBSBacked64bit": "ami-b52890a8"},"us-east-1": {"AmazonLinuxAMIHVMEBSBacked64bit": "ami-1ecae776"},"us-west-1": {"AmazonLinuxAMIHVMEBSBacked64bit": "ami-d114f295"},"us-west-2": {"AmazonLinuxAMIHVMEBSBacked64bit": "ami-e7527ed7"}}},"Resources": {"VPC": {"Type": "AWS::EC2::VPC","Properties": {"EnableDnsSupport": "true","EnableDnsHostnames": "true","CidrBlock": "10.0.0.0/16","Tags": [{"Key": "Name","Value": "jenkins-multiaz"}]}},"SubnetA": {"Type": "AWS::EC2::Subnet","Properties": {"VpcId": {"Ref": "VPC"},"AvailabilityZone": {"Fn::Select": ["0", {"Fn::GetAZs": ""}]},"CidrBlock": "10.0.0.0/24","Tags": [{"Key": "Name","Value": "jenkins-multiaz"}]}},"SubnetB": {"Type": "AWS::EC2::Subnet","Properties": {"VpcId": {"Ref": "VPC"},"AvailabilityZone": {"Fn::Select": ["1", {"Fn::GetAZs": ""}]},"CidrBlock": "10.0.1.0/24","Tags": [{"Key": "Name","Value": "jenkins-multiaz"}]}},"InternetGateway": {"Type": "AWS::EC2::InternetGateway","Properties": {"Tags": [{"Key": "Name","Value": "jenkins-multiaz"}]}},"GatewayToInternet": {"Type": "AWS::EC2::VPCGatewayAttachment","Properties": {"VpcId": {"Ref": "VPC"},"InternetGatewayId": {"Ref": "InternetGateway"}}},"RouteTable": {"Type": "AWS::EC2::RouteTable","Properties": {"VpcId": {"Ref": "VPC"},"Tags": [{"Key": "Name","Value": "jenkins-multiaz"}]}},"InternetRoute": {"Type": "AWS::EC2::Route","Properties": {"RouteTableId": {"Ref": "RouteTable"},"DestinationCidrBlock": "0.0.0.0/0","GatewayId": {"Ref": "InternetGateway"}},"DependsOn": "GatewayToInternet"},"RouteTableAssociationA": {"Type": "AWS::EC2::SubnetRouteTableAssociation","Properties": {"SubnetId": {"Ref": "SubnetA"},"RouteTableId": {"Ref": "RouteTable"}}},"RouteTableAssociationB": {"Type": "AWS::EC2::SubnetRouteTableAssociation","Properties": {"SubnetId": {"Ref": "SubnetB"},"RouteTableId": {"Ref": "RouteTable"}}},"NetworkAcl": {"Type": "AWS::EC2::NetworkAcl","Properties": {"VpcId": {"Ref": "VPC"},"Tags": [{"Key": "Name","Value": "jenkins-multiaz"}]}},"NetworkAceSSH": {"Type": "AWS::EC2::NetworkAclEntry","Properties": {"NetworkAclId": {"Ref": "NetworkAcl"},"RuleNumber": "10","Protocol": "6","RuleAction": "allow","Egress": "false","CidrBlock": "0.0.0.0/0","PortRange": {"From": "22","To": "22"}}},"NetworkAceJenkinsHTTP": {"Type": "AWS::EC2::NetworkAclEntry","Properties": {"NetworkAclId": {"Ref": "NetworkAcl"},"RuleNumber": "11","Protocol": "6","RuleAction": "allow","Egress": "false","CidrBlock": "0.0.0.0/0","PortRange": {"From": "8080","To": "8080"}}},"NetworkAceNTP": {"Type": "AWS::EC2::NetworkAclEntry","Properties": {"NetworkAclId": {"Ref": "NetworkAcl"},"RuleNumber": "20","Protocol": "17","RuleAction": "allow","Egress": "false","CidrBlock": "0.0.0.0/0","PortRange": {"From": "123","To": "123"}}},"NetworkAceICMP": {"Type": "AWS::EC2::NetworkAclEntry","Properties": {"NetworkAclId": {"Ref": "NetworkAcl"},"RuleNumber": "30","Protocol": "1","RuleAction": "allow","Egress": "false","CidrBlock": "0.0.0.0/0","Icmp": {"Code": "-1","Type": "-1"}}},"NetworkAceHighPortsTCP": {"Type": "AWS::EC2::NetworkAclEntry","Properties": {"NetworkAclId": {"Ref": "NetworkAcl"},"RuleNumber": "40","Protocol": "6","RuleAction": "allow","Egress": "false","CidrBlock": "0.0.0.0/0","PortRange": {"From": "1024","To": "65535"}}},"NetworkAceHighPortsUDP": {"Type": "AWS::EC2::NetworkAclEntry","Properties": {"NetworkAclId": {"Ref": "NetworkAcl"},"RuleNumber": "41","Protocol": "17","RuleAction": "allow","Egress": "false","CidrBlock": "0.0.0.0/0","PortRange": {"From": "1024","To": "65535"}}},"NetworkAceEgress": {"Type": "AWS::EC2::NetworkAclEntry","Properties": {"NetworkAclId": {"Ref": "NetworkAcl"},"RuleNumber": "10","Protocol": "-1","RuleAction": "allow","Egress": "true","CidrBlock": "0.0.0.0/0","PortRange": {"From": "0","To": "65535"}}},"NetworkAclAssociationA": {"Type": "AWS::EC2::SubnetNetworkAclAssociation","Properties": {"SubnetId": {"Ref": "SubnetA"},"NetworkAclId": {"Ref": "NetworkAcl"}}},"NetworkAclAssociationB": {"Type": "AWS::EC2::SubnetNetworkAclAssociation","Properties": {"SubnetId": {"Ref": "SubnetB"},"NetworkAclId": {"Ref": "NetworkAcl"}}},"SecurityGroupJenkins": {"Type": "AWS::EC2::SecurityGroup","Properties": {"GroupDescription": "SecurityGroupforjenkins","VpcId": {"Ref": "VPC"},"Tags": [{"Key": "Name","Value": "jenkins-multiaz"}],"SecurityGroupIngress": [{"IpProtocol": "tcp","FromPort": "22","ToPort": "22","CidrIp": "0.0.0.0/0"},{"IpProtocol": "tcp","FromPort": "8080","ToPort": "8080","CidrIp": "0.0.0.0/0"},{"IpProtocol": "icmp","FromPort": "-1","ToPort": "-1","CidrIp": "0.0.0.0/0"}]}},"IamRole": {"Type": "AWS::IAM::Role","Properties": {"AssumeRolePolicyDocument": {"Version": "2012-10-17","Statement": [{"Effect": "Allow","Principal": {"Service": ["ec2.amazonaws.com"]},"Action": ["sts:AssumeRole"]}]},"Path": "/","Policies": [{"PolicyName": "AttachIP","PolicyDocument": {"Version": "2012-10-17","Statement": [{"Action": ["ec2:AssociateAddress"],"Resource": ["*"],"Effect": "Allow"}]}}]}},"IamInstanceProfile": {"Type": "AWS::IAM::InstanceProfile","Properties": {"Path": "/","Roles": [{"Ref": "IamRole"}]}},"ElasticIP": {"Type": "AWS::EC2::EIP","Properties": {"Domain": "vpc"},"DependsOn": "GatewayToInternet"},"LaunchTemplate": {"Type": "AWS::EC2::LaunchTemplate","Properties": {"LaunchTemplateName": "LaunchTemplate","LaunchTemplateData":{"ImageId": {"Ref": "AMISnapshot"},"KeyName": {"Ref": "KeyName"},"IamInstanceProfile": { "Arn": {"Fn::GetAtt": ["IamInstanceProfile","Arn"]}},"NetworkInterfaces":[{"DeviceIndex":0,"AssociatePublicIpAddress":true,"Groups":[{"Ref": "SecurityGroupJenkins"}],"DeleteOnTermination":true}],"InstanceType": "t2.micro","UserData": {"Fn::Base64": {"Fn::Join": ["",["#!/bin/bash -ex\n","aws configure set default.region ", {"Ref": "AWS::Region"},"\n","INSTANCE_ID=`curl -s http://169.254.169.254/latest/meta-data/instance-id`\n","aws ec2 associate-address --instance-id $INSTANCE_ID --allocation-id ", {"Fn::GetAtt": ["ElasticIP", "AllocationId"]}, "\n","wget http://pkg.jenkins-ci.org/redhat/jenkins-1.616-1.1.noarch.rpm\n","rpm --install jenkins-1.616-1.1.noarch.rpm\n","sed -i -e 's/JENKINS_ARGS=\\\"\\\"/JENKINS_ARGS=\\\"--argumentsRealm.passwd.admin=", {"Ref": "JenkinsAdminPassword"}, " --argumentsRealm.roles.admin=admin\\\"/g' /etc/sysconfig/jenkins\n","echo \"<?xml version='1.0' encoding='UTF-8'?><hudson><version>1.0</version><useSecurity>true</useSecurity><authorizationStrategy class=\\\"hudson.security.FullControlOnceLoggedInAuthorizationStrategy\\\"/><securityRealm class=\\\"hudson.security.LegacySecurityRealm\\\"/></hudson>\" > /var/lib/jenkins/config.xml\n","service jenkins start\n"]]}}}}},"AutoScalingGroup": {"Type": "AWS::AutoScaling::AutoScalingGroup","Properties": {"LaunchTemplate" : {"LaunchTemplateId" : {"Ref" : "LaunchTemplate"},"Version" : {"Fn::GetAtt" : ["LaunchTemplate","LatestVersionNumber"]}},"Tags": [{"Key": "Name","Value": "jenkins-elasticip","PropagateAtLaunch": true}],"DesiredCapacity": 1,"MinSize": 1,"MaxSize": 1,"VPCZoneIdentifier": [{"Ref": "SubnetA"}, {"Ref": "SubnetB"}],"HealthCheckGracePeriod": 600,"HealthCheckType": "EC2"},"DependsOn": "GatewayToInternet"}},"Outputs": {"JenkinsURL": {"Description": "URL to access web interface of Jenkins server.","Value": {"Fn::Join": ["", ["http://", {"Ref": "ElasticIP"}, ":8080"]]}},"User": {"Description": "Administrator user for Jenkins.","Value": "admin"},"Password": {"Description": "Password for Jenkins administrator user.","Value": {"Ref": "JenkinsAdminPassword"}}} }Jenkins Server的IP地址是Elastic IP
可以看到IP地址是54.92.85.184,和Elastic IP相同的。

- 删除了
Jenkins Server之后,重新启动的的IP地址还是Elastic IP
- 为
-
相关文章:
aws(学习笔记第十五课) 如何从灾难中恢复(recover)
aws(学习笔记第十五课) 如何从灾难中恢复 学习内容: 使用CloudWatch对服务器进行监视与恢复区域(region),可用区(available zone)和子网(subnet)使用自动扩展(AutoScalingGroup) 1. 使用CloudWatch对服务器进行监视与恢复 整体架构 这里模拟Jenkins Se…...
github webhooks 实现网站自动更新
本文目录 Github Webhooks 介绍Webhooks 工作原理配置与验证应用云服务器通过 Webhook 自动部署网站实现复制私钥编写 webhook 接口Github 仓库配置 webhook以服务的形式运行 app.py Github Webhooks 介绍 Webhooks是GitHub提供的一种通知方式,当GitHub上发生特定事…...

【C语言】递归的内存占用过程
递归 递归是函数调用自身的一种编程技术。在C语言中,递归的实现会占用内存栈(Call Stack),每次递归调用都会在栈上分配一个新的 “栈帧(Stack Frame)”,用于存储本次调用的函数局部变量、返回地…...

365天深度学习训练营-第P6周:VGG-16算法-Pytorch实现人脸识别
🍨 本文为🔗365天深度学习训练营中的学习记录博客🍖 原作者:K同学啊 文为「365天深度学习训练营」内部文章 参考本文所写记录性文章,请在文章开头带上「👉声明」 🍺要求: 保存训练过…...

企业AI助理在数据分析与决策中扮演的角色
在当今这个数据驱动的时代,企业每天都需要处理和分析大量的数据,以支持其业务决策。然而,面对如此庞大的数据量,传统的数据分析方法已经显得力不从心。幸运的是,随着人工智能(AI)技术的不断发展…...

洛谷 B2029:大象喝水 ← 圆柱体体积
【题目来源】https://www.luogu.com.cn/problem/B2029【题目描述】 一只大象口渴了,要喝 20 升水才能解渴,但现在只有一个深 h 厘米,底面半径为 r 厘米的小圆桶 (h 和 r 都是整数)。问大象至少要喝多少桶水才会解渴。 …...

go每日一题:mock打桩、defer、recovery、panic的调用顺序
题目一:单元测试中使用—打桩 打桩概念:使用A替换 原函数B,那么A就是打桩函数打桩原理:运行时,通过一个包,将内存中函数的地址替换为桩函数的地址打桩操作:利用Patch()函…...
)
STM32F103 HSE时钟倍频以及设置频率函数(新手向,本人也是新手)
HSE_SetSysCLK是野火教程里的,不懂的去这 16-RCC(第3节)使用HSE配置系统时钟并使用MCO输出监控系统时钟_哔哩哔哩_bilibili HSE_AutoSetHSE的算法部分是自己写的,用了一个转接数组。C语言不支持bool所以自己定义了一个boolK代替bool。 AutoHSE.h: /**…...

renderExtraFooter 添加本周,本月,本年
在 Ant Design Vue 中,a-date-picker 组件提供了一个 renderExtraFooter 属性,可以用来渲染额外的页脚内容。你可以利用这个属性来添加“本周”、“本月”和“本年”的按钮。下面是如何在 Vue 2 项目中实现这一功能的具体步骤: 1.确保安装了…...
)
SprinBoot整合KafKa的使用(详解)
前言 1. 高吞吐量(High Throughput) Kafka 设计的一个核心特性是高吞吐量。它能够每秒处理百万级别的消息,适合需要高频次、低延迟消息传递的场景。即使在大规模分布式环境下,它也能保持很高的吞吐量和性能,支持低延…...

【机器学习】CatBoost 模型实践:回归与分类的全流程解析
一. 引言 本篇博客首发于掘金 https://juejin.cn/post/7441027173430018067。 PS:转载自己的文章也算原创吧。 在机器学习领域,CatBoost 是一款强大的梯度提升框架,特别适合处理带有类别特征的数据。本篇博客以脱敏后的保险数据集为例&#x…...

PyTorch 实现动态输入
使用 PyTorch 实现动态输入:支持训练和推理输入维度不一致的 CNN 和 LSTM/GRU 模型 在深度学习中,处理不同大小的输入数据是一个常见的挑战。许多实际应用需要模型能够灵活地处理可变长度的输入。本文将介绍如何使用 PyTorch 实现支持动态输入的 CNN 和…...

【Linux相关】查看conda路径和conda和cudnn版本、安装cudnn、cuDNN无需登录官方下载链接
【Linux相关】 查看conda路径和conda和cudnn版本 安装cudnn cuDNN无需登录官方下载链接 文章目录 1. 查看信息1.1 查看 Conda 路径1.2 查看 Conda 版本1.3 查看 cuDNN 版本1.4 总结 2. 安装cudnn2.1 安装cudnn步骤2.2 cuDNN无需登录官方下载链接 1. 查看信息 查看Conda 路径、C…...
基于Java Springboot环境保护生活App且微信小程序
一、作品包含 源码数据库设计文档万字PPT全套环境和工具资源部署教程 二、项目技术 前端技术:Html、Css、Js、Vue、Element-ui 数据库:MySQL 后端技术:Java、Spring Boot、MyBatis 三、运行环境 开发工具:IDEA/eclipse 微信…...

简单的springboot使用sse功能
什么是sse? 1、SSE 是Server-Sent Events(服务器发送事件) 2、SSE是一种允许服务器主动向客户端推送实时更新的技术。 3、它基于HTTP协议,并使用了其长连接特性,在客户端与服务器之间建立一条持久化的连接。 通过这条连接&am…...

【服务器问题】xshell 登录远程服务器卡住( 而 vscode 直接登录不上)
打开 xshell ssh 登录远程服务器:卡在下面这里,迟迟不继续 当 SSH 连接卡在 Connection established. 之后,但没有显示远程终端提示符时,这通常意味着连接已经成功建立,说明不是网络连接和服务器连接问题,…...

AI×5G 市场前瞻及应用现状
本文为《5GAI时代:生活方式和市场的裂变》一书读后总结及研究。 本书的上架建议是“经营”,内容也更偏向于市场分析。书出版于2021年,现在是2024年,可以收集整理一些例子,看看书里的前瞻性5GAI应用预测,到…...

利用 Redis 与 Lua 脚本解决秒杀系统中的高并发与库存超卖问题
1. 前言 1.1 秒杀系统中的库存超卖问题 在电商平台上,秒杀活动是吸引用户参与并提升销量的一种常见方式。秒杀通常会以极低的价格限量出售某些商品,目的是制造紧迫感,吸引大量用户参与。然而,这种活动的特殊性也带来了许多技术挑…...

【MySQL】创建数据库、用户和密码
创建数据库、用户和密码参考sql语句 drop database if exists demoshop; drop user if exists demoshop%; -- 支持emoji:需要mysql数据库参数: character_set_serverutf8mb4 create database demoshop default character set utf8mb4 collate utf8mb4_un…...

leetcode hot100【Leetcode 72.编辑距离】java实现
Leetcode 72.编辑距离 题目描述 给定两个单词 word1 和 word2,返回将 word1 转换为 word2 所使用的最少操作数。 你可以对一个单词执行以下三种操作之一: 插入一个字符删除一个字符替换一个字符 示例 1: 输入: word1 "horse", word2 &…...

零门槛NAS搭建:WinNAS如何让普通电脑秒变私有云?
一、核心优势:专为Windows用户设计的极简NAS WinNAS由深圳耘想存储科技开发,是一款收费低廉但功能全面的Windows NAS工具,主打“无学习成本部署” 。与其他NAS软件相比,其优势在于: 无需硬件改造:将任意W…...

逻辑回归:给不确定性划界的分类大师
想象你是一名医生。面对患者的检查报告(肿瘤大小、血液指标),你需要做出一个**决定性判断**:恶性还是良性?这种“非黑即白”的抉择,正是**逻辑回归(Logistic Regression)** 的战场&a…...

PHP和Node.js哪个更爽?
先说结论,rust完胜。 php:laravel,swoole,webman,最开始在苏宁的时候写了几年php,当时觉得php真的是世界上最好的语言,因为当初活在舒适圈里,不愿意跳出来,就好比当初活在…...

linux 下常用变更-8
1、删除普通用户 查询用户初始UID和GIDls -l /home/ ###家目录中查看UID cat /etc/group ###此文件查看GID删除用户1.编辑文件 /etc/passwd 找到对应的行,YW343:x:0:0::/home/YW343:/bin/bash 2.将标红的位置修改为用户对应初始UID和GID: YW3…...

C++ Visual Studio 2017厂商给的源码没有.sln文件 易兆微芯片下载工具加开机动画下载。
1.先用Visual Studio 2017打开Yichip YC31xx loader.vcxproj,再用Visual Studio 2022打开。再保侟就有.sln文件了。 易兆微芯片下载工具加开机动画下载 ExtraDownloadFile1Info.\logo.bin|0|0|10D2000|0 MFC应用兼容CMD 在BOOL CYichipYC31xxloaderDlg::OnIni…...
3-11单元格区域边界定位(End属性)学习笔记
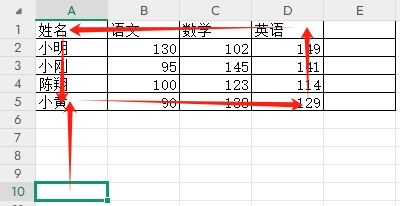
返回一个Range 对象,只读。该对象代表包含源区域的区域上端下端左端右端的最后一个单元格。等同于按键 End 向上键(End(xlUp))、End向下键(End(xlDown))、End向左键(End(xlToLeft)End向右键(End(xlToRight)) 注意:它移动的位置必须是相连的有内容的单元格…...

DeepSeek 技术赋能无人农场协同作业:用 AI 重构农田管理 “神经网”
目录 一、引言二、DeepSeek 技术大揭秘2.1 核心架构解析2.2 关键技术剖析 三、智能农业无人农场协同作业现状3.1 发展现状概述3.2 协同作业模式介绍 四、DeepSeek 的 “农场奇妙游”4.1 数据处理与分析4.2 作物生长监测与预测4.3 病虫害防治4.4 农机协同作业调度 五、实际案例大…...
多光源(Multiple Lights))
C++.OpenGL (14/64)多光源(Multiple Lights)
多光源(Multiple Lights) 多光源渲染技术概览 #mermaid-svg-3L5e5gGn76TNh7Lq {font-family:"trebuchet ms",verdana,arial,sans-serif;font-size:16px;fill:#333;}#mermaid-svg-3L5e5gGn76TNh7Lq .error-icon{fill:#552222;}#mermaid-svg-3L5e5gGn76TNh7Lq .erro…...

Java求职者面试指南:计算机基础与源码原理深度解析
Java求职者面试指南:计算机基础与源码原理深度解析 第一轮提问:基础概念问题 1. 请解释什么是进程和线程的区别? 面试官:进程是程序的一次执行过程,是系统进行资源分配和调度的基本单位;而线程是进程中的…...
基于IDIG-GAN的小样本电机轴承故障诊断
目录 🔍 核心问题 一、IDIG-GAN模型原理 1. 整体架构 2. 核心创新点 (1) 梯度归一化(Gradient Normalization) (2) 判别器梯度间隙正则化(Discriminator Gradient Gap Regularization) (3) 自注意力机制(Self-Attention) 3. 完整损失函数 二…...