【干货】Android系统定制基础篇:第十五部分(Android支持鼠标右键返回、GPIO 控制方案、属性标识USB摄像头的VID与PID)
1、修改 frameworks/native/services/inputflinger/InputReader.cpp 如下:
diff --git a/frameworks/native/services/inputflinger/InputReader.cpp b/frameworks/native/services/inputflinger/Inp
index 7207a83..2721800 100755
--- a/frameworks/native/services/inputflinger/InputReader.cpp
+++ b/frameworks/native/services/inputflinger/InputReader.cpp
@@ -1422,6 +1422,7 @@ uint32_t CursorButtonAccumulator::getButtonState() const {result |= AMOTION_EVENT_BUTTON_PRIMARY;}if (mBtnRight) {
+        /*char targetProduct[PROPERTY_VALUE_MAX] = {0};property_get("ro.target.product", targetProduct, "");if (strcmp(targetProduct, "box") == 0) {
@@ -1429,6 +1430,9 @@ uint32_t CursorButtonAccumulator::getButtonState() const {} else {result |= AMOTION_EVENT_BUTTON_SECONDARY;}
+        */
+
+        result |= AMOTION_EVENT_BUTTON_BACK;}if (mBtnMiddle) {result |= AMOTION_EVENT_BUTTON_TERTIARY;
二、Android GPIO 控制方案
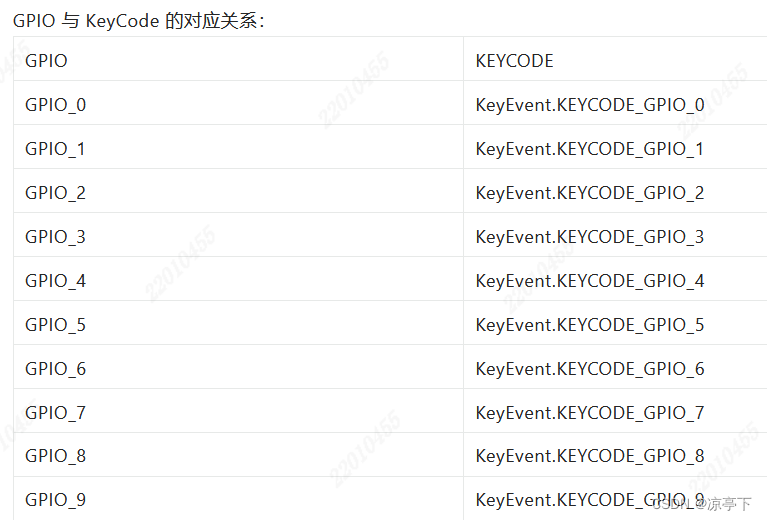
GPIO 功能在 Android Framework 中增加 GPIO 相关 API,让 APP 可以直接通过 JAVA API 操控 GPIO。支持 输入、输出、模拟按键 三种模式。做为输入时可以用于app获取外部设备的电平状态。做为输出时可以输出高低电平,用于控制外设。当做为模拟按键时,此 GPIO 低电平时 APP 会收到对应的键值。
移植
参考项目 Android-GPIOControlDriver,移植驱动和 Framework 代码。
使用
1.在 APP 源码 aidl/android/os/ 目录下新建 IGpioService.aidl,如下:
package android.os;/** {@hide} */
interface IGpioService
{int gpioWrite(int gpio, int value);int gpioRead(int gpio);int gpioDirection(int gpio, int direction, int value);int gpioRegKeyEvent(int gpio);int gpioUnregKeyEvent(int gpio);int gpioGetNumber();
}
2.参考下面源码调用 GPIO 相关 API:
package com.ayst.sample.items.gpio;import android.annotation.SuppressLint;
import android.content.Context;
import android.os.IBinder;
import android.os.IGpioService;
import android.os.RemoteException;import java.lang.reflect.Method;/*** Created by Administrator on 2018/11/6.*/
public class Gpio {private IGpioService mGpioService;@SuppressLint("WrongConstant")public Gpio(Context context) {Method method = null;try {method = Class.forName("android.os.ServiceManager").getMethod("getService", String.class);IBinder binder = (IBinder) method.invoke(null, new Object[]{"gpio"});mGpioService = IGpioService.Stub.asInterface(binder);} catch (Exception e) {e.printStackTrace();}}/*** GPIO write** @param gpio  0~Number* @param value 0: Low 1: High*/public void gpioWrite(int gpio, int value) {if (null != mGpioService) {try {mGpioService.gpioWrite(gpio, value);} catch (RemoteException e) {e.printStackTrace();}}}/*** GPIO read** @param gpio 0~Number* @return 0: Low 1: High other:error*/public int gpioRead(int gpio) {if (null != mGpioService) {try {return mGpioService.gpioRead(gpio);} catch (RemoteException e) {e.printStackTrace();}}return -1;}/*** GPIO direction** @param gpio      0~Number* @param direction 0: input 1: output* @param value     0: Low 1: High*/public void gpioDirection(int gpio, int direction, int value) {if (null != mGpioService) {try {mGpioService.gpioDirection(gpio, direction, value);} catch (RemoteException e) {e.printStackTrace();}}}/*** GPIO register key event** @param gpio 0~Number*/public void gpioRegKeyEvent(int gpio) {if (null != mGpioService) {try {mGpioService.gpioRegKeyEvent(gpio);} catch (RemoteException e) {e.printStackTrace();}}}/*** GPIO unregister key event** @param gpio 0~Number*/public void gpioUnregKeyEvent(int gpio) {if (null != mGpioService) {try {mGpioService.gpioUnregKeyEvent(gpio);} catch (RemoteException e) {e.printStackTrace();}}}/*** Get GPIO number** @return <0: error other: GPIO number*/public int gpioGetNumber() {if (null != mGpioService) {try {return mGpioService.gpioGetNumber();} catch (RemoteException e) {e.printStackTrace();}}return -1;}
}
输入
// 将GPIO_0设置为输入
gpio.gpioDirection(0, 0, 0);
// 读GPIO_0电平
int level = gpio.gpioRead(0);
输出
// 将GPIO_0设置为输出,并默认输出低电平
gpio.gpioDirection(0, 1, 0);
// GPIO_0输出高电平
gpio.gpioWrite(0, 1);
按键模式
/* 将GPIO_0设置按键模式
当GPIO_0为低电平时将收到KeyEvent.KEYCODE_GPIO_0 KeyEvent.ACTION_DOWN,
当GPIO_0为高电平时收到KeyEvent.KEYCODE_GPIO_0 KeyEvent.ACTION_UP
*/
gpio.gpioRegKeyEvent(0);
 完整 DEMO 源码请参考:https://github.com/aystshen/topband_sample
三、属性标识USB摄像头的VID与PID
Android 在使用多个 USB 摄像头时,根据加载顺序不同他们的设备文件顺序不同,比如:“video0, video1, video2”,每次启动它们的顺序都可能不同,这样 APP 就无法知道哪个设备文件对应的是哪个摄像头,因此下面方案增加属性来标识设备文件与摄像头 VID、PID 的关系,这样就解决了上面的问题。
实现
diff --git a/frameworks/base/services/usb/java/com/android/server/usb/UsbDeviceManager.java b/frameworks/base/services/usb/java/com/android/server/usb/UsbDeviceManager.java
index 26d5ac9..cfd8479 100755
--- a/frameworks/base/services/usb/java/com/android/server/usb/UsbDeviceManager.java
+++ b/frameworks/base/services/usb/java/com/android/server/usb/UsbDeviceManager.java
@@ -51,6 +51,7 @@ import android.os.UserManager;import android.os.storage.StorageManager;import android.os.storage.StorageVolume;import android.provider.Settings;
+import android.text.TextUtils;import android.util.Pair;import android.util.Slog;@@ -61,8 +62,10 @@ import com.android.internal.os.SomeArgs;import com.android.internal.util.IndentingPrintWriter;import com.android.server.FgThread;+import java.io.BufferedReader;import java.io.File;import java.io.FileNotFoundException;
+import java.io.FileReader;import java.io.IOException;import java.util.HashMap;import java.util.HashSet;
@@ -95,6 +98,10 @@ public class UsbDeviceManager {* The non-persistent property which stores the current USB actual state.*/private static final String USB_STATE_PROPERTY = "sys.usb.state";
+
+    private static final String USB_CAMERA_PROPERTY_PRE = "topband.dev.";
+
+    private static final String USB_CAMERA_CLASS_PATH = "/sys/class/video4linux";/*** ro.bootmode value when phone boots into usual Android.
@@ -215,15 +222,29 @@ public class UsbDeviceManager {if (devPath != null && devPath.contains("/devices/platform")) {if ("video4linux".equals(subSystem)) {Intent intent = new Intent(Intent.ACTION_USB_CAMERA);
+String action = event.get("ACTION");
+                    String name = event.get("DEVNAME");
+                    String idProduct = searchAndReadFileBackward("/sys" + devPath, "idProduct");
+                    String idVendor = searchAndReadFileBackward("/sys" + devPath, "idVendor");
+
+                    if (DEBUG) Slog.d(TAG, action + " usb camera: " + name + " [" + idVendor + ":" + idProduct + "]");if ("remove".equals(action)){Slog.d(TAG,"usb camera removed");intent.setFlags(Intent.FLAG_USB_CAMERA_REMOVE);SystemProperties.set("persist.sys.usbcamera.status","remove");
+
+                        if (!name.isEmpty()) {
+                            SystemProperties.set(USB_CAMERA_PROPERTY_PRE + name, "");
+                        }} else if ("add".equals(action)) {Slog.d(TAG,"usb camera added");intent.setFlags(Intent.FLAG_USB_CAMERA_ADD);SystemProperties.set("persist.sys.usbcamera.status","add");
+
+                        if (!name.isEmpty() && !idProduct.isEmpty() && !idVendor.isEmpty()) {
+                            SystemProperties.set(USB_CAMERA_PROPERTY_PRE + name, idVendor + ":" + idProduct);
+                        }}int num = android.hardware.Camera.getNumberOfCameras();
@@ -243,6 +264,99 @@ public class UsbDeviceManager {}}};
+
+    private void initUsbCameraProperty() {
+        File filePath = new File(USB_CAMERA_CLASS_PATH);
+        File[] files = filePath.listFiles();
+        if (null != files) {
+            for (File file : files) {
+                if (file.isDirectory()) {
+                    String idProduct = searchAndReadFileForward(file.getPath() + "/device/input", "product");
+                    String idVendor = searchAndReadFileForward(file.getPath() + "/device/input", "vendor");
+                    if (!TextUtils.isEmpty(idProduct) || !idVendor.isEmpty()) {
+                        if (DEBUG) Slog.v(TAG, "initUsbCameraProperty, add camera property: " + idVendor + ":" + idProduct);
+                        SystemProperties.set(USB_CAMERA_PROPERTY_PRE + file.getName(), idVendor + ":" + idProduct);
+                    }
+                }
+            }
+        }
+    }
+
+    private String searchAndReadFileForward(String filePath, String fileName) {
+        if (TextUtils.isEmpty(filePath) || TextUtils.isEmpty(fileName)) {
+            return "";
+        }
+
+        return searchAndReadFileForward(new File(filePath), fileName);
+    }
+
+    private String searchAndReadFileForward(File filePath, String fileName) {
+        if (null != filePath && !TextUtils.isEmpty(fileName)) {
+            Slog.v(TAG, "searchAndReadFileForward, path: " + filePath.getPath());
+
+            File file = new File(filePath.getPath() + "/" + fileName);
+            if (file.exists()) {
+                return readFileByLines(file.getPath());
+            }
+
+            File[] files = filePath.listFiles();
+            if (null != files) {
+                for (File subfile : files) {
+                    if (subfile.isDirectory()) {
+                        return searchAndReadFileForward(subfile, fileName);
+                    }
+                }
+            }
+        }
+
+        return "";
+    }
+
+    private String searchAndReadFileBackward(String filePath, String fileName) {
+        if (TextUtils.isEmpty(filePath) || TextUtils.isEmpty(fileName)) {
+            return "";
+        }
+
+        return searchAndReadFileBackward(new File(filePath), fileName);
+    }
+
+    private String searchAndReadFileBackward(File filePath, String fileName) {
+        if (null != filePath && !TextUtils.isEmpty(fileName)) {
+            File file = new File(filePath.getPath() + "/" + fileName);
+            if (file.exists()) {
+                return readFileByLines(file.getPath());
+            }
+
+            searchAndReadFileBackward(filePath.getParentFile(), fileName);
+        }
+
+        return "";
+    }
+
+    private static String readFileByLines(String fileName) {
+        File file = new File(fileName);
+        BufferedReader reader = null;
+        StringBuilder builder = new StringBuilder();
+        try {
+            reader = new BufferedReader(new FileReader(file));
+            String tempString;
+            while ((tempString = reader.readLine()) != null) {
+                builder.append(tempString);
+            }
+            reader.close();
+            return builder.toString();
+        } catch (IOException e) {
+            Slog.e(TAG, "readFileByLines, " + e.getMessage());
+        } finally {
+            if (reader != null) {
+                try {
+                    reader.close();
+                } catch (IOException ignored) {
+                }
+            }
+        }
+        return "";
+    }public UsbDeviceManager(Context context, UsbAlsaManager alsaManager,UsbSettingsManager settingsManager) {
@@ -494,7 +608,7 @@ public class UsbDeviceManager {UsbManager.removeFunction(UsbManager.removeFunction(persisted,UsbManager.USB_FUNCTION_MTP), UsbManager.USB_FUNCTION_PTP));}}	String state = FileUtils.readTextFile(new File(STATE_PATH), 0, null).trim();updateState(state);
@@ -548,7 +662,7 @@ public class UsbDeviceManager {} else if ("CONFIGURED".equals(state)) {connected = 1;configured = 1;if ("true".equals(SystemProperties.get("ro.usb.default_mtp")) &&UsbManager.containsFunction(mCurrentFunctions, UsbManager.USB_FUNCTION_MTP))mUsbDataUnlocked = true;} else {
@@ -1030,6 +1144,7 @@ public class UsbDeviceManager {updateUsbNotification(false);updateAdbNotification(false);updateUsbFunctions();
+                    initUsbCameraProperty();break;case MSG_LOCALE_CHANGED:updateAdbNotification(true);
验证
编译运行后,读取属性如下:
[topband.dev.video0]: [0bda:2714]
[topband.dev.video1]: [0bda:b321]
相关文章:
【干货】Android系统定制基础篇:第十五部分(Android支持鼠标右键返回、GPIO 控制方案、属性标识USB摄像头的VID与PID)
1、修改 frameworks/native/services/inputflinger/InputReader.cpp 如下: diff --git a/frameworks/native/services/inputflinger/InputReader.cpp b/frameworks/native/services/inputflinger/Inp index 7207a83..2721800 100755 --- a/frameworks/native/servi…...

ubuntu18 修改dns服务器地址为google
域名解析被干扰的有点严重,直接使用谷歌dns服务器来解析ip 第一、永久修改DNS方法 1、修改 /etc/systemd/resolved.conf 文件 vi /etc/systemd/resolved.conf这里我们可以看到这些参数: # 指定 DNS 服务器,以空白分隔,支持 IP…...

RHCE shell 作业一
1. 设置邮箱 [rootserver ~]# yum install s-nail -y [rootserver ~]# vim /etc/s-nail.rc 编写脚本 [rootserver ~]# vim homework1.sh 设置定时任务 [rootserver ~]# vim /etc/crontab 2. [rootserver ~]# vim homework2.sh 测试: 3. [rootserve…...
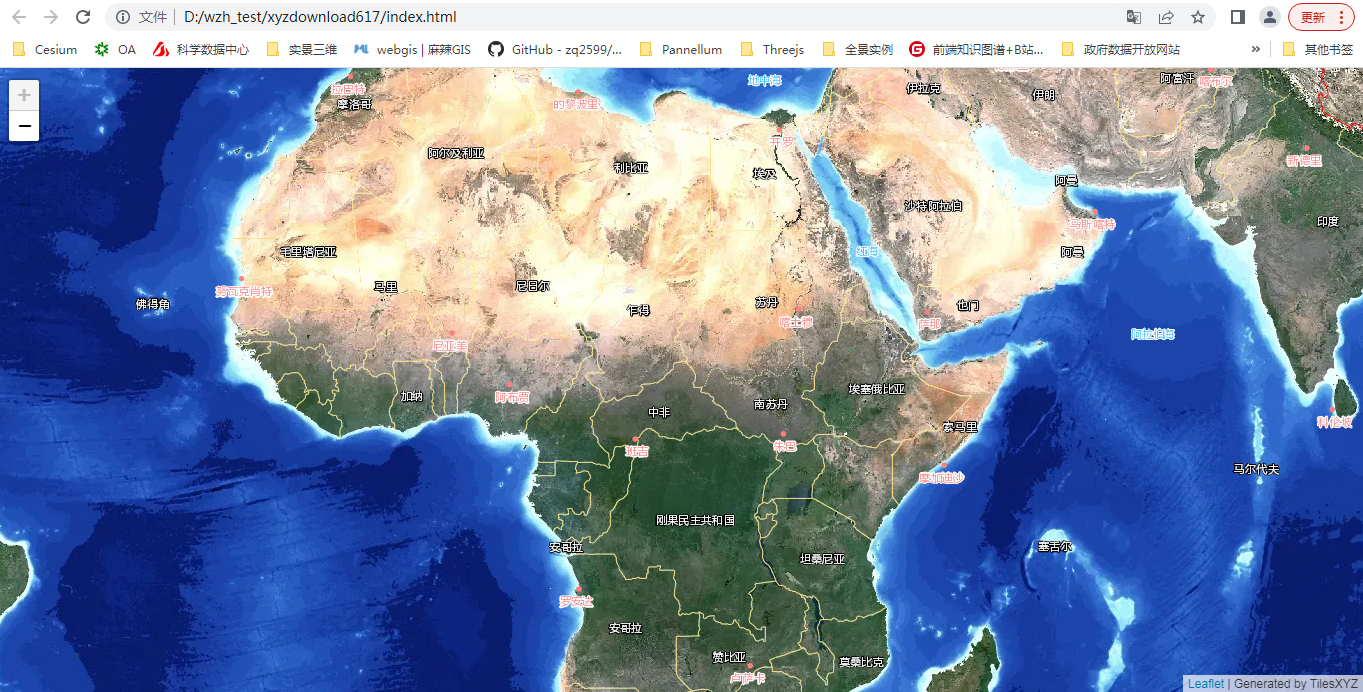
Qqis中采用栅格工具生成XYZ瓦片(目录)简介
目录 前言 一、Qgis的相关功能 1、数据准备 2、将两个xyz图源添加到图层 二、Qgis栅格工具生成 1、生成xyz图块工具在哪里 2、生成xyz图块怎么用 3、下载结果 4、Leaflet加载离线瓦块 总结 前言 在上一篇博客中,介绍了一种在Qgis中基于QMetaTiles插件进行xyz瓦…...
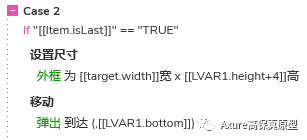
【Axure教程】根据标签数自动调整尺寸的多选下拉列表
多选下拉列表常用于需要用户从一组选项中选择多个选项的情况。它提供了一个下拉菜单,用户可以点击展开并选择他们感兴趣的多个选项。多选下拉列表可以用于展示可选标签,并允许用户选择多个标签。例如,在一个博客发布界面上,可以…...

【python】js逆向基础案例——有道翻译
前言 嗨喽,大家好呀~这里是爱看美女的茜茜呐 课程亮点: 1、爬虫的基本流程 2、反爬的基本原理 3、nodejs的使用 4、抠代码基本思路 环境介绍: python 3.8 pycharm 2022专业版 >>> 免费使用教程文末名片获取 requests >>> pip install req…...

面经系列.飞猪 Java开发工程师.杭州.2023.6.14一面面经
本人是2023年6月14日面试的,面试的岗位是飞猪的Java研发工程师,地点是杭州,面试时长37分钟,没有问八股文。全都围绕项目在问,在提问的过程中会涉及到原理以及具体操作。整体面试感觉下来,面试官很随和,通过面试也能和面试官学到很多,交流了对未来行业的看法,也对某些技…...
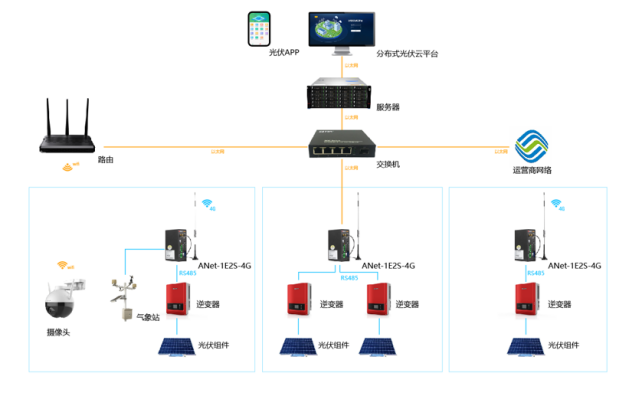
基于物联网及云平台的光伏运维系统
系统结构 在光伏变电站安装逆变器、以及多功能电力计量仪表,通过网关将采集的数据上传至服务器,并将数据进行集中存储管理。用户可以通过PC访问平台,及时获取分布式光伏电站的运行情况以及各逆变器运行状况。平台整体结构如图所示。 光伏背景…...
Android kotlin 实现仿京东多个item向左自动排队(横向、动手滑动、没有首尾滑动)功能
文章目录 一、实现效果二、引入依赖三、源码实现1、适配器2、视图实现一、实现效果 二、引入依赖 在app的build.gradle在添加以下代码 1、implementation com.github.CymChad:BaseRecyclerViewAdapterHelper:3.0.6,这个里面带的适配器,直接调用就即可 BaseRecyclerViewAdapt…...
美团买菜基于 Flink 的实时数仓建设
美团买菜基于 Flink 的实时数仓建设 1. 背景介绍2. 技术愿景和架构设计3. 典型场景、挑战与应对3.1 动态 ETA 实时特征3.2 实时数据经营分析 4. 未来规划 1. 背景介绍 美团买菜是美团自营生鲜零售平台,上面所有的商品都由美团亲自采购,并通过供应链物流体…...
08)
前端vue入门(纯代码)08
【08.webStorage--本地存储】 (1). 什么是 localStorage 和 sessionStorage ? 它们都是浏览器的一种本地存储数据的方式它们只是存在本地,即浏览器中,不会发送到服务器 它们的区别: localStorage:永久存在浏览器中…...
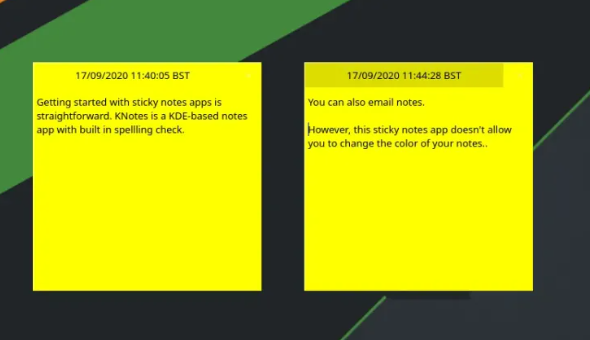
Xubuntu22.04之便签工具(一百八十)
简介: CSDN博客专家,专注Android/Linux系统,分享多mic语音方案、音视频、编解码等技术,与大家一起成长! 优质专栏:Audio工程师进阶系列【原创干货持续更新中……】🚀 人生格言: 人生…...
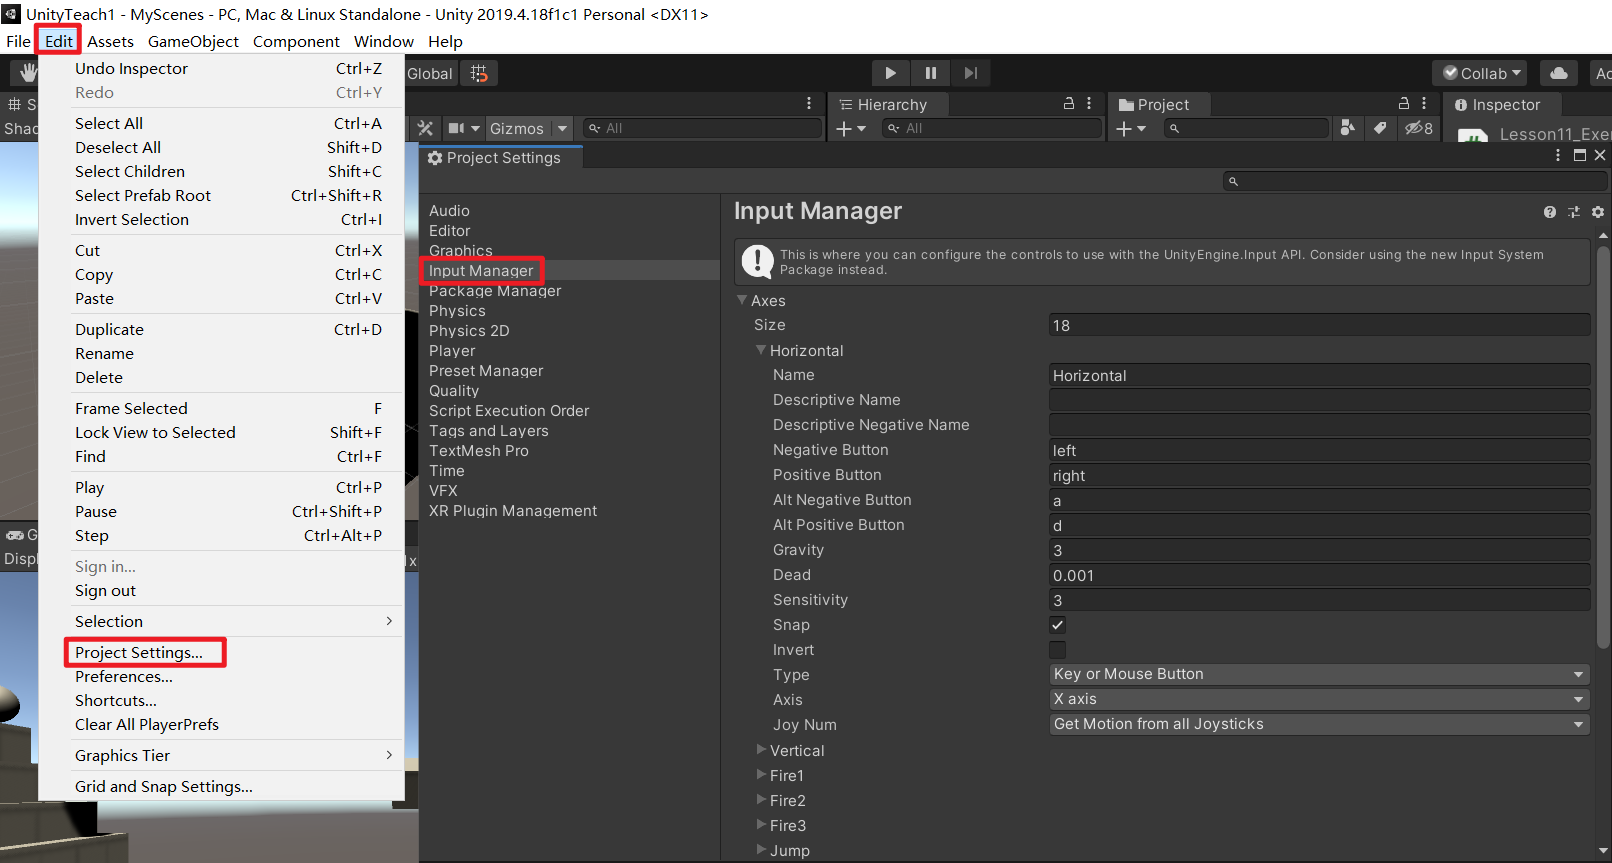
Unity入门4——重要组件与API
一、GameObject (一)成员变量 // 名字 print(this.gameObject.name); this.gameObject.name "Lesson4唐老狮改名"; print(this.gameOb…...

NFS服务器安装及NFS制备程序安装
NFS服务器安装及NFS制备程序安装 NFS服务器安装 NFS是一种分布式文件系统协议,由sun公司开发,旨在允许客户端主机可以像访问本地存储一样通过网络访问服务端文件 安装NFS服务器 登录需要安装NFS服务器的主机执行以下命令完成NFS安装 yum -y install…...
--matlab中yalmip函数介绍)
matlab+yalmip+cplex求解车辆路径优化问题(VRP)--matlab中yalmip函数介绍
YALMIP是一个MATLAB工具箱,用于建模和求解优化问题。它支持线性规划、二次规划、整数规划、鲁棒优化、半定规划等优化问题的建模和求解。下面是一些常用的函数的详细介绍: 1. sdpvar:用于定义优化问题中的变量。可以定义实数、向量和矩阵型变…...
实战:用dockerfile创建镜像实现springboot项目容器化
文章目录 前言技术积累docker基本操作命令dockerfile简介dockerfile指令说明 实战演示创建dockerfile创建挂载目录构建dockerfile启动容器完成验证 写在最后 前言 docker容器化方案是当下流行的服务部署方式,在软件领域举足轻重。我公司的测试、线上环境都采用dock…...

【Flask】配置项解析与加载
文章目录 默认配置表配置项加载方式直接配置存放在app.config字典通过.py配置文件通过class类加载对象通过.json配置文件通过环境变量配置内置命令行 默认配置表 配置项默认值备注DEBUGFalse是否开启 Debug 模式。如果为True,修改了代码,只需要保存&…...

Dinky: 实时即未来,让 Flink SQL 纵享丝滑--如何本地编译、运行
什么是Dinky 实时即未来,Dinky 为 Apache Flink 而生,让 Flink SQL 纵享丝滑。 Dinky 是一个开箱即用、易扩展,以 Apache Flink 为基础,连接 OLAP 和数据湖等众多框架的一站式实时计算平台,致力于流批一体和湖仓一体的探索与实践。 最后,Dinky 的发展皆归功于 Apache …...

2023 Nature 健康系统规模的语言模型是通用预测引擎
文章目录 一、论文关键信息二、论文主要内容三、总结与讨论🍉 CSDN 叶庭云:https://yetingyun.blog.csdn.net/ 一、论文关键信息 论文标题:Health system-scale language models are all-purpose prediction engines 期刊信息:2023 Nature 论文地址:h...

《2023 年 React 生态》
大家好,我是 Chocolate。 前不久看到一篇不错的内容,来自于 The React Ecosystem in 2023,也结合自己今年使用的 React 生态总结一下。 本文并非视频演讲稿,和视频内容还是有一点点区别,视频内容相对来说会更加详细一…...
(LeetCode 每日一题) 3442. 奇偶频次间的最大差值 I (哈希、字符串)
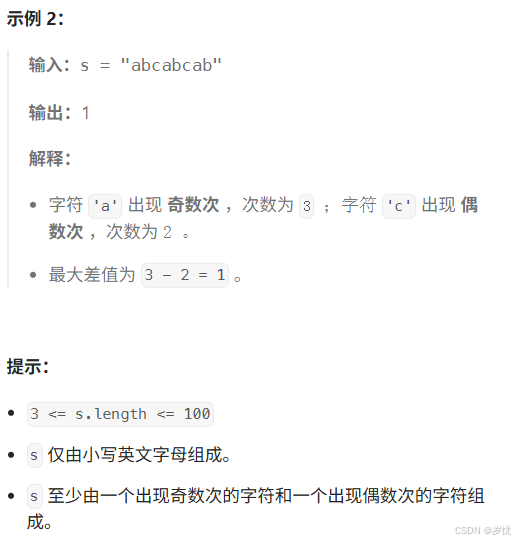
题目:3442. 奇偶频次间的最大差值 I 思路 :哈希,时间复杂度0(n)。 用哈希表来记录每个字符串中字符的分布情况,哈希表这里用数组即可实现。 C版本: class Solution { public:int maxDifference(string s) {int a[26]…...

从零实现富文本编辑器#5-编辑器选区模型的状态结构表达
先前我们总结了浏览器选区模型的交互策略,并且实现了基本的选区操作,还调研了自绘选区的实现。那么相对的,我们还需要设计编辑器的选区表达,也可以称为模型选区。编辑器中应用变更时的操作范围,就是以模型选区为基准来…...

Linux简单的操作
ls ls 查看当前目录 ll 查看详细内容 ls -a 查看所有的内容 ls --help 查看方法文档 pwd pwd 查看当前路径 cd cd 转路径 cd .. 转上一级路径 cd 名 转换路径 …...

【磁盘】每天掌握一个Linux命令 - iostat
目录 【磁盘】每天掌握一个Linux命令 - iostat工具概述安装方式核心功能基础用法进阶操作实战案例面试题场景生产场景 注意事项 【磁盘】每天掌握一个Linux命令 - iostat 工具概述 iostat(I/O Statistics)是Linux系统下用于监视系统输入输出设备和CPU使…...

将对透视变换后的图像使用Otsu进行阈值化,来分离黑色和白色像素。这句话中的Otsu是什么意思?
Otsu 是一种自动阈值化方法,用于将图像分割为前景和背景。它通过最小化图像的类内方差或等价地最大化类间方差来选择最佳阈值。这种方法特别适用于图像的二值化处理,能够自动确定一个阈值,将图像中的像素分为黑色和白色两类。 Otsu 方法的原…...

spring:实例工厂方法获取bean
spring处理使用静态工厂方法获取bean实例,也可以通过实例工厂方法获取bean实例。 实例工厂方法步骤如下: 定义实例工厂类(Java代码),定义实例工厂(xml),定义调用实例工厂ÿ…...
自然语言处理——循环神经网络
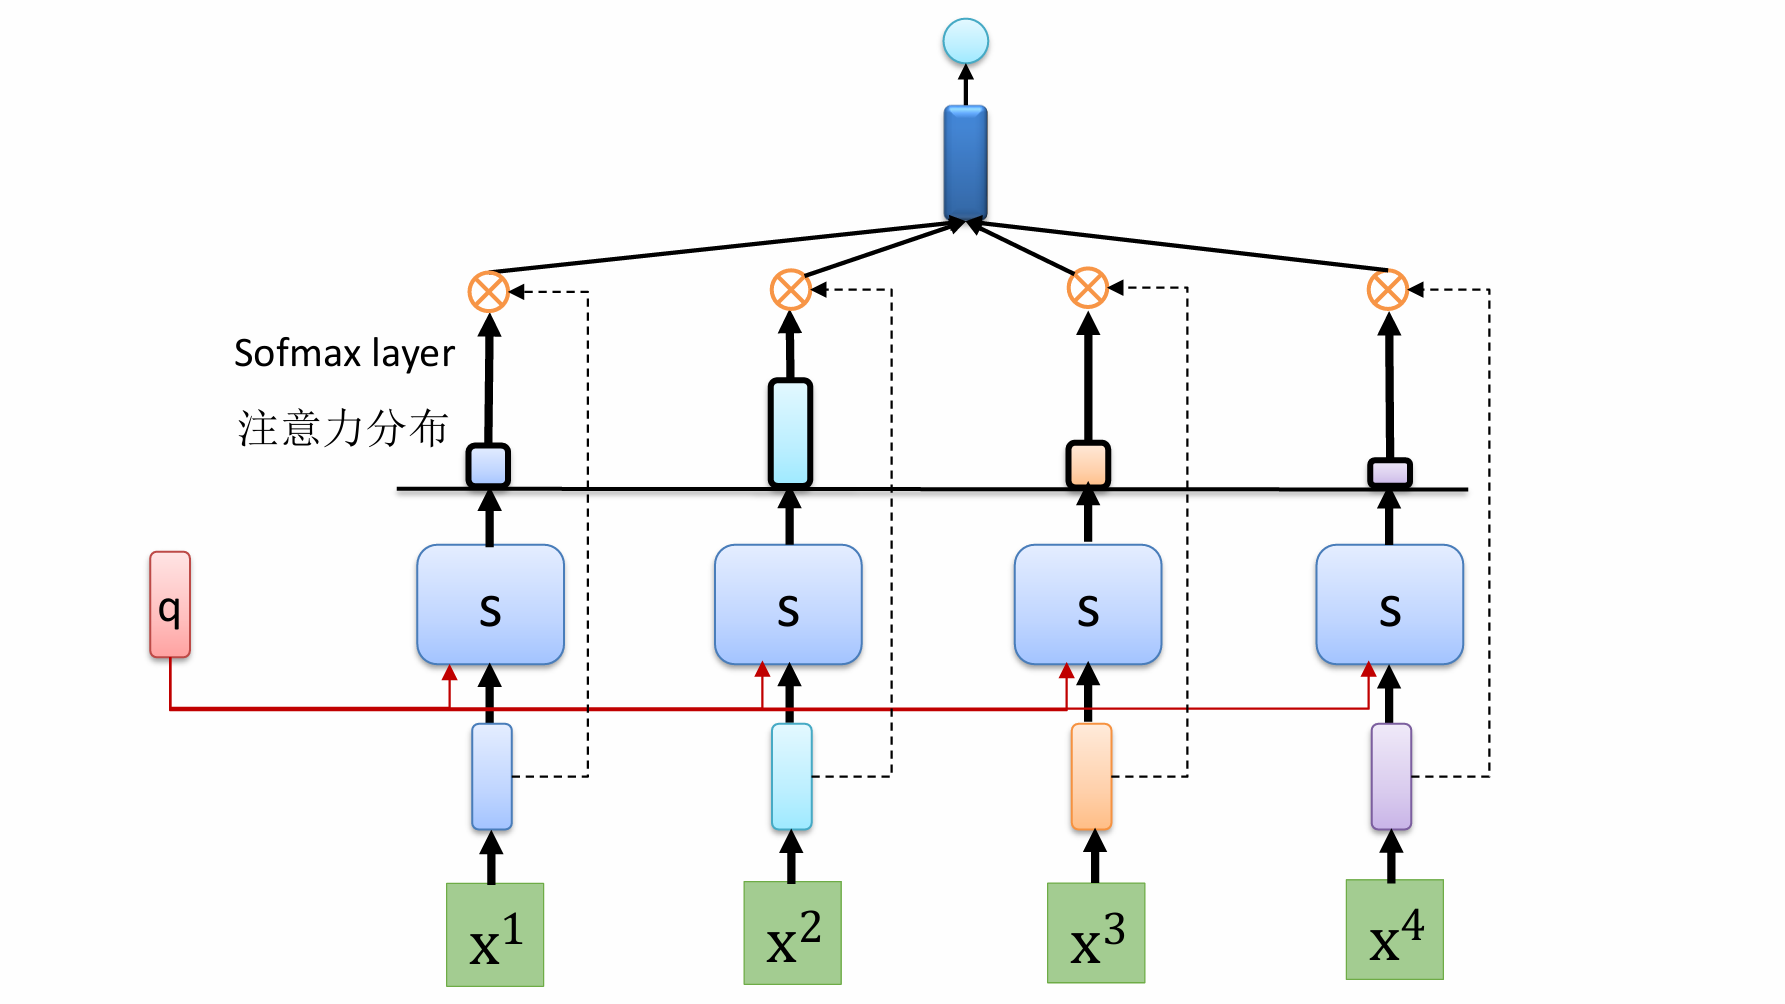
自然语言处理——循环神经网络 循环神经网络应用到基于机器学习的自然语言处理任务序列到类别同步的序列到序列模式异步的序列到序列模式 参数学习和长程依赖问题基于门控的循环神经网络门控循环单元(GRU)长短期记忆神经网络(LSTM)…...
:邮件营销与用户参与度的关键指标优化指南)
精益数据分析(97/126):邮件营销与用户参与度的关键指标优化指南
精益数据分析(97/126):邮件营销与用户参与度的关键指标优化指南 在数字化营销时代,邮件列表效度、用户参与度和网站性能等指标往往决定着创业公司的增长成败。今天,我们将深入解析邮件打开率、网站可用性、页面参与时…...

Spring Security 认证流程——补充
一、认证流程概述 Spring Security 的认证流程基于 过滤器链(Filter Chain),核心组件包括 UsernamePasswordAuthenticationFilter、AuthenticationManager、UserDetailsService 等。整个流程可分为以下步骤: 用户提交登录请求拦…...

【Linux】Linux安装并配置RabbitMQ
目录 1. 安装 Erlang 2. 安装 RabbitMQ 2.1.添加 RabbitMQ 仓库 2.2.安装 RabbitMQ 3.配置 3.1.启动和管理服务 4. 访问管理界面 5.安装问题 6.修改密码 7.修改端口 7.1.找到文件 7.2.修改文件 1. 安装 Erlang 由于 RabbitMQ 是用 Erlang 编写的,需要先安…...