【智能电表数据接入物联网平台实践】
智能电表数据接入物联网平台实践
- 设备接线准备
- 设备调试
- 代码实现
- Modbus TCP Client 读取电表数据
- 读取寄存器数据转成32bit Float格式
- 然后使用modbusTCP Client 读取数据
- 使用mqtt协议接入物联网平台
- 最终代码实现
设备接线准备

设备调试
代码实现
Modbus TCP Client 读取电表数据
读取寄存器数据转成32bit Float格式
原理
/*** *  17038,  7864
参考 https://blog.csdn.net/qq_36270361/article/details/115823294SEEE EEEE EMMM MMMM MMMM MMMM MMMM MMMM
0100 0010 1000 1110 0000 1111 0101 1100s = 0
e = (1000 0101)转10进制 133  - 127 = 6
尾数
000 1110 0000 1111 0101 1100
4#在尾数的左边有一个省略的小数点和1,这个1在浮点数的保存中经常省略,
1.000 1110 0000 1111 0101 1100
指数值e = 6,因此小数点向右移动6位,得到尾数值如下:
1000111.0 0000 1111 0101 1100整数1 *2^6 + 0 *2^5 + 0 *2^4 + 0 *2^3 + 1* 2^2 + 1 *2^1 + 1*2^0
64 + 0+0+0 + 4 + 2 + 1
71
小数部分前面0太多可以忽略不记了0 * 2^-1 + 0 * 2^-2 + 0 * 2^-3 + 0 * 2^-4 + 0 * 2^-5 ....
浮点数值 = 整数 + 小数 = 71 + 0 = 71
*/
function toFloat(s1, s2)
{// s1:第一个寄存器地址数据,s2:第二个寄存器地址数据//将输入数值short转化为无符号unsigned shortconst us1 = s1, us2 = s2; // intif (s1 < 0) us1 += 65536;if (s2 < 0) us2 += 65536;//sign: 符号位, exponent: 阶码, mantissa:尾数let sign, exponent; // intlet mantissa; // float//计算符号位sign = parseInt(us1 / 32768); // js中只需要整数//去掉符号位let emCode = us1 % 32768; // int//计算阶码exponent = parseInt(emCode / 128);//计算尾数mantissa = (emCode % 128 * 65536 + us2) / 8388608; // float//代入公式 fValue = (-1) ^ S x 2 ^ (E - 127) x (1 + M)const S = Math.pow(-1, sign)const E = Math.pow(2, exponent - 127)const M = (1 + mantissa)return S * E * M;
}
然后使用modbusTCP Client 读取数据
// create an empty modbus client
const ModbusRTU = require("modbus-serial");
const client = new ModbusRTU();// open connection to a tcp line
client.connectTCP("10.0.0.251", { port: 24 });
client.setID(1);
// read the values of 10 registers starting at address 0
// on device number 1. and log the values to the console.
setInterval(() => {console.log('-----read-----')client.readHoldingRegisters(4157, 10, (err, data) =>{// data: {//  data: [17038,  7864]//  buffer // buffer 数据 实际上转换出来就是data数组// } if (data?.data){console.log(data.data);const powerData = toFloat(data.data[0], data.data[1])console.log('-------powerData------', powerData)}});
}, 3000);
使用mqtt协议接入物联网平台
const mqtt = require("mqtt");
const md5 = require('js-md5');const secureId = "admin";
const secureKey = "adminkey";
const timestamp = new Date().getTime()
const username = `${secureId}|${timestamp}`
const password = md5(username + "|" + secureKey)
const config = {url: "mqtt://10.0.0.108:1883",productId: '1696816545212956672',clientId: "1704681506453053440", // 电表设备idhost: '10.0.0.108',port: 1883
}const mqttClient = mqtt.connect({clientId: config.clientId,username,password,host: config.host,port: config.port,protocol: 'mqtt'
}); //指定服务端地址和端口// 推送数据
function publishData (key, value) {const msg  = {"deviceId": config.clientId,"properties": {[key]: value}}mqttClient.publish(`/${config.productId}/${config.clientId}/properties/report`,JSON.stringify(msg))
}//连接成功
mqttClient.on("connect", function() {console.log("服务器连接成功");publishData('online_time', new Date().getTime()) // 上报一条上线的消息});
最终代码实现
function toFloat(s1, s2)
{// s1:第一个寄存器地址数据,s2:第二个寄存器地址数据//将输入数值short转化为无符号unsigned shortconst us1 = s1, us2 = s2; // intif (s1 < 0) us1 += 65536;if (s2 < 0) us2 += 65536;//sign: 符号位, exponent: 阶码, mantissa:尾数let sign, exponent; // intlet mantissa; // float//计算符号位sign = parseInt(us1 / 32768); // js中只需要整数//去掉符号位let emCode = us1 % 32768; // int//计算阶码exponent = parseInt(emCode / 128);//计算尾数mantissa = (emCode % 128 * 65536 + us2) / 8388608; // float//代入公式 fValue = (-1) ^ S x 2 ^ (E - 127) x (1 + M)const S = Math.pow(-1, sign)const E = Math.pow(2, exponent - 127)const M = (1 + mantissa)return S * E * M;
}
// create an empty modbus client
const ModbusRTU = require("modbus-serial");
const client = new ModbusRTU();// open connection to a tcp line
client.connectTCP("10.0.0.251", { port: 24 });
client.setID(1);const mqtt = require("mqtt");
const md5 = require('js-md5');const secureId = "admin";
const secureKey = "adminkey";
const config = {url: "mqtt://10.0.0.108:1883",productId: '1696816545212956672',clientId: "1704681506453053440", // 电表设备idhost: '10.0.0.108',port: 1883
}
let mqttClient = null
let reconnectInterval = 1000;
let reconnectTimer = null;// 推送数据
function publishData (key, value) {const msg  = {"deviceId": config.clientId,"properties": {[key]: value}}mqttClient?.publish(`/${config.productId}/${config.clientId}/properties/report`,JSON.stringify(msg))
}function createClient() {if(mqttClient){return;}const timestamp = new Date().getTime()const username = `${secureId}|${timestamp}`const password = md5(username + "|" + secureKey)mqttClient = mqtt.connect({clientId: config.clientId,username,password,host: config.host,port: config.port,protocol: 'mqtt',}); //指定服务端地址和端口//连接成功mqttClient?.on("connect", function() {console.log("服务器连接成功");publishData('online_time', new Date().getTime())});// 断线重连mqttClient.on('error', (error) => {console.log('error:',new Date().getTime(), error);reconnect();});mqttClient.on('end', () => {console.log('end-------:', new Date().getTime());reconnect();});
}function reconnect() {console.log(`reconnecting in ${reconnectInterval}ms...`);reconnectTimer = setTimeout(createClient, reconnectInterval);reconnectInterval = Math.min(reconnectInterval * 2, 30000);
}// 创建链接
createClient()// read the values of 10 registers starting at address 0
// on device number 1. and log the values to the console.
setInterval(() => {console.log('-----read-----')client.readHoldingRegisters(4157, 2, (err, data) =>{if (data?.buffer){console.log(data.data);const powerData = toFloat(data.data[0], data.data[1])console.log('------powerData-------', powerData)publishData('total_working_energy', powerData)}});
},5 * 60 * 1000);
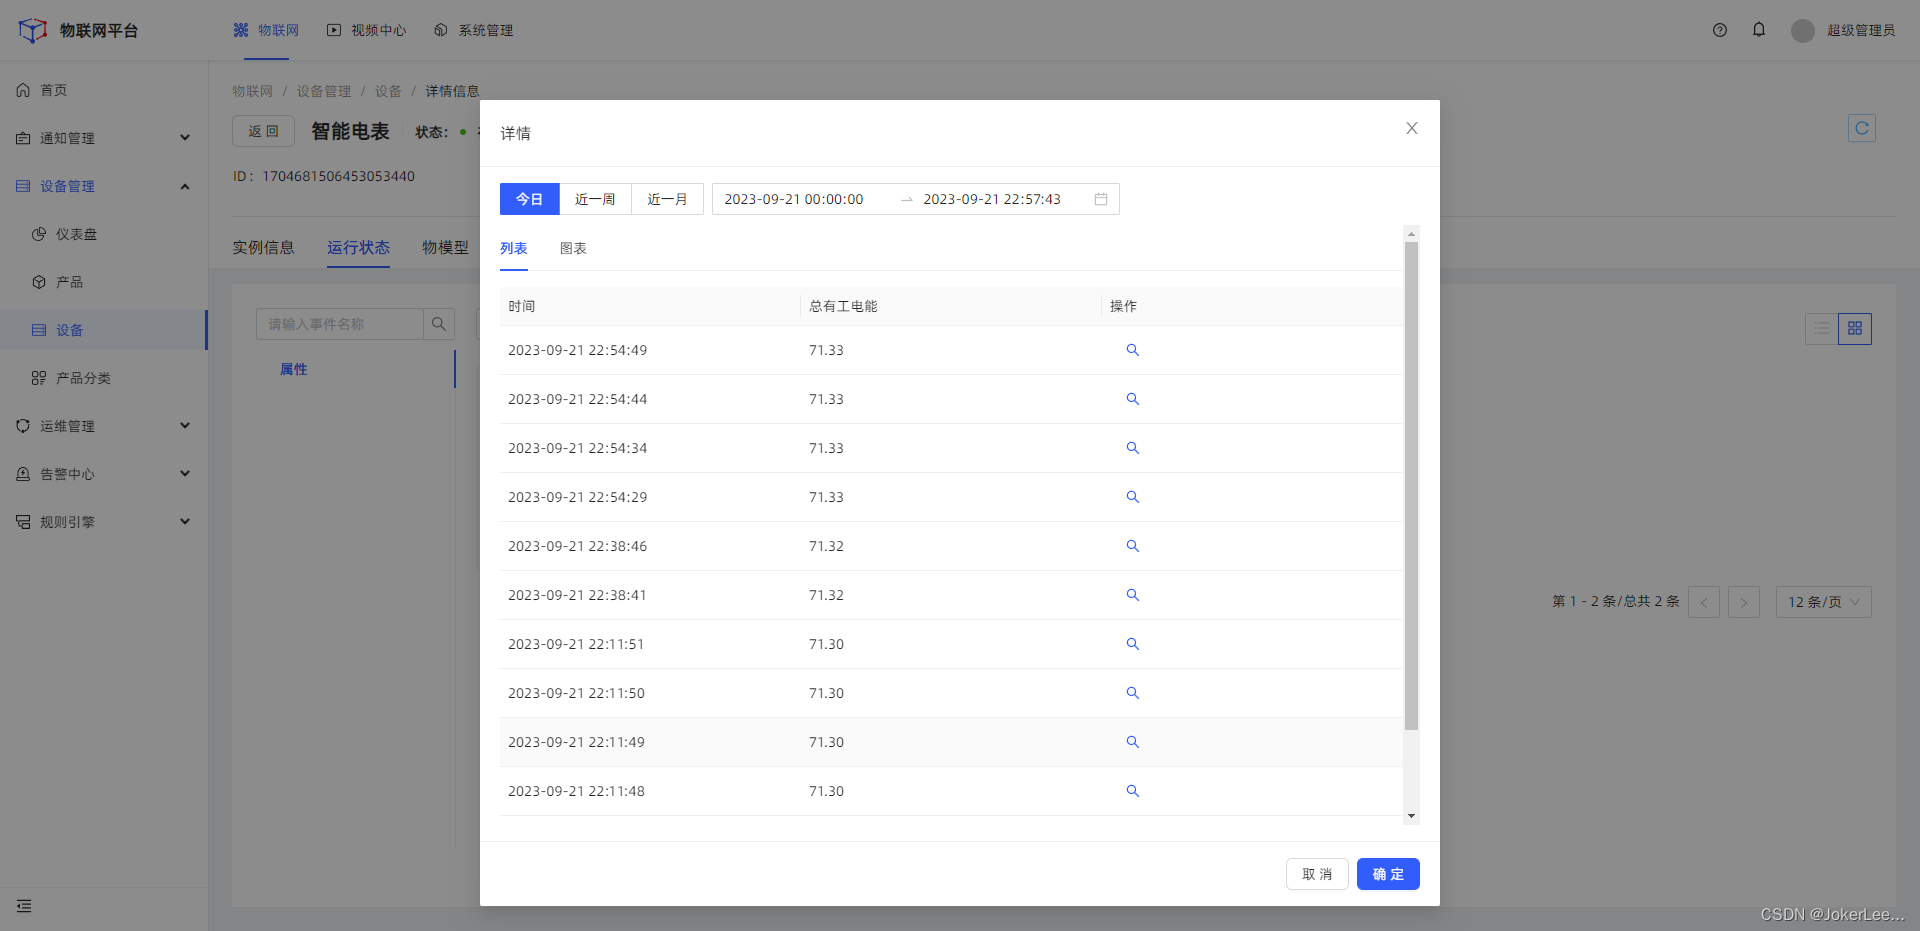
效果预览
相关文章:
【智能电表数据接入物联网平台实践】
智能电表数据接入物联网平台实践 设备接线准备设备调试代码实现Modbus TCP Client 读取电表数据读取寄存器数据转成32bit Float格式然后使用modbusTCP Client 读取数据 使用mqtt协议接入物联网平台最终代码实现 设备接线准备 设备调试 代码实现 Modbus TCP Client 读取电表数…...

Docker--network命令的用法
原文网址:Docker--network命令的用法_IT利刃出鞘的博客-CSDN博客 简介 说明 本文介绍Docker的network网络命令的用法。 官网网址 docker network | Docker Documentation 命令概述 所有命令 命令名称 说明 docker network connect 将容器连接到网络 dock…...
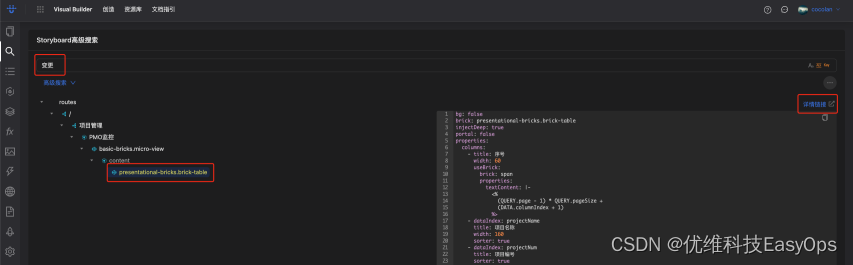
优维低代码实践:图片和搜索
优维低代码技术专栏,是一个全新的、技术为主的专栏,由优维技术委员会成员执笔,基于优维7年低代码技术研发及运维成果,主要介绍低代码相关的技术原理及架构逻辑,目的是给广大运维人提供一个技术交流与学习的平台。 优维…...
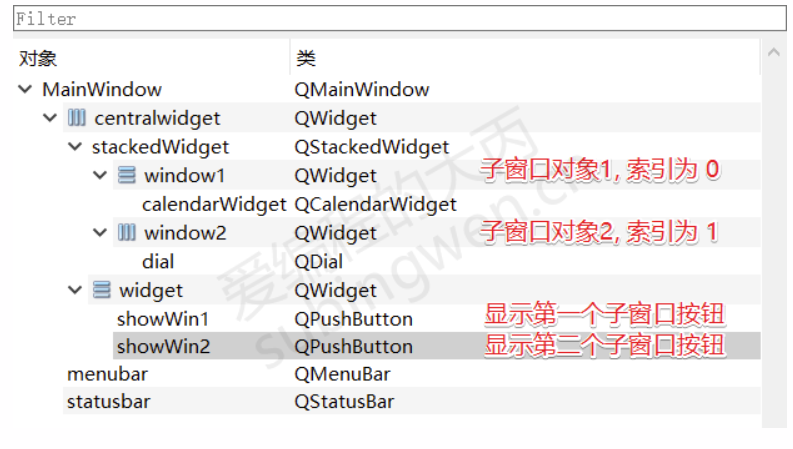
[Qt]控件
文章摘于 爱编程的大丙 文章目录 1. 按钮类型控件1.1 按钮基类 QAbstractButton1.1.1 标题和图标1.1.2 按钮的 Check 属性1.1.3 信号1.1.4 槽函数 1.2 QPushButton1.2.1 常用API1.2.2 按钮的使用 1.3 QToolButton1.3.1 常用API1.3.2 按钮的使用 1.4 QRadioButton1.4.1 常用API…...
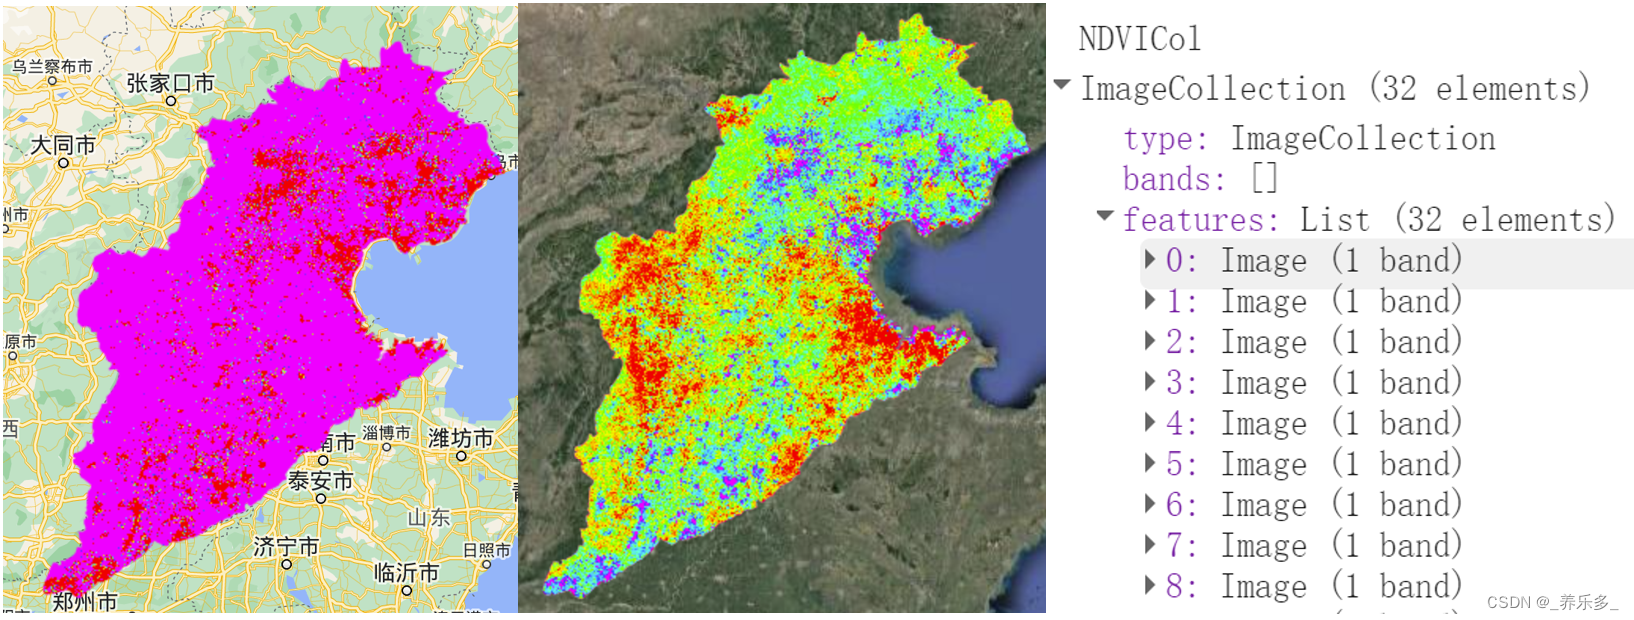
GEE:快速实现时间序列线性趋势和变化敏感性计算(斜率、截距)以NDVI时间序列为例
作者:CSDN @ _养乐多_ 本博客将向您介绍如何使用Google Earth Engine(GEE)平台来处理Landsat 5、7和8的卫星图像数据,构建时间序列,以NDVI为例,计算NDVI时间序列的斜率和截距,以及如何导出这些结果供进一步分析使用。 文章目录 一、代码详解1.1 核心代码详解1.2 核心代…...

LC1713. 得到子序列的最少操作次数(java - 动态规划)
LC1713. 得到子序列的最少操作次数 题目描述LIS 动态规划 二分法代码演示 题目描述 难度 - 困难 LC1713.得到子序列的最少操作次数 给你一个数组 target ,包含若干 互不相同 的整数,以及另一个整数数组 arr ,arr 可能 包含重复元素。 每一次…...

vr飞机驾驶舱模拟流程3D仿真演示加大航飞安全法码
众所周知,航空航天飞行是一项耗资大、变量参数很多、非常复杂的系统工程,因此可利用虚拟仿真技术经济、安全及可重复性等特点,进行飞行任务或操作的模拟,以代替某些费时、费力、费钱的真实试验或者真实试验无法开展的场合…...
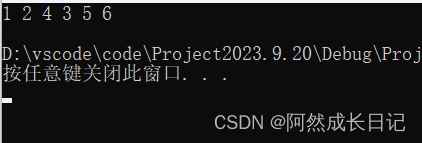
一、八大排序(sort)
文章目录 一、时间复杂度(一)定义:常数操作 二、空间复杂度(一)定义: 三、排序(一)选择排序1.定义2.代码3.特性 (二)冒泡排序1.定义2.代码3.特性 (…...
【AWS】AI 代码生成器—Amazon CodeWhisperer初体验 | 开启开挂编程之旅
使用 AI 编码配套应用程序更快、更安全地构建应用程序 文章目录 1.1 Amazon CodeWhisperper简介1.2 Amazon CodeWhisperer 定价2.1 打开VS Code2.2 安装AWS ToolKit插件 一、前言 1.1 Amazon CodeWhisperper简介 1️⃣更快地完成更多工作 CodeWhisperer 经过数十亿行代码的训…...

【Mysql主从配置方法---单主从】
Mysql主从 主服务器 创建用户 create user “for_rep”“从服务器IP地址” IDENTIFIED by “123456” 授权 grant replication slave on . to “for_rep”“从服务器IP地址” IDENTIFIED by “123456” 查看用户权限 SHOW GRANTS FOR “for_rep”“从服务器IP地址”; 修改M…...

⼀⽂读懂加密资产交易赛道的新锐⼒量Bitdu
交易所,仍然是加密资产赛道的皇冠级赛道。围绕这个领域展开的商业竞争,最能引起⼴⼤⽤⼾的关注。 经历了数轮资产价格涨跌的⽜熊之后,⼀批批创业者也在不断地思考这⼀议题 — 如何在去中⼼化的世界中,最⾼效率地集结流量、资本和…...
万里牛与金蝶云星空对接集成查询调拨单连通调拨单新增(万里牛调拨单-金蝶【直接调拨单】)
万里牛与金蝶云星空对接集成查询调拨单连通调拨单新增(万里牛调拨单-金蝶【直接调拨单】) 源系统:万里牛 万里牛是杭州湖畔网络技术有限公司旗下SaaS软件品牌,主要针对电商、外贸、实体门店等业务群体,帮助企业快速布局新零售,提升订单处理效…...
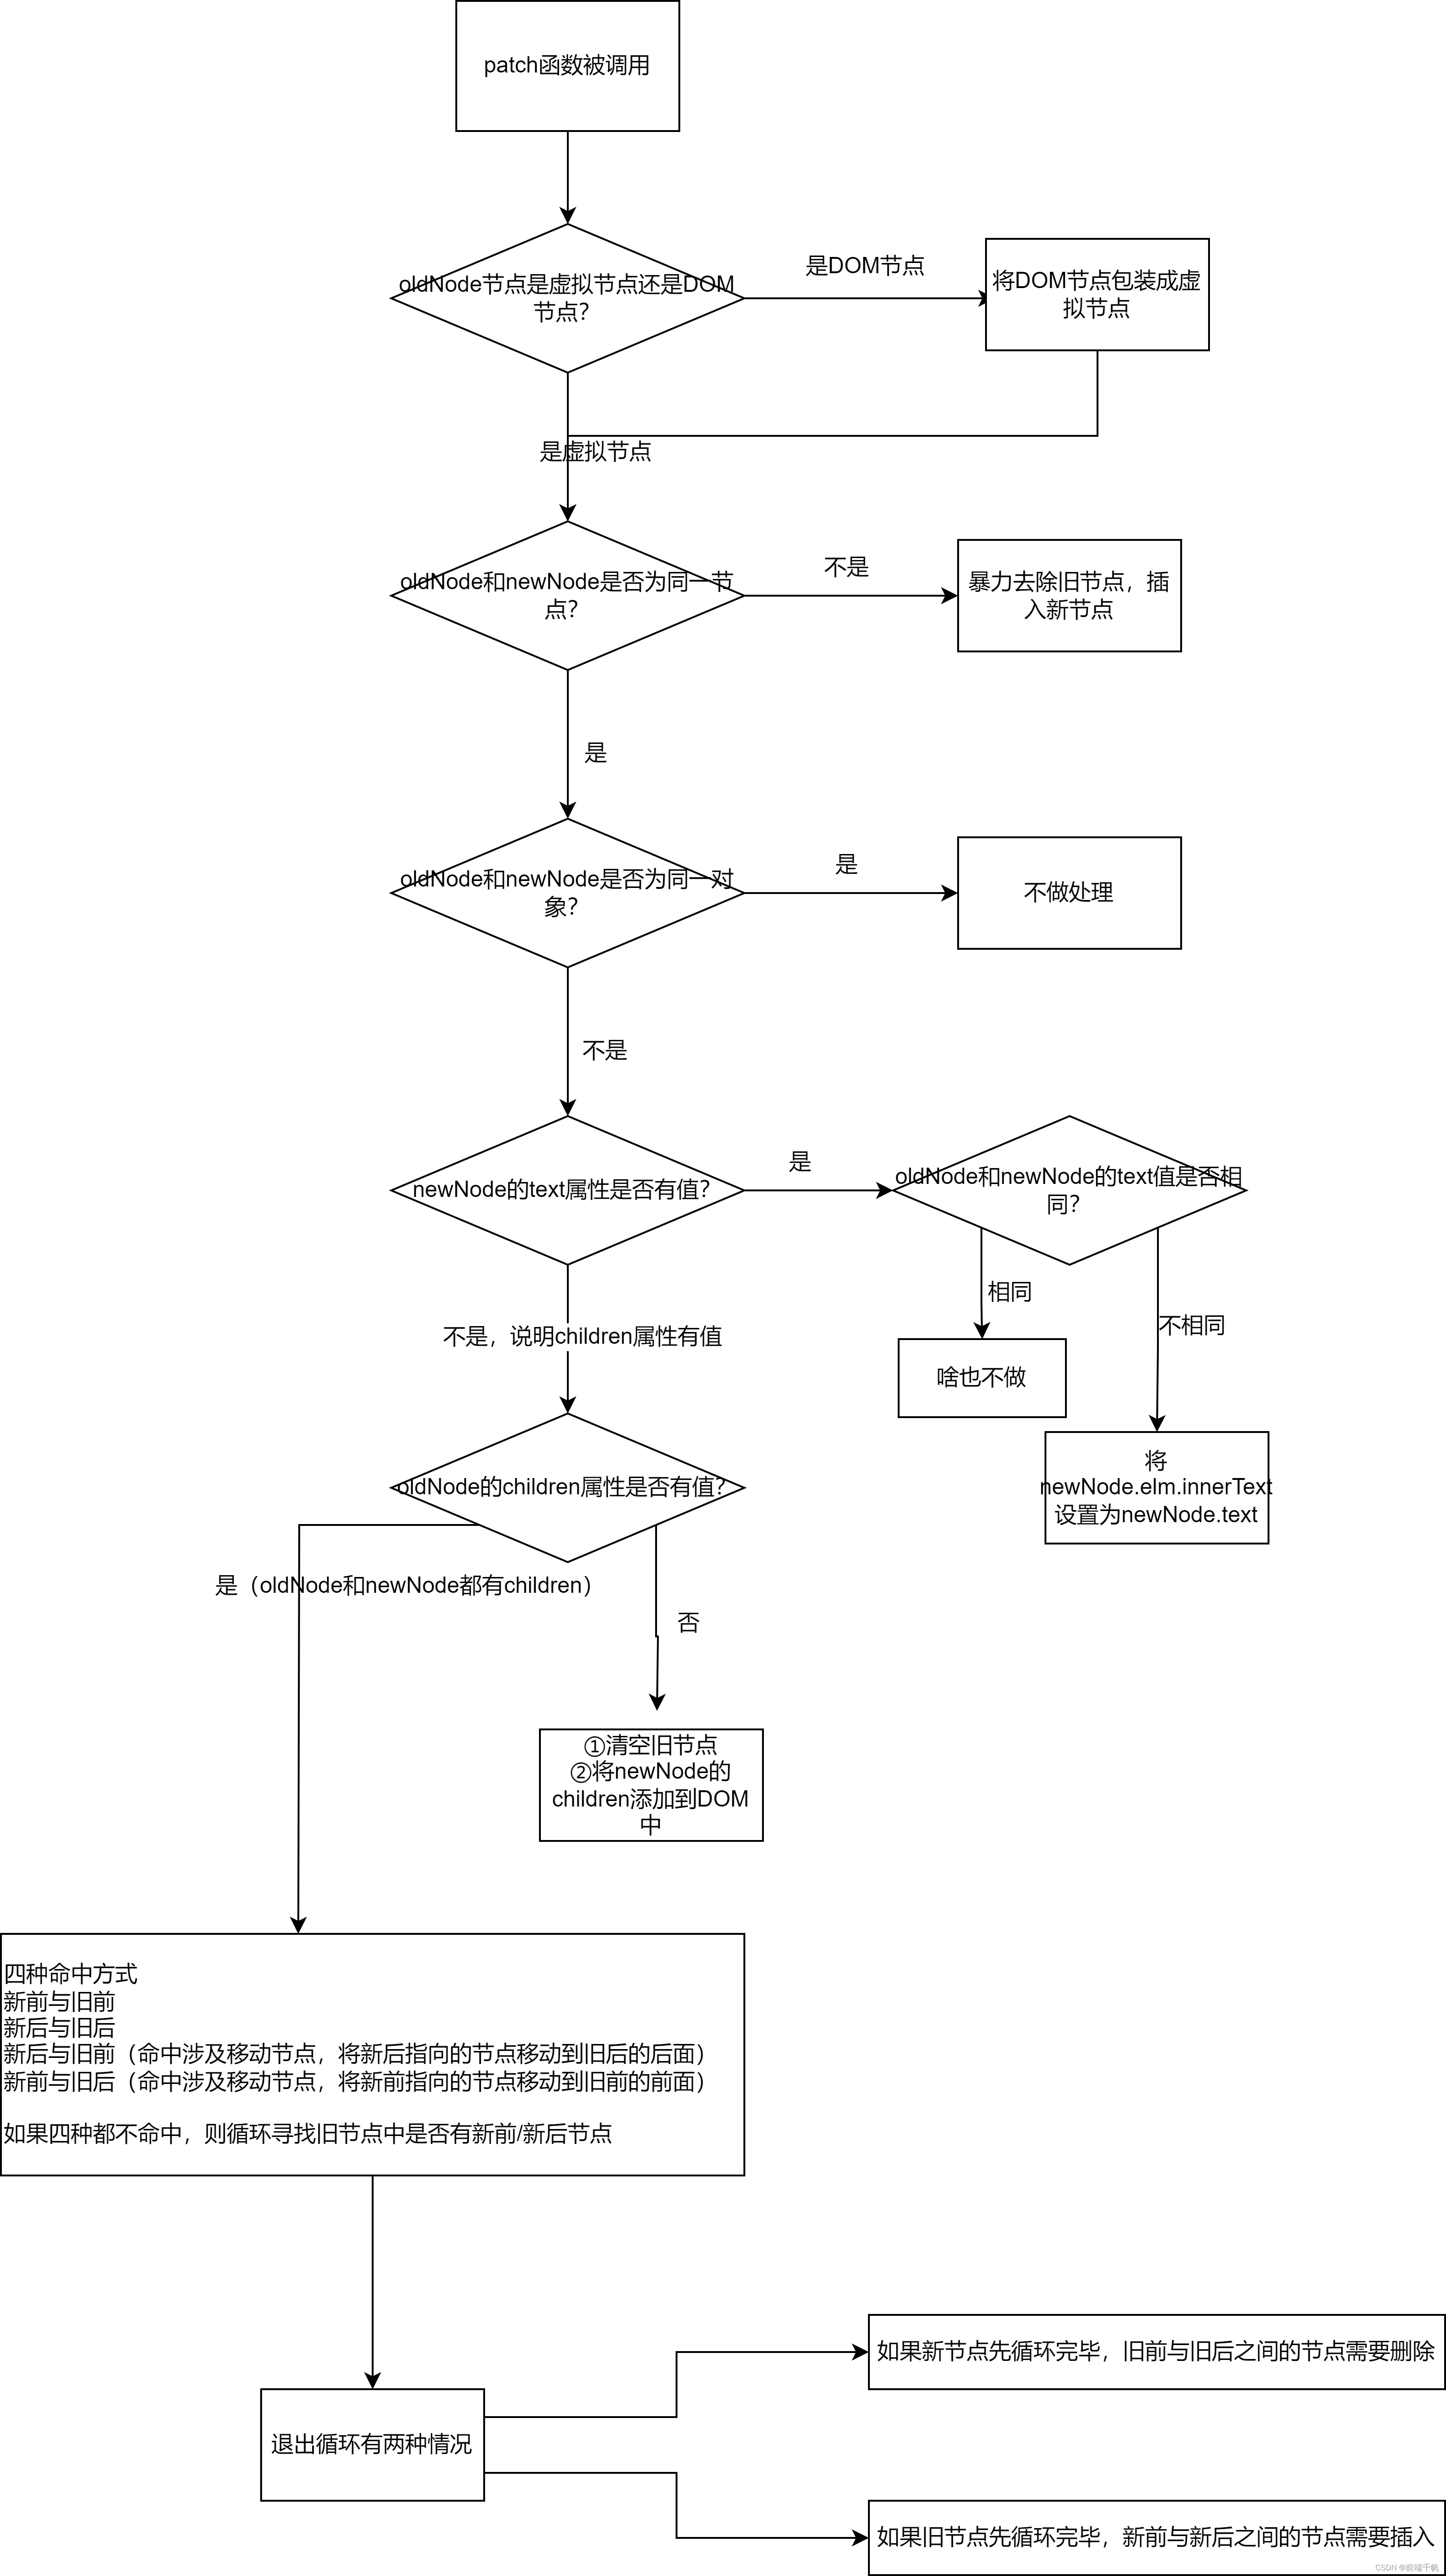
虚拟DOM与diff算法
虚拟DOM与diff算法 snabbdom虚拟DOMdiff算法 snabbdom 是什么:snabbdom是著名的虚拟DOM库,是diff算法的鼻祖,Vue源码借鉴了snabbdom 虚拟DOM 是什么:本质上是存在内存里的 JavaScript 对象 作用:用来描述真实DOM的层…...

K8S:pod资源限制及探针
文章目录 一.pod资源限制1.pod资源限制方式2.pod资源限制指定时指定的参数(1)request 资源(2) limit 资源(3)两种资源匹配方式 3.资源限制的示例(1)官网示例(2࿰…...

CSS中的定位
position 的属性与含义 CSS 中的 position 属性用于控制元素在页面中的定位方式,有四个主要的取值,每个取值都会影响元素的布局方式,它们是: static(默认值): 这是所有元素的初始定位方式。在静…...
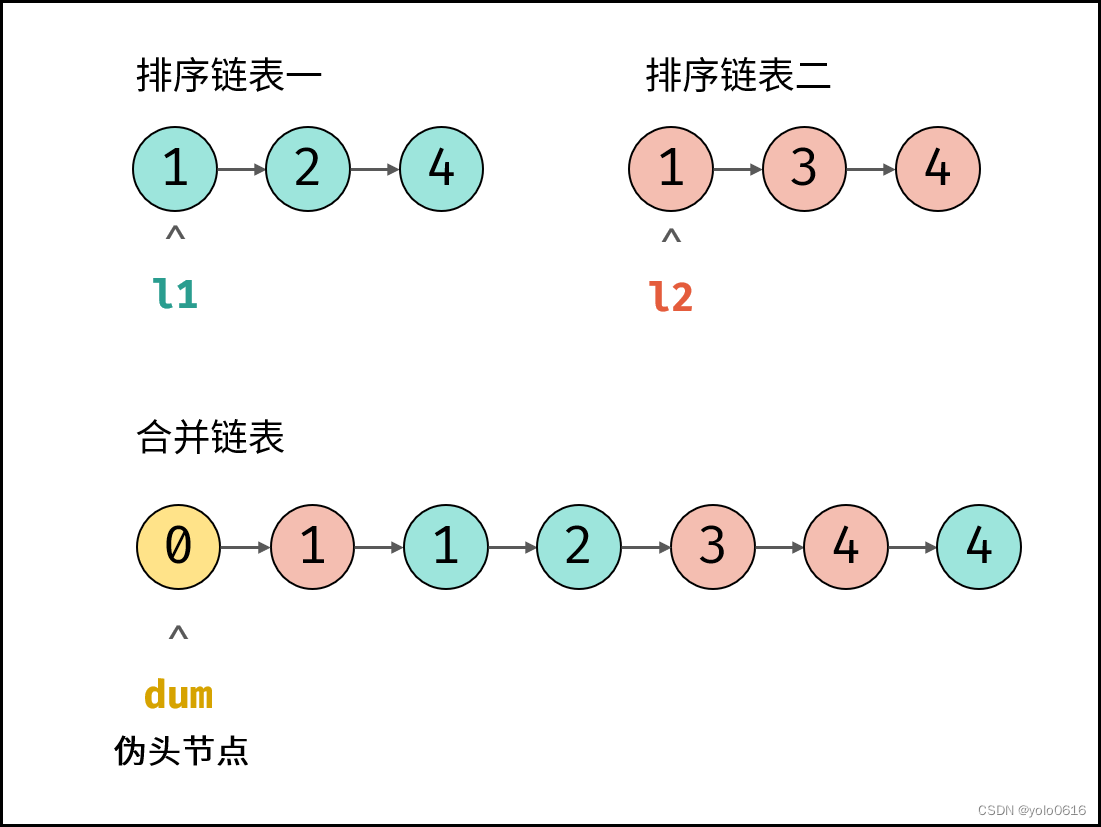
二、链表(linked-list)
文章目录 一、定义二、经典例题(一)[21.合并两个有序链表](https://leetcode.cn/problems/merge-two-sorted-lists/description/)1.思路2.复杂度分析3.注意4.代码 (二)[86.分割链表](https://leetcode.cn/problems/partition-list…...
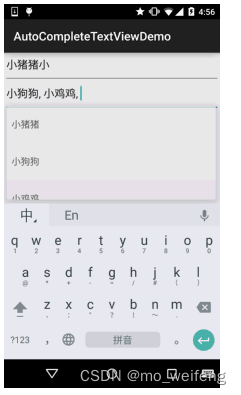
Android EditText筛选+选择功能开发
在日常开发中经常会遇到这种需求,EditText既需要可以筛选,又可以点击选择。这里筛选功能用的是AutoCompleteTextView,选择功能使用的是第三方库https://github.com/kongzue/DialogX。 Android AutoCompleteTextView(自动完成文本框)的基本使用…...

Linux 信号 alarm函数 setitimer函数
/*#include <unistd.h>unsigned int alarm(unsigned int seconds);功能:设置定时器。函数调用,开始倒计时,0的时候给当前的进程发送SIGALARM信号参数:倒计时的时长。。单位:秒 如果参数为0,无效返回…...

自主设计,模拟实现 RabbitMQ - 实现发送方消息确认机制
目录 一、实现发送方消息确认 1.1、需求分析 什么是发送方的消息确认? 如何实现?...
【数据结构】二叉树的·深度优先遍历(前中后序遍历)and·广度优先(层序遍历)
💐 🌸 🌷 🍀 🌹 🌻 🌺 🍁 🍃 🍂 🌿 🍄🍝 🍛 🍤 📃个人主页 :阿然成长日记 …...

英雄联盟智能辅助工具Seraphine:三步快速上手的终极指南
英雄联盟智能辅助工具Seraphine:三步快速上手的终极指南 【免费下载链接】Seraphine 英雄联盟战绩查询工具 项目地址: https://gitcode.com/gh_mirrors/se/Seraphine 你是否厌倦了在英雄联盟排位赛中手忙脚乱地查询对手战绩?是否希望有一个智能助…...

环境配置与基础教程:保姆级教程:VS Code DevContainer 一键构建可复现的 YOLO 训练开发容器
摘要 你是否还在为YOLO训练环境的搭建而焦头烂额?CUDA版本不匹配、Python依赖冲突、团队协作时“在我机器上能跑”的经典难题——这些问题浪费了无数开发者的宝贵时间。本文将带你通过VS Code DevContainer技术,一键构建完全可复现的YOLO训练开发容器,彻底告别环境配置噩梦…...

Go语言代理池框架clawproxy:构建高可用免费代理池的实践指南
1. 项目概述:一个面向开发者的轻量级代理抓取与验证框架 最近在折腾一些需要处理大量公开代理IP的应用场景,比如数据采集、API轮询测试或者简单的负载均衡模拟,你是不是也经常遇到这样的问题:网上找的免费代理列表,十个…...

CANN/Ascend C逻辑异或API文档
LogicalXor 【免费下载链接】asc-devkit 本项目是CANN 推出的昇腾AI处理器专用的算子程序开发语言,原生支持C和C标准规范,主要由类库和语言扩展层构成,提供多层级API,满足多维场景算子开发诉求。 项目地址: https://gitcode.com…...

从 CDS 到服务契约,读懂 ABAP Cloud 的 Model-Driven Architecture
很多做 RAP 的同学,在 ADT 里第一次同时创建 CDS view entity、behavior definition、service definition、service binding 的时候,直觉往往是,为什么对象一下子变这么多。等项目真正推进到发票、销售订单、主数据维护、审批动作、事件集成这些场景,就会慢慢体会到,这套做…...

PIC18F4550微控制器实现USB大容量存储设备设计
1. USB大容量存储设备设计概述USB大容量存储设备(Mass Storage Device,MSD)已成为现代数字生活中不可或缺的组成部分。从U盘到移动硬盘,这类设备的核心都是基于USB Mass Storage Class协议实现的。本文将深入探讨如何利用PIC18F45…...

5分钟快速上手:Blender 3MF插件让你轻松实现3D打印模型转换
5分钟快速上手:Blender 3MF插件让你轻松实现3D打印模型转换 【免费下载链接】Blender3mfFormat Blender add-on to import/export 3MF files 项目地址: https://gitcode.com/gh_mirrors/bl/Blender3mfFormat 你是否曾经在Blender中精心设计了色彩丰富的3D模型…...

大跨度异型电动挡烟垂壁技术研发与工程应用研究
当前商业综合体、交通枢纽、会展场馆、大型厂房普遍采用大跨度、异形挑空设计,按消防规范需设置挡烟垂壁划分防烟分区,控制烟气蔓延。常规直线型、小跨度挡烟垂壁存在易变形、异型适配差、漏烟、运行不稳、验收难等问题,大跨度异型电动挡烟垂…...

离线环境下的高效远程开发:手把手搭建VS Code Remote-SSH离线开发环境
1. 为什么需要离线远程开发环境 在不少企业研发场景中,开发机往往处于严格的内网隔离环境。我去年参与过一个军工项目,所有开发设备都禁止连接互联网,第一次遇到这种情况时,传统在线安装方式完全失效,团队花了整整两天…...

双模型工作流架构解析:从原理到实践,构建高效AI应用
1. 项目概述:双模型工作流的魅力与挑战最近在GitHub上看到一个挺有意思的项目,叫cait52099/openclaw-dual-model-workflow。光看名字,openclaw(开放之爪)和dual-model-workflow(双模型工作流)这…...