Django 简单图书管理系统
一、图书需求
1. 书籍book_index.html中有超链接:查看所有的书籍列表book_list.html页面
2. 书籍book_list.html中显示所有的书名,有超链接:查看本书籍详情book_detail.html(通过书籍ID)页面
3. 书籍book_detail.html中书的作者和出版社,有超链接:作者详情author_detail.html(通过书籍ID)和出版社详情publisher_detail.html(通过书籍ID)页面
4. 书籍book_list.html中添加图书超链接,book_add.html
5. 书籍book_list.html中修改图书超链接,book_edit.html
6. 书籍book_list.html中删除图书超链接,book_delete.html
二、实现步骤
1、创建每个模块的模型models.py
2、创建每个模块的html页面
3、创建每个模块的视图函数views.py
4、编写每个模块的子路由urls.py
5、运行测试每个模块访问http://127.0.0.1:8000/book/detail/1http://127.0.0.1:8000/book/list/http://127.0.0.1:8000/book/index/.....
注意:分模块操作
三、数据表关系
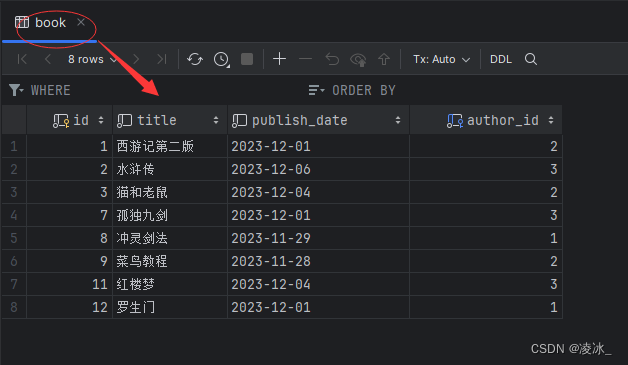
书籍表 Book:title 、 pub_date 、 publisher(多对多) 、 author(外键,多对一)
出版社表 Publisher:name 、address、city 、state_province、 country、website
作者表 Author:first_name、 last_name、 email、 gender
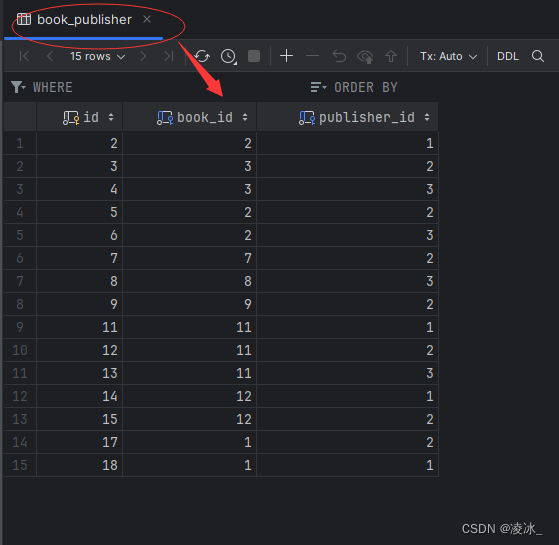
注意:自动生成中间表 book_publisher
四、创建bookitem项目

在控制台执行子应用: python manage.py startapp book
五、编码显示
(1)模型层models.py
from django.db import models# Create your models here.
#作者数据模型
class Author(models.Model):first_name=models.CharField(max_length=30)last_name=models.CharField(max_length=30)email=models.EmailField()# gender=models.BooleanField(default=True)gender_choices=((0,'女'),(1,'男'),(2,'保密'),)gender=models.SmallIntegerField(choices=gender_choices)class Meta:db_table='author'verbose_name='作者'verbose_name_plural=verbose_namedef __str__(self):return self.first_name+self.last_name
from django.db import models# Create your models here.
#出版社数据模块
class Publisher(models.Model):name=models.CharField(max_length=30)address=models.CharField(max_length=100)city=models.CharField(max_length=30)state_province=models.CharField(max_length=30)country=models.CharField(max_length=30)website=models.URLField()class Meta:db_table = 'publisher'verbose_name = '出版社'verbose_name_plural = verbose_namedef __str__(self):return self.namefrom django.db import models
from author.models import Author #导入数据模型
from publisher.models import Publisher# Create your models here.
# 书籍数据模型
class Book(models.Model):title=models.CharField(max_length=100,verbose_name='书名')publish_date=models.DateField(verbose_name='出版时间')#FK关联#fk:book:Author作者数据模型=N:1(多对一)author=models.ForeignKey(Author,on_delete=models.PROTECT,verbose_name='作者')#多对多 book:Publisher 出版社数据模型(多对多)publisher=models.ManyToManyField(Publisher,verbose_name='出版社')class Meta:db_table = 'book'verbose_name = '书籍'verbose_name_plural = verbose_namedef __str__(self):return self.title数据迁移,生成相关表
在终端依次执行命令
python manage.py makemigrationspython manage.py migrate
手动添加相关数据


(2)视图层views.py
from django.shortcuts import render
from author.models import *# Create your views here.
#作者详情
def author_detail(request,aid):'''通过aid获取作者详情信息:param request::param aid::return:'''author=Author.objects.get(pk=aid)return  render(request,'author/author_detail.html',{'author':author})
from django.shortcuts import render
from publisher.models import *
# Create your views here.
#出版社详情
def publisher_detail(request,pid):publisher=Publisher.objects.get(pk=pid)return render(request,'publisher/publisher_detail.html',{"publisher":publisher})from django.shortcuts import render, redirect
from book.models import *
from author.models import *
from publisher.models import *# Create your views here.
# 书籍首页
def book_index(request):return render(request, 'book/book_index.html')# return render(request, 'book/book_home.html')# 书籍列表
def book_list(request):'''获取所有的书籍:param request::return:'''books = Book.objects.all()return render(request, 'book/book_list.html', {'books': books})# 书籍详情
def book_detail(request, bid):'''获取bid对应的书籍:param request::param bid::return:'''book = Book.objects.get(pk=bid)return render(request, 'book/book_detail.html', {'book': book})# 书籍添加
def book_add(request):if request.method == 'POST':# 获取书名,出版时间,作者,出版社列表title = request.POST.get('title')publish_date = request.POST.get('publish_date')author_id = request.POST.get('author')#*列表:getlistpublisher_list = request.POST.getlist('publisher')# 操作数据库存储数据book_obj = Book.objects.create(title=title, publish_date=publish_date, author_id=author_id)# 书籍与出版社的关系表book_obj.publisher.add(*publisher_list)# 跳转到书籍的展示页面# 直接跳转对应的列表数据,使用别名name=listreturn redirect('../list')# 获取当前系统所有的出版社和作者信息publishers = Publisher.objects.all()# print(publishers)authors = Author.objects.all()# print(authors)#返回添加页面return render(request, 'book/book_add.html', locals())# 书籍编辑
def book_edit(request, bid):'''获取bid对应的书籍:param request::param bid::return:'''if request.method == 'POST':# 获取书名,出版时间,作者,出版社列表title = request.POST.get('title')publish_date = request.POST.get('publish_date')author_id = request.POST.get('author')# *列表:getlistpublisher_list = request.POST.getlist('publisher')# 操作数据库修改数据Book.objects.filter(pk=bid).update(title=title,publish_date=publish_date,author_id=author_id)# 修改第三张表book_obj=Book.objects.filter(pk=bid).first()# 修改出版社列表book_obj.publisher.set(publisher_list)# 跳转到书籍的展示页面# 直接跳转对应的列表数据,使用别名name=listreturn redirect('../list')# 获取当前用户想要编辑的书籍对象,展示给用户看edit_obj = Book.objects.filter(pk=bid).first()# 获取当前系统所有的出版社和作者信息publishers = Publisher.objects.all()# print(publishers)authors = Author.objects.all()# print(authors)return render(request, 'book/book_edit.html', locals())# 书籍删除
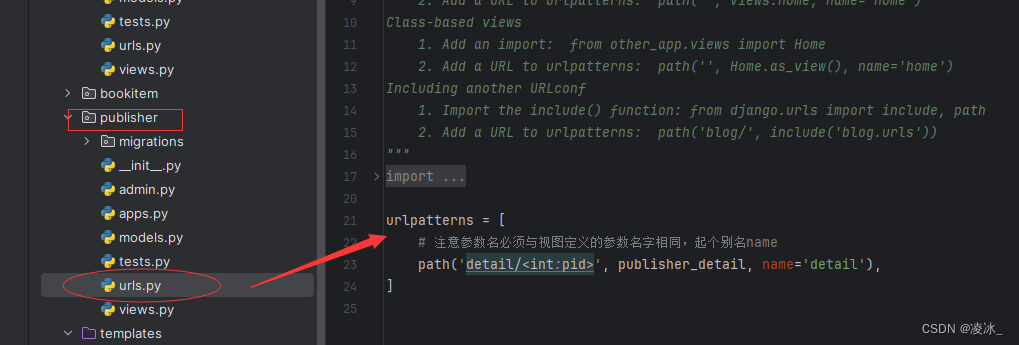
def book_delete(request, bid):#删除书籍Book.objects.filter(pk=bid).delete()# 跳转到书籍的展示页面# 直接跳转对应的列表数据,使用别名name=listreturn redirect('../list')(3)路由层urls.py

from django.contrib import admin
from django.urls import path
from book.views import *  #导入视图urlpatterns = [path('index/', book_index, name='index'),path('list/', book_list, name='list'),# 注意参数名必须与视图定义的参数名字相同,起个别名namepath('detail/<int:bid>', book_detail, name='detail'),#添加书籍path('add/', book_add, name='add'),# 注意参数名必须与视图定义的参数名字相同,起个别名name#修改书籍path('edit/<int:bid>', book_edit, name='edit'),# 删除书籍path('delete/<int:bid>', book_delete, name='delete'),
]

from django.contrib import admin
from django.urls import path, includeurlpatterns = [#path('author/', include(('author.urls','author'),namespace='author')), #子路由authorpath('book/', include(('book.urls','book'),namespace='book')), #子路由bookpath('publisher/', include(('publisher.urls','publisher'),namespace='publisher')), #子路由publisherpath('admin/', admin.site.urls), #后台管理路由
]
(4)模板页面html
(1) 首页页面
<!DOCTYPE html>
<html lang="en">
<head><meta charset="UTF-8"><title>Title</title>
</head>
<body><h1>书籍首页</h1><hr/>{# book命名空间 ,list是别名 #}<a href="{% url 'book:list' %}">查看所有的书籍</a>
</body>
</html>
(2) 图书展示页面
<!DOCTYPE html>
<html lang="en">
<head><meta charset="UTF-8"><title>Title</title>{# css #}{% block extcss %}<!-- 新 Bootstrap4 核心 CSS 文件 --><link rel="stylesheet" href="https://cdn.staticfile.org/twitter-bootstrap/4.3.1/css/bootstrap.min.css">{% endblock %}{% block extJs %}<!-- jQuery文件。务必在bootstrap.min.js 之前引入 --><script src="https://cdn.staticfile.org/jquery/3.2.1/jquery.min.js"></script><!-- bootstrap.bundle.min.js 用于弹窗、提示、下拉菜单,包含了 popper.min.js --><script src="https://cdn.staticfile.org/popper.js/1.15.0/umd/popper.min.js"></script><!-- 最新的 Bootstrap4 核心 JavaScript 文件 --><script src="https://cdn.staticfile.org/twitter-bootstrap/4.3.1/js/bootstrap.min.js"></script>{% endblock %}
</head>
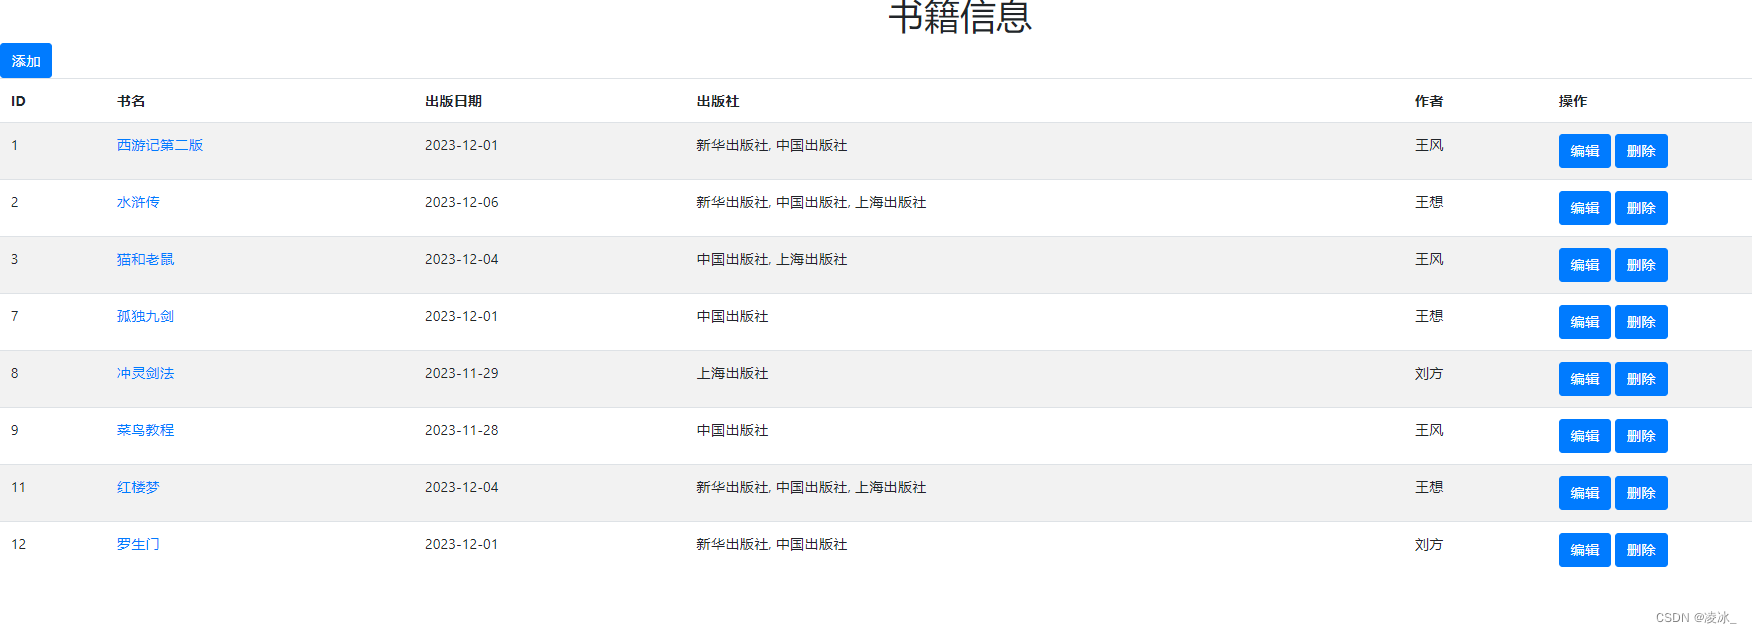
<body><h1 class="text-center">书籍信息</h1><a href="{% url 'book:add' %}" class="btn btn-primary btn-xs">添加</a><br><table class="table table-hover table-striped"><thead><tr><th>ID</th><th>书名</th><th>出版日期</th><th>出版社</th><th>作者</th><th>操作</th></tr></thead><tbody>{% for book in books %}<tr><td>{{ book.pk }}</td><td><a href="{% url 'book:detail' book.id %}">{{ book.title }}</a></td>{#格式化日期#}<td>{{ book.publish_date|date:'Y-m-d' }}</td><td>{% for publish in book.publisher.all %}{# 判断是最后一个不加,#}{% if forloop.last %}{{publish.name }}{# 判断是其他加,#}{% else %}{{publish.name }},{% endif %}{% endfor %}</td><td> {{book.author.first_name }}{{book.author.last_name }}</td><td><a href="{% url 'book:edit' book.pk %}" class="btn btn-primary btn-xs">编辑</a><a href="{% url 'book:delete' book.pk %}" class="btn btn-primary btn-xs">删除</a></td></tr>{% endfor %}</tbody></table>
</body>
(3) 图书添加页面
<!DOCTYPE html>
<html lang="en">
<head><meta charset="UTF-8"><title>Title</title>{# css #}{% block extcss %}<!-- 新 Bootstrap4 核心 CSS 文件 --><link rel="stylesheet" href="https://cdn.staticfile.org/twitter-bootstrap/4.3.1/css/bootstrap.min.css">{% endblock %}
</head>
<body><h1 class="text-center">书籍添加</h1><hr/><form action="" method="post">{# 确认html中的form添加模板标签,否则发生异常#}{% csrf_token %}<p>书名:<input type="text" name="title" class="form-control"></p><p>出版日期:<input type="date" name="publish_date" class="form-control"></p><p>出版社:<select name="publisher" id=""  multiple class="form-control">{% for publish_obj in publishers %}<option value="{{ publish_obj.pk }}">{{ publish_obj.name }}</option>{% endfor %}</select></p><p>作者:<select name="author" id=""  class="form-control">{% for author_obj in authors %}<option value="{{ author_obj.pk }}">{{ author_obj.first_name }}{{ author_obj.last_name }}</option>{% endfor %}</select></p><input type="submit" value="新增" class="btn btn-primary btn-block"></form></body>
</html>
(4) 图书修改页面
<!DOCTYPE html>
<html lang="en">
<head><meta charset="UTF-8"><title>Title</title>{# css #}{% block extcss %}<!-- 新 Bootstrap4 核心 CSS 文件 --><link rel="stylesheet" href="https://cdn.staticfile.org/twitter-bootstrap/4.3.1/css/bootstrap.min.css">{% endblock %}
</head>
<body>
<h1 class="text-center">书籍编辑</h1>
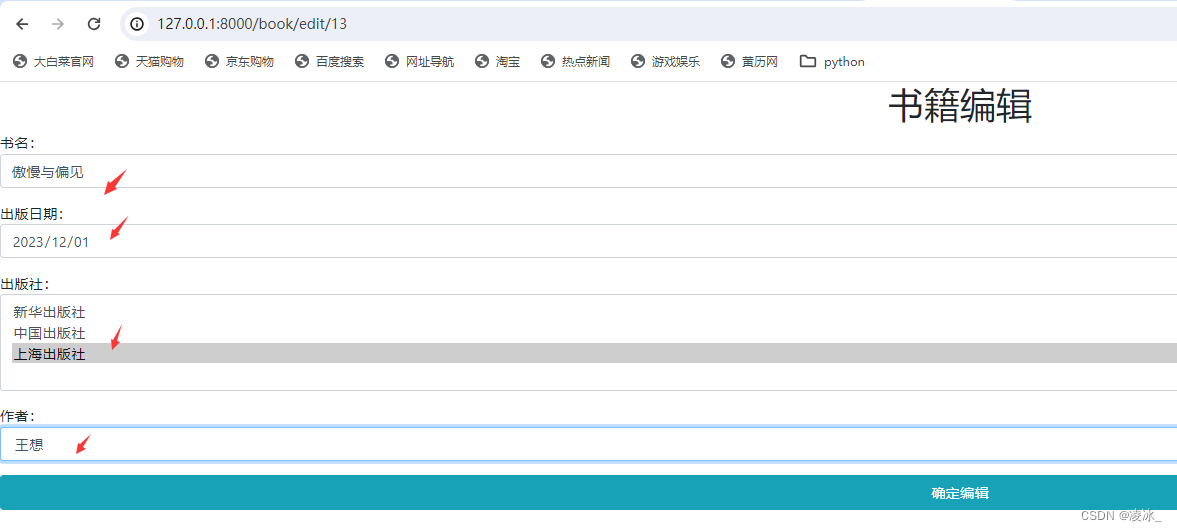
<form action="" method="post">{# 确认html中的form添加模板标签,否则发生异常#}{% csrf_token %}<p>书名:<input type="text" name="title" class="form-control" value="{{ edit_obj.title }}"></p><p>出版日期:<input type="date" name="publish_date" class="form-control"value="{{ edit_obj.publish_date|date:'Y-m-d' }}"></p><p>出版社:<select name="publisher" id="" multiple class="form-control">{% for publish_obj in publishers %}{# 针对当前书籍对象的出版社应该默认选中 #}{% if publish_obj in edit_obj.publisher.all %}<option value="{{ publish_obj.pk }}" selected>{{ publish_obj.name }}</option>{% else %}<option value="{{ publish_obj.pk }}">{{ publish_obj.name }}</option>{% endif %}{% endfor %}</select></p><p>作者:<select name="author" id="" class="form-control">{% for author_obj in authors%}{% if author_obj == edit_obj.author %}<option value="{{ author_obj.pk }}" selected>{{ author_obj.first_name }}{{ author_obj.last_name }}</option>{% else %}<option value="{{ author_obj.pk }}">{{ author_obj.first_name }}{{ author_obj.last_name }}</option>{% endif %}{% endfor %}</select></p><input type="submit" value="确定编辑" class="btn btn-info btn-block">
</form></body>
</html>(5) 图书详情页面
<!DOCTYPE html>
<html lang="en">
<head><meta charset="UTF-8"><title>Title</title>
</head>
<body><h1>书籍详情页</h1><hr/><div><p>名称:{{ book.title }}</p><p>出版时间:{{ book.publish_date }}</p><p>作者:<a href="{% url 'author:detail' book.author.id %}">{{ book.author.first_name }}{{ book.author.last_name }}</a></p><p>出版社:{% for publisher in book.publisher.all %}<a href="{% url 'publisher:detail' publisher.id  %}">{{ publisher.name}}</a>{# 每个出版社之间加分割|#}{%  if not forloop.last %}|{% endif %}{% endfor %}</p></div></body>
</html>
(6) 作者详情页面
<!DOCTYPE html>
<html lang="en">
<head><meta charset="UTF-8"><title>Title</title>
</head>
<body><h1>作者详情页</h1><hr/><div><p>名字:{{ author.last_name }}{{ author.last_name }}</p><p>性别:{{author.gender }}</p><p>邮箱:{{author.email }}</p></div>
</body>
</html>
(7) 出版社详情页面
<!DOCTYPE html>
<html lang="en">
<head><meta charset="UTF-8"><title>Title</title>
</head>
<body><h1>出版社详情页</h1><hr/><div><p>名字:{{ publisher.name }}</p><p>地址:{{publisher.address }}</p><p>城市:{{publisher.city }}</p><p>省份:{{publisher.state_province }}</p><p>国家:{{publisher.country }}</p><p>网址:{{publisher.website }}</p></div>
</body>
</html>
四、效果
图书信息

图书详情

作者详情

出版社详情

图书添加
单击添加按钮

返回列表显示

图书修改
单击编辑跳转

修改数据
修改后数据显示

图书删除
单击删除按钮
注意:删除书籍信息,相关的中间表的也删除数据。
相关文章:
Django 简单图书管理系统
一、图书需求 1. 书籍book_index.html中有超链接:查看所有的书籍列表book_list.html页面 2. 书籍book_list.html中显示所有的书名,有超链接:查看本书籍详情book_detail.html(通过书籍ID)页面 3. 书籍book_detail.html中书的作者和出版社&…...

C++内存管理和模板初阶
C/C内存分布 请看代码: int globalVar 1; static int staticGlobalVar 1; void Test() {static int staticVar 1;int localVar 1;int num1[10] { 1, 2, 3, 4 };char char2[] "abcd";const char* pChar3 "abcd";int* ptr1 (int*)mallo…...
分布式对象远程通信)
QtRO(Qt Remote Objects)分布式对象远程通信
一、什么是QtRO Qt Remote Objects(QRO)是Qt提供的一种用于实现远程对象通信的机制。 QtRO支持两种类型的通信:RPC(远程过程调用)和LPC(本地进程通信)。 RPC(远程过程调用…...
【K8s】1# 使用kuboard-spray安装K8s集群
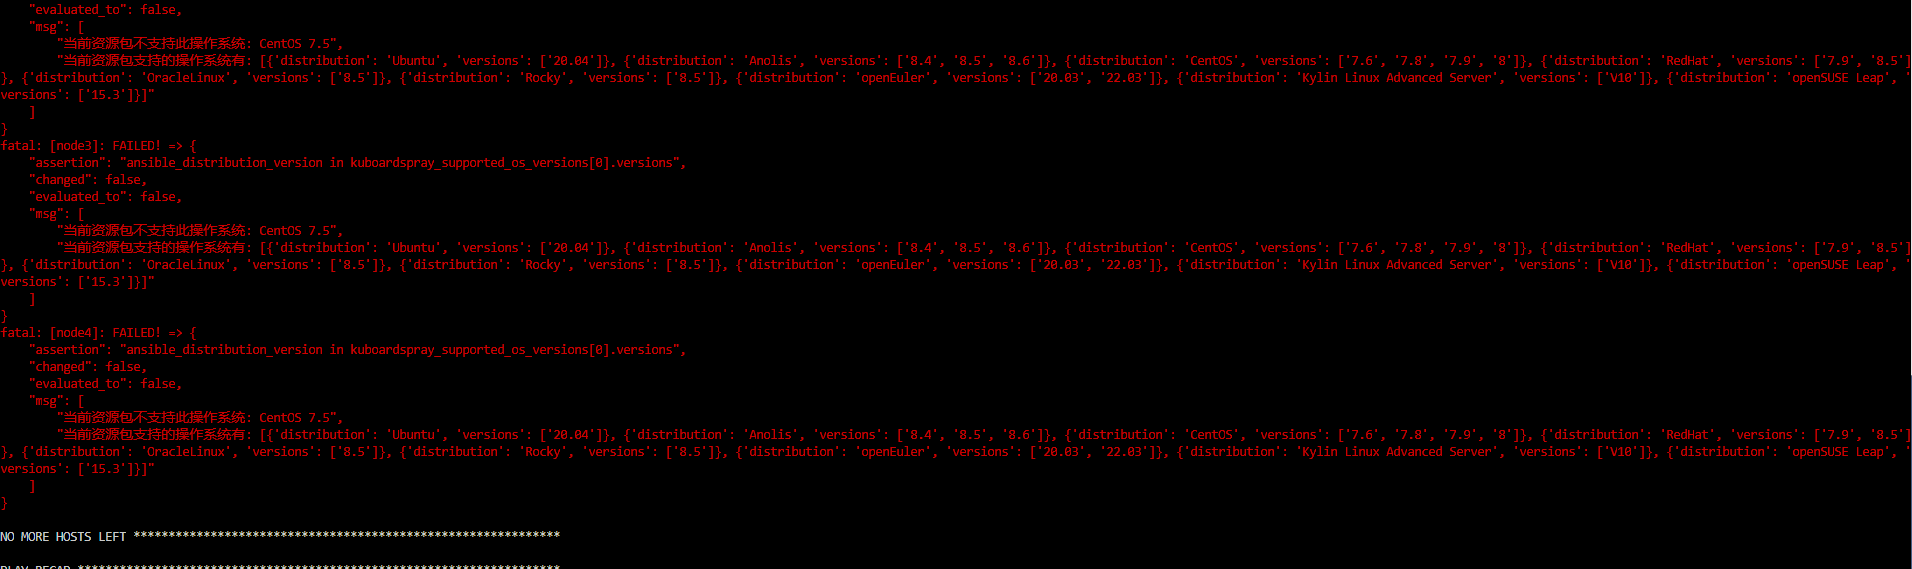
文章目录 搭建k8s集群1.推荐配置1.1.服务器配置1.2.软件版本 2.使用Kuboard-Spray安装k8s集群2.1.配置要求2.2.操作系统兼容性2.3.安装 Kuboard-Spray2.4.加载离线资源包2.5.规划并安装集群2.6.安装成功2.7.访问集群 3.涉及的命令3.1.linux 4.问题汇总Q1:启动离线集…...

leetCode算法—12. 整数转罗马数字
12. 整数转罗马数字 难度:中等 ** 罗马数字包含以下七种字符: I, V, X, L,C,D 和 M。 字符 数值 I 1 V 5 X 10 L 50 C 100 D 500 M 1000 例如, 罗马数字 2 写做 II ,即…...
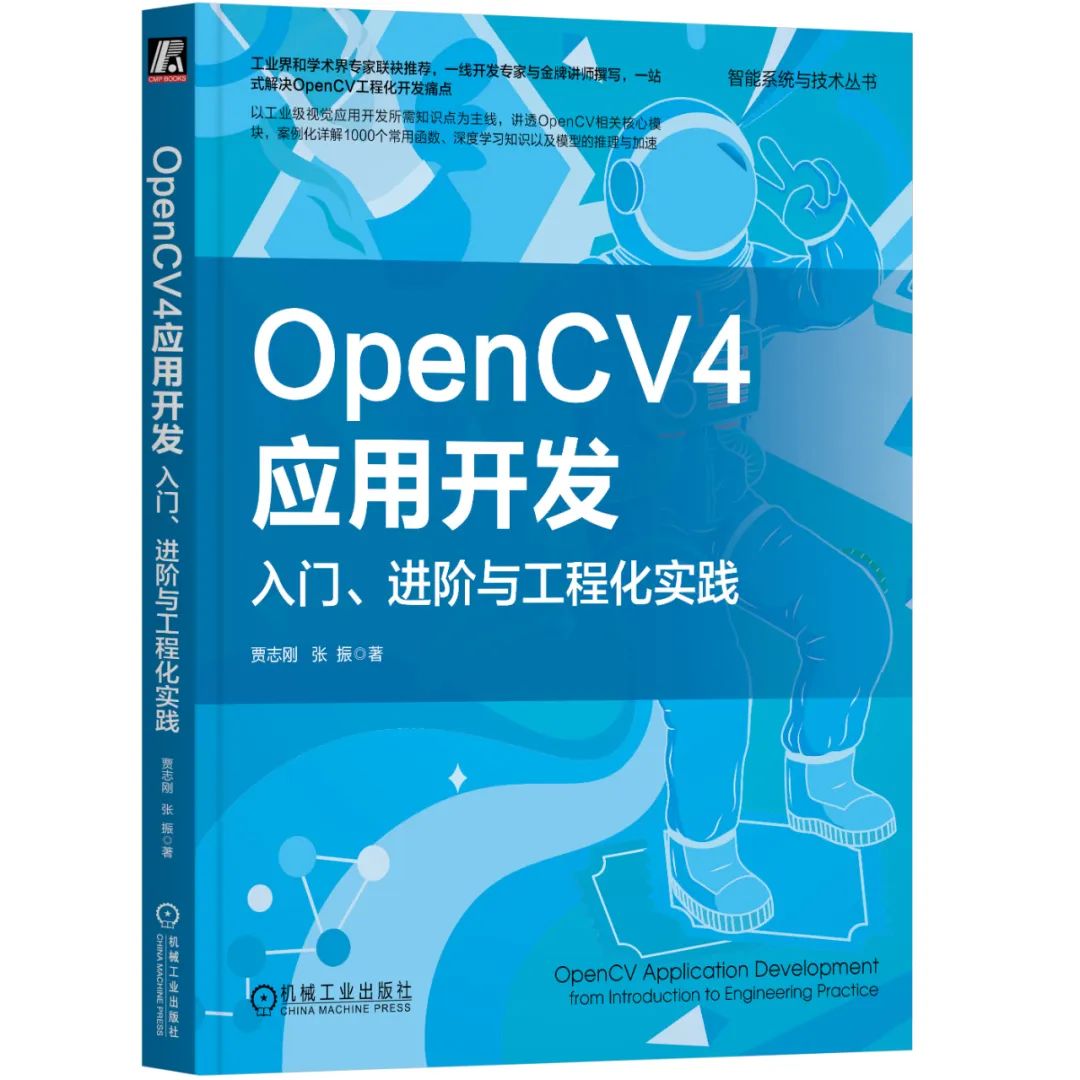
使用OpenCV4实现工业缺陷检测的六种方法
目录 1 机器视觉2 缺陷检测3 工业上常见缺陷检测方法 1 机器视觉 机器视觉是使用各种工业相机,结合传感器跟电气信号实现替代传统人工,完成对象识别、计数、测量、缺陷检测、引导定位与抓取等任务。其中工业品的缺陷检测极大的依赖人工完成,…...

Excel 获取当前行的行数
ROW() 获取当前行 ROW()1 获取当前行然后支持二次开发...

R语言【stringr】——str_detect 检测是否存在字符串的匹配项
Package stringr version 1.5.1 str_detect(string, pattern, negate FALSE) 参数【string】:输入向量。既可以是字符向量,也可以是强制作为一个字符向量。 参数【pattern】:要寻找的模式。默认解释为正则表达式,如 vignette(&…...
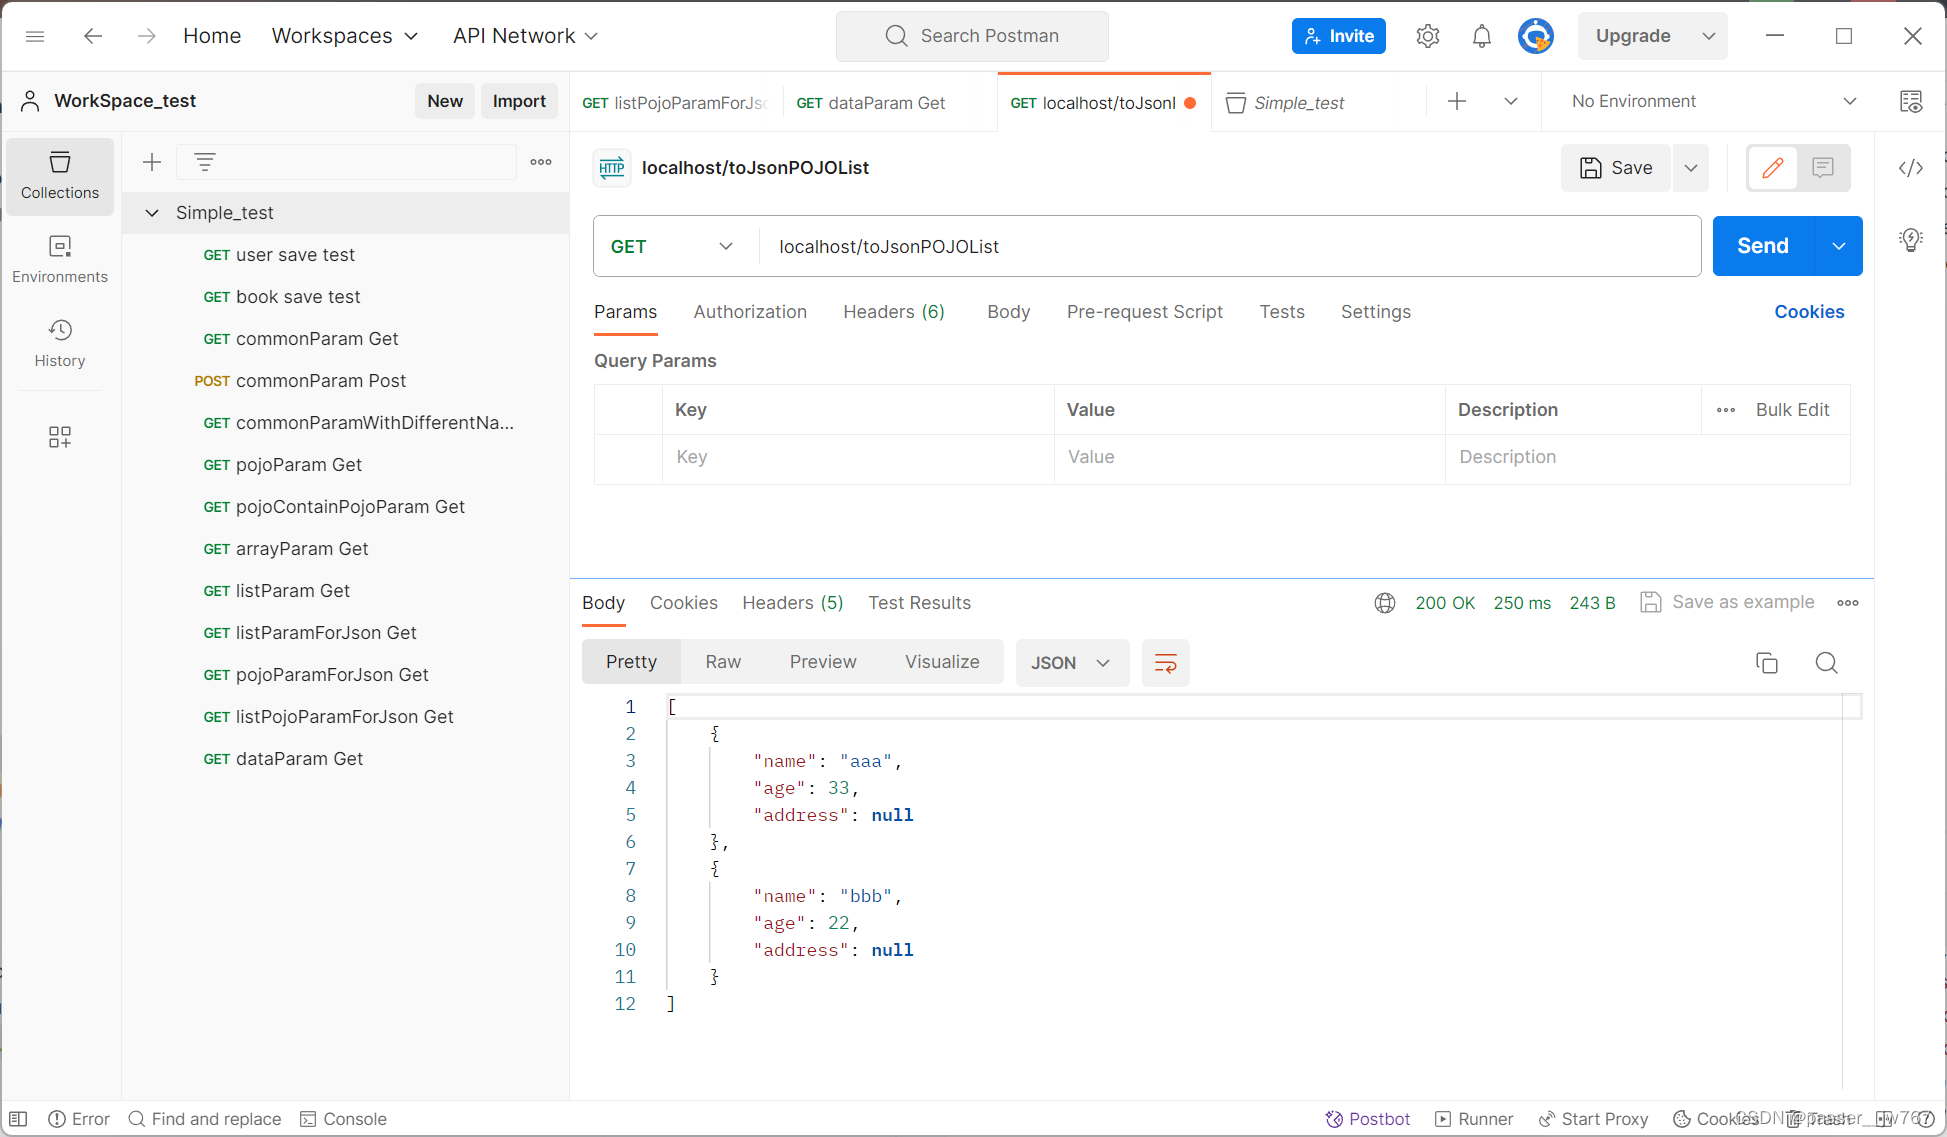
【SpringMVC】SpringMVC的请求与响应
文章目录 0. Tomcat环境的配置1. PostMan工具介绍创建WorkSpace建立新的请求 2. 请求映射路径案例结构与代码案例结构案例代码 案例存在问题解决方案方法方法升级版——配置请求路径前缀注解总结 3. Get请求与Post请求案例结构与案例代码案例结构案例代码 Get请求Post请求接收中…...
Spring Boot3通过GraalVM生成exe执行文件
一、安装GraalVM 1、官网:https://www.graalvm.org/downloads/ 2、配置环境变量 2.1、环境变量必须使用JAVA_HOME,否则会出现问题 2.2、在系统变量配置Path,%JAVA_HOME%\bin,注意必须放在顶部第一位 2.3、配置jdk的环境变量,在P…...

【Amazon 实验②】使用缓存策略及源请求策略,用于控制边缘缓存的行为及回源行为
文章目录 1. 了解缓存策略和源请求策略1.1 使用缓存键和缓存策略 实验:使用CloudFront缓存策略和缓存键控制缓存行为 接上一篇文章【Amazon 实验①】使用 Amazon CloudFront加速Web内容分发,我们现在了解和配置如何使用缓存策略及源请求策略,…...

达梦数据对比工具的部署与使用
1、拷贝达梦软件bin目录到Oracle服务器(root用户) 压缩Linux rh6 x86版本的达梦数据库bin目录,例如压缩文件为dmbin.tar.gz,将文件拷贝到Oracle服务器指定目录并解压(如:/home/oracle/dmbin)&a…...

TLC2543(12位A/D转换器)实现将输入的模拟电压显示到数码管上
代码: #include <reg51.h> #define uchar unsigned char #define uint unsigned int// 数码管0-9 unsigned char seg[] {0x3F, 0x06, 0x5B, 0x4F, 0x66, 0x6D, 0x7D, 0x07, 0x7F, 0x6F}; sbit SDO P1^0; sbit SDI P1^1; sbit CS P1^2; sbit CLK P1^3; s…...

npm的使用技巧
以下是一些NPM(Node Package Manager)的使用技巧: 1. **获取帮助**: - 使用 npm help 或者 npm <command> --help 可以获取关于特定命令的帮助信息。 2. **命令自动完成**: - 在 Bash、Zsh 等 shell 中&…...

MySQL 5.6的新特性
MySQL 5.6是一个主要的版本发布,它在性能、可伸缩性、可靠性和可用性方面引入了多项重要改进和新特性。它在2013年发布,相比于它的前身MySQL 5.5,MySQL 5.6带来了以下关键升级: 优化的InnoDB存储引擎:MySQL 5.6中的Inn…...

大模型重构云计算:AI原生或将改变格局
摘要:随着AI技术的快速发展,大模型正逐渐改变云计算的格局。本文将深入探讨大模型如何重构云计算,并分析其对云计算的影响。 一、开篇引言 近年来,人工智能技术的飞速发展,特别是大模型的崛起,正在对云计算…...

一文讲清什么是TypeScript装饰器以及如何使用TypeScript装饰器
TypeScript 装饰器是什么? 装饰器(Decorator)是TypeScript提供的一个高级语法,它类似于一种特殊类型的声明,可以附加到类声明,方法,访问符,属性或参数上。装饰器主要以函数的形式出…...
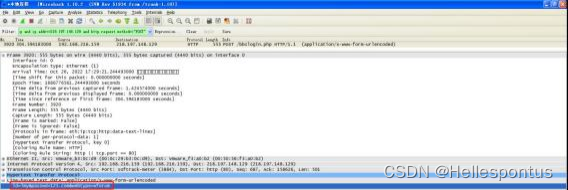
恶意软件样本行为分析——Process Monitor和Wireshark
1.1 实验名称 恶意软件样本行为分析 1.2 实验目的 1) 熟悉 Process Monitor 的使用 2) 熟悉抓包工具 Wireshark 的使用 3) VMware 的熟悉和使用 4) 灰鸽子木马的行为分析 1.3 实验步骤及内容 第一阶段:熟悉 Process Monitor 的使用 利用 Process …...
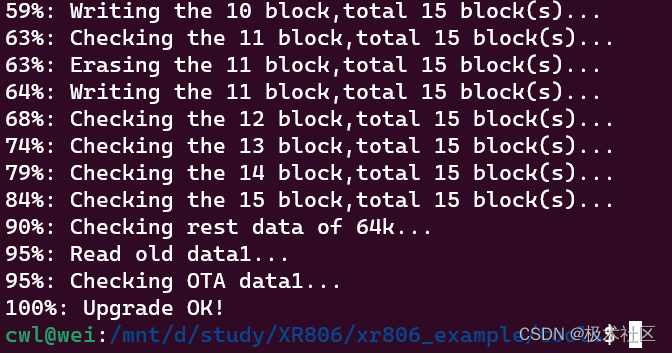
【XR806开发板试用】通过http请求从心知天气网获取天气预报信息
1. 开发环境搭建 本次评测开发环境搭建在windows11的WSL2的Ubuntu20.04中,关于windows安装WSL2可以参考文章: Windows下安装Linux(Ubuntu20.04)子系统(WSL) (1) 在WSL的Ubuntu20.04下安装必要的工具的. 安装git: sudo apt-get install git …...

NPM介绍与使用
什么是NPM? NPM(Node Package Manager)是一个强大的包管理工具,专门用于Node.js应用程序的依赖管理。它允许开发者轻松地分享、安装、更新和管理项目中使用的库、工具和框架。 NPM的安装 在使用NPM之前,请确保你的机…...

vLLM-v0.17.1开发者案例:VS Code插件集成vLLM实现本地代码补全
vLLM-v0.17.1开发者案例:VS Code插件集成vLLM实现本地代码补全 1. vLLM框架简介 vLLM是一个专为大型语言模型(LLM)设计的高性能推理和服务库,最新发布的v0.17.1版本带来了多项性能优化和功能增强。这个开源项目最初由加州大学伯克利分校的天空计算实验…...

OpenClaw+GLM-4.7-Flash自动化测试:3小时无人值守执行日志分析
OpenClawGLM-4.7-Flash自动化测试:3小时无人值守执行日志分析 1. 为什么选择这个技术组合 上个月团队新上线了一个分布式服务,每天产生近10GB的日志文件。最初我们尝试用传统脚本分析,但发现两个痛点:一是日志格式不统一&#x…...

自媒体人利器:OpenClaw+百川2-13B自动生成短视频脚本
自媒体人利器:OpenClaw百川2-13B自动生成短视频脚本 1. 为什么需要自动化脚本生成工具 作为一个每天需要产出3-5条短视频的自媒体创作者,我经常陷入创意枯竭和重复劳动的困境。传统的工作流程需要手动搜索热点、构思脚本、撰写分镜,这个过程…...

OpenClaw本地知识库:nanobot处理私有化文档问答
OpenClaw本地知识库:nanobot处理私有化文档问答 1. 为什么需要本地知识库助手 去年我接手了一个技术文档整理项目,团队积累了超过2000份内部技术文档、会议纪要和产品说明。每次新人入职或者遇到特定技术问题时,我们都要在这些文档里大海捞…...

X-NUCLEO-IHM02A1双步进电机驱动开发与L6470嵌入式控制实践
1. X-NUCLEO-IHM02A1 电机控制扩展板技术解析与嵌入式驱动开发实践X-NUCLEO-IHM02A1 是意法半导体(STMicroelectronics)推出的高性能双通道步进电机驱动扩展板,专为 STM32 Nucleo 开发平台设计。该板基于 L6470 智能功率级芯片构建࿰…...

Python数据处理:Anything to RealCharacters 2.5D引擎结果分析与可视化
Python数据处理:Anything to RealCharacters 2.5D引擎结果分析与可视化 1. 引言 作为一名数据分析师,你可能经常遇到这样的场景:团队使用Anything to RealCharacters 2.5D引擎生成了大量转换结果,但如何系统性地分析这些结果的质…...

python-学生选课成绩系统vue
目录系统架构设计前端实现模块后端API设计数据库表结构关键技术点测试与部署扩展性考虑项目技术支持源码获取详细视频演示 :文章底部获取博主联系方式!同行可合作系统架构设计 采用前后端分离架构: 前端:Vue 3 TypeScript Ele…...

三电平 VSG 构网型变流器仿真分析
三电平 VSG 构网型变流器仿真 仿真使用双闭环控制,svpwm 调制 [1]包含 LC 滤波器 [2]包含中点电位平衡控制 [3]包含负荷投切与离网切换 基本工况:0—3s 功率指令 170kw3-6s 功率指令 140kw电网频率在 1-2s 暂降 0.2hz,vsg 通过 增发有功维持…...

StarRocks新手入门:如何用CloudDM个人版快速验证四种数据模型的特点?
StarRocks数据模型实战指南:用可视化工具快速掌握四大核心特性 刚接触StarRocks时,最让人困惑的莫过于四种数据模型的选择。官方文档虽然详细,但缺乏直观对比。本文将带你使用CloudDM个人版,通过同一组测试数据在四种模型下的不同…...

IPTV抓包工具合集:Wireshark、parse_cap_channels_v2、IPTV全能工具箱
分享一个刚刚大佬那里转存过来的IPTV工具箱v5.2版本。先叠个甲,这仅仅是一个单纯的源检测和管理工具分享,不包含任何IPTV源地址,也不涉及任何违规教程。如果版主认为违规请直接删帖。 这个软件主打一个省心。不需要你自己有服务器,…...