springboot复习(黑马)
学习目标
基于SpringBoot框架的程序开发步骤
熟练使用SpringBoot配置信息修改服务器配置
基于SpringBoot的完成SSM整合项目开发
一、SpringBoot简介
1. 入门案例
问题导入
SpringMVC的HelloWord程序大家还记得吗?
SpringBoot是由Pivotal团队提供的全新框架,其设计目的是用来简化Spring应用的初始搭建以及开发过程
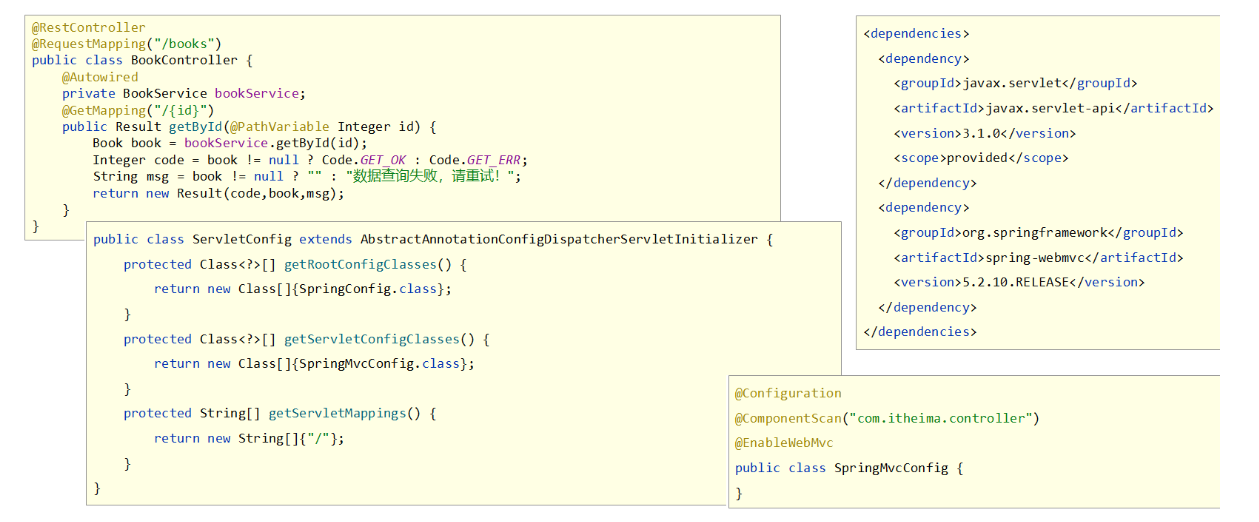
原生开发SpringMVC程序过程
1.1 入门案例开发步骤
环境准备
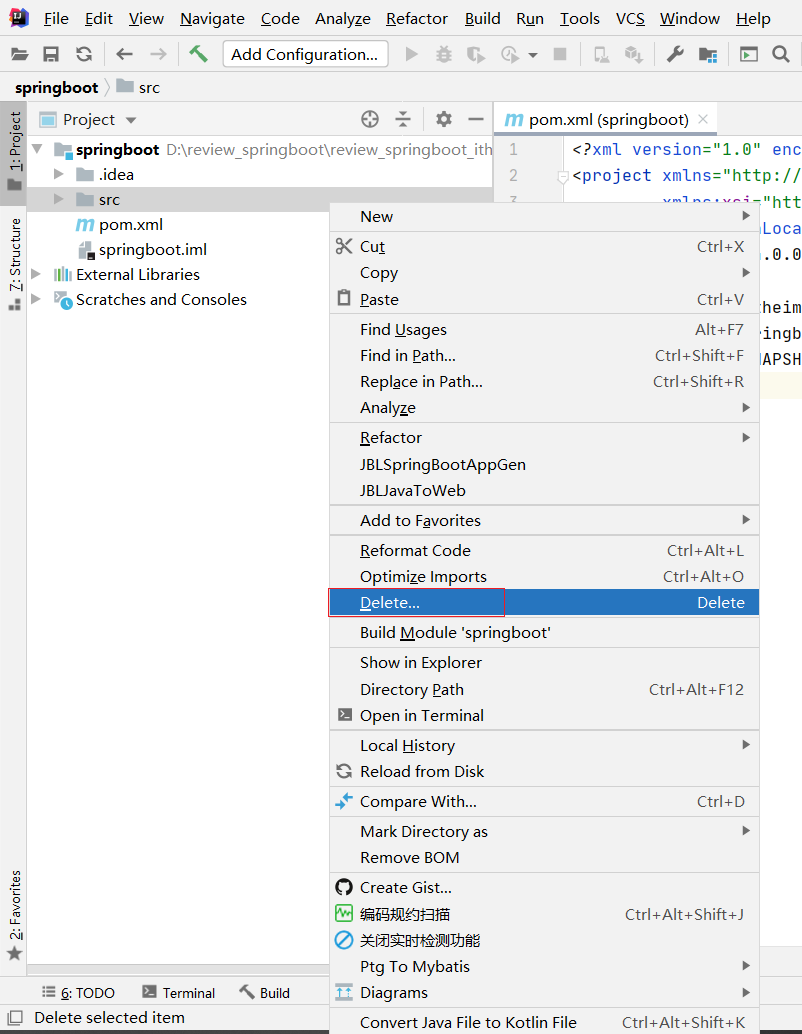
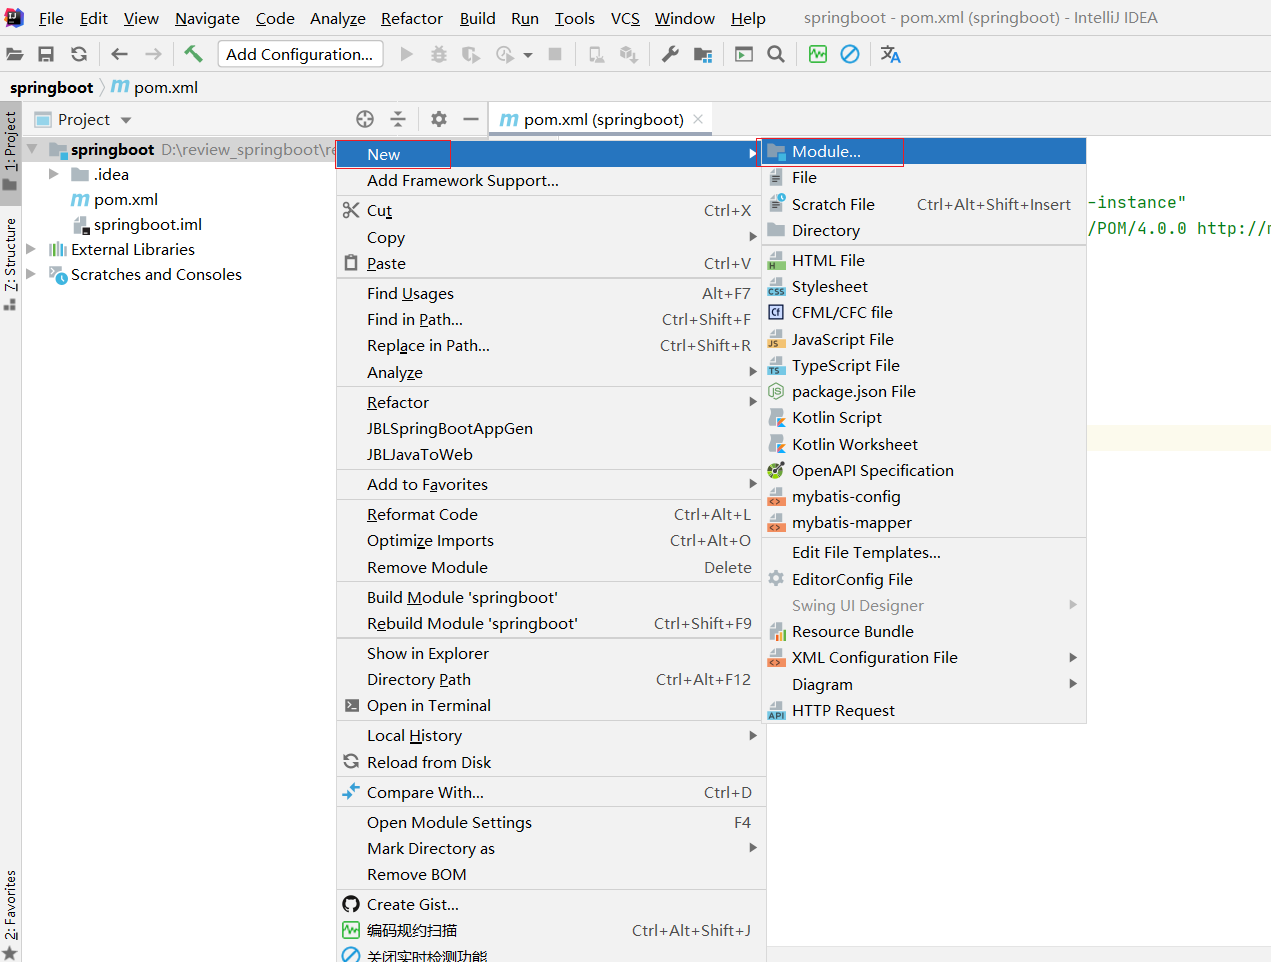
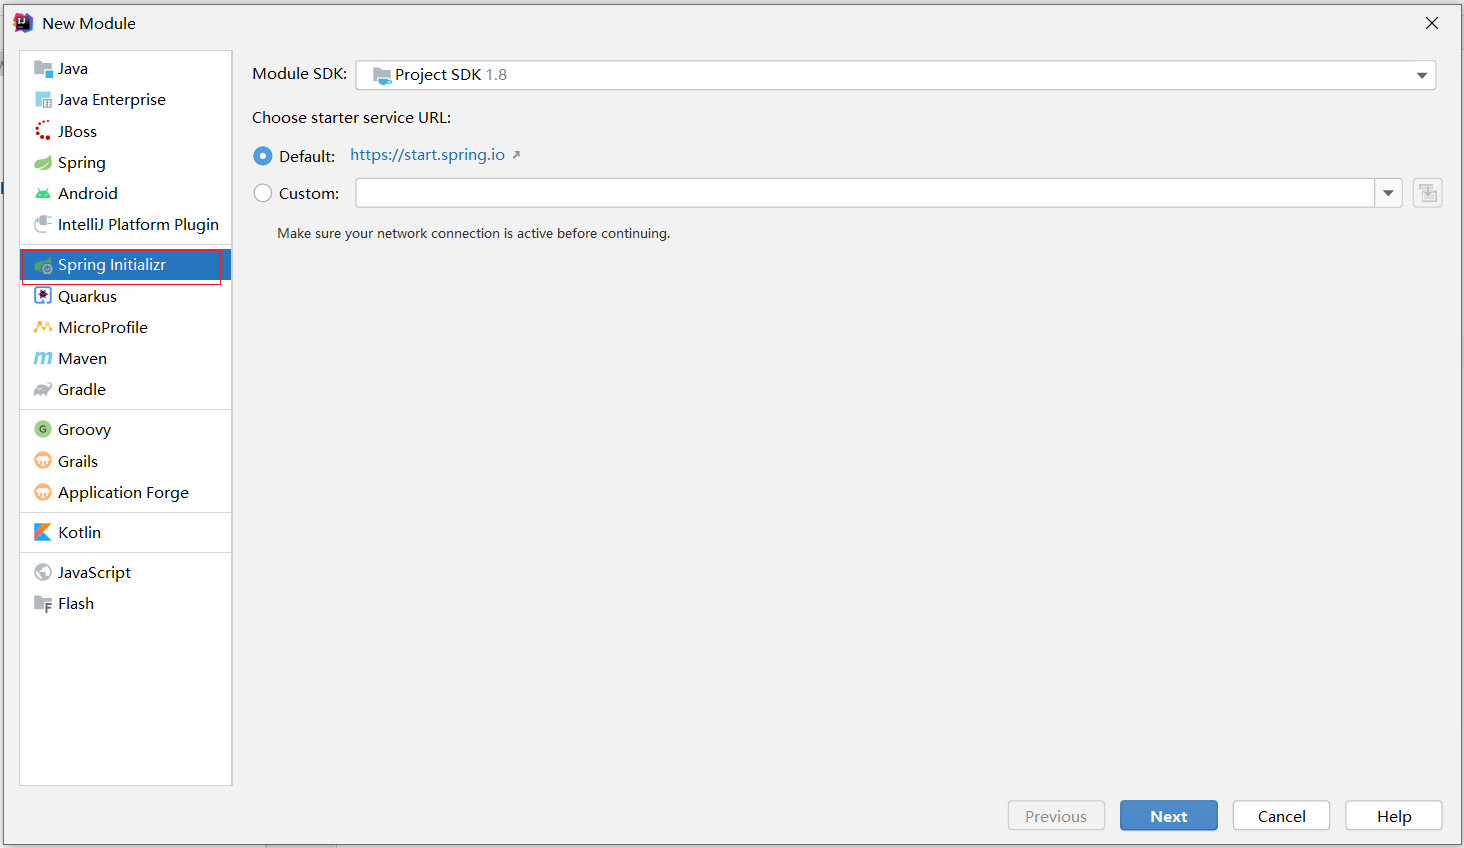
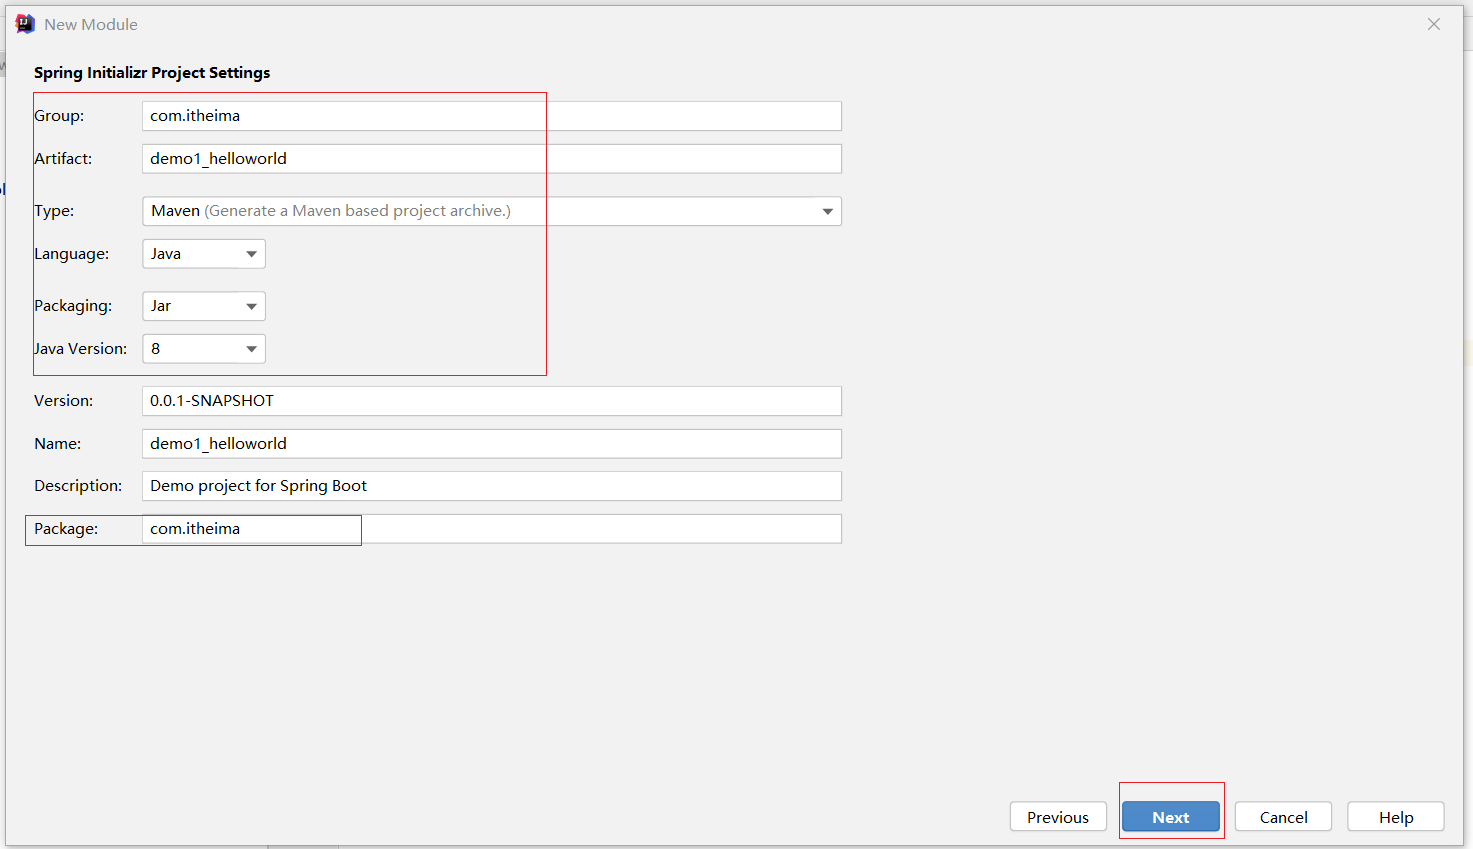
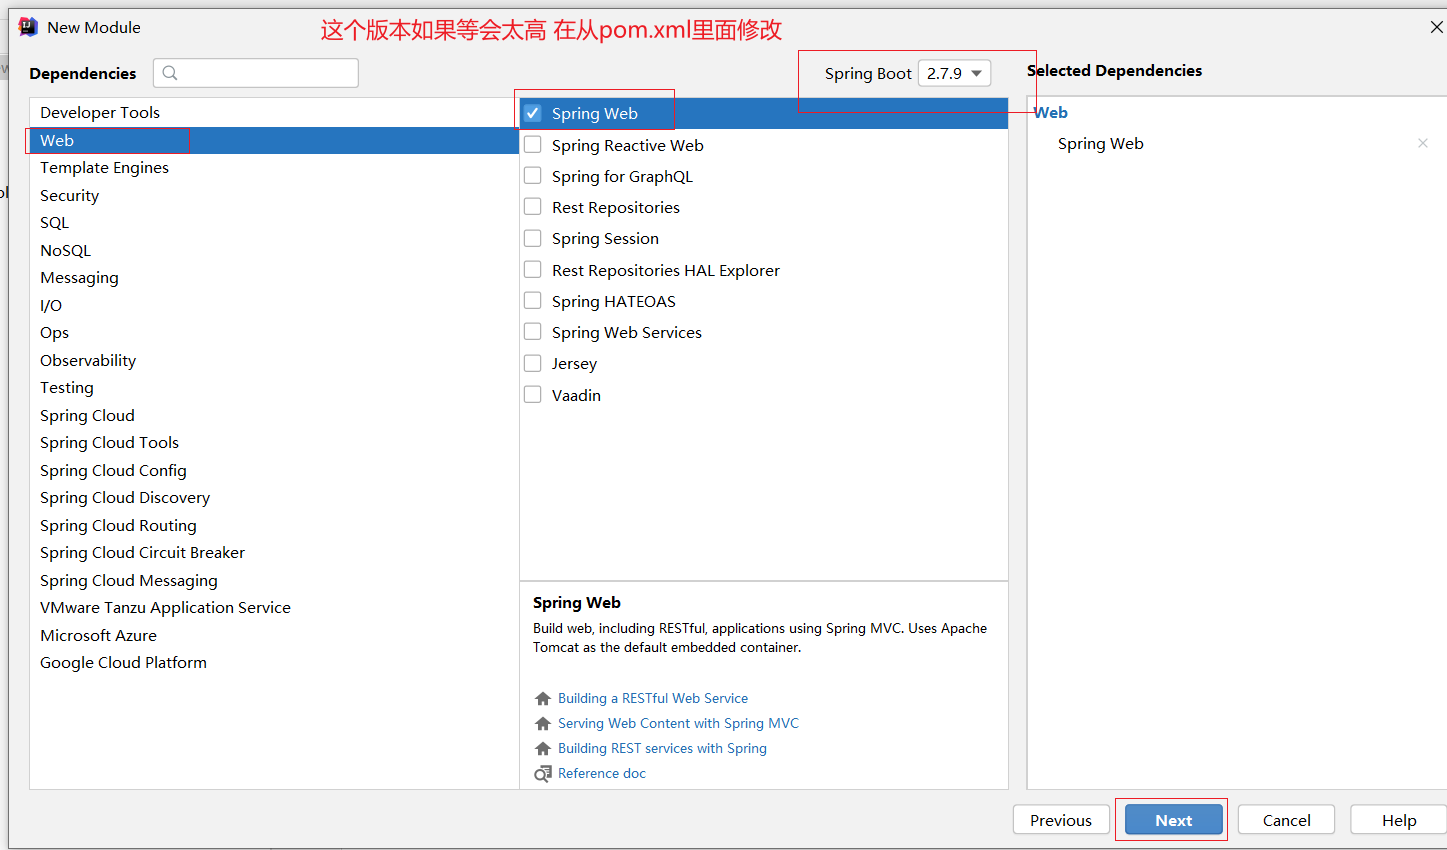
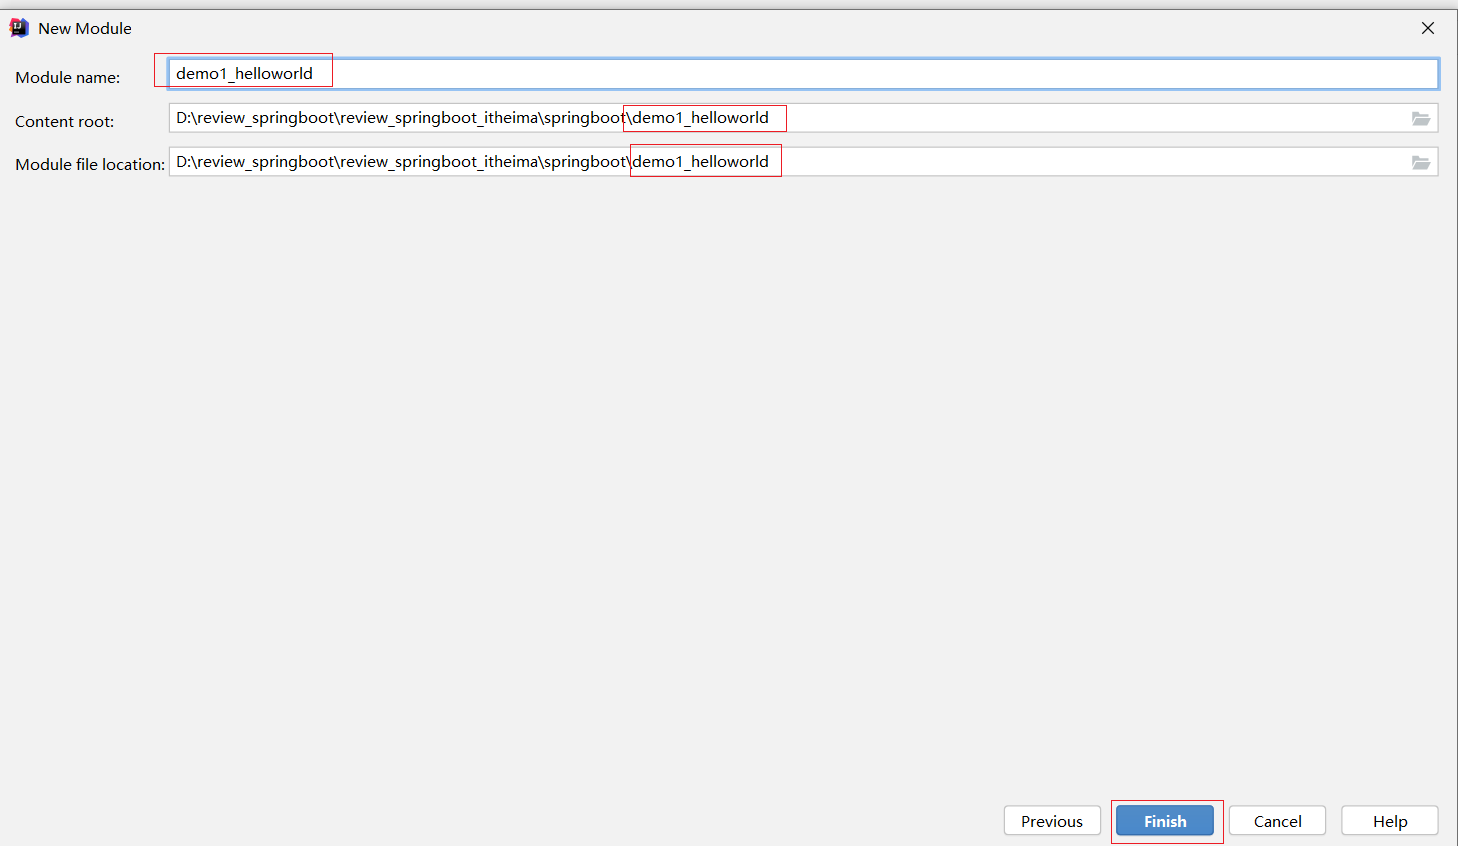
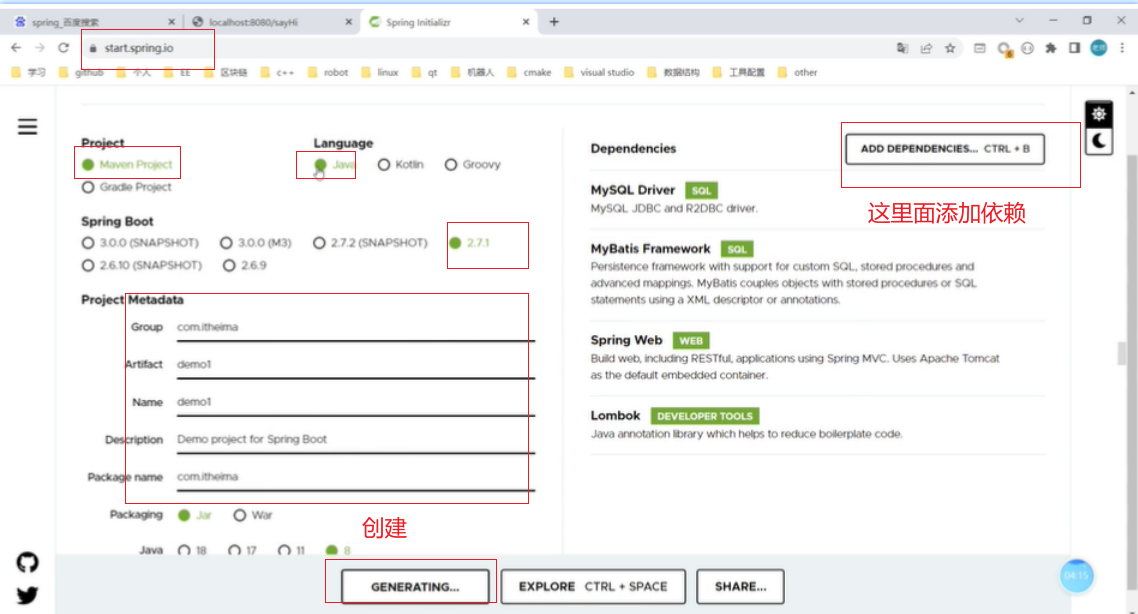
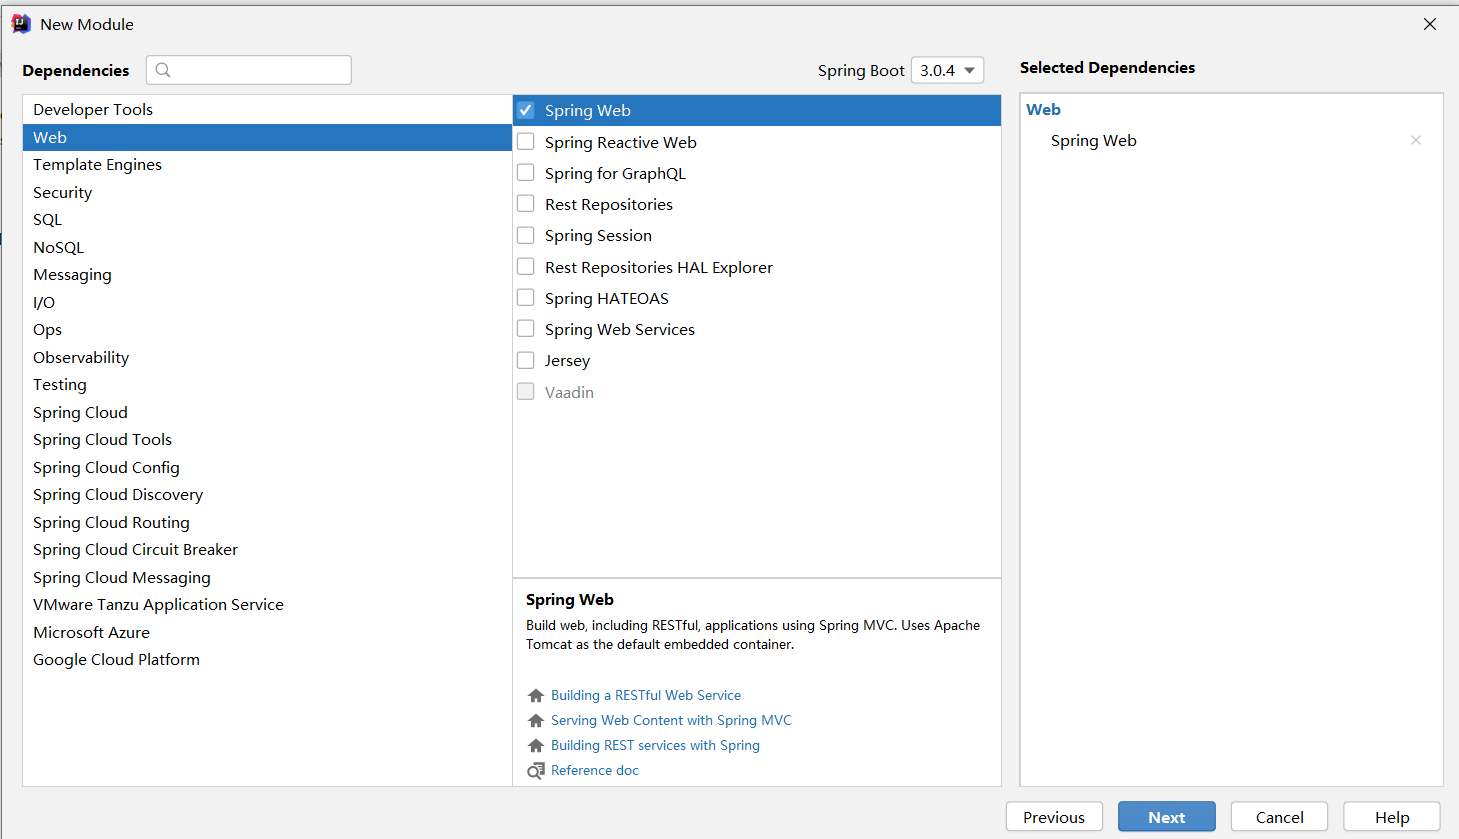
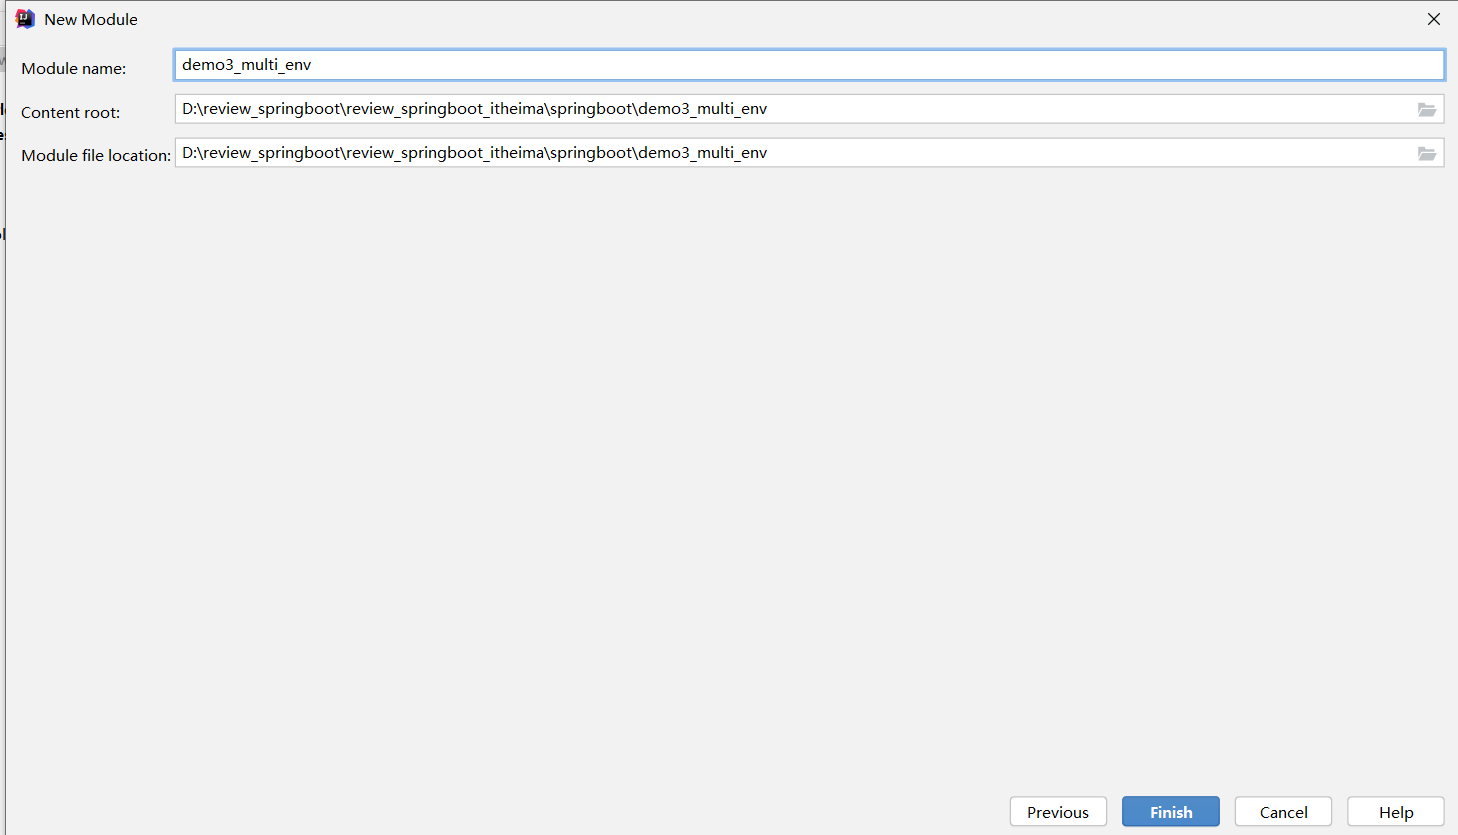
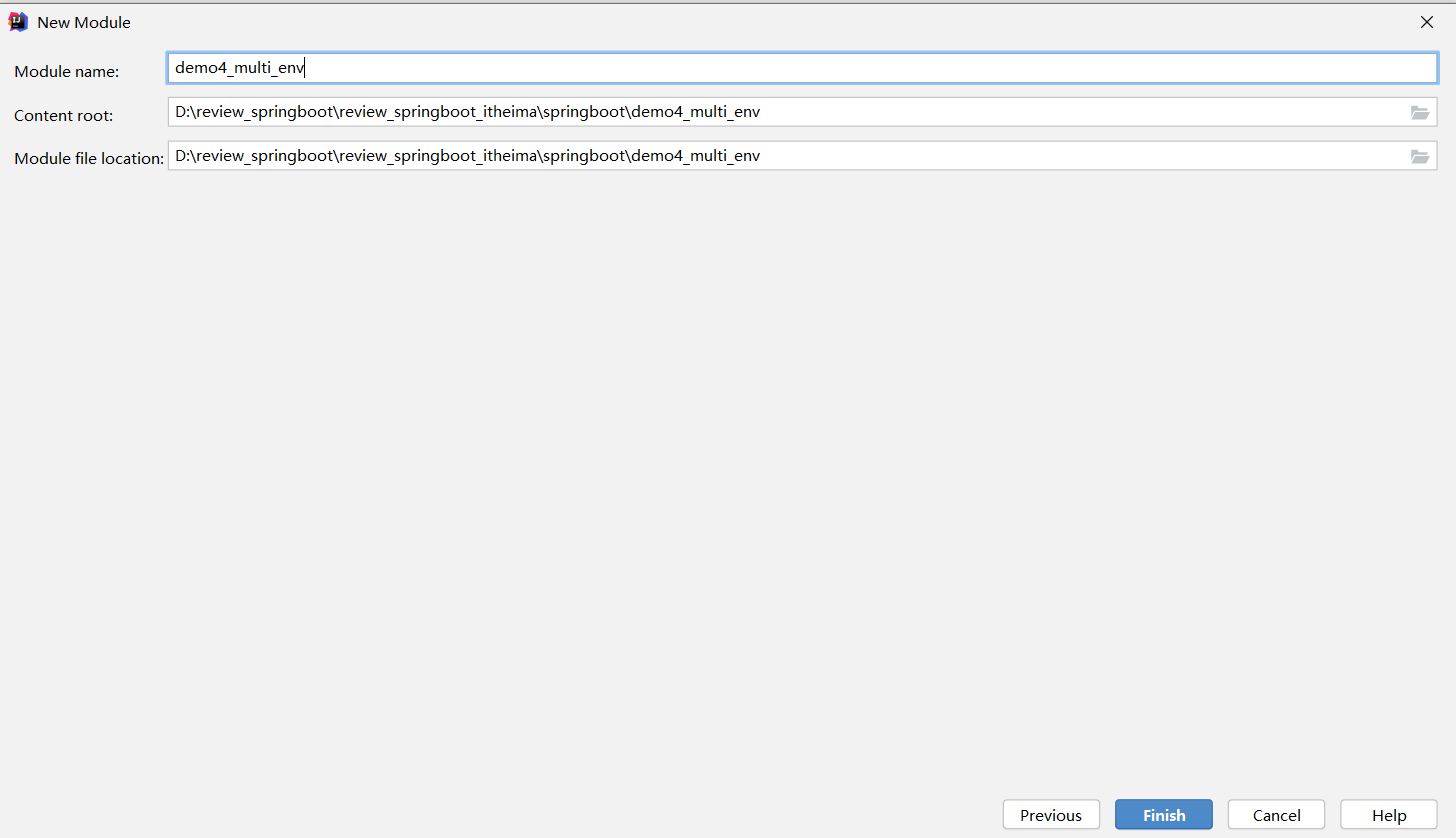
①:创建新模块,选择Spring初始化,并配置模块相关基础信息
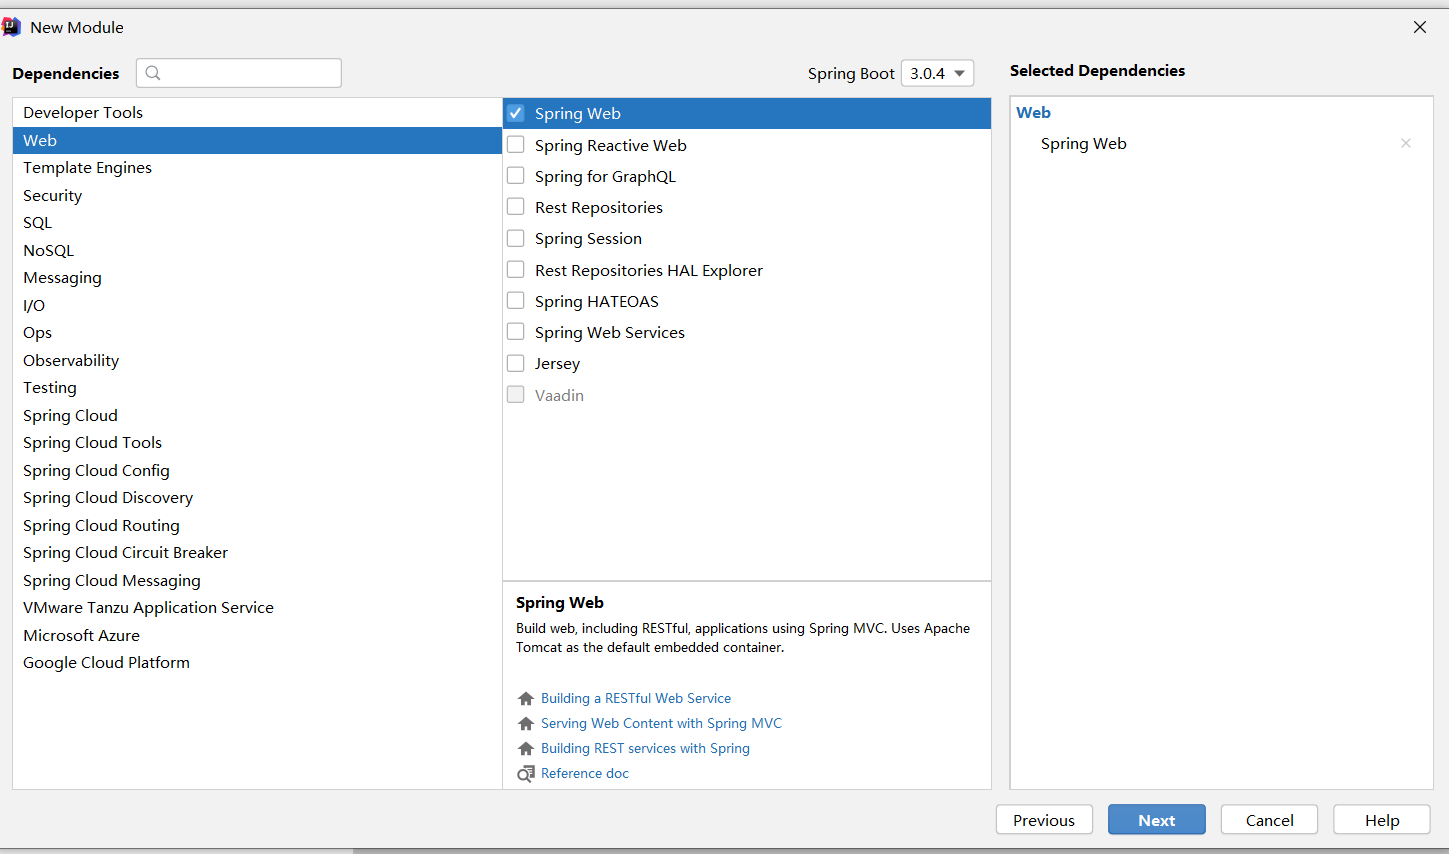
②:选择当前模块需要使用的技术集
③:开发控制器类
@RestController
public class Controller01 {@RequestMapping("/sayHi")public String sayHi(){System.out.println("hi...");return "hi ... springboot...";}
}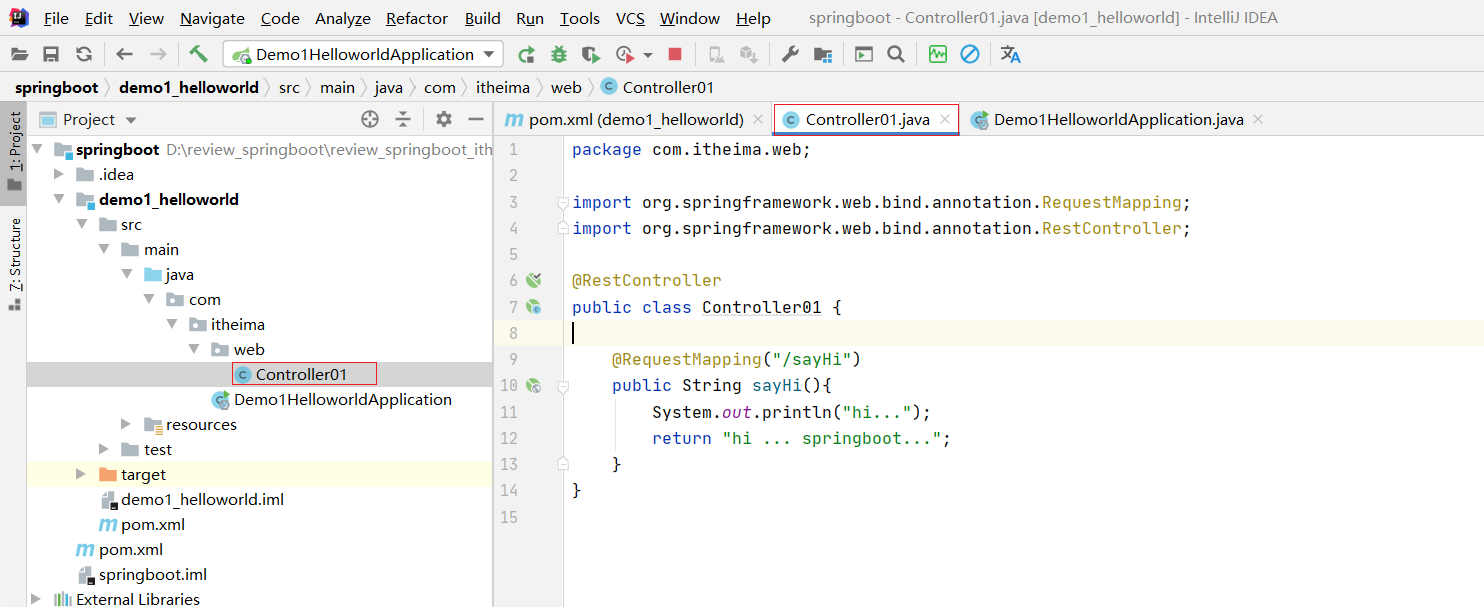
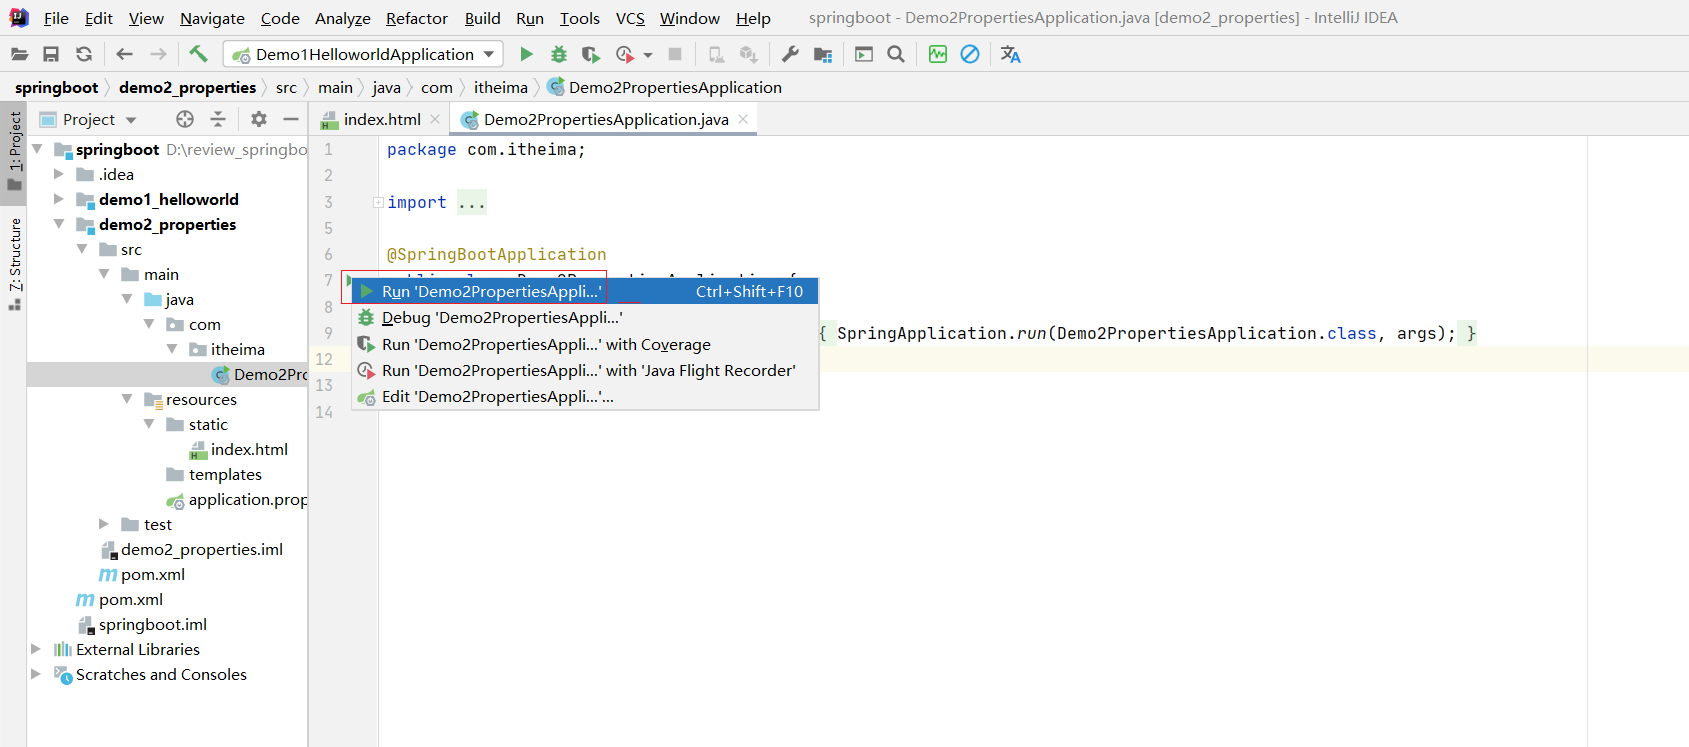
④:运行自动生成的Application类
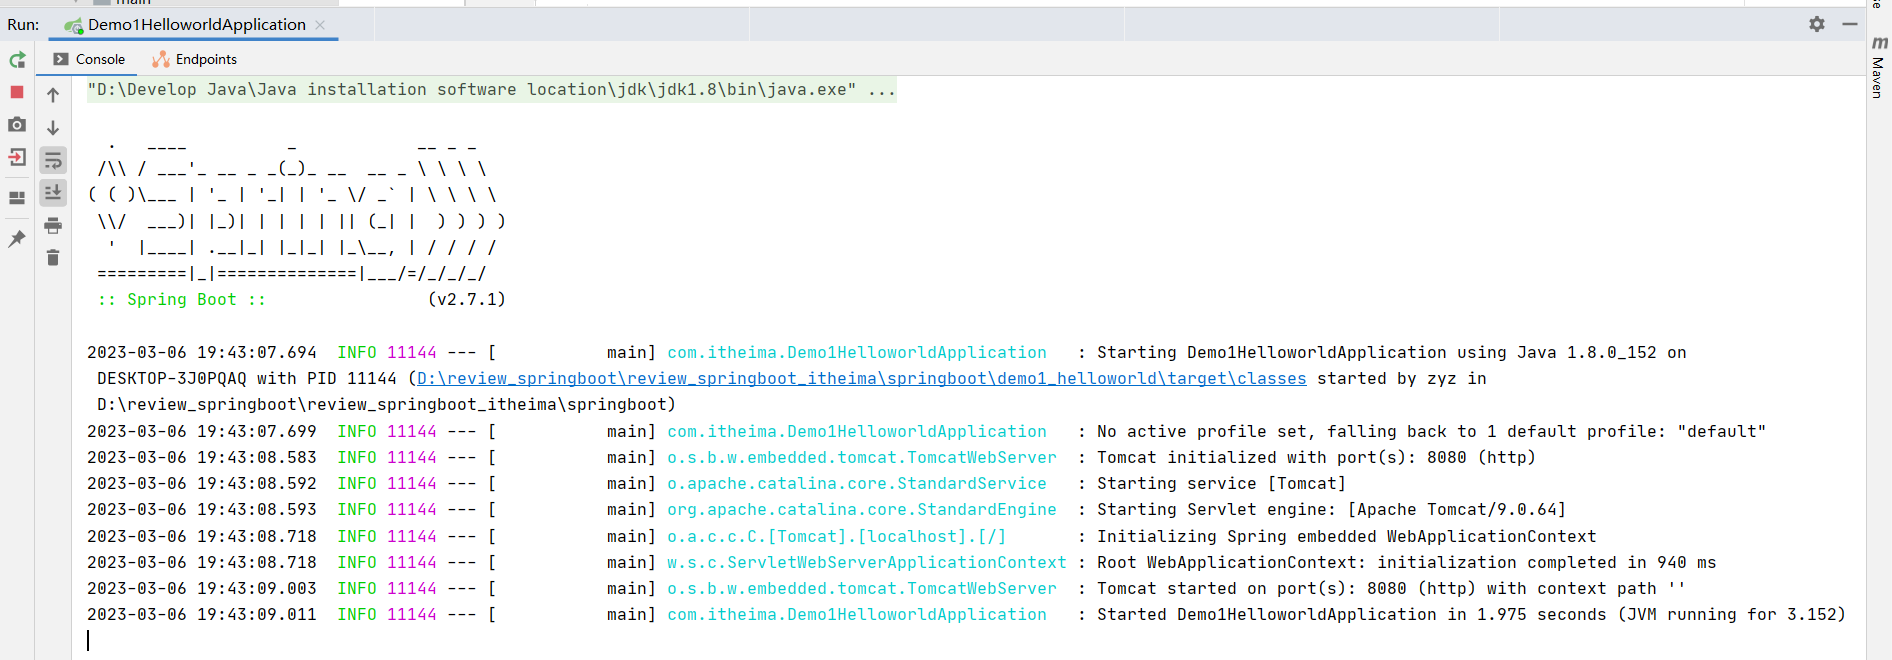
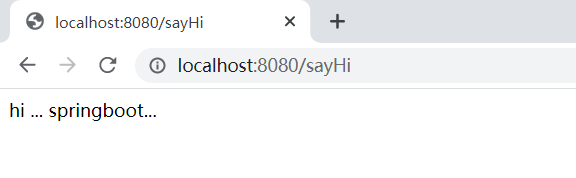
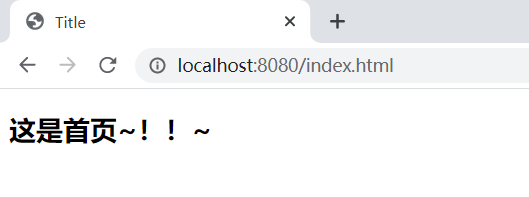
访问页面
重新启动
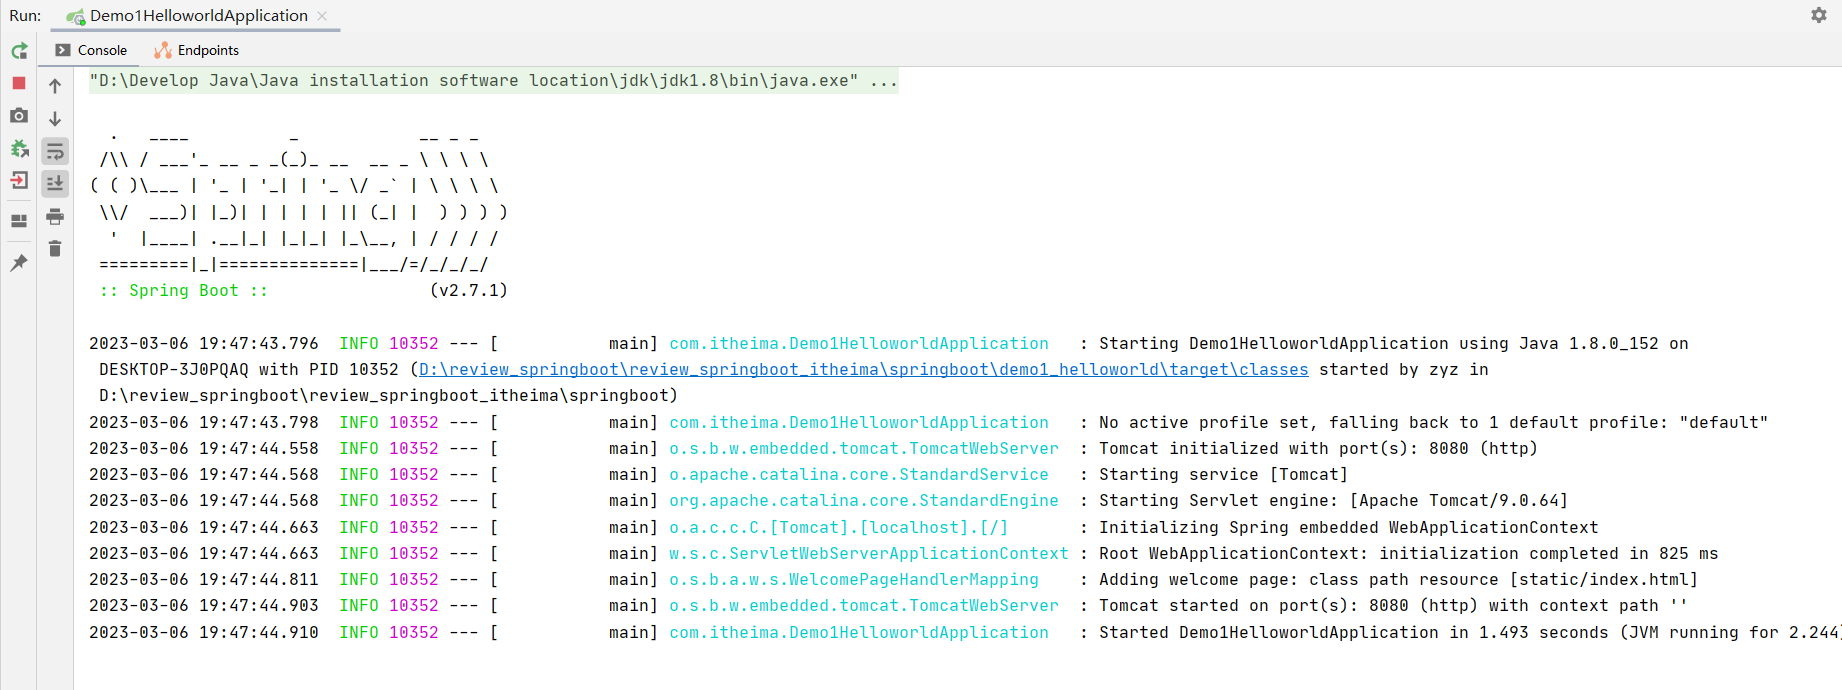
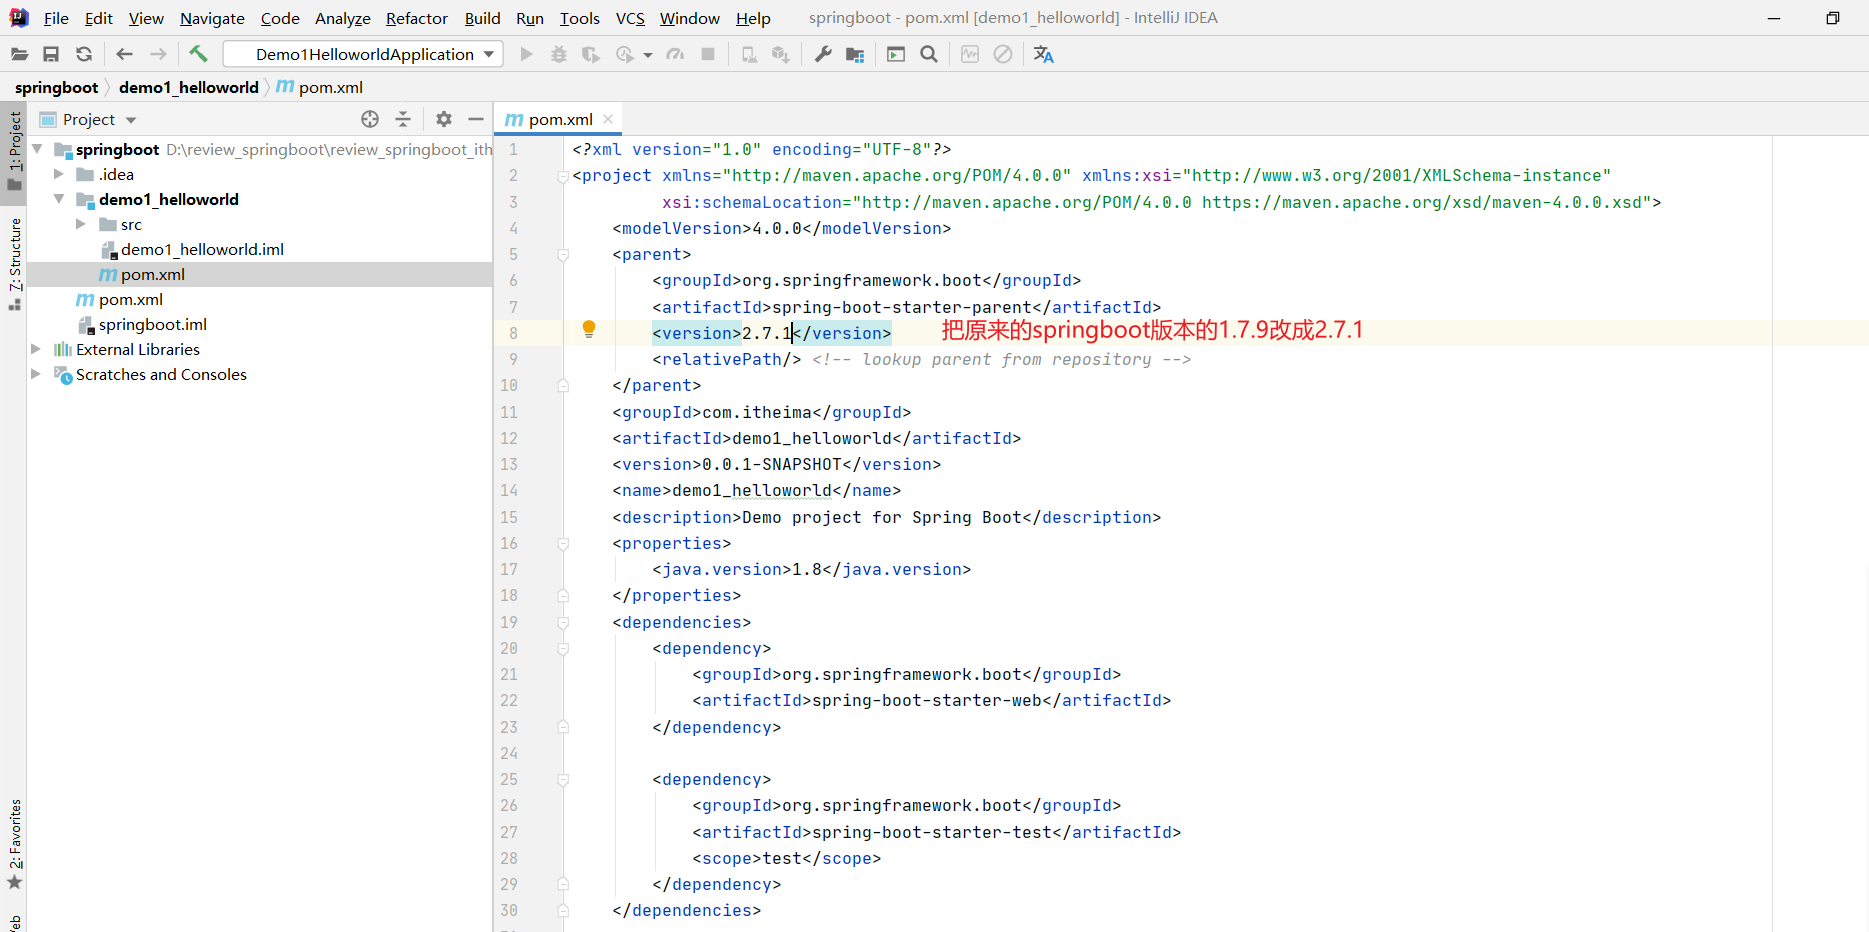
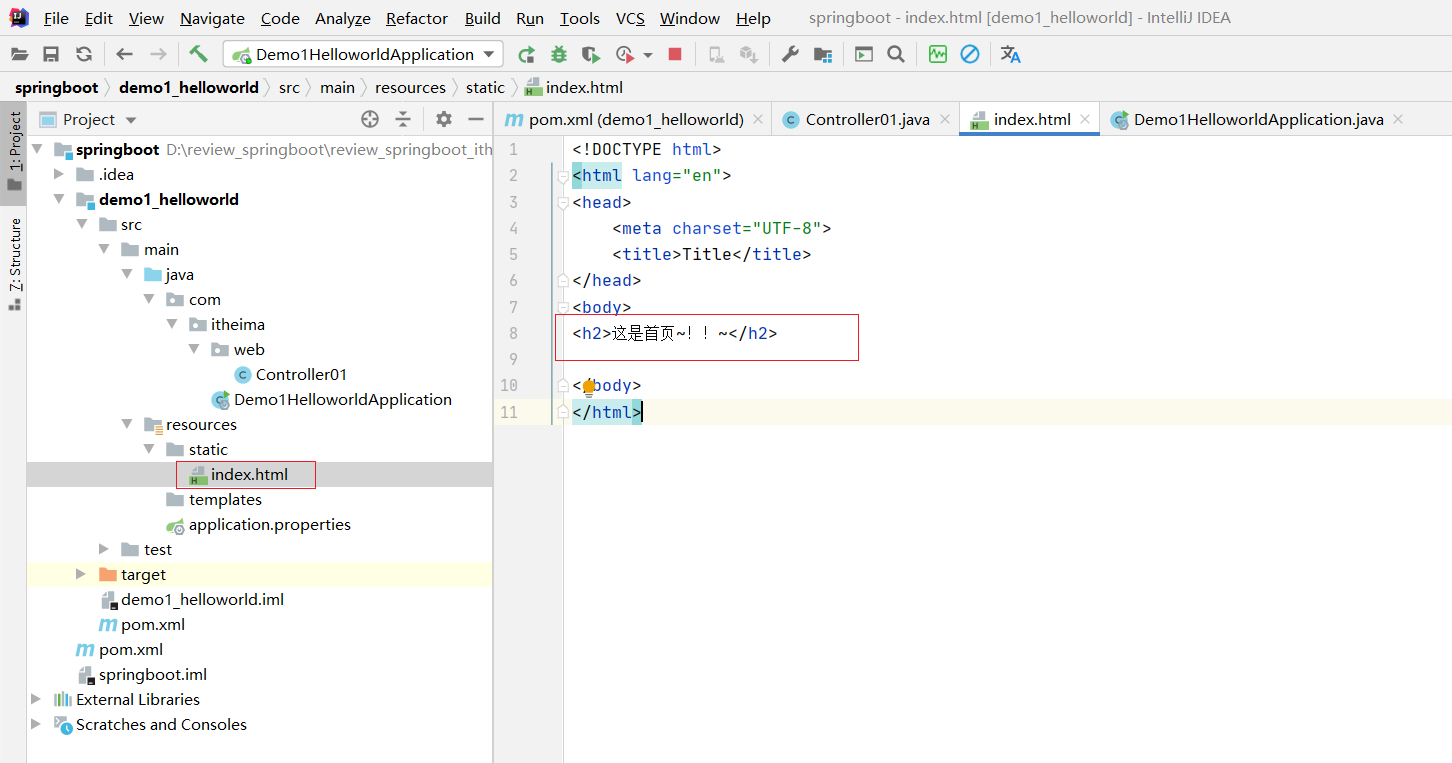
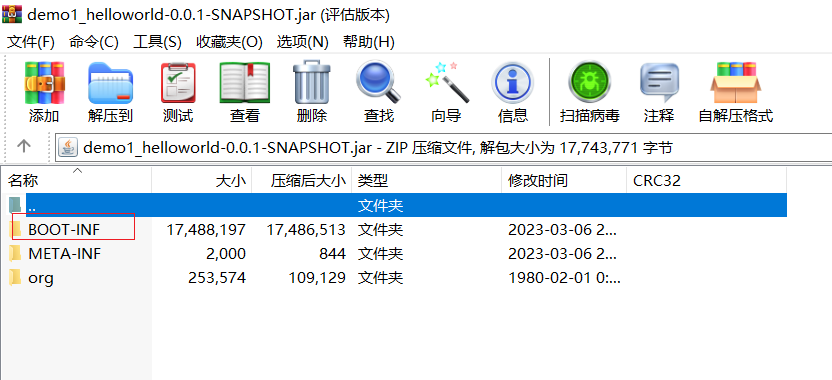
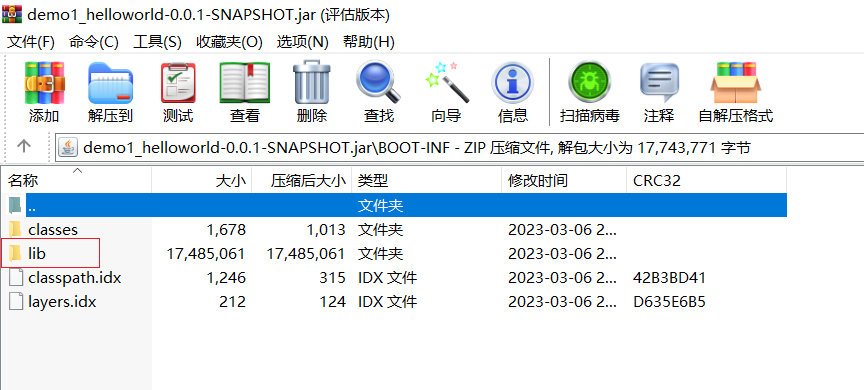
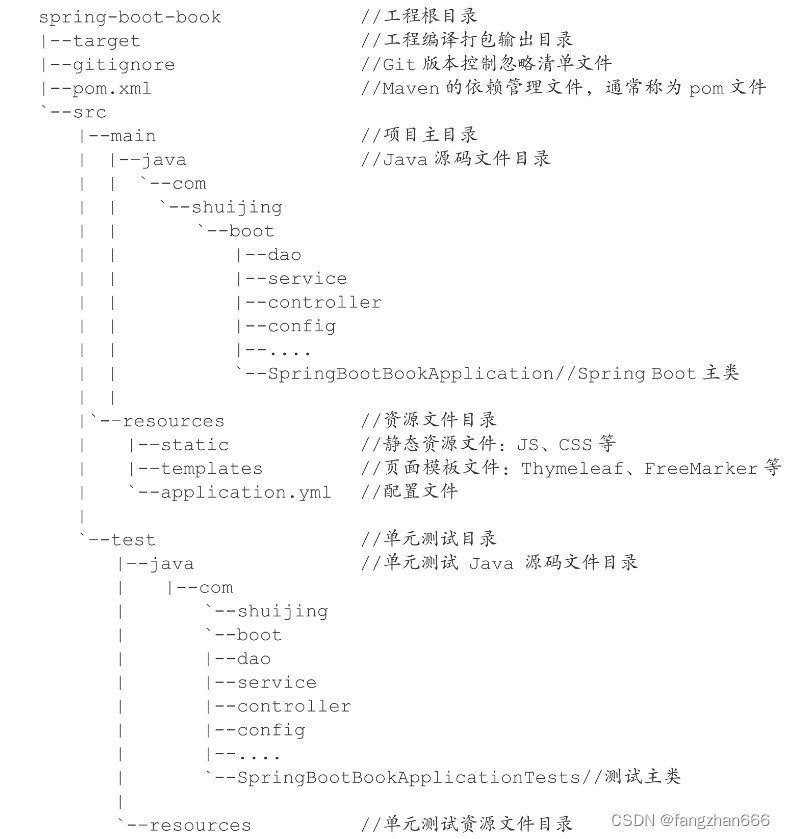
最简SpringBoot程序所包含的基础文件
<?xml version="1.0" encoding="UTF-8"?>
<project xmlns="http://maven.apache.org/POM/4.0.0" xmlns:xsi="http://www.w3.org/2001/XMLSchema-instance"xsi:schemaLocation="http://maven.apache.org/POM/4.0.0 https://maven.apache.org/xsd/maven-4.0.0.xsd"><modelVersion>4.0.0</modelVersion><parent><groupId>org.springframework.boot</groupId><artifactId>spring-boot-starter-parent</artifactId><version>2.7.1</version><relativePath/> <!-- lookup parent from repository --></parent><groupId>com.itheima</groupId><artifactId>demo1_helloworld</artifactId><version>0.0.1-SNAPSHOT</version><name>demo1_helloworld</name><description>Demo project for Spring Boot</description><properties><java.version>1.8</java.version></properties><dependencies><dependency><groupId>org.springframework.boot</groupId><artifactId>spring-boot-starter-web</artifactId></dependency><dependency><groupId>org.springframework.boot</groupId><artifactId>spring-boot-starter-test</artifactId><scope>test</scope></dependency></dependencies><build><plugins><plugin><groupId>org.springframework.boot</groupId><artifactId>spring-boot-maven-plugin</artifactId></plugin></plugins></build></project>
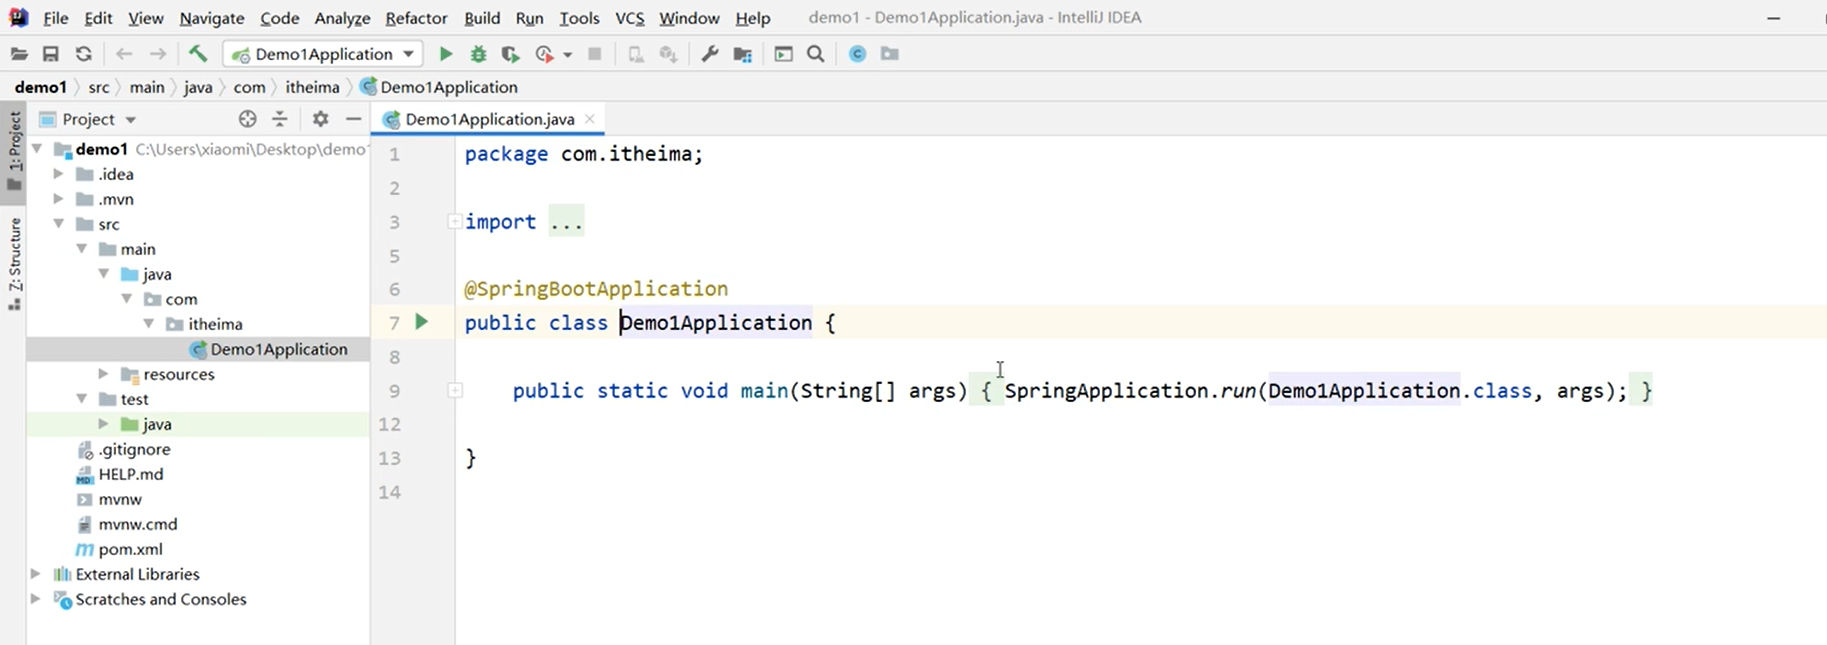
package com.itheima;import org.springframework.boot.SpringApplication;
import org.springframework.boot.autoconfigure.SpringBootApplication;/*/*@SpringBootApplication:1. 表示这个类是一个springboot应用程序的入口类。2. 要想让程序启动,只需要在main方法里面写上这样的一句话:SpringApplication.run(当前类的字节码对象, args);3. 拓展:3.1 springboot项目启动的时候,默认会扫描启动类所在的位置,以及它后续的所有子包。3.2 查找到类里面打的注解 @Controller , @Service , @RequestMapping.3.3 springApplication.run 传递进去当前类的字节码对象,也是可以确定当前这个启动器它的包是哪个!*/
@SpringBootApplication
public class Demo1HelloworldApplication {public static void main(String[] args) {SpringApplication.run(Demo1HelloworldApplication.class, args);}}
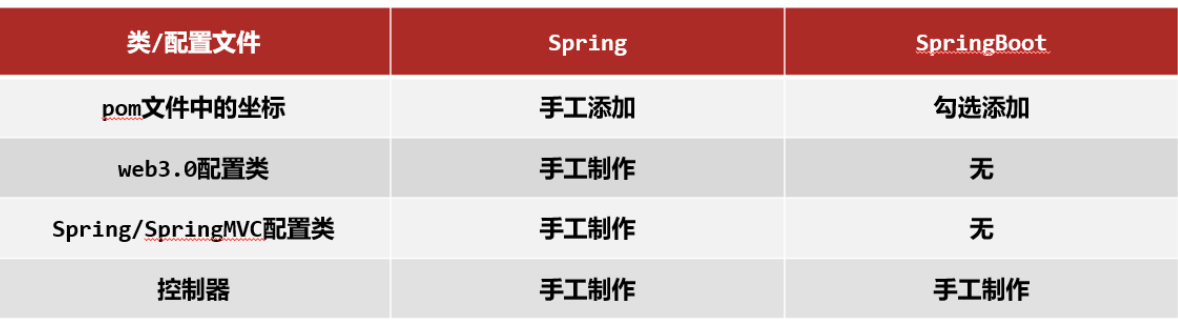
Spring程序与SpringBoot程序对比
注意事项:
基于idea开发SpringBoot程序需要确保联网且能够加载到程序框架结构
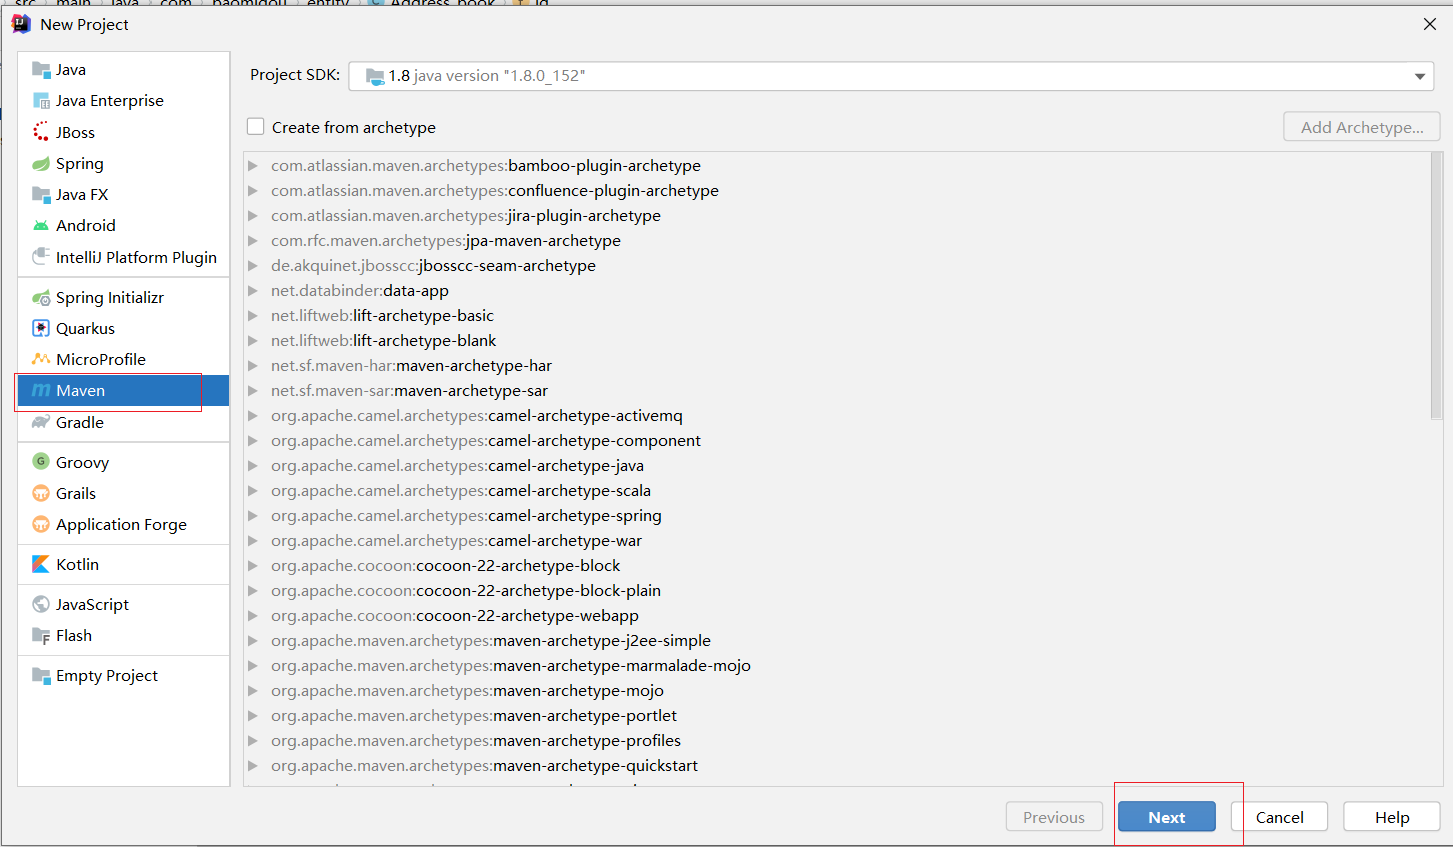
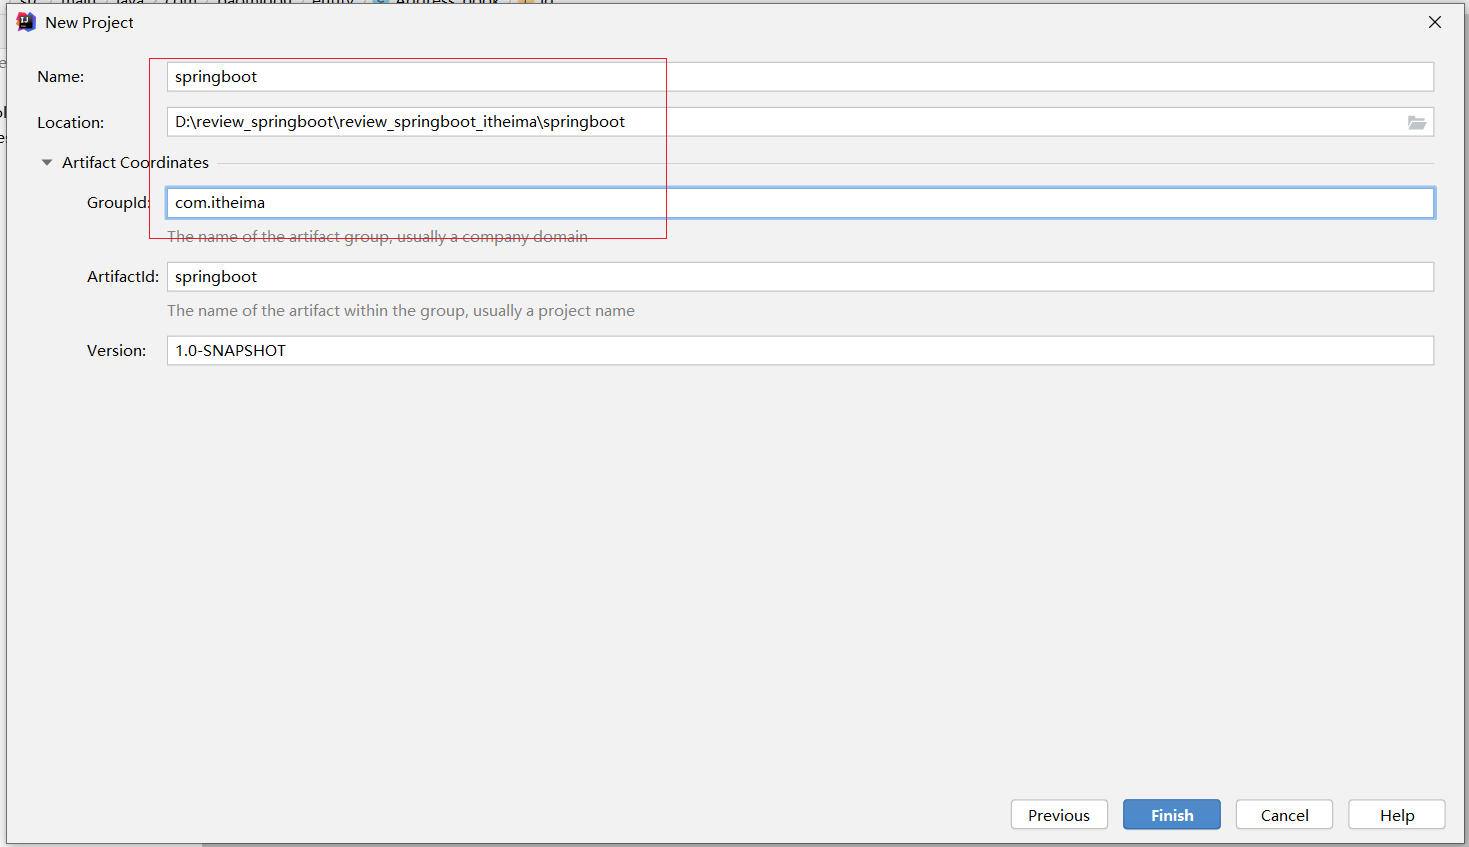
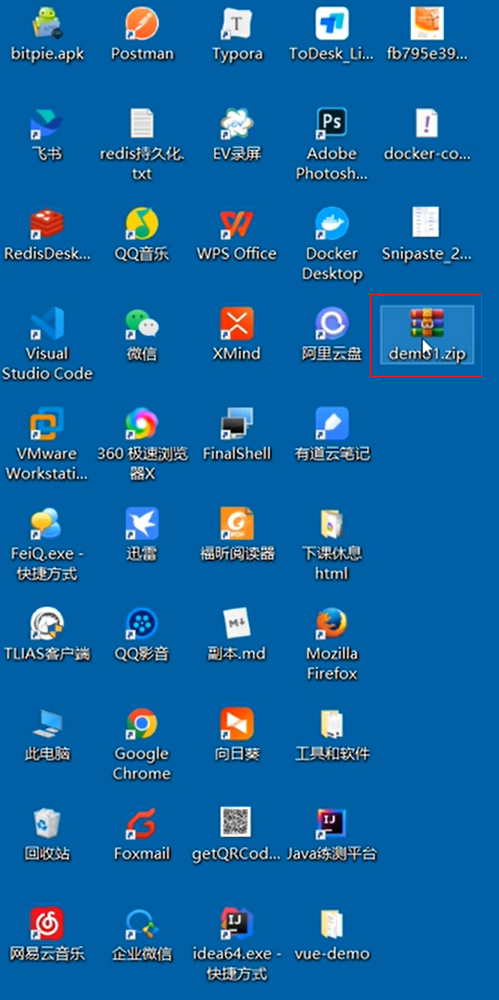
1.2 基于SpringBoot官网创建项目
保存到桌面

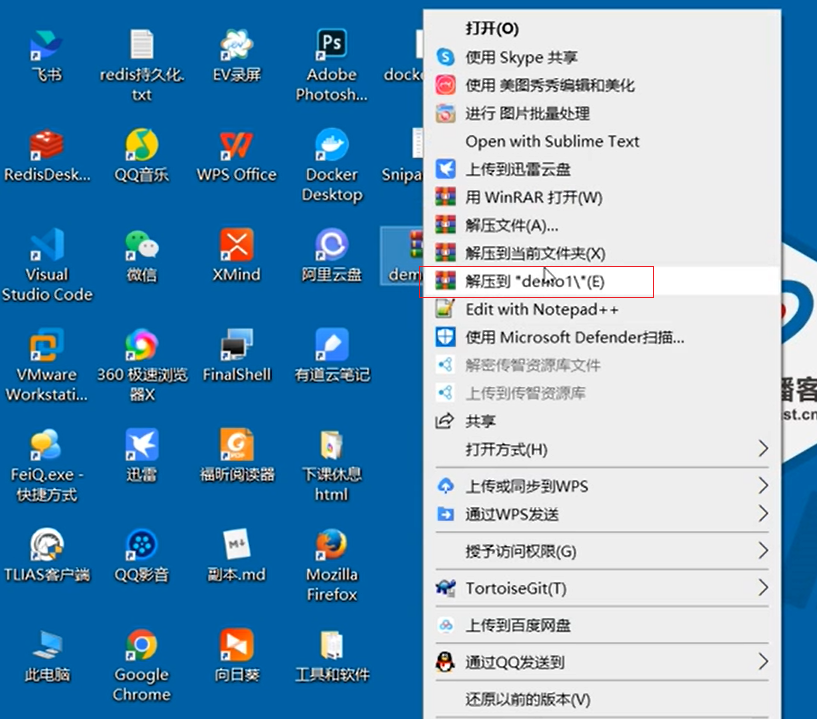
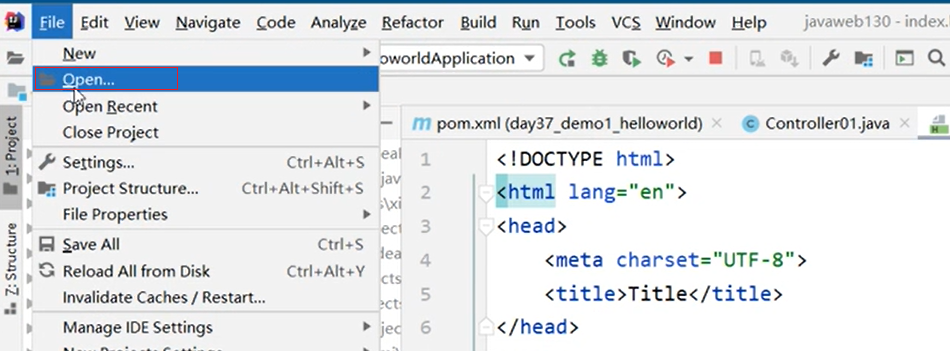
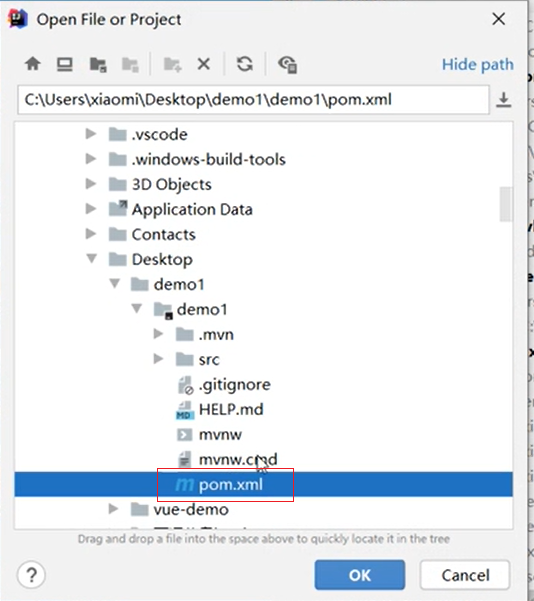
解压完之后 用idea打开他
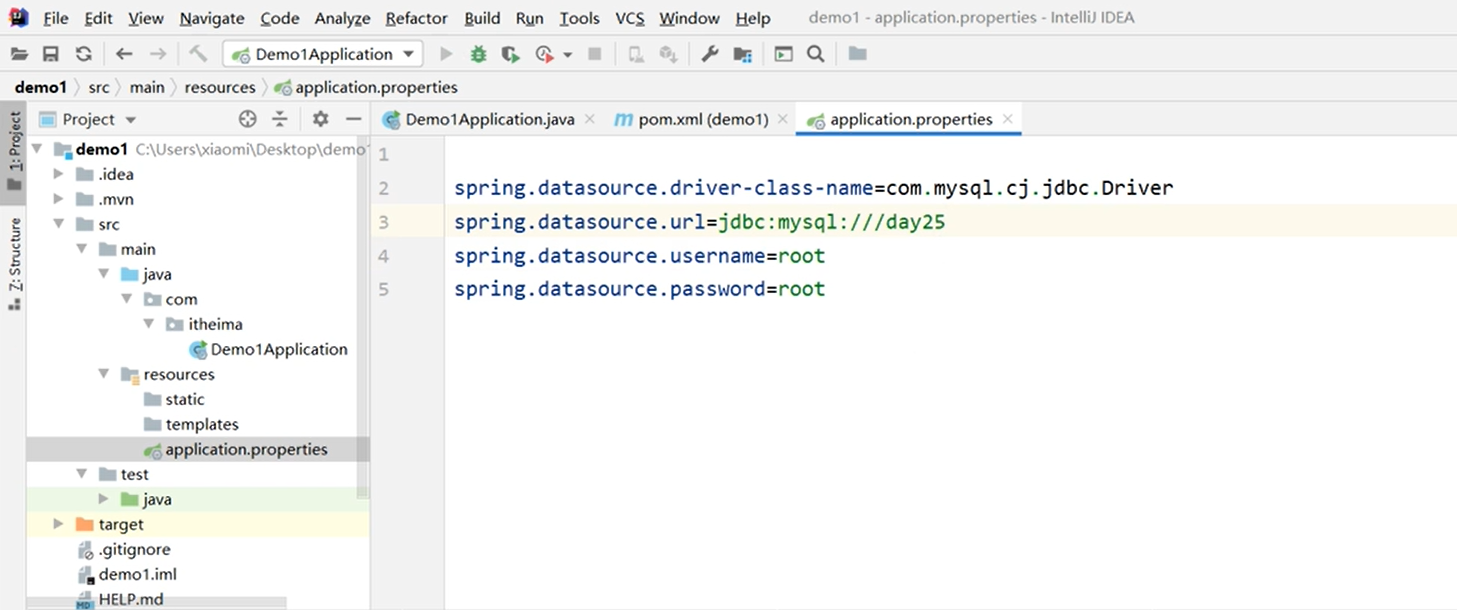
因为用到了Mysql 所以得配置数据库
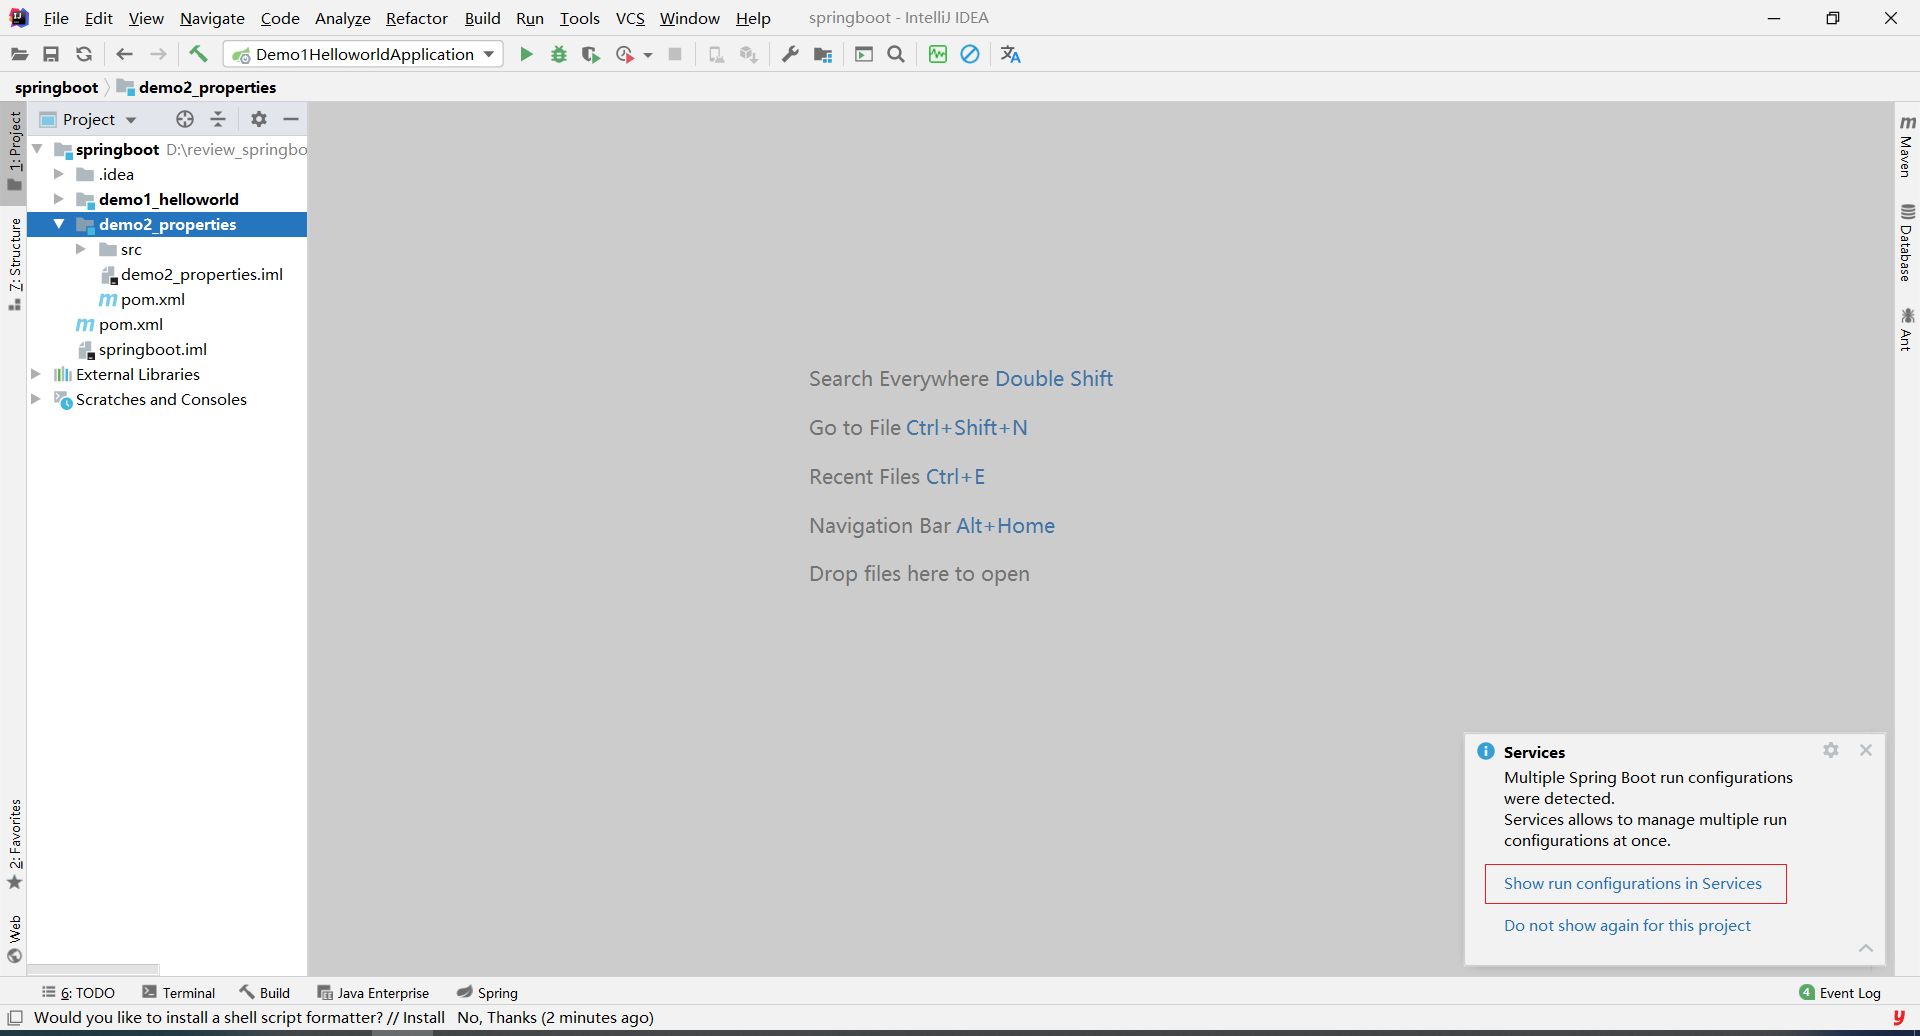
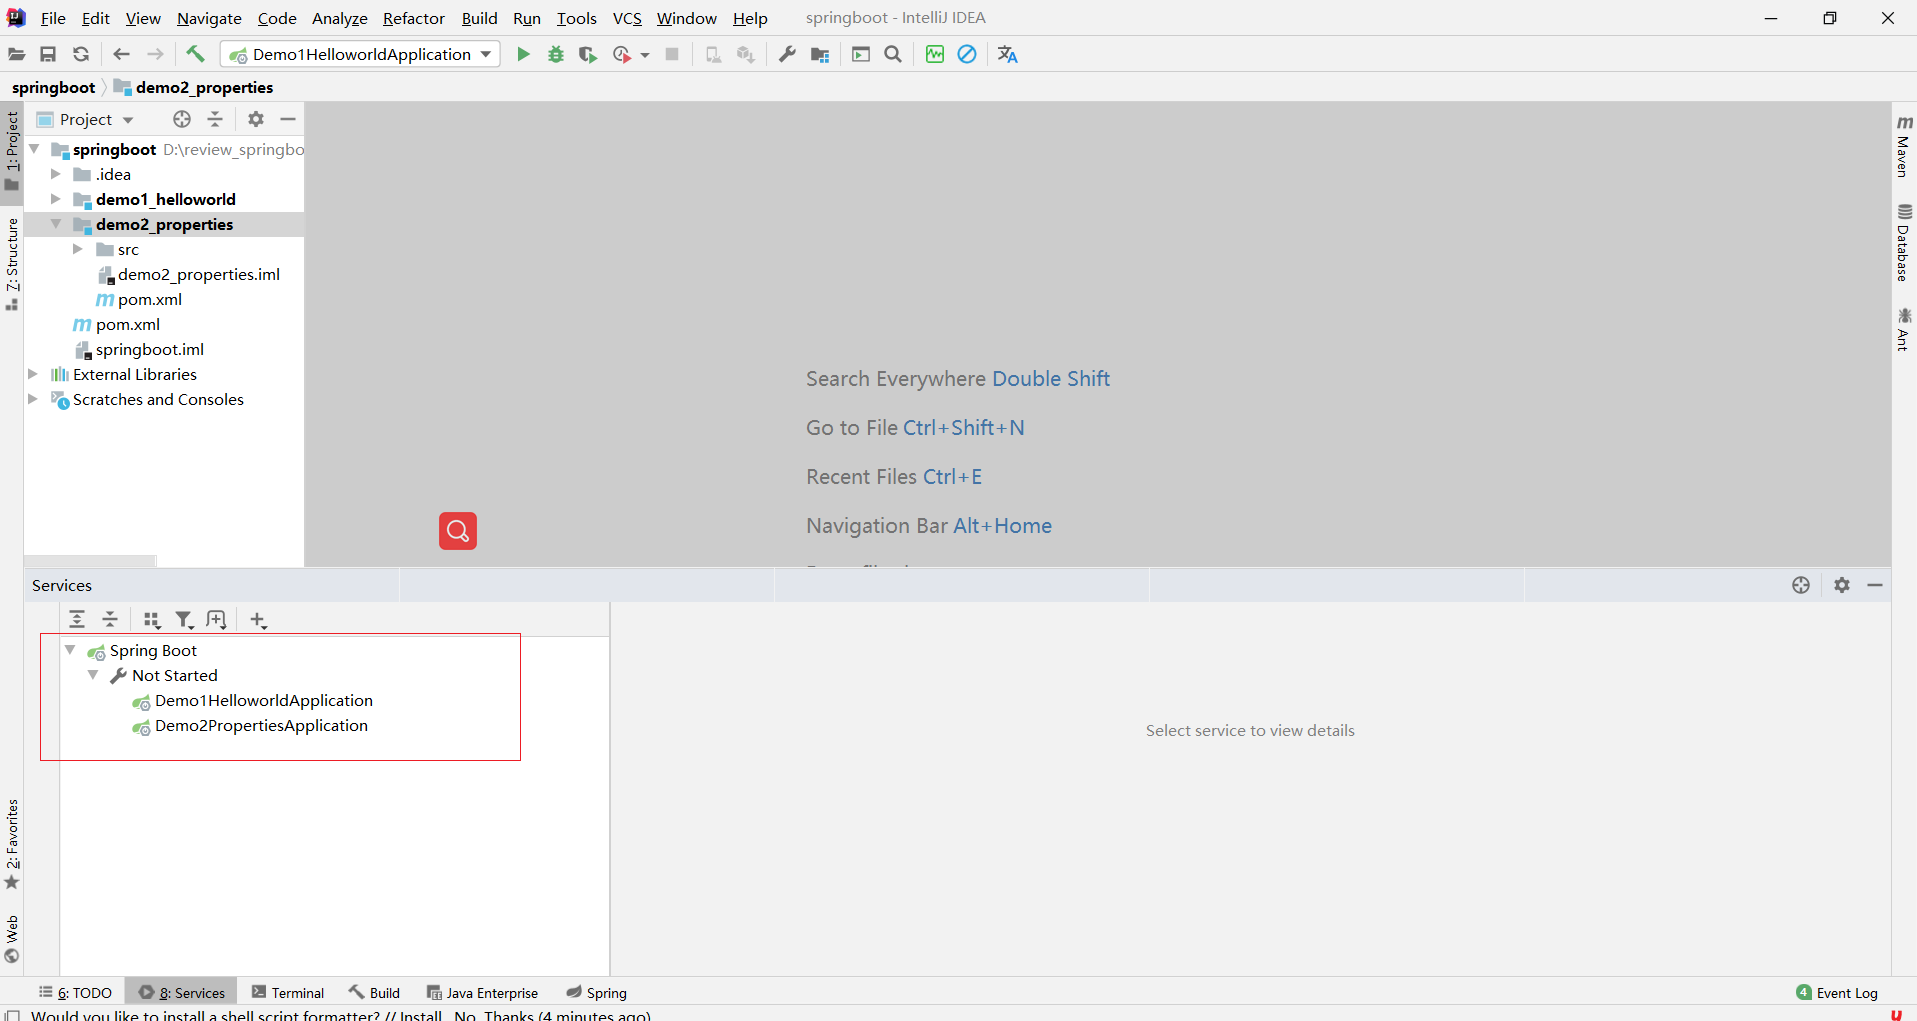
已经启动

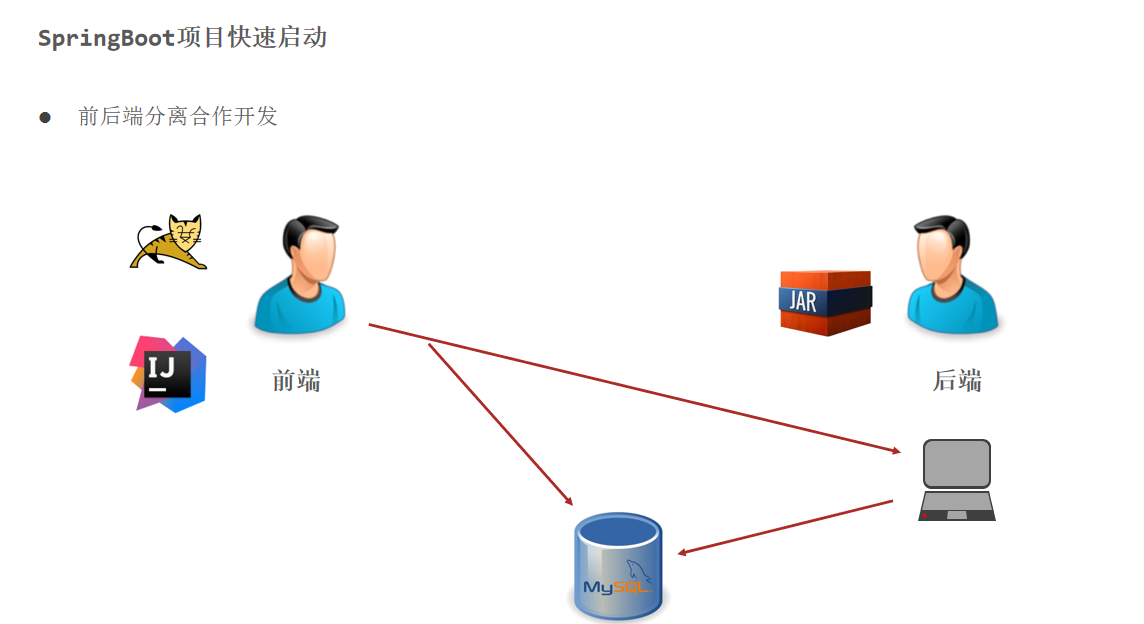
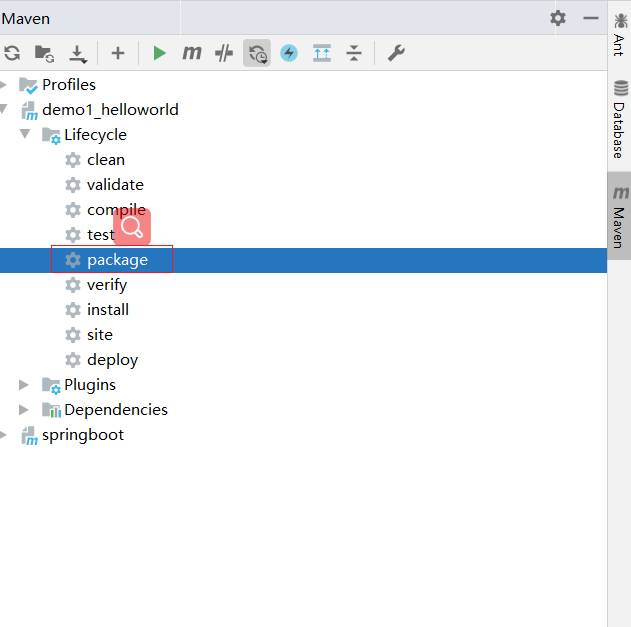
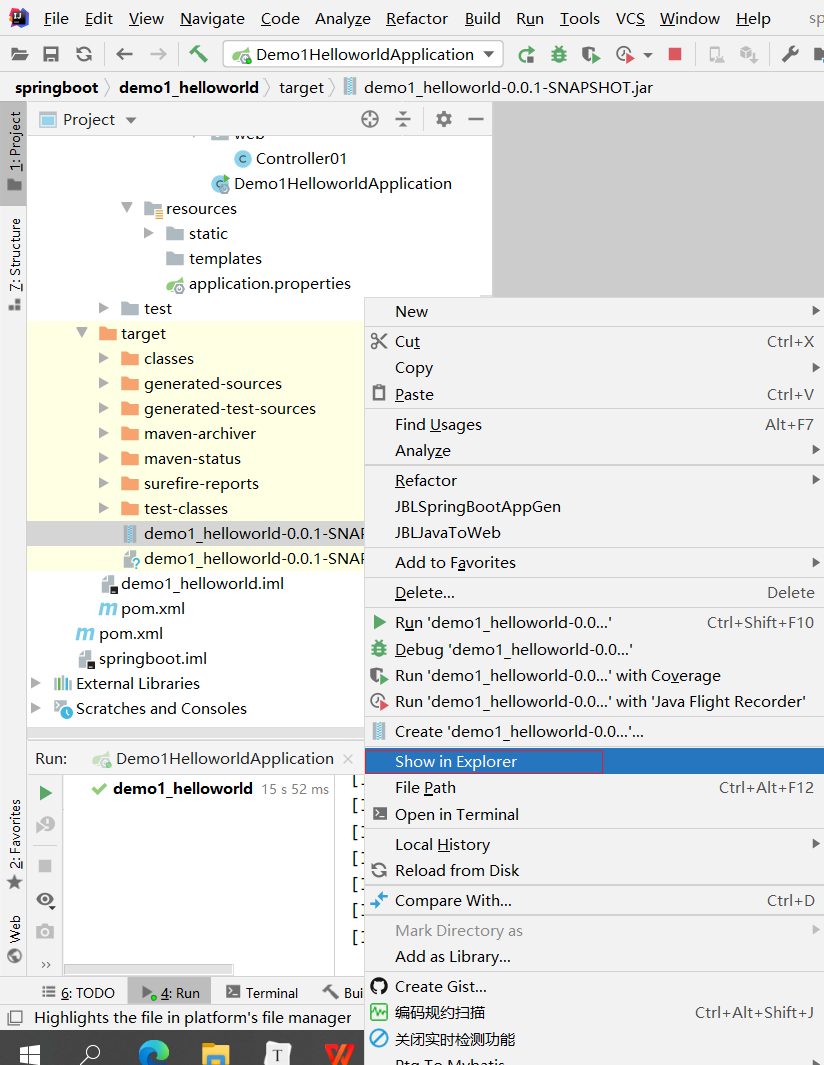
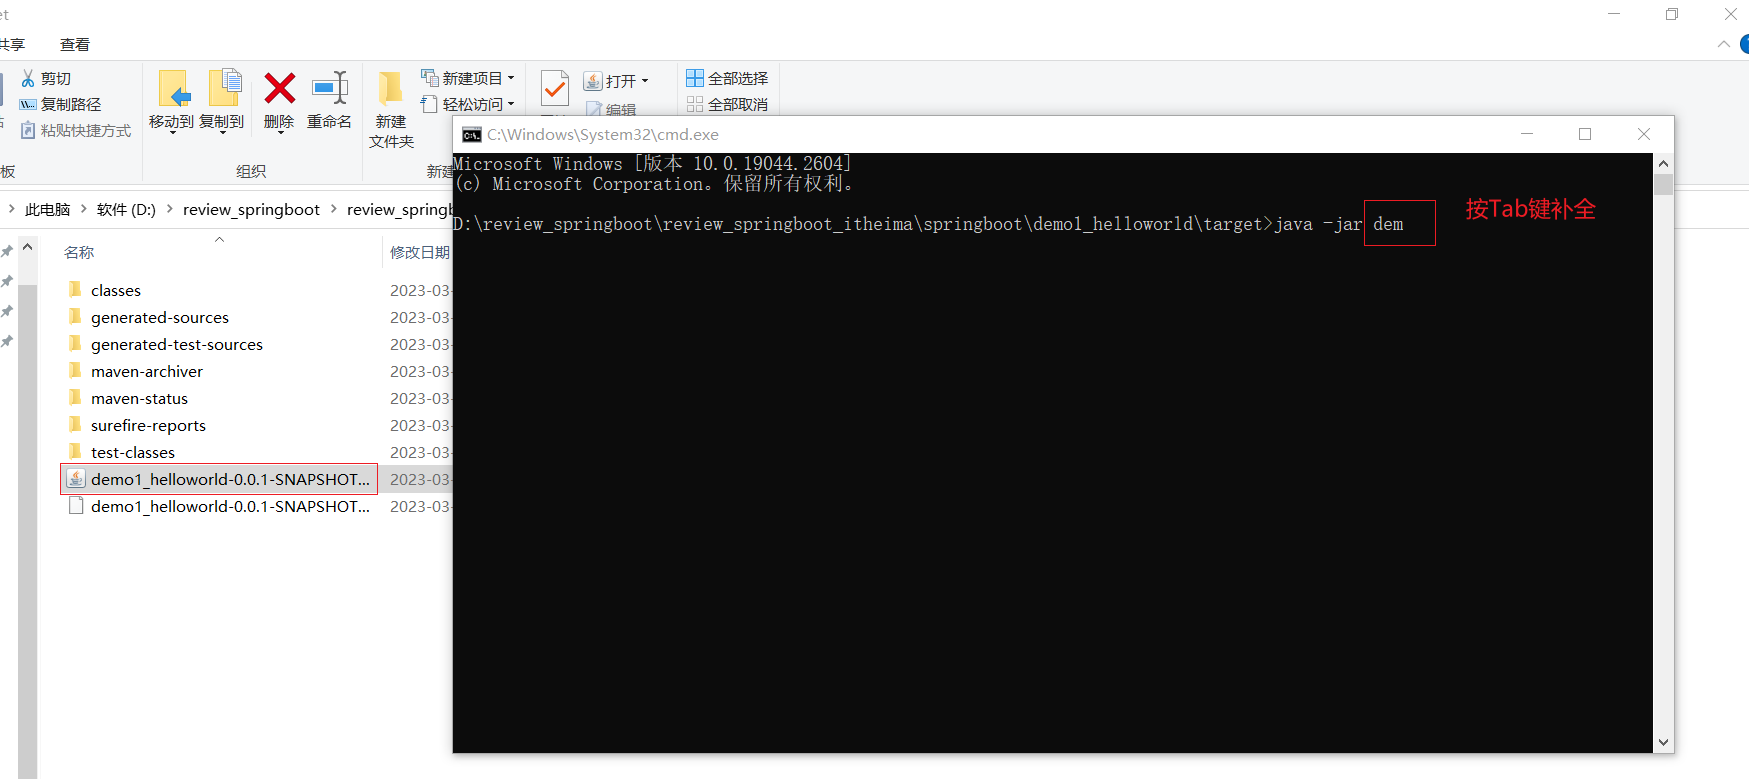
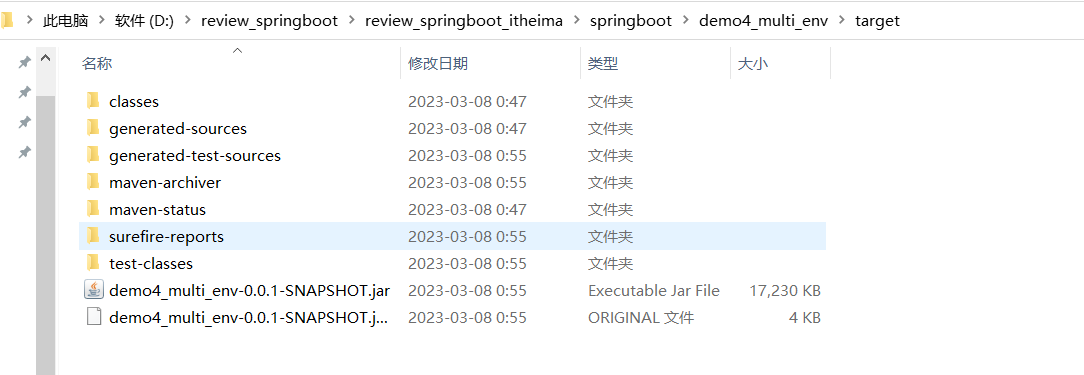
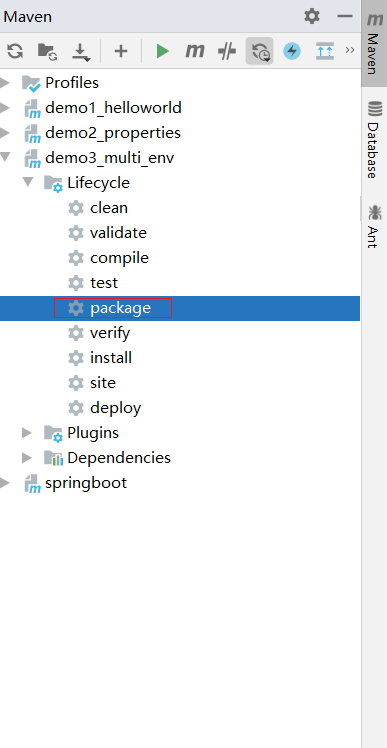
1.3 SpringBoot项目快速启动
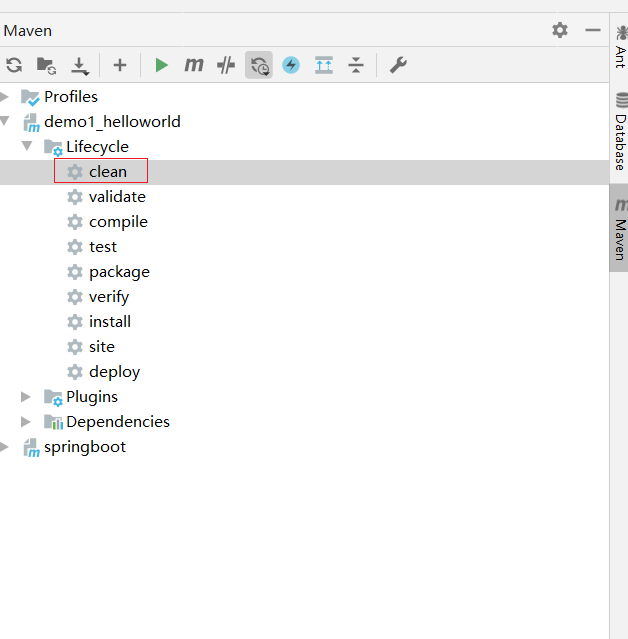
① 对SpringBoot项目打包(执行Maven构建指令package)
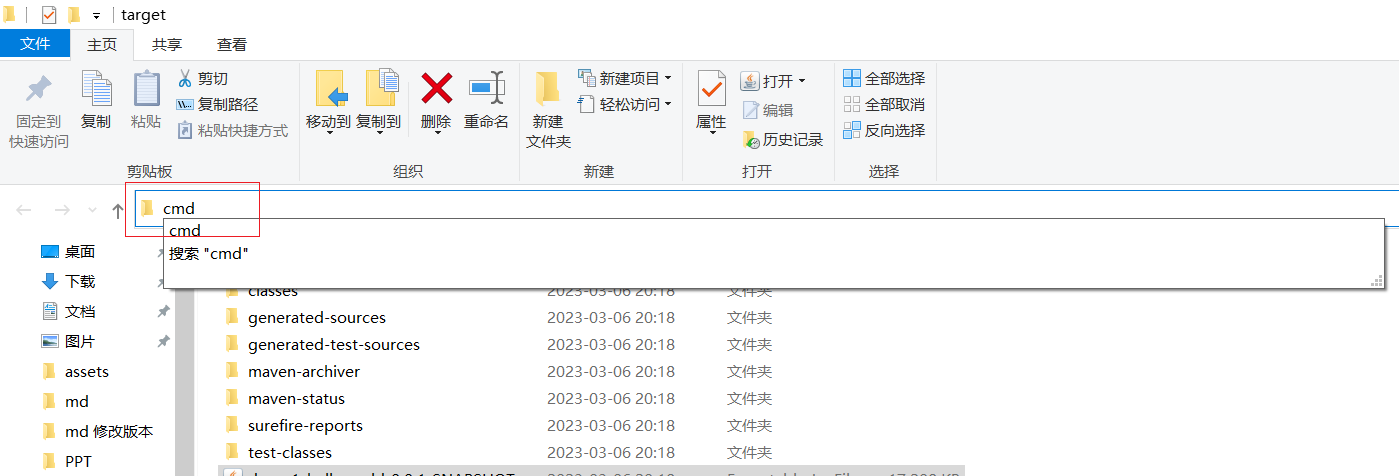
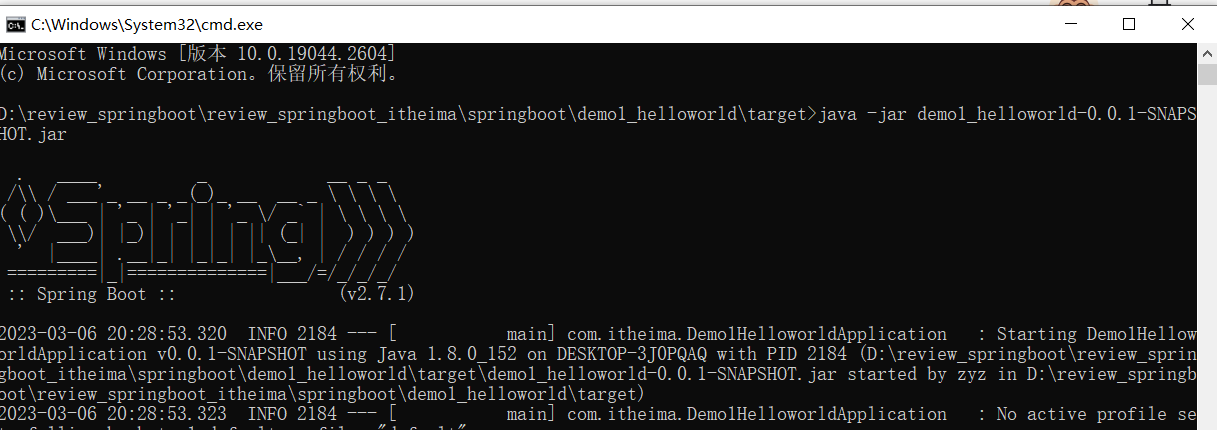
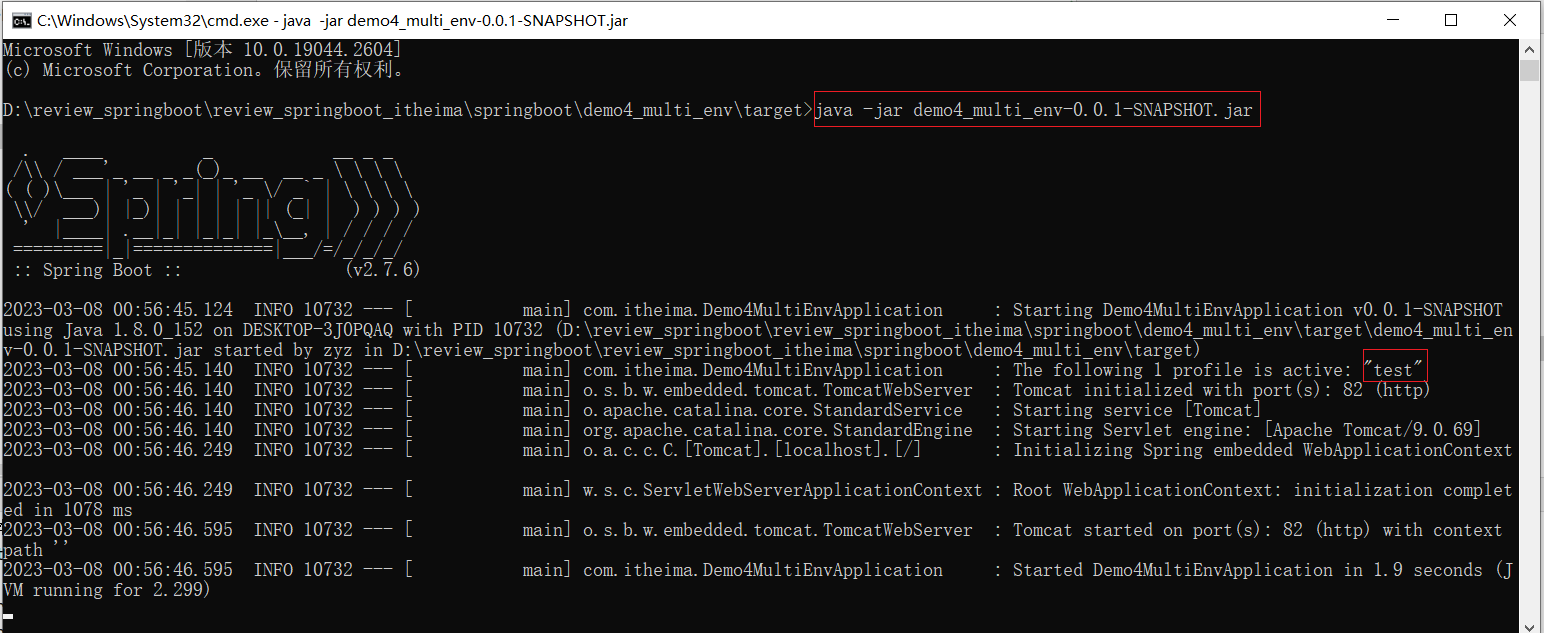
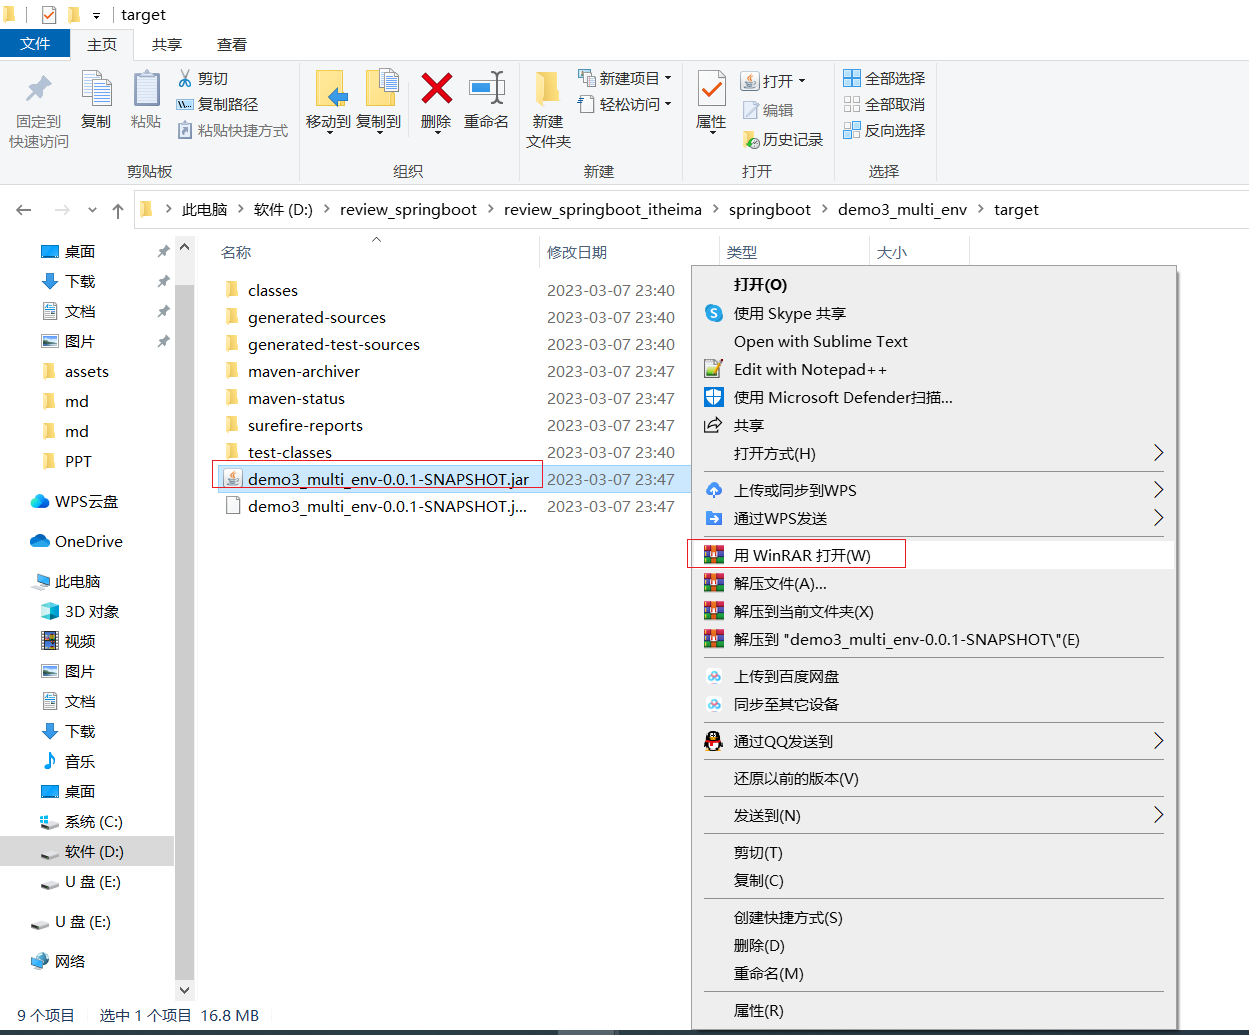
② 执行启动指令
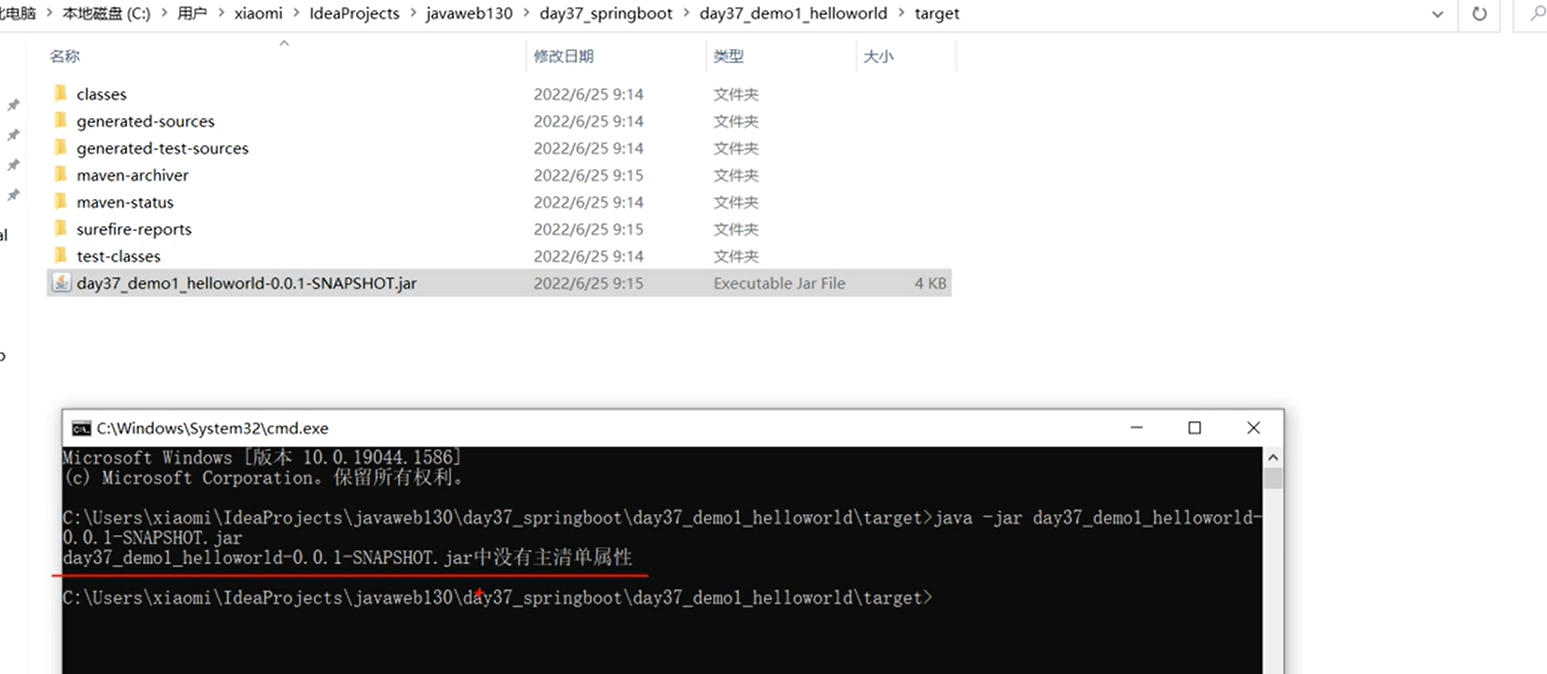
java -jar ava -jar demo1_helloworld-0.0.1-SNAPSHOT.jar # 项目的名称根据实际情况修改例子
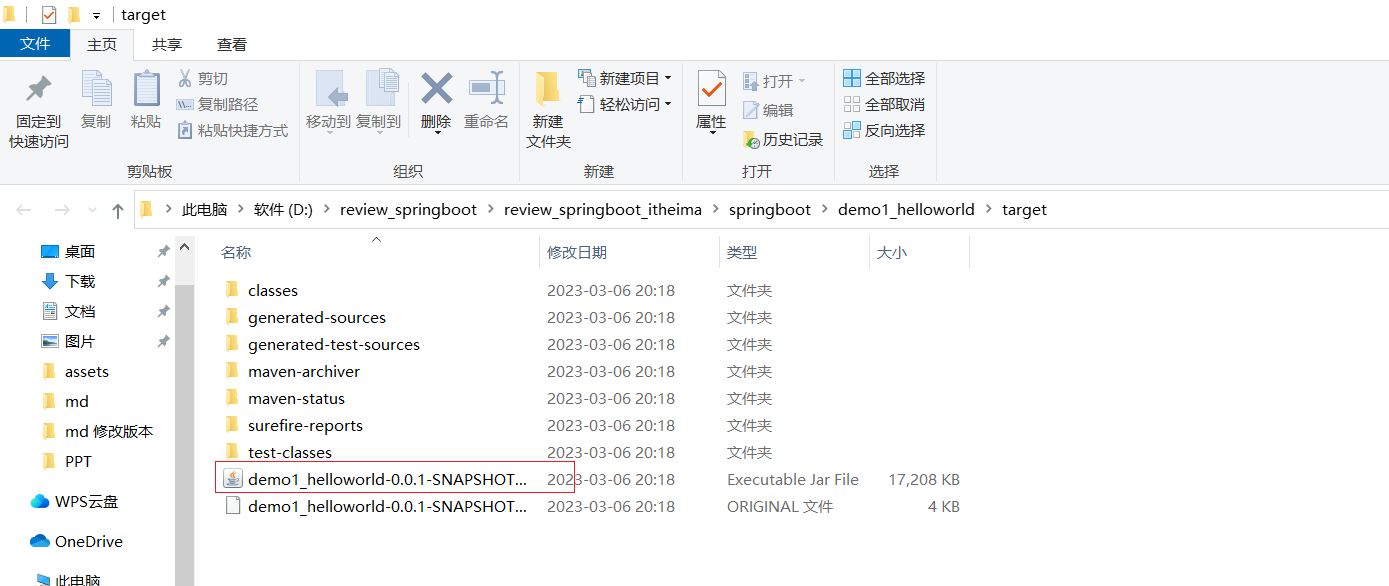
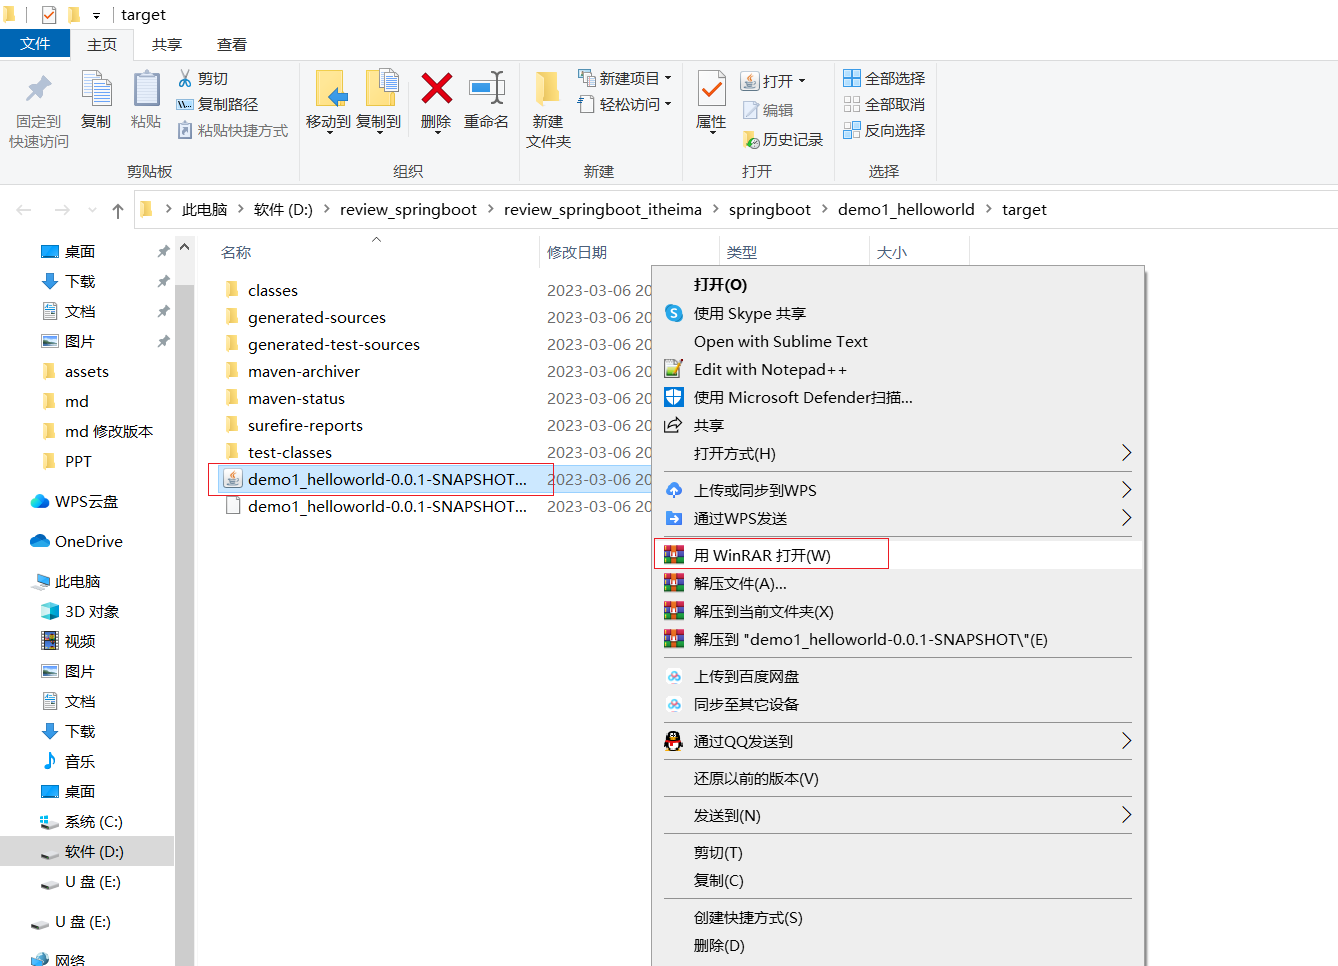


注意事项:
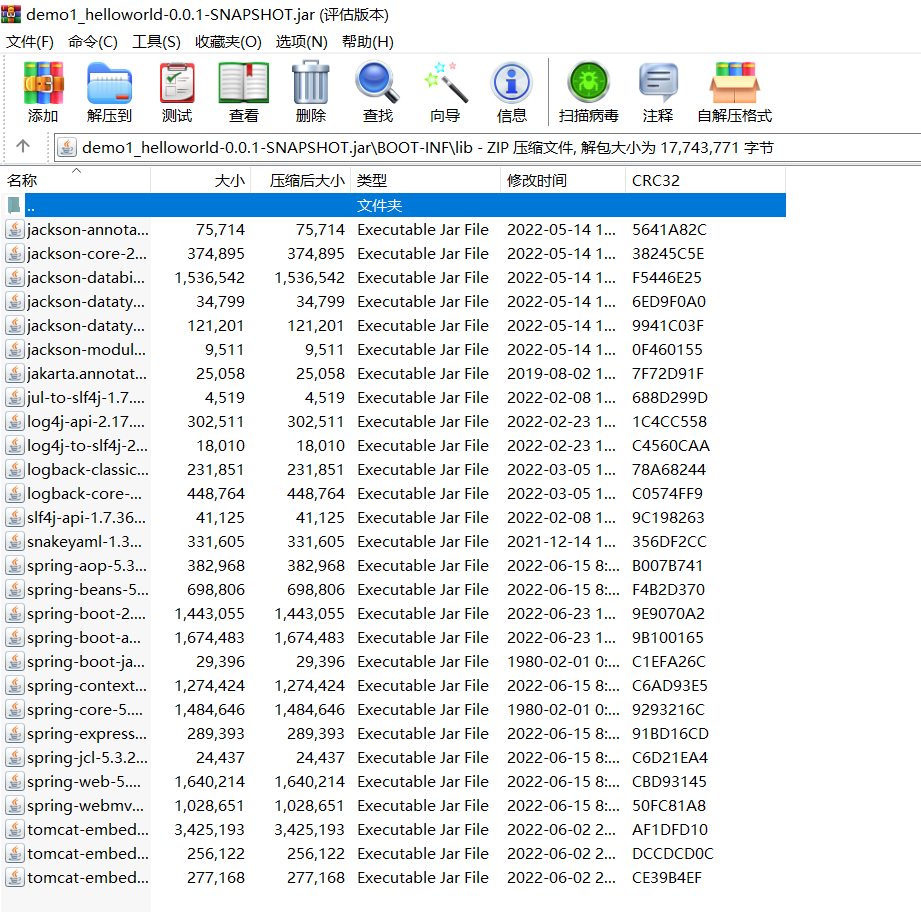
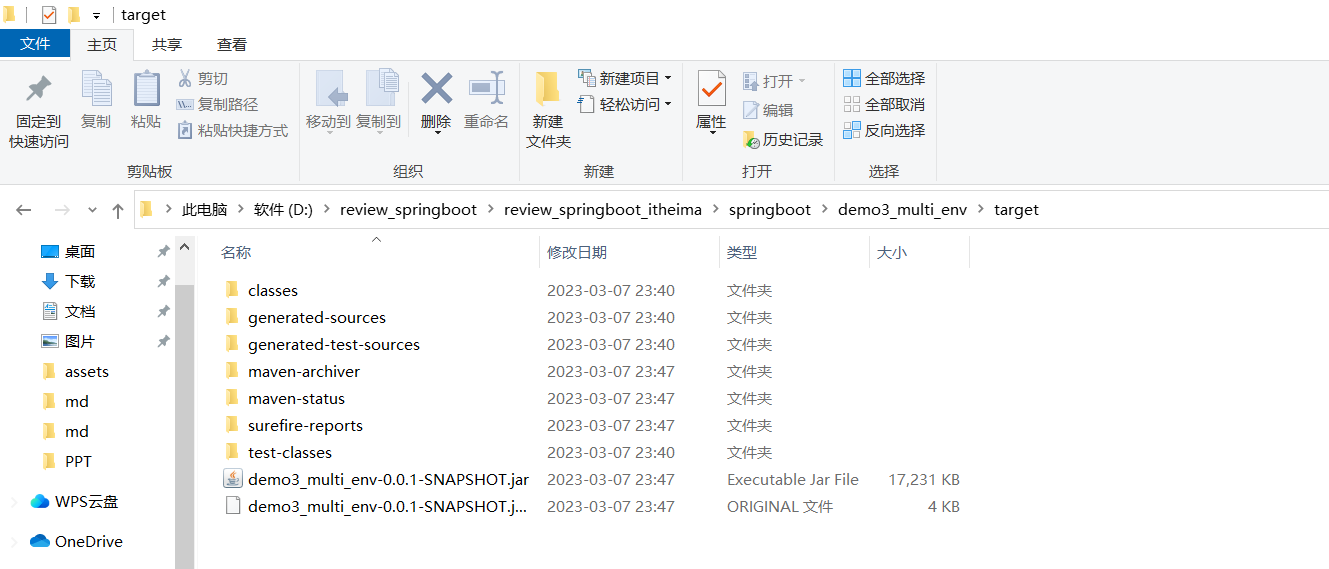
jar支持命令行启动需要依赖maven插件支持,请确认打包时是否具有SpringBoot对应的maven插件。
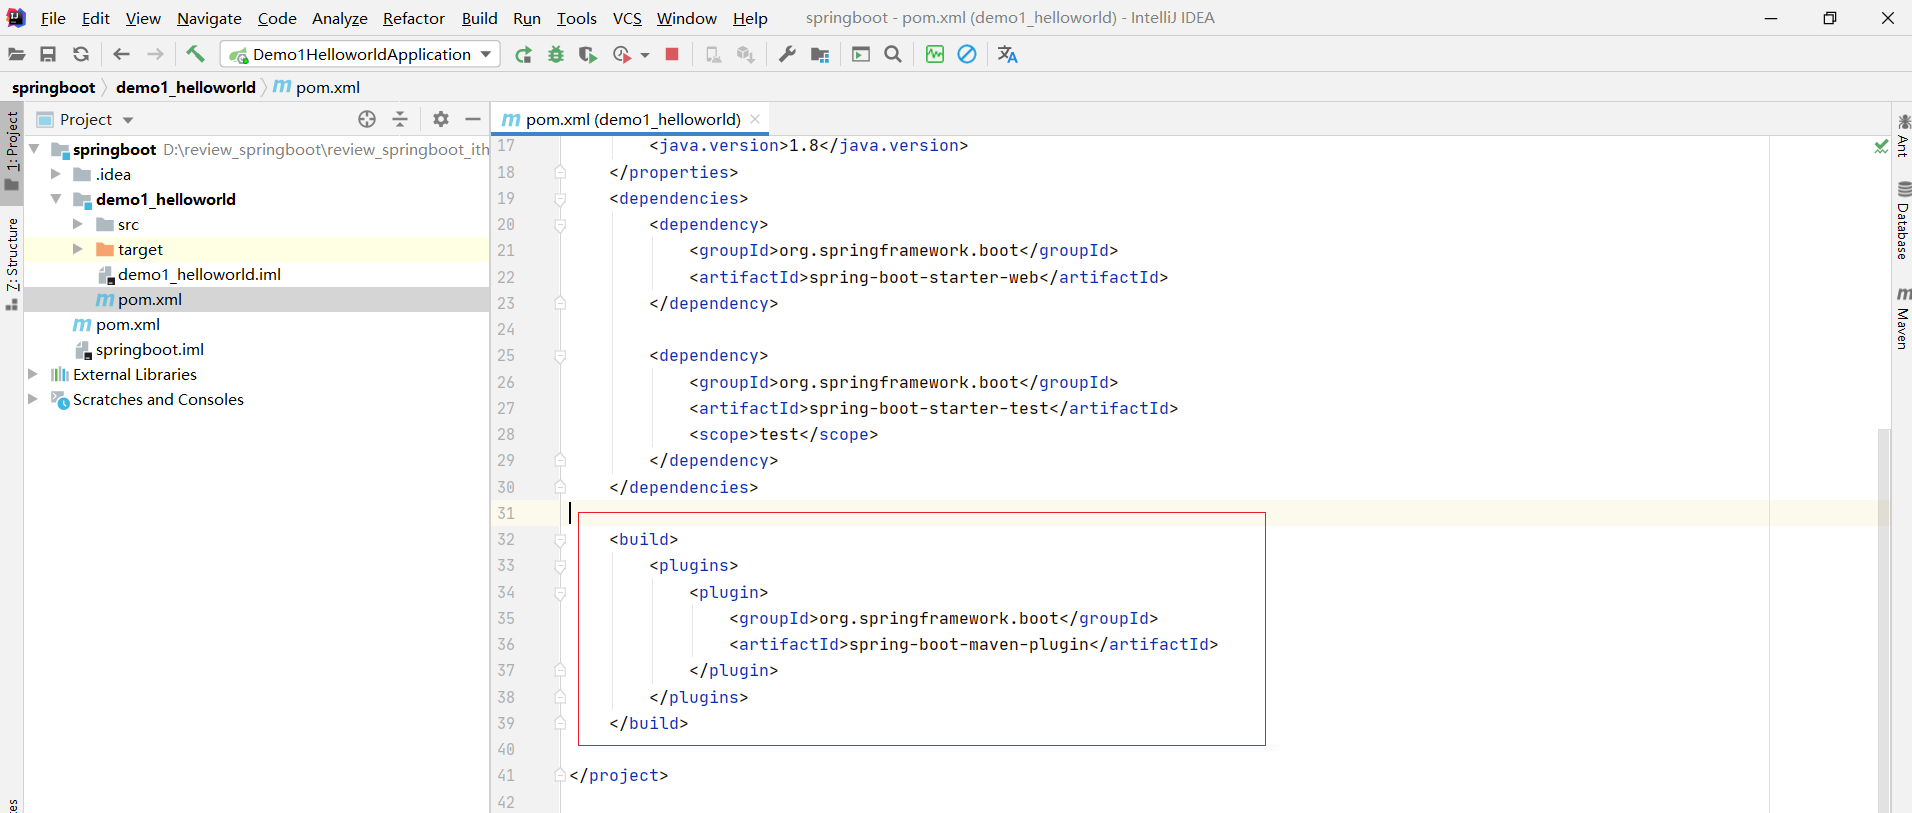
<build><plugins><plugin><groupId>org.springframework.boot</groupId><artifactId>spring-boot-maven-plugin</artifactId></plugin></plugins></build>如果没有这个依赖maven插件 打包就只有4k左右
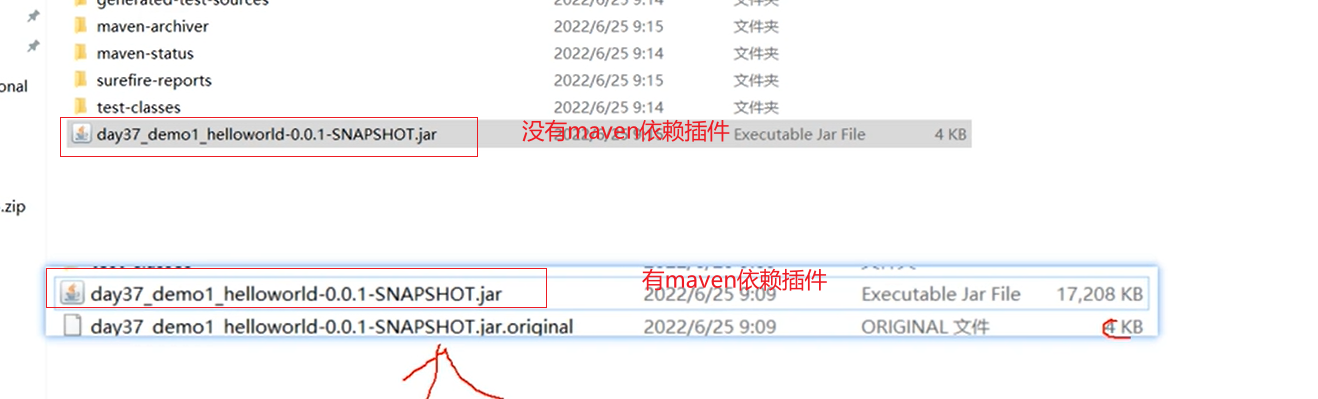
这个时候跟本运行不了
2. SpringBoot概述
问题导入
学习了SpringBoot入门案例之后,感觉对比SpringMVC哪一个更加方便简洁?
SpringBoot是由Pivotal团队提供的全新框架,其设计目的是用来简化Spring应用的初始搭建以及开发过程
Spring程序缺点
配置繁琐
依赖设置繁琐
SpringBoot程序优点
自动配置
起步依赖(简化依赖配置)
辅助功能(内置服务器,……)
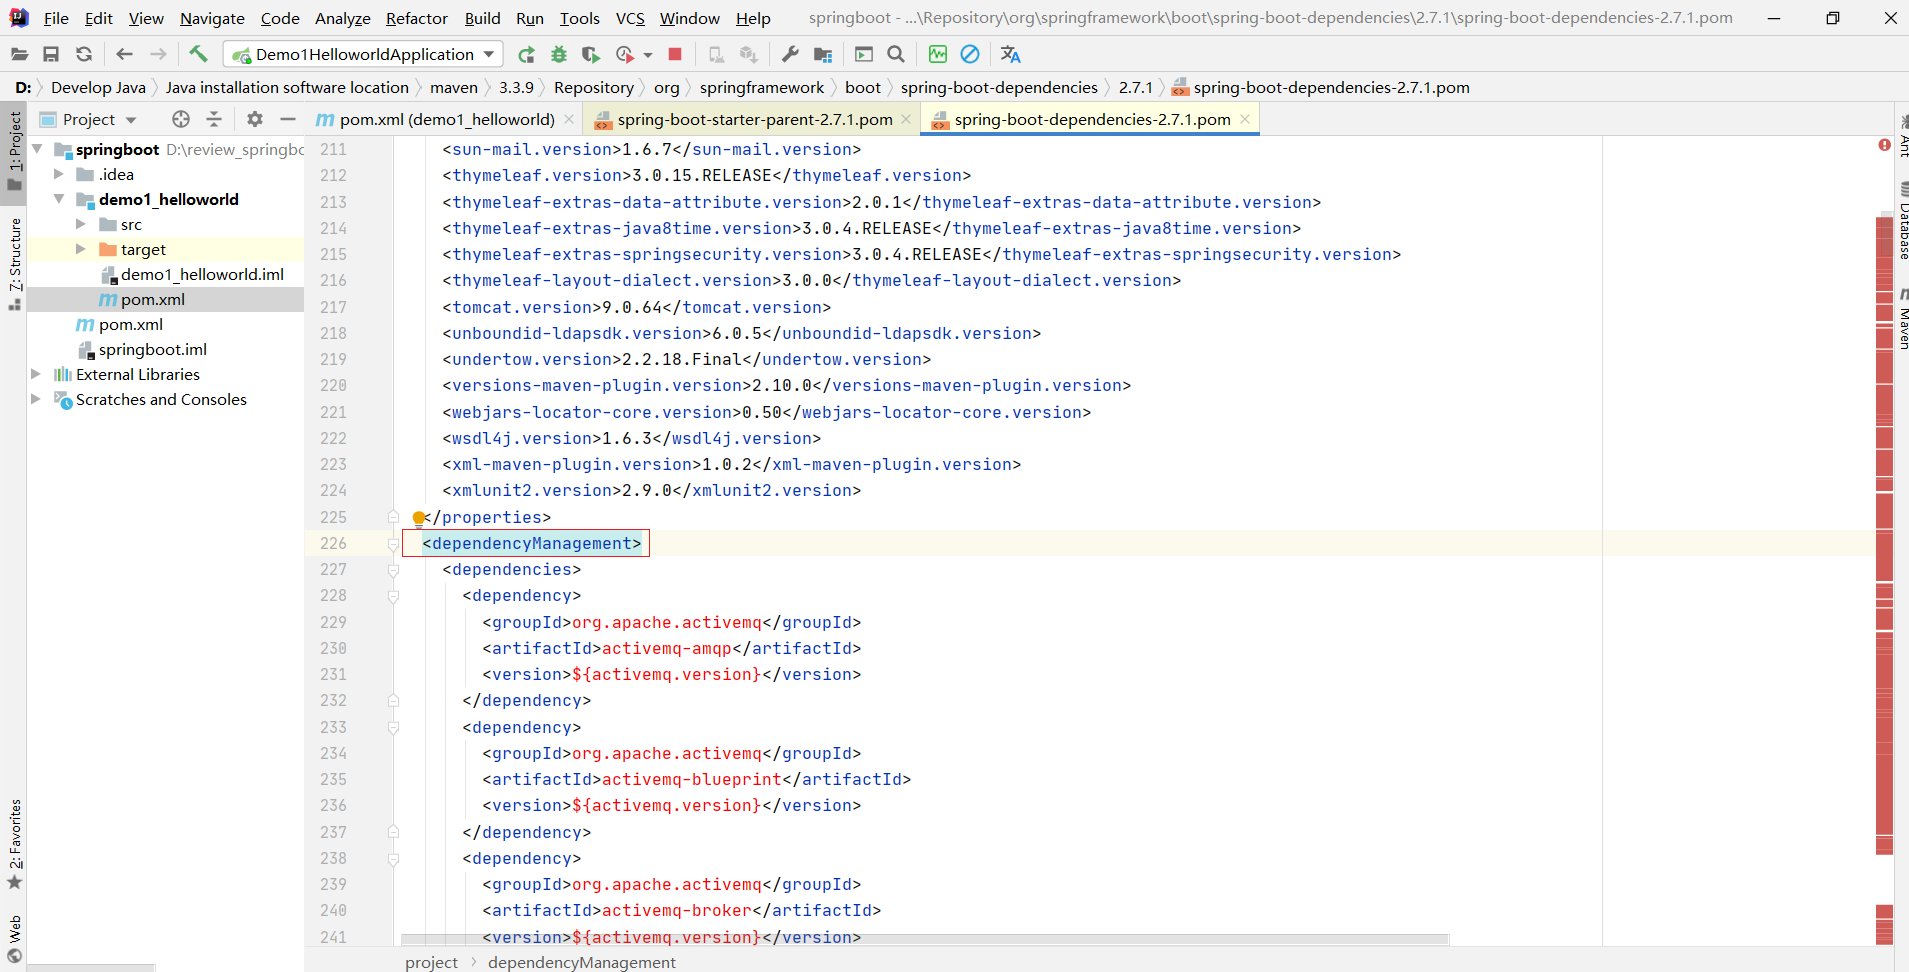
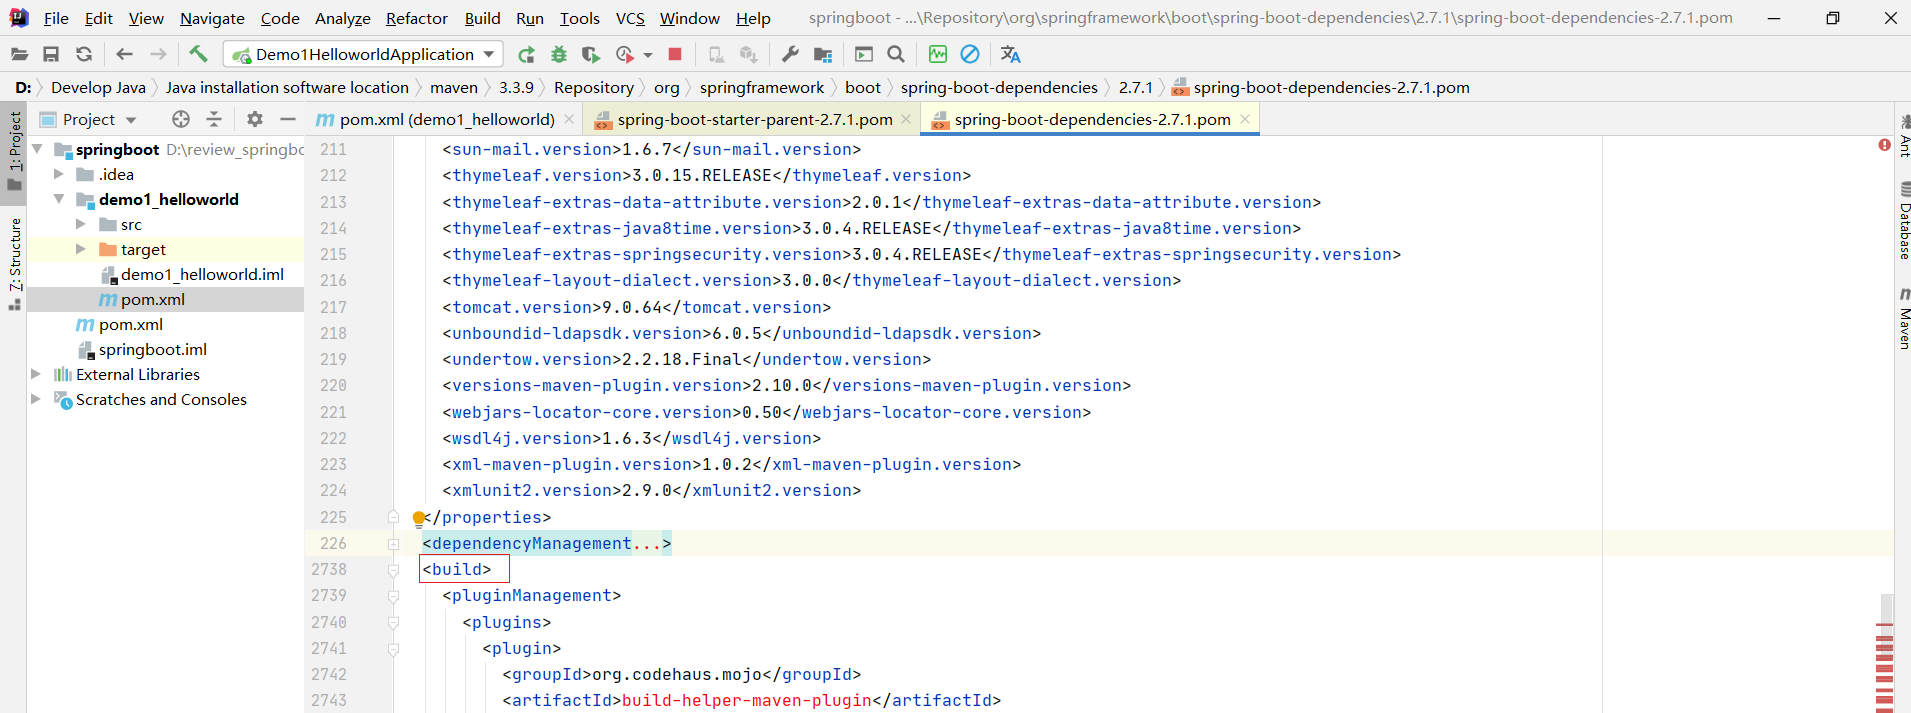
28行到225行 <properties></properties>
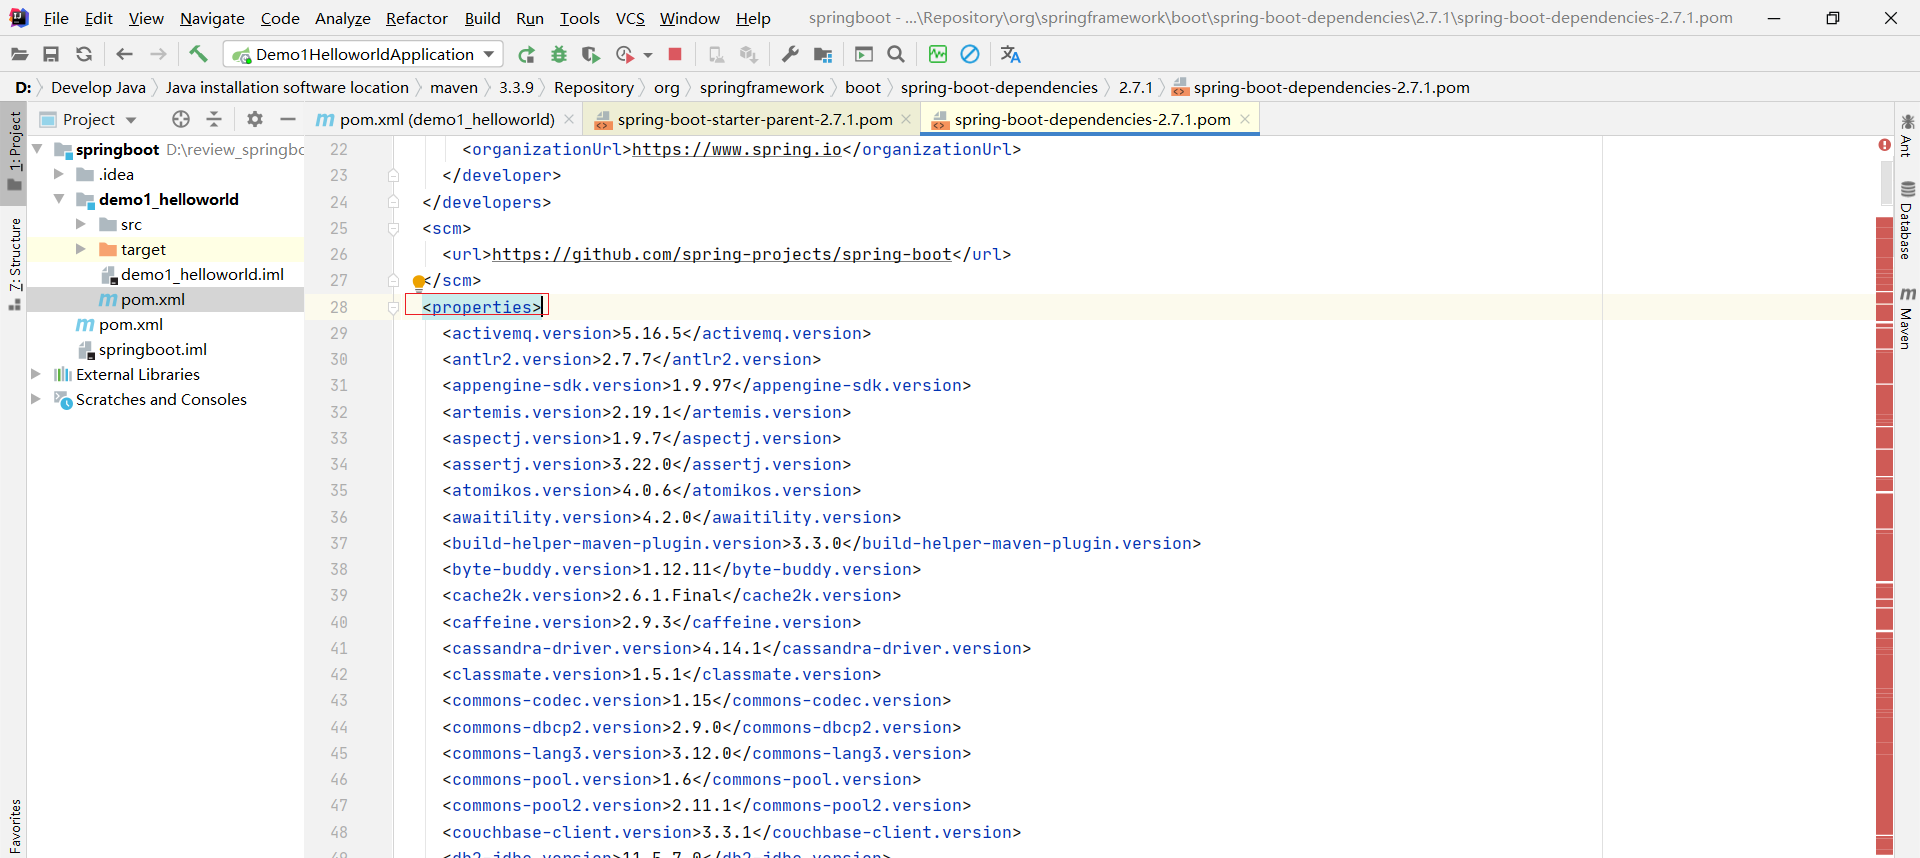
226行 到2737行 <dependencyManagement> </dependencyManagement>
2.1 起步依赖
starter
SpringBoot中常见项目名称,定义了当前项目使用的所有项目坐标,以达到减少依赖配置的目的
可以认为这个起步依赖相当于一个开关 我们主要用了这个东西 就相当用了他的全套功能
<!--starter:1. 在springboot的依赖里面很常见2. 一般会称之为起步依赖3. 所谓起步依赖就是说: 只要导入这个起步依赖,起步依赖的背后会包含着一大堆依赖--><dependencies><dependency><groupId>org.springframework.boot</groupId><artifactId>spring-boot-starter-web</artifactId></dependency><dependency><groupId>org.springframework.boot</groupId><artifactId>spring-boot-starter-test</artifactId><scope>test</scope></dependency></dependencies>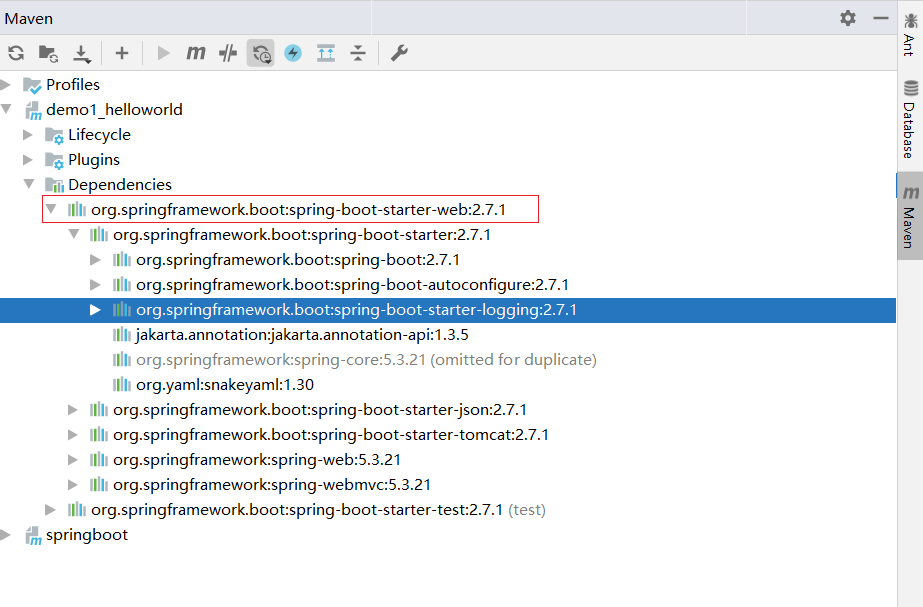
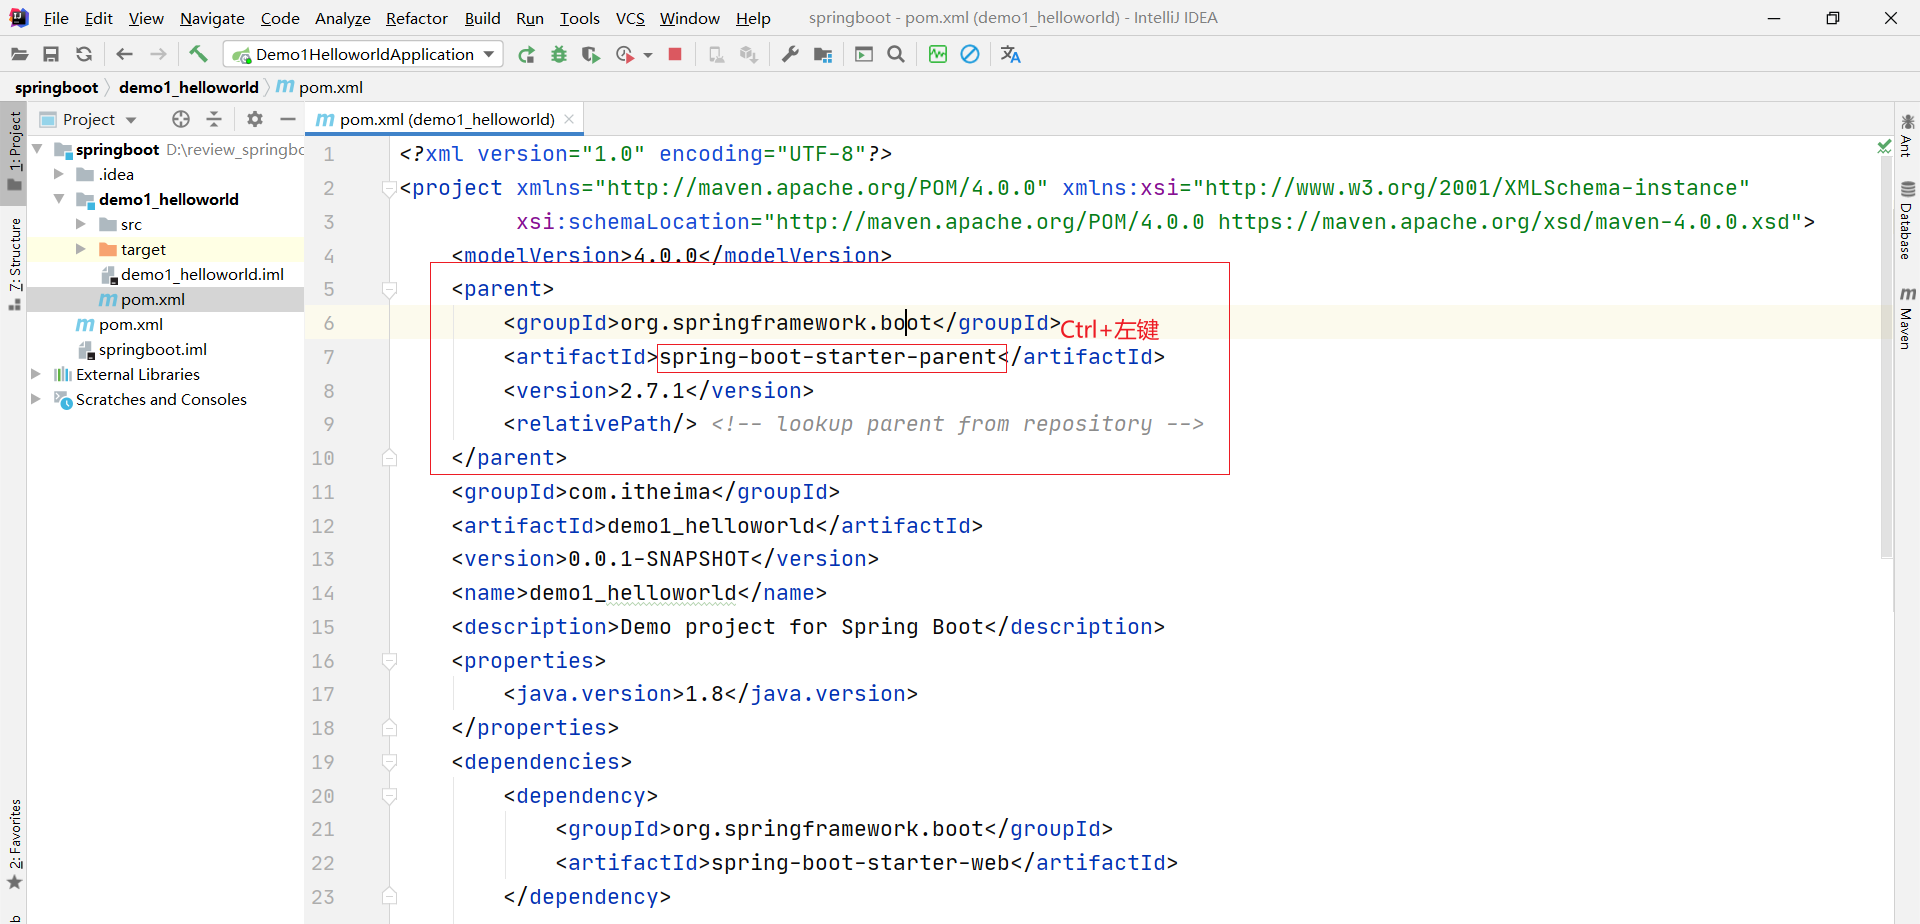
parent
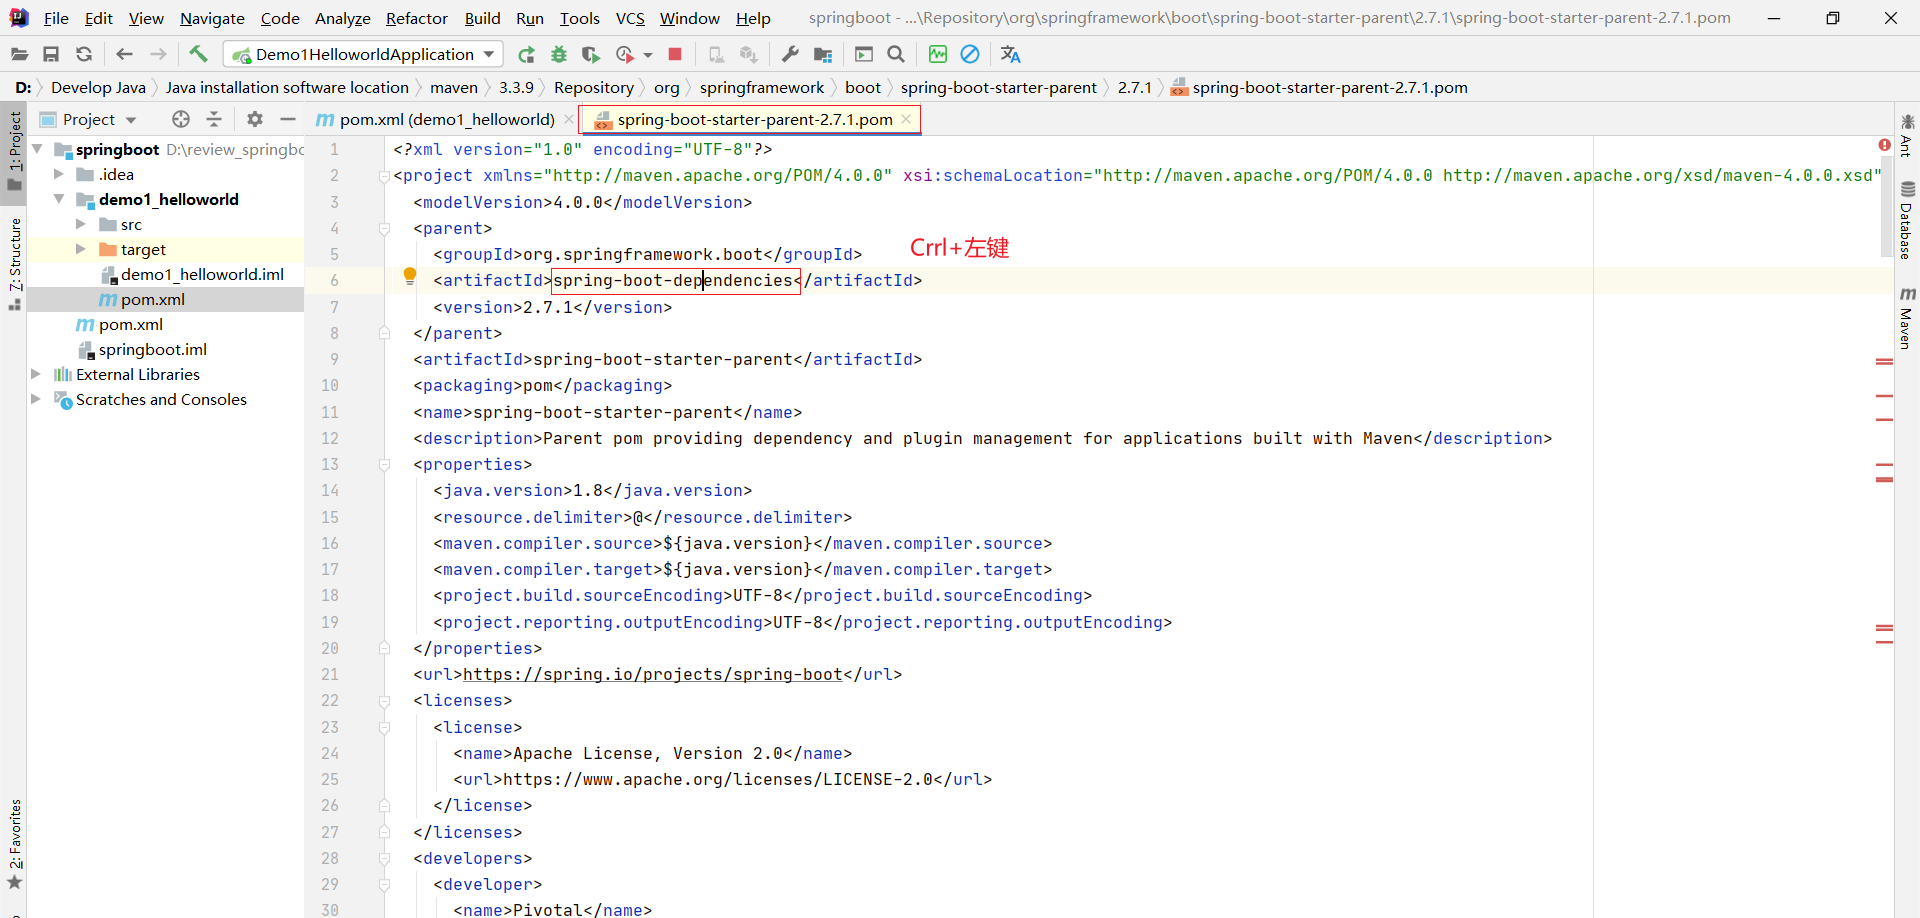
所有SpringBoot项目要继承的项目,定义了若干个坐标版本号(依赖管理,而非依赖),以达到减少依赖冲突的目的
spring-boot-starter-parent(2.5.0)与 spring-boot-starter-parent(2.4.6)共计57处坐标版本不同
<?xml version="1.0" encoding="UTF-8"?>
<project xmlns="http://maven.apache.org/POM/4.0.0" xmlns:xsi="http://www.w3.org/2001/XMLSchema-instance"xsi:schemaLocation="http://maven.apache.org/POM/4.0.0 https://maven.apache.org/xsd/maven-4.0.0.xsd"><modelVersion>4.0.0</modelVersion><!--继承 springboot 父亲--><parent><groupId>org.springframework.boot</groupId><artifactId>spring-boot-starter-parent</artifactId><version>2.7.1</version><relativePath/> <!-- lookup parent from repository --></parent><!--项目本身的信息--><groupId>com.itheima</groupId><artifactId>demo1_helloworld</artifactId><version>0.0.1-SNAPSHOT</version><name>demo1_helloworld</name><description>Demo project for Spring Boot</description>
<?xml version="1.0" encoding="UTF-8"?>
<project xmlns="http://maven.apache.org/POM/4.0.0"xsi:schemaLocation="http://maven.apache.org/POM/4.0.0 http://maven.apache.org/xsd/maven-4.0.0.xsd"xmlns:xsi="http://www.w3.org/2001/XMLSchema-instance"><modelVersion>4.0.0</modelVersion><parent><groupId>org.springframework.boot</groupId><artifactId>spring-boot-dependencies</artifactId><version>2.5.0</version></parent><artifactId>spring-boot-starter-parent</artifactId><packaging>pom</packaging> ...
</project>实际开发
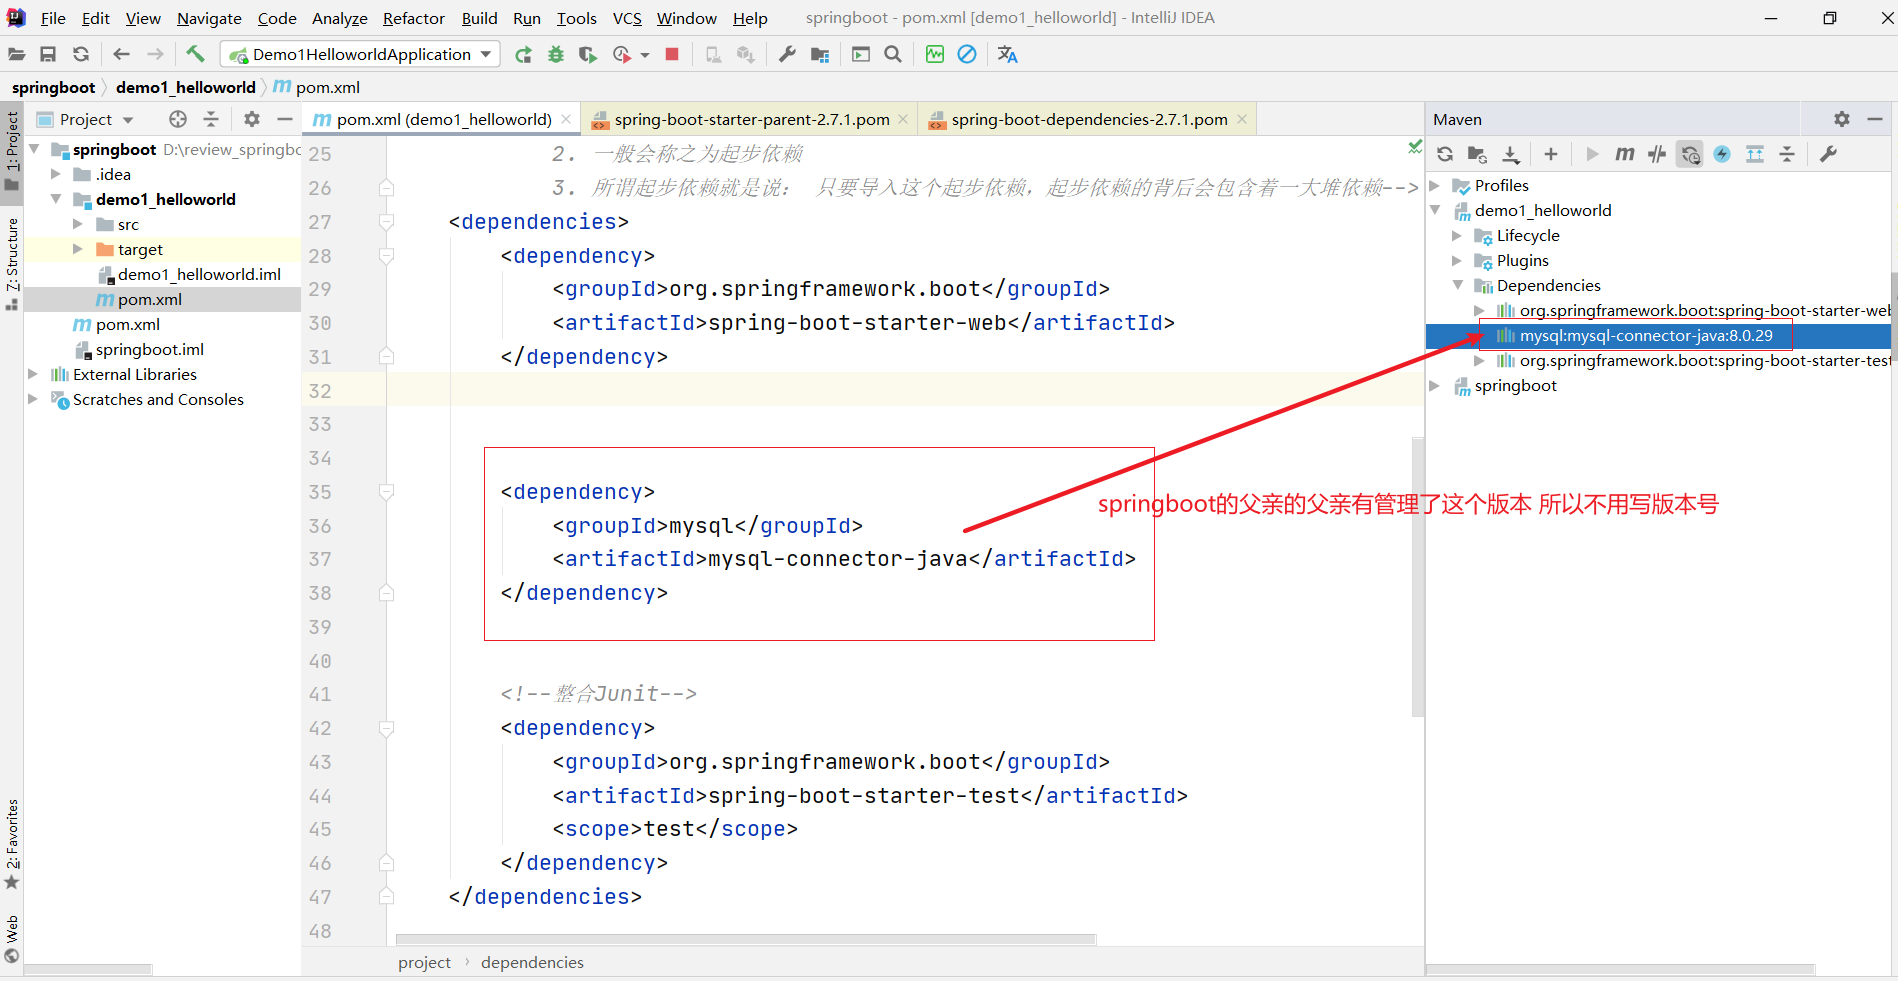
使用任意坐标时,仅书写GAV中的G和A,V由SpringBoot提供
如发生坐标错误,再指定version(要小心版本冲突)
如我们要用到Mysql
<dependency><groupId>mysql</groupId><artifactId>mysql-connector-java</artifactId></dependency>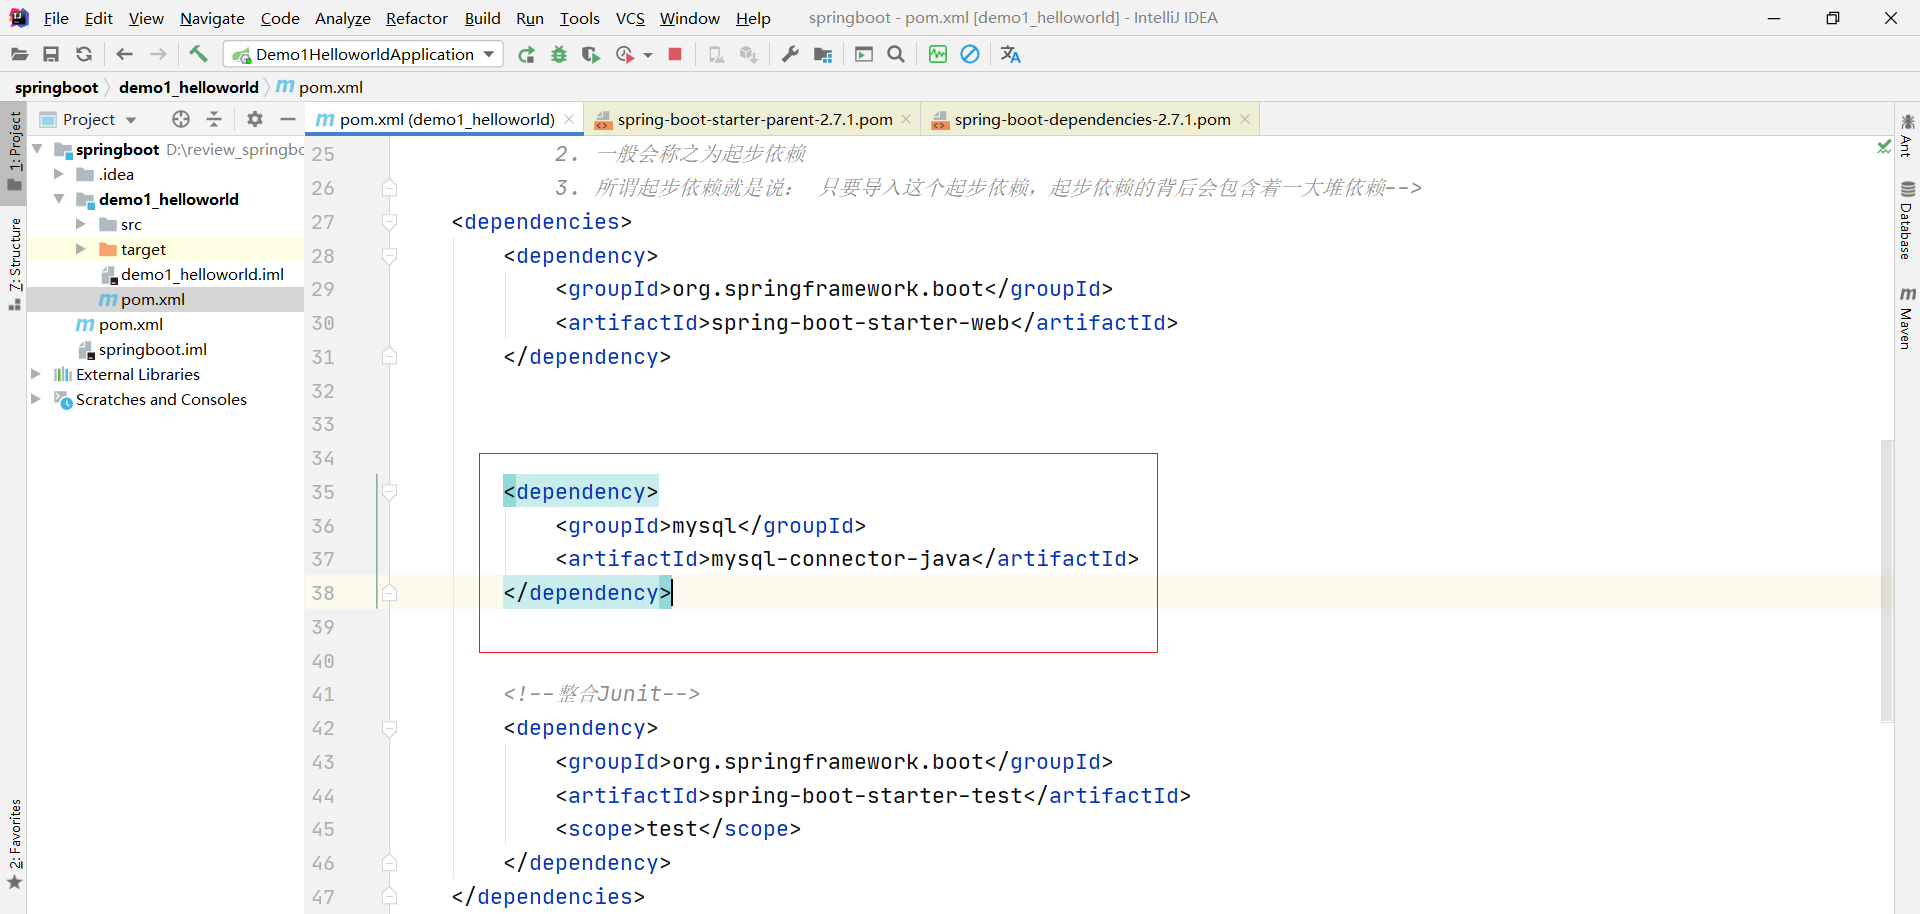
当然也不是什么都有管理
比如druid就不被管理
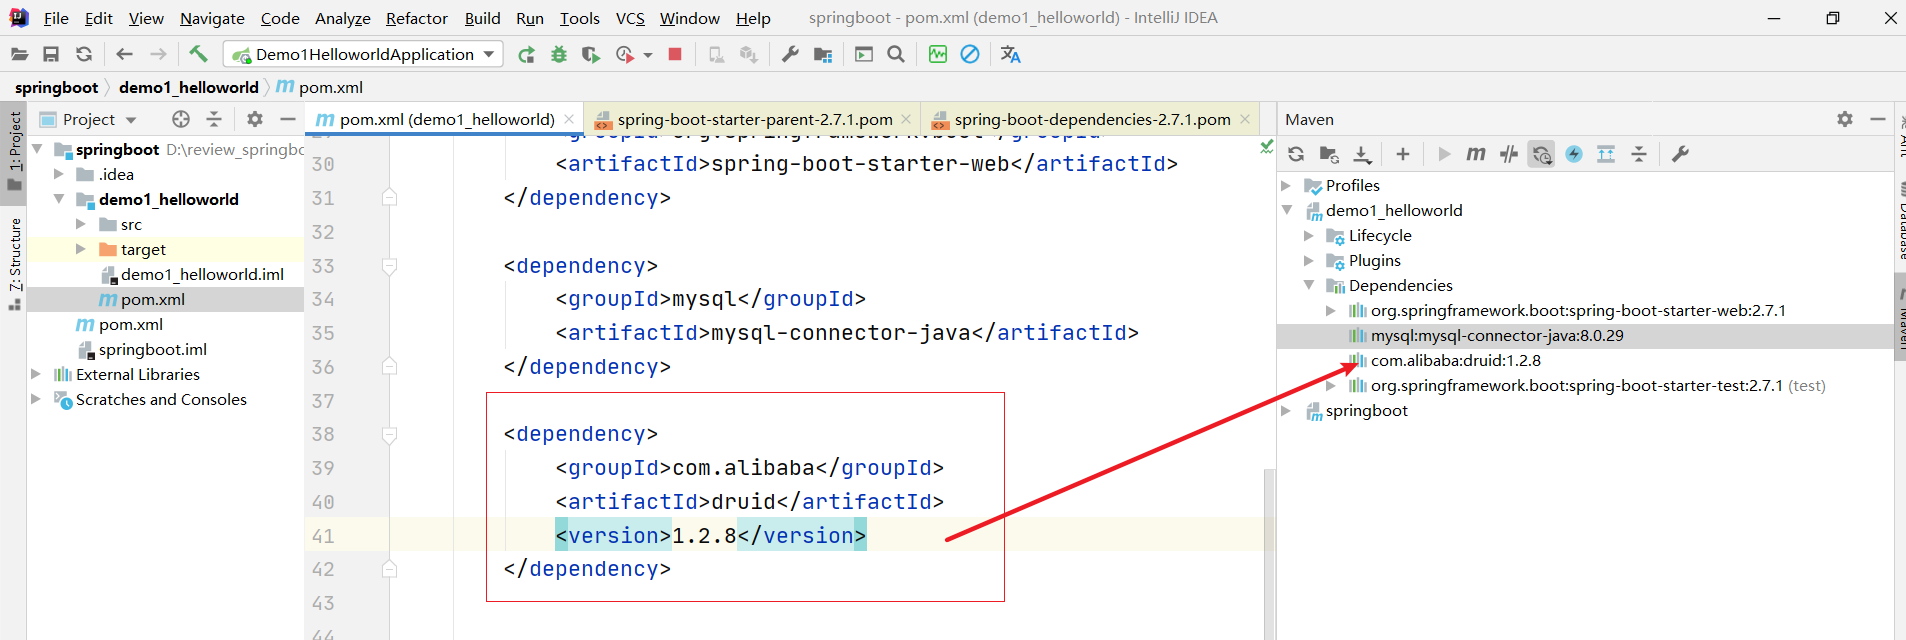
<dependency><groupId>com.alibaba</groupId><artifactId>druid</artifactId><version>1.2.8</version></dependency>如果不写版本号的话 就会出现unknown 这个时候 我们就知道在springboot的父亲的父亲里面并没有管理这个依赖 这个时候 我们就能自己添加版本号
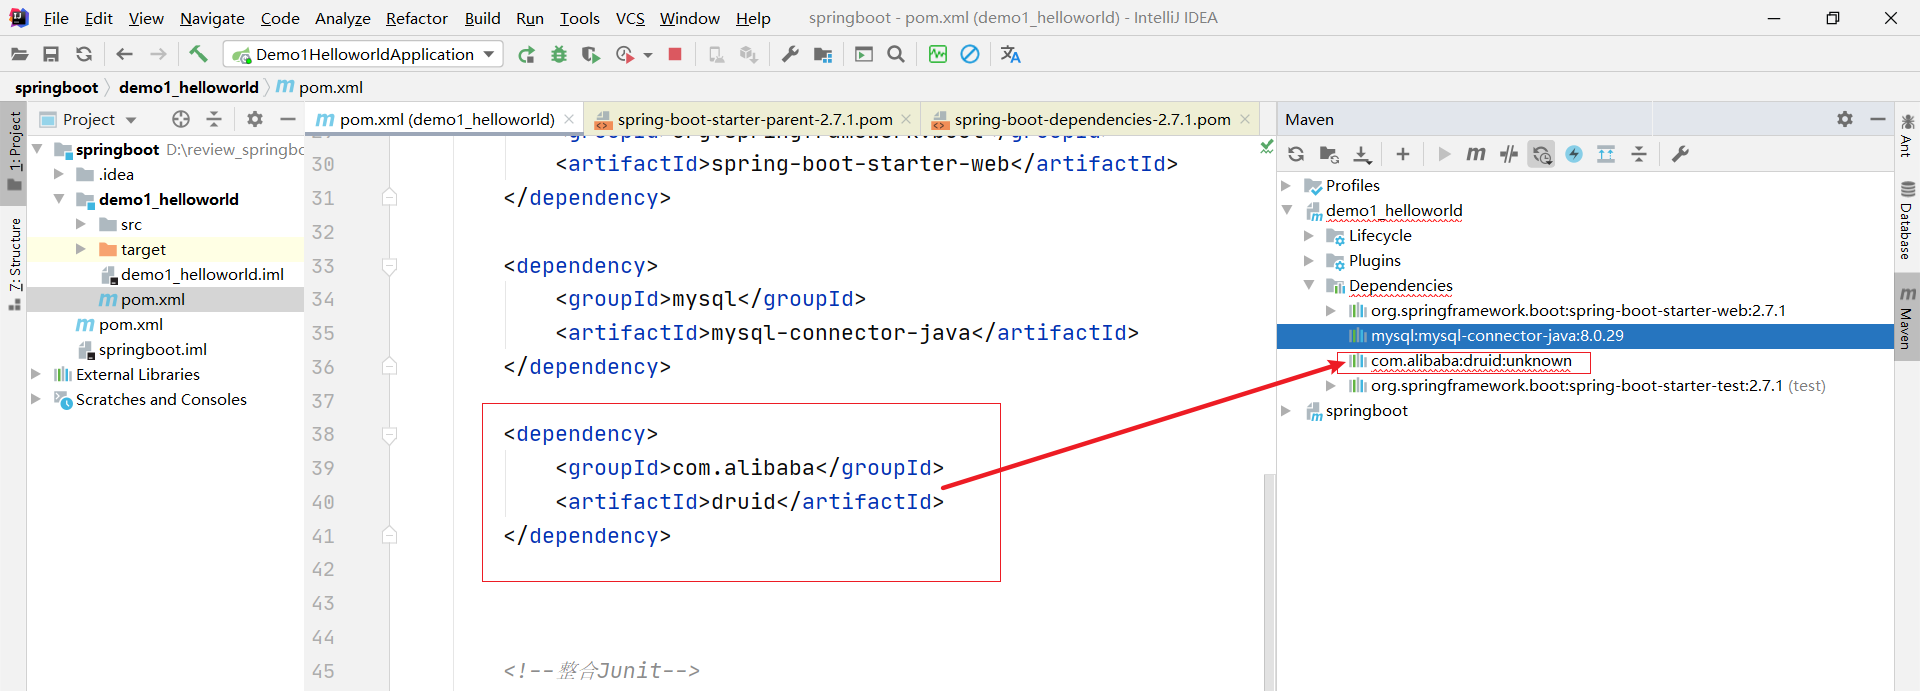
自己添加版本号
2.2 辅助功能
SpringBoot程序启动
package com.itheima;import org.springframework.boot.SpringApplication;
import org.springframework.boot.autoconfigure.SpringBootApplication;/*/*@SpringBootApplication:1. 表示这个类是一个springboot应用程序的入口类。2. 要想让程序启动,只需要在main方法里面写上这样的一句话:SpringApplication.run(当前类的字节码对象, args);3. 拓展:3.1 springboot项目启动的时候,默认会扫描启动类所在的位置,以及它后续的所有子包。3.2 查找到类里面打的注解 @Controller , @Service , @RequestMapping.3.3 springApplication.run 传递进去当前类的字节码对象,也是可以确定当前这个启动器它的包是哪个!*/
@SpringBootApplication
public class Demo1HelloworldApplication {public static void main(String[] args) {SpringApplication.run(Demo1HelloworldApplication.class, args);}}
SpringBoot在创建项目时,采用jar的打包方式
SpringBoot的引导类是项目的入口,运行main方法就可以启动项目
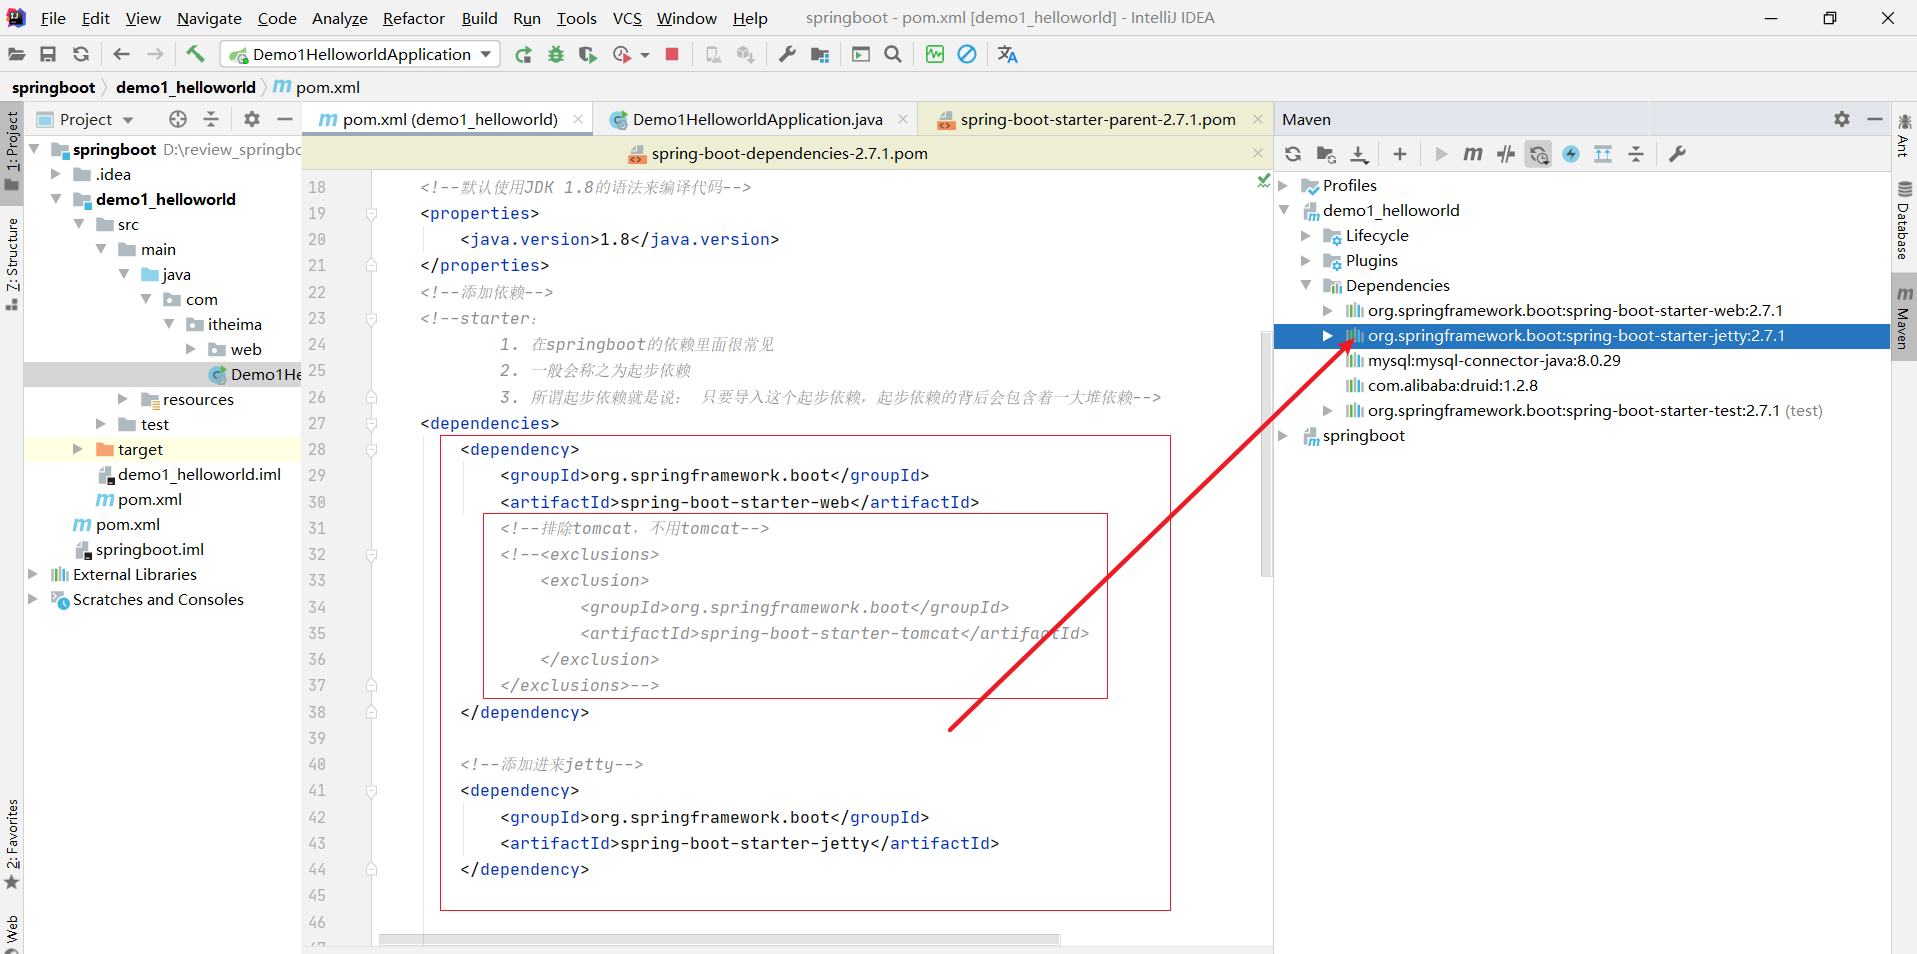
使用maven依赖管理变更起步依赖项
Jetty比Tomcat更轻量级,可扩展性更强(相较于Tomcat),谷歌应用引擎(GAE)已经全面切换为Jetty
<dependencies><dependency><groupId>org.springframework.boot</groupId><artifactId>spring-boot-starter-web</artifactId><!--排除tomcat,不用tomcat--><!--<exclusions><exclusion><groupId>org.springframework.boot</groupId><artifactId>spring-boot-starter-tomcat</artifactId></exclusion></exclusions>--></dependency><!--添加进来jetty--><dependency><groupId>org.springframework.boot</groupId><artifactId>spring-boot-starter-jetty</artifactId></dependency><dependency><groupId>mysql</groupId><artifactId>mysql-connector-java</artifactId></dependency><dependency><groupId>com.alibaba</groupId><artifactId>druid</artifactId><version>1.2.8</version></dependency><!--整合Junit--><dependency><groupId>org.springframework.boot</groupId><artifactId>spring-boot-starter-test</artifactId><scope>test</scope></dependency></dependencies>
全部pom.xml
`<?xml version="1.0" encoding="UTF-8"?>
<project xmlns="http://maven.apache.org/POM/4.0.0" xmlns:xsi="http://www.w3.org/2001/XMLSchema-instance"xsi:schemaLocation="http://maven.apache.org/POM/4.0.0 https://maven.apache.org/xsd/maven-4.0.0.xsd"><modelVersion>4.0.0</modelVersion><!--继承 springboot 父亲--><parent><groupId>org.springframework.boot</groupId><artifactId>spring-boot-starter-parent</artifactId><version>2.7.1</version><relativePath/> <!-- lookup parent from repository --></parent><!--项目本身的信息--><groupId>com.itheima</groupId><artifactId>demo1_helloworld</artifactId><version>0.0.1-SNAPSHOT</version><name>demo1_helloworld</name><description>Demo project for Spring Boot</description><!--默认使用JDK 1.8的语法来编译代码--><properties><java.version>1.8</java.version></properties><!--添加依赖--><!--starter:1. 在springboot的依赖里面很常见2. 一般会称之为起步依赖3. 所谓起步依赖就是说: 只要导入这个起步依赖,起步依赖的背后会包含着一大堆依赖--><dependencies><dependency><groupId>org.springframework.boot</groupId><artifactId>spring-boot-starter-web</artifactId><!--排除tomcat,不用tomcat--><!--<exclusions><exclusion><groupId>org.springframework.boot</groupId><artifactId>spring-boot-starter-tomcat</artifactId></exclusion></exclusions>--></dependency><!--添加进来jetty--><dependency><groupId>org.springframework.boot</groupId><artifactId>spring-boot-starter-jetty</artifactId></dependency><dependency><groupId>mysql</groupId><artifactId>mysql-connector-java</artifactId></dependency><dependency><groupId>com.alibaba</groupId><artifactId>druid</artifactId><version>1.2.8</version></dependency><!--整合Junit--><dependency><groupId>org.springframework.boot</groupId><artifactId>spring-boot-starter-test</artifactId><scope>test</scope></dependency></dependencies><!--这是用来配置打jar包的, 有了这个插件的配置,那么项目打出来的jar包,就具备了执行的入口。就可以使用 java -jar xxxx.jar 启动起来项目--><build><plugins><plugin><groupId>org.springframework.boot</groupId><artifactId>spring-boot-maven-plugin</artifactId></plugin></plugins></build></project>
二、基础配置
环境准备 demo2_properties
前面的创建操作和demo1类似 不在展示

1. 配置文件格式
问题导入
框架常见的配置文件有哪几种形式?
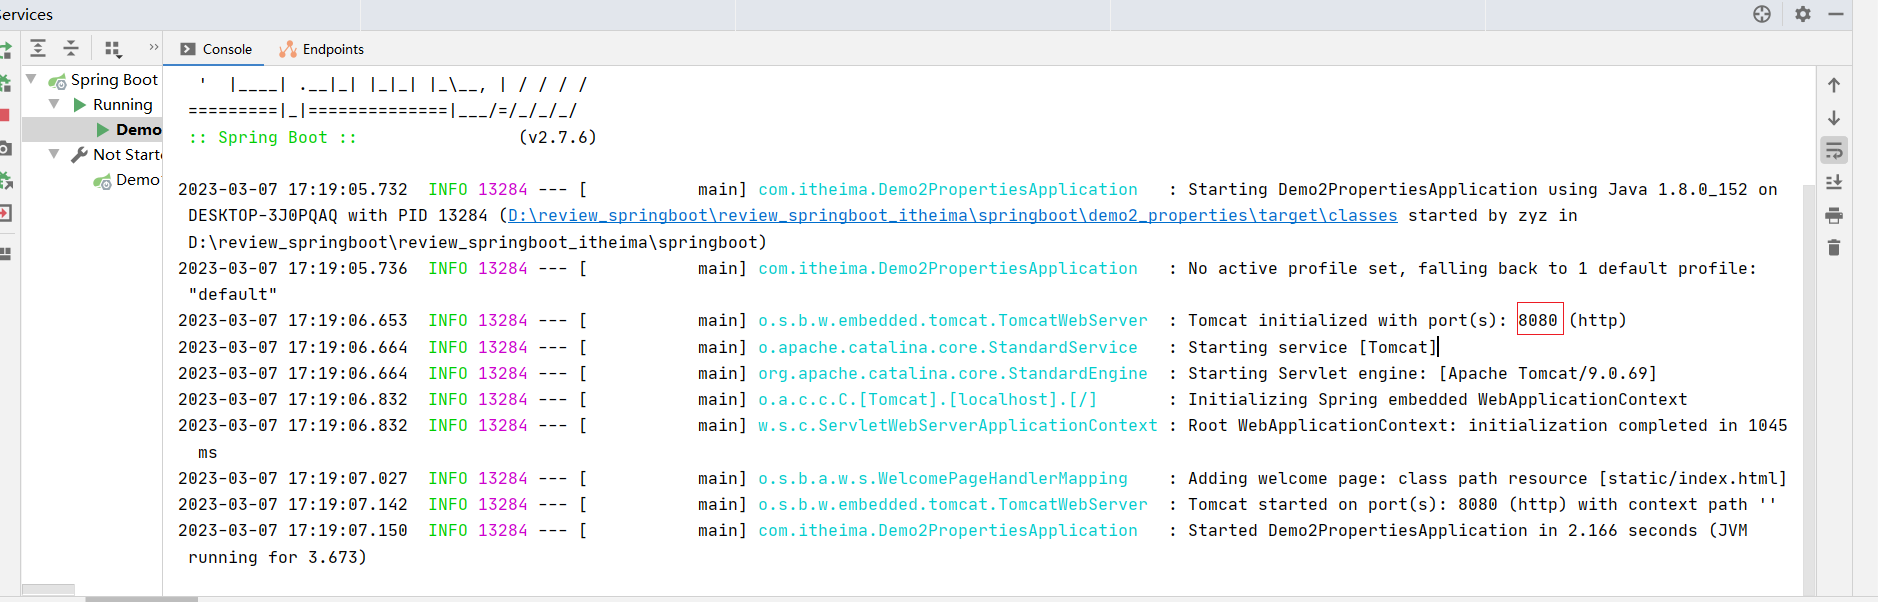
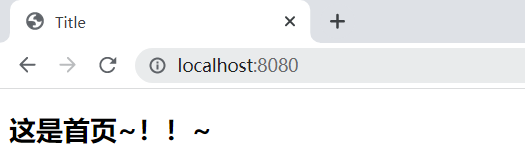
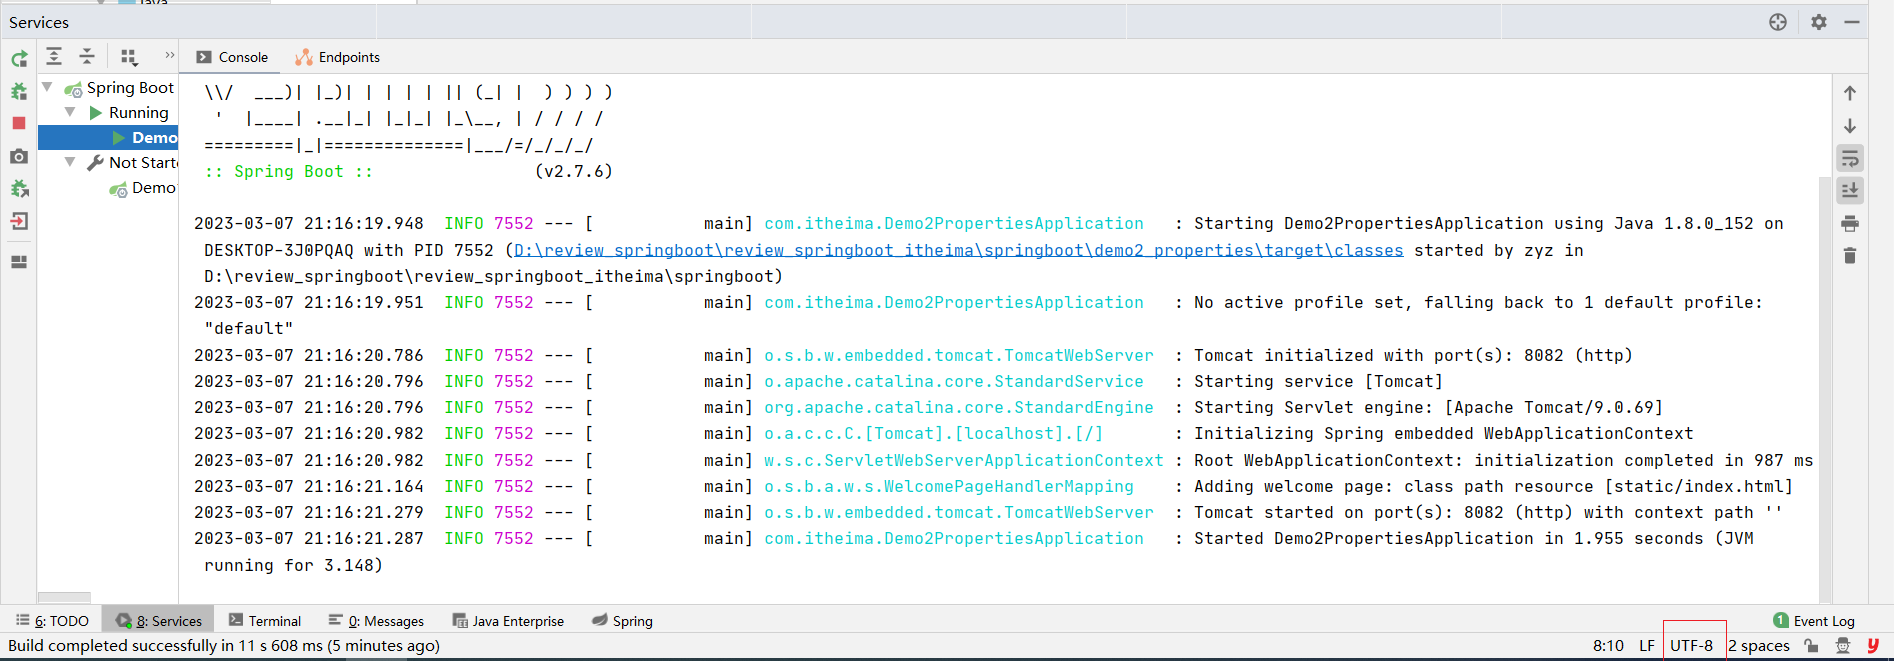
1.1 修改服务器端口
SpringBoot提供了多种属性配置方式
application.properties
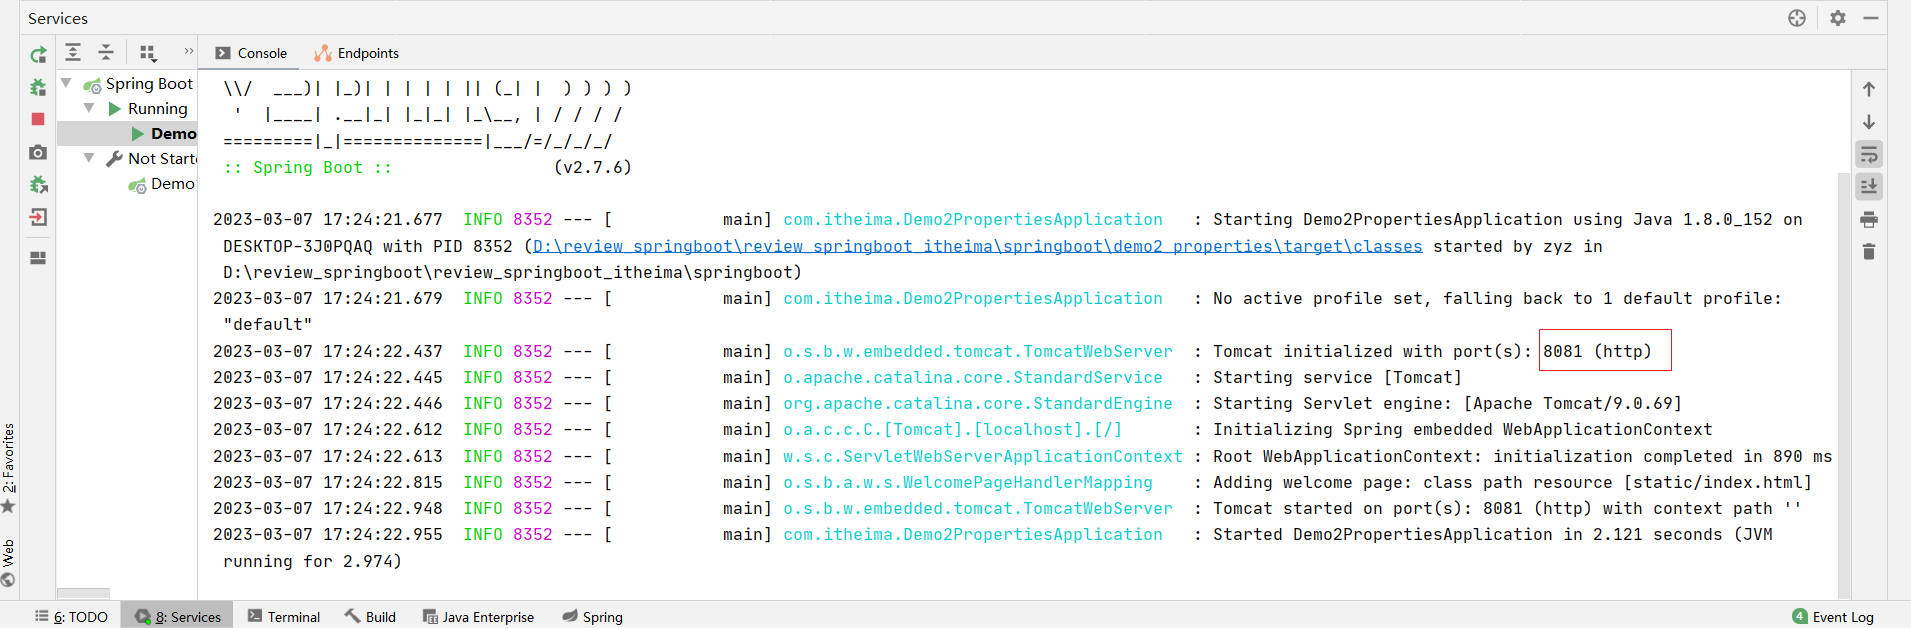
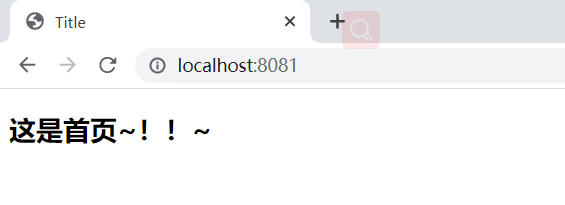
server.port=8081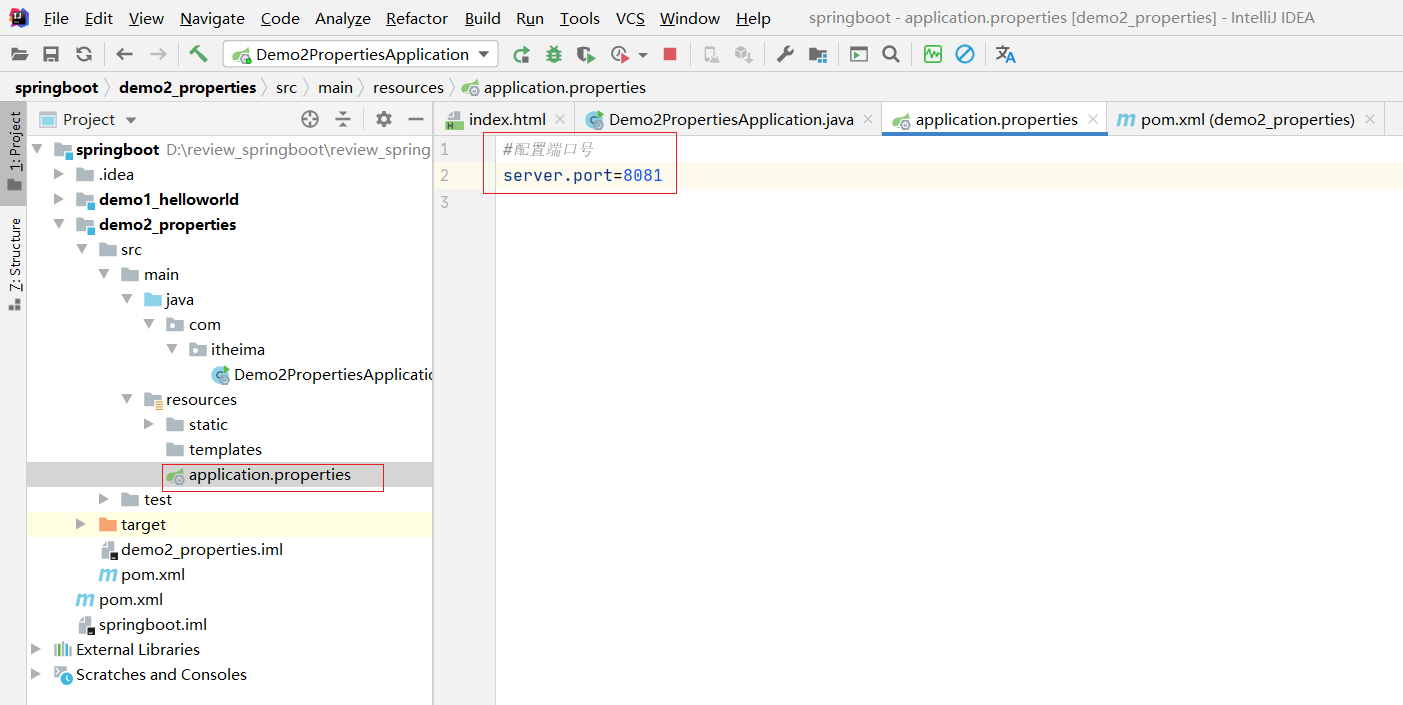
重启
小备注:如果发现启动报错

解决办法
查看进程 看看有没的被人家使用了
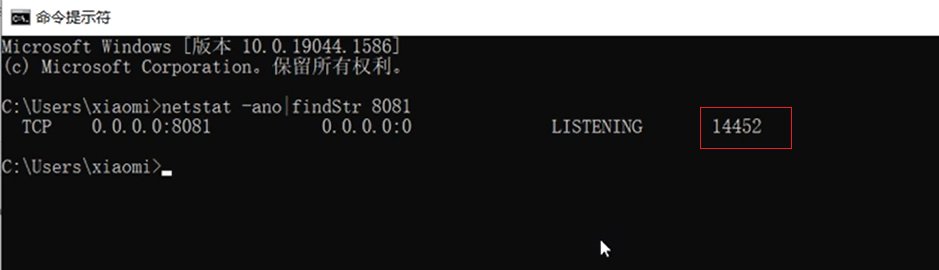
发现被14452使用了
打开任务管理器
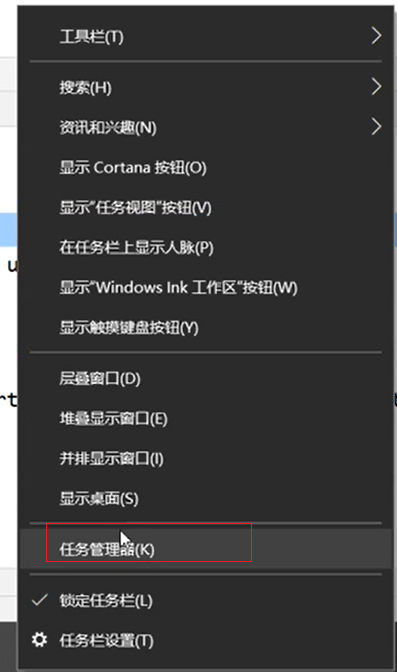
找到14452
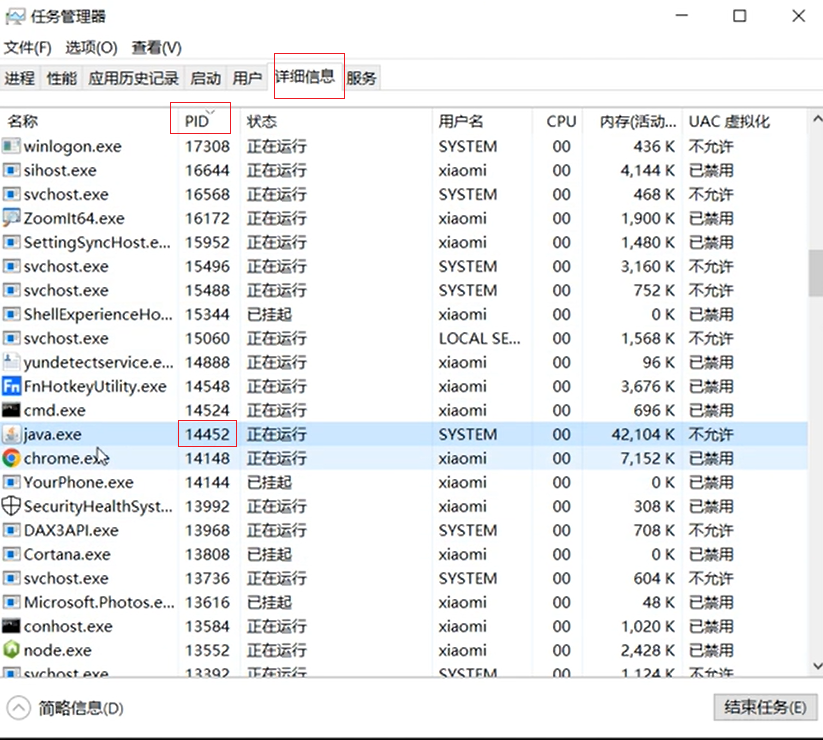
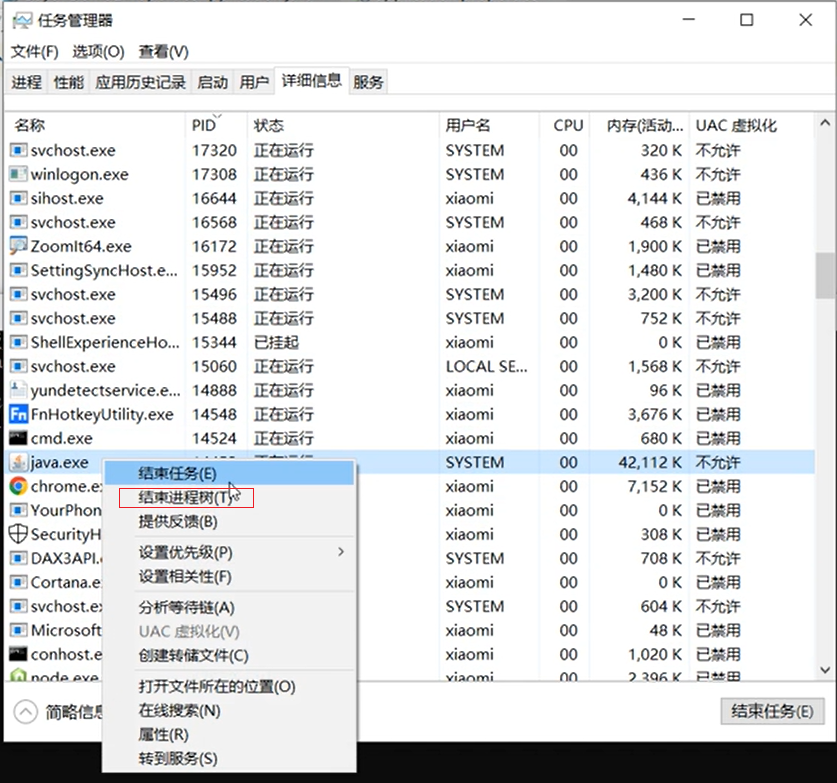
在重新启动就可以
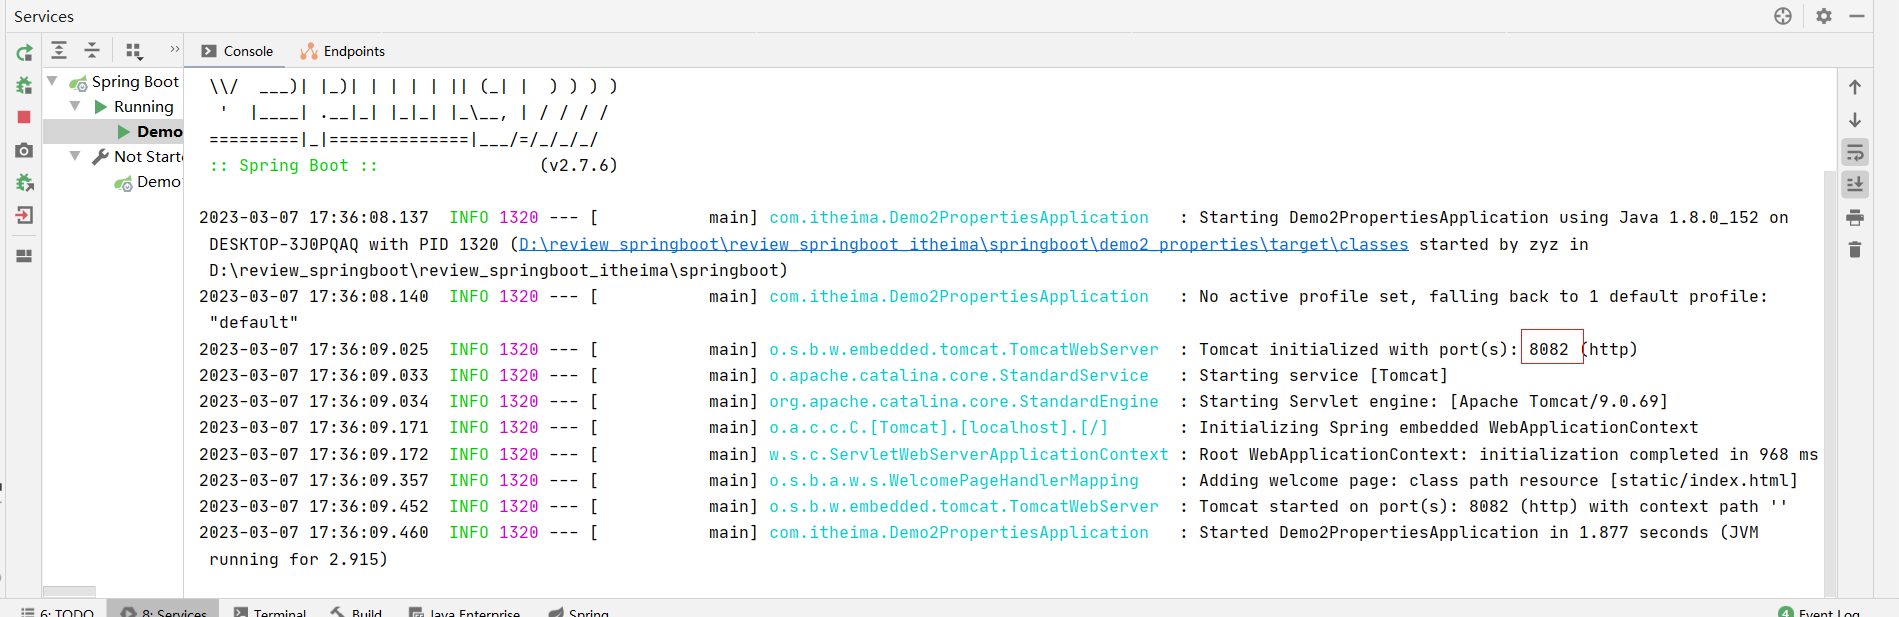
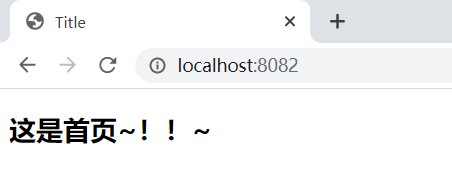
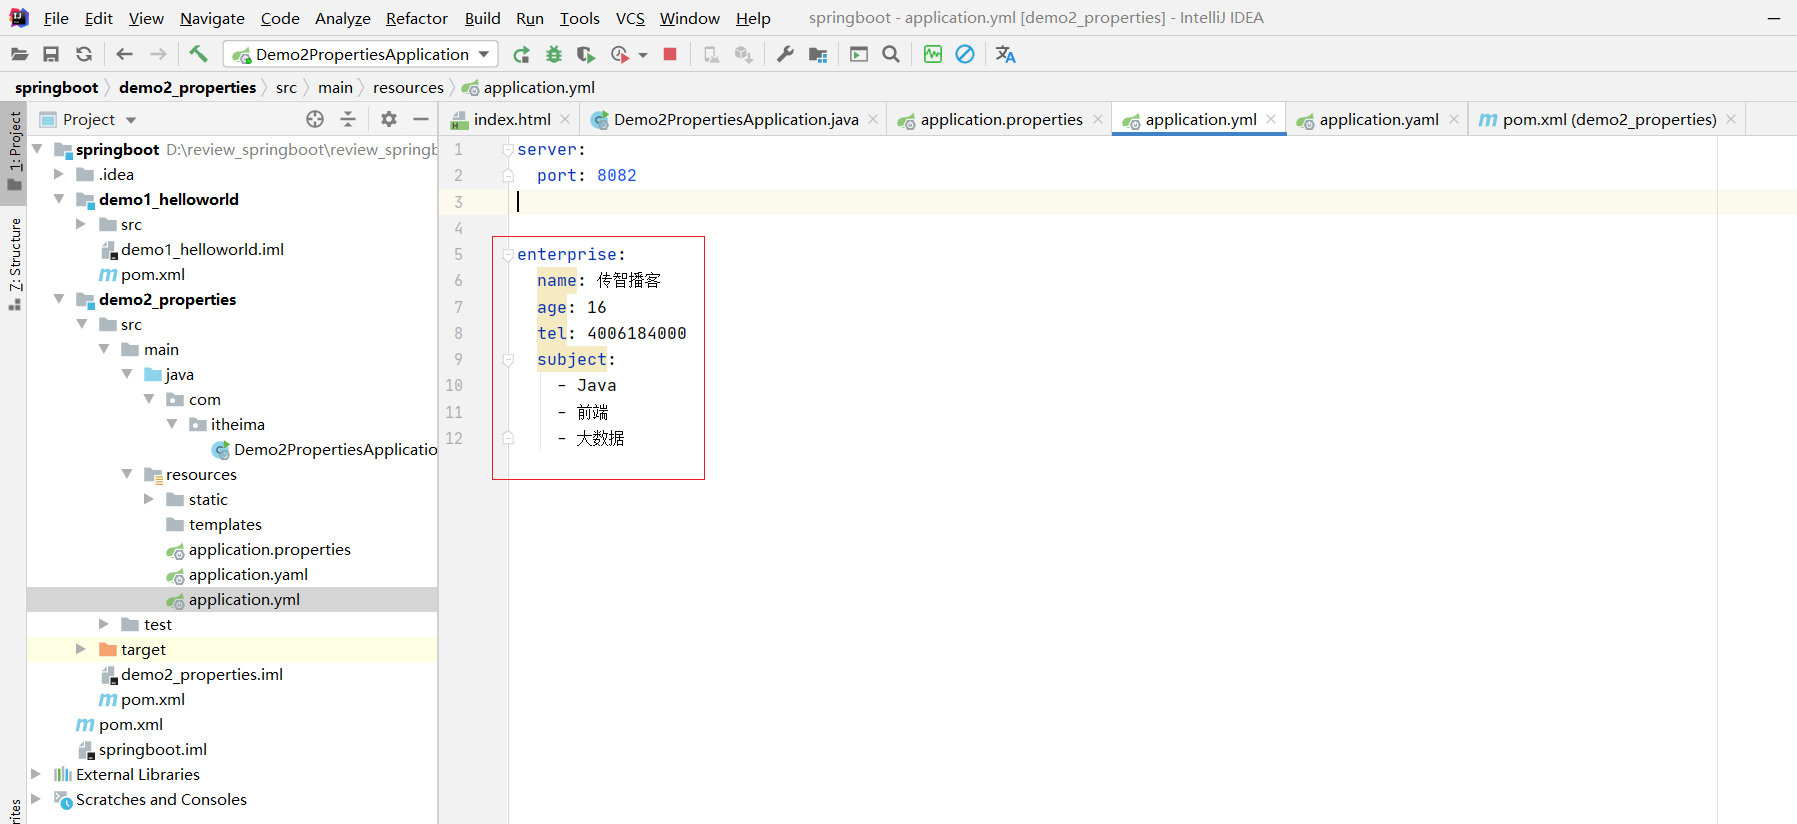
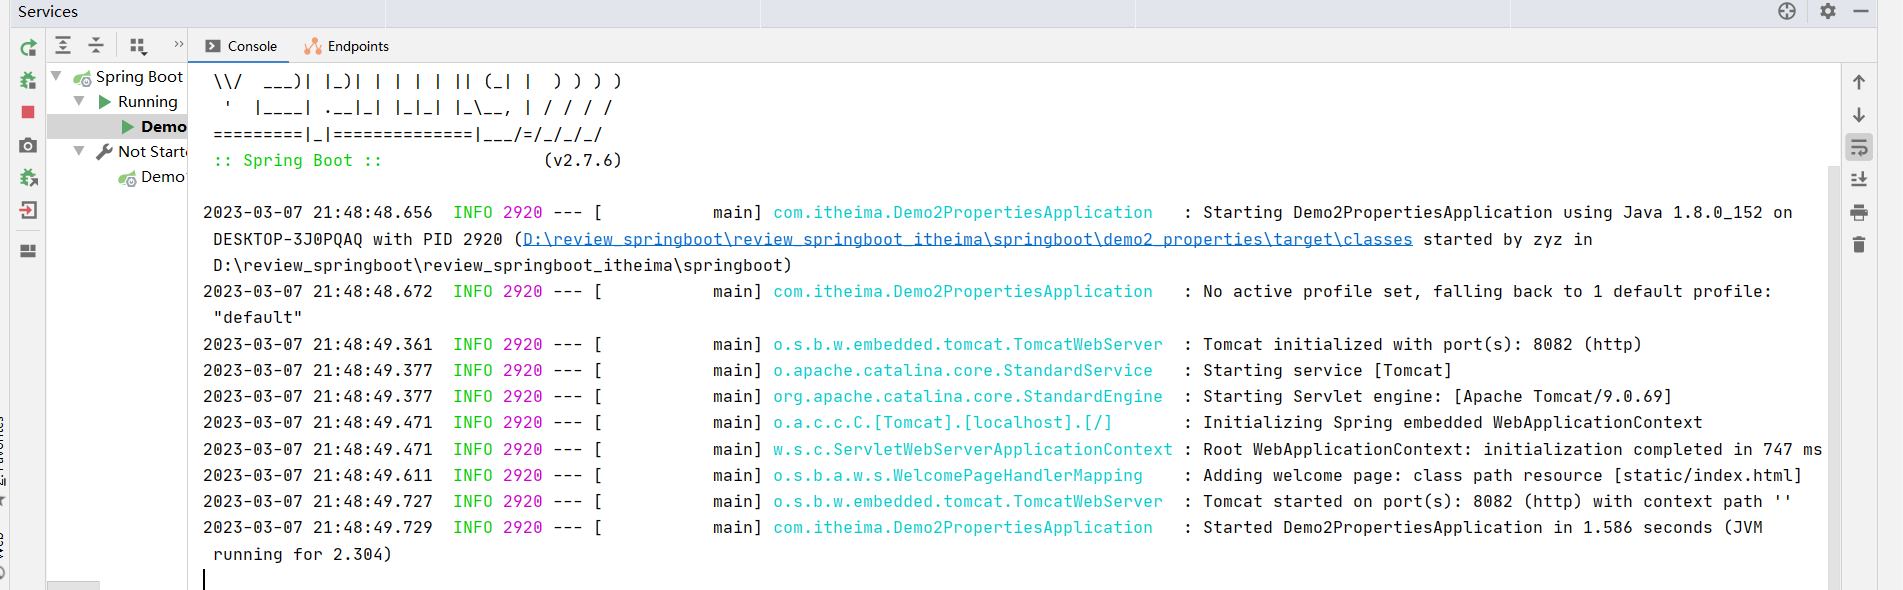
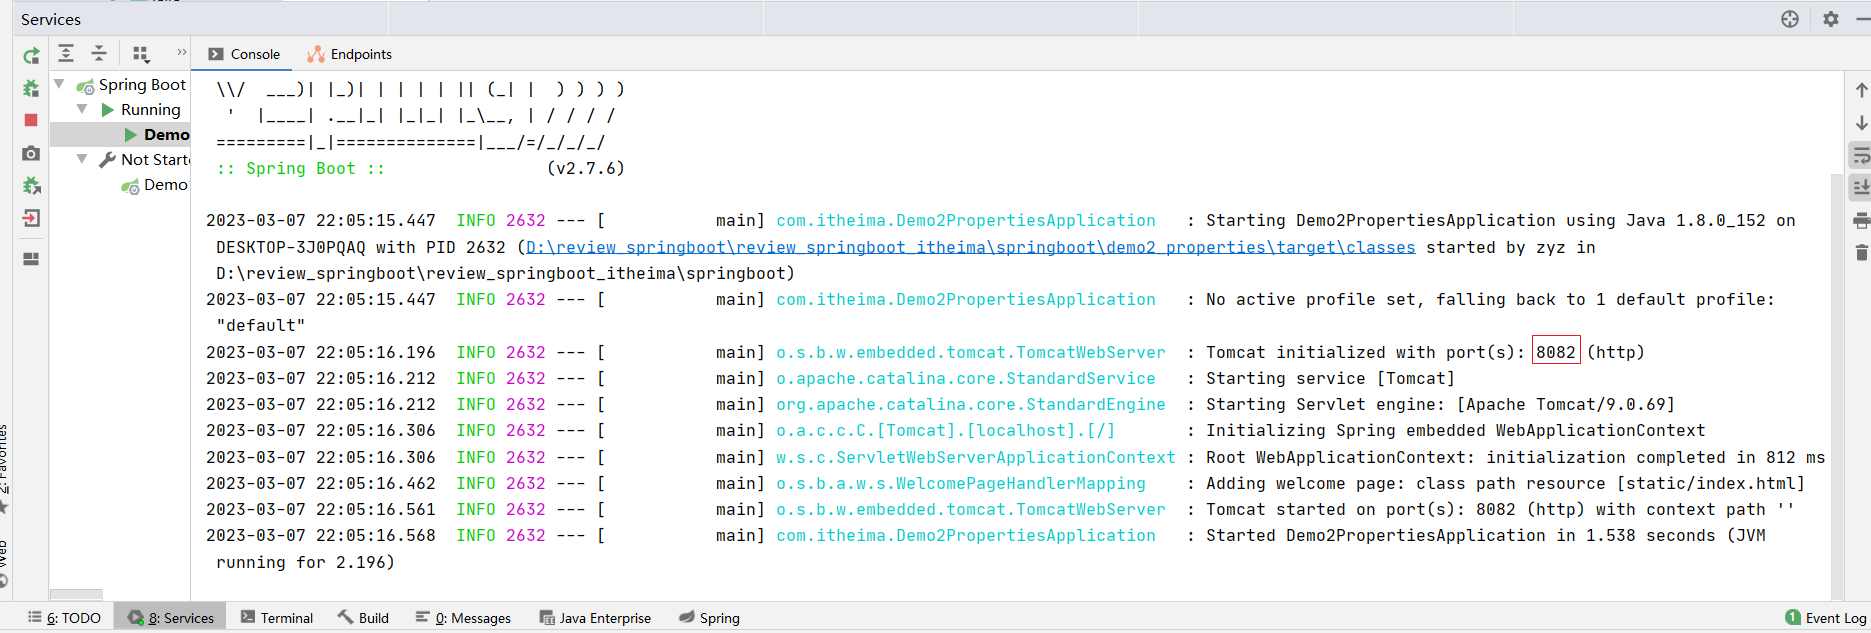
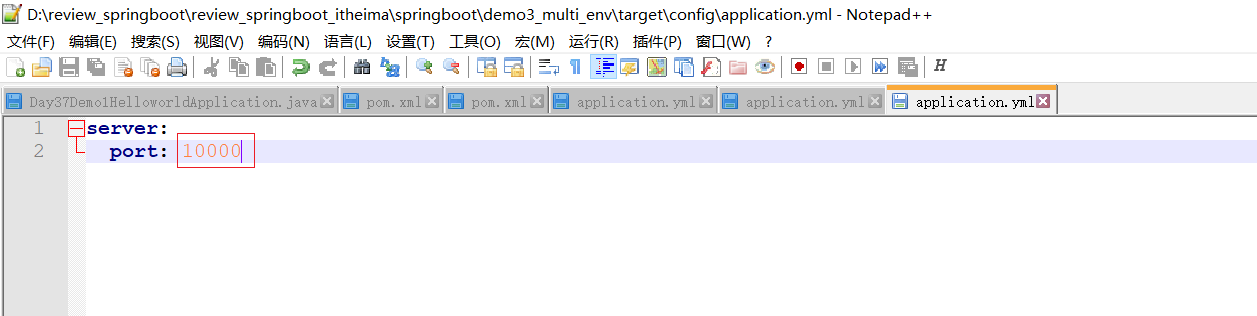
application.yml
server:port: 8082


重新启动
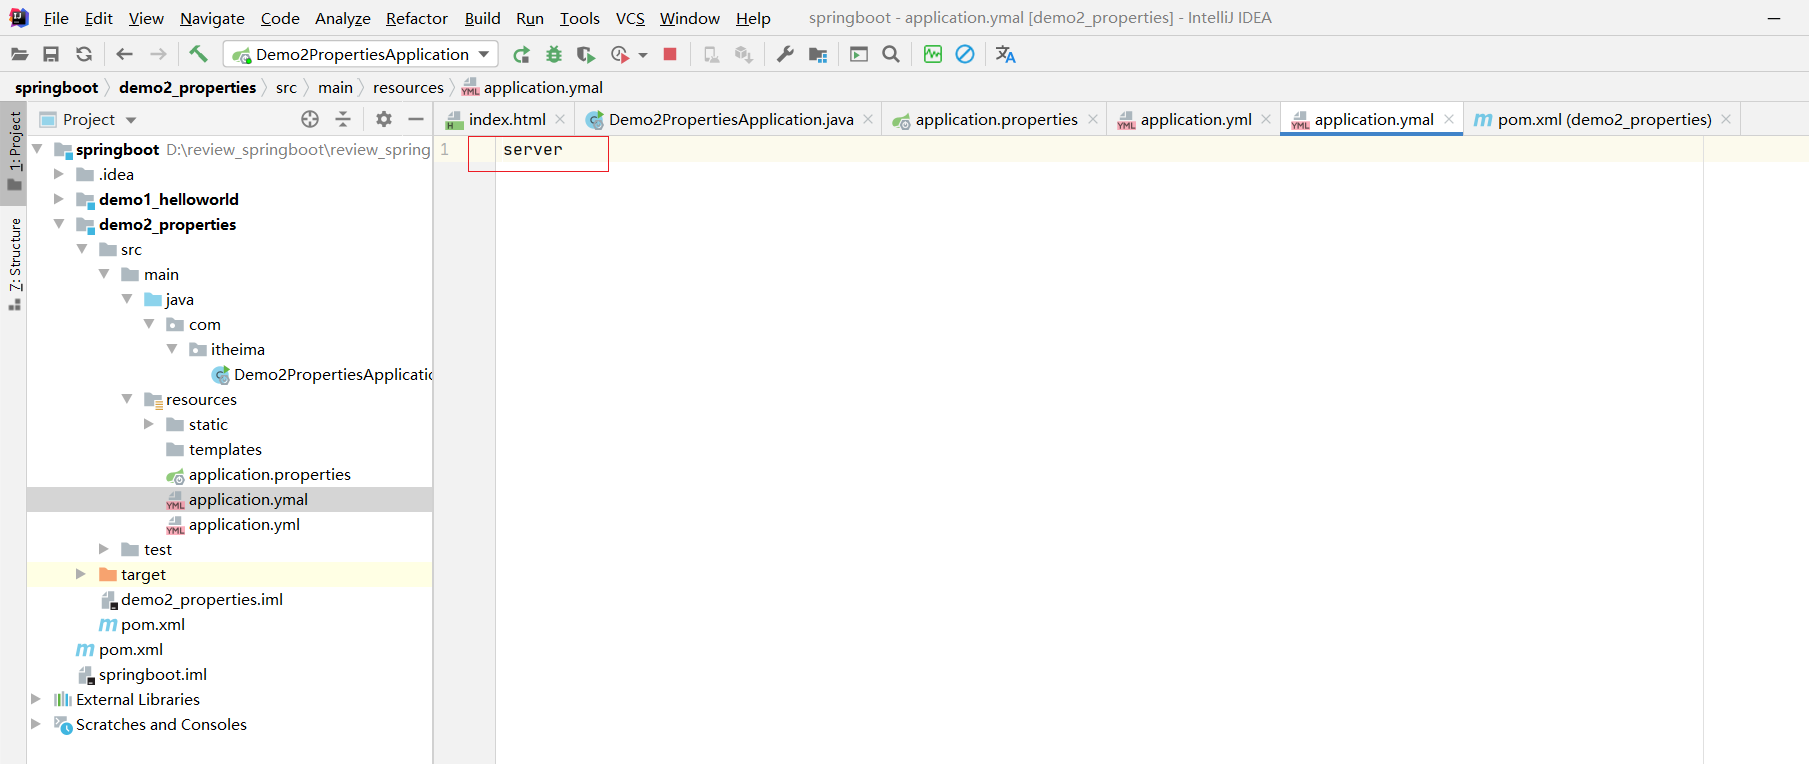
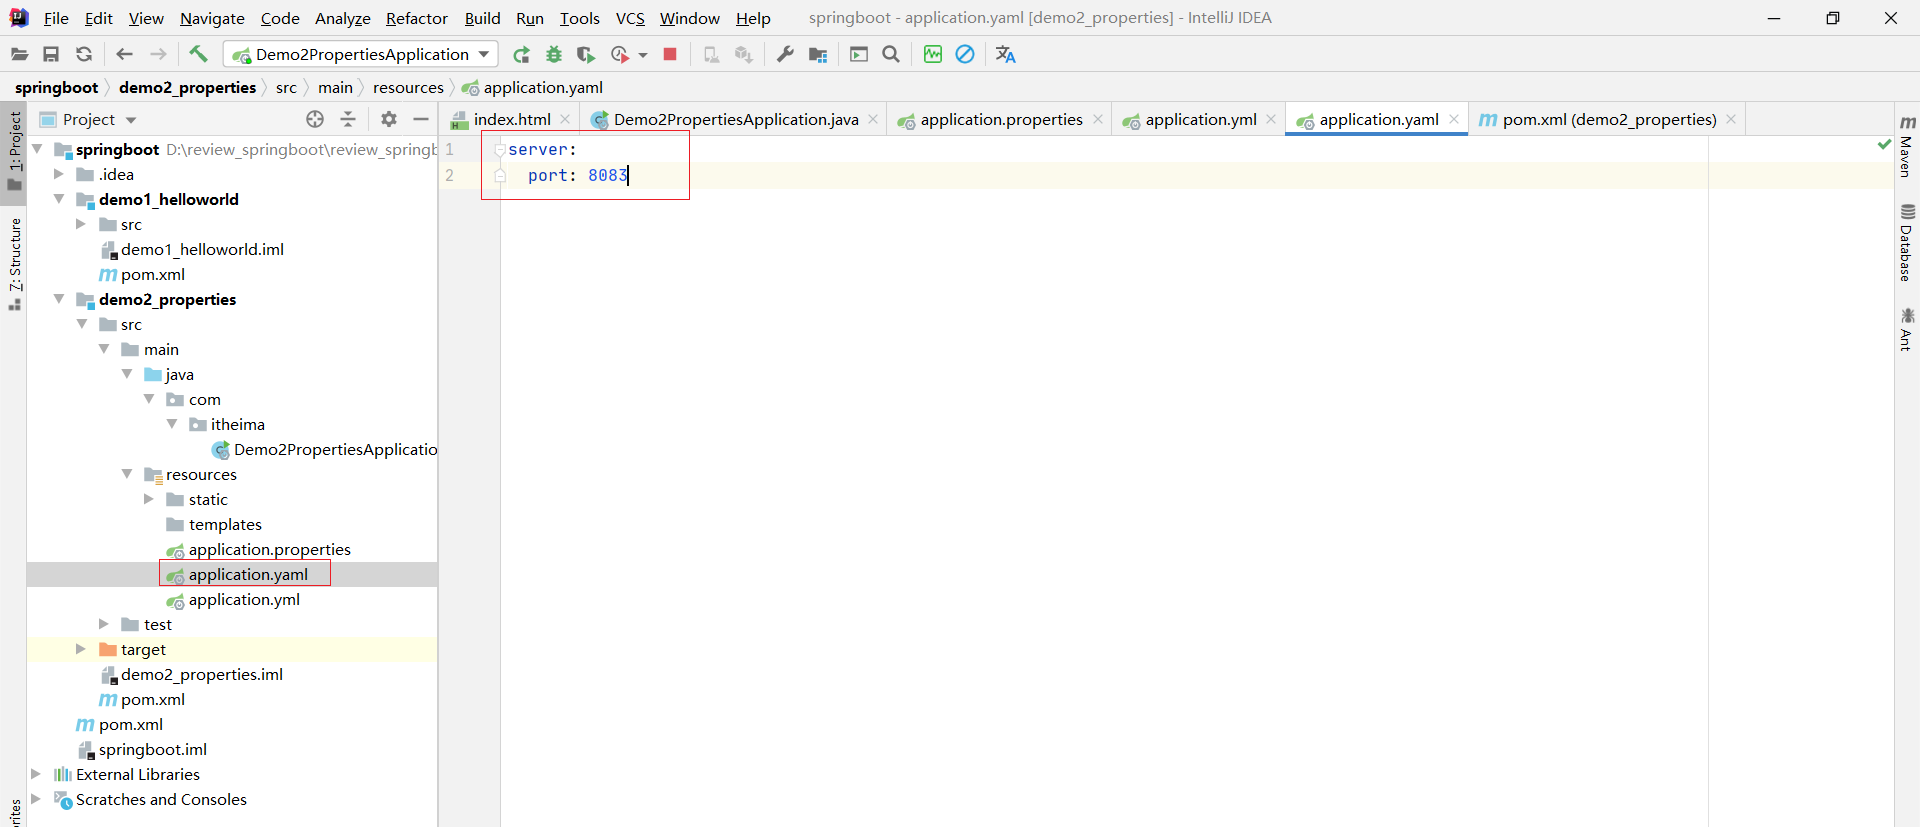
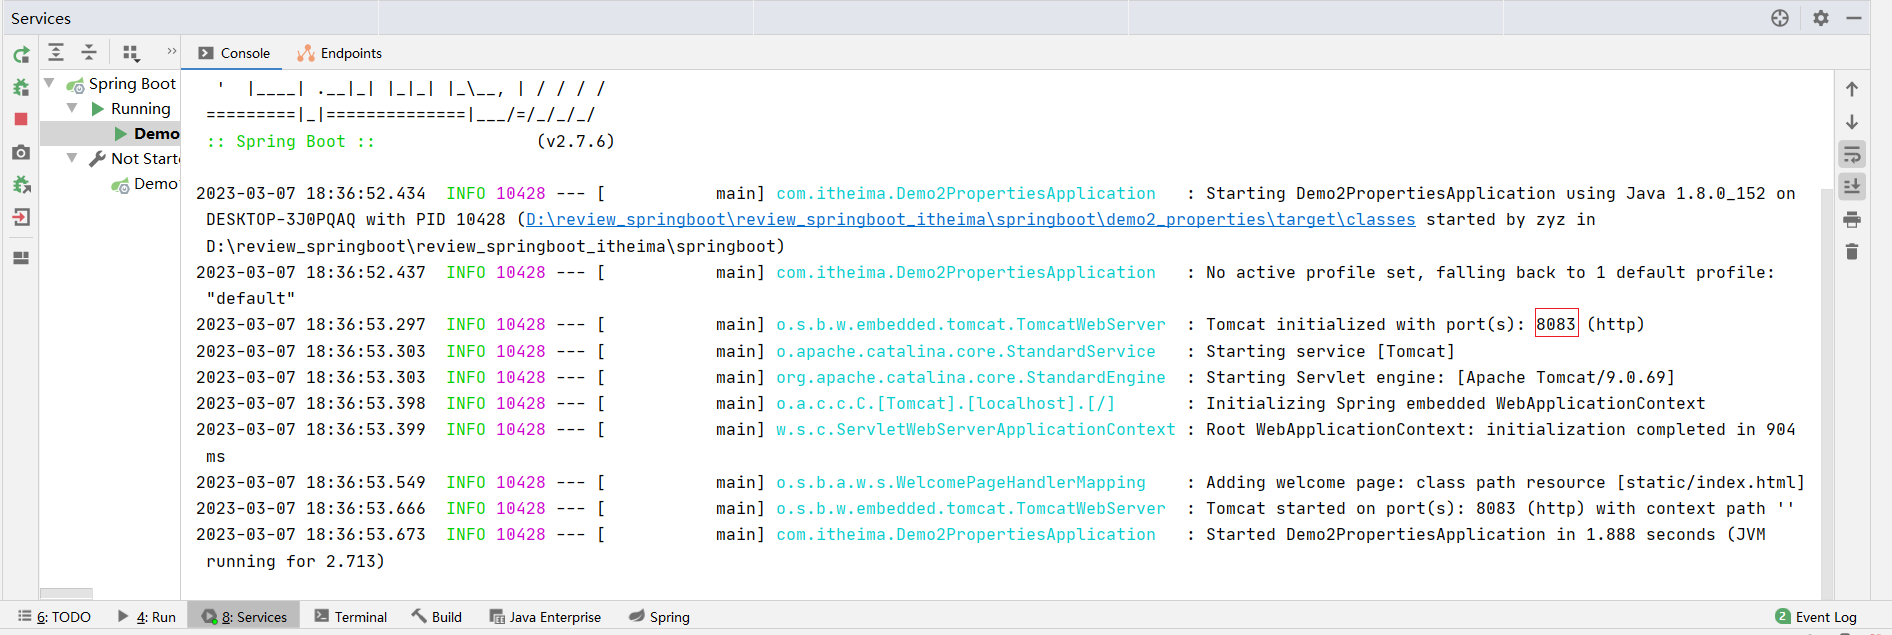
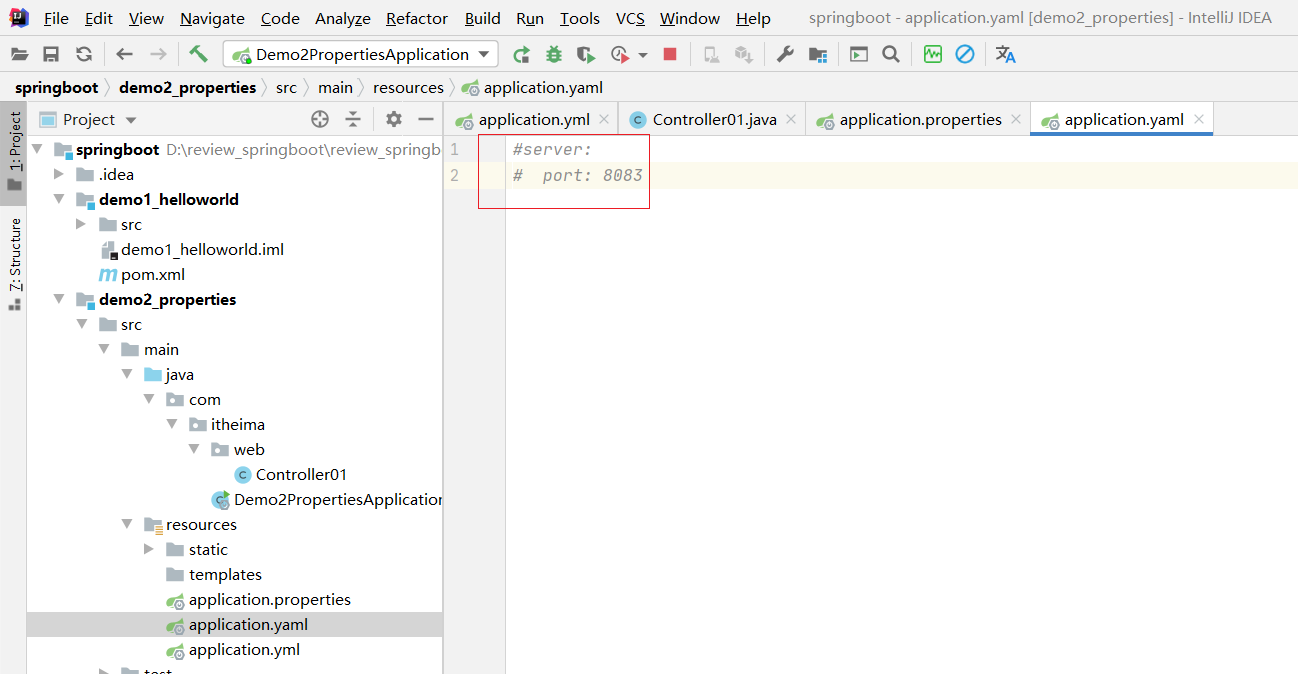
application.yaml
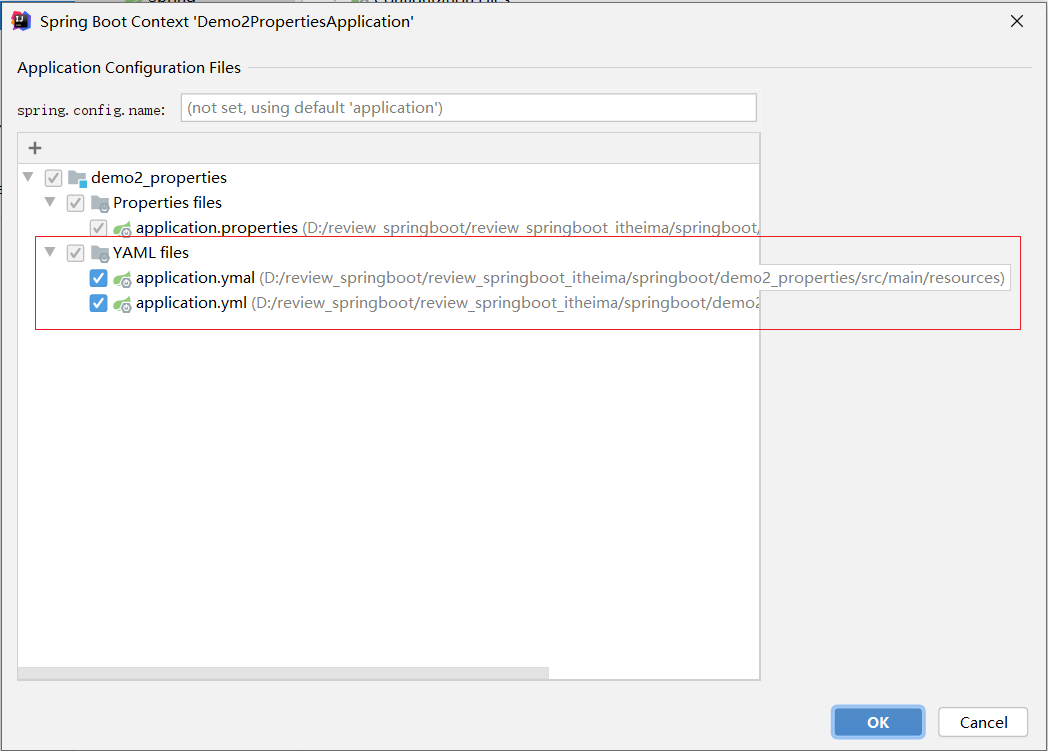
server:port: 8083发现不提示 解决办法 1.2 自动提示功能消失解决方案
解决完小叶子问题之 后 就会有提示了
重启
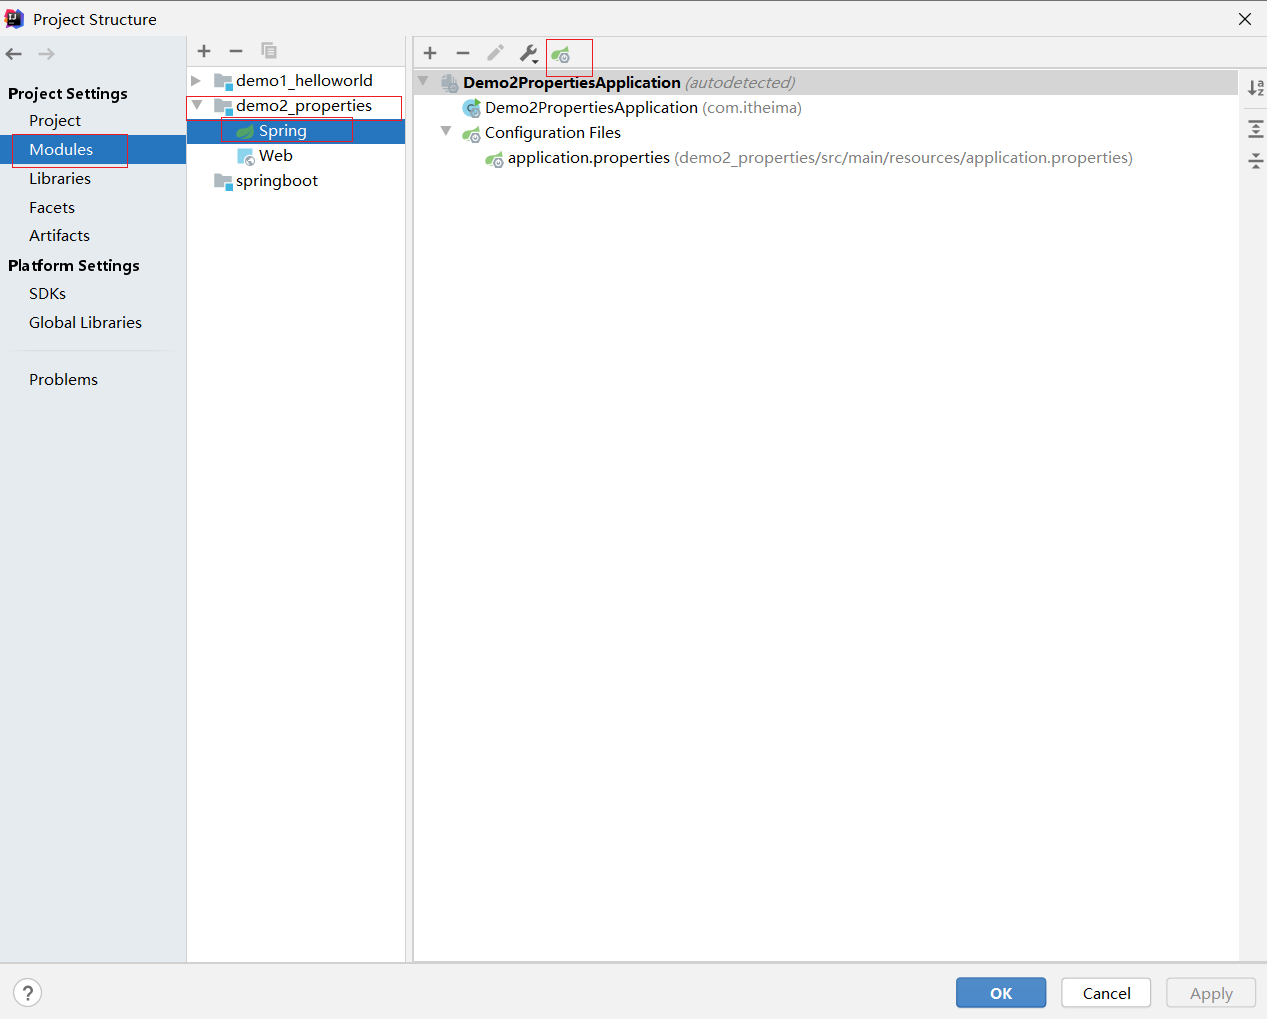
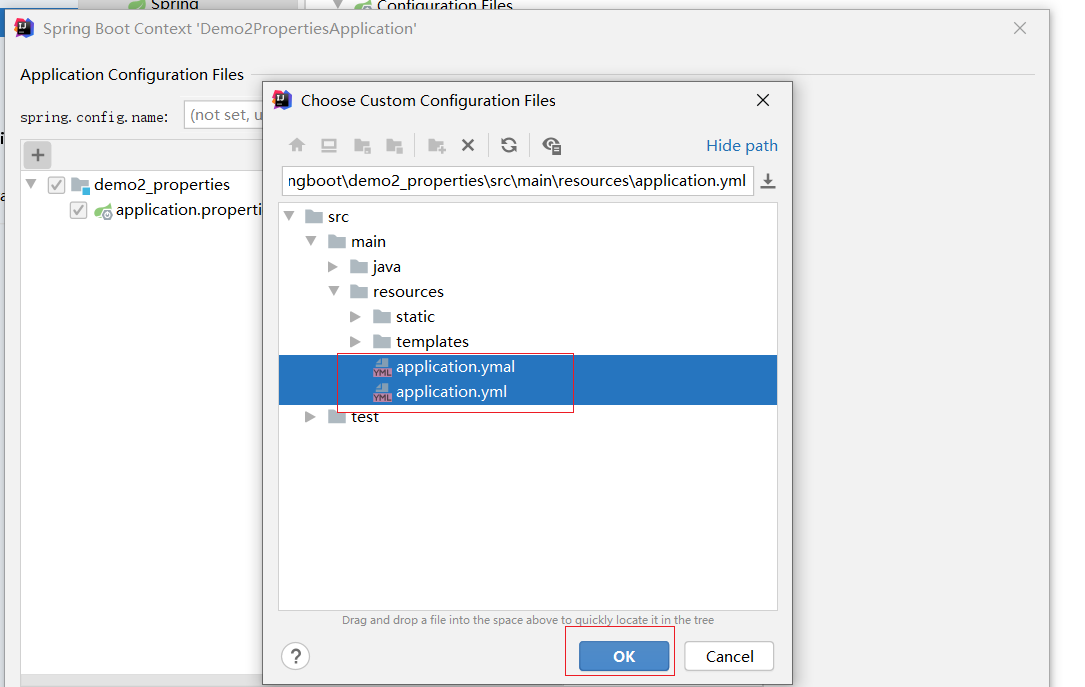
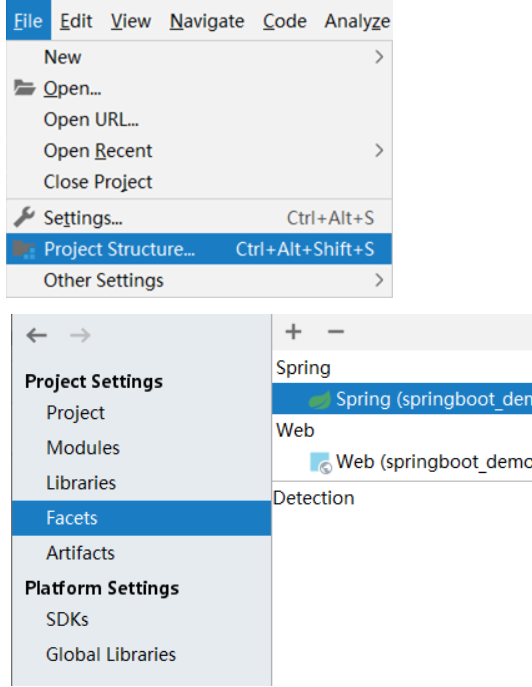
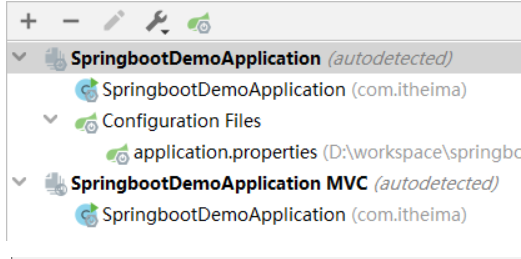
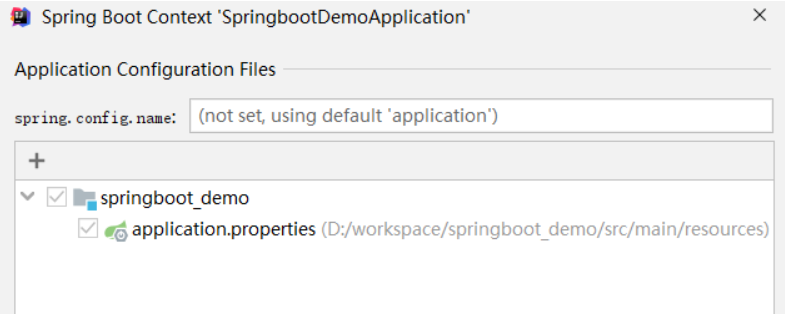
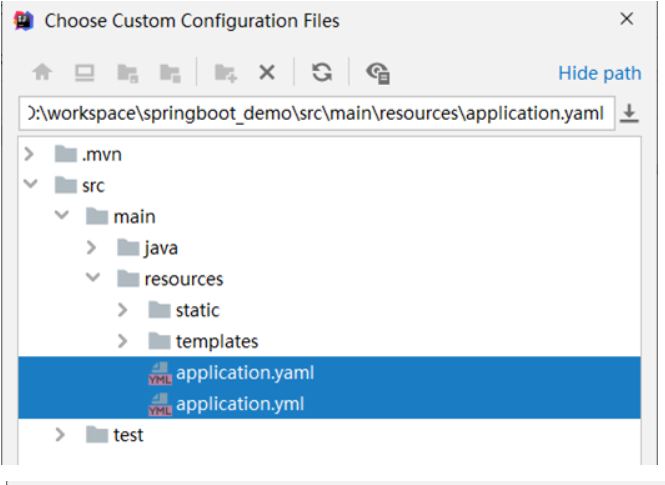
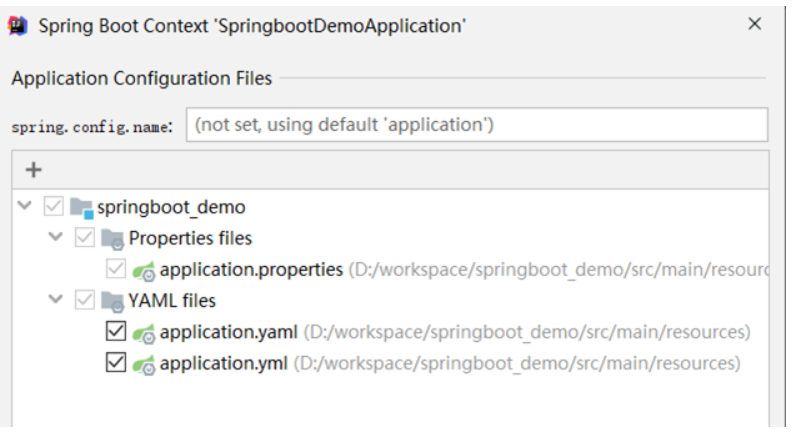
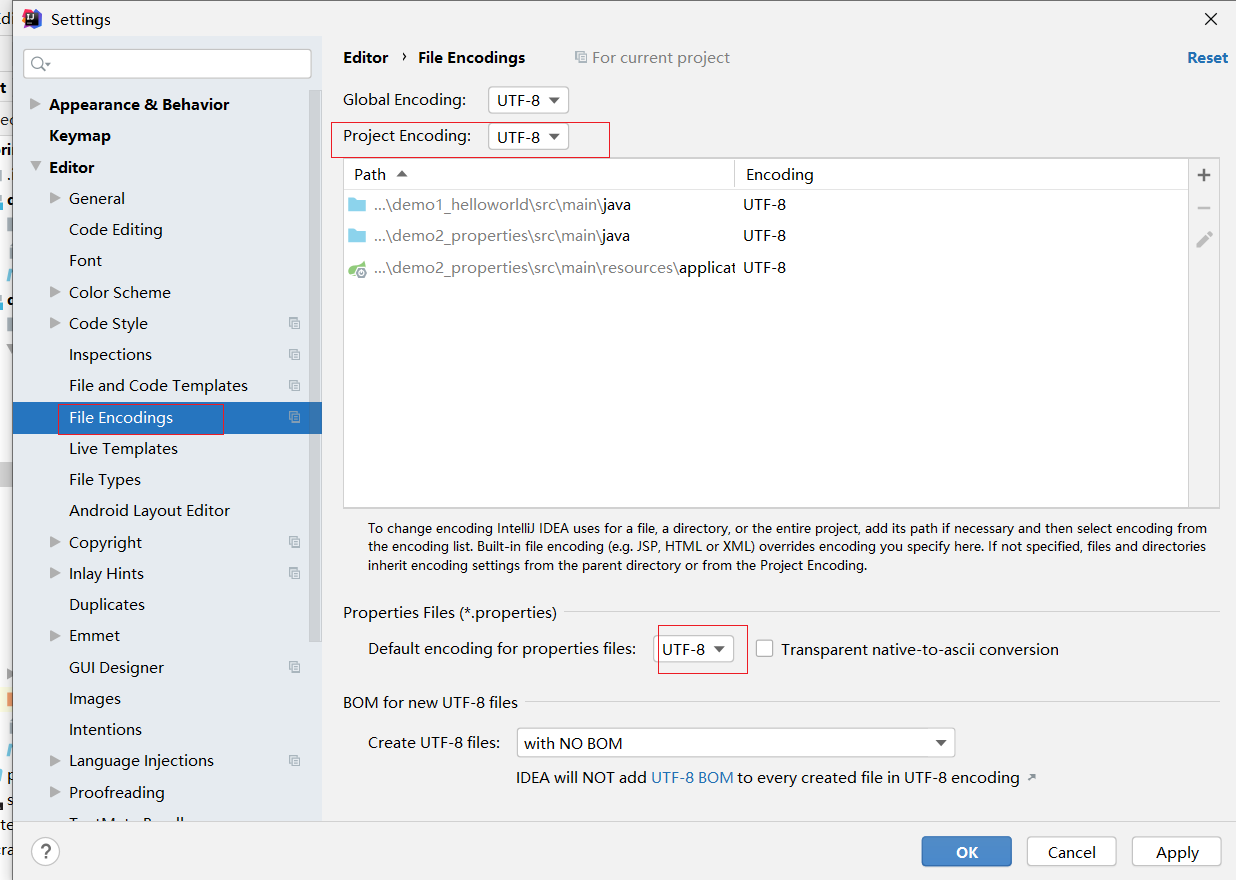
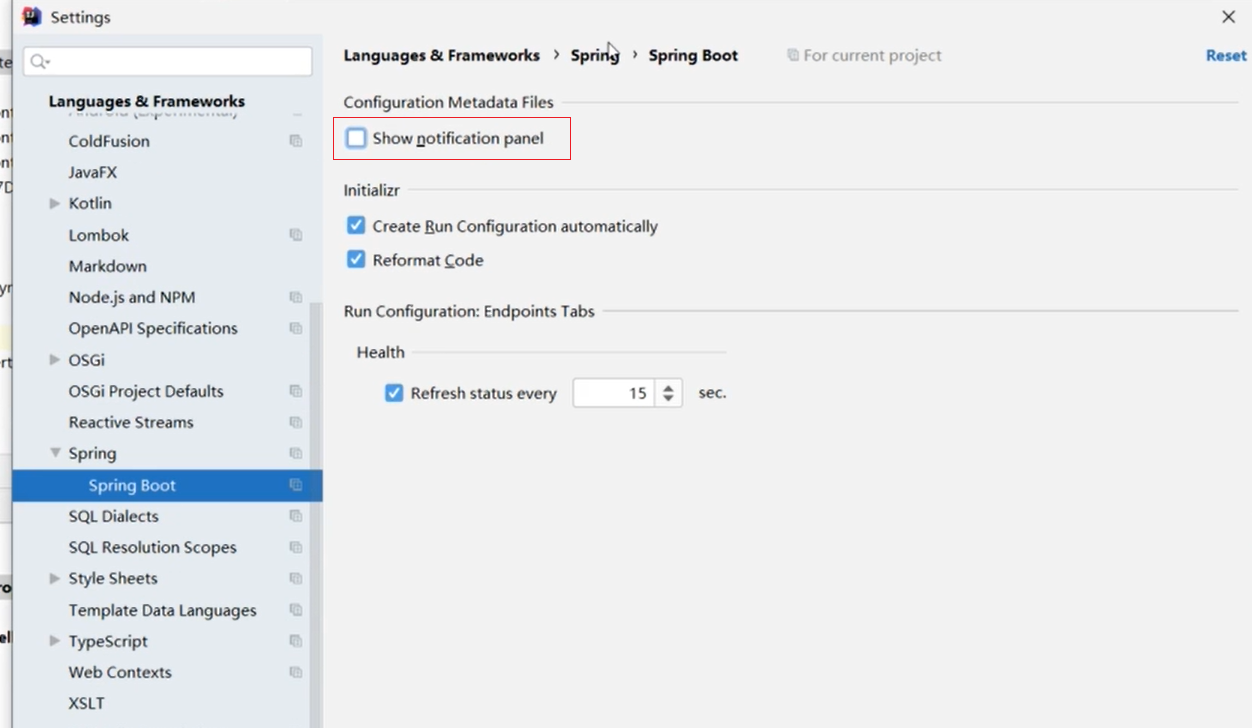
1.2 自动提示功能消失解决方案
操作步骤:
第一种:
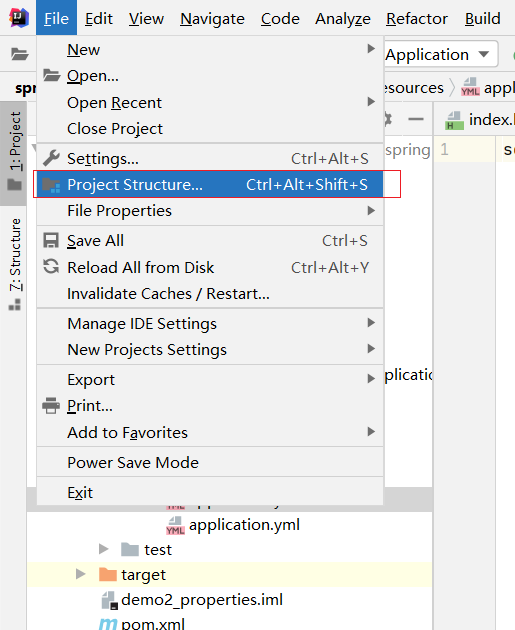
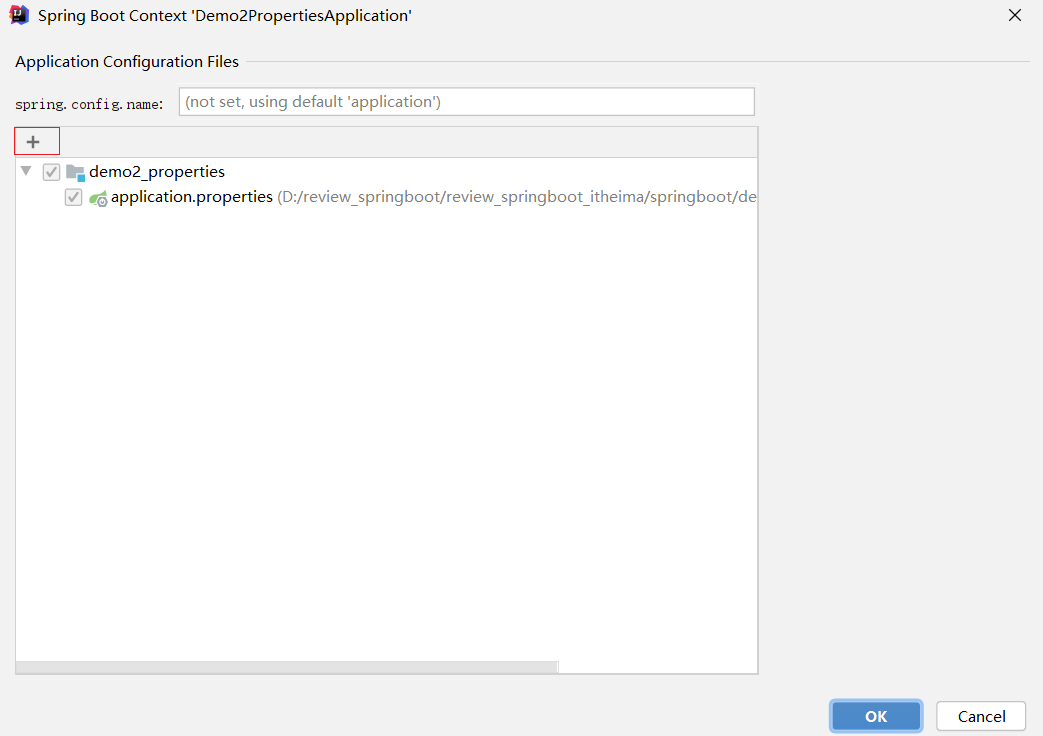
如果发现上面的ok点不了 可能是没有application.properties 我们要先把这个给创建出来
第二种
1.3 SpringBoot配置文件加载顺序(了解)
application.properties > application.yml > application.yaml
注意事项:
SpringBoot核心配置文件名为application
SpringBoot内置属性过多,且所有属性集中在一起修改,在使用时,通过提示键+关键字修改属性
2. yaml
问题导入
什么是yaml,和properties有什么区别?
YAML(YAML Ain't Markup Language),一种数据序列化格式
优点:
容易阅读
容易与脚本语言交互
以数据为核心,重数据轻格式
YAML文件扩展名
.yml(主流)
.yaml
2.1 yaml语法规则
大小写敏感
属性层级关系使用多行描述,每行结尾使用冒号结束
使用缩进表示层级关系,同层级左侧对齐,只允许使用空格(不允许使用Tab键)
属性值前面添加空格(属性名与属性值之间使用冒号+空格作为分隔)
#表示注释
核心规则:数据前面要加空格与冒号隔开
2.2 yaml数组数据
数组数据在数据书写位置的下方使用减号作为数据开始符号,每行书写一个数据,减号与数据间空格分隔
数组数据在数据书写位置的下方使用减号作为数据开始符号,每行书写一个数据,减号与数据间空格分隔
2.3 yaml数据读取
2.3.1 使用@Value读取单个数据,属性名引用方式:${一级属性名.二级属性名……}
package com.itheima.web;/*在这个类里面,使用@Value来读取yml文件中的数据。*/import org.springframework.beans.factory.annotation.Value;
import org.springframework.web.bind.annotation.RequestMapping;
import org.springframework.web.bind.annotation.RestController;
@RestController
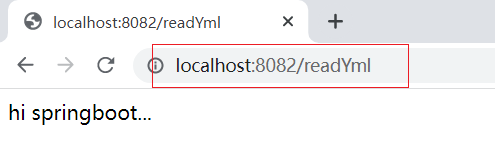
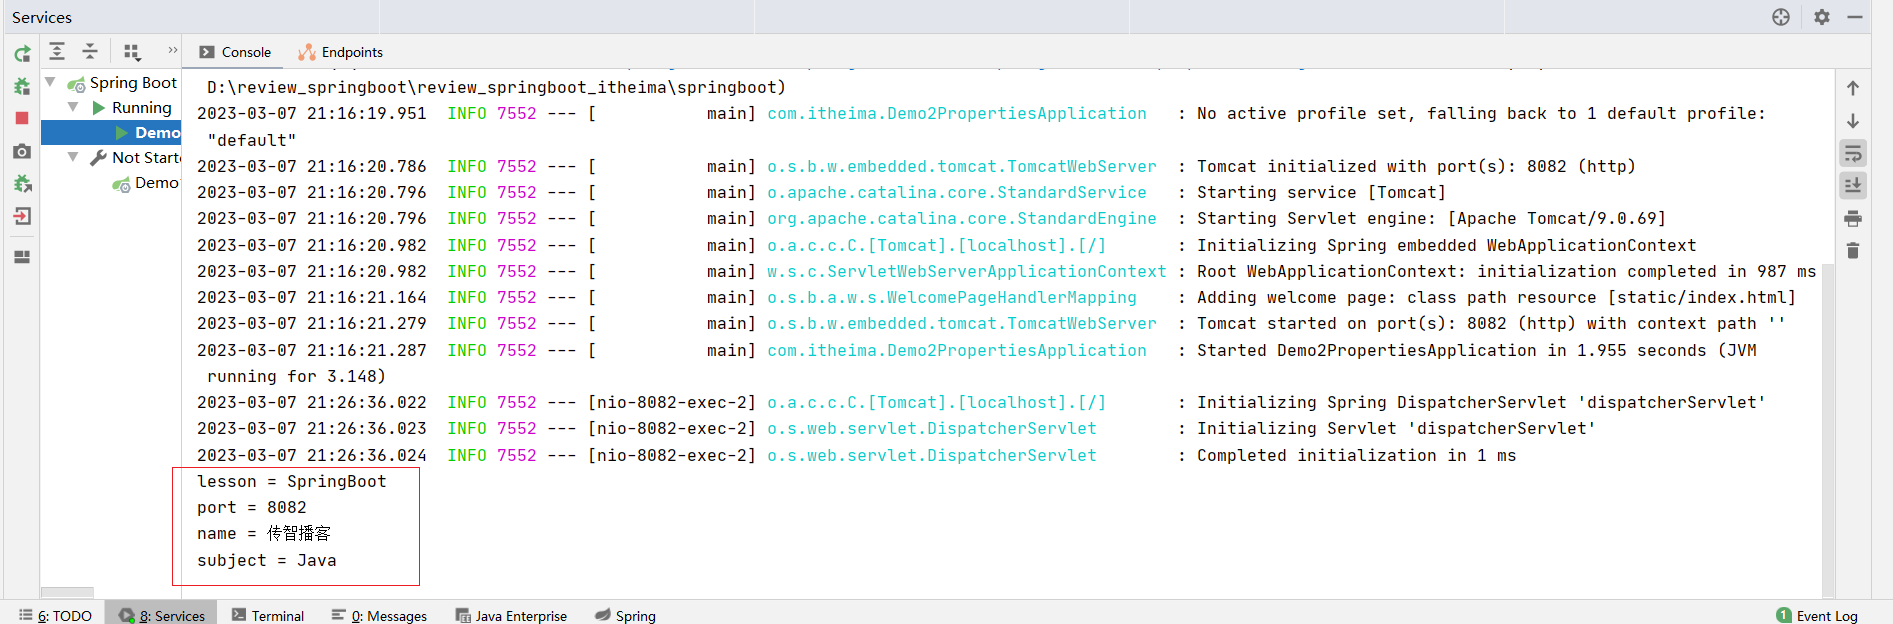
public class Controller01 {@Value("${lesson}")private String lesson;//@Value("${第一层.第二层.第三层.属性名}")@Value("${server.port}")private String port;@Value("${enterprise.name}")private String name;@Value("${enterprise.subject[0]}")private String subject;@RequestMapping("/readYml")public String readYml(){System.out.println("lesson = " + lesson);System.out.println("port = " + port);System.out.println("name = " + name);System.out.println("subject = " + subject);return "hi springboot...";}
}
lesson: SpringBootserver:port: 8082enterprise:name: 传智播客age: 16tel: 4006184000subject:- Java- 前端- 大数据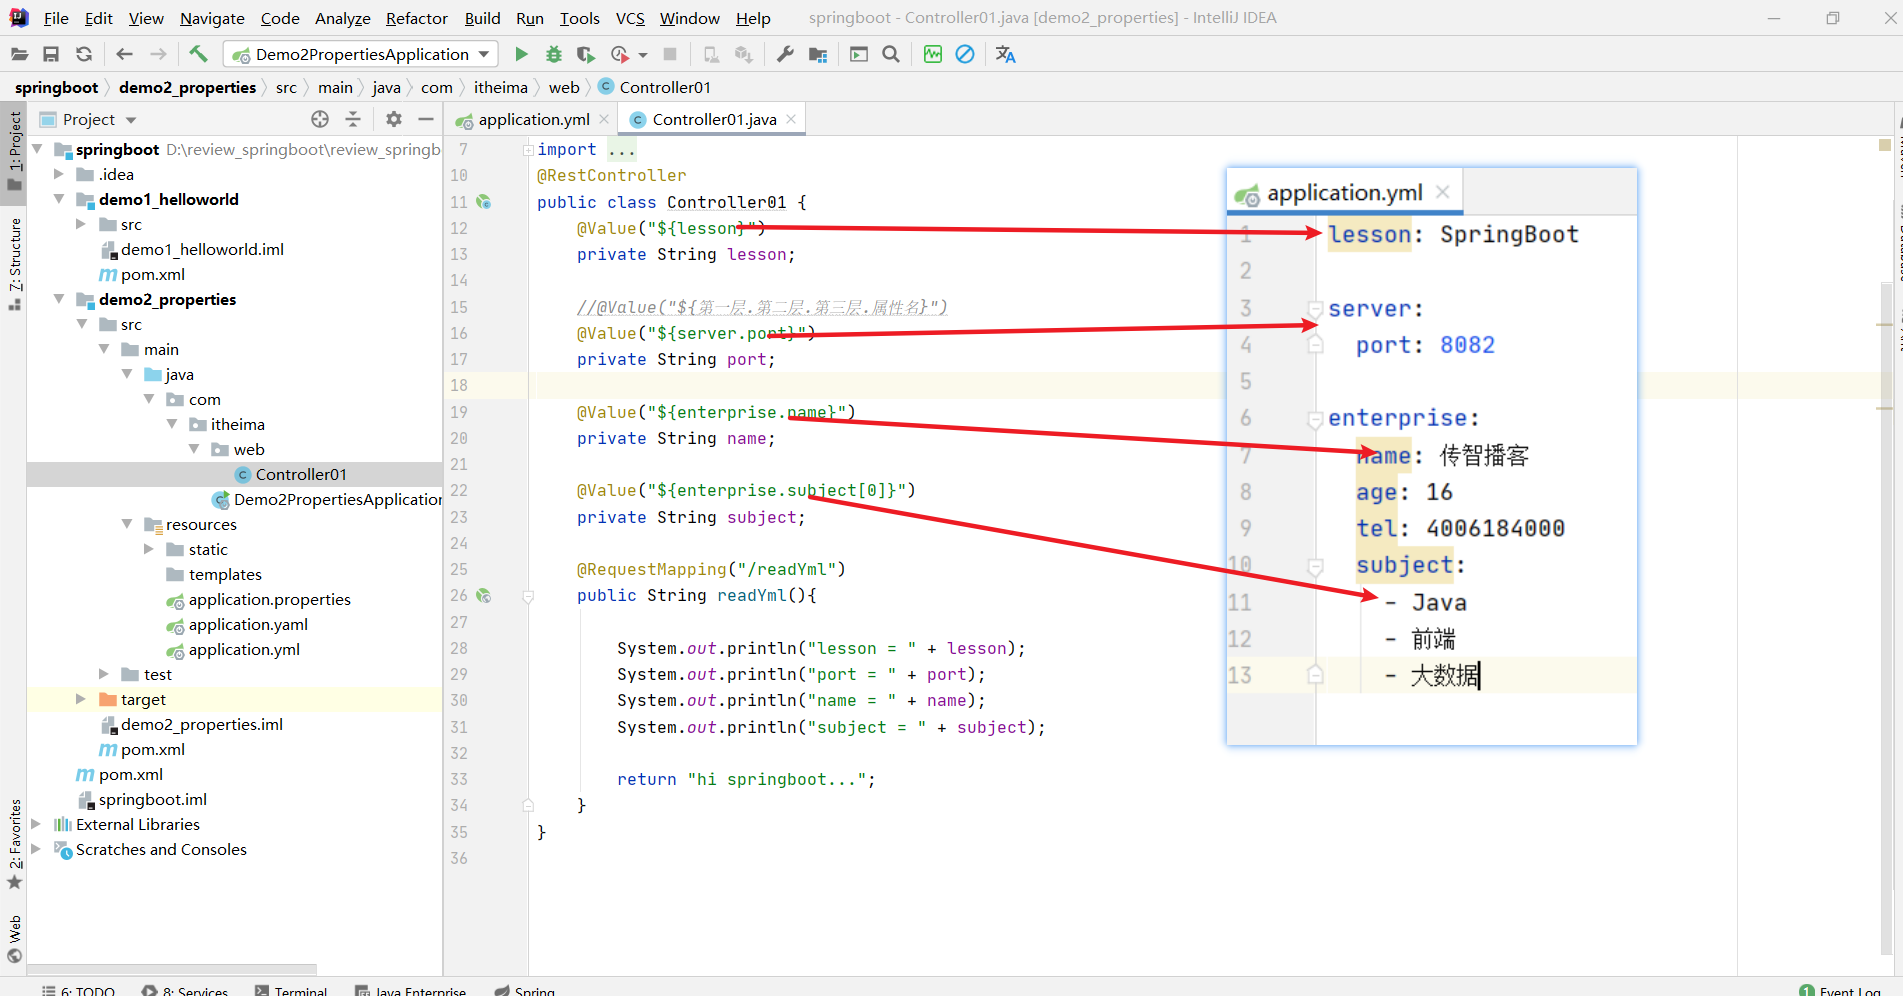
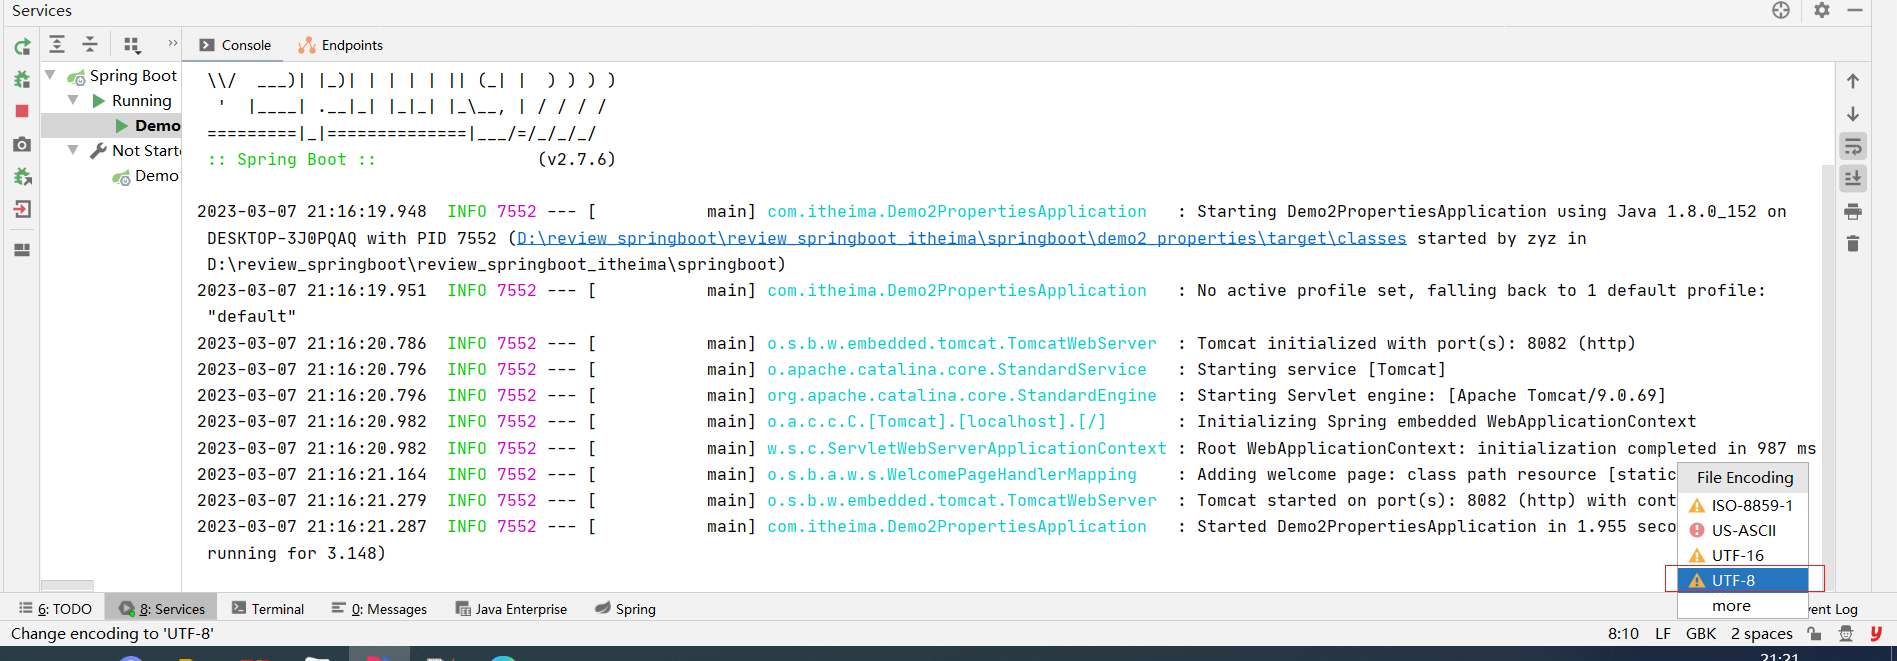
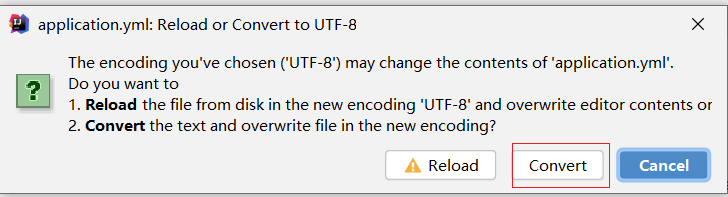
注:如果报错的话 修改一下编码
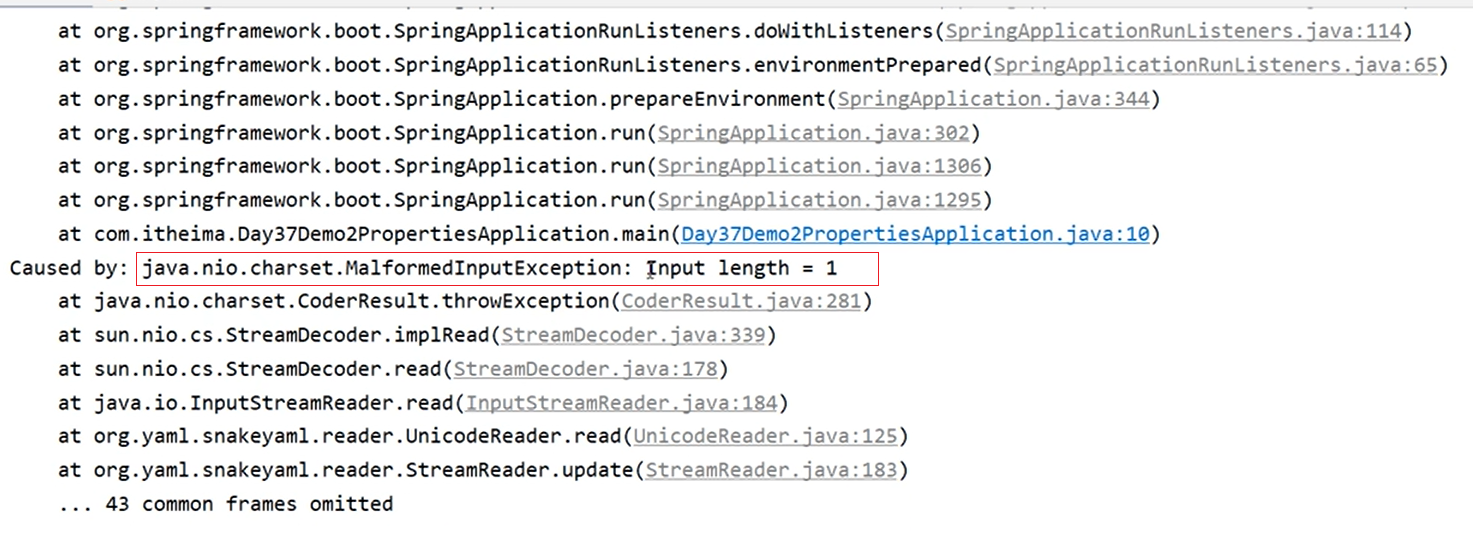
如果还报错的话 就clean一下
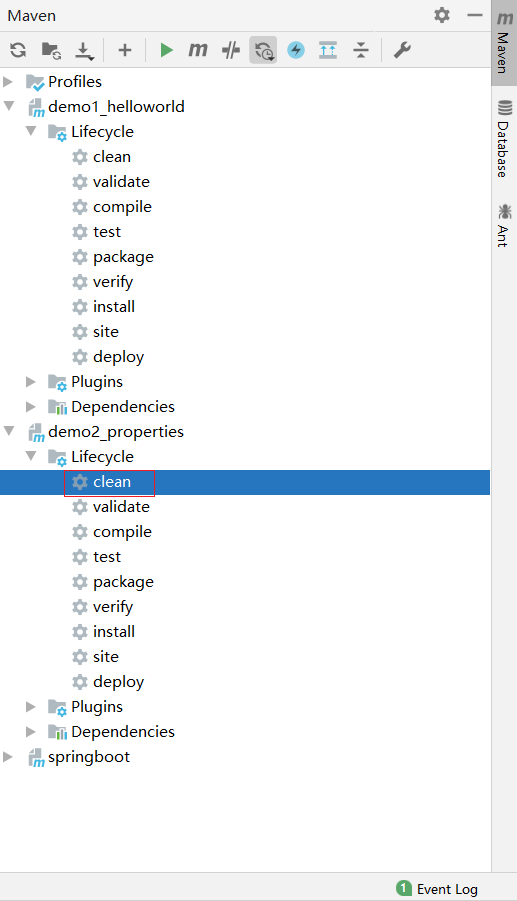
如果还是报错的话
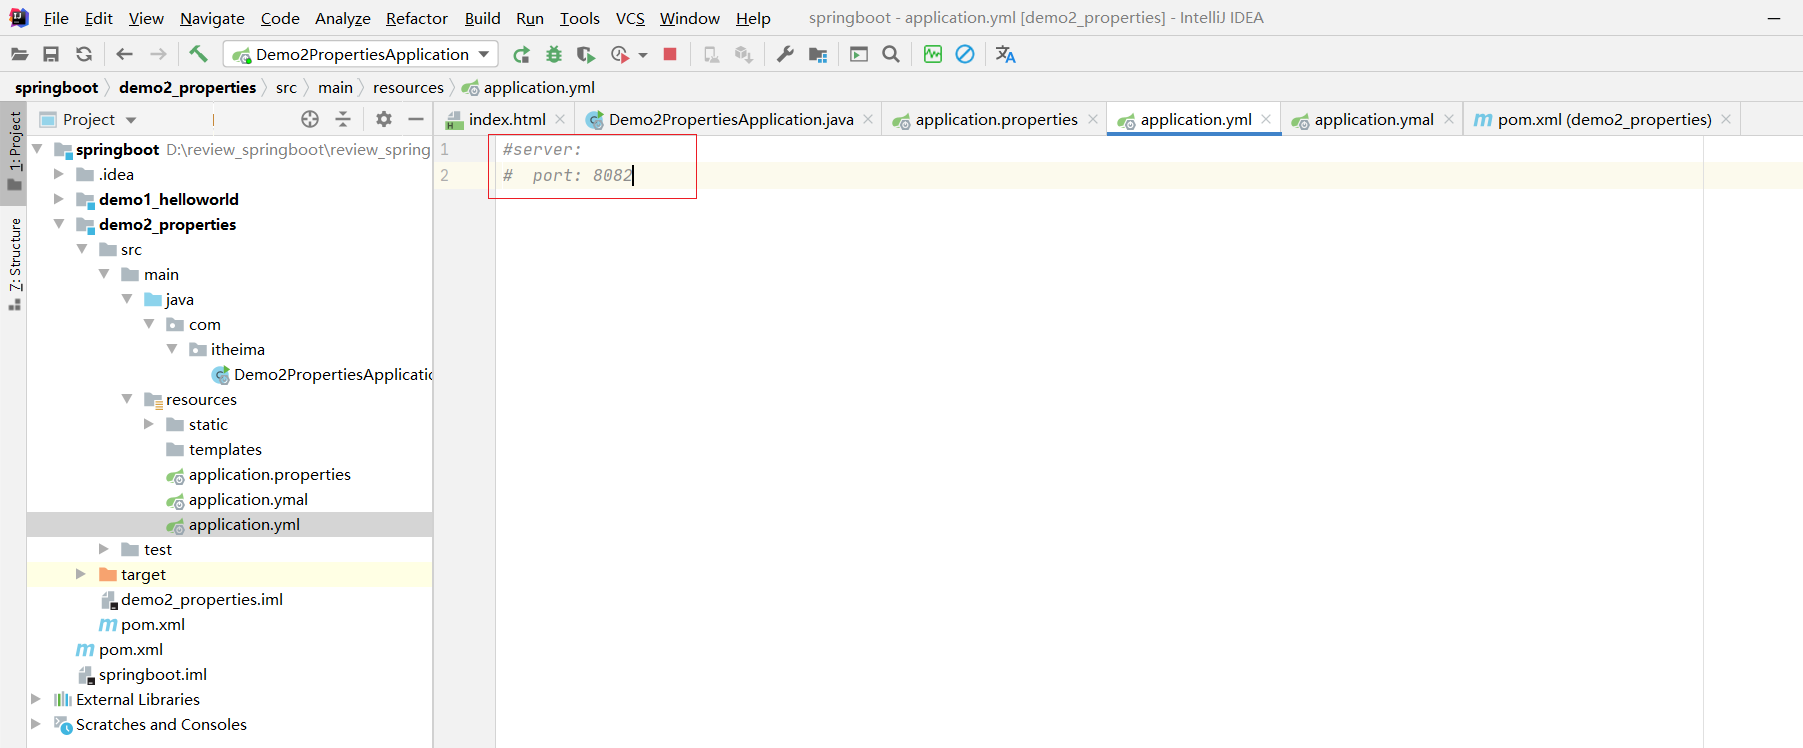
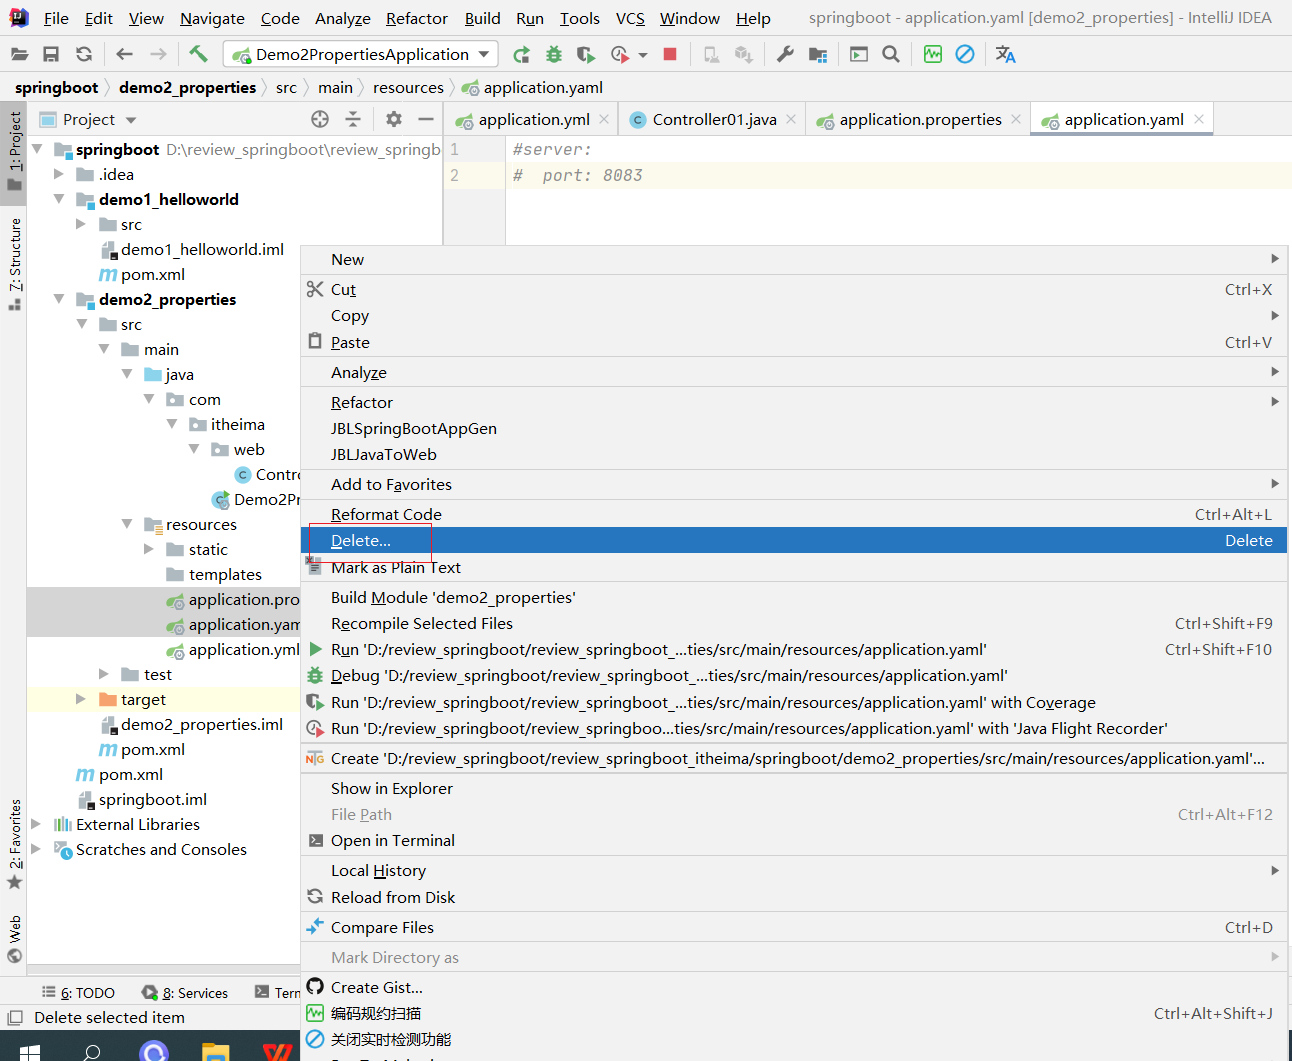
如果还是报错 我们就把前面没有用到的application.properties和application.yaml的端口号给注释了或把这二个文件删除
端口号给注释了
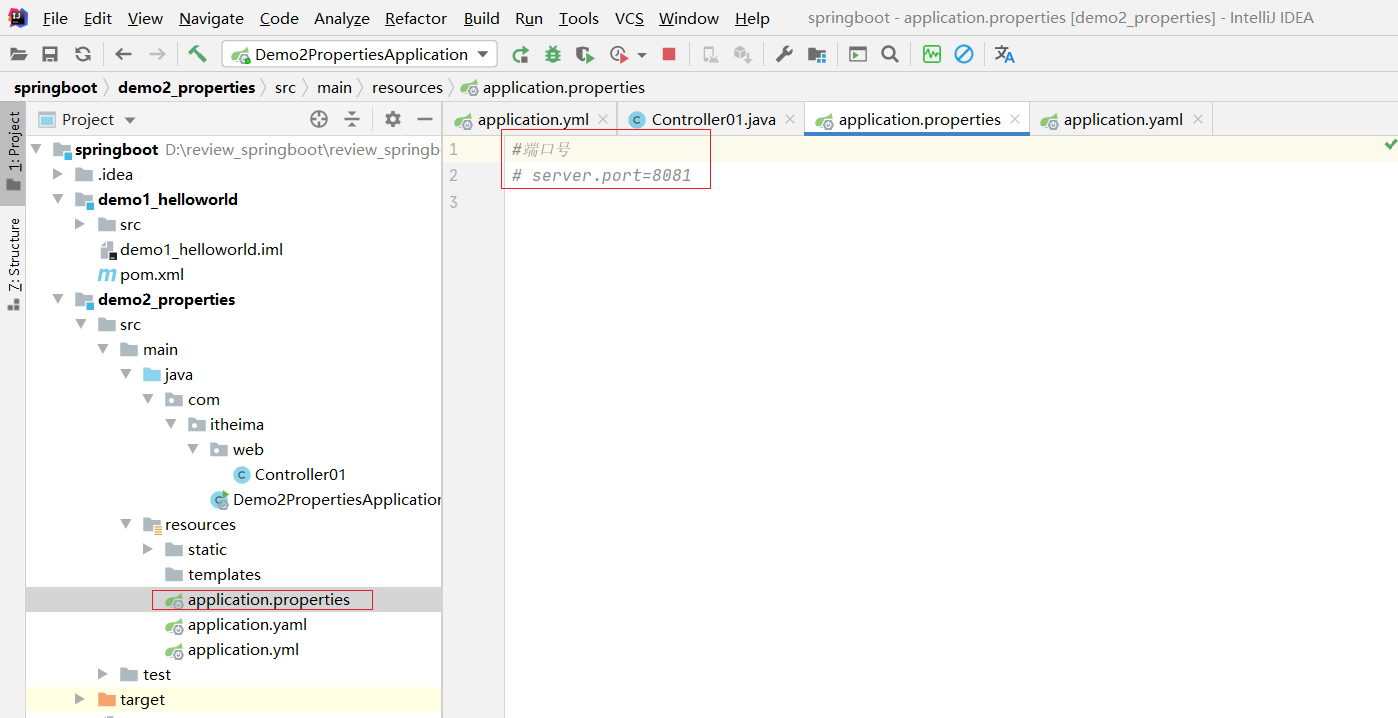
或删除
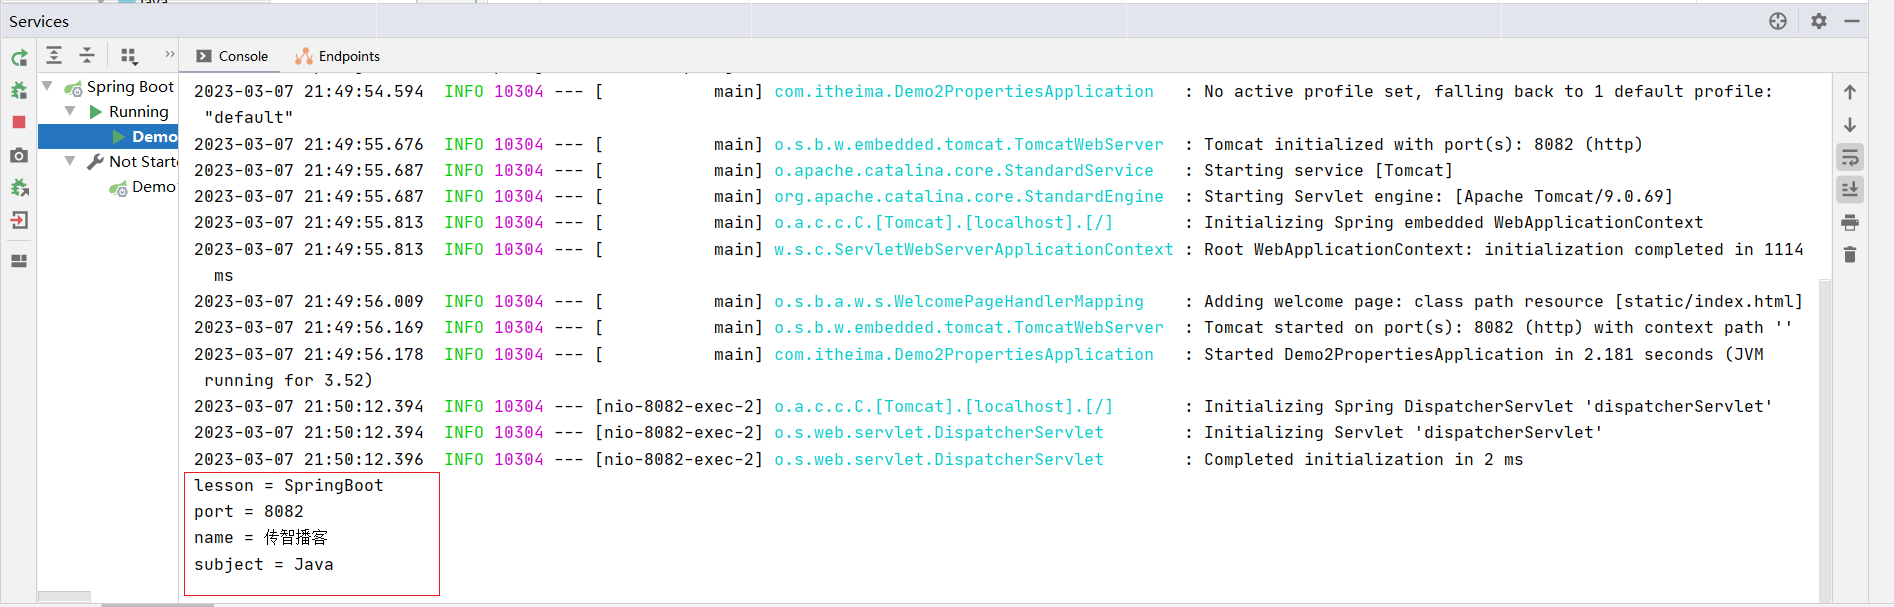
2.3.2 封装全部数据到Environment对象
package com.itheima.web;/*在这个类里面,使用Environment来读取yml文件中的数据。*/import org.springframework.beans.factory.annotation.Autowired;
import org.springframework.core.env.Environment;
import org.springframework.web.bind.annotation.RequestMapping;
import org.springframework.web.bind.annotation.RestController;@RestController
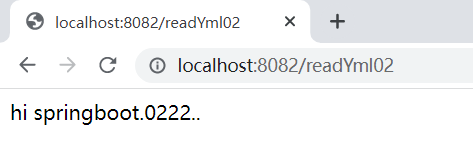
public class Controller02 {@Autowiredprivate Environment env;@RequestMapping("/readYml02")public String readYml(){System.out.println("lesson = " + env.getProperty("lesson"));System.out.println("port = " + env.getProperty("server.port"));System.out.println("name = " + env.getProperty("enterprise.name"));System.out.println("subject = " + env.getProperty("enterprise.subject[0]"));return "hi springboot.0222..";}
}
lesson: SpringBootserver:port: 8082enterprise:name: 传智播客age: 16tel: 4006184000subject:- Java- 前端- 大数据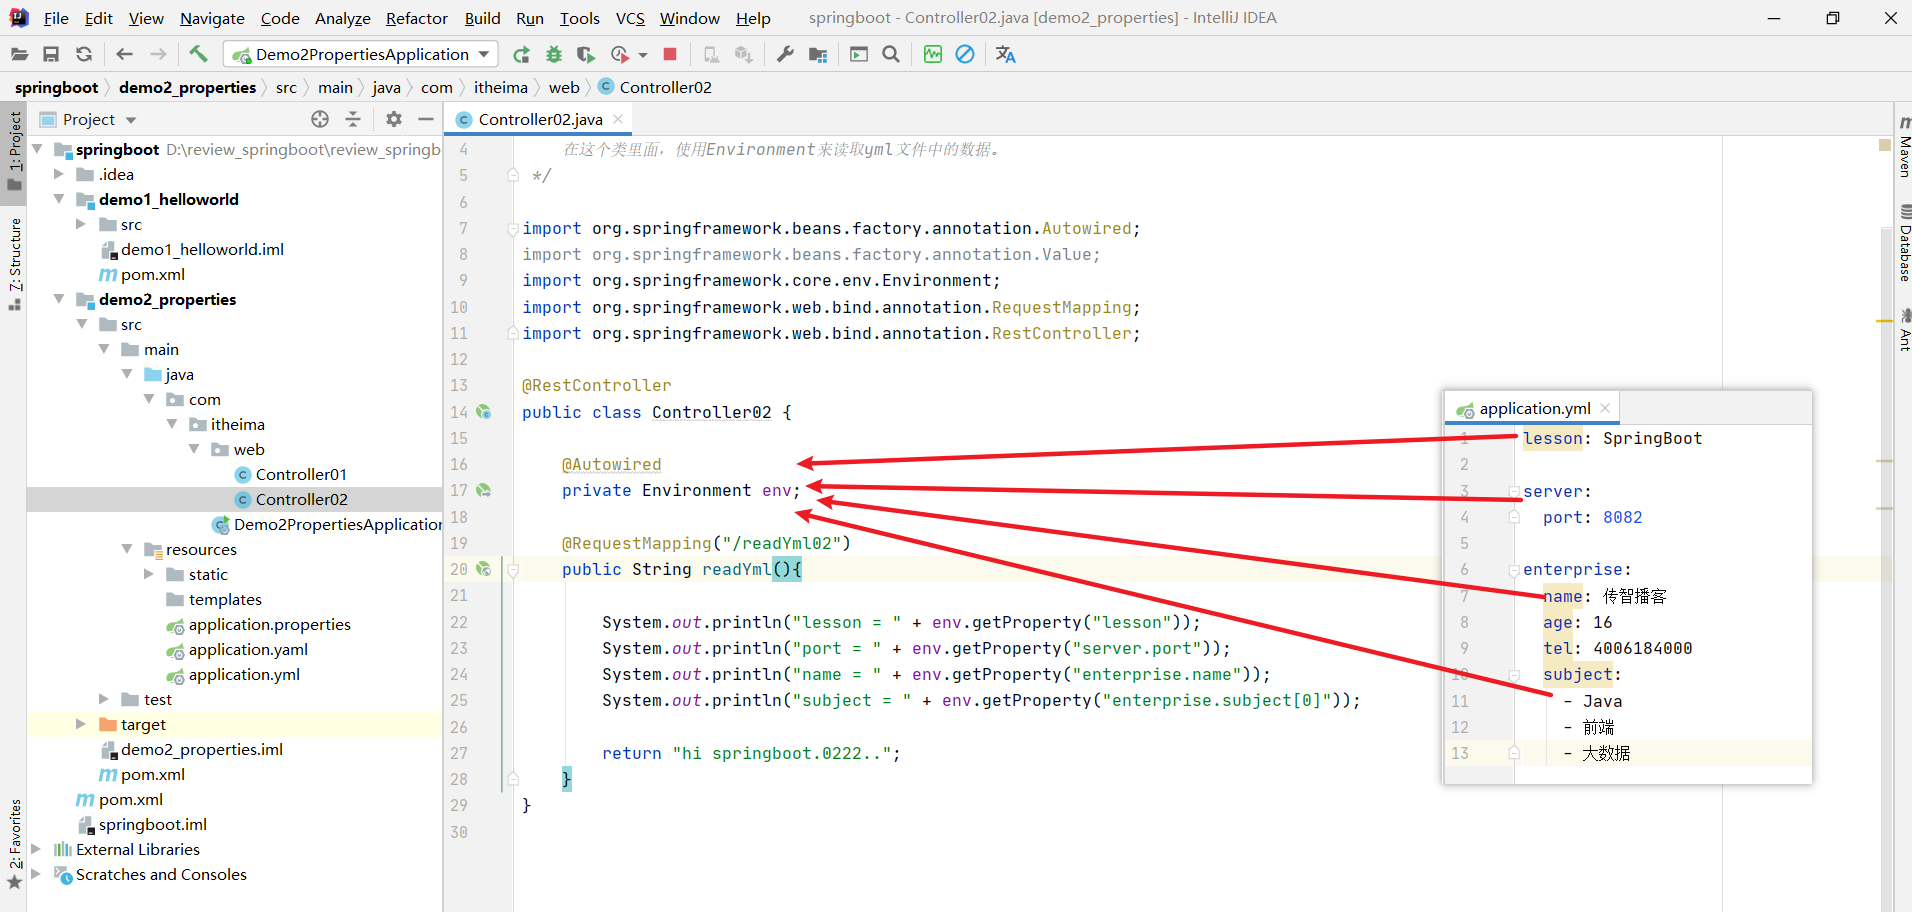
2.3.3 自定义对象封装指定数据【常用】==
因为封装 要得到属性 用到@Data注解 所以要加入以下依赖
<dependency><groupId>org.projectlombok</groupId><artifactId>lombok</artifactId></dependency>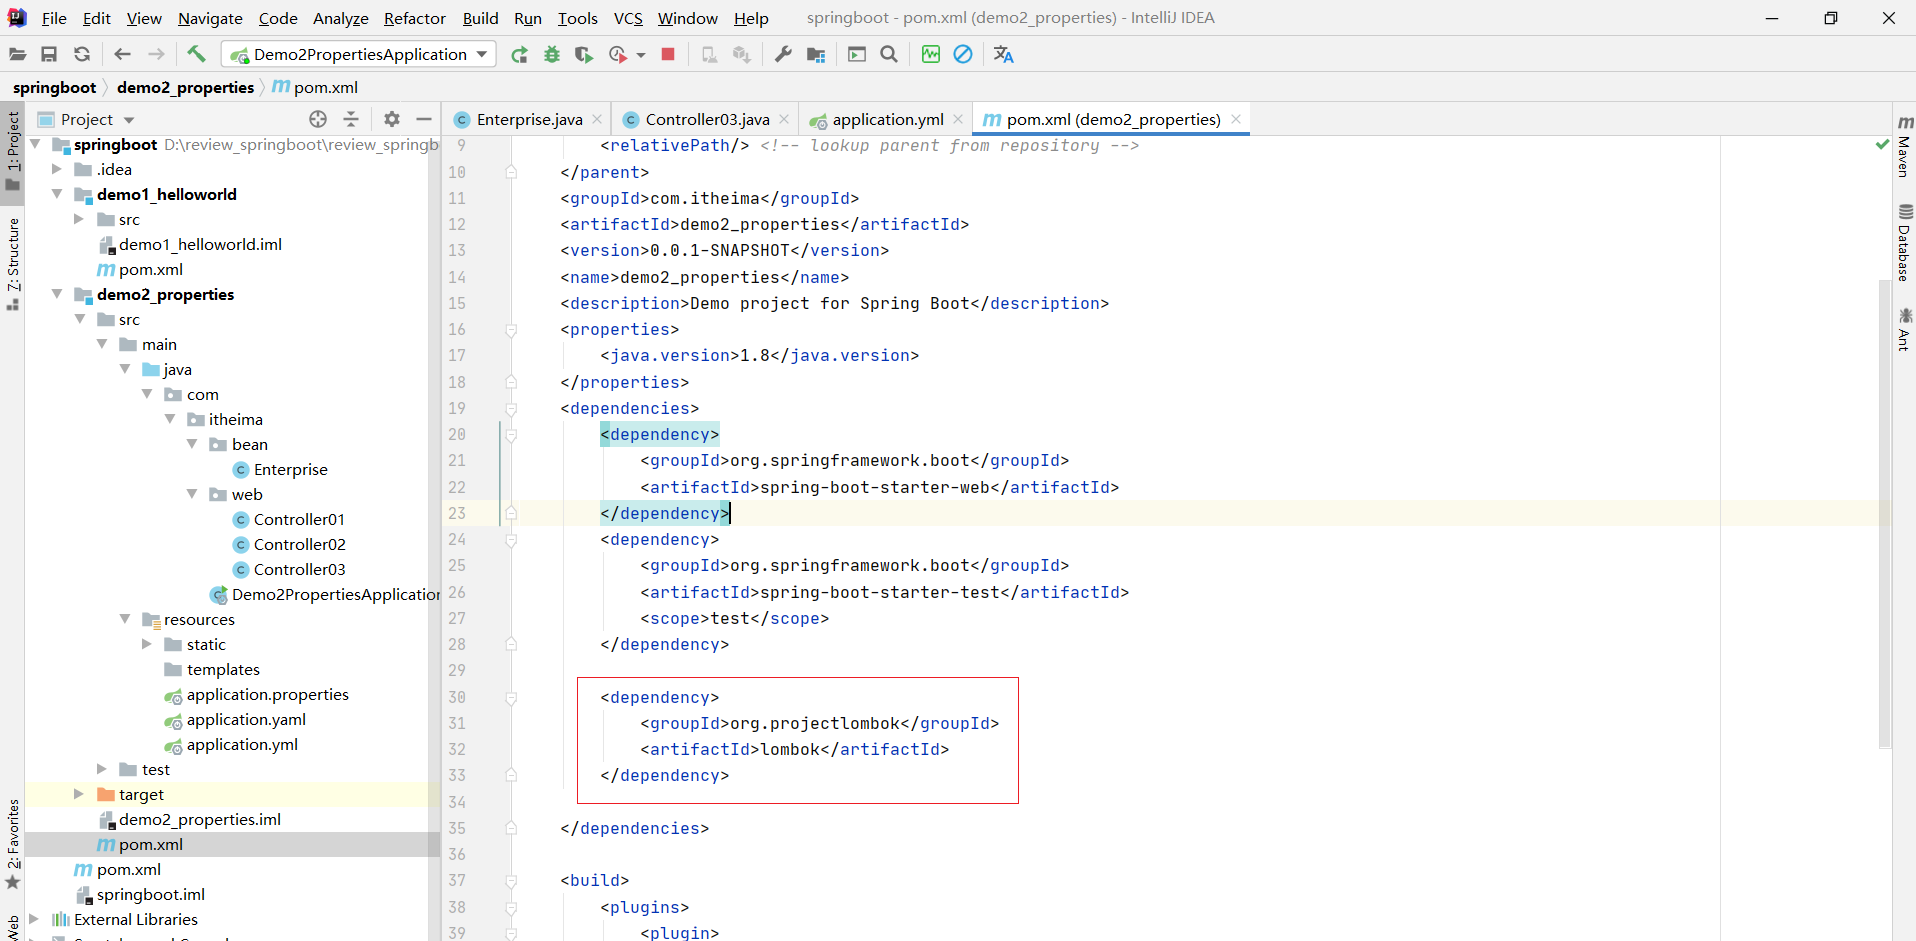
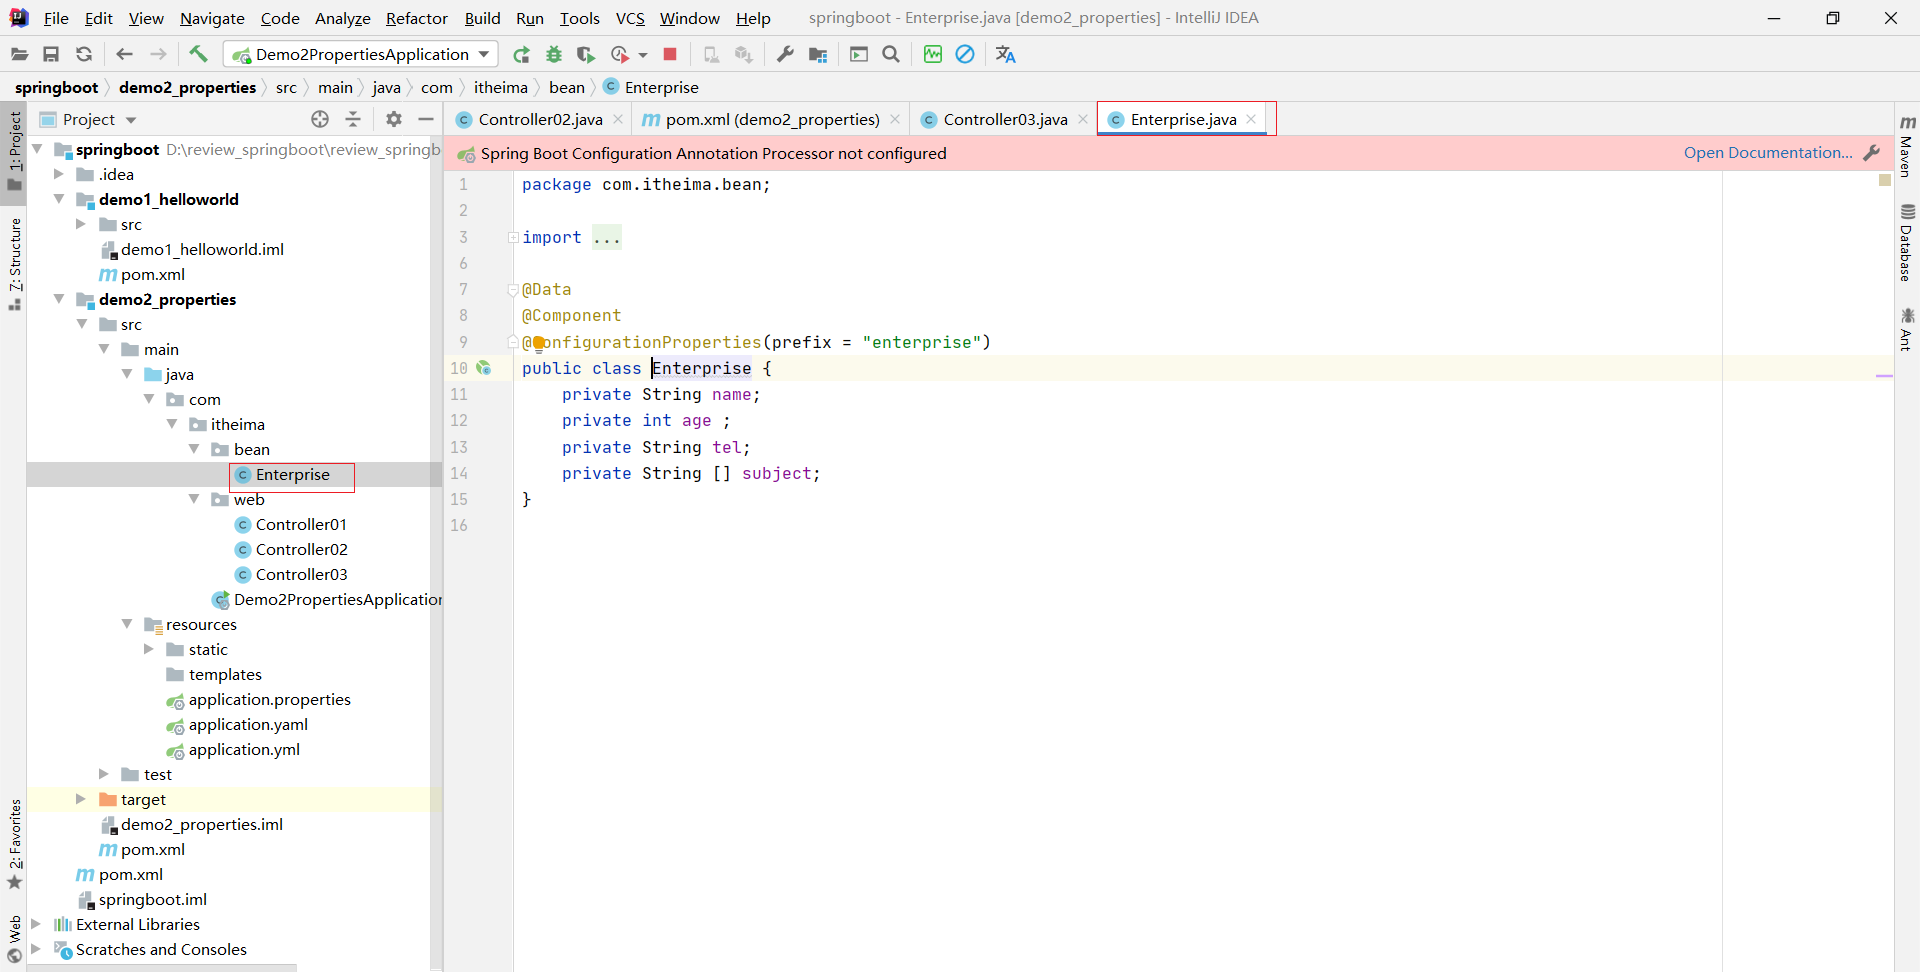
package com.itheima.bean;import lombok.Data;
import org.springframework.boot.context.properties.ConfigurationProperties;
import org.springframework.stereotype.Component;@Data
@Component
@ConfigurationProperties(prefix = "enterprise")
public class Enterprise {private String name;private int age ;private String tel;private String [] subject;
}
package com.itheima.web;/*在这个类里面,使用Environment来读取yml文件中的数据。*/import com.itheima.bean.Enterprise;
import org.springframework.beans.factory.annotation.Autowired;
import org.springframework.core.env.Environment;
import org.springframework.web.bind.annotation.RequestMapping;
import org.springframework.web.bind.annotation.RestController;import java.util.Arrays;@RestController
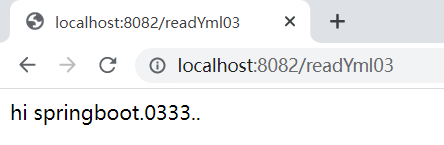
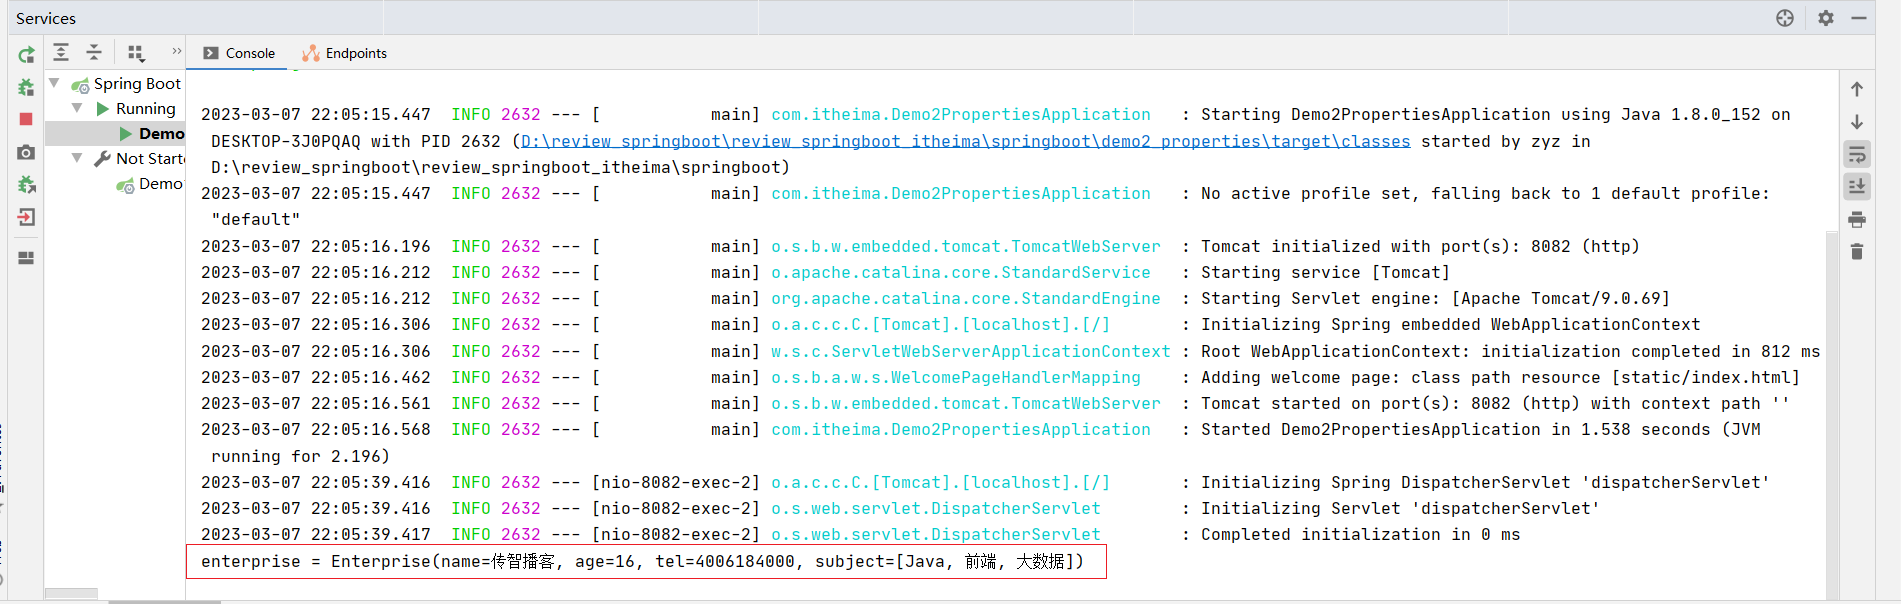
public class Controller03 {@Autowiredprivate Enterprise enterprise;@RequestMapping("/readYml03")public String readYml(){System.out.println("enterprise = " + enterprise);return "hi springboot.0333..";}
}
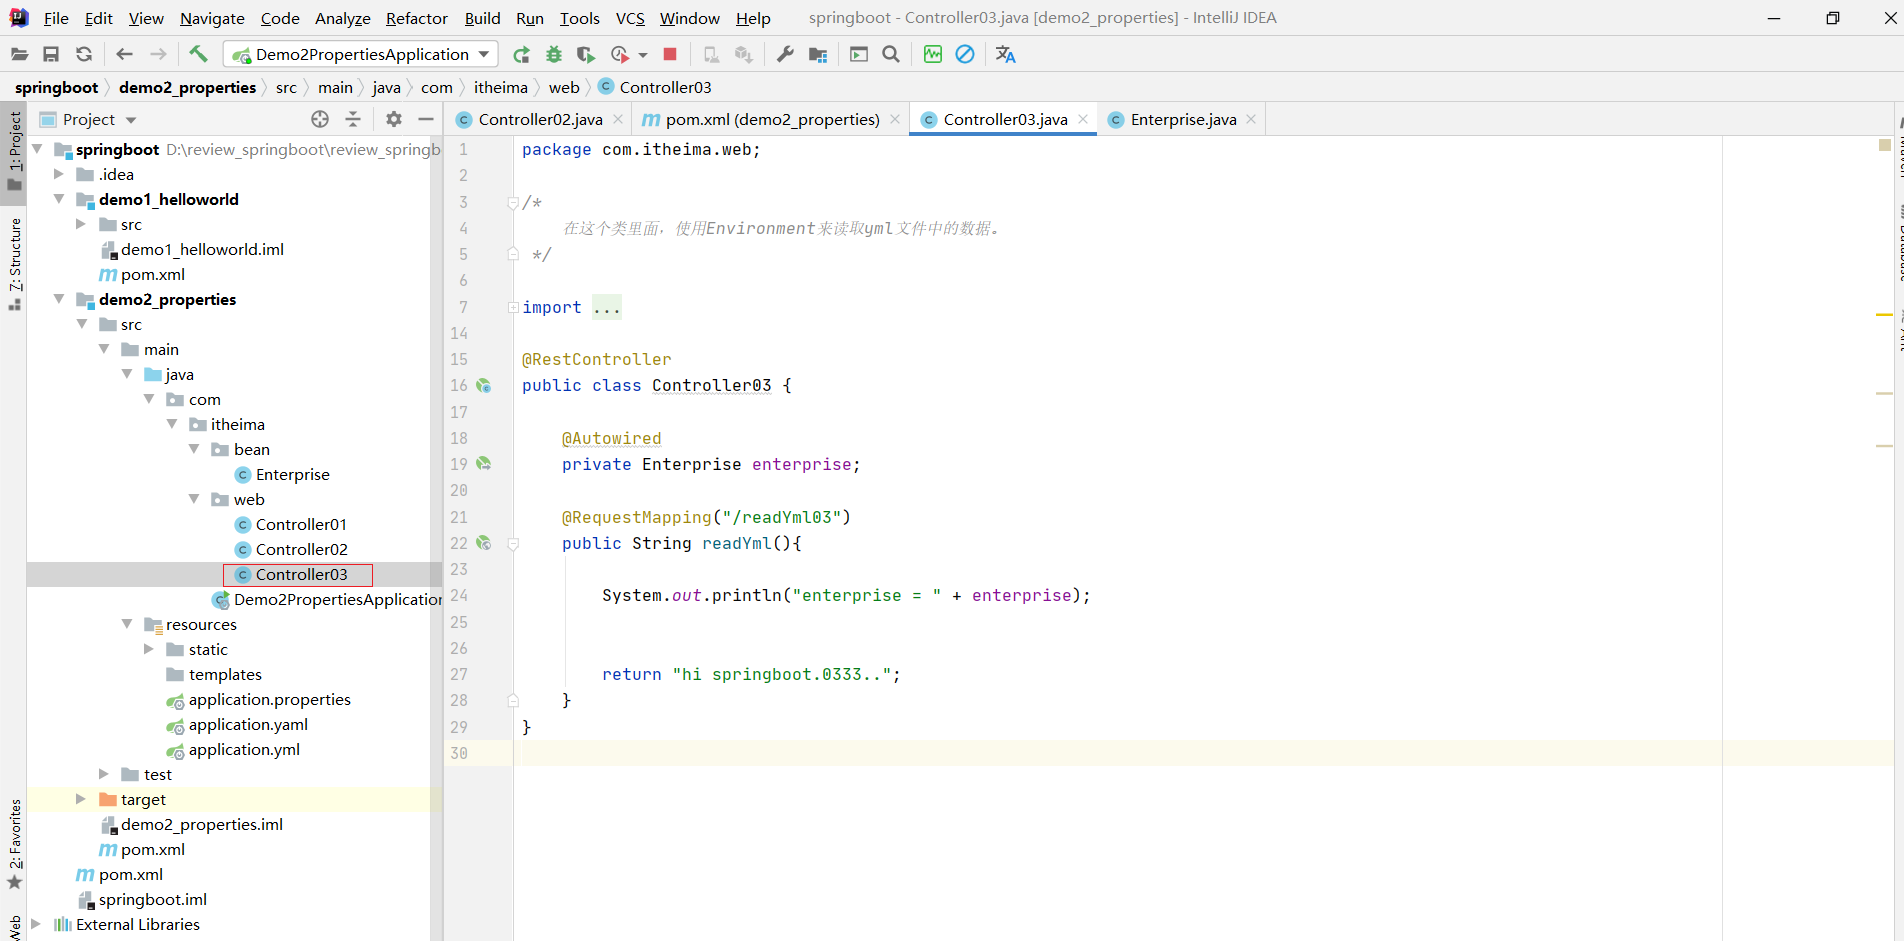
lesson: SpringBootserver:port: 8082enterprise:name: 传智播客age: 16tel: 4006184000subject:- Java- 前端- 大数据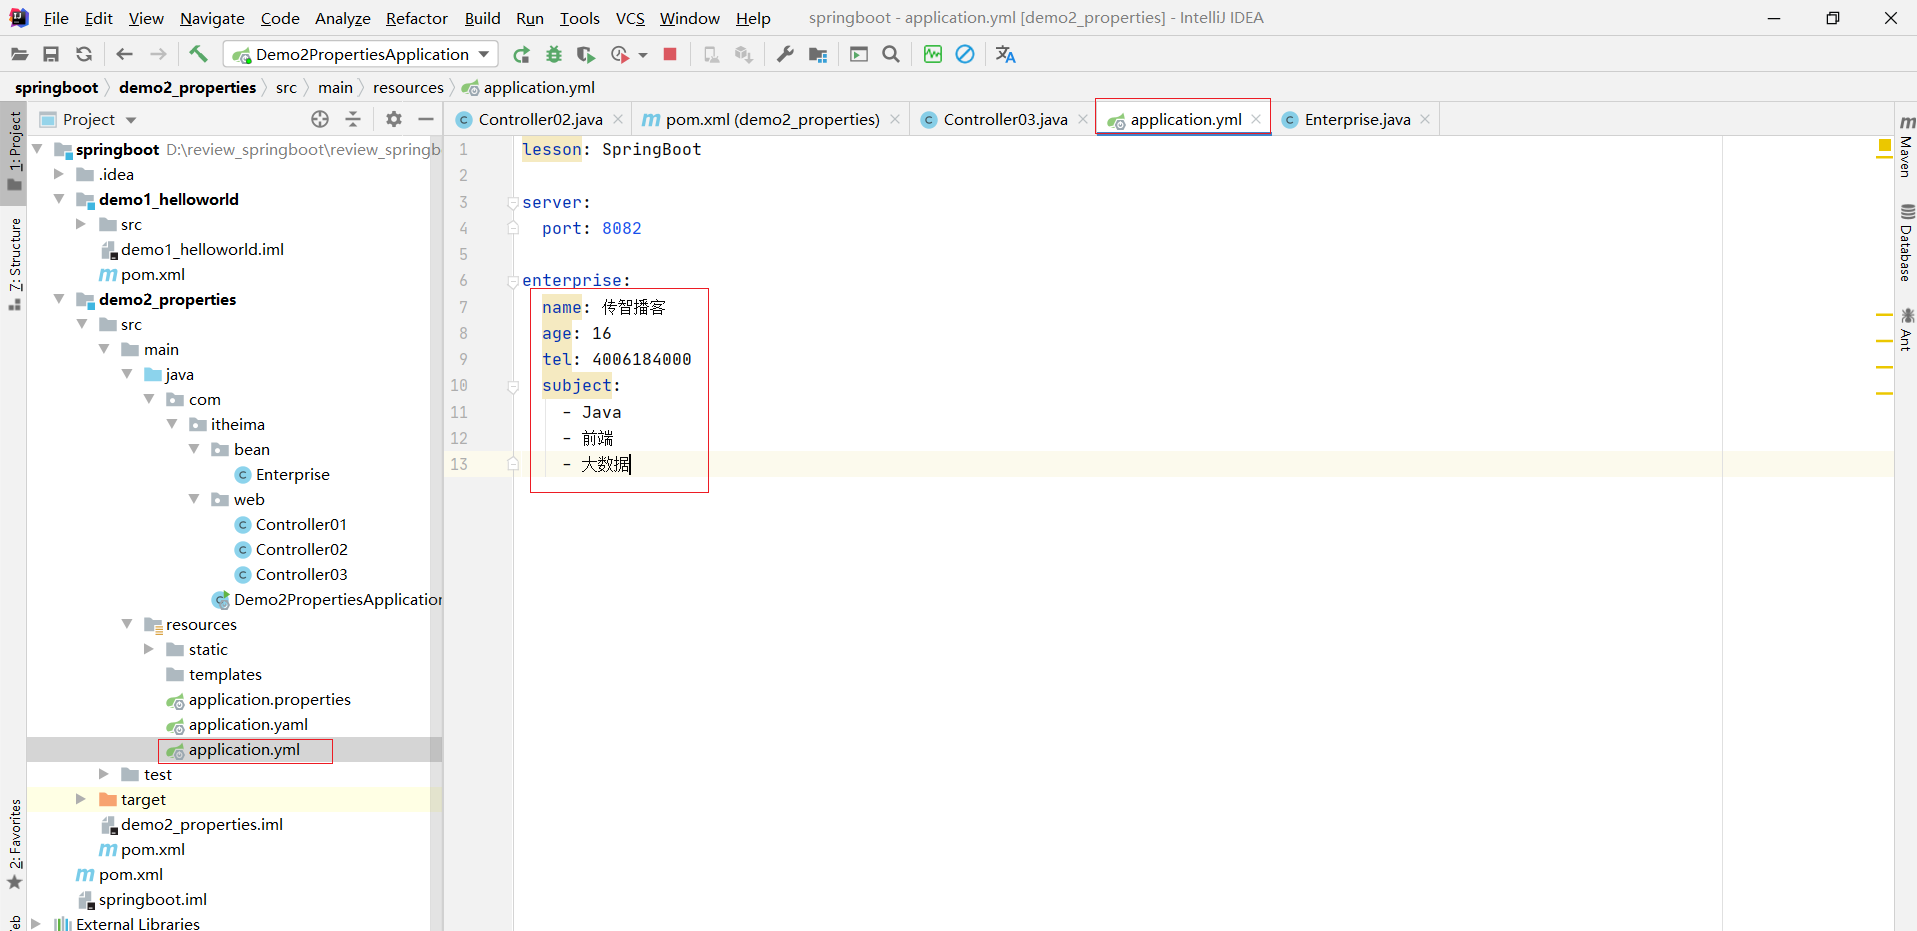
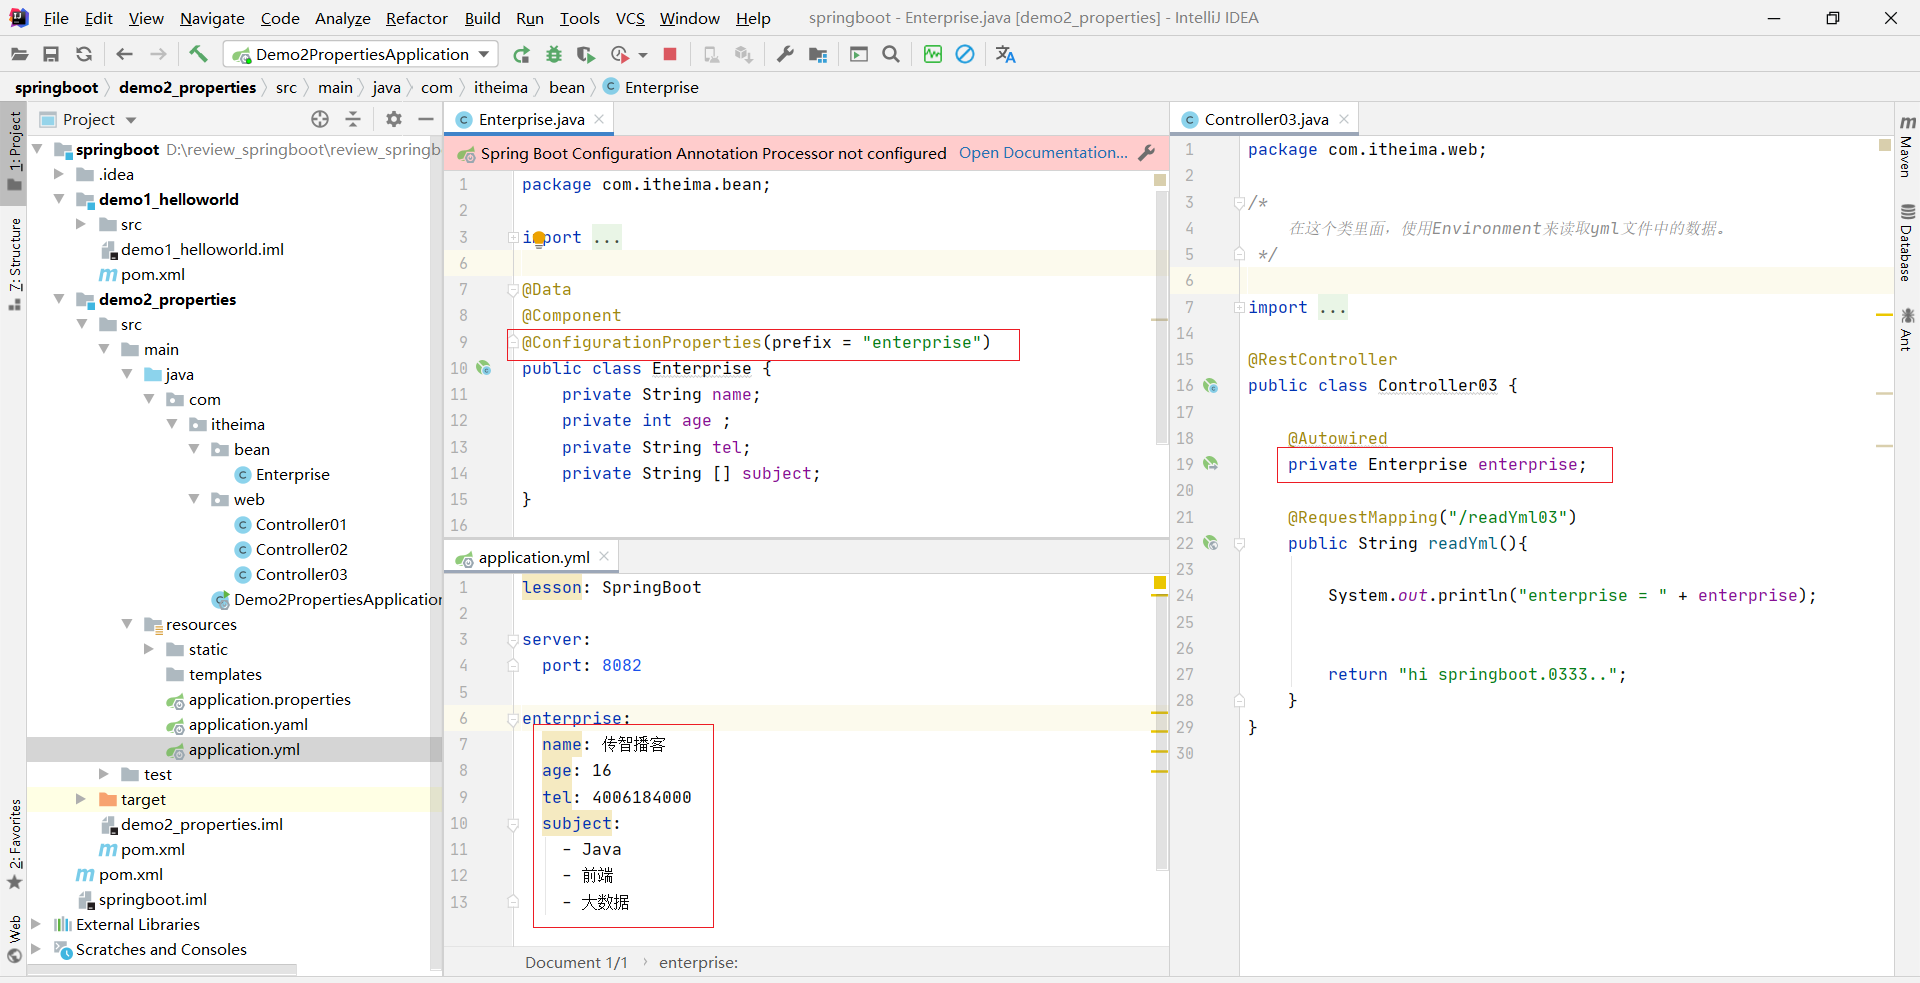
自定义对象封装数据警告解决方案
问题:

解决
加入依赖
<dependency><groupId>org.springframework.boot</groupId><artifactId>spring-boot-configuration-processor</artifactId><optional>true</optional></dependency>
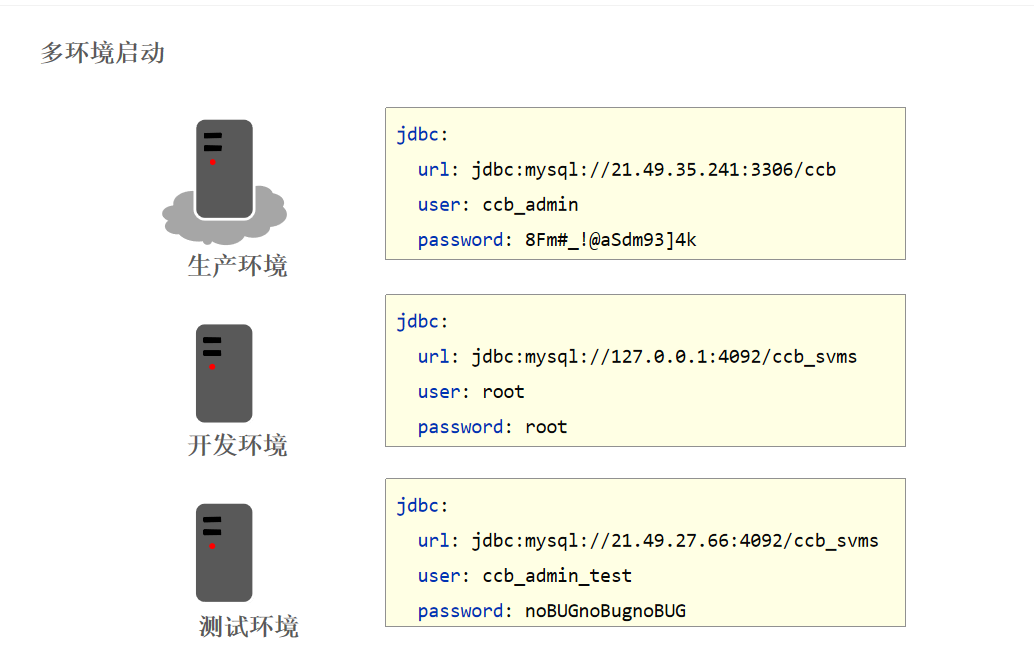
3. 多环境开发配置
环境准备

问题导入
在实际开发中,项目的开发环境、测试环境、生产环境的配置信息是否会一致?如何快速切换?
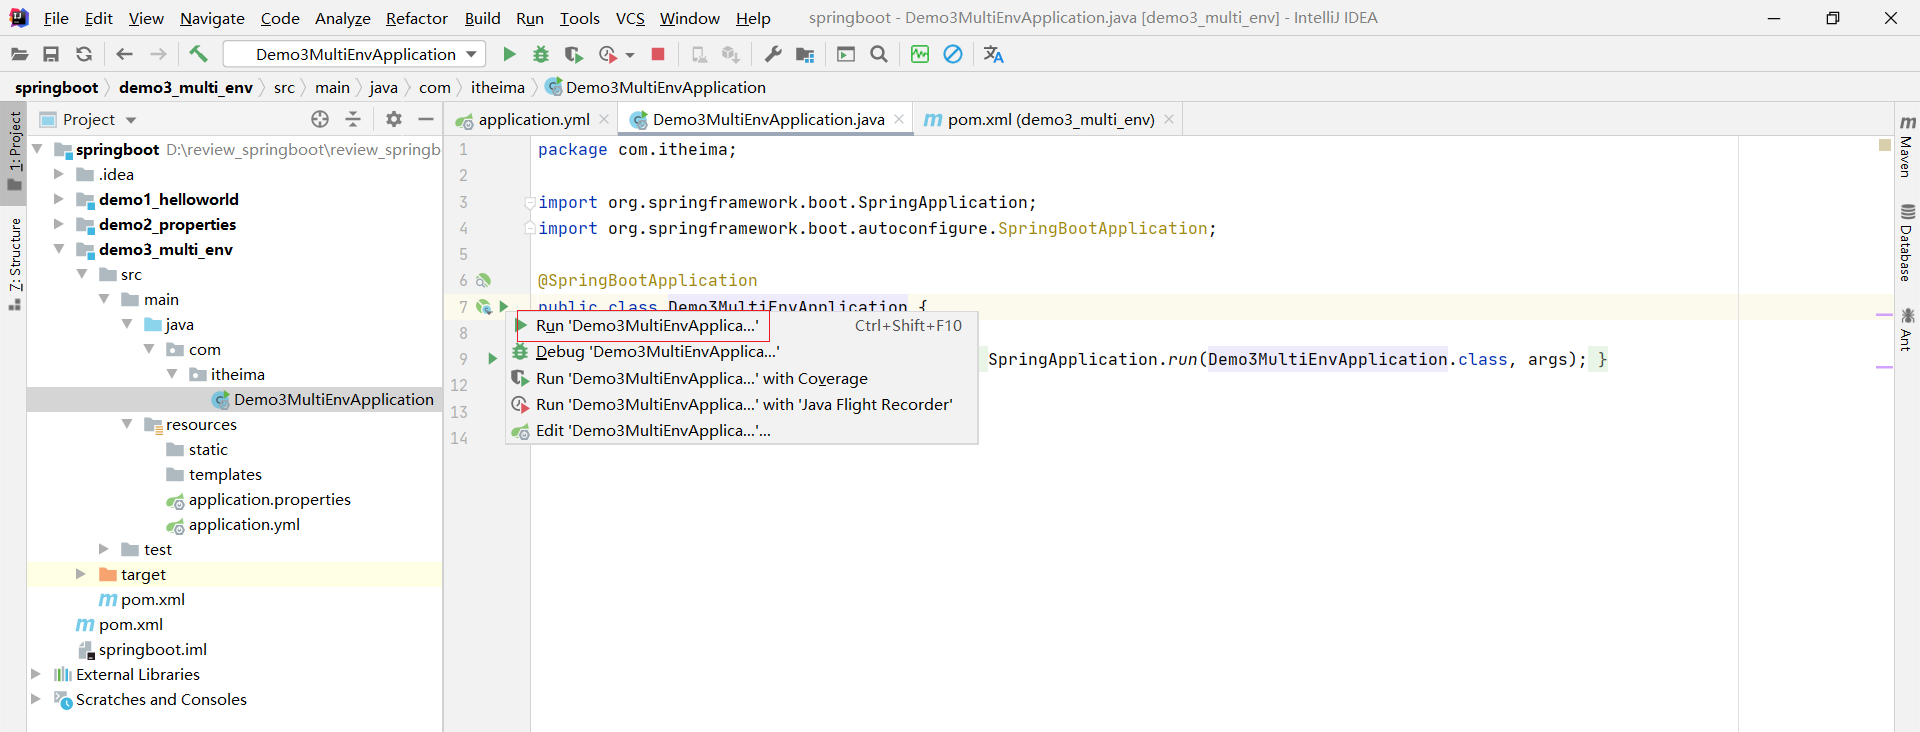
3.1 多环境启动配置
yaml文件多环境启动
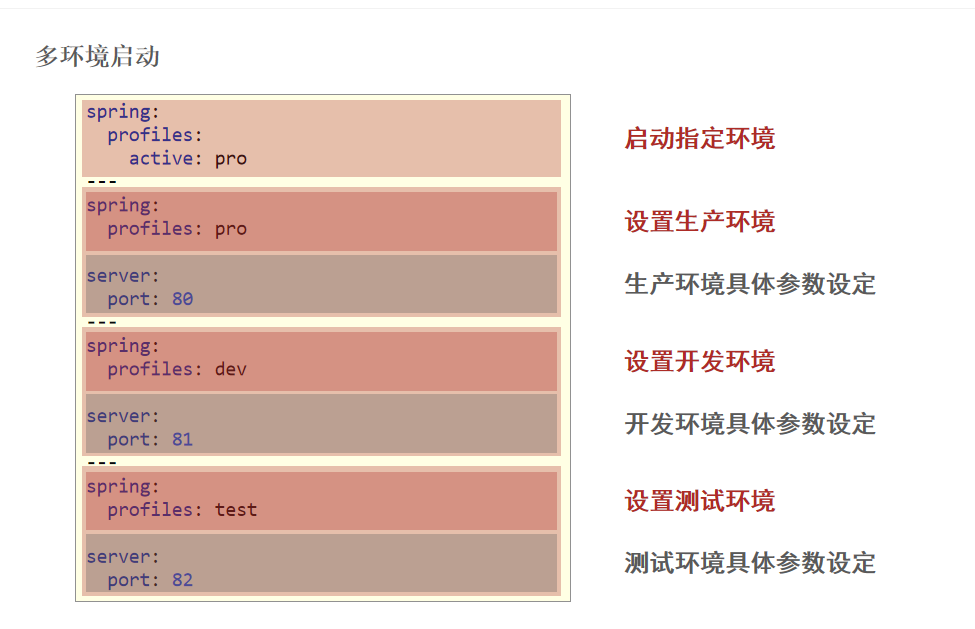
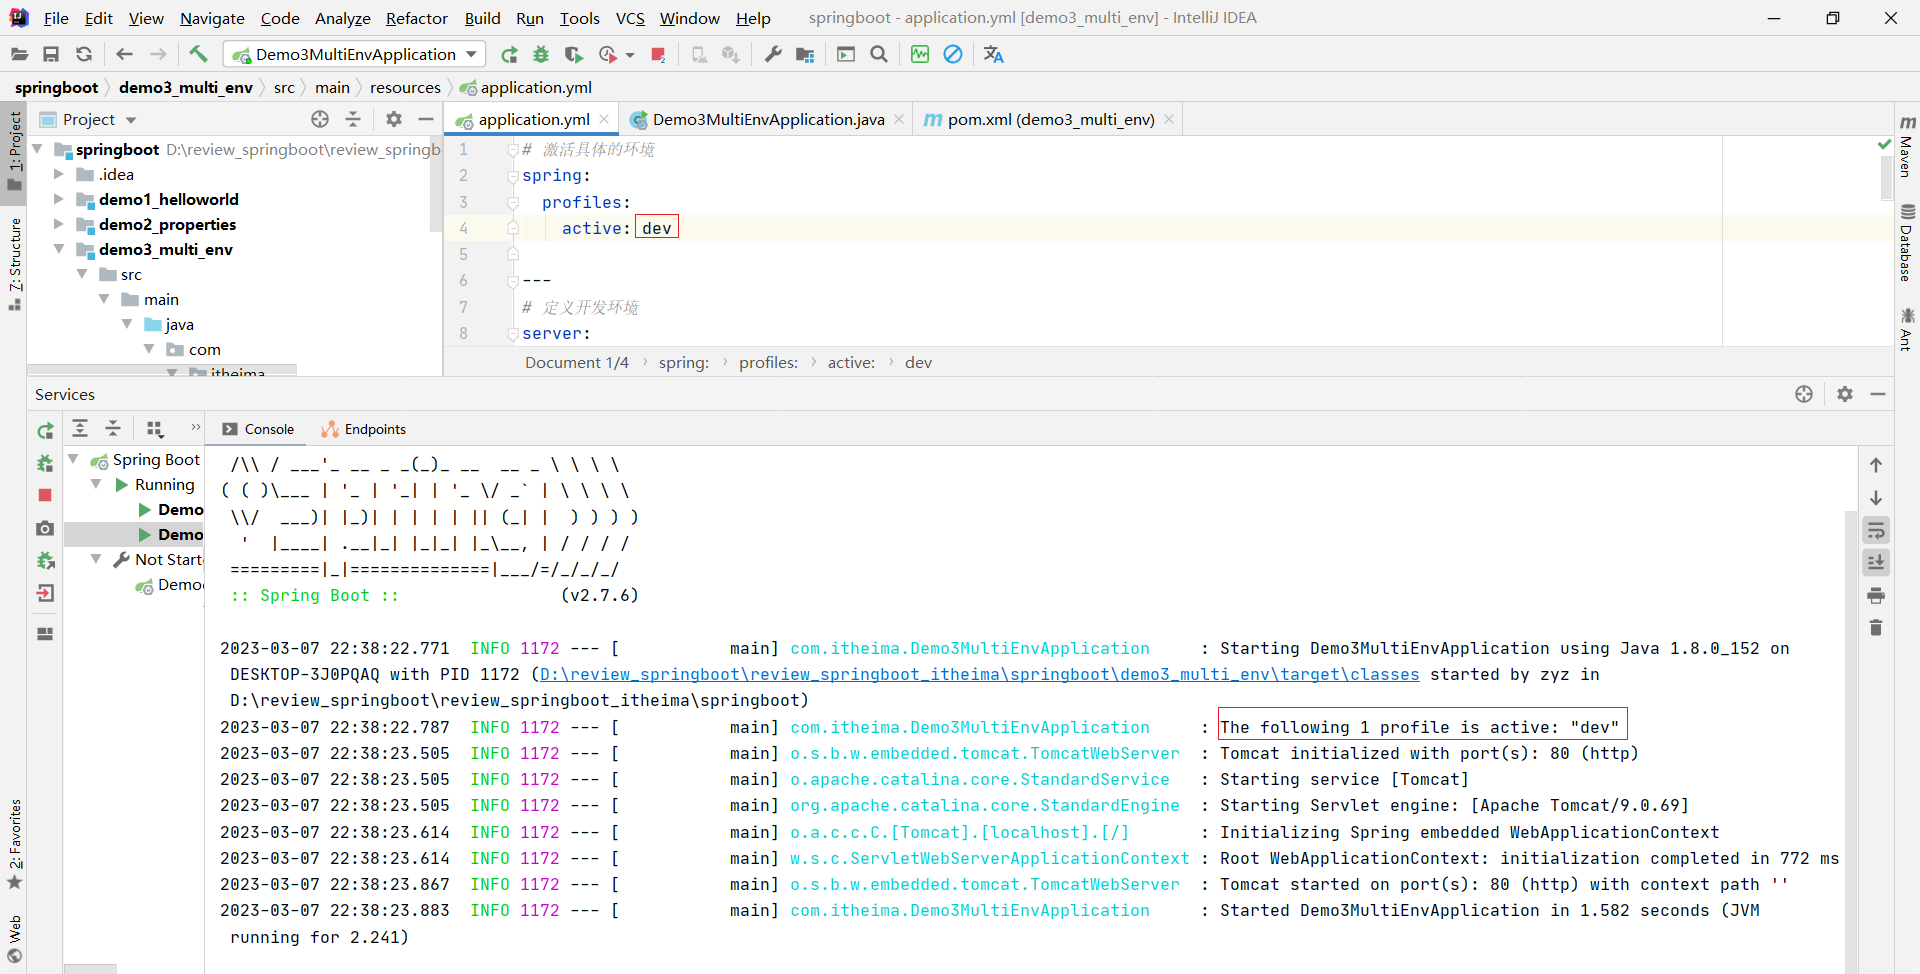
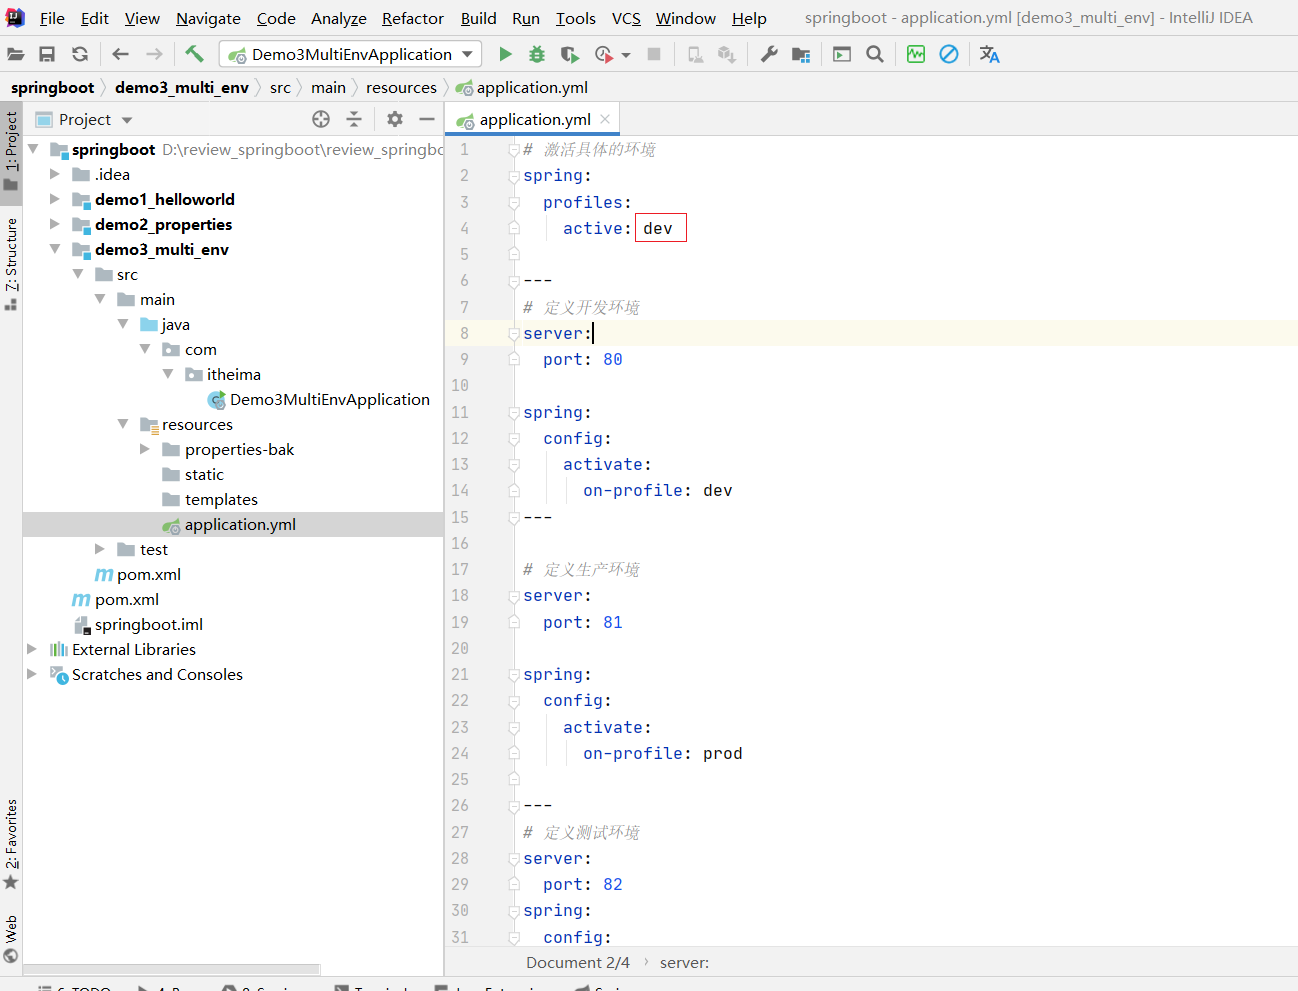
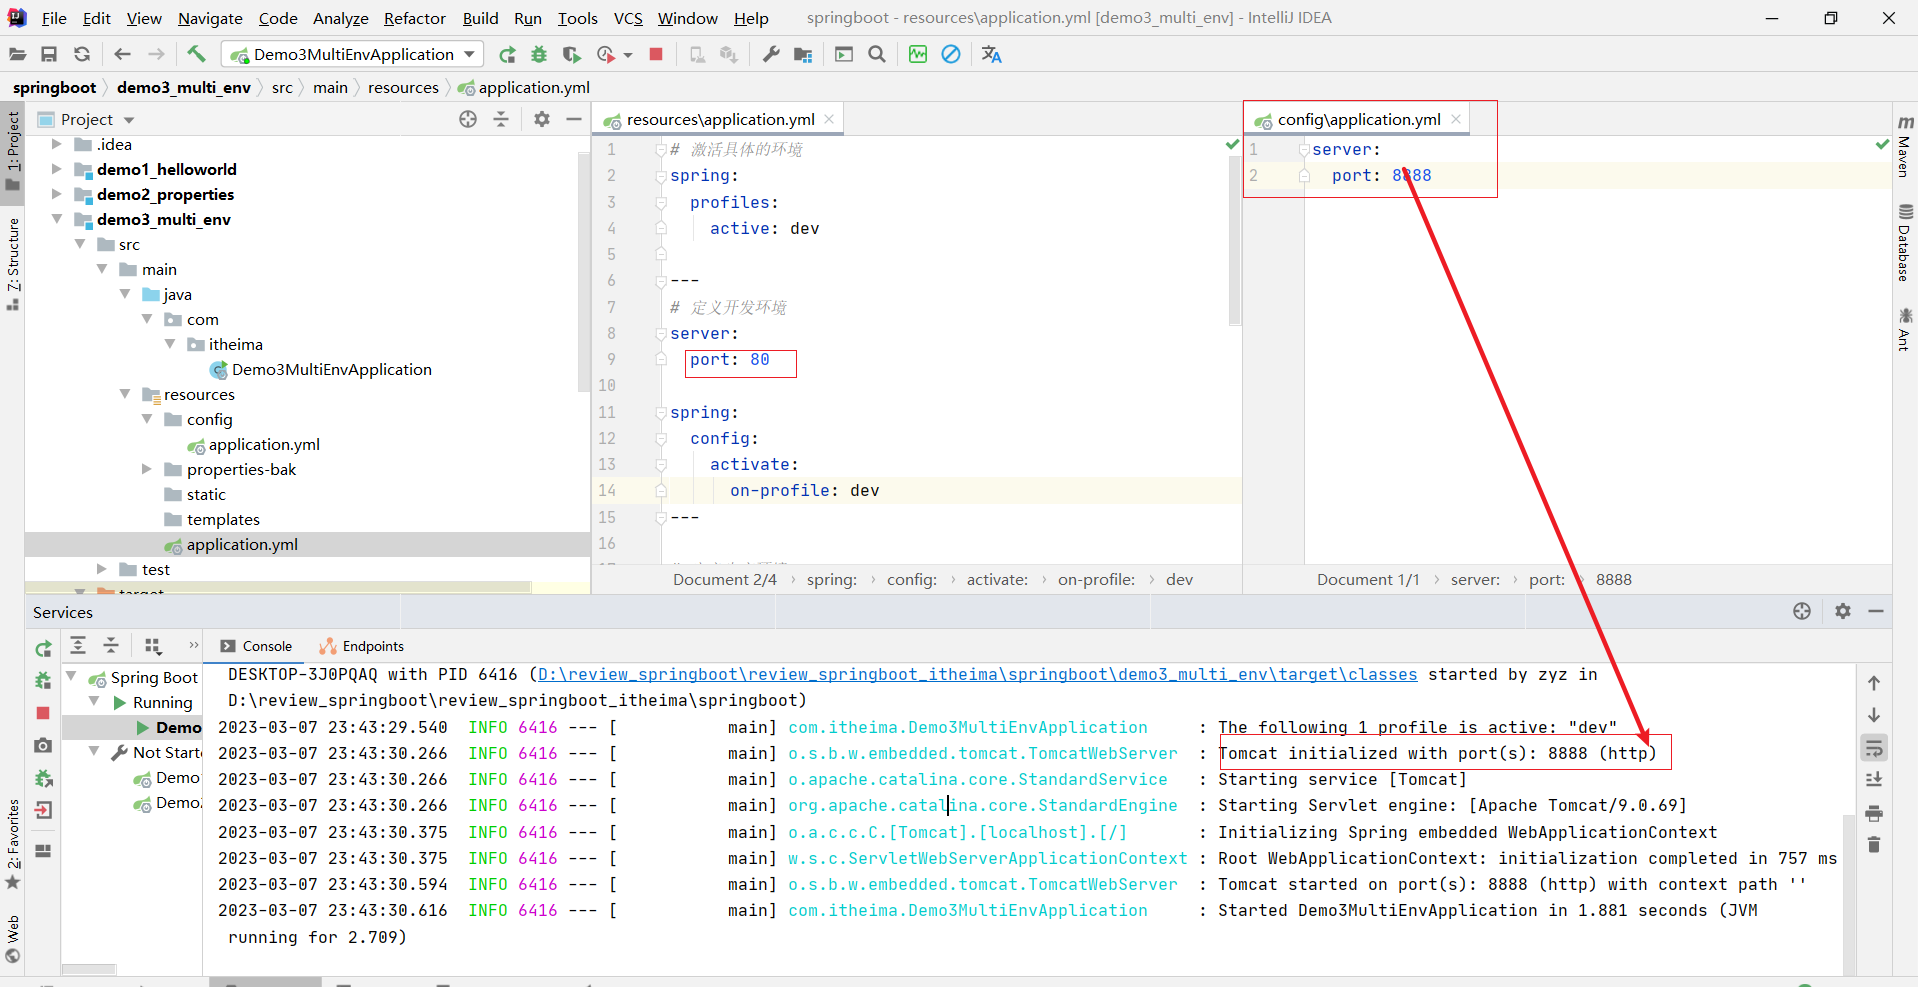
3.1.1 在YML文件多环境启动
# 激活具体的环境
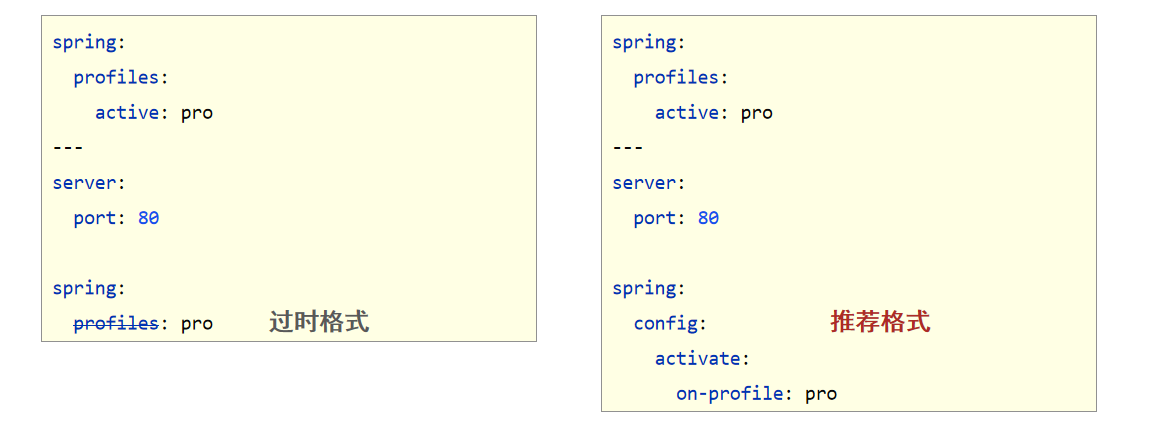
spring:profiles:active: dev---
# 定义开发环境
server:port: 80spring:config:activate:on-profile: dev
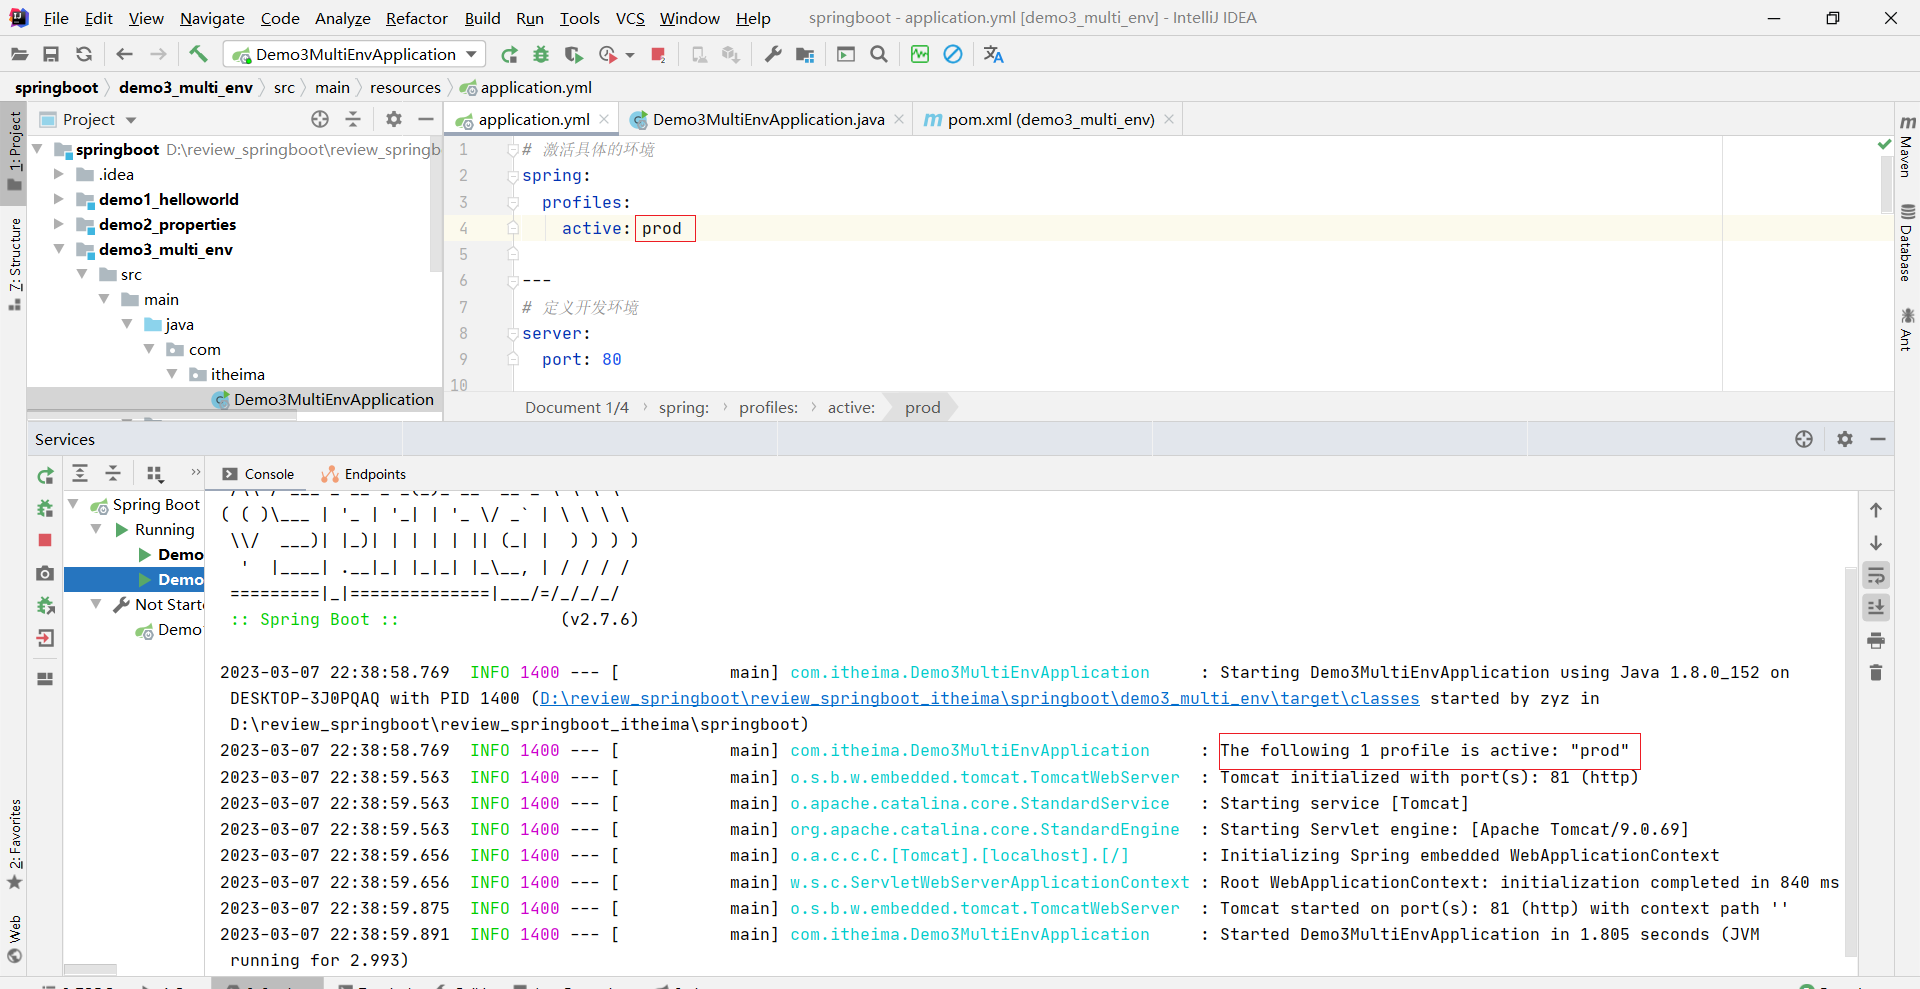
---# 定义生产环境
server:port: 81spring:config:activate:on-profile: prod---
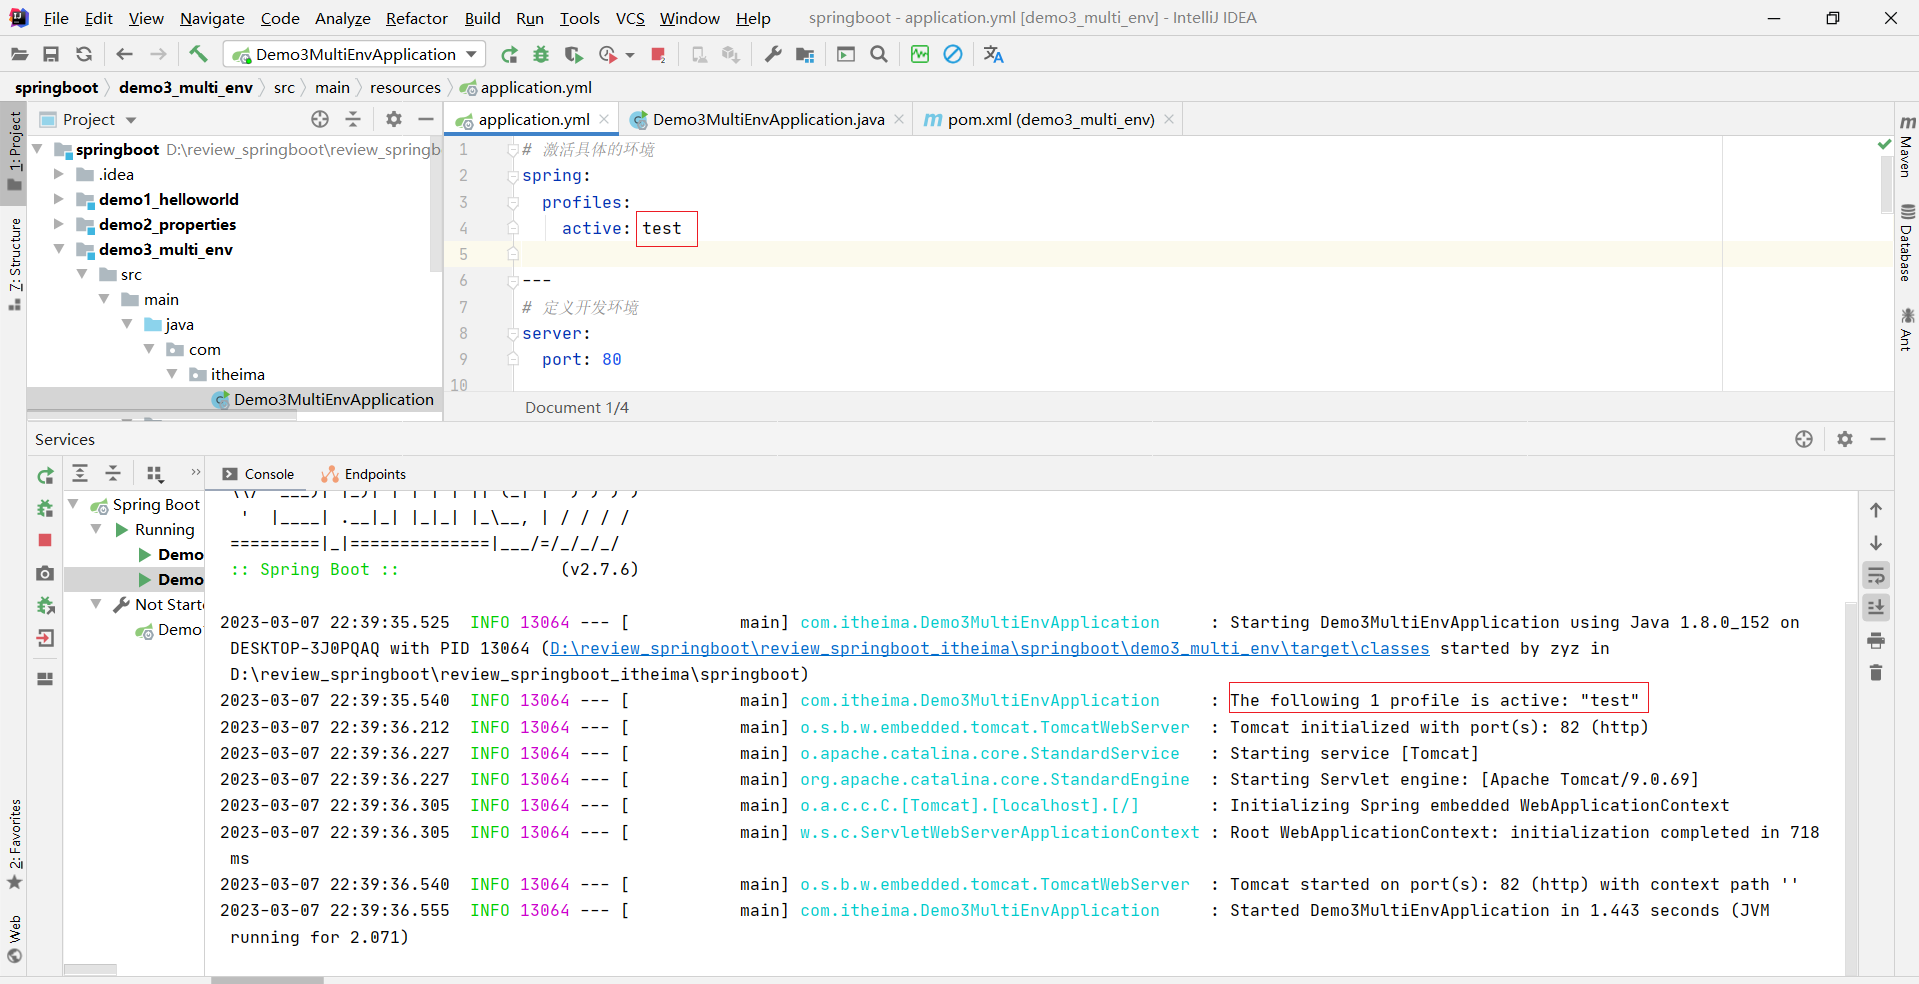
# 定义测试环境
server:port: 82
spring:config:activate:on-profile: test

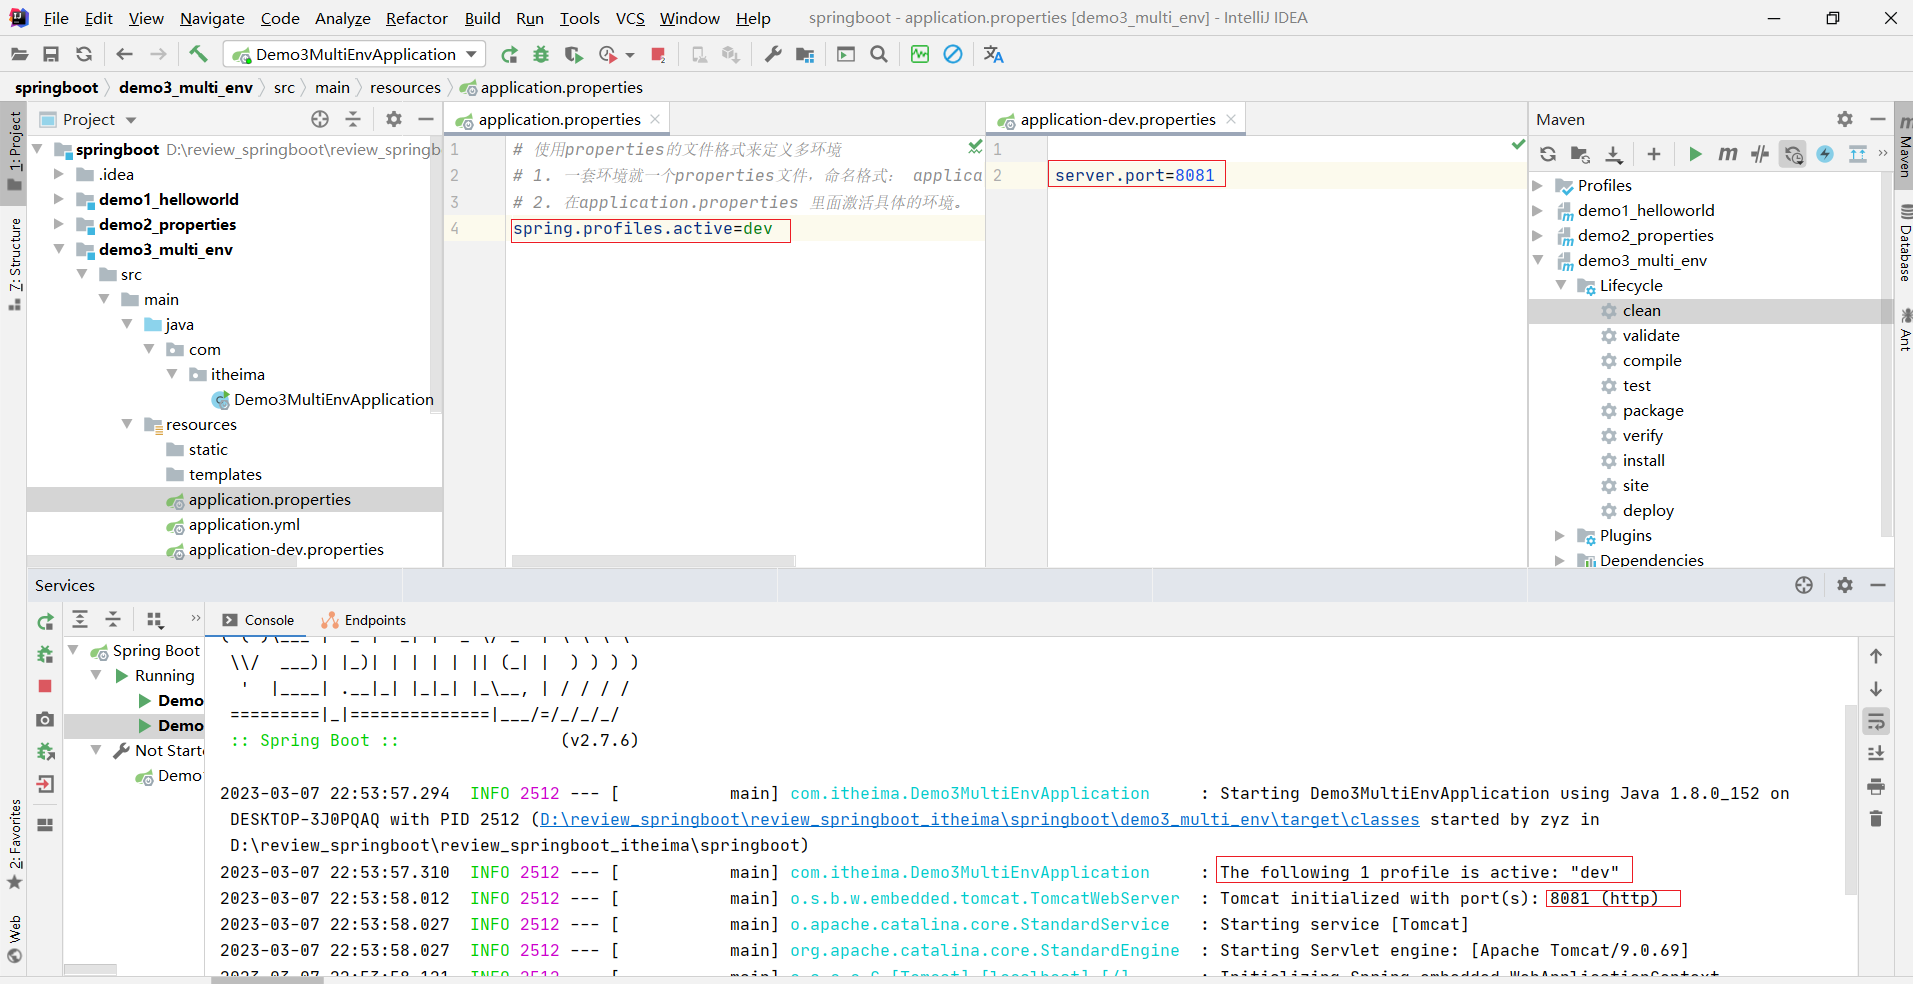
3.1.2 properties文件多环境启动
application.properties
# 使用properties的文件格式来定义多环境
# 1. 一套环境就一个properties文件,命名格式: application-环境的id.properries
# 2. 在application.properties 里面激活具体的环境。
spring.profiles.active=dev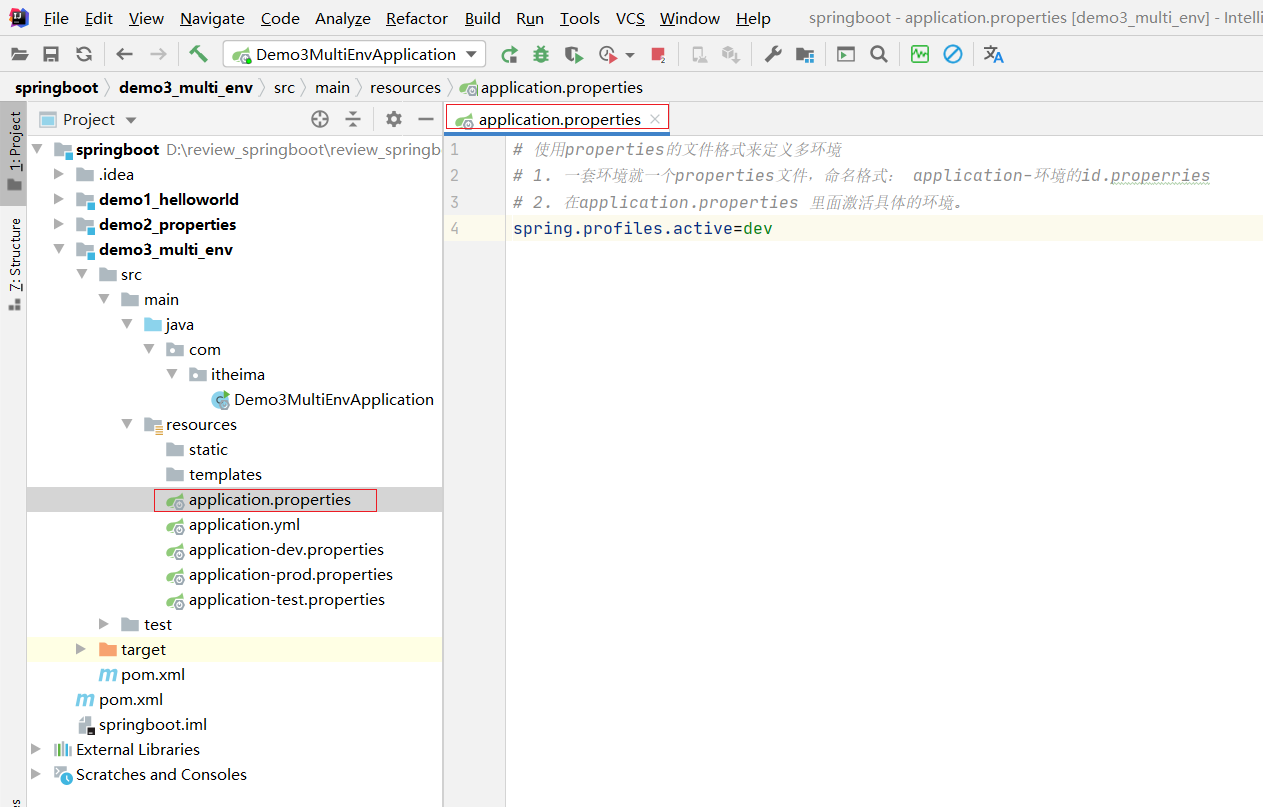
application-dev.properties
server.port=8081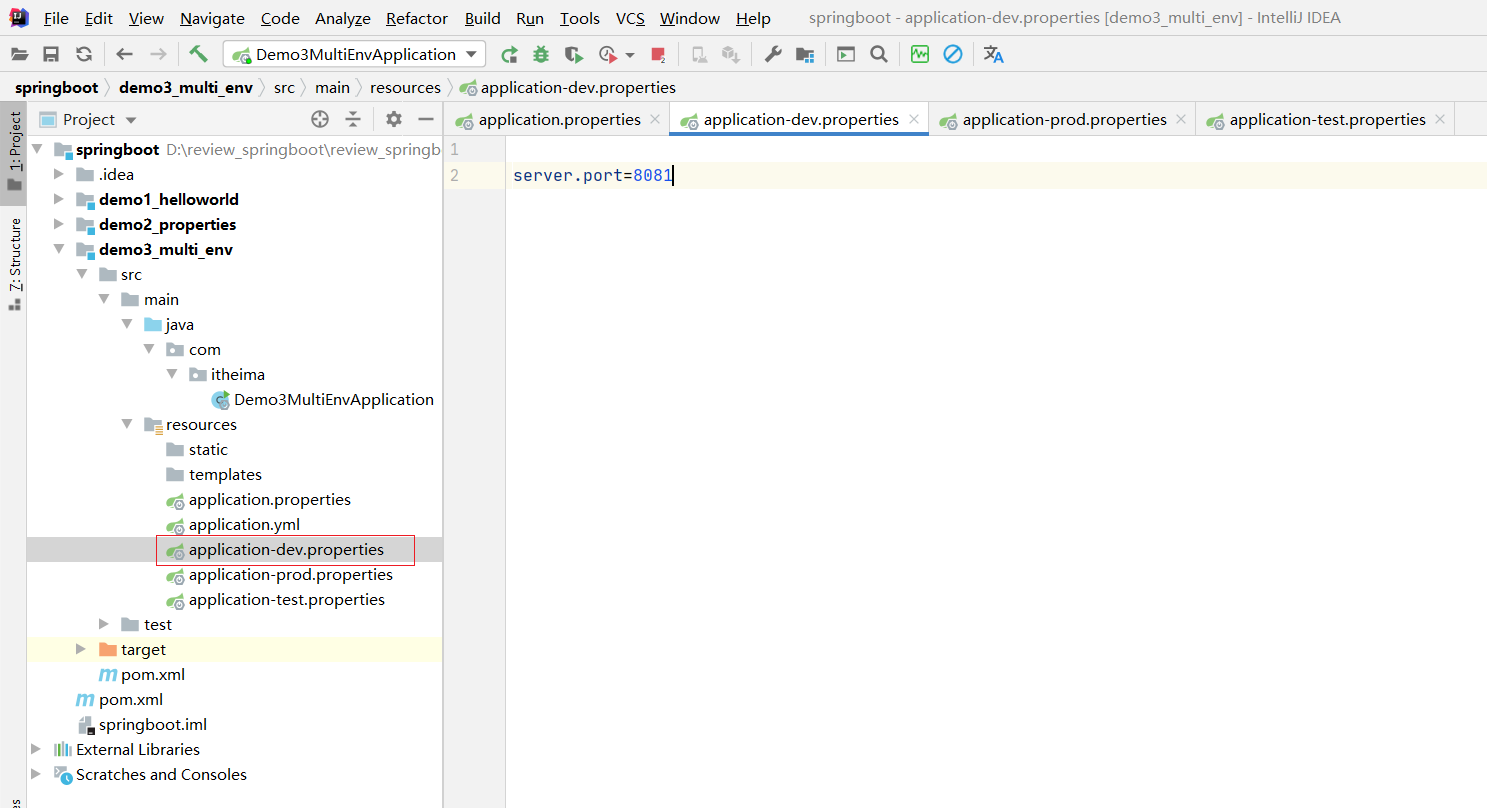
application-prod.properties
server.port=8082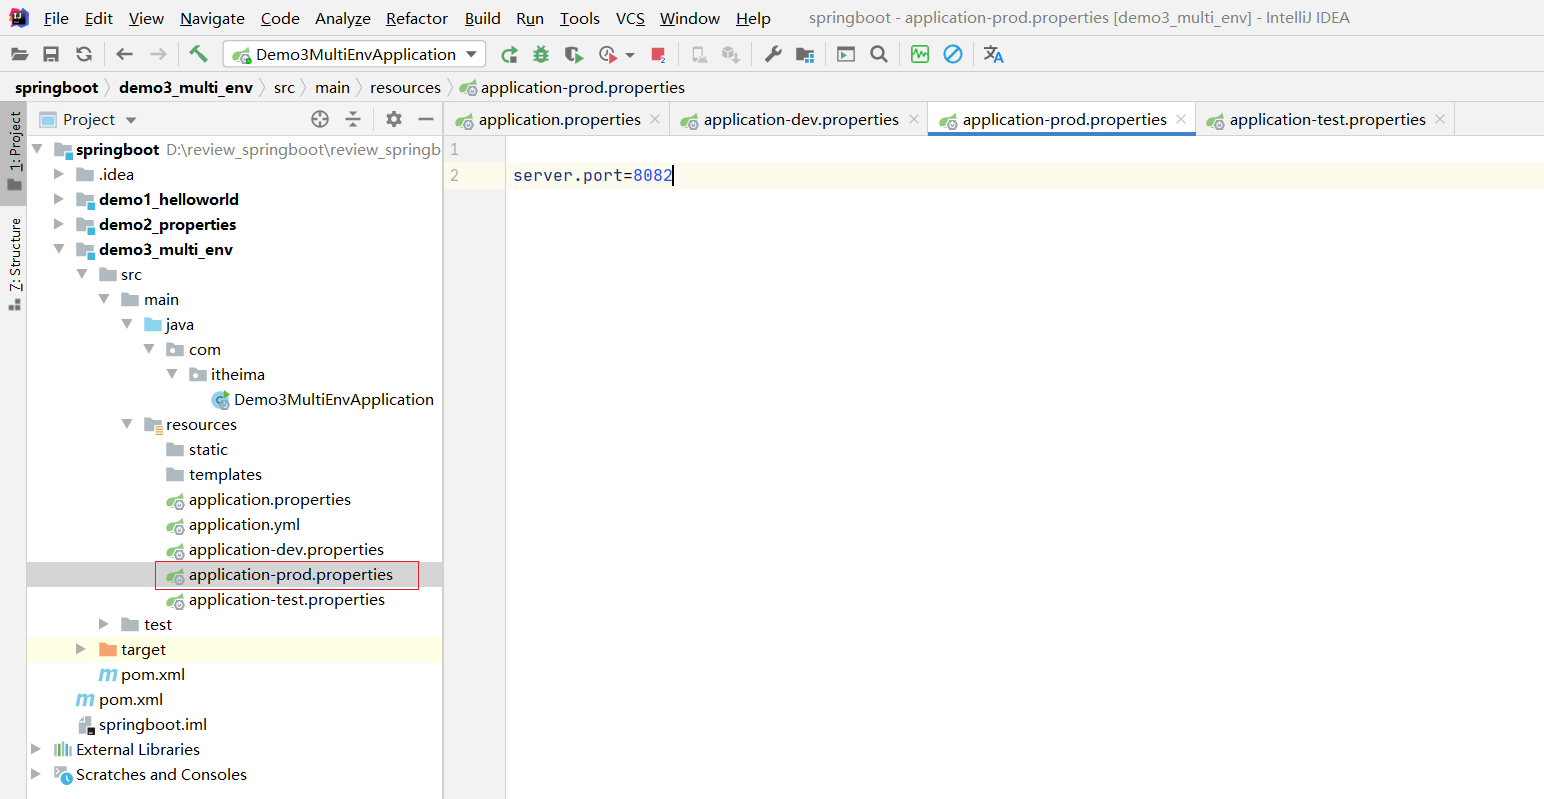
application-test.properties
server.port=8083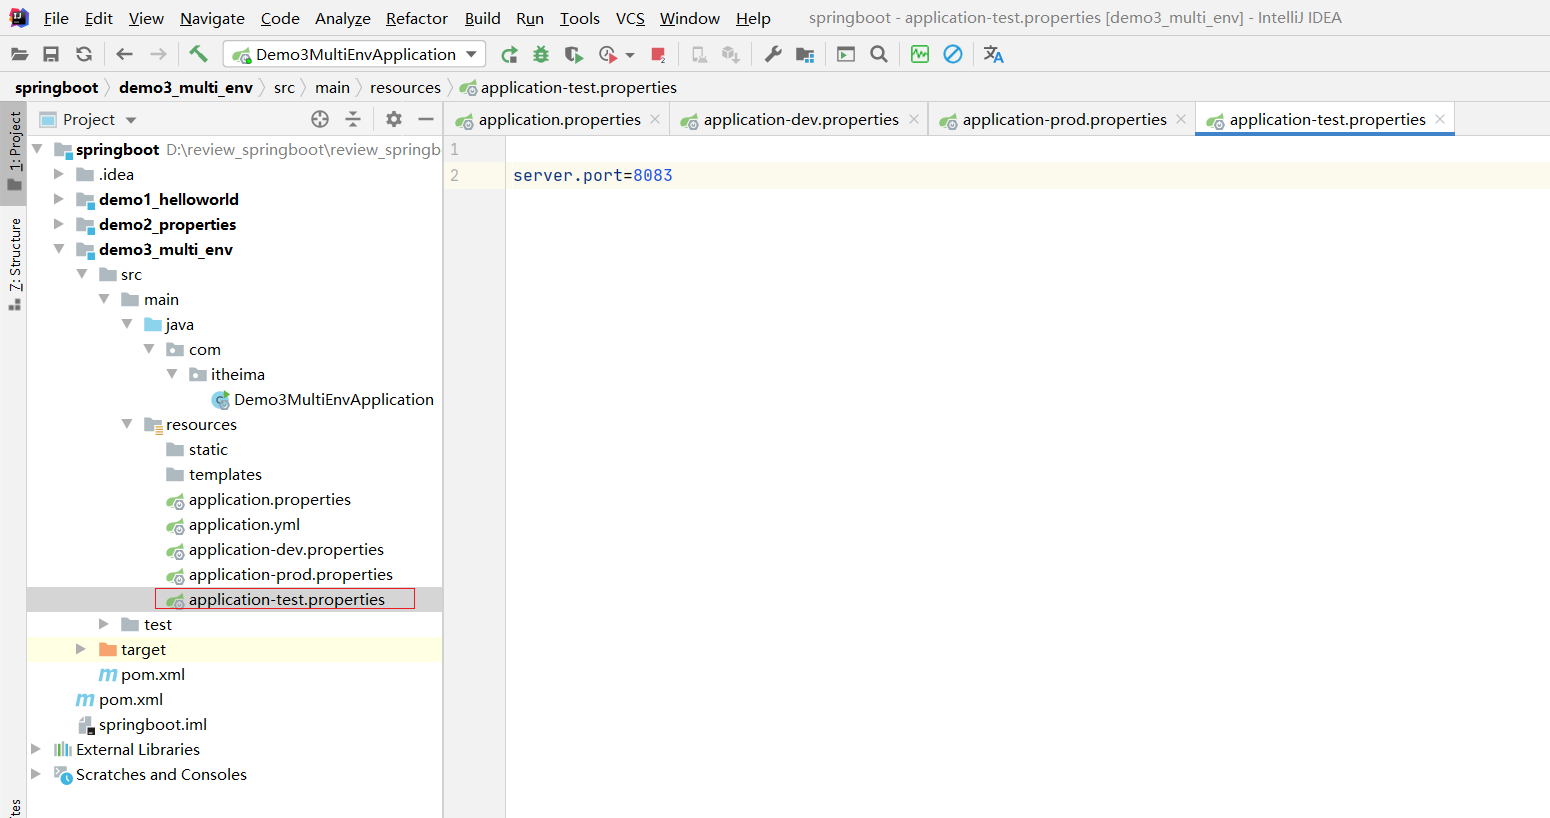
启动
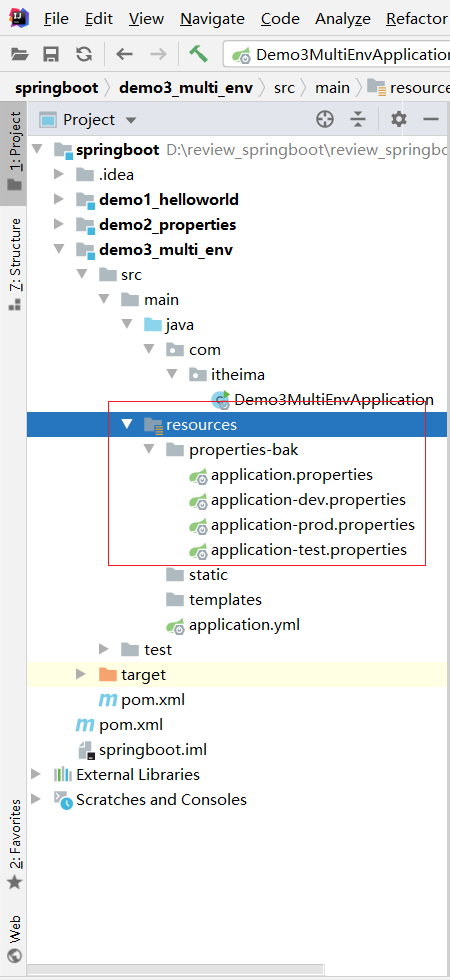
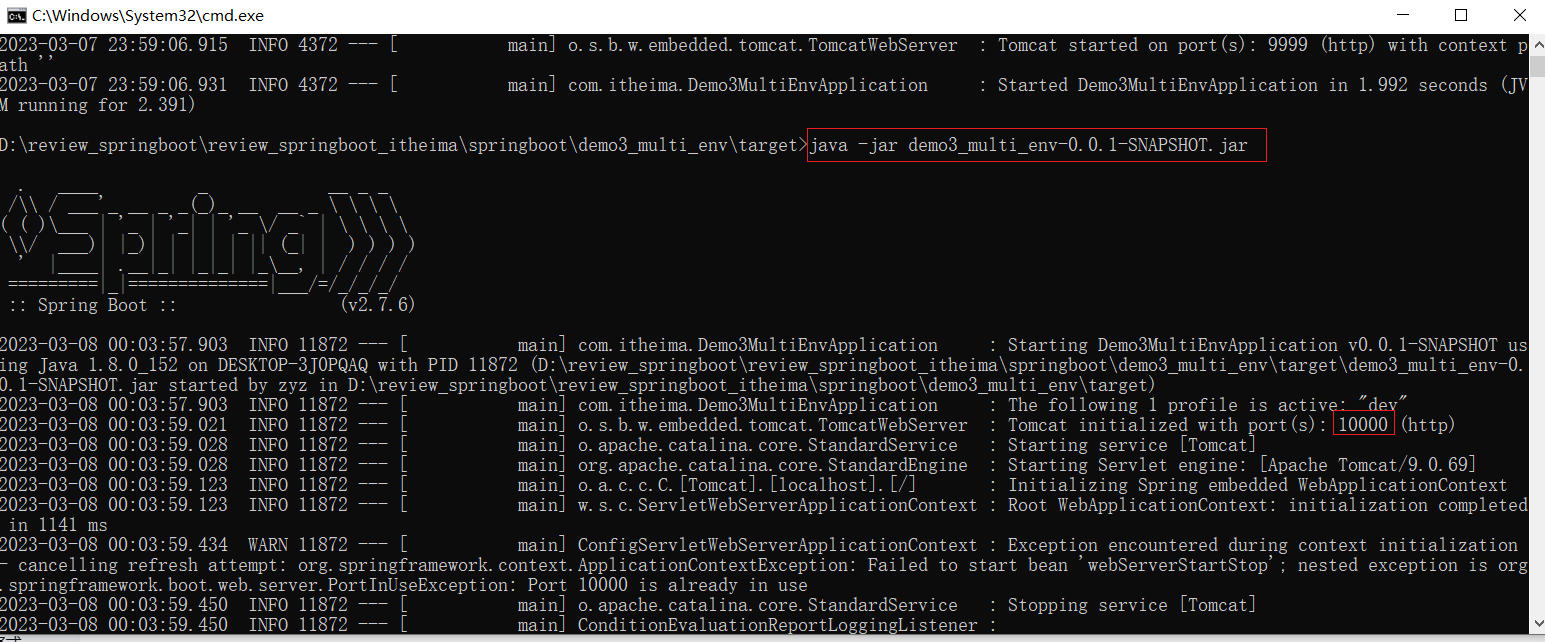
3.2 多环境启动命令格式
把application.properties放到properties-bak
带参数启动SpringBoot
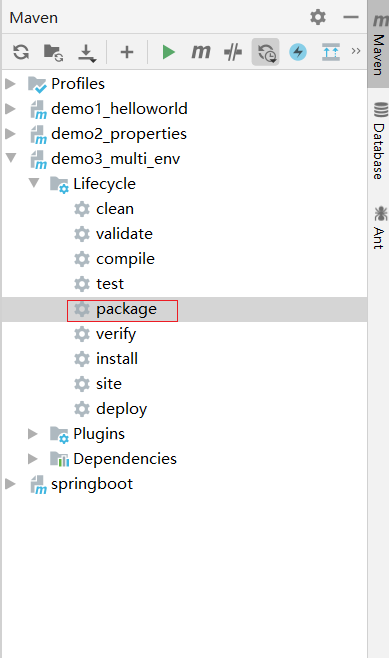
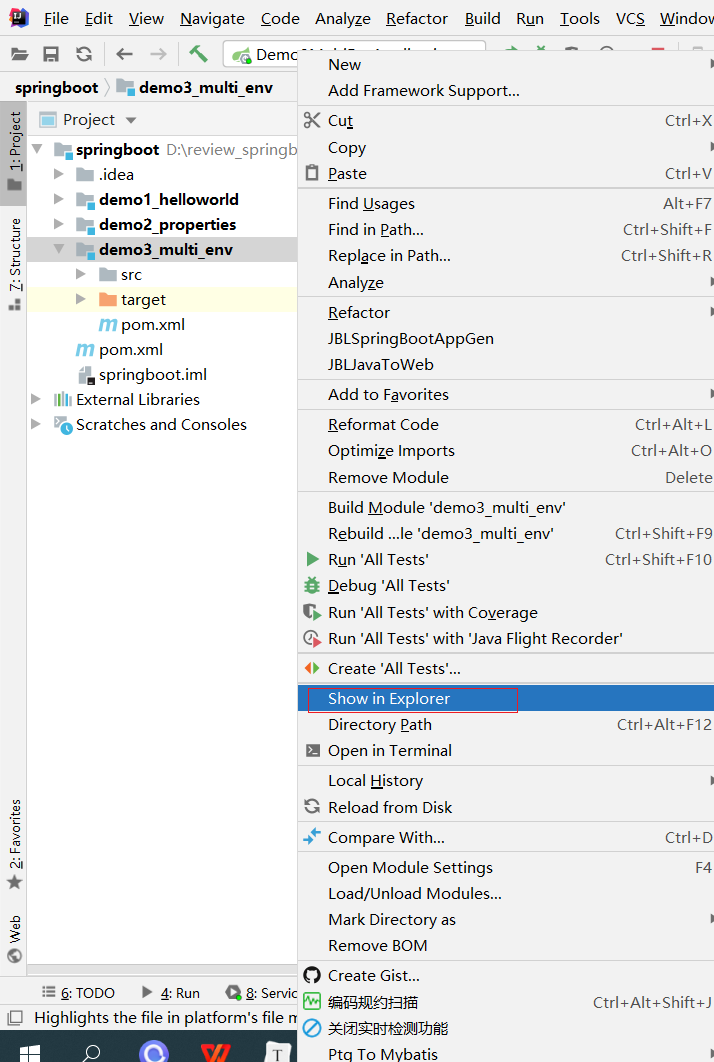
打包
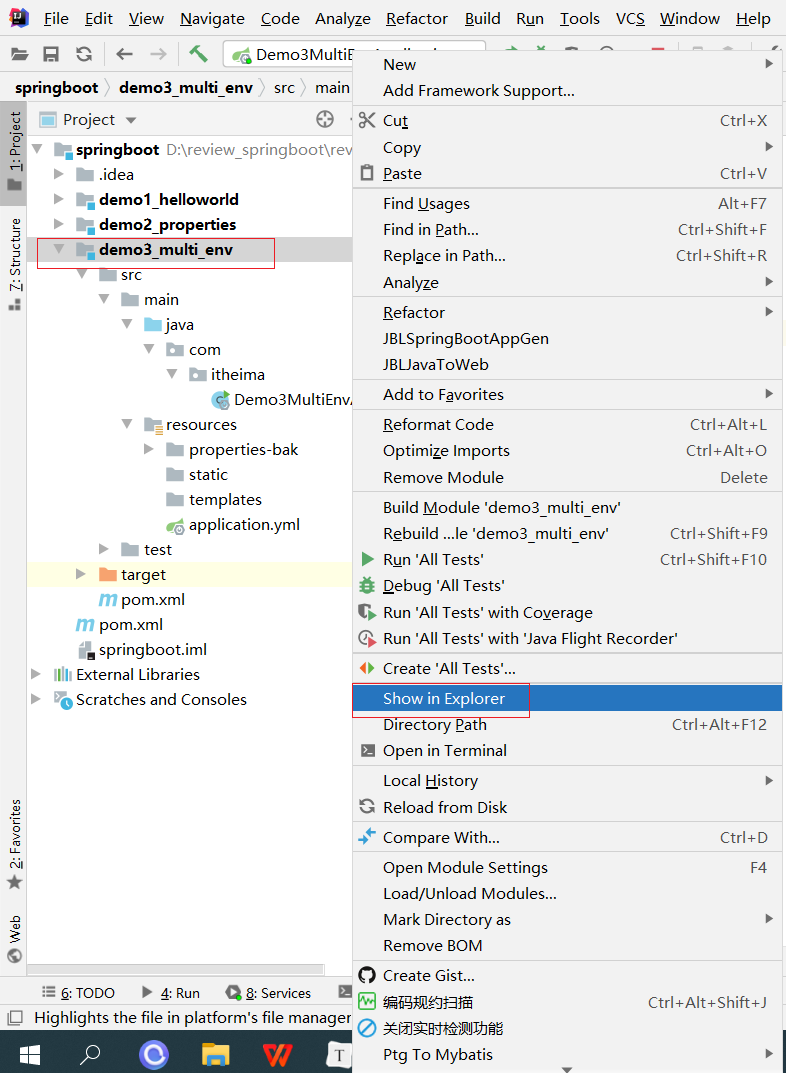

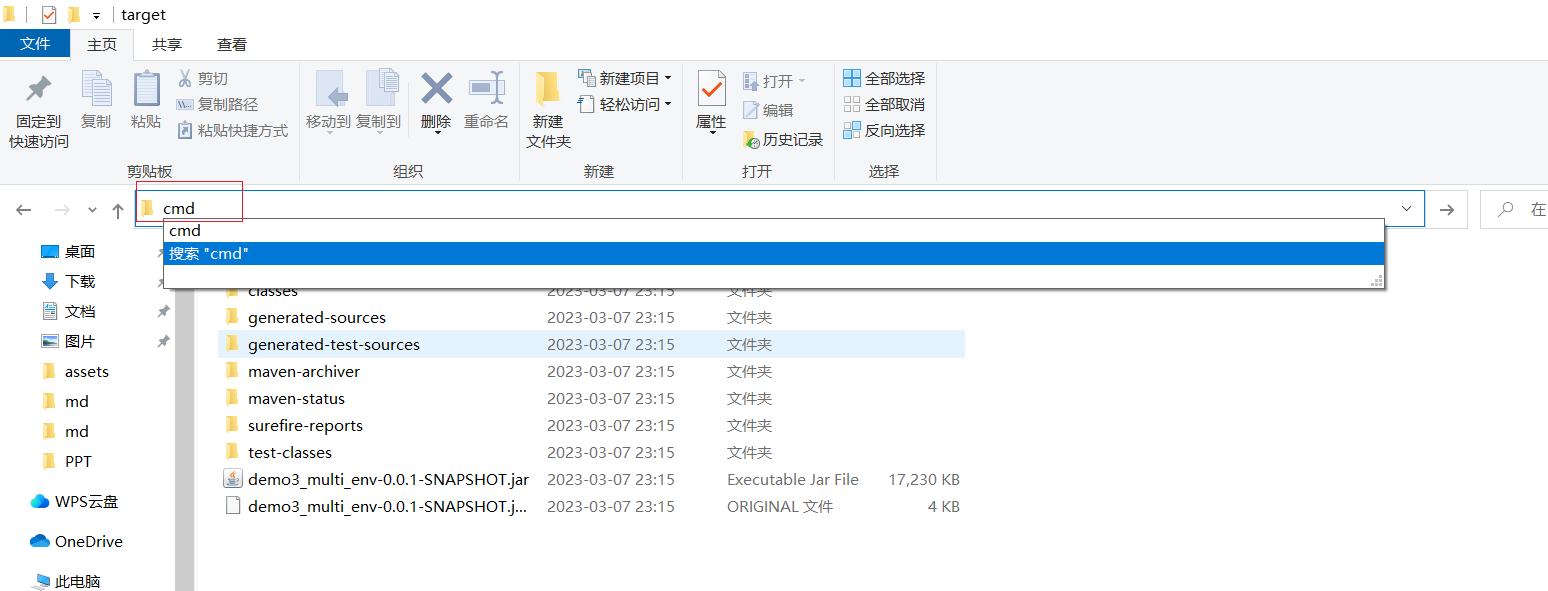
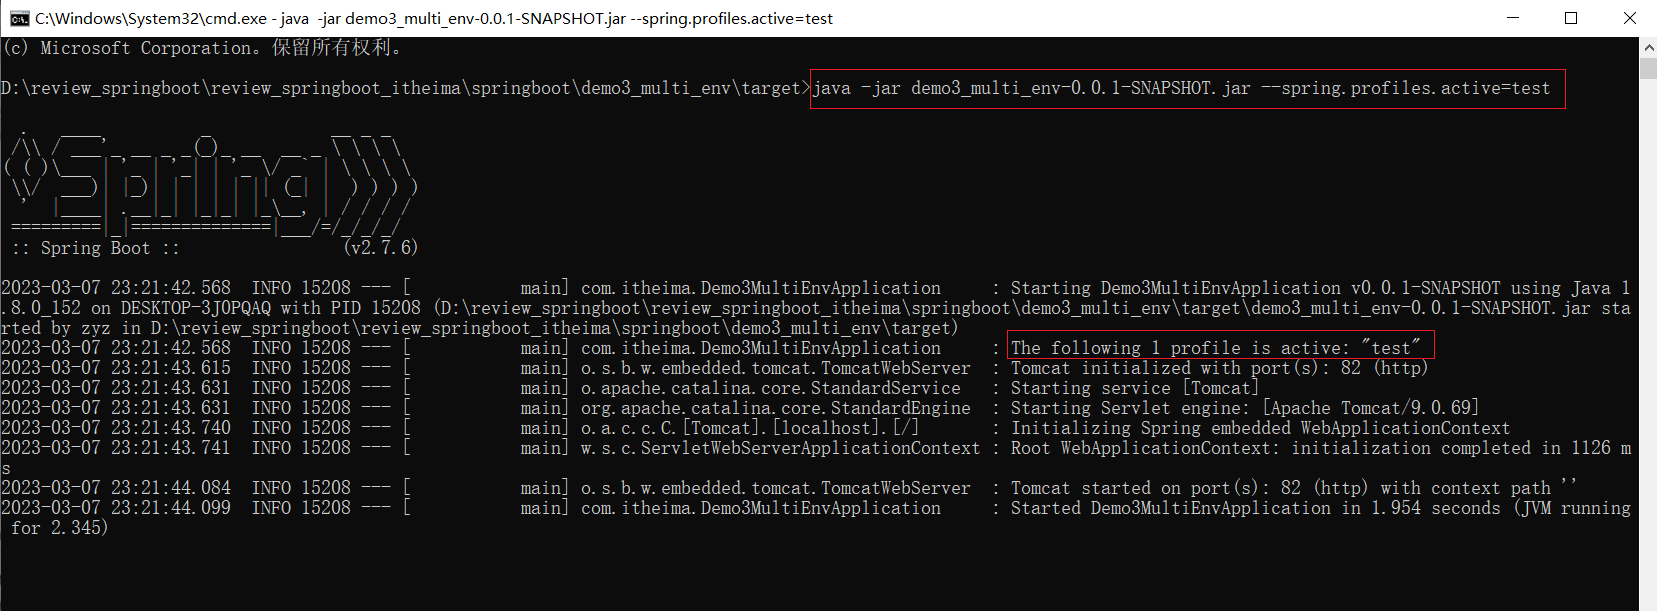
重新cmd 修改端口
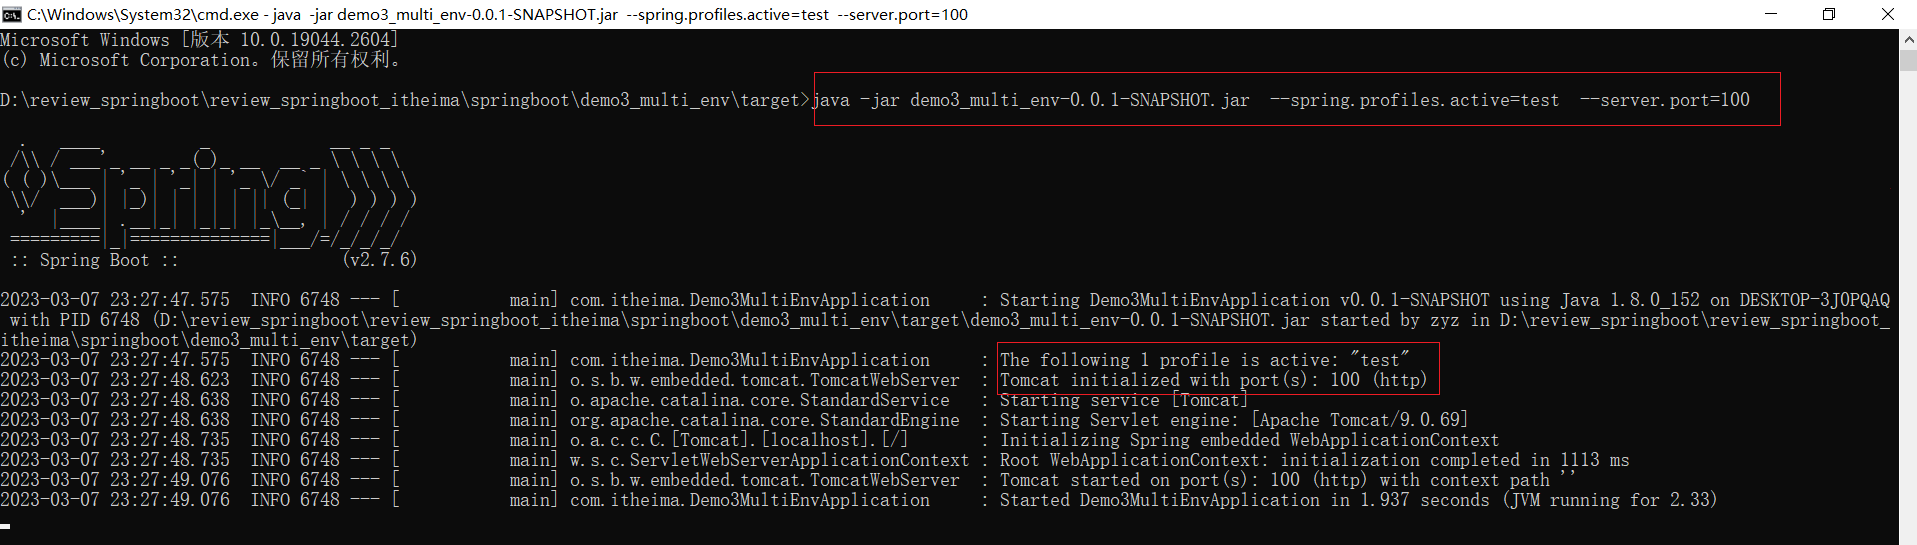
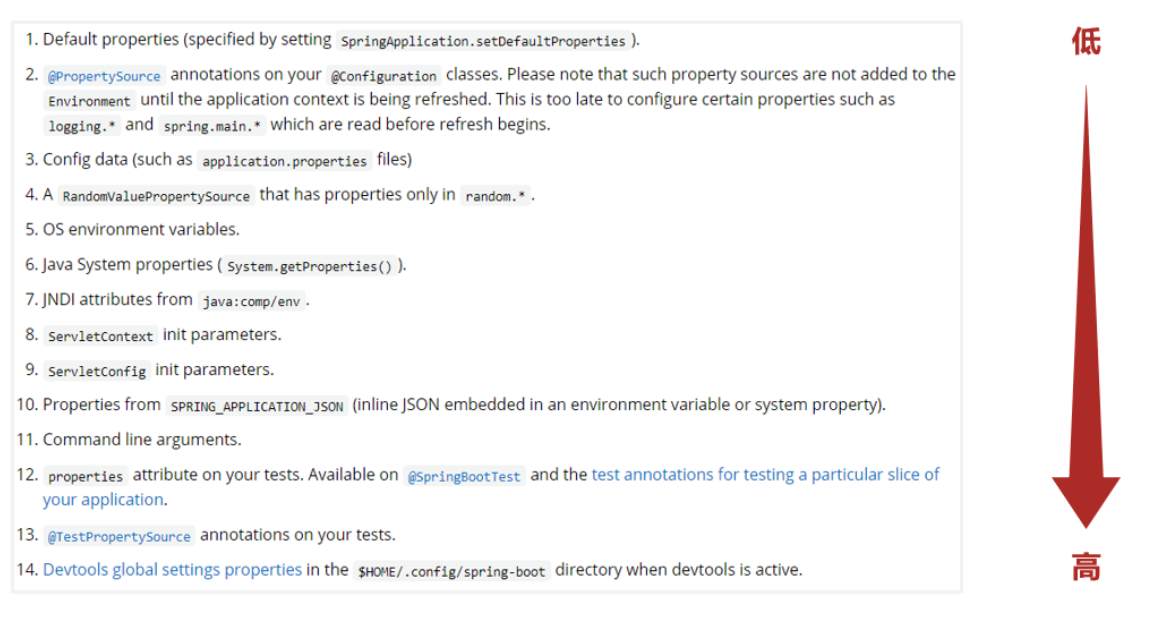
参数加载优先顺序
参看文档:https://docs.spring.io/spring-boot/docs/current/reference/html/spring-boot-features.html#boot-features-external-config
3.3 多环境开发控制
Maven与SpringBoot多环境兼容(步骤)
环境准备

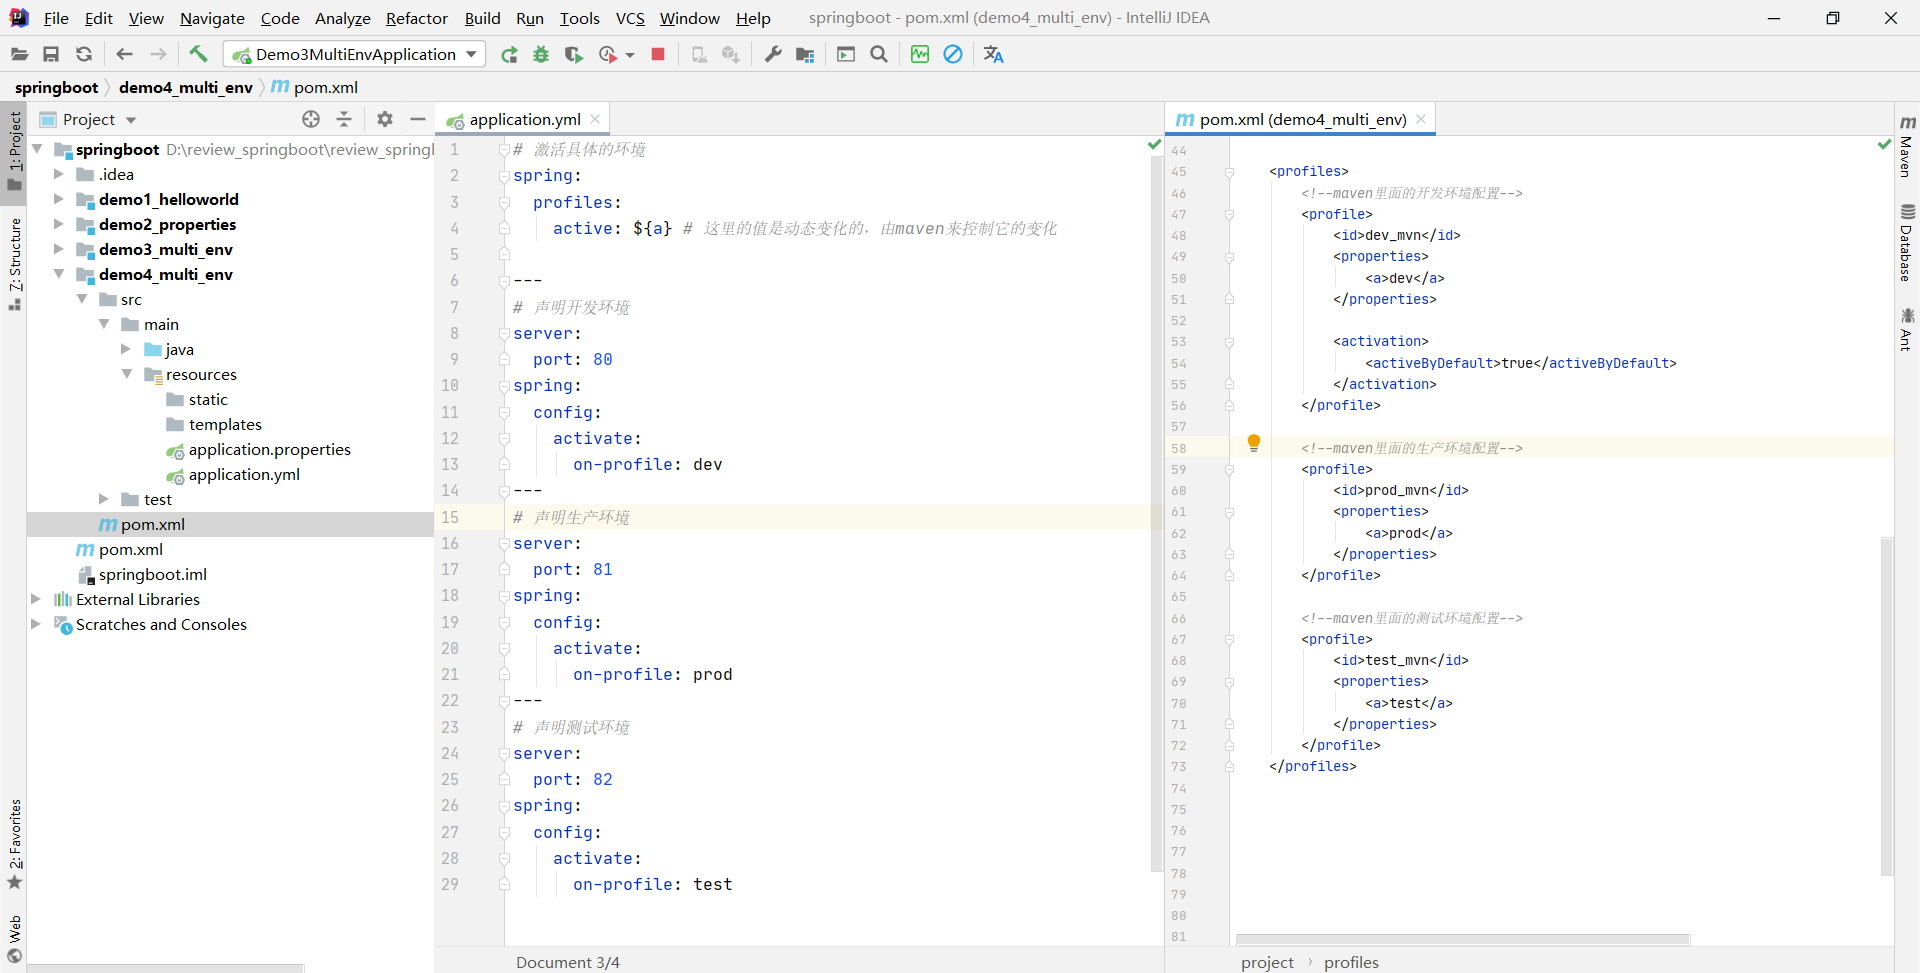
①:Maven中设置多环境属性
<profiles><!--maven里面的开发环境配置--><profile><id>dev_mvn</id><properties><a>dev</a></properties><activation><activeByDefault>true</activeByDefault></activation></profile><!--maven里面的生产环境配置--><profile><id>prod_mvn</id><properties><a>prod</a></properties></profile><!--maven里面的测试环境配置--><profile><id>test_mvn</id><properties><a>test</a></properties></profile></profiles>

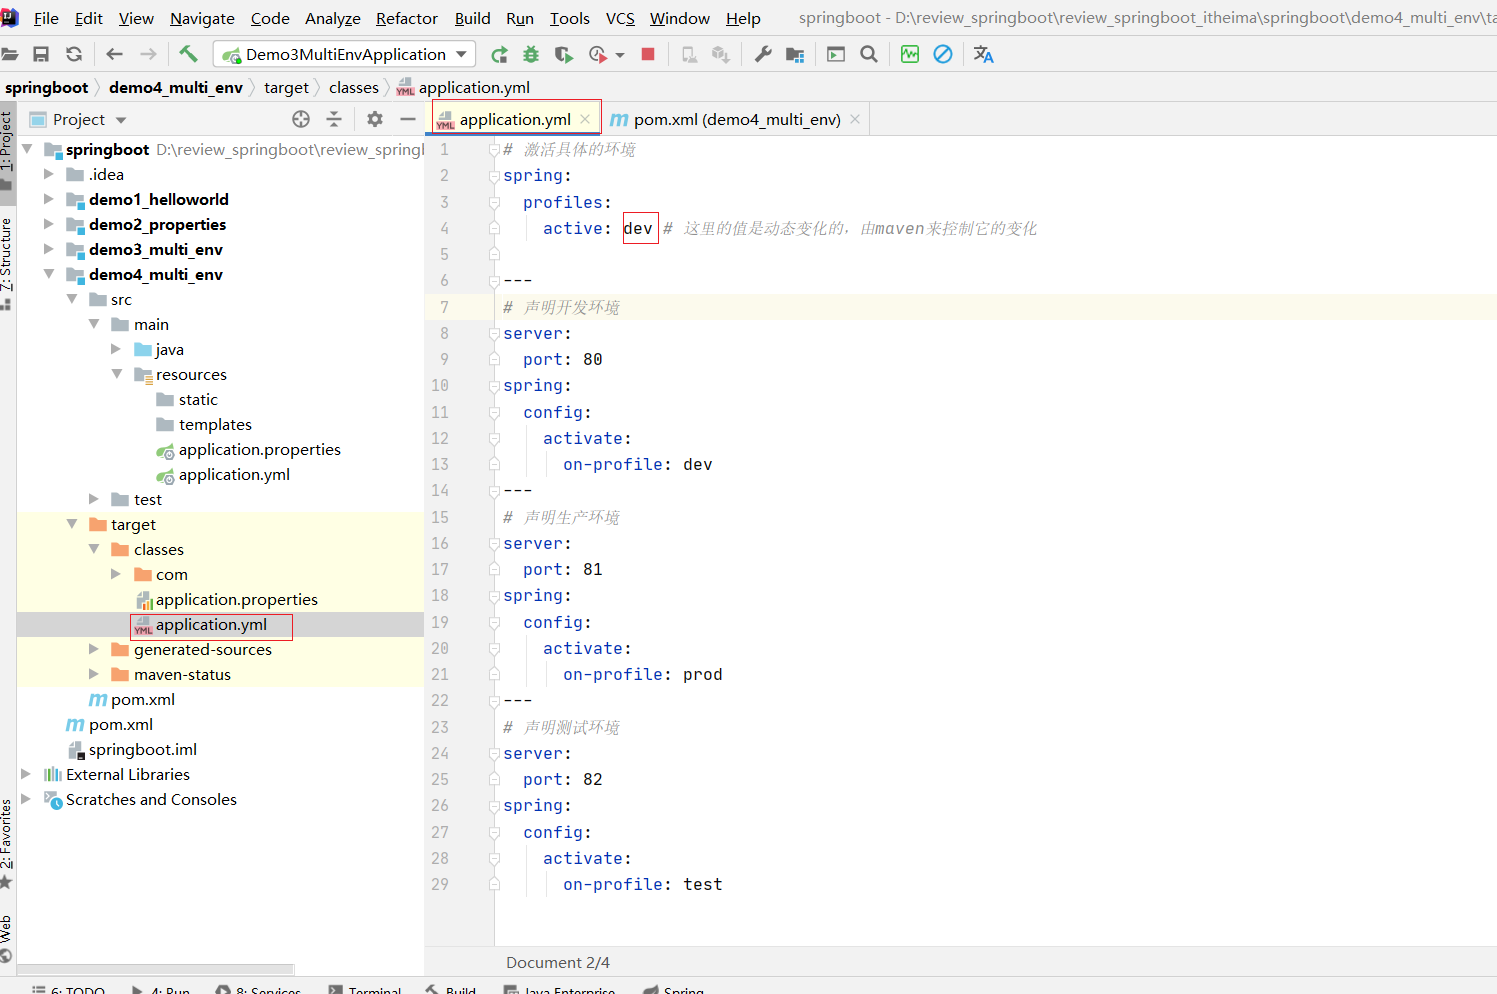
②:SpringBoot中引用Maven属性
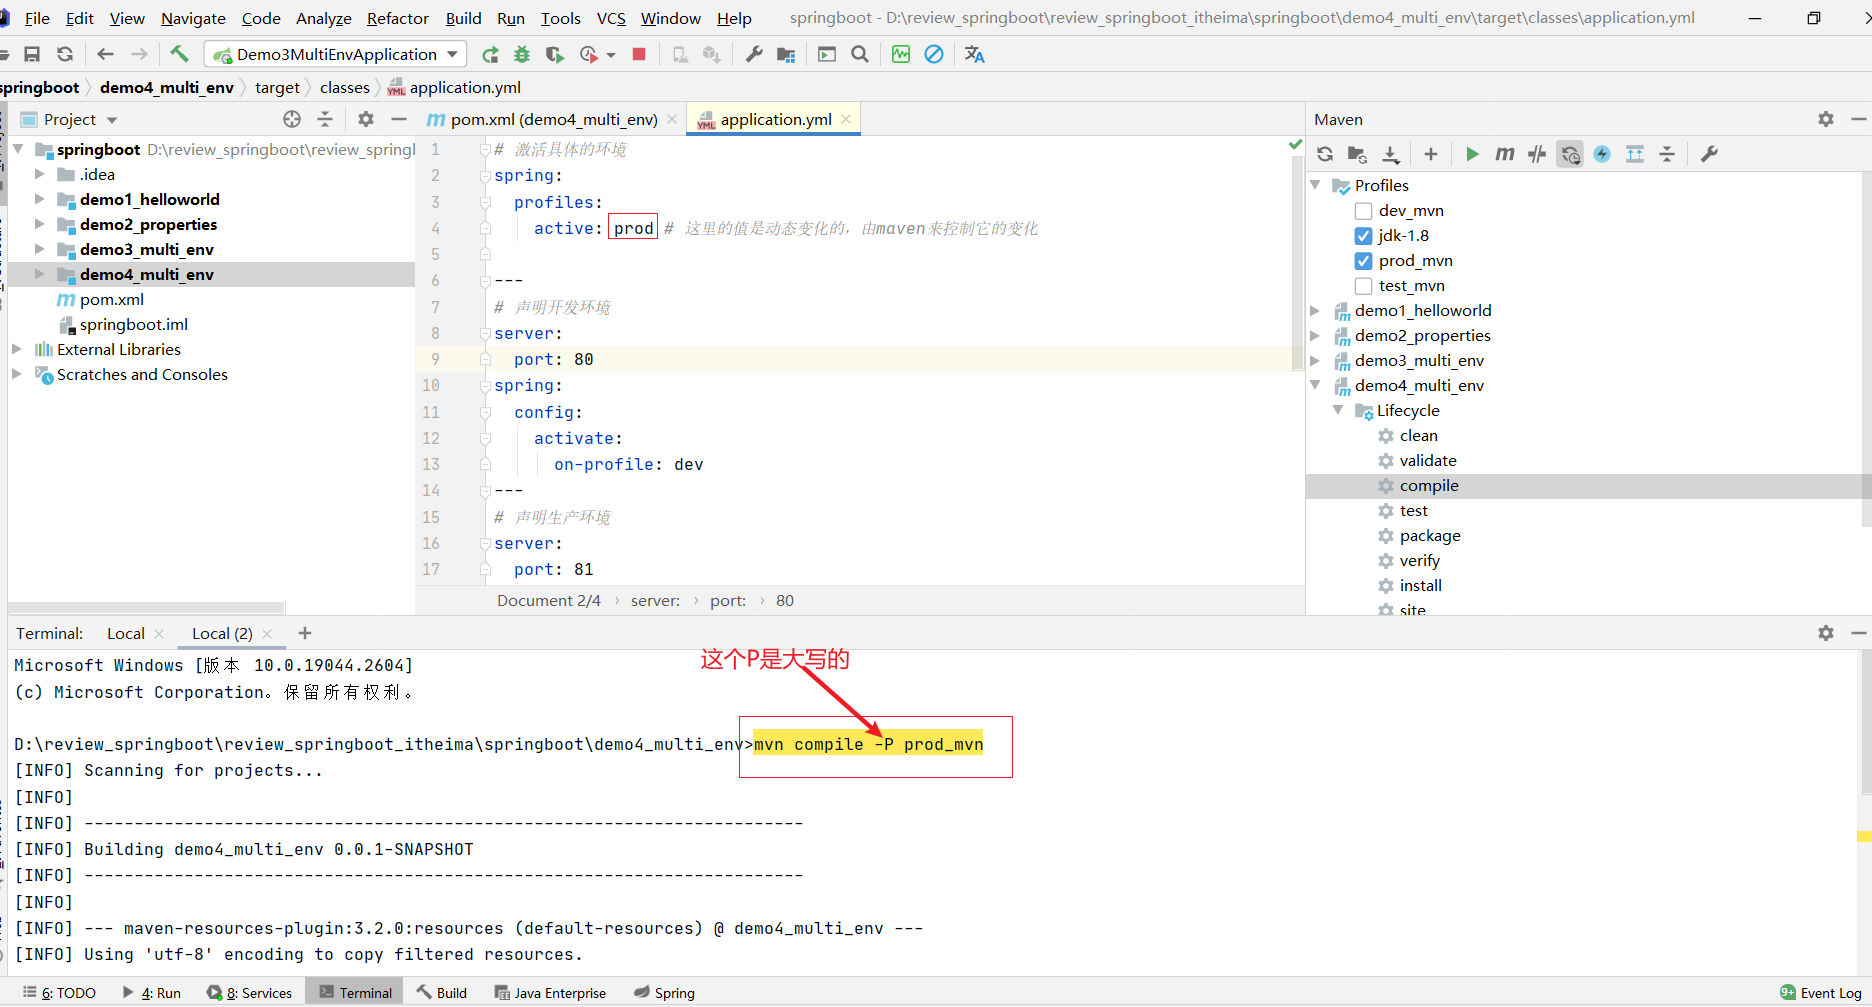
# 激活具体的环境
spring:profiles:active: ${a} # 这里的值是动态变化的,由maven来控制它的变化---
# 声明开发环境
server:port: 80
spring:config:activate:on-profile: dev
---
# 声明生产环境
server:port: 81
spring:config:activate:on-profile: prod
---
# 声明测试环境
server:port: 82
spring:config:activate:on-profile: test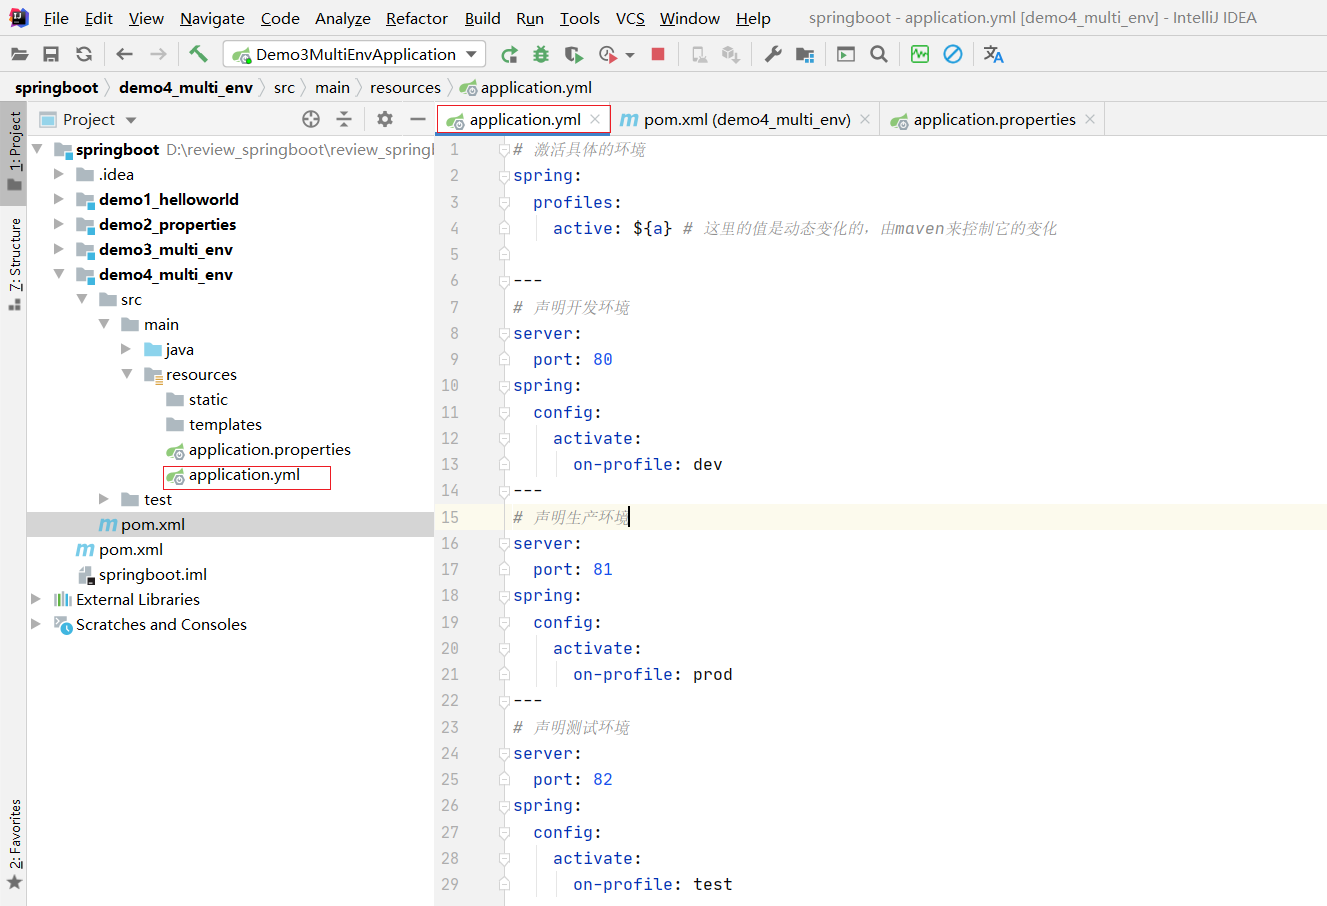
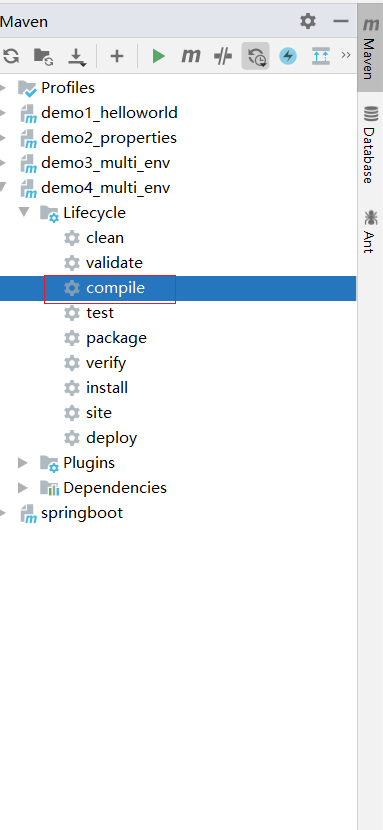
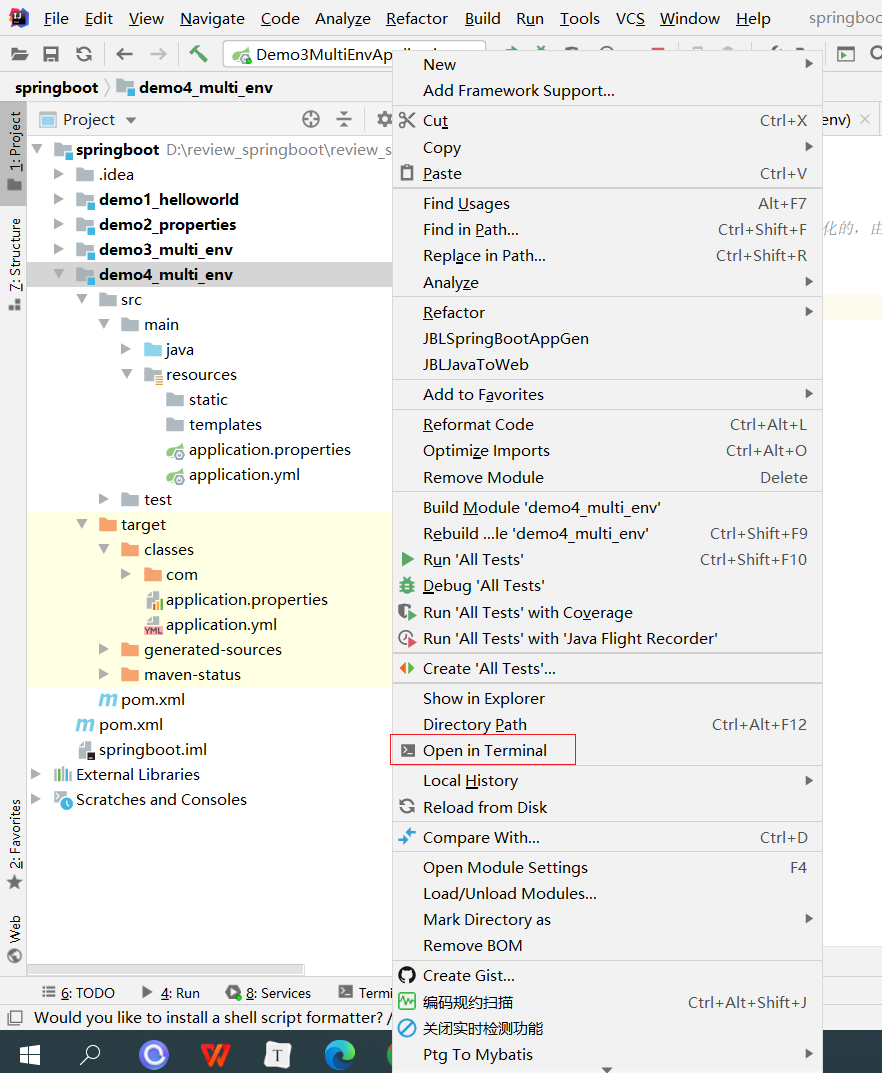
③:执行Maven编译指令
Maven指令执行完毕后,生成了对应的包,其中类参与编译,但是配置文件并没有编译,而是复制到包中
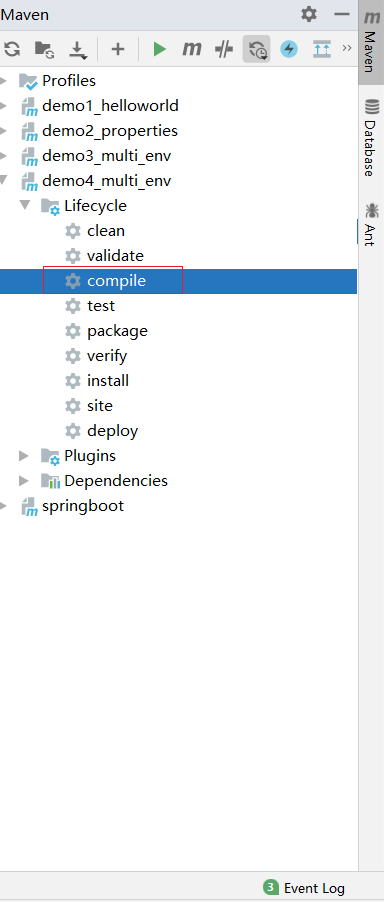
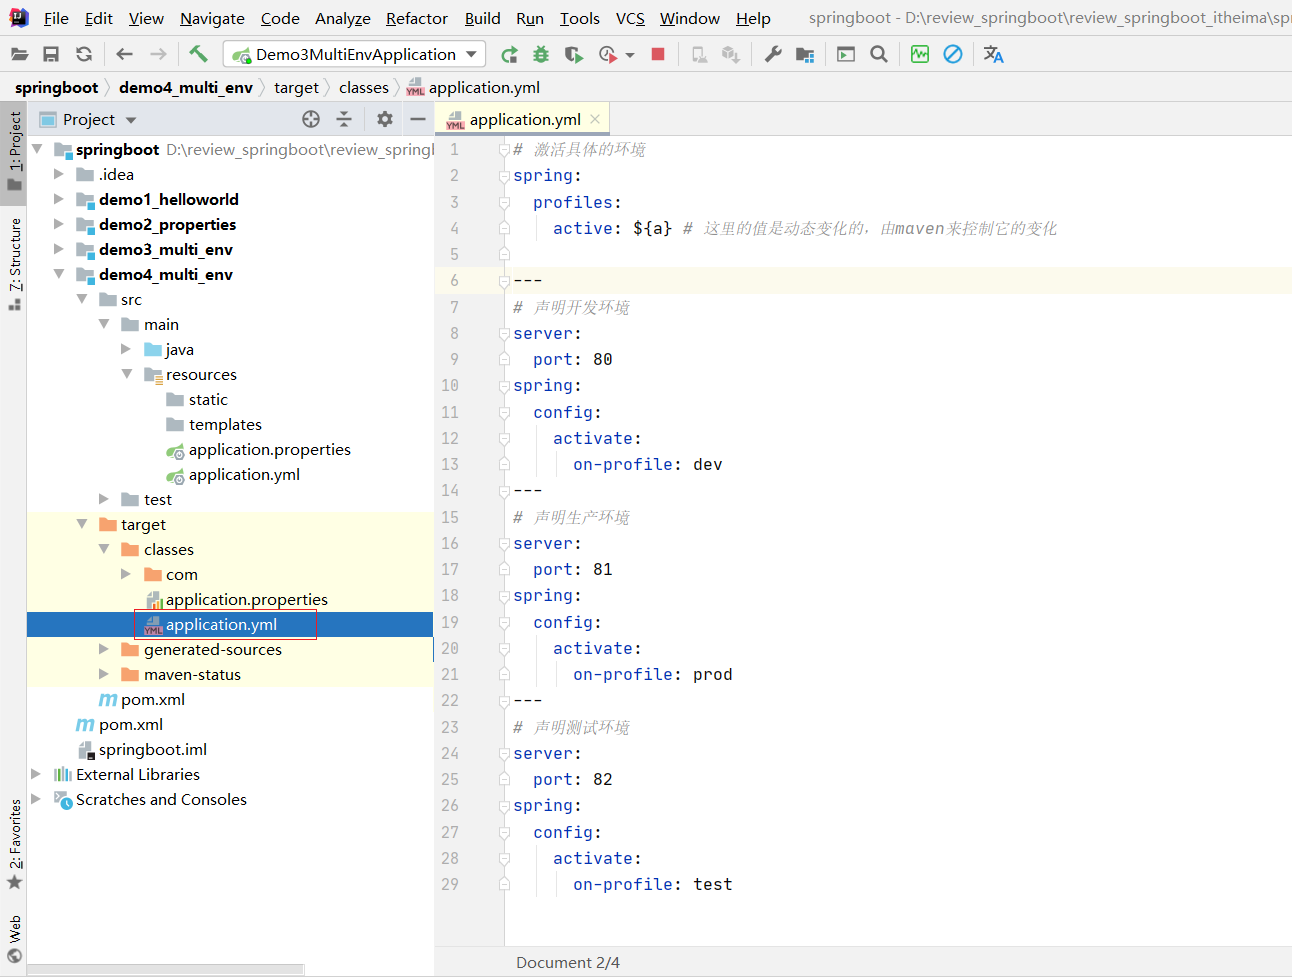
解决思路:对于源码中非java类的操作要求加载Maven对应的属性,解析${}占位符
④:对资源文件开启对默认占位符的解析
<!--这个插件是用来解析资源文件里面的 ${}--><plugin><artifactId>maven-resources-plugin</artifactId><configuration><encoding>utf-8</encoding><useDefaultDelimiters>true</useDefaultDelimiters></configuration></plugin>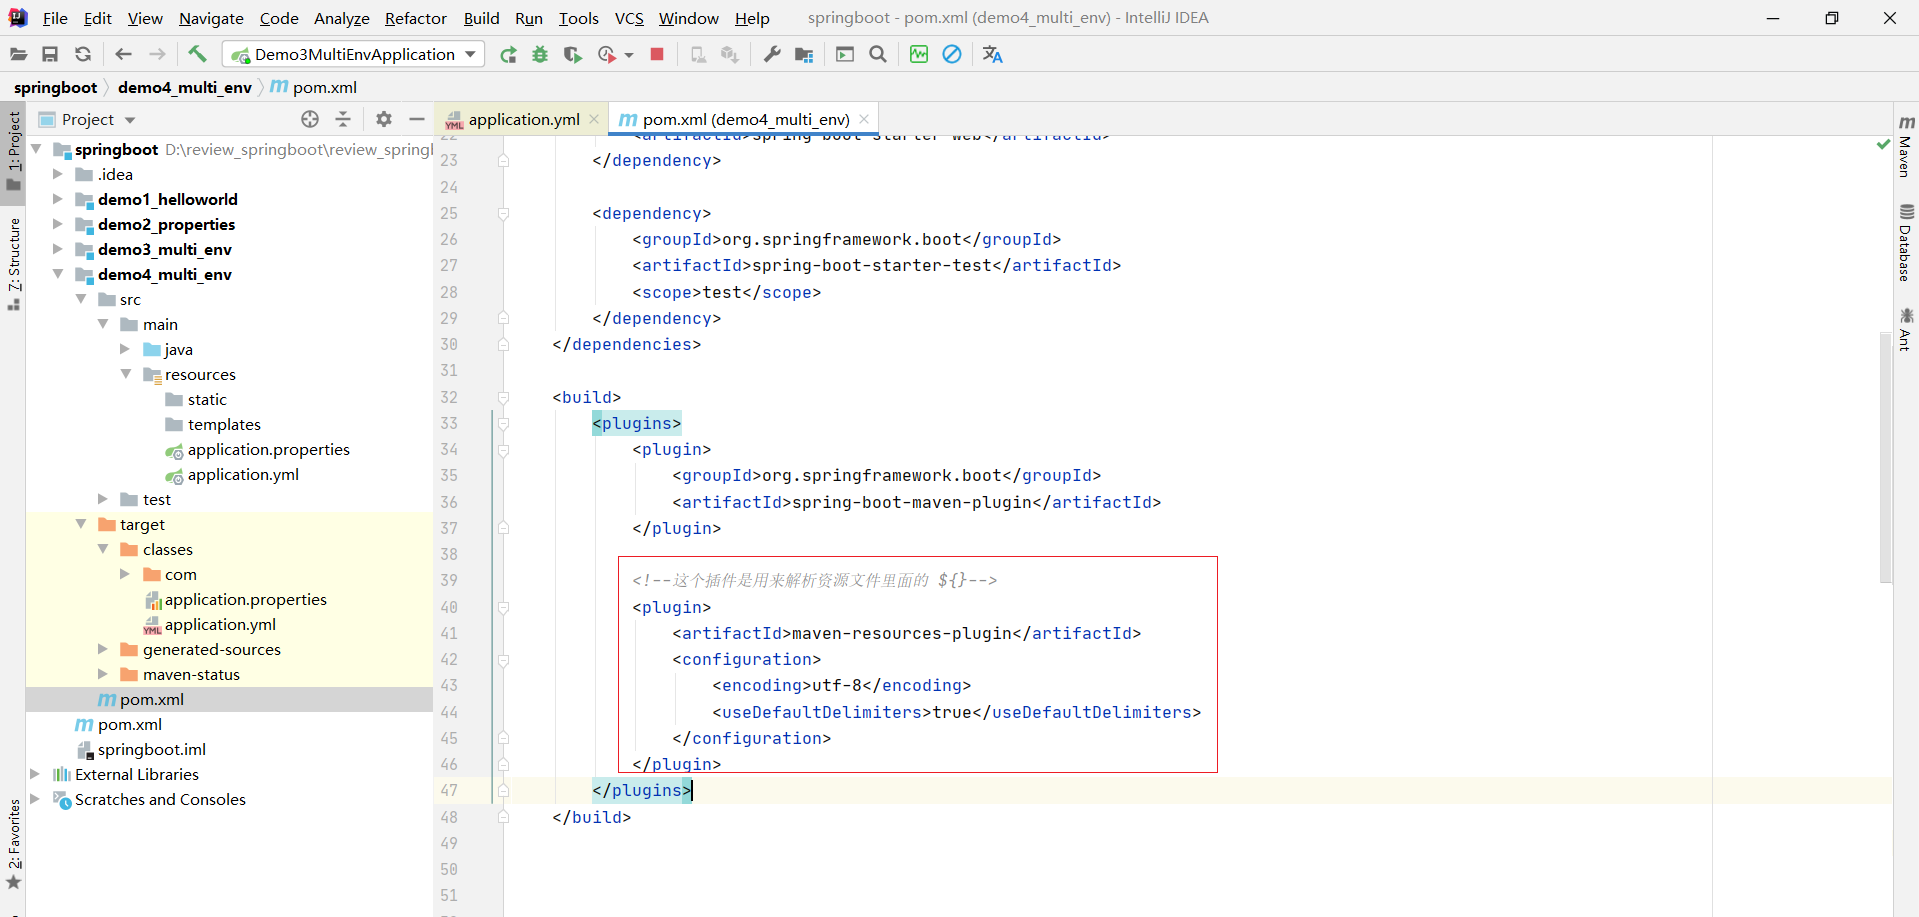
重新编译
Maven编译加载到属性,编译顺利通过
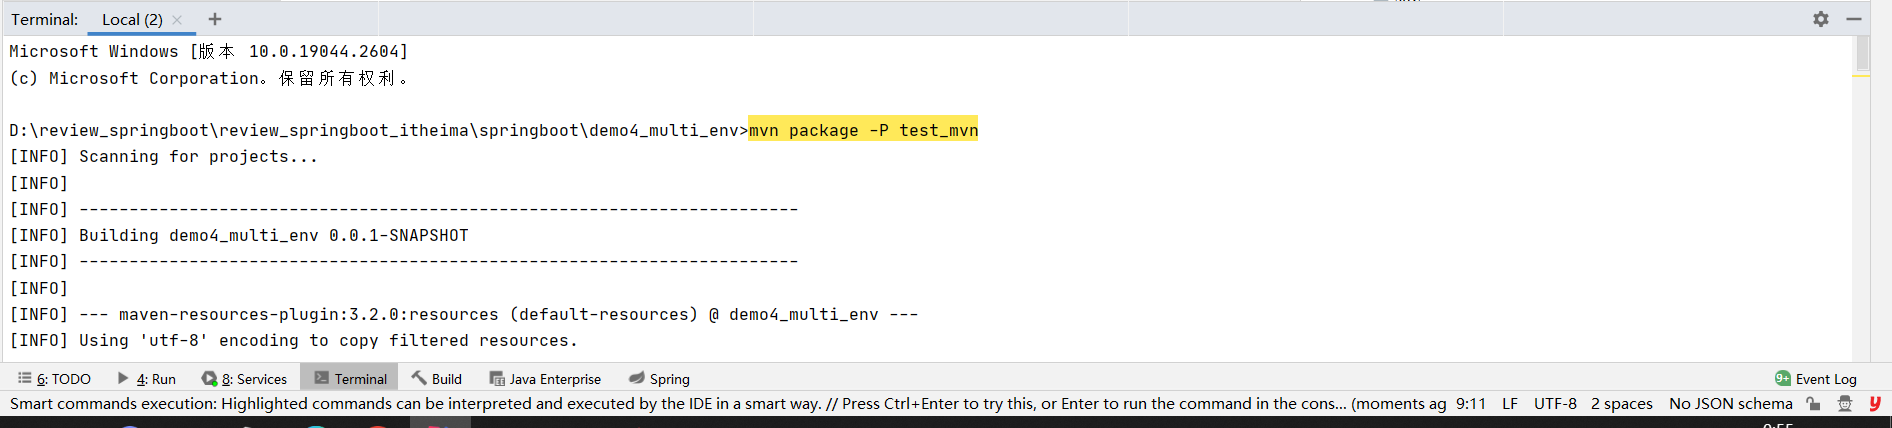
如果想要换其他的环境
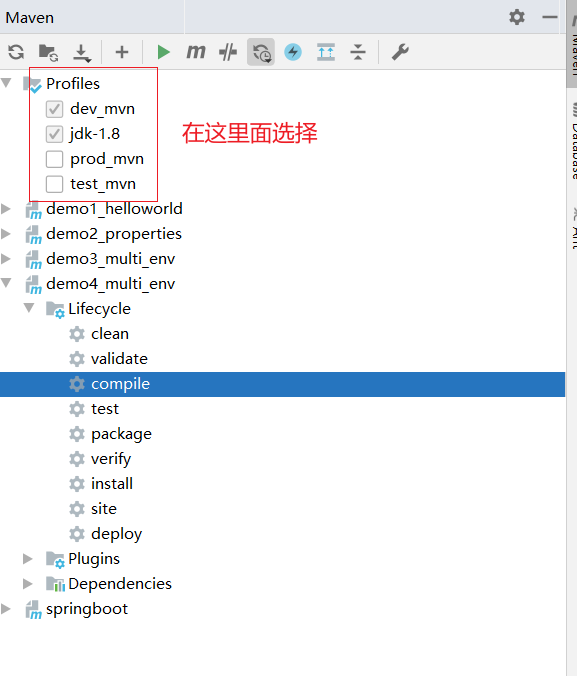
也可以用命令的方式
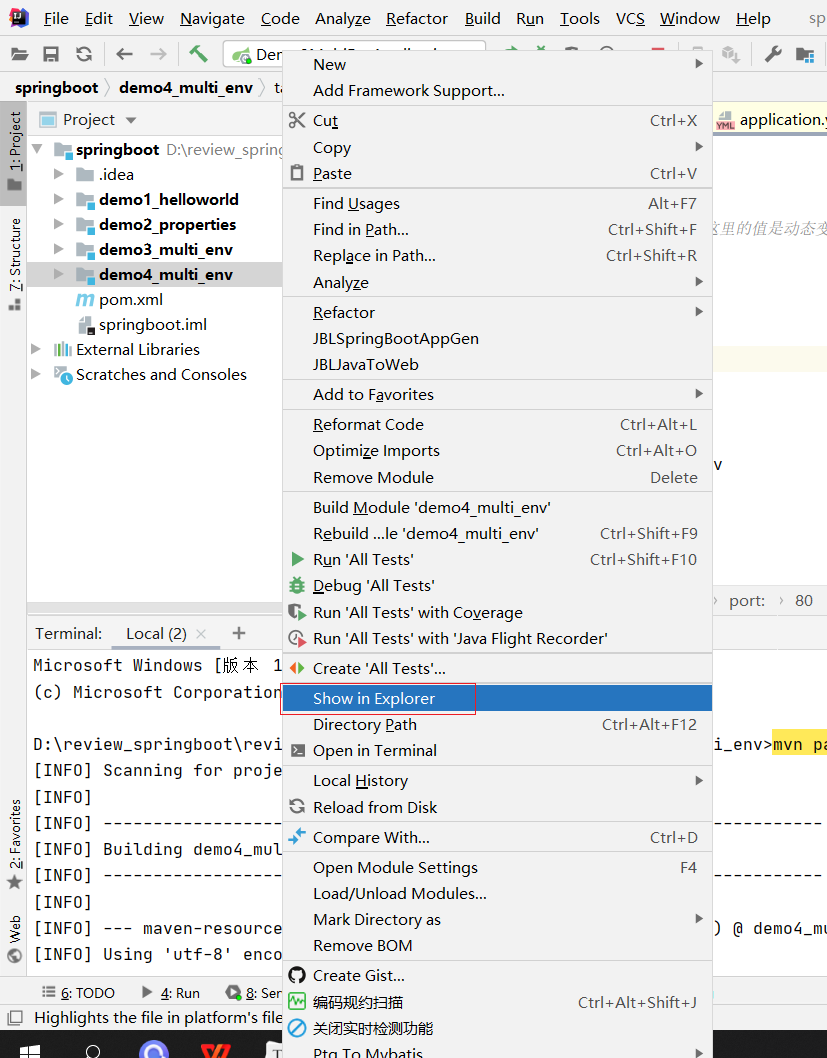
打包
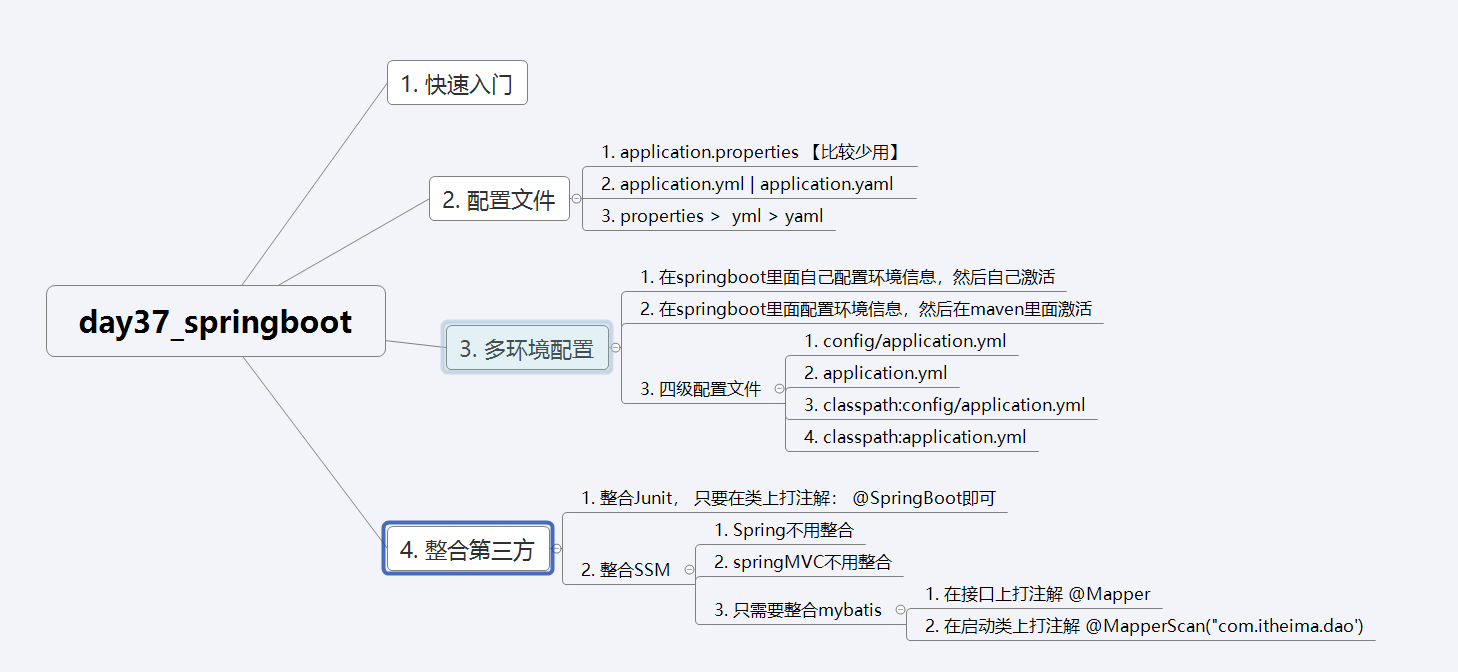
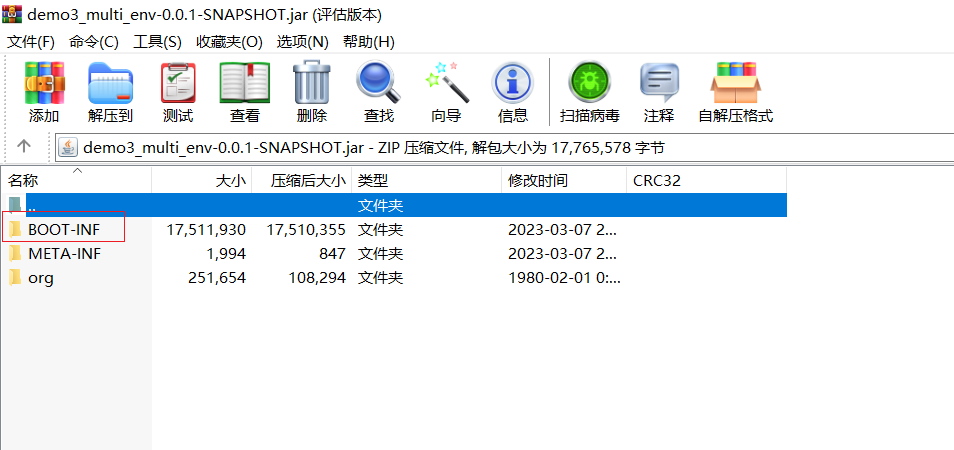
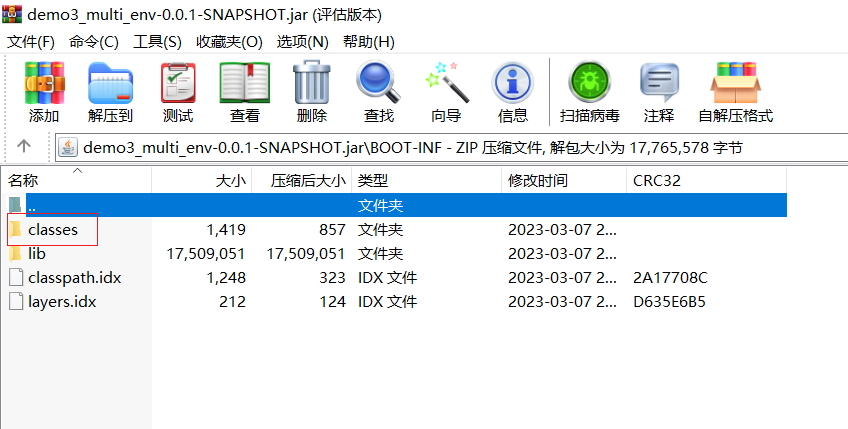
4. 配置文件分类
问题导入
SpringBoot的配置文件可以放在项目的哪些地方?

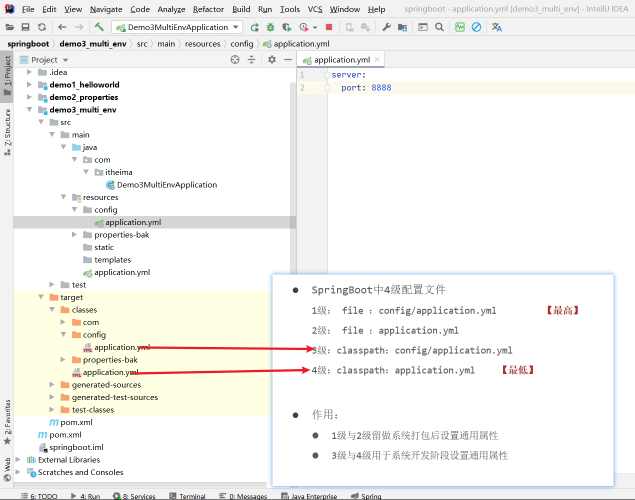
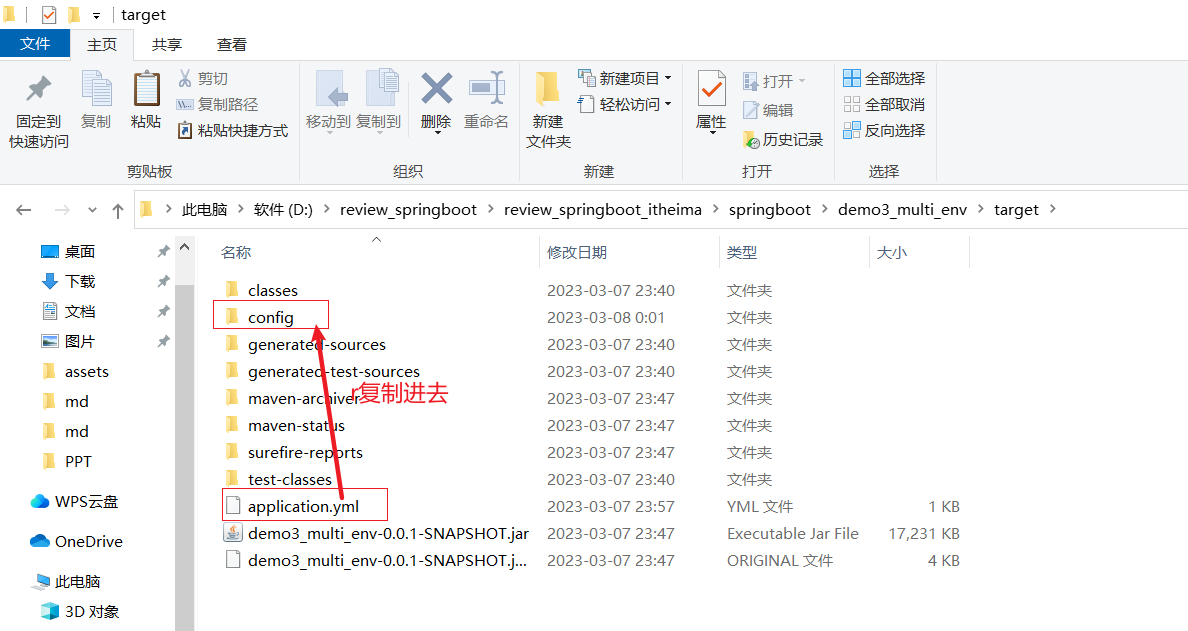
java –jar springboot.jar --spring.profiles.active=test --server.port=85 --server.servlet.context-path=/heima --server.tomcat.connection-timeout=-1 ... ...SpringBoot中4级配置文件
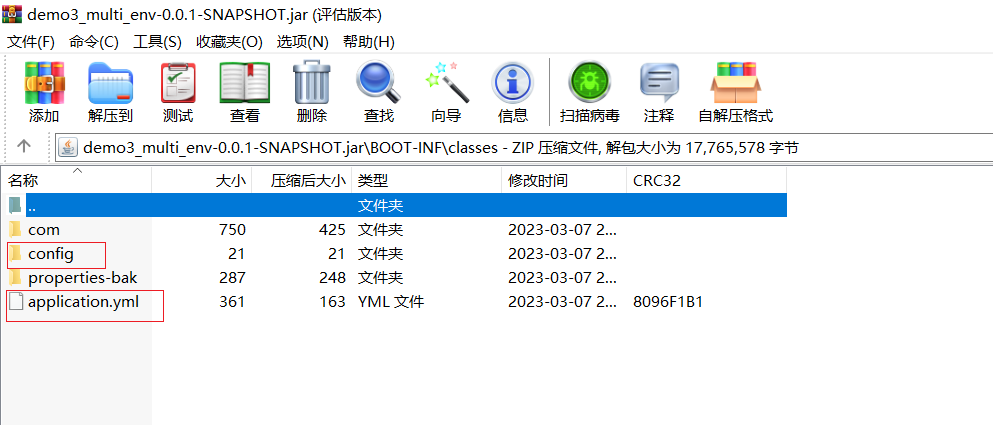
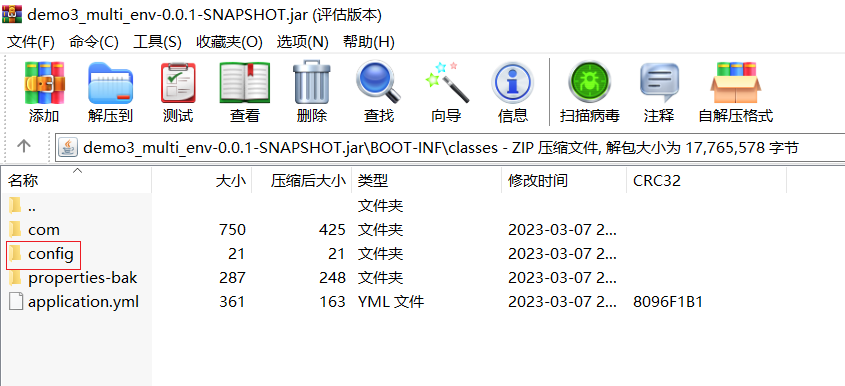
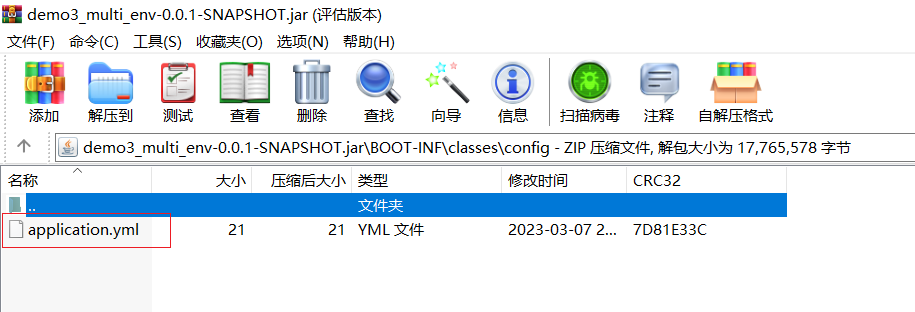
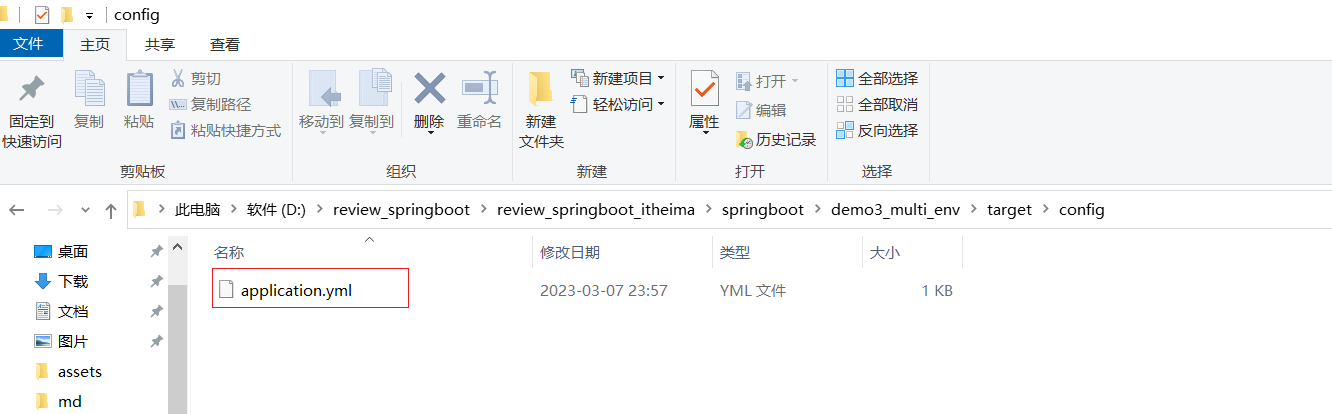
1级: file :config/application.yml 【最高】
2级: file :application.yml
3级:classpath:config/application.yml
4级:classpath:application.yml 【最低】
作用:
1级与2级留做系统打包后设置通用属性
3级与4级用于系统开发阶段设置通用属性

演示3级和4级
优先使用8888端口 因为config/application.yml的优先级高于application.yml 【最低】
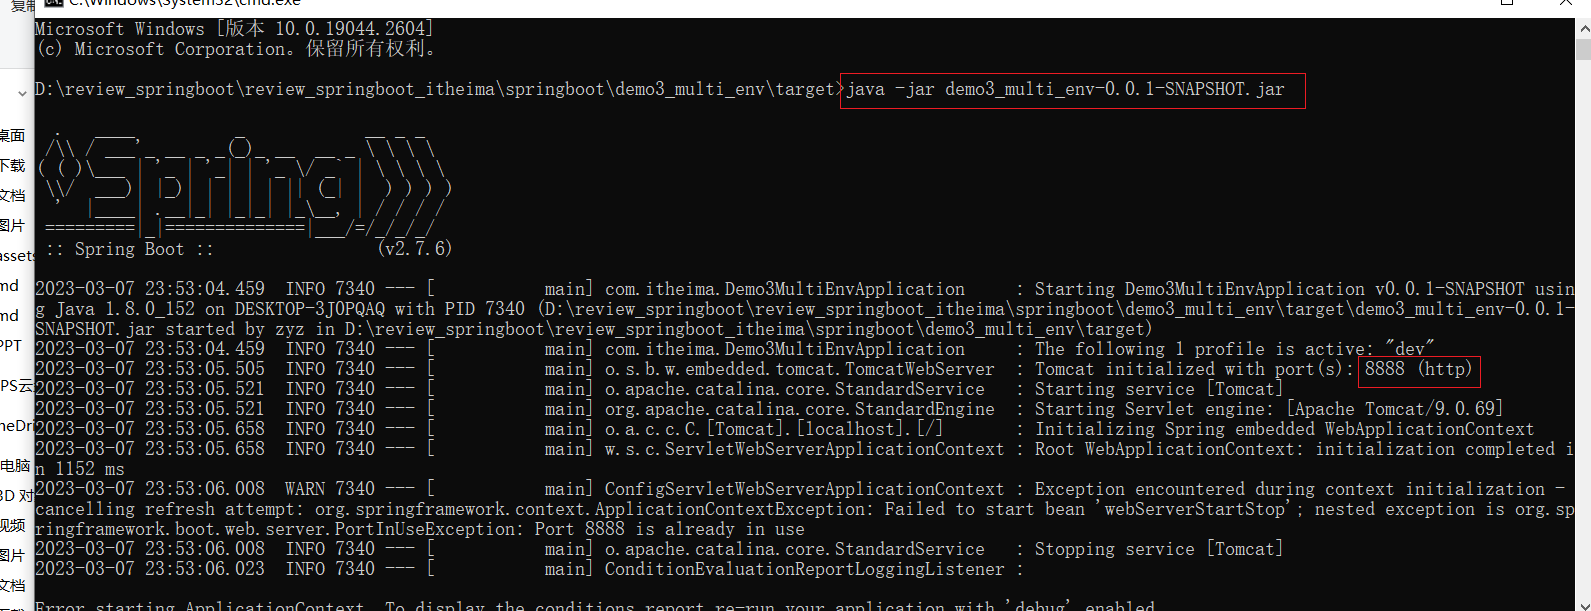
演示第二级
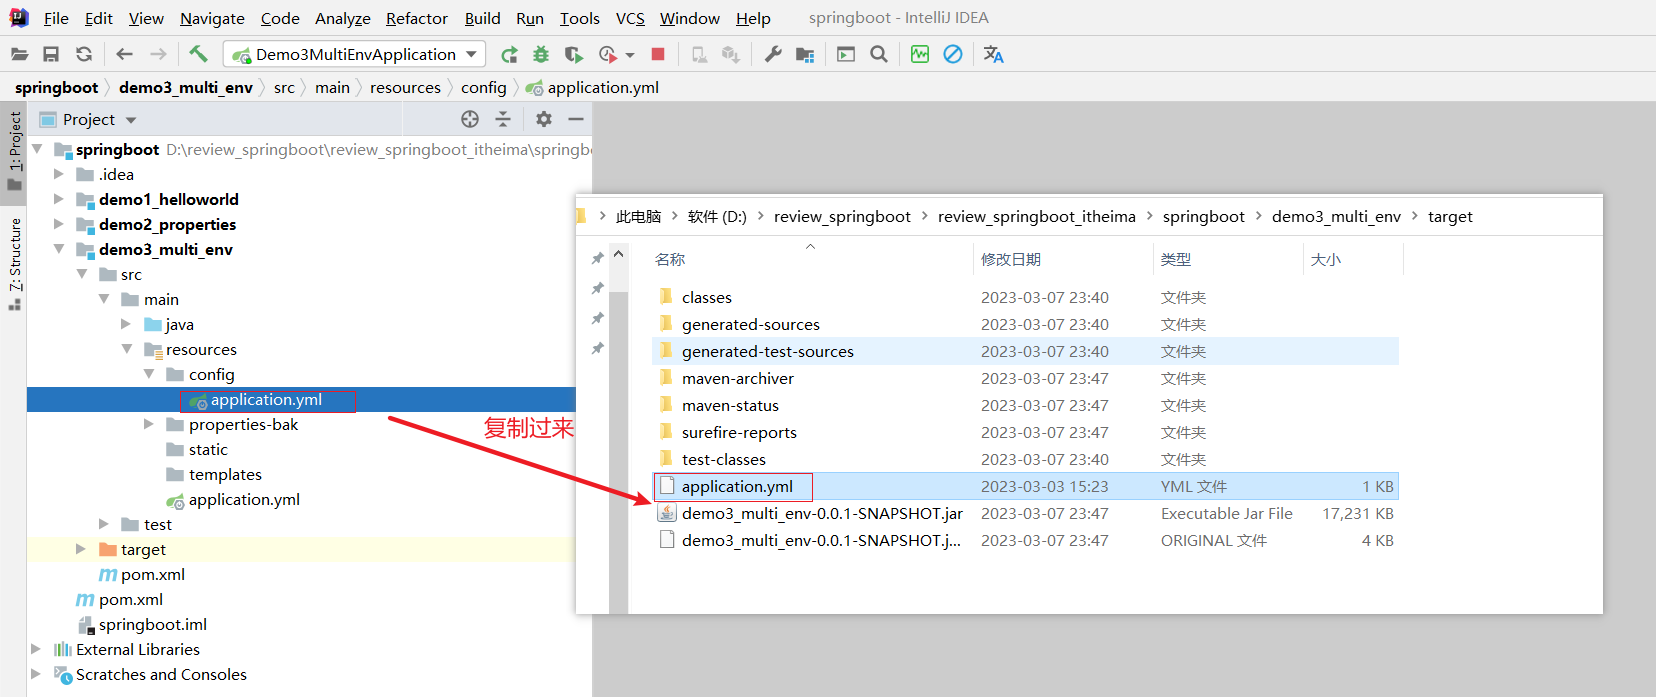

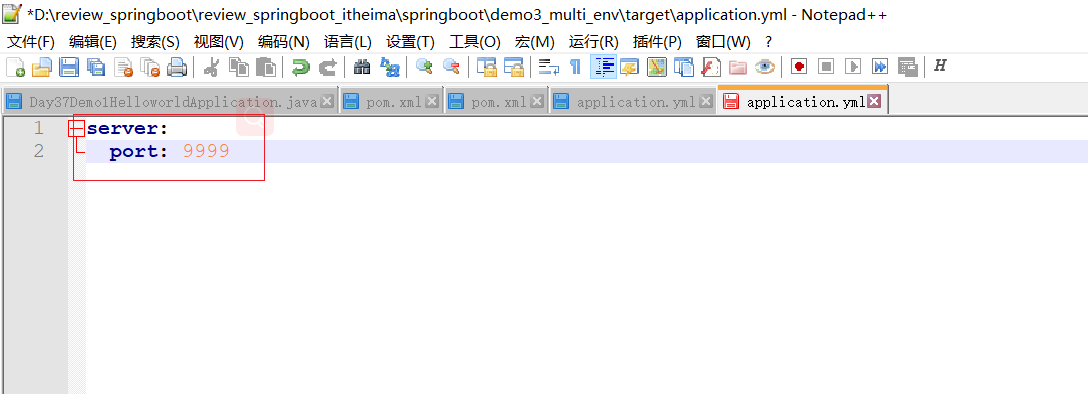
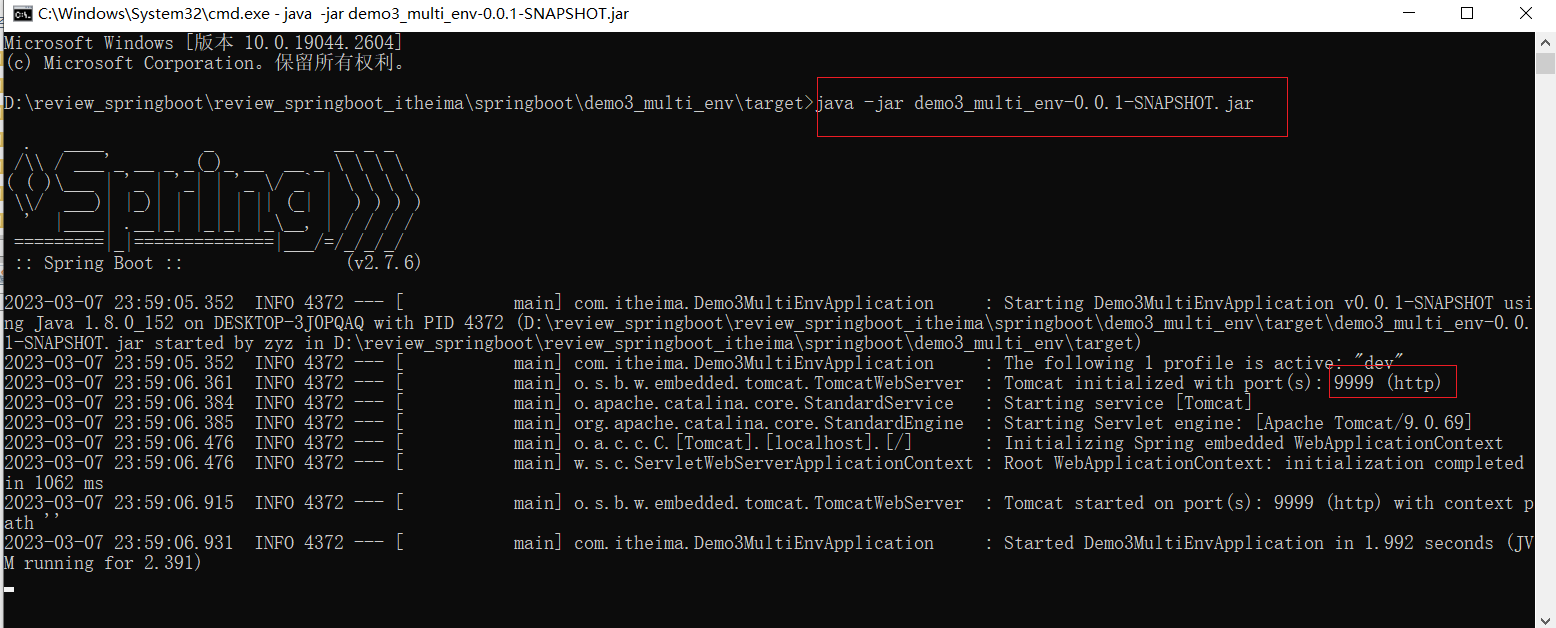
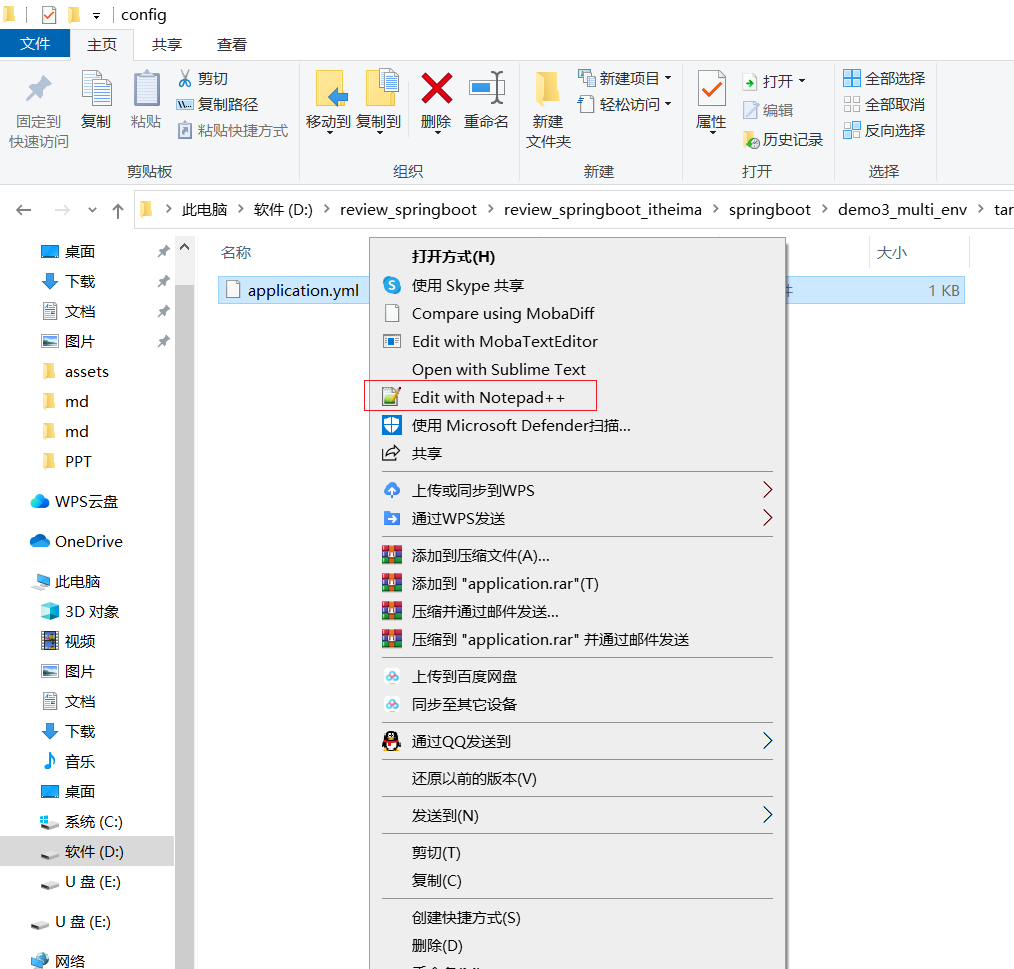
演示第一级
Ctrl+C 结束前面的
重新启动
三、整合第三方技术
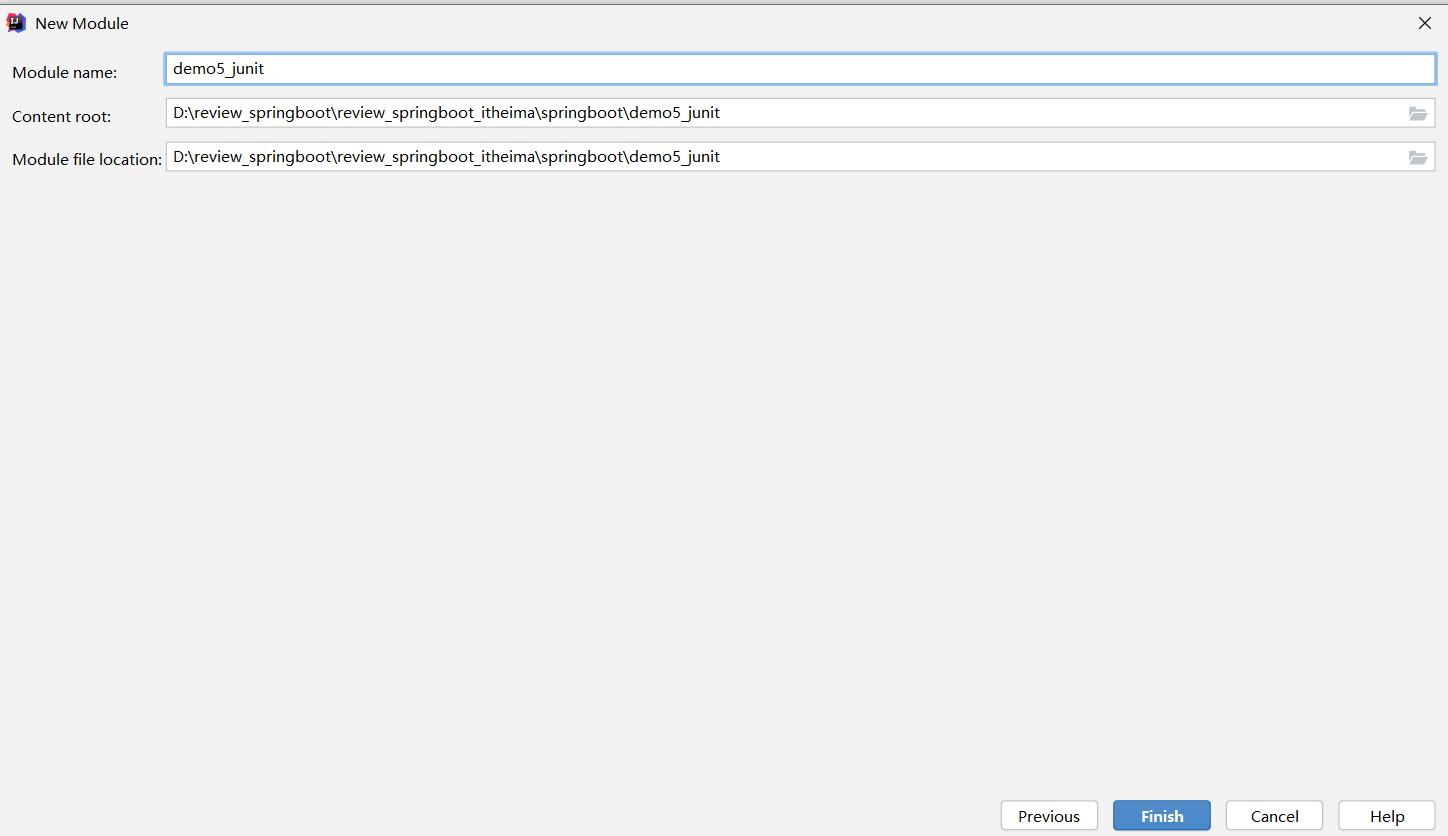
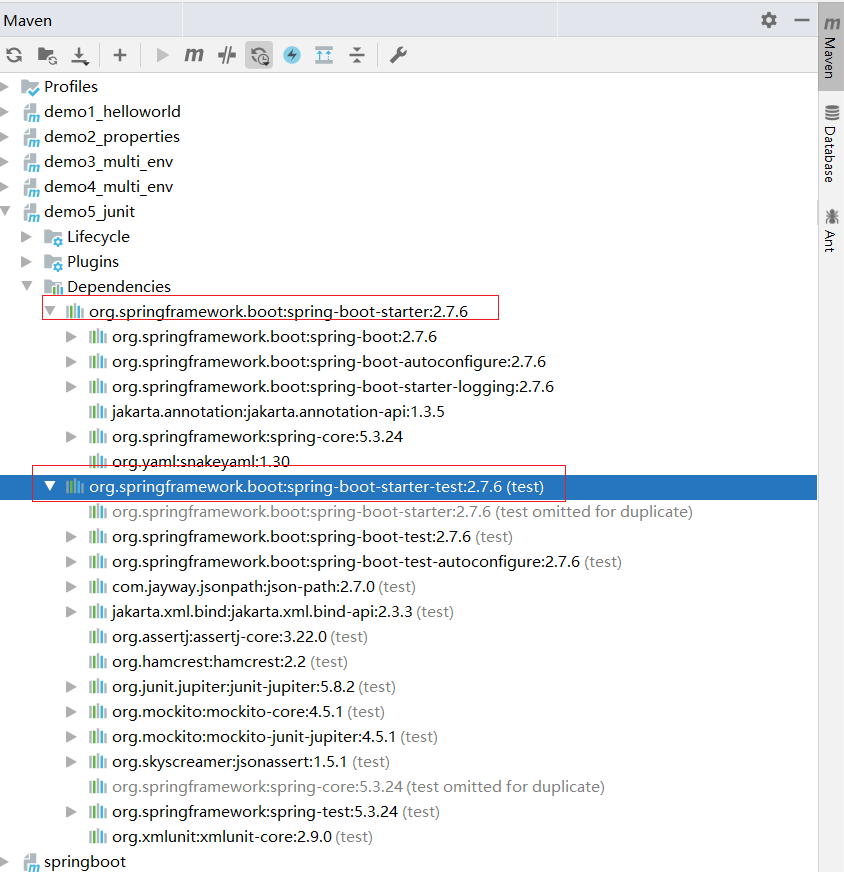
1. 整合JUnit
环境准备


有web
<dependency><groupId>org.springframework.boot</groupId><artifactId>spring-boot-starter-web</artifactId></dependency>无web
<dependency><groupId>org.springframework.boot</groupId><artifactId>spring-boot-starter</artifactId></dependency>不导入web也是可以自动扫描包 也是可以自动创建工程
问题导入
回忆一下Spring整合JUnit的步骤?
1.1 Spring整合JUnit(复习)
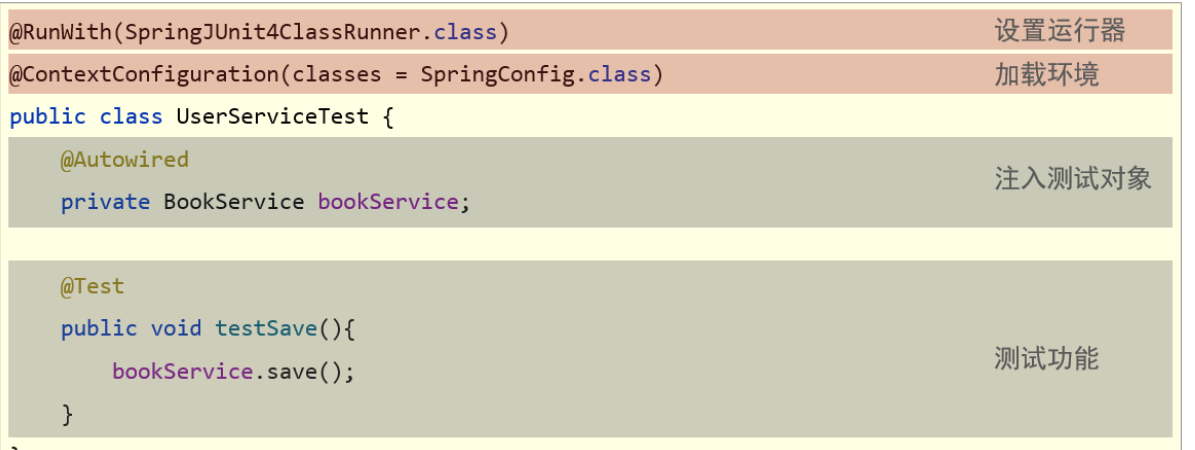
1.2 SpringBoot整合JUnit
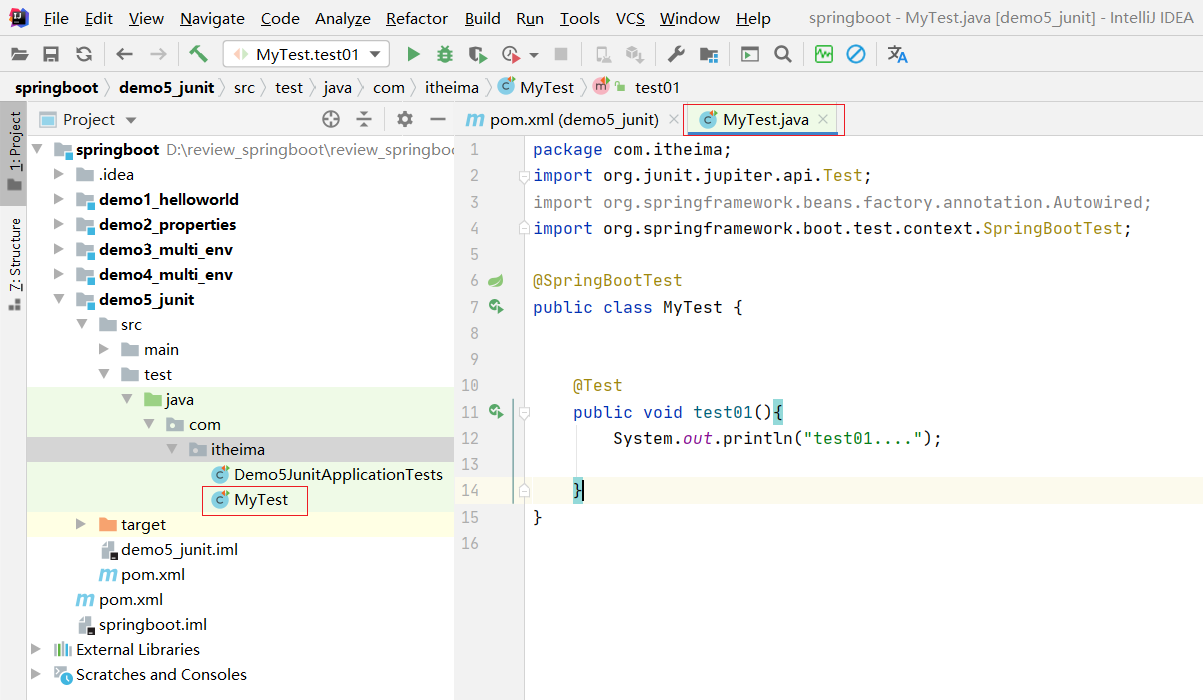
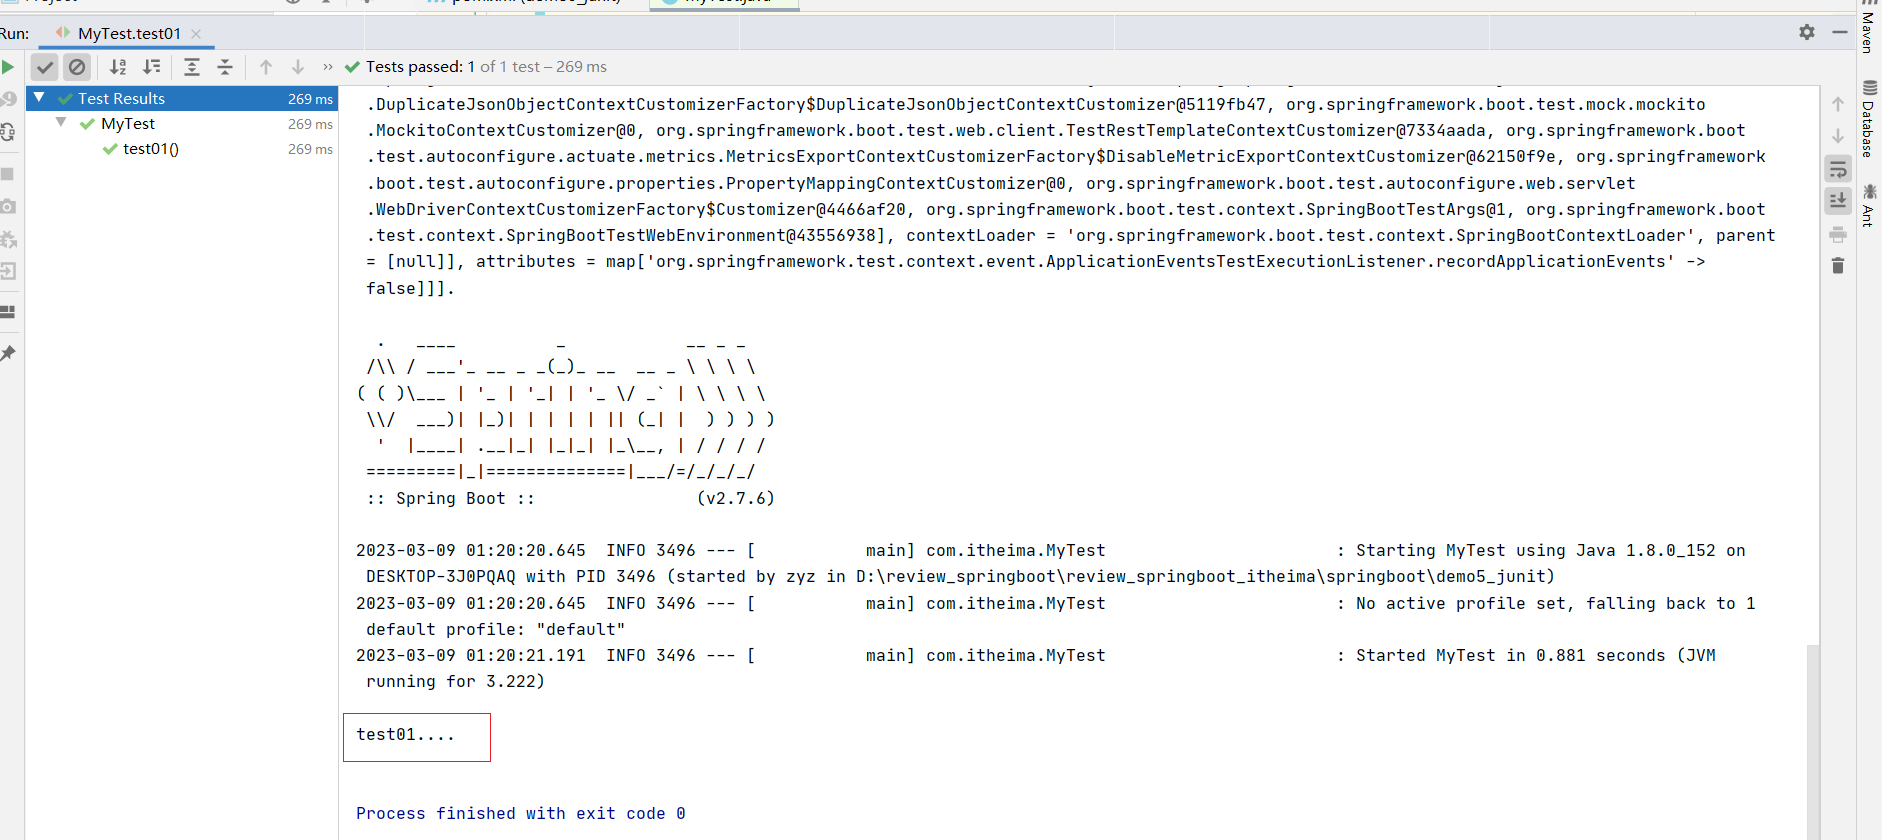
先跑一下自己写的测试类
@SpringBootTest
public class MyTest {@Testpublic void test01(){System.out.println("test01....");}
}
在MyTest里面测试service的方法
测试类
package com.itheima;
import com.itheima.service.UserService;
import org.junit.jupiter.api.Test;
import org.springframework.beans.factory.annotation.Autowired;
import org.springframework.boot.test.context.SpringBootTest;@SpringBootTest
public class MyTest {@Autowiredprivate UserService us;@Testpublic void test01(){System.out.println("test01....");us.add();}
}
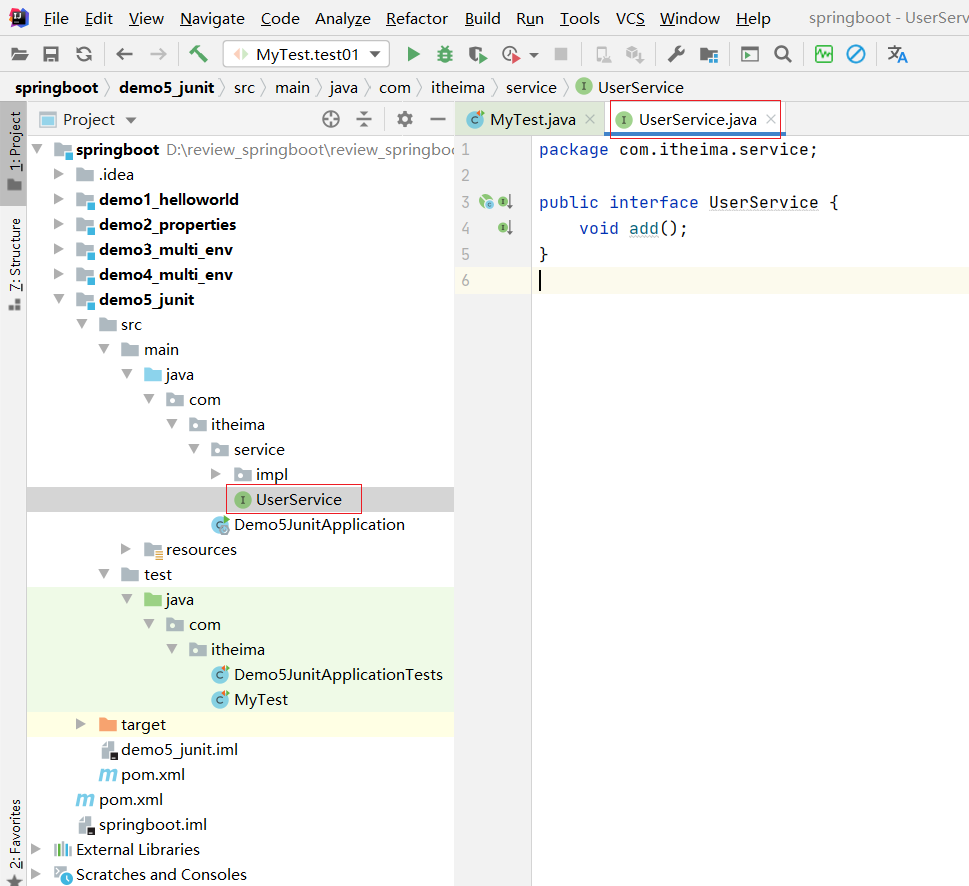
接口
package com.itheima.service;public interface UserService {void add();
}
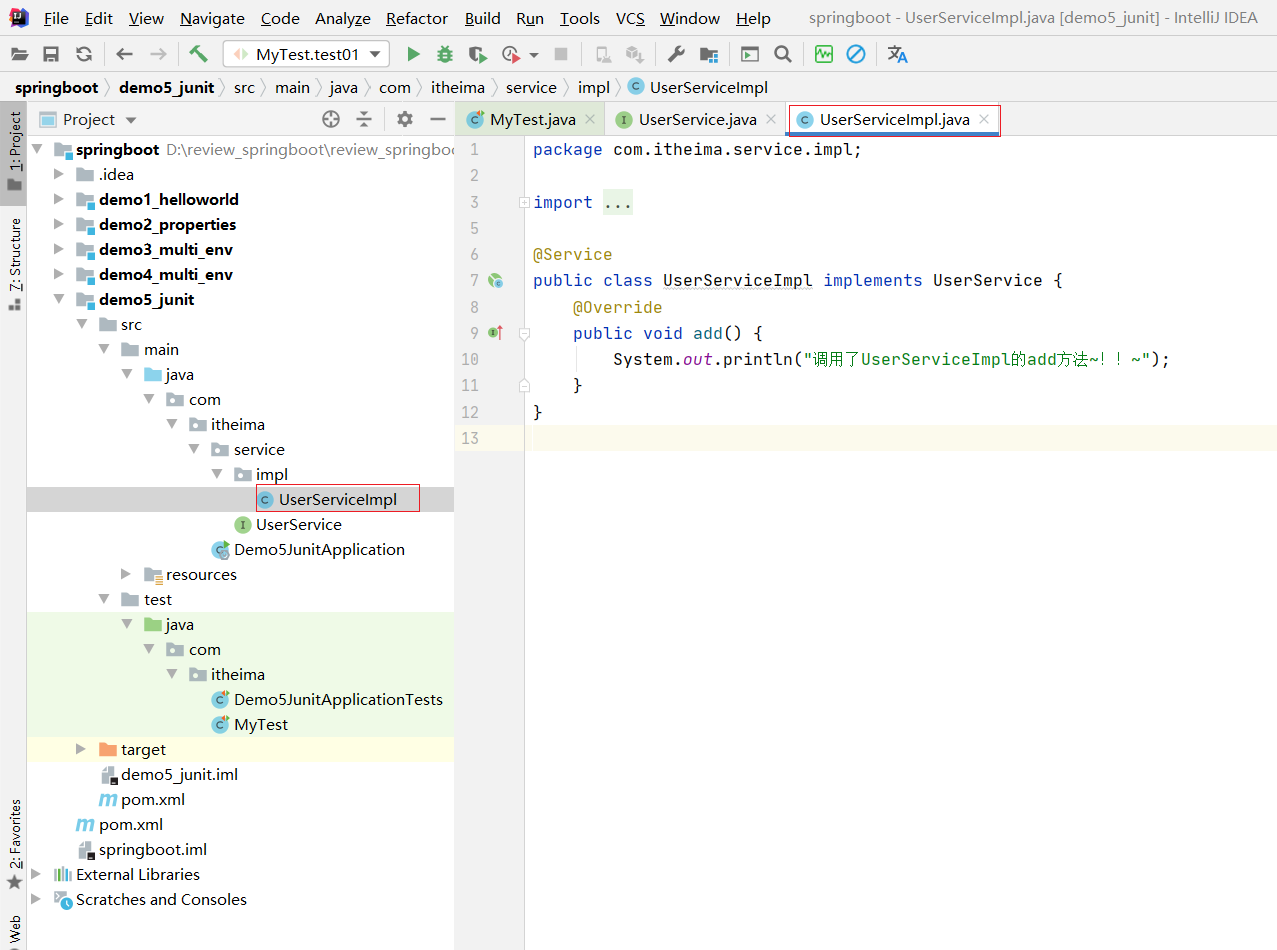
实现类
package com.itheima.service.impl;import com.itheima.service.UserService;
import org.springframework.stereotype.Service;@Service
public class UserServiceImpl implements UserService {@Overridepublic void add() {System.out.println("调用了UserServiceImpl的add方法~!!~");}
}
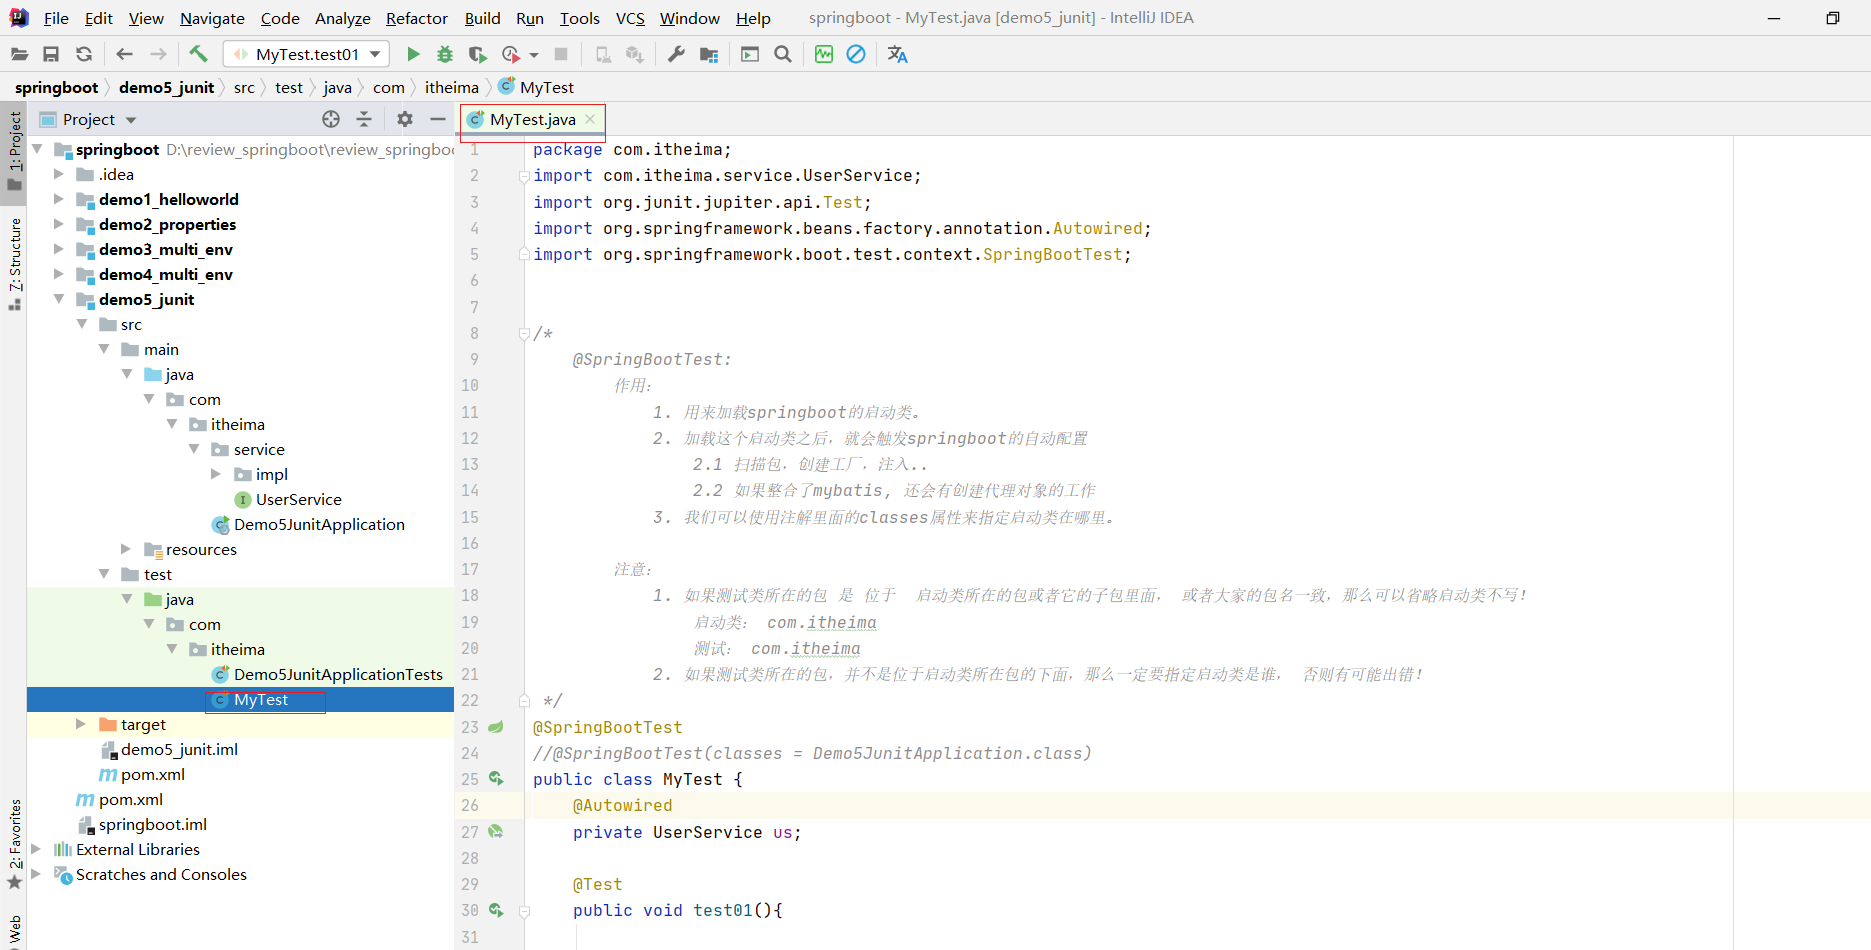
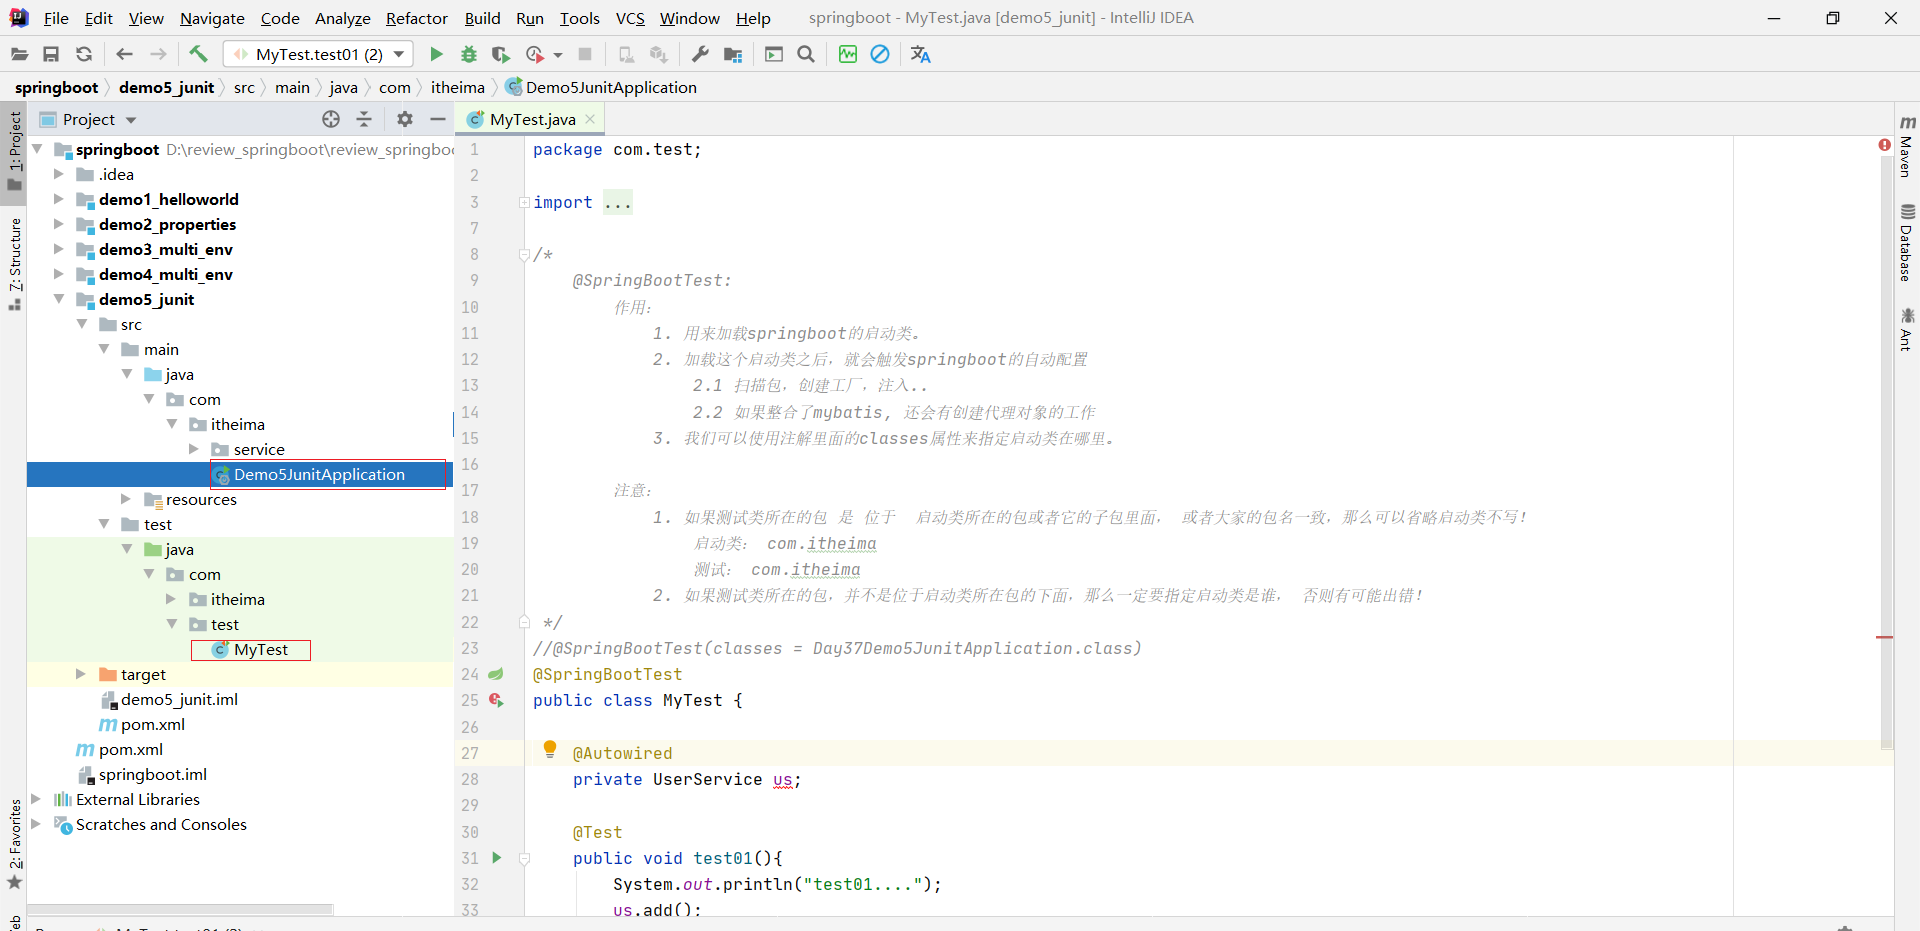
@SpringBootTest解释
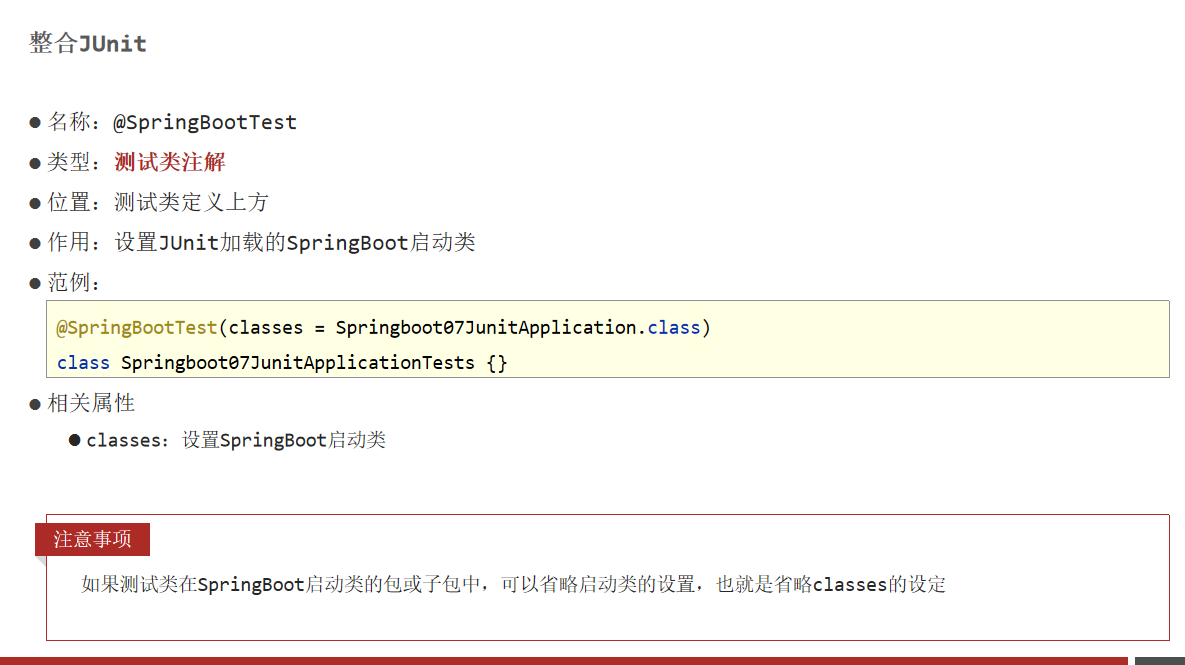
@SpringBootTest(classes = Demo5JunitApplication.class)
什么时候加classes
1. 如果测试类所在的包 是 位于 启动类所在的包或者它的子包里面, 或者大家的包名一致,那么可以省略启动类不写!
启动类: com.itheima
测试: com.itheima
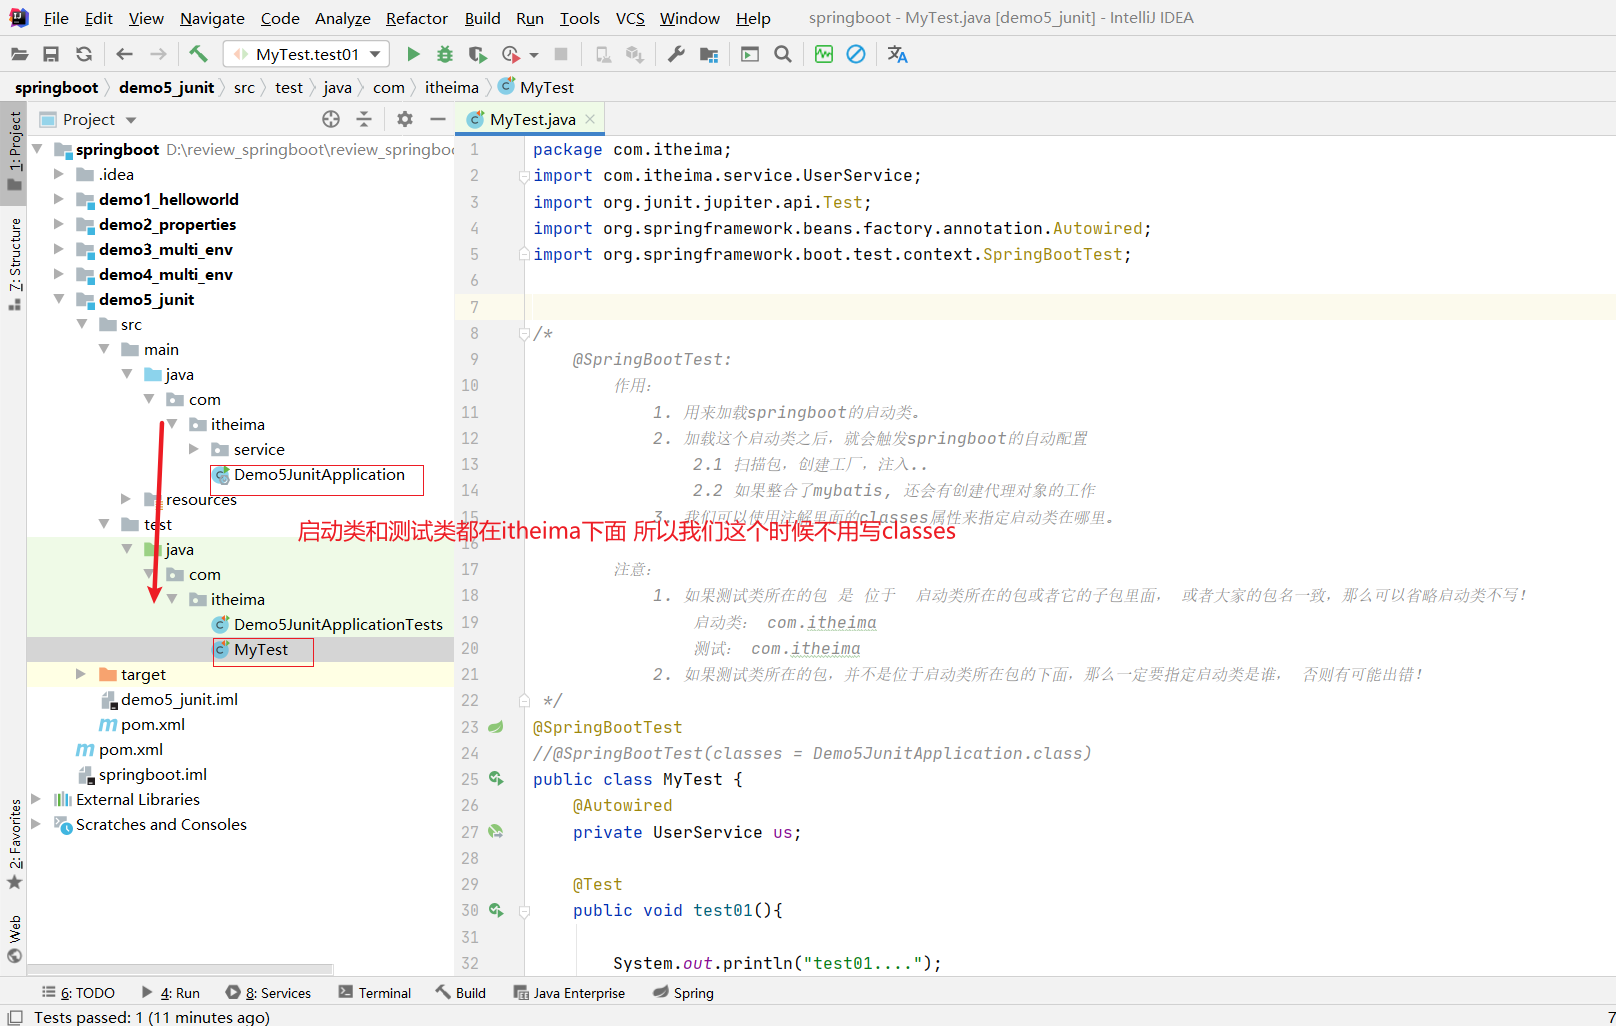
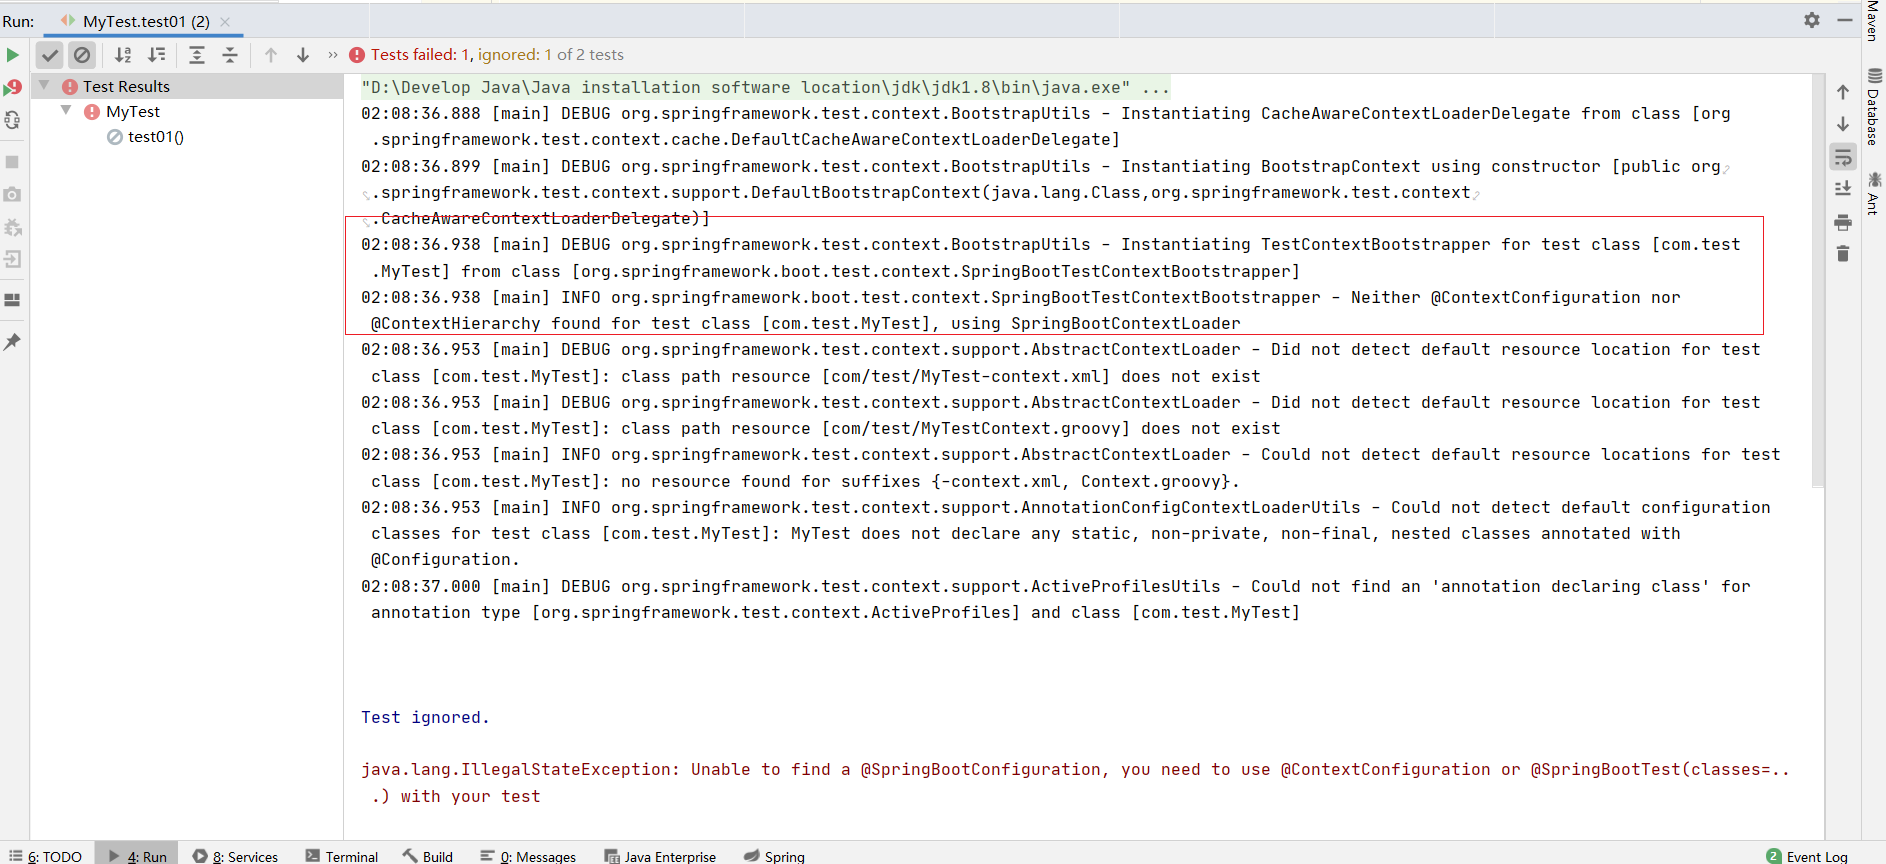
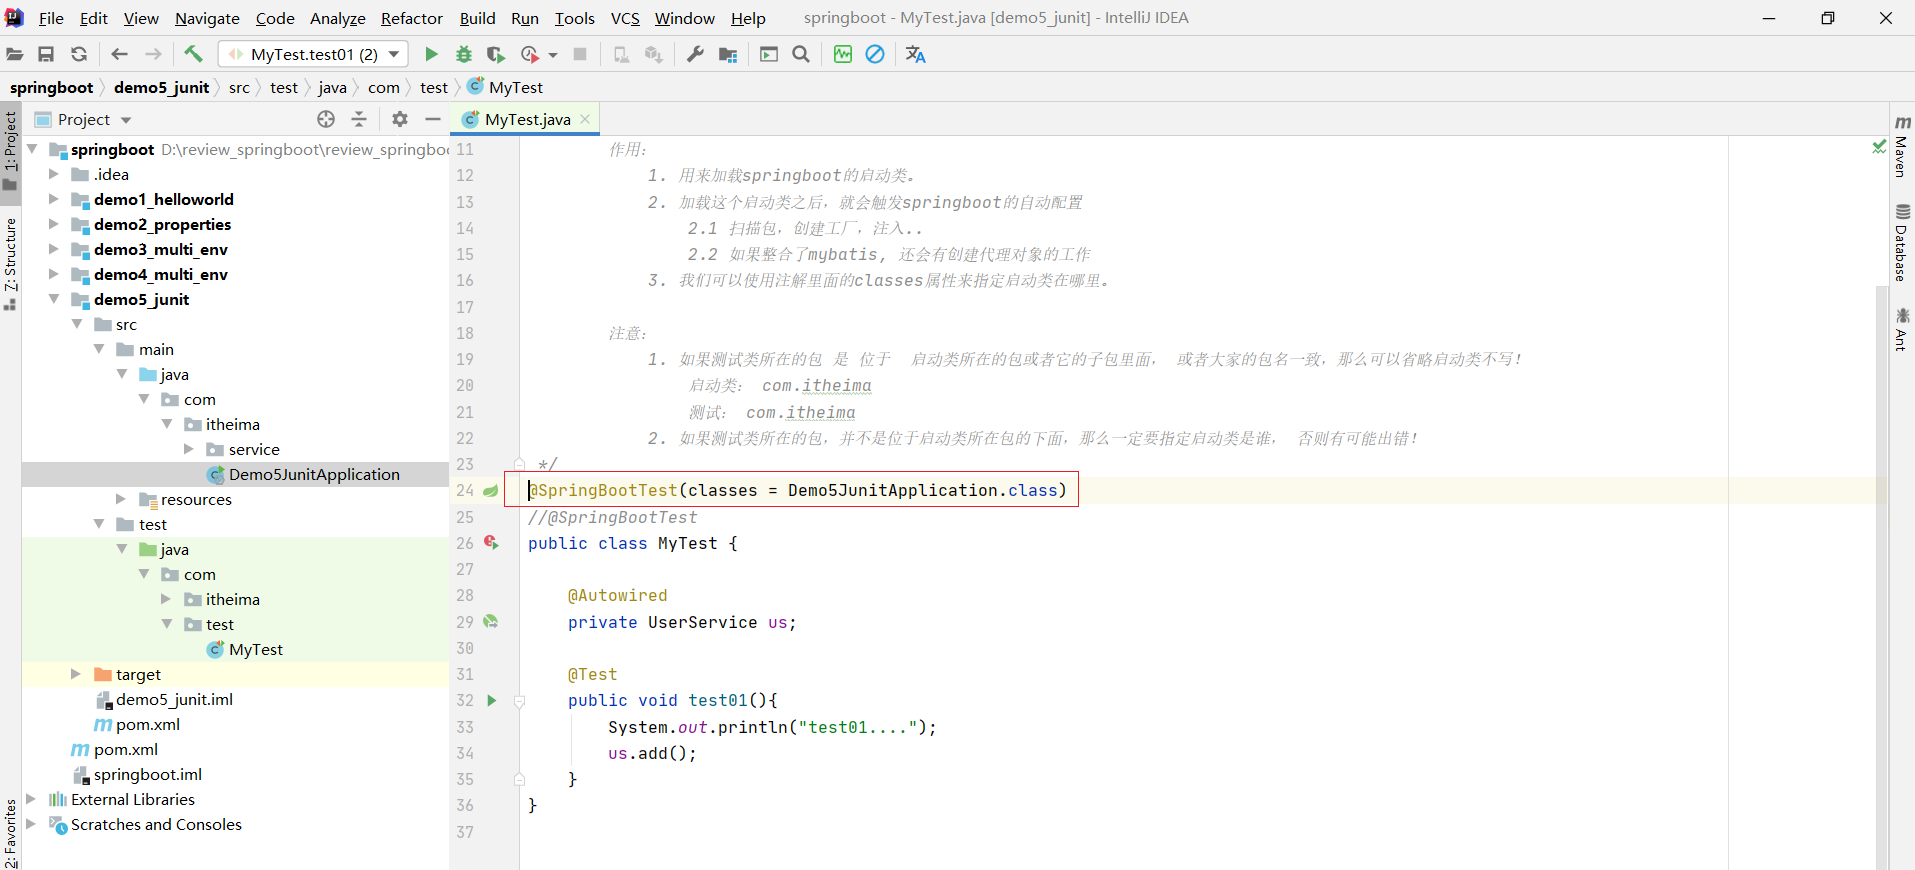
2. 如果测试类所在的包,并不是位于启动类所在包的下面,那么一定要指定启动类是谁, 否则有可能出错!
比如我们把test包放到com下面 不写classes就会出错
如果写上classes

2. 基于SpringBoot实现SSM整合
问题导入
回忆一下Spring整合MyBatis的核心思想?
2.1 Spring整合MyBatis(复习)
2.1 Spring整合MyBatis(复习)
SpringConfig
导入JdbcConfig
导入MyBatisConfig
`@Configuration
@ComponentScan("com.itheima")
@PropertySource("classpath:jdbc.properties")
@Import({JdbcConfig.class, MyBatisConfig.class})
public class SpringConfig {}
JDBCConfig
定义数据源(加载properties配置项:driver、url、username、password)
#jdbc.properties
jdbc.driver=com.mysql.jdbc.Driver
jdbc.url=jdbc:mysql://localhost:3306/spring_db
jdbc.username=root
jdbc.password=itheima
public class JdbcConfig {@Value("${jdbc.driver}")private String driver;@Value("${jdbc.url}")private String url;@Value("${jdbc.username}")private String userName;@Value("${jdbc.password}")private String password;@Beanpublic DataSource getDataSource() {DruidDataSource ds = new DruidDataSource();ds.setDriverClassName(driver);ds.setUrl(url);ds.setUsername(userName);ds.setPassword(password);return ds;}
}MyBatisConfig
定义SqlSessionFactoryBean
定义映射配置
@Bean
public SqlSessionFactoryBean getSqlSessionFactoryBean(DataSource dataSource) {SqlSessionFactoryBean ssfb = new SqlSessionFactoryBean();ssfb.setTypeAliasesPackage("com.itheima.domain");ssfb.setDataSource(dataSource);return ssfb;
}
@Bean
public MapperScannerConfigurer getMapperScannerConfigurer() {MapperScannerConfigurer msc = new MapperScannerConfigurer();msc.setBasePackage("com.itheima.dao");return msc;
}2.2 SpringBoot整合MyBatis
SpringBoot整合Spring(不存在)
SpringBoot整合SpringMVC(不存在)
SpringBoot整合MyBatis(主要)
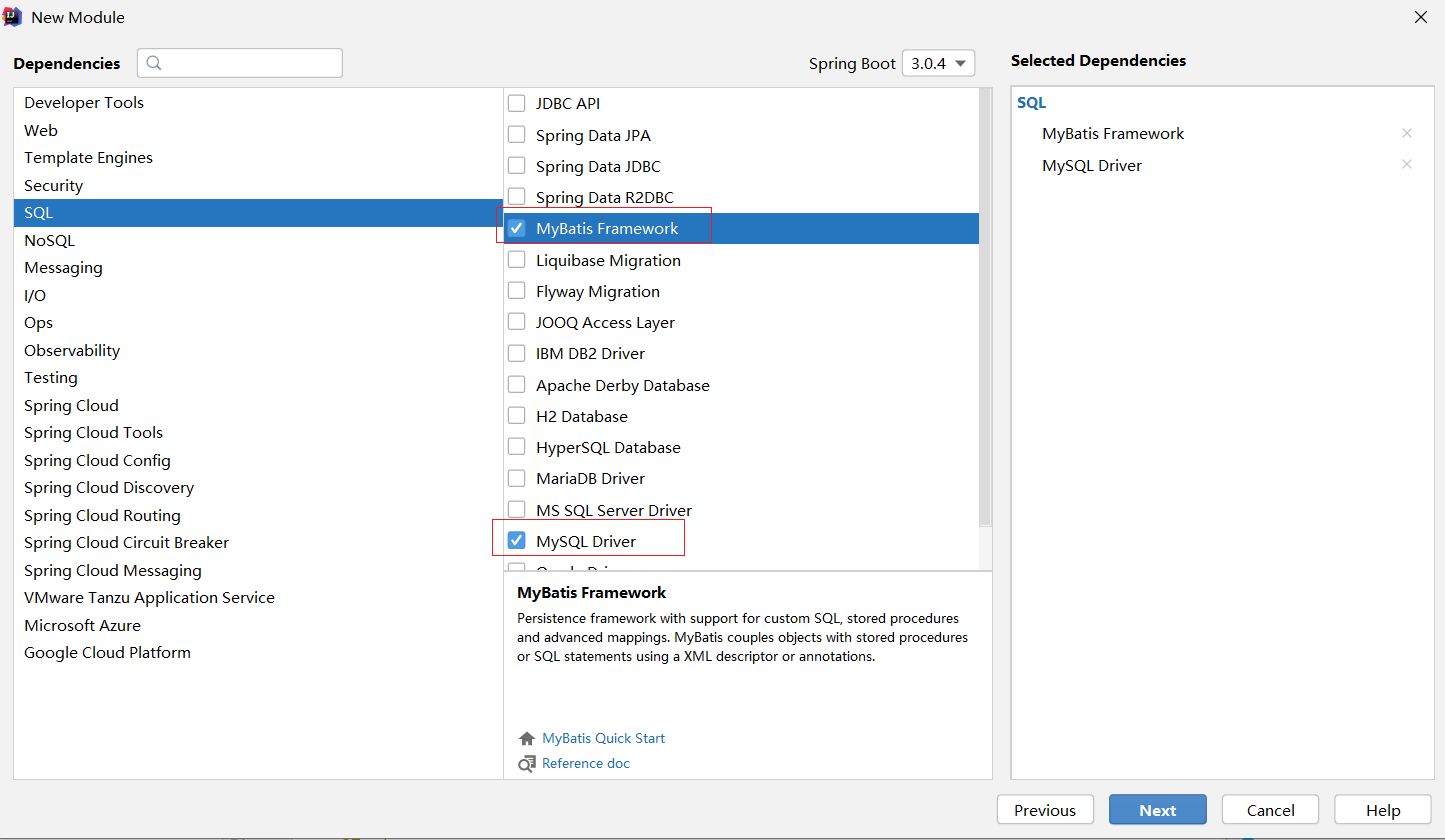
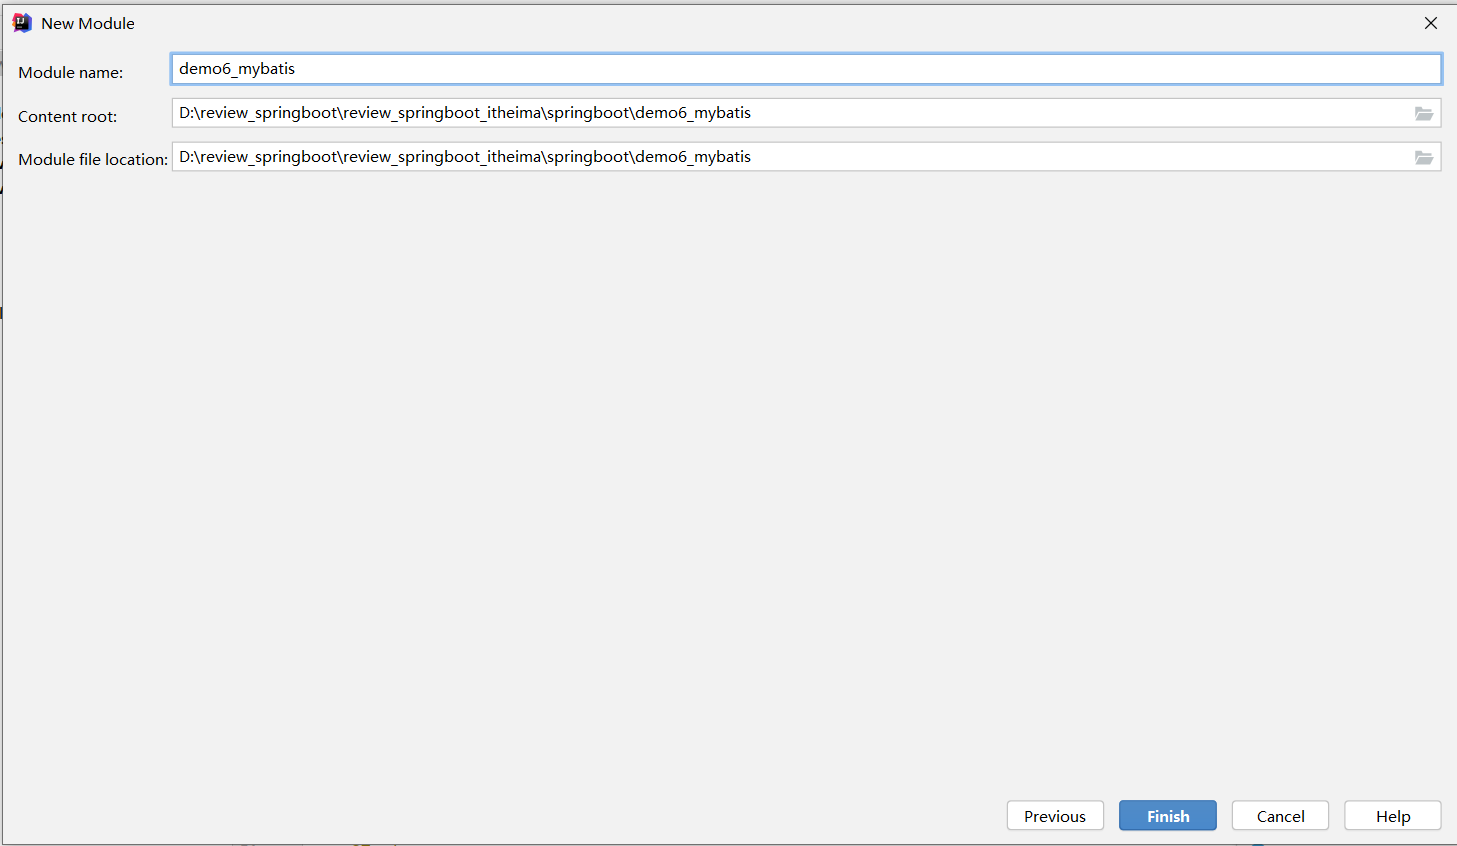
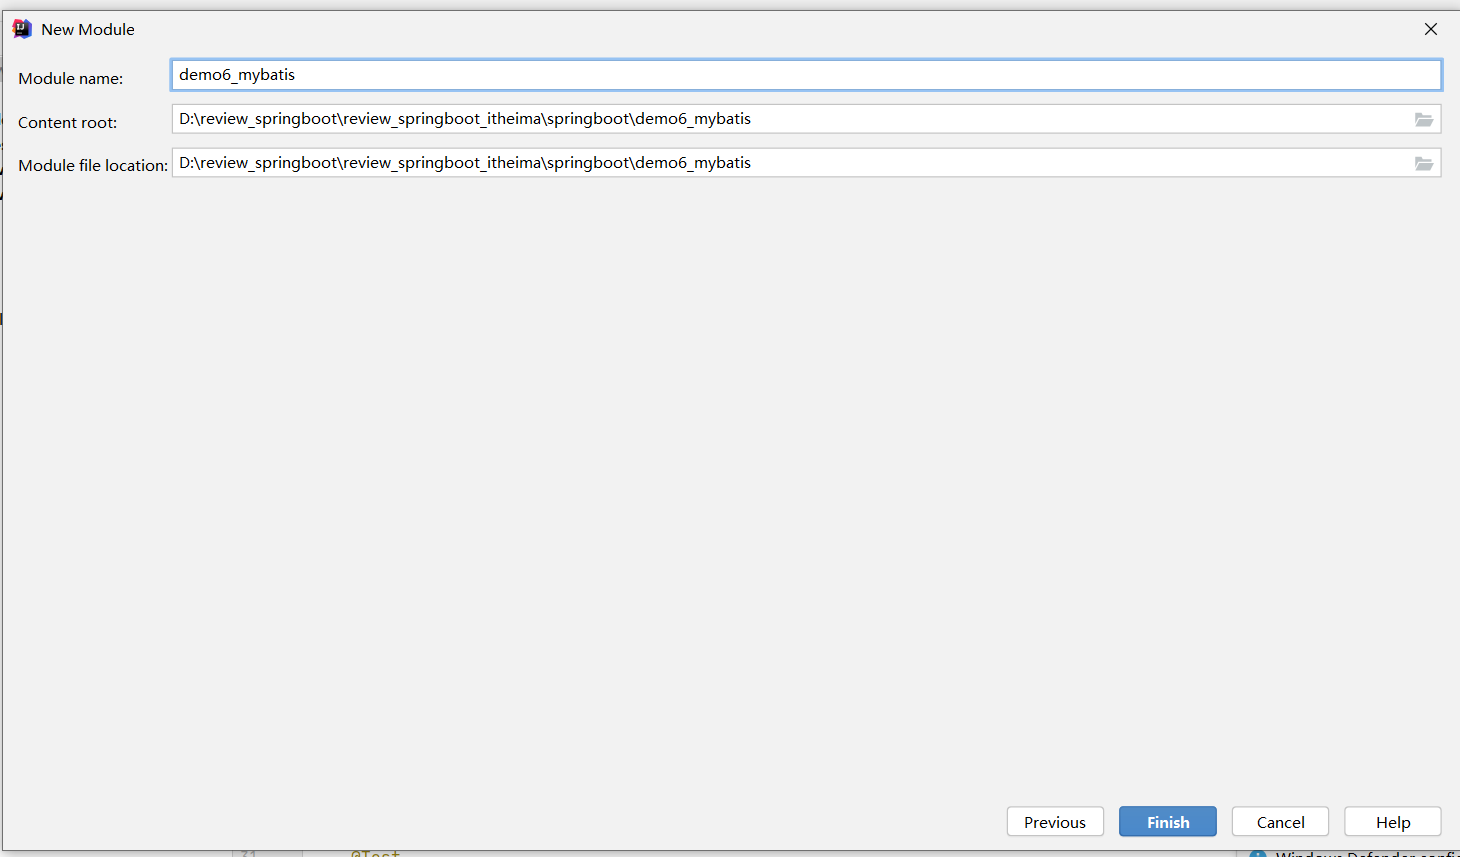
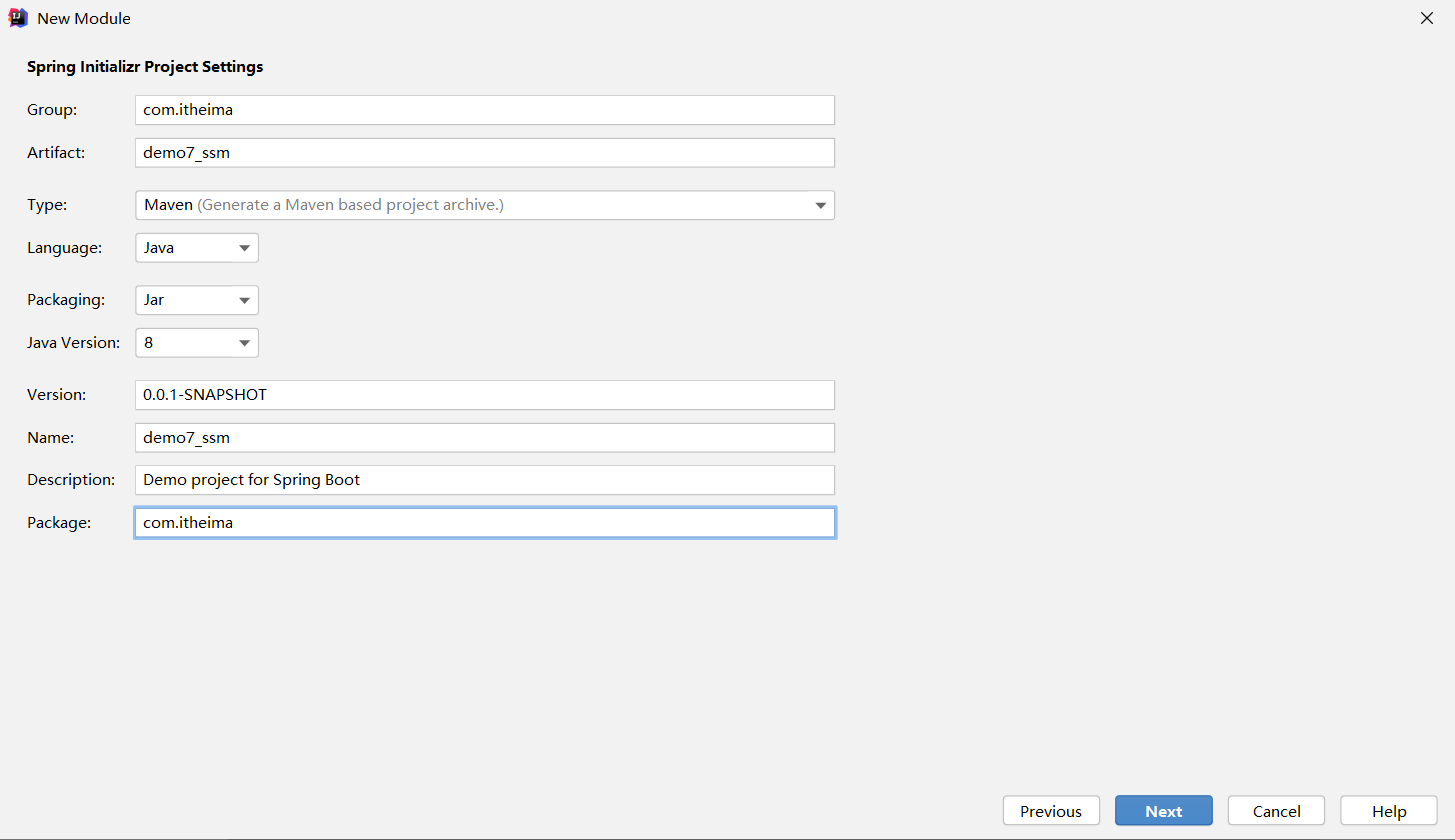
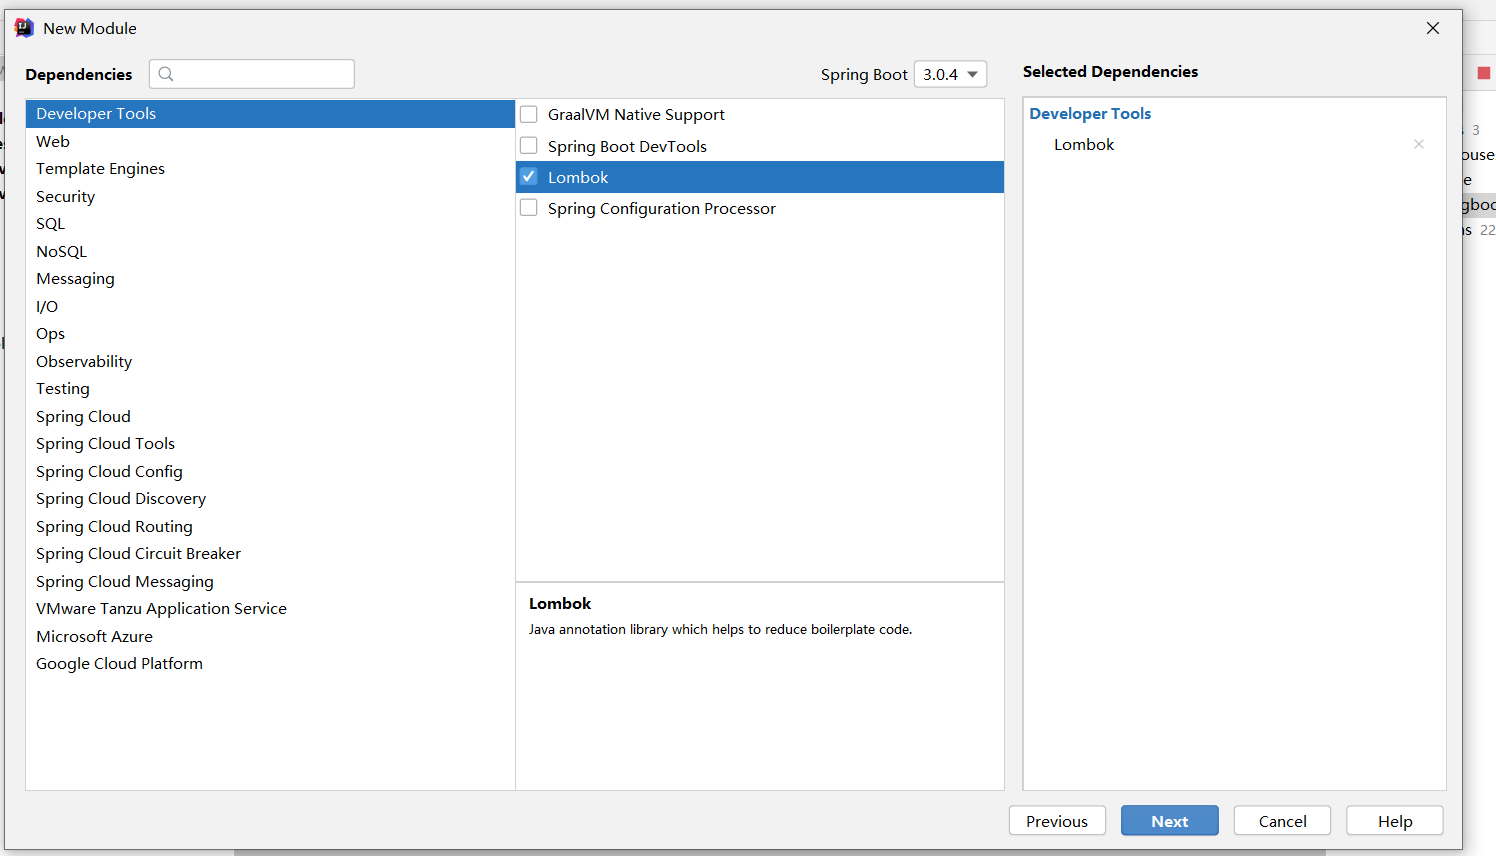
①:创建新模块,选择Spring初始化,并配置模块相关基础信息
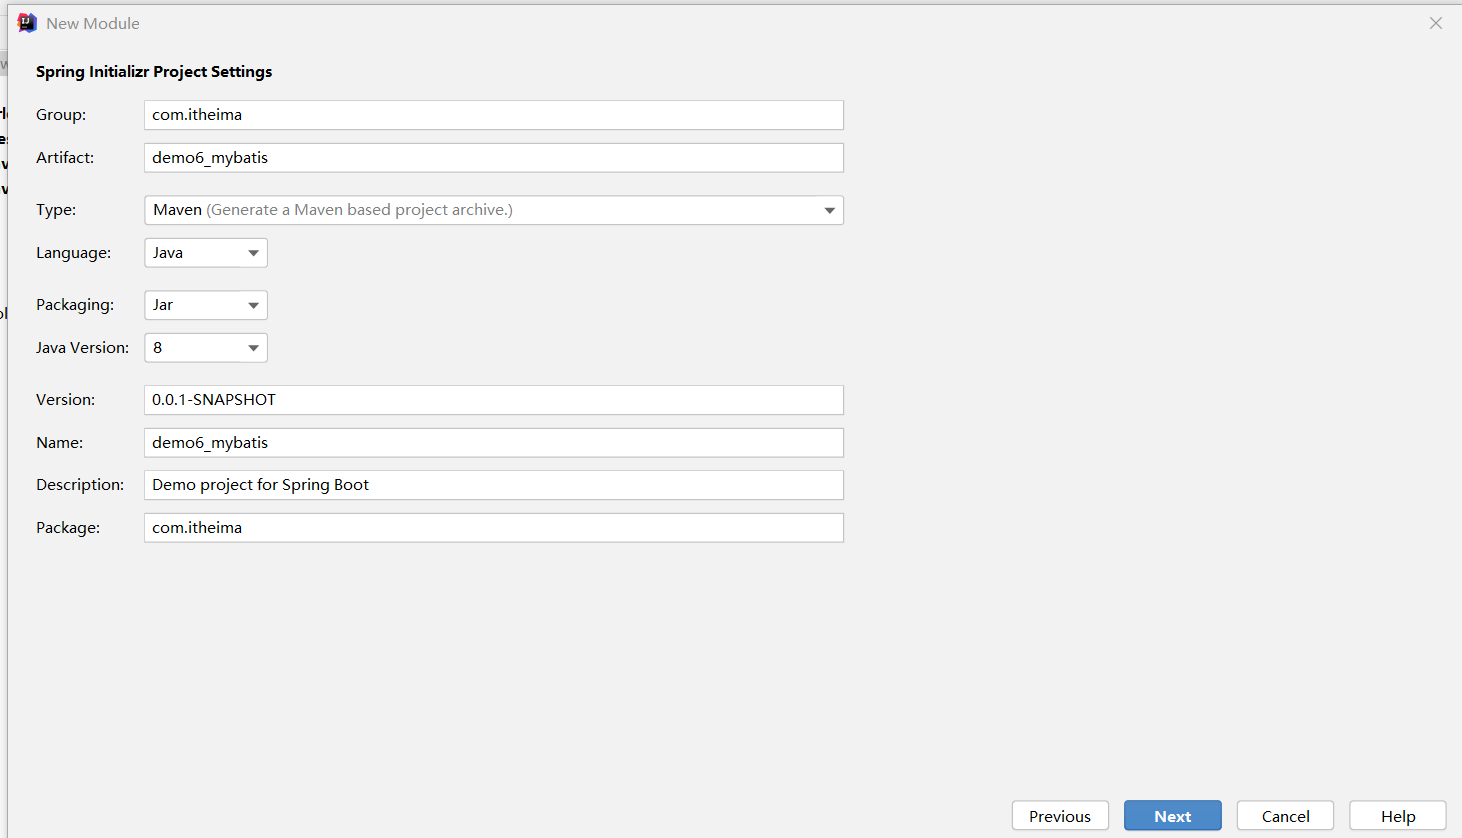
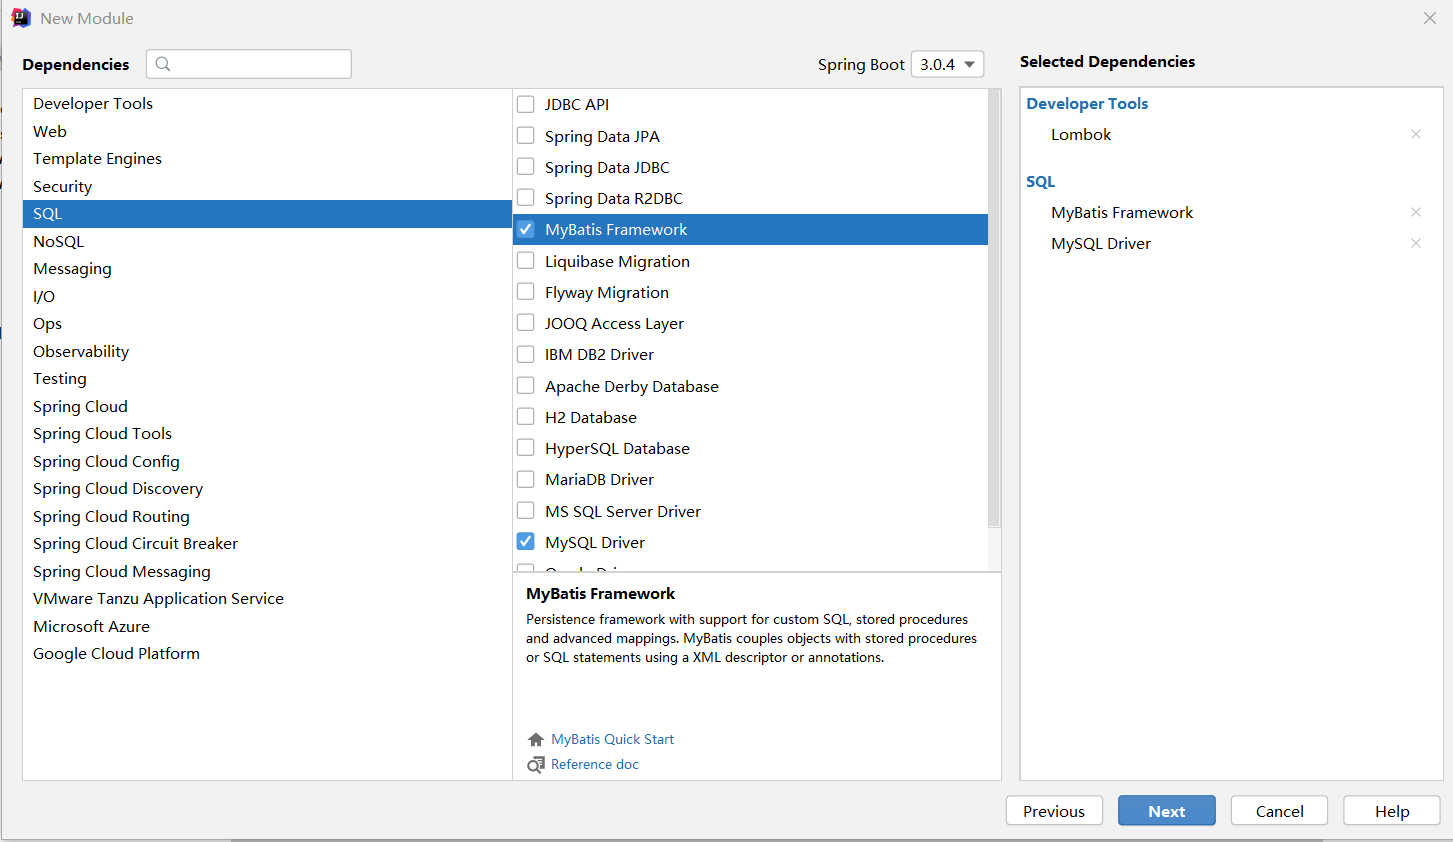
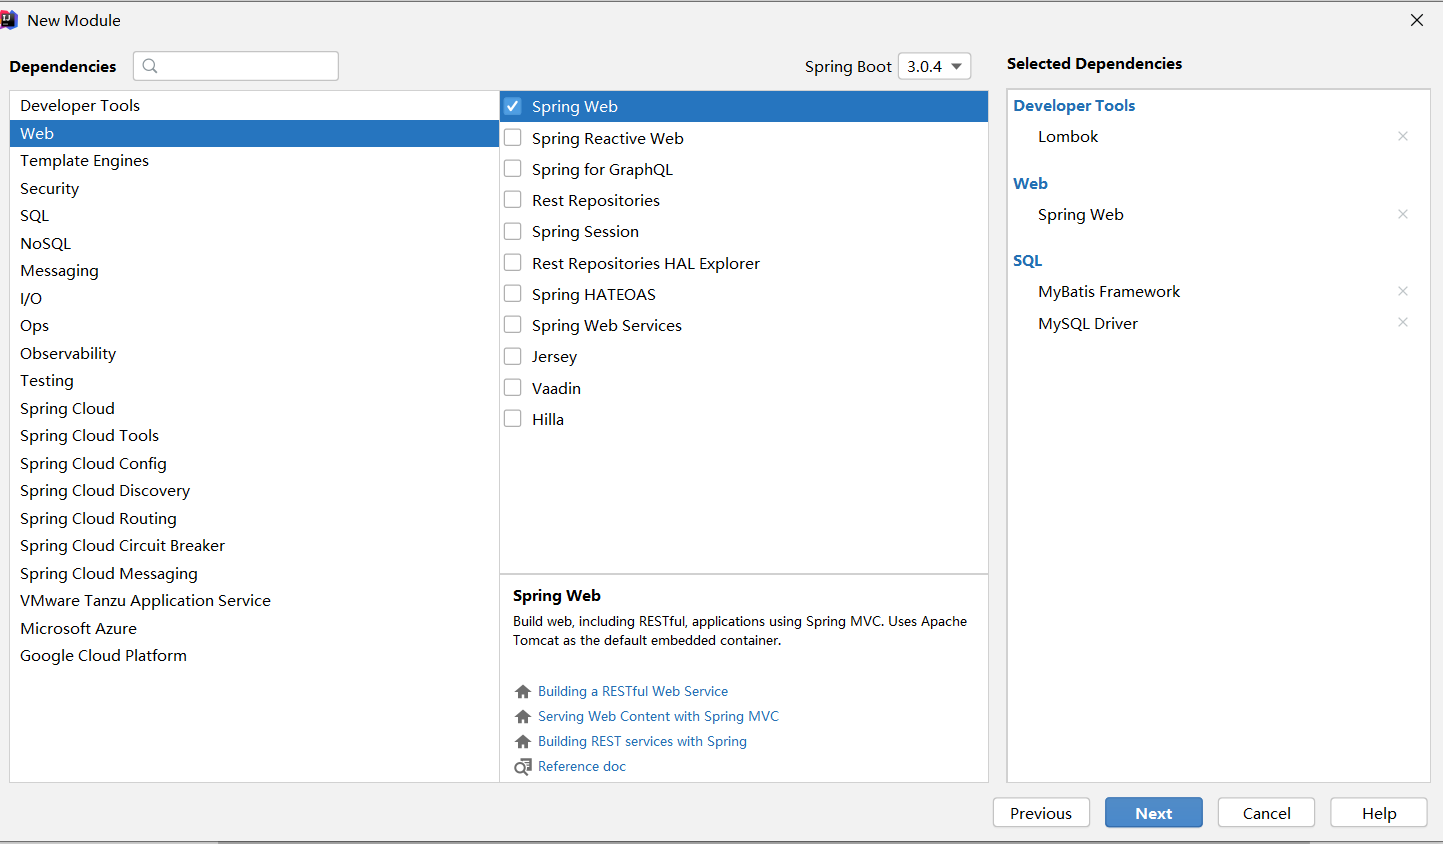
②:选择当前模块需要使用的技术集(MyBatis、MySQL)
③:设置数据源参数
spring:datasource:type: com.alibaba.druid.pool.DruidDataSourcedriver-class-name: com.mysql.cj.jdbc.Driverurl: jdbc:mysql://localhost:3306/springboot_testusername: rootpassword: 123456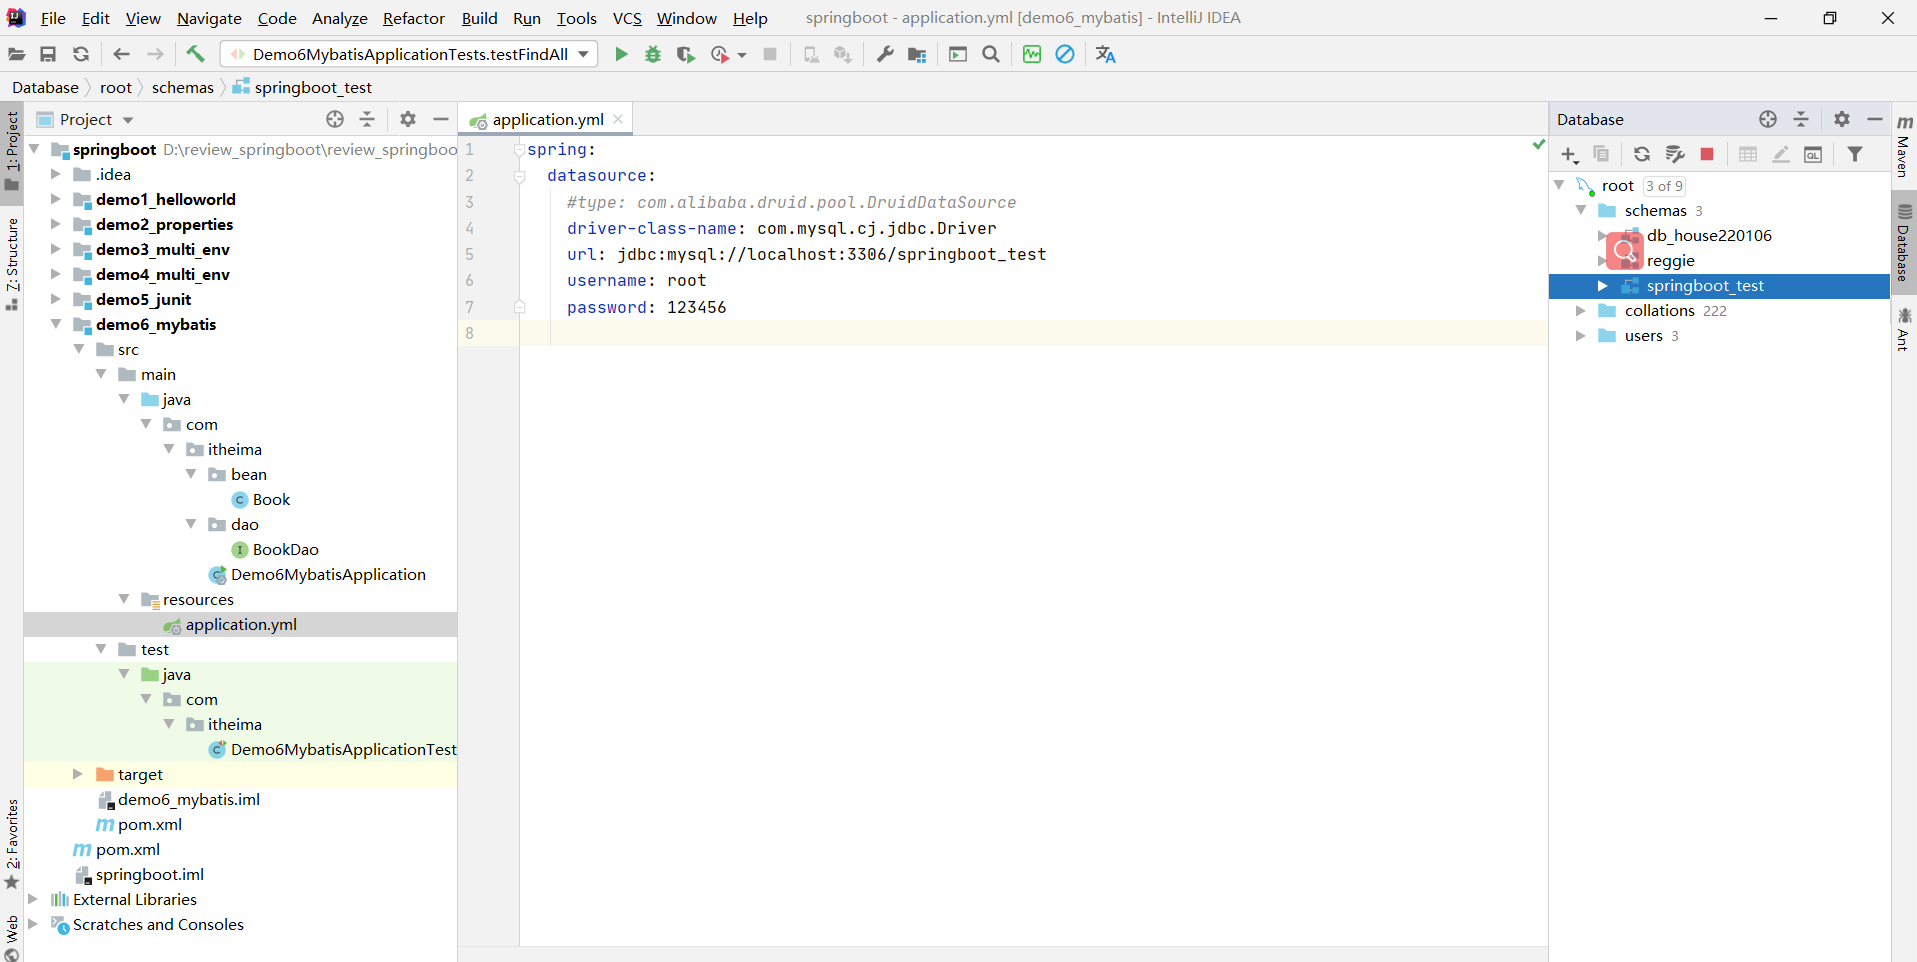
注意事项:
SpringBoot版本低于2.4.3(不含),Mysql驱动版本大于8.0时,需要在url连接串中配置时区,或在MySQL数据库端配置时区解决此问题
jdbc:mysql://localhost:3306/springboot_test?serverTimezone=UTC加入druid连接池 和lombok依赖
<dependency><groupId>com.alibaba</groupId><artifactId>druid</artifactId><version>1.2.8</version></dependency> <dependency><groupId>org.projectlombok</groupId><artifactId>lombok</artifactId></dependency>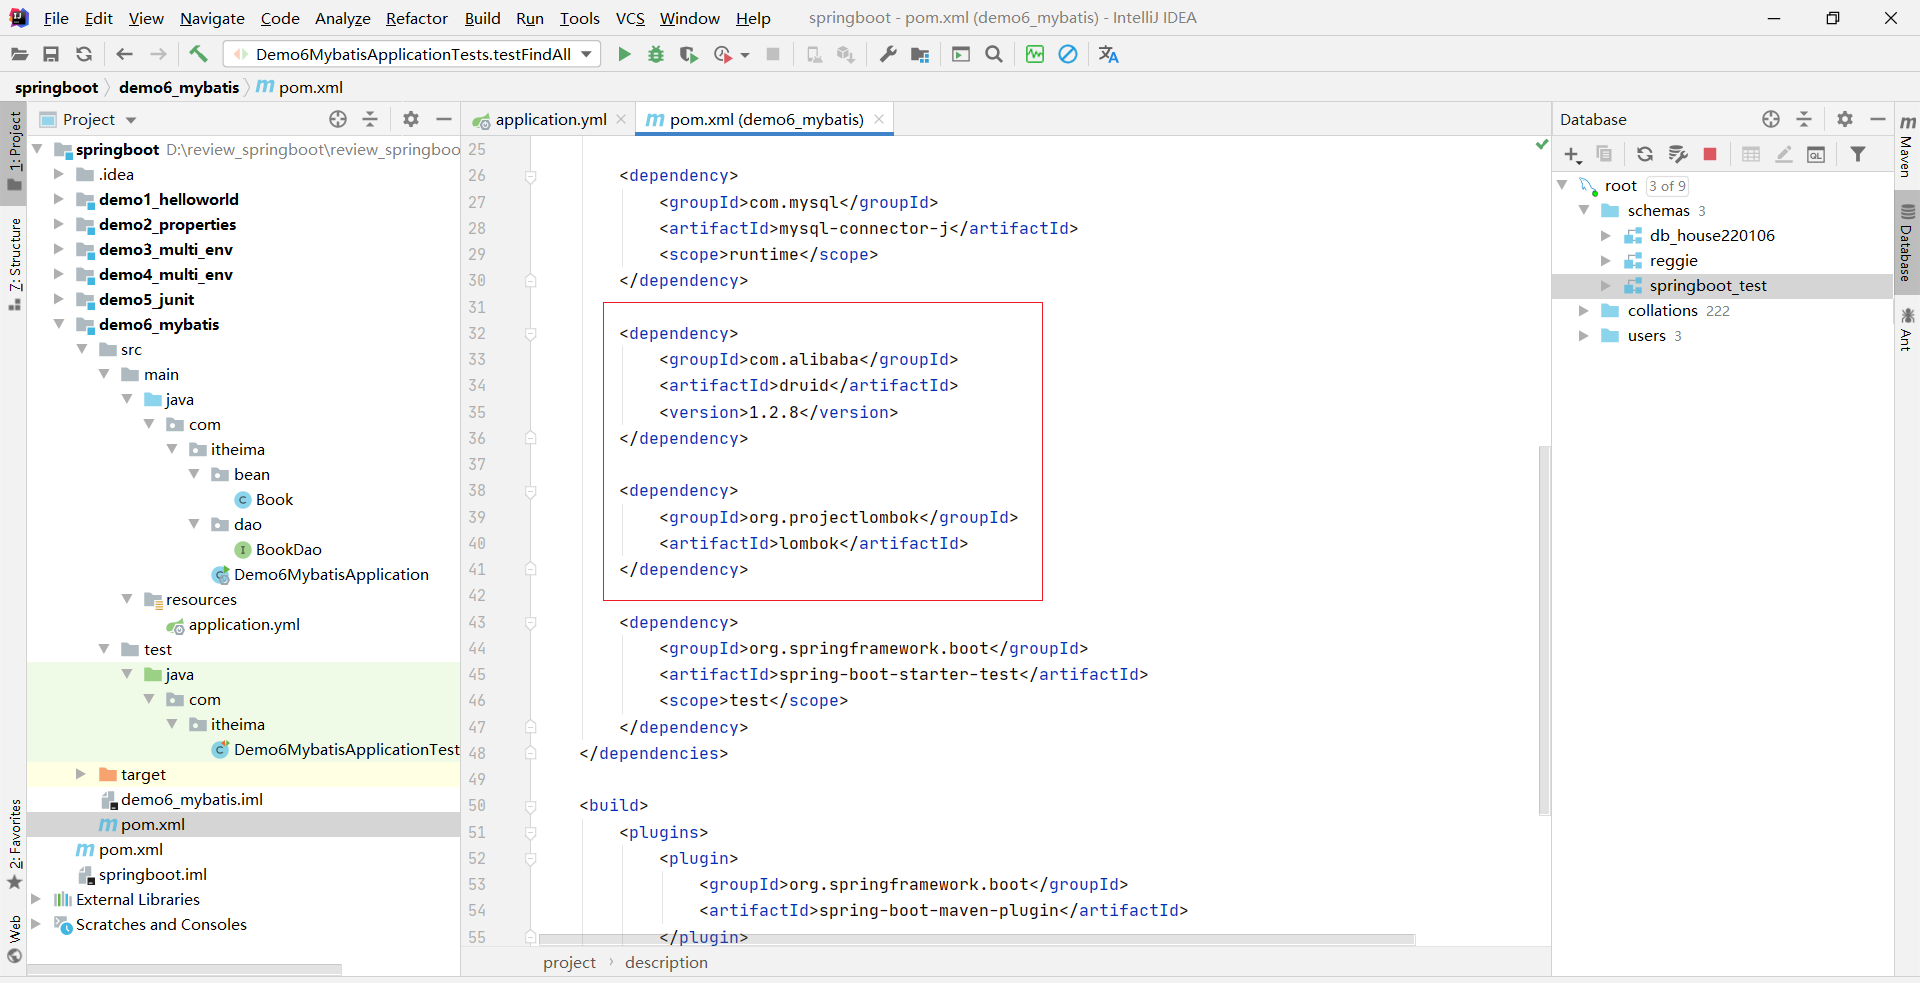
④:定义数据层接口与映射配置
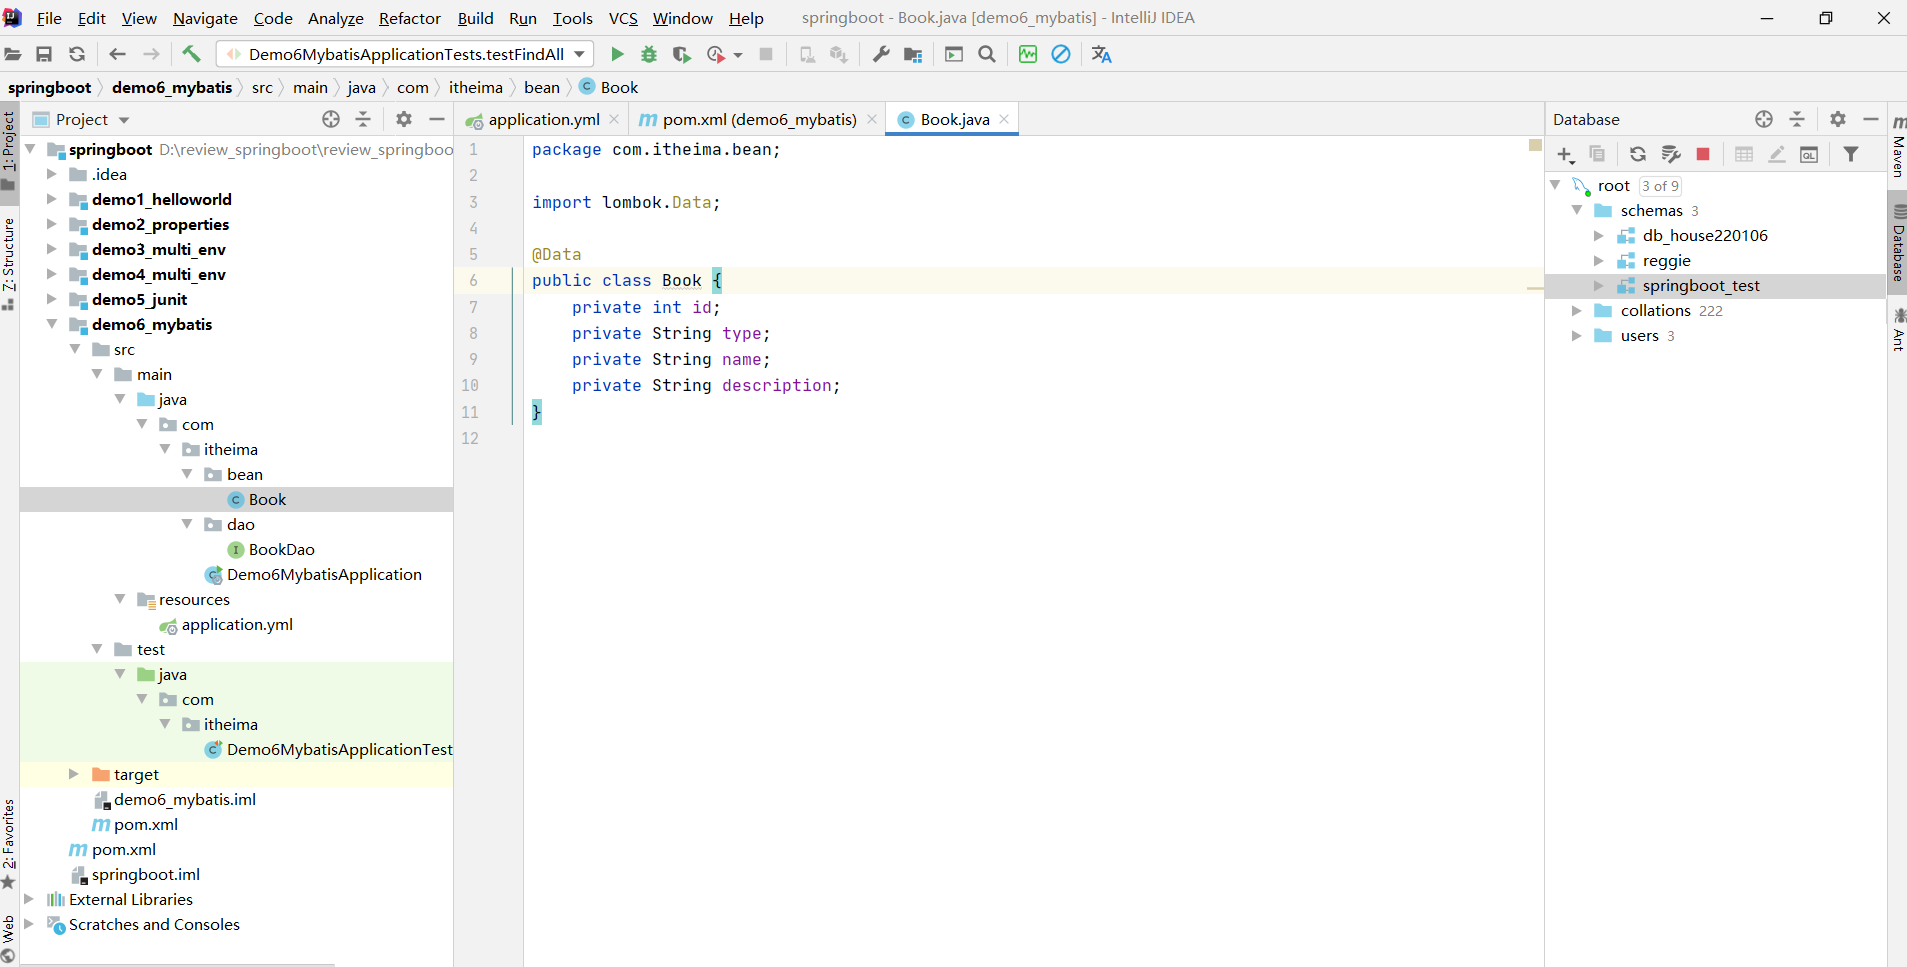
实体类bean
package com.itheima.bean;import lombok.Data;@Data
public class Book {private int id;private String type;private String name;private String description;
}
⑤:测试类中注入dao接口,测试功能
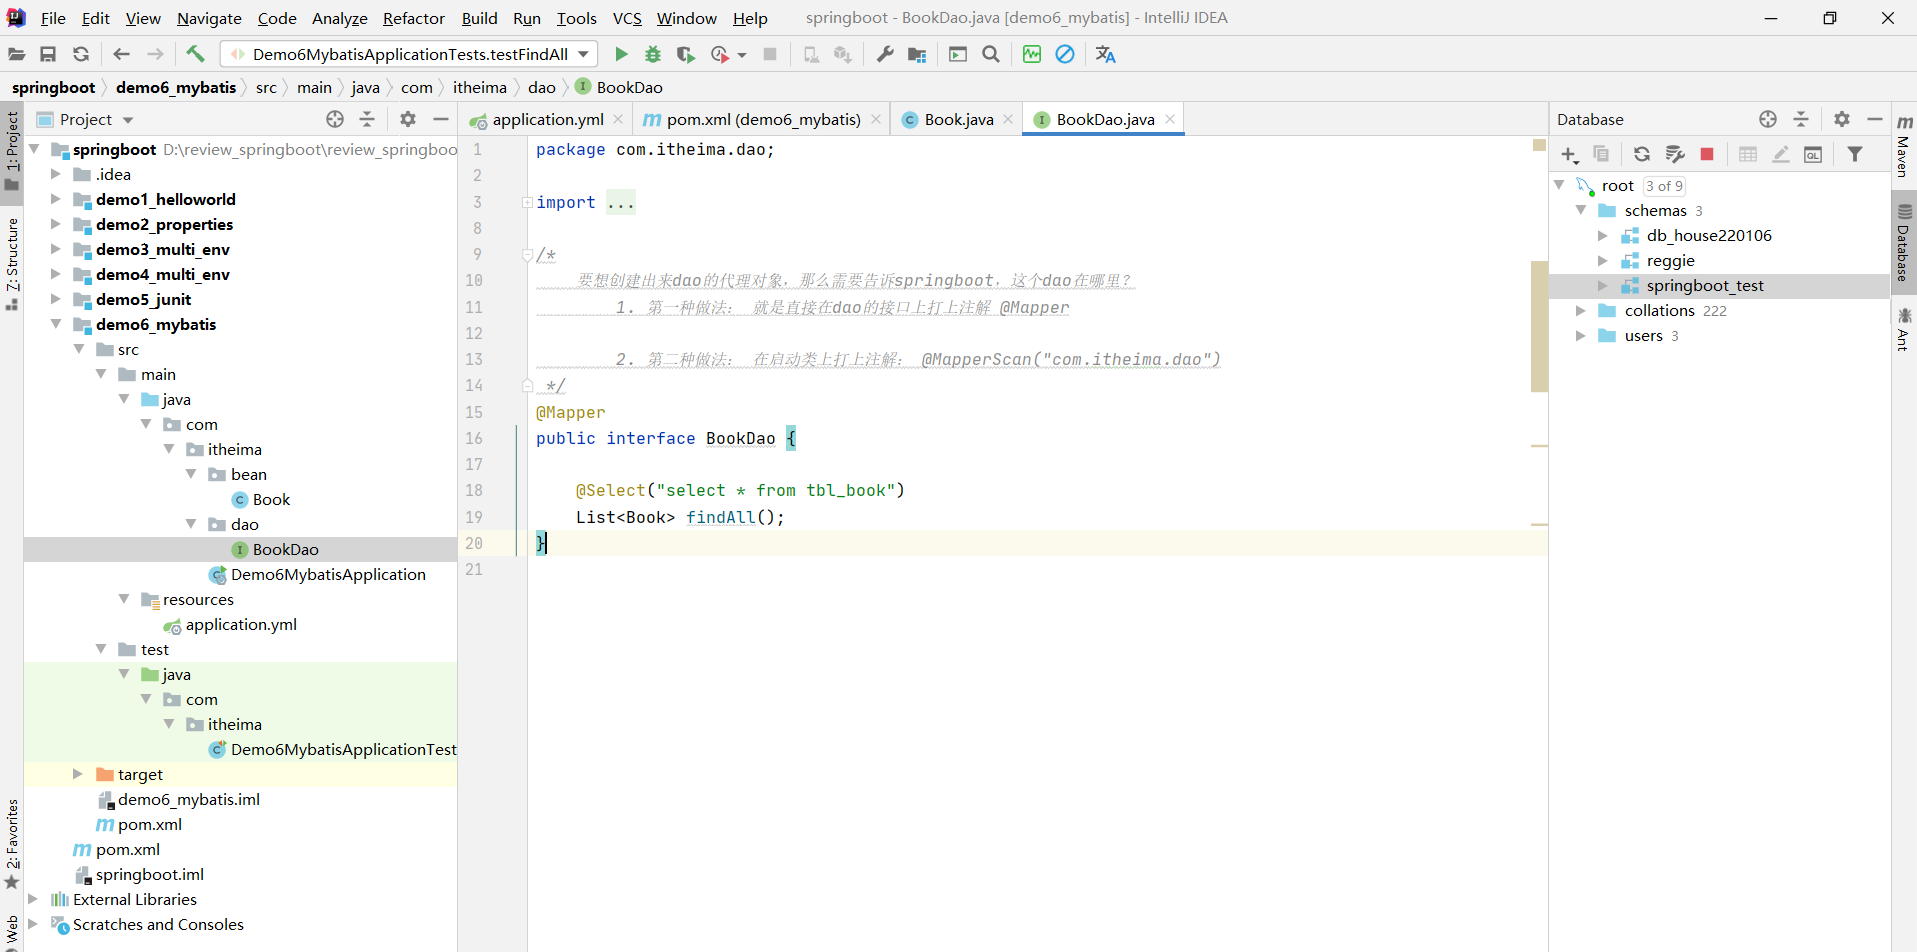
package com.itheima.dao;import com.itheima.bean.Book;
import org.apache.ibatis.annotations.Mapper;
import org.apache.ibatis.annotations.Select;import java.util.List;/*要想创建出来dao的代理对象,那么需要告诉springboot,这个dao在哪里?1. 第一种做法: 就是直接在dao的接口上打上注解 @Mapper2. 第二种做法: 在启动类上打上注解: @MapperScan("com.itheima.dao")*/
@Mapper
public interface BookDao {@Select("select * from tbl_book")List<Book> findAll();
}
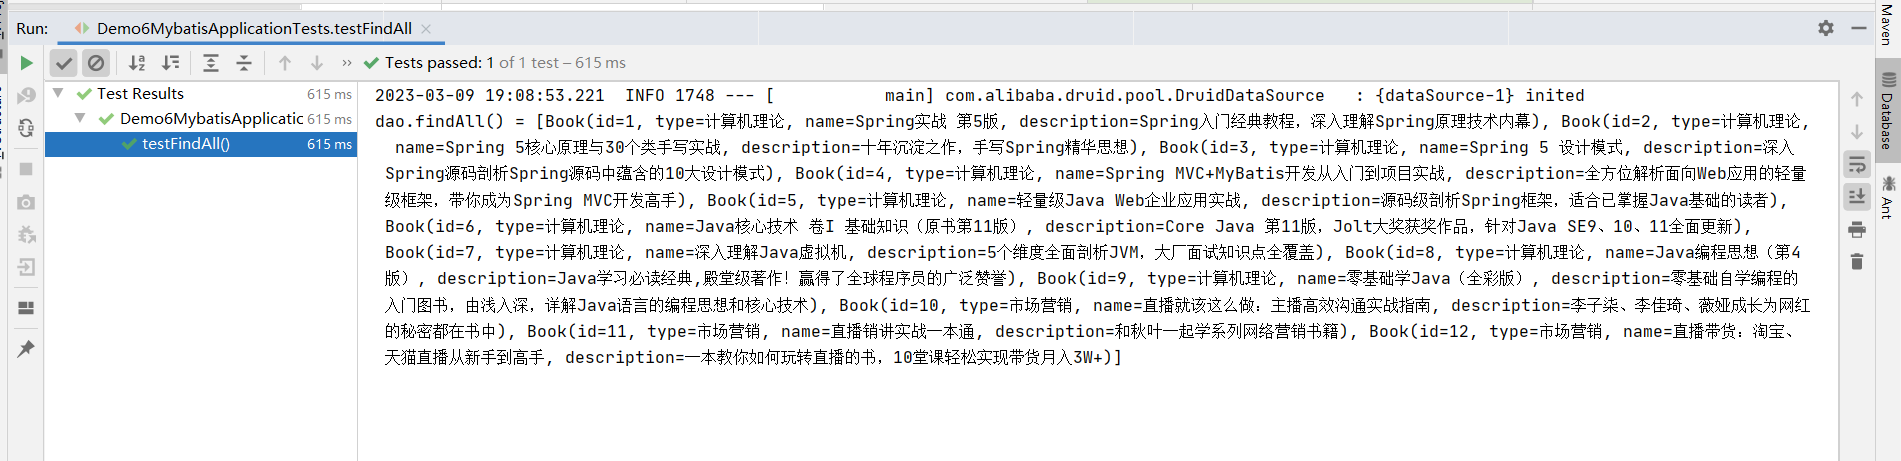
package com.itheima;import com.itheima.dao.BookDao;
import org.junit.jupiter.api.Test;
import org.springframework.beans.factory.annotation.Autowired;
import org.springframework.boot.test.context.SpringBootTest;@SpringBootTest
class Demo6MybatisApplicationTests {@Autowiredprivate BookDao dao;@Testvoid testFindAll() {System.out.println("dao.findAll() = " + dao.findAll());}
}
测试结果:
如果不用druid连接池 就用光连接池
spring:datasource:#type: com.alibaba.druid.pool.DruidDataSourcedriver-class-name: com.mysql.cj.jdbc.Driverurl: jdbc:mysql://localhost:3306/springboot_testusername: rootpassword: 123456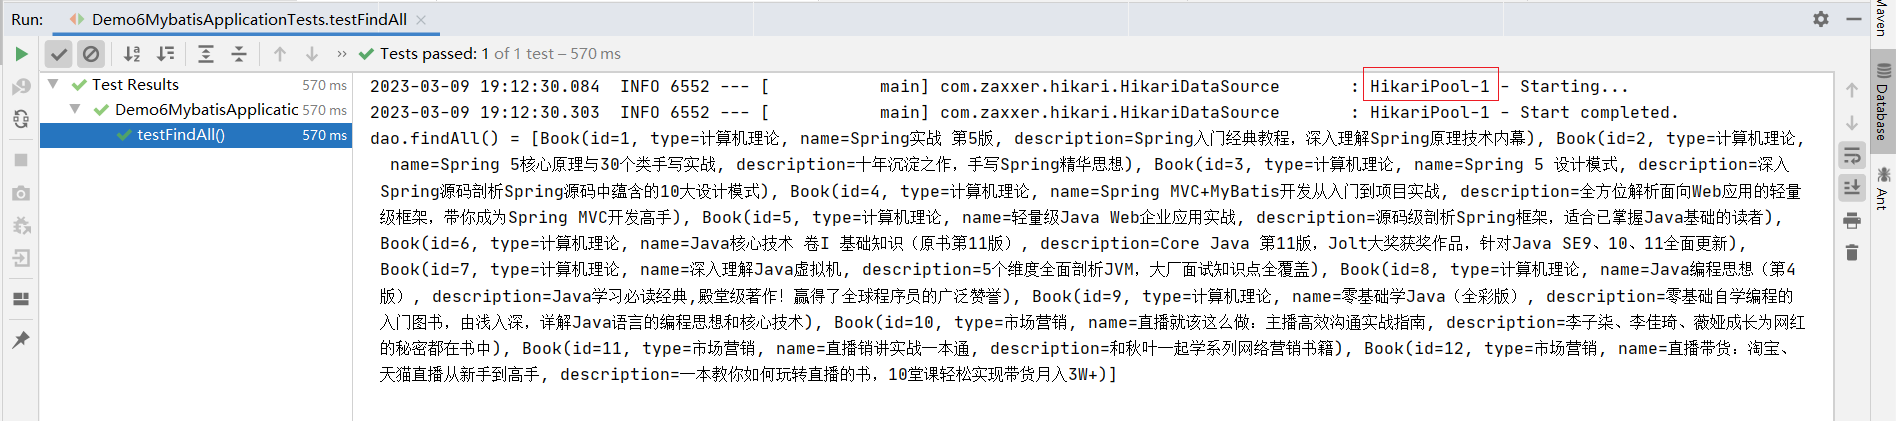
/*要想创建出来dao的代理对象,那么需要告诉springboot,这个dao在哪里?1. 第一种做法: 就是直接在dao的接口上打上注解 @Mapper2. 第二种做法: 在启动类上打上注解: @MapperScan("com.itheima.dao")*/第二种做法
package com.itheima;import org.mybatis.spring.annotation.MapperScan;
import org.springframework.boot.SpringApplication;
import org.springframework.boot.autoconfigure.SpringBootApplication;@MapperScan("com.itheima.dao")
@SpringBootApplication
public class Demo6MybatisApplication {public static void main(String[] args) {SpringApplication.run(Demo6MybatisApplication.class, args);}}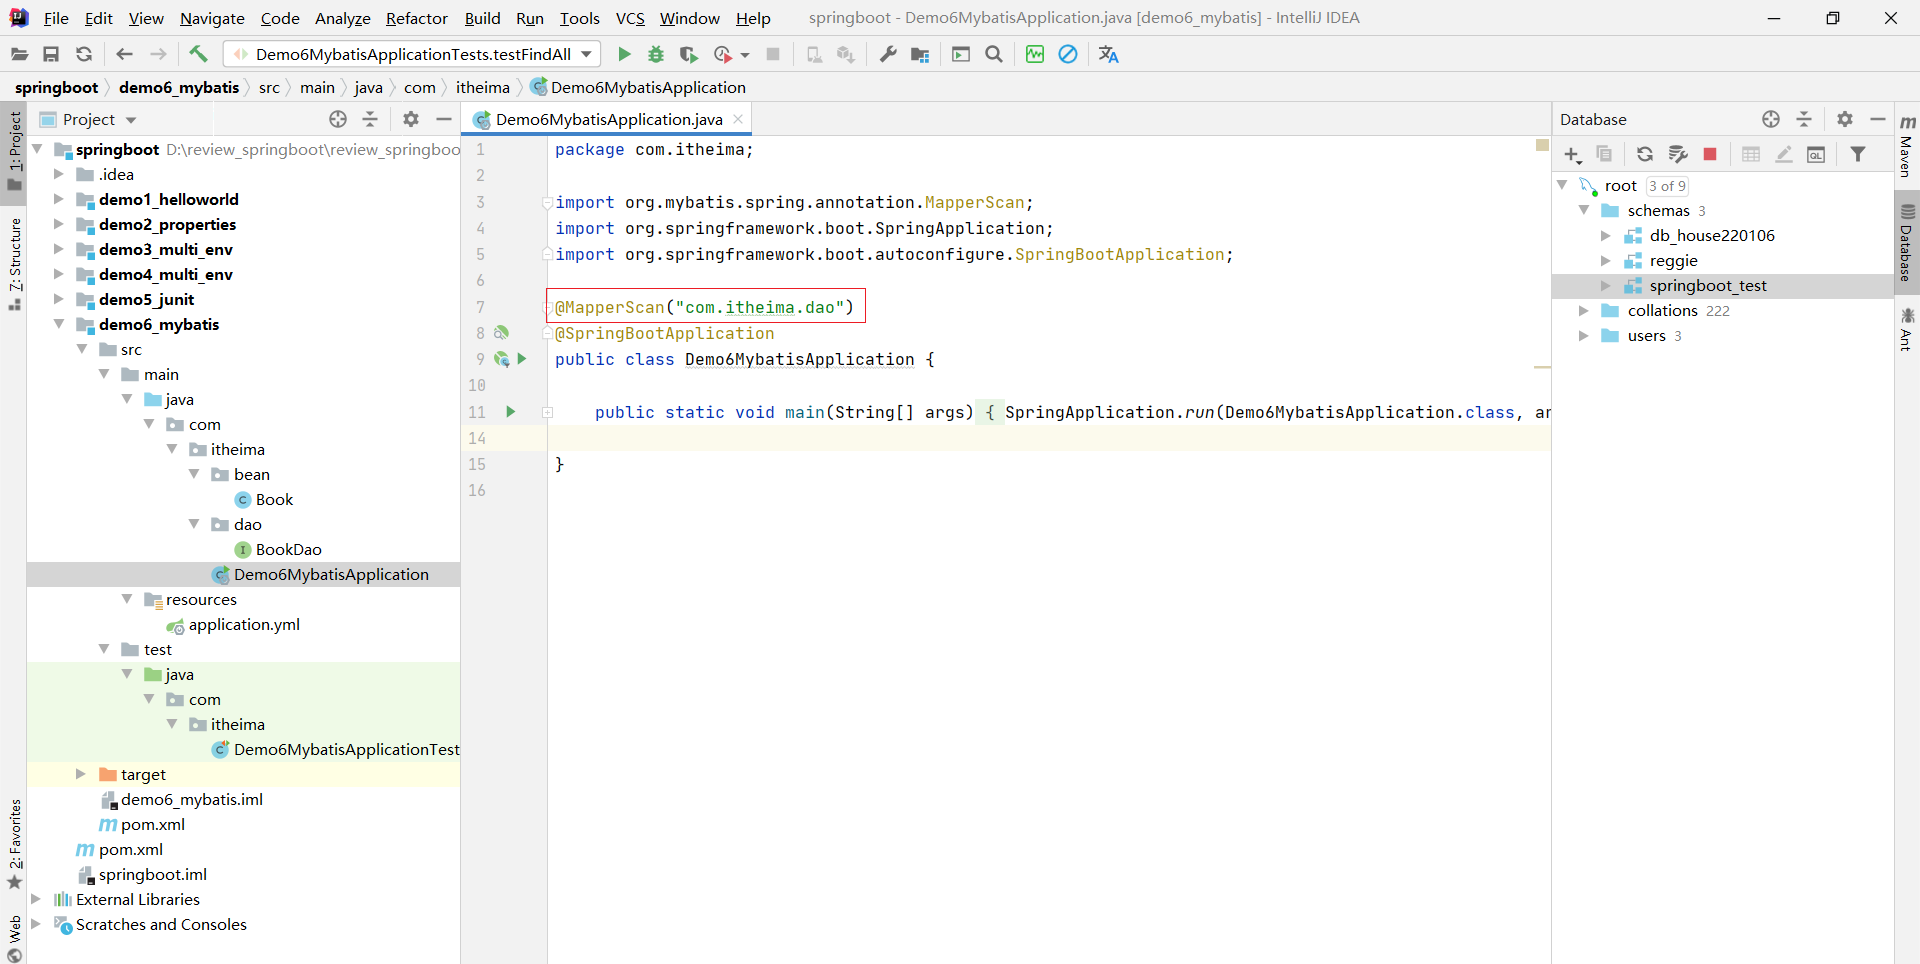
如果二种都不打 会报以下错误
Caused by: org.springframework.beans.factory.NoSuchBeanDefinitionException: No qualifying bean of type 'com.itheima.dao.BookDao' available: expected at least 1 bean which qualifies as autowire candidate. Dependency annotations: {@org.springframework.beans.factory.annotation.Autowired(required=true)}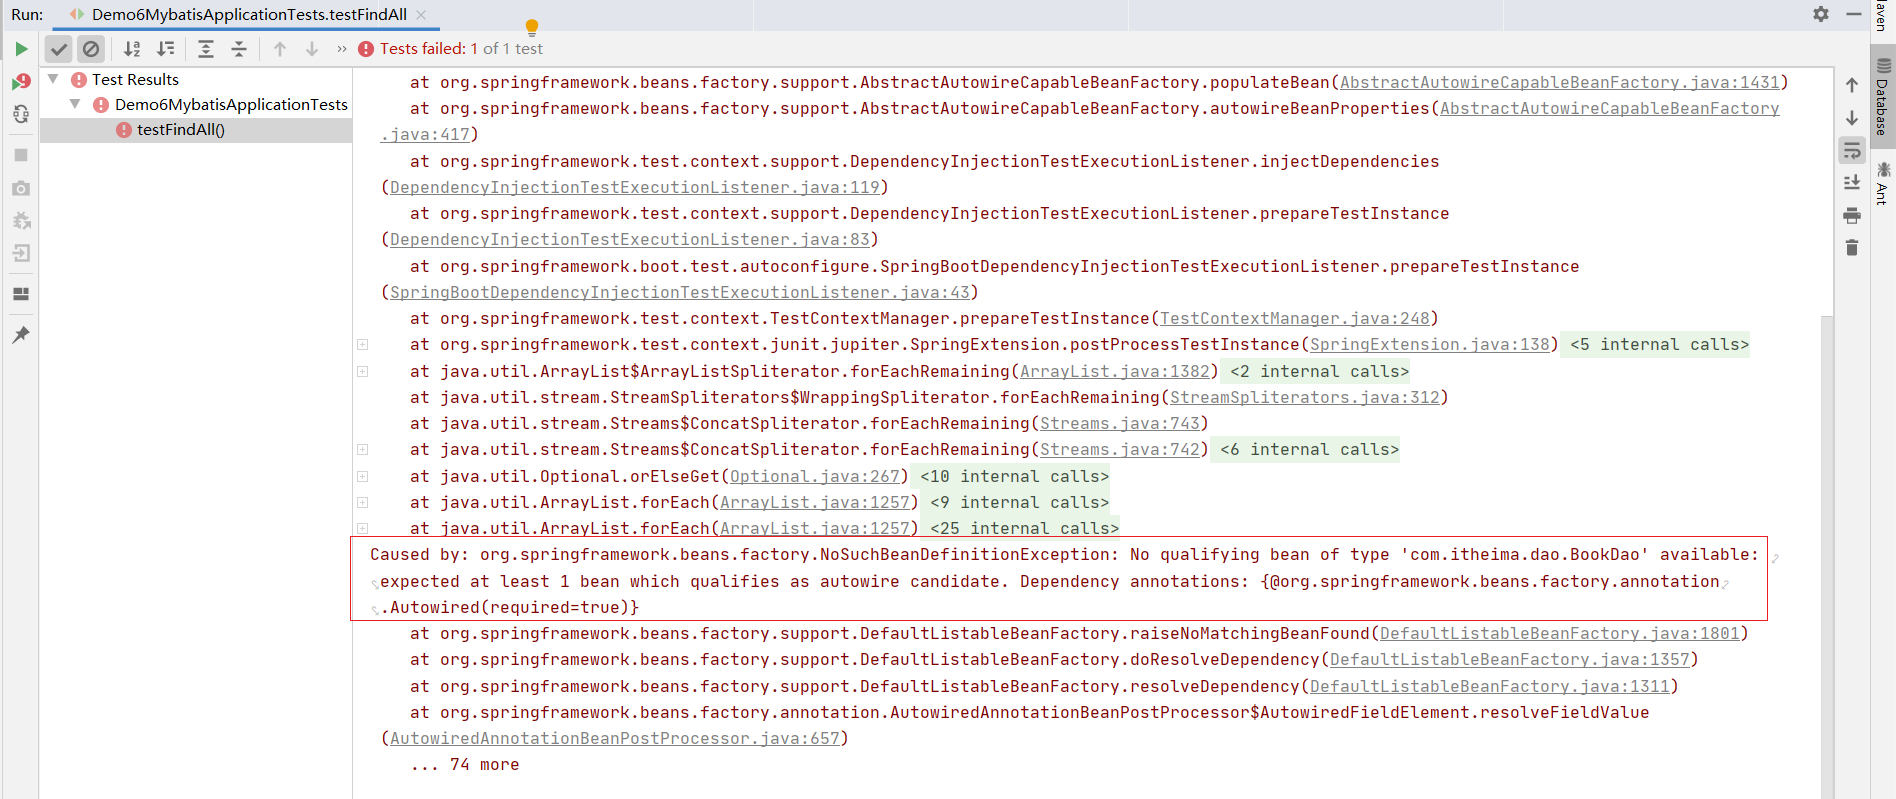
2.3 案例-SpringBoot实现ssm整合
① 环境准备

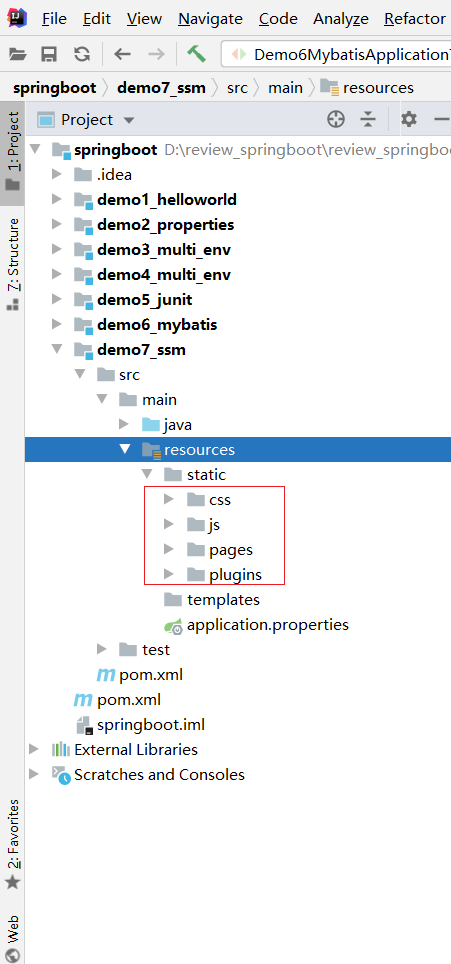
② 导入静态页面
③ yml
spring:datasource:driver-class-name: com.mysql.cj.jdbc.Driverurl: jdbc:mysql://localhost:3306/springboot_testusername: rootpassword: 123456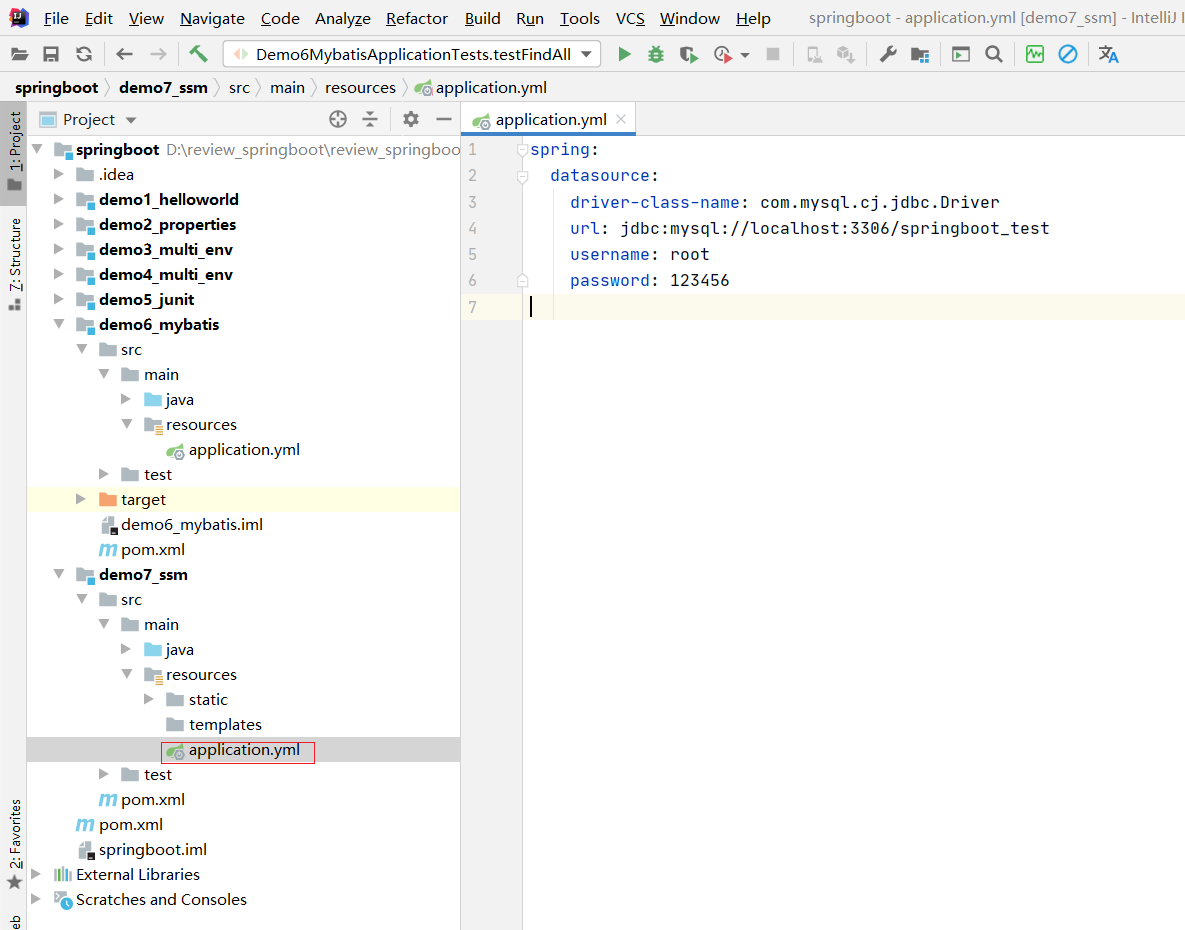
启动
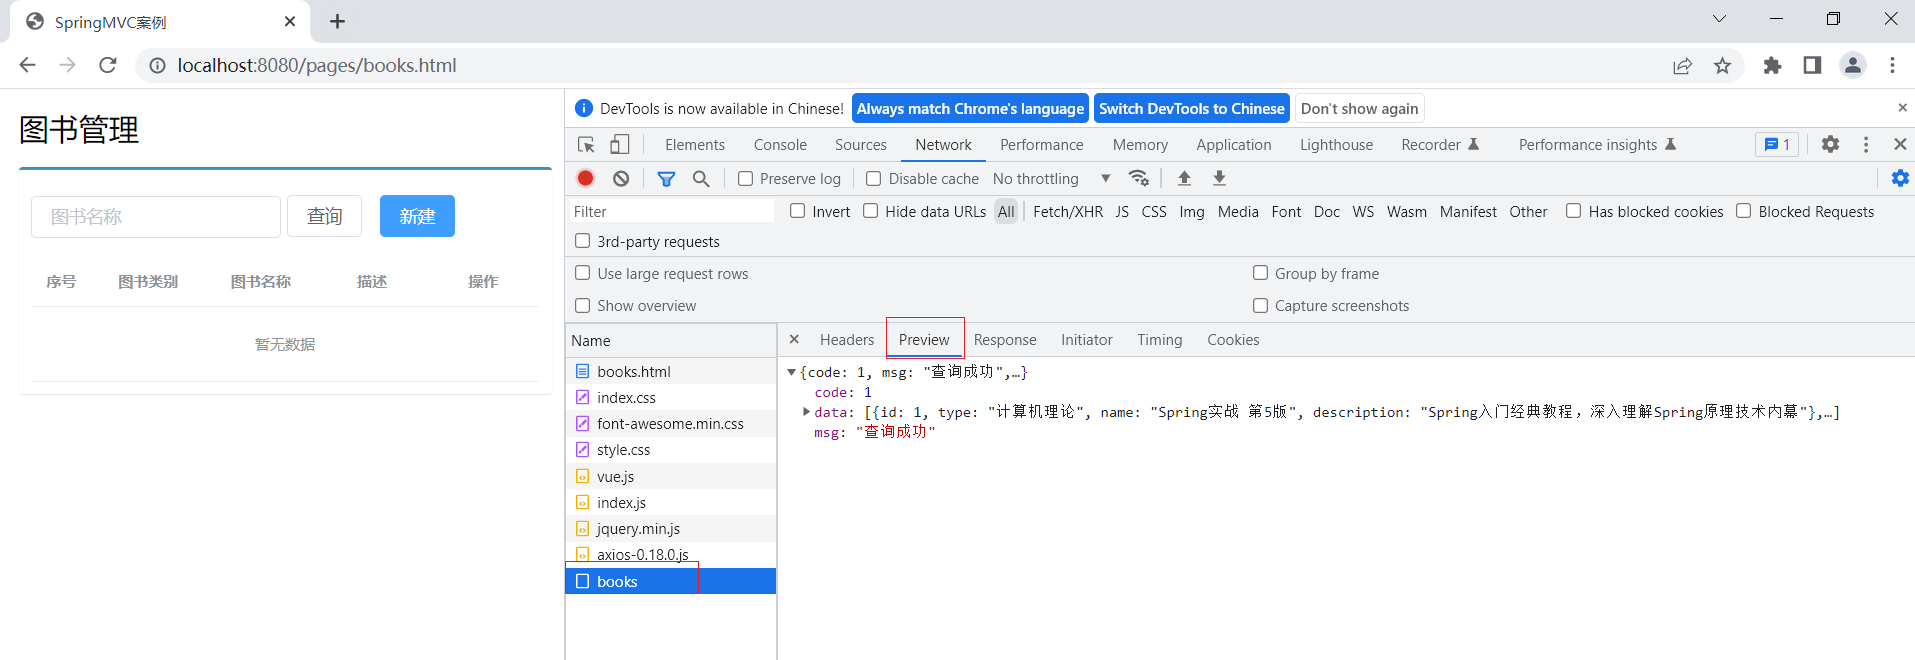
访问
http://localhost:8080/pages/books.html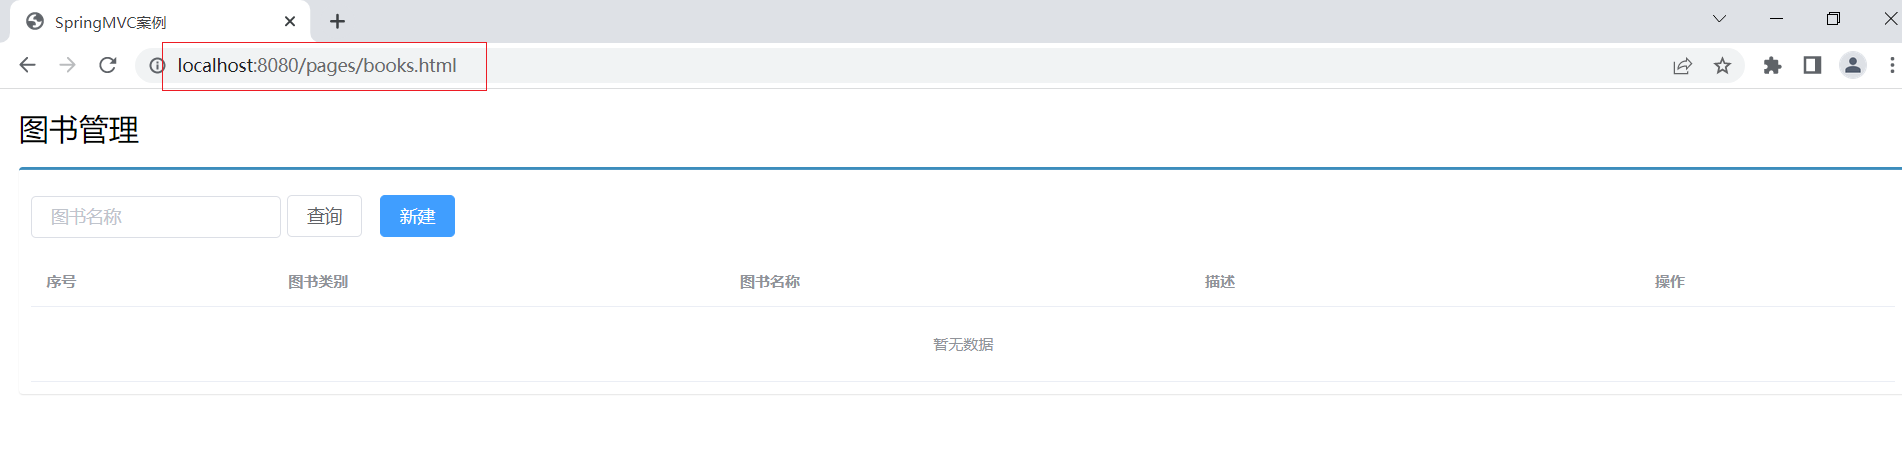
④ 前端
methods: {//列表getAll() {axios.get("/books").then(resp=>{console.log(resp);//this.dataList = resp.data.data;});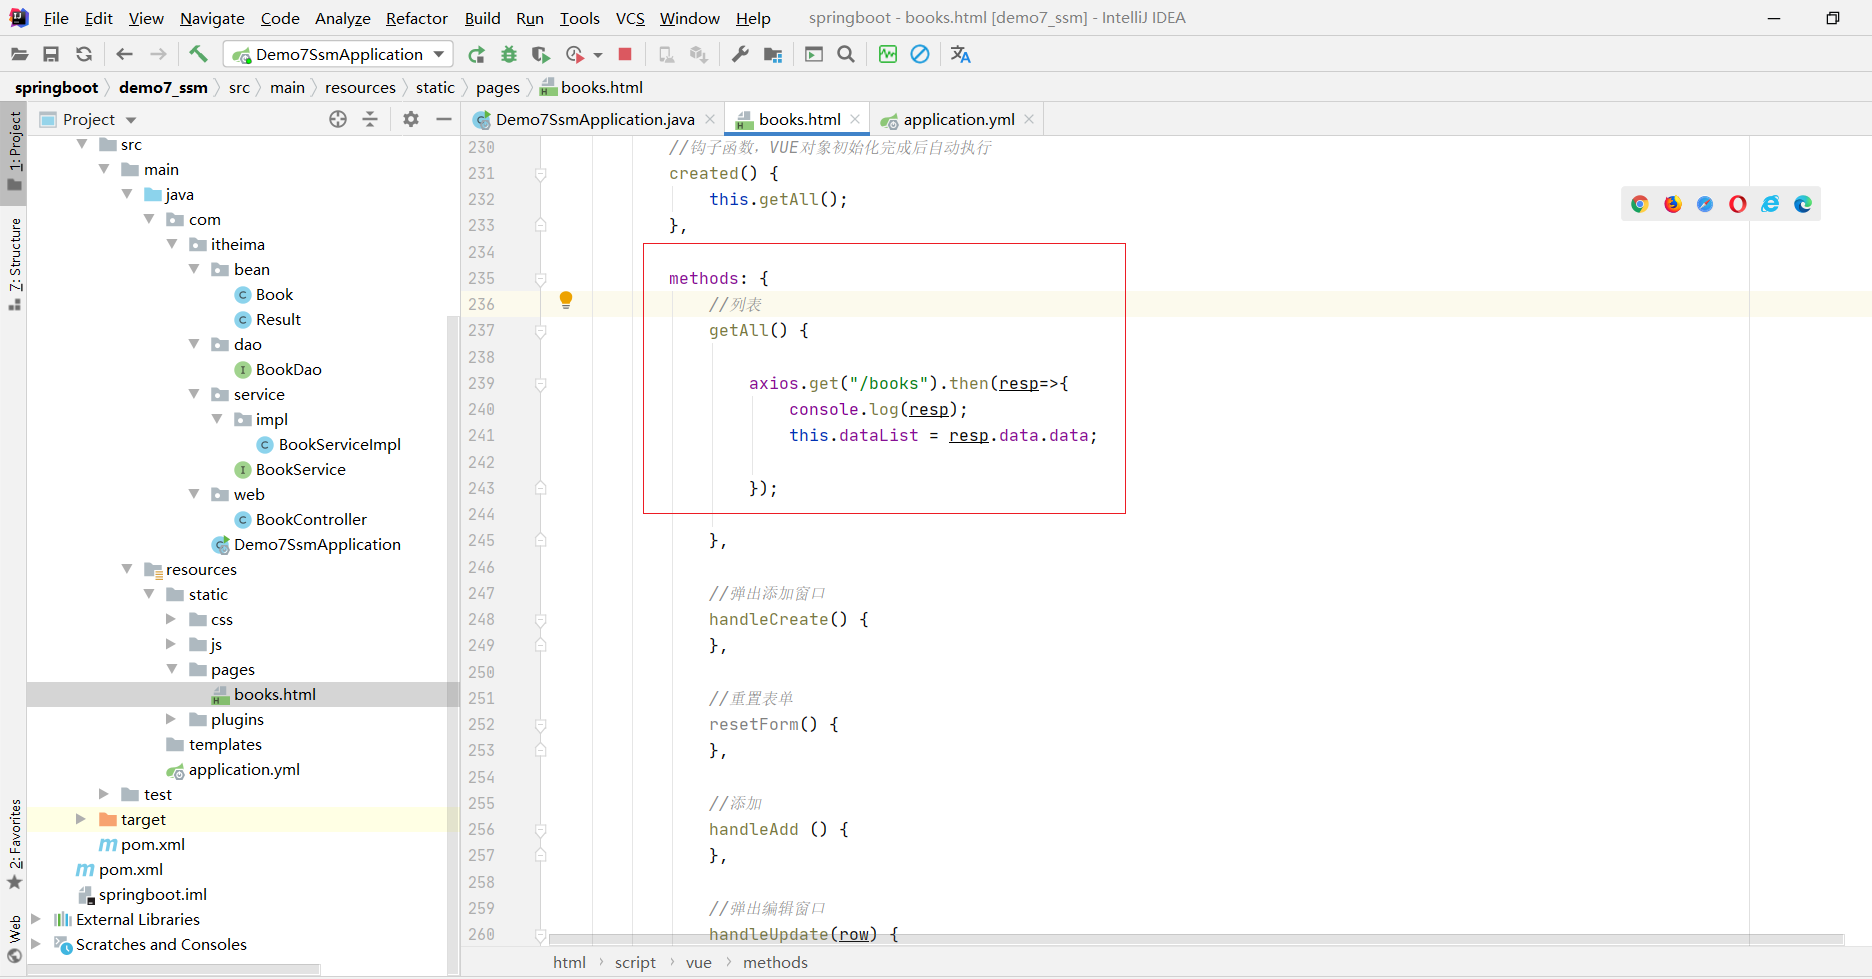
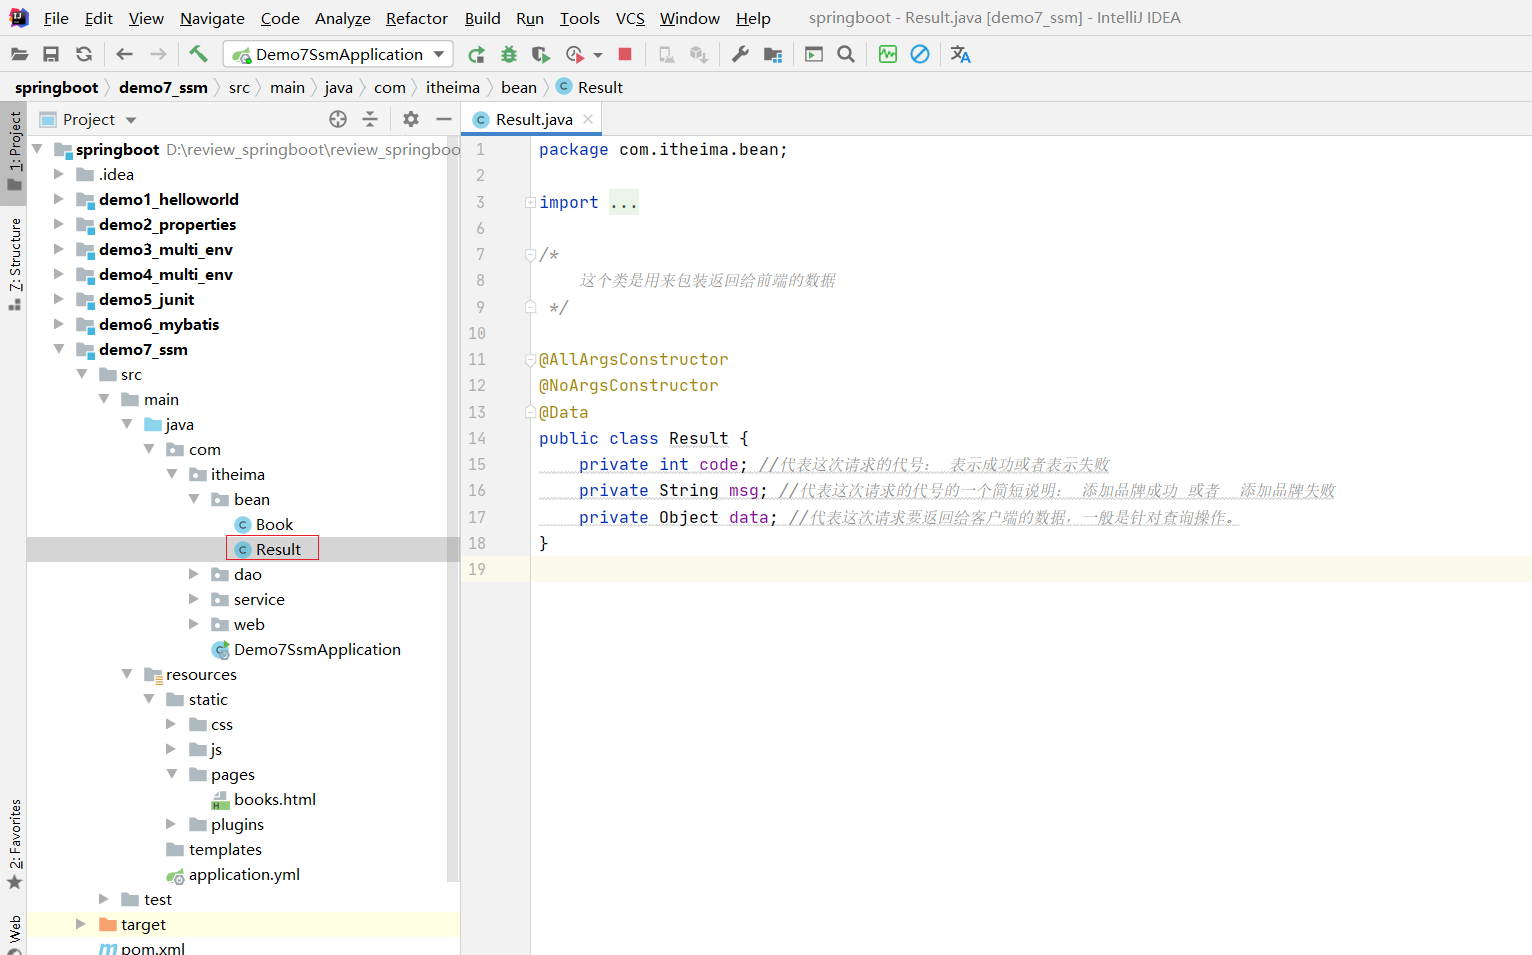
⑤ bean实体类
`package com.itheima.bean;import lombok.AllArgsConstructor;
import lombok.Data;
import lombok.NoArgsConstructor;/*这个类是用来包装返回给前端的数据*/@AllArgsConstructor
@NoArgsConstructor
@Data
public class Result {private int code; //代表这次请求的代号: 表示成功或者表示失败private String msg; //代表这次请求的代号的一个简短说明: 添加品牌成功 或者  添加品牌失败private Object data; //代表这次请求要返回给客户端的数据,一般是针对查询操作。
}
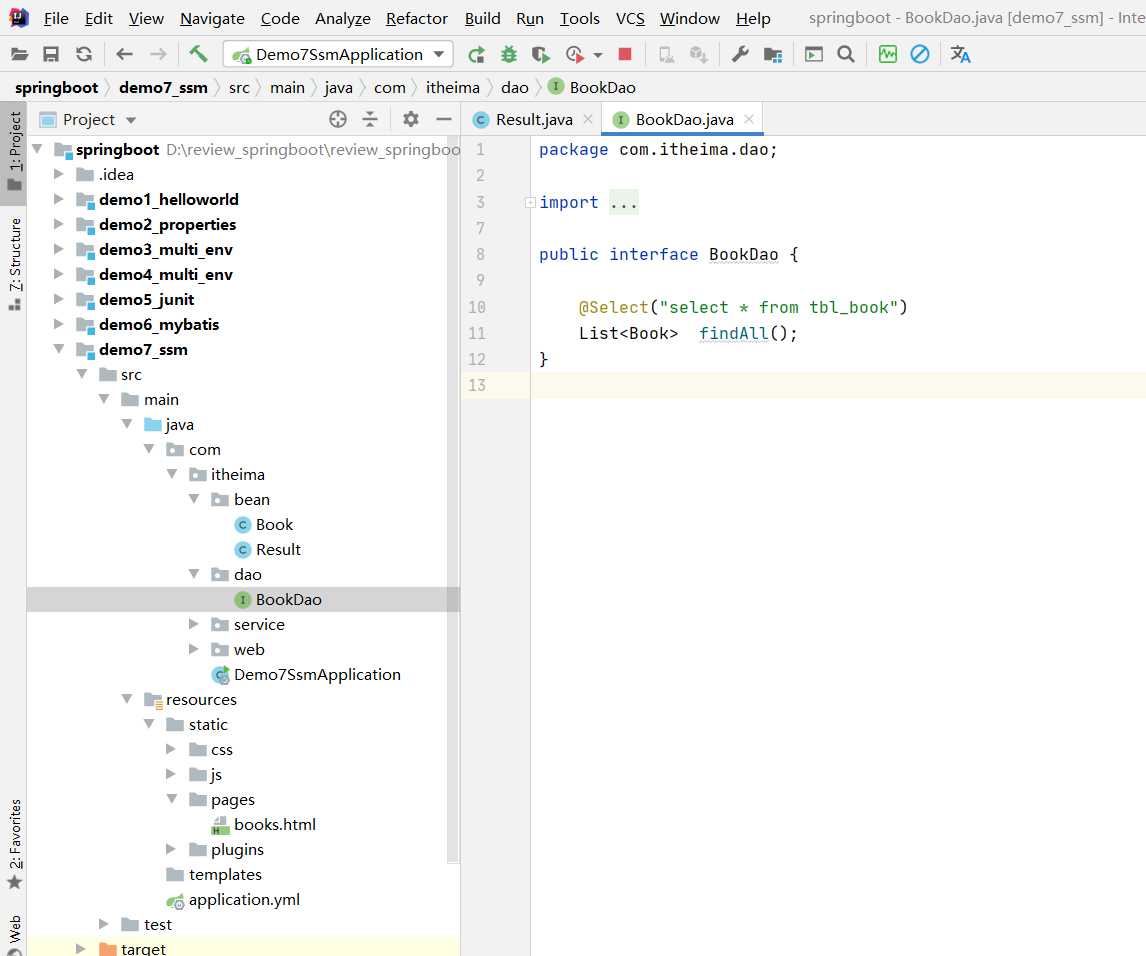
⑥ dao接口
package com.itheima.dao;import com.itheima.bean.Book;
import org.apache.ibatis.annotations.Select;import java.util.List;public interface BookDao {@Select("select * from tbl_book")List<Book>  findAll();
}
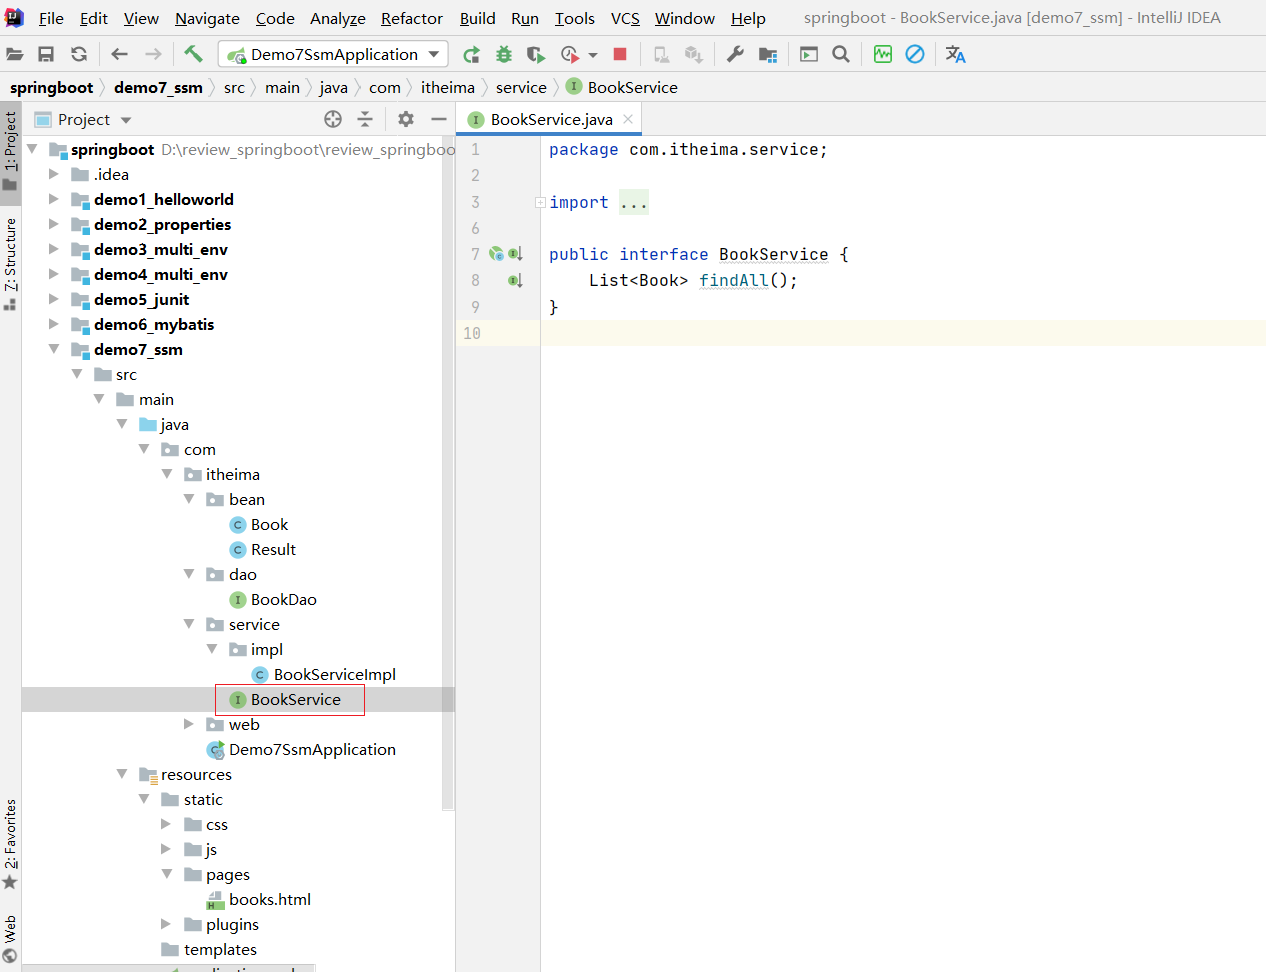
⑦ service接口
`package com.itheima.service;import com.itheima.bean.Book;import java.util.List;public interface BookService {List<Book> findAll();
}
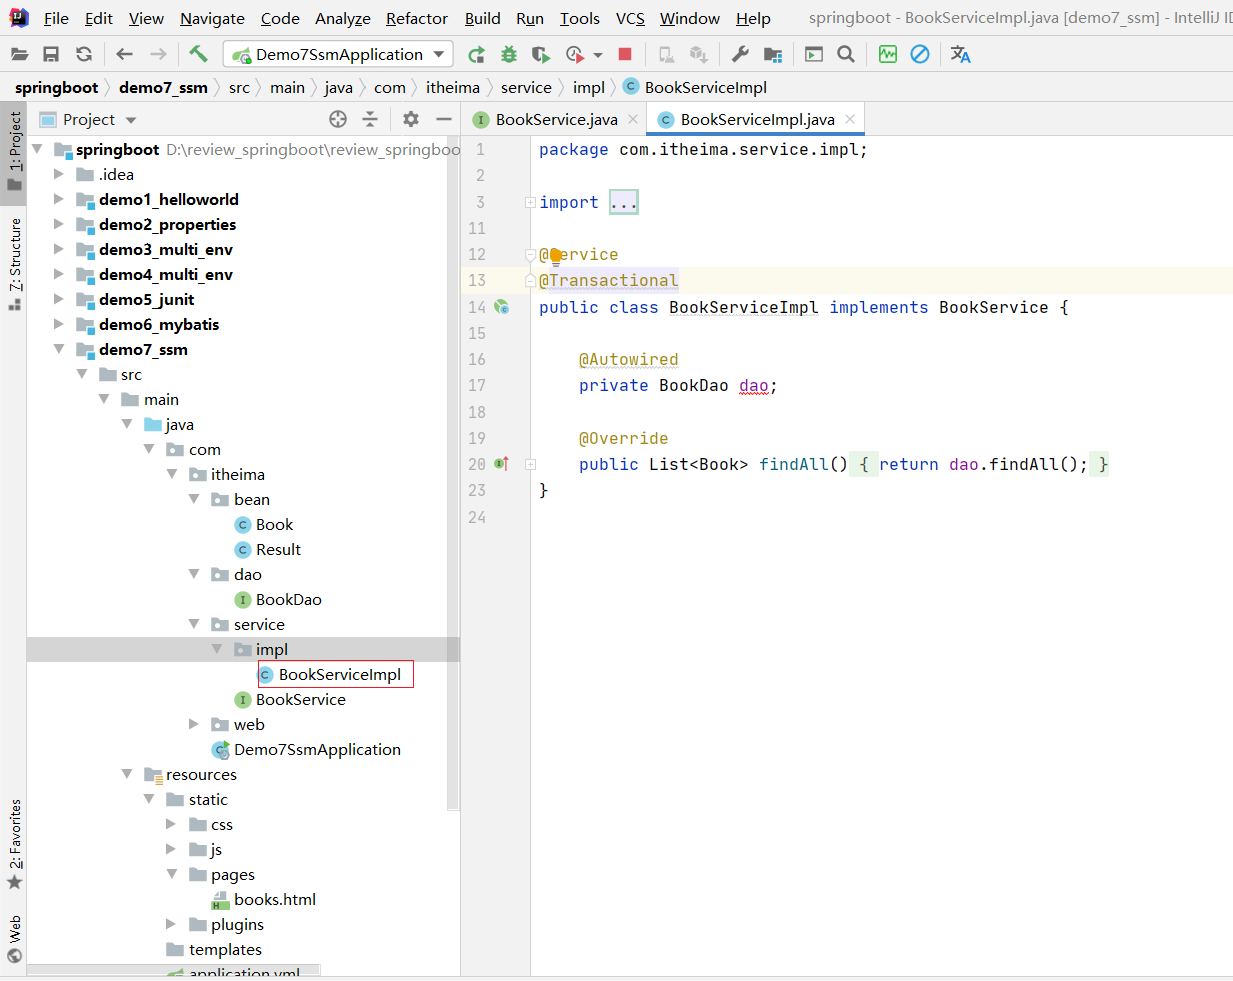
⑧ BookServiceImpl实现类
`package com.itheima.service.impl;import com.itheima.bean.Book;
import com.itheima.dao.BookDao;
import com.itheima.service.BookService;
import org.springframework.beans.factory.annotation.Autowired;
import org.springframework.stereotype.Service;
import org.springframework.transaction.annotation.Transactional;import java.util.List;@Service
@Transactional
public class BookServiceImpl implements BookService {@Autowiredprivate BookDao dao;@Overridepublic List<Book> findAll() {return dao.findAll();}
}
⑨ web 【Controller】
`package com.itheima.web;import com.itheima.bean.Book;
import com.itheima.bean.Result;
import com.itheima.service.BookService;
import org.springframework.beans.factory.annotation.Autowired;
import org.springframework.web.bind.annotation.GetMapping;
import org.springframework.web.bind.annotation.RequestMapping;
import org.springframework.web.bind.annotation.RestController;import java.util.List;@RequestMapping("/books")
@RestController
public class BookController {@Autowiredprivate BookService bs;@GetMappingpublic Result findAll(){List<Book> list = bs.findAll();return new Result(1, "查询成功" , list);}
}
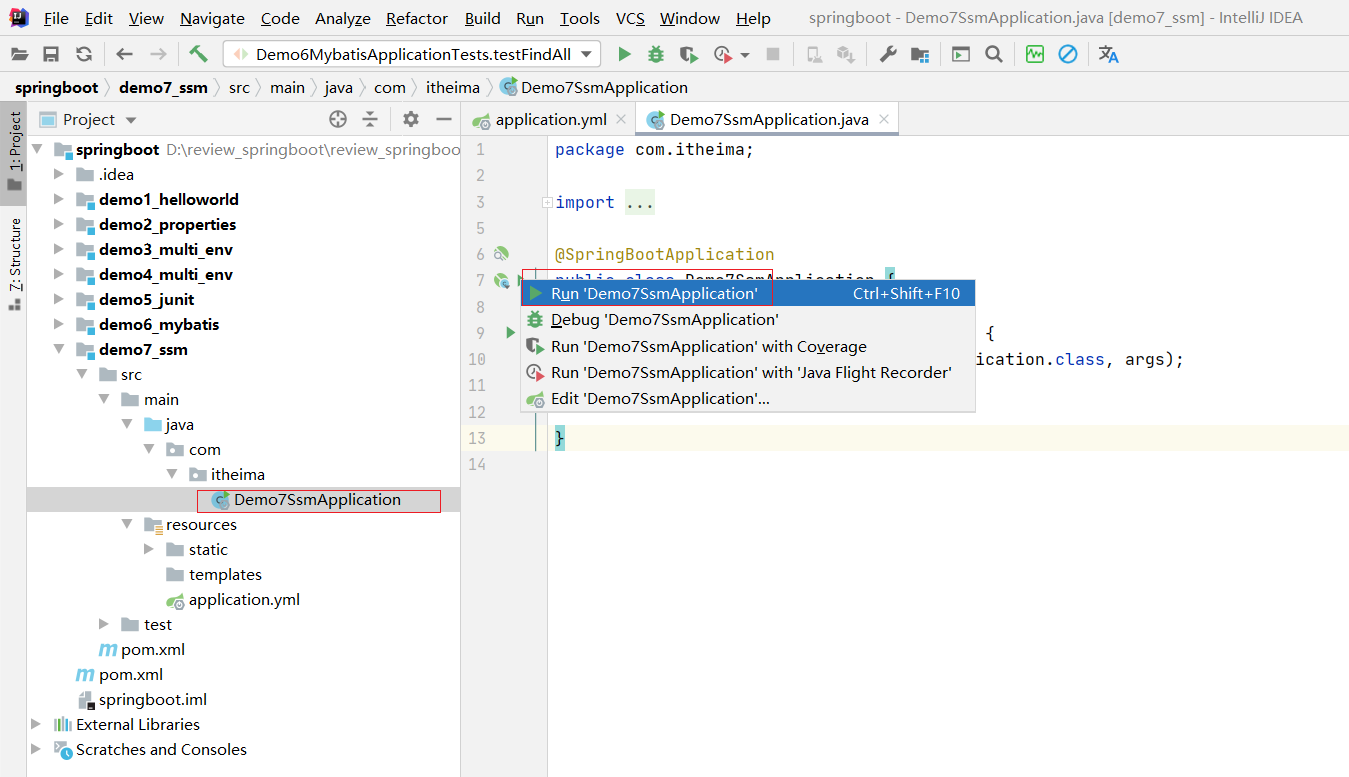
启动类打上@MapperScan("com.itheima.dao")
package com.itheima;import org.mybatis.spring.annotation.MapperScan;
import org.springframework.boot.SpringApplication;
import org.springframework.boot.autoconfigure.SpringBootApplication;@MapperScan("com.itheima.dao")
@SpringBootApplication
public class Demo7SsmApplication {public static void main(String[] args) {SpringApplication.run(Demo7SsmApplication.class, args);}}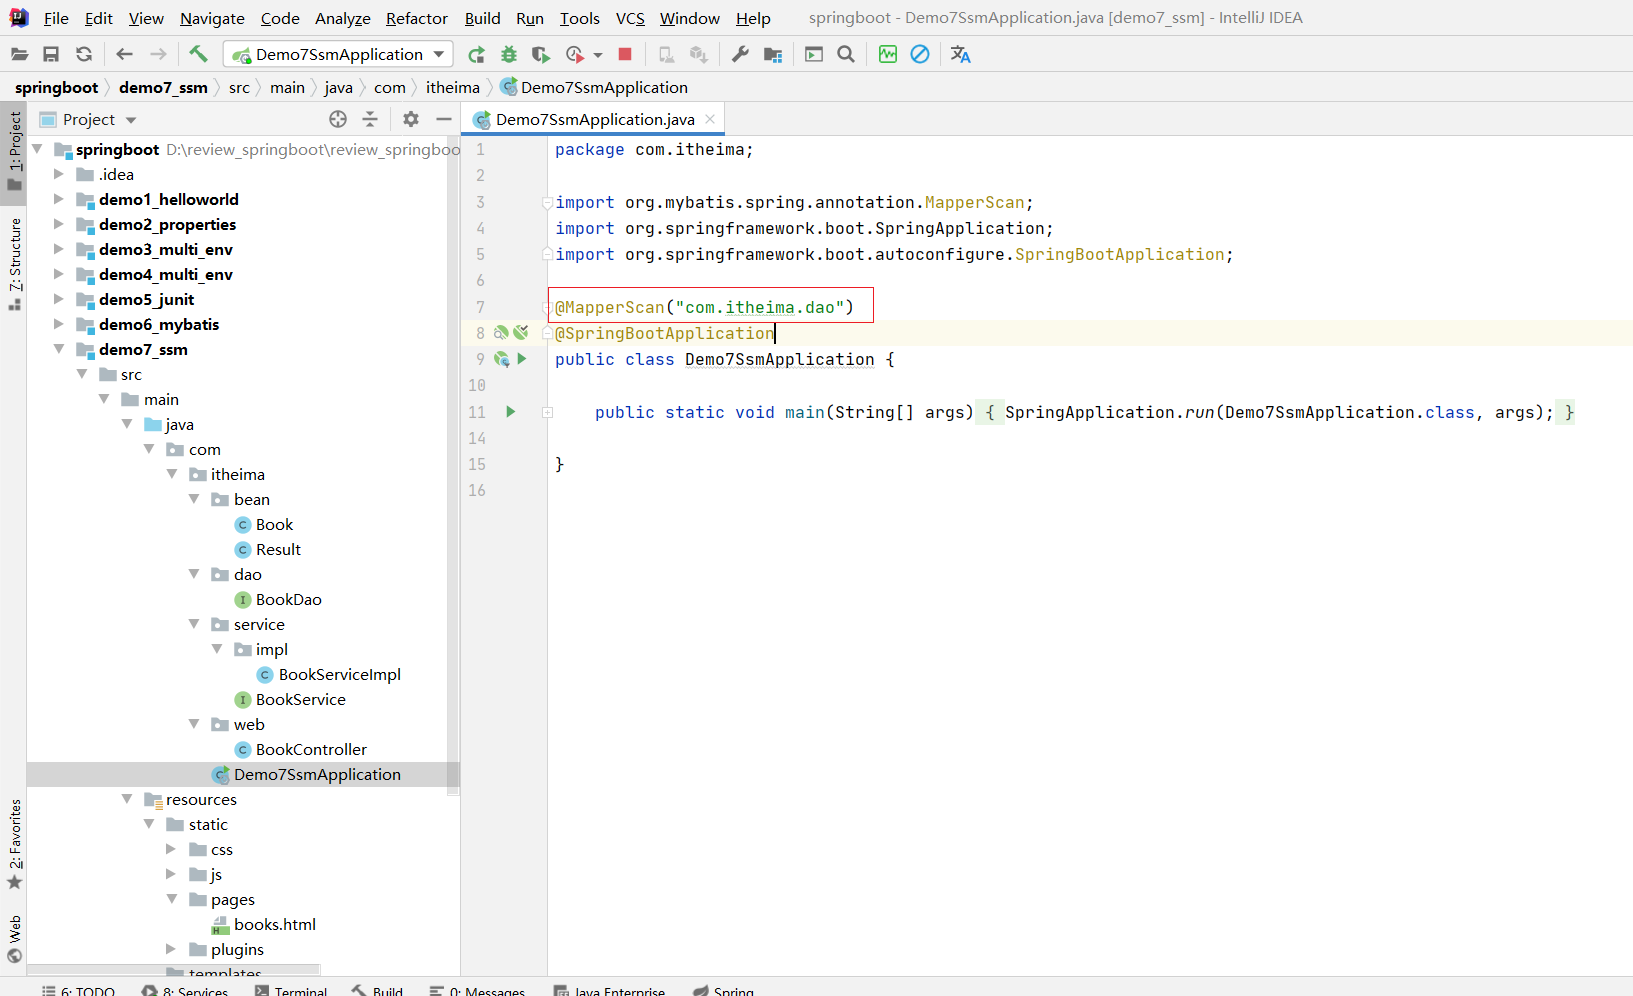
启动
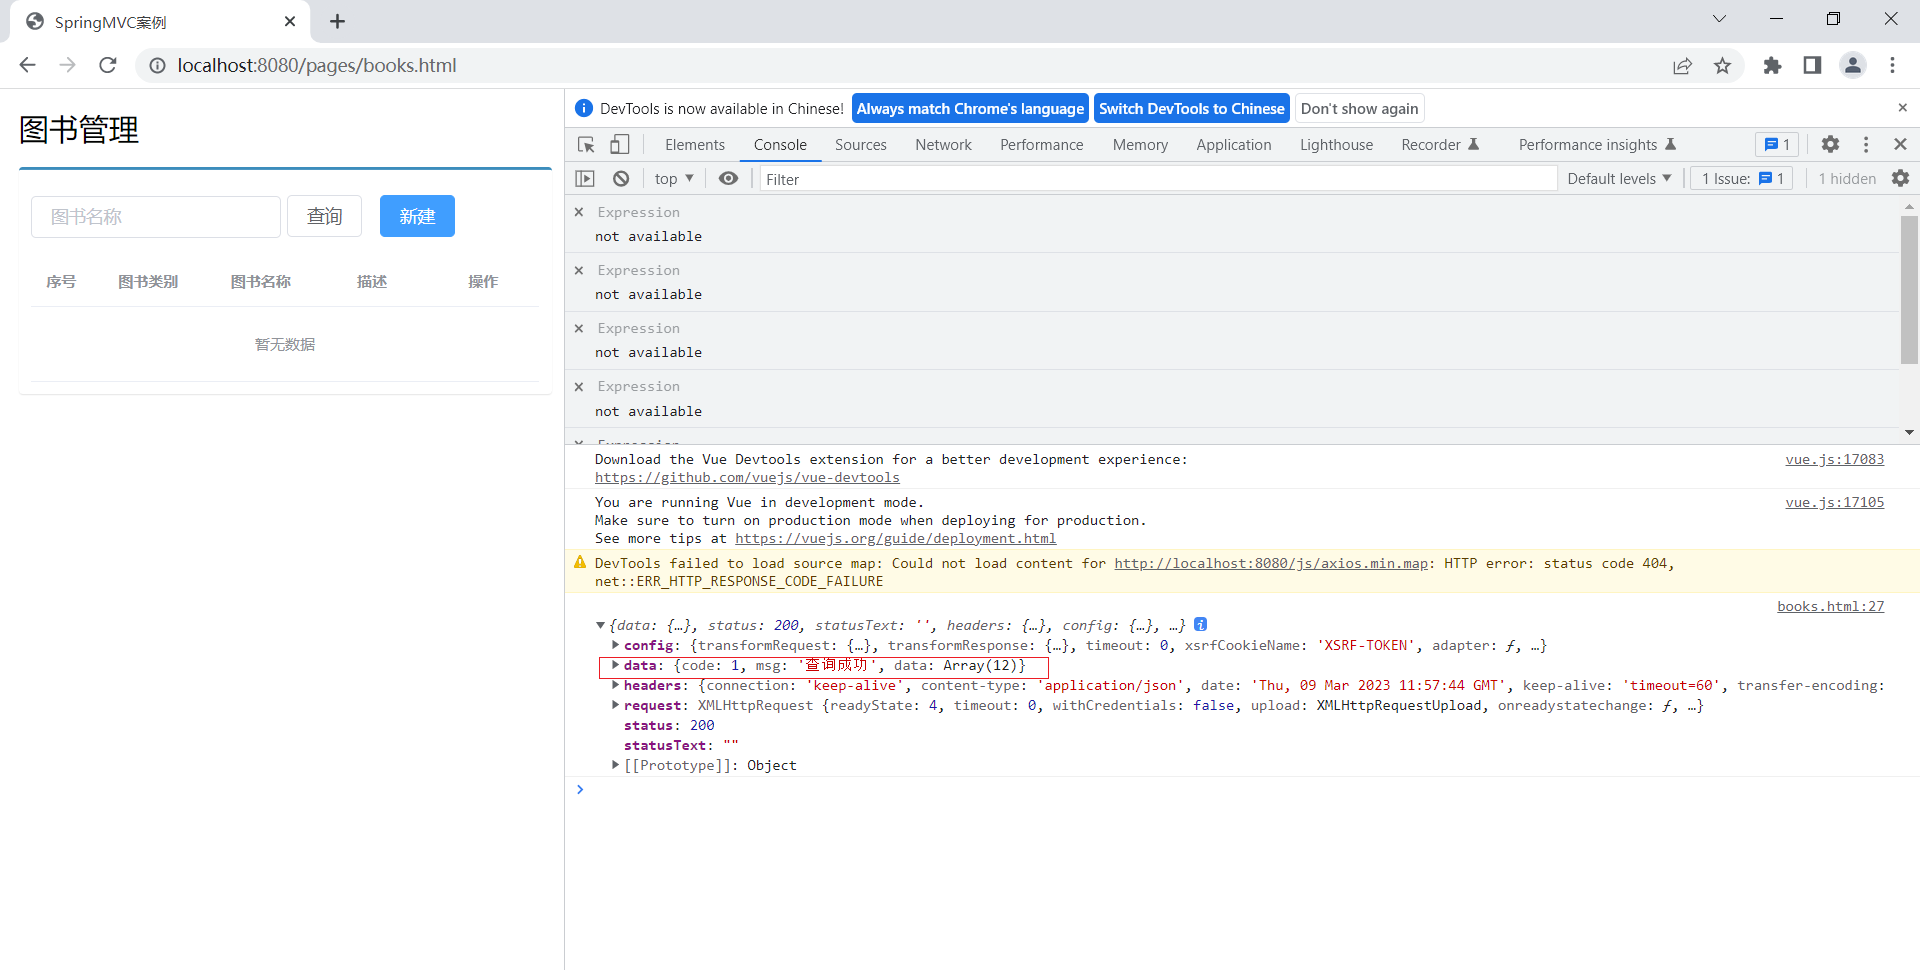
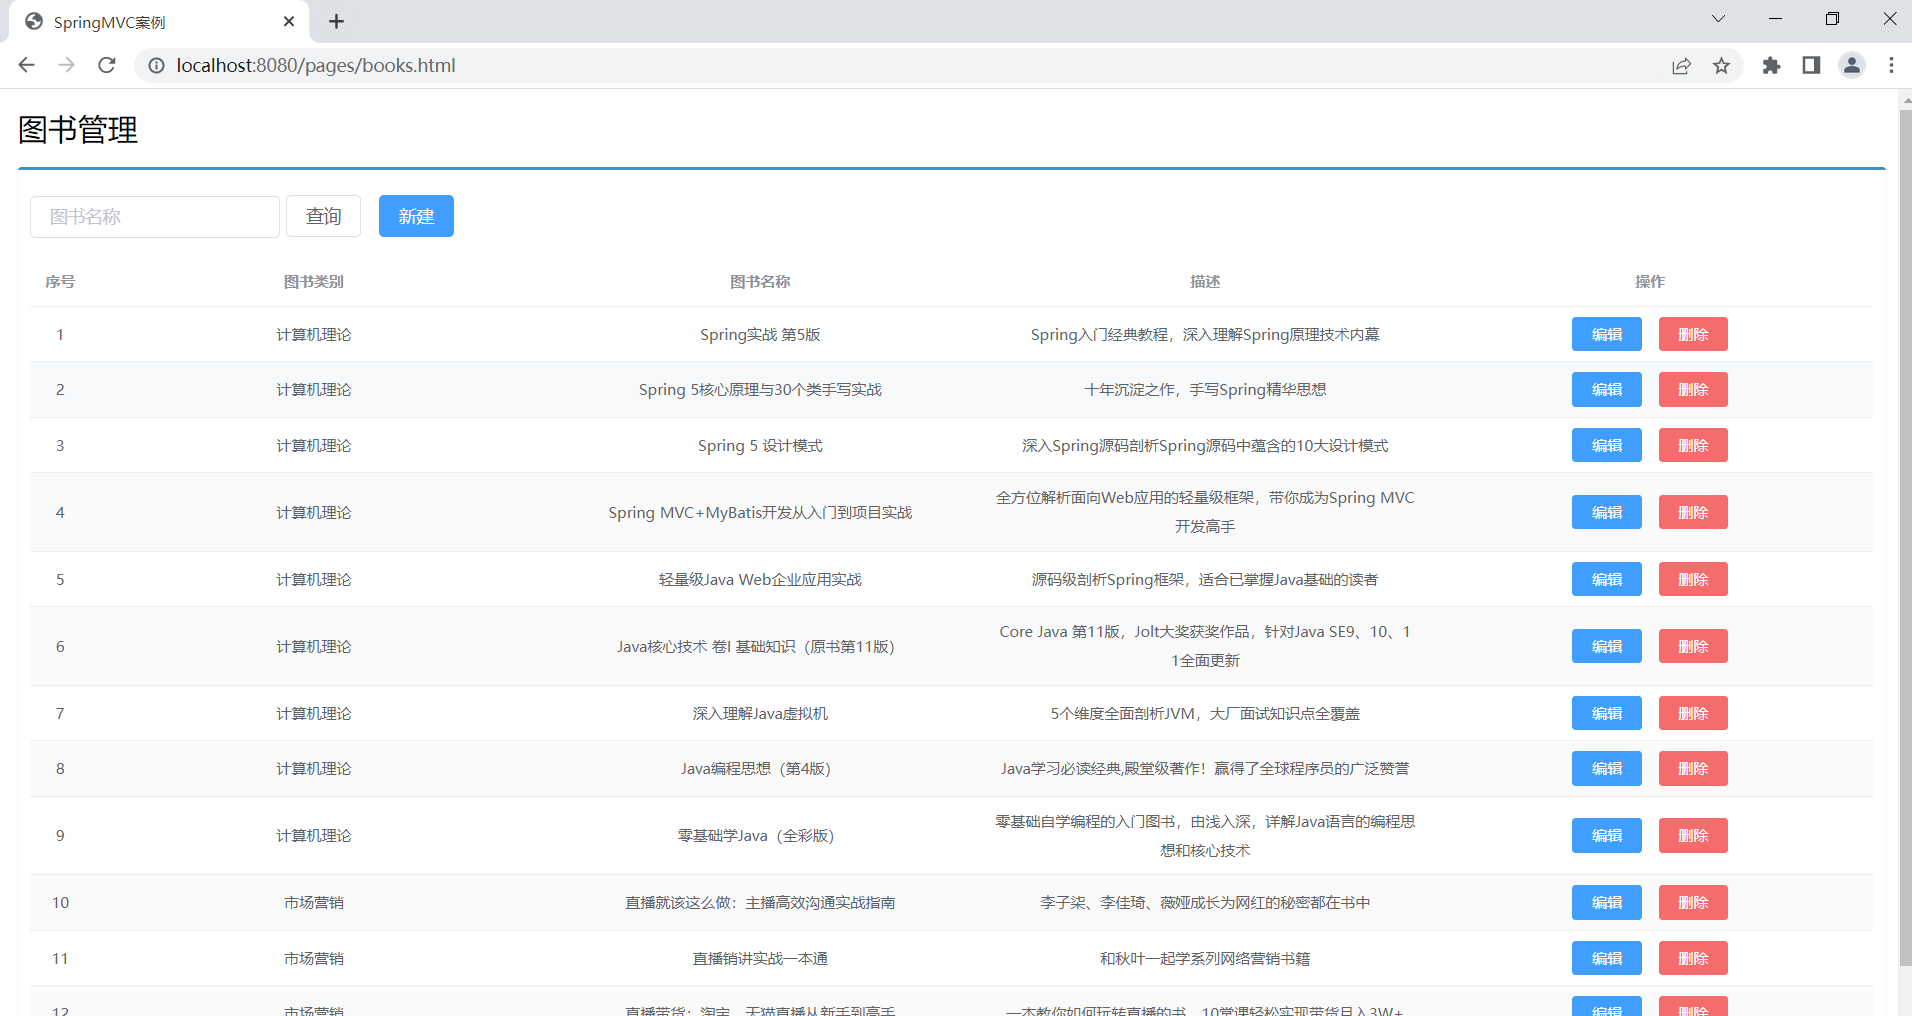
⑩ 前端
methods: {//列表getAll() {axios.get("/books").then(resp=>{console.log(resp);this.dataList = resp.data.data;});重启
相关文章:
springboot复习(黑马)
学习目标基于SpringBoot框架的程序开发步骤熟练使用SpringBoot配置信息修改服务器配置基于SpringBoot的完成SSM整合项目开发一、SpringBoot简介1. 入门案例问题导入SpringMVC的HelloWord程序大家还记得吗?SpringBoot是由Pivotal团队提供的全新框架,其设计…...
C++指针详解
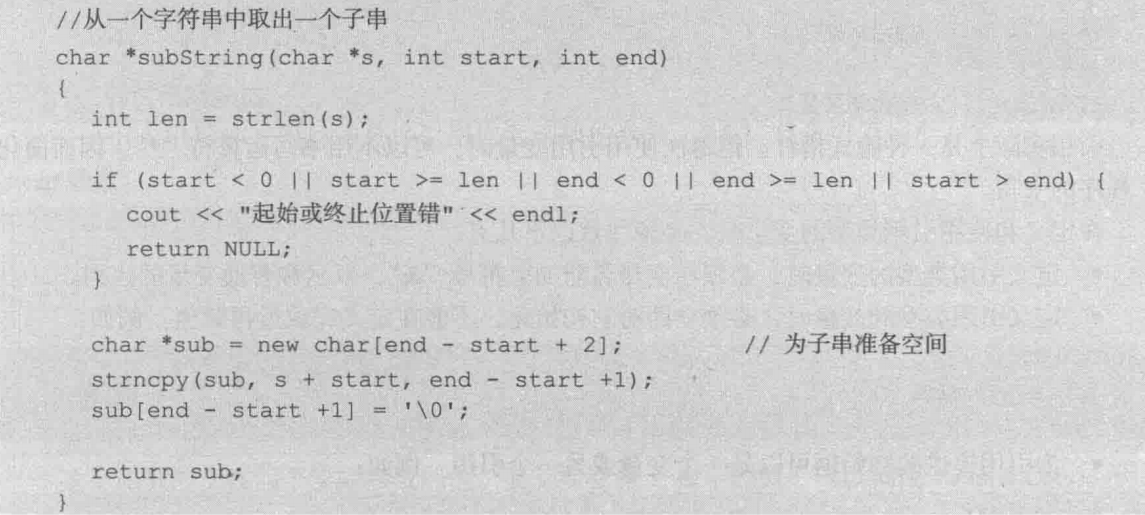
旧文更新:两三年的旧文了,一直放在电脑里,现在直接传上CSDN 一、指针的概念 1.1 指针 程序运行时每个变量都会有一块内存空间,变量的值就存放在这块空间中。程序可以通过变量名直接访问这块空间内的数据,这种访问方…...
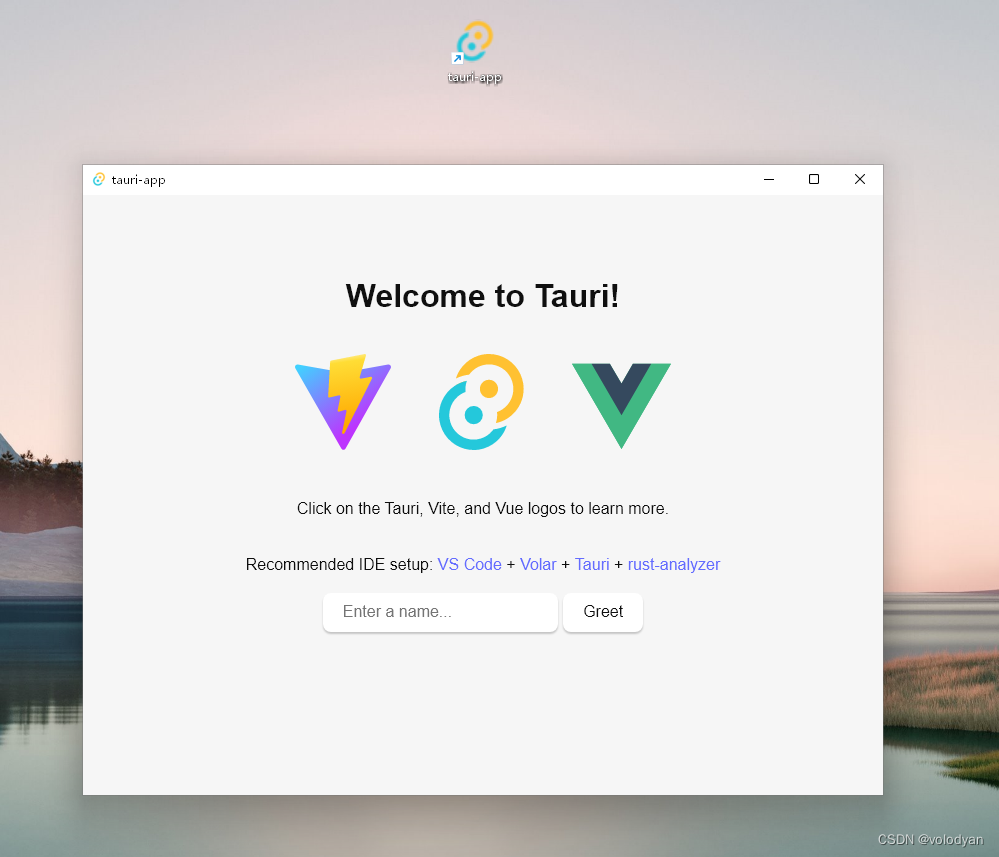
tauri+vite+vue3开发环境下创建、启动运行和打包发布
目录 1.创建项目 2.安装依赖 3.启动项目 4.打包生成windows安装包 5.安装打包生成的安装包 1.创建项目 运行下面命令创建一个tauri项目 pnpm create tauri-app 我创建该项目时的node版本为16.15.0 兼容性注意 Vite 需要 Node.js 版本 14.18,16。然而&#x…...

安卓进阶系列-系统基础
文章目录计算机结构冯诺依曼结构哈弗结构冯诺依曼结构与哈弗结构对比安卓采用的架构安卓操作系统进程间通讯(IPC)内存共享linux内存共享安卓内存共享管道Unix Domain Socket同步常见同步机制信号量Mutex管程安卓同步机制安卓中的Mutex安卓中的ConditionB…...
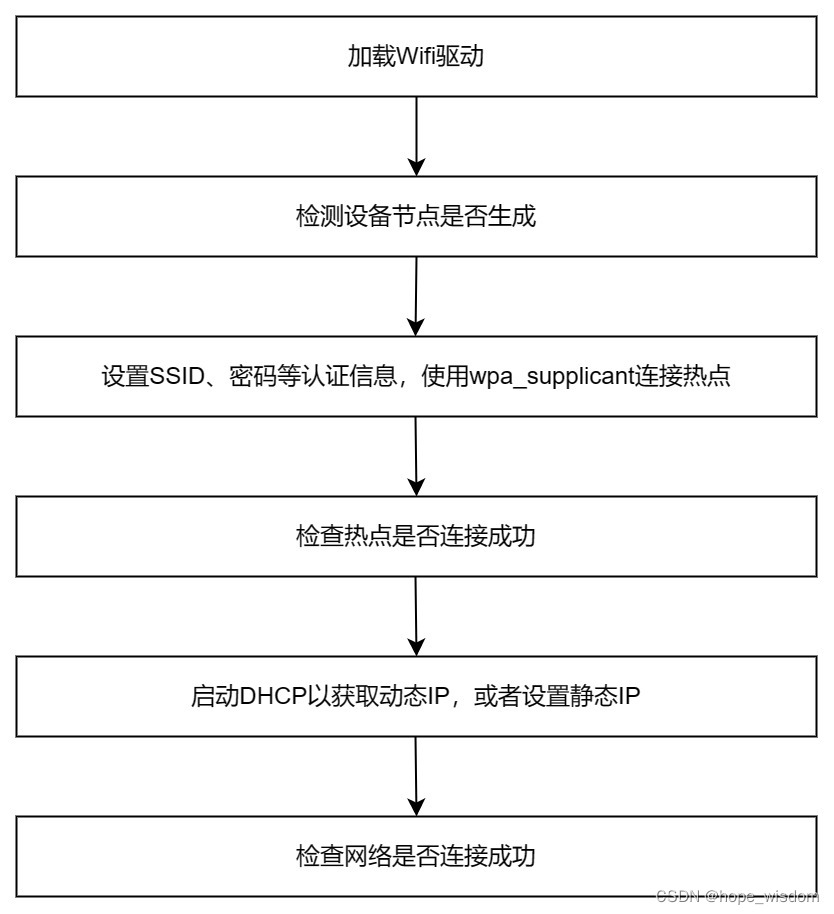
10 Wifi网络的封装
概述 Wifi有多种工作模式,比如:STA模式、AccessPoint模式、Monitor模式、Ad-hoc模式、Mesh模式等。但在IPC设备上,主要使用STA和AccessPoint这两种模式。下面分别进行介绍。 STA模式:任何一种无线网卡都可以运行在此模式,这种模式也是无线网卡的默认模式。在此模式下,无线…...
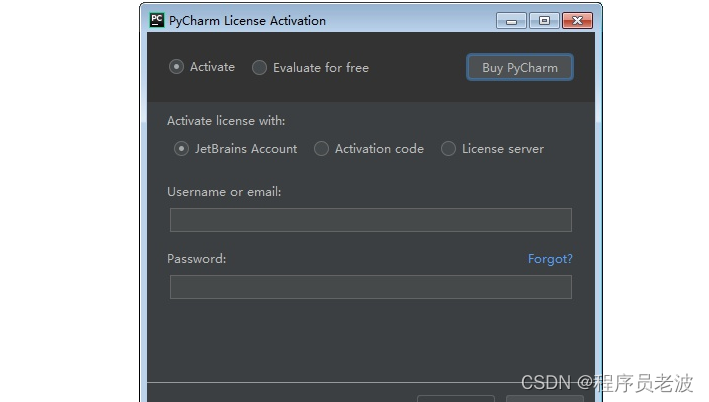
手把手的教你安装PyCharm --Pycharm安装详细教程(一)(非常详细,非常实用)
简介 Jetbrains家族和Pycharm版本划分: pycharm是Jetbrains家族中的一个明星产品,Jetbrains开发了许多好用的编辑器,包括Java编辑器(IntelliJ IDEA)、JavaScript编辑器(WebStorm)、PHP编辑器&…...

开发板与ubantu文件传送
接下来的所以实验都通过下面这种方式发送APP文件到开发板运行 目录 1、在ubantu配置 ①在虚拟机上添加一个桥接模式的虚拟网卡 ②设定网卡 ③在网卡上配置静态地址 2、开发板设置 ①查看网卡 ②配置网卡静态ip 3、 测试 ①ping ②文件传送 传送报错情况 配置环境&#…...
如何成为一名优秀的网络安全工程师?
前言 这是我的建议如何成为网络安全工程师,你应该按照下面顺序学习。 简要说明 第一件事你应该学习如何编程,我建议首先学python,然后是java。 (非必须)接下来学习一些算法和数据结构是很有帮助的,它将…...
面试问题之高并发内存池项目
项目部分 1.这个项目是什么? 高并发内存池的原型是谷歌一个开源项目,tcmalloc,而这个项目,就是tcmalloc中最核心的框架和部分拿出来进行模拟。他的作用就是在去代替原型的内存分配函数malloc和free。这个项目涉及的技术有,c&…...

如果阿里巴巴给蒋凡“百亿补贴”
出品 | 何玺 排版 | 叶媛 2021底,阿里内部进行组织架构大调整,任命蒋凡为阿里海外商业负责人,分管全球速卖通和国际贸易(ICBU)两个海外业务,以及Lazada等面向海外市场的多家子公司。 一年时间过去&#x…...

Linux版本现状
Linux的发行版本可以大体分为两类,一类是商业公司维护的发行版本,一类是社区组织维护的发行版本,前者以著名的Red Hat(RHEL红帽)为代表,后者以Debian为代表。Red HatRedhat,应该称为Redhat系列&…...
)
Winform中实现保存配置到文件/项目启动时从文件中读取配置(序列化与反序列化对象)
场景 Winform中实现序列化指定类型的对象到指定的Xml文件和从指定的Xml文件中反序列化指定类型的对象: Winform中实现序列化指定类型的对象到指定的Xml文件和从指定的Xml文件中反序列化指定类型的对象_winform xml序列化_霸道流氓气质的博客-CSDN博客 上面讲的序…...

基于python的超市历年数据可视化分析
人生苦短 我用python Python其他实用资料:点击此处跳转文末名片获取 数据可视化分析目录人生苦短 我用python一、数据描述1、数据概览二、数据预处理0、导入包和数据1、列名重命名2、提取数据中时间,方便后续分析绘图三、数据可视化1、美国各个地区销售额的分布&…...
GPT-4技术报告
摘要 链接:https://cdn.openai.com/papers/gpt-4.pdf 我们汇报了GPT-4的发展,这是一个大规模的多模态模型,可以接受图像和文本输入并产生文本输出。虽然在许多现实场景中,GPT-4的能力不如人类,但它在各种专业和学术基…...

前端性能优化
总结 使用打包工具对代码进行打包压缩;引入css时采用link标签,并放入头部,使其与文档一起加载,减少页面卡顿时间;尽量减少dom结构的重排和重绘;使用css雪碧图,减少网络请求;对不同分…...
尚医通-(三十三)就诊人管理功能实现
目录: (1)前台用户系统-就诊人管理-需求说明 (2)就诊人管理-接口开发-列表接口 (3)就诊人管理-接口开发-其他接口 (4)前台用户系统-就诊人管理-前端整合 ࿰…...
《Spring Boot 趣味实战课》读书笔记(二)
牛刀小试——五分钟入门 Spring Boot 万物皆可 Hello World 创建一个 Web 工程 填写项目信息 选择依赖 从 IDEA 打开下载好的 Spring Boot 工程: 完成核心代码 创建 HelloController 类并编写 hello 方法 创建一个 HelloController 类,或者选择 Fi…...
Spring Cloud -- GateWay
为什么需要网关在微服务架构中,一个系统会被拆分为很多个微服务。那么作为客户端要如何去调用这么多的微服务呢?如果没有网关的存在,我们只能在客户端记录每个微服务的地址,然后分别去调用。这样的话会产生很多问题,例…...

【C语言】memcpy , memset等内存操作函数使用方法与注意事项
这个章节,我们探讨C语言内存操作函数。 重点介绍处理内存操作函数使用和注意事项 和内存函数如何模拟实现。 内存函数所需头文件 #include<string.h> 文章目录memcpymemcpy 函数模拟实现memmovememmove 函数模拟实现memcmpmemcmp 函数模拟实现memsetmemset 函…...
尚融宝04-mybatis-plus插件和条件构造器
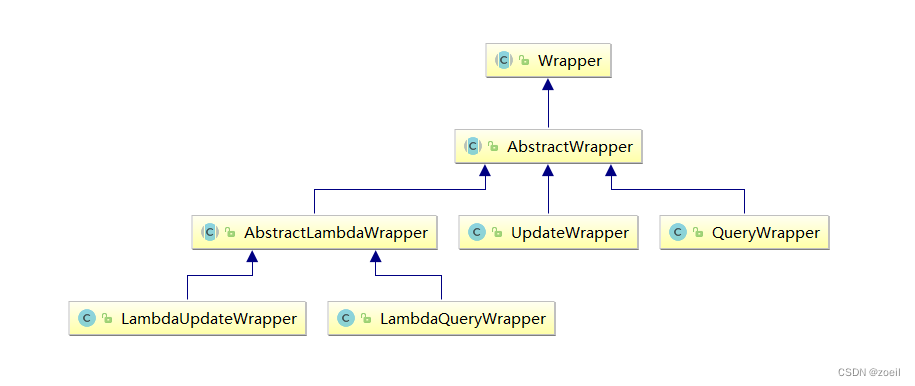
目录 一、分页插件 1、添加配置类 2、添加分页插件 3、测试分页 二、XML自定义分页 1、UserMapper中定义接口方法 2、定义XML 3、测试 三、乐观锁 1、场景 2、乐观锁方案 3、乐观锁实现流程 4、优化流程 四、wapper介绍 1、Wrapper家族 2、创建测试类 五、Qu…...
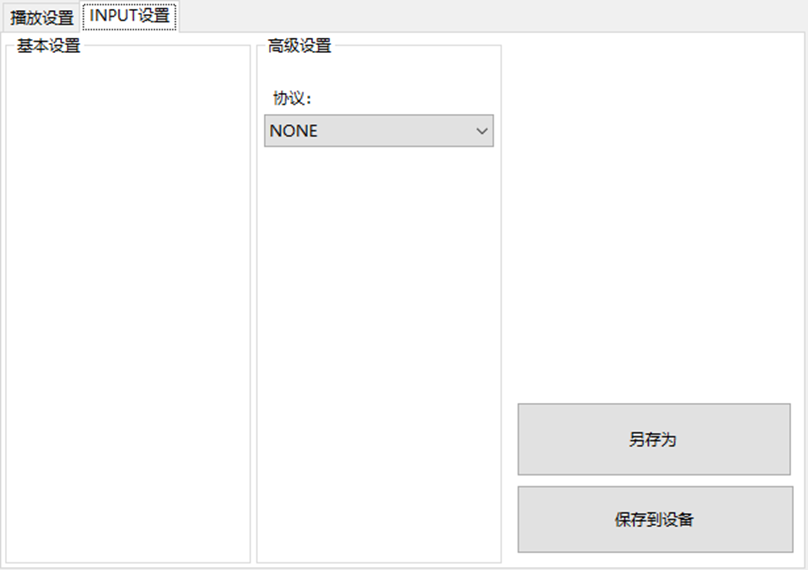
LBE-LEX系列工业语音播放器|预警播报器|喇叭蜂鸣器的上位机配置操作说明
LBE-LEX系列工业语音播放器|预警播报器|喇叭蜂鸣器专为工业环境精心打造,完美适配AGV和无人叉车。同时,集成以太网与语音合成技术,为各类高级系统(如MES、调度系统、库位管理、立库等)提供高效便捷的语音交互体验。 L…...
linux之kylin系统nginx的安装
一、nginx的作用 1.可做高性能的web服务器 直接处理静态资源(HTML/CSS/图片等),响应速度远超传统服务器类似apache支持高并发连接 2.反向代理服务器 隐藏后端服务器IP地址,提高安全性 3.负载均衡服务器 支持多种策略分发流量…...
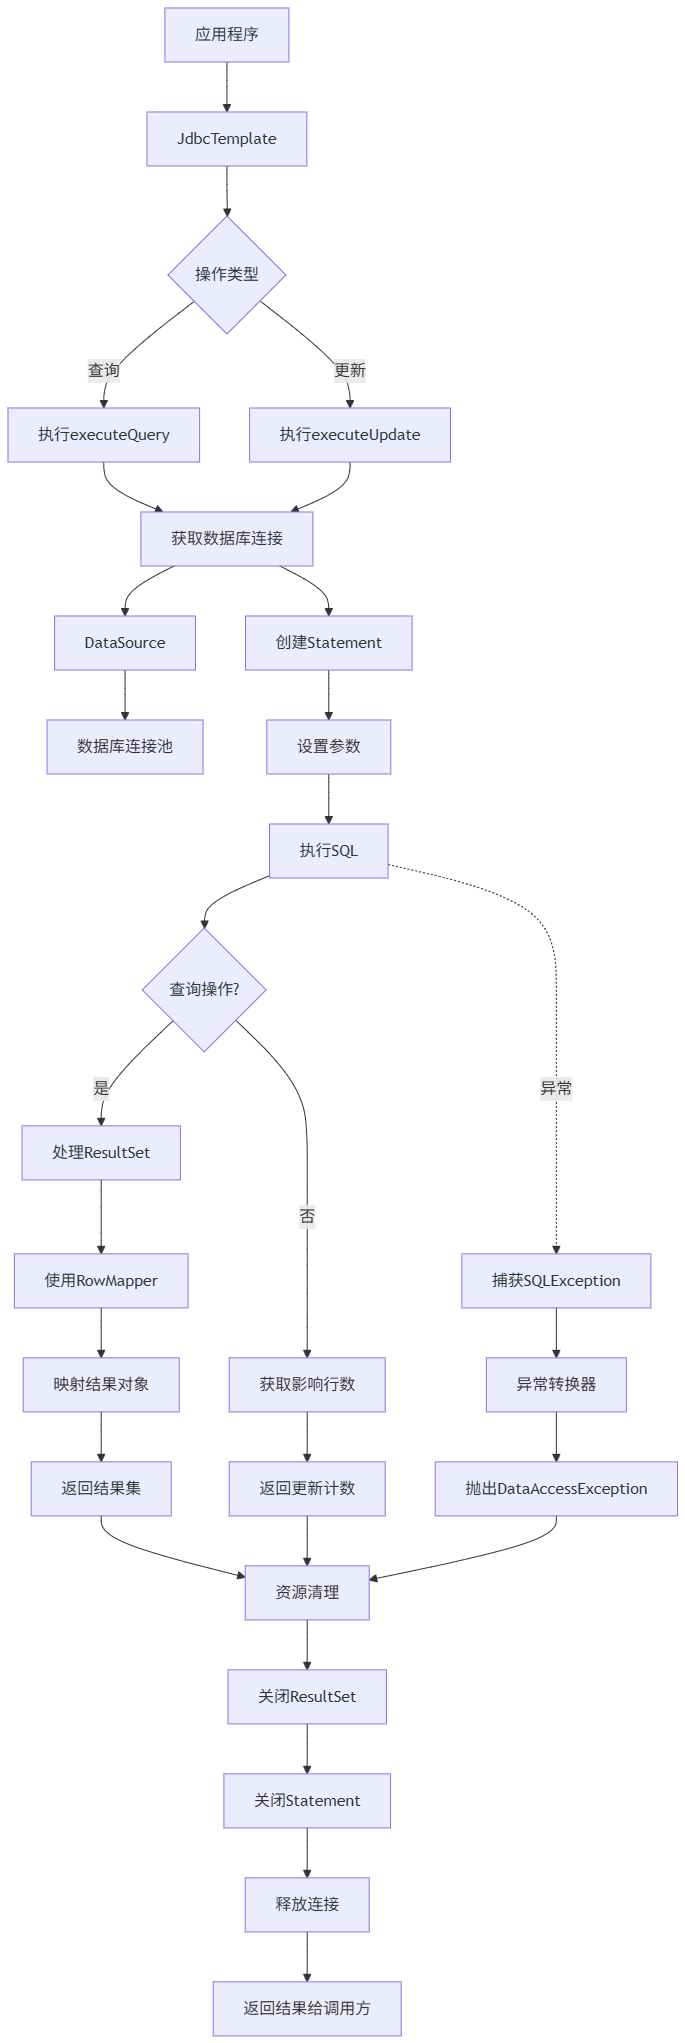
Spring数据访问模块设计
前面我们已经完成了IoC和web模块的设计,聪明的码友立马就知道了,该到数据访问模块了,要不就这俩玩个6啊,查库势在必行,至此,它来了。 一、核心设计理念 1、痛点在哪 应用离不开数据(数据库、No…...

html-<abbr> 缩写或首字母缩略词
定义与作用 <abbr> 标签用于表示缩写或首字母缩略词,它可以帮助用户更好地理解缩写的含义,尤其是对于那些不熟悉该缩写的用户。 title 属性的内容提供了缩写的详细说明。当用户将鼠标悬停在缩写上时,会显示一个提示框。 示例&#x…...

【无标题】路径问题的革命性重构:基于二维拓扑收缩色动力学模型的零点隧穿理论
路径问题的革命性重构:基于二维拓扑收缩色动力学模型的零点隧穿理论 一、传统路径模型的根本缺陷 在经典正方形路径问题中(图1): mermaid graph LR A((A)) --- B((B)) B --- C((C)) C --- D((D)) D --- A A -.- C[无直接路径] B -…...

JS手写代码篇----使用Promise封装AJAX请求
15、使用Promise封装AJAX请求 promise就有reject和resolve了,就不必写成功和失败的回调函数了 const BASEURL ./手写ajax/test.jsonfunction promiseAjax() {return new Promise((resolve, reject) > {const xhr new XMLHttpRequest();xhr.open("get&quo…...

毫米波雷达基础理论(3D+4D)
3D、4D毫米波雷达基础知识及厂商选型 PreView : https://mp.weixin.qq.com/s/bQkju4r6med7I3TBGJI_bQ 1. FMCW毫米波雷达基础知识 主要参考博文: 一文入门汽车毫米波雷达基本原理 :https://mp.weixin.qq.com/s/_EN7A5lKcz2Eh8dLnjE19w 毫米波雷达基础…...

多元隐函数 偏导公式
我们来推导隐函数 z z ( x , y ) z z(x, y) zz(x,y) 的偏导公式,给定一个隐函数关系: F ( x , y , z ( x , y ) ) 0 F(x, y, z(x, y)) 0 F(x,y,z(x,y))0 🧠 目标: 求 ∂ z ∂ x \frac{\partial z}{\partial x} ∂x∂z、 …...
:LSM Tree 概述)
从零手写Java版本的LSM Tree (一):LSM Tree 概述
🔥 推荐一个高质量的Java LSM Tree开源项目! https://github.com/brianxiadong/java-lsm-tree java-lsm-tree 是一个从零实现的Log-Structured Merge Tree,专为高并发写入场景设计。 核心亮点: ⚡ 极致性能:写入速度超…...

MeshGPT 笔记
[2311.15475] MeshGPT: Generating Triangle Meshes with Decoder-Only Transformers https://library.scholarcy.com/try 真正意义上的AI生成三维模型MESHGPT来袭!_哔哩哔哩_bilibili GitHub - lucidrains/meshgpt-pytorch: Implementation of MeshGPT, SOTA Me…...