PowerDNS架构解析与安装部署指南
1、背景介绍
目前公司使用PowerDNS进行DNS管理,但由于采用的是单节点架构,存在不可用的风险。为提升系统的稳定性和可靠性,我们计划对现有架构进行重构。通过引入高可用性设计,我们将优化系统架构,使其能够在故障情况下依然保持服务的连续性和高效性,从而提升整体的业务稳定性。
2、环境介绍
系统:Cnetos7
软件:
pdns-4.1.8-1.el7.MIND.x86_64
pdns-recursor-4.1.11-1.el7.MIND.x86_64
(相关信息已经脱敏)
| 名称 | ip | 组件 |
|---|---|---|
| matser | 172.17.20.20 | nginx,mysql,PowerDNS Authoritative ,PowerDNS Recursor (主) |
| slave | 172.17.20.21 | nginx,mysql,PowerDNS Authoritative ,PowerDNS Recursor (备) |
nginx(53):作为upstream 代理 53 端口
mysql(3306):作为PowerDNS的后端存储
PowerDNS Authoritative(5300):用于管理企业私有域名
PowerDNS Recursor(5301): 用于DNS解析转发、缓存

3、组件介绍
PowerDNS全家桶中包含PowerDNS Authoritative、Recursor、DNSList(暂不使用)三个组件。
- PowerDNS Authoritative:DNS权威服务器,用于提供企业私有域名的管理和解析;
- PowerDNS Recursor:DNS递归服务器,用于接受客户端DNS查询请求,并根据目标域转发配置转发到不同的上游DNS服务器进行解析,并对DNS解析记录进行缓存;
- PowerDNS-Admin:DNS权威服务器的Web管理页面;
- PowerDNS-Monitor:使用Grafana提供权威服务器和递归服务器的监控页面
PowerDNS权威服务器支持多种复制模式,本架构采用MySQL作为后端存储,并通过MySQL复制实现主备数据同步。
PowerDNS(PDNS)成立于20世纪90年代末,是开源DNS软件、服务和支持的主要供应商,它们提供的权威认证DNS服务器和递归认证DNS服务器都是100%开源的软件,同时也和红帽等开源方案提供商一样提供了付费的技术支持版本。同时官方表示为了避免和软件使用者出现竞争,他们只提供服务支持而不提供DNS托管服务。
熟悉DNS工作原理的同学可以大致地将DNS记录的查询分为两种:查询本地缓存和向上递归查询。和其他的如BIND、dnsmasq等将这些功能集成到一起的DNS软件不同,PowerDNS将其一分为二,分为了PowerDNS Authoritative Server和PowerDNS Recursor,分别对应这两种主要的需求,而我们常说的pdns指的就是PowerDNS Authoritative Server (后面简称PDNS Auth),主要用途就是作为权威域名服务器,当然也可以作为普通的DNS服务器提供DNS查询功能。
对于PowerDNS-Recursor,PowerDNS官网介绍其是一个内置脚本能力的高性能的DNS递归查询服务器,并且已经为一亿五千万个互联网连接提供支持。

4、MySQL安装
可参照博客安装 : https://blog.csdn.net/heian_99/article/details/106644755
MySQL主从同步
master创建账号
grant replication slave  on *.* to repl@'172.17.20.%' identified by '123';
flush privileges;
show master status; #查询master的状态 ,进行同步

slave库同步
注意:主从库的server_id 不能设置一样,auto.cnf 设置也不能一样,不满会出现mysql主从同步失败的
mysql> change master to master_host='172.17.20.20′,master_user='repl',master_password='123',master_log_file='mysql-bin.000006′,master_log_pos=407;CHANGE MASTER TO
MASTER_HOST='172.17.20.20',
MASTER_PORT=3306,
MASTER_USER='repl',
MASTER_PASSWORD='123',
MASTER_LOG_FILE='mysql-bin.000006',
MASTER_LOG_POS=407;mysql> start slave;mysql> show slave status\G

创建powerdns数据库
需要在主从配置完成后创建
在主库执行以下命令
mysql -uroot -p
CREATE DATABASE powerdns;
GRANT ALL ON powerdns.* TO 'powerdns'@'localhost' IDENTIFIED BY 'VMware1!';
FLUSH PRIVILEGES;

导入PowerDNS 的数据库
CREATE TABLE domains (id                    INT AUTO_INCREMENT,name                  VARCHAR(255) NOT NULL,master                VARCHAR(128) DEFAULT NULL,last_check            INT DEFAULT NULL,type                  VARCHAR(6) NOT NULL,notified_serial       INT DEFAULT NULL,account               VARCHAR(40) CHARACTER SET 'utf8' DEFAULT NULL,PRIMARY KEY (id)
) Engine=InnoDB CHARACTER SET 'latin1';CREATE UNIQUE INDEX name_index ON domains(name);CREATE TABLE records (id                    BIGINT AUTO_INCREMENT,domain_id             INT DEFAULT NULL,name                  VARCHAR(255) DEFAULT NULL,type                  VARCHAR(10) DEFAULT NULL,content               VARCHAR(64000) DEFAULT NULL,ttl                   INT DEFAULT NULL,prio                  INT DEFAULT NULL,change_date           INT DEFAULT NULL,disabled              TINYINT(1) DEFAULT 0,ordername             VARCHAR(255) BINARY DEFAULT NULL,auth                  TINYINT(1) DEFAULT 1,PRIMARY KEY (id)
) Engine=InnoDB CHARACTER SET 'latin1';CREATE INDEX nametype_index ON records(name,type);
CREATE INDEX domain_id ON records(domain_id);
CREATE INDEX ordername ON records (ordername);CREATE TABLE supermasters (ip                    VARCHAR(64) NOT NULL,nameserver            VARCHAR(255) NOT NULL,account               VARCHAR(40) CHARACTER SET 'utf8' NOT NULL,PRIMARY KEY (ip, nameserver)
) Engine=InnoDB CHARACTER SET 'latin1';CREATE TABLE comments (id                    INT AUTO_INCREMENT,domain_id             INT NOT NULL,name                  VARCHAR(255) NOT NULL,type                  VARCHAR(10) NOT NULL,modified_at           INT NOT NULL,account               VARCHAR(40) CHARACTER SET 'utf8' DEFAULT NULL,comment               TEXT CHARACTER SET 'utf8' NOT NULL,PRIMARY KEY (id)
) Engine=InnoDB CHARACTER SET 'latin1';CREATE INDEX comments_name_type_idx ON comments (name, type);
CREATE INDEX comments_order_idx ON comments (domain_id, modified_at);CREATE TABLE domainmetadata (id                    INT AUTO_INCREMENT,domain_id             INT NOT NULL,kind                  VARCHAR(32),content               TEXT,PRIMARY KEY (id)
) Engine=InnoDB CHARACTER SET 'latin1';CREATE INDEX domainmetadata_idx ON domainmetadata (domain_id, kind);CREATE TABLE cryptokeys (id                    INT AUTO_INCREMENT,domain_id             INT NOT NULL,flags                 INT NOT NULL,active                BOOL,content               TEXT,PRIMARY KEY(id)
) Engine=InnoDB CHARACTER SET 'latin1';CREATE INDEX domainidindex ON cryptokeys(domain_id);CREATE TABLE tsigkeys (id                    INT AUTO_INCREMENT,name                  VARCHAR(255),algorithm             VARCHAR(50),secret                VARCHAR(255),PRIMARY KEY (id)
) Engine=InnoDB CHARACTER SET 'latin1';CREATE UNIQUE INDEX namealgoindex ON tsigkeys(name, algorithm);
创建文件导入数据库
touch /opt/schema.mysql.sql
把mysql的内容写到这个文件里面
mysql> use powerdns
Database changed
mysql> source /opt/schema.mysql.sql
Query OK, 0 rows affected (0.01 sec)

5、PowerDNS Authoritative Server安装
- 参考官网文档:https://doc.powerdns.com/authorit文章来源(Source):https://www.dqzboy.comative/installation.html
- PowerDNS已经集成到
epel源中,所以我们首先需要安装elel源
[root@localhost ~]# wget https://dl.fedoraproject.org/pub/epel/epel-release-latest-7.noarch.rpm[root@localhost ~]# rpm -ivh https://dl.fedoraproject.org/pub/epel/epel-release-latest-7.noarch.rpm[root@localhost ~]# yum clean all
[root@localhost ~]# yum makecache
[root@localhost ~]# yum install -y pdns pdns-backend-mysql

修改配置文件
/etc/pdns/pdns.conf
[root@master ~]# cp /etc/pdns/pdns.conf /etc/pdns/pdns.conf_`date '+%Y_%m_%d'`
[root@master ~]# tree /etc/pdns/
/etc/pdns/
└── pdns.conf0 directories, 1 file[root@master ~]# cat /etc/pdns/pdns.conf |  grep -Ev "^#|^$"
launch=bind
setgid=pdns
setuid=pdns添加配置 生产环境如下###############cache-ttl=60
config-dir=/etc/pdns
disable-axfr=yes
distributor-threads=3
#数据库的连接信息
gmysql-dbname=powerdns
gmysql-host=127.0.0.1
gmysql-password=VMware1!
gmysql-user=powerdns
guardian=no
launch=gmysql
## pdns config 本地地址和启动端口
local-address=127.0.0.1
local-port=5300
log-dns-details=no
disable-syslog=no
negquery-cache-ttl=60
query-cache-ttl=60
query-logging=no
receiver-threads=12
cache-ttl=0
setuid=pdns
setgid=pdns
## pdns API   激活 API 服务
api-key=3jEkItlrSHfuqJbr
api=yes
#web页面也信息
webserver-address=0.0.0.0
webserver-password=bdata.pdns
# webserver-allow-from指定允许访问webserver和API的IP白名单,多个IP可以使用英文逗号隔开
webserver-allow-from=0.0.0.0/0
webserver-port=8281
webserver=yes
loglevel=9
启动Pdns服务
[root@master pdns]# systemctl enable pdns
Created symlink from /etc/systemd/system/multi-user.target.wants/pdns.service to /usr/lib/systemd/system/pdns.service.[root@master pdns]# systemctl start pdns.service
[root@master pdns]# systemctl status pdns.service

6、PowerDNS Recursor安装
[root@master pdns]# yum install pdns-recursor -y
修改配置文件
/etc/pdns-recursor/recursor.conf
[root@master pdns]# tree /etc/pdns-recursor/
/etc/pdns-recursor/
└── recursor.conf[root@master pdns]# cp /etc/pdns-recursor/recursor.conf /etc/pdns-recursor/recursor.conf_`date '+%Y_%m_%d'`[root@master pdns]# cat /etc/pdns-recursor/recursor.conf | grep  -Ev "^#|^$"
security-poll-suffix=
setgid=pdns-recursor
setuid=pdns-recursor添加配置 生产环境如下################允许所有用户端请求
allow-from=0.0.0.0/0,::/0
## pdns-re API   激活 API 服务
api-key=3jEkItlrSHfuqJbrdisable-packetcache=no
export-etc-hosts=yes
#用户解析的自定义配置文件   与forward-zones相同,从文件中解析
forward-zones-file=/etc/pdns-recursor/forward
#/etc/hosts 文件的路径或等效文件。该文件可用于使用export-etc-hosts权威地提供数据。
etc-hosts-file=/etc/pdns-recursor/hosts
#本地监听地址
local-address=0.0.0.0
local-port=5301
max-cache-entries=1000000
max-cache-ttl=60
max-mthreads=1024
max-packetcache-entries=500000
packetcache-servfail-ttl=0
packetcache-ttl=0
quiet=yes
setgid=pdns-recursor
setuid=pdns-recursor
threads=6
#web页面也信息
webserver-address=0.0.0.0
webserver-password=bdata.pdns
webserver-port=8282
webserver-allow-from=172.17.0.0/16
webserver=yes
loglevel=9
创建forward 和hosts 文件
1. Forward 配置
forward 配置用于指定 PowerDNS 在无法解析某个 DNS 请求时,将请求转发给其他上游 DNS 服务器进行解析。这在多种情况下都很有用,比如公司内部网络中的 DNS 服务器需要解析外部互联网域名时。
主要用途:
- 外部解析:如果本地 DNS 服务器没有相应的记录,可以通过 forward 配置将请求转发给公共 DNS 服务器,如 Google DNS(8.8.8.8)。
- 负载均衡和冗余:可以配置多个上游 DNS 服务器,提高解析请求的成功率和响应速度。
配置示例:
forward-zones=.=8.8.8.8;8.8.4.4
上面的示例表示将所有(. 代表所有域名)未解析的请求转发给 Google 的 DNS 服务器。
2. Hosts 文件
hosts 文件是一个静态的 DNS 记录文件,用于手动定义特定域名的 IP 地址。这类似于传统的 /etc/hosts 文件,用于快速、本地化地解析一些常用或特定的域名,而无需通过外部 DNS 服务器。
主要用途:
- 本地解析:快速解析常用域名,避免每次都去查询外部 DNS。
- 自定义解析:为本地网络设备或特定服务自定义域名解析记录。
- 简化开发和测试:开发和测试环境中,直接在 hosts 文件中添加记录,方便快捷。
配置示例:
假设 hosts 文件内容如下:
192.168.1.1   server1.local
192.168.1.2   server2.local
这表示将 server1.local 解析为 192.168.1.1,将 server2.local 解析为 192.168.1.2。
总结
- Forward 配置:用于指定 PowerDNS 在无法解析请求时,将请求转发给其他上游 DNS 服务器,确保解析的成功率和速度。
- Hosts 文件:用于手动定义特定域名的 IP 地址,实现本地化、静态的 DNS 解析。
通过合理配置和使用 forward 和 hosts 文件,可以大大提升 PowerDNS 系统的灵活性和解析效率,满足各种不同的网络需求。
touch {forward,hosts}

借鉴配置
[root@prometheus-server pdns-recursor]# cat forward
+fjf.com=127.0.0.1:5300
+sit.com=127.0.0.1:5300
+fjf=127.0.0.1:5300
+cloudcs.fjf=172.31.0.10
+168.192.in-addr.arpa=127.0.0.1:5300
+30.172.in-addr.arpa=172.31.0.10
+31.172.in-addr.arpa=172.31.0.10
+.=223.5.5.5,223.6.6.6,119.29.29.29
[root@prometheus-server pdns-recursor]# cat hosts
192.168.82.22   mvn.test.com
192.168.84.47   gitlab.test.com
192.168.81.11   mirrors.test.cn
192.168.82.22   img.test.cn
192.168.82.22  test.xxx.com
启动Pdns-recursor
[root@master pdns-recursor]# systemctl enable pdns-recursor.service
Created symlink from /etc/systemd/system/multi-user.target.wants/pdns-recursor.service to /usr/lib/systemd/system/pdns-recursor.service.[root@master pdns-recursor]# systemctl start  pdns-recursor
[root@master pdns-recursor]# systemctl status pdns-recursor.service

7、PowerAdmin安装
wget https://nchc.dl.sourceforge.net/project/poweradmin/poweradmin-2.1.7.tgz
yum -y install php56u php56u-fpm php56u-fpm  tengine php56u-mcrypt php56u-pdo  php56u-soap  php56u-mysqlnd
https://linux.cn/article-5623-2.html        #跟随此连接安装即可
安装步骤
打开浏览器 ,打开页面
http://172.17.20.20:90/install/


需要移除从PowerAdmin的根目录中移除“install”文件夹,这一点很重要。使用以下命令:


添加主域名
添加子域名

8、成功测试
[root@master pdns-recursor]# cat /etc/resolv.conf
# Generated by NetworkManager
nameserver 172.17.20.20
[root@master pdns-recursor]# nslookup www.fjf.com
Server:		172.17.20.20
Address:	172.17.20.20#53Non-authoritative answer:
Name:	www.fjf.com
Address: 172.17.20.21[root@master pdns-recursor]# nslookup test.fjf.com
Server:		172.17.20.20
Address:	172.17.20.20#53Non-authoritative answer:
Name:	test.fjf.com
Address: 172.17.20.21[root@master pdns-recursor]# nslookup 112.efoxconn.com
Server:		172.17.20.20
Address:	172.17.20.20#53Non-authoritative answer:
Name:	112.efoxconn.com
Address: 10.134.192.116
9、备服务器同上步骤
备份服务器 按照上面配置,可以进行安装 和配置文件scp
yum install -y pdns pdns-backend-mysqlyum install pdns-recursor -y[root@master pdns-recursor]# scp -r /etc/pdns/*  172.17.20.21:/etc/pdns/
[root@master pdns-recursor]# scp -r /etc/pdns-recursor/* 172.17.20.21:/etc/pdns-recursor/[root@slave pdns]# systemctl start pdns &&systemctl status pdns
[root@slave pdns]# systemctl start pdns-recursor && systemctl status pdns-recursor.service [root@slave pdns]# systemctl enable pdns && systemctl enable pdns-recursor
10、nginx负载均衡
安装nginx
yum install -y nginx
把这个配置加入 nginx.conf 后面
stream {# 添加socket转发的代理upstream dns {server 172.17.20.21:5301 max_fails=3 fail_timeout=3s;server 172.17.20.21:5301 max_fails=3 fail_timeout=3s;}# 提供转发的服务,即访问localhost:30001,会跳转至代理bss_num_socket指定的转发地址server {listen 53 udp;proxy_pass dns;proxy_timeout 3s;proxy_connect_timeout 3s;}
}
[root@master ~]# netstat -ltunp |grep 53
tcp        0      0 127.0.0.1:5300          0.0.0.0:*               LISTEN      39851/pdns_server
tcp        0      0 0.0.0.0:53              0.0.0.0:*               LISTEN      41809/nginx: master
tcp        0      0 0.0.0.0:5301            0.0.0.0:*               LISTEN      40930/pdns_recursor
tcp6       0      0 :::5300                 :::*                    LISTEN      39851/pdns_server
udp        0      0 127.0.0.1:5300          0.0.0.0:*                           39851/pdns_server
udp        0      0 0.0.0.0:5301            0.0.0.0:*                           40930/pdns_recursor
udp        0      0 0.0.0.0:53              0.0.0.0:*                           41809/nginx: master
udp6       0      0 :::5300                 :::*                                39851/pdns_server
备份服务器的nginx也如上配置即可
相关文章:
PowerDNS架构解析与安装部署指南
1、背景介绍 目前公司使用PowerDNS进行DNS管理,但由于采用的是单节点架构,存在不可用的风险。为提升系统的稳定性和可靠性,我们计划对现有架构进行重构。通过引入高可用性设计,我们将优化系统架构,使其能够在故障情况…...

Ubuntu 20.04.6 安装 Elasticsearch
1.准备 -- 系统更新 sudo apt update sudo apt upgrade -- 安装vim 文本编辑器 sudo apt install vim-- jdk 版本确认 java -versionjdk 安装可以参照:https://blog.csdn.net/CsethCRM/article/details/140768670 2.官方下载Elasticsearch 官方地址:h…...

Python for循环迭代原理(迭代器 Iterator)
在使用Python时,我们经常会使用for循环来访问容器对象(列表、字符、字典等)中的元素。其幕后实际是通过迭代协议来完成的,迭代是一种依次访问对象中元素的方式,for循环在对象上调用iter()函数生成一个迭代器࿰…...

通信原理-思科实验四:静态路由项配置实验
实验四 静态路由项配置实验 一:实验内容 二:实验目的 三、实验原理 四、实验步骤 选择三个2811型号的路由器 R1、R2、R3 路由器默认只有两个快速以太网接口,为路由器R1和R3增加快速以太网接口模块NM-1FE-TX,安装后检查路由器的接…...

ngzero使用外部的svg图标
1.将图标svg下下来,放到项目中,路径如下所示 之后 <span nz-icon [nzIconfont]“‘icon-zhibiao’”>使用 2.直接使用阿里的图标 先将你要用的图标放入购物车,再将购物车的图标添加到你主页的我的项目中 之后代码中在startupService…...

逆矩阵、秩
在数学的广阔天地中,线性代数扮演着至关重要的角色。它不仅是现代科学和工程学的基石,也是理解复杂数据结构的关键。本文将深入探讨线性代数中的几个核心概念:逆矩阵、秩、列空间和零空间,通过详细的解释和丰富的实例,…...

pc端小程序抓包修改数据相关记录
看了很多关于小程序抓包的 废话不多说直接演示 一、小程序抓包 1.所需要的工具 官网下载即可: https://www.charlesproxy.com/latest-release/download.do 我这里用的 Charles-proxy-4.6.6-win64 需要中文破解参考 https://www.jianshu.com/p/4d67dbbf2f6a 2、破…...

用Python打造精彩动画与视频.2.1 Python基础语法概述
2.1 Python基础语法概述 Python作为一门功能强大且易于学习的编程语言,其基础语法简单直观,非常适合初学者入门。这一节将带你了解Python的基本语法规则,为后续制作动画和视频打下坚实的基础。 1. 变量与数据类型 Python的变量不需要提前声…...

Golang高效合并(拼接)多个gzip压缩文件
有时我们可能会遇到需要把多个 gzip 文件合并成单个 gzip 文件的场景,最简单最容易的方式是把每个gzip文件都先解压,然后合并成一个文件后再次进行压缩,最终得到我们想要的结果,但这种先解压后压缩的方式显然效率不高,…...

MySQL数据库-基本概念
数据 描述事物的符号记录包括属组、文字、图形、图像、声音、档案记录等以“记录”形式按统一的格式进行存储 表 将不同的记录组织在一起用来存储具体数据 数据库 表的集合,是以一定的组织方式存储的相互有关的数据集合 数据库管理系统(DBMS&#…...

【无标题】web+http协议+nginx搭建+nginx反向代理(环境准备)
一.Web 为用户提供互联网上浏览信息的服务,web服务是动态的,可交互的。 1.安装httpd yum -y install httpd 2.启动 systemctl start httpd 3.关闭防火墙 systemctl stop firewalld [rootrs html]# echo "我手机号是" > …...

c-periphery RS485串口库文档serial.md(serial.h)(非阻塞读)(VMIN、VTIME)
c-peripheryhttps://github.com/vsergeev/c-periphery 文章目录 NAMESYNOPSISENUMERATIONS关于奇偶校验枚举类型 DESCRIPTIONserial_new()serial_open()关于流控制软件流控制(XON/XOFF)硬件流控制(RTS/CTS)选择流控制方法 serial_…...

Matlab arrayfun 与 bsxfun——提高编程效率的利器!
许多人知道 MATLAB 向量化编程,少用 for 循环 可以提高代码运行效率,但关于代码紧凑化编程, arrayfun 与 bsxfun 两个重要函数却鲜有人能够用好,今天针对这两个函数举例说明其威力。 Matlab arrayfun 概述 arrayfun 是 Matlab …...
【Unity编辑器拓展】GraphView自定义可视化节点
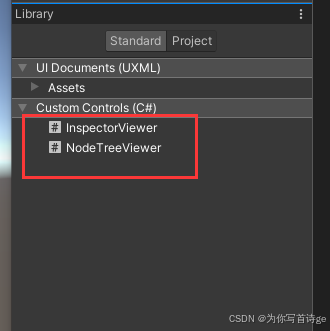
1、创建节点区域脚本 其中的new class UxmlFactory,可以让该元素显示在UI Builder中,我们就可以在Library-Project中看到我们新建的这两个UI元素,就可以拖入我们的UI窗口编辑了 public class NodeTreeViewer : GraphView {public new class…...

教程系列4 | 趋动云『社区项目』极速体验 LivePortrait 人脸表情“移花接木”大法
LivePortrait LivePortrait 由快手可灵大模型团队开源,只需 1 张原图就能生成动态视频。 LivePortrait 的核心优势在于其卓越的表情"迁移"技术,能够令静态图像中的人物瞬间焕发活力,无论是眨眼、微笑还是转头,皆栩栩如…...

WGS84、GCJ-02、BD09三大坐标系详解
文章目录 前言WGS84坐标系定义应用WGS84 Web 墨卡托投影 GCJ-02坐标系(火星坐标系)定义应用GCJ-02经纬度投影与Web墨卡托投影 BD09坐标系(百度坐标系)定义应用BD09经纬度投影与Web墨卡托投影 坐标系之间的区别与注意事项总结 前言…...

css上下动画 和淡化
.popup_hidden_bg { transition: opacity .5s ease-out; opacity: 0; pointer-events: none; /* 防止在隐藏时仍然能点击 */ } keyframes popupShop { from { transform: translateY(100%); opacity: 0; } to {transform: translateY(0);opacity: 1; }} keyframes popupHidd…...

深入解析C#中的URI和URL编码:理解EscapeDataString、EscapeUriString和UrlEncode的区别及字符编码错误处理
在C#中,处理URI(统一资源标识符)和URL(统一资源定位符)时,可以使用Uri.EscapeDataString、Uri.EscapeUriString和HttpUtility.UrlEncode(或WebUtility.UrlEncode)方法来编码字符串。…...

【CSS】给图片设置 max-width
.logo img{width:100%; /* 缩成父盒子的100% */max-width:100%; /* (谁小用谁的百分之百) *//* max-width:100%;【1】图片比盒子大,缩成父盒子的100%【2】图片比盒子小,图片自身的100%*/ }示例 设置样式 .el-image {width: 100%;max-width: 100%;max-…...
)
区块链——代码格式检查(prettier、solhint)
一、引入依赖 // 导入prettier prettier-plugin-solidity yarn add --dev prettier prettier-plugin-solidity yarn add --dev solhint二、创建.prettierrc文件 {"tabWidth": 2,"semi": false,"useTabs": false,"singleQuote": fals…...

GEMM内核与MHA中的寄存器分配优化策略
1. GEMM内核与寄存器分配基础解析通用矩阵乘法(GEMM)作为深度学习计算的核心算子,其性能表现直接决定了神经网络训练和推理的效率。在硬件层面,寄存器分配的优劣往往能带来数倍的性能差异。我们以典型的GEMM运算C αAB βC为例&…...

飞书远程控机:OpenClaw配置全攻略
本文详细介绍如何通过 OpenClaw 工具对接飞书开放平台,配置智能机器人实现 Windows 电脑的远程控制。主要内容涵盖文件管理和程序启动等核心功能的实现方法,并提供完整的配置指南与常见问题解决方案。 一、使用前提说明 1. 系统要求 仅适用于 Windows…...

如何快速掌握开源UE资产编辑器:UAssetGUI完整配置与实战指南
如何快速掌握开源UE资产编辑器:UAssetGUI完整配置与实战指南 【免费下载链接】UAssetGUI A tool designed for low-level examination and modification of Unreal Engine game assets by hand. 项目地址: https://gitcode.com/gh_mirrors/ua/UAssetGUI UAss…...

三步实现跨架构程序兼容:Box64高效架构转换指南
三步实现跨架构程序兼容:Box64高效架构转换指南 【免费下载链接】box64 Box64 - Linux Userspace x86_64 Emulator with a twist, targeted at ARM64, RV64 and LoongArch Linux devices 项目地址: https://gitcode.com/gh_mirrors/bo/box64 你是否曾在ARM64…...

基于ESP32的AIS转WiFi转换器:实现NMEA 0183数据无线传输
1. 项目概述:从VHF-AIS接收器到iPad的无线桥梁作为一名经常在海上折腾电子设备的航海爱好者,我最近遇到了一个挺实际的需求:我的主力导航设备是iPad上的iSailor应用,它功能强大、界面友好,但有个“硬伤”——它需要通过…...

pan-baidu-download:百度网盘多线程下载加速器架构解析与性能优化指南
pan-baidu-download:百度网盘多线程下载加速器架构解析与性能优化指南 【免费下载链接】pan-baidu-download 百度网盘下载脚本 项目地址: https://gitcode.com/gh_mirrors/pa/pan-baidu-download pan-baidu-download是一款基于Python开发的百度网盘命令行下载…...

【MySQL数据库 | 第一篇】 概述
数据库相关概念: 数据库(Database):数据库是指一组有组织的数据的集合,通过计算机程序进行管理和访问。数据库管理系统:操纵和管理数据库的大型软件SQL:操作关系型数据库的编程语言,定义了一套操作关系型数…...

Windows文件夹共享
目标:同一局域网实现在一台计算机上共享文件夹,在另一台电脑访问一、电脑A 1.点击要共享的文件夹 -> 属性 -> 共享2.添加Everyone用户组3.控制面板中网络共享关闭密码保存,在访问时不用输入账号密码。二、电脑B 1.在文件资源管理器路径…...

3步快速上手Whisper-WebUI:轻松实现语音转字幕的完整指南
3步快速上手Whisper-WebUI:轻松实现语音转字幕的完整指南 【免费下载链接】Whisper-WebUI A Web UI for easy subtitle using whisper model. 项目地址: https://gitcode.com/gh_mirrors/wh/Whisper-WebUI 还在为视频制作繁琐的字幕而烦恼吗?Whis…...

微信红包助手终极指南:无需ROOT的智能抢红包解决方案
微信红包助手终极指南:无需ROOT的智能抢红包解决方案 【免费下载链接】WeChatLuckyMoney :money_with_wings: WeChats lucky money helper (微信抢红包插件) by Zhongyi Tong. An Android app that helps you snatch red packets in WeChat groups. 项目地址: ht…...