Vue3 常用代码指南手抄,超详细 cheatsheet
一、Vue3 基础
1.1 创建 Vue3 项目
- 使用 Vite 创建
npm create vite@latest my-vue-app -- --template vue
cd my-vue-app
npm install
npm run dev
- 使用 Vue CLI 创建
npm install -g @vue/cli
vue create my-vue-app
1.2 项目结构
my-vue-app
├── node_modules
├── public
│   └── favicon.ico
├── src
│   ├── assets
│   ├── components
│   ├── views
│   ├── App.vue
│   ├── main.js
│   └── router
├── .gitignore
├── index.html
├── package.json
├── vite.config.js
└── README.md
1.3 main.js 配置
import { createApp } from 'vue'
import App from './App.vue'
import router from './router'
import store from './store'const app = createApp(App)app.use(router)
app.use(store)app.mount('#app')
二、组件
2.1 组件注册
- 全局注册
import { createApp } from 'vue'
import MyComponent from './components/MyComponent.vue'const app = createApp(App)
app.component('MyComponent', MyComponent)
app.mount('#app')
- 局部注册
<template><MyComponent />
</template><script>
import MyComponent from './components/MyComponent.vue'export default {components: {MyComponent}
}
</script>
2.2 组件通信
- 父传子: props
// 父组件
<template><ChildComponent :message="parentMessage" />
</template><script>
import ChildComponent from './ChildComponent.vue'export default {components: { ChildComponent },data() {return {parentMessage: 'Hello from parent'}}
}
</script>
// 子组件
<template><div>{{ message }}</div>
</template><script>
export default {props: {message: {type: String,required: true}}
}
</script>
- 子传父: emit
// 子组件
<template><button @click="sendMessage">Send Message</button>
</template><script>
export default {emits: ['message'],methods: {sendMessage() {this.$emit('message', 'Hello from child')}}
}
</script>
// 父组件
<template><ChildComponent @message="handleMessage" />
</template><script>
import ChildComponent from './ChildComponent.vue'export default {components: { ChildComponent },methods: {handleMessage(message) {console.log(message)}}
}
</script>
- 兄弟组件通信: EventBus
// event-bus.js
import { EventEmitter } from 'vue'
export const EventBus = new EventEmitter()
// 组件 A
<template><button @click="sendMessage">Send Message</button>
</template><script>
import { EventBus } from './event-bus'export default {methods: {sendMessage() {EventBus.emit('message', 'Hello from component A')}}
}
</script>
// 组件 B
<template><div>{{ message }}</div>
</template><script>
import { onMounted, onUnmounted } from 'vue'
import { EventBus } from './event-bus'export default {data() {return {message: ''}},setup() {const handleMessage = (msg) => {message.value = msg}onMounted(() => {EventBus.on('message', handleMessage)})onUnmounted(() => {EventBus.off('message', handleMessage)})}
}
</script>
2.3 插槽
- 默认插槽
// 子组件
<template><slot></slot>
</template>
// 父组件
<ChildComponent><p>默认插槽内容</p>
</ChildComponent>
- 具名插槽
// 子组件
<template><slot name="header"></slot><slot></slot><slot name="footer"></slot>
</template>
// 父组件
<ChildComponent><template #header><h1>Header</h1></template><p>默认插槽内容</p><template #footer><p>Footer</p></template>
</ChildComponent>
- 作用域插槽
// 子组件
<template><slot :user="user"></slot>
</template><script>
export default {data() {return {user: { name: 'Alice', age: 25 }}}
}
</script>
// 父组件
<ChildComponent v-slot:default="slotProps"><p>{{ slotProps.user.name }}</p>
</ChildComponent>
三、Vue Router
3.1 基本配置
// router/index.js
import { createRouter, createWebHistory } from 'vue-router'
import Home from '../views/Home.vue'
import About from '../views/About.vue'const routes = [{ path: '/', name: 'Home', component: Home },{ path: '/about', name: 'About', component: About }
]const router = createRouter({history: createWebHistory(),routes
})export default router
// main.js
import { createApp } from 'vue'
import App from './App.vue'
import router from './router'const app = createApp(App)
app.use(router)
app.mount('#app')
3.2 导航守卫
- 全局守卫
router.beforeEach((to, from, next) => {console.log('全局前置守卫')next()
})
- 路由独享守卫
const routes = [{path: '/',component: Home,beforeEnter: (to, from, next) => {console.log('路由独享守卫')next()}}
]
3.3 动态路由
- 定义动态路由
const routes = [{ path: '/user/:id', name: 'User', component: User },
]
- 获取路由参数
<template><div>User ID: {{ id }}</div>
</template><script>
import { useRoute } from 'vue-router'export default {setup() {const route = useRoute()return {id: route.params.id}}
}
</script>
- 路由跳转
<template><router-link to="/user/123">Go to User 123</router-link>
</template>
<script>
import { useRouter } from 'vue-router'export default {setup() {const router = useRouter()const goToUser = () => {router.push({ name: 'User', params: { id: 123 } })}return { goToUser }}
}
</script>
3.4 嵌套路由
const routes = [{path: '/dashboard',component: Dashboard,children: [{path: 'profile',component: Profile},{path: 'settings',component: Settings}]}
]
<!-- Dashboard.vue -->
<template><div><h1>Dashboard</h1><router-view></router-view></div>
</template>
3.5 路由懒加载
const Home = () => import('../views/Home.vue')
const routes = [{ path: '/', name: 'Home', component: Home },
]
四、Vuex
4.1 基本配置
// store/index.js
import { createStore } from 'vuex'export default createStore({state: {count: 0},mutations: {increment(state) {state.count++}},actions: {increment({ commit }) {commit('increment')}},getters: {doubleCount(state) {return state.count * 2}}
})
// main.js
import { createApp } from 'vue'
import App from './App.vue'
import store from './store'const app = createApp(App)
app.use(store)
app.mount('#app')
4.2 使用 Vuex
- 在组件中获取 state
<template><div>Count: {{ count }}</div>
</template><script>
import { mapState } from 'vuex'export default {computed: {...mapState(['count'])}
}
</script>
- 在组件中提交 mutation
<template><button @click="increment">Increment</button>
</template><script>
import { mapMutations } from 'vuex'export default {methods: {...mapMutations(['increment'])}
}
</script>
- 在组件中分发 action
<template><button @click="increment">Increment</button>
</template><script>
import { mapActions } from 'vuex'export default {methods: {...mapActions(['increment'])}
}
</script>
- 使用 getters
<template><div>Double Count: {{ doubleCount }}</div>
</template><script>
import { mapGetters } from 'vuex'export default {computed: {...mapGetters(['doubleCount'])}
}
</script>
4.3 模块化
// store/modules/user.js
export default {namespaced: true,state: {username: ''},mutations: {setUsername(state, username) {state.username = username}},actions: {setUsername({ commit }, username) {commit('setUsername', username)}},getters: {username: (state) => state.username}
}
// store/index.js
import { createStore } from 'vuex'
import user from './modules/user'export default createStore({modules: {user}
})
// 使用模块中的 state, mutation, action, getter
<template><div>Username: {{ username }}</div><button @click="setUsername('Alice')">Set Username</button>
</template><script>
import { mapState, mapMutations, mapActions, mapGetters } from 'vuex'export default {computed: {...mapState('user', ['username']),...mapGetters('user', ['username'])},methods: {...mapMutations('user', ['setUsername']),...mapActions('user', ['setUsername'])}
}
</script>
五、组合式 API
5.1 setup 函数
<template><div>{{ count }}</div><button @click="increment">Increment</button>
</template><script>
import { ref } from 'vue'export default {setup() {const count = ref(0)const increment = () => {count.value++}return {count,increment}}
}
</script>
5.2 响应式数据
- ref
const count = ref(0)
- reactive
const state = reactive({count: 0,user: {name: 'Alice'}
})
- computed
const doubleCount = computed(() => count.value * 2)
- watch
watch(count, (newVal, oldVal) => {console.log(`count changed from ${oldVal} to ${newVal}`)
})
5.3 生命周期钩子
- onMounted
onMounted(() => {console.log('mounted')
})
- onUnmounted
onUnmounted(() => {console.log('unmounted')
})
- 其他钩子: onBeforeMount, onBeforeUnmount, onActivated, onDeactivated, onErrorCaptured, onRenderTracked, onRenderTriggered
六、其他常用功能
6.1 指令
- v-bind
<img v-bind:src="imageSrc" />
- v-model
<input v-model="message" />
- v-if, v-else-if, v-else
<div v-if="isLoggedIn">Welcome!</div>
<div v-else>Please log in.</div>
- v-for
<ul><li v-for="item in items" :key="item.id">{{ item.name }}</li>
</ul>
-
v-on 修饰符
-
.stop:阻止事件冒泡<button @click.stop="handleClick">Click</button> -
.prevent:阻止默认事件<form @submit.prevent="handleSubmit"></form> -
.once:事件只触发一次<button @click.once="handleClick">Click</button> -
.self:只有事件是从元素本身触发时才触发处理函数<div @click.self="handleClick"><button>Click</button> </div> -
按键修饰符
<input @keyup.enter="submit" />
-
-
v-for 进阶用法
-
遍历对象
<ul><li v-for="(value, key, index) in object" :key="key">{{ index }} - {{ key }}: {{ value }}</li> </ul> -
遍历数字范围
<div v-for="n in 10" :key="n">{{ n }}</div> -
使用
v-for和template结合<ul><template v-for="item in items" :key="item.id"><li>{{ item.name }}</li><li class="divider" role="presentation"></li></template> </ul>
-
-
v-slot 插槽
-
具名插槽
<!-- 子组件 -->
<slot name="header"></slot>
<slot></slot>
<slot name="footer"></slot>
<!-- 父组件 --> <ChildComponent><template #header><h1>Header</h1></template><p>默认插槽内容</p><template #footer><p>Footer</p></template> </ChildComponent> -
作用域插槽
<!-- 子组件 -->
<slot :user="user"></slot>
<!-- 父组件 --> <ChildComponent v-slot:default="slotProps"><p>{{ slotProps.user.name }}</p> </ChildComponent>
-
6.2 过渡与动画
-
单元素过渡
<transition name="fade"><div v-if="isVisible">Hello</div>
</transition>
.fade-enter-active, .fade-leave-active {transition: opacity 0.5s; } .fade-enter-from, .fade-leave-to {opacity: 0; } -
列表过渡
<transition-group name="list" tag="ul"><li v-for="item in items" :key="item.id">{{ item.name }}</li>
</transition-group>
.list-enter-active, .list-leave-active {transition: all 0.5s; } .list-enter-from, .list-leave-to {opacity: 0;transform: translateY(30px); } -
使用 JavaScript 钩子
<transition @before-enter="beforeEnter" @enter="enter" @leave="leave"><div v-if="isVisible">Hello</div>
</transition>
export default {methods: {beforeEnter(el) {el.style.opacity = 0},enter(el, done) {Velocity(el, { opacity: 1, fontSize: '1.4em' }, { duration: 300, complete: done })},leave(el, done) {Velocity(el, { opacity: 0, fontSize: '1em' }, { duration: 300, complete: done })}} }
6.3 混入(Mixin)
-
定义混入
// mixins/log.js export default {created() {console.log('Mixin created')},methods: {log(message) {console.log(message)}} } -
使用混入
<script>
import logMixin from './mixins/log'export default {mixins: [logMixin],created() {this.log('Hello from component')}
}
</script>
6.4 自定义指令
-
定义自定义指令
// directives/focus.js export default {mounted(el) {el.focus()} } -
注册全局指令
import { createApp } from 'vue' import App from './App.vue' import focusDirective from './directives/focus'const app = createApp(App) app.directive('focus', focusDirective) app.mount('#app') -
使用自定义指令
<input v-focus />
6.5 插件
-
创建插件
// plugins/logger.js export default {install(app, options) {console.log(options)app.config.globalProperties.$logger = (message) => {console.log(message)}} } -
使用插件
// main.js
import { createApp } from 'vue'
import App from './App.vue'
import loggerPlugin from './plugins/logger'const app = createApp(App)
app.use(loggerPlugin, { someOption: 'someValue' })
app.mount('#app')
// 在组件中使用 export default {mounted() {this.$logger('Hello from plugin')} }
七、Vue3 新特性
7.1 Teleport
-
使用 Teleport 将组件内容渲染到指定位置
<!-- App.vue -->
<div><h1>App</h1><Teleport to="body"><div id="modal"><p>Modal Content</p></div></Teleport>
</div>
7.2 Suspense
-
使用 Suspense 处理异步组件
<template><Suspense><template #default><AsyncComponent /></template><template #fallback><div>Loading...</div></template></Suspense> </template> -
异步组件示例
// components/AsyncComponent.vue
<template><div>Async Component</div>
</template><script>
export default {async setup() {// 模拟异步操作await new Promise((resolve) => setTimeout(resolve, 2000))return {}}
}
</script>
<!-- 使用 Suspense 包裹异步组件 --> <template><Suspense><template #default><AsyncComponent /></template><template #fallback><div>Loading...</div></template></Suspense> </template> -
错误处理
<template><Suspense><template #default><AsyncComponent /></template><template #fallback><div>Loading...</div></template><template #error><div>Error occurred!</div></template></Suspense>
</template>
// components/AsyncComponent.vue <script> export default {async setup() {await new Promise((_, reject) => setTimeout(() => reject(new Error('Async Error')), 2000))} } </script>
7.3 Fragment
-
Vue3 支持组件返回多个根节点,无需再使用包裹元素
<template><header>Header</header><main>Main Content</main><footer>Footer</footer>
</template>
7.4 组合式 API 进阶
-
响应式 API
-
reactive:创建响应式对象import { reactive } from 'vue'const state = reactive({count: 0,user: {name: 'Alice'} }) -
ref:创建响应式引用import { ref } from 'vue'const count = ref(0) -
computed:创建计算属性import { ref, computed } from 'vue'const count = ref(0) const doubleCount = computed(() => count.value * 2) -
watch:监听数据变化import { ref, watch } from 'vue'const count = ref(0) watch(count, (newVal, oldVal) => {console.log(`count changed from ${oldVal} to ${newVal}`) })
-
-
生命周期钩子
-
onMounted:组件挂载完成后调用import { onMounted } from 'vue'onMounted(() => {console.log('mounted') }) -
onUnmounted:组件卸载后调用import { onUnmounted } from 'vue'onUnmounted(() => {console.log('unmounted') }) -
其他钩子:
onBeforeMount,onBeforeUnmount,onActivated,onDeactivated,onErrorCaptured,onRenderTracked,onRenderTriggered
-
-
依赖注入
-
provide和inject// 父组件 import { provide, ref } from 'vue'const theme = ref('dark') provide('theme', theme)// 子组件 import { inject, onMounted } from 'vue'const theme = inject('theme') onMounted(() => {console.log(`Theme is ${theme.value}`) })
-
-
自定义 Hooks
-
创建可复用的组合式函数
// hooks/useMousePosition.js
import { ref, onMounted, onUnmounted } from 'vue'export function useMousePosition() {const x = ref(0)const y = ref(0)const updatePosition = (e) => {x.value = e.pageXy.value = e.pageY}onMounted(() => {window.addEventListener('mousemove', updatePosition)})onUnmounted(() => {window.removeEventListener('mousemove', updatePosition)})return { x, y }
}
// 使用自定义 Hook import { useMousePosition } from '../hooks/useMousePosition'export default {setup() {const { x, y } = useMousePosition()return { x, y }} }
-
八、性能优化
8.1 组件懒加载
-
使用动态导入实现组件懒加载
const Home = () => import('./views/Home.vue')
const routes = [{ path: '/', component: Home }
]
8.2 避免不必要的渲染
-
使用
v-once渲染静态内容<div v-once>{{ message }}</div> -
使用
shallowRef和shallowReactive避免深层响应式import { shallowRef } from 'vue'const data = shallowRef({ count: 0 })

相关文章:
Vue3 常用代码指南手抄,超详细 cheatsheet
一、Vue3 基础 1.1 创建 Vue3 项目 使用 Vite 创建 npm create vitelatest my-vue-app -- --template vue cd my-vue-app npm install npm run dev使用 Vue CLI 创建 npm install -g vue/cli vue create my-vue-app1.2 项目结构 my-vue-app ├── node_modules ├── pu…...

结构体是否包含特定类型的成员变量
结构体是否包含特定类型的成员变量 在C中,可以使用模板元编程和类型特性(type traits)来判断一个结构体是否包含特定类型的成员变量。这通常通过std::is_member_object_pointer类型特性来实现,它可以用来检查给定的成员指针是否指…...

堆排序与链式二叉树:数据结构与排序算法的双重探索
大家好,我是小卡皮巴拉 文章目录 目录 引言 一.堆排序 1.1 版本一 核心概念 堆排序过程 1.2 版本二 堆排序函数 HeapSort 向下调整算法 AdjustDown 向上调整算法 AdjustUp 二.链式二叉树 2.1 前中后序遍历 链式二叉树的结构 创建链式二叉树 前序遍历…...
用 Python 从零开始创建神经网络(四):激活函数(Activation Functions)
激活函数(Activation Functions) 引言1. 激活函数的种类a. 阶跃激活功能b. 线性激活函数c. Sigmoid激活函数d. ReLU 激活函数e. more 2. 为什么使用激活函数3. 隐藏层的线性激活4. 一对神经元的 ReLU 激活5. 在隐蔽层中激活 ReLU6. ReLU 激活函数代码7. …...
使用 Flask 和 ONLYOFFICE 实现文档在线编辑功能
提示:CSDN 博主测评ONLYOFFICE 文章目录 引言技术栈环境准备安装 ONLYOFFICE 文档服务器获取 API 密钥安装 Flask 和 Requests 创建 Flask 应用项目结构编写 app.py创建模板 templates/index.html 运行应用功能详解文档上传生成编辑器 URL显示编辑器回调处理 安全性…...

【C++】【算法基础】序列编辑距离
编辑距离 题目 给定 n n n个长度不超过 10 10 10 的字符串以及 m m m 次询问,每次询问给出一个字符串和一个操作次数上限。 对于每次询问,请你求出给定的 n n n个字符串中有多少个字符串可以在上限操作次数内经过操作变成询问给出的字符串。 每个…...
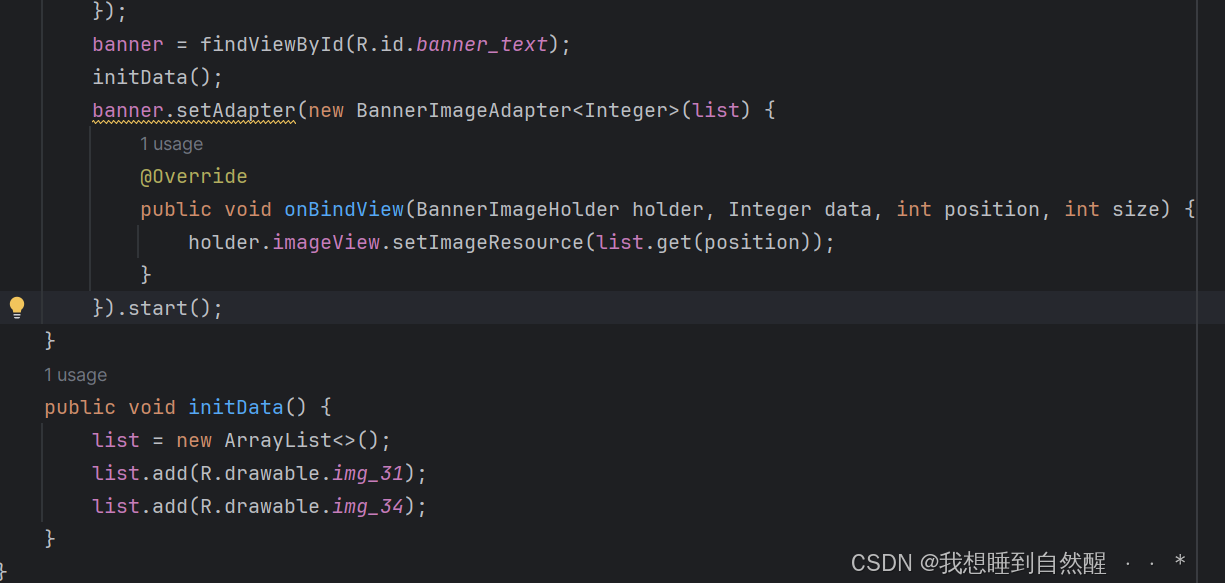
【Android】轮播图——Banner
引言 Banner轮播图是一种在网页和移动应用界面设计中常见的元素,主要用于在一个固定的区域内自动或手动切换一系列图片,以展示不同的内容或信息。这个控件在软件当中经常看到,商品促销、热门歌单、头像新闻等等。它不同于ViewPgaer在于无需手…...
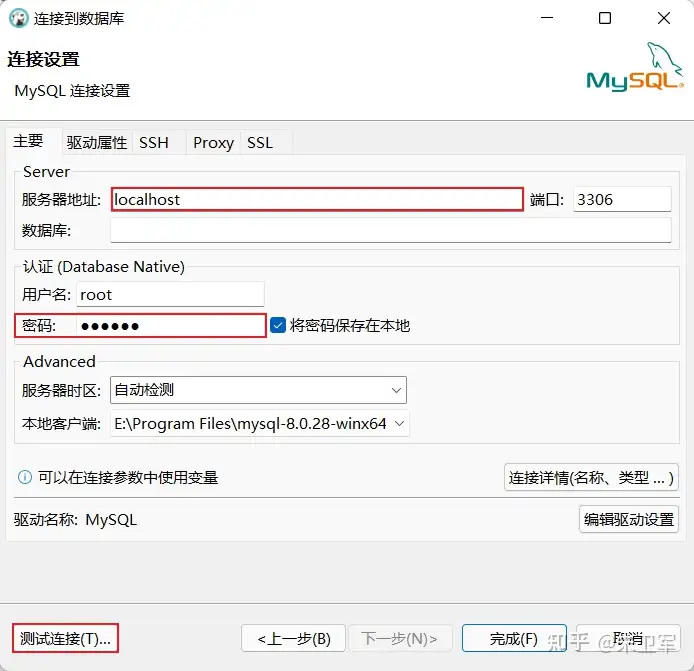
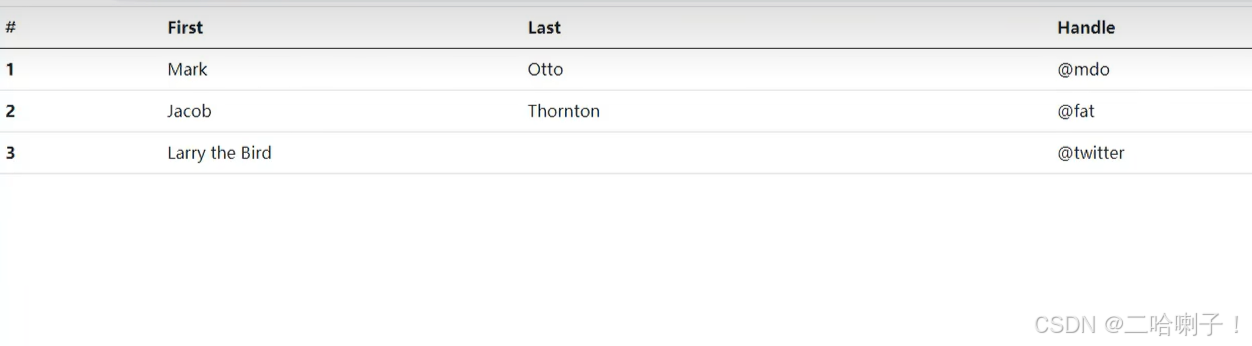
学SQL,要安装什么软件?
先上结论,推荐MySQLDbeaver的组合。 学SQL需要安装软件吗? 记得几年前我学习SQL的时候,以为像Java、Python一样需要安装SQL软件包,后来知道并没有所谓SQL软件,因为SQL是一种查询语言,它用来对数据库进行操…...

webstorm 设置总结
编辑器-》文件类型-》忽略的文件和文件夹-》加上node_modules 修改WebStorm 内存有两种方式。 1. 点击菜单中的Help -> change memory settings 弹出设置内存窗口,修改最大内存大小。然后点击Save and Restart 即可。 2. 点击菜单中的Help -> Edit Custom V…...
基于Spring Boot的养老保险管理系统的设计与实现,LW+源码+讲解
摘 要 如今社会上各行各业,都喜欢用自己行业的专属软件工作,互联网发展到这个时候,人们已经发现离不开了互联网。新技术的产生,往往能解决一些老技术的弊端问题。因为传统养老保险管理系统信息管理难度大,容错率低&a…...
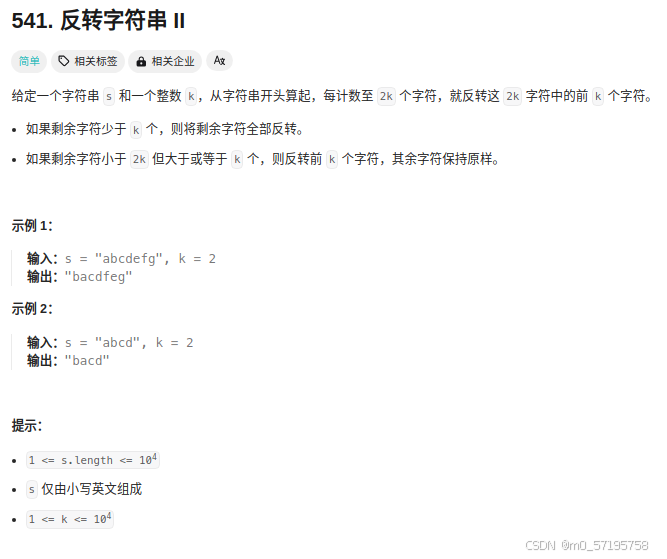
Java | Leetcode Java题解之第541题反转字符串II
题目: 题解: class Solution {public String reverseStr(String s, int k) {int n s.length();char[] arr s.toCharArray();for (int i 0; i < n; i 2 * k) {reverse(arr, i, Math.min(i k, n) - 1);}return new String(arr);}public void reve…...

sql分区
将学员表student按所在城市使用PARTITION BY LIST 1、创建分区表。 CREATE TABLE public.student( sno numeric(4,0), sname character varying(20 char),gender character varying(2 char), phone numeric(11,0), …...
[OpenGL]使用OpenGL实现硬阴影效果
一、简介 本文介绍了如何使用OpenGL实现硬阴影效果,并在最后给出了全部的代码。本文基于[OpenGL]渲染Shadow Map,实现硬阴影的流程如下: 首先,以光源为视角,渲染场景的深度图,将light space中的深度图存储…...
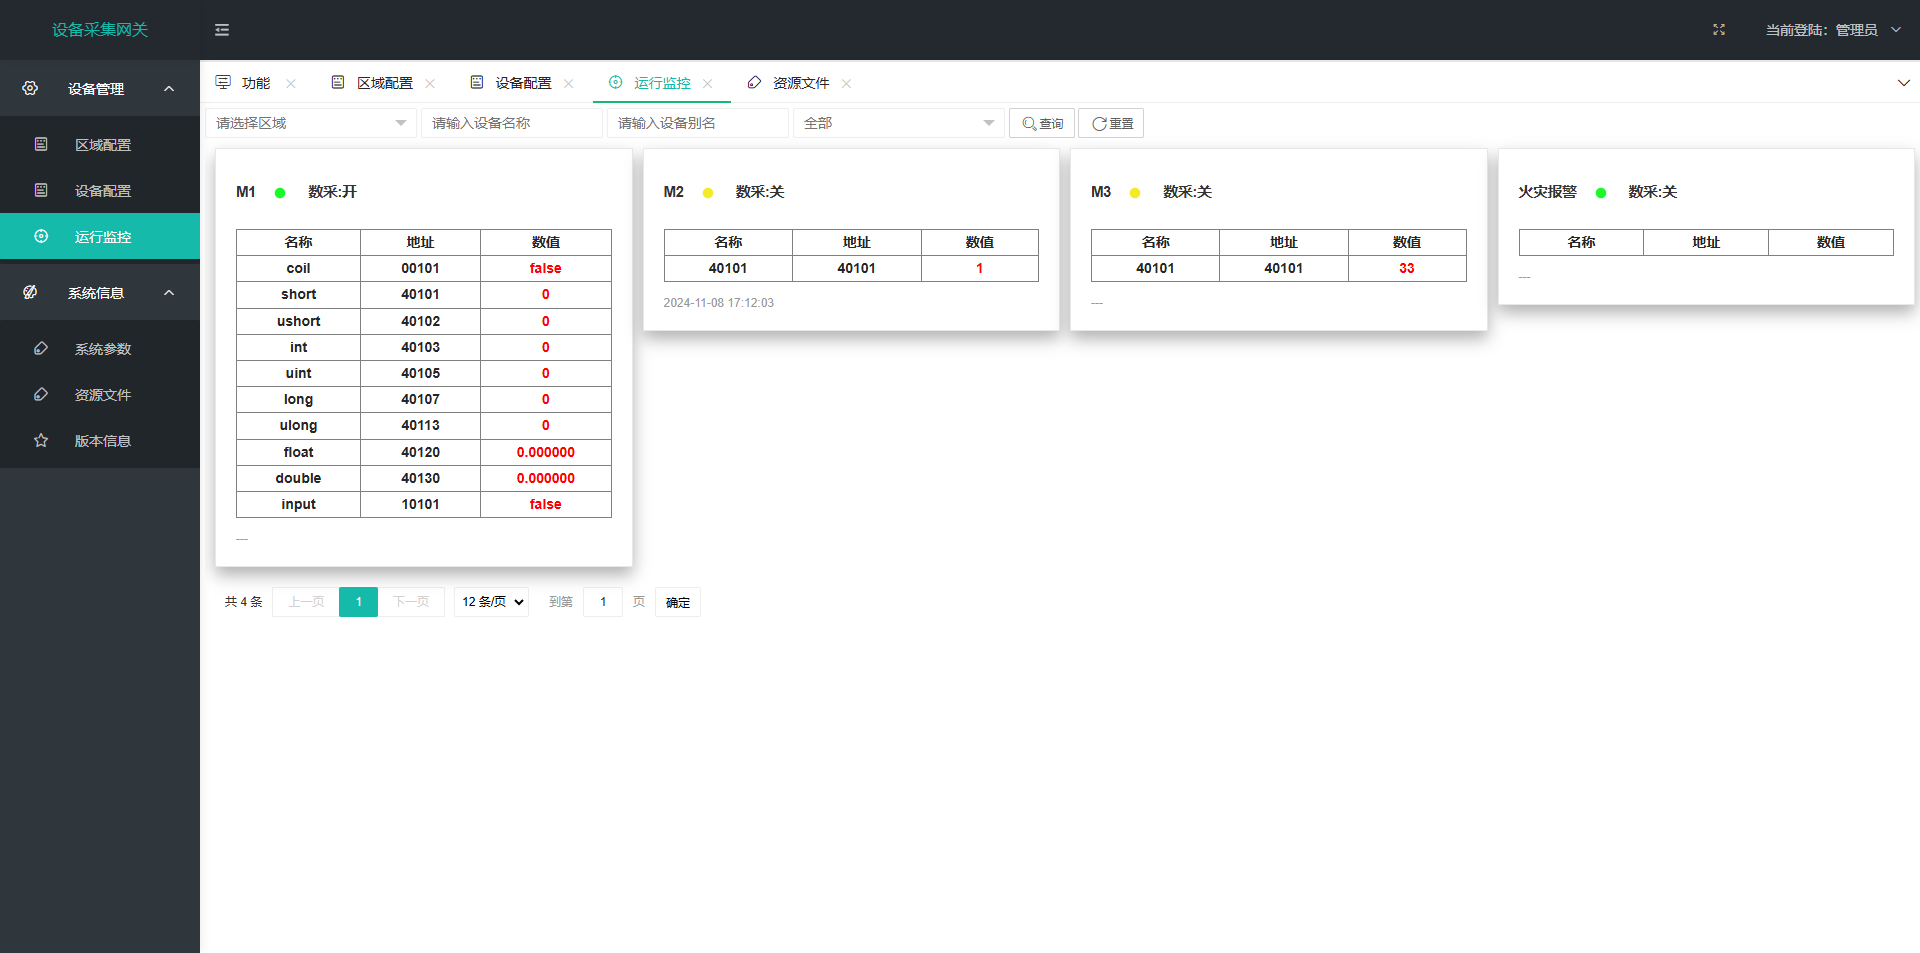
嵌入式采集网关(golang版本)
为了一次编写到处运行,使用纯GO编写,排除CGO,解决在嵌入式中交叉编译难问题 硬件设备:移远EC200A-CN LTE Cat 4 无线通信模块,搭载openwrt操作系统,90M内存...
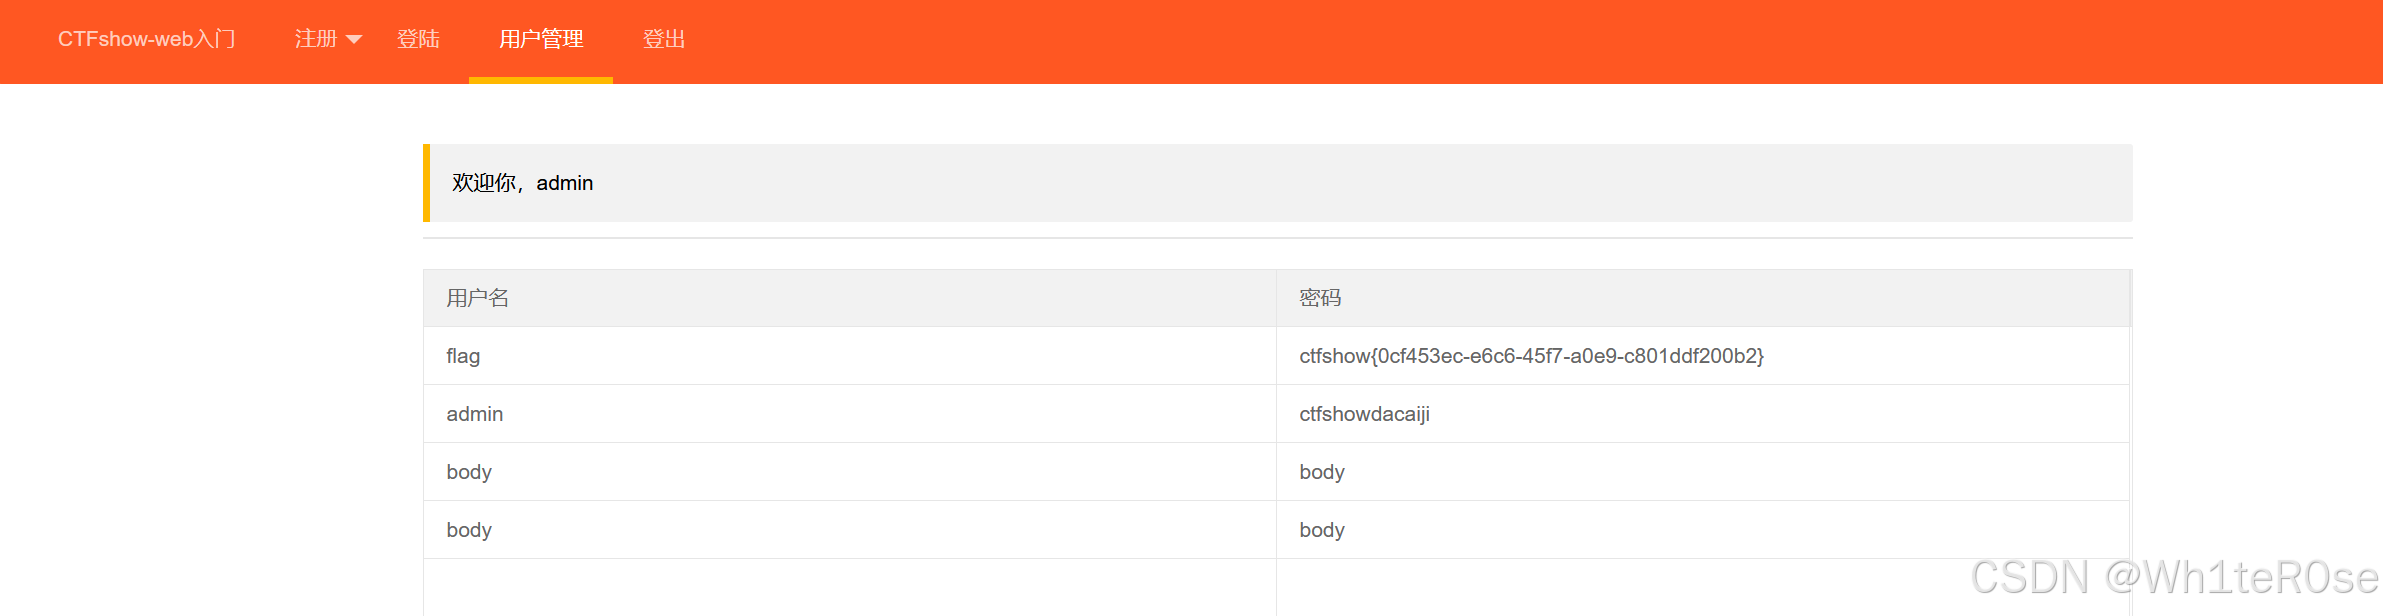
ctfshow(328)--XSS漏洞--存储型XSS
Web328 简单阅读一下页面。 是一个登录系统,存在一个用户管理数据库。 那么我们注册一个账号,在账号或者密码中植入HTML恶意代码,当管理员访问用户管理数据库页面时,就会触发我们的恶意代码。 思路 我们向数据库中写入盗取管理员…...

【C#】Thread.CurrentThread的用法
Thread.CurrentThread 是 System.Threading.Thread 类的一个静态属性,它返回当前正在执行的线程对象。通过 Thread.CurrentThread,可以访问和修改当前线程的各种属性和方法。 下面是一些常见的用法和示例: 1. 获取当前线程的信息 使用 Thr…...
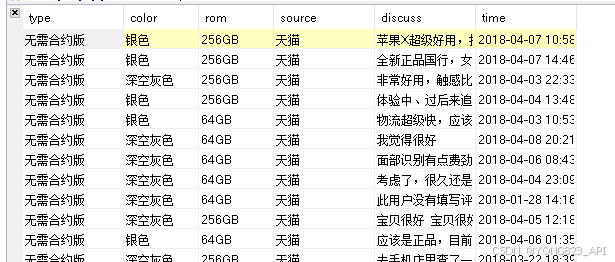
简单分享一下淘宝商品数据自动化抓取的技术实现与挑战
在电子商务领域,数据是驱动决策的关键。淘宝作为国内最大的电商平台之一,其商品数据对电商从业者来说具有极高的价值。然而,从淘宝平台自动化抓取商品数据并非易事,涉及多重技术和法律挑战。本文将从技术层面分析实现淘宝商品数据…...
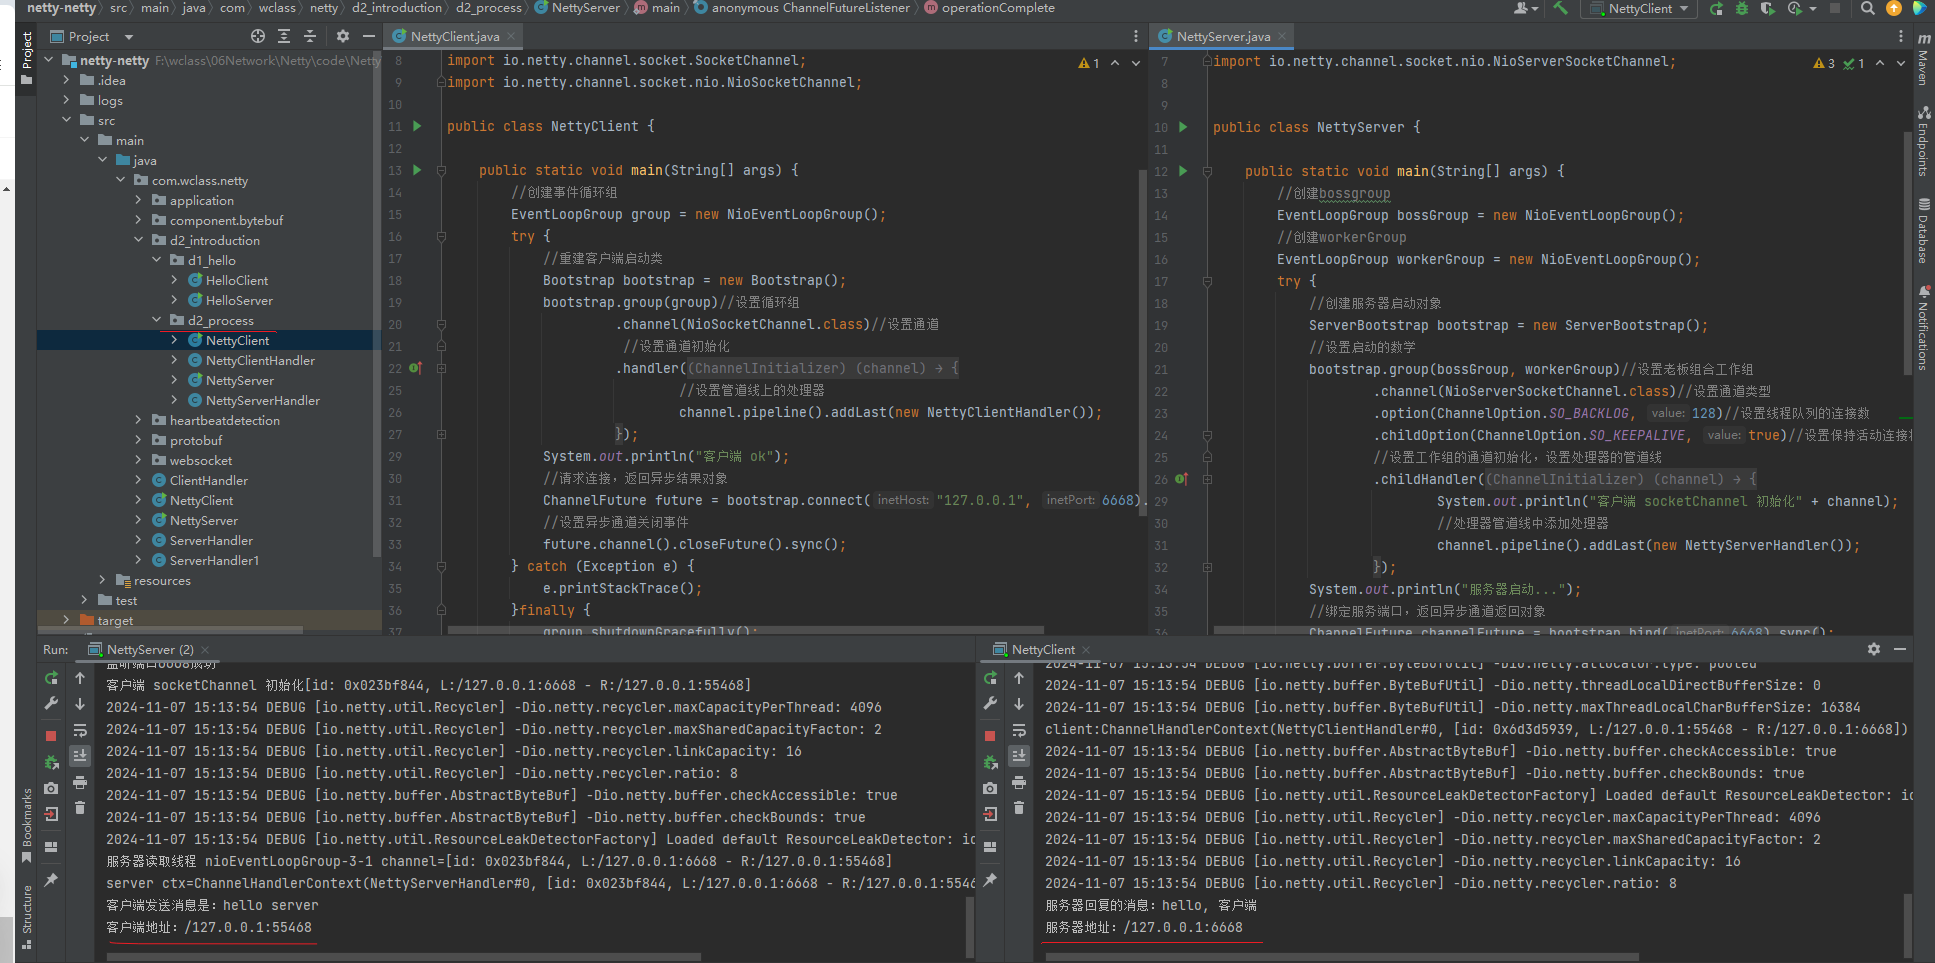
Netty篇(入门编程)
目录 一、Hello World 1. 目标 2. 服务器端 3. 客户端 4. 流程梳理 💡 提示 5. 运行结果截图 二、Netty执行流程 1. 流程分析 2. 代码案例 2.1. 引入依赖 2.2. 服务端 服务端 服务端处理器 2.3. 客户端 客户端 客户端处理器 2.4. 代码截图 一、Hel…...

【渗透测试】payload记录
Java开发使用char[]代替String保存敏感数据 Java Jvm会提供内存转储功能,当Java程序dump后,会生成堆内存的快照,保存在.hprof后缀的文件中,进而导致敏感信息的泄露。char[]可以在存储敏感数据后手动清零,String对象会…...

2024自动驾驶线控底盘行业研究报告
自动驾驶线控底盘是实现自动驾驶的关键技术之一,它通过电子信号来控制车辆的行驶,包括转向、制动、驱动、换挡和悬架等系统。线控底盘技术的发展对于自动驾驶汽车的实现至关重要,因为它提供了快速响应和精确控制的能力,这是自动驾驶系统所必需的。 线控底盘由五大系统组成…...

【杂谈】-递归进化:人工智能的自我改进与监管挑战
递归进化:人工智能的自我改进与监管挑战 文章目录 递归进化:人工智能的自我改进与监管挑战1、自我改进型人工智能的崛起2、人工智能如何挑战人类监管?3、确保人工智能受控的策略4、人类在人工智能发展中的角色5、平衡自主性与控制力6、总结与…...

【配置 YOLOX 用于按目录分类的图片数据集】
现在的图标点选越来越多,如何一步解决,采用 YOLOX 目标检测模式则可以轻松解决 要在 YOLOX 中使用按目录分类的图片数据集(每个目录代表一个类别,目录下是该类别的所有图片),你需要进行以下配置步骤&#x…...

unix/linux,sudo,其发展历程详细时间线、由来、历史背景
sudo 的诞生和演化,本身就是一部 Unix/Linux 系统管理哲学变迁的微缩史。来,让我们拨开时间的迷雾,一同探寻 sudo 那波澜壮阔(也颇为实用主义)的发展历程。 历史背景:su的时代与困境 ( 20 世纪 70 年代 - 80 年代初) 在 sudo 出现之前,Unix 系统管理员和需要特权操作的…...

OpenPrompt 和直接对提示词的嵌入向量进行训练有什么区别
OpenPrompt 和直接对提示词的嵌入向量进行训练有什么区别 直接训练提示词嵌入向量的核心区别 您提到的代码: prompt_embedding = initial_embedding.clone().requires_grad_(True) optimizer = torch.optim.Adam([prompt_embedding...
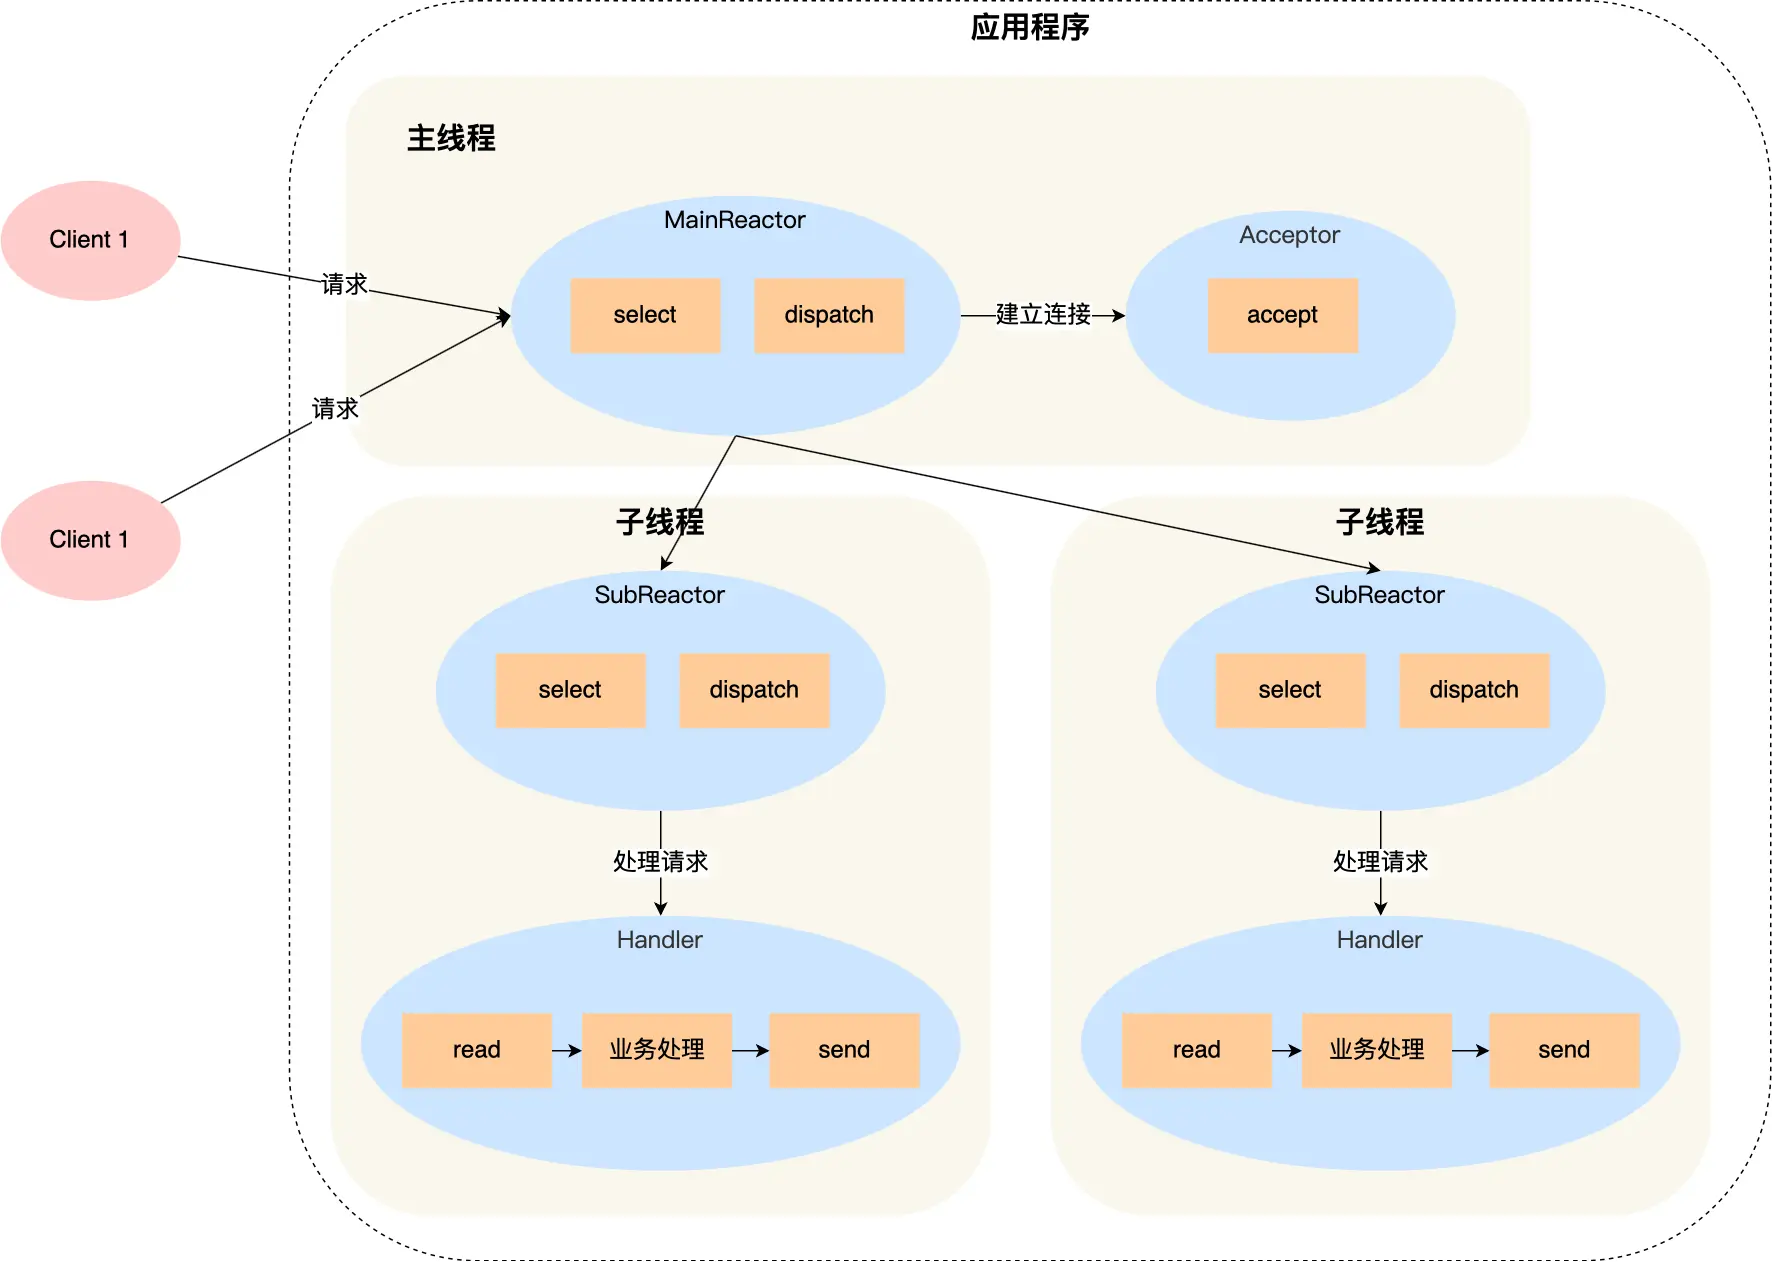
select、poll、epoll 与 Reactor 模式
在高并发网络编程领域,高效处理大量连接和 I/O 事件是系统性能的关键。select、poll、epoll 作为 I/O 多路复用技术的代表,以及基于它们实现的 Reactor 模式,为开发者提供了强大的工具。本文将深入探讨这些技术的底层原理、优缺点。 一、I…...
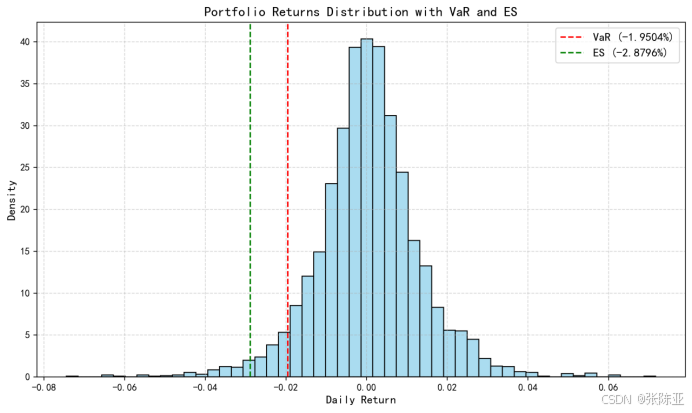
Python基于历史模拟方法实现投资组合风险管理的VaR与ES模型项目实战
说明:这是一个机器学习实战项目(附带数据代码文档),如需数据代码文档可以直接到文章最后关注获取。 1.项目背景 在金融市场日益复杂和波动加剧的背景下,风险管理成为金融机构和个人投资者关注的核心议题之一。VaR&…...

【MATLAB代码】基于最大相关熵准则(MCC)的三维鲁棒卡尔曼滤波算法(MCC-KF),附源代码|订阅专栏后可直接查看
文章所述的代码实现了基于最大相关熵准则(MCC)的三维鲁棒卡尔曼滤波算法(MCC-KF),针对传感器观测数据中存在的脉冲型异常噪声问题,通过非线性加权机制提升滤波器的抗干扰能力。代码通过对比传统KF与MCC-KF在含异常值场景下的表现,验证了后者在状态估计鲁棒性方面的显著优…...
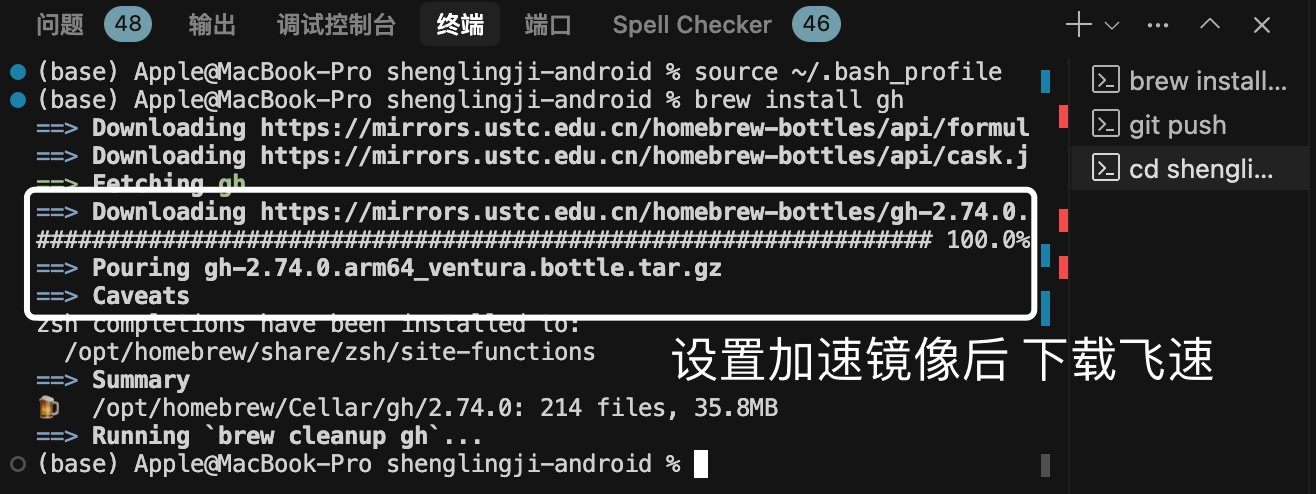
MacOS下Homebrew国内镜像加速指南(2025最新国内镜像加速)
macos brew国内镜像加速方法 brew install 加速formula.jws.json下载慢加速 🍺 最新版brew安装慢到怀疑人生?别怕,教你轻松起飞! 最近Homebrew更新至最新版,每次执行 brew 命令时都会自动从官方地址 https://formulae.…...

数学建模-滑翔伞伞翼面积的设计,运动状态计算和优化 !
我们考虑滑翔伞的伞翼面积设计问题以及运动状态描述。滑翔伞的性能主要取决于伞翼面积、气动特性以及飞行员的重量。我们的目标是建立数学模型来描述滑翔伞的运动状态,并优化伞翼面积的设计。 一、问题分析 滑翔伞在飞行过程中受到重力、升力和阻力的作用。升力和阻力与伞翼面…...

Java高级 |【实验八】springboot 使用Websocket
隶属文章:Java高级 | (二十二)Java常用类库-CSDN博客 系列文章:Java高级 | 【实验一】Springboot安装及测试 |最新-CSDN博客 Java高级 | 【实验二】Springboot 控制器类相关注解知识-CSDN博客 Java高级 | 【实验三】Springboot 静…...