Spring 属性填充源码分析(简单实用版)
属性填充
属性填充只有 3 种方式
-
根据名称填充
-
根据类型填充
思考什么时候会出现呢???
多见于第三方框架与 Spring集成,举例:Mybatis 与 Spring集成,把 Mapper 接口注册为 BeanDefinition 时候就指定了自动注入模式为『
按类型注入』// 代码位置:org.mybatis.spring.mapper.ClassPathMapperScanner#processBeanDefinitions方法 definition.setAutowireMode(AbstractBeanDefinition.AUTOWIRE_BY_TYPE); -
后置处理器,基本近似认为是
AutowiredAnnotationBeanPostProcessor类多见于自己开发的时候,如通过注解@Autowired 注入,或通过注解@Value 注入
1. 总体流程
protected void populateBean(String beanName, RootBeanDefinition mbd, @Nullable BeanWrapper bw) {boolean continueWithPropertyPopulation = true;// <1> 应用InstantiationAwareBeanPostProcessor的postProcessAfterInstantiation方法if (!mbd.isSynthetic() && hasInstantiationAwareBeanPostProcessors()) {for (BeanPostProcessor bp : getBeanPostProcessors()) {if (bp instanceof InstantiationAwareBeanPostProcessor) {InstantiationAwareBeanPostProcessor ibp = (InstantiationAwareBeanPostProcessor) bp;if (!ibp.postProcessAfterInstantiation(bw.getWrappedInstance(), beanName)) {continueWithPropertyPopulation = false;break;}}}}if (!continueWithPropertyPopulation) {return;}PropertyValues pvs = (mbd.hasPropertyValues() ? mbd.getPropertyValues() : null);// <2> 根据名称自动注入 或者 根据类型自动注入if (mbd.getResolvedAutowireMode() == AUTOWIRE_BY_NAME || mbd.getResolvedAutowireMode() == AUTOWIRE_BY_TYPE) {MutablePropertyValues newPvs = new MutablePropertyValues(pvs);// Add property values based on autowire by name if applicable// <2.1> 根据名称添加属性值if (mbd.getResolvedAutowireMode() == AUTOWIRE_BY_NAME) {autowireByName(beanName, mbd, bw, newPvs);}// Add property values based on autowire by type if applicable// <2.2> 根据类型添加属性值if (mbd.getResolvedAutowireMode() == AUTOWIRE_BY_TYPE) {autowireByType(beanName, mbd, bw, newPvs);}pvs = newPvs;}boolean hasInstAwareBpps = hasInstantiationAwareBeanPostProcessors();boolean needsDepCheck = (mbd.getDependencyCheck() != AbstractBeanDefinition.DEPENDENCY_CHECK_NONE);PropertyDescriptor[] filteredPds = null;if (hasInstAwareBpps) {if (pvs == null) {pvs = mbd.getPropertyValues();}// <3> 应用InstantiationAwareBeanPostProcessor的postProcessProperties方法for (BeanPostProcessor bp : getBeanPostProcessors()) {if (bp instanceof InstantiationAwareBeanPostProcessor) {InstantiationAwareBeanPostProcessor ibp = (InstantiationAwareBeanPostProcessor) bp;PropertyValues pvsToUse = ibp.postProcessProperties(pvs, bw.getWrappedInstance(), beanName);if (pvsToUse == null) {if (filteredPds == null) {filteredPds = filterPropertyDescriptorsForDependencyCheck(bw, mbd.allowCaching);}pvsToUse = ibp.postProcessPropertyValues(pvs, filteredPds, bw.getWrappedInstance(), beanName);if (pvsToUse == null) {return;}}pvs = pvsToUse;}}}// <4> 设置属性值if (pvs != null) {applyPropertyValues(beanName, mbd, bw, pvs);}
}<1>处,应用InstantiationAwareBeanPostProcessor的postProcessAfterInstantiation方法,在实例化之后是否继续处理,一般都会继续处理<2>处,根据名称 或 类型自动注入<2.1>处,根据名称自动注入(重点分析)<2.2>处,根据类型自动注入(重点分析)
<3>处,应用InstantiationAwareBeanPostProcessor的postProcessProperties方法,一般的,就用应用AutowiredAnnotationBeanPostProcessor完成@Autowired或@Value注解的处理<4>处,这里 pvs 变量已经是得到的值了,这里只需要把值设置到 bw 实例中
2. 各种类型的注入
结论:无论是哪一种类型的注入,最后都会调用 getBean 方法,下面的分析只是简单的说明下如何一步一步调用到 getBean 方法的
2.1 按名称填充(autowireByName方法)
总结:这个直接调用 getBean 方法,很简单很好!
protected void autowireByName(String beanName, AbstractBeanDefinition mbd, BeanWrapper bw, MutablePropertyValues pvs) {// <1> 用内省机制查找需要注入的属性String[] propertyNames = unsatisfiedNonSimpleProperties(mbd, bw);for (String propertyName : propertyNames) {if (containsBean(propertyName)) {// <2> 既然是使用根据名称注入,那么简单了直接 getBean(String) 方法Object bean = getBean(propertyName);// <3> 添加到 pvs 中,返回后设置到pvs.add(propertyName, bean);registerDependentBean(propertyName, beanName);}}
}
-
<1>处, 用内省机制查找需要注入的属性(我们重点查看)如何用内省机制查找属性???
protected String[] unsatisfiedNonSimpleProperties(AbstractBeanDefinition mbd, BeanWrapper bw) {Set<String> result = new TreeSet<>();PropertyValues pvs = mbd.getPropertyValues();// <1>、内省机制查找属性PropertyDescriptor[] pds = bw.getPropertyDescriptors();for (PropertyDescriptor pd : pds) {// <2> 并不是所有的属性都需要注入,所以要做过滤(过滤条件:要有 write 方法;不是简单属性而是我们常见的需要注入的属性;pvs 不包含)if (pd.getWriteMethod() != null && !isExcludedFromDependencyCheck(pd) && !pvs.contains(pd.getName()) &&!BeanUtils.isSimpleProperty(pd.getPropertyType())) {result.add(pd.getName());}}return StringUtils.toStringArray(result);
}
结果一些代码会来到如下方法
private CachedIntrospectionResults(Class<?> beanClass) throws BeansException {// <1> 内省机制得到 BeanInfo 对象this.beanInfo = getBeanInfo(beanClass);this.propertyDescriptorCache = new LinkedHashMap<>();// <2> 内省机制获取属性PropertyDescriptor[] pds = this.beanInfo.getPropertyDescriptors();for (PropertyDescriptor pd : pds) {pd = buildGenericTypeAwarePropertyDescriptor(beanClass, pd);this.propertyDescriptorCache.put(pd.getName(), pd);}// <3> 循环处理父接口啊Class<?> currClass = beanClass;while (currClass != null && currClass != Object.class) {introspectInterfaces(beanClass, currClass);currClass = currClass.getSuperclass();}}-
<1>处,使用内省机制获取到 beanClass 的 BeanInfo 信息内省机制:Introspector.getBeanInfo(beanClass)
-
<2>处,获取属性会获取到父类的所有属性 -
<3>处,循环处理父接口啊,为什么不处理父类,因为不需要处理,内省机制获取属性已经包含了父类的属性
-
-
<2>处, 因为是使用名称注入,那么直接用属性的名称,然后调用 getBean(String) 方法 -
<3>处,把 bean 设置到 pvs 中返回,交由主方法调用 setXxx 方法把数据设置到目标中
2.2 按类型填充(autowireByType方法)
跟按名称注入大致一样,比它略多几个步骤(多一个解析依赖),代码如下:
protected void autowireByType(String beanName, AbstractBeanDefinition mbd, BeanWrapper bw, MutablePropertyValues pvs) {TypeConverter converter = getCustomTypeConverter();if (converter == null) {converter = bw;}Set<String> autowiredBeanNames = new LinkedHashSet<>(4);// <1> 内省机制查找注入属性String[] propertyNames = unsatisfiedNonSimpleProperties(mbd, bw);for (String propertyName : propertyNames) {PropertyDescriptor pd = bw.getPropertyDescriptor(propertyName);if (Object.class != pd.getPropertyType()) {MethodParameter methodParam = BeanUtils.getWriteMethodParameter(pd);boolean eager = !PriorityOrdered.class.isInstance(bw.getWrappedInstance());DependencyDescriptor desc = new AutowireByTypeDependencyDescriptor(methodParam, eager);// <2> 解析依赖,重点方法Object autowiredArgument = resolveDependency(desc, beanName, autowiredBeanNames, converter);if (autowiredArgument != null) {pvs.add(propertyName, autowiredArgument);}}}
}
-
<1>处,用内省机制查找注入的属性的 unsatisfiedNonSimpleProperties 方法,同前面的『按名称填充(autowireByName方法)』,略 -
<2>处,重点分析解析依赖resolveDependency 方法完成依赖解析,其实也就是最后调用 getBean 方法!!!
public Object resolveDependency(DependencyDescriptor descriptor, @Nullable String requestingBeanName,@Nullable Set<String> autowiredBeanNames, @Nullable TypeConverter typeConverter) throws BeansException {// 解析依赖result = doResolveDependency(descriptor, requestingBeanName, autowiredBeanNames, typeConverter);return result;
}
public Object doResolveDependency(DependencyDescriptor descriptor, @Nullable String beanName,@Nullable Set<String> autowiredBeanNames, @Nullable TypeConverter typeConverter) throws BeansException {InjectionPoint previousInjectionPoint = ConstructorResolver.setCurrentInjectionPoint(descriptor);try {// <1> 如果注入的类型是 Array、List、Map 等集合类型Object multipleBeans = resolveMultipleBeans(descriptor, beanName, autowiredBeanNames, typeConverter);if (multipleBeans != null) {return multipleBeans;}// <2> 注入的不是集合类型,但可能匹配了多个Map<String, Object> matchingBeans = findAutowireCandidates(beanName, type, descriptor);if (matchingBeans.isEmpty()) {if (isRequired(descriptor)) {raiseNoMatchingBeanFound(type, descriptor.getResolvableType(), descriptor);}return null;}if (matchingBeans.size() > 1) {// <2.1> 类型匹配了多个,那么就要决定使用哪一个(如在@Primary and @Priority就会出现这种情况)autowiredBeanName = determineAutowireCandidate(matchingBeans, descriptor);instanceCandidate = matchingBeans.get(autowiredBeanName);}else {// <2.2> 刚好匹配一个,更多的是这种情况Map.Entry<String, Object> entry = matchingBeans.entrySet().iterator().next();autowiredBeanName = entry.getKey();instanceCandidate = entry.getValue();}if (autowiredBeanNames != null) {autowiredBeanNames.add(autowiredBeanName);}if (instanceCandidate instanceof Class) {// <3> 解析候选值,这里会调用 getBean 方法instanceCandidate = descriptor.resolveCandidate(autowiredBeanName, type, this);}Object result = instanceCandidate;// <4> 返回 getBean 方法结果return result;}finally {ConstructorResolver.setCurrentInjectionPoint(previousInjectionPoint);} }<1>处,处理集合类型的注入(如 Array、List、Map等)<2>处,处理单个注入,但是也可能会匹配到多个此时就需要考虑优先级选择出一个(如 @Primary 注解)<3>处,调用 getBean 方法完成实际的依赖注入<4>处,返回注入的结果
public Object resolveCandidate(String beanName, Class<?> requiredType, BeanFactory beanFactory)throws BeansException {// 终于看到我们想要看的 getBean 方法了!return beanFactory.getBean(beanName);
}
2.3 AutowiredAnnotationBeanPostProcessor的postProcessProperties方法
public PropertyValues postProcessProperties(PropertyValues pvs, Object bean, String beanName) {// <1> 发现 Autowired 元数据InjectionMetadata metadata = findAutowiringMetadata(beanName, bean.getClass(), pvs);// <2> 执行实际注入metadata.inject(bean, beanName, pvs);return pvs;
}
-
<1>处,查找 beanClass 中的@Autowired 元数据信息private InjectionMetadata buildAutowiringMetadata(final Class<?> clazz) {List<InjectionMetadata.InjectedElement> elements = new ArrayList<>();Class<?> targetClass = clazz;do {final List<InjectionMetadata.InjectedElement> currElements = new ArrayList<>();// <1> 查找本地字段ReflectionUtils.doWithLocalFields(targetClass, field -> {// 是不是有@Autowired 或 @Value 这些注解AnnotationAttributes ann = findAutowiredAnnotation(field);if (ann != null) {boolean required = determineRequiredStatus(ann);currElements.add(new AutowiredFieldElement(field, required));}});// <2> 查找本地方法ReflectionUtils.doWithLocalMethods(targetClass, method -> {// 是不是有@Autowired 或 @Value 这些注解Method bridgedMethod = BridgeMethodResolver.findBridgedMethod(method);if (!BridgeMethodResolver.isVisibilityBridgeMethodPair(method, bridgedMethod)) {return;}AnnotationAttributes ann = findAutowiredAnnotation(bridgedMethod);if (ann != null && method.equals(ClassUtils.getMostSpecificMethod(method, clazz))) {boolean required = determineRequiredStatus(ann);PropertyDescriptor pd = BeanUtils.findPropertyForMethod(bridgedMethod, clazz);currElements.add(new AutowiredMethodElement(method, required, pd));}});// <3> 处理父类elements.addAll(0, currElements);targetClass = targetClass.getSuperclass();}while (targetClass != null && targetClass != Object.class);return new InjectionMetadata(clazz, elements); }<1>处,处理了本地字段是否包含了指定的注解,如果包含则加入到元数据中<2>处,处理了本地方法是否包含了指定的注解,如果包含则加入到元数据中<3>处,循环处理父类直到全部处理完毕
-
<2>处,根据前面得到的InjectionMetadata,执行实际的注入,最后会调用到 getBean 方法,以下简单代码描述如何一步一步调用到 getBean 方法public void inject(Object target, @Nullable String beanName, @Nullable PropertyValues pvs) throws Throwable {Collection<InjectedElement> checkedElements = this.checkedElements;Collection<InjectedElement> elementsToIterate =(checkedElements != null ? checkedElements : this.injectedElements);// 循环处理每个注入元数据的注入if (!elementsToIterate.isEmpty()) {for (InjectedElement element : elementsToIterate) {element.inject(target, beanName, pvs);}} }protected void inject(Object bean, @Nullable String beanName, @Nullable PropertyValues pvs) throws Throwable {// <1> 解析@Autowired 依赖value = beanFactory.resolveDependency(desc, beanName, autowiredBeanNames, typeConverter);// <2> 反射设置字段的值if (value != null) {ReflectionUtils.makeAccessible(field);field.set(bean, value);} }-
<1>处,依赖解析方法 resolveDependency 同前面的『按类型填充(autowireByType方法)』,略 -
<2> 处,使用了反射设置属性值,并没有像autowireByName 或 autowireByType 一样把属性添加到 pvs 中,最后才设置属性
-
3. 属性值设置
略
相关文章:
)
Spring 属性填充源码分析(简单实用版)
属性填充 属性填充只有 3 种方式 根据名称填充 根据类型填充 思考什么时候会出现呢??? 多见于第三方框架与 Spring集成,举例:Mybatis 与 Spring集成,把 Mapper 接口注册为 BeanDefinition 时候就指定了自…...

【机器学习分支】重要性采样(Importance sampling)学习笔记
重要性采样(importance sampling)是一种用于估计概率密度函数期望值的常用蒙特卡罗积分方法。其基本思想是利用一个已知的概率密度函数来生成样本,从而近似计算另一个概率密度函数的期望值。 想从复杂概率分布中采样的一个主要原因是能够使用…...

三角回文数+123
三角回文数:用户登录 问题描述 对于正整数 n, 如果存在正整数 k 使得 n123⋯kk(k1)/2, 则 n 称为三角数。例如, 66066 是一个三角数, 因为 66066123⋯363 。 如果一个整数从左到右读出所有数位上的数字, 与从右到左读出所有数位 上的数字是一样的, 则称这个数为…...

JAVA常用的异步处理方法总结
前言 在java项目开发过程中经常会遇到比较耗时的任务,通常是将这些任务做成异步操作,在java中实现异步操作有很多方法,本文主要总结一些常用的处理方法。为了简化,我们就拿一个实际的案例,再用每种方法去实现…...

GitLab统计代码量
gitlab官方文档:https://docs.gitlab.com/ee/api/index.html 1、生成密钥 登录gitlab,编辑个人资料,设置访问令牌 2、获取当前用户所有可见的项目 接口地址 GET请求 http://gitlab访问地址/api/v4/projects?private_tokenxxx 返回参数 …...

Linux TCP MIB统计汇总
概述 在 linux > 4.7 才将所有TCP丢包收敛到 函数 tcp_drop 中 指标详解 cat /proc/net/netstat 格式化命令 cat /proc/net/netstat | awk (f0) {name$1; i2; while ( i<NF) {n[i] $i; i }; f1; next} (f1){ i2; while ( i<NF){ printf "%s%s %d\n", …...

记录 docker linux部署jar
第一步 web sso user admin 中yml文件还原到阿里mysql数据库 第二步 各个jar进行打包处理 第三步 正式服务器的Jar备份 第四步 拉取以上jar包 到正式服务器中 第五步 查看 docker images 其中 web_service 1.0.2是上一个版本 上一个版本build 镜像命令是这样的(需…...

【Linux】教你用进程替换制作一个简单的Shell解释器
本章的代码可以访问这里获取。 由于程序代码是一体的,本章在分开讲解各部分的实现时,代码可能有些跳跃,建议在讲解各部分实现后看一下源代码方便理解程序。 制作一个简单的Shell解释器 一、观察Shell的运行状态二、简单的Shell解释器制作原理…...

onMeasure里如何重置只有1个子view一行满屏, 若有多个自适应一行
onMeasure里如何重置只有1个子view一行满屏, 若有多个自适应一行 可以尝试在 onMeasure 方法中重写 measureChildWithMargins 或 measureChild 方法来实现这个需求。 对于只有一个字的 View,我们可以把它的宽度设为屏幕宽度,高度设为最大高度,这样这个 View 就会占满一整行…...
Postman创建项目 对接口发起请求处理
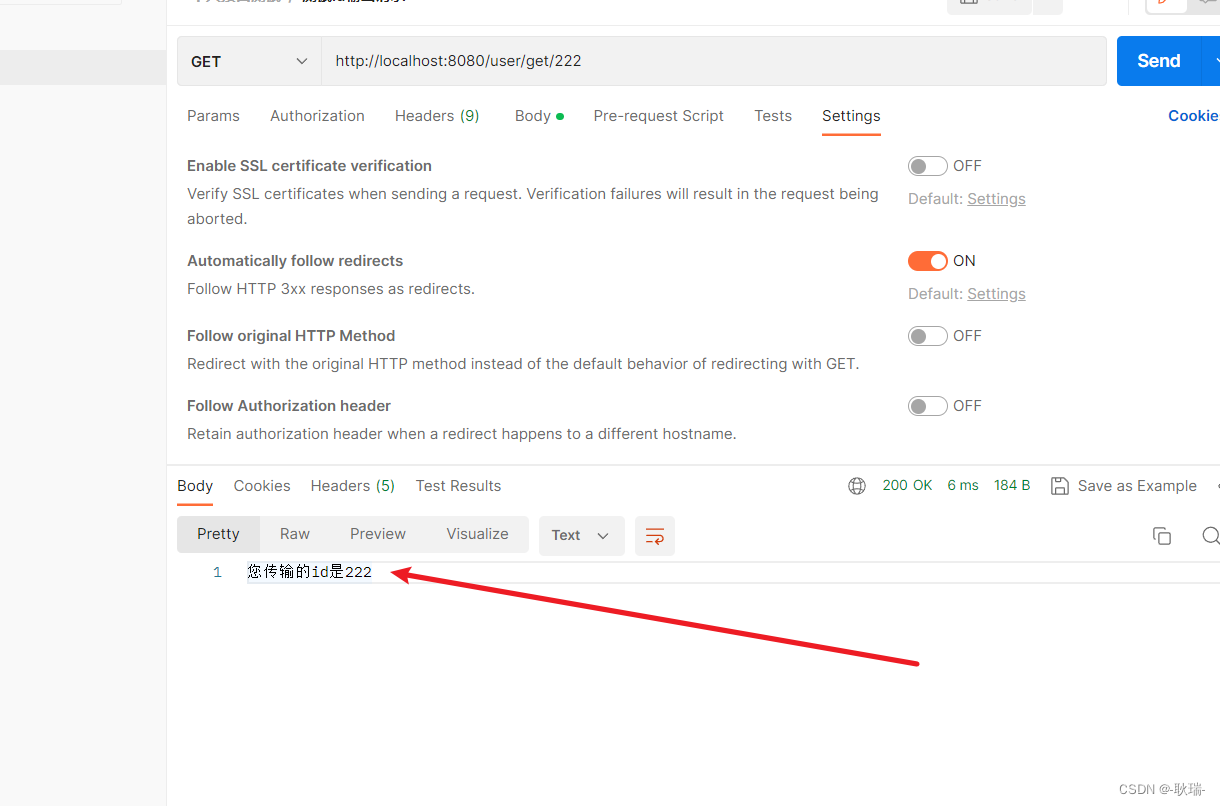
查看本文之前 您需要理解了解 Postman 的几个简单工作区 如果还没有掌握 可以先查看我的文章 简单认识 Postman界面操作 那么 掌握之后 我们就可以正式来开启我们的接口测试 我们先选择 Collections 我们点上面这个加号 多拉一个项目出来 然后 我们选我们刚加号点出来的项目…...

在Vue3项目中js-cookie库的使用
文章目录 前言1.安装js-cookie库2.引入、使用js-cookie库 前言 今天分享一下在Vue3项目中引入使用js-cookie。 1.安装js-cookie库 js-cookie官网 安装js-cookie,输入 npm i js-cookie安装完成可以在package.json中看到: 安装以后,就可…...

【论文笔记】Attention和Visual Transformer
Attention和Visual Transformer Attention和Transformer为什么需要AttentionAttention机制Multi-head AttentionSelf Multi-head Attention,SMA TransformerVisual Transformer,ViT Attention和Transformer Attention机制在相当早的时间就已经被提出了&…...

独立IP服务器和共享IP服务器有什么区别
在选择一个合适的服务器时,最常见的选择是共享IP服务器和独立IP服务器。尽管两者看起来很相似,但它们有着很大的不同。本文将详细介绍共享IP服务器和独立IP服务器的不同之处,以及如何选择适合您需求的服务器。 一、什么是共享IP服务器? 共享…...

Java8
Java8 (一)、双列集合(二)、Map集合常用api(三)、Map集合的遍历方式(四)、HashMap(五)、LinkedHashMap(六)、TreeMap(七&a…...

nn.conv1d的输入问题
Conv1d(in_channels, out_channels, kernel_size, stride1, padding0, dilation1, groups1, biasTrue) in_channels(int) – 输入信号的通道。在文本分类中,即为词向量的维度out_channels(int) – 卷积产生的通道。有多少个out_channels,就需要多少个1维…...
js判断是否为null,undefined,NaN,空串或者空对象
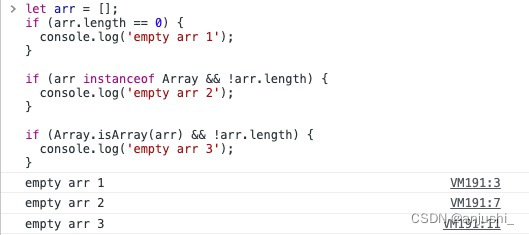
js判断是否为null,undefined,NaN,空串或者空对象 这里写目录标题 js判断是否为null,undefined,NaN,空串或者空对象特殊值nullundefinedNaN空字符串("")空对象(…...

Java每日一练(20230501)
目录 1. 路径交叉 🌟🌟 2. 环形链表 🌟🌟 3. 被围绕的区域 🌟🌟 🌟 每日一练刷题专栏 🌟 Golang每日一练 专栏 Python每日一练 专栏 C/C每日一练 专栏 Java每日一练 专栏…...

从零开始学习Web自动化测试:如何使用Selenium和Python提高效率?
B站首推!2023最详细自动化测试合集,小白皆可掌握,让测试变得简单、快捷、可靠https://www.bilibili.com/video/BV1ua4y1V7Db 目录 引言: 一、了解Web自动化测试的基本概念 二、选择Web自动化测试工具 三、学习Web自动化测试的…...

fastdfs环境搭建
安装包下载路径 libfastcommon下载地址:https://github.com/happyfish100/libfastcommon/releasesFastDFS下载地址:https://github.com/happyfish100/fastdfs/releasesfastdfs-nginx-module下载地址:https://github.com/happyfish100/fastdf…...

有什么牌子台灯性价比高?性价比最高的护眼台灯
由心感叹现在的孩子真不容易,学习压力比我们小时候大太多,特别是数学,不再是简单的计算,而更多的是培养学生其他思维方式,有时候我都觉得一年级数学题是不是超纲了。我女儿现在基本上都是晚上9点30左右上床睡觉&#x…...
UE5 学习系列(二)用户操作界面及介绍
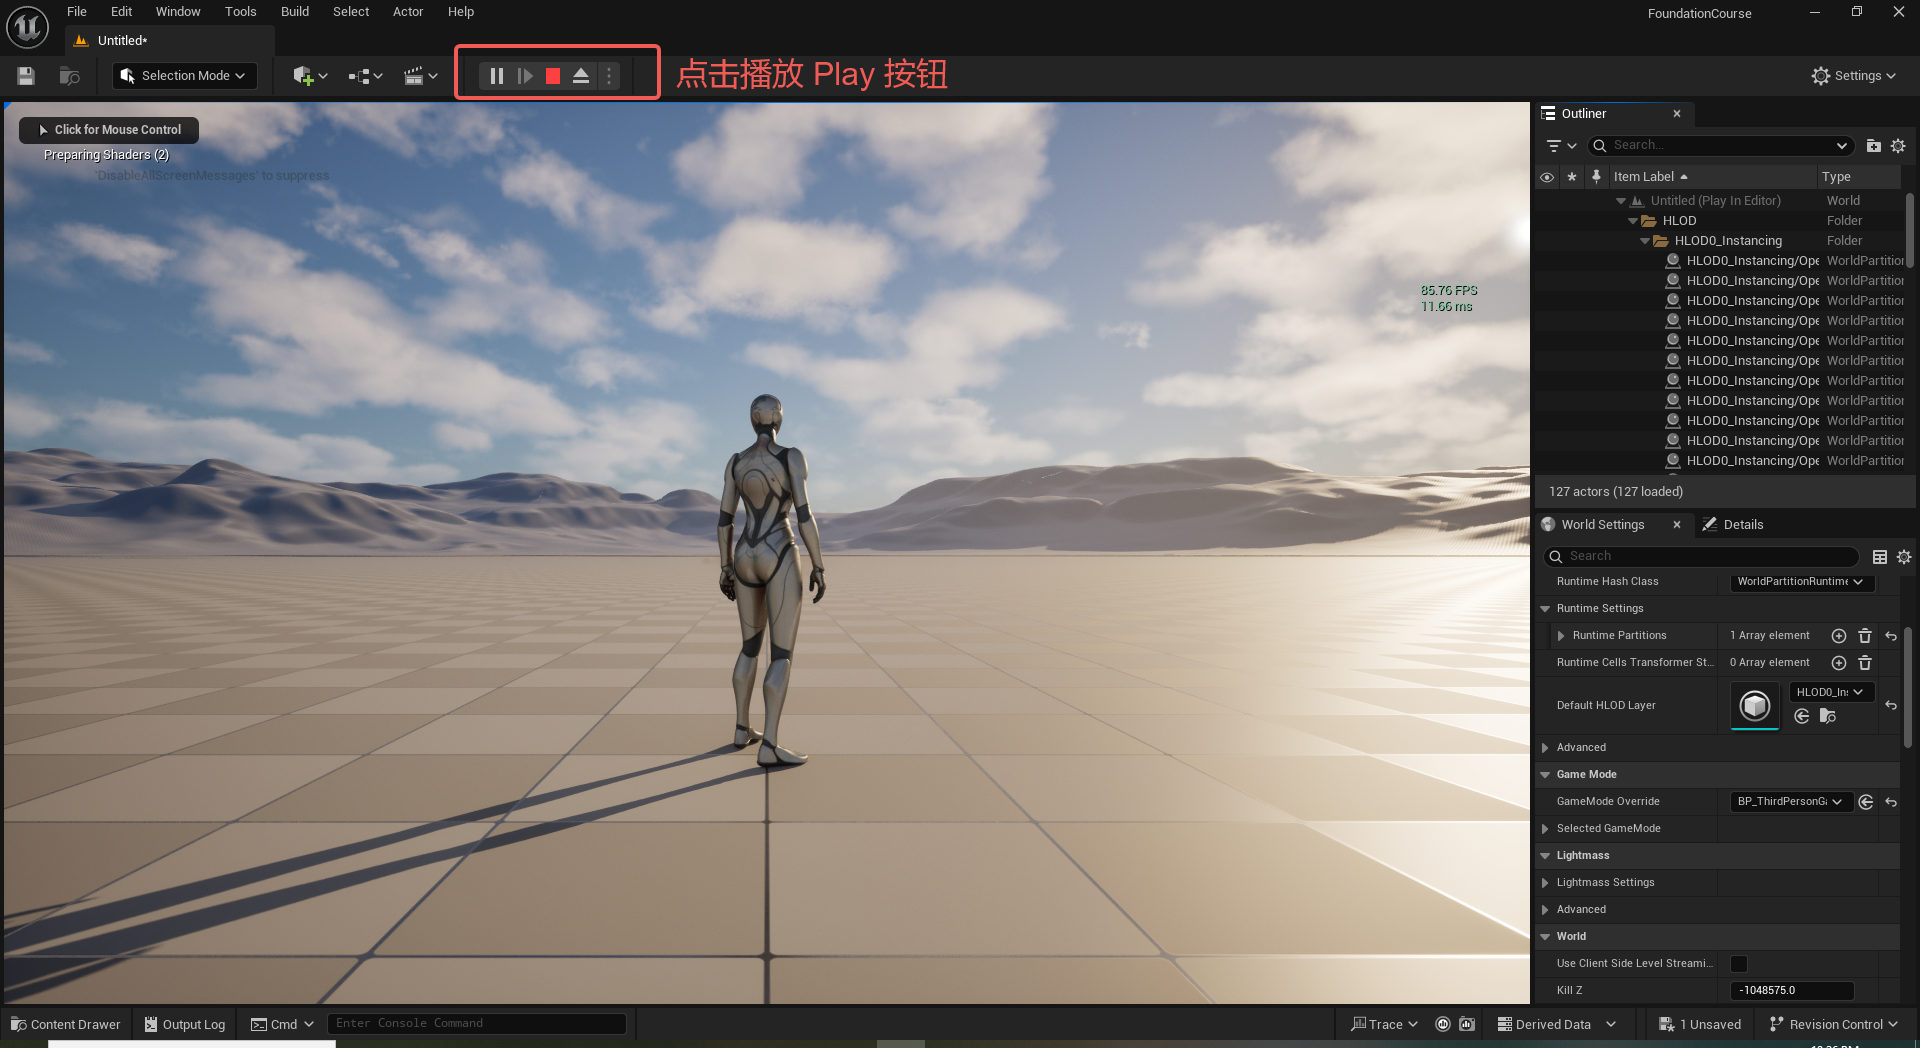
这篇博客是 UE5 学习系列博客的第二篇,在第一篇的基础上展开这篇内容。博客参考的 B 站视频资料和第一篇的链接如下: 【Note】:如果你已经完成安装等操作,可以只执行第一篇博客中 2. 新建一个空白游戏项目 章节操作,重…...

边缘计算医疗风险自查APP开发方案
核心目标:在便携设备(智能手表/家用检测仪)部署轻量化疾病预测模型,实现低延迟、隐私安全的实时健康风险评估。 一、技术架构设计 #mermaid-svg-iuNaeeLK2YoFKfao {font-family:"trebuchet ms",verdana,arial,sans-serif;font-size:16px;fill:#333;}#mermaid-svg…...
)
IGP(Interior Gateway Protocol,内部网关协议)
IGP(Interior Gateway Protocol,内部网关协议) 是一种用于在一个自治系统(AS)内部传递路由信息的路由协议,主要用于在一个组织或机构的内部网络中决定数据包的最佳路径。与用于自治系统之间通信的 EGP&…...
从零开始打造 OpenSTLinux 6.6 Yocto 系统(基于STM32CubeMX)(九)
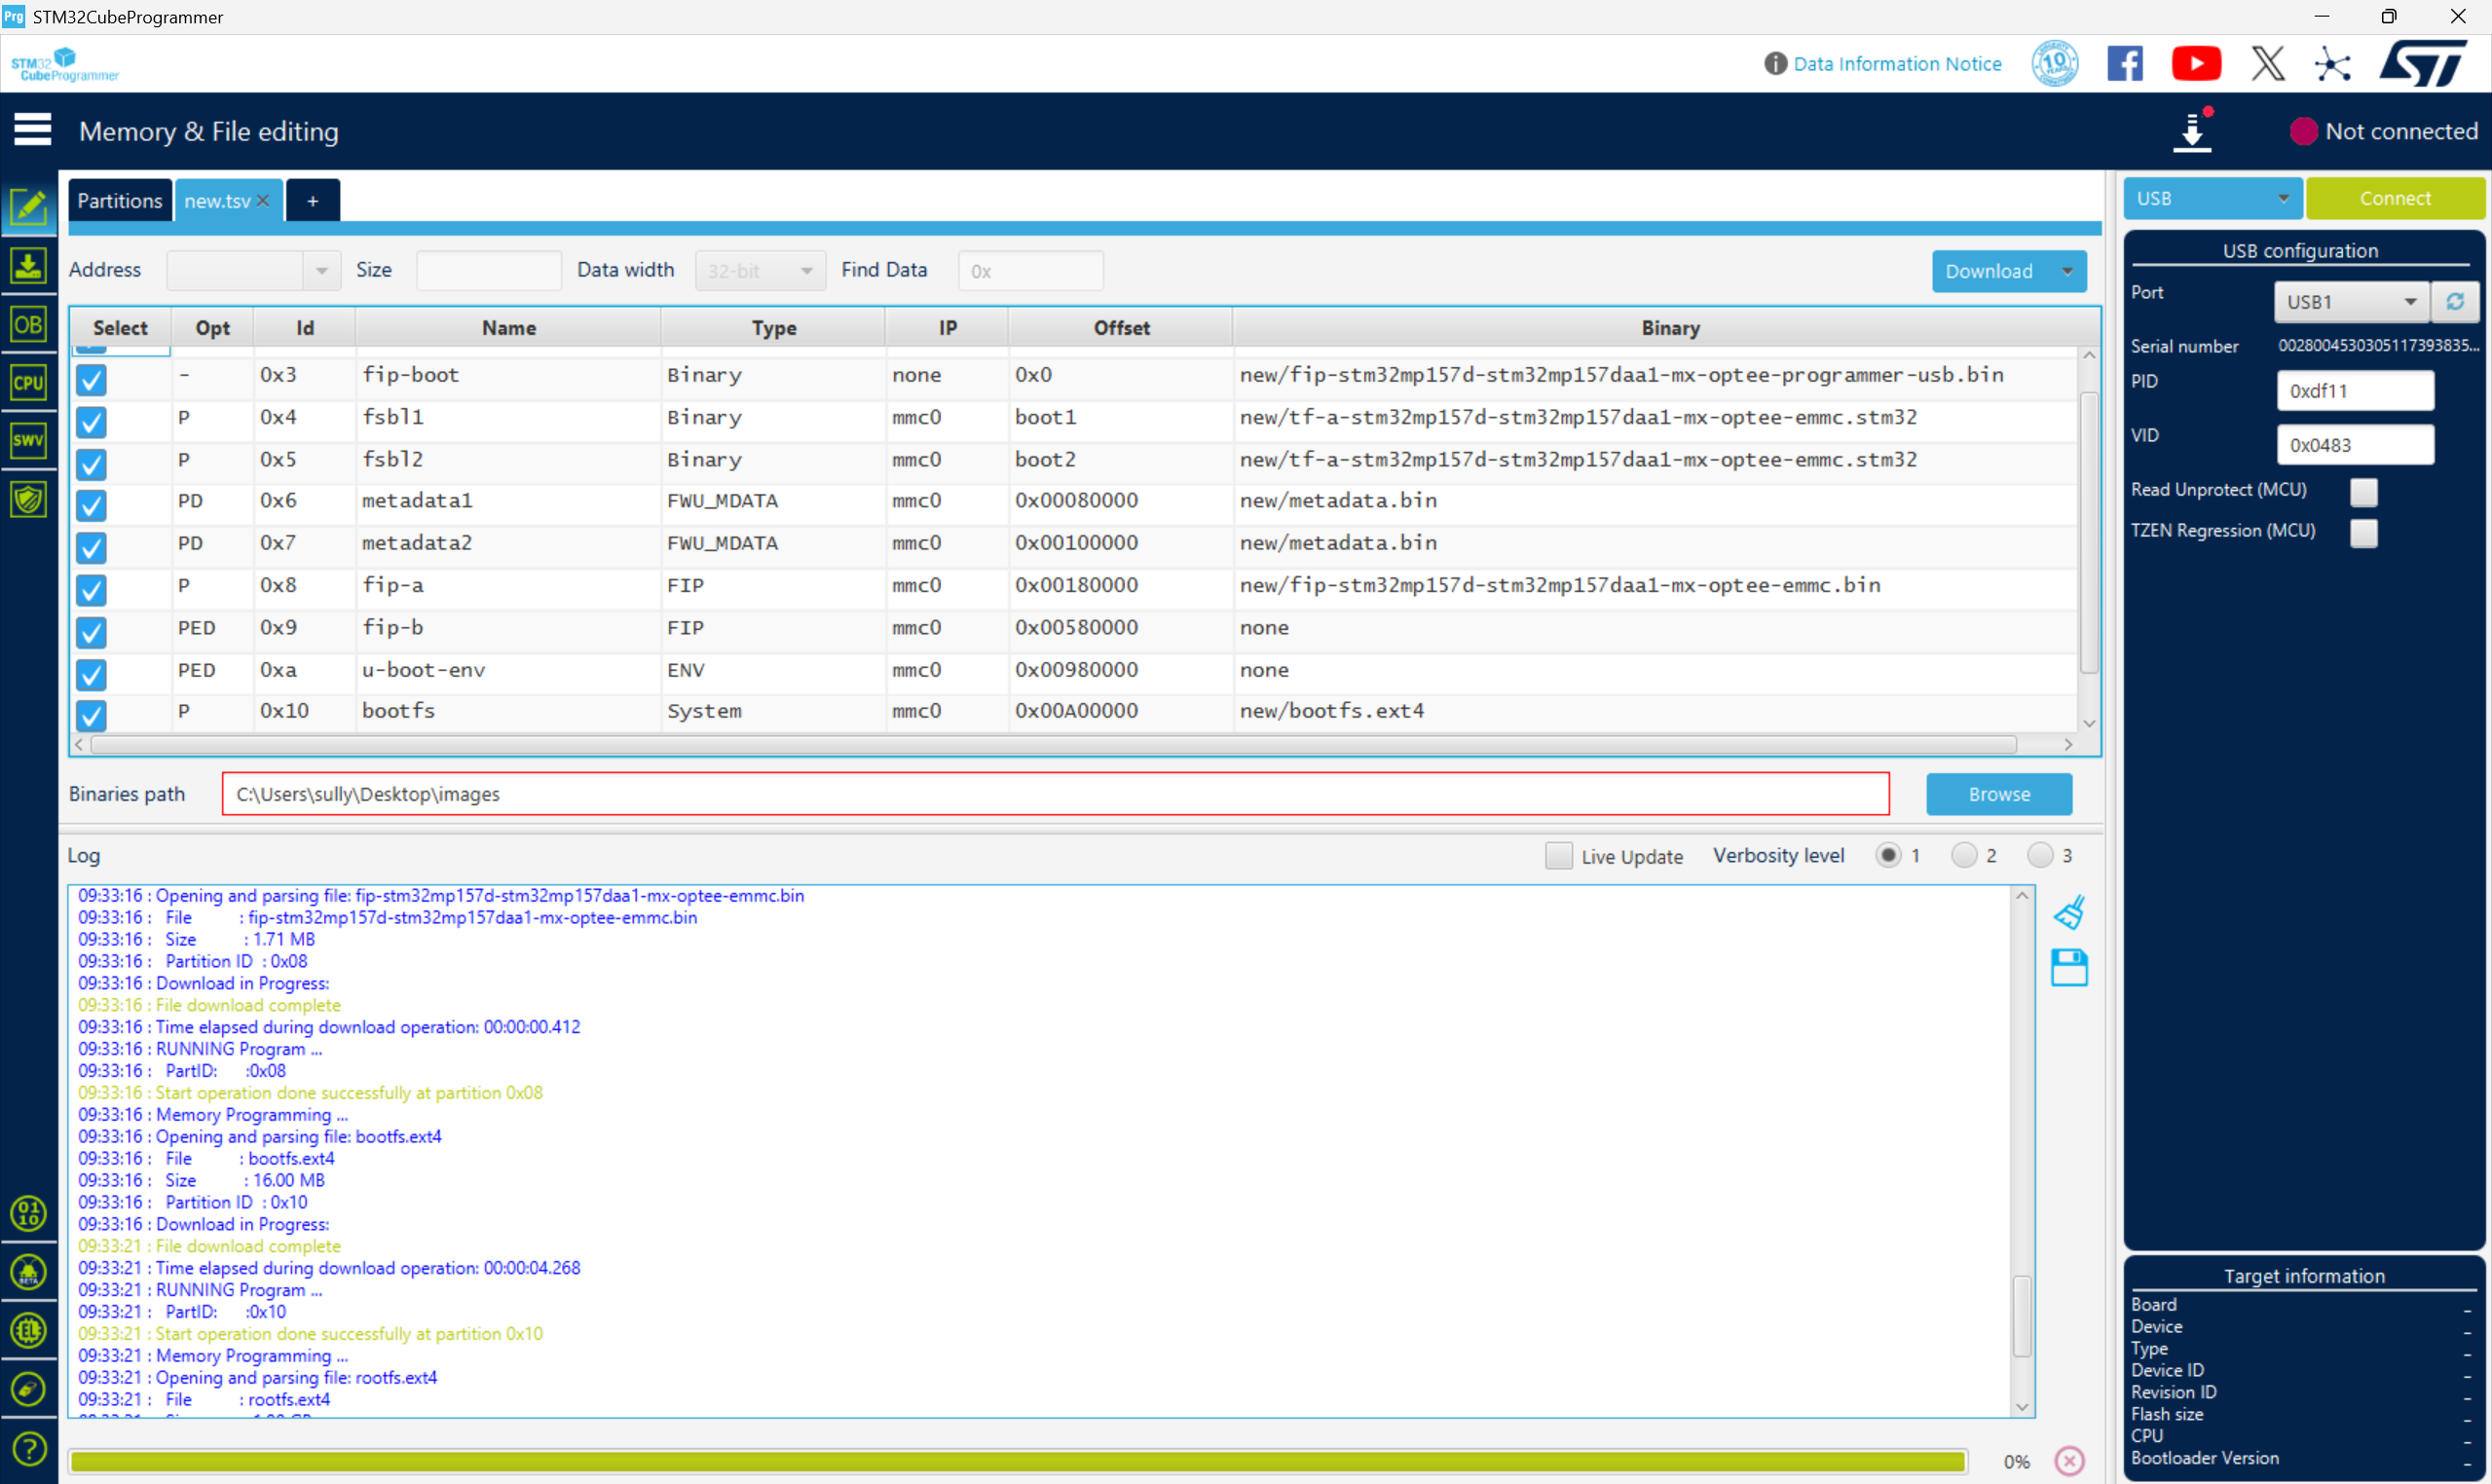
设备树移植 和uboot设备树修改的内容同步到kernel将设备树stm32mp157d-stm32mp157daa1-mx.dts复制到内核源码目录下 源码修改及编译 修改arch/arm/boot/dts/st/Makefile,新增设备树编译 stm32mp157f-ev1-m4-examples.dtb \stm32mp157d-stm32mp157daa1-mx.dtb修改…...

UR 协作机器人「三剑客」:精密轻量担当(UR7e)、全能协作主力(UR12e)、重型任务专家(UR15)
UR协作机器人正以其卓越性能在现代制造业自动化中扮演重要角色。UR7e、UR12e和UR15通过创新技术和精准设计满足了不同行业的多样化需求。其中,UR15以其速度、精度及人工智能准备能力成为自动化领域的重要突破。UR7e和UR12e则在负载规格和市场定位上不断优化…...
用docker来安装部署freeswitch记录
今天刚才测试一个callcenter的项目,所以尝试安装freeswitch 1、使用轩辕镜像 - 中国开发者首选的专业 Docker 镜像加速服务平台 编辑下面/etc/docker/daemon.json文件为 {"registry-mirrors": ["https://docker.xuanyuan.me"] }同时可以进入轩…...

高防服务器能够抵御哪些网络攻击呢?
高防服务器作为一种有着高度防御能力的服务器,可以帮助网站应对分布式拒绝服务攻击,有效识别和清理一些恶意的网络流量,为用户提供安全且稳定的网络环境,那么,高防服务器一般都可以抵御哪些网络攻击呢?下面…...
优选算法第十二讲:队列 + 宽搜 优先级队列
优选算法第十二讲:队列 宽搜 && 优先级队列 1.N叉树的层序遍历2.二叉树的锯齿型层序遍历3.二叉树最大宽度4.在每个树行中找最大值5.优先级队列 -- 最后一块石头的重量6.数据流中的第K大元素7.前K个高频单词8.数据流的中位数 1.N叉树的层序遍历 2.二叉树的锯…...
)
Typeerror: cannot read properties of undefined (reading ‘XXX‘)
最近需要在离线机器上运行软件,所以得把软件用docker打包起来,大部分功能都没问题,出了一个奇怪的事情。同样的代码,在本机上用vscode可以运行起来,但是打包之后在docker里出现了问题。使用的是dialog组件,…...

Linux C语言网络编程详细入门教程:如何一步步实现TCP服务端与客户端通信
文章目录 Linux C语言网络编程详细入门教程:如何一步步实现TCP服务端与客户端通信前言一、网络通信基础概念二、服务端与客户端的完整流程图解三、每一步的详细讲解和代码示例1. 创建Socket(服务端和客户端都要)2. 绑定本地地址和端口&#x…...
