Android应用程序进程的启动过程
Android应用程序进程的启动过程

导语
到这篇文章为止,我们已经简要地了解过了Android系统的启动流程了,其中比较重要的内容有Zygote进程的启动和SystemService以及Launcher的启动,接下来我们将要学习的是Android应用程序的启动过程,这篇文章将会比较简单地介绍这个过程,下面是一张个人总结出来的流程图:
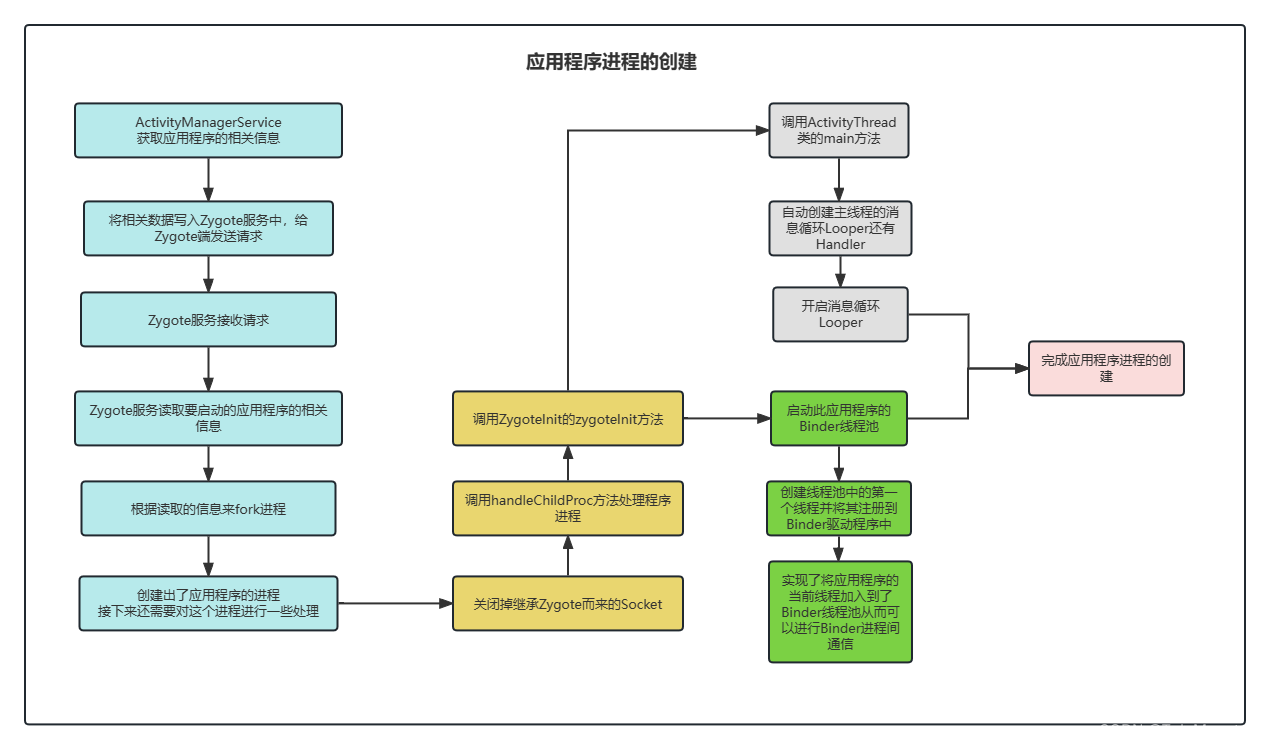
ActivityManagerService向Zygote服务发送请求
其实在之前Zygote服务启动的过程中,我们已经提到了这个Zygote服务将会创建出一个Socket来用于给ActivityManagerService使用,应用程序进程的启动就需要ActivityManagerService来给Zygote的服务端发送请求。
首先我们介绍ProcessRecord类,这个类是Android系统中用于表示应用程序进程的数据结构。每当应用程序启动时,系统都会为其创建一个ProcessRecord对象来跟踪该进程的状态和信息。
具体来说,在ActivityMangerService中也是通过这个类来启动进程的,来看看这个方法:
@GuardedBy("mService")boolean startProcessLocked(ProcessRecord app, HostingRecord hostingRecord,int zygotePolicyFlags, boolean disableHiddenApiChecks, boolean disableTestApiChecks,String abiOverride) {if (app.isPendingStart()) {return true;}final long startUptime = SystemClock.uptimeMillis();final long startElapsedTime = SystemClock.elapsedRealtime();if (app.getPid() > 0 && app.getPid() != ActivityManagerService.MY_PID) {checkSlow(startUptime, "startProcess: removing from pids map");mService.removePidLocked(app.getPid(), app);app.setBindMountPending(false);mService.mHandler.removeMessages(PROC_START_TIMEOUT_MSG, app);checkSlow(startUptime, "startProcess: done removing from pids map");app.setPid(0);app.setStartSeq(0);}// Clear any residual death recipient link as the ProcessRecord could be reused.app.unlinkDeathRecipient();app.setDyingPid(0);if (DEBUG_PROCESSES && mService.mProcessesOnHold.contains(app)) Slog.v(TAG_PROCESSES,"startProcessLocked removing on hold: " + app);mService.mProcessesOnHold.remove(app);checkSlow(startUptime, "startProcess: starting to update cpu stats");mService.updateCpuStats();checkSlow(startUptime, "startProcess: done updating cpu stats");try {final int userId = UserHandle.getUserId(app.uid);try {AppGlobals.getPackageManager().checkPackageStartable(app.info.packageName, userId);} catch (RemoteException e) {throw e.rethrowAsRuntimeException();}int uid = app.uid;int[] gids = null;int mountExternal = Zygote.MOUNT_EXTERNAL_NONE;boolean externalStorageAccess = false;if (!app.isolated) {int[] permGids = null;try {checkSlow(startUptime, "startProcess: getting gids from package manager");final IPackageManager pm = AppGlobals.getPackageManager();permGids = pm.getPackageGids(app.info.packageName,MATCH_DIRECT_BOOT_AUTO, app.userId);StorageManagerInternal storageManagerInternal = LocalServices.getService(StorageManagerInternal.class);mountExternal = storageManagerInternal.getExternalStorageMountMode(uid,app.info.packageName);externalStorageAccess = storageManagerInternal.hasExternalStorageAccess(uid,app.info.packageName);if (pm.checkPermission(Manifest.permission.INSTALL_PACKAGES,app.info.packageName, userId)== PackageManager.PERMISSION_GRANTED) {Slog.i(TAG, app.info.packageName + " is exempt from freezer");app.mOptRecord.setFreezeExempt(true);}} catch (RemoteException e) {throw e.rethrowAsRuntimeException();}if (app.processInfo != null && app.processInfo.deniedPermissions != null) {for (int i = app.processInfo.deniedPermissions.size() - 1; i >= 0; i--) {int[] denyGids = mService.mPackageManagerInt.getPermissionGids(app.processInfo.deniedPermissions.valueAt(i), app.userId);if (denyGids != null) {for (int gid : denyGids) {permGids = ArrayUtils.removeInt(permGids, gid);}}}}gids = computeGidsForProcess(mountExternal, uid, permGids, externalStorageAccess);}app.setMountMode(mountExternal);checkSlow(startUptime, "startProcess: building args");if (mService.mAtmInternal.isFactoryTestProcess(app.getWindowProcessController())) {uid = 0;}int runtimeFlags = 0;...........app.setGids(gids);app.setRequiredAbi(requiredAbi);app.setInstructionSet(instructionSet);ApplicationInfo definingAppInfo;if (hostingRecord.getDefiningPackageName() != null) {definingAppInfo = new ApplicationInfo(app.info);definingAppInfo.packageName = hostingRecord.getDefiningPackageName();definingAppInfo.uid = uid;} else {definingAppInfo = app.info;}runtimeFlags |= Zygote.getMemorySafetyRuntimeFlags(definingAppInfo, app.processInfo, instructionSet, mPlatformCompat);if (TextUtils.isEmpty(app.info.seInfoUser)) {Slog.wtf(ActivityManagerService.TAG, "SELinux tag not defined",new IllegalStateException("SELinux tag not defined for "+ app.info.packageName + " (uid " + app.uid + ")"));}final String seInfo = app.info.seInfo+ (TextUtils.isEmpty(app.info.seInfoUser) ? "" : app.info.seInfoUser);final String entryPoint = "android.app.ActivityThread";return startProcessLocked(hostingRecord, entryPoint, app, uid, gids,runtimeFlags, zygotePolicyFlags, mountExternal, seInfo, requiredAbi,instructionSet, invokeWith, startUptime, startElapsedTime);} catch (RuntimeException e) {Slog.e(ActivityManagerService.TAG, "Failure starting process " + app.processName, e);mService.forceStopPackageLocked(app.info.packageName, UserHandle.getAppId(app.uid),false, false, true, false, false, app.userId, "start failure");return false;}}
这里截取了部分代码,其实这个方法里做的主要就是获取到了应用程序的一些信息,比如Gid,Uid等,然后把获取到的信息设置到要启动的App中:
app.setGids(gids);app.setRequiredAbi(requiredAbi);app.setInstructionSet(instructionSet);
然后最后还需要调用一层重载方法开始正式进行进程的启动:
boolean startProcessLocked(HostingRecord hostingRecord, String entryPoint, ProcessRecord app,int uid, int[] gids, int runtimeFlags, int zygotePolicyFlags, int mountExternal,String seInfo, String requiredAbi, String instructionSet, String invokeWith,long startUptime, long startElapsedTime) {............try {final Process.ProcessStartResult startResult = startProcess(hostingRecord,entryPoint, app,uid, gids, runtimeFlags, zygotePolicyFlags, mountExternal, seInfo,requiredAbi, instructionSet, invokeWith, startUptime);handleProcessStartedLocked(app, startResult.pid, startResult.usingWrapper,startSeq, false);} catch (RuntimeException e) {Slog.e(ActivityManagerService.TAG, "Failure starting process "+ app.processName, e);app.setPendingStart(false);mService.forceStopPackageLocked(app.info.packageName, UserHandle.getAppId(app.uid),false, false, true, false, false, app.userId, "start failure");}return app.getPid() > 0;}}
这里它又会调用到startProcess和handleProcessStartedLocked方法,startProcessLocked 方法用于启动新的进程,而 handleProcessStartedLocked 方法用于处理进程启动完成后的回调,更新进程状态并通知其他模块有关进程启动完成的事件。这两个方法共同协作以实现进程的启动和管理。
在这里我们主要还是看进程的启动,所以着重来看startProcess方法,这个方法又将调用到Process的start方法:
startResult = Process.start(entryPoint,app.processName, uid, uid, gids, runtimeFlags, mountExternal,app.info.targetSdkVersion, seInfo, requiredAbi, instructionSet,app.info.dataDir, invokeWith, app.info.packageName, zygotePolicyFlags,isTopApp, app.getDisabledCompatChanges(), pkgDataInfoMap,allowlistedAppDataInfoMap, bindMountAppsData, bindMountAppStorageDirs,new String[]{PROC_START_SEQ_IDENT + app.getStartSeq()});
所以接下来看Process的start方法,这个方法又会调转到ZygoteProcess的start方法,并继续跳转到startViaZygote方法中,我们接下来看一看这个方法:
private Process.ProcessStartResult startViaZygote(@NonNull final String processClass,@Nullable final String niceName,final int uid, final int gid,@Nullable final int[] gids,int runtimeFlags, int mountExternal,int targetSdkVersion,@Nullable String seInfo,@NonNull String abi,@Nullable String instructionSet,@Nullable String appDataDir,@Nullable String invokeWith,boolean startChildZygote,@Nullable String packageName,int zygotePolicyFlags,boolean isTopApp,@Nullable long[] disabledCompatChanges,@Nullable Map<String, Pair<String, Long>>pkgDataInfoMap,@Nullable Map<String, Pair<String, Long>>allowlistedDataInfoList,boolean bindMountAppsData,boolean bindMountAppStorageDirs,@Nullable String[] extraArgs)throws ZygoteStartFailedEx {ArrayList<String> argsForZygote = new ArrayList<>();// --runtime-args, --setuid=, --setgid=,// and --setgroups= must go firstargsForZygote.add("--runtime-args");argsForZygote.add("--setuid=" + uid);argsForZygote.add("--setgid=" + gid);argsForZygote.add("--runtime-flags=" + runtimeFlags);if (mountExternal == Zygote.MOUNT_EXTERNAL_DEFAULT) {argsForZygote.add("--mount-external-default");} else if (mountExternal == Zygote.MOUNT_EXTERNAL_INSTALLER) {argsForZygote.add("--mount-external-installer");} else if (mountExternal == Zygote.MOUNT_EXTERNAL_PASS_THROUGH) {argsForZygote.add("--mount-external-pass-through");} else if (mountExternal == Zygote.MOUNT_EXTERNAL_ANDROID_WRITABLE) {argsForZygote.add("--mount-external-android-writable");}argsForZygote.add("--target-sdk-version=" + targetSdkVersion);// --setgroups is a comma-separated listif (gids != null && gids.length > 0) {final StringBuilder sb = new StringBuilder();sb.append("--setgroups=");final int sz = gids.length;for (int i = 0; i < sz; i++) {if (i != 0) {sb.append(',');}sb.append(gids[i]);}argsForZygote.add(sb.toString());}..........synchronized(mLock) {// The USAP pool can not be used if the application will not use the systems graphics// driver. If that driver is requested use the Zygote application start path.return zygoteSendArgsAndGetResult(openZygoteSocketIfNeeded(abi),zygotePolicyFlags,argsForZygote);}}这个变量名argsForZygote的数组显然是用作传参用的,这个方法做的主要也就是创建一个字符串列表argsForZygote,并将应用程序的启动参数保存在这个列表中,最后调用zygoteSendArgsAndGetResult方法将其传给zygote执行,这实际上就是达到了AMS向zygote发送请求的目的:
private Process.ProcessStartResult attemptZygoteSendArgsAndGetResult(ZygoteState zygoteState, String msgStr) throws ZygoteStartFailedEx {try {final BufferedWriter zygoteWriter = zygoteState.mZygoteOutputWriter;final DataInputStream zygoteInputStream = zygoteState.mZygoteInputStream;zygoteWriter.write(msgStr);zygoteWriter.flush();Process.ProcessStartResult result = new Process.ProcessStartResult();result.pid = zygoteInputStream.readInt();result.usingWrapper = zygoteInputStream.readBoolean();if (result.pid < 0) {throw new ZygoteStartFailedEx("fork() failed");}return result;} catch (IOException ex) {zygoteState.close();Log.e(LOG_TAG, "IO Exception while communicating with Zygote - "+ ex.toString());throw new ZygoteStartFailedEx(ex);}}
在这个过程中会调用到上面这个方法,将应用参数的启动数据等写入zygote中,实际上就是向zygote发送了请求了。里面出现的ZygoteState类就是用于表示与Zygote的通信状况的。
再回到之前的
zygoteSendArgsAndGetResult(openZygoteSocketIfNeeded(abi),zygotePolicyFlags,argsForZygote);
这里的请求就是通过第一个参数(其实也是方法)的socket传达的,我们来看一看这个方法:
private ZygoteState openZygoteSocketIfNeeded(String abi) throws ZygoteStartFailedEx {try {attemptConnectionToPrimaryZygote();if (primaryZygoteState.matches(abi)) {return primaryZygoteState;}if (mZygoteSecondarySocketAddress != null) {// The primary zygote didn't match. Try the secondary.attemptConnectionToSecondaryZygote();if (secondaryZygoteState.matches(abi)) {return secondaryZygoteState;}}} catch (IOException ioe) {throw new ZygoteStartFailedEx("Error connecting to zygote", ioe);}throw new ZygoteStartFailedEx("Unsupported zygote ABI: " + abi);}
实际上就是根据abi参数来建立与Zygote的Socket连接,其实就是根据Zygote的启动脚本类型来建立不同的连接,这里我们就不深入了。
所以到目前为止,ActivityManagerService就成功地读取应用程序的相关信息并将其打包发给Zygote,请求Zygote创建进程了,接下来我们看Zygote是如何响应AMS的请求的。
Zygote服务创建应用程序的进程
在之前的文章中,其实我们已经提到过了,Zygote将在创建完自身的Socket后等待AMS的请求,具体是在ZygoteInit的main方法中:
caller = zygoteServer.runSelectLoop(abiList);
其实这个方法里还是继续跳转,我们直接跳过中间步骤,来到最终调用到的ZygoteConnection方法中:
Runnable processCommand(ZygoteServer zygoteServer, boolean multipleOK) {ZygoteArguments parsedArgs;try (ZygoteCommandBuffer argBuffer = new ZygoteCommandBuffer(mSocket)) {while (true) {try {parsedArgs = ZygoteArguments.getInstance(argBuffer);//1-----1} .........if (parsedArgs.mInvokeWith != null || parsedArgs.mStartChildZygote|| !multipleOK || peer.getUid() != Process.SYSTEM_UID) {// Continue using old code for now. TODO: Handle these cases in the other path.pid = Zygote.forkAndSpecialize(parsedArgs.mUid, parsedArgs.mGid,parsedArgs.mGids, parsedArgs.mRuntimeFlags, rlimits,parsedArgs.mMountExternal, parsedArgs.mSeInfo, parsedArgs.mNiceName,fdsToClose, fdsToIgnore, parsedArgs.mStartChildZygote,parsedArgs.mInstructionSet, parsedArgs.mAppDataDir,parsedArgs.mIsTopApp, parsedArgs.mPkgDataInfoList,parsedArgs.mAllowlistedDataInfoList, parsedArgs.mBindMountAppDataDirs,parsedArgs.mBindMountAppStorageDirs);//2-----2try {if (pid == 0) {// in childzygoteServer.setForkChild();zygoteServer.closeServerSocket();IoUtils.closeQuietly(serverPipeFd);serverPipeFd = null;return handleChildProc(parsedArgs, childPipeFd,parsedArgs.mStartChildZygote);//3--------3} else {IoUtils.closeQuietly(childPipeFd);childPipeFd = null;handleParentProc(pid, serverPipeFd);return null;}} finally {IoUtils.closeQuietly(childPipeFd);IoUtils.closeQuietly(serverPipeFd);}} else {ZygoteHooks.preFork();Runnable result = Zygote.forkSimpleApps(argBuffer,zygoteServer.getZygoteSocketFileDescriptor(),peer.getUid(), Zygote.minChildUid(peer), parsedArgs.mNiceName);if (result == null) {// parent; we finished some number of forks. Result is Boolean.// We already did the equivalent of handleParentProc().ZygoteHooks.postForkCommon();// argBuffer contains a command not understood by forksimpleApps.continue;} else {// child; result is a Runnable.zygoteServer.setForkChild();Zygote.setAppProcessName(parsedArgs, TAG); // ??? Necessary?return result;}}}}........}
方法很长,我们主要看注释出的三处,第一处的
parsedArgs = ZygoteArguments.getInstance(argBuffer);
方法显然是将我们之间通过AMS发送过来的启动参数给获取出来了。接着注释二处通过zygote将要启动的应用程序的进程就已经fork出来了,到此为止,实际上要启动的进程已经被创建出来了,只不过创建出来后我们还需要将这个进程进行一些处理,所以接下来会调用到注释三处的handleChildProc方法,到了这里之后又会跳转,具体来说会跳转到ZygoteInit.zygoteInit方法,这个方法我们在之前的Zygote的启动中也提到过,它首先会启动进程的Binder进程池,这样这个进程就可以与其他进程进行Binder进程间通信了,然后它会执行具体类的main方法。在这里,他将会启动ActivityThread的main方法。
这个ActivityThread类是Android系统中的核心类之一,它负责管理应用程序的主线程(UI线程)以及应用程序的生命周期和消息处理。每个应用程序在启动时都会创建一个ActivityThread实例,并在该实例的主线程中执行应用程序的主要逻辑。ActivityThread类的主要职责包括:
-
应用程序的初始化:在ActivityThread的main()方法中,会创建Application实例,并调用其onCreate()方法来进行应用程序的初始化工作。
-
管理Activity的生命周期:ActivityThread负责跟踪和管理应用程序中所有Activity的生命周期。它会接收来自系统的生命周期回调消息,并分发给相应的Activity进行处理,例如调用Activity的onCreate()、onStart()、onResume()等方法。
-
处理消息和事件:ActivityThread通过一个消息循环机制,处理来自系统和应用程序的消息和事件。它会接收并分发消息给对应的Handler进行处理,例如处理用户界面事件、处理来自其他组件的消息等。
-
启动Activity和Service:ActivityThread负责启动应用程序中的Activity和Service组件。它会接收来自系统的启动请求,并负责创建和启动相应的组件实例。
-
处理窗口和界面更新:ActivityThread负责处理窗口和界面的更新操作,包括创建和管理窗口、更新界面布局、处理用户界面事件等。
那么接下来我们就来简单看看它的main方法:
public static void main(String[] args) {Trace.traceBegin(Trace.TRACE_TAG_ACTIVITY_MANAGER, "ActivityThreadMain");// Install selective syscall interceptionAndroidOs.install();CloseGuard.setEnabled(false);Environment.initForCurrentUser();// Make sure TrustedCertificateStore looks in the right place for CA certificatesfinal File configDir = Environment.getUserConfigDirectory(UserHandle.myUserId());TrustedCertificateStore.setDefaultUserDirectory(configDir);// Call per-process mainline module initialization.initializeMainlineModules();Process.setArgV0("<pre-initialized>");Looper.prepareMainLooper();// Find the value for {@link #PROC_START_SEQ_IDENT} if provided on the command line.// It will be in the format "seq=114"long startSeq = 0;if (args != null) {for (int i = args.length - 1; i >= 0; --i) {if (args[i] != null && args[i].startsWith(PROC_START_SEQ_IDENT)) {startSeq = Long.parseLong(args[i].substring(PROC_START_SEQ_IDENT.length()));}}}ActivityThread thread = new ActivityThread();thread.attach(false, startSeq);if (sMainThreadHandler == null) {sMainThreadHandler = thread.getHandler();}if (false) {Looper.myLooper().setMessageLogging(newLogPrinter(Log.DEBUG, "ActivityThread"));}// End of event ActivityThreadMain.Trace.traceEnd(Trace.TRACE_TAG_ACTIVITY_MANAGER);Looper.loop();throw new RuntimeException("Main thread loop unexpectedly exited");}
可以看到这个main方法中会自动创建出一个消息Looper和一个默认的Handler,然后会自动开启消息队列的循环使它可以处理消息。接下来Activity就将由ActivityThread管理启动了,这就已经完成了应用程序进程的启动了。
总结
最后再来回顾一下上面那张总结图:
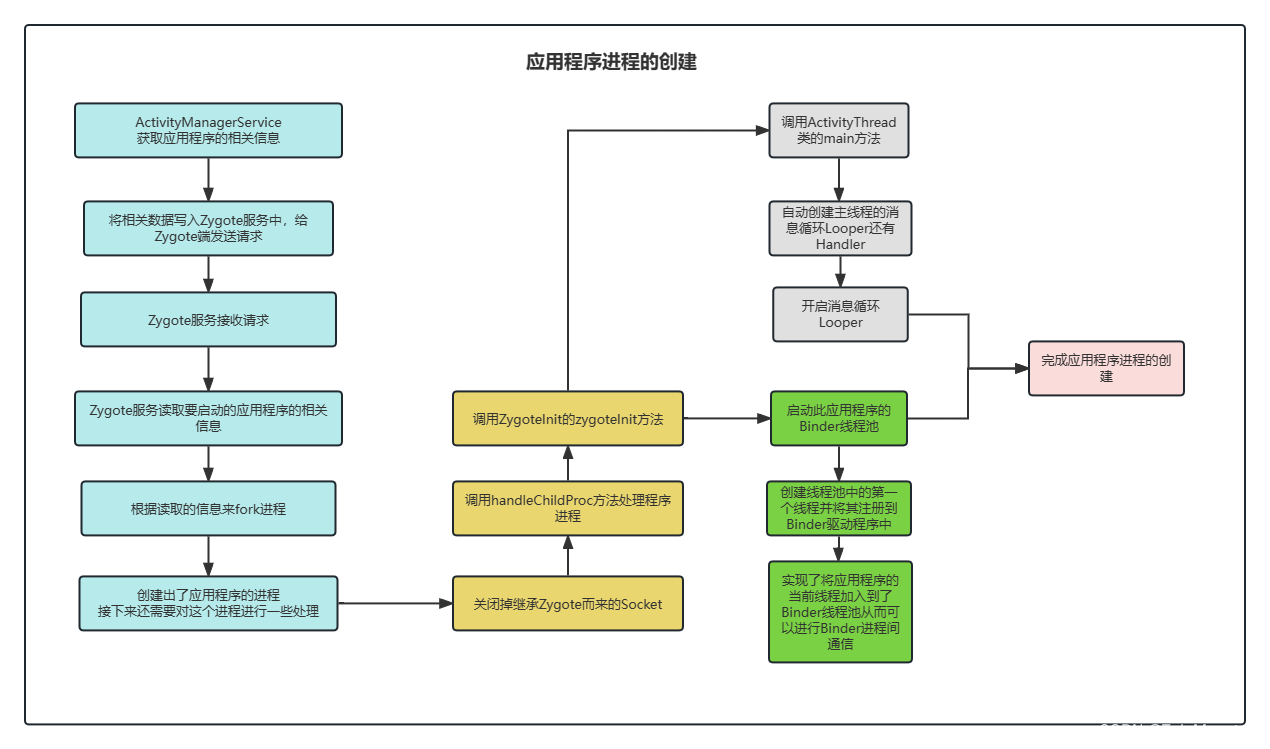
这就是应用程序进程的启动过程。
相关文章:

Android应用程序进程的启动过程
Android应用程序进程的启动过程 导语 到这篇文章为止,我们已经简要地了解过了Android系统的启动流程了,其中比较重要的内容有Zygote进程的启动和SystemService以及Launcher的启动,接下来我们将要学习的是Android应用程序的启动过程ÿ…...

【2】Midjourney注册
随着AI技术的问世,2023年可以说是AI爆炸性成长的一年,近期最广为人知的AI服务除了chatgpt外,就是从去年五月就已经问世的AI绘画工具mid journey了。 ▲几个AI工具也代表了人工智能的热门阶段 只要输入一段文字,AI就会根据语意计算…...

第六十八天学习记录:高等数学:导数(宋浩板书)
导数是微积分中的一个概念,描述了函数在某一个点上的变化率。具体地说,函数 f ( x ) f(x) f(x)在 x a xa xa处的导数为 f ′ ( a ) f(a) f′(a),表示当 x x x在 a a a处发生微小的变化 Δ x \Delta x Δx时, f ( x ) f(x) f(x)对…...
unreal 5 实现角色拾取功能
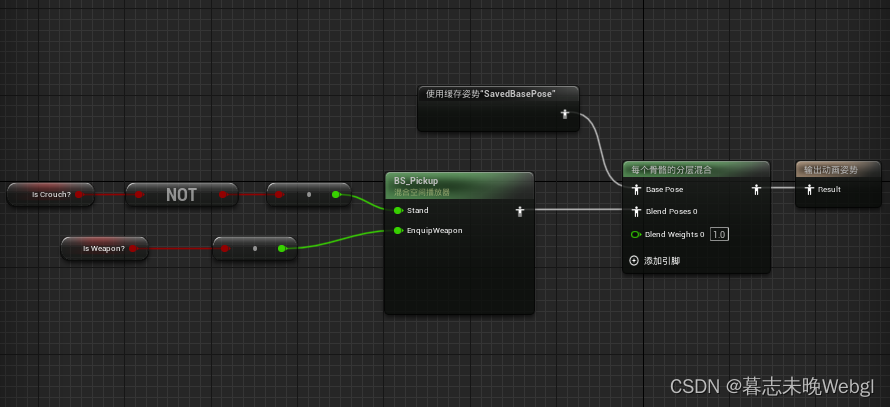
要实现角色拾取功能,我们需要实现蓝图接口功能,蓝图接口主要提供的是蓝图和蓝图之间可以通信,接下来,跟着教程,实现一下角色的拾取功能。 首先,我们要实现一个就是可视区的物品在朝向它的时候,会…...

chatgpt赋能python:如何使用Python升序排列一个列表?
如何使用Python升序排列一个列表? 在Python编程中,我们经常需要对列表进行排序。列表排序是一种常见的操作,可以帮助我们对数据进行分析和管理。在这篇文章中,我们将学习如何使用Python对一个列表进行升序排列。 什么是升序排列…...

Lecture 20 Topic Modelling
目录 Topic ModellingA Brief History of Topic ModelsLDAEvaluationConclusion Topic Modelling makeingsense of text English Wikipedia: 6M articlesTwitter: 500M tweets per dayNew York Times: 15M articlesarXiv: 1M articlesWhat can we do if we want to learn somet…...

ThreadPoolExecutor线程池
文章目录 一、ThreadPool线程池状态二、ThreadPoolExecutor构造方法三、Executors3.1 固定大小线程池3.2 带缓冲线程池3.3 单线程线程池 四、ThreadPoolExecutor4.1 execute(Runnable task)方法使用4.2 submit()方法4.3 invokeAll()4.4 invokeAny()4.5 shutdown()4.6 shutdownN…...

chatgpt赋能python:Python实践:如何升级pip
Python实践:如何升级pip Python作为一门高效的脚本语言,被广泛应用于数据分析、人工智能、Web开发等领域。而pip则是Python的包管理工具,是开发Python应用的必备工具。但是pip在使用过程中,有时候会出现版本不兼容或者出现漏洞等…...

【JavaEE进阶】mybatis
目录: 一、Mybatis是什么 三个映射关系如下图: 二、mybatis的使用(前置工作简单案例) 第一步:导入MAVEN依赖 第二步: 在spring项目当中新建数据源 第三步:新建一个实体类,是和…...
Redis的大key
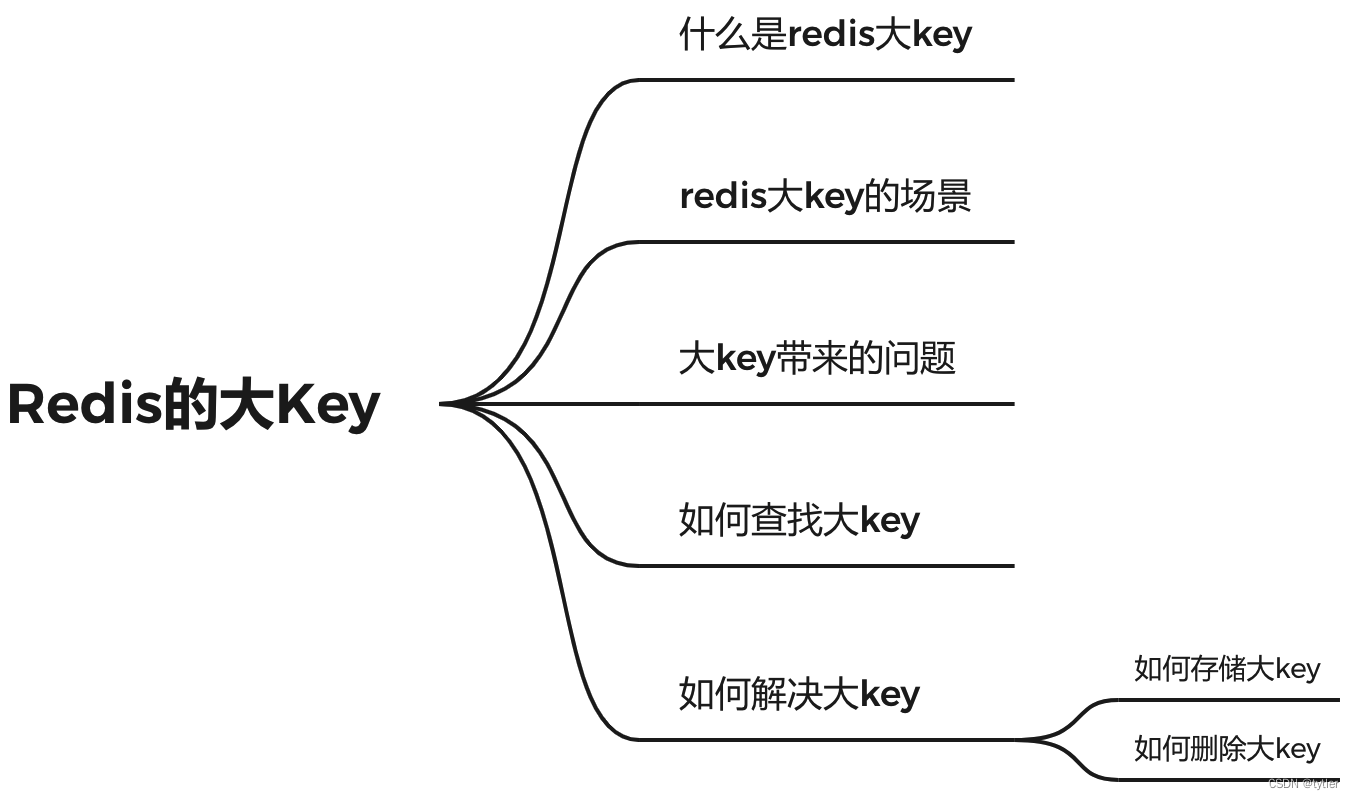
什么是 redis 的大 key redis 的大 key 不是指存储在 redis 中的某个 key 的大小超过一定的阈值,而是该 key 所对应的 value 过大对于 string 类型来说,一般情况下超过 10KB 则认为是大 key;对于set、zset、hash 等类型来说,一般…...
MMPretrain
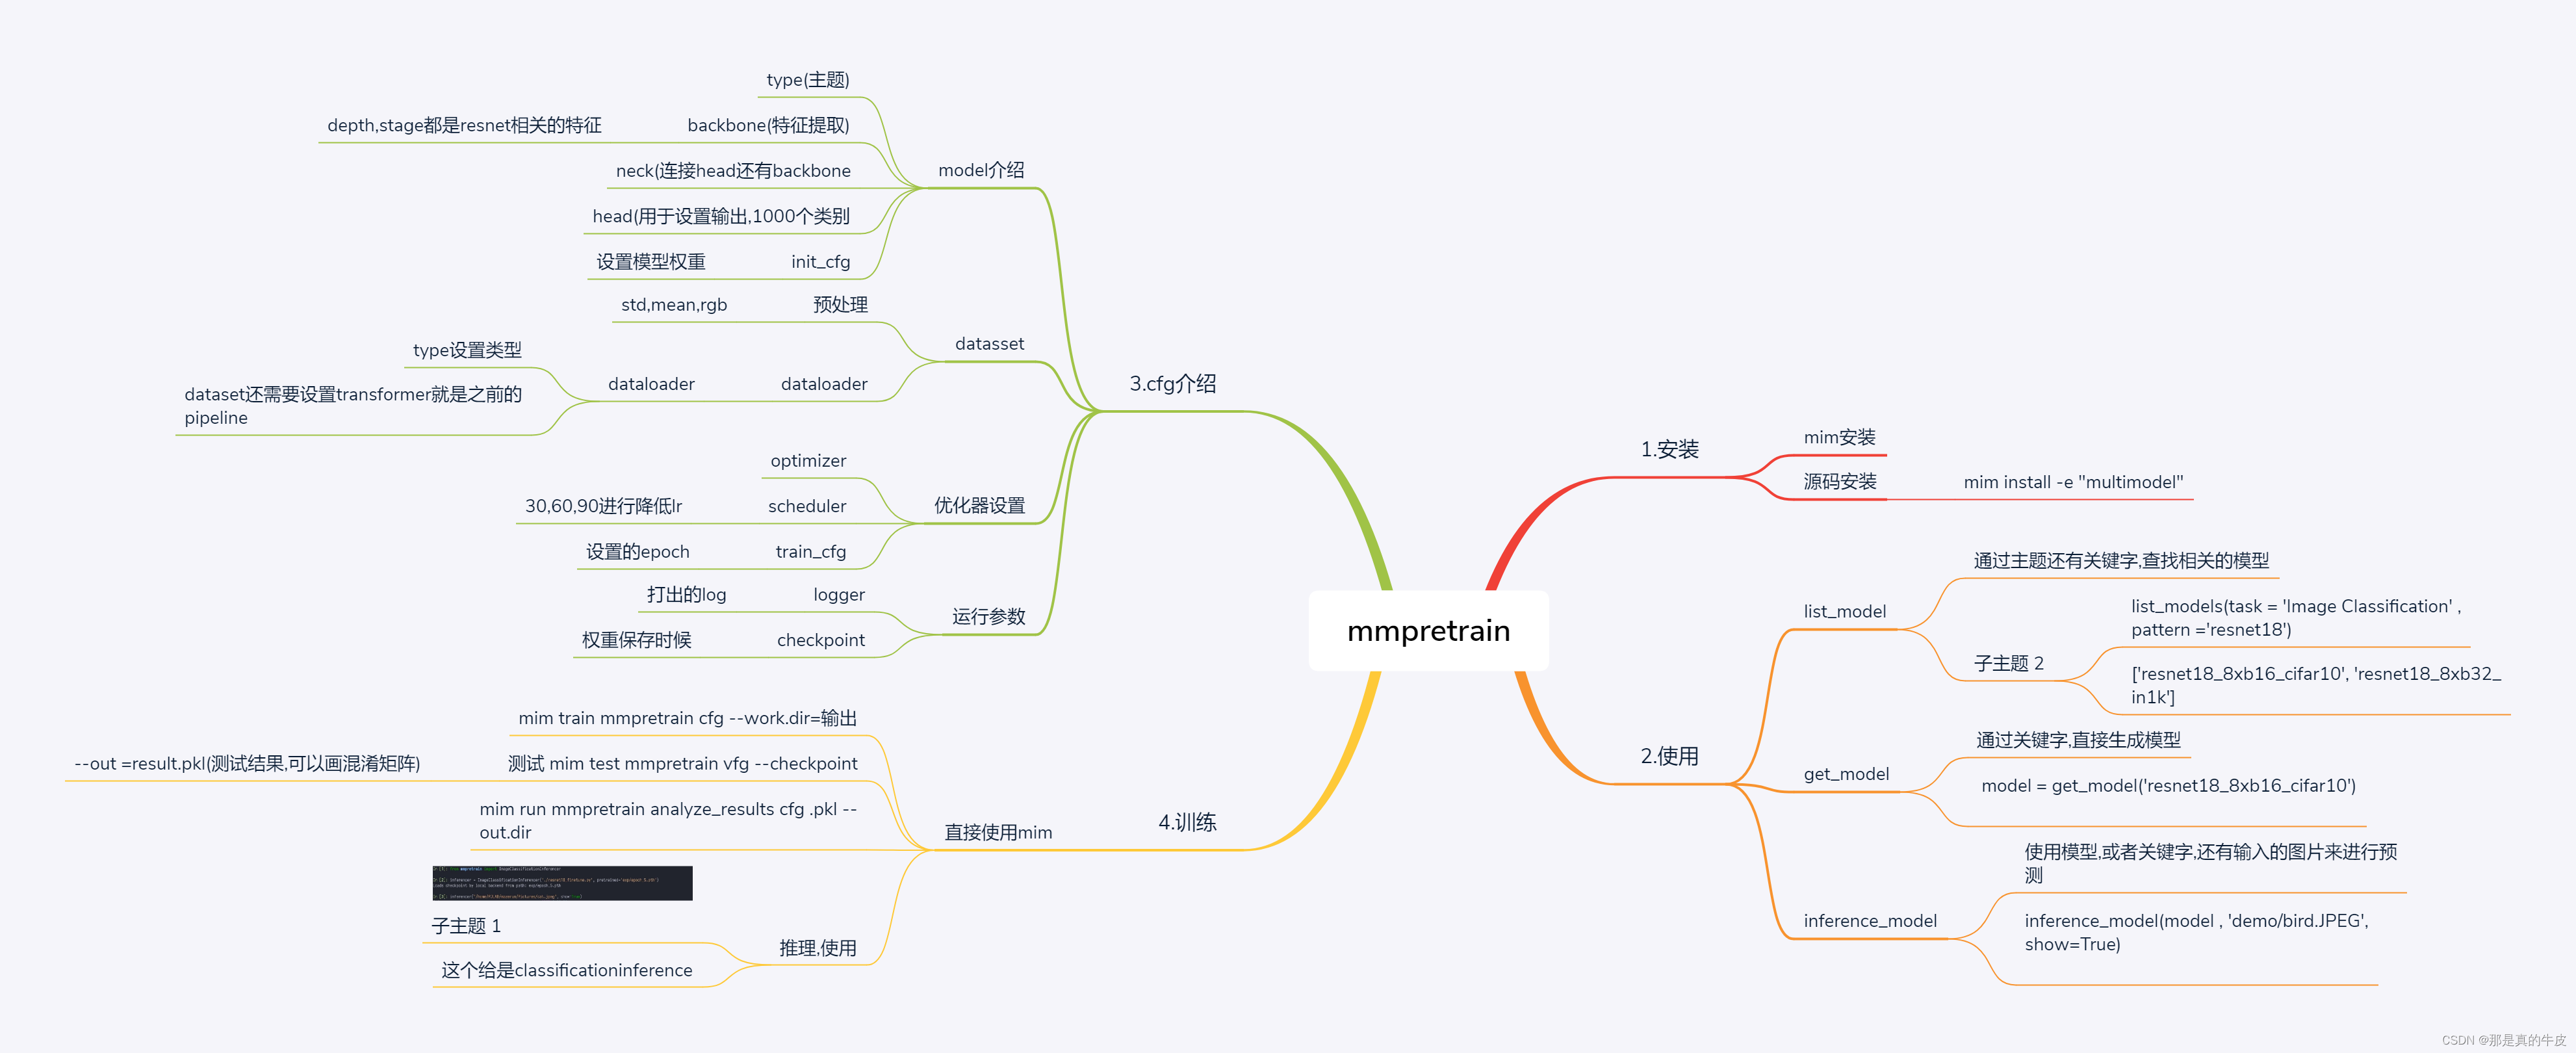
title: mmpretrain实战 date: 2023-06-07 16:04:01 tags: [image classification,mmlab] mmpretrain实战 [外链图片转存失败,源站可能有防盗链机制,建议将图片保存下来直接上传(img-ccTl9bOl-1686129437336)(null)] 主要讲解了安装,还有使用教程.安装教程直接参考官网.下面讲…...
栈和队列(数据结构刷题)[一]-python
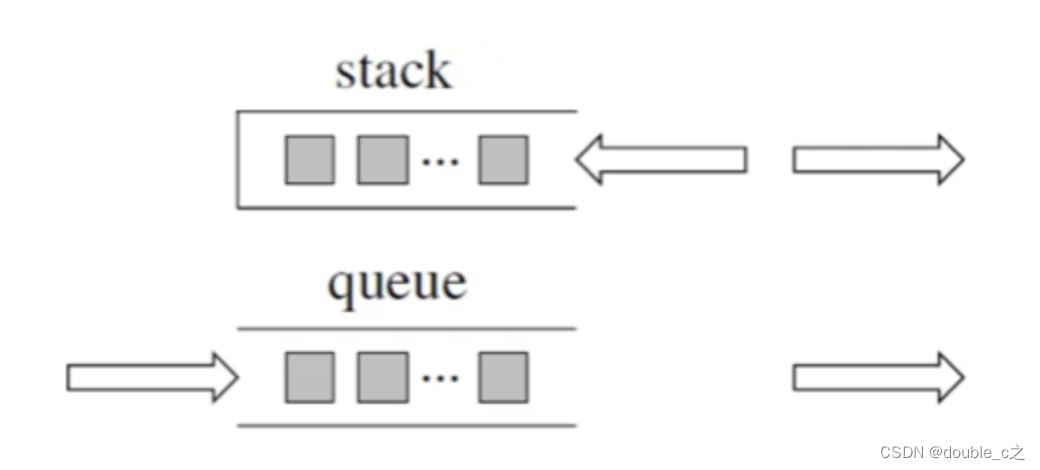
文章目录 前言一、原理介绍二、用栈实现队列1.操作2.思路 三、关于面试考察栈里面的元素在内存中是连续分布的么? 前言 提到栈和队列,大家可能对它们的了解只停留在表面,再深入一点,好像知道又好像不知道的感觉。本文我将从底层实…...

【备战秋招】JAVA集合
集合 前言 一方面, 面向对象语言对事物的体现都是以对象的形式,为了方便对多个对象 的操作,就要 对对象进行存储。 另一方面,使用Array存储对象方面具有一些弊端,而Java 集合就像一种容器,可以动态地把多…...
setState详解
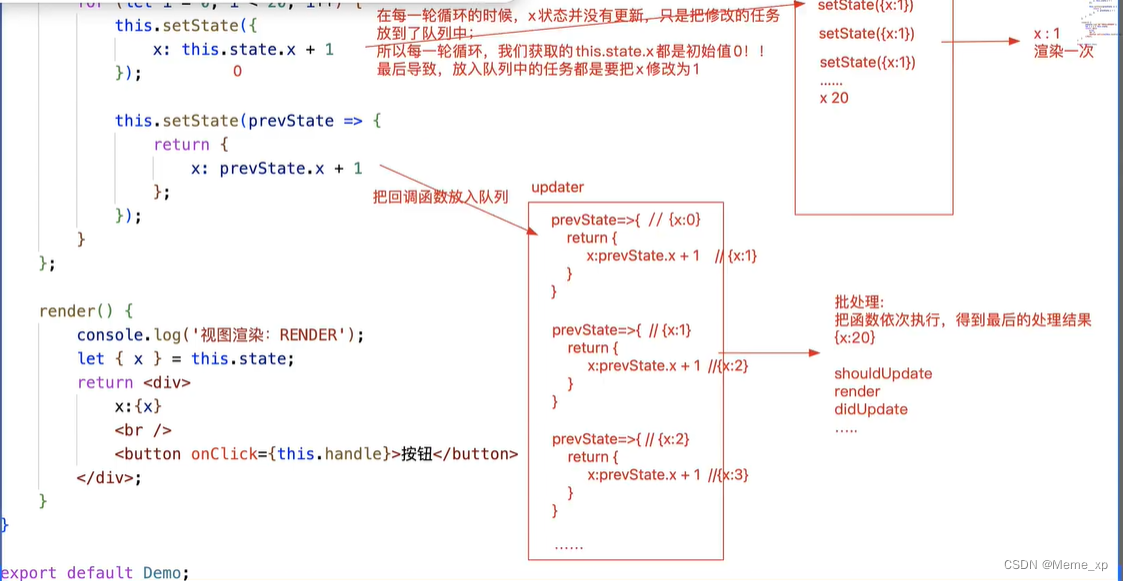
this. setState( [partialState], [callback]) 1.[partialState] :支持部分状态更改 this, setState({ x:100 //不论总共有多少状态,我们只修改了x,其余的状态不动 });callback :在状态更改/视图更新完毕后触发执行,也可以说只要执行了setS…...

Qt5.12.6配置Android Arm开发环境(windows)
1. 安装jdk1.8 2.安装Android Studio 并安装 SDK 与NDK SDK Tools 选择 26.0.3 SDK Platform 选择 Android SDK Platform 26 NDK选择19版本 安卓ARM环境配置成功如下: JDK1.8 , SDK 26 , NDK 19 在安装QT时要选择 ARMv7(32位CPU)与ARM64-v8a(64位CPU) 选择支持android平台…...
七、进程程序替换
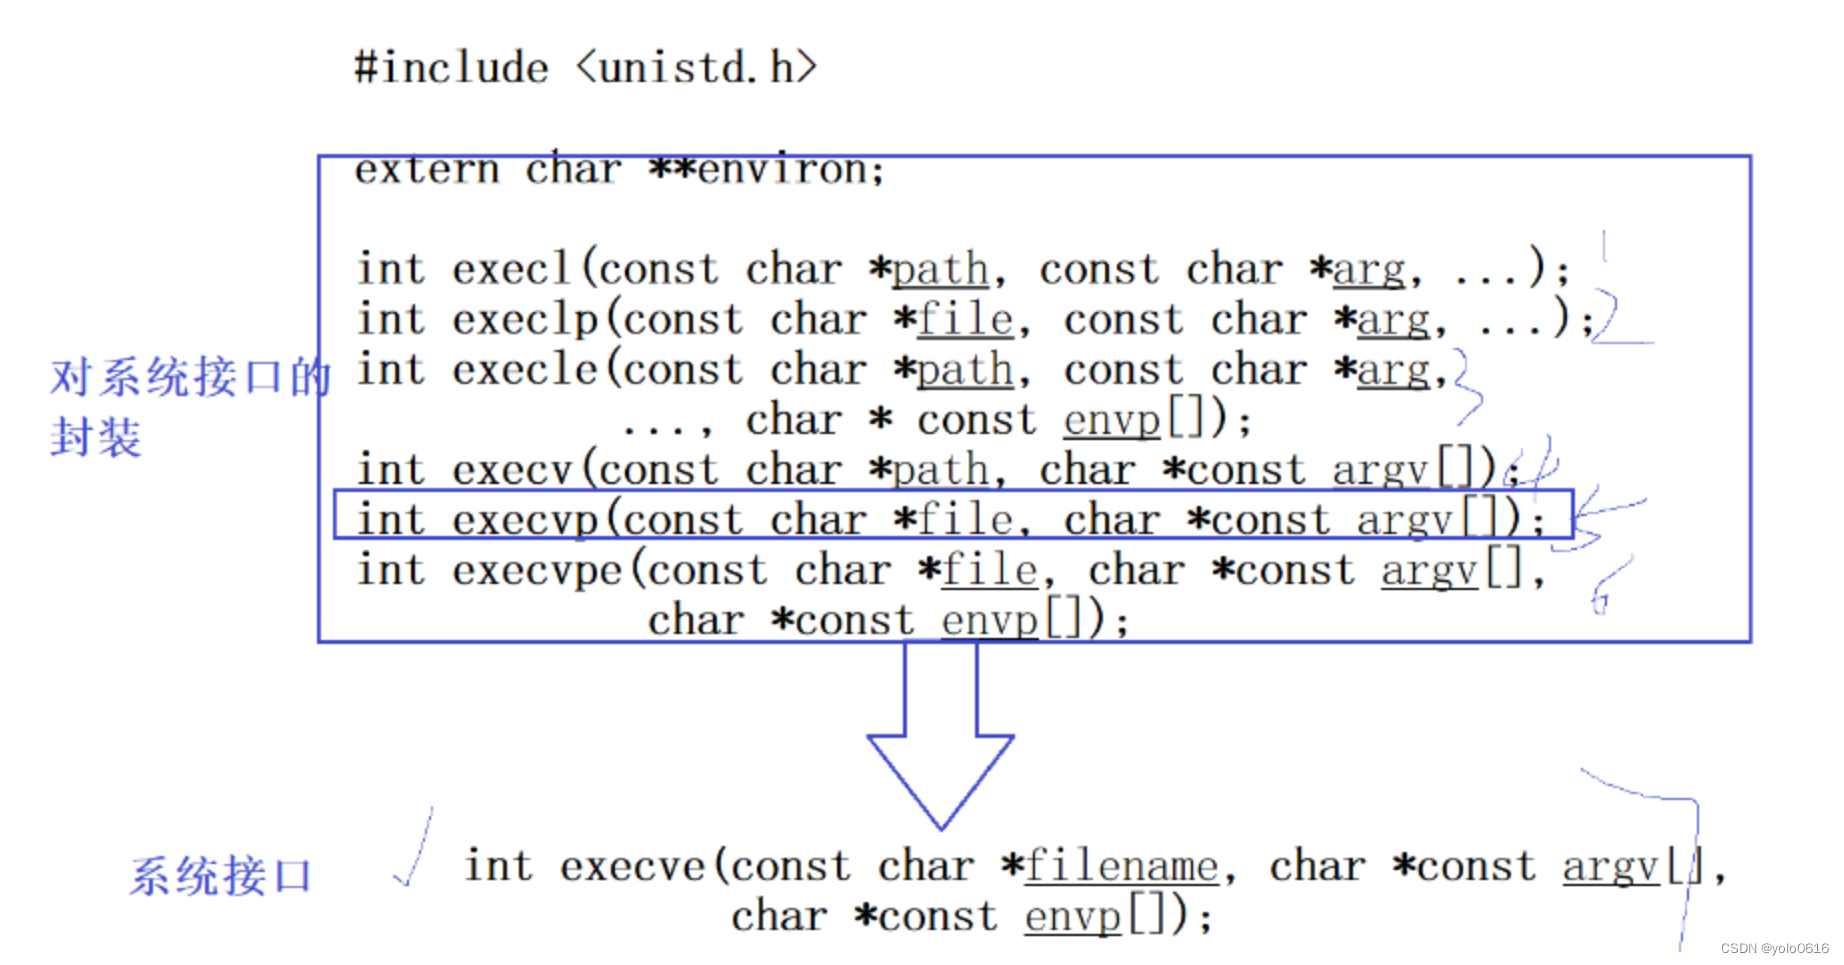
文章目录 一、进程程序替换(一)概念(二)为什么程序替换(三)程序替换的原理(四)如何进行程序替换1. execl2. 引入进程创建——子进程执行程序替换,会不会影响父进程呢? &…...
C++核心编程——详解运算符重载
文章目录💬 一.运算符重载基础知识①基本概念②运算符重载的规则③运算符重载形式④运算符重载建议 二.常用运算符重载①左移(<<)和右移(>>)运算符重载1️⃣重载后函数参数是什么?2️⃣重载的函数返回类型是什么?3️⃣重载为哪种…...
2023年前端面试汇总-CSS
1. CSS基础 1.1. CSS选择器及其优先级 对于选择器的优先级: 1. 标签选择器、伪元素选择器:1; 2. 类选择器、伪类选择器、属性选择器:10; 3. id 选择器:100; 4. 内联样式:1000&a…...

Java调用Pytorch实现以图搜图(附源码)
Java调用Pytorch实现以图搜图 设计技术栈: 1、ElasticSearch环境; 2、Python运行环境(如果事先没有pytorch模型时,可以用python脚本创建模型); 1、运行效果 2、创建模型(有则可以跳过…...
【EasyX】实时时钟
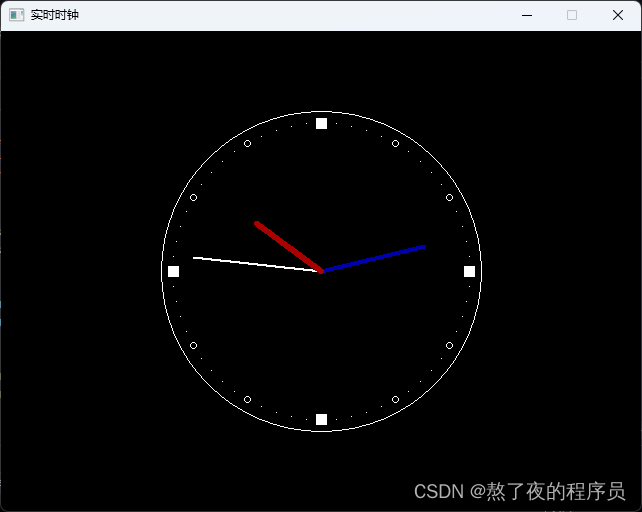
目录 实时时钟1. 绘制静态秒针2. 秒针的转动3. 根据实际时间转动4. 添加时针和分针5. 添加表盘刻度 实时时钟 本博客介绍利用EasyX实现一个实时钟表的小程序,同时学习时间函数的使用。 本文源码可从github获取 1. 绘制静态秒针 第一步定义钟表的中心坐标center&a…...

在鸿蒙HarmonyOS 5中实现抖音风格的点赞功能
下面我将详细介绍如何使用HarmonyOS SDK在HarmonyOS 5中实现类似抖音的点赞功能,包括动画效果、数据同步和交互优化。 1. 基础点赞功能实现 1.1 创建数据模型 // VideoModel.ets export class VideoModel {id: string "";title: string ""…...
Debian系统简介
目录 Debian系统介绍 Debian版本介绍 Debian软件源介绍 软件包管理工具dpkg dpkg核心指令详解 安装软件包 卸载软件包 查询软件包状态 验证软件包完整性 手动处理依赖关系 dpkg vs apt Debian系统介绍 Debian 和 Ubuntu 都是基于 Debian内核 的 Linux 发行版ÿ…...

【SpringBoot】100、SpringBoot中使用自定义注解+AOP实现参数自动解密
在实际项目中,用户注册、登录、修改密码等操作,都涉及到参数传输安全问题。所以我们需要在前端对账户、密码等敏感信息加密传输,在后端接收到数据后能自动解密。 1、引入依赖 <dependency><groupId>org.springframework.boot</groupId><artifactId...

连锁超市冷库节能解决方案:如何实现超市降本增效
在连锁超市冷库运营中,高能耗、设备损耗快、人工管理低效等问题长期困扰企业。御控冷库节能解决方案通过智能控制化霜、按需化霜、实时监控、故障诊断、自动预警、远程控制开关六大核心技术,实现年省电费15%-60%,且不改动原有装备、安装快捷、…...
【单片机期末】单片机系统设计
主要内容:系统状态机,系统时基,系统需求分析,系统构建,系统状态流图 一、题目要求 二、绘制系统状态流图 题目:根据上述描述绘制系统状态流图,注明状态转移条件及方向。 三、利用定时器产生时…...
NLP学习路线图(二十三):长短期记忆网络(LSTM)
在自然语言处理(NLP)领域,我们时刻面临着处理序列数据的核心挑战。无论是理解句子的结构、分析文本的情感,还是实现语言的翻译,都需要模型能够捕捉词语之间依时序产生的复杂依赖关系。传统的神经网络结构在处理这种序列依赖时显得力不从心,而循环神经网络(RNN) 曾被视为…...

智能仓储的未来:自动化、AI与数据分析如何重塑物流中心
当仓库学会“思考”,物流的终极形态正在诞生 想象这样的场景: 凌晨3点,某物流中心灯火通明却空无一人。AGV机器人集群根据实时订单动态规划路径;AI视觉系统在0.1秒内扫描包裹信息;数字孪生平台正模拟次日峰值流量压力…...

#Uniapp篇:chrome调试unapp适配
chrome调试设备----使用Android模拟机开发调试移动端页面 Chrome://inspect/#devices MuMu模拟器Edge浏览器:Android原生APP嵌入的H5页面元素定位 chrome://inspect/#devices uniapp单位适配 根路径下 postcss.config.js 需要装这些插件 “postcss”: “^8.5.…...

腾讯云V3签名
想要接入腾讯云的Api,必然先按其文档计算出所要求的签名。 之前也调用过腾讯云的接口,但总是卡在签名这一步,最后放弃选择SDK,这次终于自己代码实现。 可能腾讯云翻新了接口文档,现在阅读起来,清晰了很多&…...

PostgreSQL——环境搭建
一、Linux # 安装 PostgreSQL 15 仓库 sudo dnf install -y https://download.postgresql.org/pub/repos/yum/reporpms/EL-$(rpm -E %{rhel})-x86_64/pgdg-redhat-repo-latest.noarch.rpm# 安装之前先确认是否已经存在PostgreSQL rpm -qa | grep postgres# 如果存在࿰…...
