elasticsearch8.3.2搭建部署
0.过往文章
ES-6文章:
Elasticsearch6.6.0部署、原理和使用介绍: https://blog.csdn.net/wt334502157/article/details/119515730
ES-7文章:
Elasticsearch7.6.1部署、原理和使用介绍: https://blog.csdn.net/wt334502157/article/details/127693231
ES8正文- Elasticsearch8.3.2搭建部署详细步骤
1.环境准备
1-1.机器规划
| IP地址 | 操作系统 | 主机名 | 角色 |
|---|---|---|---|
| 172.28.54.213 | CentOS7.8 | es01 | master&data节点 |
| 172.28.54.214 | CentOS7.8 | es02 | master&data节点 |
| 172.28.54.215 | CentOS7.8 | es03 | master&data节点 |
es各节点均为master,Elasticsearch-8版本部署的集群无主思想
这里使用了三台全新的机器,考虑到es版本8对java的要求相对较高,如机器部署的应用较多,避免java环境混乱以及应用之间相互影响,所以es8不建议使用在已经部署较多java环境的应用机器。
ES各版本对java版本的需求:
ES 7.x 及之前版本:选择 Java 8
ES 8.x,支持 Java 17 和 Java 18,推荐版本:
- 其中对于ES 8.0:Java版本仅支持 Java 17
- ES 8.1及以上版本:支持Java 17 以及 Java 18,建议使用Java 17
【注意】
- Java 9、Java 10、Java 12 和 Java 13 均为官方公布的短期版本,ES各版本均不推荐使用这几个
- ES 8.1及以上版本的es对应版本的 Logstash 不支持 Java 18
- elasticsearch项目的jdk目录下现在已经内置了openjdk18,也可以直接使用
1-2.各节点设置主机名
# 172.28.54.213
hostnamectl set-hostname es01# 172.28.54.214
hostnamectl set-hostname es01# 172.28.54.215
hostnamectl set-hostname es01
1-3.各节点创建普通用户
ES不能使用root用户来启动,否则会报错,使用普通用户来安装启动。创建一个普通用户以及定义一些常规目录用于存放我们的数据文件以及安装包等
# 3台机器都需要执行
[root@es01 ~]# useradd wangting && echo wangting|passwd --stdin wangting
1-4.各节点将普通用户权限提高
[root@es01 ~]# visudo
# 增加一行普通用户权限内容
wangting ALL=(ALL) NOPASSWD:ALL
让普通用户有更大的操作权限,一般都会给普通用户设置sudo权限,方便普通用户的操作,避免操作时频繁输入密码
1-5.各节点添加hosts主机名解析
[root@es01 ~]# vim /etc/hosts
# es
172.28.54.213 es01
172.28.54.214 es02
172.28.54.215 es03
如果在各节点的/etc/hosts中都配置了节点的ip解析,那后续在配置文件中,相关的ip配置都可以用解析名代替
1-6.安装包准备
各组件均可以在官方找到对应版本下载:
官方下载安装包地址:https://www.elastic.co/cn/downloads/elasticsearch
# 下载安装包
[root@es01 ~]# wget https://artifacts.elastic.co/downloads/elasticsearch/elasticsearch-8.3.2-linux-x86_64.tar.gz
[root@es01 ~]# ls -l
total 526672
-rw-r--r-- 1 root root 539306119 Jul  7  2022 elasticsearch-8.3.2-linux-x86_64.tar.gz
1-7.各节点环境优化(各节点)
- 注意环境优化为各节点均要执行的实施操作,需要自行在每个节点去执行命令
1-7-1.优化1:最大文件数
系统允许 Elasticsearch 打开的最大文件数需要修改成65536
[root@es01 ~]# vim /etc/security/limits.conf
# End of file
* soft nofile 65536
* hard nofile 131072
* soft nproc 2048
* hard nproc 65536# 断开重连会话
[root@es01 ~]# ulimit -n
65536
如果这个配置不优化后续启动服务会出现:
[error] max file descriptors [4096] for elasticsearch process likely too low, increase to at least [65536] elasticsearch
1-7-2.优化2:最大进程数
允许最大进程数配置修该成4096;不是4096则需要修改优化
[root@es01 ~]# vim /etc/security/limits.d/20-nproc.conf
# Default limit for number of user's processes to prevent
# accidental fork bombs.
# See rhbz #432903 for reasoning.*          soft    nproc     4096
root       soft    nproc     unlimited
这个配置不优化启动服务会出现:
[error]max number of threads [1024] for user [judy2] likely too low, increase to at least [4096]
1-7-3.优化3:虚拟内存
设置一个进程可以拥有的虚拟内存区域的数量
# 增加配置项vm.max_map_count
[root@es01 ~]# vim /etc/sysctl.conf
vm.max_map_count=262144
# 重载配置
[root@es01 ~]# sysctl -p
这个配置不优化启动服务会出现:
[error]max virtual memory areas vm.max_map_count [65530] likely too low, increase to at least [262144]
2.安装es
2-1.解压安装
[root@es01 ~]# mkdir -p /opt/module/
[root@es01 ~]# chown -R wangting.wangting /opt/module/
[root@es01 ~]# tar -xf elasticsearch-8.3.2-linux-x86_64.tar.gz -C /opt/module/
[root@es01 ~]# chown -R wangting.wangting /opt/module/elasticsearch-8.3.2
[root@es01 ~]# cd /opt/module/elasticsearch-8.3.2/
[root@es01 elasticsearch-8.3.2]# ls -l
total 892
drwxr-xr-x  2 wangting wangting   4096 Jul  6  2022 bin
drwxr-xr-x  3 wangting wangting   4096 Feb 10 15:05 config
drwxr-xr-x  8 wangting wangting   4096 Jul  6  2022 jdk
drwxr-xr-x  5 wangting wangting   4096 Jul  6  2022 lib
-rw-r--r--  1 wangting wangting   3860 Jul  6  2022 LICENSE.txt
drwxr-xr-x  2 wangting wangting   4096 Jul  6  2022 logs
drwxr-xr-x 66 wangting wangting   4096 Jul  6  2022 modules
-rw-r--r--  1 wangting wangting 874704 Jul  6  2022 NOTICE.txt
drwxr-xr-x  2 wangting wangting   4096 Jul  6  2022 plugins
-rw-r--r--  1 wangting wangting   2710 Jul  6  2022 README.asciidoc
2-2.修改profile环境
[root@es01 elasticsearch-8.3.2]# vim /etc/profile
# ES
export JAVA_HOME=/opt/module/elasticsearch-8.3.2/jdk
export ES_HOME=/opt/module/elasticsearch-8.3.2
export PATH=$PATH:$ES_HOME/bin# 引用
[root@es01 elasticsearch-8.3.2]# source /etc/profile
[root@es01 ~]# /opt/module/elasticsearch-8.3.2/jdk/bin/java -version
openjdk version "18.0.1.1" 2022-04-22
OpenJDK Runtime Environment (build 18.0.1.1+2-6)
OpenJDK 64-Bit Server VM (build 18.0.1.1+2-6, mixed mode, sharing)# ###节点es02上操作###
[root@es02 ~]# vim /etc/profile
# ES
export JAVA_HOME=/opt/module/elasticsearch-8.3.2/jdk
export ES_HOME=/opt/module/elasticsearch-8.3.2
export PATH=$PATH:$ES_HOME/bin[root@es02 ~]# source /etc/profile# ###节点es03上操作###
[root@es03 ~]# vim /etc/profile
# ES
export JAVA_HOME=/opt/module/elasticsearch-8.3.2/jdk
export ES_HOME=/opt/module/elasticsearch-8.3.2
export PATH=$PATH:$ES_HOME/bin[root@es03 ~]# source /etc/profile
2-3.创建es相关目录
# 创建数据文件目录
[root@es01 ~]# mkdir -p /opt/module/elasticsearch-8.3.2/data
# 创建证书生成目录
[root@es01 ~]# mkdir -p /opt/module/elasticsearch-8.3.2/config/certs
# 目录有改动,重新刷一下权限
[root@es01 module]# chown -R wangting:wangting /opt/module/elasticsearch-8.3.2# 分发至es02、es03
# 新建目录
[root@es02 ~]# mkdir -p /opt/module
[root@es03 ~]# mkdir -p /opt/module
# 分发到其他节点,并在02 03上查看操作文件权限
[root@es01 ~]# scp -r /opt/module/elasticsearch-8.3.2 es02:/opt/module/elasticsearch-8.3.2
[root@es01 ~]# scp -r /opt/module/elasticsearch-8.3.2 es03:/opt/module/elasticsearch-8.3.2
# 目录文件权限刷用户所属
[root@es02 module]# chown -R wangting:wangting /opt/module/elasticsearch-8.3.2
[root@es03 module]# chown -R wangting:wangting /opt/module/elasticsearch-8.3.2
2-4.证书签发
# 在第一台服务器节点es01 设置集群多节点通信密钥
# 切换普通用户实施
[root@es01 module]# su - wangting
[wangting@es01 ~]$ cd /opt/module/elasticsearch-8.3.2/bin
[wangting@es01 bin]$ ./elasticsearch-certutil ca
warning: ignoring JAVA_HOME=/opt/module/elasticsearch-8.3.2/jdk; using bundled JDK
This tool assists you in the generation of X.509 certificates and certificate
signing requests for use with SSL/TLS in the Elastic stack.
The 'ca' mode generates a new 'certificate authority'
This will create a new X.509 certificate and private key that can be used
to sign certificate when running in 'cert' mode.Use the 'ca-dn' option if you wish to configure the 'distinguished name'
of the certificate authorityBy default the 'ca' mode produces a single PKCS#12 output file which holds:* The CA certificate* The CAs private keyIf you elect to generate PEM format certificates (the -pem option), then the output will
be a zip file containing individual files for the CA certificate and private keyPlease enter the desired output file [elastic-stack-ca.p12]: # 回车即可
Enter password for elastic-stack-ca.p12 :  # 回车即可# 用 ca 证书签发节点证书,过程中需按三次回车键,生成目录:es的home:/opt/elasticsearch-8.3.2/
[wangting@es01 bin]$ ./elasticsearch-certutil cert --ca elastic-stack-ca.p12If you specify any of the following options:* -pem (PEM formatted output)* -multiple (generate multiple certificates)* -in (generate certificates from an input file)
then the output will be be a zip file containing individual certificate/key filesEnter password for CA (elastic-stack-ca.p12) :  # 回车即可
Please enter the desired output file [elastic-certificates.p12]:  # 回车即可
Enter password for elastic-certificates.p12 :  # 回车即可Certificates written to /opt/module/elasticsearch-8.3.2/elastic-certificates.p12This file should be properly secured as it contains the private key for
your instance.
This file is a self contained file and can be copied and used 'as is'
For each Elastic product that you wish to configure, you should copy
this '.p12' file to the relevant configuration directory
and then follow the SSL configuration instructions in the product guide.For client applications, you may only need to copy the CA certificate and
configure the client to trust this certificate.# 将生成的证书文件移动到 config/certs 目录中
[wangting@es01 bin]$ cd /opt/module/elasticsearch-8.3.2/
[wangting@es01 elasticsearch-8.3.2]$ ls -l | grep "elastic-"
-rw-------  1 wangting wangting   3596 Feb 10 16:05 elastic-certificates.p12
-rw-------  1 wangting wangting   2672 Feb 10 16:03 elastic-stack-ca.p12
[wangting@es01 elasticsearch-8.3.2]$
[wangting@es01 elasticsearch-8.3.2]$ mv elastic-certificates.p12 config/certs/
[wangting@es01 elasticsearch-8.3.2]$ mv elastic-stack-ca.p12 config/certs/
2-5.设置集群多节点 HTTP 证书
# 签发 Https 证书
[wangting@es01 elasticsearch-8.3.2]$ cd /opt/module/elasticsearch-8.3.2/bin/
[wangting@es01 bin]$ ./elasticsearch-certutil http
warning: ignoring JAVA_HOME=/opt/module/elasticsearch-8.3.2/jdk; using bundled JDK## Elasticsearch HTTP Certificate Utility
The 'http' command guides you through the process of generating certificates
for use on the HTTP (Rest) interface for Elasticsearch.
This tool will ask you a number of questions in order to generate the right
set of files for your needs.
## Do you wish to generate a Certificate Signing Request (CSR)?
A CSR is used when you want your certificate to be created by an existing
Certificate Authority (CA) that you do not control (that is, you do not have
access to the keys for that CA).
If you are in a corporate environment with a central security team, then you
may have an existing Corporate CA that can generate your certificate for you.
Infrastructure within your organisation may already be configured to trust this
CA, so it may be easier for clients to connect to Elasticsearch if you use a
CSR and send that request to the team that controls your CA.
If you choose not to generate a CSR, this tool will generate a new certificate
for you. That certificate will be signed by a CA under your control. This is a
quick and easy way to secure your cluster with TLS, but you will need to
configure all your clients to trust that custom CA.
######################################################
# 是否生成CSR,选择 N ,不需要                           #
######################################################
Generate a CSR? [y/N]N## Do you have an existing Certificate Authority (CA) key-pair that you wish to use to sign your certificate?If you have an existing CA certificate and key, then you can use that CA to
sign your new http certificate. This allows you to use the same CA across
multiple Elasticsearch clusters which can make it easier to configure clients,
and may be easier for you to manage.If you do not have an existing CA, one will be generated for you.
######################################################
# 是否使用已经存在的CA证书,选择 y ,因为已经创建签发好了CA    #
######################################################
Use an existing CA? [y/N]y## What is the path to your CA?
Please enter the full pathname to the Certificate Authority that you wish to
use for signing your new http certificate. This can be in PKCS#12 (.p12), JKS
(.jks) or PEM (.crt, .key, .pem) format.
######################################################
# 指定CA证书的路径地址,CA Path:后写绝对路径               #
######################################################
CA Path: /opt/module/elasticsearch-8.3.2/config/certs/elastic-stack-ca.p12
Reading a PKCS12 keystore requires a password.
It is possible for the keystore's password to be blank,
in which case you can simply press <ENTER> at the prompt######################################################
# 设置密钥库的密码,直接 回车 即可                         #
######################################################
Password for elastic-stack-ca.p12:## How long should your certificates be valid?Every certificate has an expiry date. When the expiry date is reached clients
will stop trusting your certificate and TLS connections will fail.
Best practice suggests that you should either:
(a) set this to a short duration (90 - 120 days) and have automatic processes
to generate a new certificate before the old one expires, or
(b) set it to a longer duration (3 - 5 years) and then perform a manual update
a few months before it expires.You may enter the validity period in years (e.g. 3Y), months (e.g. 18M), or days (e.g. 90D)
######################################################
# 设置证书的失效时间,这里的y表示年,5y则代表失效时间5年       #
######################################################
For how long should your certificate be valid? [5y] 5y## Do you wish to generate one certificate per node?If you have multiple nodes in your cluster, then you may choose to generate a
separate certificate for each of these nodes. Each certificate will have its
own private key, and will be issued for a specific hostname or IP address.Alternatively, you may wish to generate a single certificate that is valid
across all the hostnames or addresses in your cluster.If all of your nodes will be accessed through a single domain
(e.g. node01.es.example.com, node02.es.example.com, etc) then you may find it
simpler to generate one certificate with a wildcard hostname (*.es.example.com)
and use that across all of your nodes.However, if you do not have a common domain name, and you expect to add
additional nodes to your cluster in the future, then you should generate a
certificate per node so that you can more easily generate new certificates when
you provision new nodes.######################################################
# 是否需要为每个节点都生成证书,选择 N 无需每个节点都配置证书   #
######################################################
Generate a certificate per node? [y/N]N## Which hostnames will be used to connect to your nodes?
These hostnames will be added as "DNS" names in the "Subject Alternative Name"
(SAN) field in your certificate.
You should list every hostname and variant that people will use to connect to
your cluster over http.
Do not list IP addresses here, you will be asked to enter them later.If you wish to use a wildcard certificate (for example *.es.example.com) you
can enter that here.Enter all the hostnames that you need, one per line.
######################################################
# 输入需连接集群节点主机名信息,一行输入一个IP地址,空行回车结束 #
######################################################
When you are done, press <ENTER> once more to move on to the next step.es01
es02
es03You entered the following hostnames.- es01- es02- es03####################################################
# 确认以上是否为正确的配置,输入 Y 表示信息正确            #
####################################################
Is this correct [Y/n]Y## Which IP addresses will be used to connect to your nodes?
If your clients will ever connect to your nodes by numeric IP address, then you
can list these as valid IP "Subject Alternative Name" (SAN) fields in your
certificate.If you do not have fixed IP addresses, or not wish to support direct IP access
to your cluster then you can just press <ENTER> to skip this step.Enter all the IP addresses that you need, one per line.
####################################################
# 输入需连接集群节点IP信息,一行输入一个IP地址,空行回车结束 #
####################################################
When you are done, press <ENTER> once more to move on to the next step.172.28.54.213
172.28.54.214
172.28.54.215You entered the following IP addresses.- 172.28.54.213- 172.28.54.214- 172.28.54.215####################################################
# 确认以上是否为正确的配置,输入 Y 表示信息正确            #
####################################################
Is this correct [Y/n]Y## Other certificate options
The generated certificate will have the following additional configuration
values. These values have been selected based on a combination of the
information you have provided above and secure defaults. You should not need to
change these values unless you have specific requirements.Key Name: es01
Subject DN: CN=es01
Key Size: 2048####################################################
# 是否要更改以上这些选项,选择 N ,不更改证书选项配置       #
####################################################
Do you wish to change any of these options? [y/N]N## What password do you want for your private key(s)?Your private key(s) will be stored in a PKCS#12 keystore file named "http.p12".
This type of keystore is always password protected, but it is possible to use a
blank password.####################################################
# 是否要给证书加密,不需要加密,两次 回车 即可             #
####################################################
If you wish to use a blank password, simply press <enter> at the prompt below.
Provide a password for the "http.p12" file:  [<ENTER> for none]## Where should we save the generated files?
A number of files will be generated including your private key(s),
public certificate(s), and sample configuration options for Elastic Stack products.
These files will be included in a single zip archive.
What filename should be used for the output zip file? [/opt/module/elasticsearch-8.3.2/elasticsearch-ssl-http.zip]
Zip file written to /opt/module/elasticsearch-8.3.2/elasticsearch-ssl-http.zip
2-6.解压证书并分发
# 解压
[wangting@es01 bin]$ cd /opt/module/elasticsearch-8.3.2/
[wangting@es01 elasticsearch-8.3.2]$ unzip elasticsearch-ssl-http.zip
# 移动证书
[wangting@es01 elasticsearch-8.3.2]$ mv ./elasticsearch/http.p12 config/certs/
[wangting@es01 elasticsearch-8.3.2]$ mv ./kibana/elasticsearch-ca.pem config/certs/# 将证书分发到其他节点02 03
[wangting@es01 elasticsearch-8.3.2]$ cd /opt/module/elasticsearch-8.3.2/config/certs
[wangting@es01 certs]$ ll
total 16
-rw------- 1 wangting wangting 3596 Feb 10 16:05 elastic-certificates.p12
-rw-rw-r-- 1 wangting wangting 1200 Feb 10 16:13 elasticsearch-ca.pem
-rw------- 1 wangting wangting 2672 Feb 10 16:03 elastic-stack-ca.p12
-rw-rw-r-- 1 wangting wangting 3652 Feb 10 16:13 http.p12
[wangting@es01 certs]$ scp * es02:/opt/module/elasticsearch-8.3.2/config/certs/
[wangting@es01 certs]$ scp * es03:/opt/module/elasticsearch-8.3.2/config/certs/
如果提示:-bash: unzip: command not found,使用yum安装即可
[wangting@es01 elasticsearch-8.3.2]$ sudo yum install -y unzip
2-7.配置文件修改配置
[wangting@es01 certs]$ cd /opt/module/elasticsearch-8.3.2/config/
[wangting@es01 config]$ vim elasticsearch.yml
cluster.name: bigdata-es
node.name: es-es01
path.data: /opt/module/elasticsearch-8.3.2/data
path.logs: /opt/module/elasticsearch-8.3.2/logs
network.host: 0.0.0.0
http.port: 9200
discovery.seed_hosts: ["es01"]
cluster.initial_master_nodes: ["es-es01", "es-es02","es-es03"]
xpack.security.enabled: true
xpack.security.enrollment.enabled: true
xpack.security.http.ssl:enabled: truekeystore.path: /opt/module/elasticsearch-8.3.2/config/certs/http.p12truststore.path: /opt/module/elasticsearch-8.3.2/config/certs/http.p12
xpack.security.transport.ssl:enabled: trueverification_mode: certificatekeystore.path: /opt/module/elasticsearch-8.3.2/config/certs/elastic-certificates.p12truststore.path: /opt/module/elasticsearch-8.3.2/config/certs/elastic-certificates.p12
http.host: [_local_, _site_]
ingest.geoip.downloader.enabled: false
xpack.security.http.ssl.client_authentication: none
【注意】:
xpack.security.http.ssl & xpack.security.transport.ssl后的子配置需要空一格,遵循yml的格式要求
如果不需要后续的http证书认证或者用户密码认证可以将xpack.security相关的功能falase关闭掉
xpack.security.http.ssl:enabled: false
xpack.security.transport.ssl:enabled: false
有些业务使用场景中,可能会遇到跨域问题,当elasticsearch需要涉及到跨域问题时,可以在配置文件中最后增加配置:
http.cors.enabled: true
http.cors.allow-origin: "*"
2-8.修改其余节点的配置文件
[wangting@es01 elasticsearch-8.3.2]$ scp config/elasticsearch.yml es02:/opt/module/elasticsearch-8.3.2/config/
[wangting@es01 elasticsearch-8.3.2]$ scp config/elasticsearch.yml es03:/opt/module/elasticsearch-8.3.2/config/# es02修改 config/elasticsearch.yml
[wangting@es02 ~]# vim /opt/module/elasticsearch-8.3.2/config/elasticsearch.yml
# 设置节点名称
node.name: es-es02# es03修改 config/elasticsearch.yml
[wangting@es03 ~]# vim /opt/module/elasticsearch-8.3.2/config/elasticsearch.yml
# 设置节点名称
node.name: es-es03
2-9.启动集群
每台节点依次启动(无顺序要求,只要多于2台,就可以启动集群,这就是es的无主模式,自动识别集群,选举master):
[wangting@es01 elasticsearch-8.3.2]$ /opt/module/elasticsearch-8.3.2/bin/elasticsearch  -d
[wangting@es02 elasticsearch-8.3.2]$ /opt/module/elasticsearch-8.3.2/bin/elasticsearch  -d
[wangting@es03 elasticsearch-8.3.2]$ /opt/module/elasticsearch-8.3.2/bin/elasticsearch  -d
登录网页,都与之前的密码一致:elastic/bigdata
https://es01:9200/_cat/nodes?v
【注意】
如果不留神使用root修改过目录下文件,则文件权限会变成root所属主,所以需要修改回普通用户
sudo chown -R wangting.wangting /opt/module/
ES服务启动后有2个端口
- 9200为客户端访问es的http协议RESTFUL端口
- 9300为ES集群之间组件的通信端口
2-10.修改HTTP登录密码
# 手工指定elastic的新密码 (-i参数)
[wangting@es01 ~]$ /opt/module/elasticsearch-8.3.2/bin/elasticsearch-reset-password -u elastic -i
warning: ignoring JAVA_HOME=/opt/module/elasticsearch-8.3.2/jdk; using bundled JDK
bThis tool will reset the password of the [elastic] user.
You will be prompted to enter the password.
Please confirm that you would like to continue [y/N]y
Did not understand answer 'by'
Please confirm that you would like to continue [y/N]yEnter password for [elastic]: # 输入用户elastic的密码
Re-enter password for [elastic]: # 输入用户elastic的密码
Password for the [elastic] user successfully reset.
# 也可以不加-i参数让系统随机给个字符串密码,但是很难记住,很少使用
# 为elastic账号自动生成新的随机密码,输出至控制台;不加参数
[wangting@es01 ~]$ /opt/module/elasticsearch-8.3.2/bin/elasticsearch-reset-password -u elastic
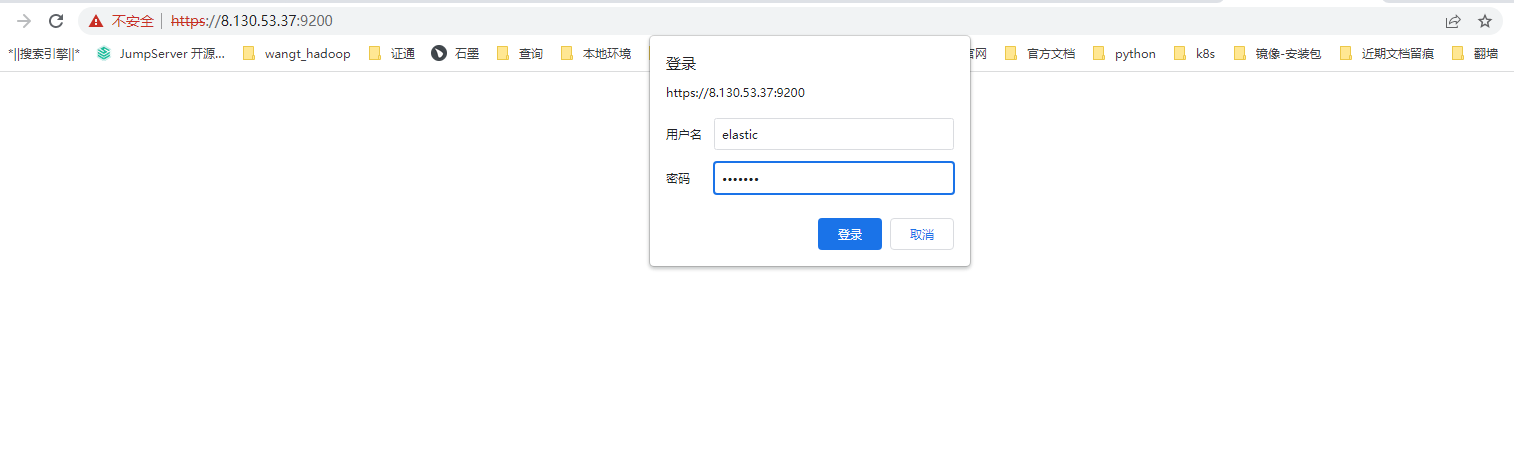
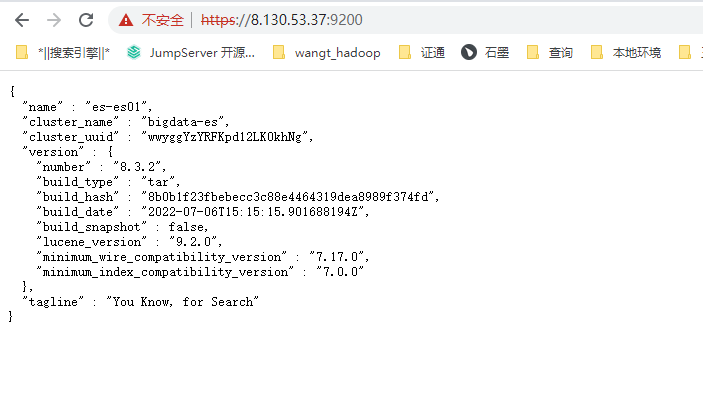
2-11.页面访问验证
https://ip:9200 (注意是https)
账号密码为上面创建的:elastic / elastic的密码
2-12.集群启动|停止
- 启动服务方式
[wangting@es01 ~]$ /opt/module/elasticsearch-8.3.2/bin/elasticsearch -d
【注意】:
- -d 为后台运行,不加-d只能前台运行,关了会话窗口服务也会同时终止
- 3台机器都需要启动elasticsearch
- 运行日志没有配置定义,默认在服务目录下:elasticsearch-8.3.2/logs/ ,有异常可以先查看日志
- 停止服务方式
[wangting@es01 ~]$ ps -ef | grep elasticsearch|grep -vE "grep|controller" |awk -F" " '{print $2}' | xargs kill -9
- 脚本
# 需先配置免密登录
[wangting@es01 ~]$ ssh-keygen -t rsa
[wangting@es01 ~]$ ssh-copy-id es01
[wangting@es01 ~]$ ssh-copy-id es02
[wangting@es01 ~]$ ssh-copy-id es03# 编写脚本
[wangting@es01 ~]$ vim my_es.sh
#! /bin/bash
if (($#==0)); thenecho -e "请输入参数:\n start  启动elasticsearch集群;\n stop  停止elasticsearch集群;\n" && exit
ficase $1 in"start")for host in es01 es02 es03doecho "---------- $1 $host 的elasticsearch ----------"ssh $host "/opt/module/elasticsearch-8.3.2/bin/elasticsearch -d >/dev/null 2>&1"done;;"stop")for host in es01 es02 es03doecho "---------- $1 $host 的elasticsearch ----------"ssh $host "ps -ef | grep elasticsearch|grep -v grep|grep -v controller |awk '{print $2}' | xargs kill -9" > /dev/null 2>&1done;;*)echo -e "---------- 请输入正确的参数 ----------\n"echo -e "start  启动elasticsearch集群;\n stop  停止elasticsearch集群;\n" && exit;;
esac
启动集群:
等待脚本执行结束
[wangting@es01 ~]$ bash my_es.sh start
停止集群:
[wangting@es01 ~]$ bash my_es.sh stop
相关文章:
elasticsearch8.3.2搭建部署
Elasticsearch8.3.2搭建部署详细步骤 0.过往文章 ES-6文章: Elasticsearch6.6.0部署、原理和使用介绍: https://blog.csdn.net/wt334502157/article/details/119515730 ES-7文章: Elasticsearch7.6.1部署、原理和使用介绍: https://blog.csdn.net/wt…...
MySQL_InnoDB引擎
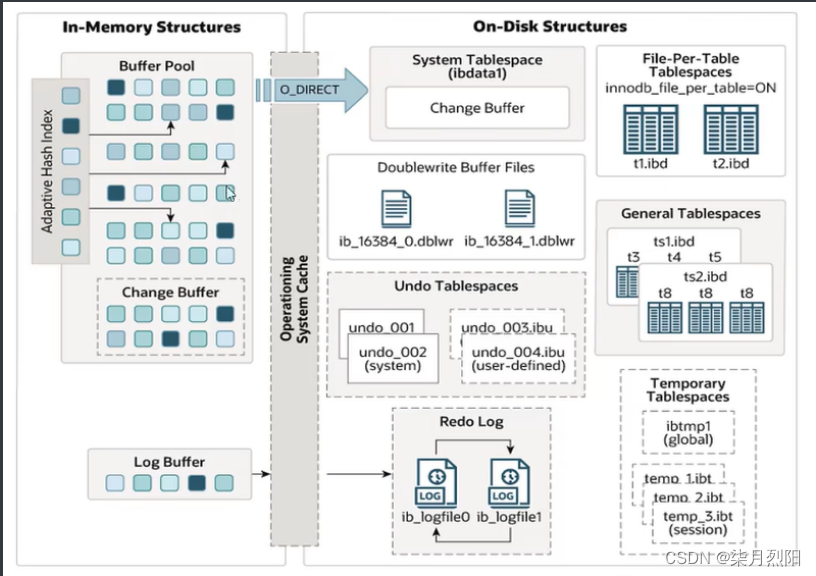
InnoDB引擎 逻辑存储结构 表空间(ibd文件),一个mysql实例可以对应多个表空间,用于存储记录、索引等数据。 段,分为数据段(Leaf node segment)、索引段(Non-leaf node segment)、回滚段(Rollba…...
json-server使用
文章目录json-server使用简介安装json-server启动json-server操作创建数据库查询数据增加数据删除数据修改数据putpatch配置静态资源静态资源首页资源json-server使用 简介 github地址 安装json-server npm install -g json-server启动json-server json-server --watch db…...
)
实现mint操作(参考pancake)
区块链发展越来越好,nft已经火了很久,今天写一下如何用js、web3js、调用合约,实现mint nft。简单的调用://引入一些依赖 (根据需要,有一些是其他功能的) import useActiveWeb3React from ./web3…...

Linux进程信号
目录 一、认识信号 1.1 生活角度的信号 1.2 技术角度的信号 1.3 信号的发送与记录 1.4 常见信号处理方式 二、产生信号 2.1 通过终端按键产生信号(核心转储) 2.2 通过系统函数向进程发送信号 2.2.1 kill()函数 2.2.2 raise()函数 2.2.3 abort()函数 2.3 因软件条件…...

1.7 Web学生管理系统
1.定义通讯协议基于前面介绍过的 FLask Web 网站 与 urlib 的访问网站的方法,设计一个综合应用实例。它是一个基于 Web 的学生记录管理程序。学生的记录包括 id(学号) 、name(姓名) 、grade(成绩),服务器的作用是建立与维护一个Sqllite 的学生数据库 stu…...

前端教学视频分享(视频内容与市场时刻保持紧密相连,火热更新中。。。)
⚠️获取公众号 本次要想大家推荐一下本人的公众号,在微信中搜索公众号 李帅豪在对话框中输入前端视频四个字即可立即获取所有视频,不收费无广告!!! 本公众号收集了近两年来前端最新最优秀的学习视频,涵盖…...
Docker-consul的容器服务更新与发现
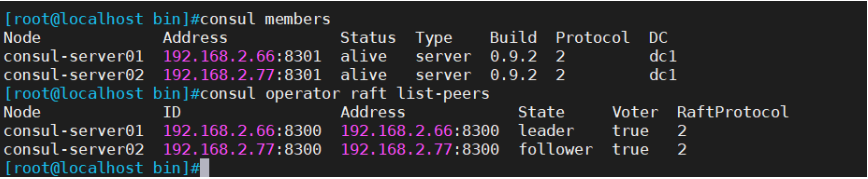
一.Consul概述1.1 什么是服务注册与发现服务注册与发现是微服务架构中不可或缺的重要组件。起初服务都是单节点的,不保障高可用性,也不考虑服务的压力承载,服务之间调用单纯的通过接口访问。直到后来出现了多个节点的分布式架构,起…...
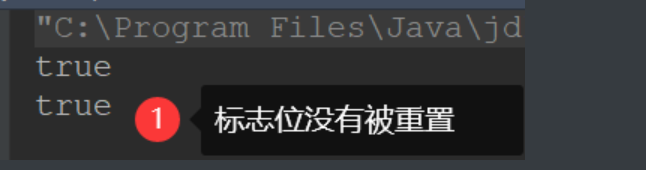
Java笔记-线程中断
线程的中断 1.应用场景: 假设从网络下载一个100M的文件,如果网速很慢,用户等得不耐烦,就可能在下载过程中点“取消”,这时,程序就需要中断下载线程的执行。 2.常用中断线程的方法: 1.使用标…...

js中的自调用表达式
自调用表达式 由函数表达式创建的函数可以自调用,称之为自调用表达式。 语法 由函数表达式创建函数: const myFn function () {let a 100console.log(a);return a } myFn() //调用后执行,输出100表达式后面紧跟 ( ) 则会自动调用: const myFn fu…...

Python操作的5个坏习惯,你中了几个呢?
很多文章都有介绍怎么写好 Python,我今天呢相反,说说写代码时的几个坏习惯。有的习惯会让 Bug 变得隐蔽难以追踪,当然,也有的并没有错误,只是个人觉得不够完美。 注意:示例代码在 Python 3.6 环境下编写 …...
---线程间共享数据)
C++并发与多线程编程(3)---线程间共享数据
主要内容:共享数据带来的问题使用互斥量保护数据数据保护的替代方案共享数据带来的问题当涉及到共享数据时,问题可能是因为共享数据修改所导致。如果共享数据是只读的,那么只读操作不会影响到数据,更不会涉及对数据的修改…...

洞察:2022年医疗行业数据安全回顾及2023年展望
过去的2022年,统筹安全与发展,在医疗信息化发展道路中,数据安全不可或缺。这一年,实施五年多的《网络安全法》迎来首次修改,《数据安全法》、《个人信息保护法》实施一周年,配套的《数据出境安全评估办法》…...

多传感器融合定位十五-多传感器时空标定(综述)
多传感器融合定位十五-多传感器时空标定1. 多传感器标定简介1.1 标定内容及方法1.2 讲解思路2. 内参标定2.1 雷达内参标定2.2 IMU内参标定2.3 编码器内参标定2.4 相机内参标定3. 外参标定3.1 雷达和相机外参标定3.2 多雷达外参标定3.3 手眼标定3.4 融合中标定3.5 总结4. 时间标…...

开发微服务电商项目演示(三)
一,nginx动静分离第1步:通过SwitchHosts新增二级域名:images.zmall.com第2步:将本次项目的易买网所有静态资源js/css/images复制到nginx中的html目录下第3步:在nginx的核心配置文件nginx.conf中新增二级域名images.zma…...

C/C++排序算法(二) —— 选择排序和堆排序
文章目录前言1. 直接选择排序🍑 基本思想🍑 具体步骤🍑 具体步骤🍑 动图演示🍑 代码实现🍑 代码升级🍑 特性总结2. 堆排序🍑 向下调整算法🍑 任意树调整为堆的思想&#…...
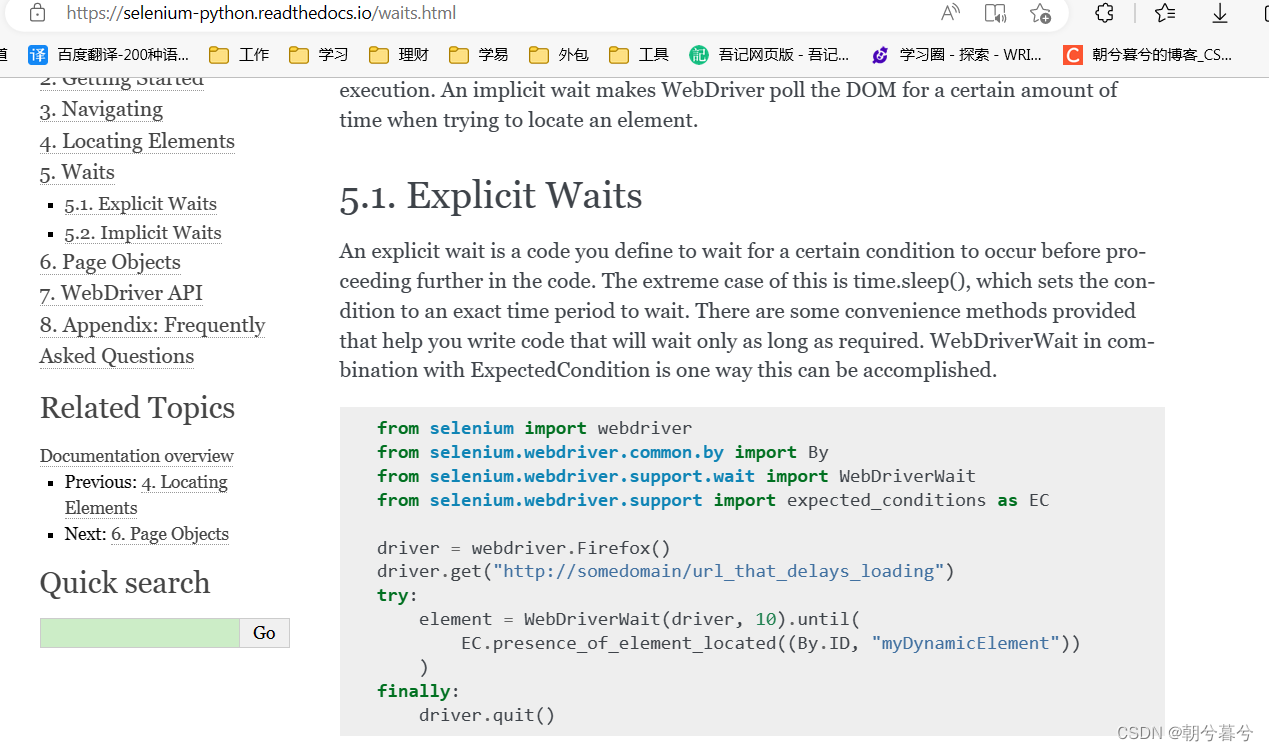
爬虫笔记之——selenium安装与使用(1)
爬虫笔记之——selenium安装与使用(1)一、安装环境1、下载Chrome浏览器驱动(1)查看Chrome版本(2)下载相匹配的Chrome驱动程序地址:https://chromedriver.storage.googleapis.com/index.html2、学…...
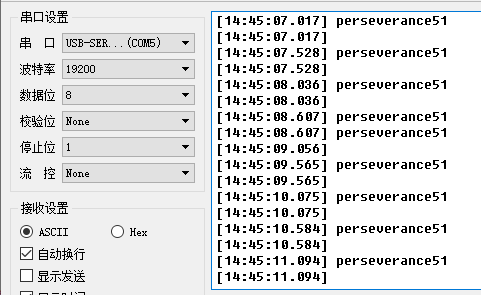
STC15单片机软串口的使用
STC15软串口的使用📖在没有使用定时器资源的情况下,根据波特率位传输时间,利用STC-ISP工具自动计算出位延时函数。 ✨在官方所提供的库函数中位传输时间函数,仅适用于使用波特率为:9600的串口数据传输: void BitTime(…...

Ansible的脚本------playbook剧本
一、剧本的前置知识点1、主机清单ansible默认的主机清单是/etc/ansible/hosts文件主机清单可以手动设置,也可以通过Dynamic Inventory动态生成一般主机名使用FQDNvi /etc/ansible/hosts [webserver] #使用方括号设置组名 www1.example.org #定…...

实验5-计算中值及分治技术
目录 1.寻找中位数(利用快速排序来寻找中位数) 2.分治方法求数组的和 3.合并排序...

国防科技大学计算机基础课程笔记02信息编码
1.机内码和国标码 国标码就是我们非常熟悉的这个GB2312,但是因为都是16进制,因此这个了16进制的数据既可以翻译成为这个机器码,也可以翻译成为这个国标码,所以这个时候很容易会出现这个歧义的情况; 因此,我们的这个国…...

在鸿蒙HarmonyOS 5中实现抖音风格的点赞功能
下面我将详细介绍如何使用HarmonyOS SDK在HarmonyOS 5中实现类似抖音的点赞功能,包括动画效果、数据同步和交互优化。 1. 基础点赞功能实现 1.1 创建数据模型 // VideoModel.ets export class VideoModel {id: string "";title: string ""…...
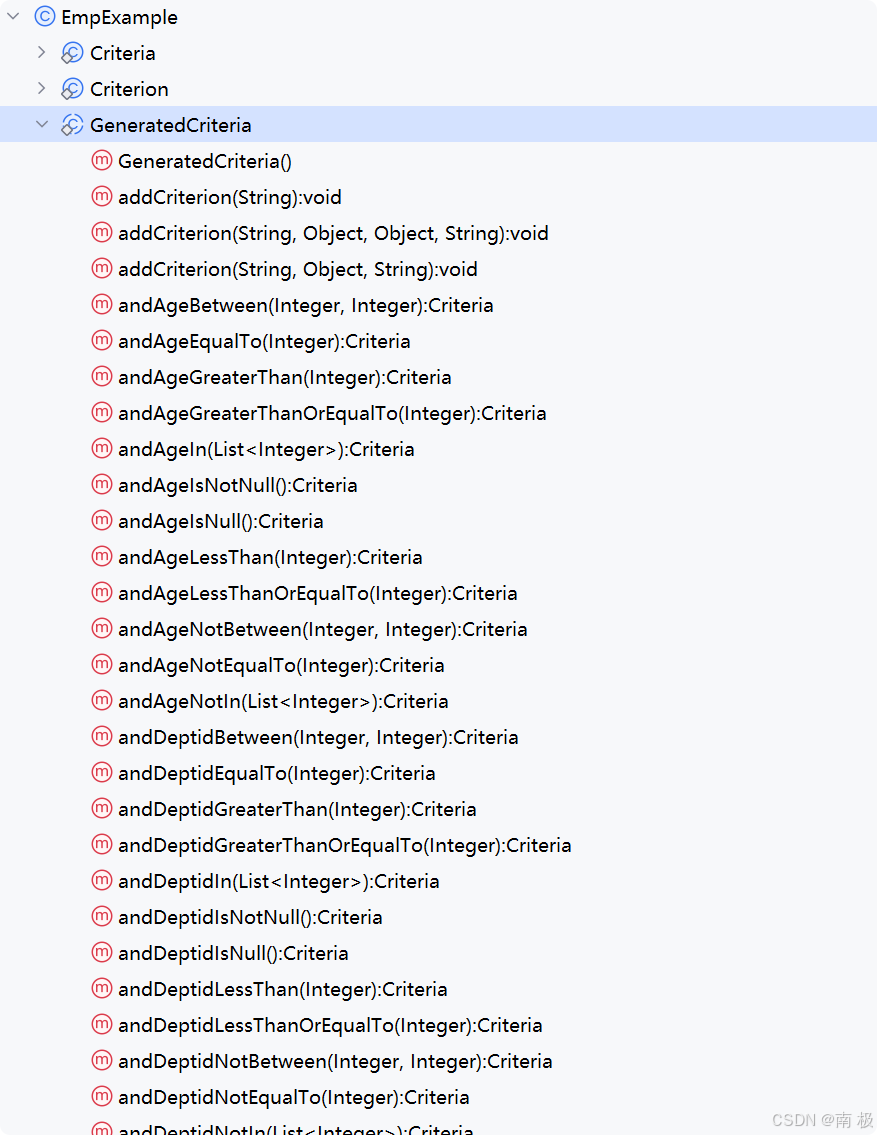
Mybatis逆向工程,动态创建实体类、条件扩展类、Mapper接口、Mapper.xml映射文件
今天呢,博主的学习进度也是步入了Java Mybatis 框架,目前正在逐步杨帆旗航。 那么接下来就给大家出一期有关 Mybatis 逆向工程的教学,希望能对大家有所帮助,也特别欢迎大家指点不足之处,小生很乐意接受正确的建议&…...
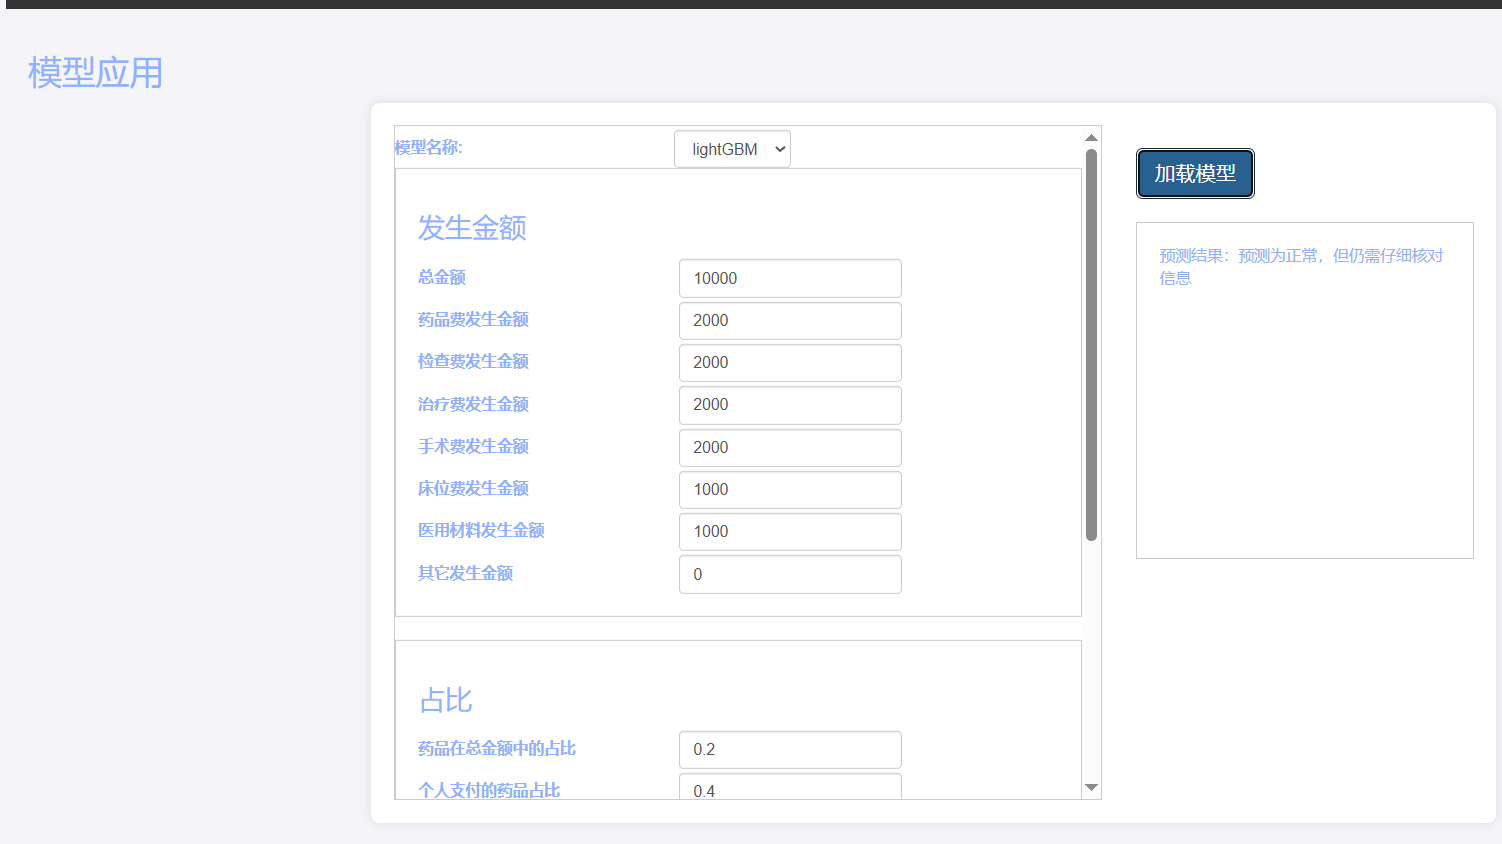
基于Flask实现的医疗保险欺诈识别监测模型
基于Flask实现的医疗保险欺诈识别监测模型 项目截图 项目简介 社会医疗保险是国家通过立法形式强制实施,由雇主和个人按一定比例缴纳保险费,建立社会医疗保险基金,支付雇员医疗费用的一种医疗保险制度, 它是促进社会文明和进步的…...

python如何将word的doc另存为docx
将 DOCX 文件另存为 DOCX 格式(Python 实现) 在 Python 中,你可以使用 python-docx 库来操作 Word 文档。不过需要注意的是,.doc 是旧的 Word 格式,而 .docx 是新的基于 XML 的格式。python-docx 只能处理 .docx 格式…...

OPenCV CUDA模块图像处理-----对图像执行 均值漂移滤波(Mean Shift Filtering)函数meanShiftFiltering()
操作系统:ubuntu22.04 OpenCV版本:OpenCV4.9 IDE:Visual Studio Code 编程语言:C11 算法描述 在 GPU 上对图像执行 均值漂移滤波(Mean Shift Filtering),用于图像分割或平滑处理。 该函数将输入图像中的…...

在Ubuntu24上采用Wine打开SourceInsight
1. 安装wine sudo apt install wine 2. 安装32位库支持,SourceInsight是32位程序 sudo dpkg --add-architecture i386 sudo apt update sudo apt install wine32:i386 3. 验证安装 wine --version 4. 安装必要的字体和库(解决显示问题) sudo apt install fonts-wqy…...

比较数据迁移后MySQL数据库和OceanBase数据仓库中的表
设计一个MySQL数据库和OceanBase数据仓库的表数据比较的详细程序流程,两张表是相同的结构,都有整型主键id字段,需要每次从数据库分批取得2000条数据,用于比较,比较操作的同时可以再取2000条数据,等上一次比较完成之后,开始比较,直到比较完所有的数据。比较操作需要比较…...

MinIO Docker 部署:仅开放一个端口
MinIO Docker 部署:仅开放一个端口 在实际的服务器部署中,出于安全和管理的考虑,我们可能只能开放一个端口。MinIO 是一个高性能的对象存储服务,支持 Docker 部署,但默认情况下它需要两个端口:一个是 API 端口(用于存储和访问数据),另一个是控制台端口(用于管理界面…...
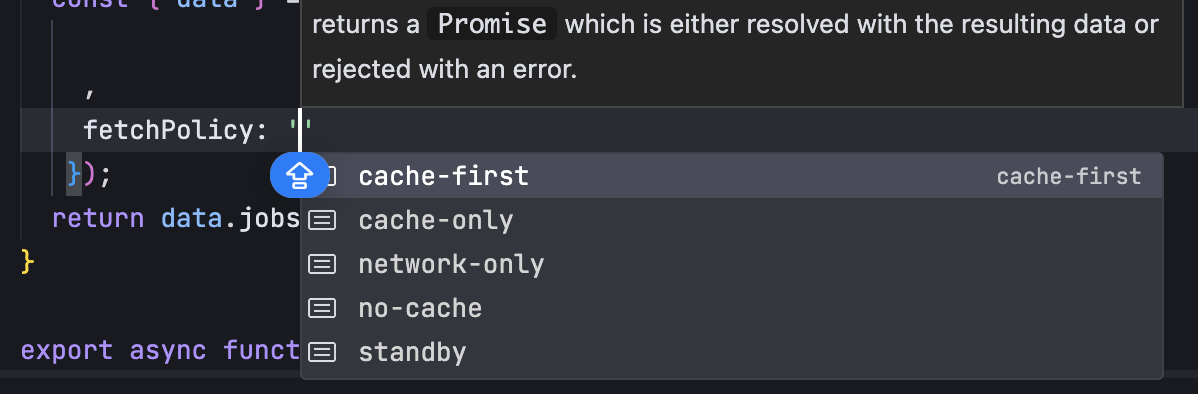
GraphQL 实战篇:Apollo Client 配置与缓存
GraphQL 实战篇:Apollo Client 配置与缓存 上一篇:GraphQL 入门篇:基础查询语法 依旧和上一篇的笔记一样,主实操,没啥过多的细节讲解,代码具体在: https://github.com/GoldenaArcher/graphql…...