ELK8.15.4搭建开启安全认证
安装 Elastic :Elasticsearch,Kibana,Logstash
另外安装一个收集器filebeat
通过二进制安装包进行安装
创建一个专门放elk目录
mkdir /elk/
mkdir /elk/soft
下载 es 、kibana、Logstash、filebeat二进制包
cd /elk/softwget https://artifacts.elastic.co/downloads/elasticsearch/elasticsearch-8.15.4-linux-x86_64.tar.gz
wget https://artifacts.elastic.co/downloads/kibana/kibana-8.15.4-linux-x86_64.tar.gz
wget https://artifacts.elastic.co/downloads/logstash/logstash-8.15.4-linux-x86_64.tar.gz
wget https://artifacts.elastic.co/downloads/beats/filebeat/filebeat-8.15.4-linux-x86_64.tar.gz
解压四个安装包
tar -zxvf kibana-8.15.4-linux-x86_64.tar.gz -C /elk/
tar -zxvf elasticsearch-8.15.4-linux-x86_64.tar.gz -C /elk/
tar -zxvf logstash-8.15.4-linux-x86_64.tar.gz -C /elk/
tar -zxvf elasticsearch-8.15.4-linux-x86_64.tar.gz -C /elk/
tar -zxvf filebeat-8.15.4-linux-x86_64.tar.gz -C /elk/
查看解压出来的文件
[root@server elk]# ls
elasticsearch-8.15.4  filebeat-8.15.4-linux-x86_64  kibana-8.15.4  logstash-8.15.4  soft
安装Elasticsearch
进入elasticsearch目录,修改配置文件
[root@server elk]# cd elasticsearch-8.15.4/
[root@server elasticsearch-8.15.4]# ls
bin  config  jdk  lib  LICENSE.txt  logs  modules  NOTICE.txt  plugins  README.asciidoc[root@server config]# cd config/[root@server config]# vim elasticsearch.yml
### 不同的集群使用不同的 cluster.name
cluster.name: my-application
### 默认是主机名
node.name: node-1
network.host: 0.0.0.0
http.port: 9200
xpack.monitoring.collection.enabled: true启动elasticsearch,报错Elasticsearchjava.lang.RuntimeException: can not run elasticsearch as root
[root@server elasticsearch-8.15.4]# cd bin/
[root@server bin]# ./elasticsearch
warning: ignoring JAVA_HOME=/usr/local/jdk-21.0.5; using bundled JDK
Nov 14, 2024 2:46:50 PM sun.util.locale.provider.LocaleProviderAdapter <clinit>
WARNING: COMPAT locale provider will be removed in a future release
[2024-11-14T14:47:11,607][INFO ][o.e.n.NativeAccess       ] [server] Using native vector library; to disable start with -Dorg.elasticsearch.nativeaccess.enableVectorLibrary=false
[2024-11-14T14:47:12,169][INFO ][o.e.n.NativeAccess       ] [server] Using [jdk] native provider and native methods for [Linux]
[2024-11-14T14:47:12,169][ERROR][o.e.b.Elasticsearch      ] [server] fatal exception while booting Elasticsearchjava.lang.RuntimeException: can not run elasticsearch as rootat org.elasticsearch.server@8.15.4/org.elasticsearch.bootstrap.Elasticsearch.initializeNatives(Elasticsearch.java:289)at org.elasticsearch.server@8.15.4/org.elasticsearch.bootstrap.Elasticsearch.initPhase2(Elasticsearch.java:170)at org.elasticsearch.server@8.15.4/org.elasticsearch.bootstrap.Elasticsearch.main(Elasticsearch.java:75)See logs for more details.ERROR: Elasticsearch did not exit normally - check the logs at /usr/local/elk/elasticsearch-8.15.4/logs/elasticsearch.logERROR: Elasticsearch died while starting up, with exit code 1
这里有几个很明显的提示:
- 有个告警:warning: ignoring JAVA_HOME=/usr/local/java; using bundled JDK ,Elasticsearch 安装包本身绑定使用的是 OpenJDK 。
Elasticsearch 使用 Java 构建,在每个发行版中都包含 OpenJDK 捆绑版本。 ES 推荐使用默认的 OpenJDK 的 JVM,该 JDK 位于$ES_HOME 的 jdk 目录中。
当然也可以改成使用自己的 Java 版本,设置一下 ES_JAVA_HOME 环境变量,指向自己的 JDK 即可。
建议还是使用 ES 默认的 JDK 进行构建,无需其他额外的配置。
can not run elasticsearch as root:不能使用 root 用户来运行 ES。
创建一个 elastic 用户,使用该用户启动
[root@server config]#  useradd user-es
# 目录修改权限
[root@server config]# cd /elk/
[root@server elk]# chown user-es:user-es  elasticsearch-8.15.4/ -R
# 切换用户,进入目录
[root@server config]# su - user-es
[user-es@server ~]$ cd /elk/elasticsearch-8.15.4/
[user-es@server elasticsearch-8.15.4]$ ll
total 2260
drwxr-xr-x  2 user-es user-es    4096 Nov  7 17:42 bin
drwxr-xr-x  3 user-es user-es     210 Nov 15 15:28 config
drwxr-xr-x  8 user-es user-es      96 Nov  7 17:42 jdk
drwxr-xr-x  6 user-es user-es    4096 Nov  7 17:42 lib
-rw-r--r--  1 user-es user-es    3860 Nov  7 17:35 LICENSE.txt
drwxr-xr-x  2 user-es user-es       6 Nov  7 17:37 logs
drwxr-xr-x 83 user-es user-es    4096 Nov  7 17:42 modules
-rw-r--r--  1 user-es user-es 2285006 Nov  7 17:37 NOTICE.txt
drwxr-xr-x  2 user-es user-es       6 Nov  7 17:37 plugins
-rw-r--r--  1 user-es user-es   10156 Nov  7 17:35 README.asciidoc
启动服务成功后,记录一下最后输出的密码和密钥
[user-es@server elasticsearch-8.15.4]$ ./bin/elasticsearch
...
...
✅ Elasticsearch security features have been automatically configured!
✅ Authentication is enabled and cluster connections are encrypted.ℹ️  Password for the elastic user (reset with `bin/elasticsearch-reset-password -u elastic`):sL=UaxXXma1MvHkYL2KNℹ️  HTTP CA certificate SHA-256 fingerprint:1588a660008e333c1c80e525323440b153515689f63c7bc9399f4e5948ed0fe4ℹ️  Configure Kibana to use this cluster:
• Run Kibana and click the configuration link in the terminal when Kibana starts.
• Copy the following enrollment token and paste it into Kibana in your browser (valid for the next 30 minutes):eyJ2ZXIiOiI4LjE0LjAiLCJhZHIiOlsiMTkyLjE2OC41Ni4xMzU6OTIwMCJdLCJmZ3IiOiIxNTg4YTY2MDAwOGUzMzNjMWM4MGU1MjUzMjM0NDBiMTUzNTE1Njg5ZjYzYzdiYzkzOTlmNGU1OTQ4ZWQwZmU0Iiwia2V5IjoiTl9pOExwTUJKWmt2dWNHbVVrOVE6c0xFVlZvbzFRVGluY1RZVzRONWxrZyJ9ℹ️ Configure other nodes to join this cluster:
• Copy the following enrollment token and start new Elasticsearch nodes with `bin/elasticsearch --enrollment-token <token>` (valid for the next 30 minutes):eyJ2ZXIiOiI4LjE0LjAiLCJhZHIiOlsiMTkyLjE2OC41Ni4xMzU6OTIwMCJdLCJmZ3IiOiIxNTg4YTY2MDAwOGUzMzNjMWM4MGU1MjUzMjM0NDBiMTUzNTE1Njg5ZjYzYzdiYzkzOTlmNGU1OTQ4ZWQwZmU0Iiwia2V5IjoiTmZpOExwTUJKWmt2dWNHbVVrOU46Z0dMSjhsSC1TdUc0MVpYYUhZWDY2QSJ9If you're running in Docker, copy the enrollment token and run:`docker run -e "ENROLLMENT_TOKEN=<token>" docker.elastic.co/elasticsearch/elasticsearch:8.15.4`
停掉之后重新后台运行, -d 参数是后台运行,第一次执行不要加-d,需要记录最后返回的密码和ca证书的信息
[user-es@server elasticsearch-8.15.4]$ ./bin/elasticsearch -d
启动成功后可查看端口情况9200和9300端口
如果失败可以查以下链接解决
Linux环境下安装Elasticsearch,史上最详细的教程来啦~_linux elasticsearch-CSDN博客
[root@server ~]# netstat -ntpl
Active Internet connections (only servers)
Proto Recv-Q Send-Q Local Address           Foreign Address         State       PID/Program name
tcp        0      0 0.0.0.0:22              0.0.0.0:*               LISTEN      1418/sshd
tcp        0      0 127.0.0.1:25            0.0.0.0:*               LISTEN      1644/master
tcp6       0      0 127.0.0.1:9300          :::*                    LISTEN      4455/java
tcp6       0      0 ::1:9300                :::*                    LISTEN      4455/java
tcp6       0      0 :::22                   :::*                    LISTEN      1418/sshd
tcp6       0      0 ::1:25                  :::*                    LISTEN      1644/master
tcp6       0      0 :::9200                 :::*                    LISTEN      4455/java
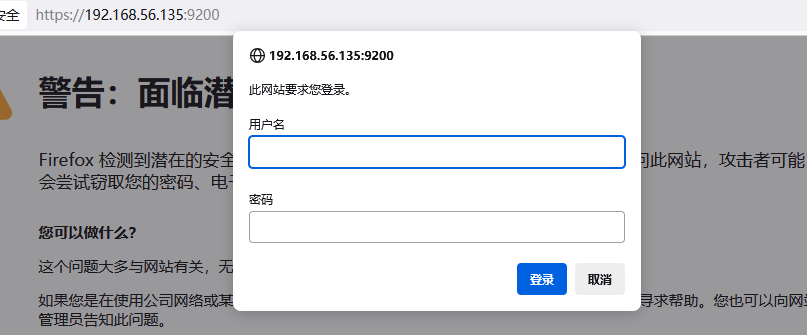
浏览器访问https://ip地址:9200端口,账号密码在启动时的最后有展示
Password for the elastic user (reset with `bin/elasticsearch-reset-password -u elastic`):zgPgb3EPuflSKVBwT3wu账号:elastic
密码:zgPgb3EPuflSKVBwT3wu
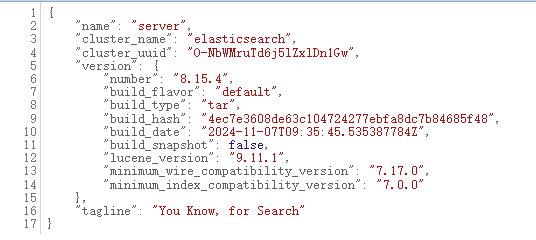
elasticsearch8.x启用了安全模块
在配置文件
config/elasticsearch.yml中可以查看
# Enable security features
xpack.security.enabled: truexpack.security.enrollment.enabled: true# Enable encryption for HTTP API client connections, such as Kibana, Logstash, and Agents
xpack.security.http.ssl:enabled: truekeystore.path: certs/http.p12# Enable encryption and mutual authentication between cluster nodes
xpack.security.transport.ssl:enabled: trueverification_mode: certificatekeystore.path: certs/transport.p12truststore.path: certs/transport.p12
# Create a new cluster with the current node only
# Additional nodes can still join the cluster later
cluster.initial_master_nodes: ["node-1"]
如果没记住启动时的账号密码可以使用工具生成
使用 bin/elasticsearch-reset-password 可以修改密码,通常有两种方式:
# 生成随机密码
./elasticsearch-reset-password -u elastic# 指定密码
./elasticsearch-reset-password -u elastic -i
安装Kibana
Kibana 版本选择和 Elasticsearch 的版本一致即可,官方提供了一致的版本。
安装和Elasticsearch基本相似
修改配置文件
退回到root用户,进入kibana-8.15.4目录中修改配置文件
[root@server kibana-8.15.4]# vi config/kibana.yml
# 修改server.host 改为0.0.0.0 使其能够外网访问
server.host: "0.0.0.0"# 启动中文
i18n.locale: "zh-CN"
启动服务
给目录赋权普通用户并使用普通用户启动
[root@server elk]#  chown user-es:user-es -R kibana-8.15.4/
[root@server elk]# su - user-es[user-es@server ~]$ cd /elk/kibana-8.15.4/
[user-es@server kibana-8.15.4]$ ./bin/kibana
...
...
[2024-11-15T15:40:30.812+08:00][INFO ][root] Kibana is starting
[2024-11-15T15:40:30.855+08:00][INFO ][node] Kibana process configured with roles: [background_tasks, ui]
[2024-11-15T15:40:40.498+08:00][INFO ][plugins-service] The following plugins are disabled: "cloudChat,cloudExperiments,cloudFullStory,profilingDataAccess,profiling,securitySolutionServerless,serverless,serverlessObservability,serverlessSearch".
[2024-11-15T15:40:40.573+08:00][INFO ][http.server.Preboot] http server running at http://0.0.0.0:5601
[2024-11-15T15:40:40.852+08:00][INFO ][plugins-system.preboot] Setting up [1] plugins: [interactiveSetup]
[2024-11-15T15:40:40.869+08:00][INFO ][preboot] "interactiveSetup" plugin is holding setup: Validating Elasticsearch connection configuration…
[2024-11-15T15:40:40.908+08:00][INFO ][root] Holding setup until preboot stage is completed.
i Kibana has not been configured.Go to http://0.0.0.0:5601/?code=609695 to get started.# 后台启动方法
[user-es@server kibana-8.15.4]$ nohup ./bin/kibana &
直接使用root启动会报错Kibana should not be run as root. Use --allow-root to continue.,但是可以加上--allow-root参数忽略
[root@server kibana-8.15.4]# ./bin/kibana
Kibana is currently running with legacy OpenSSL providers enabled! For details and instructions on how to disable see https://www.elastic.co/guide/en/kibana/8.15/production.html#openssl-legacy-provider
Kibana should not be run as root.  Use --allow-root to continue.# 可以直接忽略启动
[root@server kibana-8.15.4]# ./bin/kibana --allow-root [2024-11-14T15:21:50.455+08:00][INFO ][root] Kibana is starting
[2024-11-14T15:21:50.508+08:00][INFO ][node] Kibana process configured with roles: [background_tasks, ui]
[2024-11-14T15:22:02.328+08:00][INFO ][plugins-service] The following plugins are disabled: "cloudChat,cloudExperiments,cloudFullStory,profilingDataAccess,profiling,securitySolutionServerless,serverless,serverlessObservability,serverlessSearch".
[2024-11-14T15:22:02.409+08:00][INFO ][http.server.Preboot] http server running at http://0.0.0.0:5601
[2024-11-14T15:22:02.715+08:00][INFO ][plugins-system.preboot] Setting up [1] plugins: [interactiveSetup]
[2024-11-14T15:22:02.734+08:00][INFO ][preboot] "interactiveSetup" plugin is holding setup: Validating Elasticsearch connection configuration…
[2024-11-14T15:22:02.773+08:00][INFO ][root] Holding setup until preboot stage is completed.i Kibana has not been configured.Go to http://0.0.0.0:5601/?code=337222 to get started.# 后台启动命令nohup ./bin/kibana --allow-root &
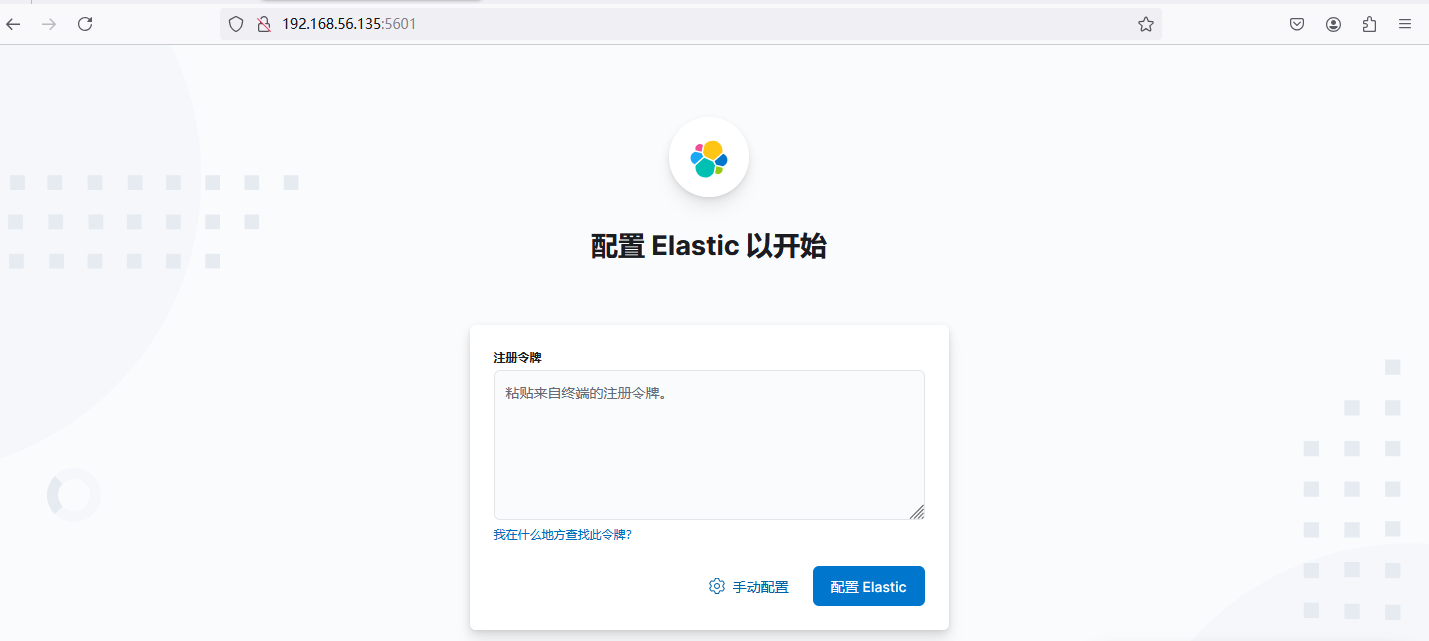
启动成功后访问5601端口,需要我们使用令牌进行注册
注册elasticsearch
令牌可以使用elasticsearch-create-enrollment-token 命令为 Elasticsearch 节点和 Kibana 实例创建注册令牌:
实际上在启动es的时候最后展示的结果中也有内容,但是30分钟如果不用的话会失效,失效之后也可以使用上面的命令创建一个新的
# elasticsearch启动中返回的令牌
ℹ️  Configure Kibana to use this cluster:
• Run Kibana and click the configuration link in the terminal when Kibana starts.
• Copy the following enrollment token and paste it into Kibana in your browser (valid for the next 30 minutes):eyJ2ZXIiOiI4LjE0LjAiLCJhZHIiOlsiMTkyLjE2OC41Ni4xMzU6OTIwMCJdLCJmZ3IiOiIxNTg4YTY2MDAwOGUzMzNjMWM4MGU1MjUzMjM0NDBiMTUzNTE1Njg5ZjYzYzdiYzkzOTlmNGU1OTQ4ZWQwZmU0Iiwia2V5IjoiTl9pOExwTUJKWmt2dWNHbVVrOVE6c0xFVlZvbzFRVGluY1RZVzRONWxrZyJ9
创建新的令牌,直接执行发现需要指定参数
[user-es@server bin]$ ./elasticsearch-create-enrollment-token
warning: ignoring JAVA_HOME=/usr/local/jdk-21.0.5; using bundled JDK
Creates enrollment tokens for elasticsearch nodes and kibana instancesOption (* = required)  Description
---------------------  -----------
-E <KeyValuePair>      Configure a setting
-f, --force            Use this option to force execution of the command       against a cluster that is currently unhealthy.
-h, --help             Show help
* -s, --scope          The scope of this enrollment token, can be either "node"or "kibana"
--url                  the URL where the elasticsearch node listens for        connections.
-v, --verbose          Show verbose output                                     ERROR: Missing required option(s) [s/scope]
提示 -s 为必填项,这里我们是要将kibana 加入,所以可以这样创建 token:
[user-es@server bin]$ ./elasticsearch-create-enrollment-token -s kibana
warning: ignoring JAVA_HOME=/usr/local/jdk-21.0.5; using bundled JDK
eyJ2ZXIiOiI4LjE0LjAiLCJhZHIiOlsiMTkyLjE2OC41Ni4xMzU6OTIwMCJdLCJmZ3IiOiI4YTEyOWM1ODJmNmYwNWVkMTdhMzNiMDA0MTYyNjk5MGFhNGI0ODI2MjQ2ZWNkZjEwMzZhYTM2MGUyYzg2N2RlIiwia2V5IjoiRzBTV0taTUJtUExTNWJ4TEFDTjA6bmJ5TDlIcjZUcENQSWJGQWlDTV9WdyJ9
点击配置之后会让输入验证码,前台启动的话会在控制台打印出来,后台启动可以查看nohup日志最后获取
Your verification code is: 609 695
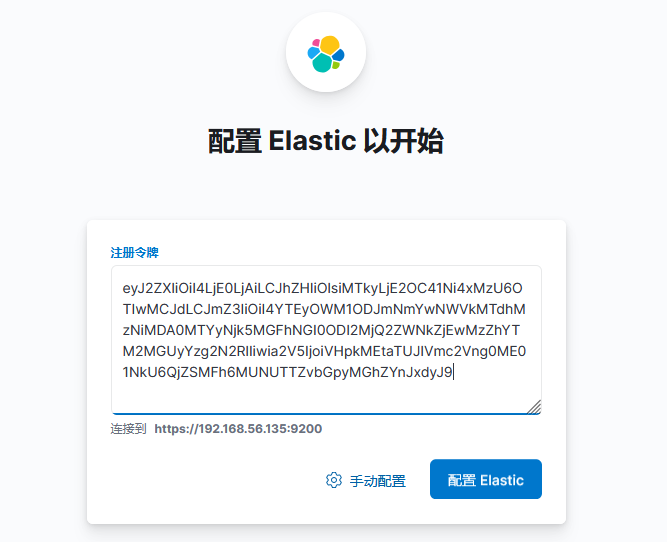

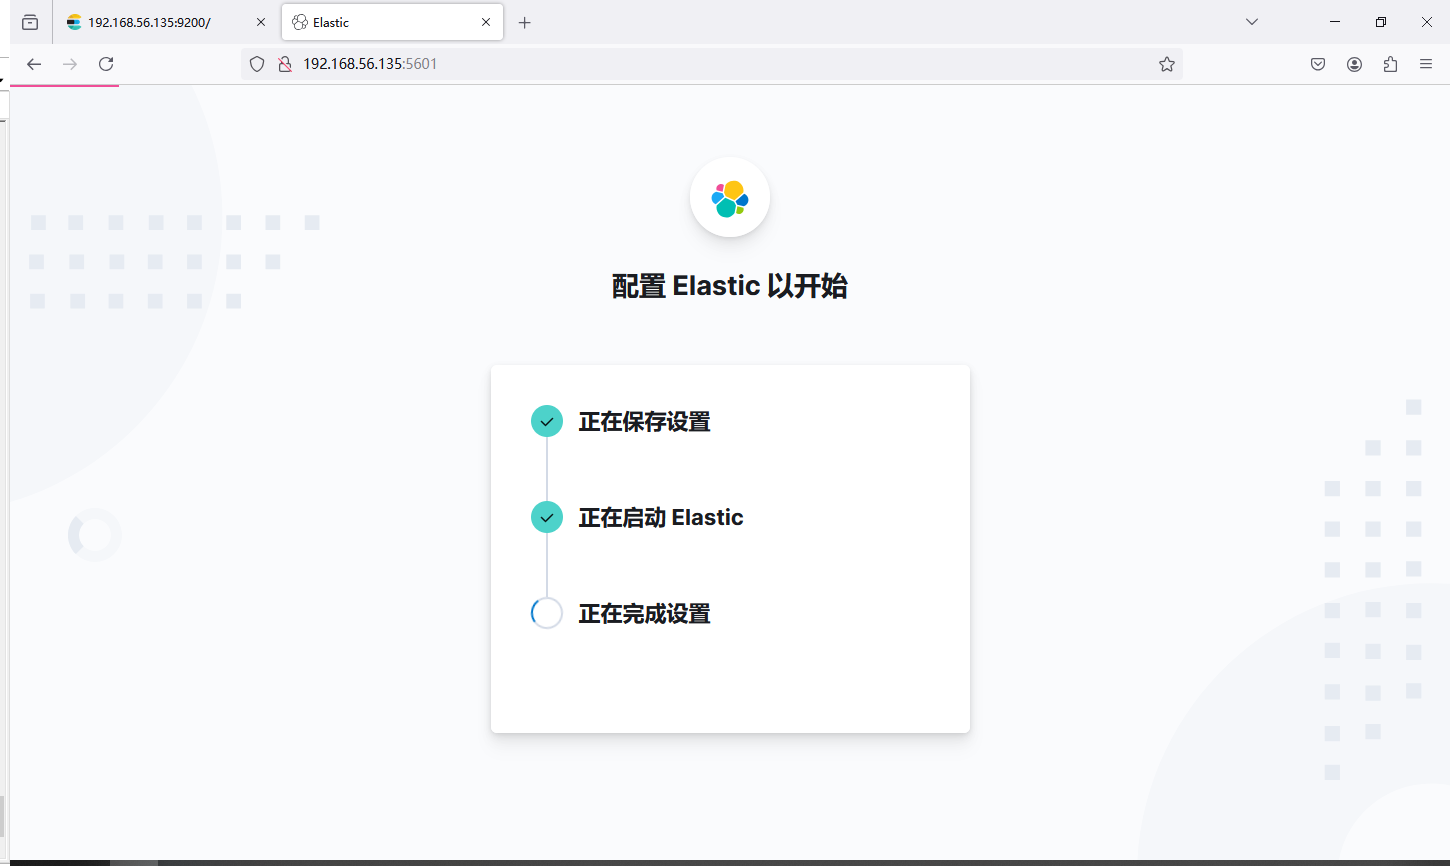
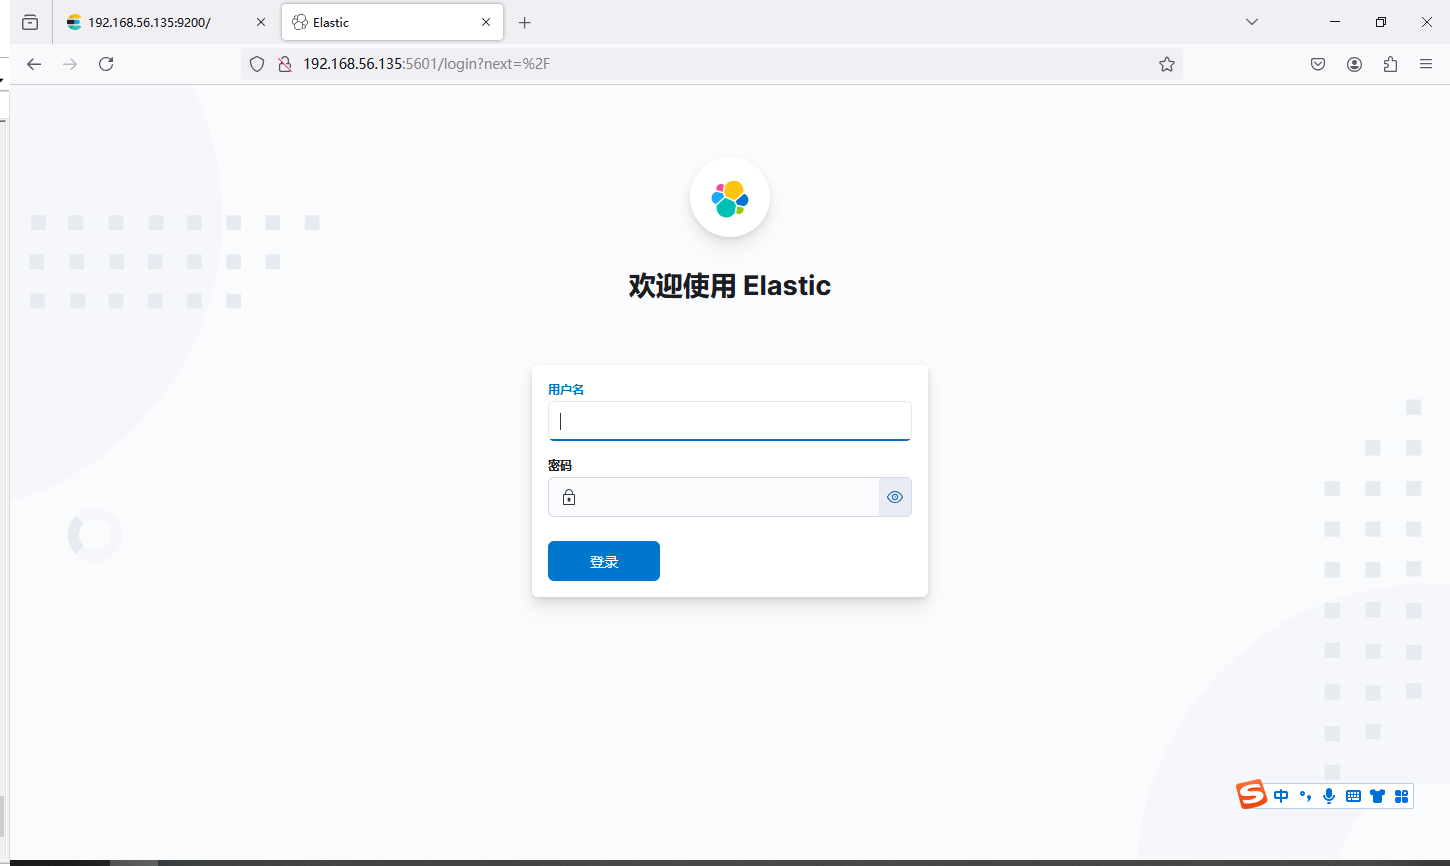
完成配置之后会跳转到登录界面,用户名称和密码和elasticsearch的一样
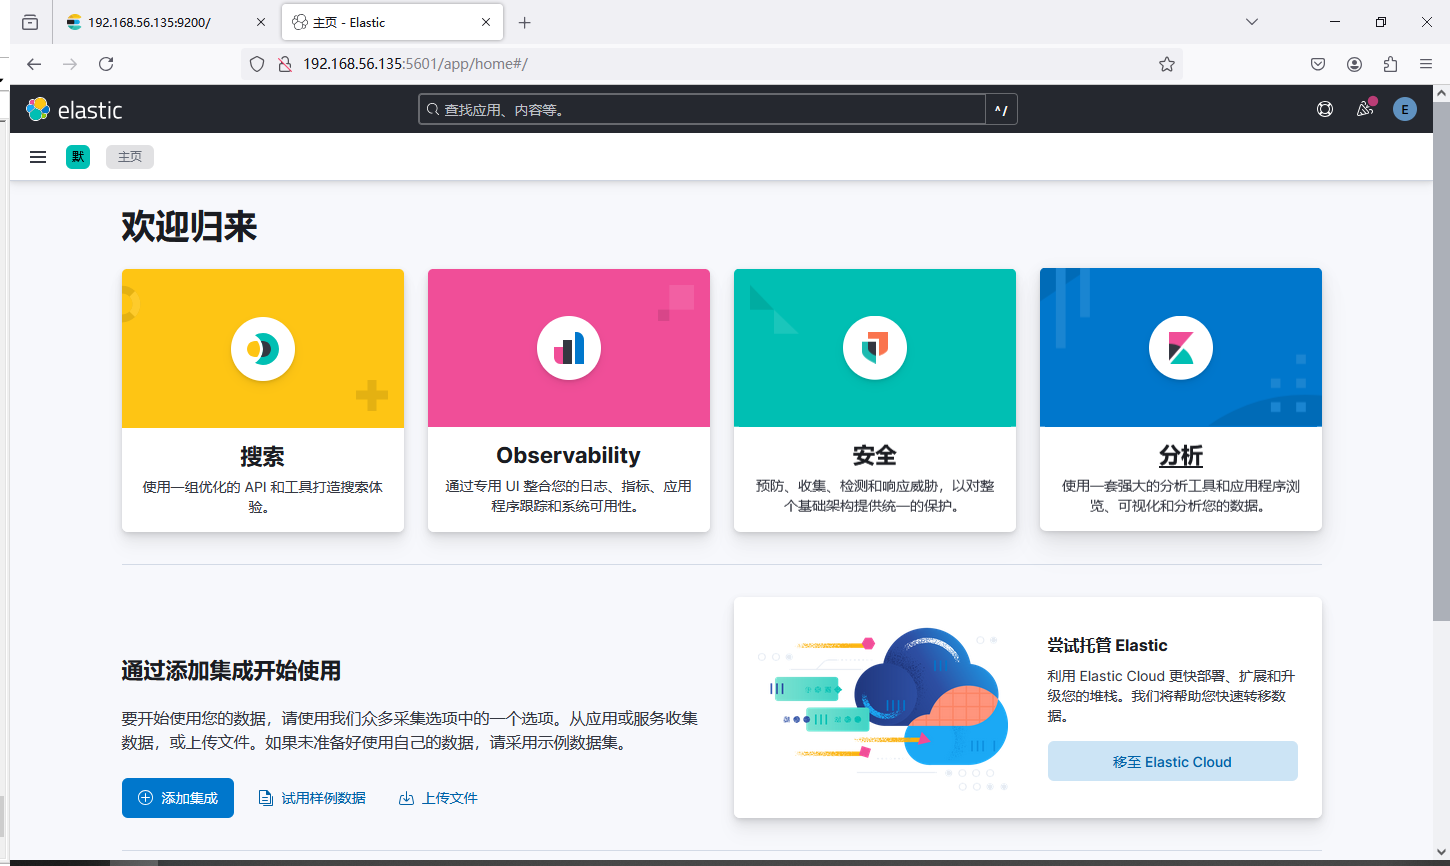
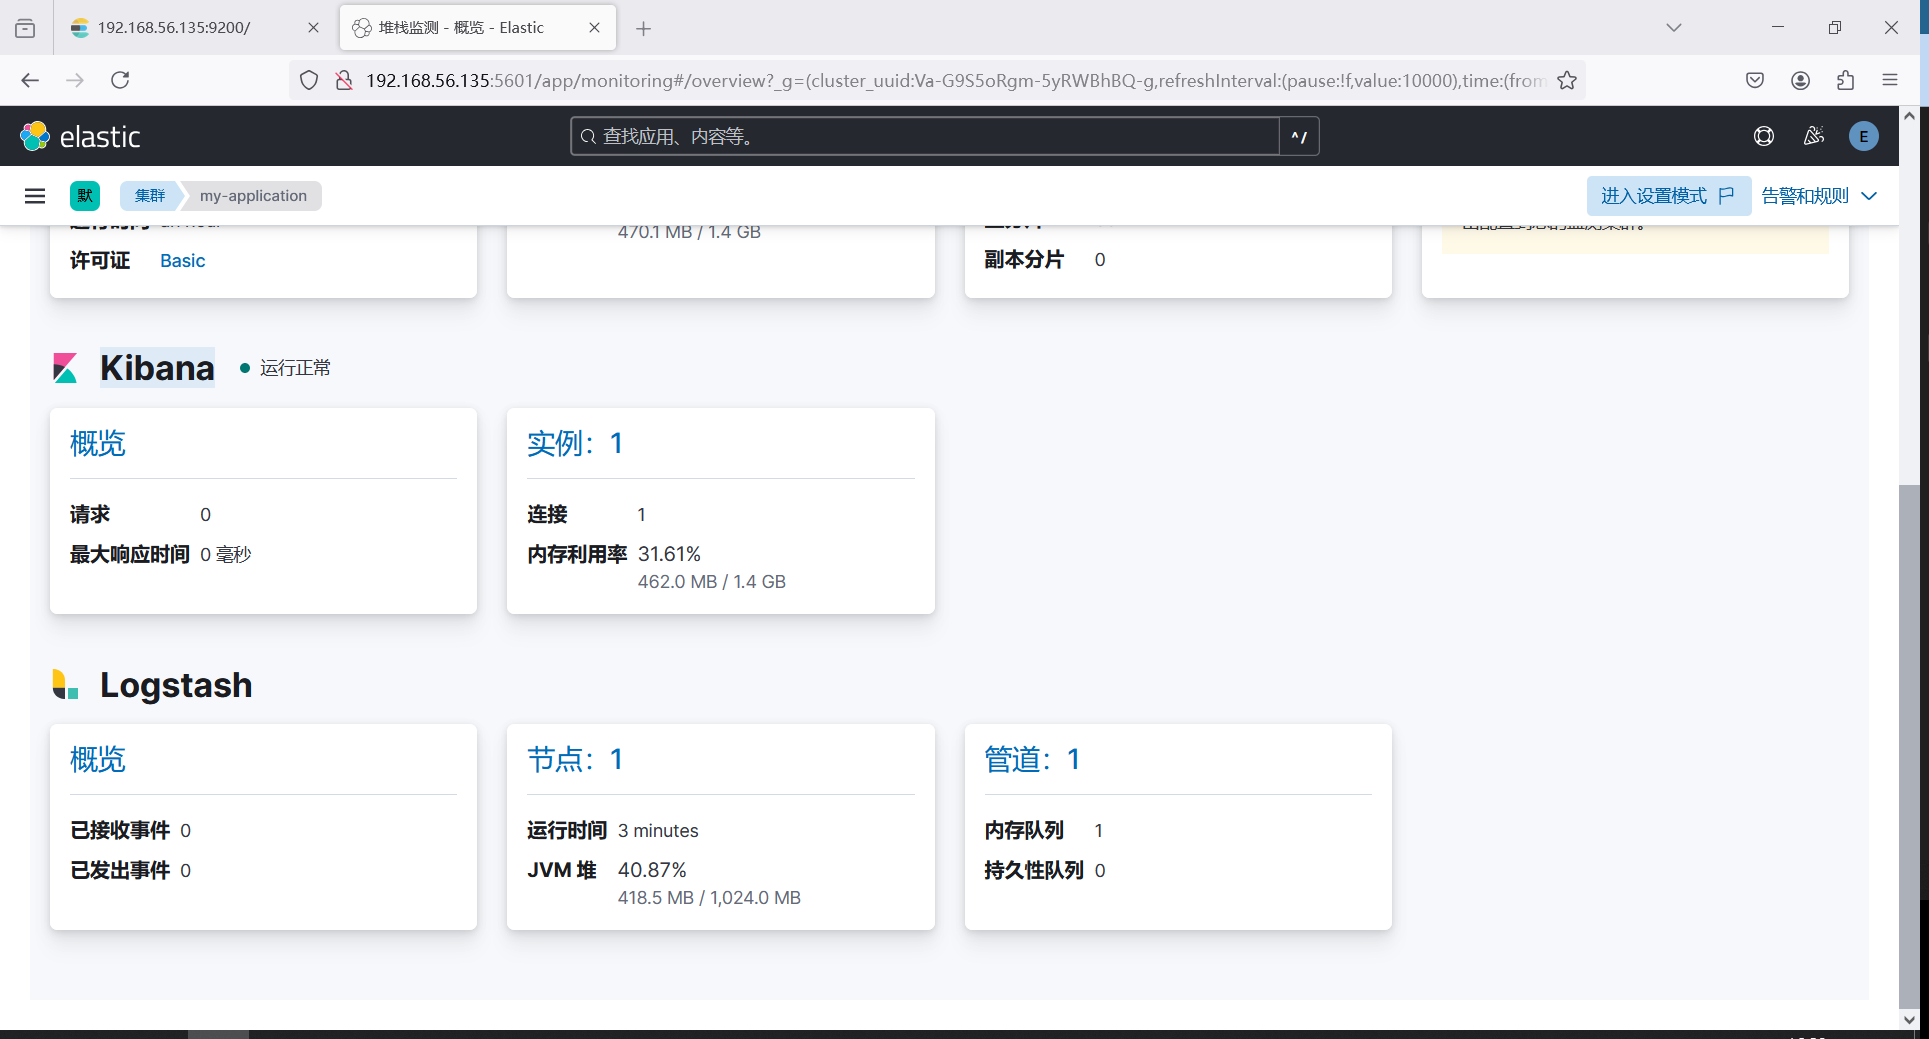
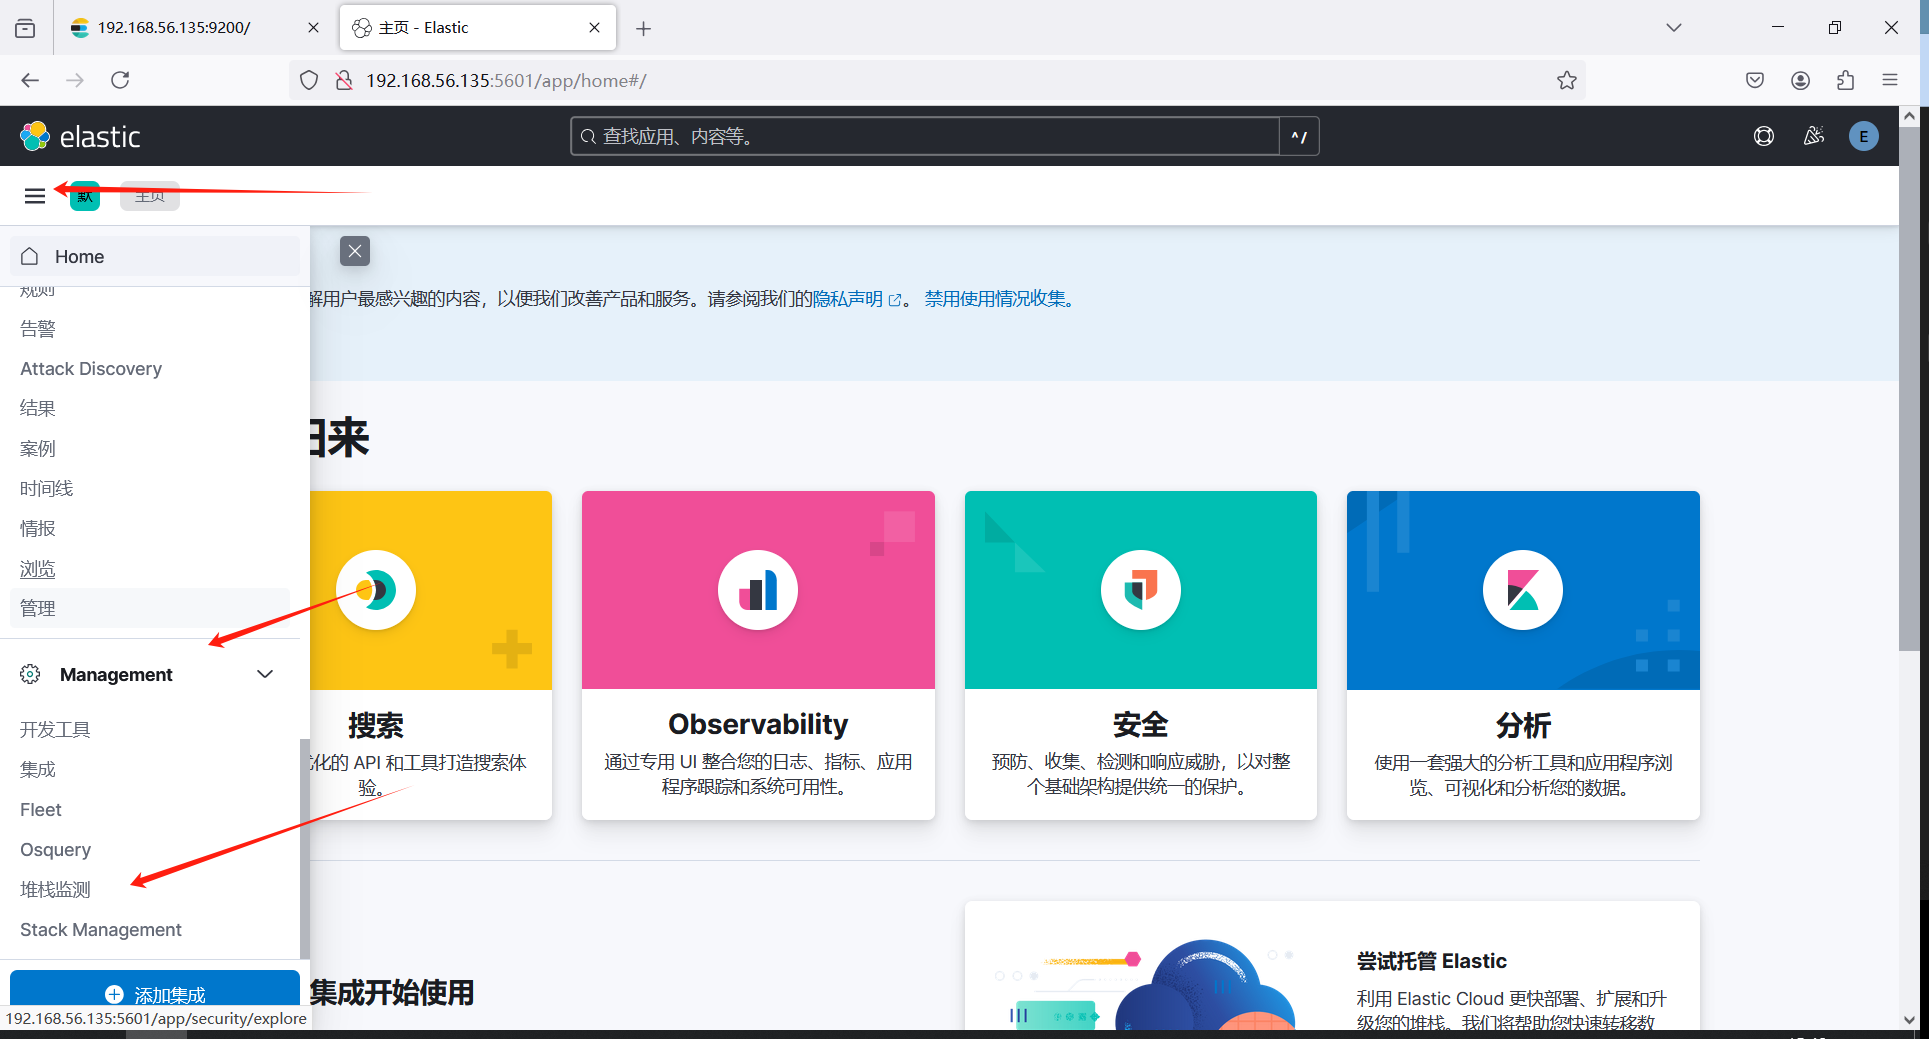
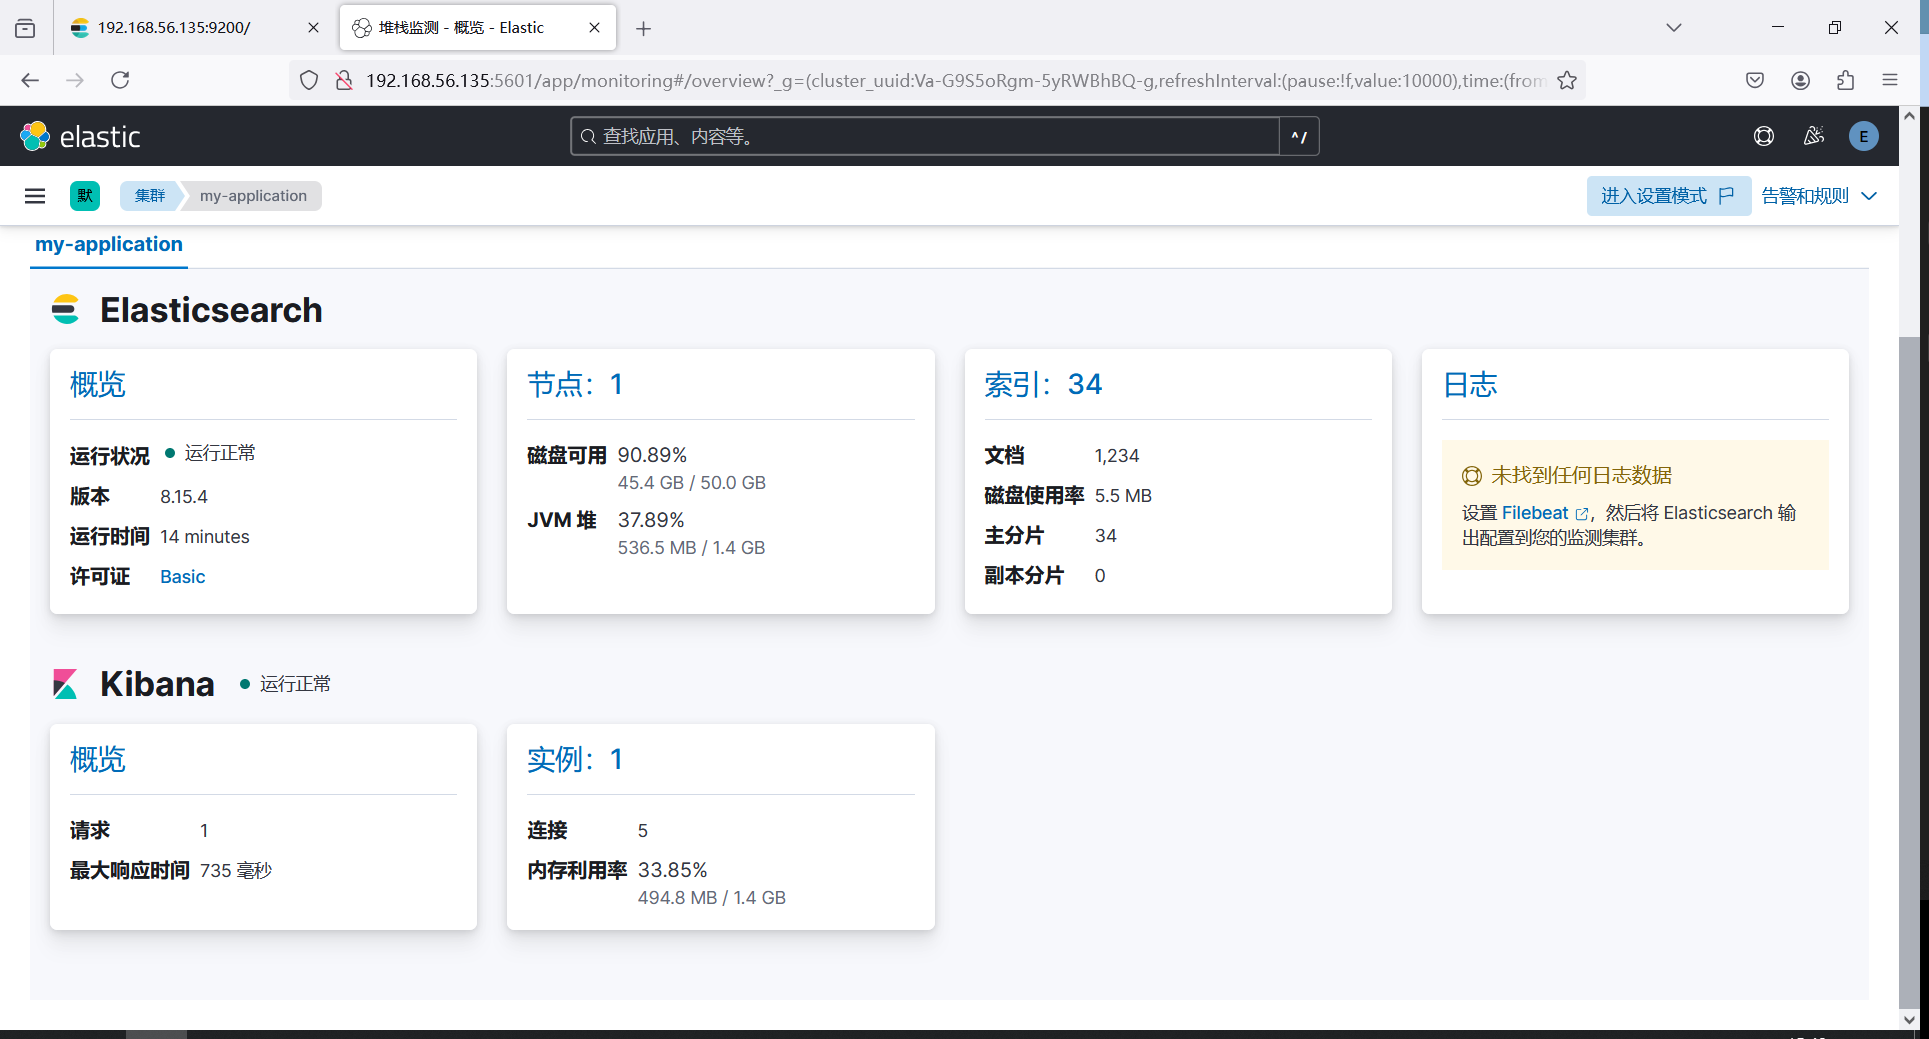
登录之后可以进入左上角的菜单 - Managerment - 堆栈检测中查看集群的状态
安装 Logstash
Logstash,直接下载安装包解压使用即可。版本需要和es、kibana一致
修改配置文件以及拷贝证书
退回到root用户,logstash可以直接使用root运行,进到目录中修改一下配置文件
[root@server ~]# cd /elk/logstash-8.15.4/
[root@server logstash-8.15.4]# cd config/#拷贝es目录下certs文件夹里到config下面有相关认证证书
[root@server config]# cp -rf /elk/elasticsearch-8.15.4/config/certs/ .
[root@server config]# ll certs/
total 24
-rw-r----- 1 root root  1915 Nov 15 15:51 http_ca.crt
-rw-r----- 1 root root 10029 Nov 15 15:51 http.p12
-rw-r----- 1 root root  5822 Nov 15 15:51 transport.p12
# 修改配置文件
[root@server config]$ vim logstash.yml
http.host: "0.0.0.0"
# 开启认证并填入elasticsearch账号密码
xpack.monitoring.enabled: true
xpack.monitoring.elasticsearch.username: "elastic"
xpack.monitoring.elasticsearch.password: "sL=UaxXXma1MvHkYL2KN"
# elasticsearch主机的地址
xpack.monitoring.elasticsearch.hosts: ["https://192.168.56.135:9200"]
# 将从elasticsearch目录中拷贝过来的证书填入
xpack.monitoring.elasticsearch.ssl.certificate_authority: "/elk/logstash-8.15.4/config/certs/http_ca.crt"
# ca_trusted_fingerprint获取方法,es启动时HTTP CA certificate SHA-256 fingerprint的值,或者查看kibana配置文件中有写
xpack.monitoring.elasticsearch.ssl.ca_trusted_fingerprint: 1588a660008e333c1c80e525323440b153515689f63c7bc9399f4e5948ed0fe4
修改输入输出配置文件
logstash需要配置一下才可以接收和输出日志,拷贝一份logstash-sample.conf进行修改
[root@server config]# cp logstash-sample.conf logstash.conf
[root@server config]# cat logstash.conf
input {beats {port => 5044}
}# 过滤相关内容
filter {grok{# 获取日志信息之后提取时间并赋予字段logdatematch => {"message" => "%{SYSLOGTIMESTAMP:logdate}"}}# 使用date模块将日志中时间logdate值赋予@timestamp;@timestamp字段是es默认的索引字段,可以使用其进行排序date{match => [ "logdate", "MMM dd HH:mm:ss"]locale => "en"# add_tag => "@timestamp"target => "@timestamp"timezone => "Asia/Shanghai"}# 删除logdate 字段,不然会存在重复的时间字段,不删也行mutate{remove_field => ["logdate"]}
}# 将数据输出到es中
output {elasticsearch {# 主机地址hosts => ["https://192.168.56.135:9200"]# 索引名称index => "newtime-es-%{+YYYY.MM.dd}"ssl => truessl_certificate_verification => false# es的账号密码以及ca证书填入cacert => "/elk/logstash-8.15.4/config/certs/http_ca.crt"ca_trusted_fingerprint => "1588a660008e333c1c80e525323440b153515689f63c7bc9399f4e5948ed0fe4"user => "elastic"password => "sL=UaxXXma1MvHkYL2KN"}
}
启动logstash
[root@server config]# ../bin/logstash -f logstash.conf # 后台启动命令
nohup ../bin/logstash -f logstash.conf &
启动成功之后可以在Kibana中看到logstash
安装filebeat
filebeat用于采集日志,吐给logstash去做数据清洗
修改配置文件
[root@server ~]# cd /elk/filebeat-8.15.4-linux-x86_64/[root@server filebeat-8.15.4-linux-x86_64]# vim filebeat.ymlfilebeat.inputs:
- type: logenabled: true# 获取日志的文件paths:- /var/log/test.log
output.logstash:enabled: truehosts: ["192.168.56.135:5044"]
启动服务
[root@server filebeat-8.15.4-linux-x86_64]# ./filebeat -e -c filebeat.yml # 后台启动
nohup ./filebeat -e -c filebeat.yml &
数据测试
# 将系统message日志输入到
[root@server log]# cat /var/log/messages > /var/log/test.log
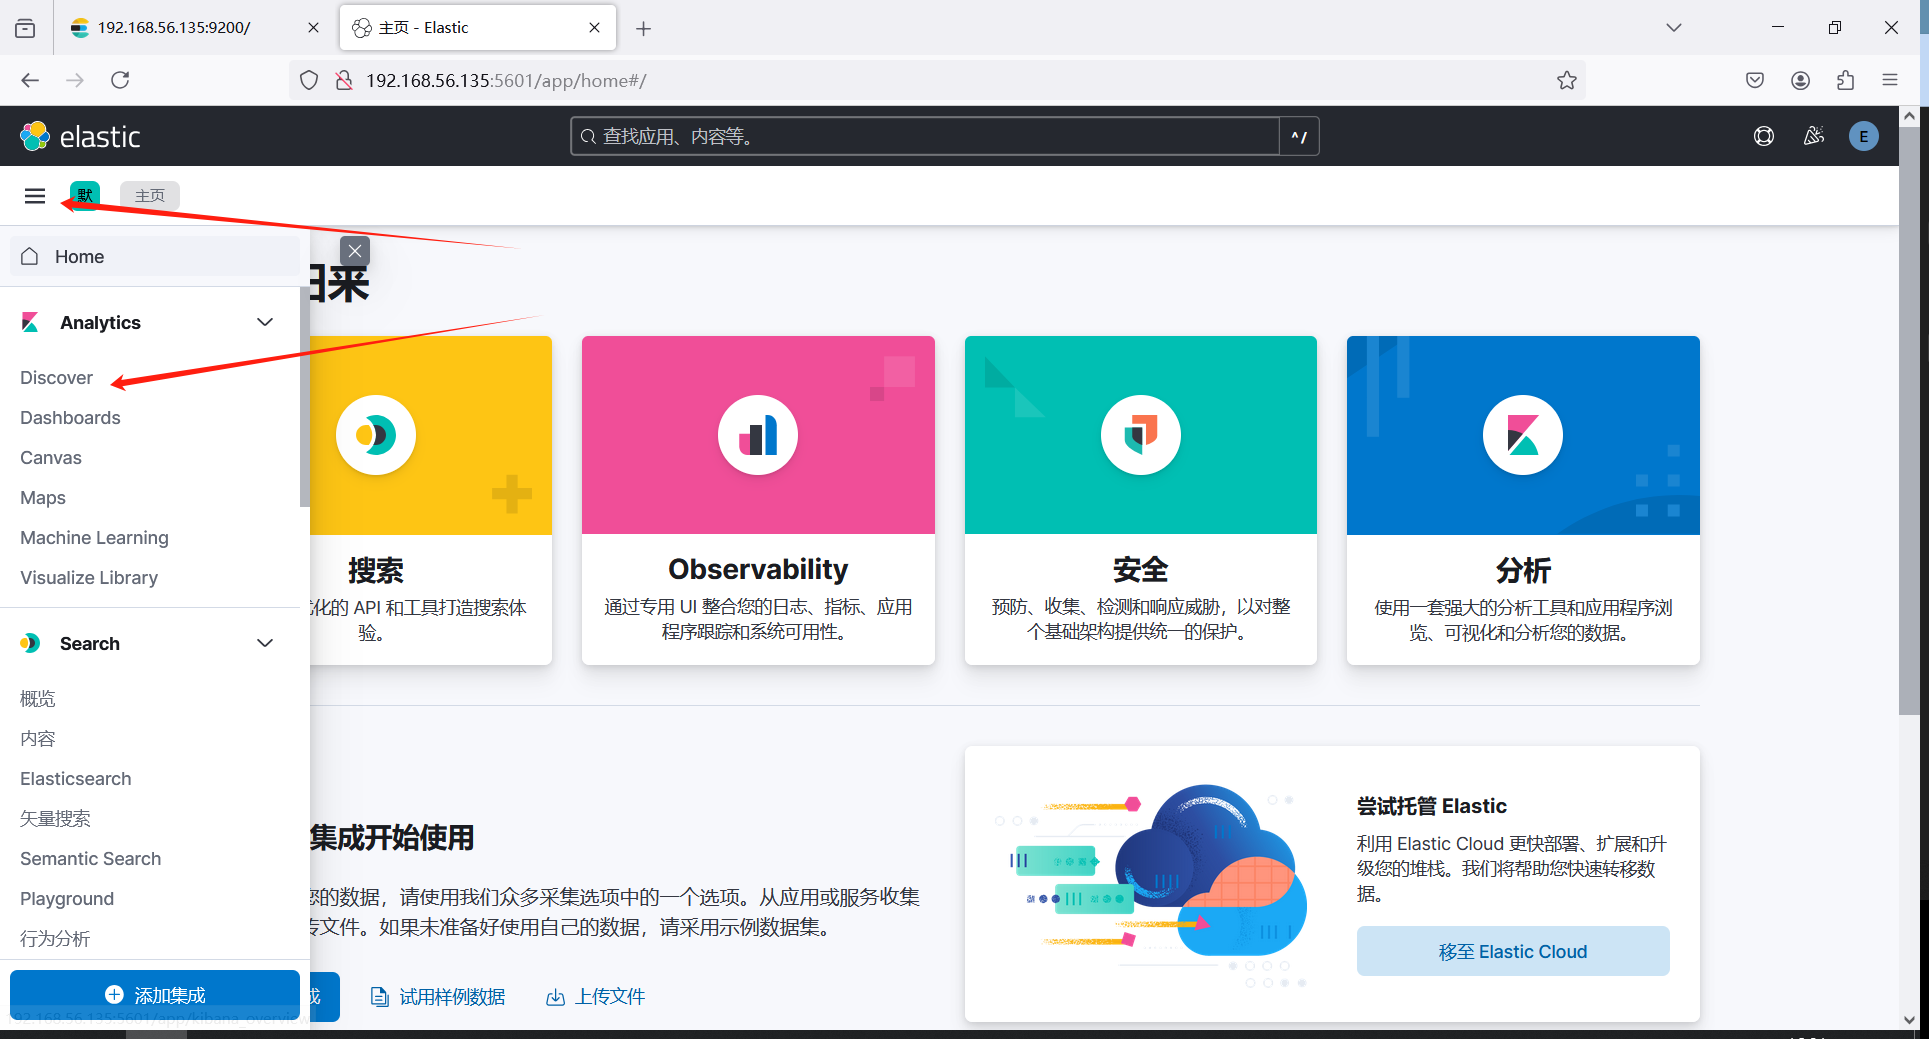
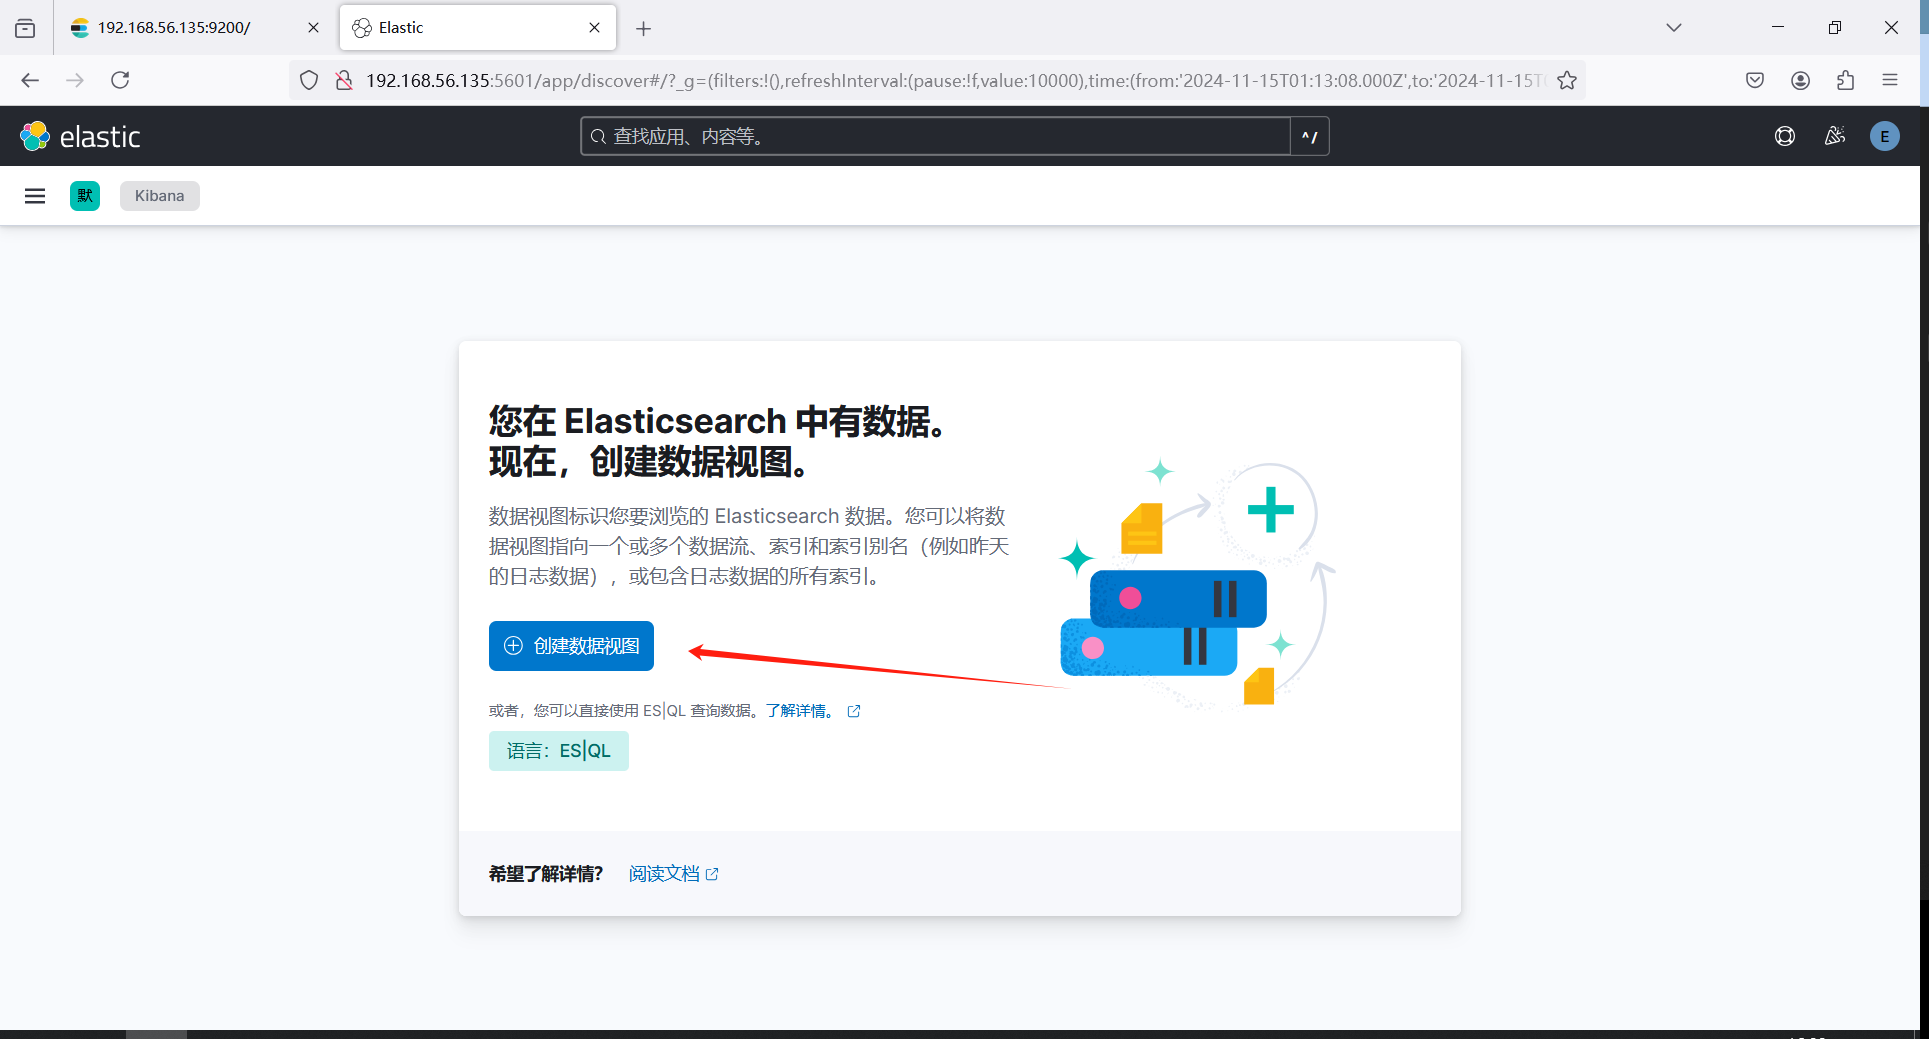
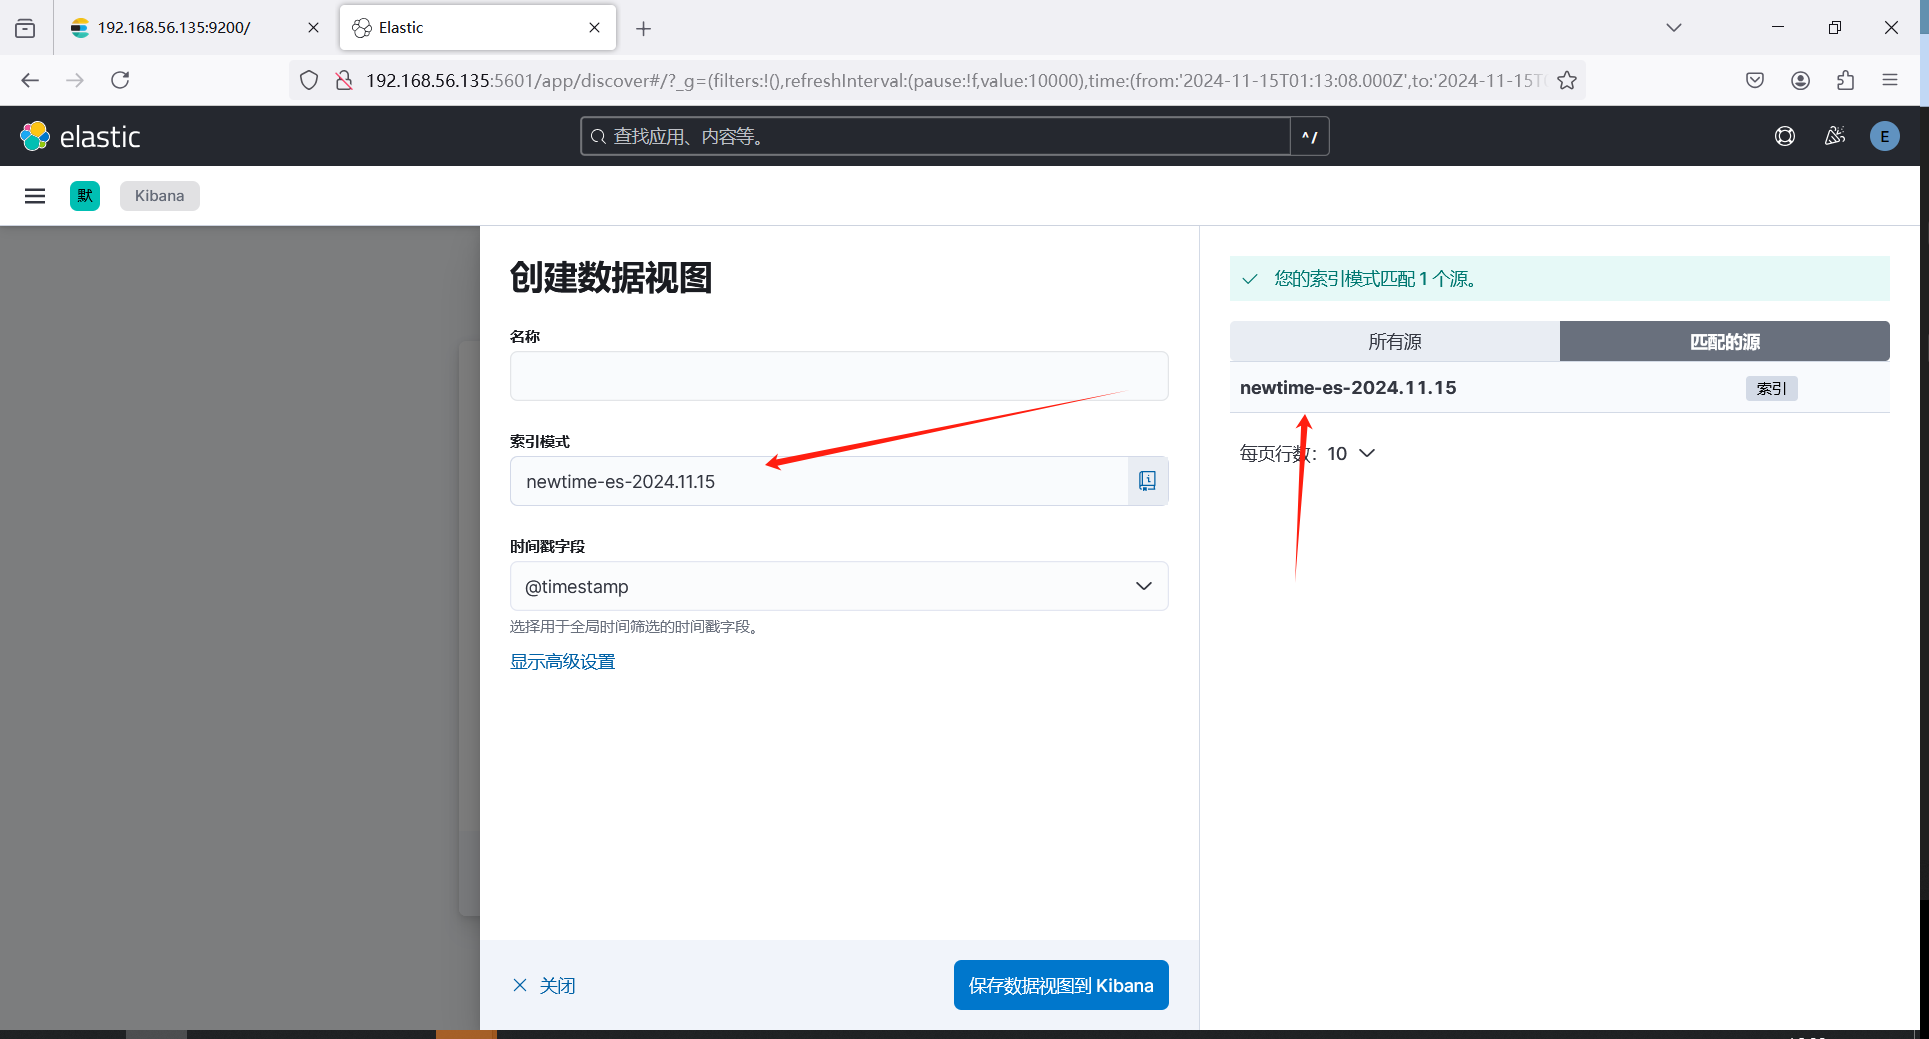
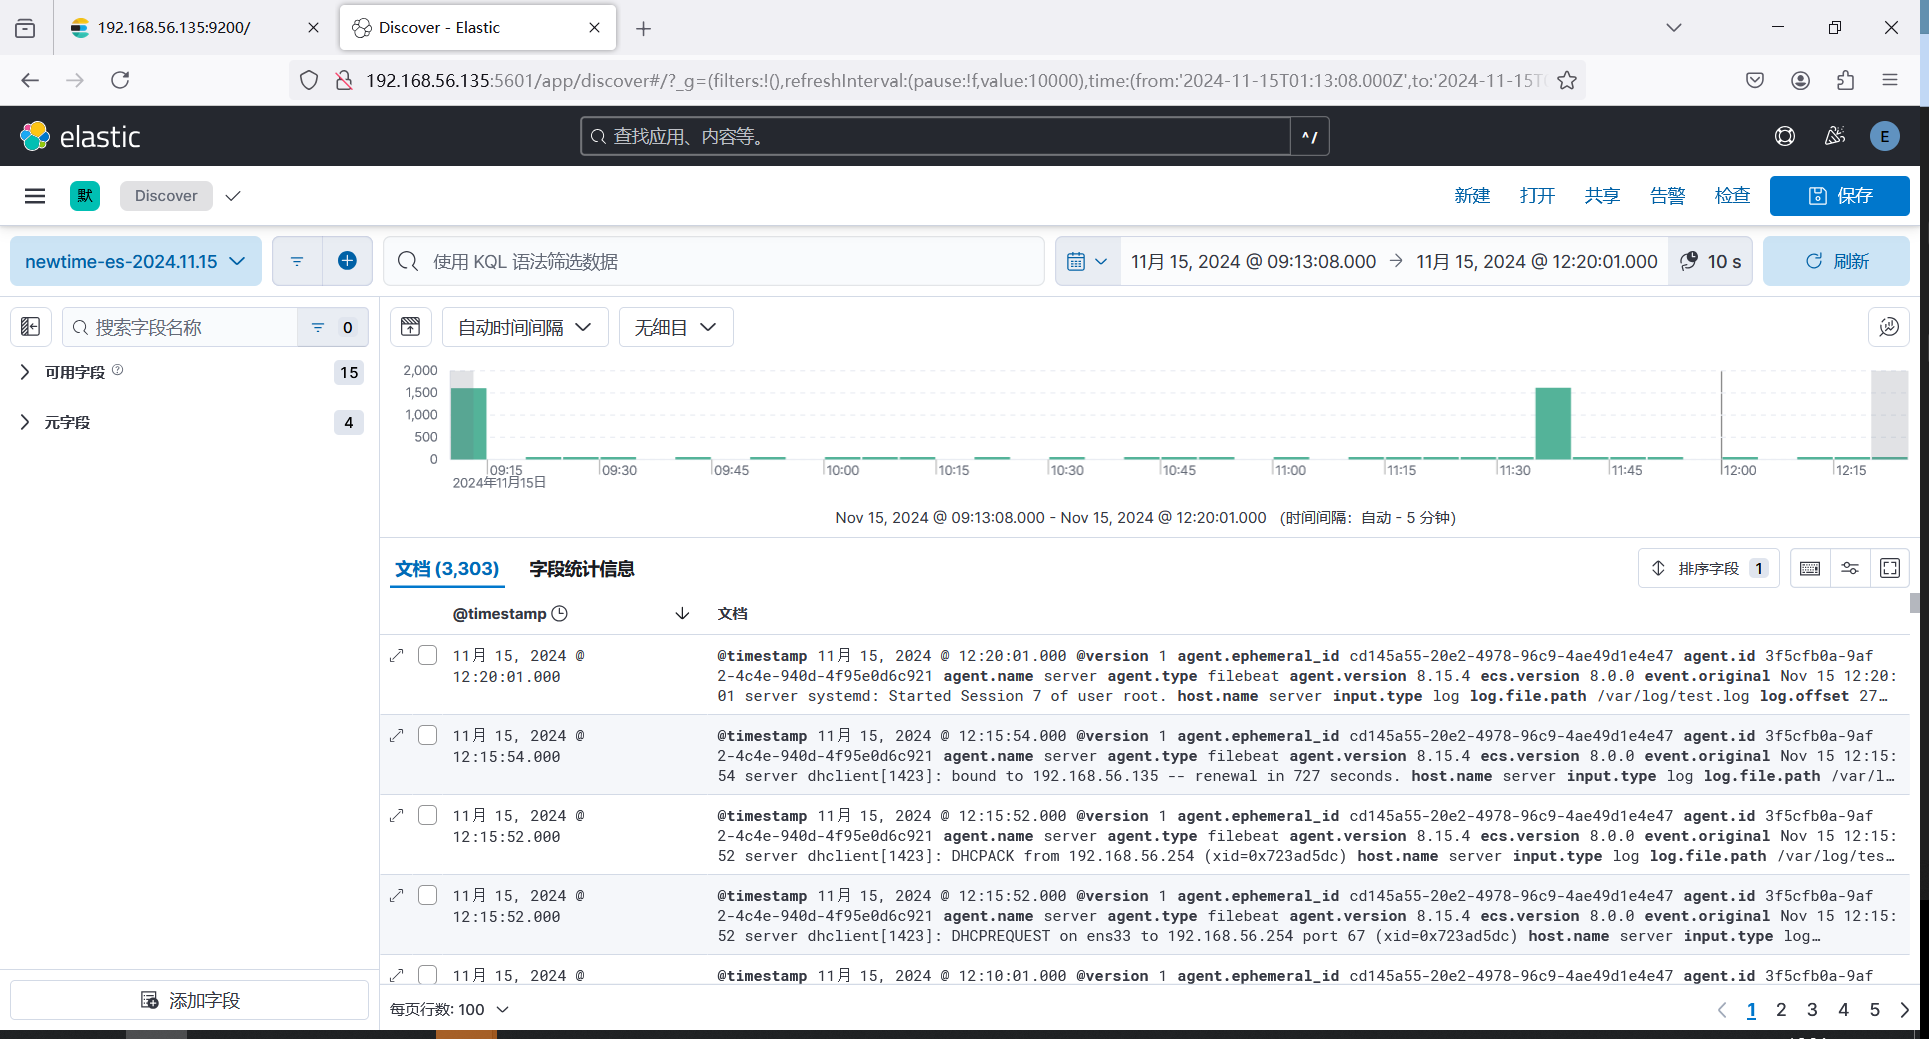
进入Kibana页面 菜单 - Discover;创建一个数据视图,索引模式是在logstash.conf中配置的名称,填写完毕后保存即可看到日志信息
相关文章:

ELK8.15.4搭建开启安全认证
安装 Elastic :Elasticsearch,Kibana,Logstash 另外安装一个收集器filebeat 通过二进制安装包进行安装 创建一个专门放elk目录 mkdir /elk/ mkdir /elk/soft下载 es 、kibana、Logstash、filebeat二进制包 cd /elk/softwget https://art…...
原生微信小程序中封装一个模拟select 下拉框组件
1.首先在components 里面设置组件名称:van-select(随便取名字); 2.新建文件写代码: wxml: <view class"w100 select_all_view"><!-- 标题,可以没有 --><view class…...

商品管理系统引领时尚零售智能化升级 降价商品量锐减30%
根据贝恩咨询公司2024年发布的消费品报告,当前消费品行业正面临增长放缓、全球市场波动及消费者期望变化的巨大压力。为保持市场竞争力,企业需要重新审视其增长战略,重视可持续创新、数字化转型和运营敏捷性。企业必须灵活应对供应链中断和消…...

UE5 5.1.1创建C++项目,显示error C4668和error C4067
因为工作要求,没法使用最新 5.5版本的ue5 而是要用ue5.1和5.2版本。 但是我在安装下载了visual studio2022后,使用 ue5.1编辑器 创建C项目,爆出如下错误。 error C4668: ?????__has_feature?????ΪԤ?????꣬???0????…...

spring boot 集成 redis 实现缓存的完整的例子
Cacheable 注解是 Spring Cache 抽象的一部分,用于声明式地管理缓存。Cacheable 注解本身并不直接指定缓存的存储位置,而是依赖于配置的缓存管理器(CacheManager)来决定缓存数据的存储位置。 常见的缓存存储方式: 1、内存缓存&a…...

json-bigint处理前端精度丢失问题
问题描述:前后端调试过程中,有时候会遇到精度丢失的问题,比如后端给过来的id超过16位,就会出现精度丢失的情况,前端拿到的id与后端给过来的不一致。 解决方案: 1、安装 npm i json-bigint 2、在axios中配置…...

【算法】【优选算法】前缀和(下)
目录 一、560.和为K的⼦数组1.1 前缀和1.2 暴力枚举 二、974.和可被K整除的⼦数组2.1 前缀和2.2 暴力枚举 三、525.连续数组3.1 前缀和3.2 暴力枚举 四、1314.矩阵区域和4.1 前缀和4.2 暴力枚举 一、560.和为K的⼦数组 题目链接:560.和为K的⼦数组 题目描述&#x…...

Node.js 23 发布了!
Node.js 23 现已推出,带来了新功能、性能改进和更好的开发者体验。此次版本提升了兼容性和稳定性,提供了更多工具来构建高效的应用程序。 此外,Node.js 22 将在 10 月 29 日当周被提升为长期支持 (LTS) 版本,进入长期维护阶段&am…...

如何通过低代码逻辑编排实现业务流程自动化?
随着数字化转型的加速,企业对高效、灵活的业务流程自动化需求日益增加。传统开发模式下的定制化解决方案往往周期长、成本高且难以适应快速变化的需求。低代码平台以其直观、简便的操作界面和强大的功能逐渐成为企业实现业务流程自动化的理想选择。本文将探讨低代码…...

thinkphp6模板调用URL方法生成的链接异常
var uul params.url ;console.log(params.url);console.log("{:Url(UserLog/index)}");console.log("{:Url("uul")}"); 生成的链接地址 UserLog/index /jjg/index.php/Home/UserLog/index.html /jjg/index.php/Home/Index/UserLog/index.html…...

Spring Boot汽车资讯:科技驱动的未来
4系统概要设计 4.1概述 本系统采用B/S结构(Browser/Server,浏览器/服务器结构)和基于Web服务两种模式,是一个适用于Internet环境下的模型结构。只要用户能连上Internet,便可以在任何时间、任何地点使用。系统工作原理图如图4-1所示: 4系统概要设计 4.1概…...

嵌入式硬件电子电路设计(五)LDO低压差线性稳压器全面详解
引言: LDO(Low Dropout Regulator,低压差线性稳压器)是一种常用的电源管理组件,用于提供稳定的输出电压,同时允许较小的输入电压与输出电压之间的差值。LDO广泛应用于各种电子设备中,特别是在对…...

qiankun主应用(vue2+element-ui)子应用(vue3+element-plus)不同版本element框架css样式相互影响的问题
背景:qiankun微前端架构实现多应用集成 主应用框架:vue2 & element-ui 子应用框架:vue3 & element-plus >> 问题现象和分析 登录页面是主应用的,在登录之后才能打开子应用的菜单页面,即加载子应用。 首…...

resnet50,clip,Faiss+Flask简易图文搜索服务
一、实现 文件夹目录结构: templates -----upload.html faiss_app.py 前端代码: <!DOCTYPE html> <html lang"en"> <head><meta charset"UTF-8"><meta name"viewport" content"widt…...

使用OkHttp进行HTTPS请求的Kotlin实现
OkHttp简介 OkHttp是一个高效的HTTP客户端,它支持同步和异步请求,自动处理重试和失败,支持HTTPS,并且可以轻松地与Kotlin协程集成。OkHttp的设计目标是提供最简洁的API,同时保持高性能和低延迟。 为什么选择OkHttp …...
使用Mac下载MySQL修改密码
Mac下载MySQL MySQL官网链接MySQL 当进入到官网后下滑到community社区,进行下载 然后选择community sever下载 这里就是要下载的界面,如果需要下载之前版本的话可以点击archives, 可能会因为这是外网原因,有时候下…...

运维面试题.云计算面试题集锦第一套
运维+网络安全学科基础升就业 测试题(总分100分) 一,单词翻译(10分,直接写在答题卡上) 二,单选题(每题2分,共30题): 1.如下哪个属于管道符?( ) A、|| B、<< C、// D、| 2.有一备份程序mybackup,需要在周一至周五下午1点和晚上8点各运行一次,下面哪条cront…...

CSS-flex布局
flex常用语法 display: flex 父级元素相关 flex-direction 主轴方向【水平方向(默认)、垂直方向】justify-content 主轴上的对齐方式【flex-end结束对齐、space-between两端对齐、center】align-items 交叉轴的对齐方式【center、flex-end】flex-wrap…...

Linux:进程的优先级 进程切换
文章目录 前言一、进程优先级1.1 基本概念1.2 查看系统进程1.3 PRI和NI1.4 调整优先级1.4.1 top命令1.4.2 nice命令1.4.3 renice命令 二、进程切换2.1 补充概念2.2 进程的运行和切换步骤(重要) 二、Linux2.6内核进程O(1)调度队列(重要&#x…...

web应用安全和信息泄露
使用springboot开发的应用可能存在各种使用不当导致的信息泄露和漏洞,在此记录 1:spring actuator导致的信息泄露 使用spring actuator你可以选择通过使用HTTP端点或使用JMX来管理和监控你的应用程序。 审计、健康和指标收集也可以自动应用于你的应用程…...
JavaSec-RCE
简介 RCE(Remote Code Execution),可以分为:命令注入(Command Injection)、代码注入(Code Injection) 代码注入 1.漏洞场景:Groovy代码注入 Groovy是一种基于JVM的动态语言,语法简洁,支持闭包、动态类型和Java互操作性,…...

<6>-MySQL表的增删查改
目录 一,create(创建表) 二,retrieve(查询表) 1,select列 2,where条件 三,update(更新表) 四,delete(删除表…...
)
椭圆曲线密码学(ECC)
一、ECC算法概述 椭圆曲线密码学(Elliptic Curve Cryptography)是基于椭圆曲线数学理论的公钥密码系统,由Neal Koblitz和Victor Miller在1985年独立提出。相比RSA,ECC在相同安全强度下密钥更短(256位ECC ≈ 3072位RSA…...
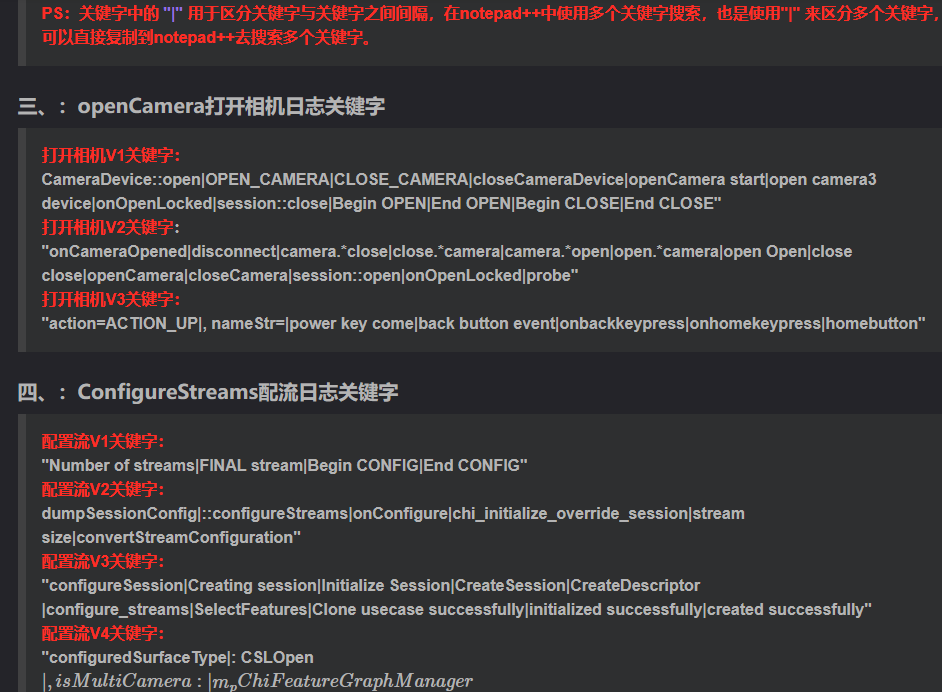
相机Camera日志实例分析之二:相机Camx【专业模式开启直方图拍照】单帧流程日志详解
【关注我,后续持续新增专题博文,谢谢!!!】 上一篇我们讲了: 这一篇我们开始讲: 目录 一、场景操作步骤 二、日志基础关键字分级如下 三、场景日志如下: 一、场景操作步骤 操作步…...

大数据零基础学习day1之环境准备和大数据初步理解
学习大数据会使用到多台Linux服务器。 一、环境准备 1、VMware 基于VMware构建Linux虚拟机 是大数据从业者或者IT从业者的必备技能之一也是成本低廉的方案 所以VMware虚拟机方案是必须要学习的。 (1)设置网关 打开VMware虚拟机,点击编辑…...

解决本地部署 SmolVLM2 大语言模型运行 flash-attn 报错
出现的问题 安装 flash-attn 会一直卡在 build 那一步或者运行报错 解决办法 是因为你安装的 flash-attn 版本没有对应上,所以报错,到 https://github.com/Dao-AILab/flash-attention/releases 下载对应版本,cu、torch、cp 的版本一定要对…...

鱼香ros docker配置镜像报错:https://registry-1.docker.io/v2/
使用鱼香ros一件安装docker时的https://registry-1.docker.io/v2/问题 一键安装指令 wget http://fishros.com/install -O fishros && . fishros出现问题:docker pull 失败 网络不同,需要使用镜像源 按照如下步骤操作 sudo vi /etc/docker/dae…...
)
Java入门学习详细版(一)
大家好,Java 学习是一个系统学习的过程,核心原则就是“理论 实践 坚持”,并且需循序渐进,不可过于着急,本篇文章推出的这份详细入门学习资料将带大家从零基础开始,逐步掌握 Java 的核心概念和编程技能。 …...

基于matlab策略迭代和值迭代法的动态规划
经典的基于策略迭代和值迭代法的动态规划matlab代码,实现机器人的最优运输 Dynamic-Programming-master/Environment.pdf , 104724 Dynamic-Programming-master/README.md , 506 Dynamic-Programming-master/generalizedPolicyIteration.m , 1970 Dynamic-Programm…...
集成 Mybatis-Plus 和 Mybatis-Plus-Join)
纯 Java 项目(非 SpringBoot)集成 Mybatis-Plus 和 Mybatis-Plus-Join
纯 Java 项目(非 SpringBoot)集成 Mybatis-Plus 和 Mybatis-Plus-Join 1、依赖1.1、依赖版本1.2、pom.xml 2、代码2.1、SqlSession 构造器2.2、MybatisPlus代码生成器2.3、获取 config.yml 配置2.3.1、config.yml2.3.2、项目配置类 2.4、ftl 模板2.4.1、…...

